How To Guide: Getting Started with Agreements
1. Introduction
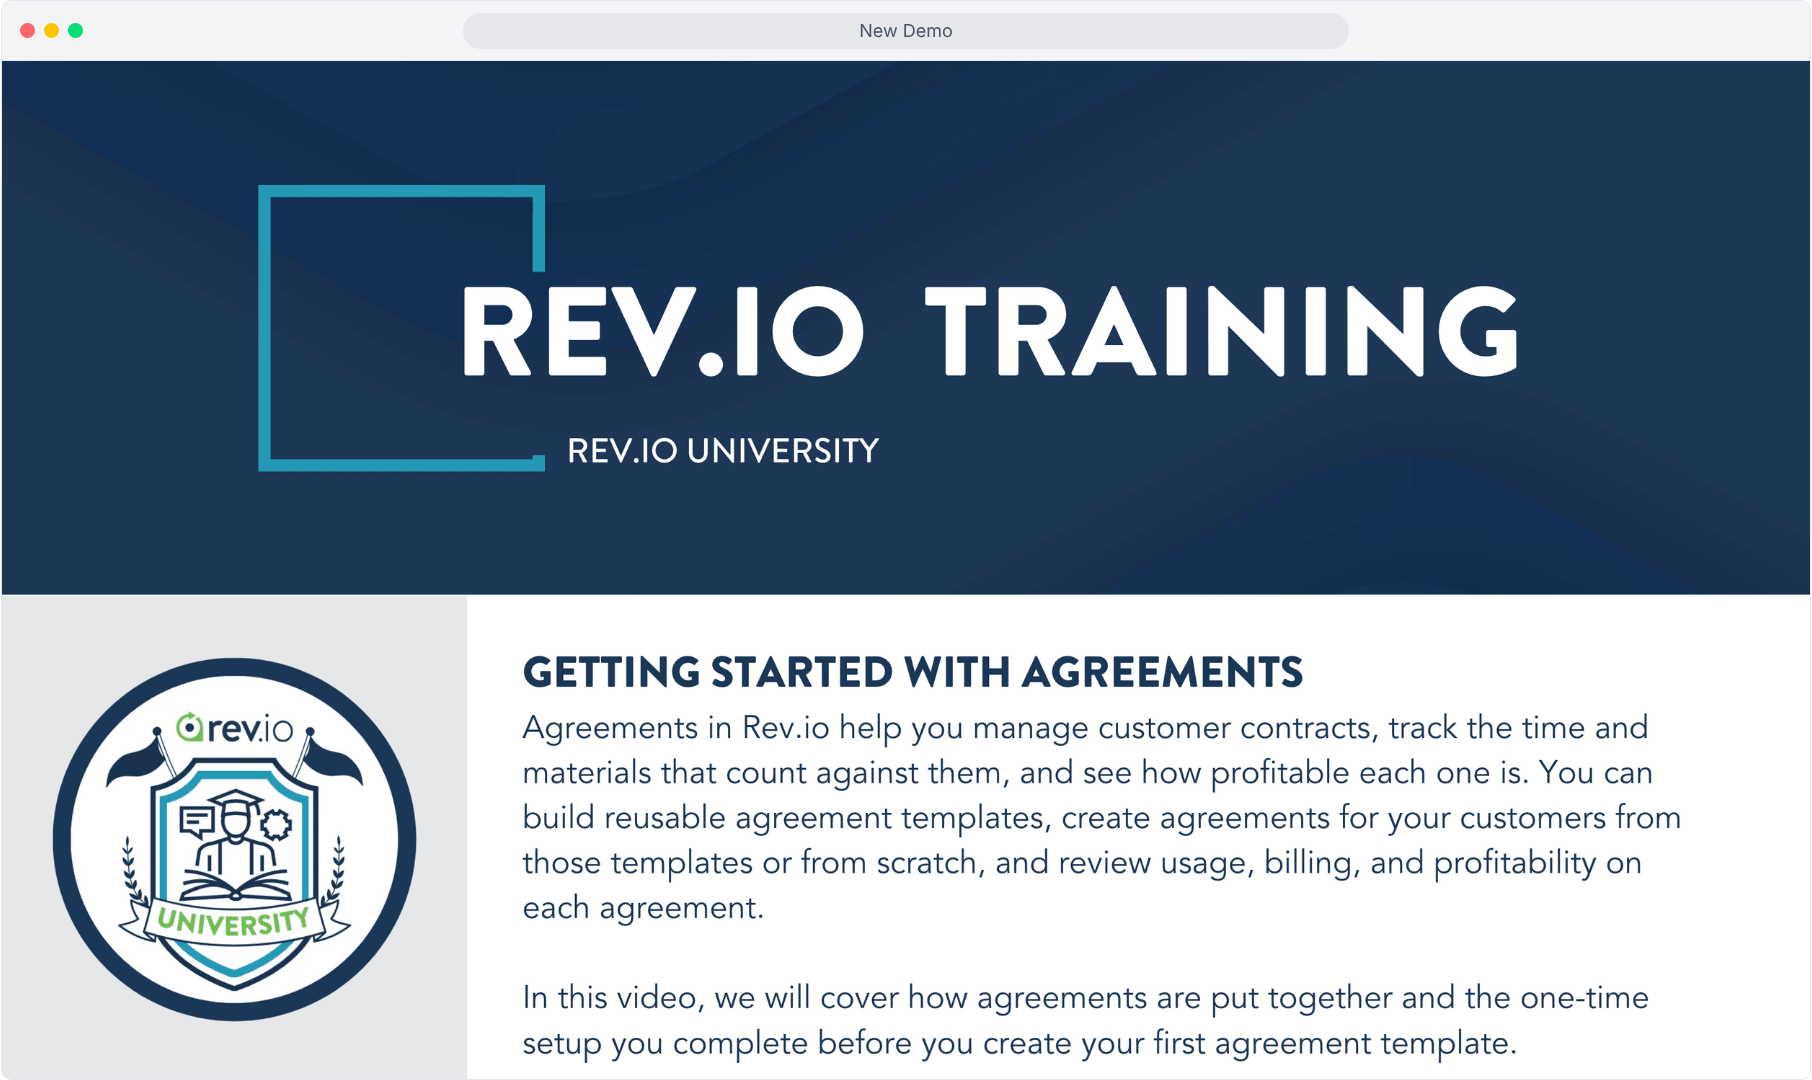
2. To find your agreements, click Customers in the sidebar menu and select Agreements.
You can also open the Agreements tab in the Billing section of any customer's profile.
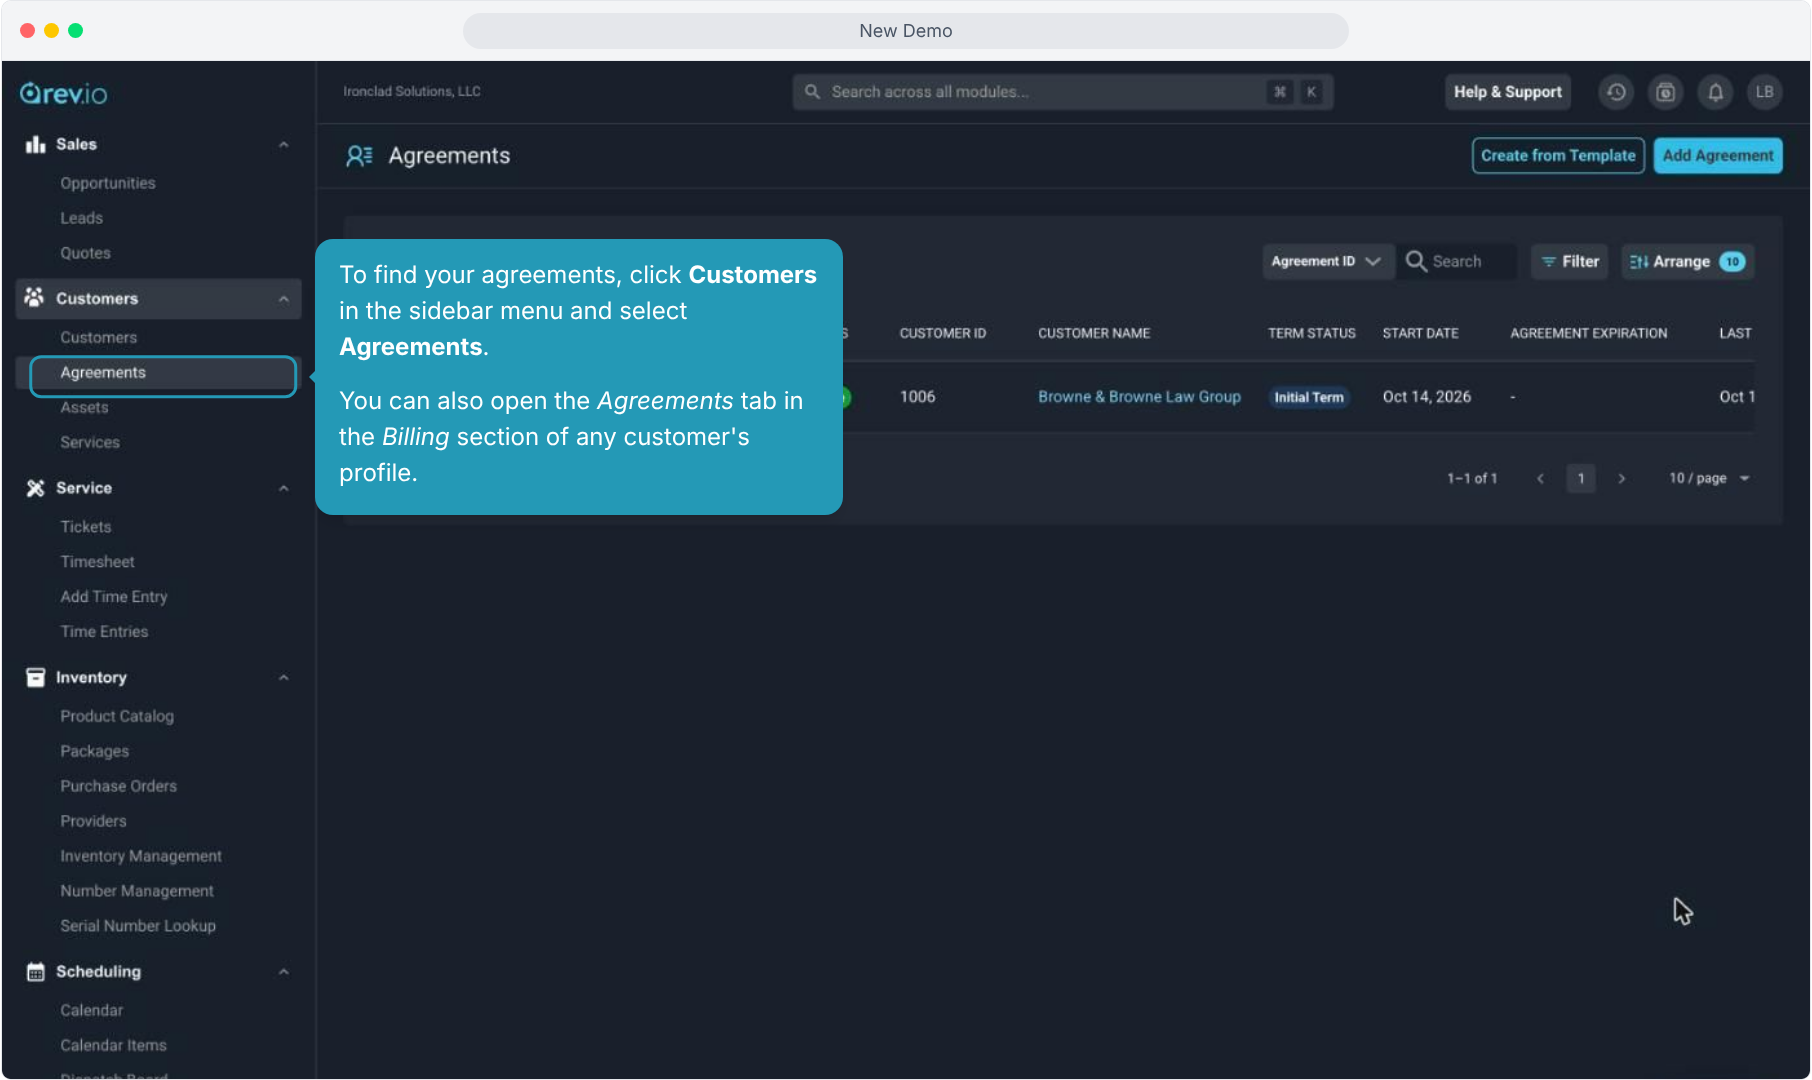
3. Every agreement is made up of components, the billable building blocks of the agreement.
There are four component types: Block Hours, Time and Materials, Recurring, and One-Time Items.
An agreement can have only one component of each type.
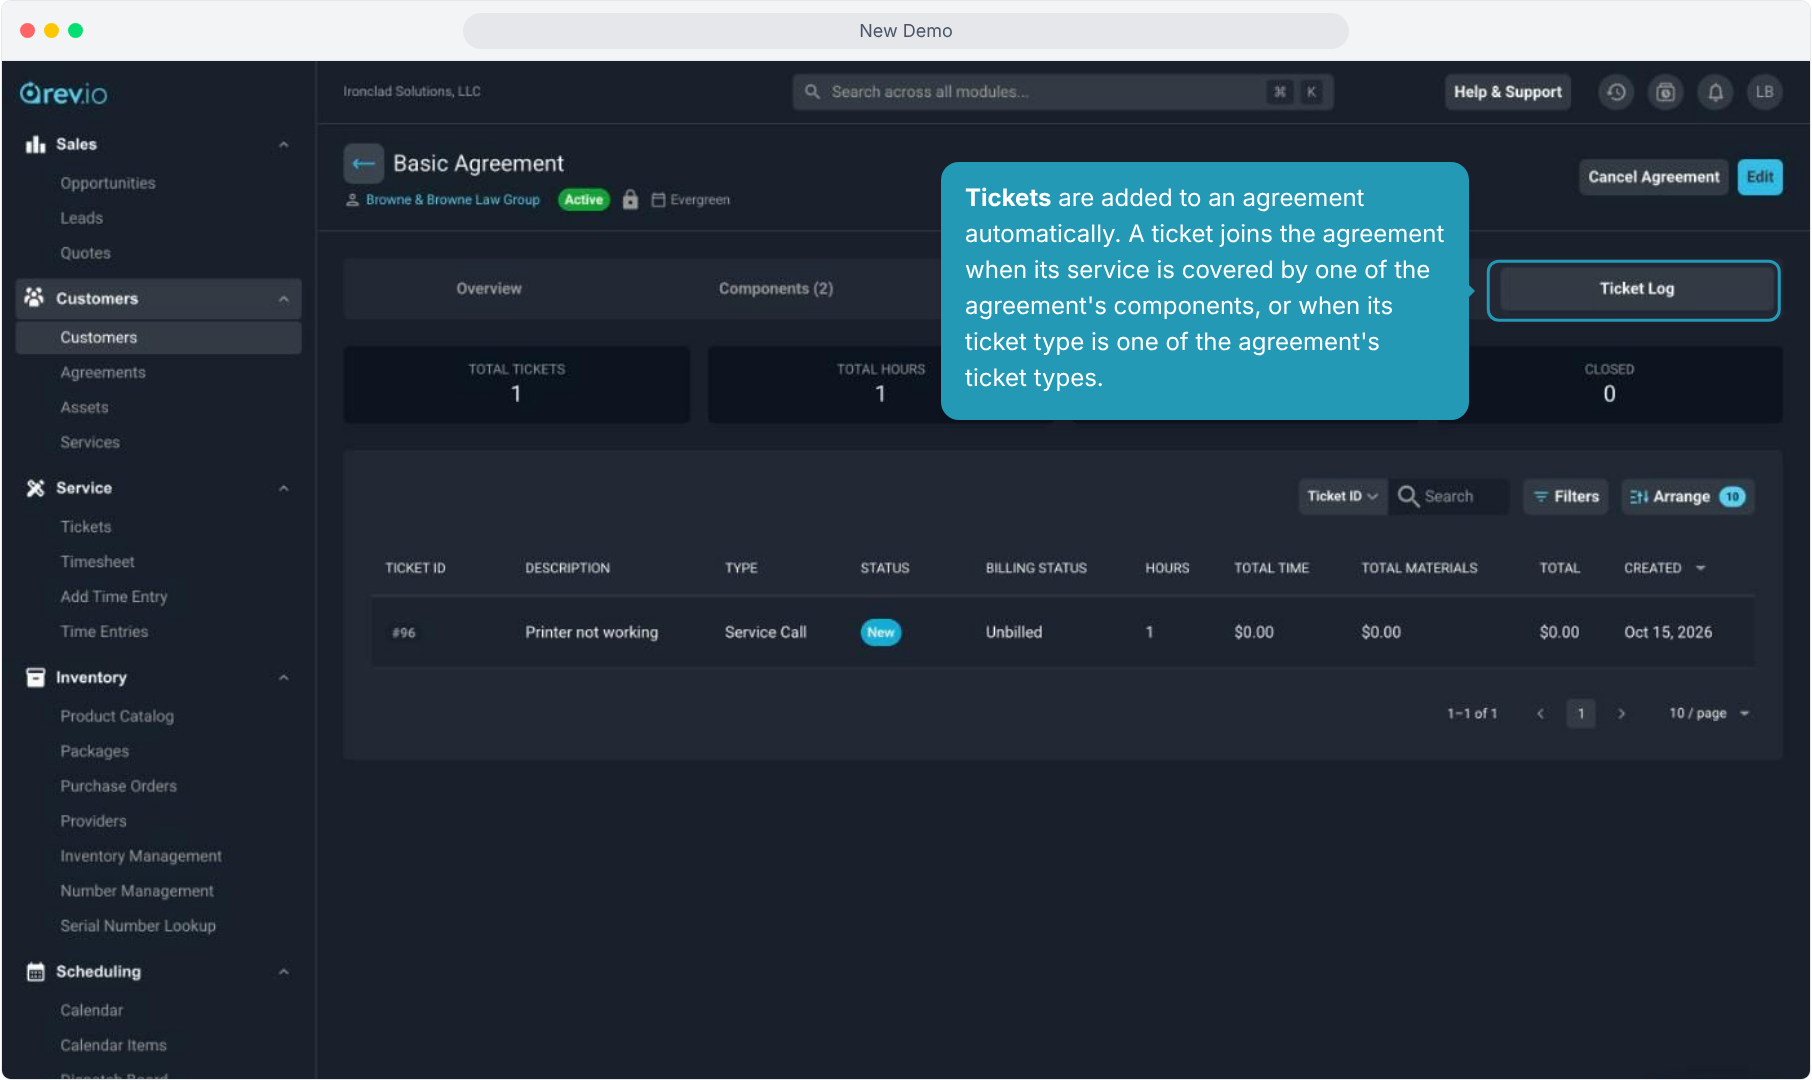
4. Tickets are added to an agreement automatically. A ticket joins the agreement when its service is covered by one of the agreement's components, or when its ticket type is one of the agreement's ticket types.
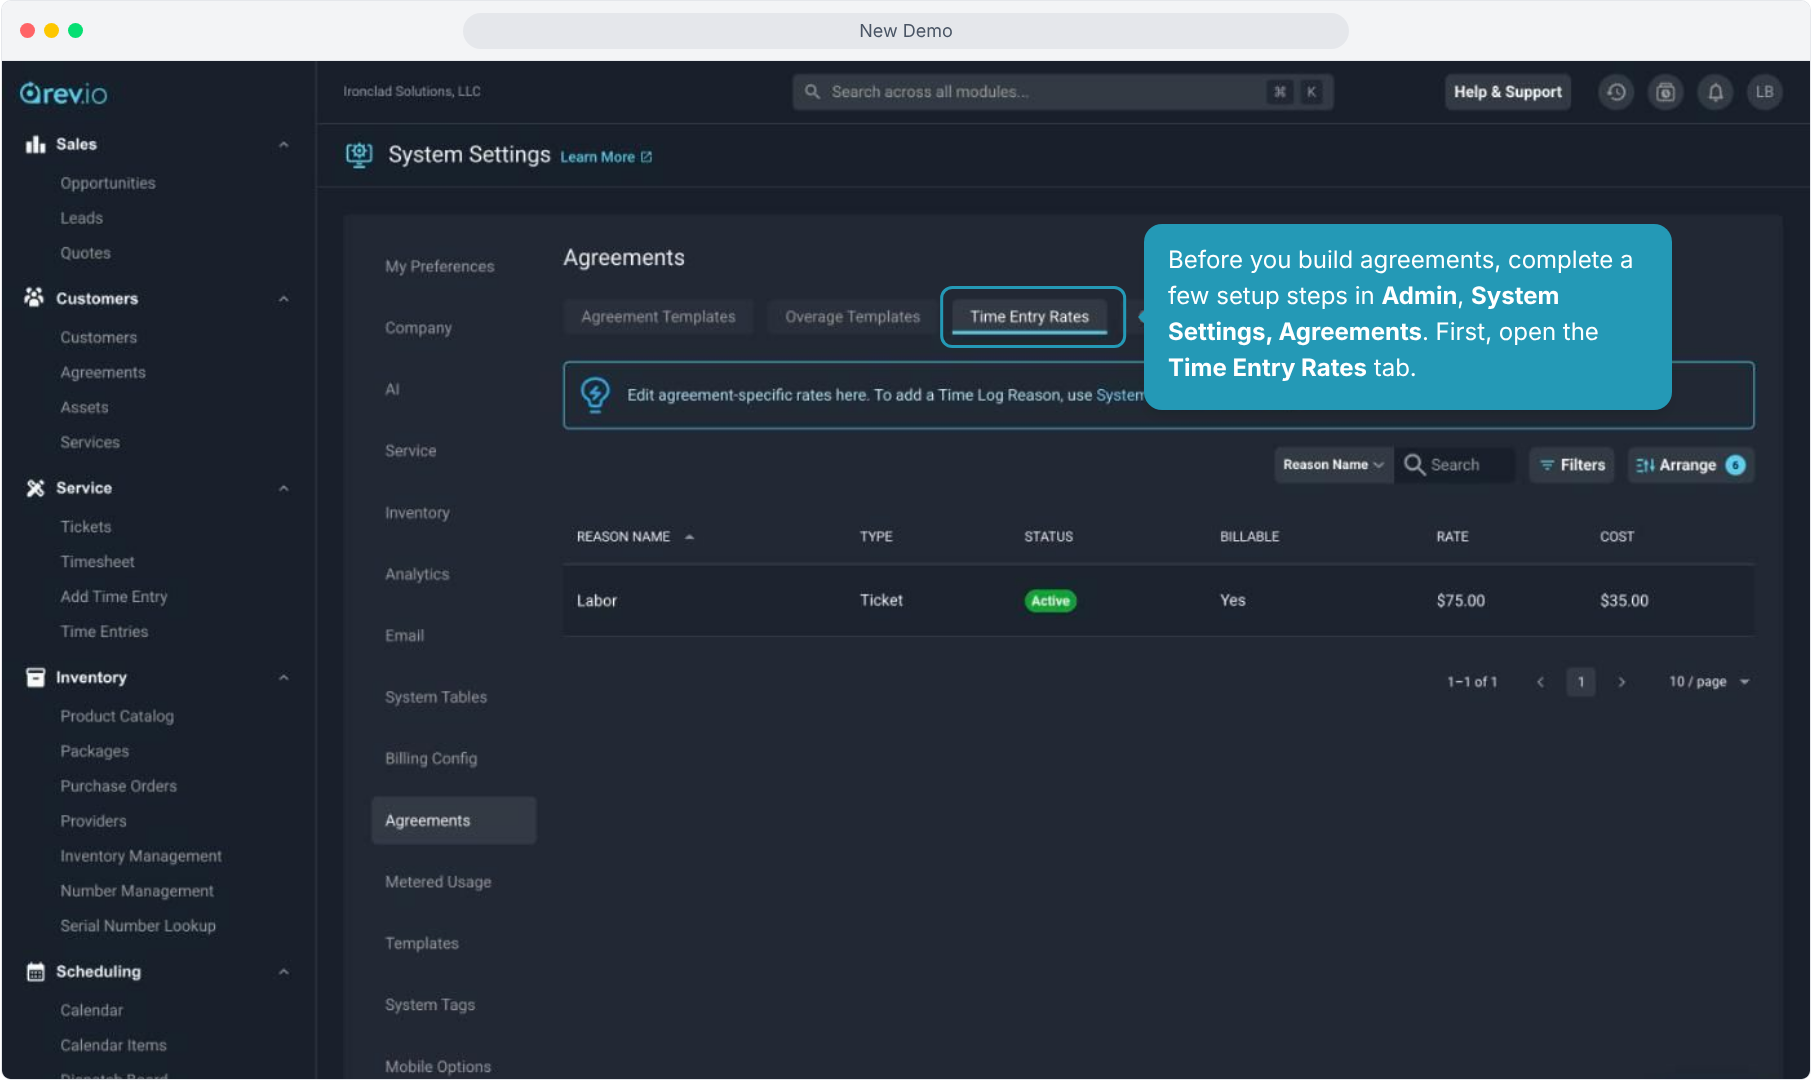
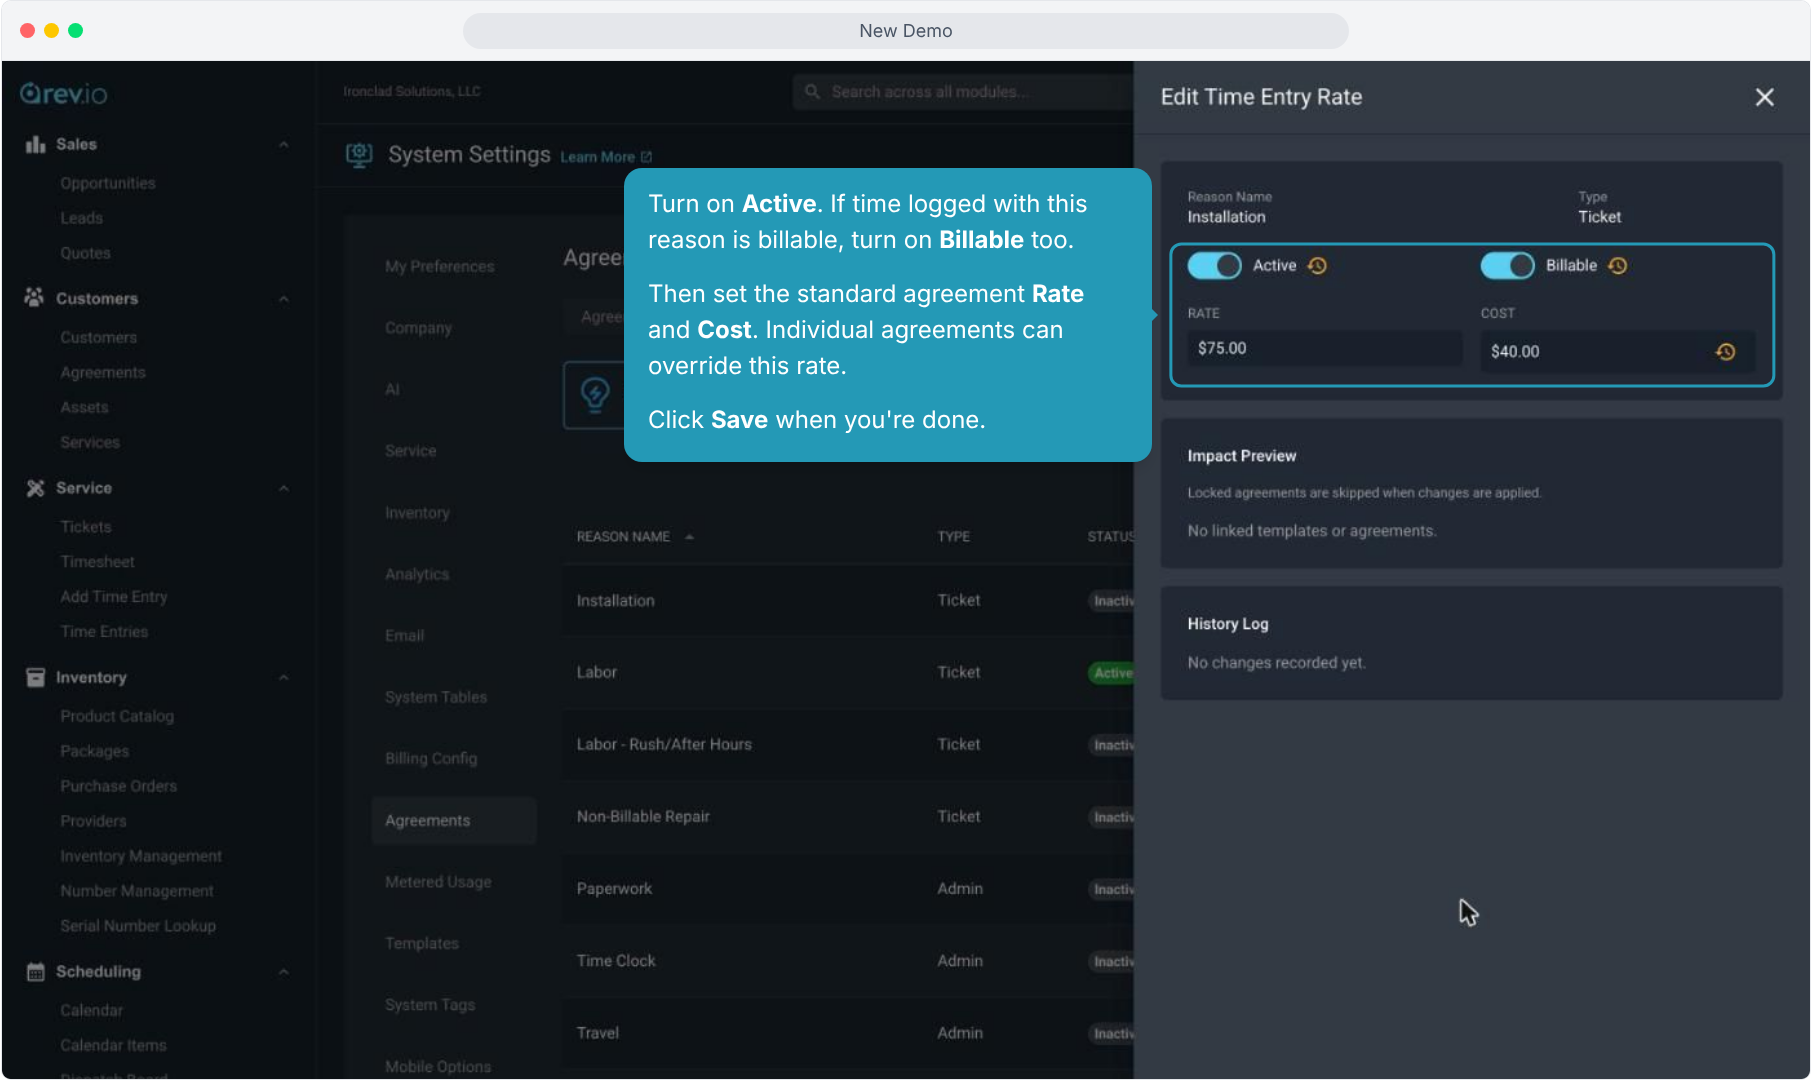
5. Before you build agreements, complete a few setup steps in Admin, System Settings, Agreements. First, open the Time Entry Rates tab.
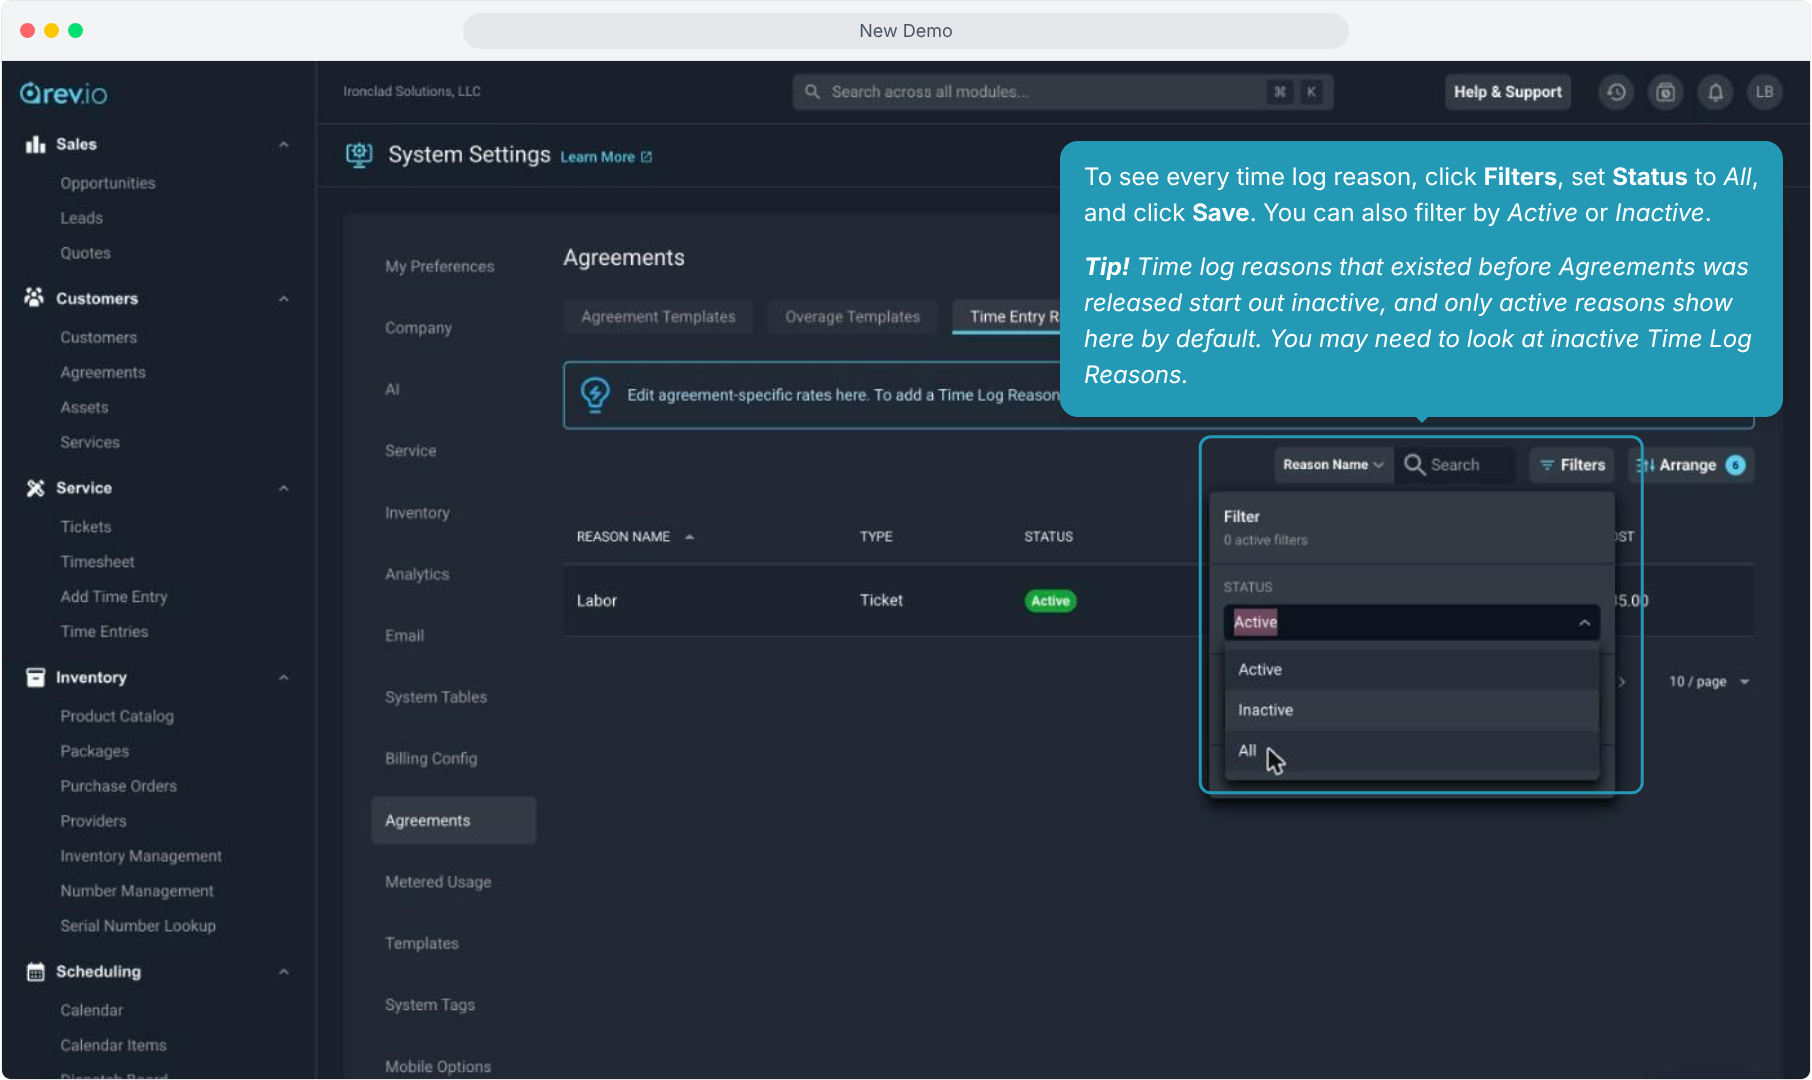
6. To see every time log reason, click Filters, set Status to All, and click Save. You can also filter by Active or Inactive.
Tip! Time log reasons that existed before Agreements was released start out inactive, and only active reasons show here by default. You may need to look at inactive Time Log Reasons.
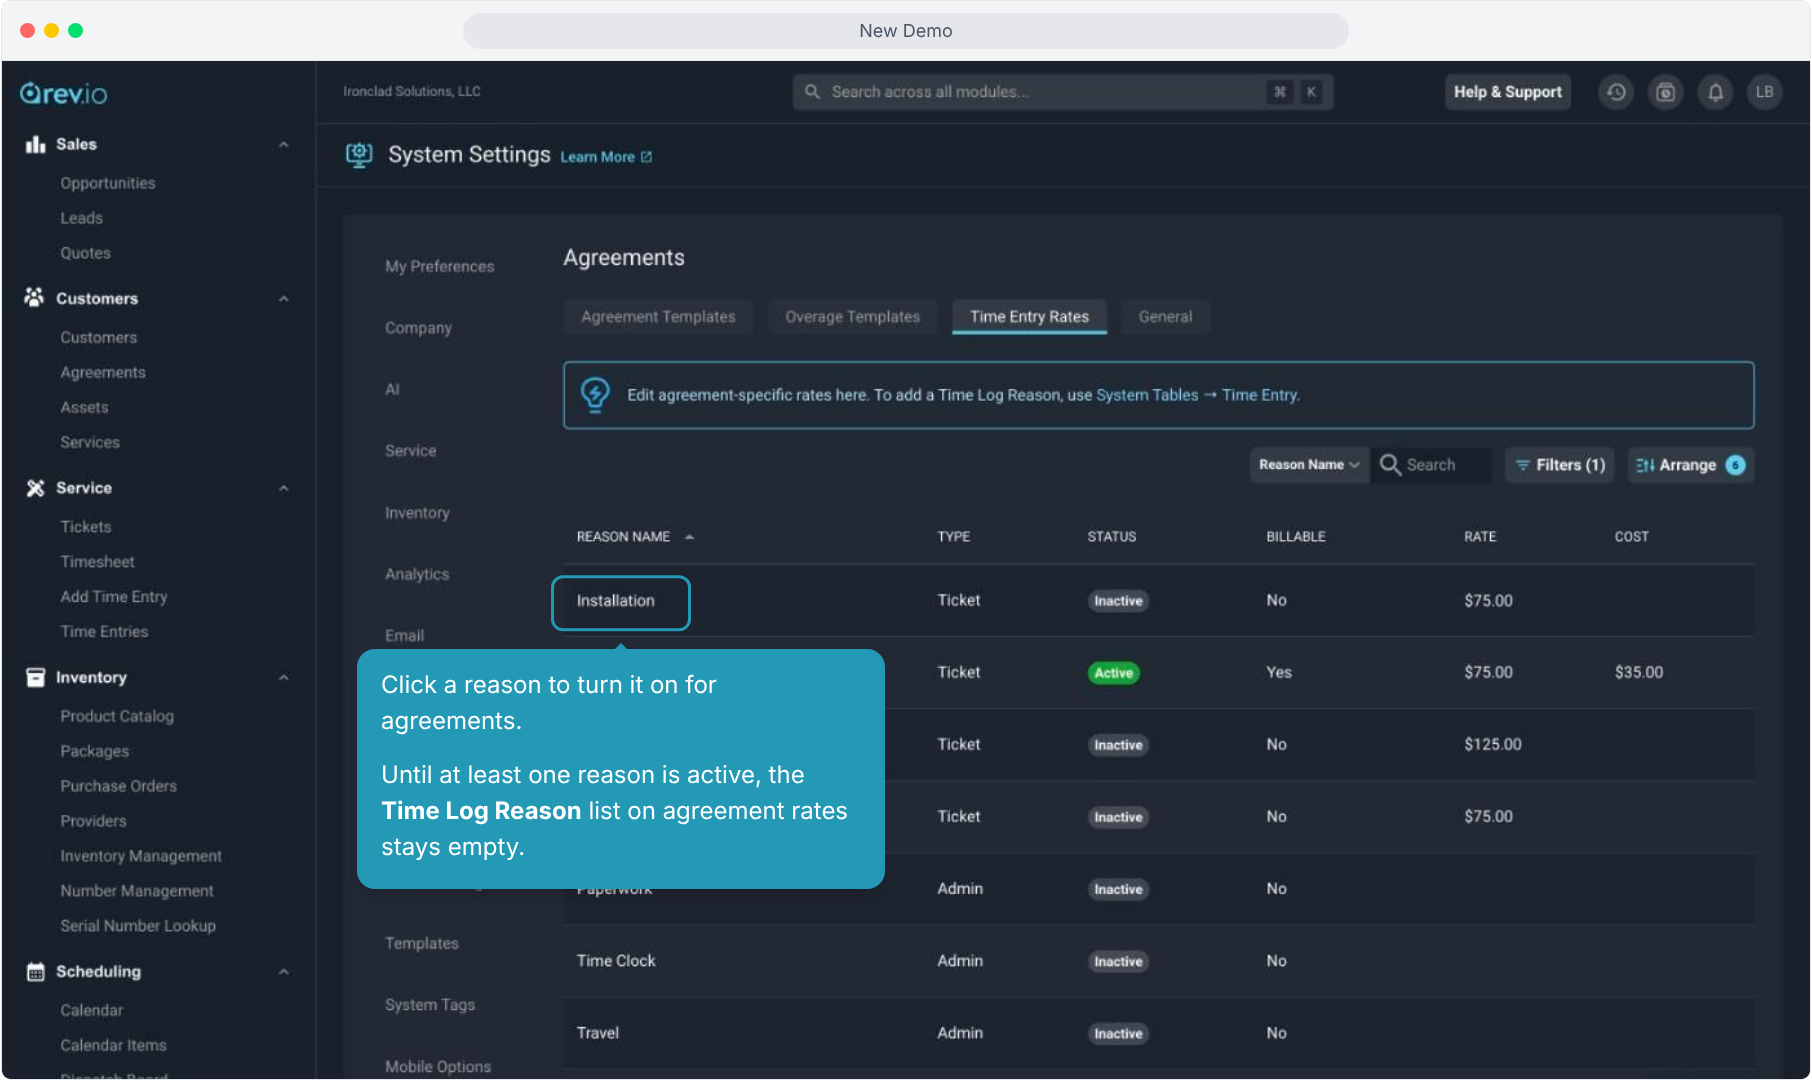
7. Click a reason to turn it on for agreements. Until at least one reason is active, the Time Log Reason list on agreement rates stays empty.
8. Turn on Active. If time logged with this reason is billable, turn on Billable too.
Then set the standard agreement Rate and Cost. Individual agreements can override this rate.
Click Save when you're done.
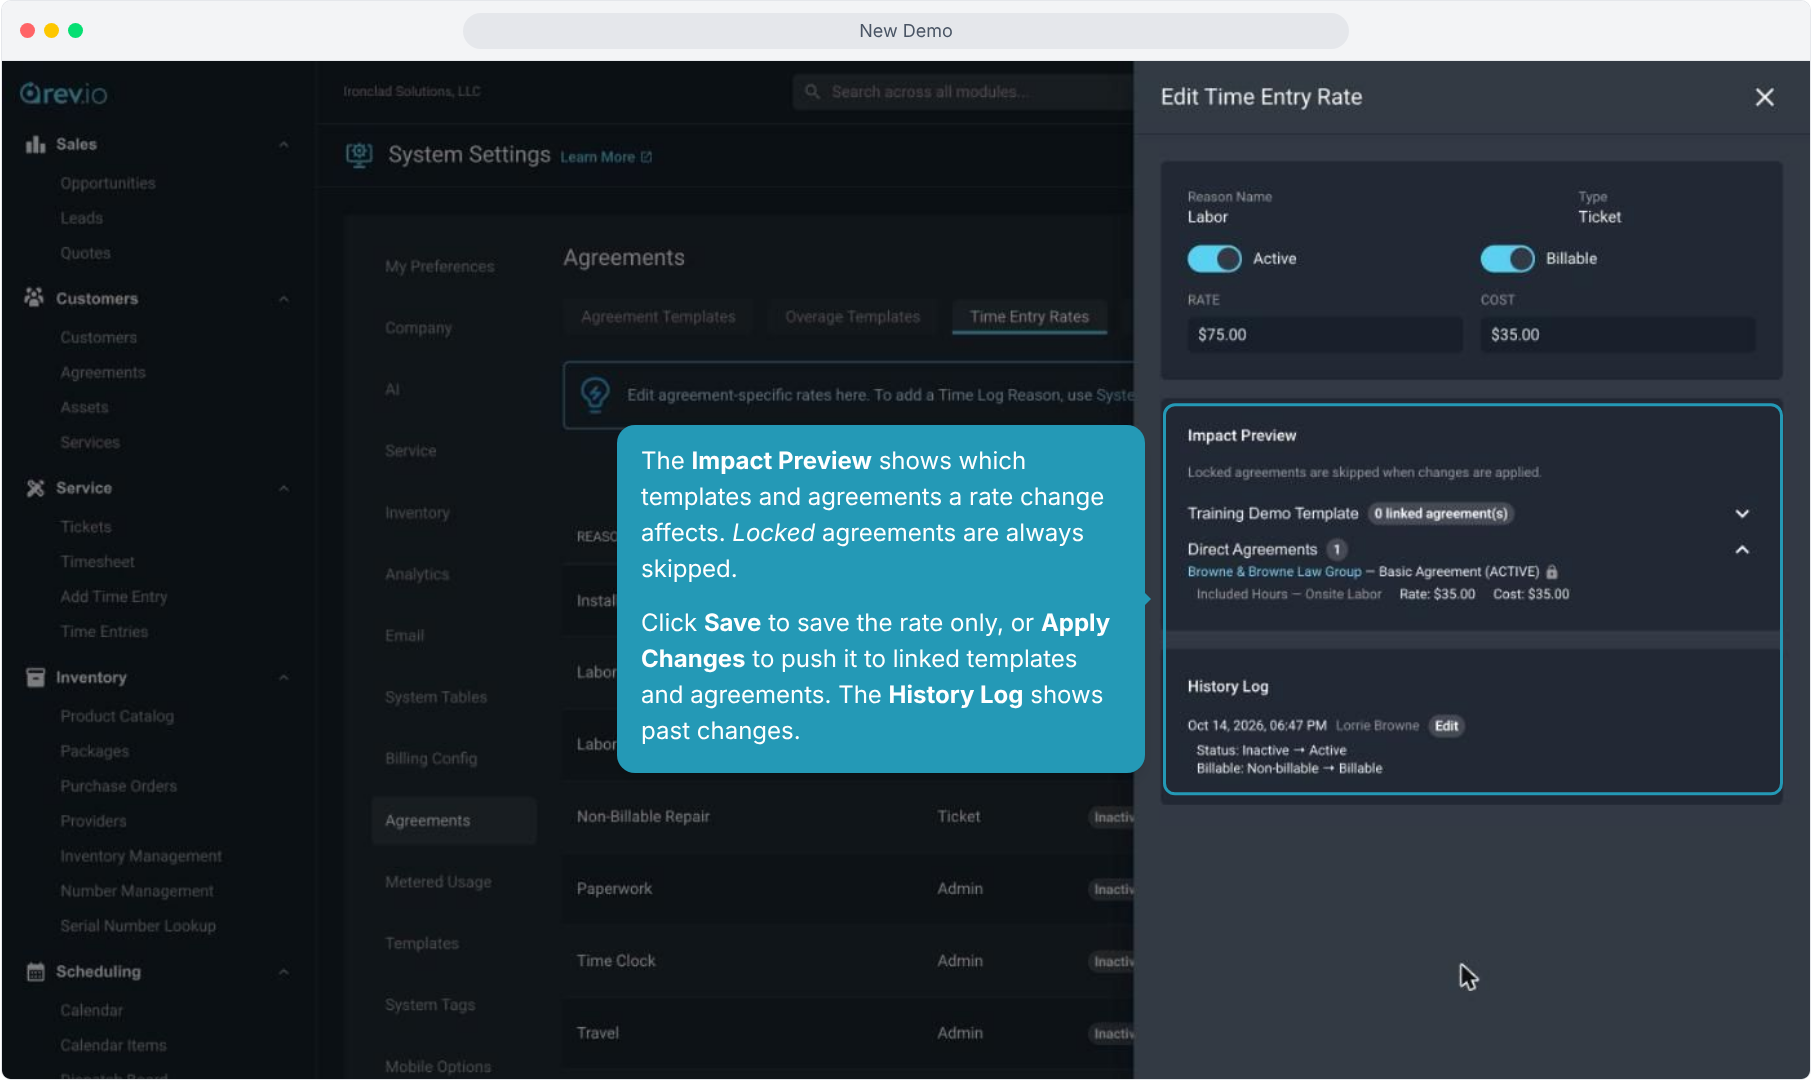
9. The Impact Preview shows which templates and agreements a rate change affects. Locked agreements are always skipped.
Click Save to save the rate only, or Apply Changes to push it to linked templates and agreements. The History Log shows past changes.
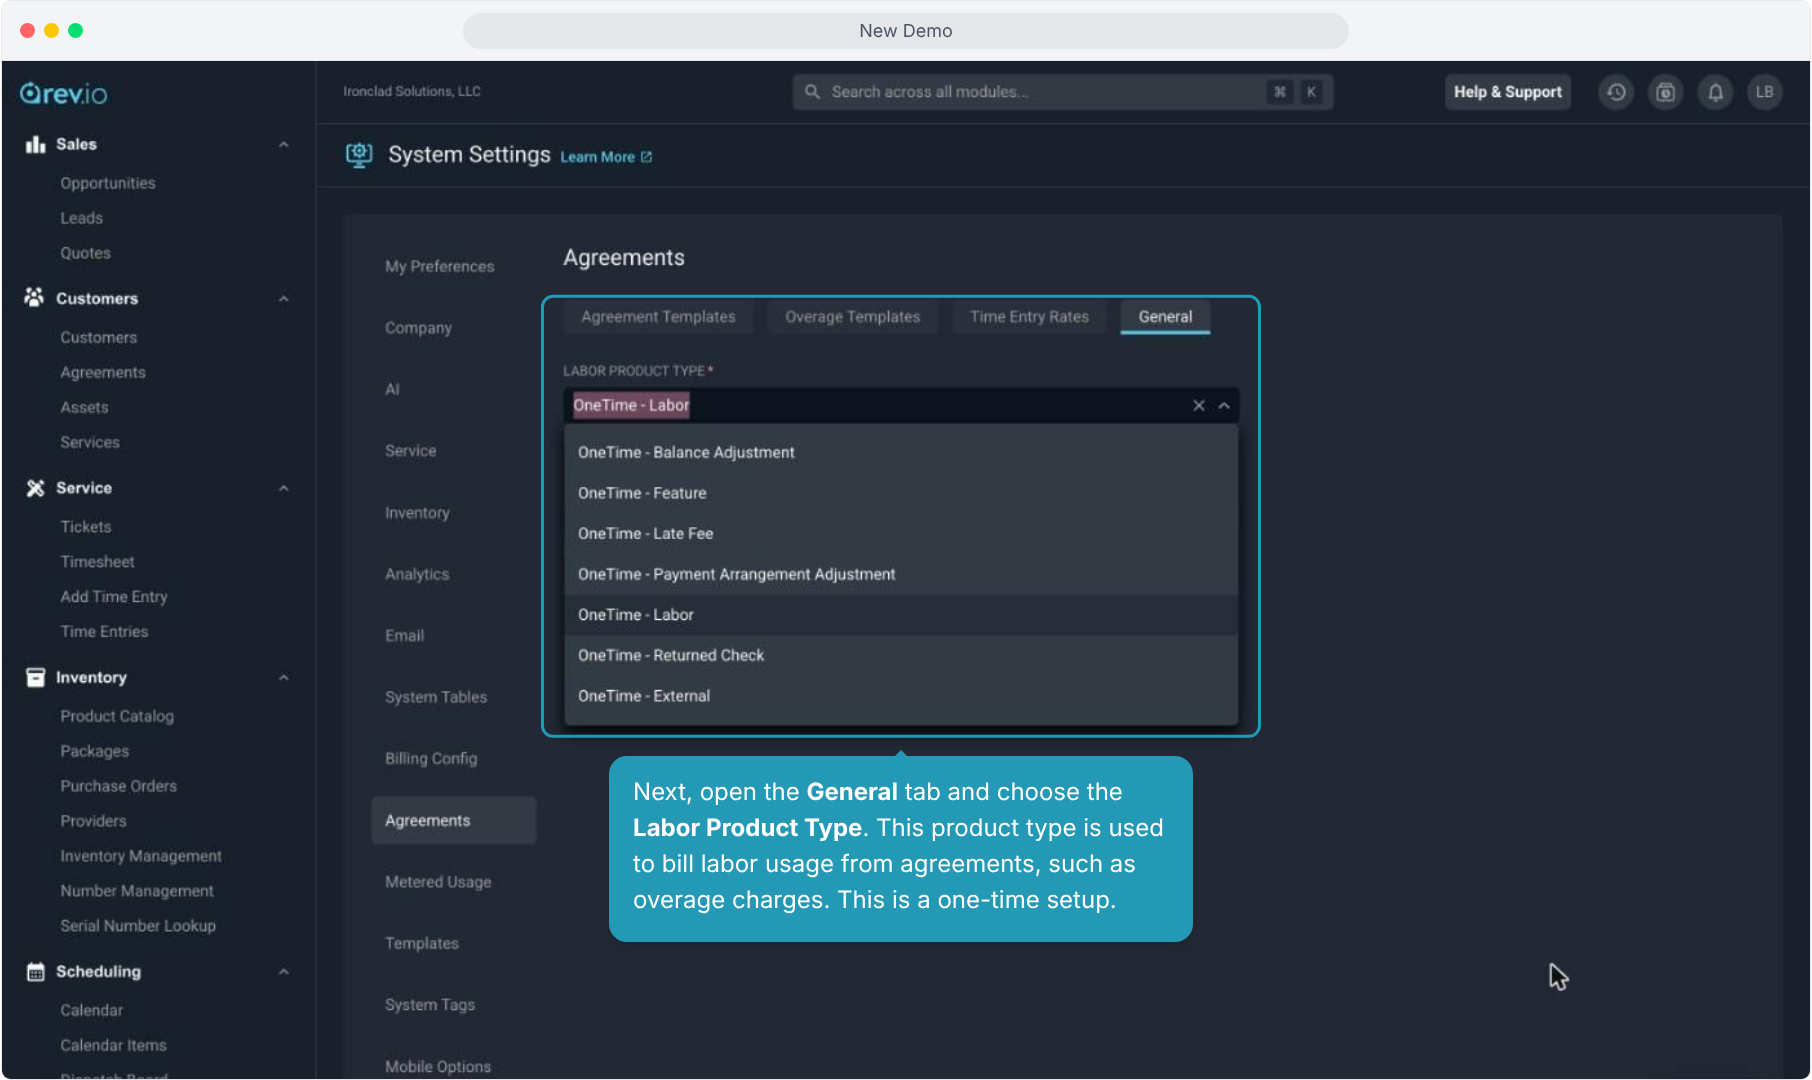
10. Next, open the General tab and choose the Labor Product Type. This product type is used to bill labor usage from agreements, such as overage charges. This is a one-time setup.
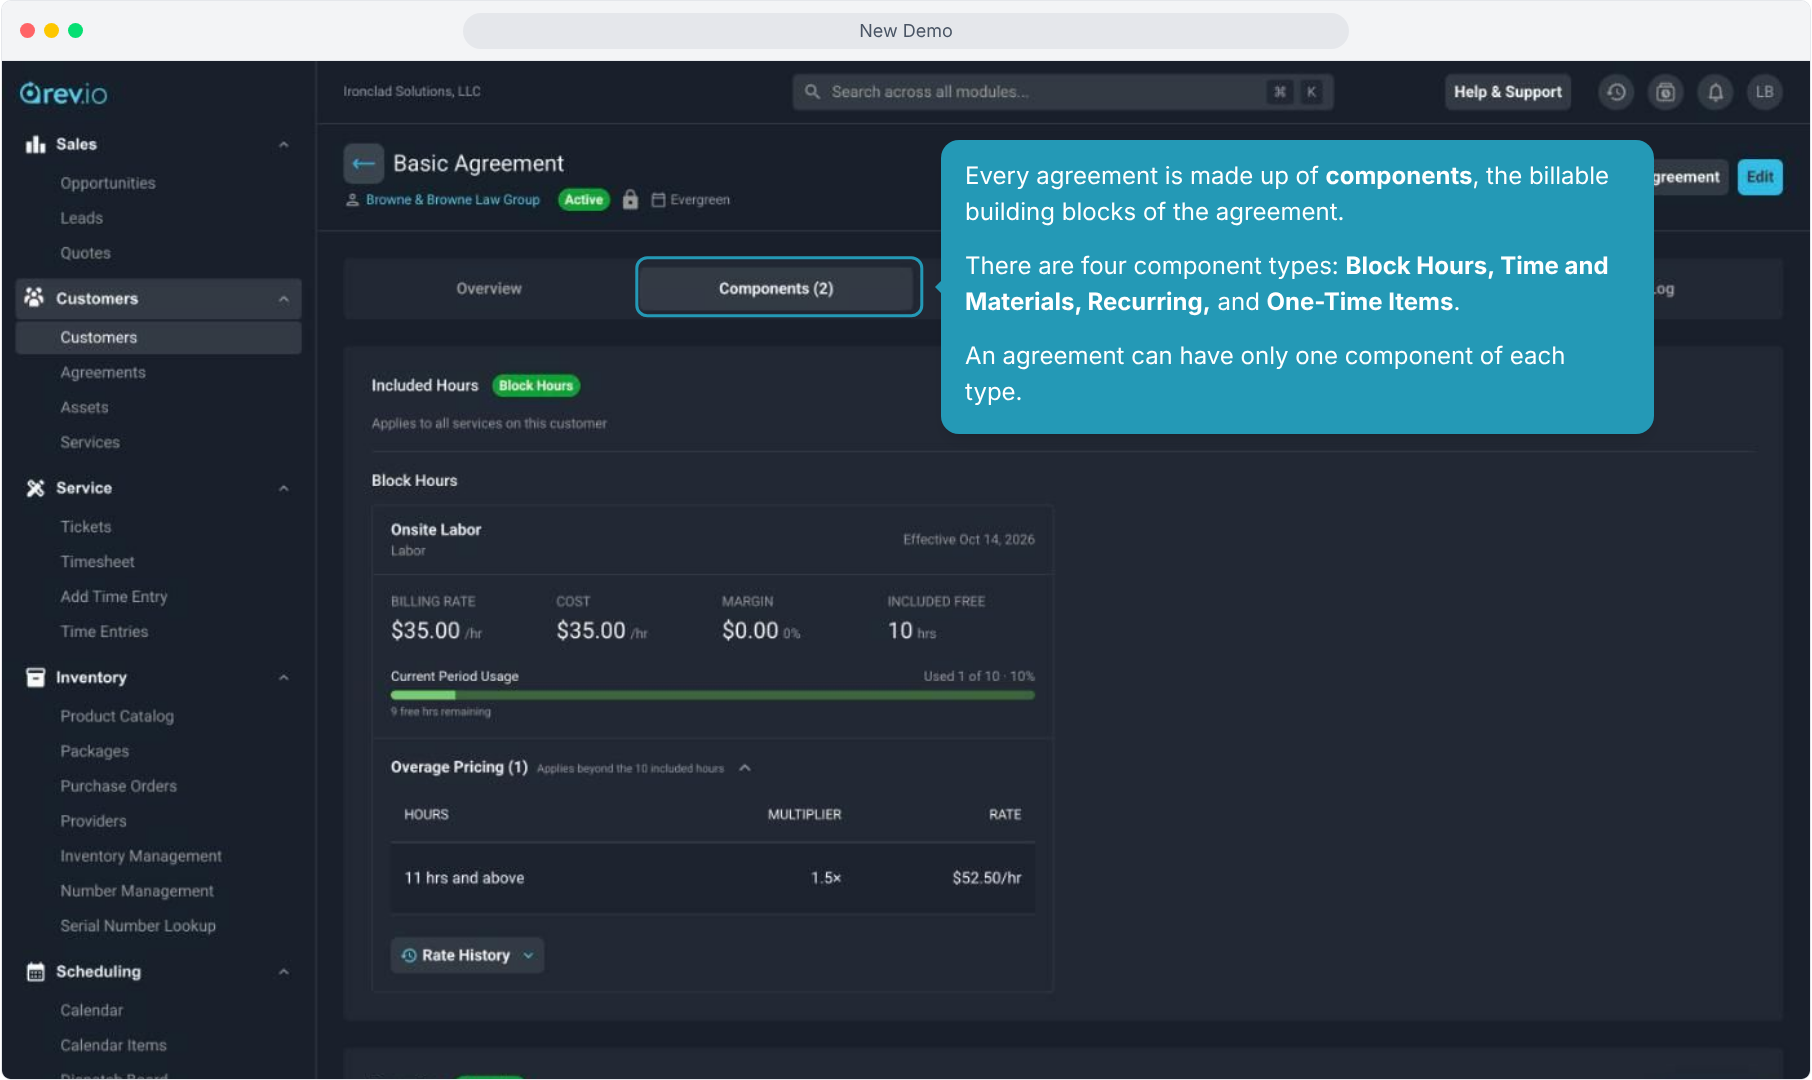
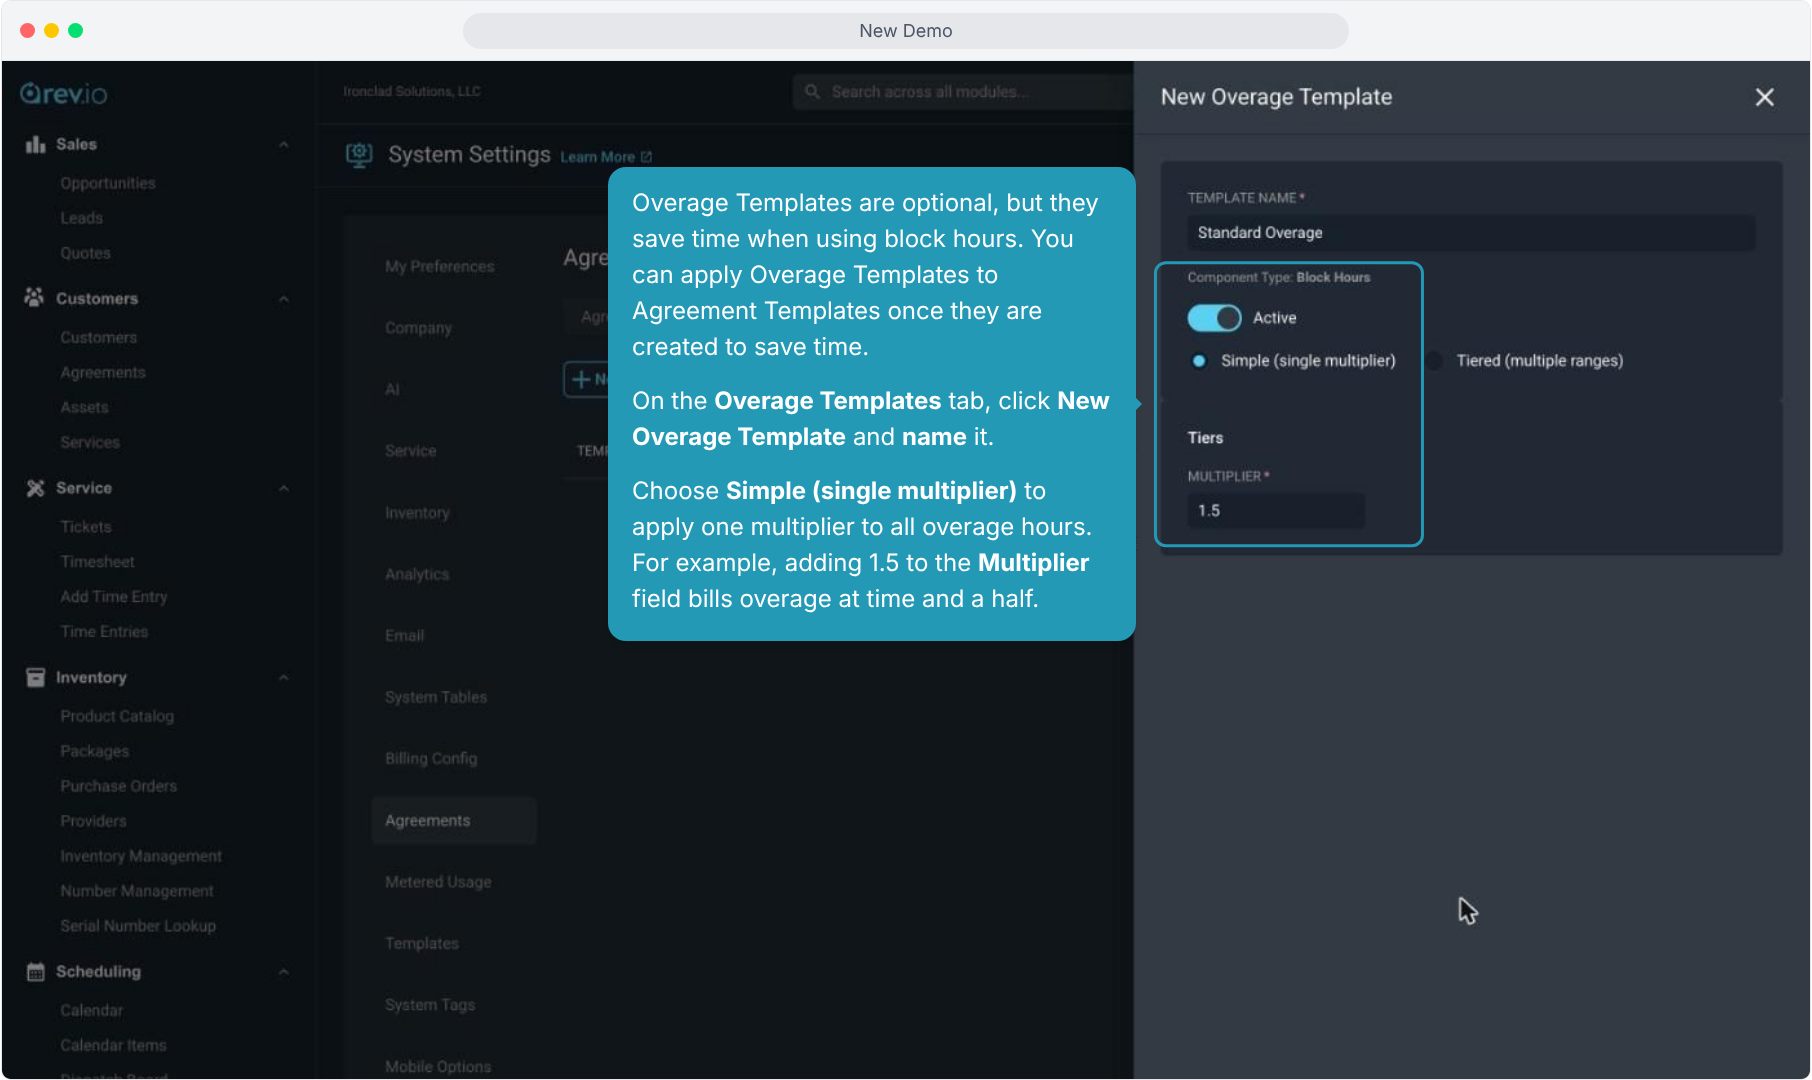
11. Overage Templates are optional, but they save time when using block hours. You can apply Overage Templates to Agreement Templates once they are created to save time.
On the Overage Templates tab, click New Overage Template and name it.
Choose Simple (single multiplier) to apply one multiplier to all overage hours. For example, adding 1.5 to the Multiplier field bills overage at time and a half.
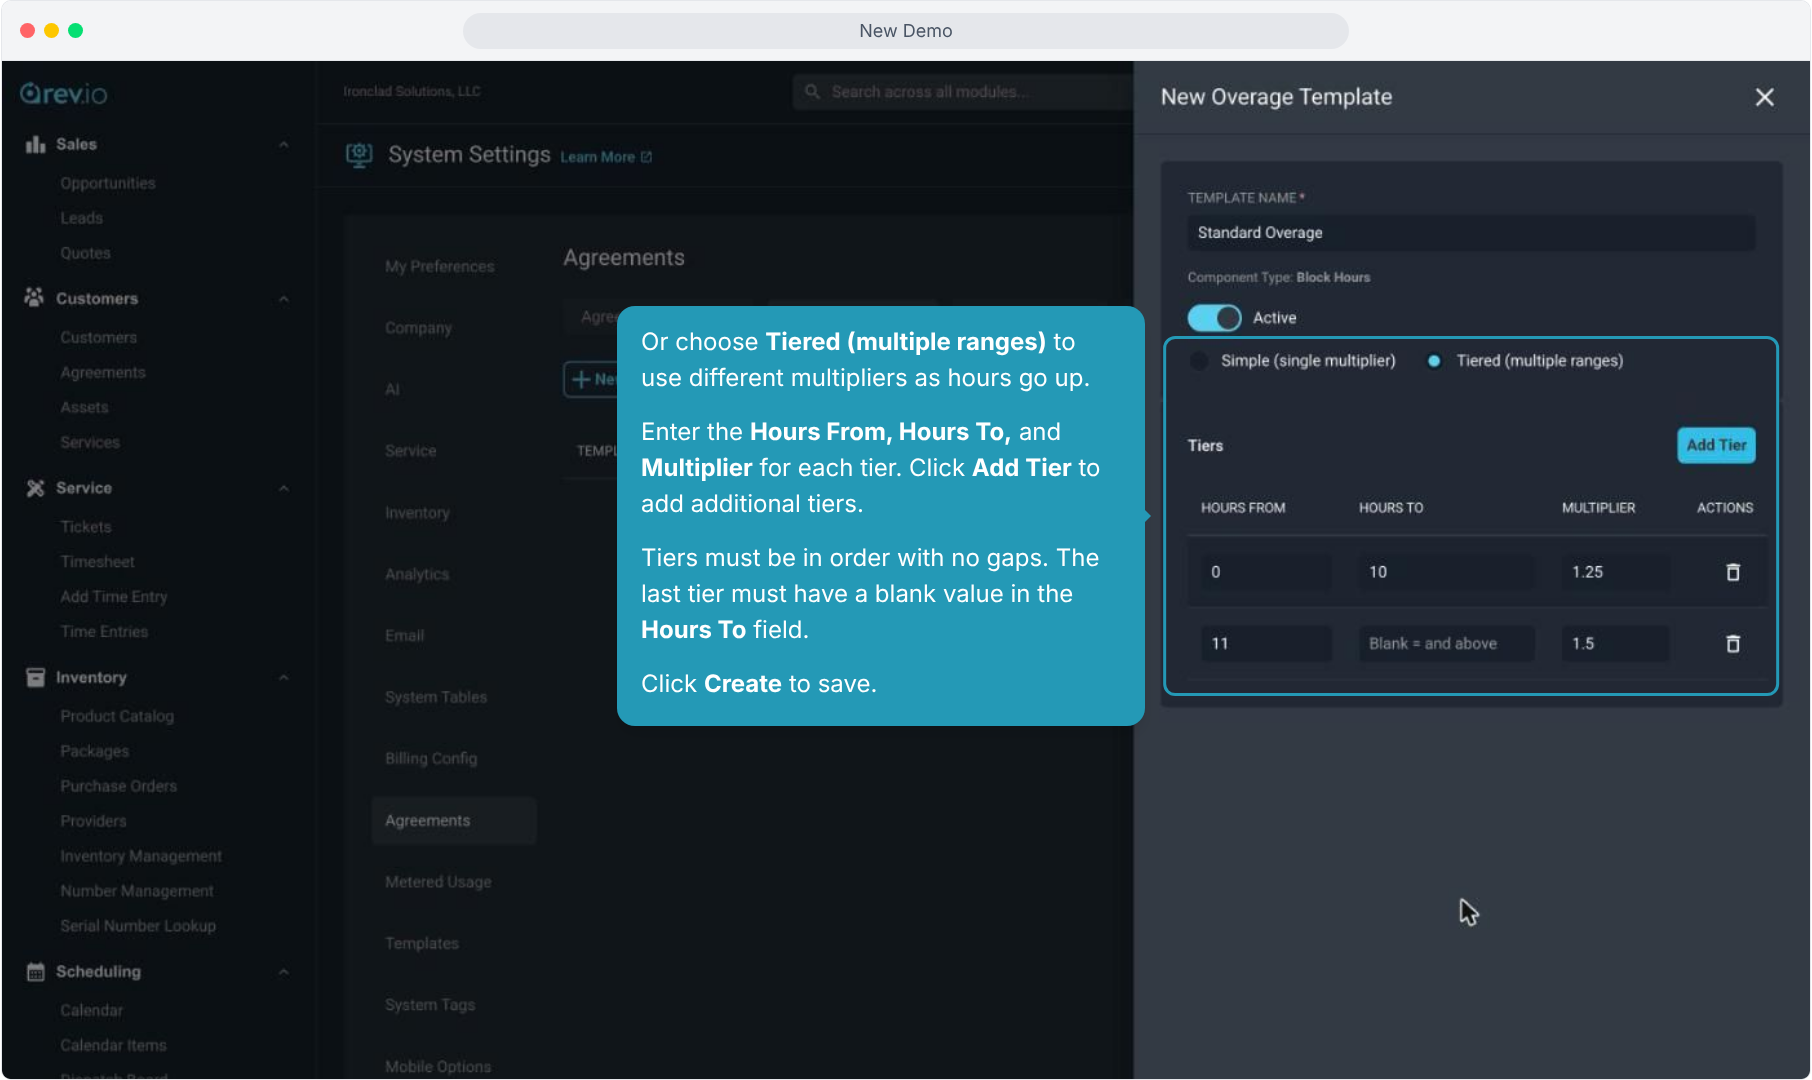
12. Or choose Tiered (multiple ranges) to use different multipliers as hours go up.
Enter the Hours From, Hours To, and Multiplier for each tier. Click Add Tier to add additional tiers.
Tiers must be in order with no gaps. The last tier must have a blank value in the Hours To field. Click Create to save.
13. Your overage template is ready to use on Block Hours components. With setup complete, you're ready to build your agreement templates.