How To Guide: Managing Leads
1. Introduction
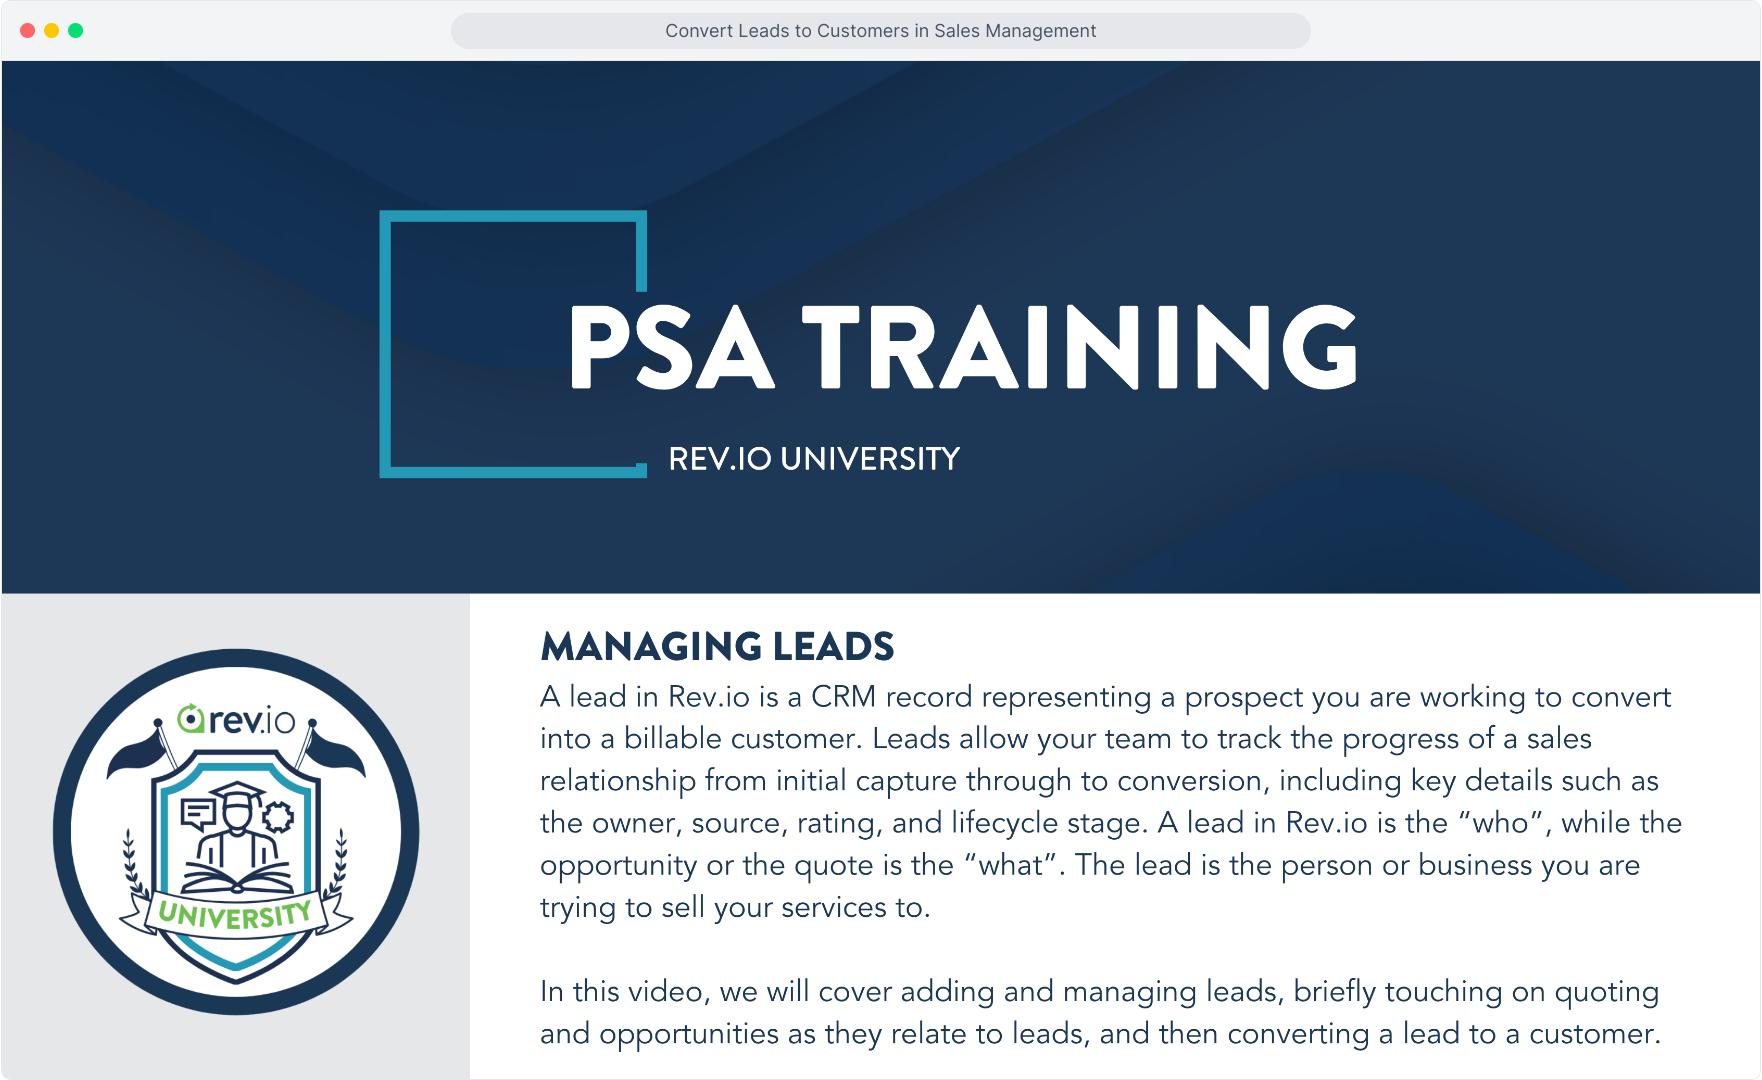
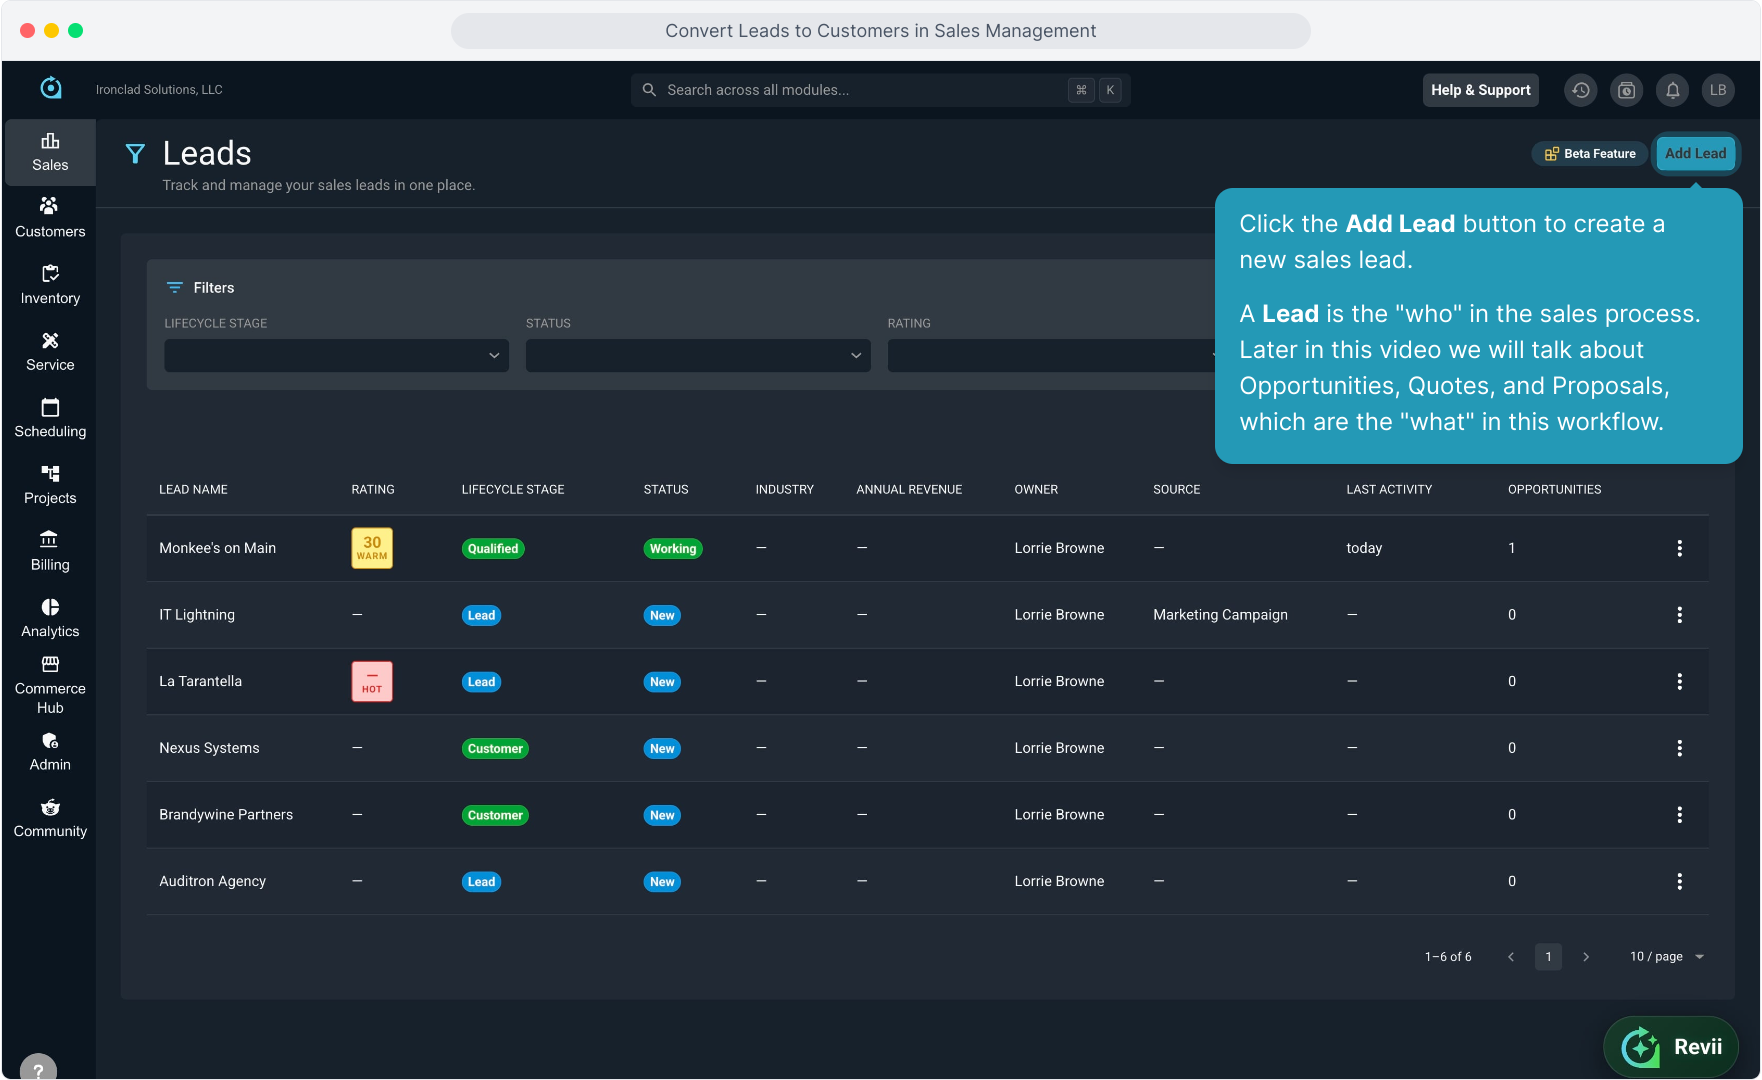
2. From the main Sales menu, select Leads.
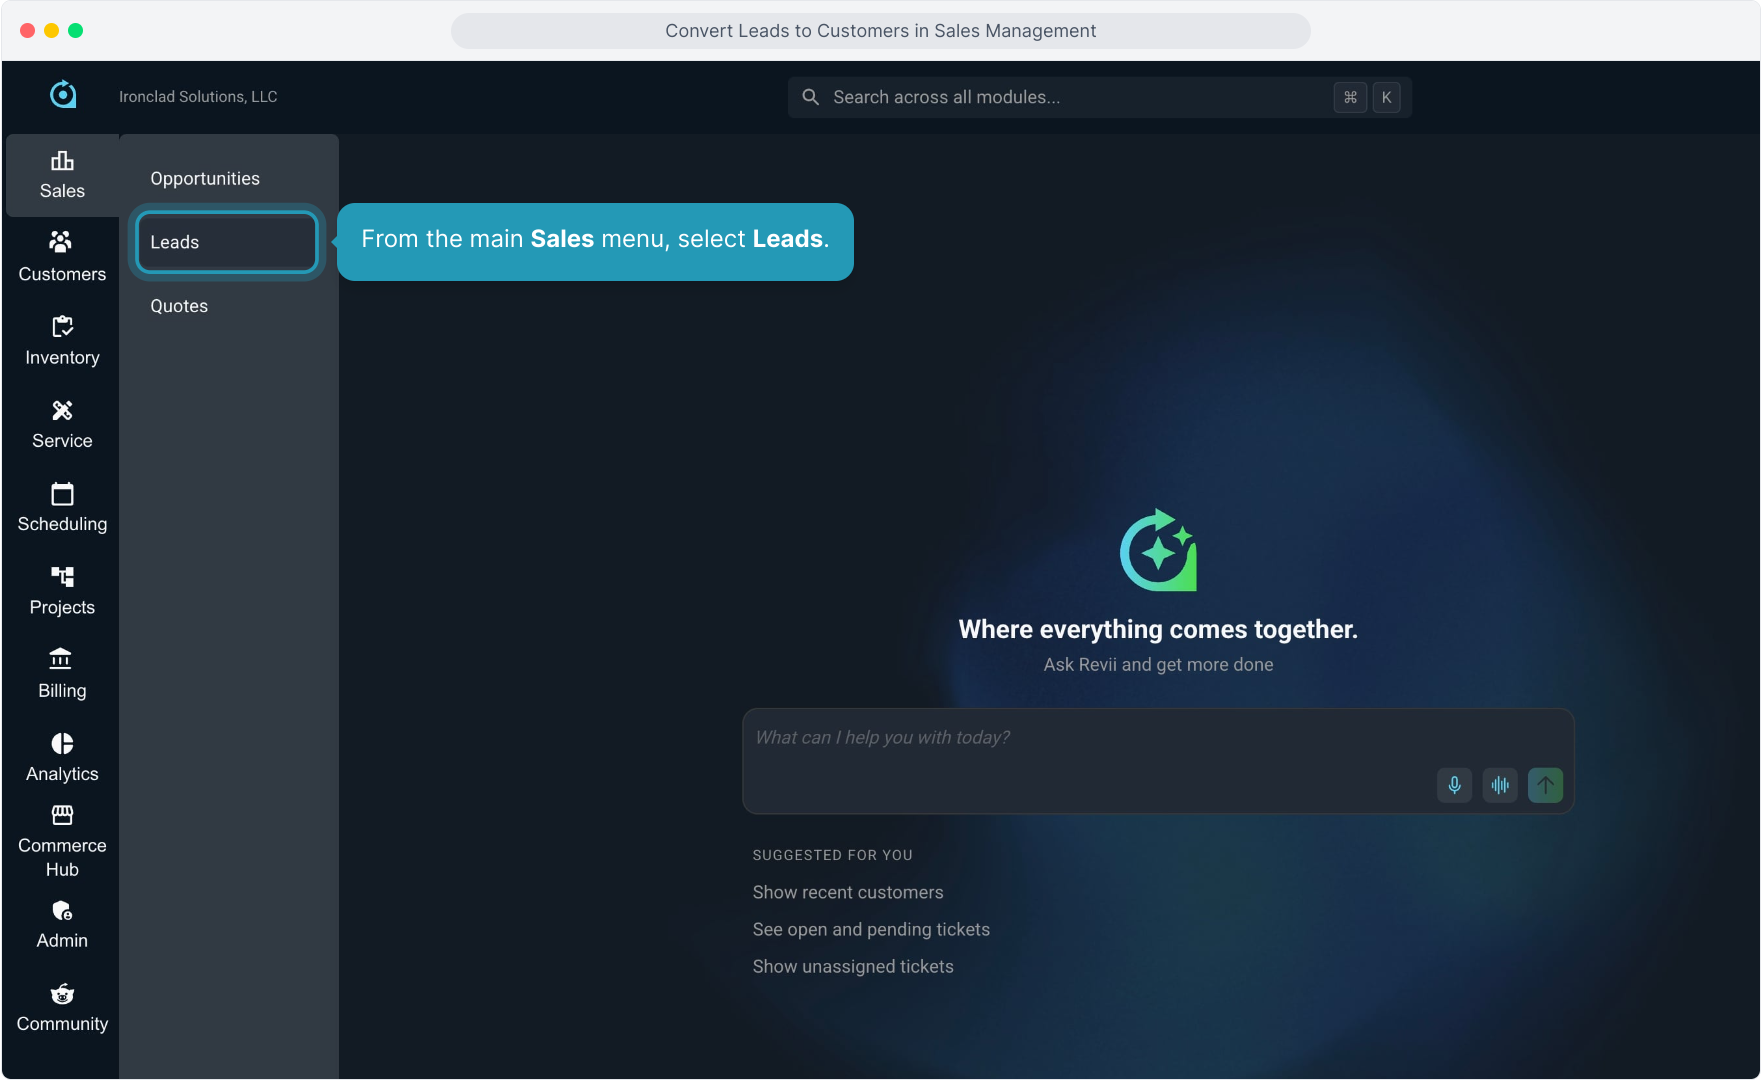
3. At the top of the Leads page, you'll see all the Filters, Search, and Arrange options, similar to other pages in Rev.io.
4. Click the Add Lead button to create a new sales lead.
A Lead is the "who" in the sales process. Later in this video we will talk about Opportunities, Quotes, and Proposals, which are the "what" in this workflow.
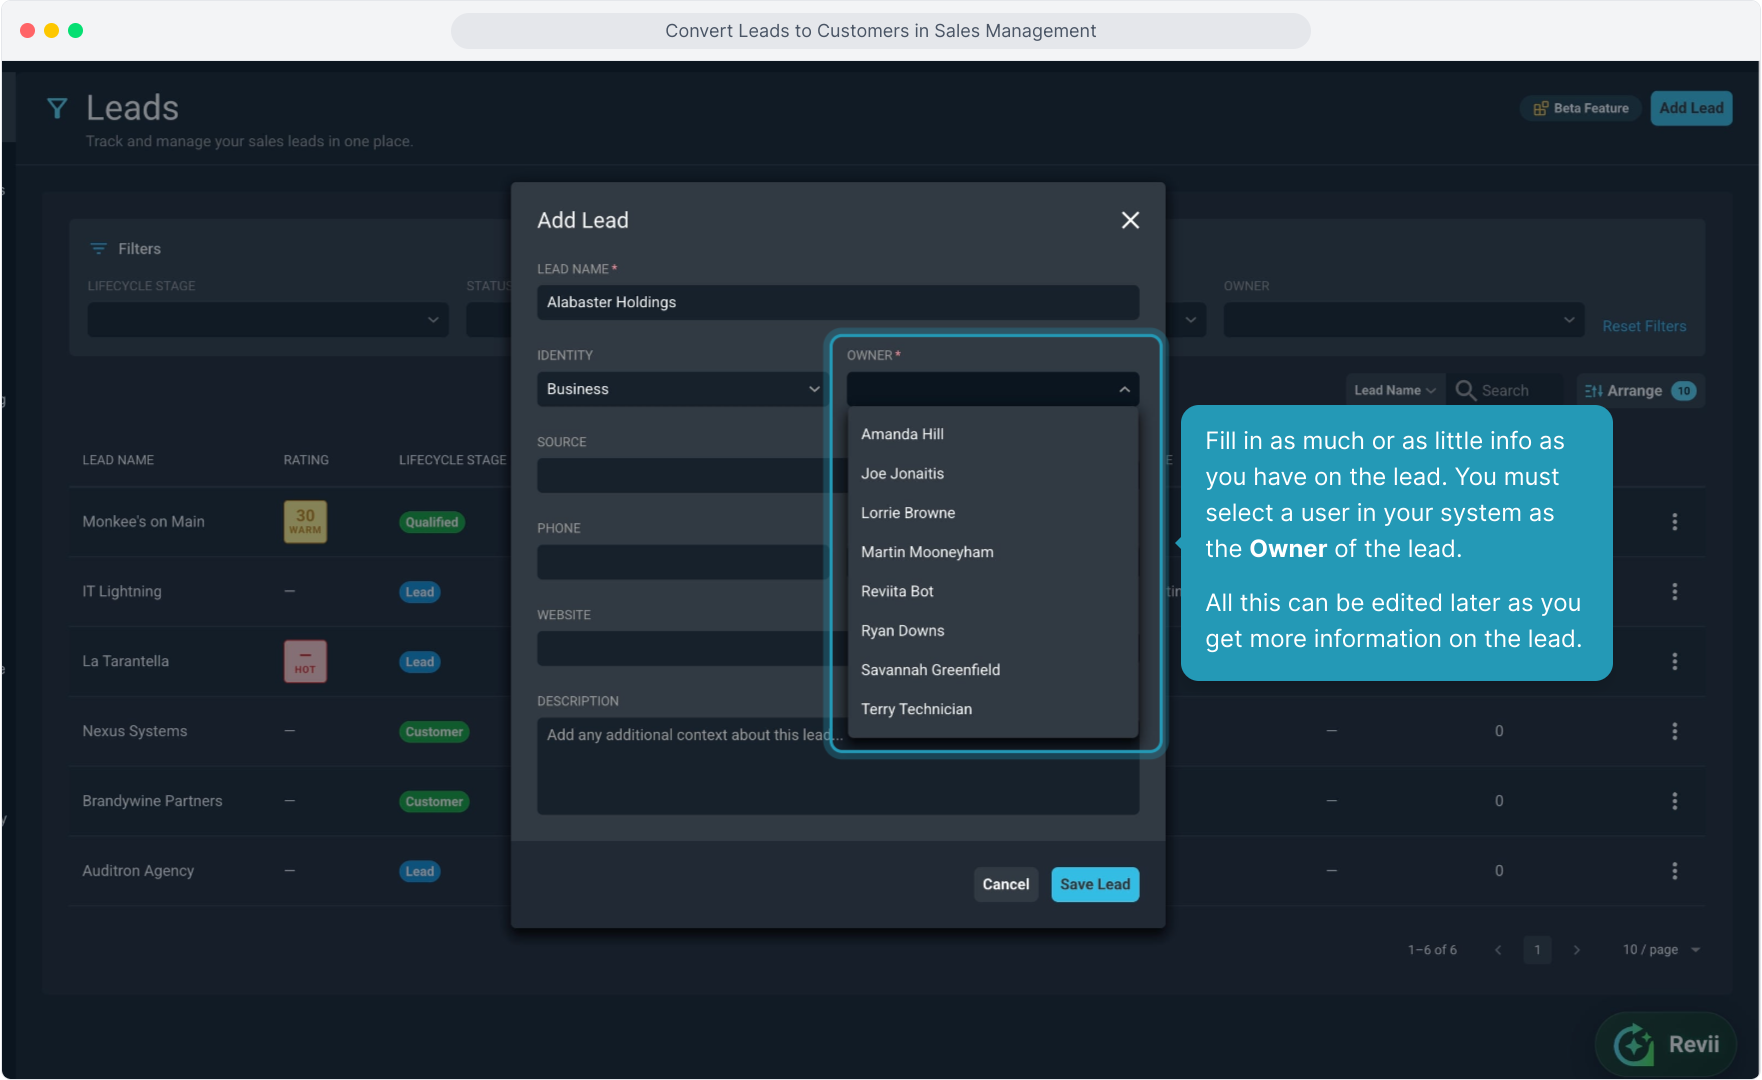
5. Fill in as much or as little info as you have on the lead. You must select a user in your system as the Owner of the lead.
All this can be edited later as you get more information on the lead.
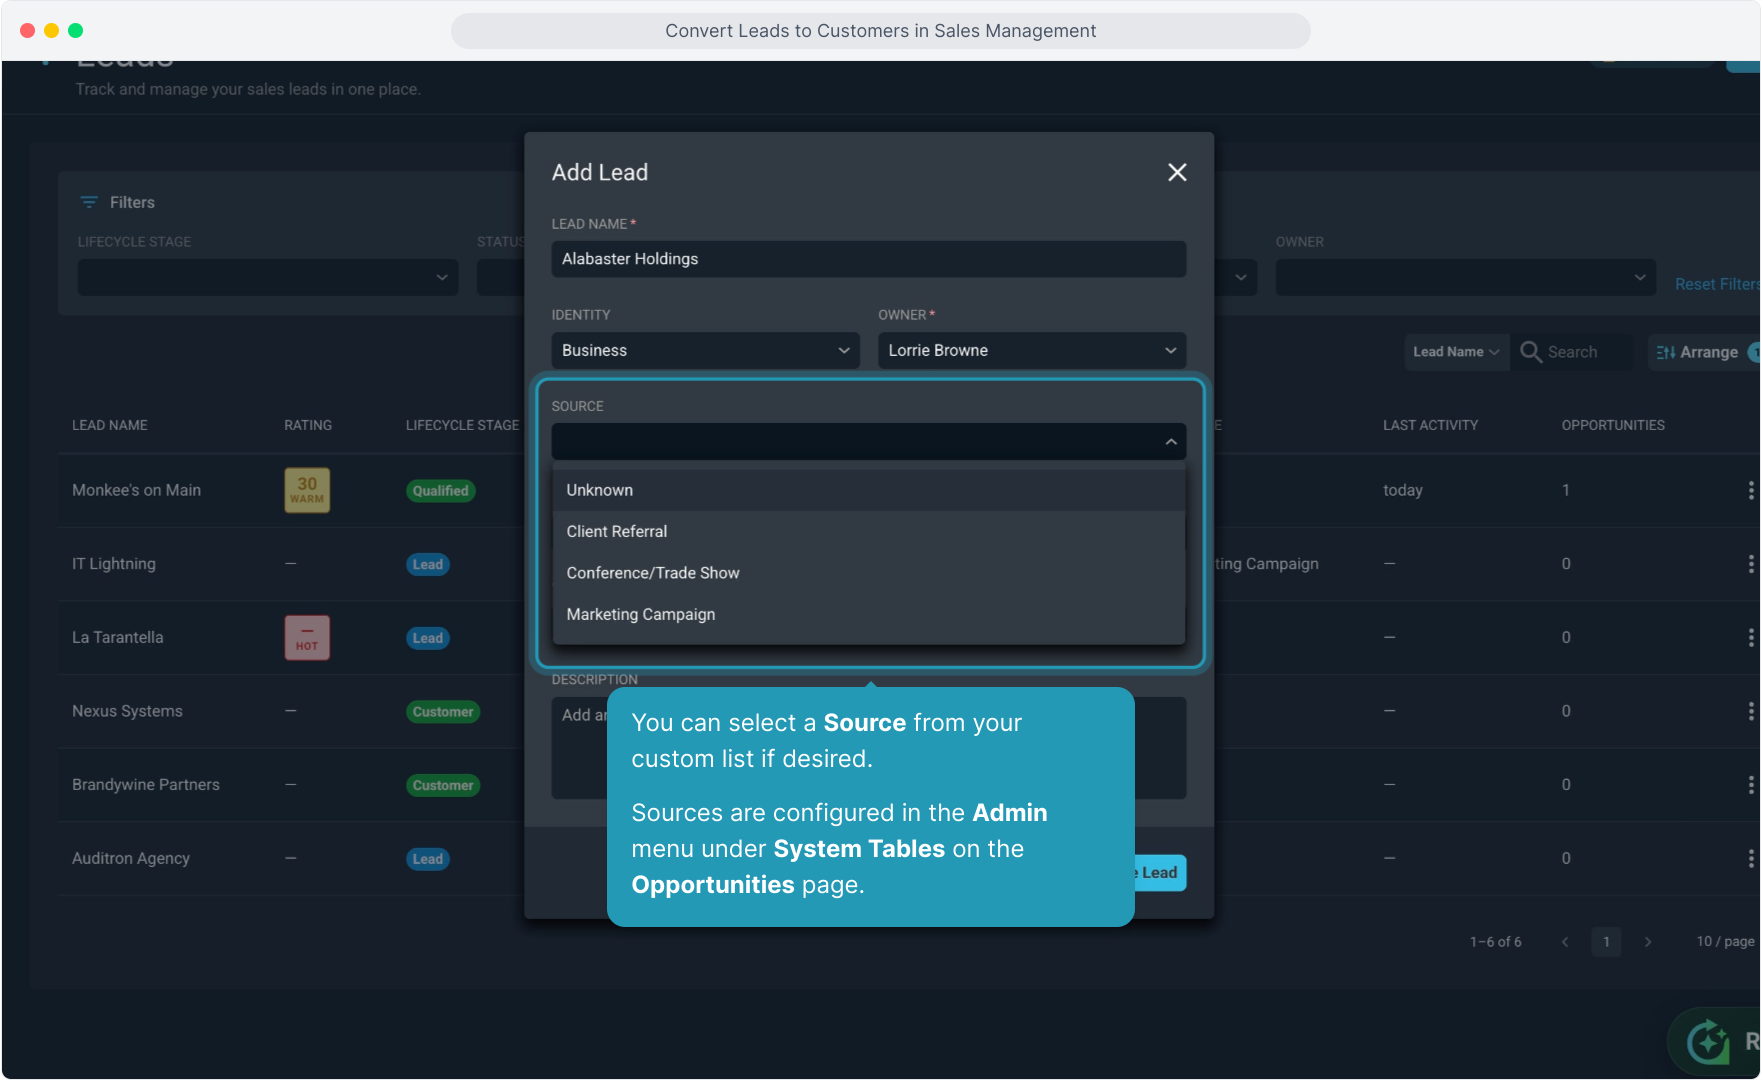
6. You can select a Source from your custom list if desired.
Sources are configured in the Admin menu under System Tables on the Opportunities page.
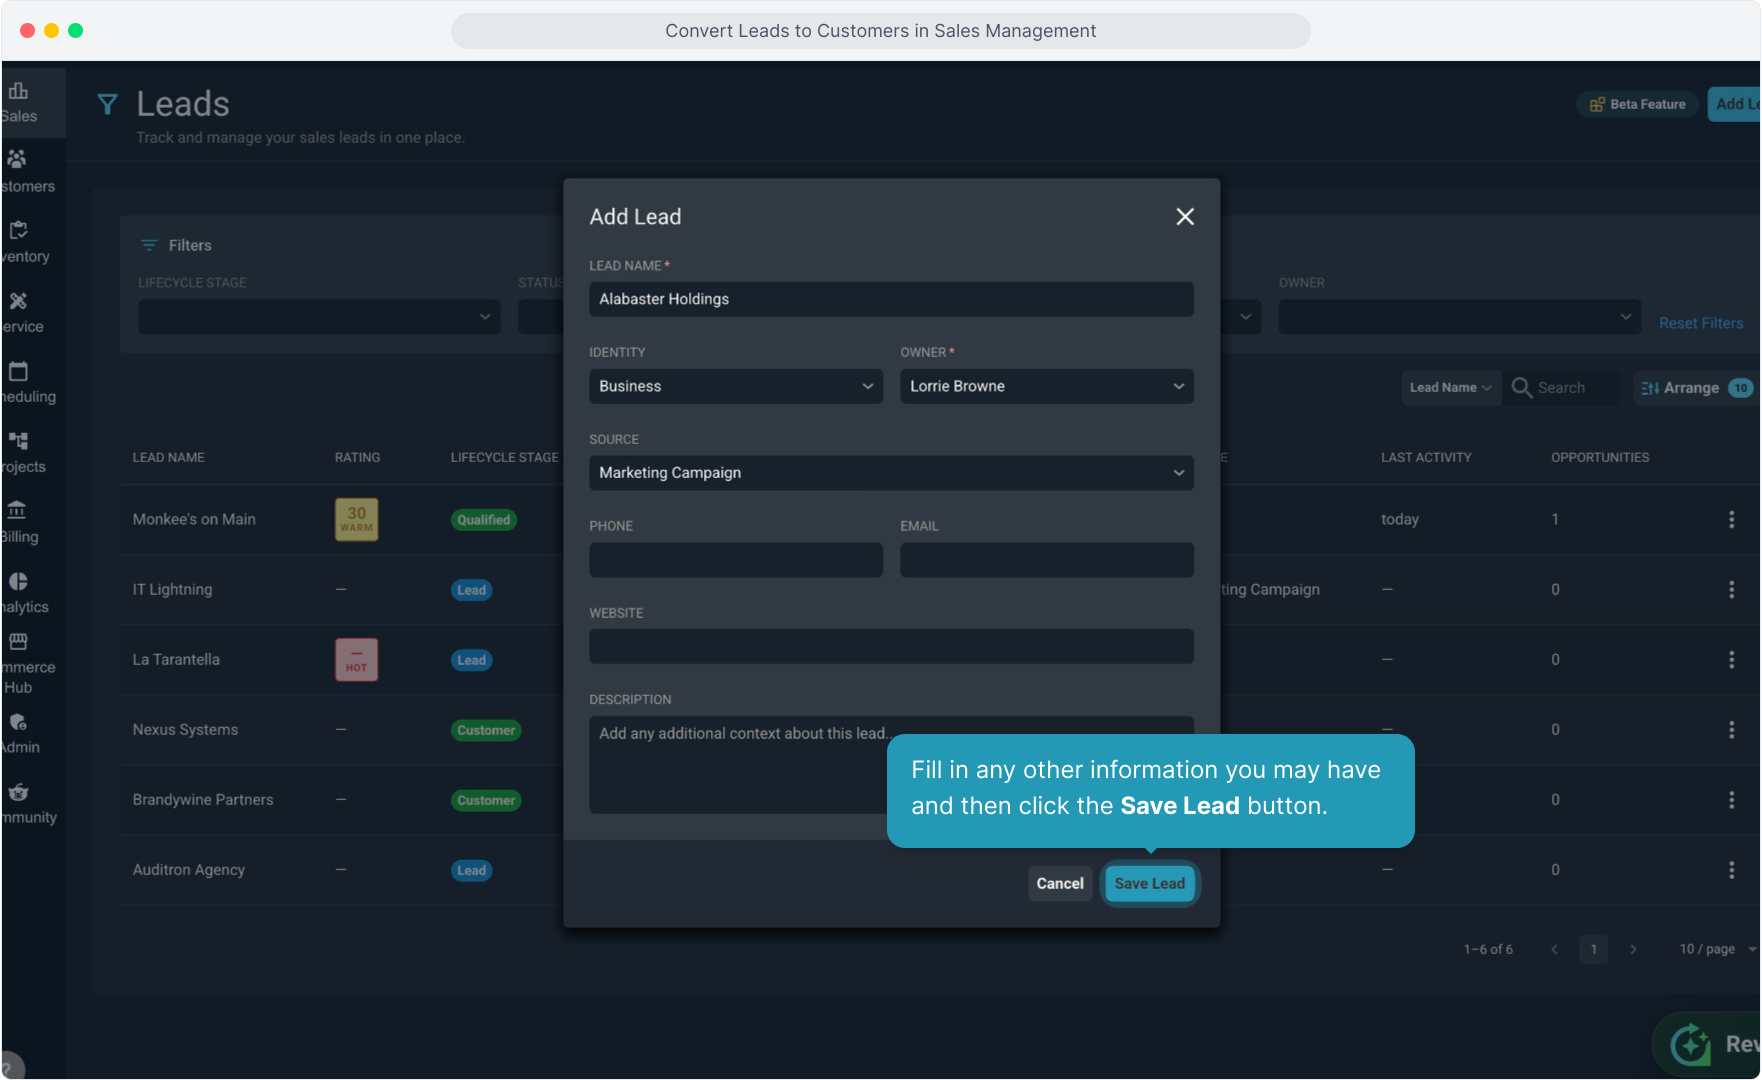
7. Fill in any other information you may have and then click the Save Lead button.
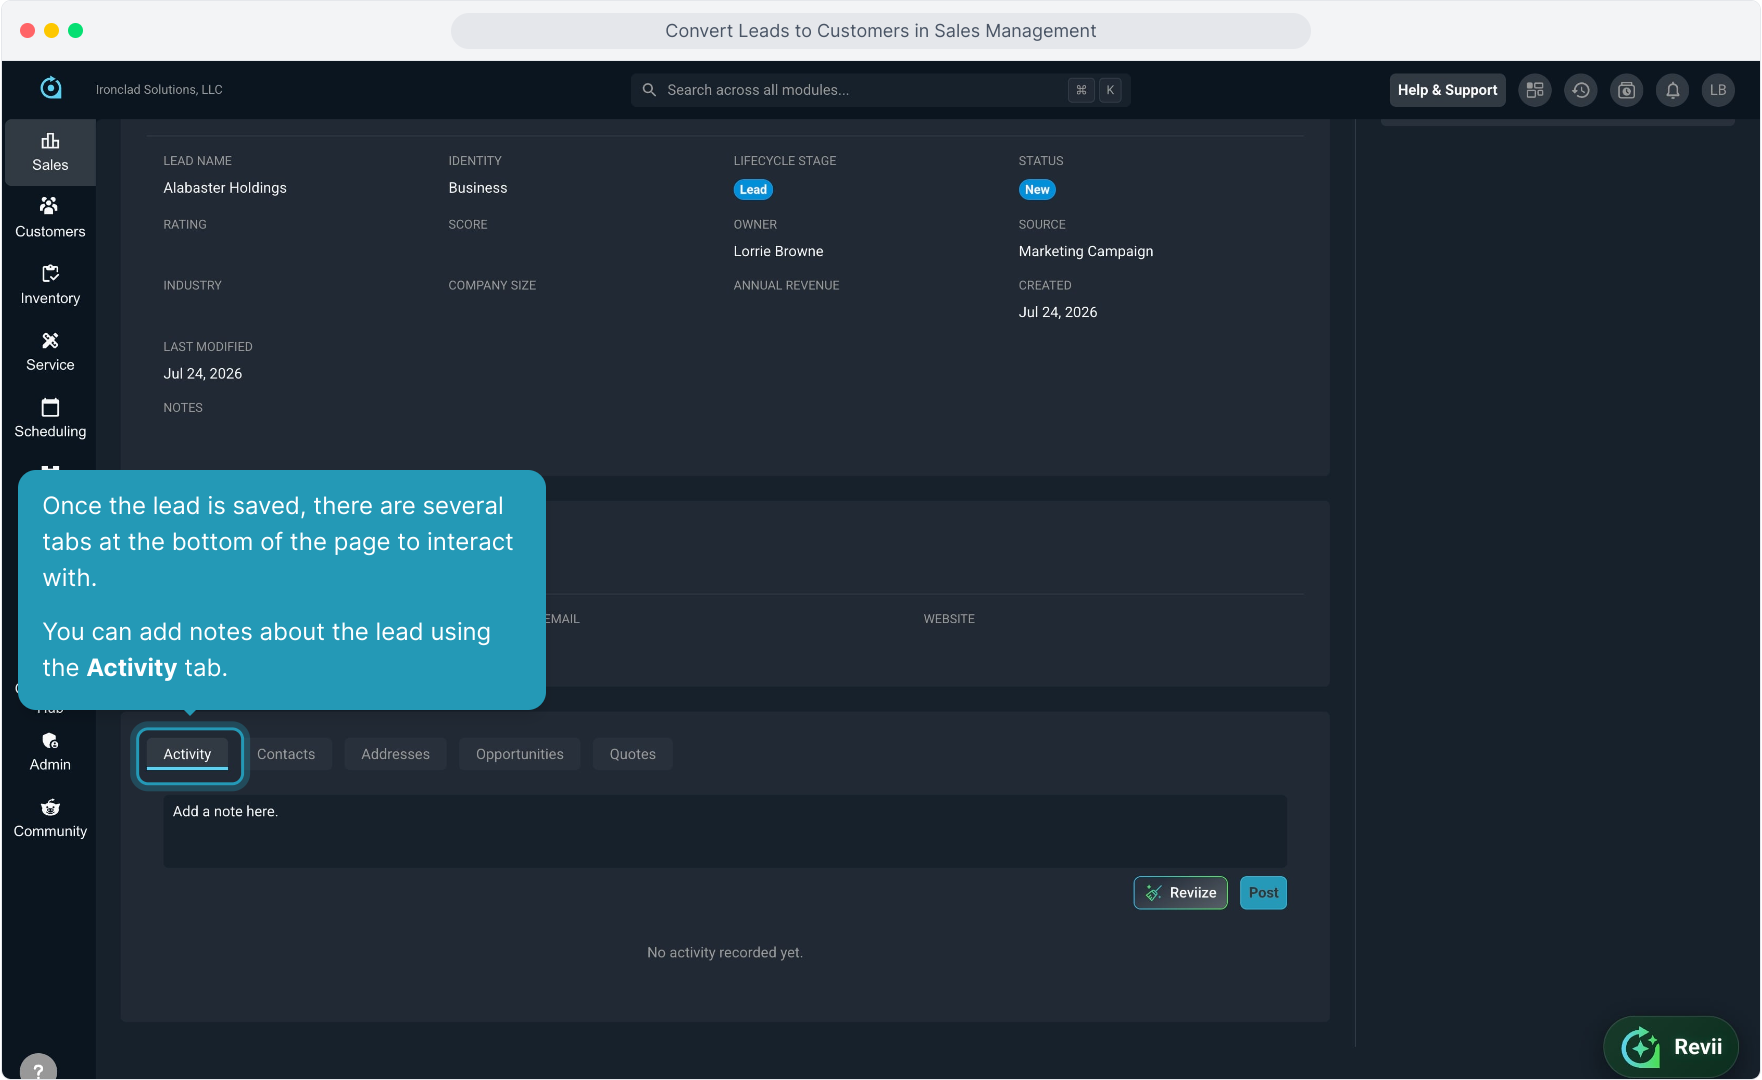
8. Once the lead is saved, there are several tabs at the bottom of the page to interact with.
You can add notes about the lead using the Activity tab.
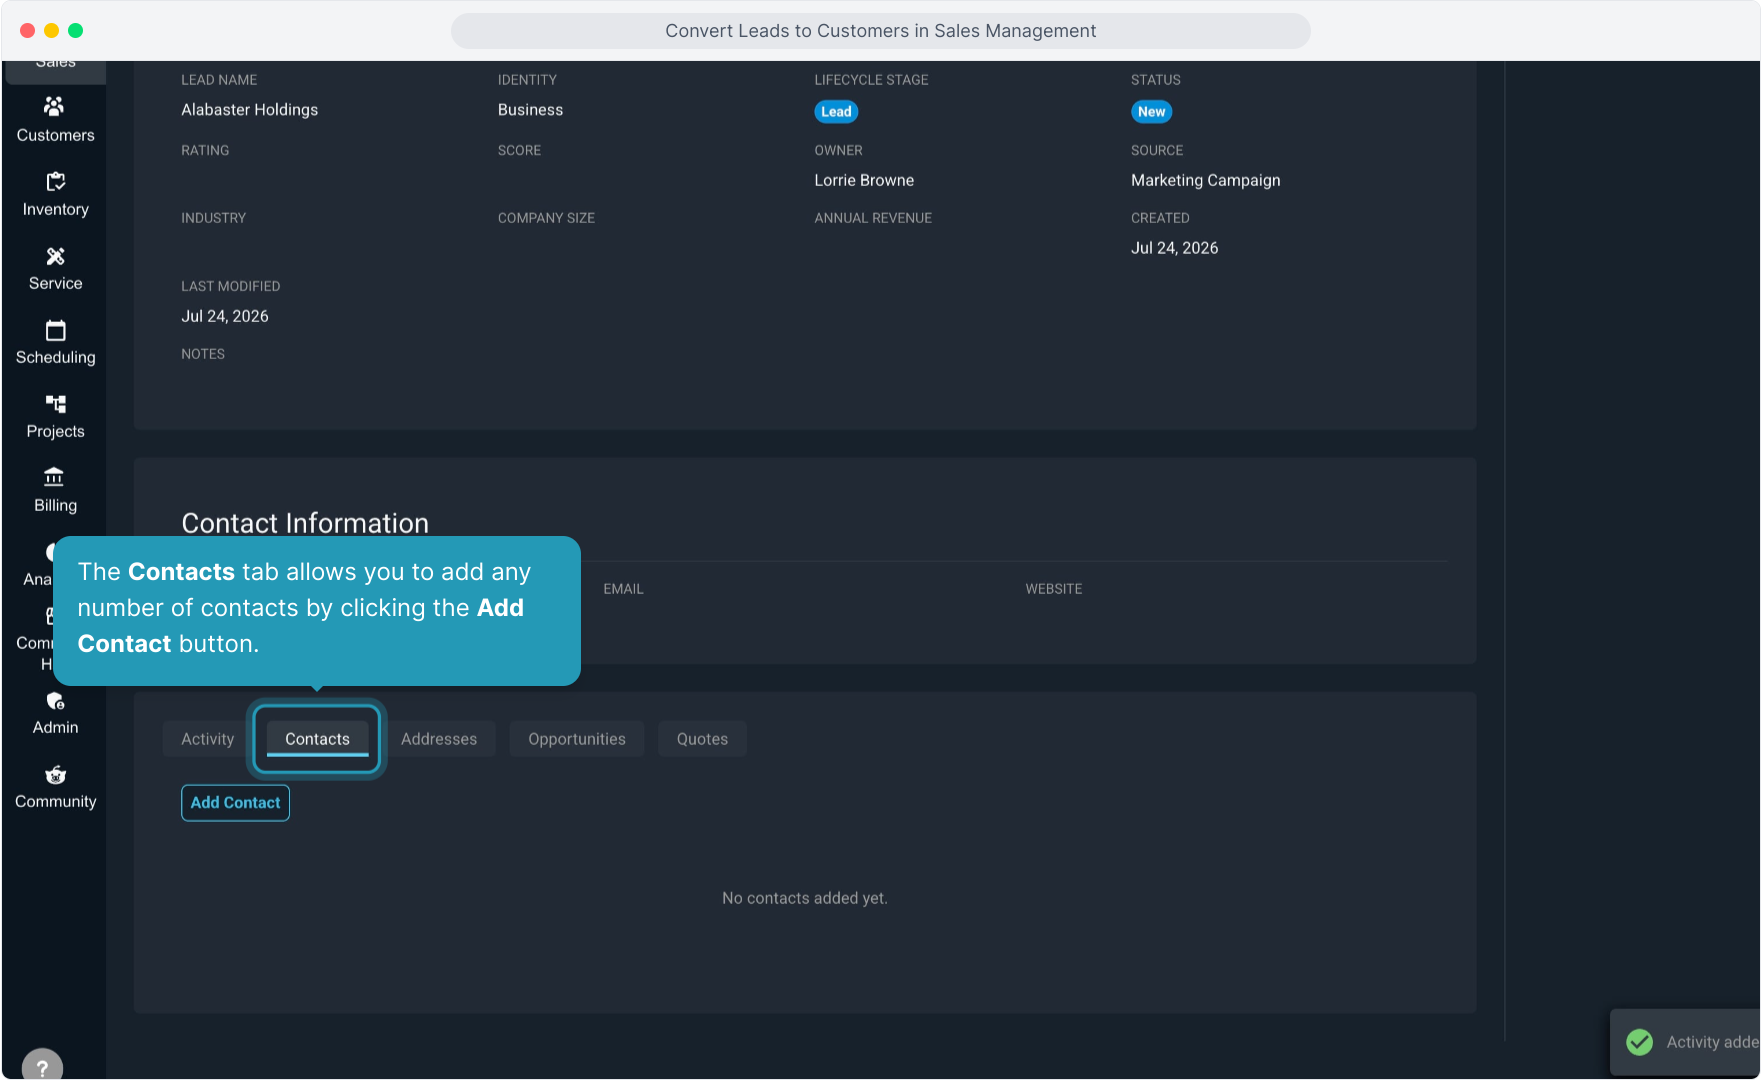
9. The Contacts tab allows you to add any number of contacts by clicking the Add Contact button.
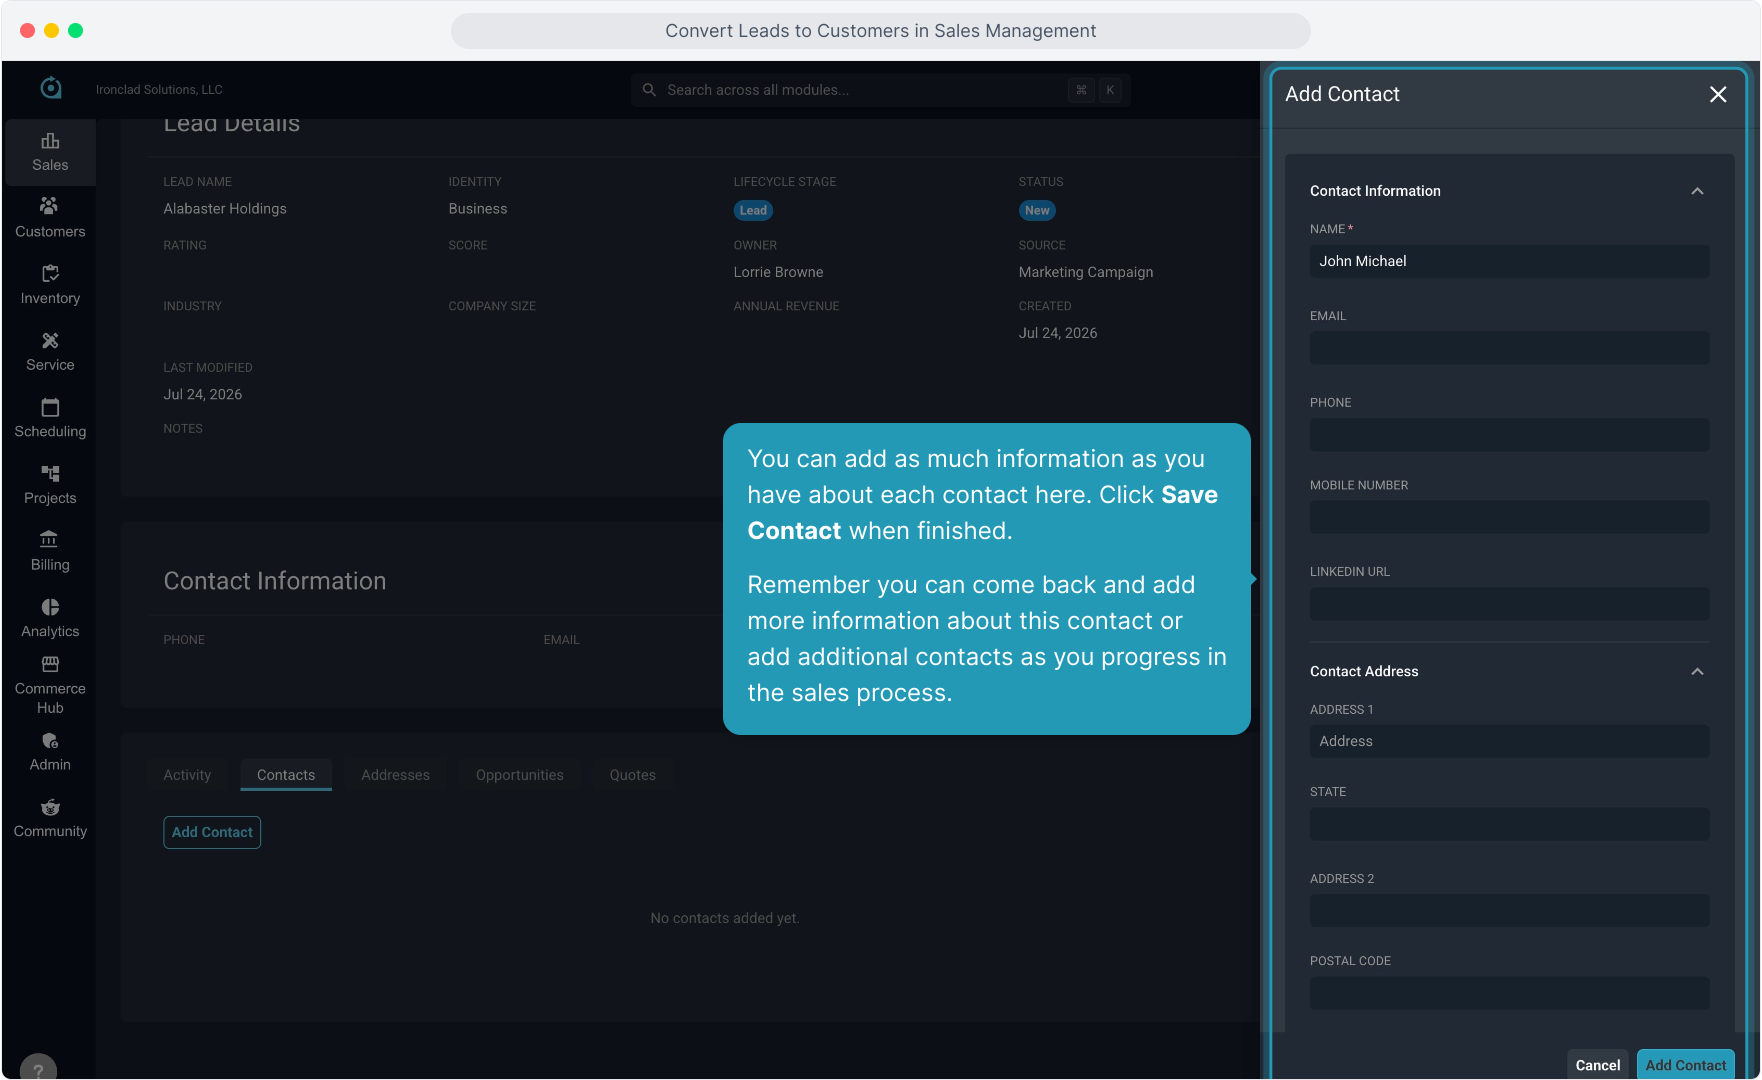
10. You can add as much information as you have about each contact here. Click Save Contact when finished.
Remember you can come back and add more information about this contact or add additional contacts as you progress in the sales process.
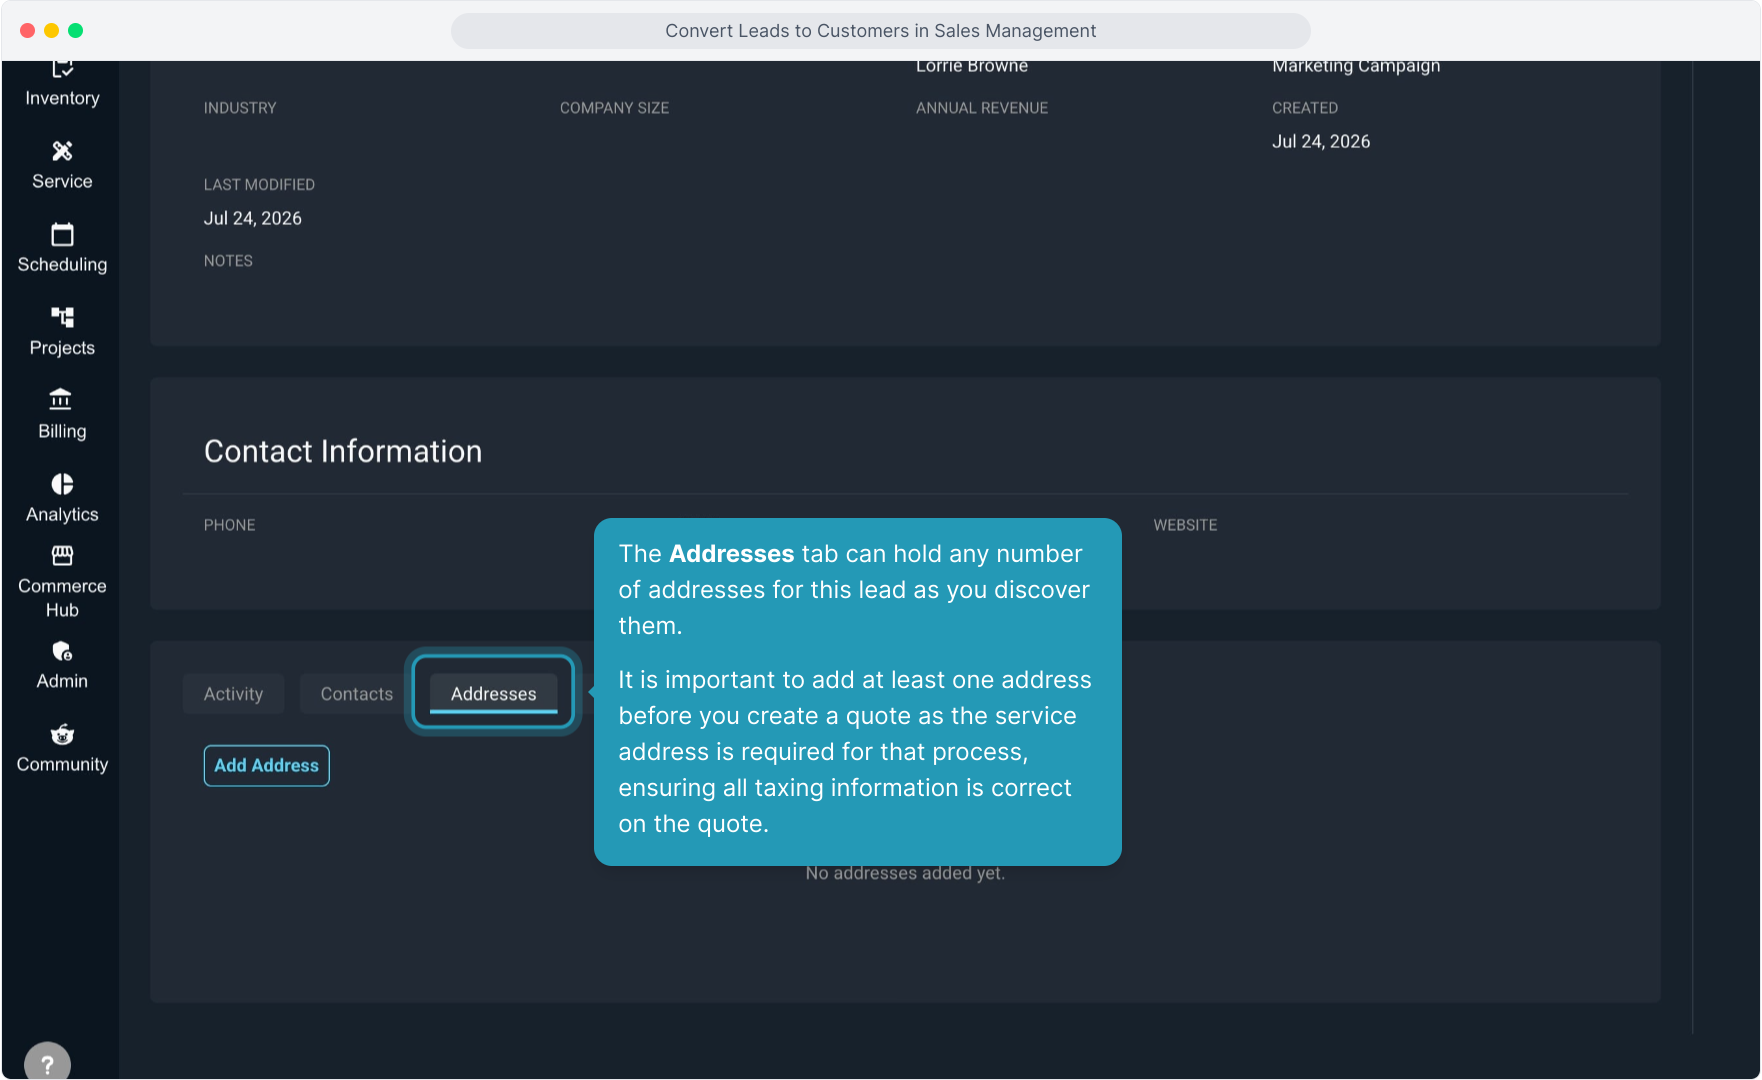
11. The Addresses tab can hold any number of addresses for this lead as you discover them.
It is important to add at least one address before you create a quote as the service address is required for that process, ensuring all taxing information is correct on the quote.
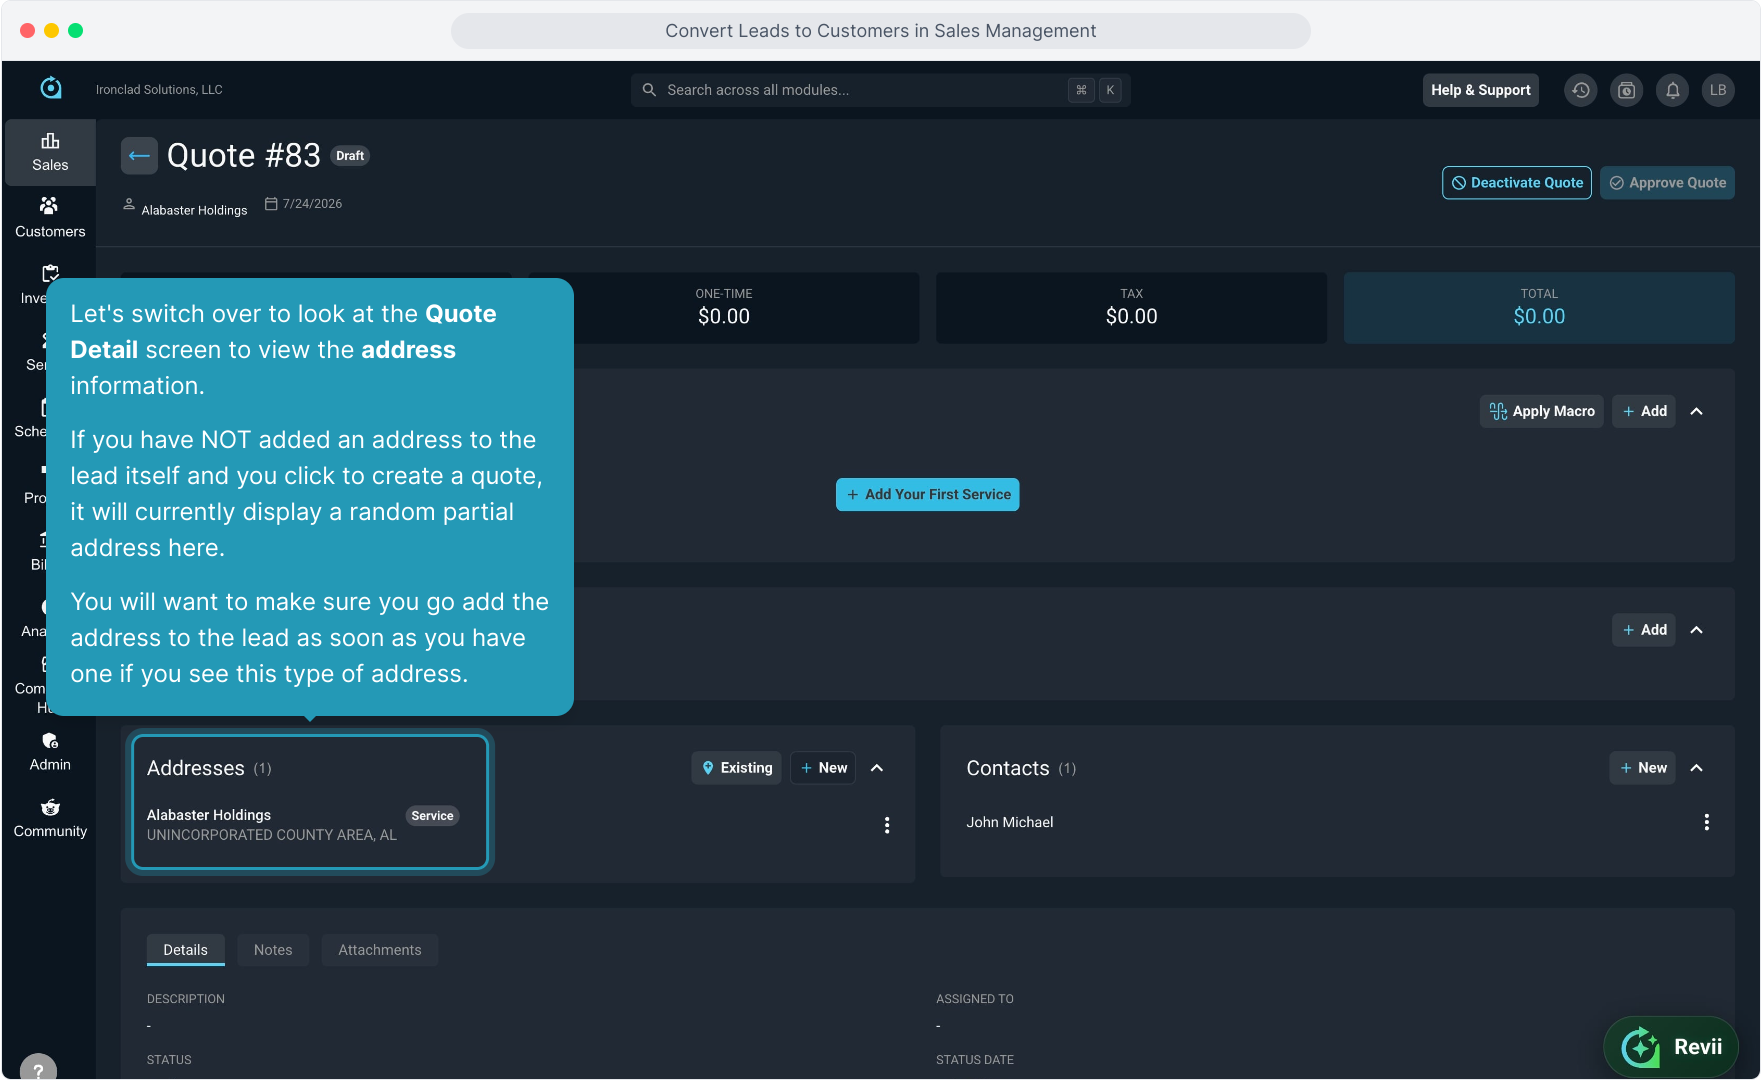
12. Let's switch over to look at the Quote Detail screen to view the address information.
If you have NOT added an address to the lead itself and you click to create a quote, it will currently display a random partial address here.
You will want to make sure you go add the address to the lead as soon as you have one if you see this type of address.
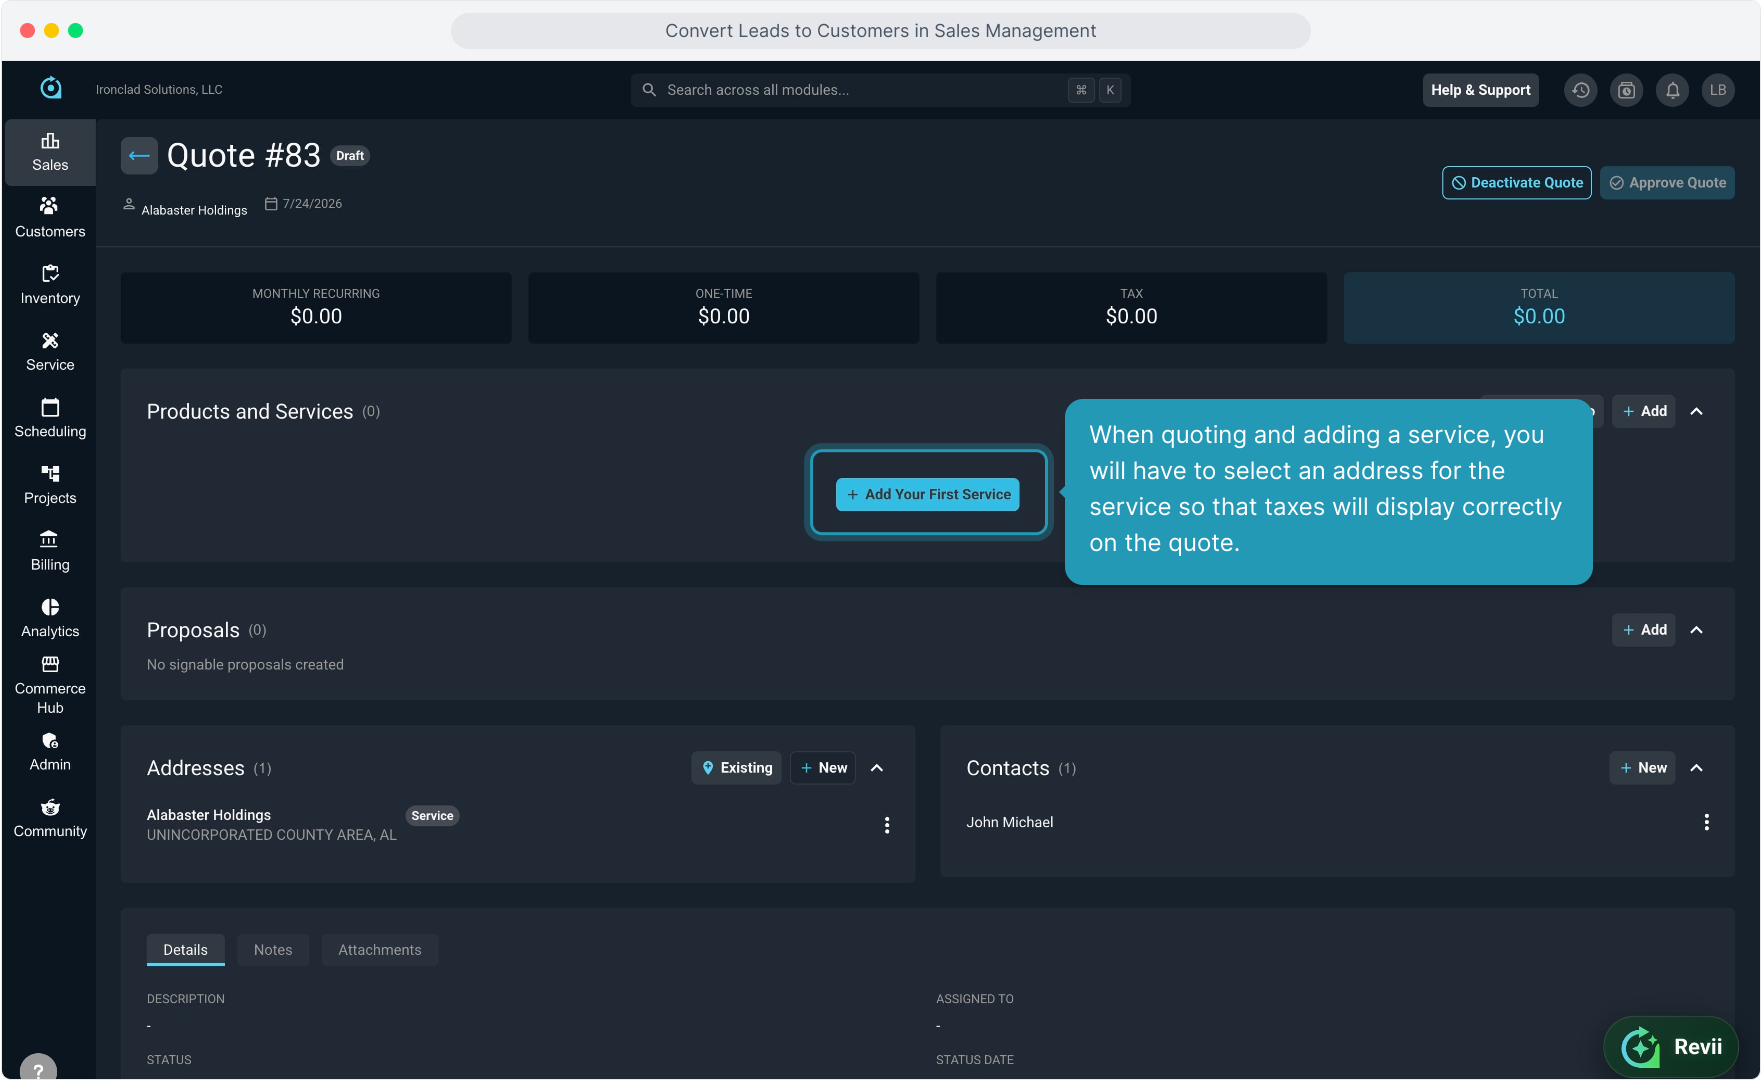
13. When quoting and adding a service, you will have to select an address for the service so that taxes will display correctly on the quote.
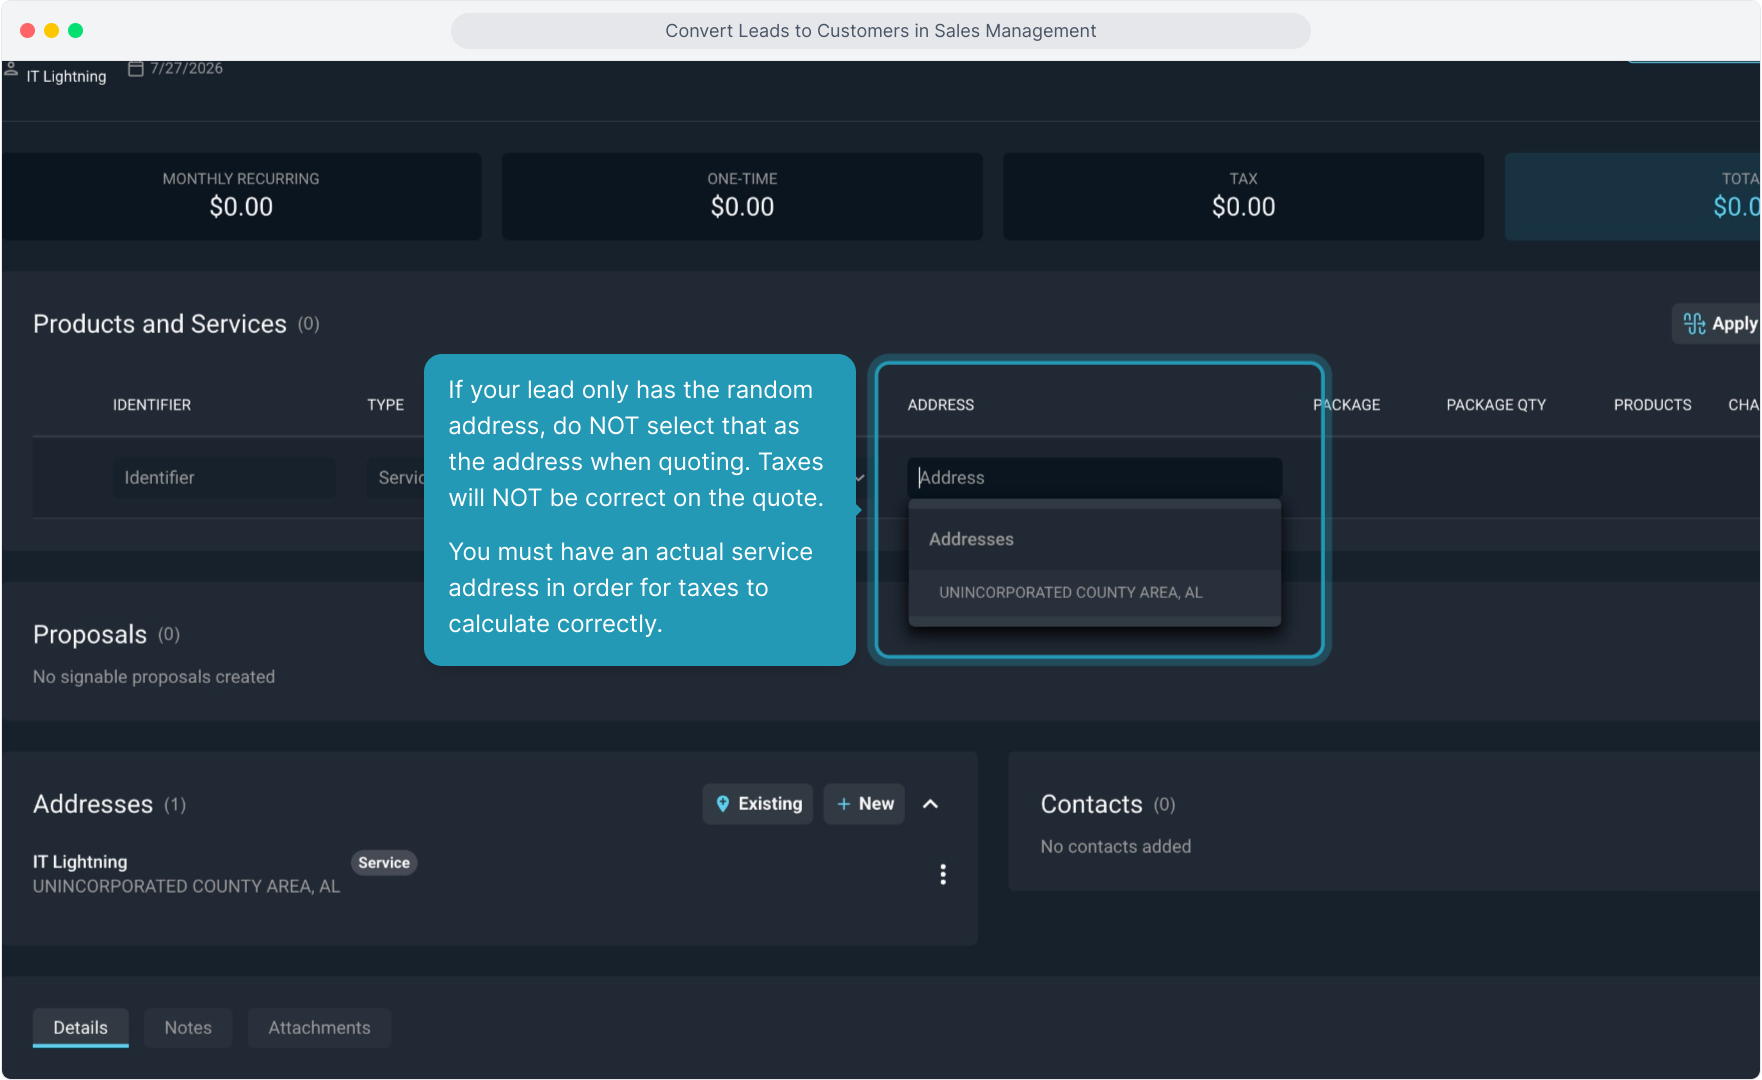
14. If your lead only has the random address, do NOT select that as the address when quoting. Taxes will NOT be correct on the quote.
You must have an actual service address in order for taxes to calculate correctly.
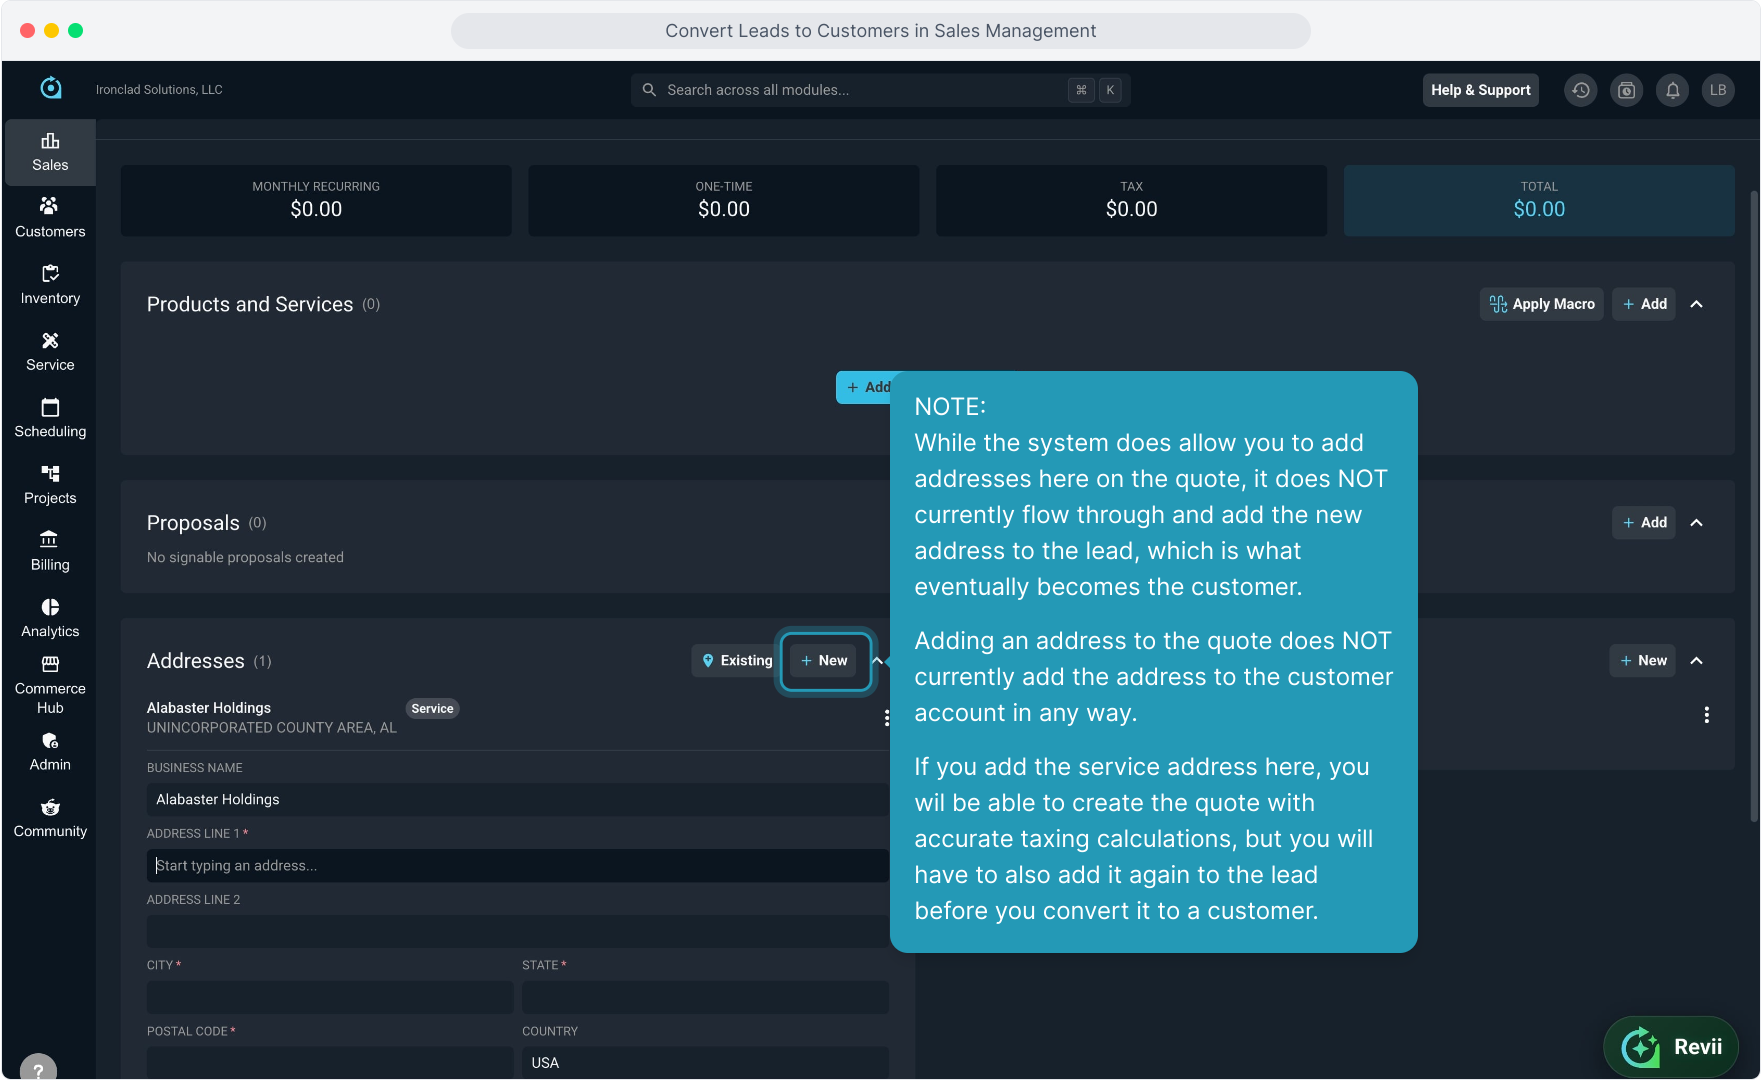
15. NOTE:
While the system does allow you to add addresses here on the quote, it does NOT currently flow through and add the new address to the lead, which is what eventually becomes the customer.
Adding an address to the quote does NOT currently add the address to the customer account in any way.
If you add the service address here, you wil be able to create the quote with accurate taxing calculations, but you will have to also add it again to the lead before you convert it to a customer.
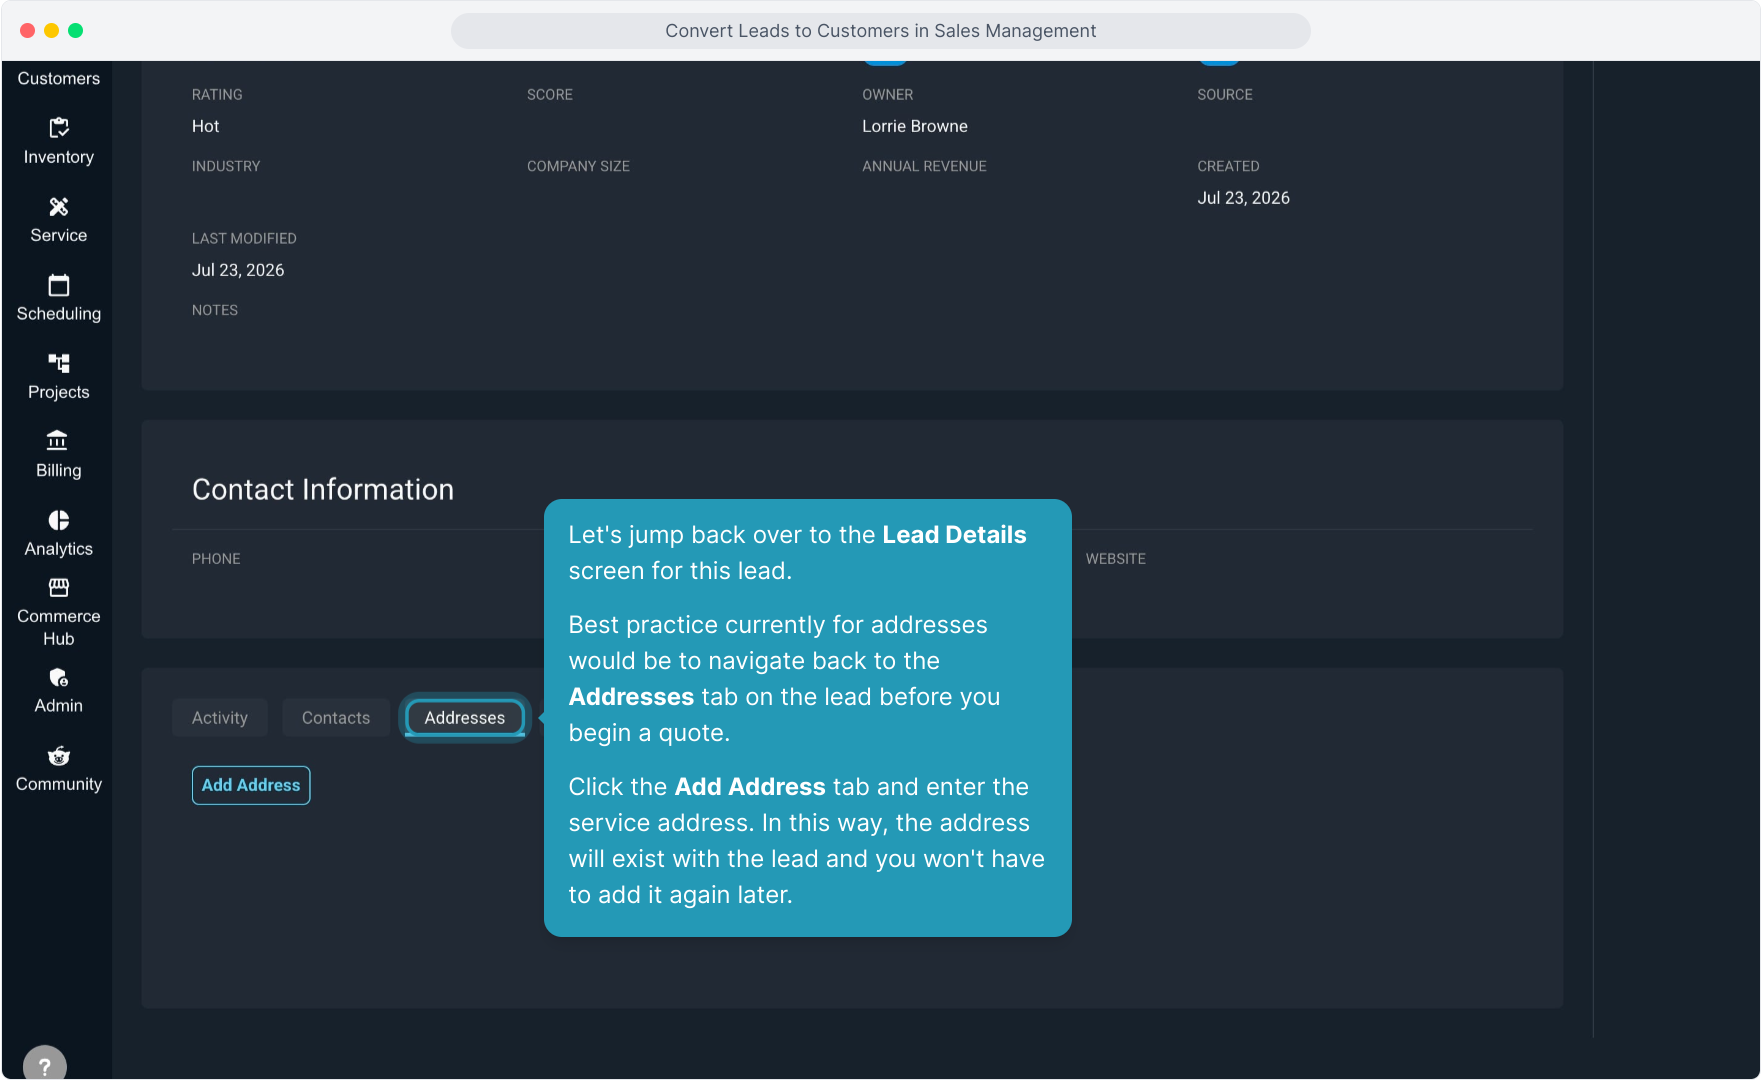
16. Let's jump back over to the Lead Details screen for this lead.
Best practice currently for addresses would be to navigate back to the Addresses tab on the lead before you begin a quote.
Click the Add Address tab and enter the service address. In this way, the address will exist with the lead and you won't have to add it again later.
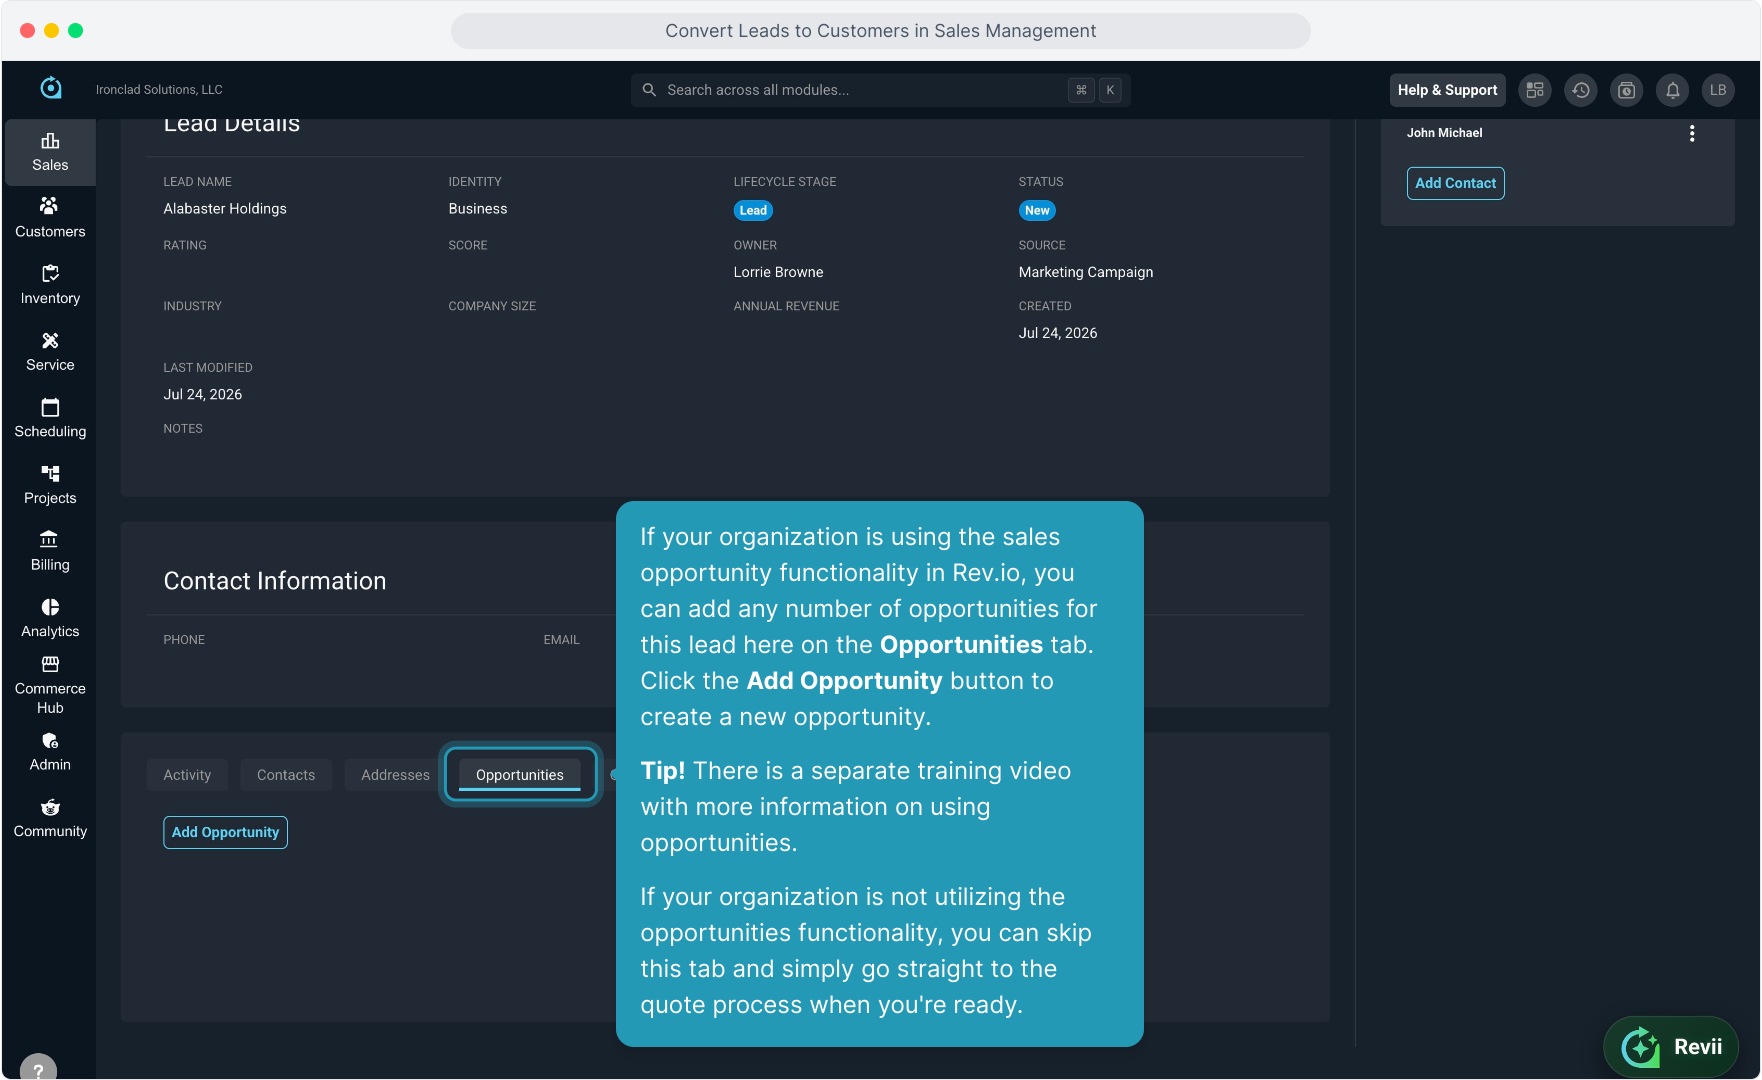
17. If your organization is using the sales opportunity functionality in Rev.io, you can add any number of opportunities for this lead here on the Opportunities tab. Click the Add Opportunity button to create a new opportunity.
Tip! There is a separate training video with more information on using opportunities.
If your organization is not utilizing the opportunities functionality, you can skip this tab and simply go straight to the quote process when you're ready.
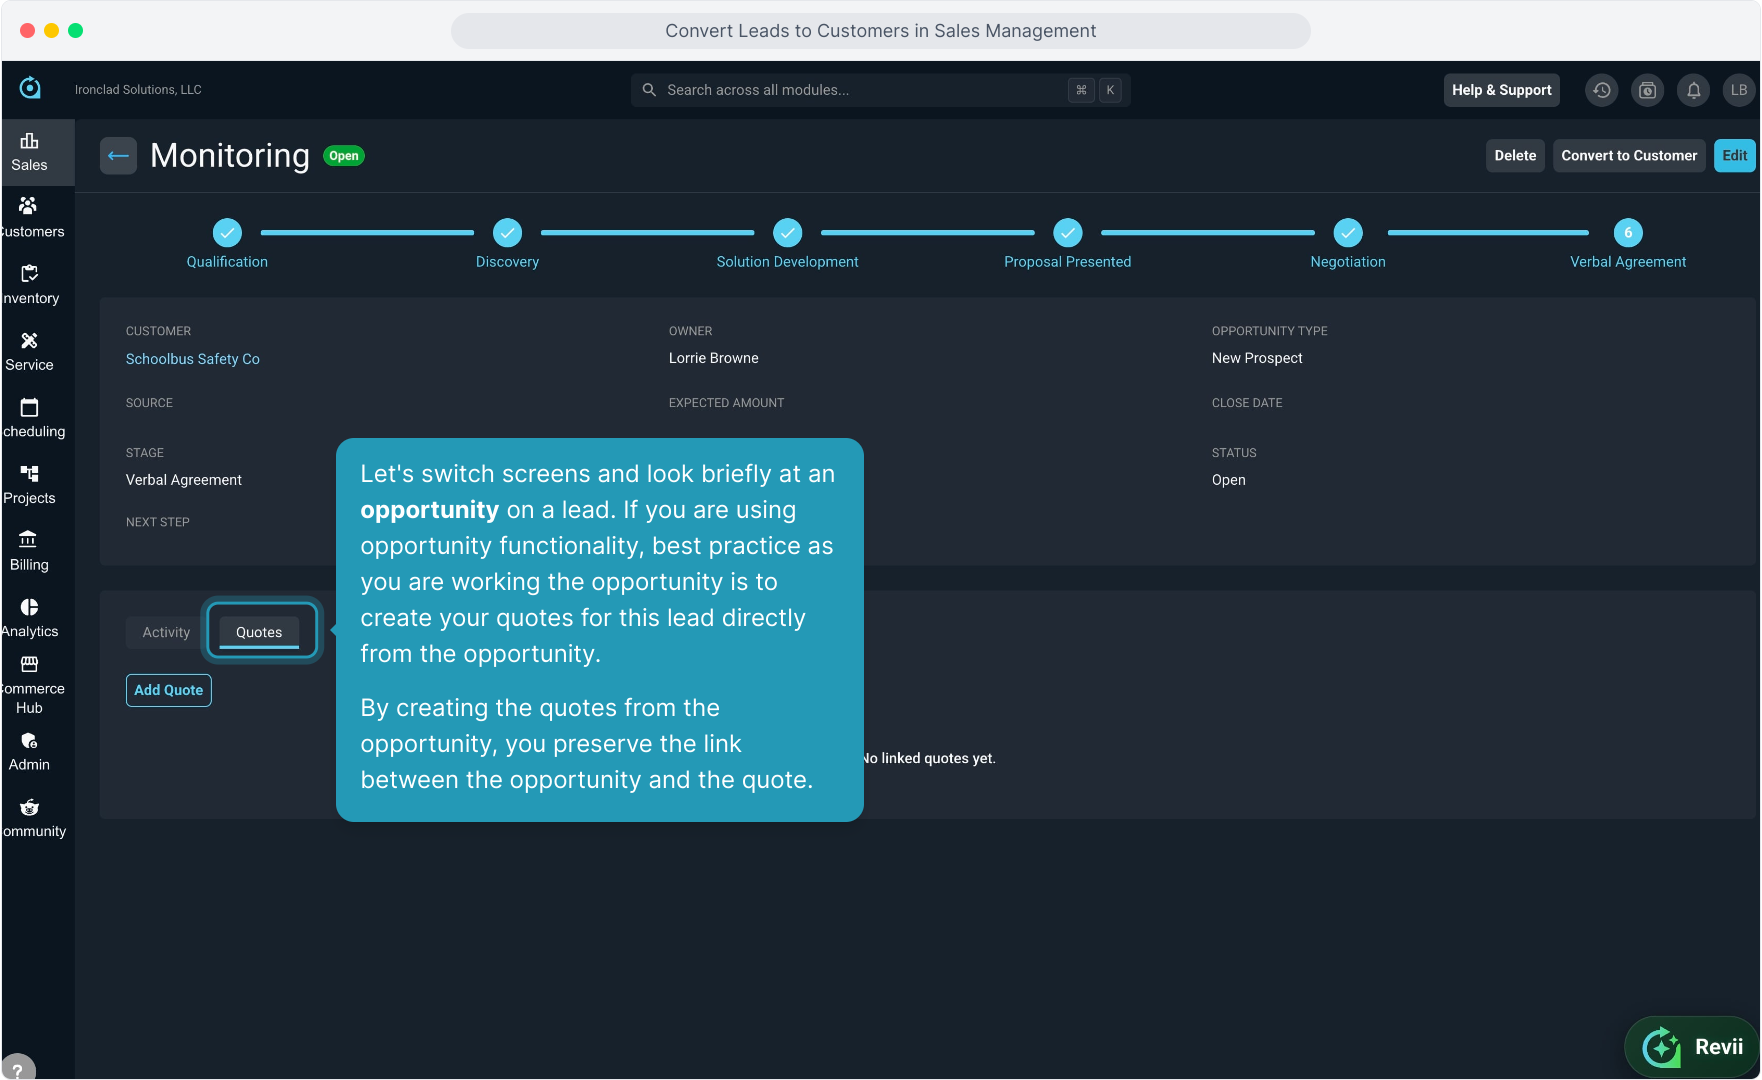
18. Let's switch screens and look briefly at an opportunity on a lead. If you are using opportunity functionality, best practice as you are working the opportunity is to create your quotes for this lead directly from the opportunity.
By creating the quotes from the opportunity, you preserve the link between the opportunity and the quote.
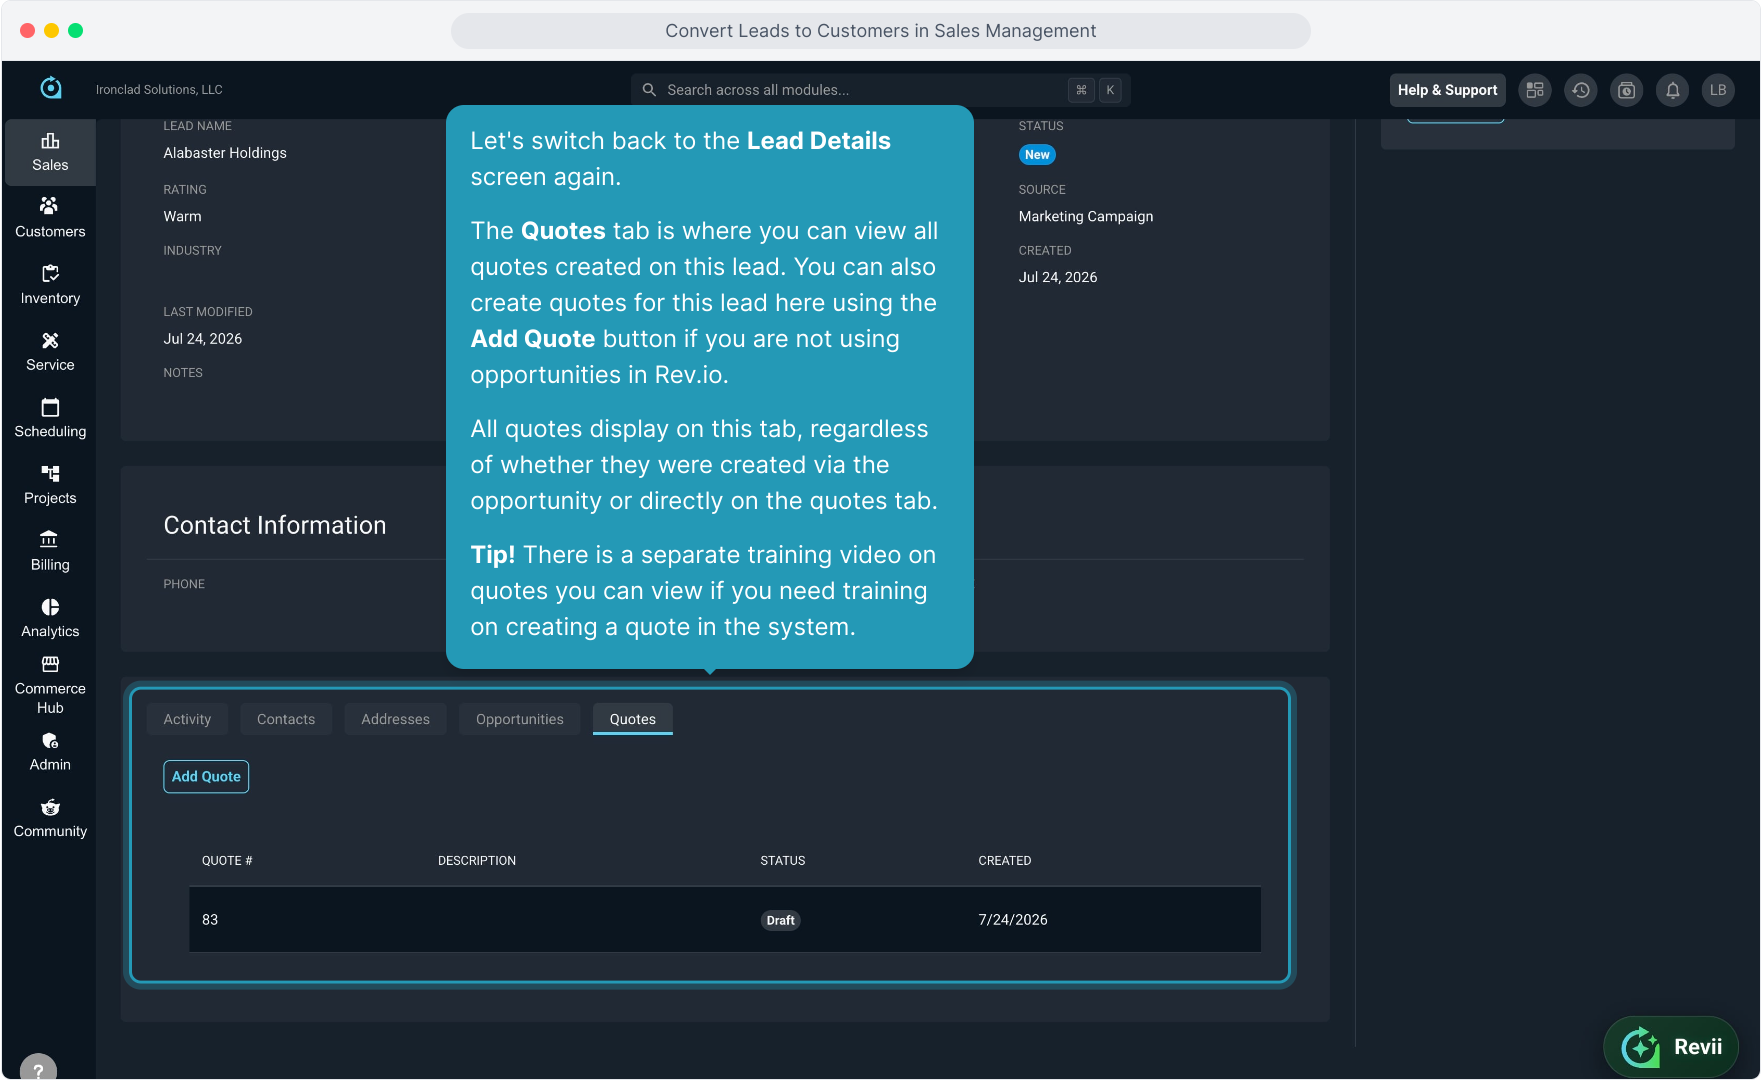
19. Let's switch back to the Lead Details screen again.
The Quotes tab is where you can view all quotes created on this lead. You can also create quotes for this lead here using the Add Quote button if you are not using opportunities in Rev.io.
All quotes display on this tab, regardless of whether they were created via the opportunity or directly on the quotes tab.
Tip! There is a separate training video on quotes you can view if you need training on creating a quote in the system.
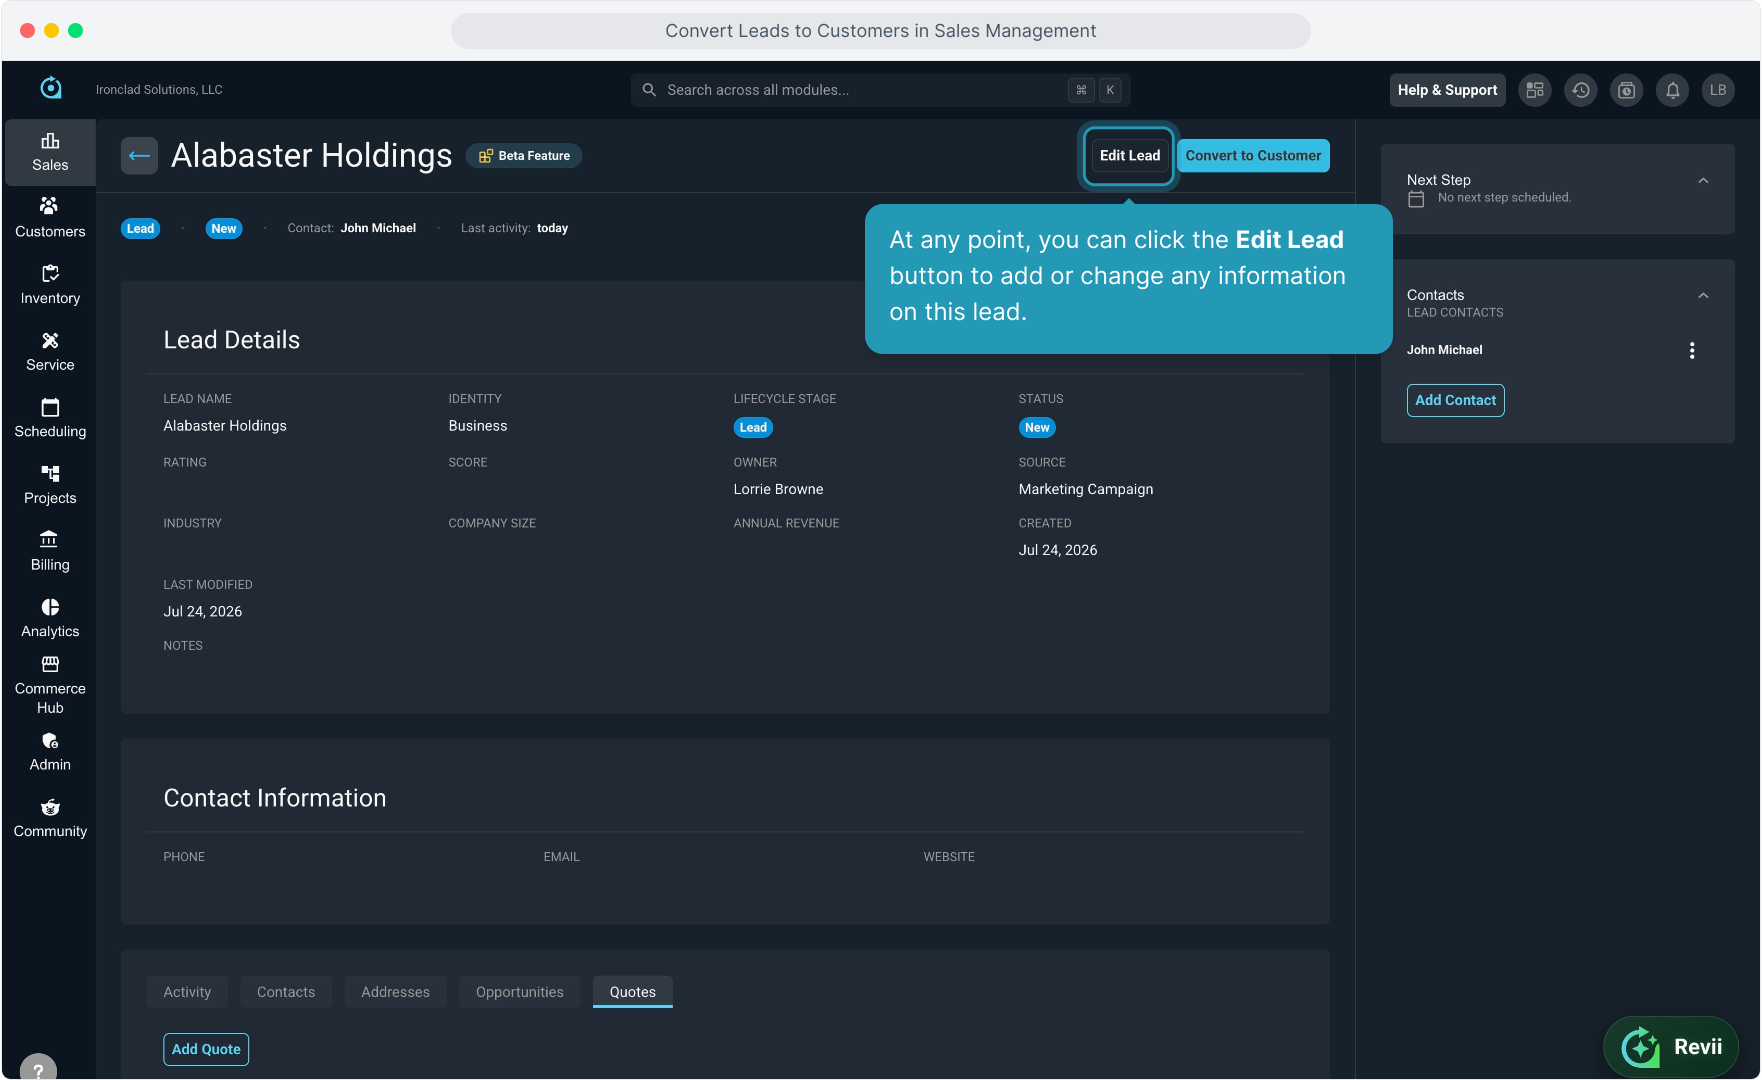
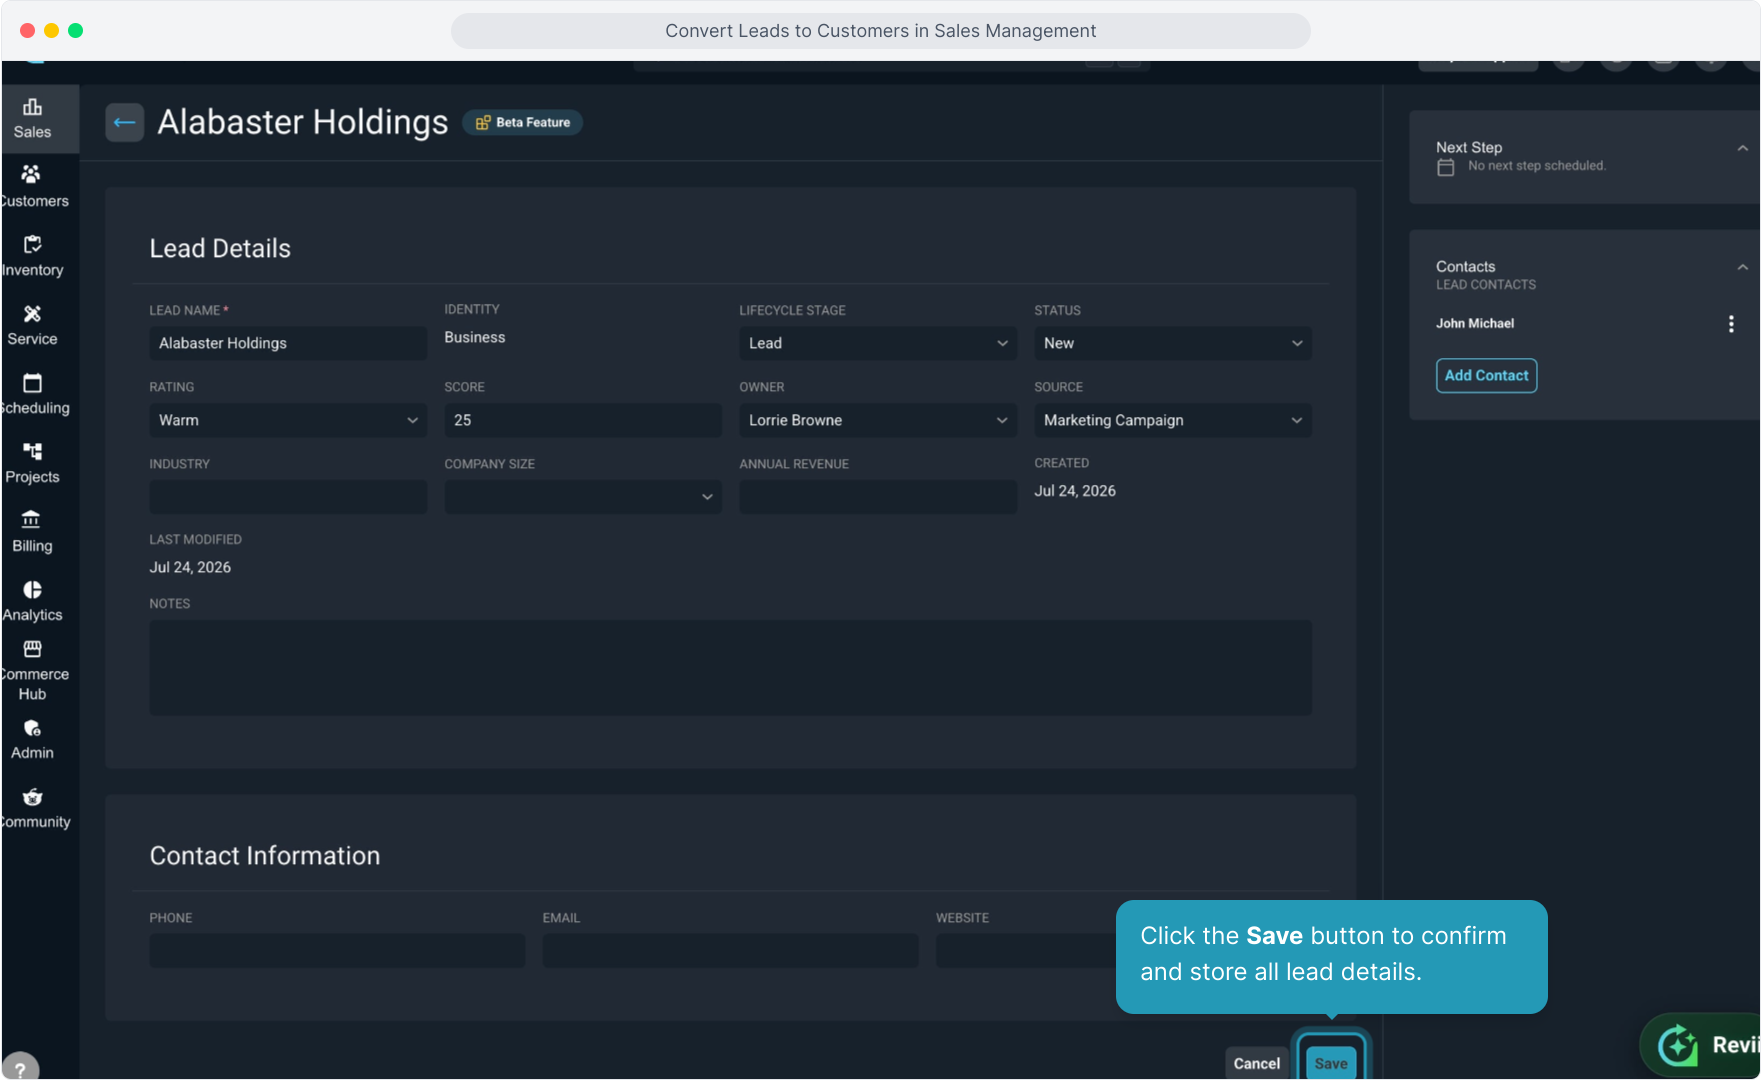
20. At any point, you can click the Edit Lead button to add or change any information on this lead.
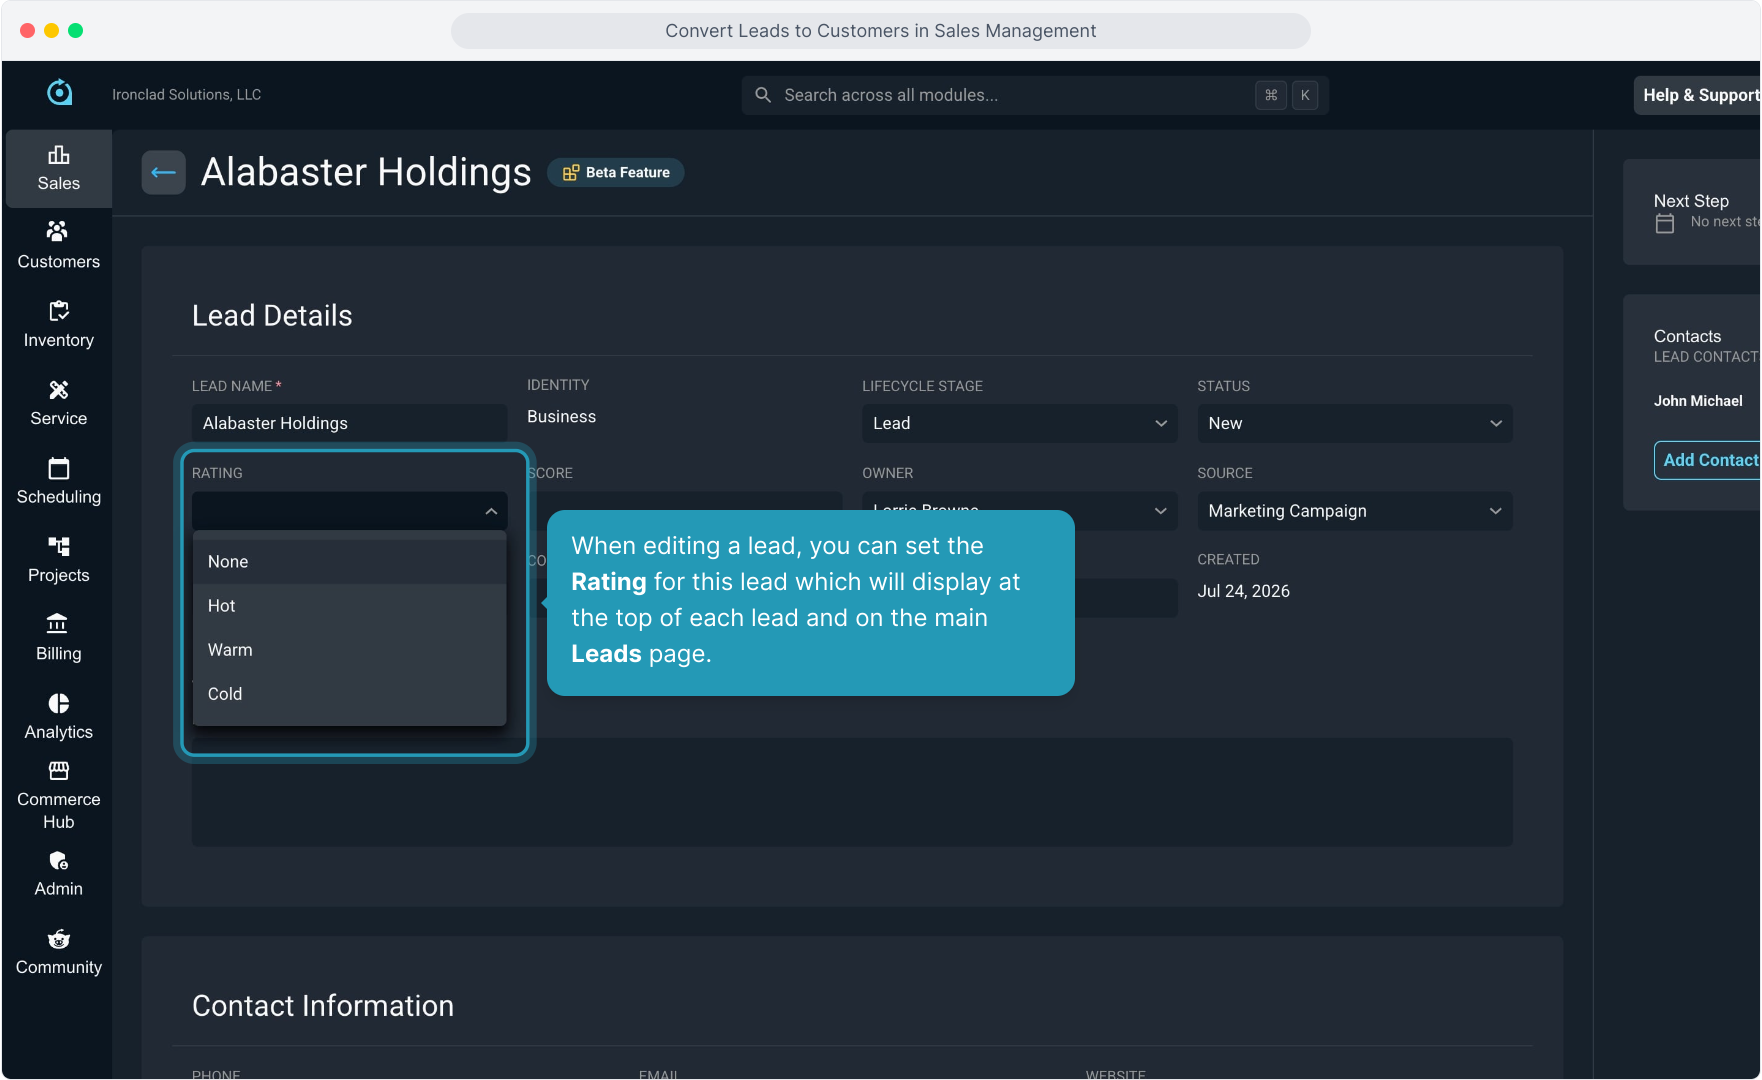
21. When editing a lead, you can set the Rating for this lead which will display at the top of each lead and on the main Leads page.
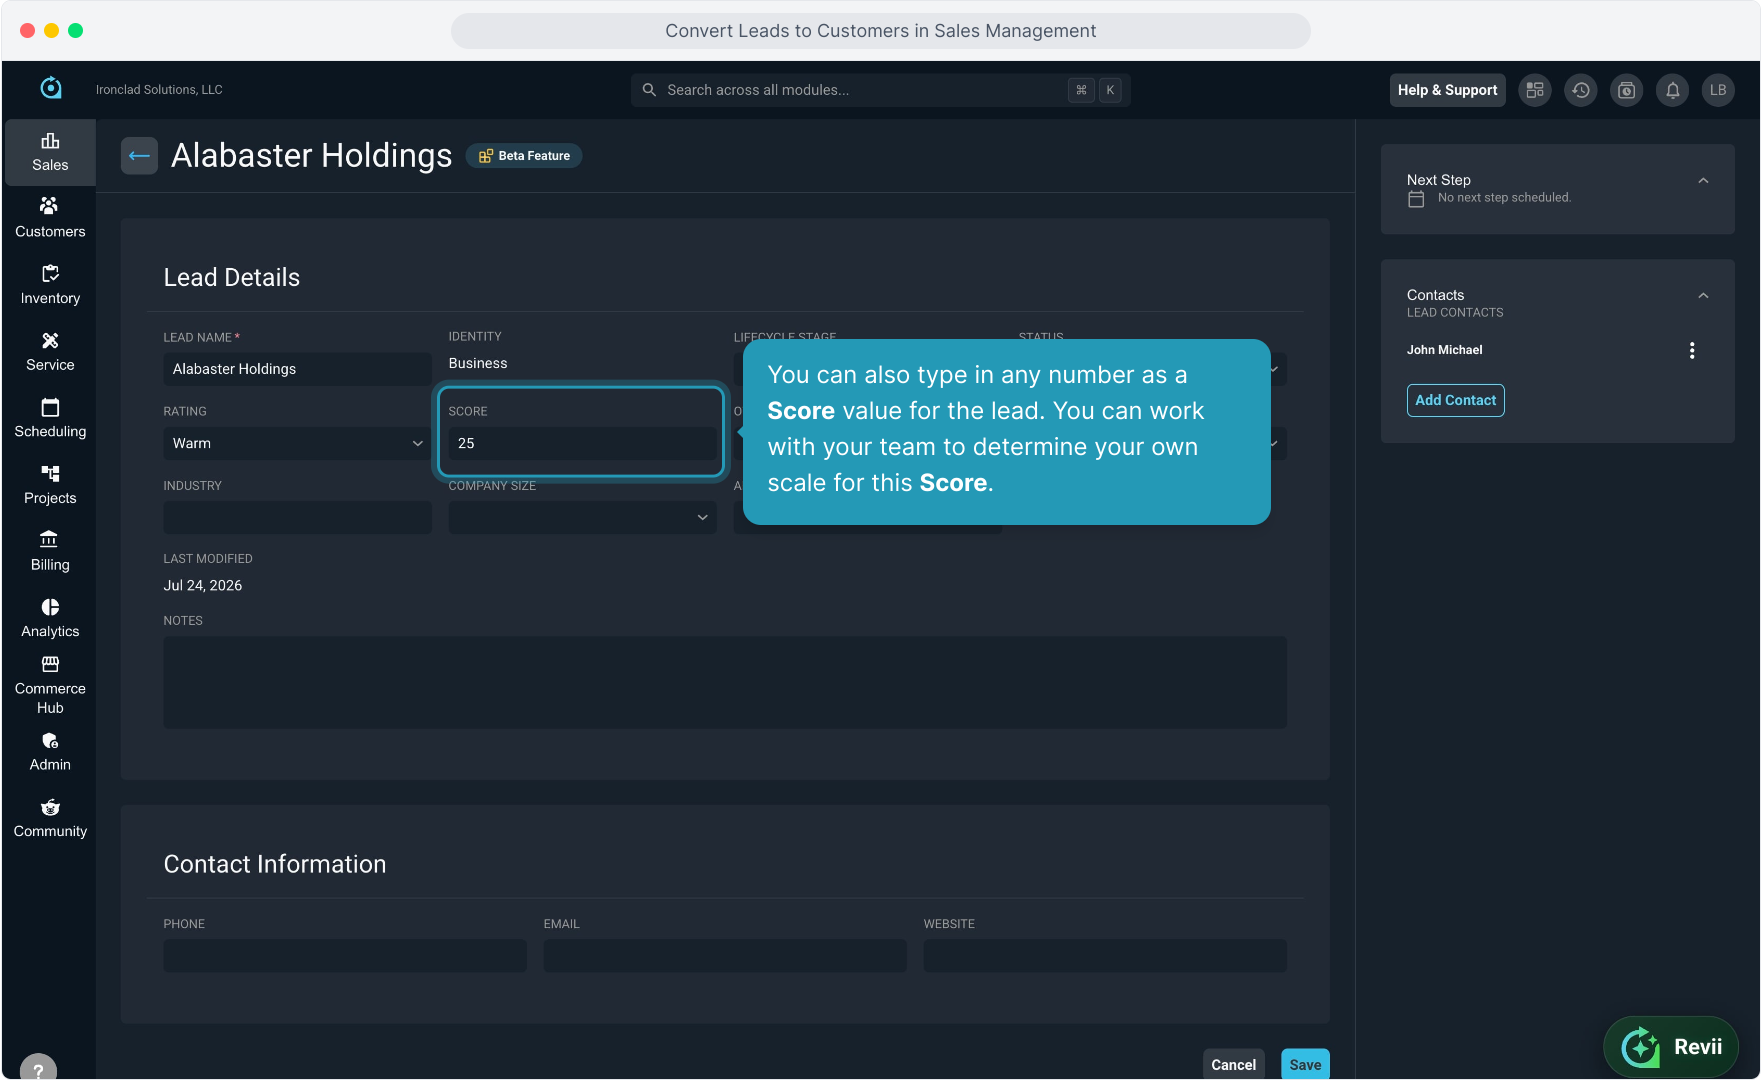
22. You can also type in any number as a Score value for the lead. You can work with your team to determine your own scale for this Score.
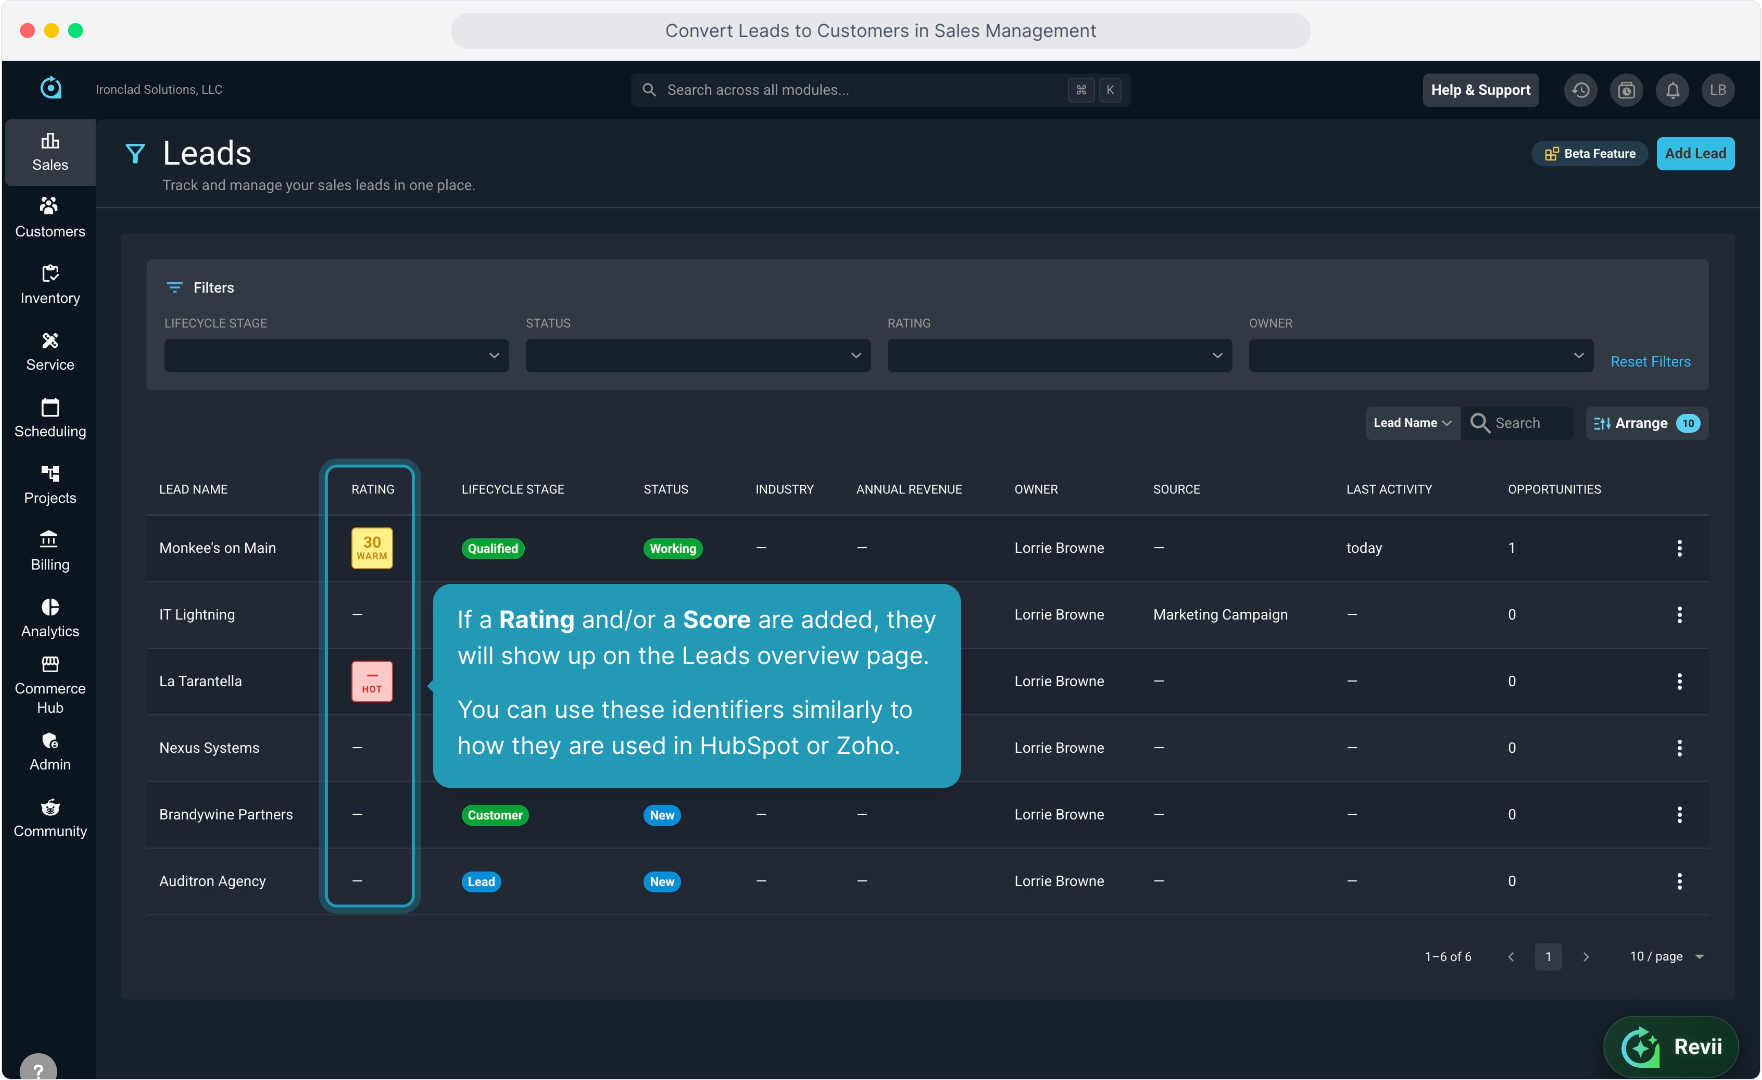
23. If a Rating and/or a Score are added, they will show up on the Leads overview page.
You can use these identifiers similarly to how they are used in HubSpot or Zoho.
24. Click the Save button to confirm and store all lead details.
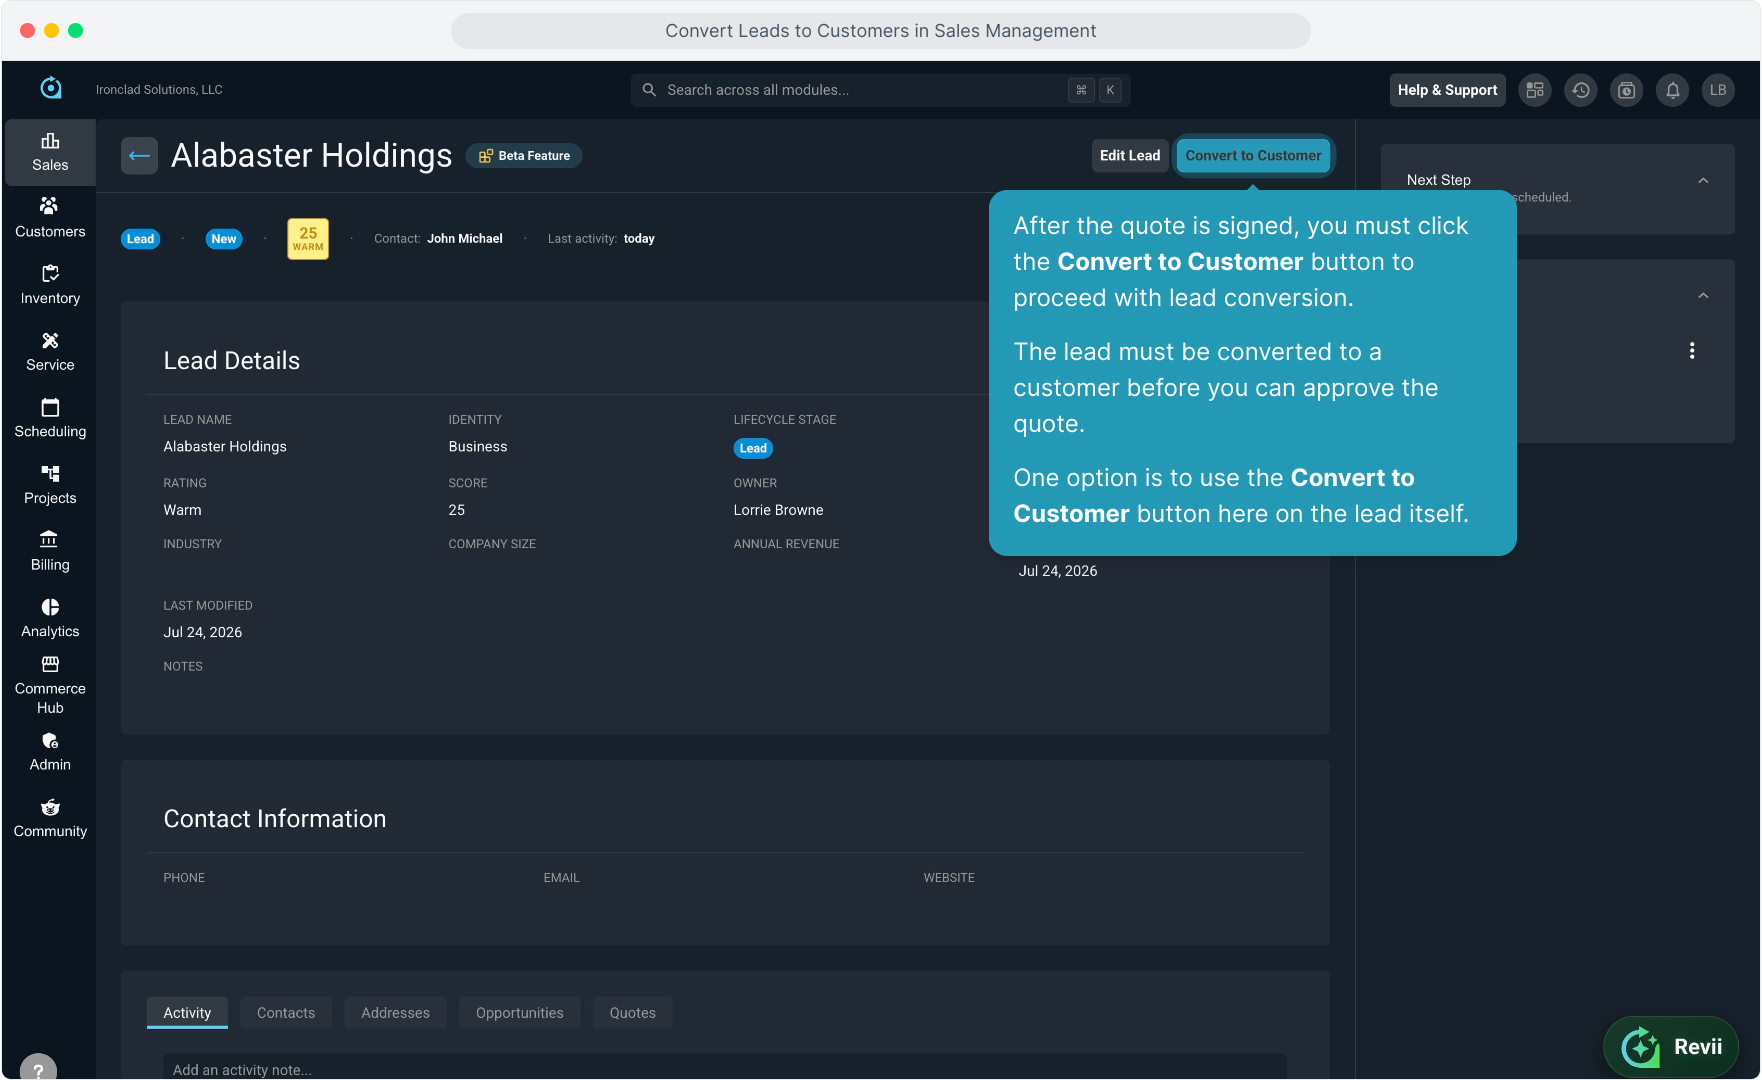
25. After the quote is signed, you must click the Convert to Customer button to proceed with lead conversion.
The lead must be converted to a customer before you can approve the quote.
One option is to use the Convert to Customer button here on the lead itself.
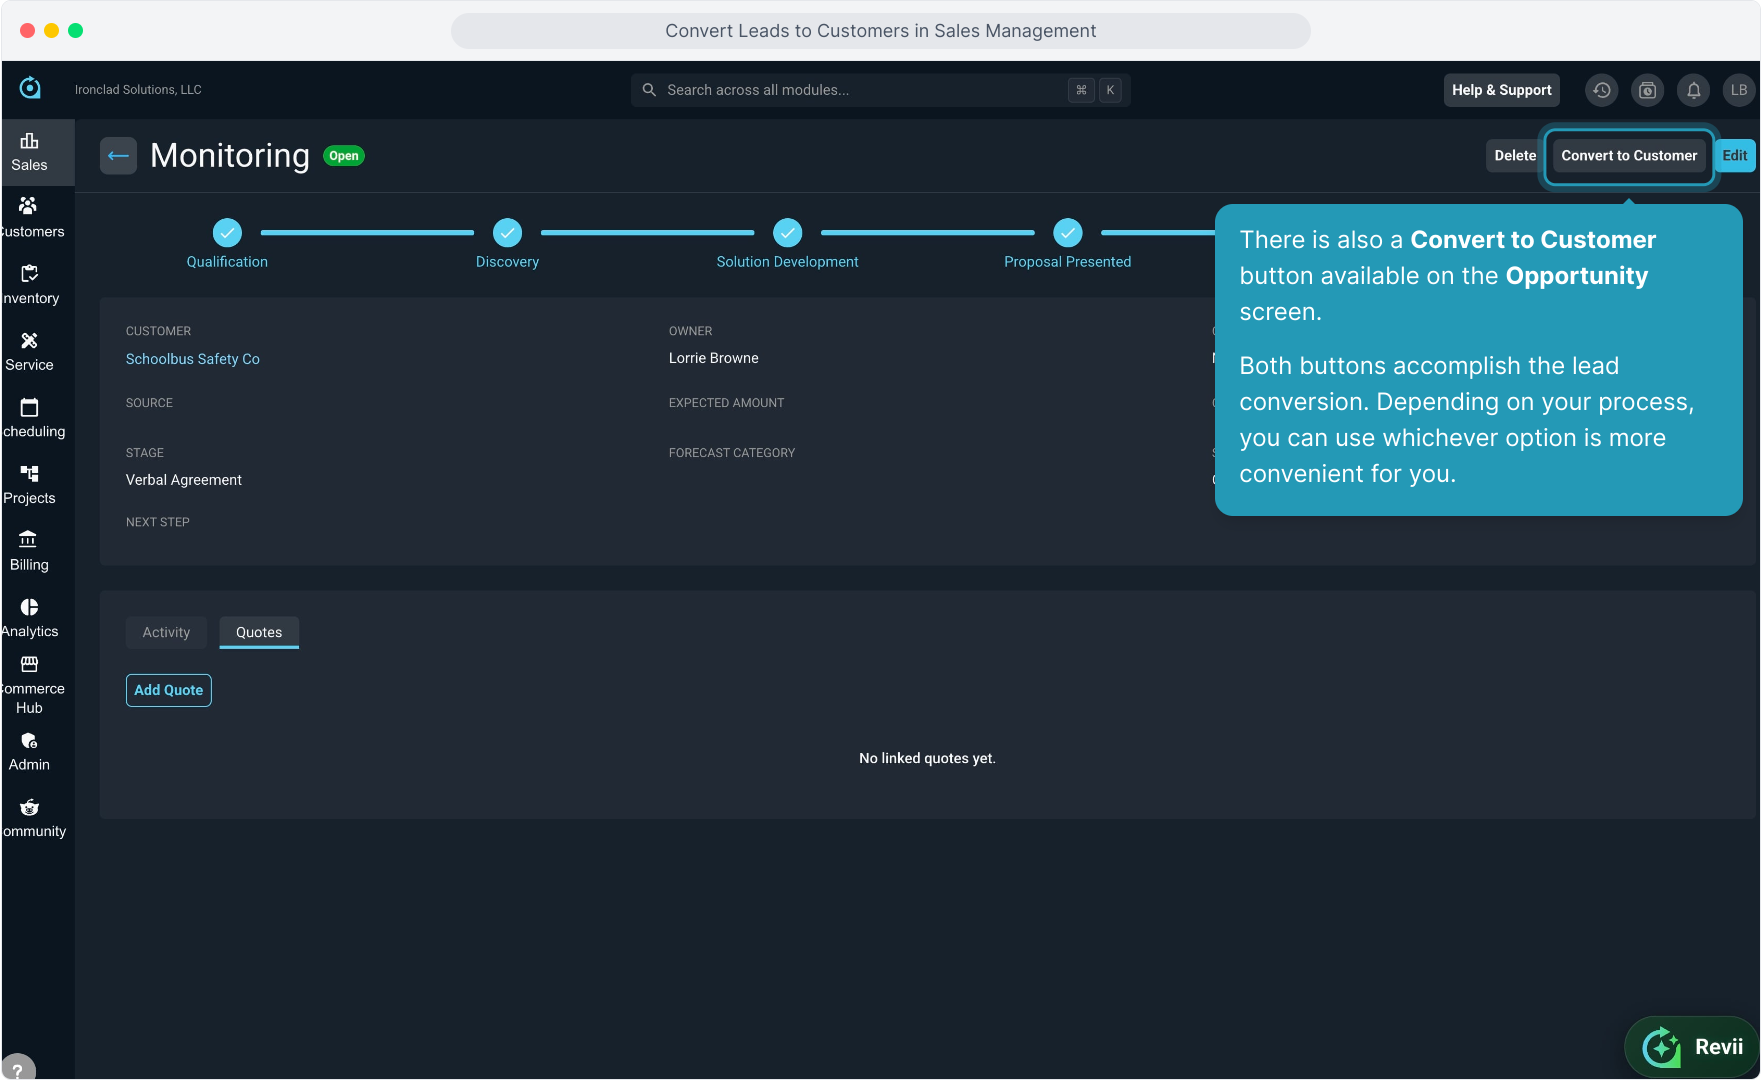
26. There is also a Convert to Customer button available on the Opportunity screen.
Both buttons accomplish the lead conversion. Depending on your process, you can use whichever option is more convenient for you.
27. The system will prompt you for any missing details when converting the lead.
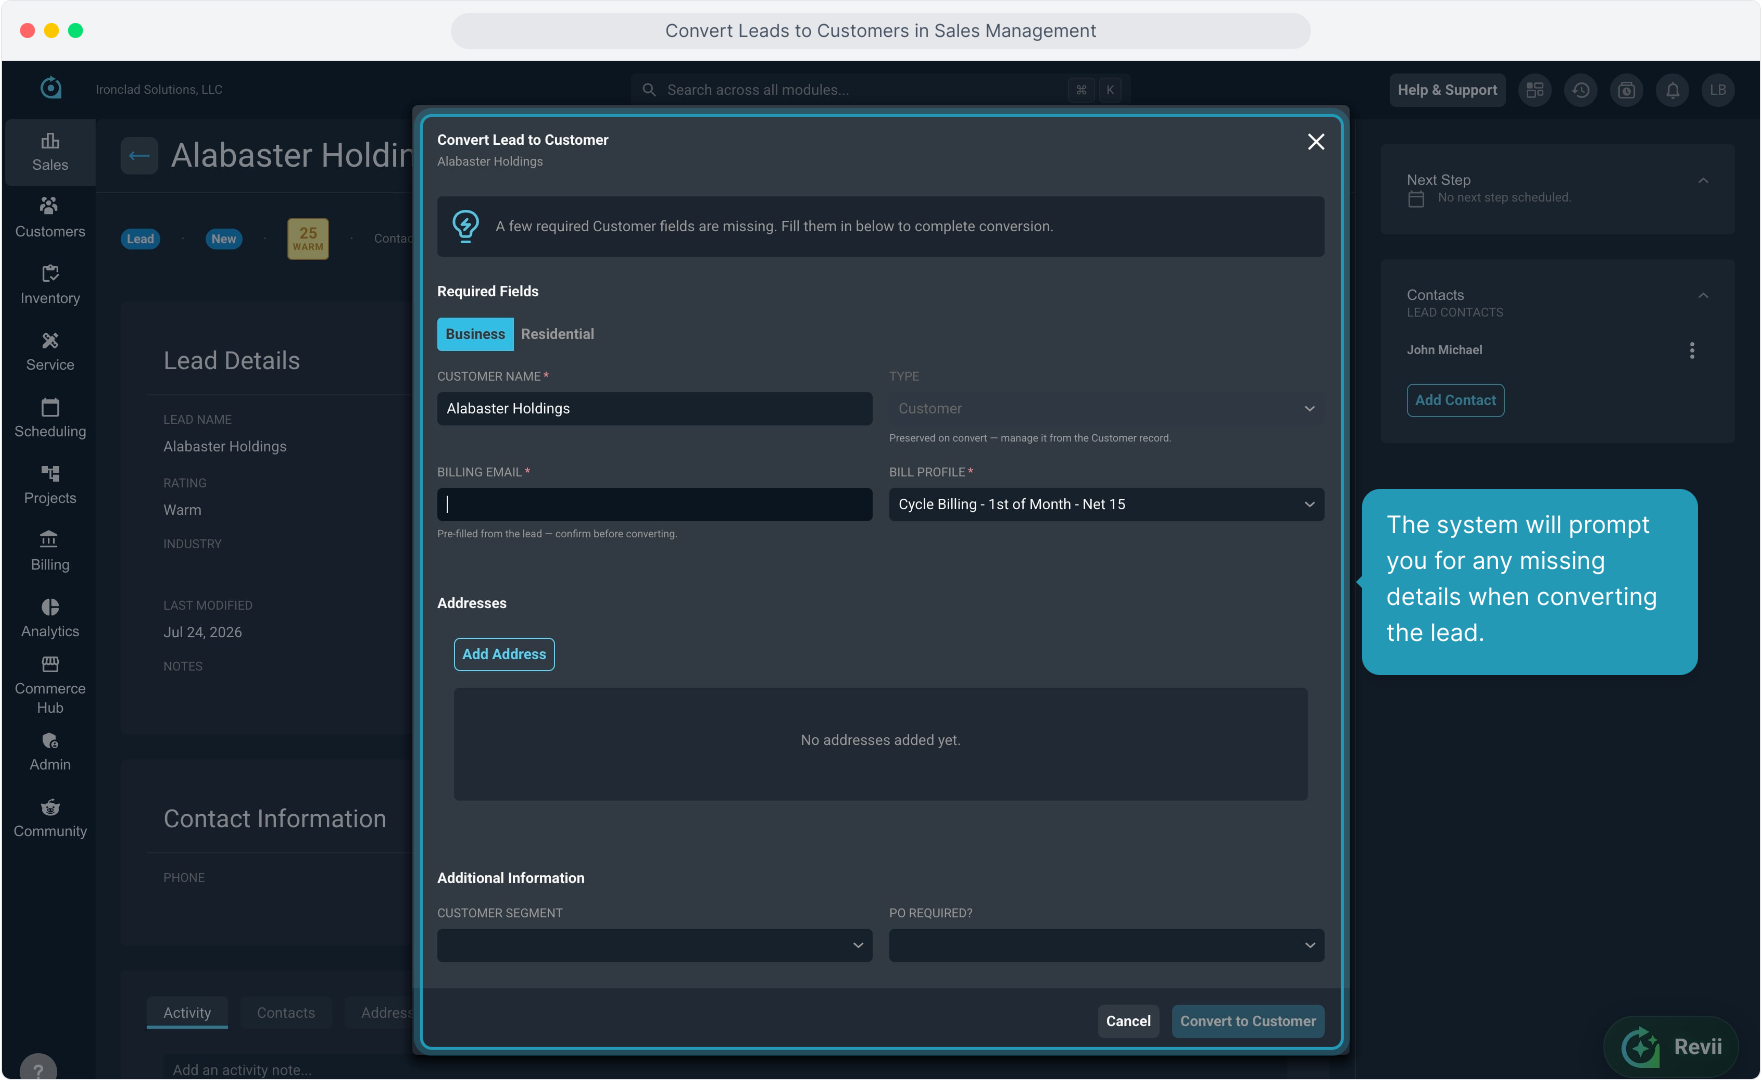
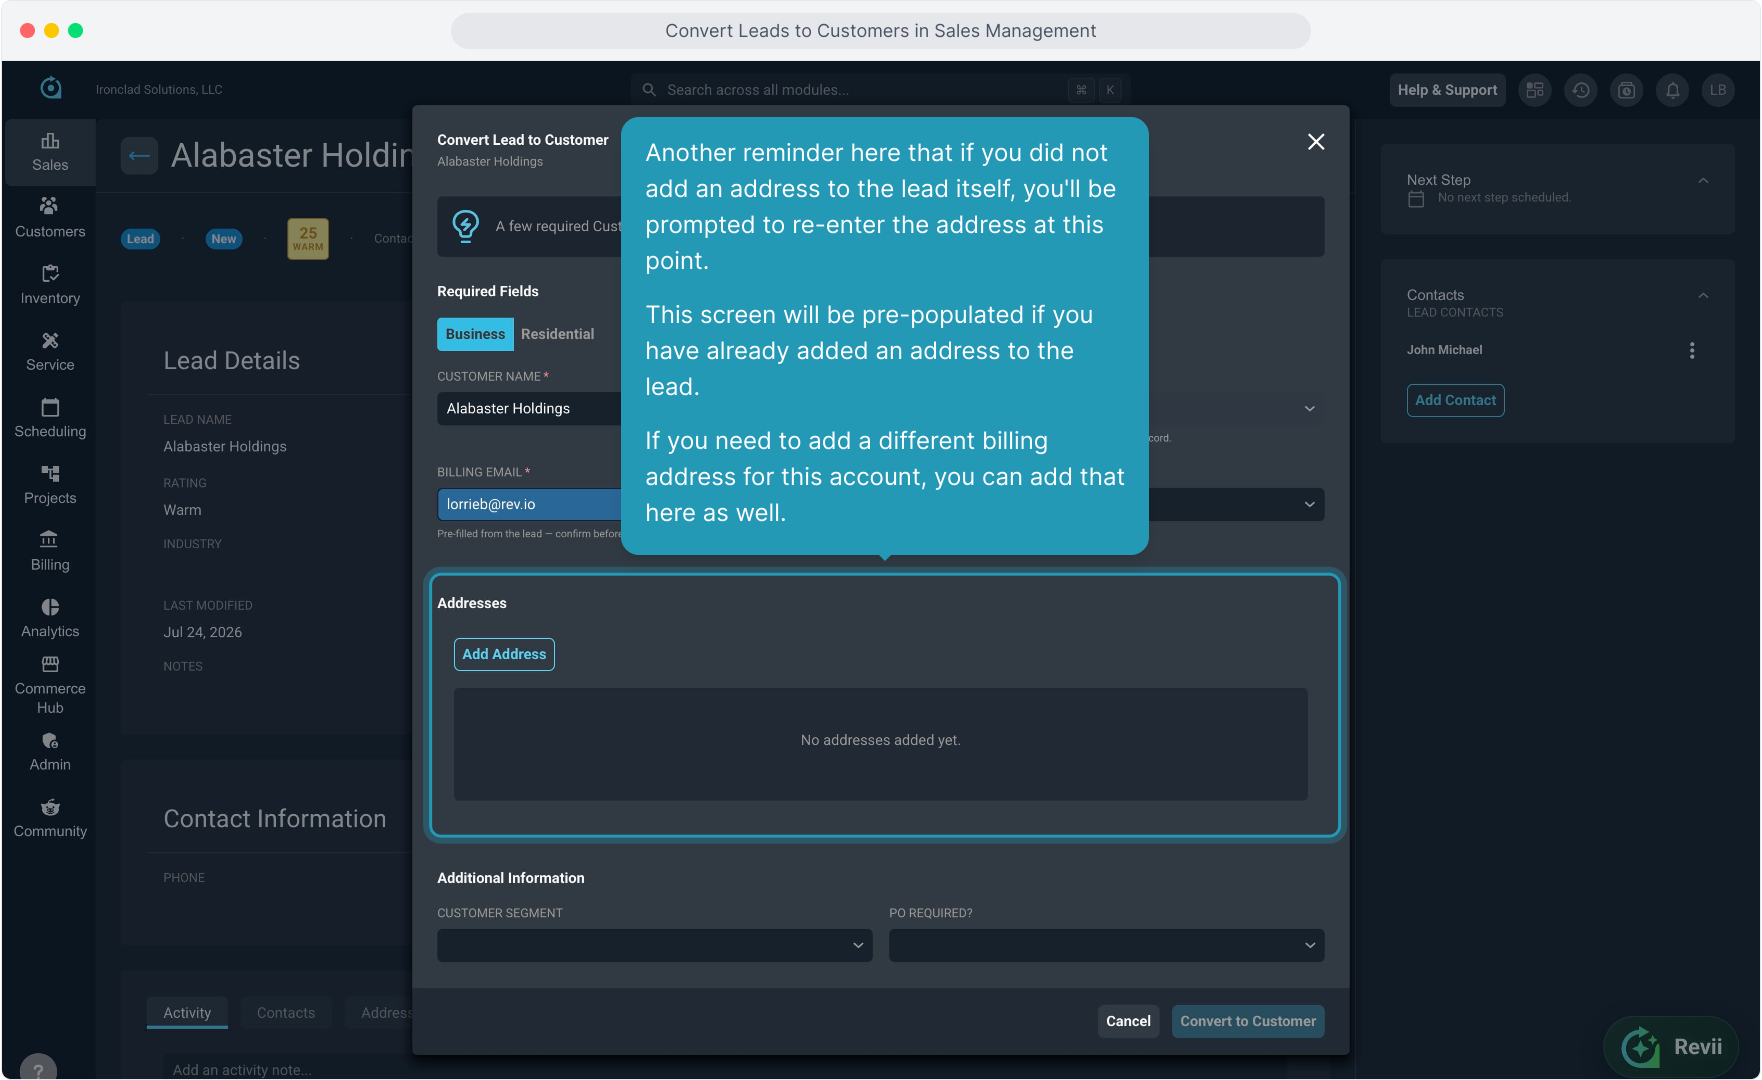
28. Another reminder here that if you did not add an address to the lead itself, you'll be prompted to re-enter the address at this point.
This screen will be pre-populated if you have already added an address to the lead.
If you need to add a different billing address for this account, you can add that here as well.
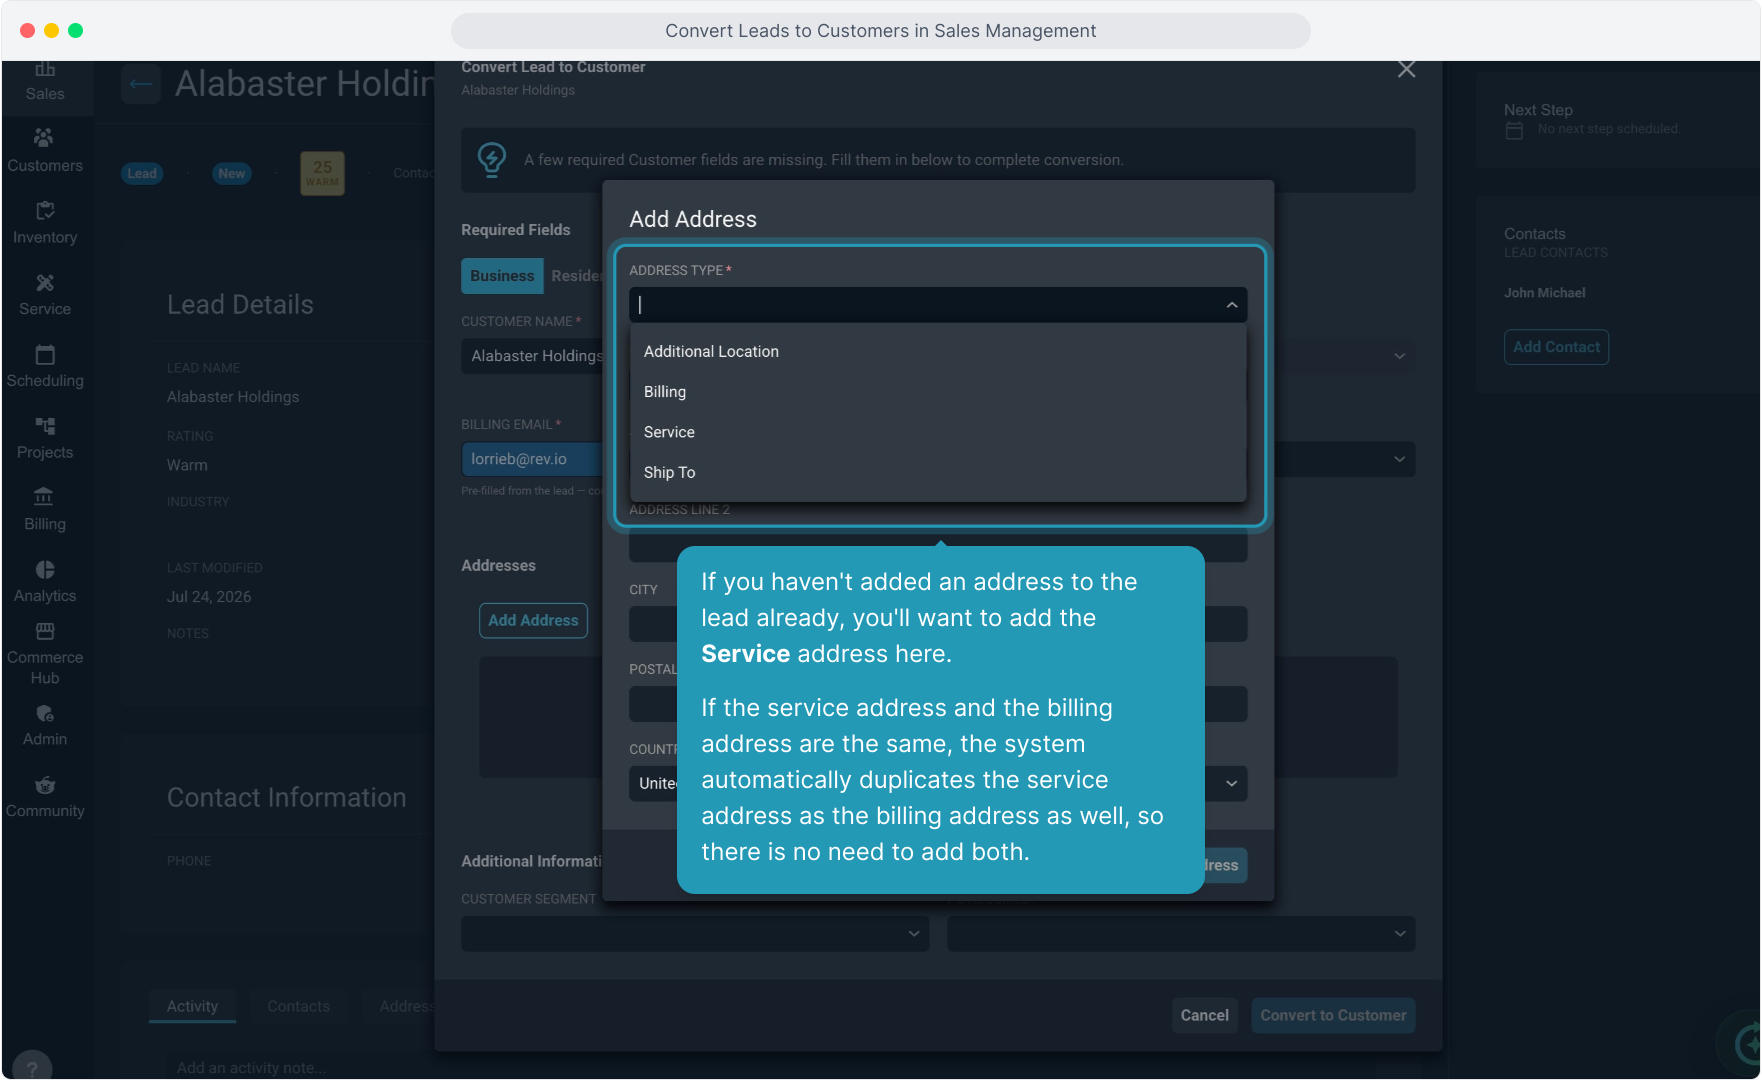
29. If you haven't added an address to the lead already, you'll want to add the Service address here.
If the service address and the billing address are the same, the system automatically duplicates the service address as the billing address as well, so there is no need to add both.
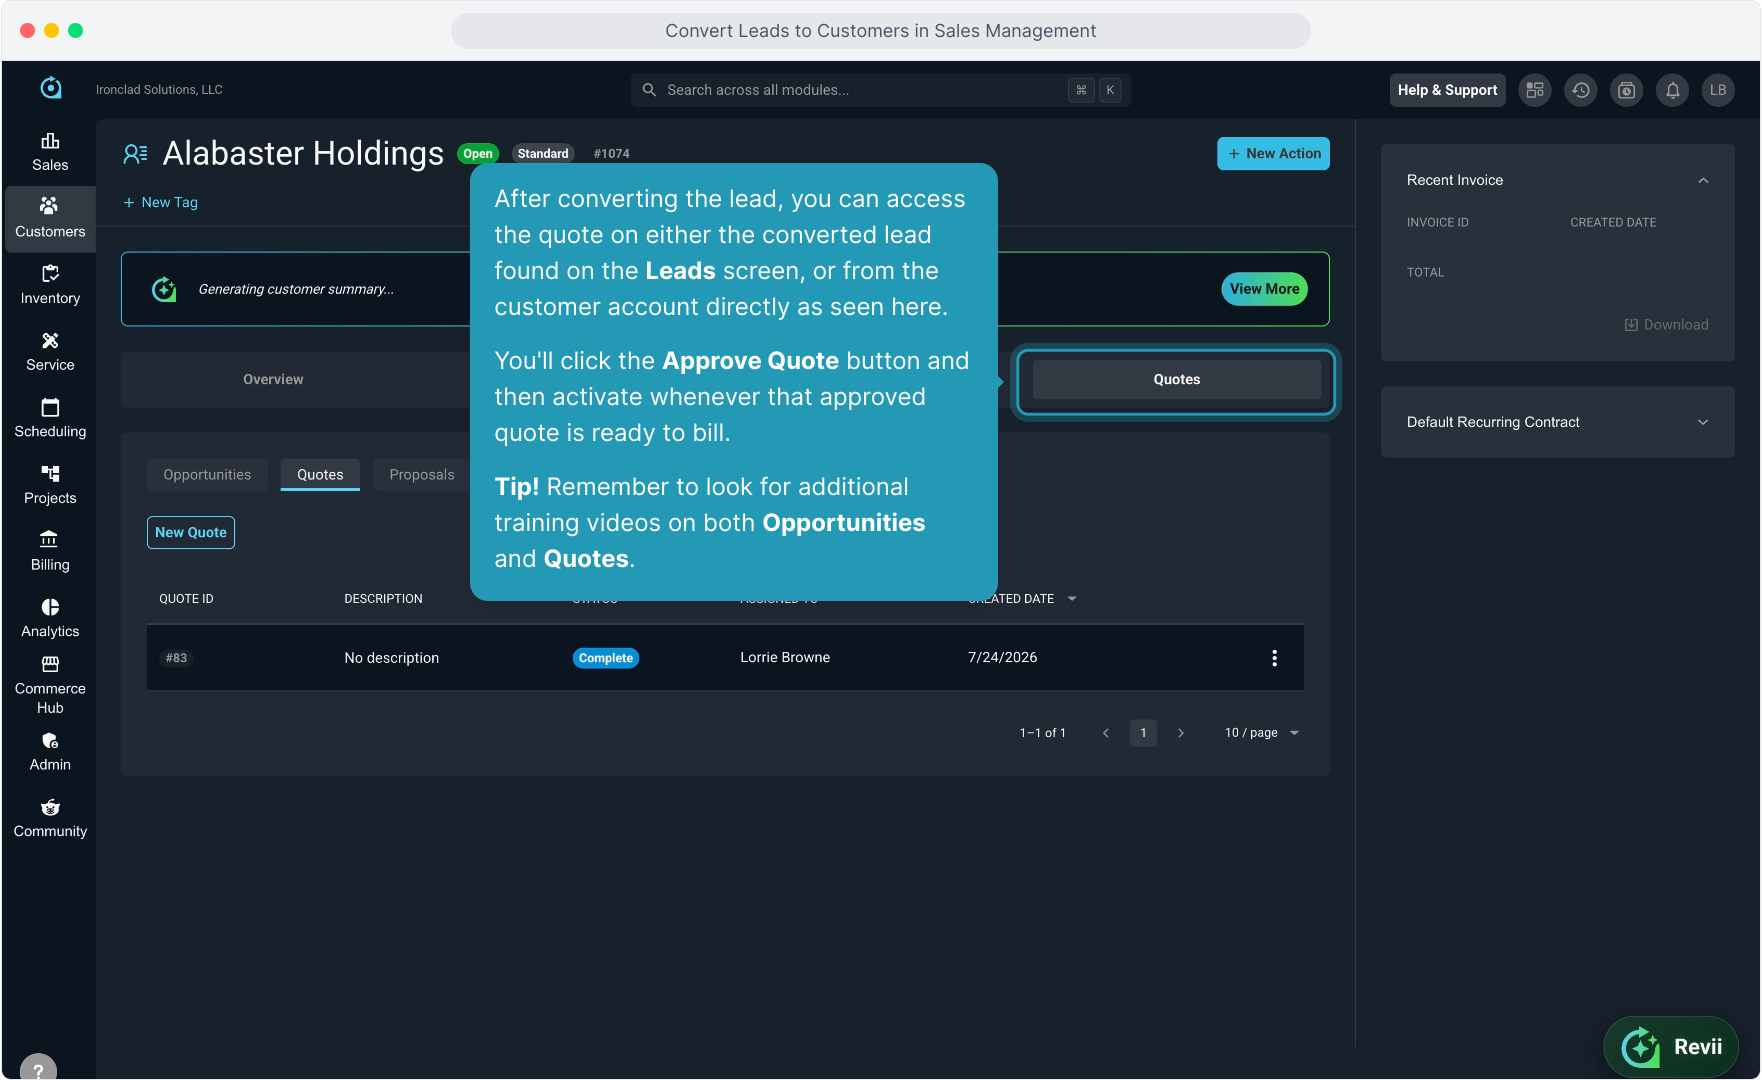
30. After converting the lead, you can access the quote on either the converted lead found on the Leads screen, or from the customer account directly as seen here.
You'll click the Approve Quote button and then activate whenever that approved quote is ready to bill.
Tip! Remember to look for additional training videos on both Opportunities and Quotes.
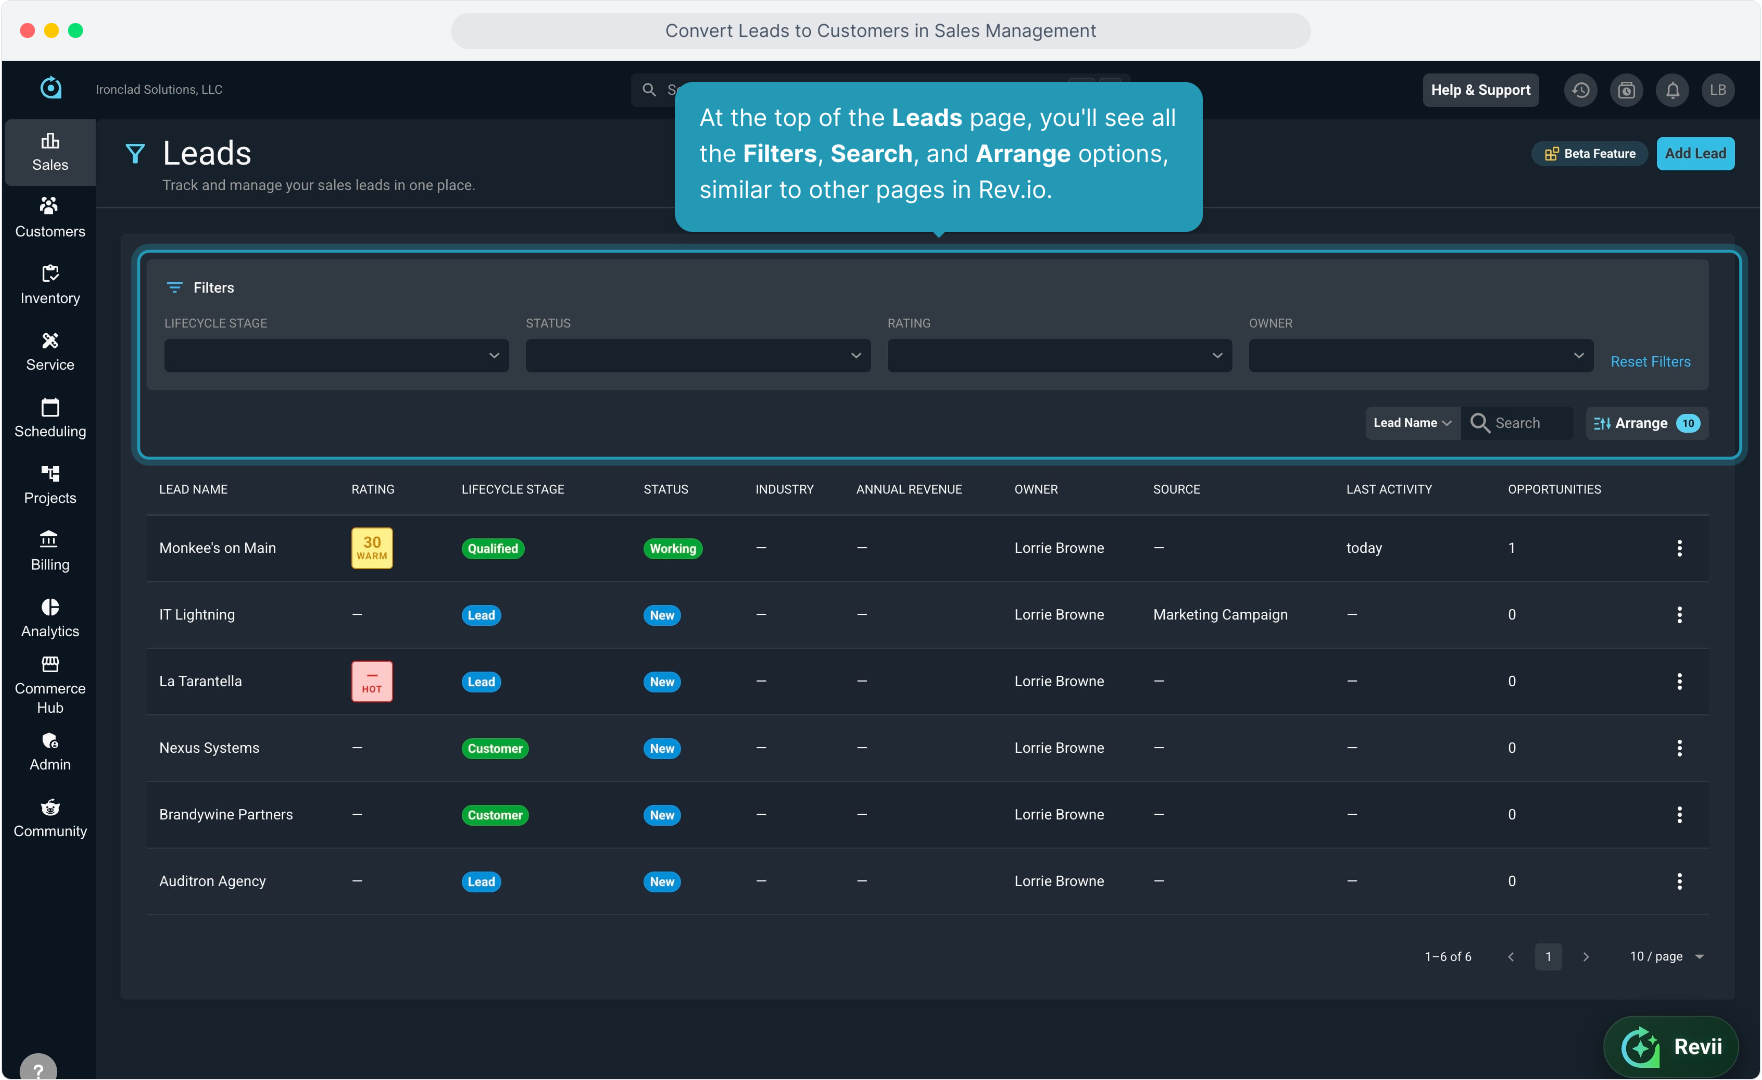
31. To wrap things up, you can view all leads, including converted leads, on the main Leads page using the Lifecycle Stage.
Converted leads will be marked "Customer" here. You can use the filters at the top of the page to view different stages as necessary.