
How To Guide: Creating a Quote for Service
1. Introduction
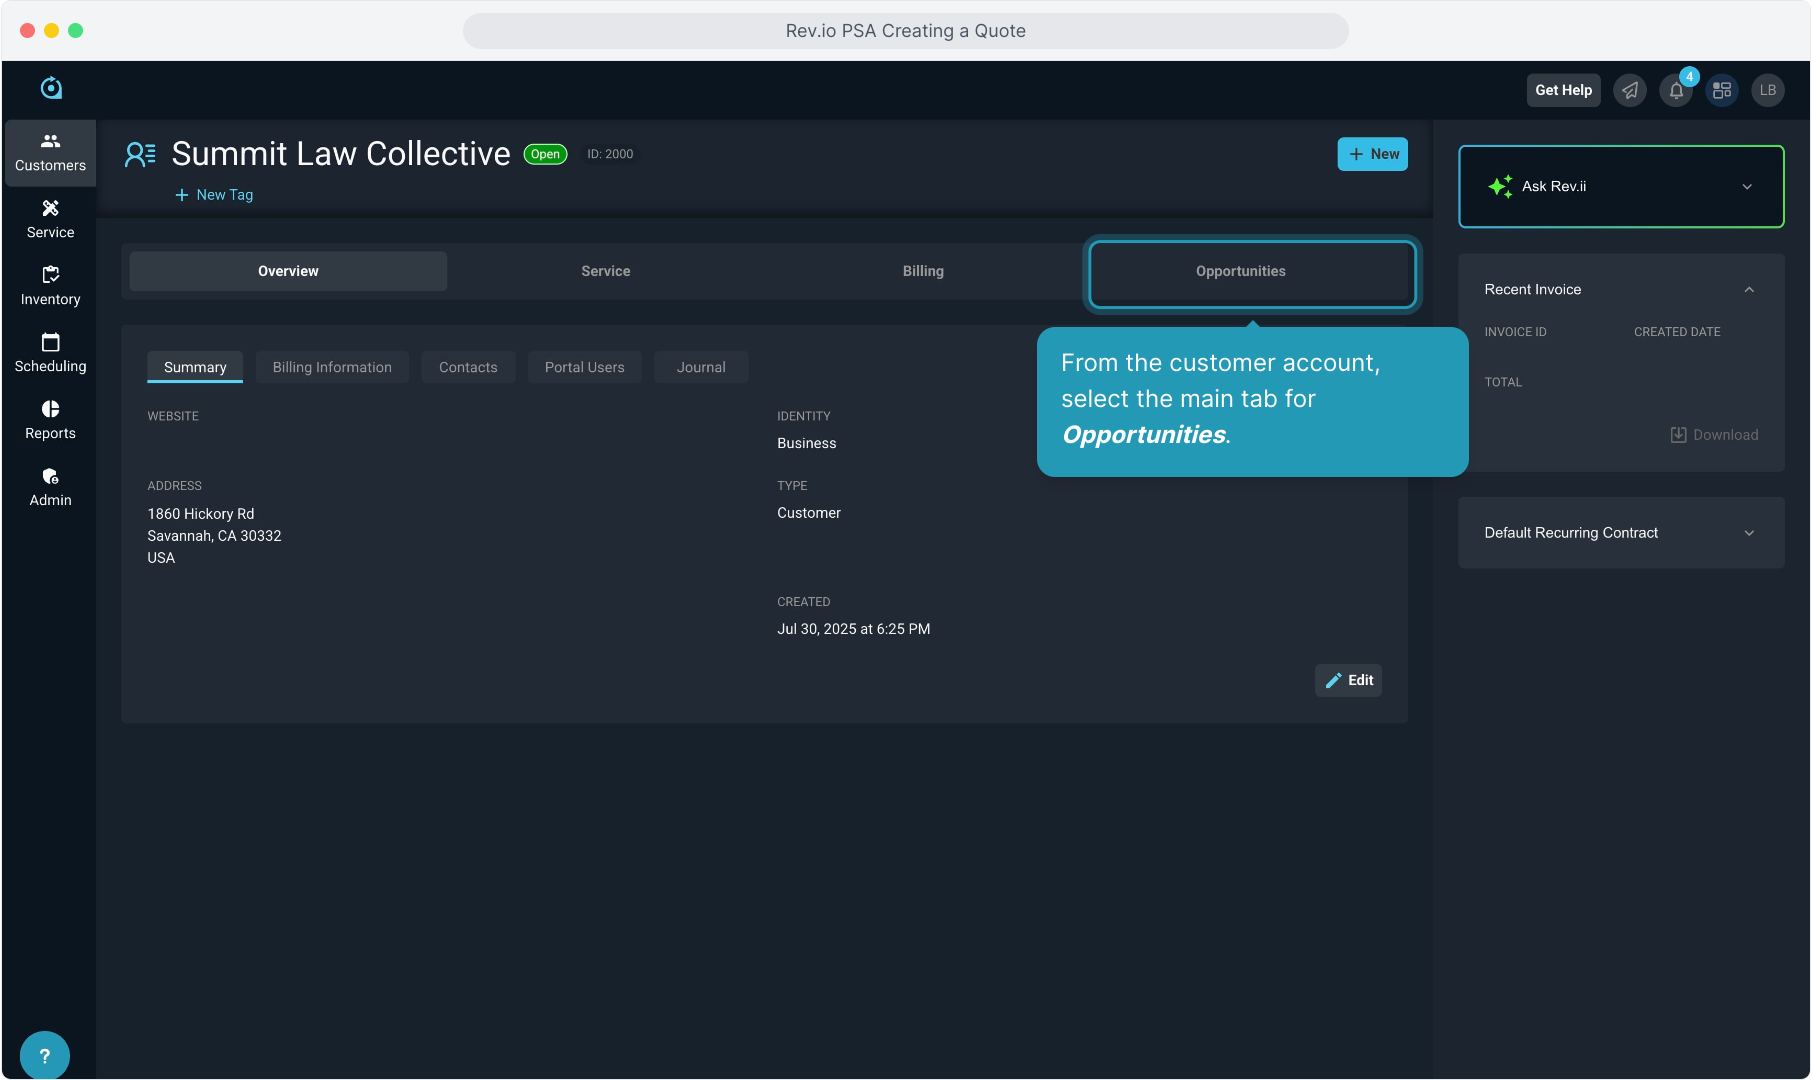
2. From the customer account, select the main tab for Opportunities.
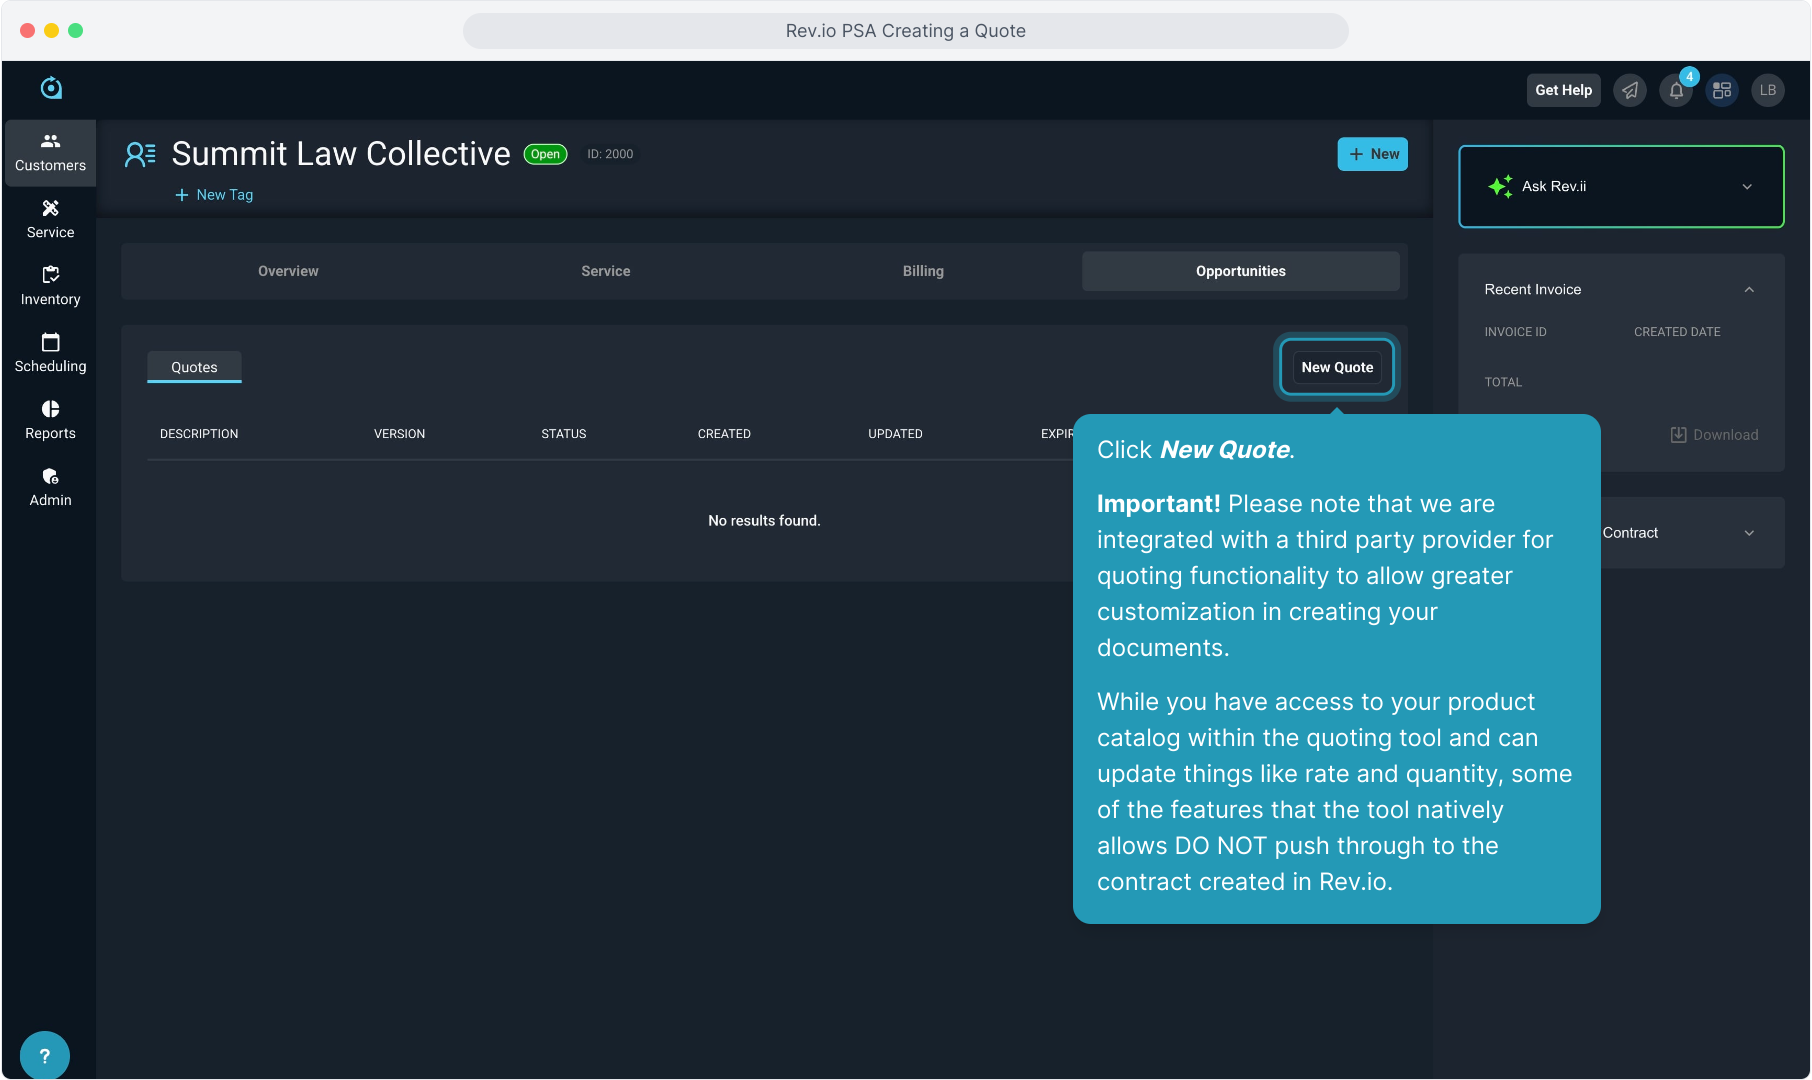
3. Click New Quote.
Important! Please note that we are integrated with a third party provider for quoting functionality to allow greater customization in creating your documents.
While you have access to your product catalog within the quoting tool and can update things like rate and quantity, some of the features that the tool natively allows DO NOT push through to the contract created in Rev.io.
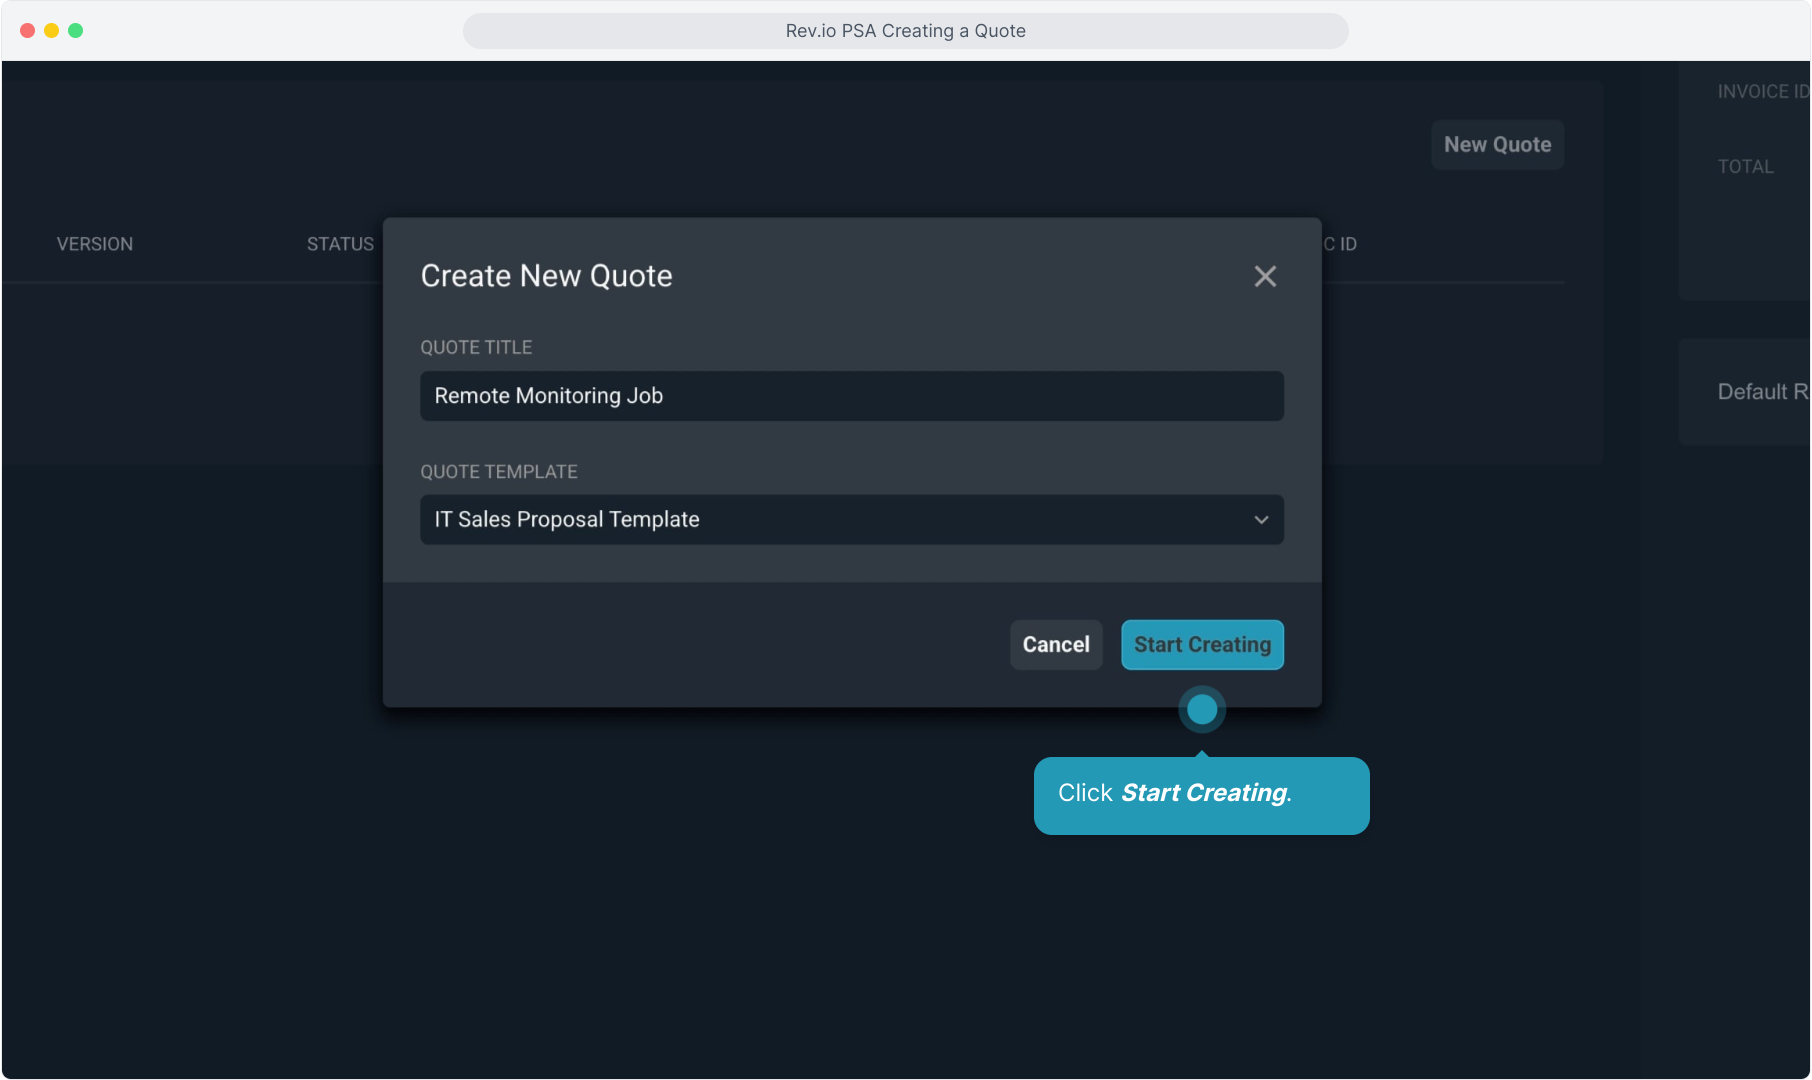
4. Give the quote a Title. This will show in the email that gets sent to the customer for signature.

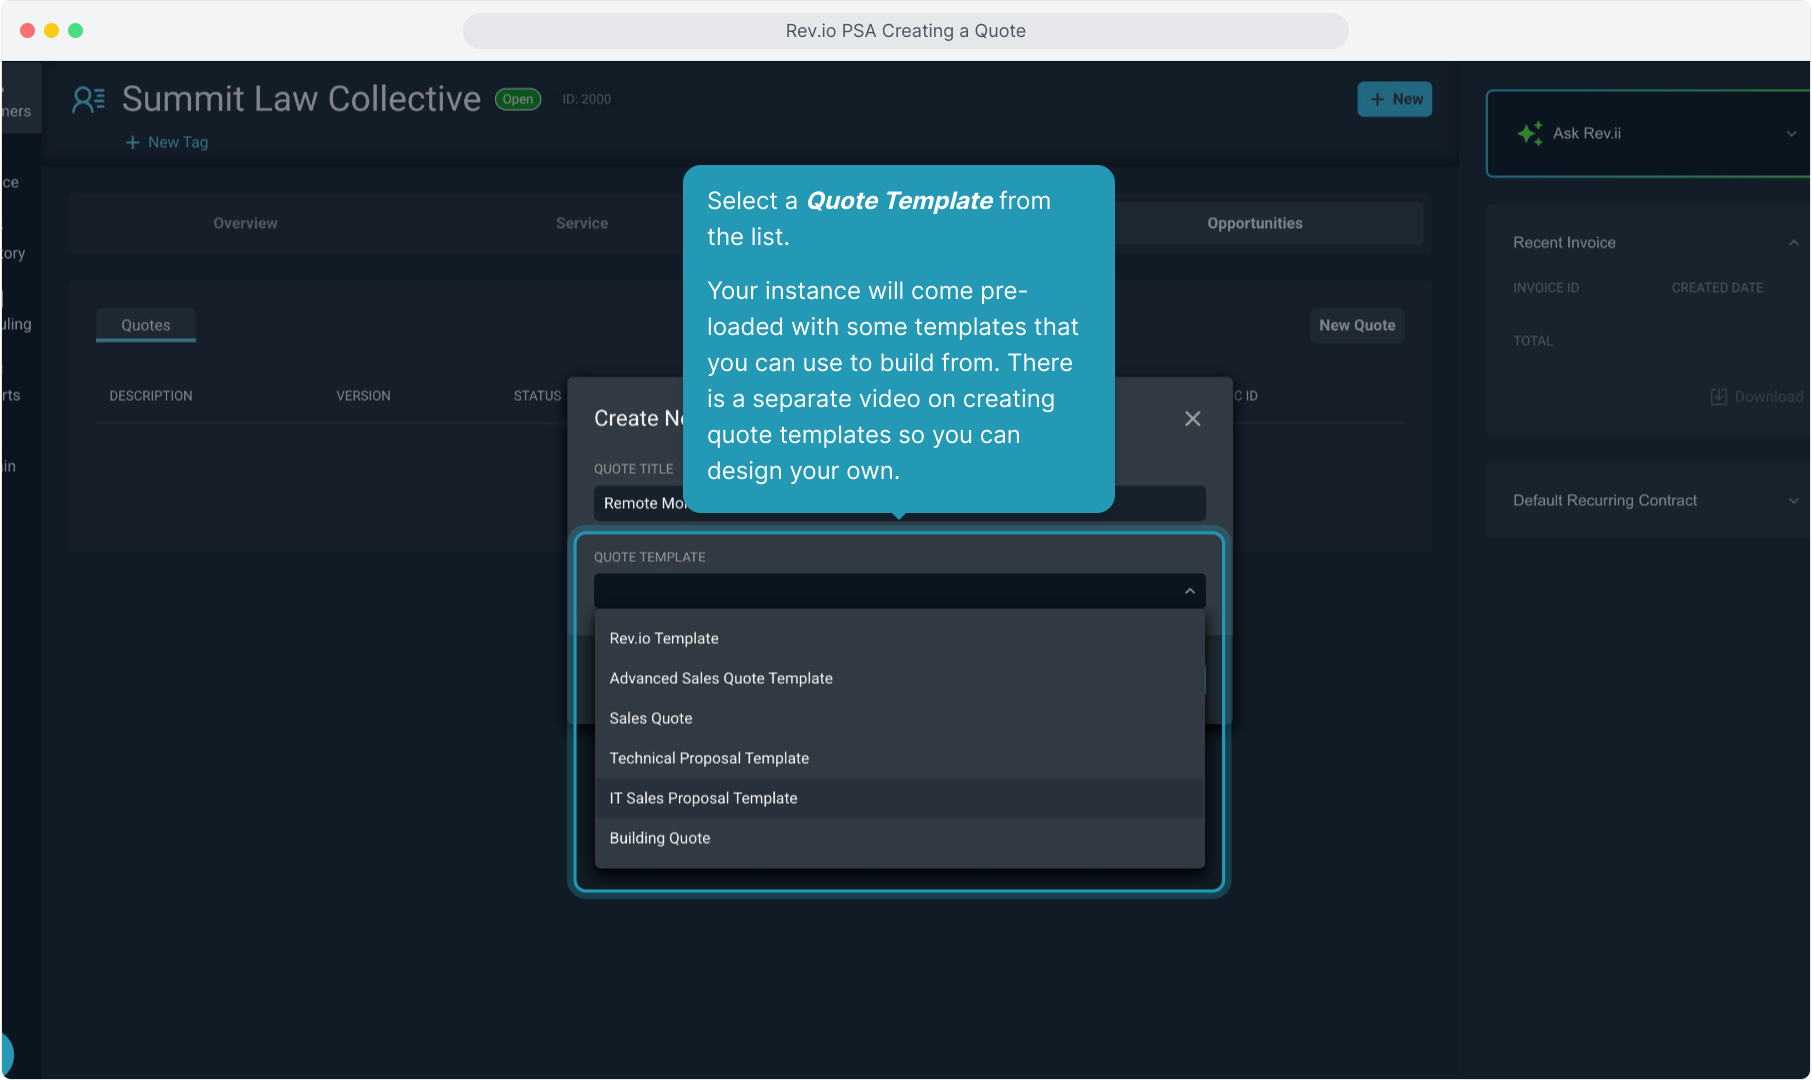
5. Select a Quote Template from the list.
Your instance will come pre-loaded with some templates that you can use to build from. There is a separate video on creating quote templates so you can design your own.
6. Click Start Creating.
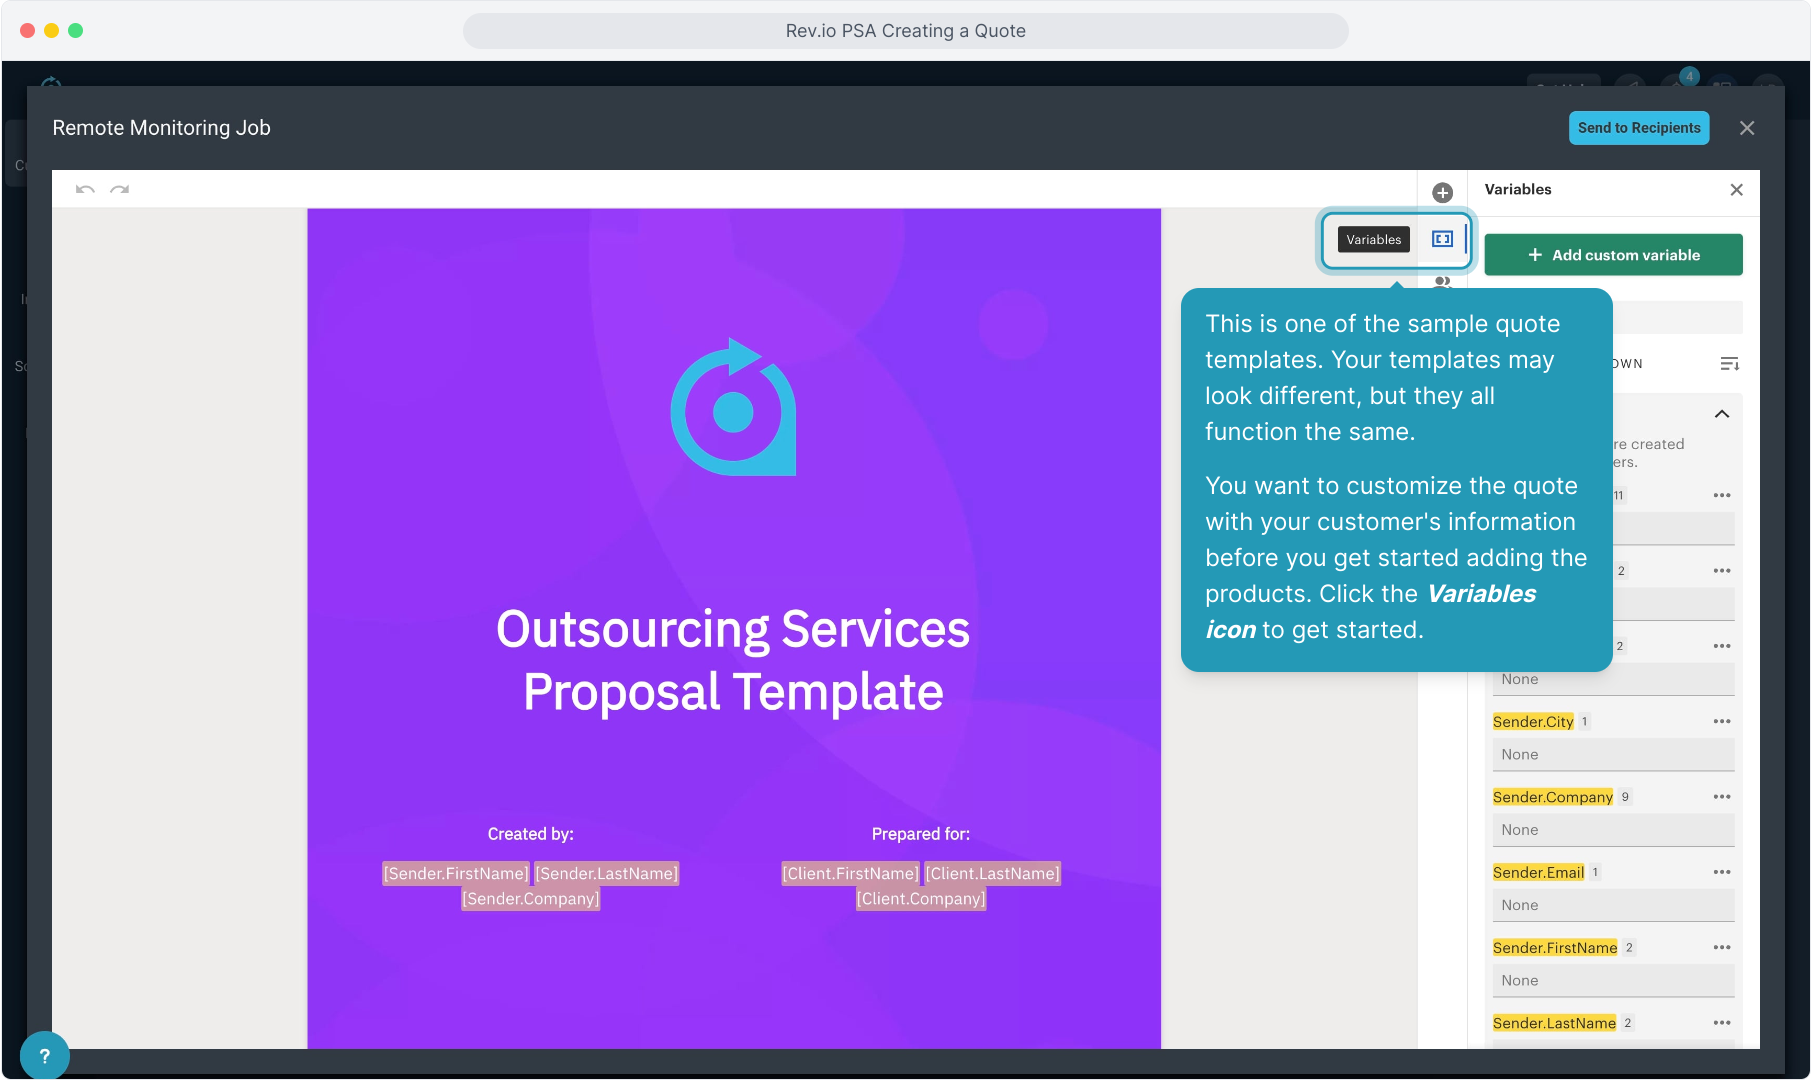
7. This is one of the sample quote templates. Your templates may look different, but they all function the same.
You want to customize the quote with your customer's information before you get started adding the products. Click the Variables icon to get started.
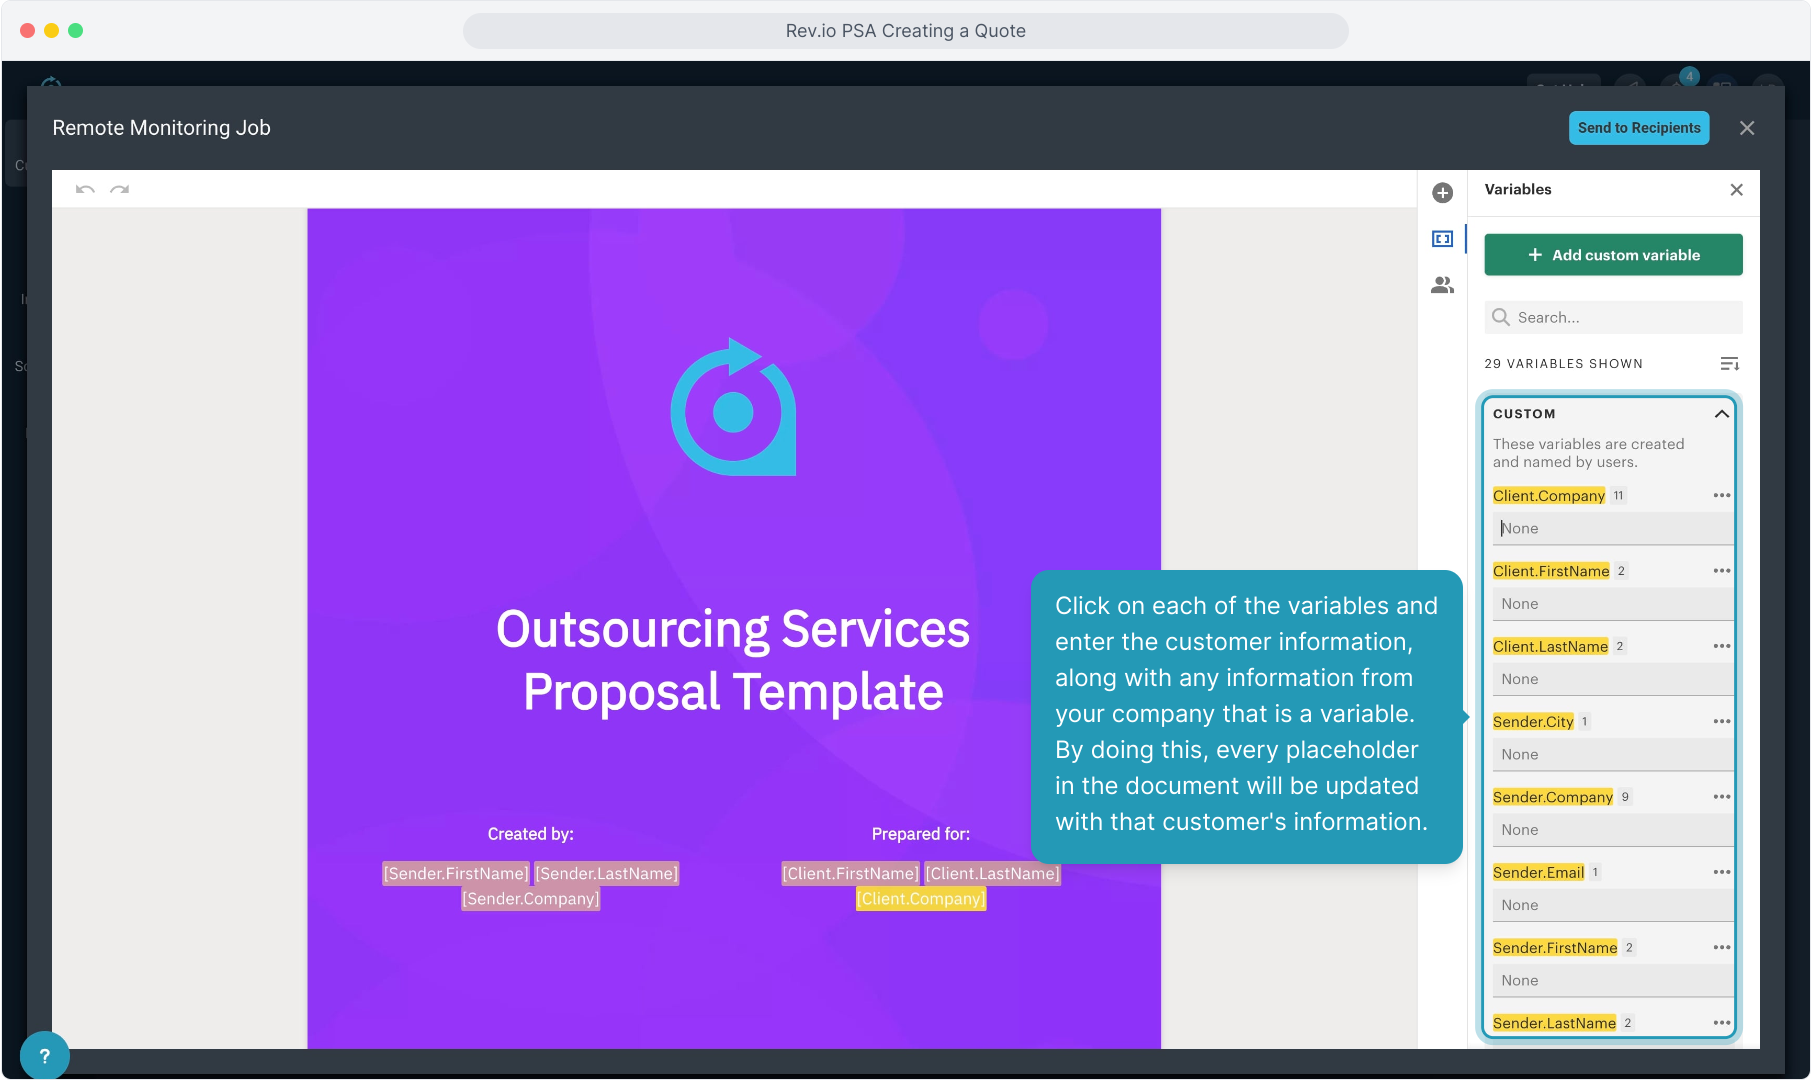
8. Click on each of the variables and enter the customer information, along with any information from your company that is a variable. By doing this, every placeholder in the document will be updated with that customer's information.
9. Intentionally blank.
10. Intentionally blank.
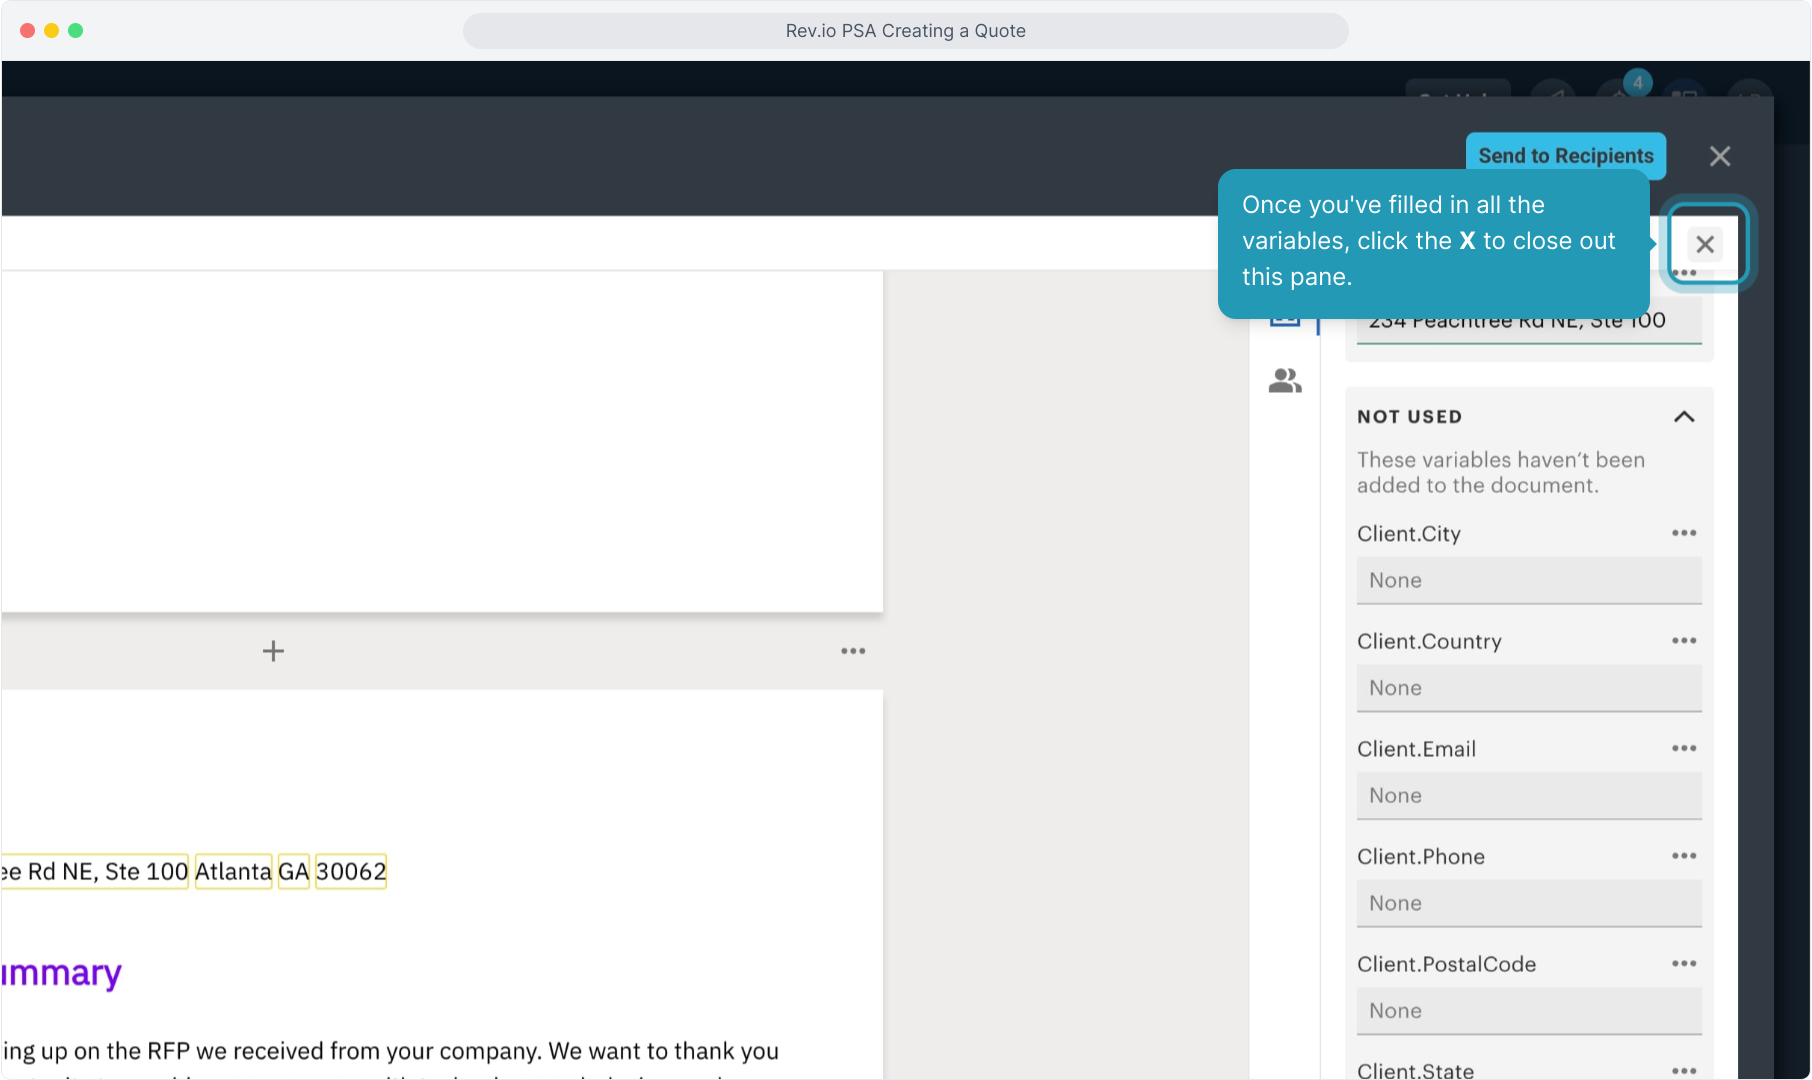
11. Once you've filled in all the variables, click the X to close out this pane.
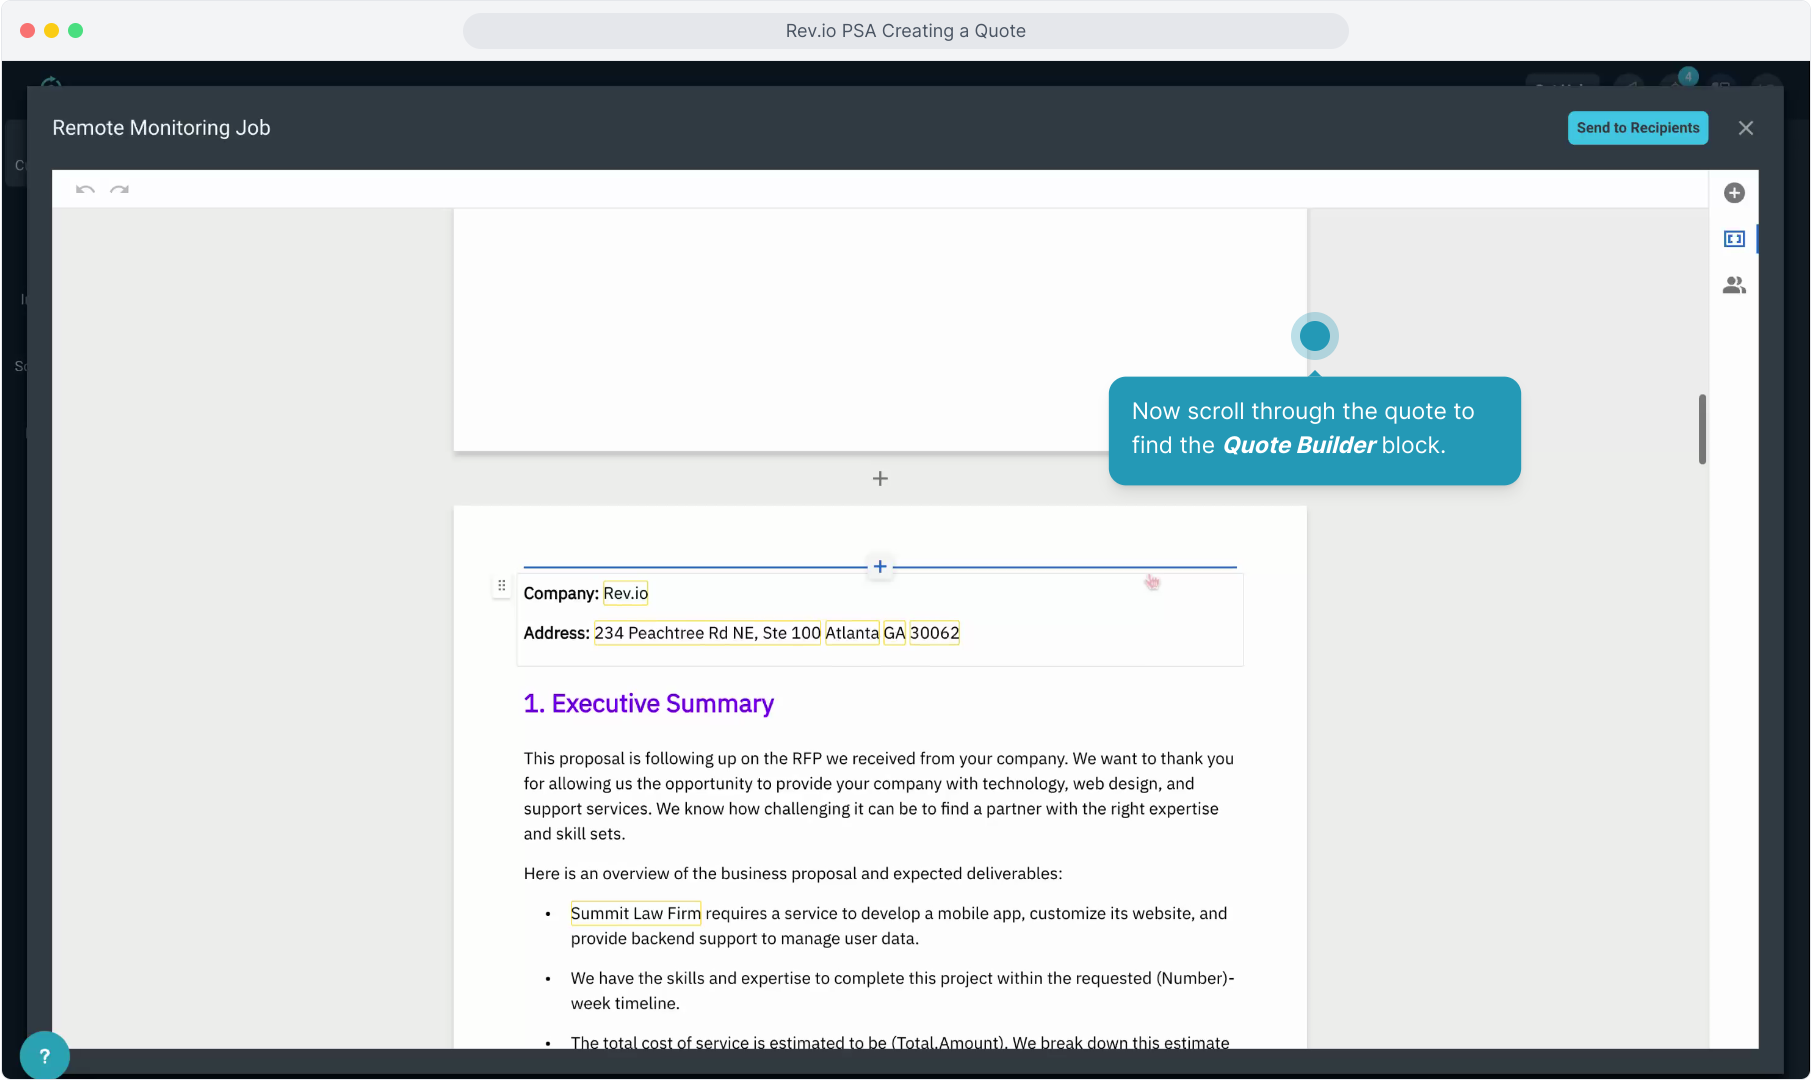
12. Now scroll through the quote to find the Quote Builder block using the scroll bar on the right side.
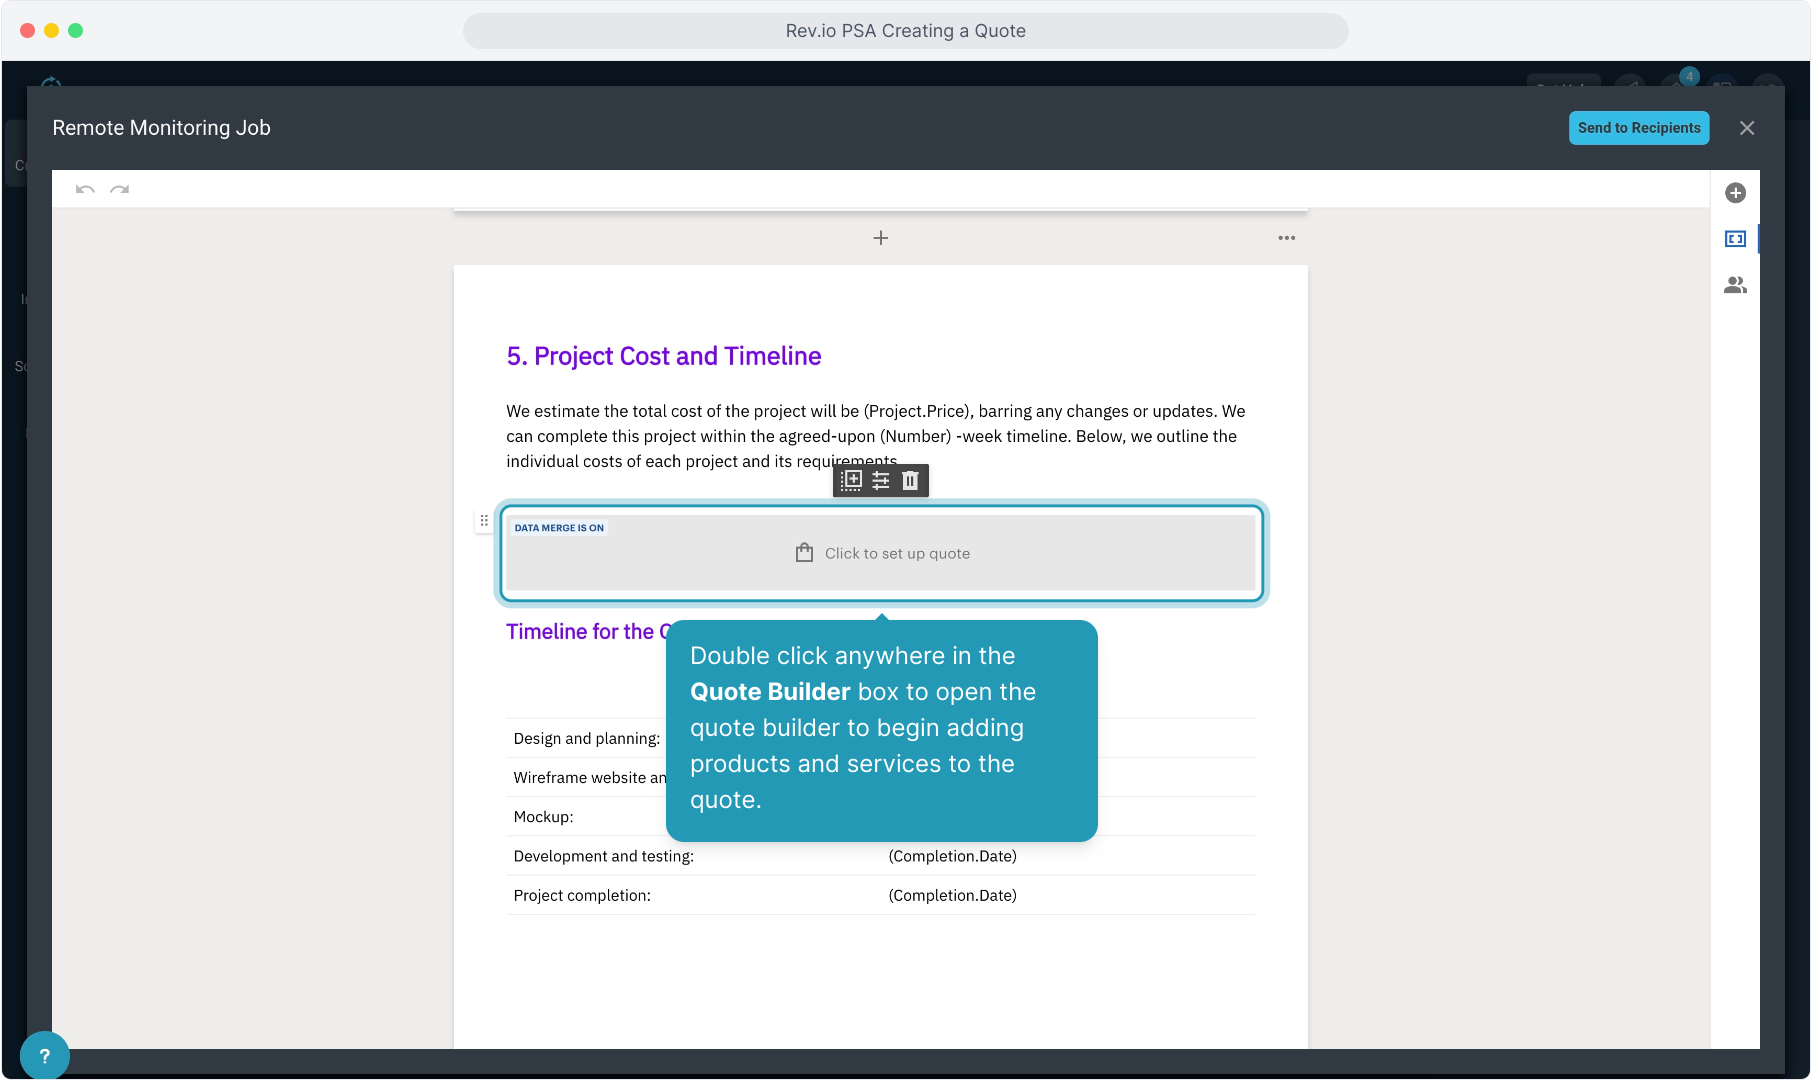
13. Double click anywhere in the Quote Builder box to open the quote builder to begin adding products and services to the quote.
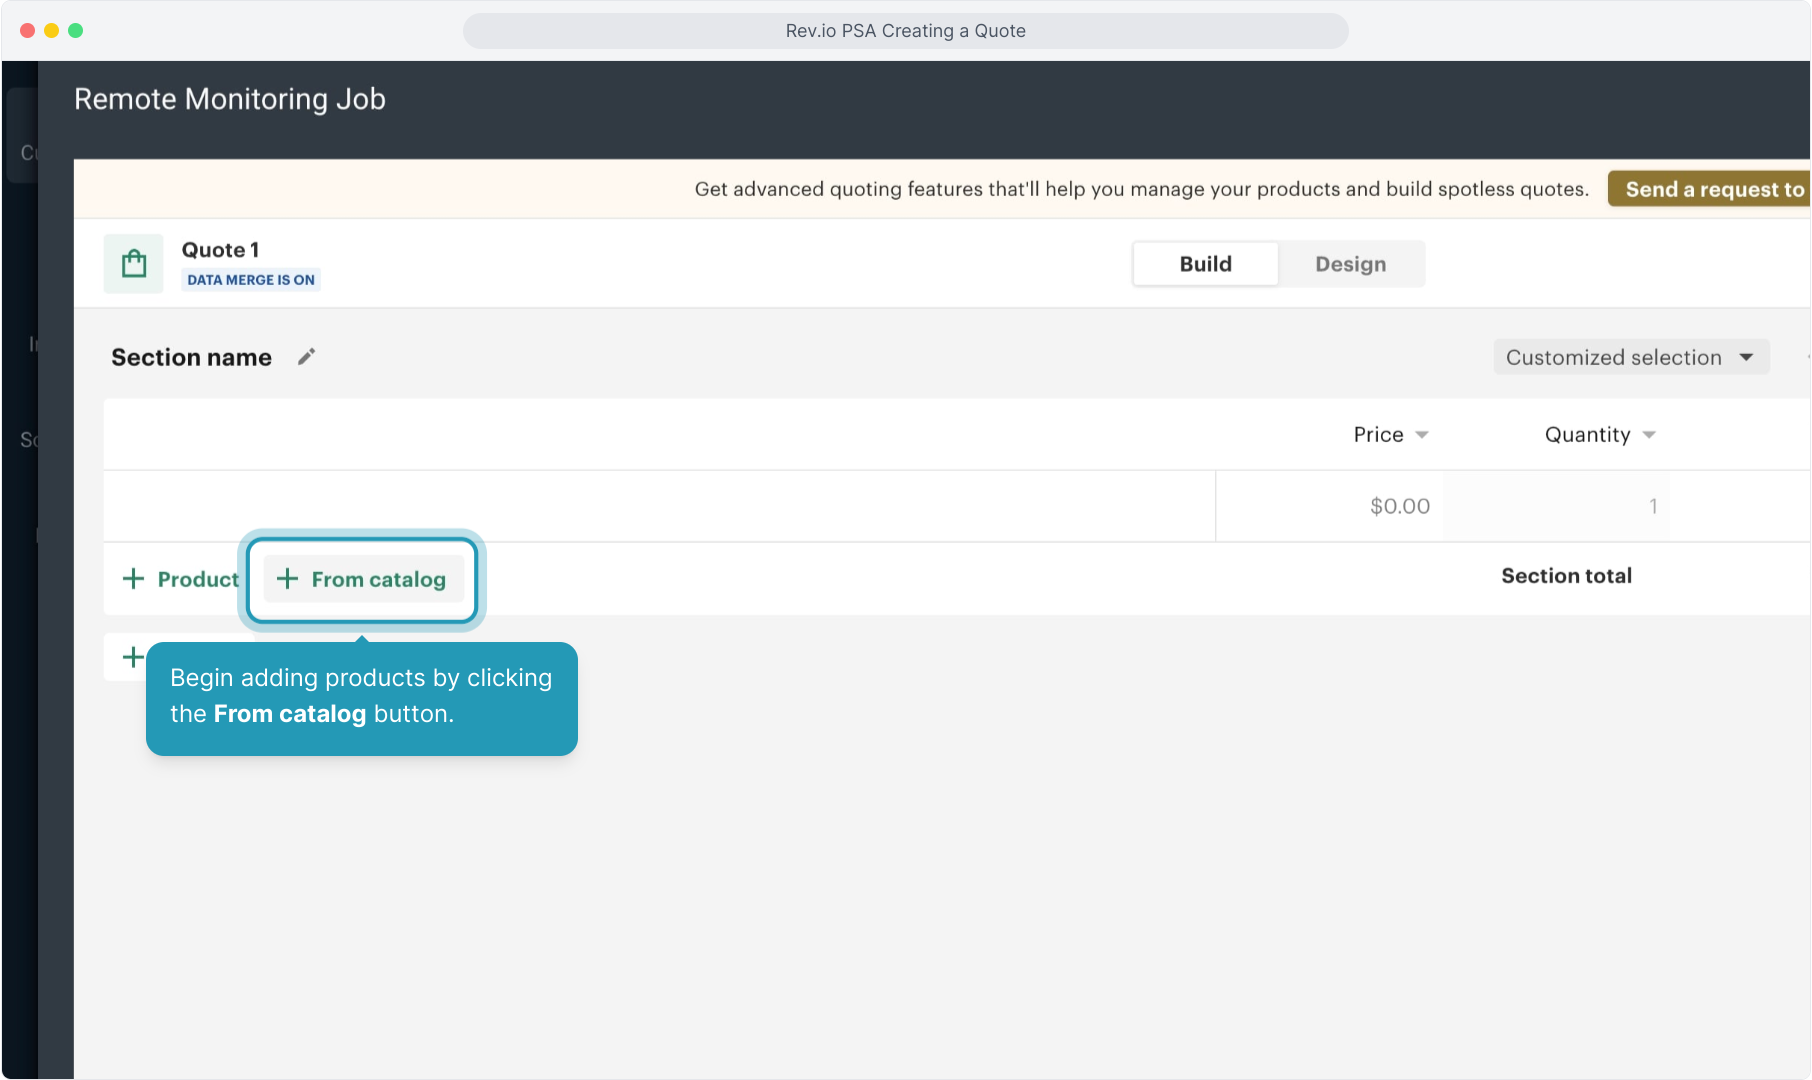
14. Begin adding products by clicking the From catalog button.
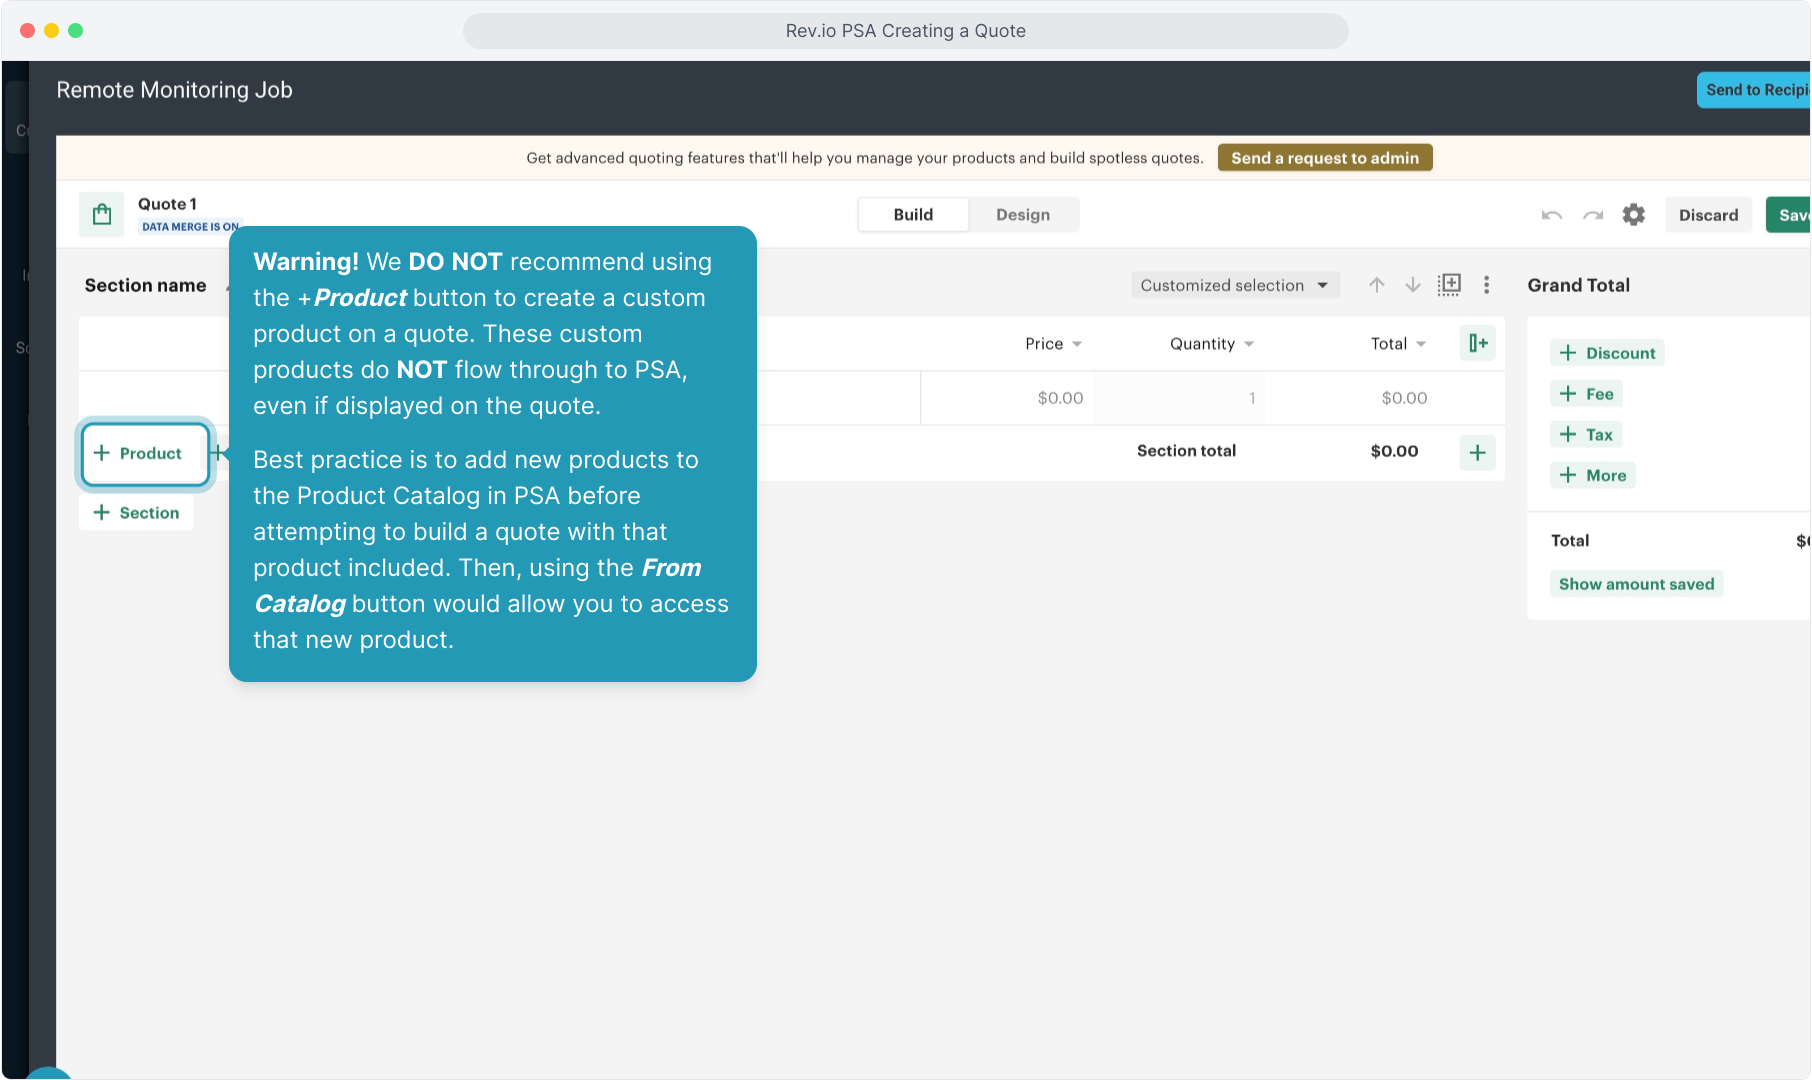
15. Warning! We DO NOT recommend using the +Product button to create a custom product on a quote. These custom products do NOT flow through to PSA, even if displayed on the quote.
Best practice is to add new products to the Product Catalog in PSA before attempting to build a quote with that product included. Then, using the From Catalog button would allow you to access that new product.
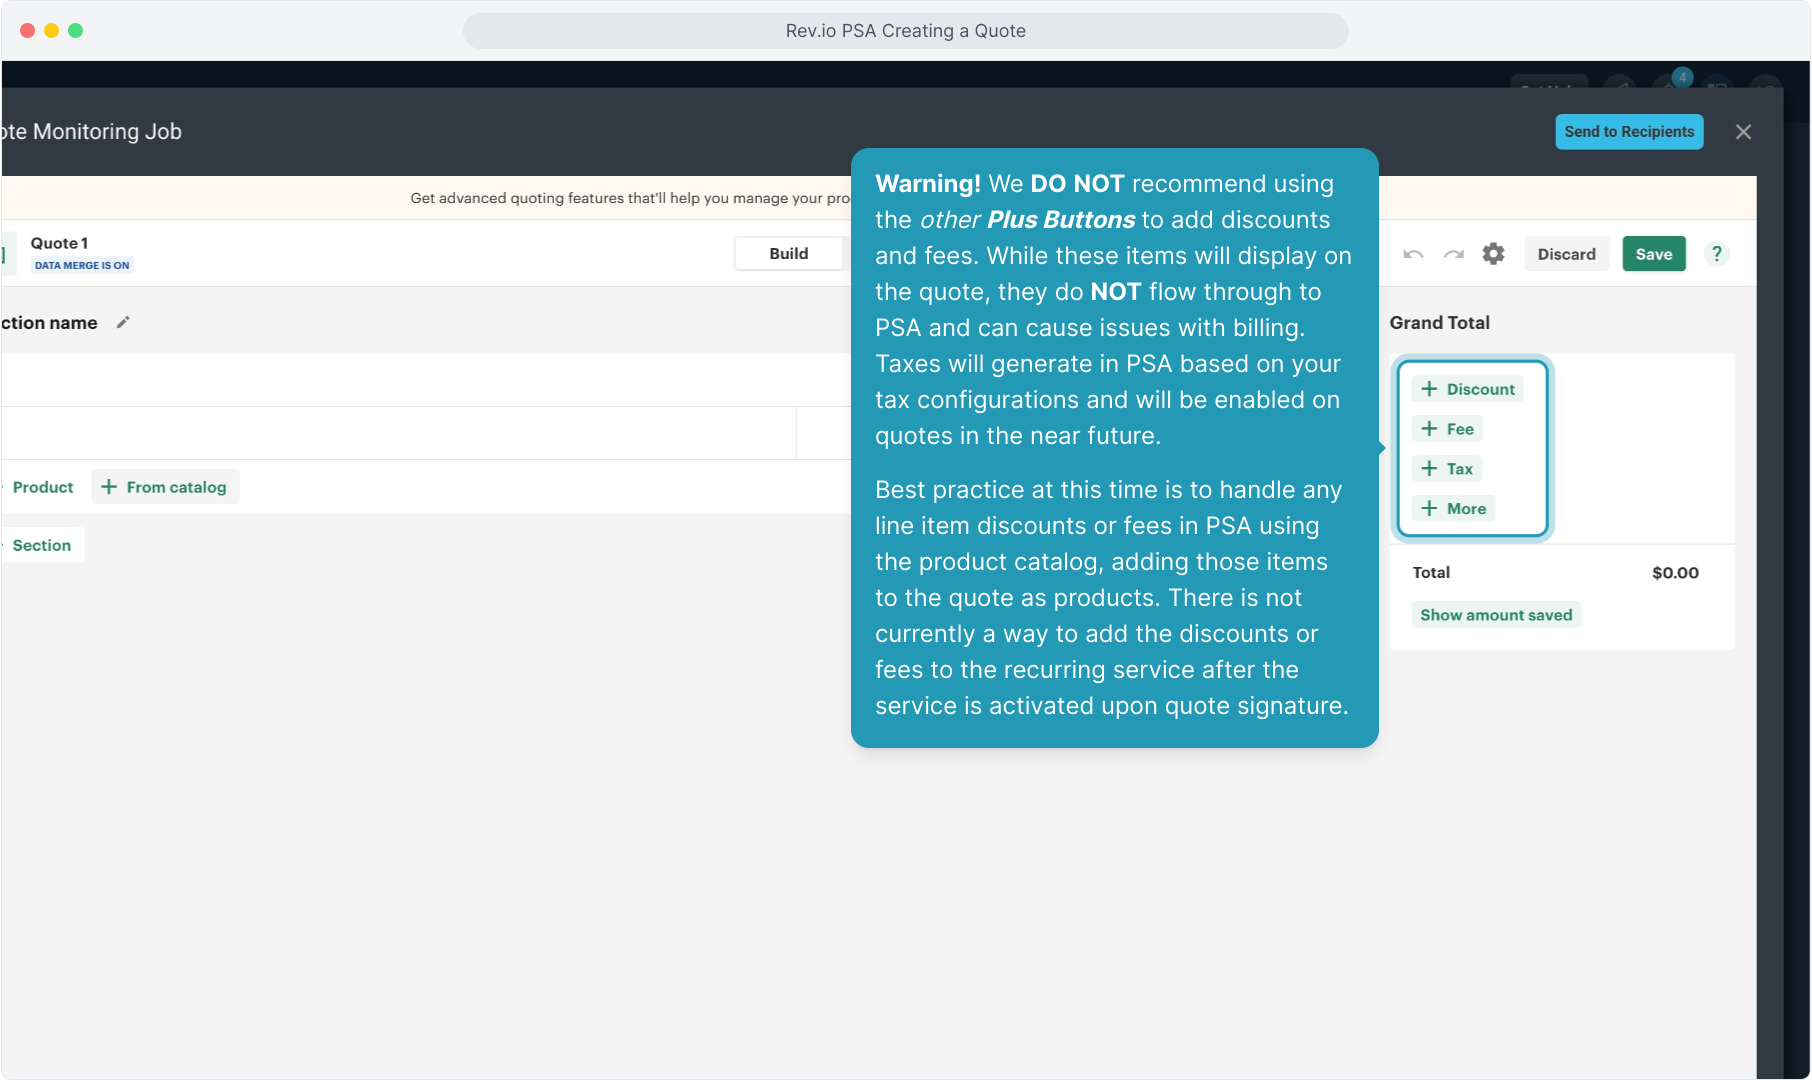
16. Warning! We DO NOT recommend using the other Plus Buttons to add discounts and fees. While these items will display on the quote, they do NOT flow through to PSA and can cause issues with billing. Taxes will generate in PSA based on your tax configurations and will be enabled on quotes in the near future.
Best practice at this time is to handle any line item discounts or fees in PSA using the product catalog, adding those items to the quote as products. There is not currently a way to add the discounts or fees to the recurring service after the service is activated upon quote signature.
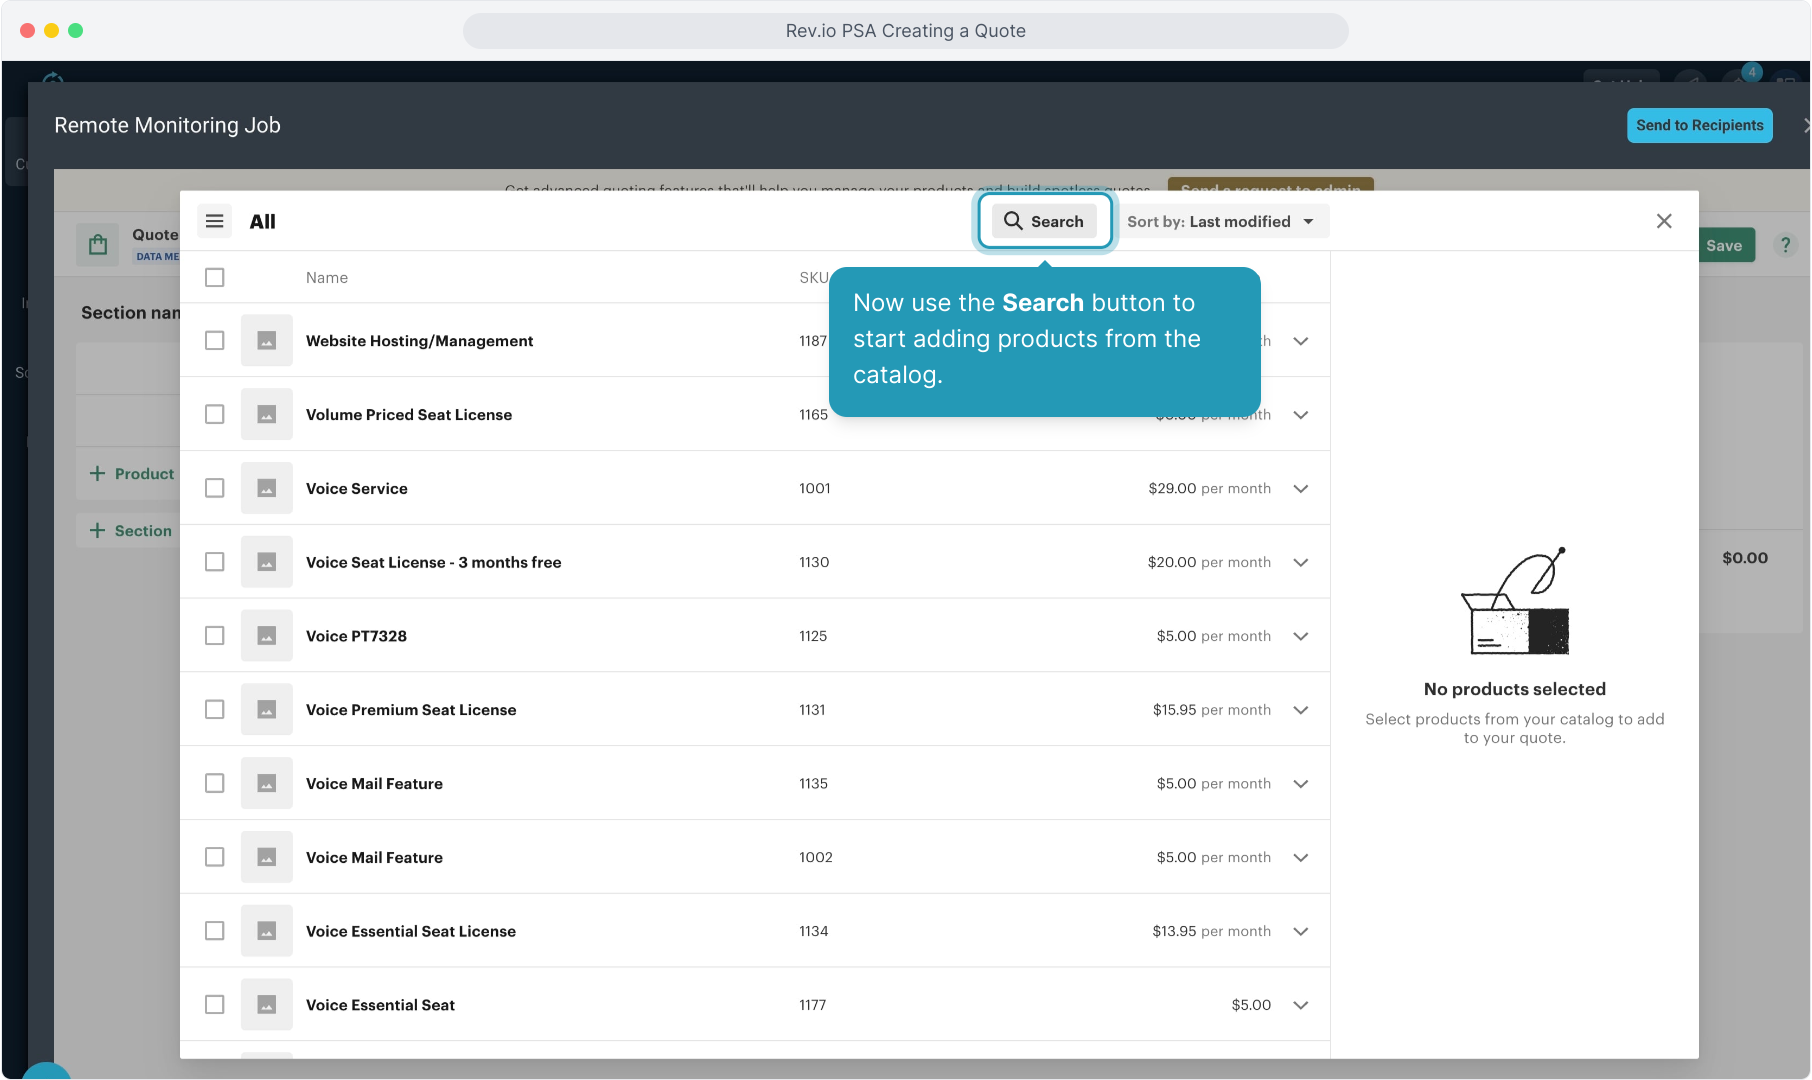
17. Now use the Search button to start adding products from the catalog.
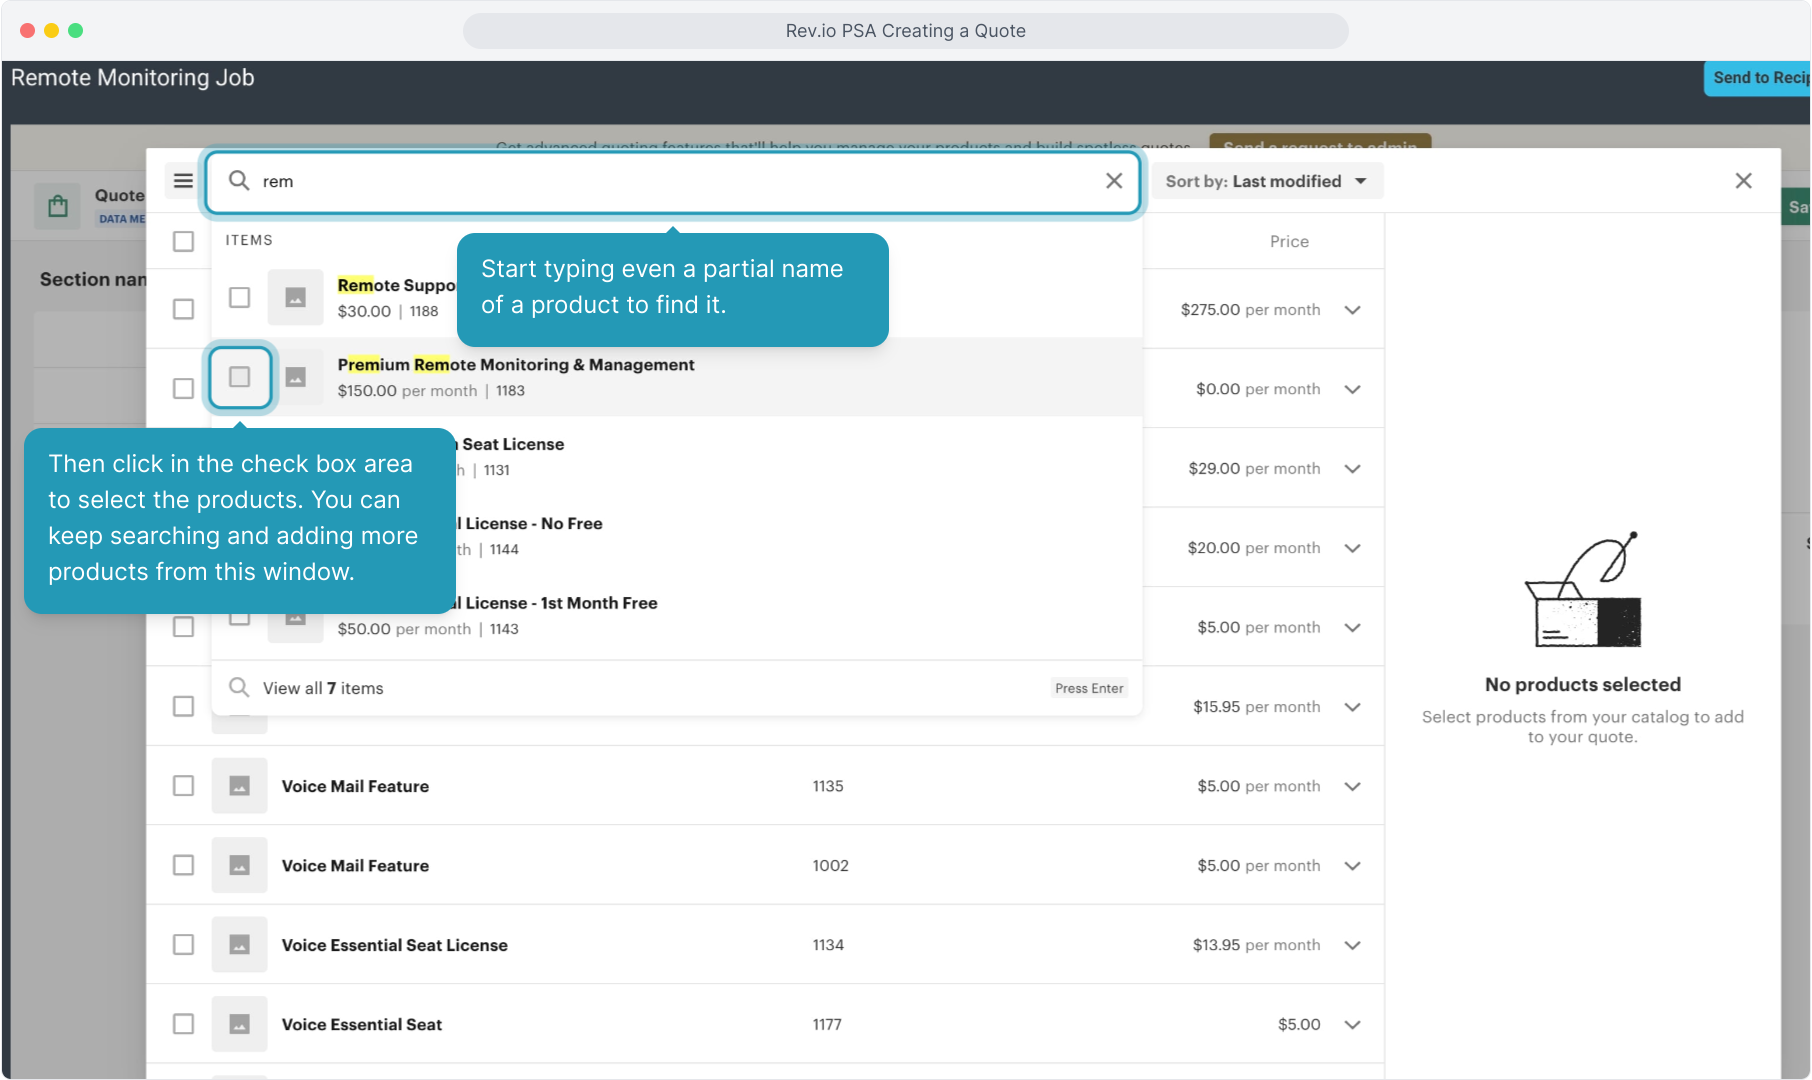
18. Then click in the check box area to select the products. You can keep searching and adding more products from this window.
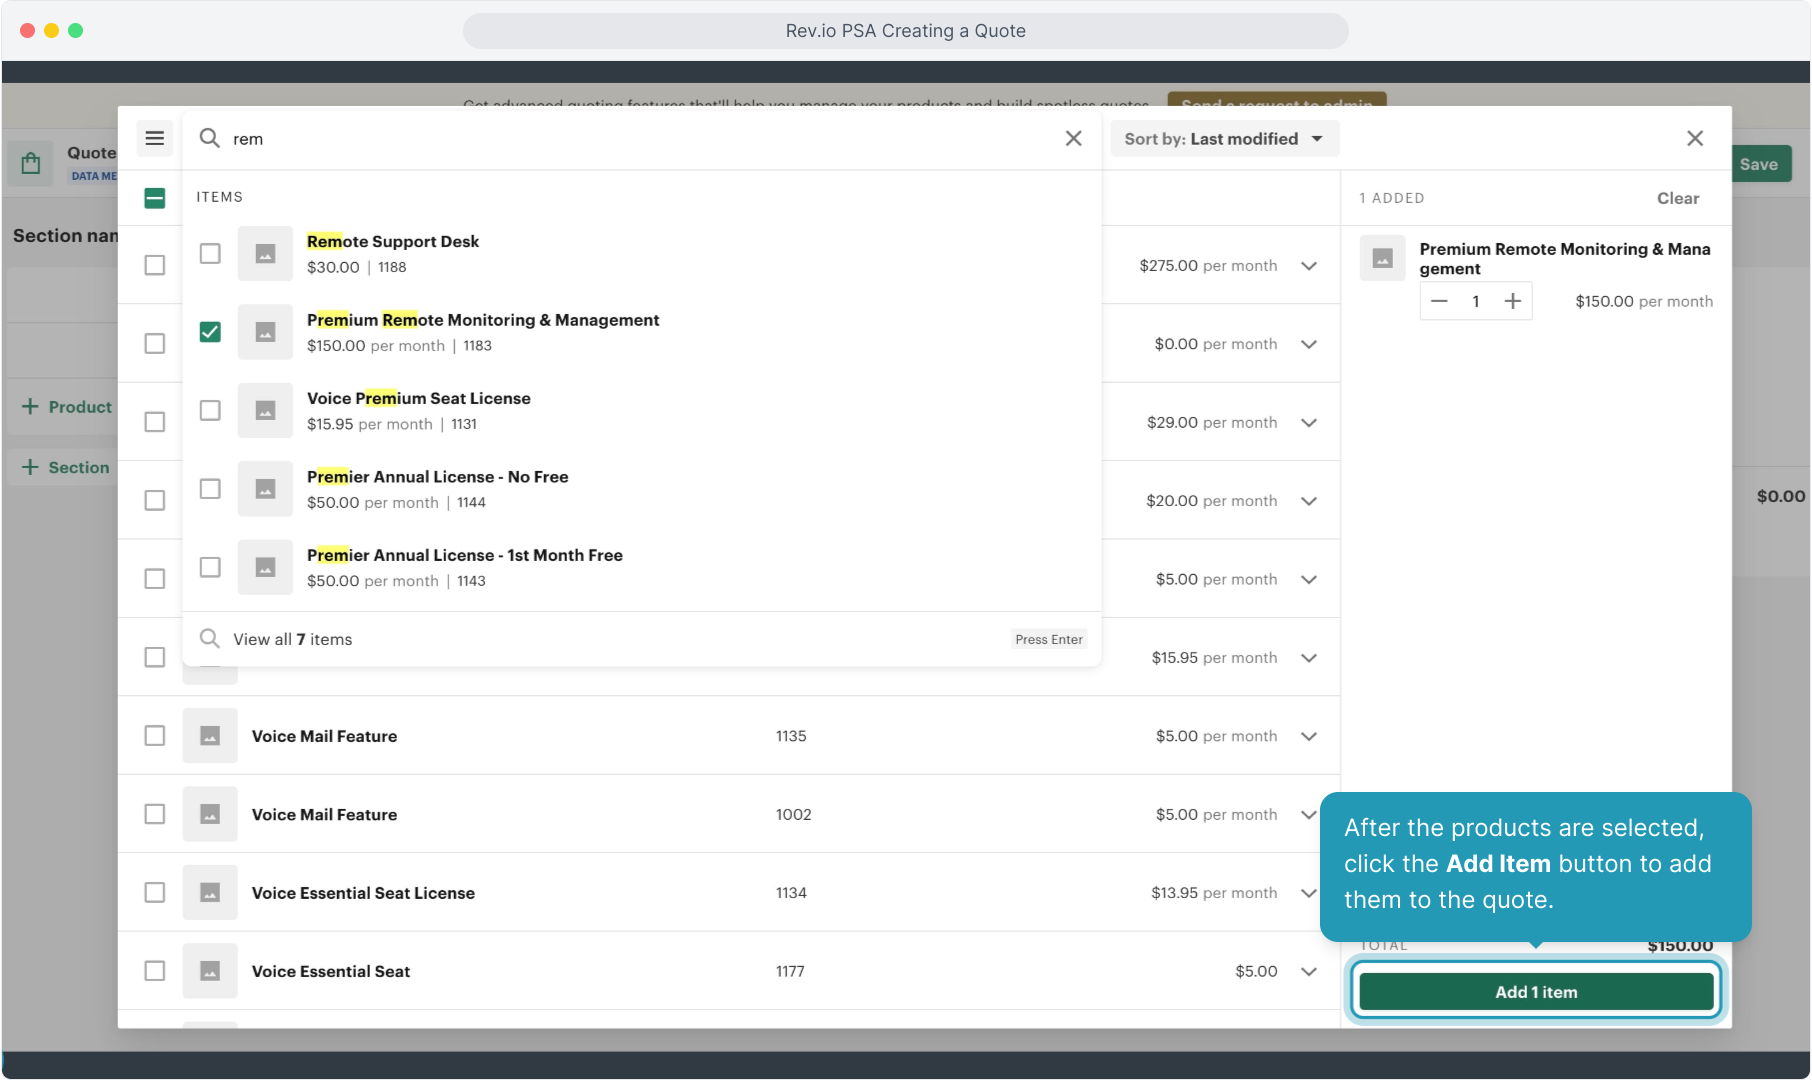
19. After the products are selected, click the Add Item button to add them to the quote.
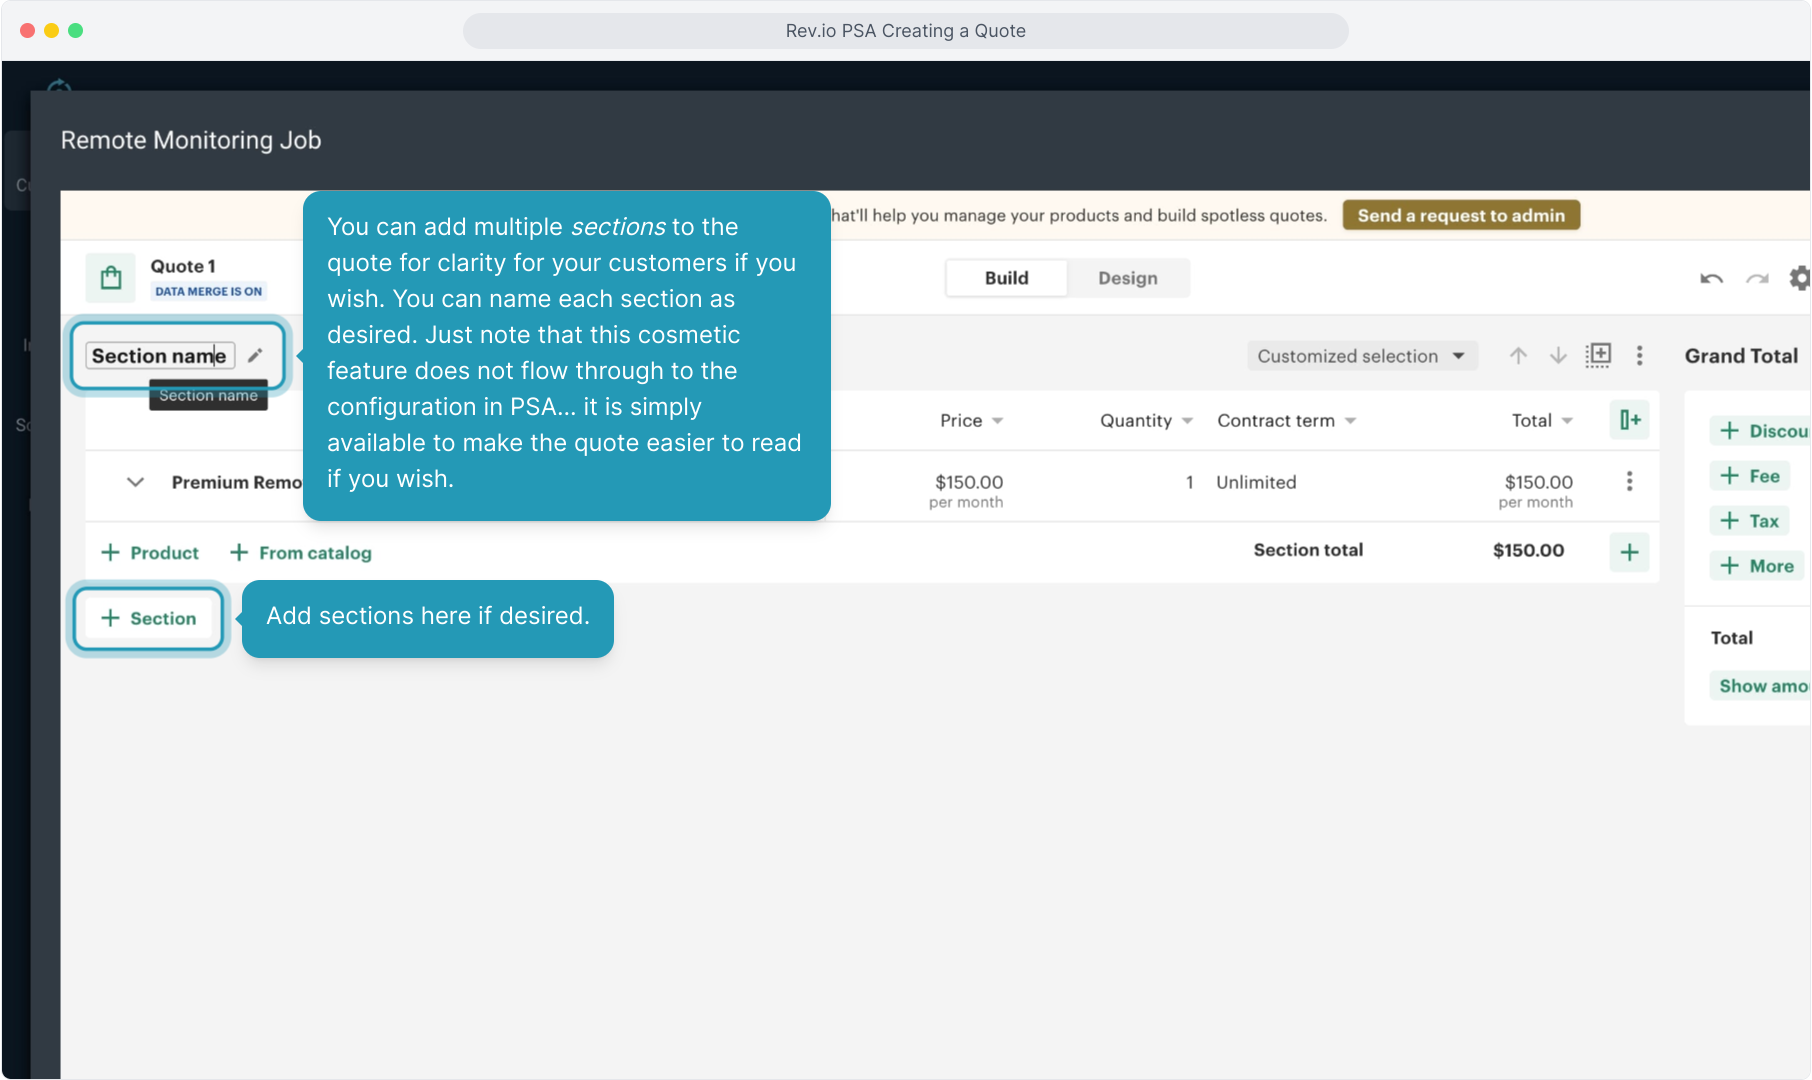
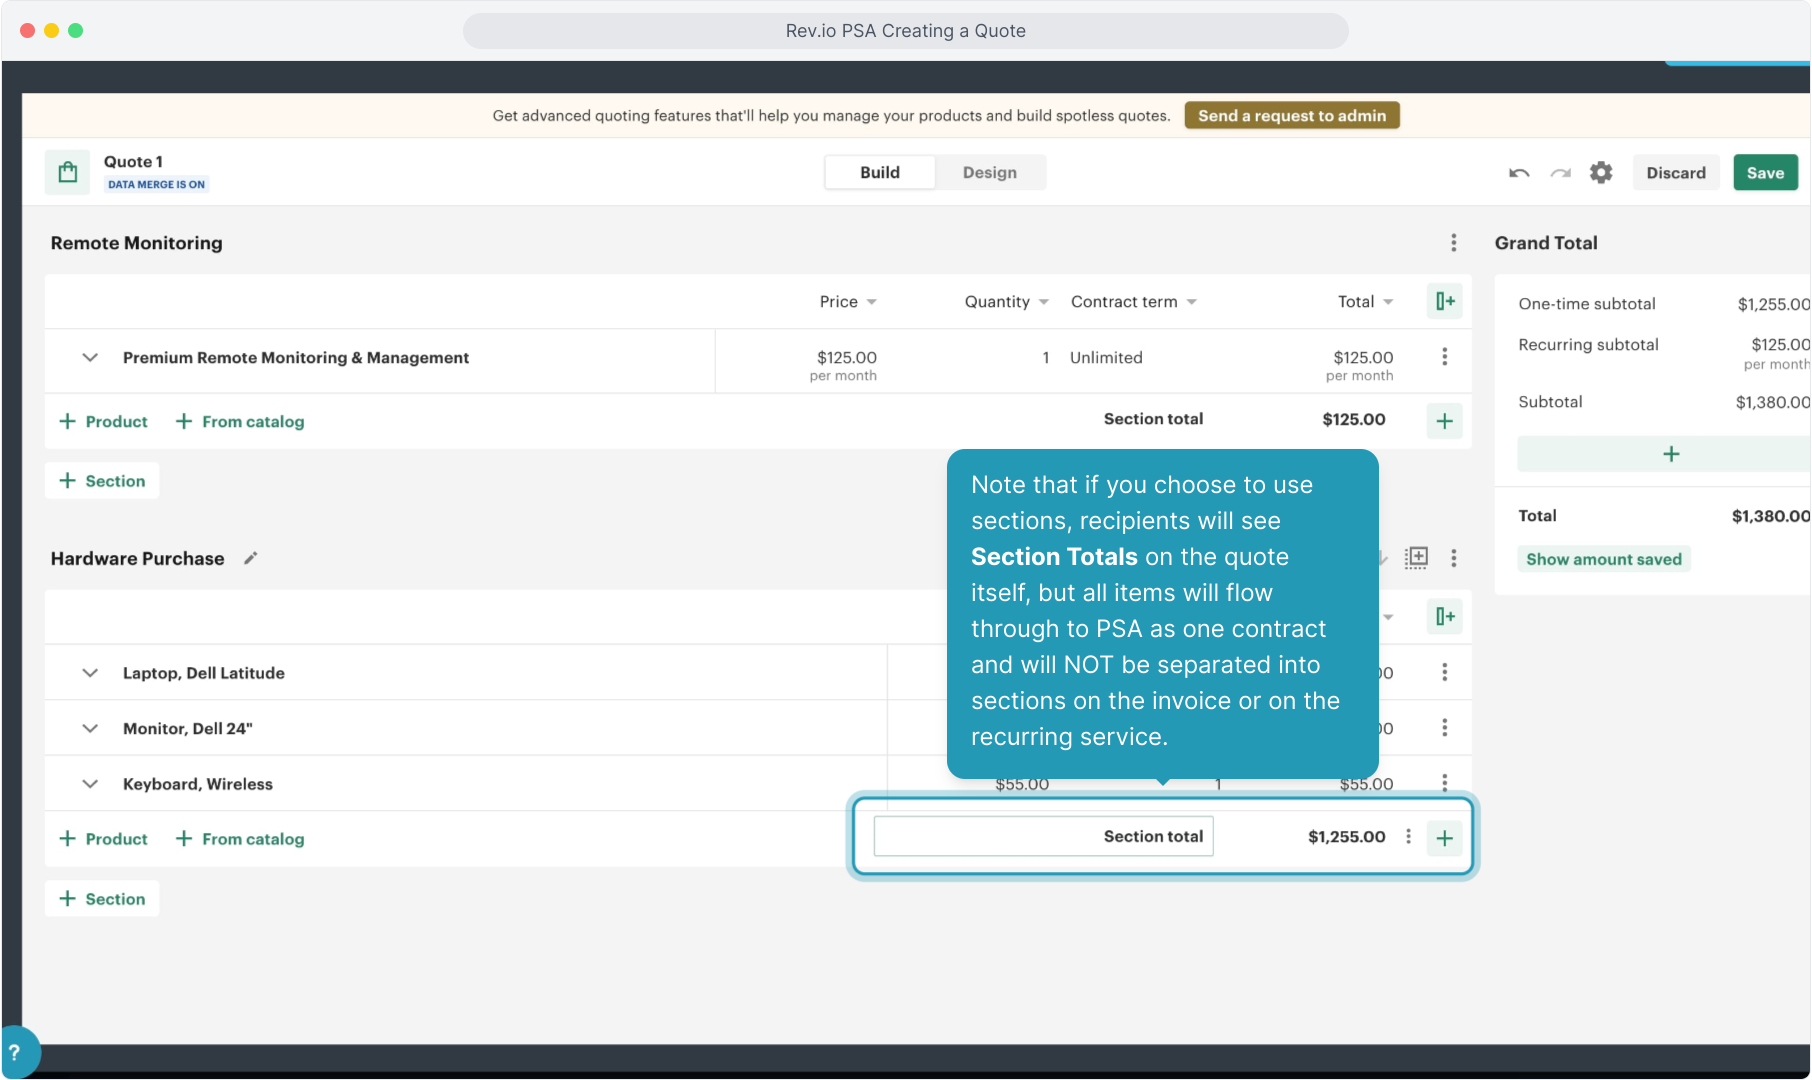
20. You can add multiple sections to the quote for clarity for your customers if you wish. You can name each section as desired. Just note that this cosmetic feature does not flow through to the configuration in PSA... it is simply available to make the quote easier to read if you wish.
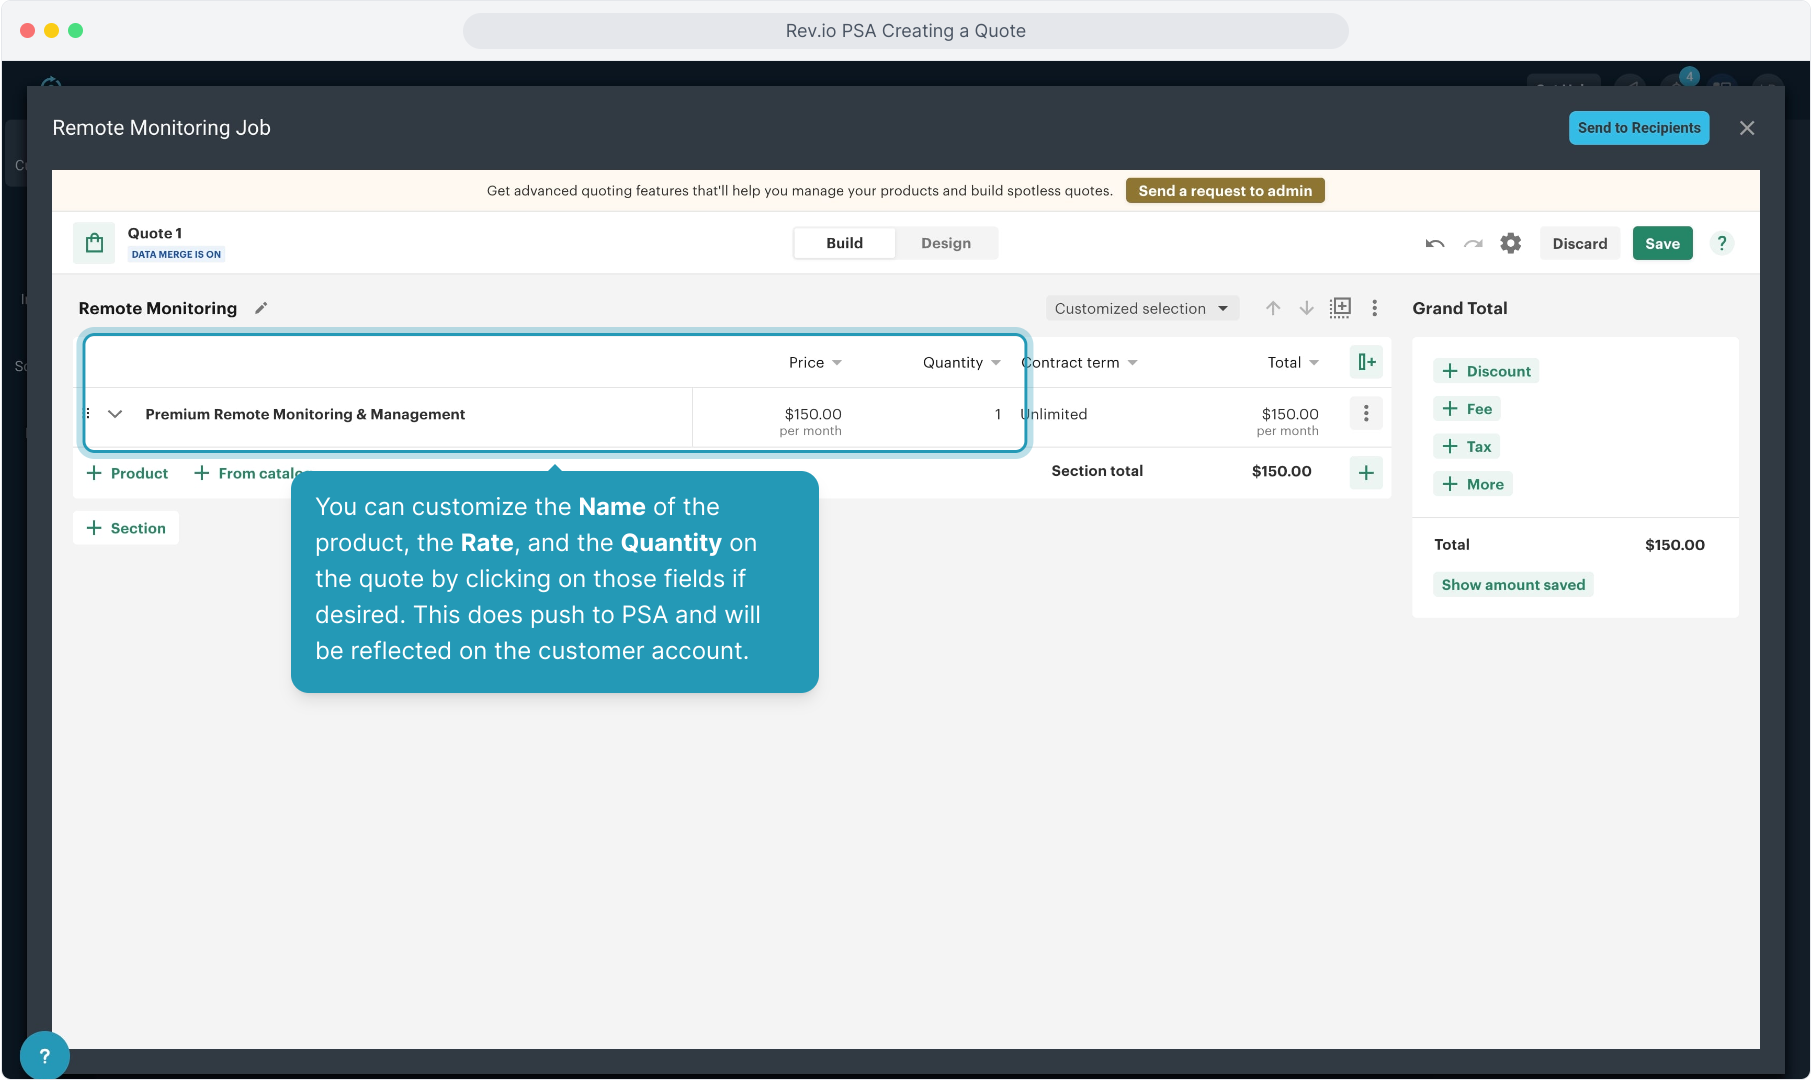
21. You can customize the Name of the product, the Rate, and the Quantity on the quote by clicking on those fields if desired. This does push to PSA and will be reflected on the customer account.
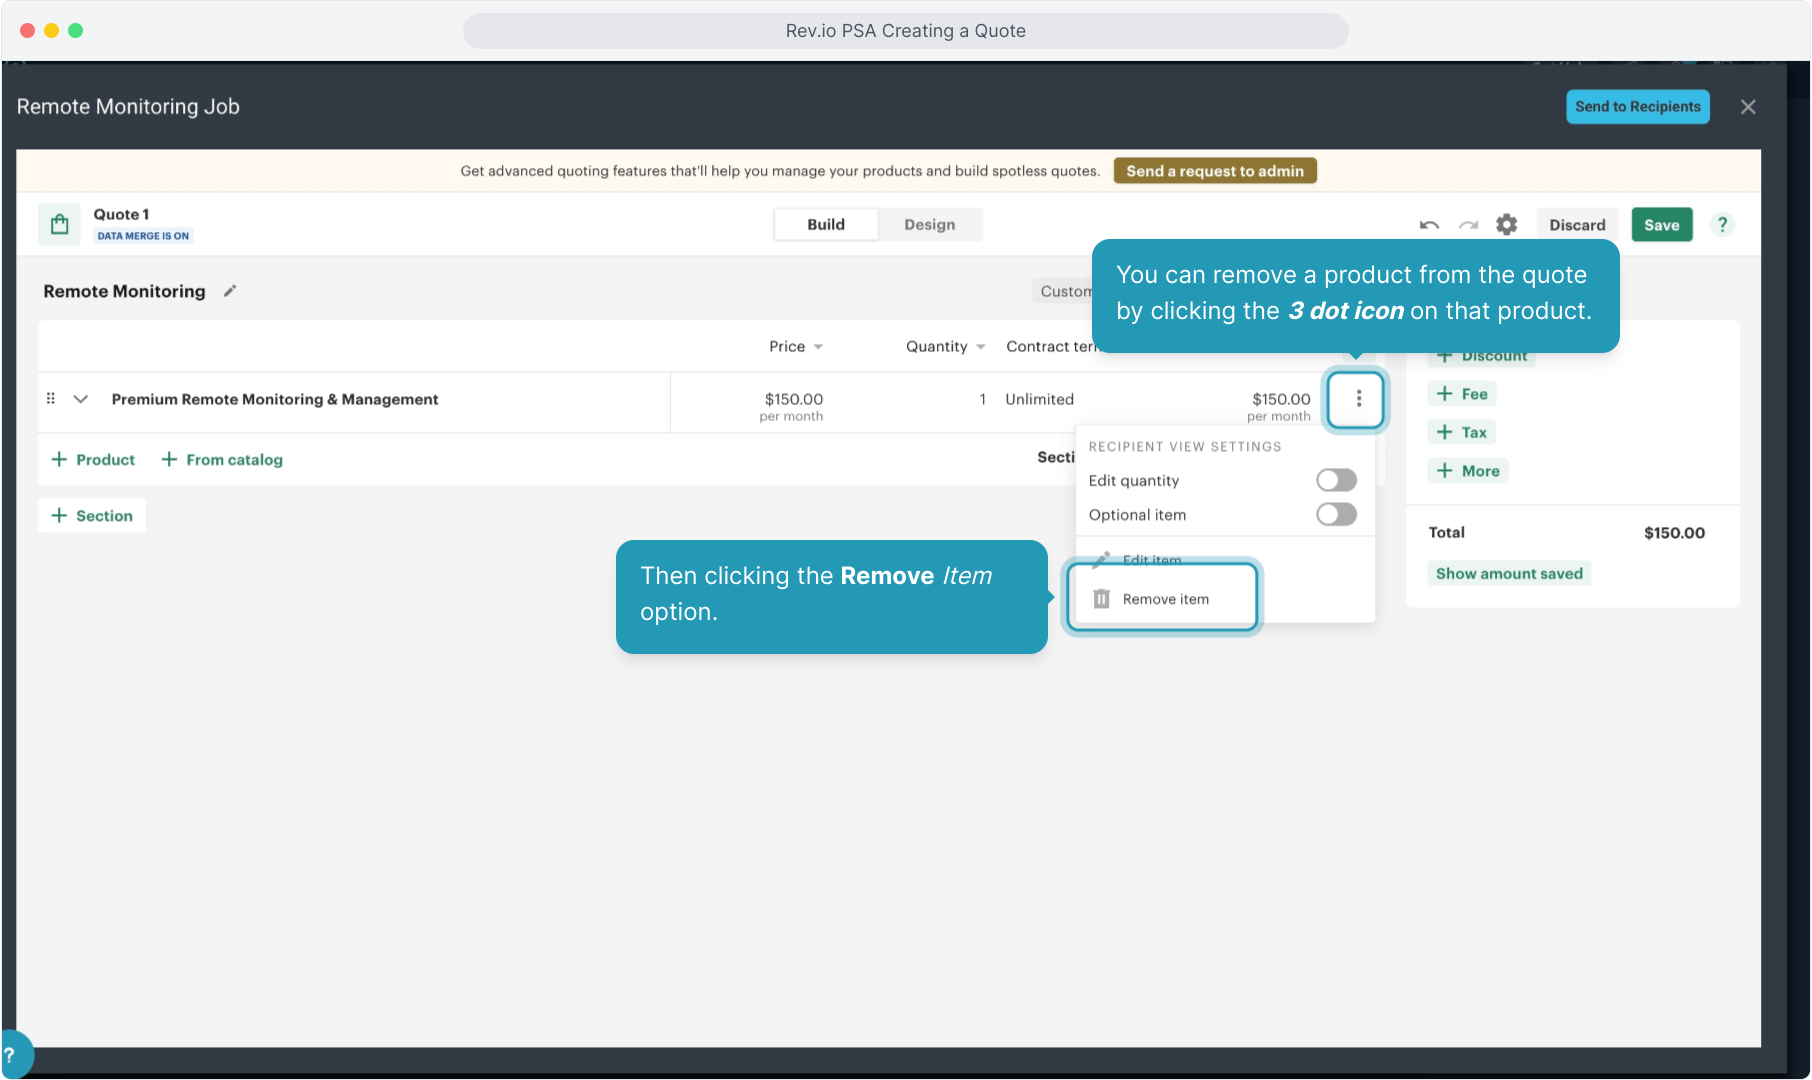
22. Then clicking the Remove Item option.
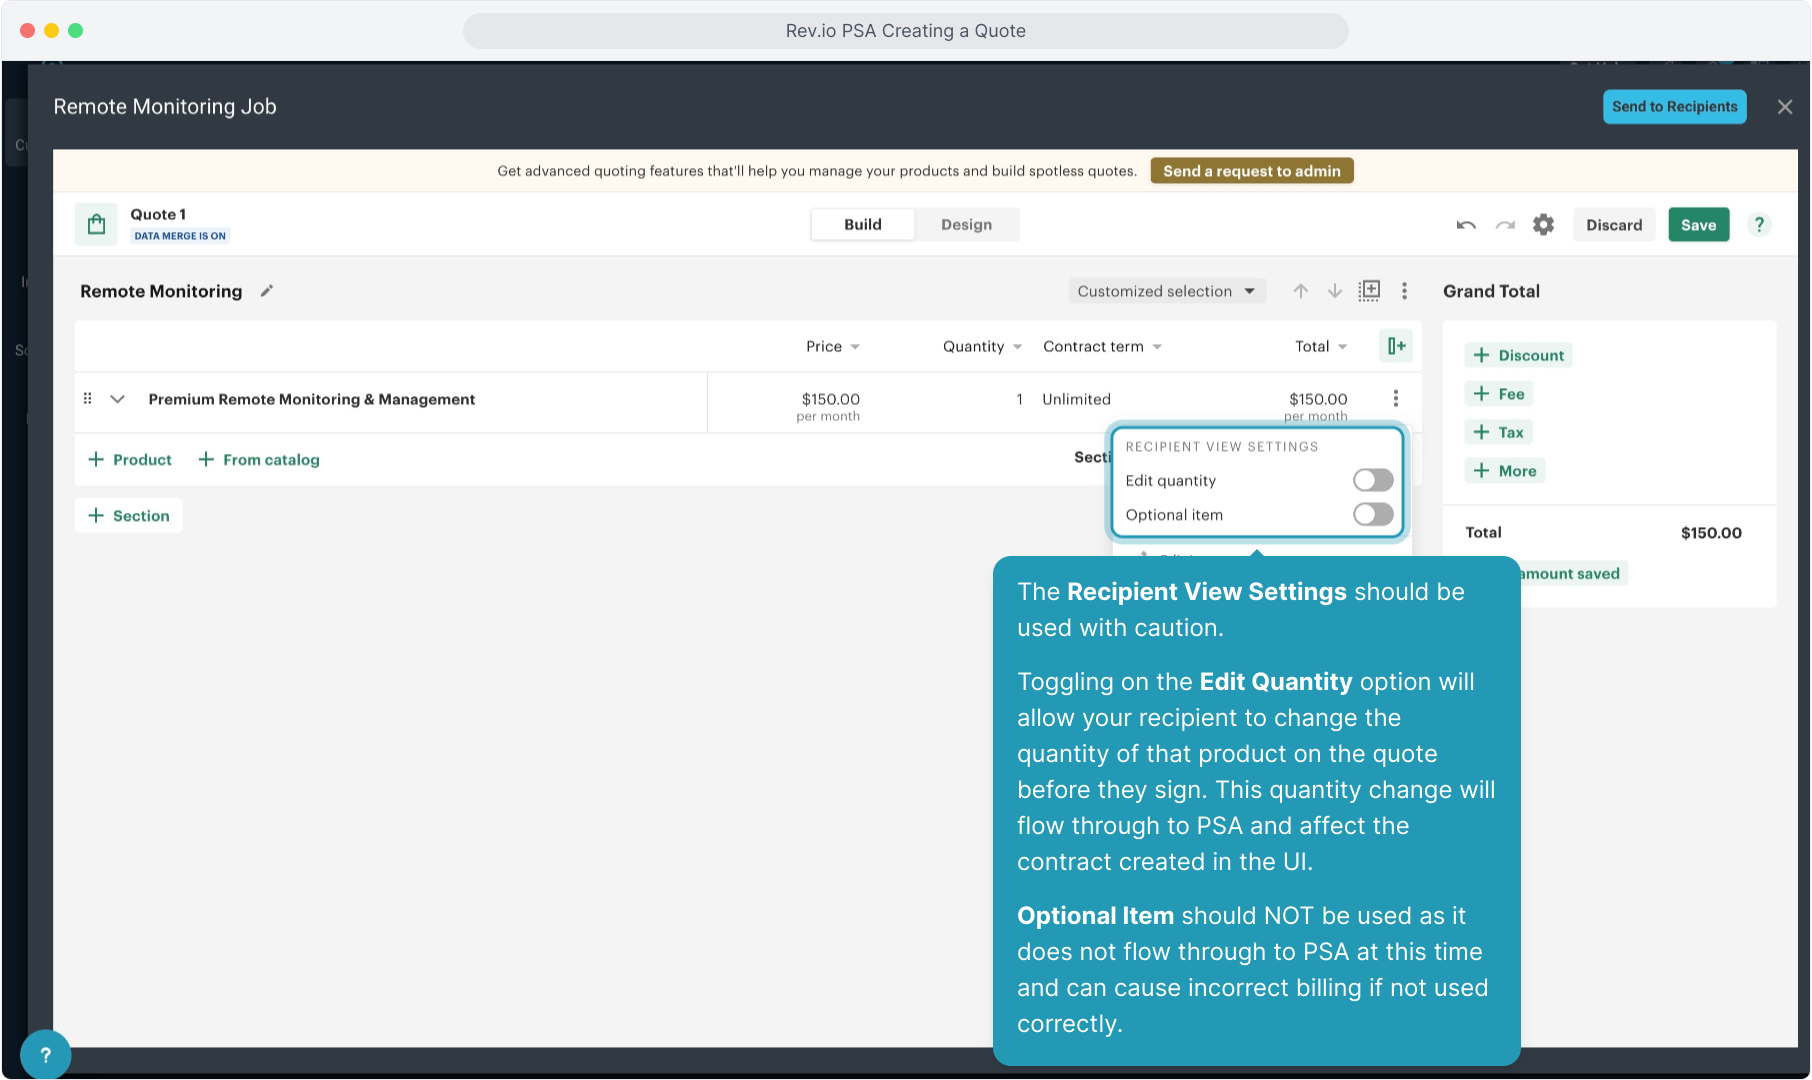
23. The Recipient View Settings should be used with caution.
Toggling on the Edit Quantity option will allow your recipient to change the quantity of that product on the quote before they sign. This quantity change will flow through to PSA and affect the contract created in the UI.
Optional Item should NOT be used as it does not flow through to PSA at this time and can cause incorrect billing if not used correctly.
24. Note that any additional detail you may add on the Edit Item option only shows on the quote and does NOT flow through to your contract in the UI as well.

25. Note that if you choose to use sections, recipients will see Section Totals on the quote itself, but all items will flow through to PSA as one contract and will NOT be separated into sections on the invoice or on the recurring service.
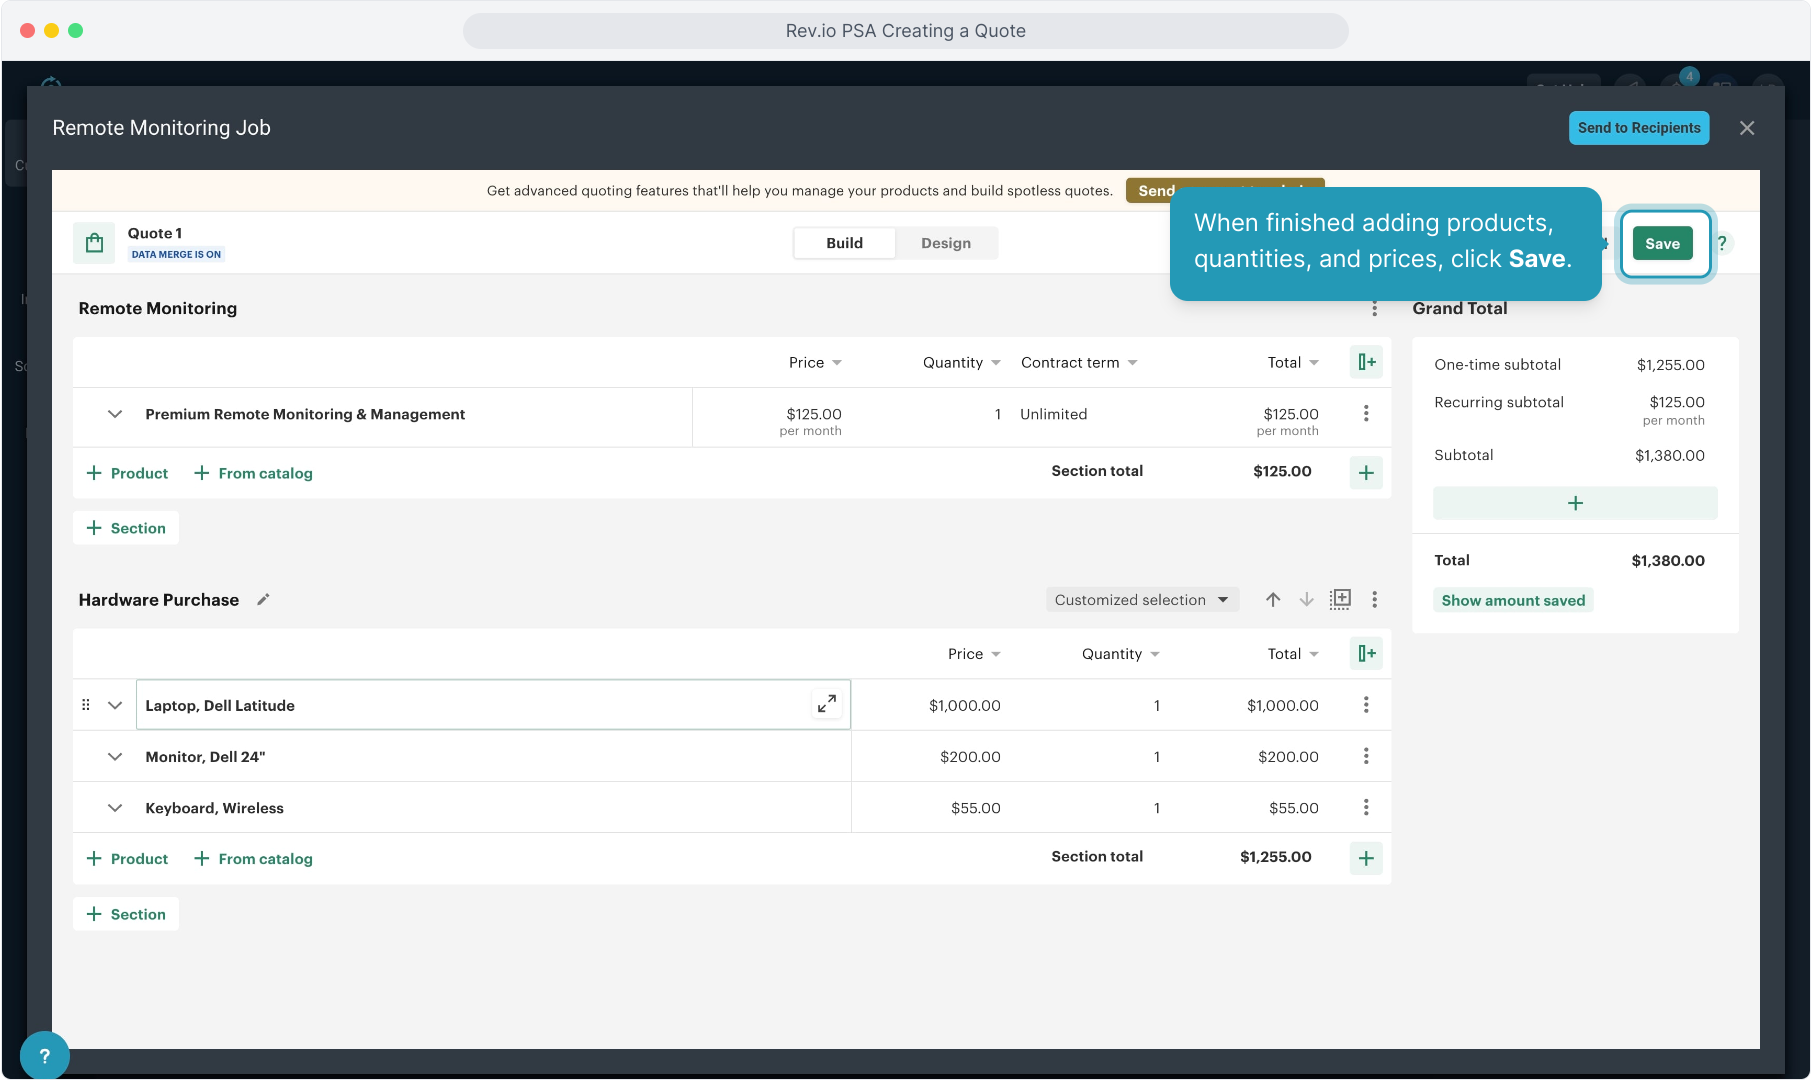
26. When finished adding products, quantities, and prices, click Save.
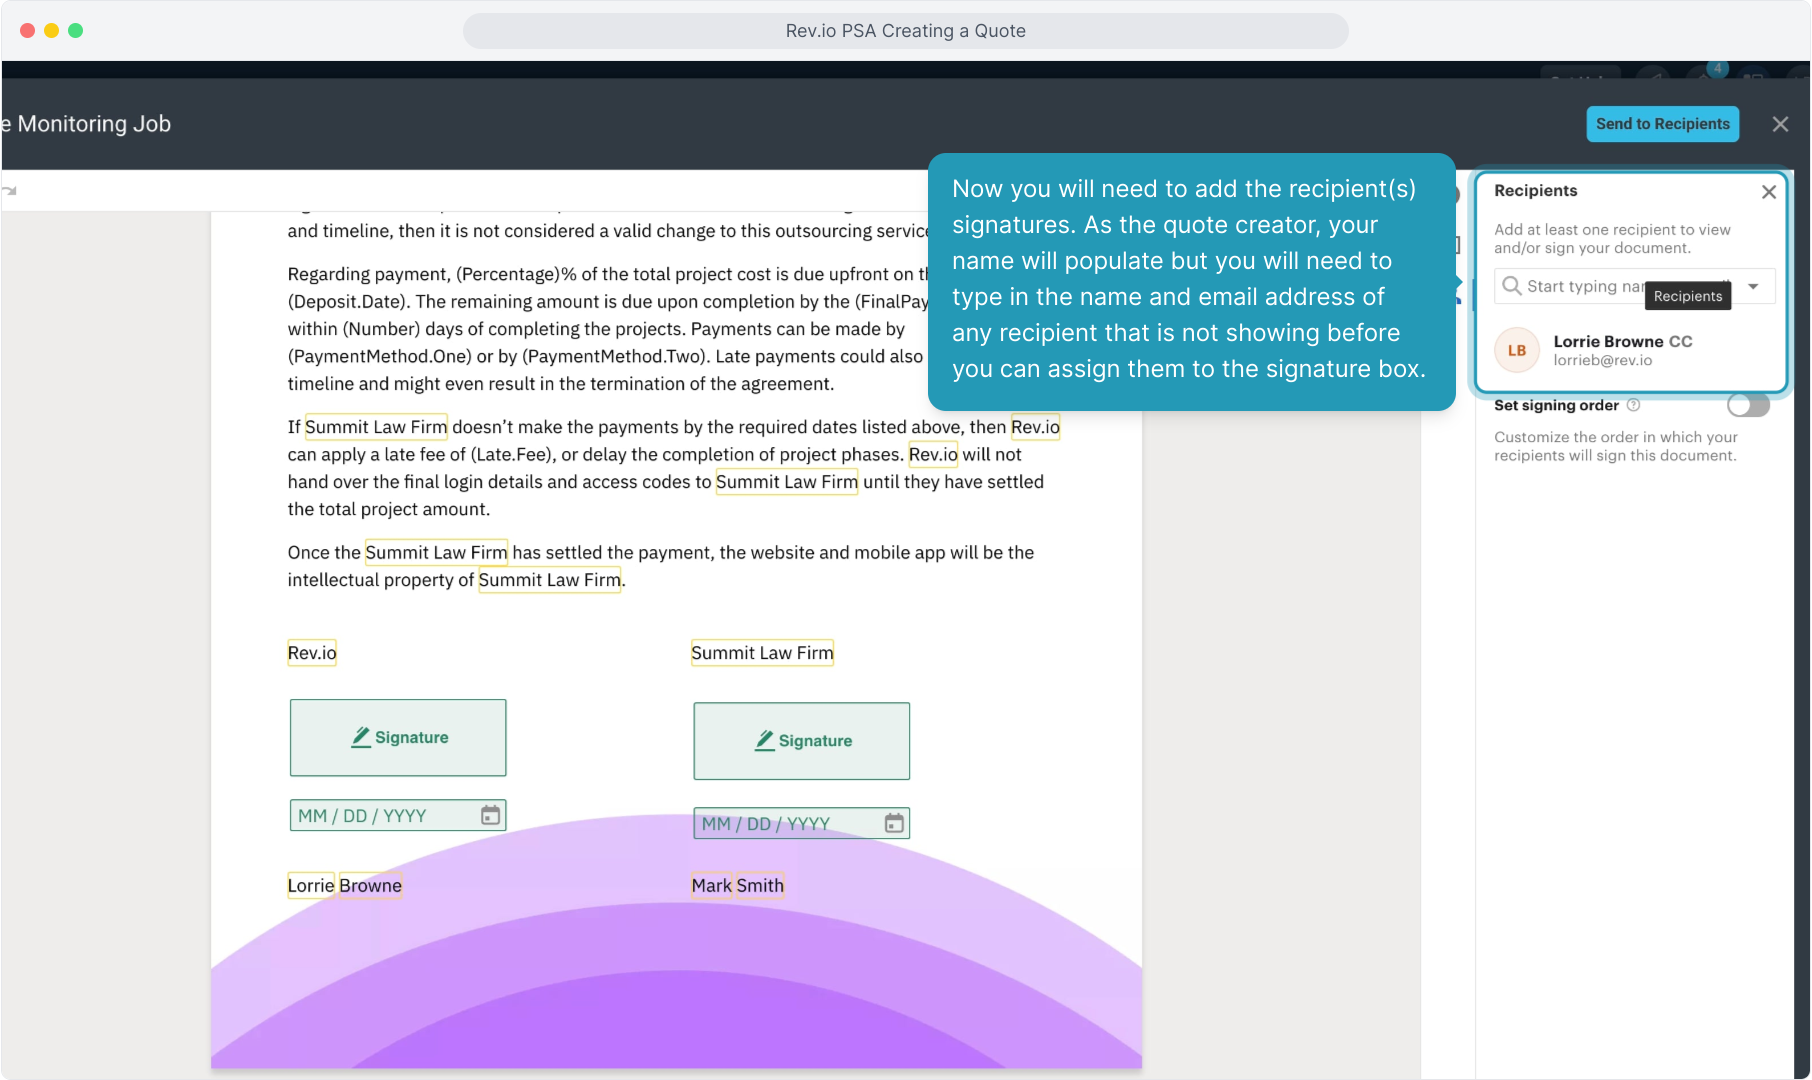
27. Now you will need to add the recipient(s) signatures. As the quote creator, your name will populate but you will need to type in the name and email address of any recipient that is not showing before you can assign them to the signature box.
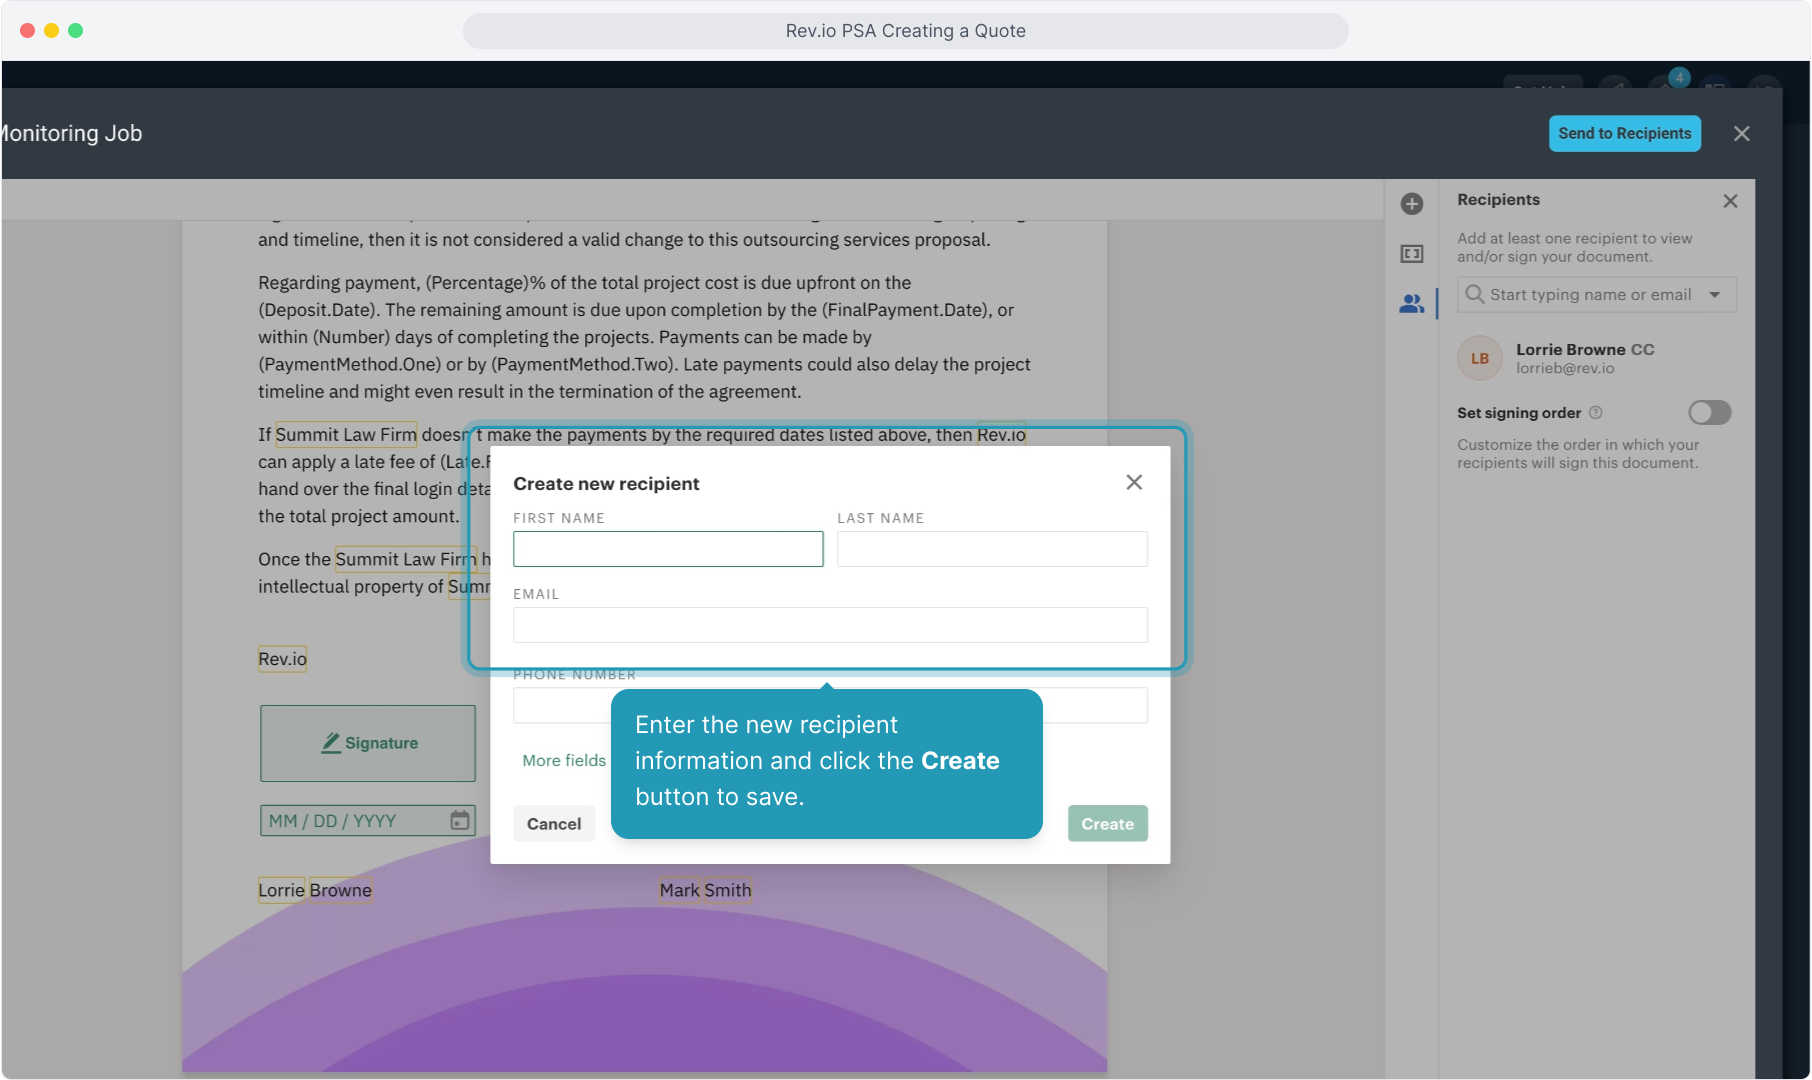
28. Enter the new recipient information and click the Create button to save.
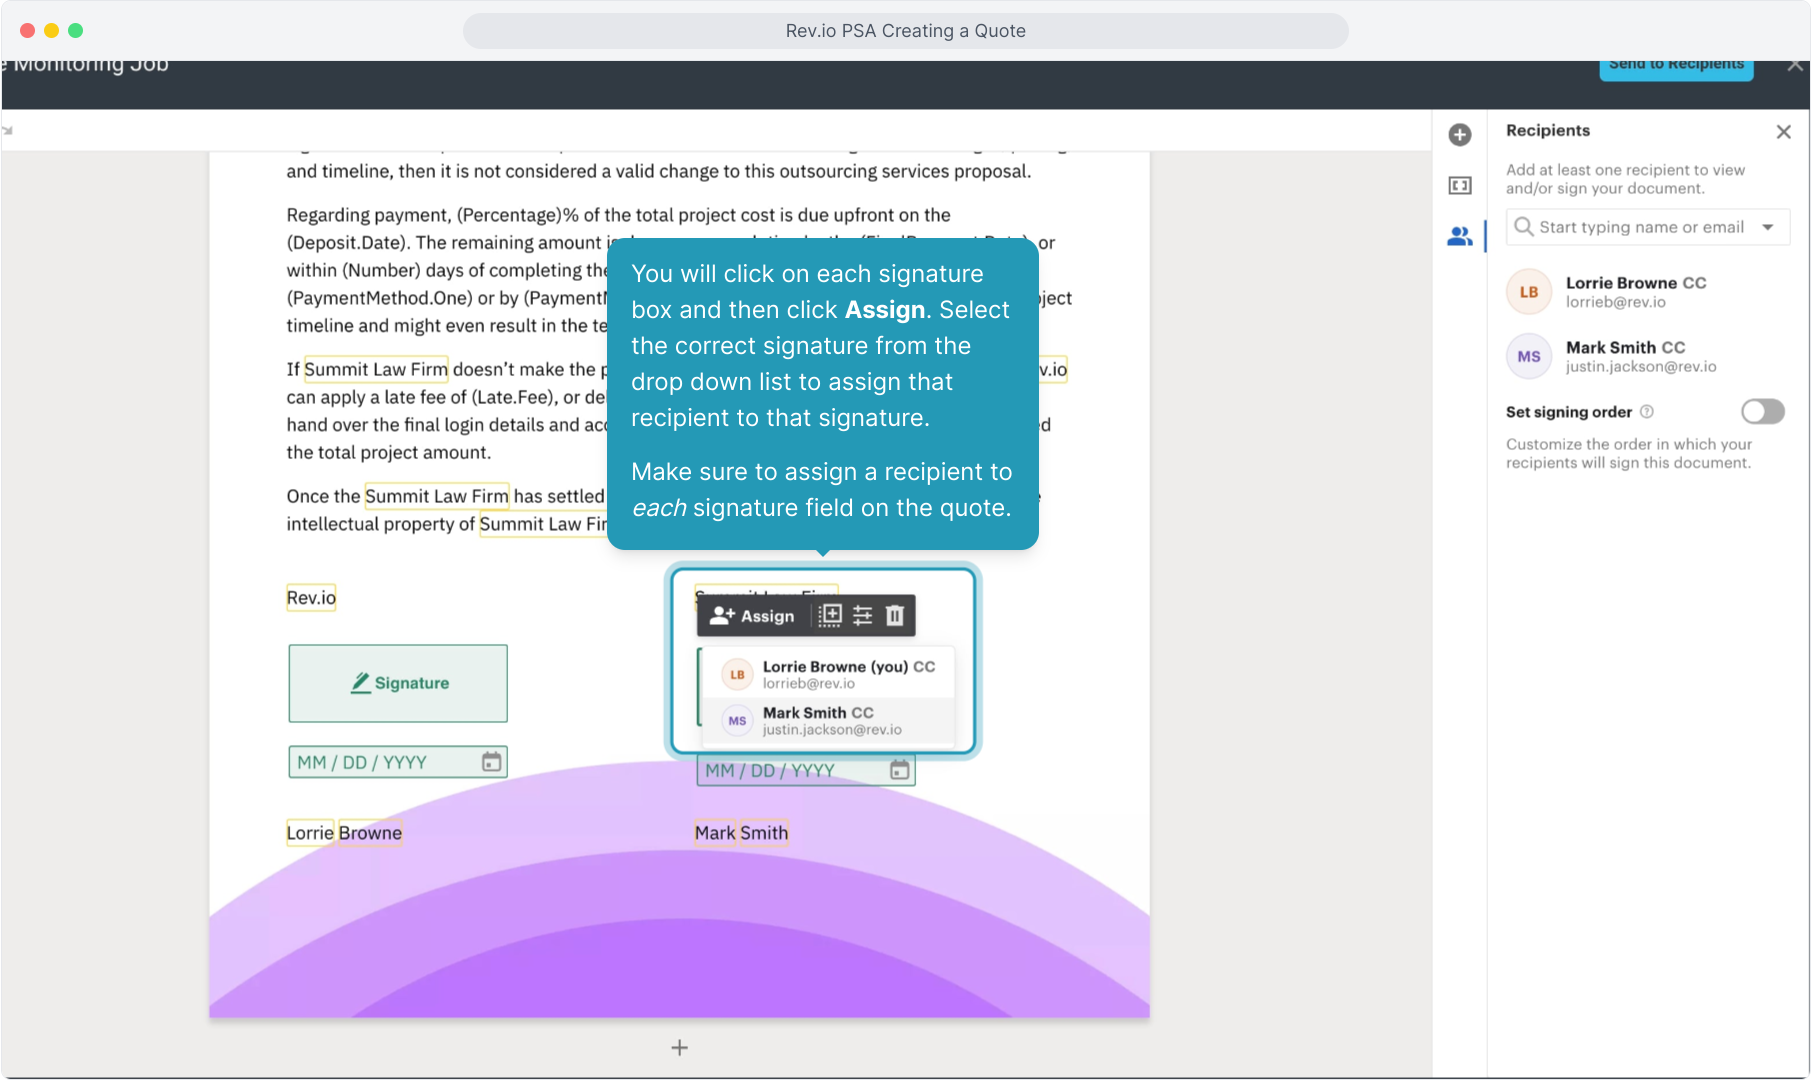
29. You will click on each signature box and then click Assign. Select the correct signature from the drop down list to assign that recipient to that signature.
Make sure to assign a recipient to each signature field on the quote.
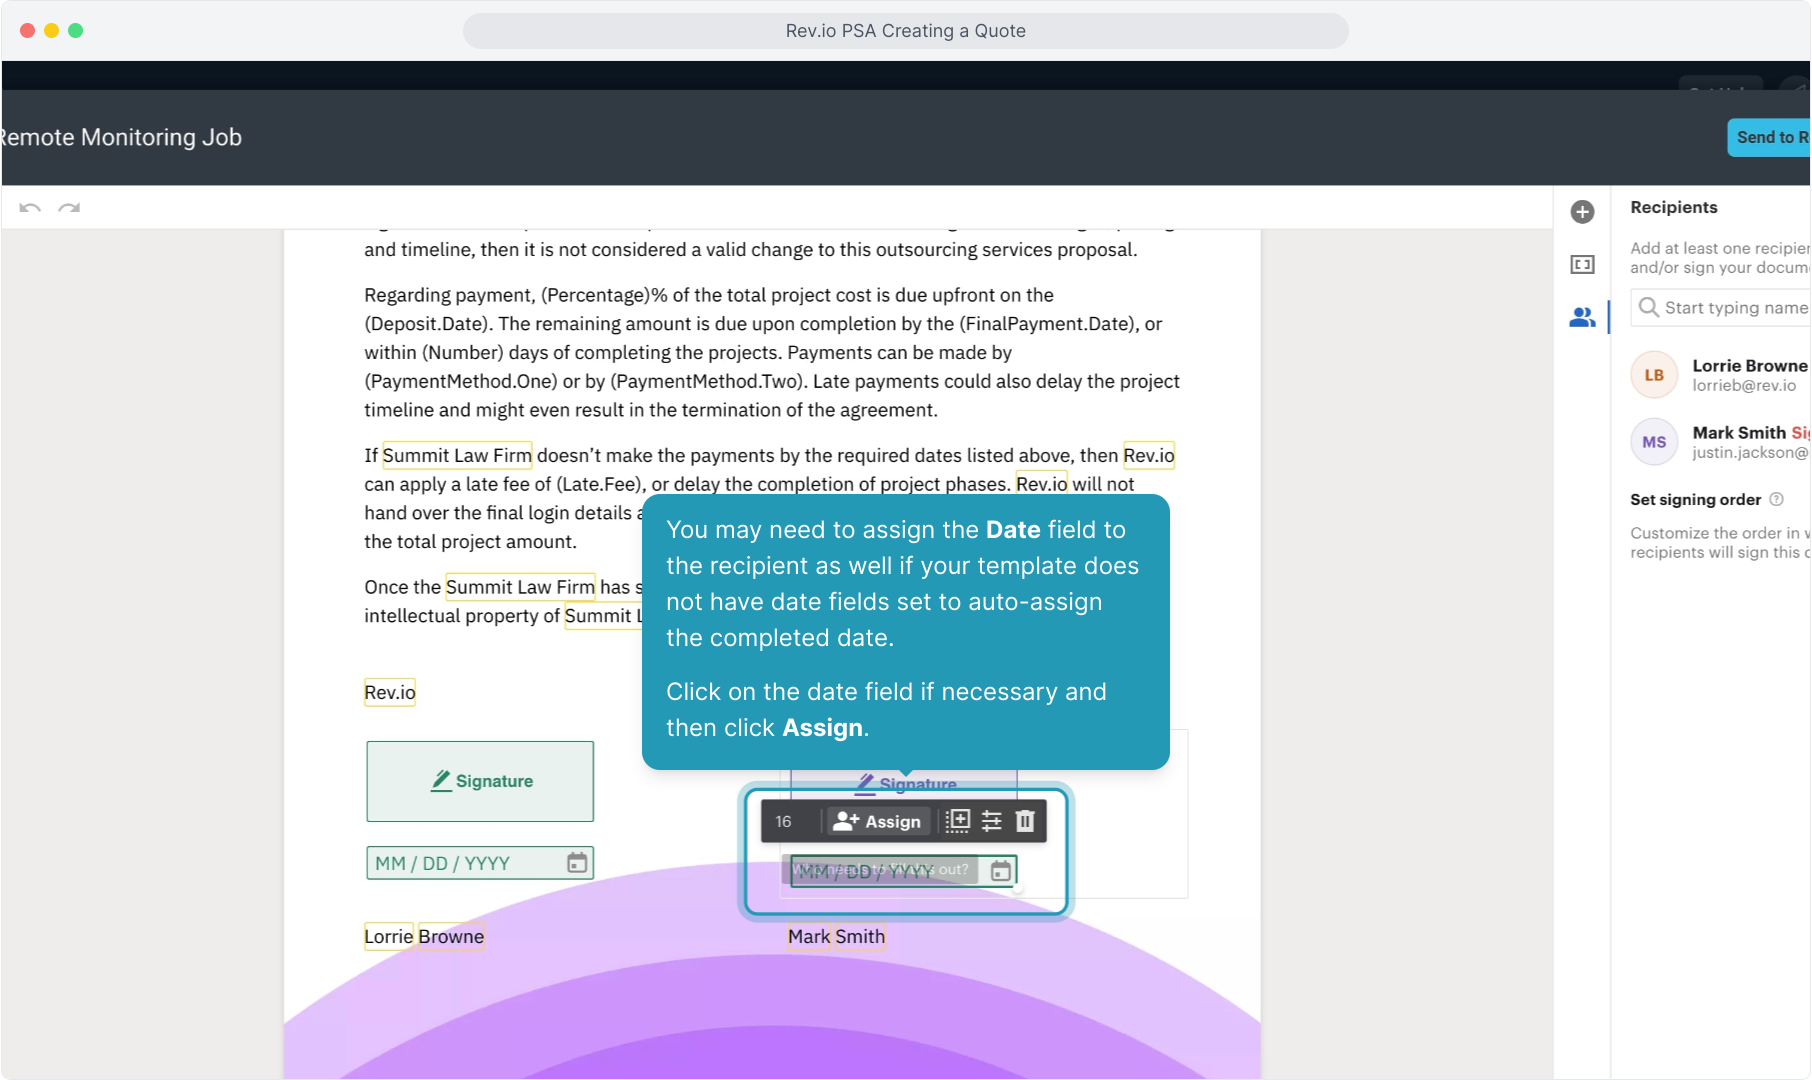
30. You may need to assign the Date field to the recipient as well if your template does not have date fields set to auto-assign the completed date.
Click on the date field if necessary and then click Assign.
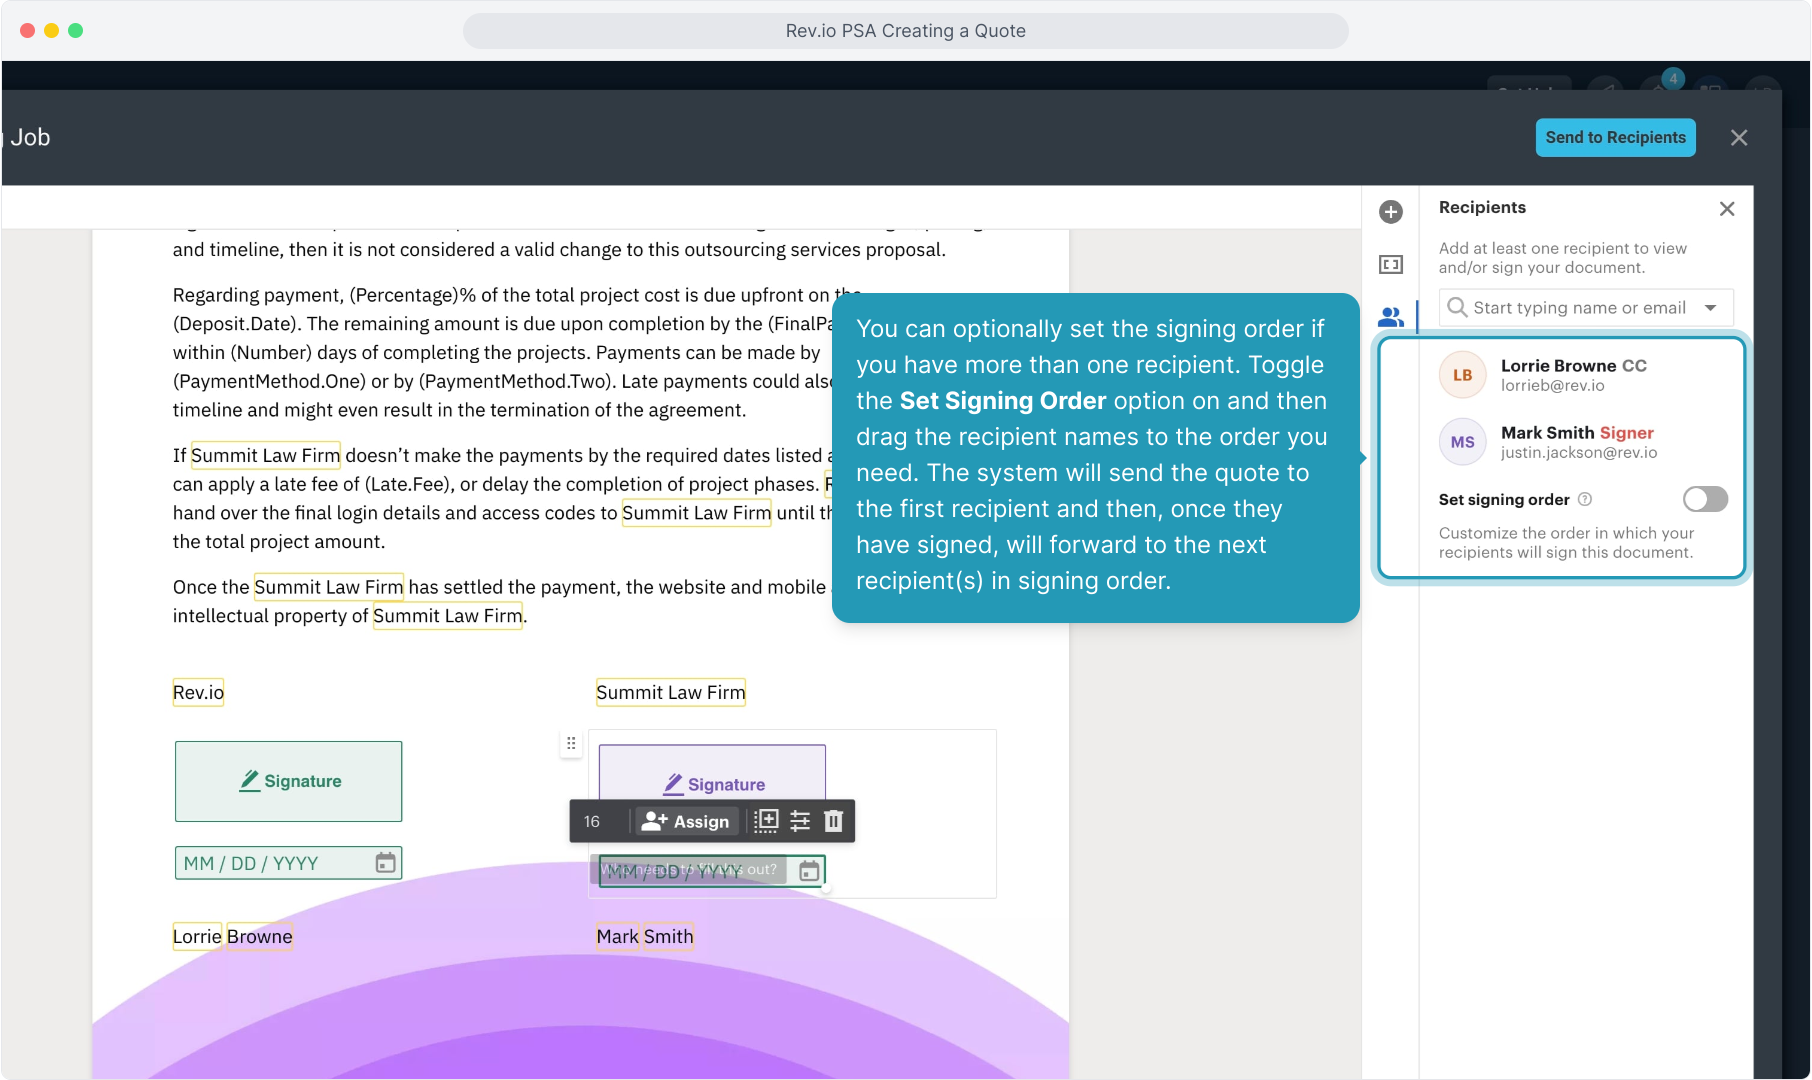
31. You can optionally set the signing order if you have more than one recipient. Toggle the Set Signing Order option on and then drag the recipient names to the order you need. The system will send the quote to the first recipient and then, once they have signed, will forward to the next recipient(s) in signing order.
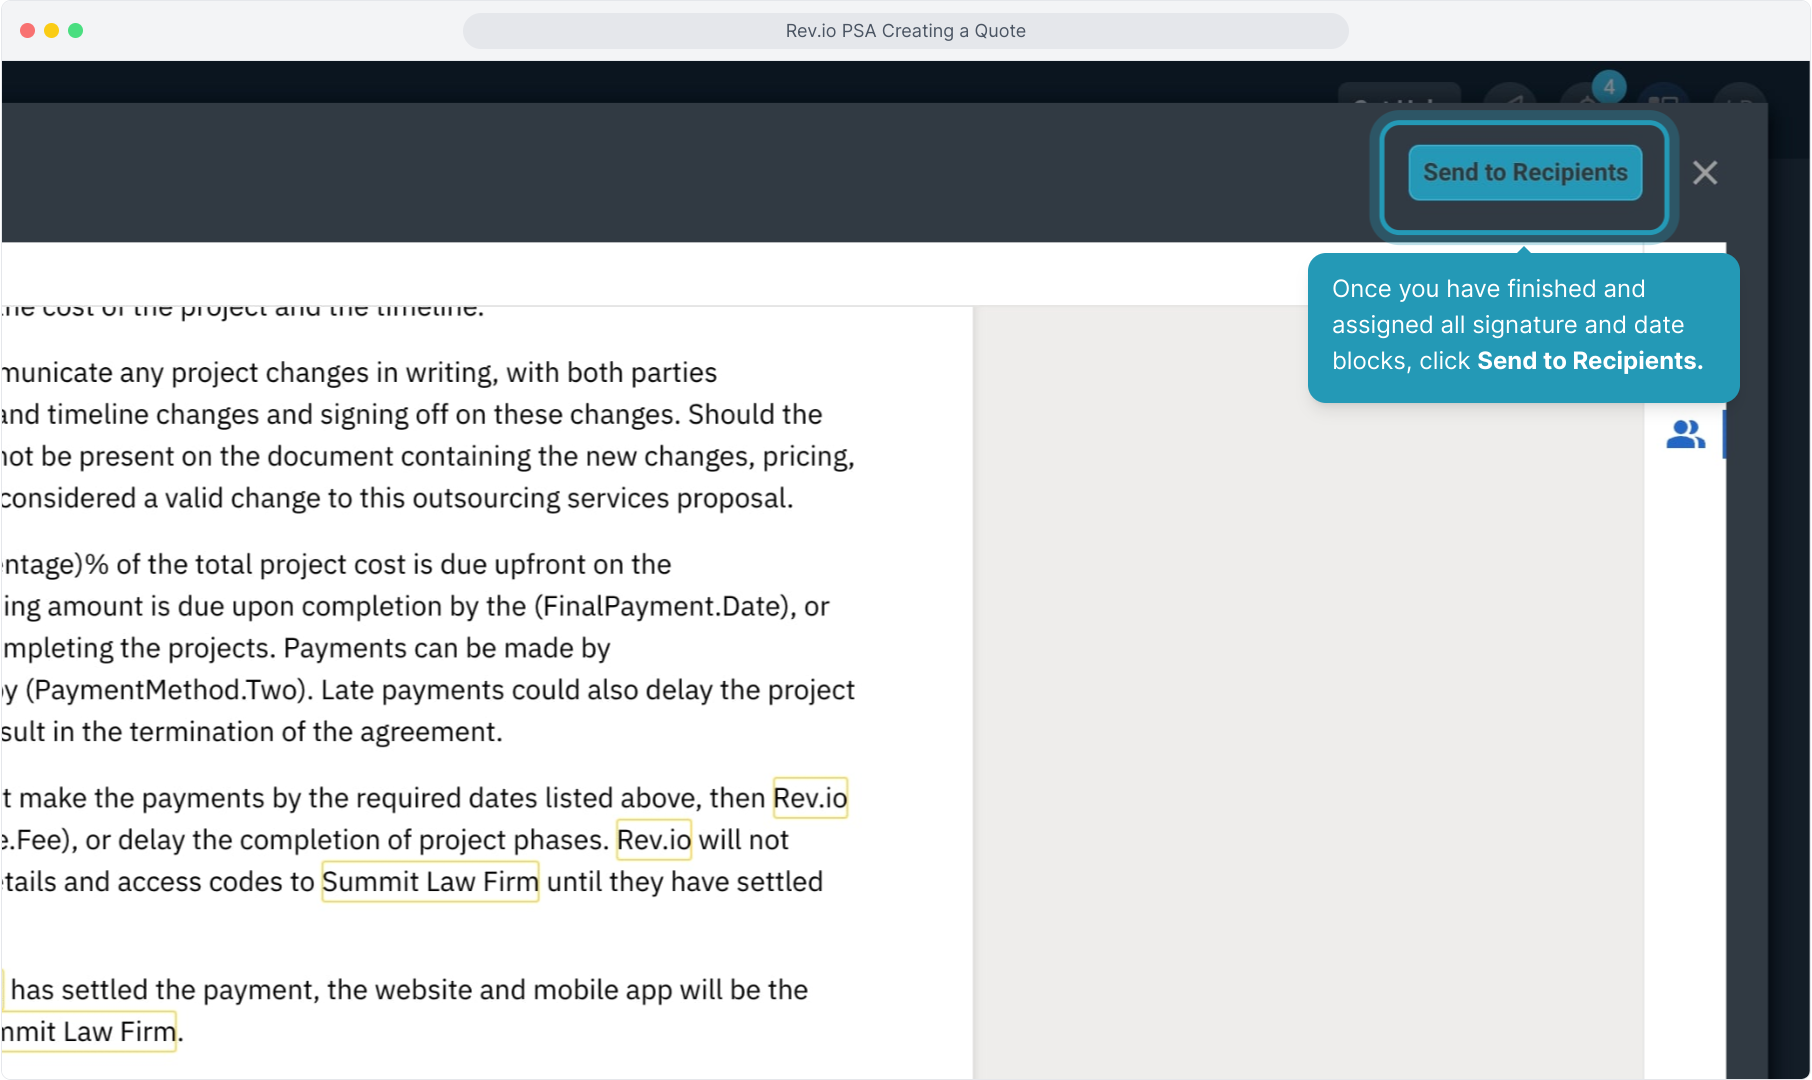
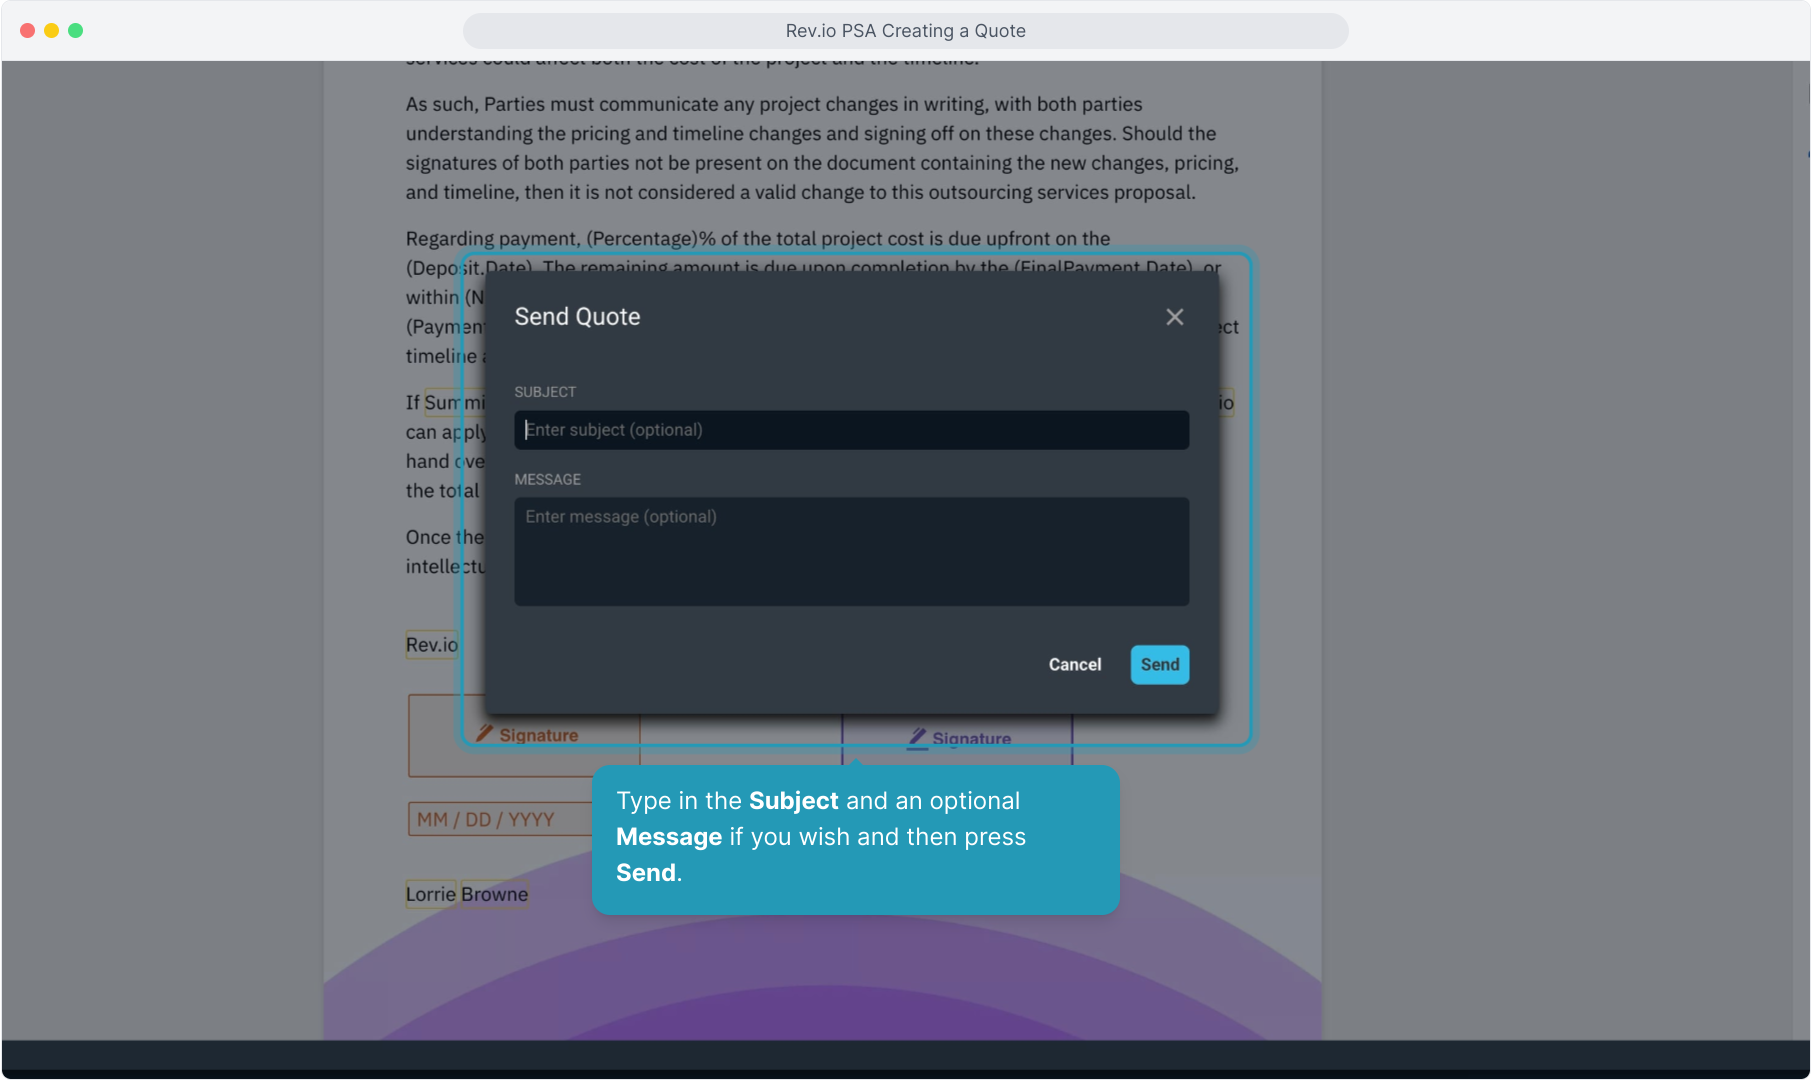
32. Once you have finished and assigned all signature and date blocks, click Send to Recipients.
33. Type in the Subject and an optional Message if you wish and then press Send.
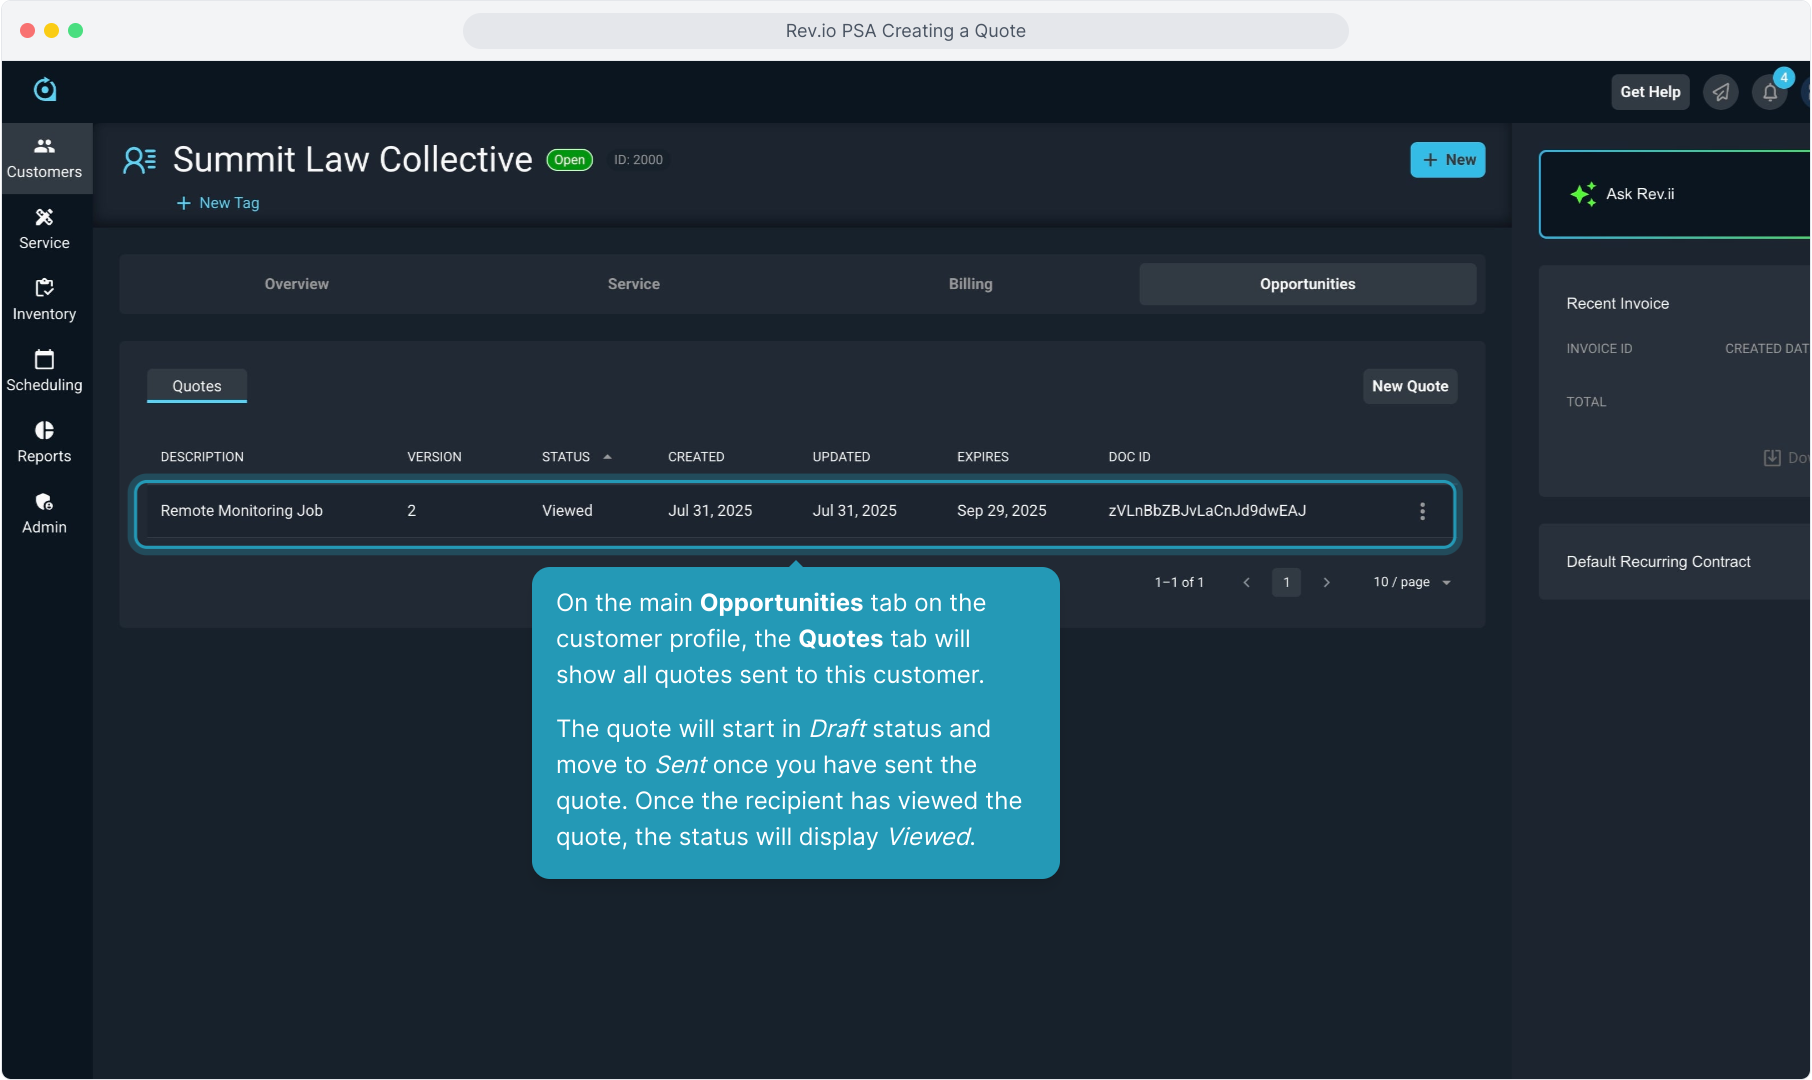
34. On the main Opportunities tab on the customer profile, the Quotes tab will show all quotes sent to this customer.
The quote will start in Draft status and move to Sent once you have sent the quote. Once the recipient has viewed the quote, the status will display Viewed.
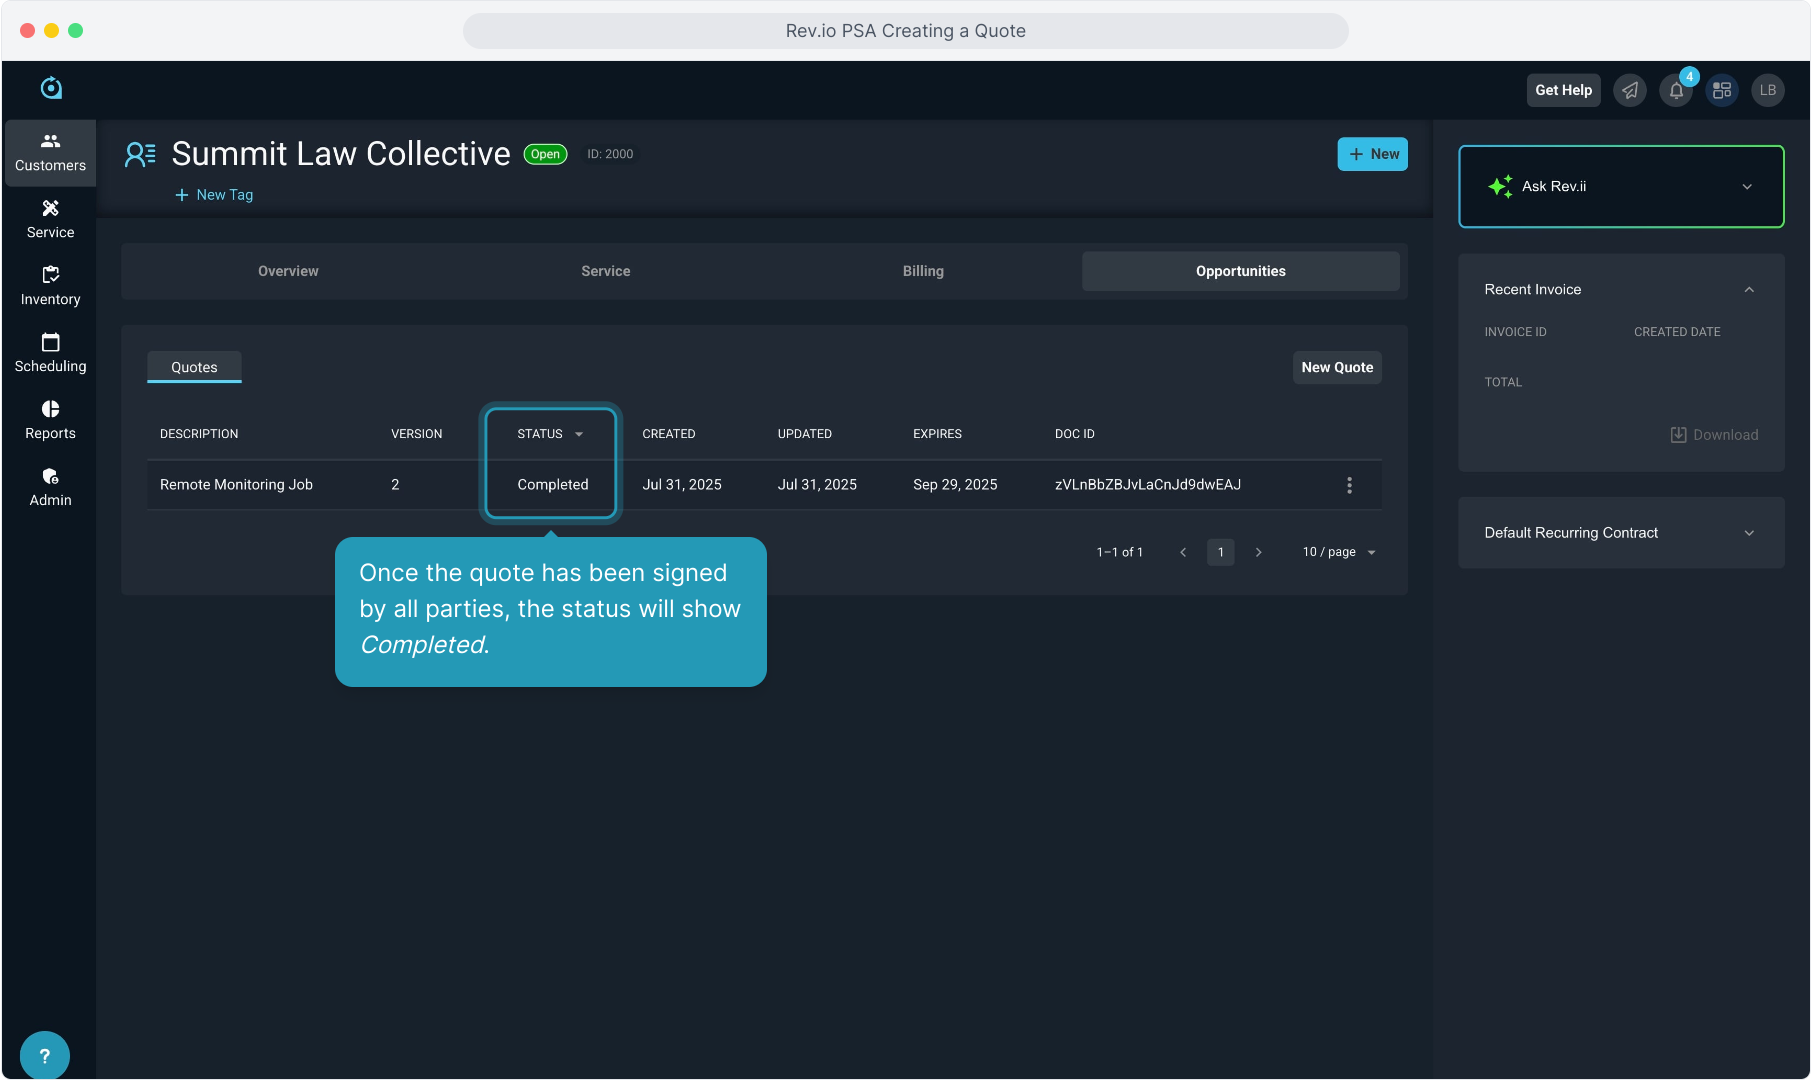
35. Once the quote has been signed by all parties, the status will show Completed.
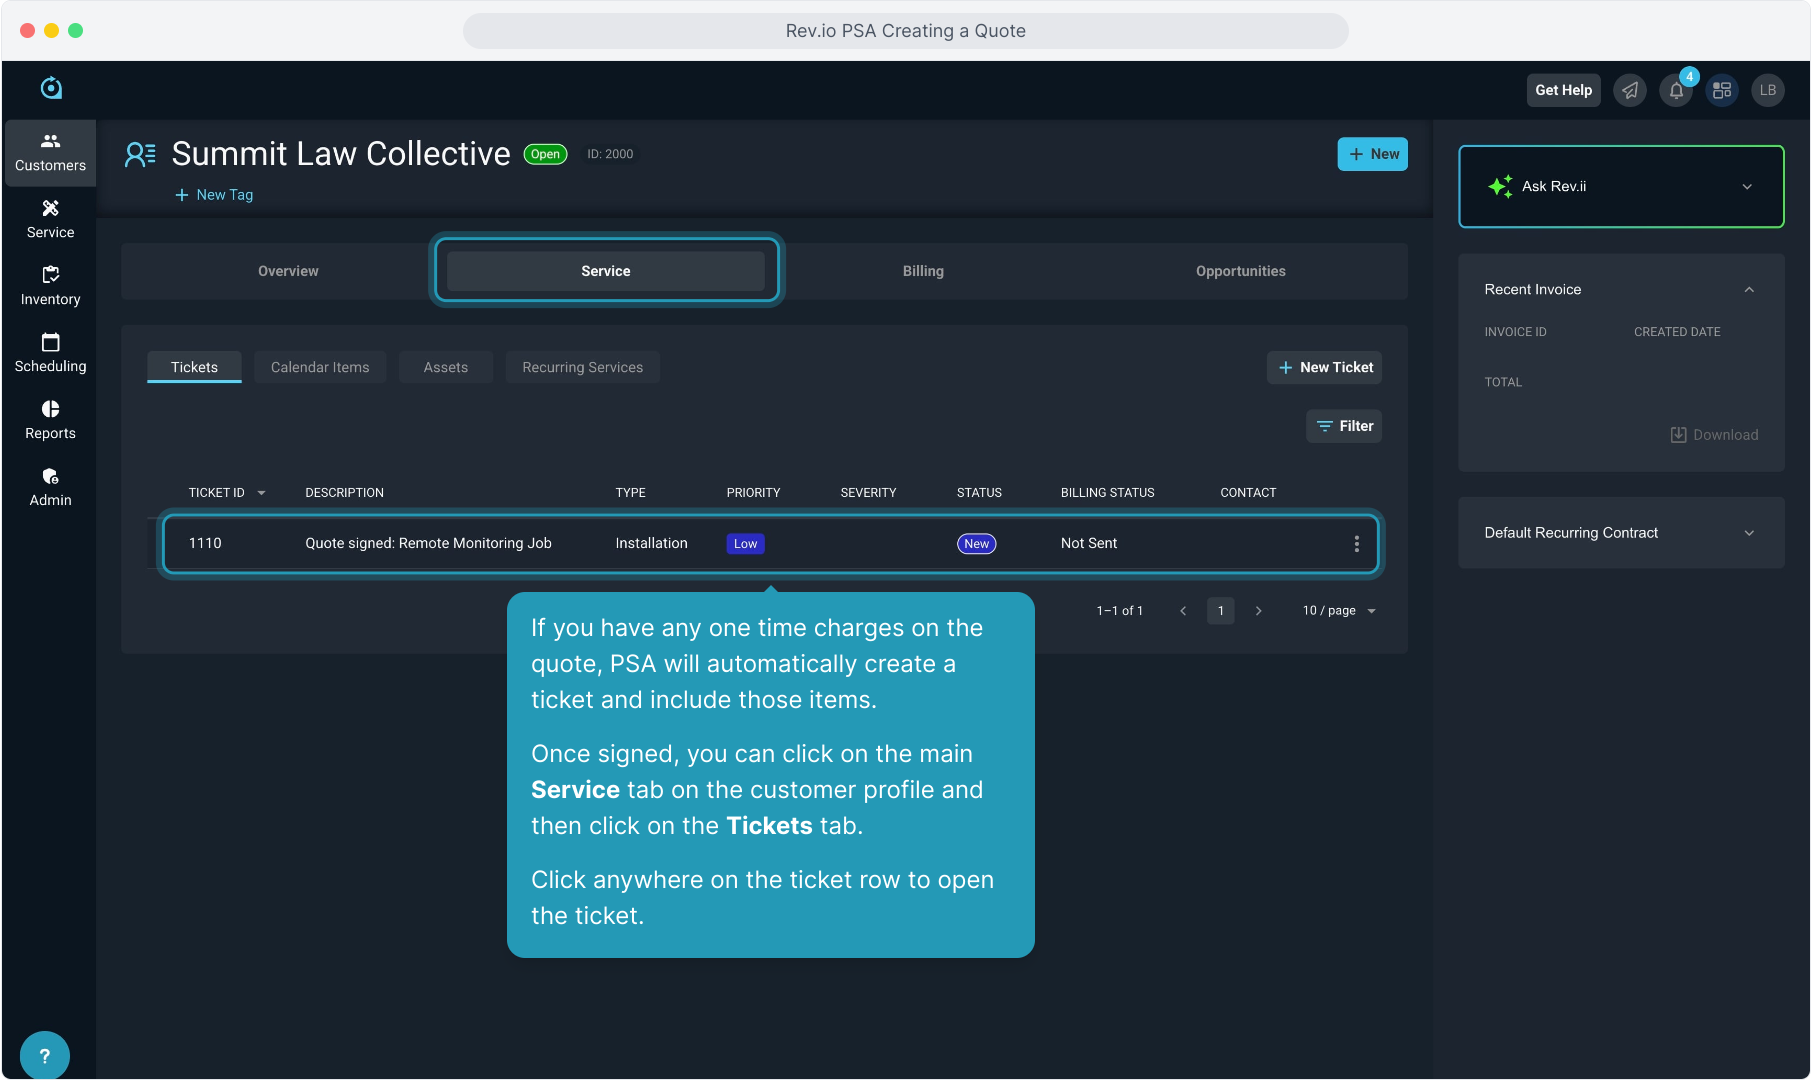
36. If you have any one time charges on the quote, PSA will automatically create a ticket and include those items.
Once signed, you can click on the main Service tab on the customer profile and then click on the Tickets tab.
Click on the ticket row to open the ticket.
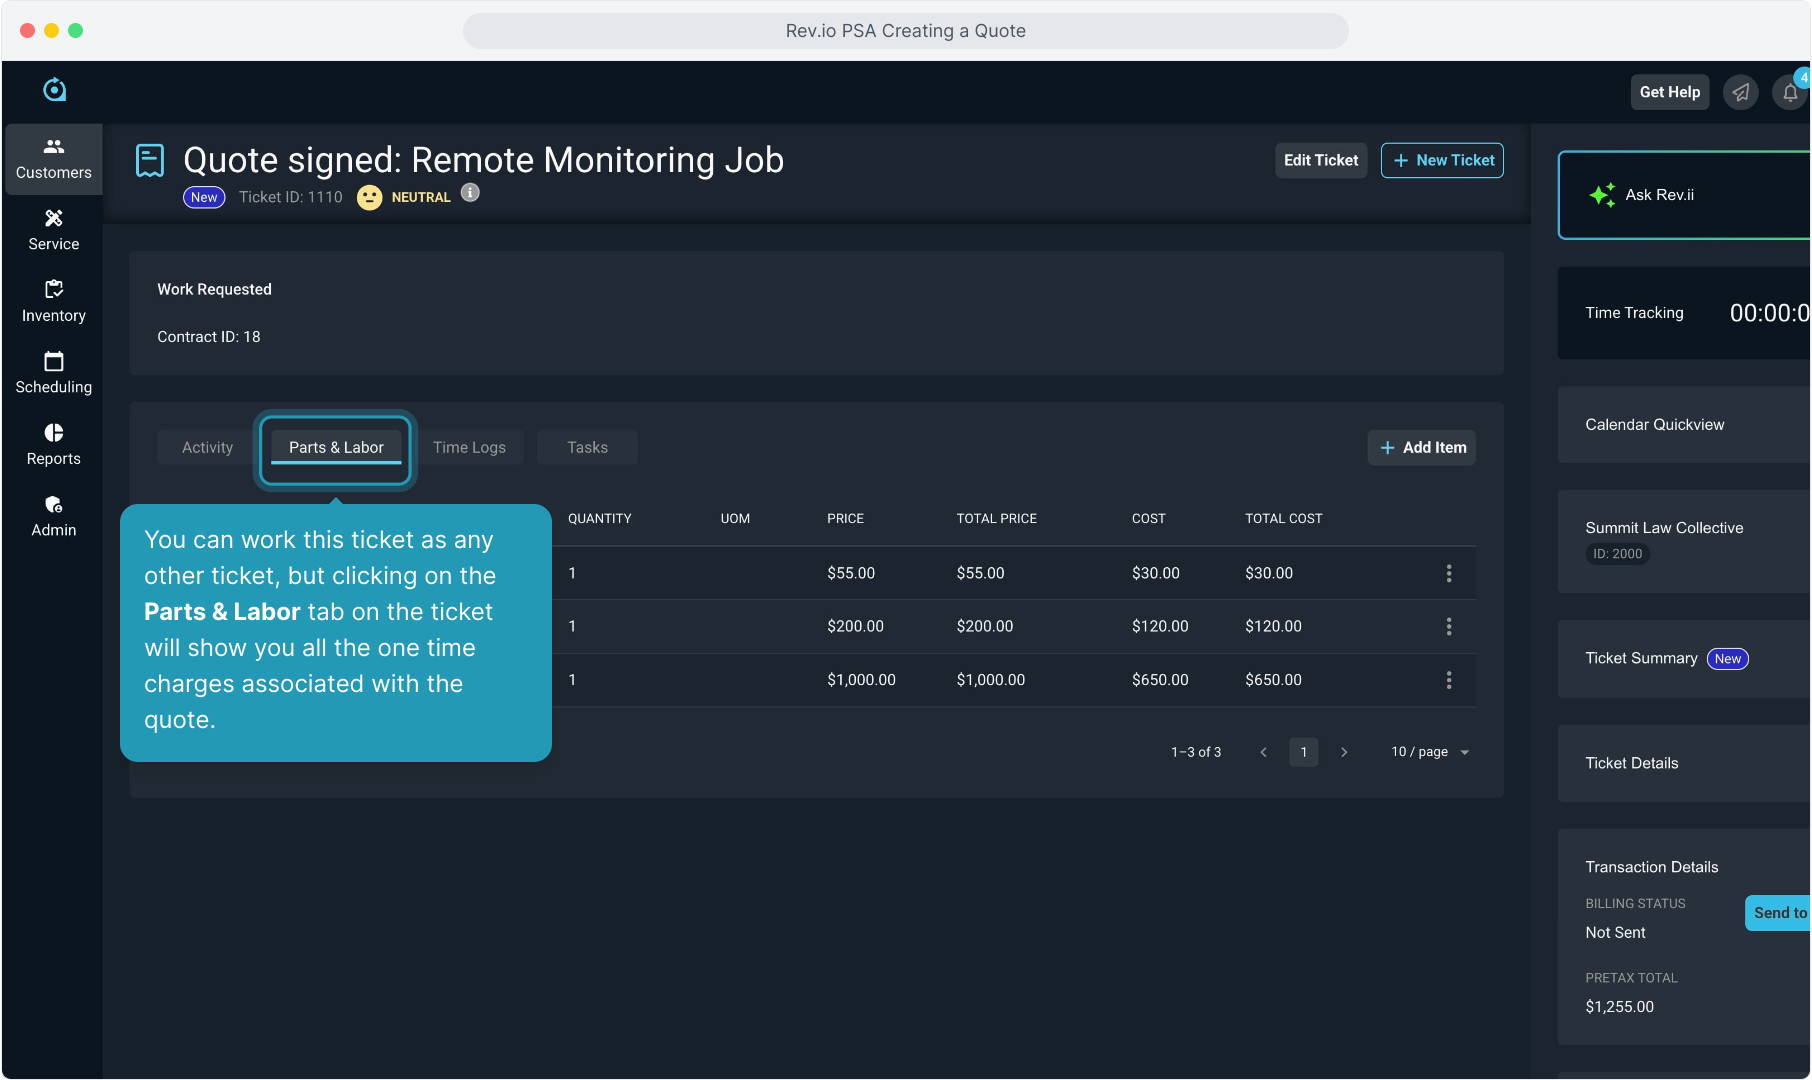
37. You can work this ticket as any other ticket, but clicking on the Parts & Labor tab on the ticket will show you all the one time charges associated with the quote.
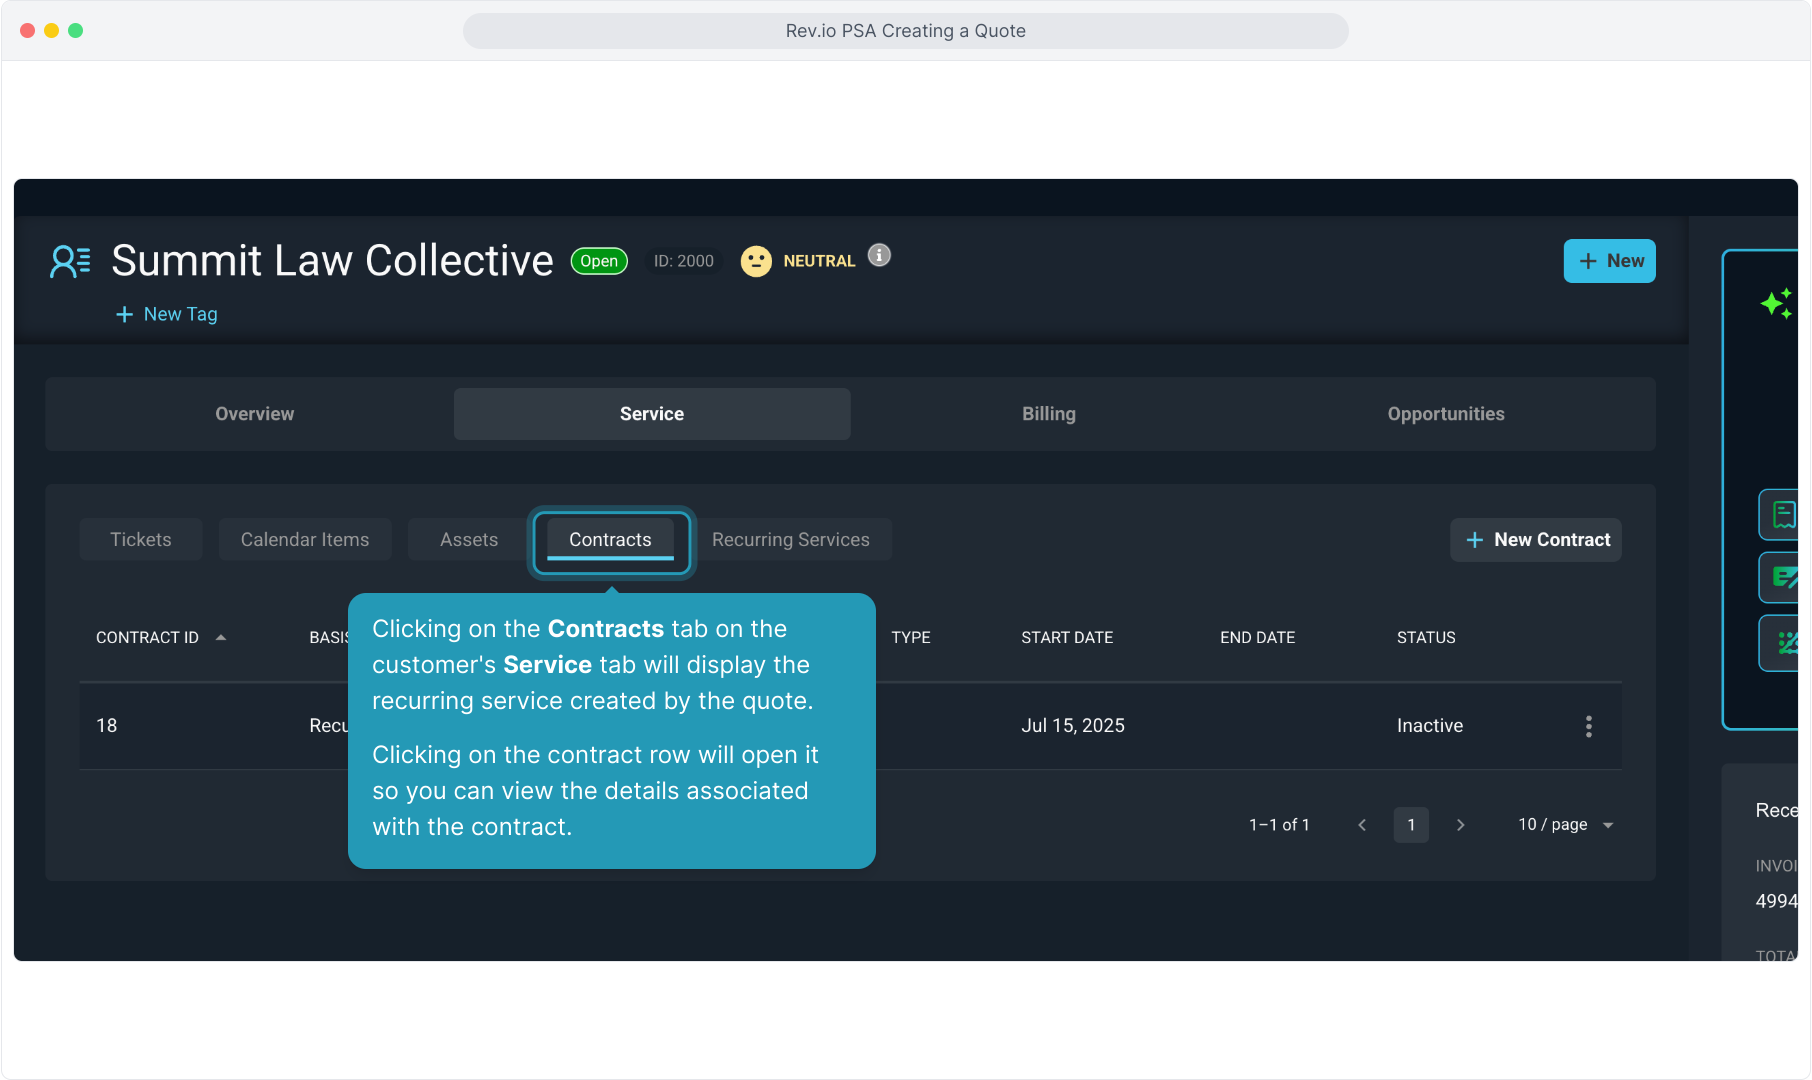
38. Clicking on the Contracts tab on the customer's Service tab will display the recurring service created by the quote.
Clicking on the contract row will open it so you can view the details associated with the contract.
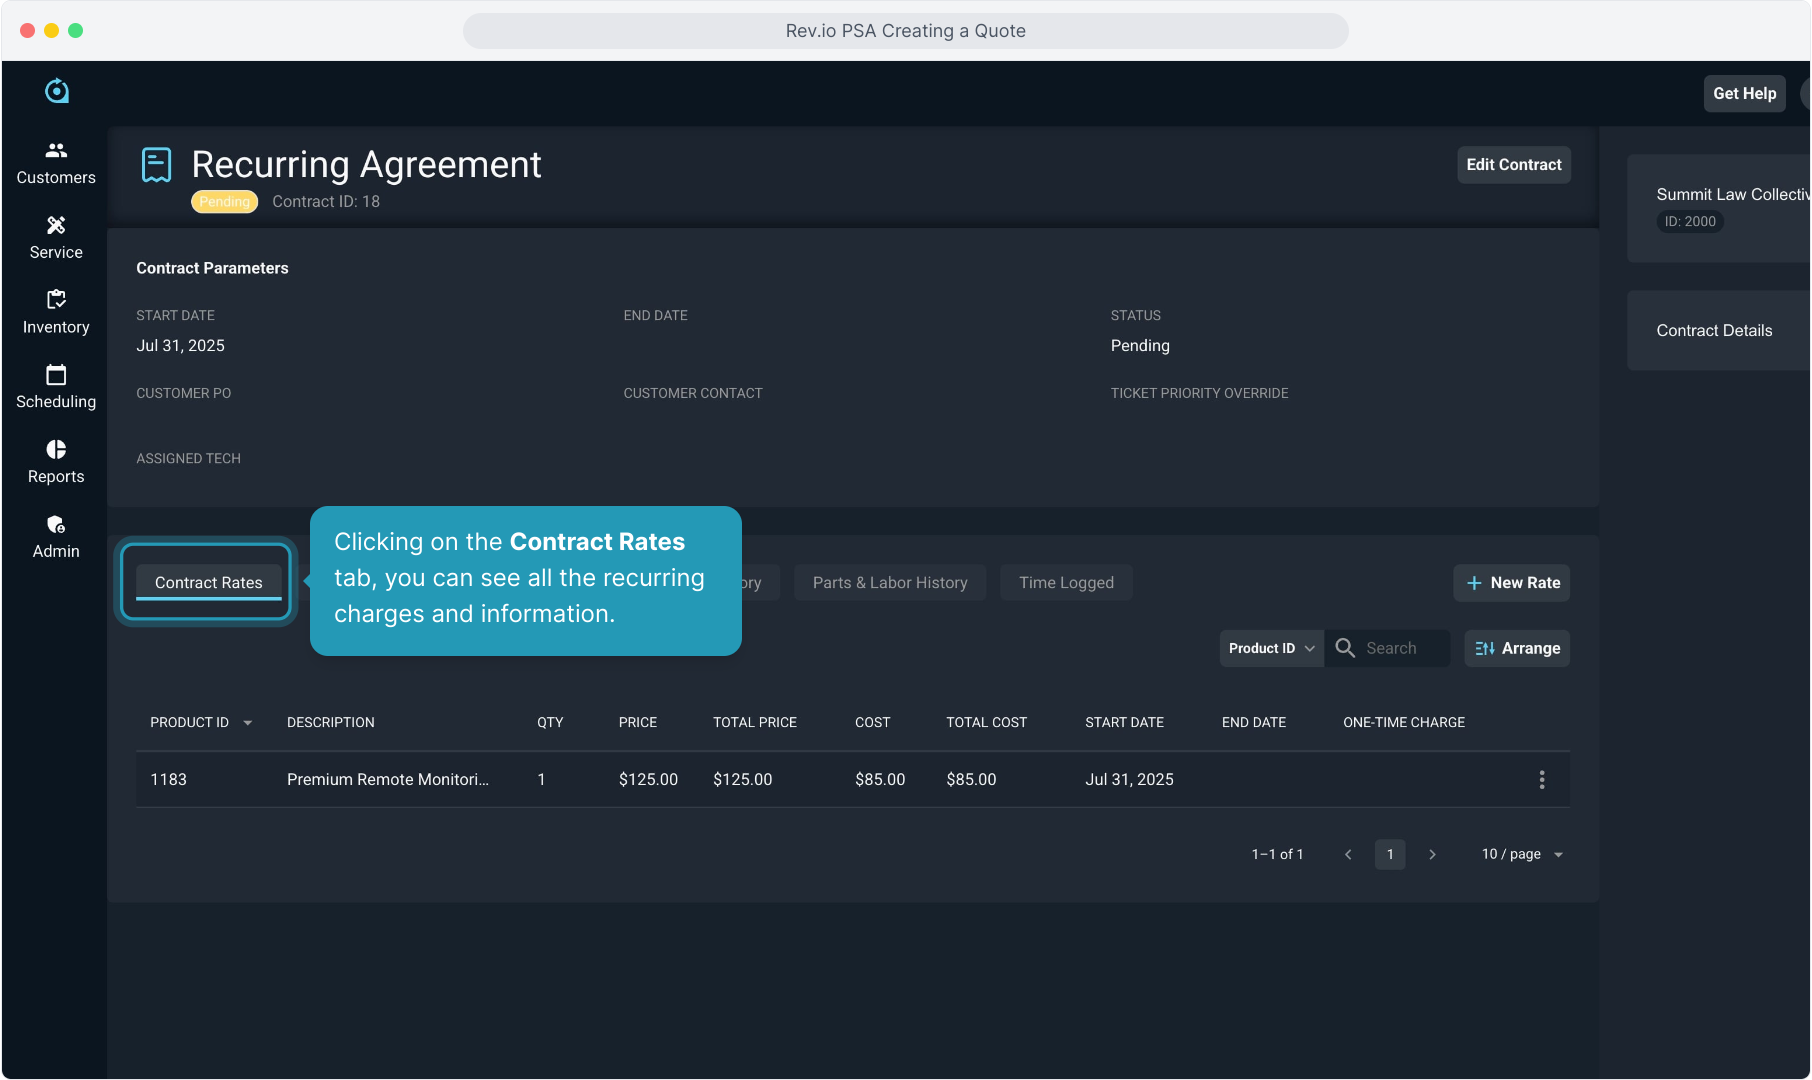
39. Clicking on the Contract Rates tab, you can see all the recurring charges and information.
40. When you are ready to close the ticket and bill for the one time charges from the quote, you will click the Send to Billing button as instructed in other ticketing training videos.
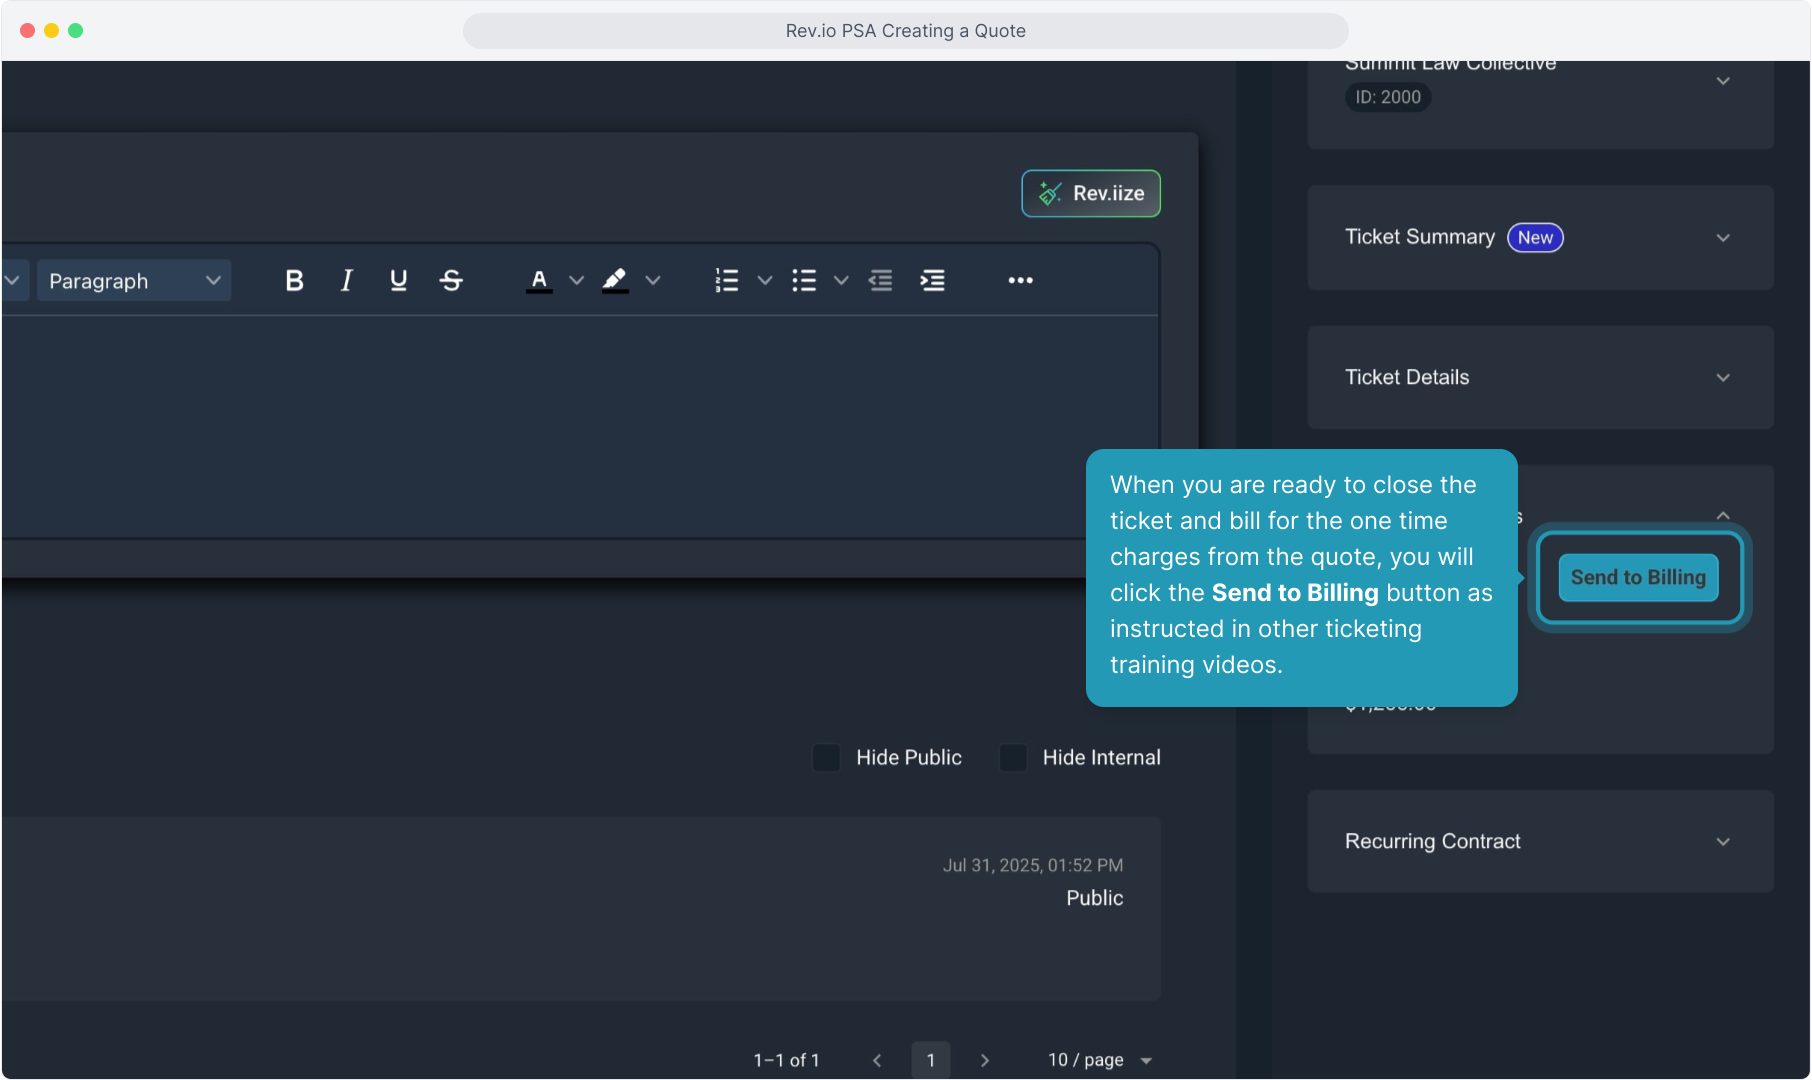
For more information about billing tickets from quotes, see the Billing - Charges Generated from Quotes how-to guide.