
Create/Edit Bill Profiles
The Bill Profile section allows you to designate a set of billing rules to apply on customer accounts. Bill profiles contain rules about late fees, NET terms, payment method/processor, and the collections template.
Settings
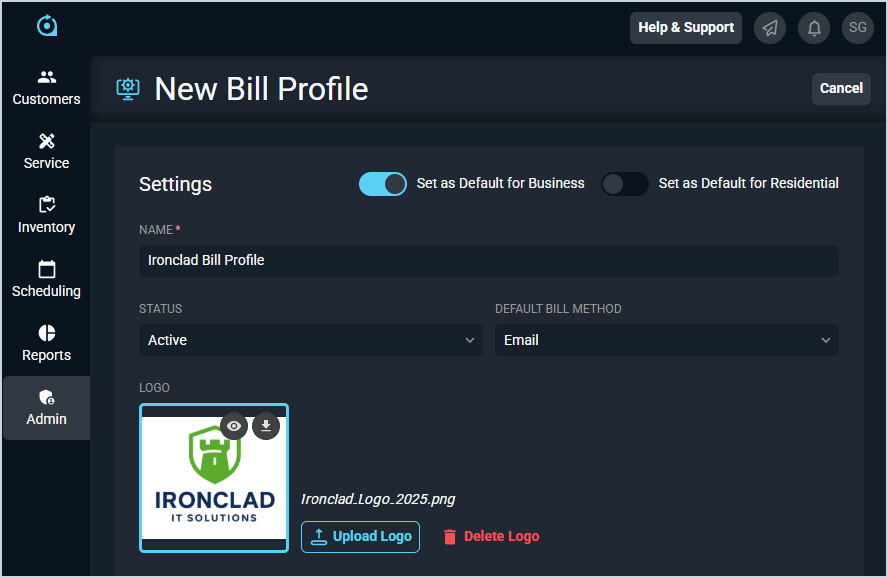
Each field in the Settings section is defined below.
| No. | Label | Definition |
| 1 | Set as Default for Business | Select this option to set the bill profile as the default for new business customers. The Bill Profile field on the New Business Customer screen defaults to the bill profile set with this option, but can be changed for each customer. |
| 2 | Set as Default for Residential | Select this option to set the bill profile as the default for new residential customers. The Bill Profile field on the New Residential Customer screen defaults to the bill profile set with this option, but can be changed for each customer. |
| 3 | Name | Name of the bill profile. |
| 4 | Status | Status of the bill profile. Status options include Active and Inactive. |
| 5 | Default Bill Method | Default bill method for the bill profile. Default Bill Method options include Email, Print, or Both. This field defaults to Email. |
| 6 | Logo | Click to upload a logo for the bill profile. The recommended pixel dimensions for an image are 183 x 110. Once the logo image is uploaded, you can preview an invoice with your logo on it by clicking the View Preview and Download Preview icons that display on the logo preview. |
Billing Rules
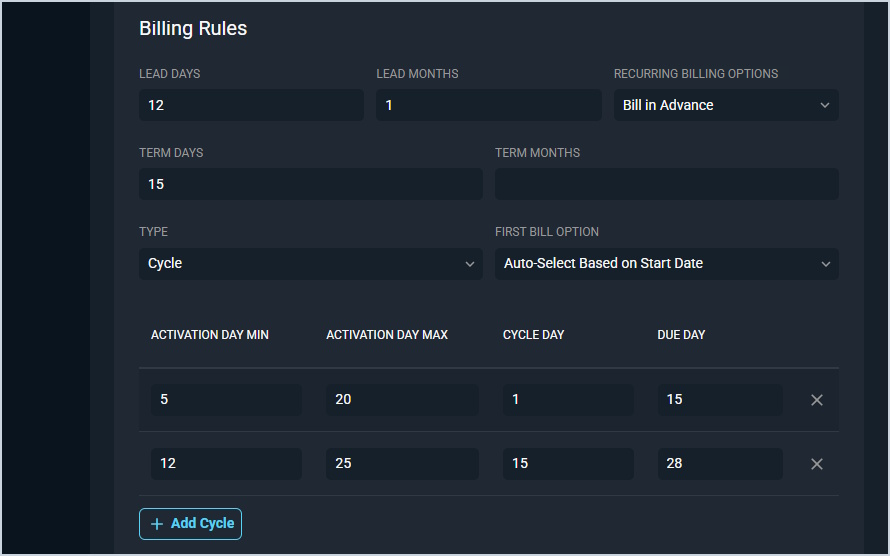
Each field in the Billing Rules section is defined below.
| No. | Label | Definition | |
| 1 | Lead Days | Number of days the monthly recurring charges and credits on an account will be generated before the actual cycle date. This number controls how many days prior to the cycle date that the system will generate the MRCs. It is independent of direction. How many days before the cycle date the system generates the recurring services. | |
| 2 | Lead Months | Number of calendar months that the monthly recurring charges and credits on an account will be generated before the actual cycle date. Using Lead Months versus Lead Days can help with more accurately setting the lead time and avoids fluctuation that happens depending on if the month has 31, 30, or 28 days. | |
| 3 | Recurring Billing Options | Direction that the account will bill. Recurring Billing options include Bill in Advance and Bill in Arrears. | |
| 4 | Term Days | Number of days the bill payment will be due after the cycle date. If you want to set a specific Due Date for the customer's statement, leave this field blank.
| |
| 5 | Term Months | Number of calendar months the bill payment will be due after the cycle date. | |
| 6 | Type | Type of billing cycle. Type options include Cycle and Daily. The Cycle option allows for one or multiple monthly cycles to be set. With the Daily option, the customer's activation date becomes their cycle date, which is also known as anniversary billing. | |
| 7 | First Bill Option | Charges included on the first bill when a customer is activated on cycle billing. After the first bill, the customer follows the normal billing rules as all the other customers on this bill profile. First Bill Options include Bill Current and Next Cycle, Bill Current Cycle Only, and Auto-Select Based on Start Date. | |
| 8 | Activation Day Min | First day the customer will be placed on a cycle day. This field displays if you selected the Cycle Type. | |
| 9 | Activation Day Max | Last day the customer will be placed on a cycle day. This field displays if you selected the Cycle Type. | |
| 10 | Cycle Day | Actual day the customer's charges will cycle. This field displays if you selected the Cycle Type. | |
| 11 | Due Day | Due date printed on the customer's statement. This field displays if you selected the Cycle Type. |
Payment Method Processor & Auto Pay Incentive
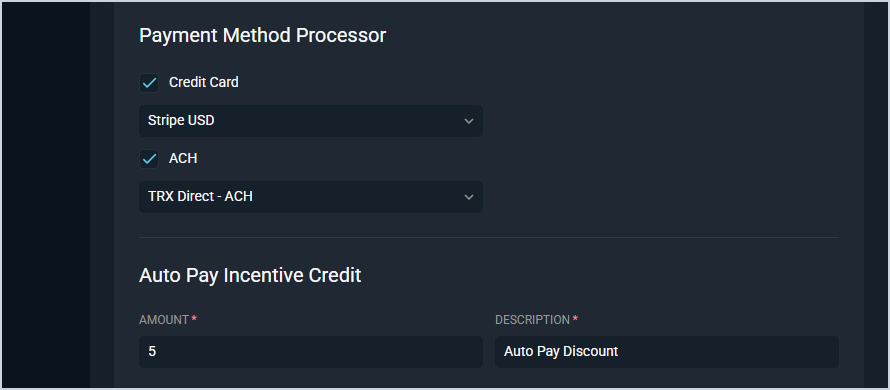
Each field in the Payment Methods and Collections sections are defined below.
| No. | Label | Definition |
| Payment Method Processor | ||
| 1 | Payment Method Processor | Click to select a payment processor for the bill profile. See the Add/Edit Payment Methods article for information on configuring payment methods. |
| Auto Pay Incentive Credit | ||
| 2 | Amount | Description of the credit applied when a customer payment is processed in the Auto Pay queue. |
| 3 | Description | Amount of the credit applied when a customer payment is processed in the Auto Pay queue. |
Collections & Fees

Each field in the Late Fee section is defined below.
| No. | Label | Definition |
| Collection Template | ||
| 1 | Collection Template | Click to select a collection template for the bill profile. See the Add/Edit Collection Templates article for information on configuring collection templates. |
| Returned Payment Fee | ||
| 2 | Amount | Amount charged for the returned payment fee. |
| 3 | Description | Description of the returned payment fee. |
| Late Fee | ||
| 4 | Days | Number of days past the due date that the late fee applies. |
| 5 | Minimum Balance | Minimum balance required for the late fee to apply. |
| 6 | Fee Type | Type of fee. Type options include Flat Fee or Percentage Fee. |
| 7 | Amount | Amount charged for the late fee. This field displays if you selected the Flat Fee Fee Type. |
| 8 | Percentage | Percentage charged for the late fee. This field displays if you selected the Percentage Fee Fee Type. |
| 9 | Minimum Late Fee Amount | Minimum amount in dollars and cents charged for the late fee. This field displays if you selected the Percentage Fee Fee Type. |
Invoice
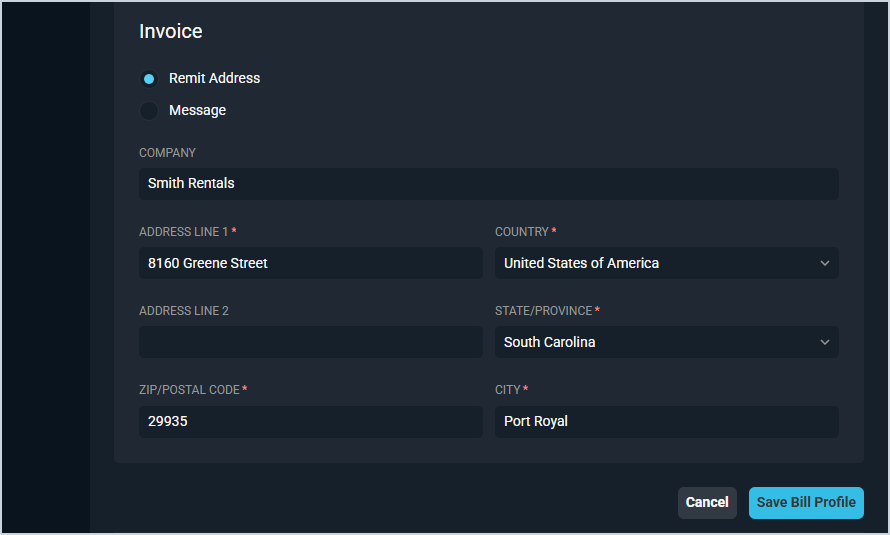
Each field in the Invoice section is defined below.
| No. | Label | Definition |
| 1 | Invoices | Click to select what to print on the invoices for the bill profile. Select the Remit Address option to include a remit address on your invoices. Select the Message option to enter a custom message to display on your invoices. |
| Remit Address | ||
| 2 | Company | Name of the company for remittance. |
| 3 | Address Line 1 | Line 1 of the remittance address. |
| 4 | Country | Country for the remittance address. |
| 5 | Address Line 2 | Line 2 of the remittance address. |
| 6 | State/Province | State or province for the remittance address. |
| 7 | ZIP/Postal Code | Postal or ZIP code for the remittance address. |
| 8 | City | City for the remittance address. |
| Message | ||
| 9 | Message | Enter a custom message to display on your invoice instead of a Remit Address. |
Available Actions
These actions are available in the New Bill Profile screen.
- Enter or edit the bill profile information by completing the fields in each section and clicking the Save button.
- See the System Settings Overview article for more information about the other categories on the System Settings screen.