
Invoice Management: Create Invoices
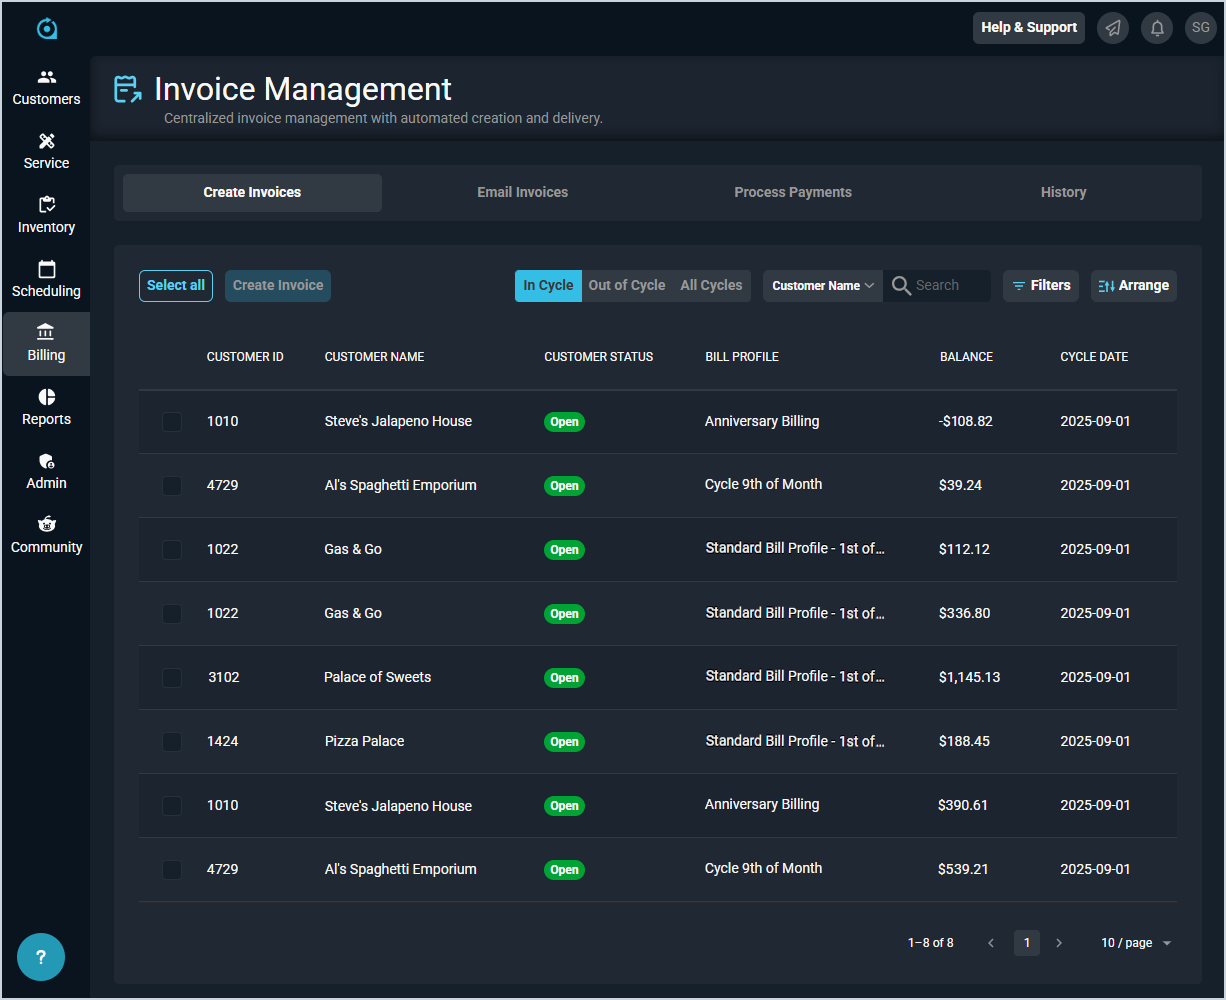
The Create Invoices tab in Invoice Management displays all customers with unposted transactions that are ready to be invoiced. From this tab, you can create invoices individually or in bulk for all customers in the list. Customers are organized into two categories based on where they are in their billing cycle.
In Cycle customers are those whose billing cycle has rolled over and who have unposted transactions ready to be invoiced on their normal schedule. Out of Cycle customers are those who have billable activity, such as a mid-cycle one-off charge, that is sitting unposted outside their normal billing cadence and whose cycle date has not yet rolled over.
| NOTE: When creating invoices from the Invoice Management screen, the Due Date on the invoice defaults to the due date set on the bill profile assigned to the customer. |
Each field on the Create Invoices tab is defined below.
| No. | Label | Definition |
| 1 | Customer ID | Numerical identifier for the customer. |
| 2 | Customer Name | Name of the customer account. |
| 3 | Customer Status | Status of the customer. |
| 4 | Bill Profile | Bill profile assigned to the customer. |
| 5 | Balance | Current outstanding balance for the customer |
| 6 | Cycle Date | Date of the customer's current billing cycle. |
The following actions are available on the Create Invoices tab.
- Filter the list to show In Cycle, Out of Cycle, or all customers by clicking the In Cycle, Out of Cycle, or All Cycles toggle buttons.
- Search the customers displayed by selecting a column from the dropdown and entering text in the Search field.
- Filter the customers displayed by clicking the Filters button and selecting the desired filter criteria.
- Customize which columns display in the list and the order in which they display by clicking the Arrange button. See the Arrange Columns article for more information.
- Sort the results in the table by clicking the column label in the table header.
- Select all customers in the list by clicking the Select All button.
- Create an invoice for one or more customers by selecting the checkboxes next to the desired customers and clicking the Create Invoice button.