
System Settings: System Tags
The System Tags category on the System Settings screen allows you to create system tags which will populate in the Select System Tag dropdown, allowing you to easily assign the same tag to multiple customers without having to type the tag name manually each time. These tags can be used to assist with customer management and allow you to see a clear snapshot of the customer account at a glance so you can make decisions quickly.
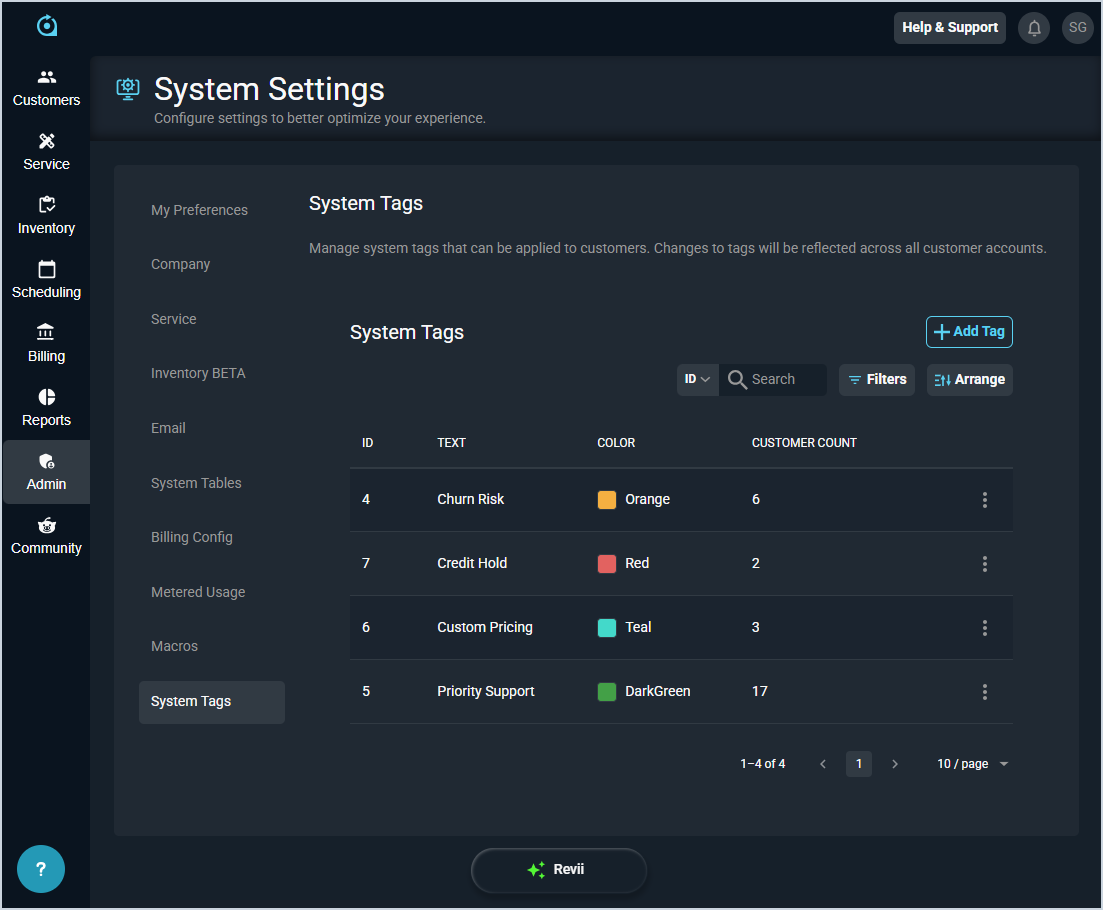
Each field in the System Tags category is defined below.
| No. | Label | Definition |
| 1 | ID | Numerical identifier for the system tag. |
| 2 | Text | Description or name for the system tag. |
| 3 | Color | Color for the system tag. |
| 4 | Customer Count | Number of customers with the system tag added to their account. |
These actions are available in the System Tags category.
- Create a system tag by clicking the Add Tag button. See the Adding Tags to Customer Profiles article for more information.
- Search the system tags by selecting a column from the dropdown above the grid and entering text in the Search field. The list view updates to display records matching your search in the column you selected.
- Filter the system tags displayed on this view by clicking the Filter button above the grid and selecting from the available filter options. The list view updates to display records matching the filters you selected.
- Customize which columns display in the list view and the order in which they display by clicking the Arrange button and making the desired changes. See the Arrange Columns article for more information.
- Edit the system tag by clicking the ellipsis at the end of the row and selecting Edit from the menu options.
- Delete the system tag by clicking the ellipsis at the end of the row and selecting Delete from the menu options.