How To Guide: Creating and Editing Purchase Orders from a Ticket
1. Introductoin
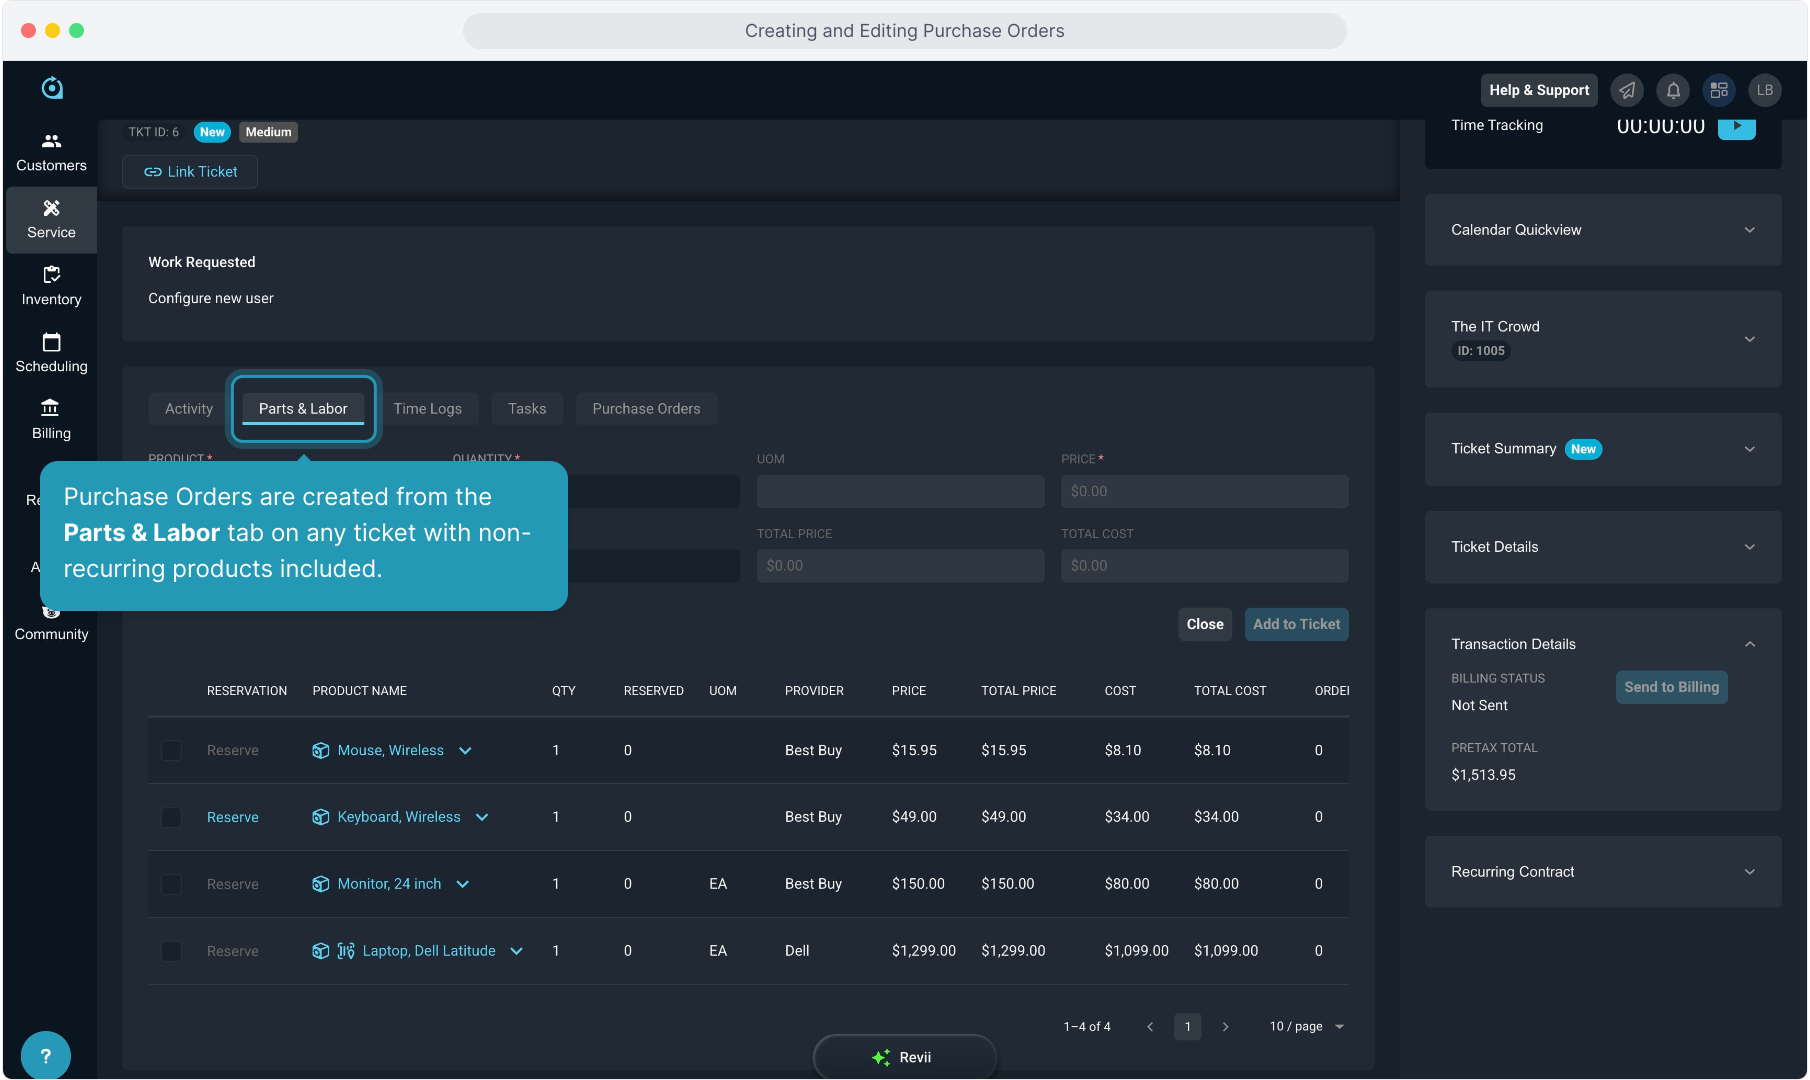
2. Purchase Orders are created from the Parts & Labor tab on any ticket with non-recurring products included.
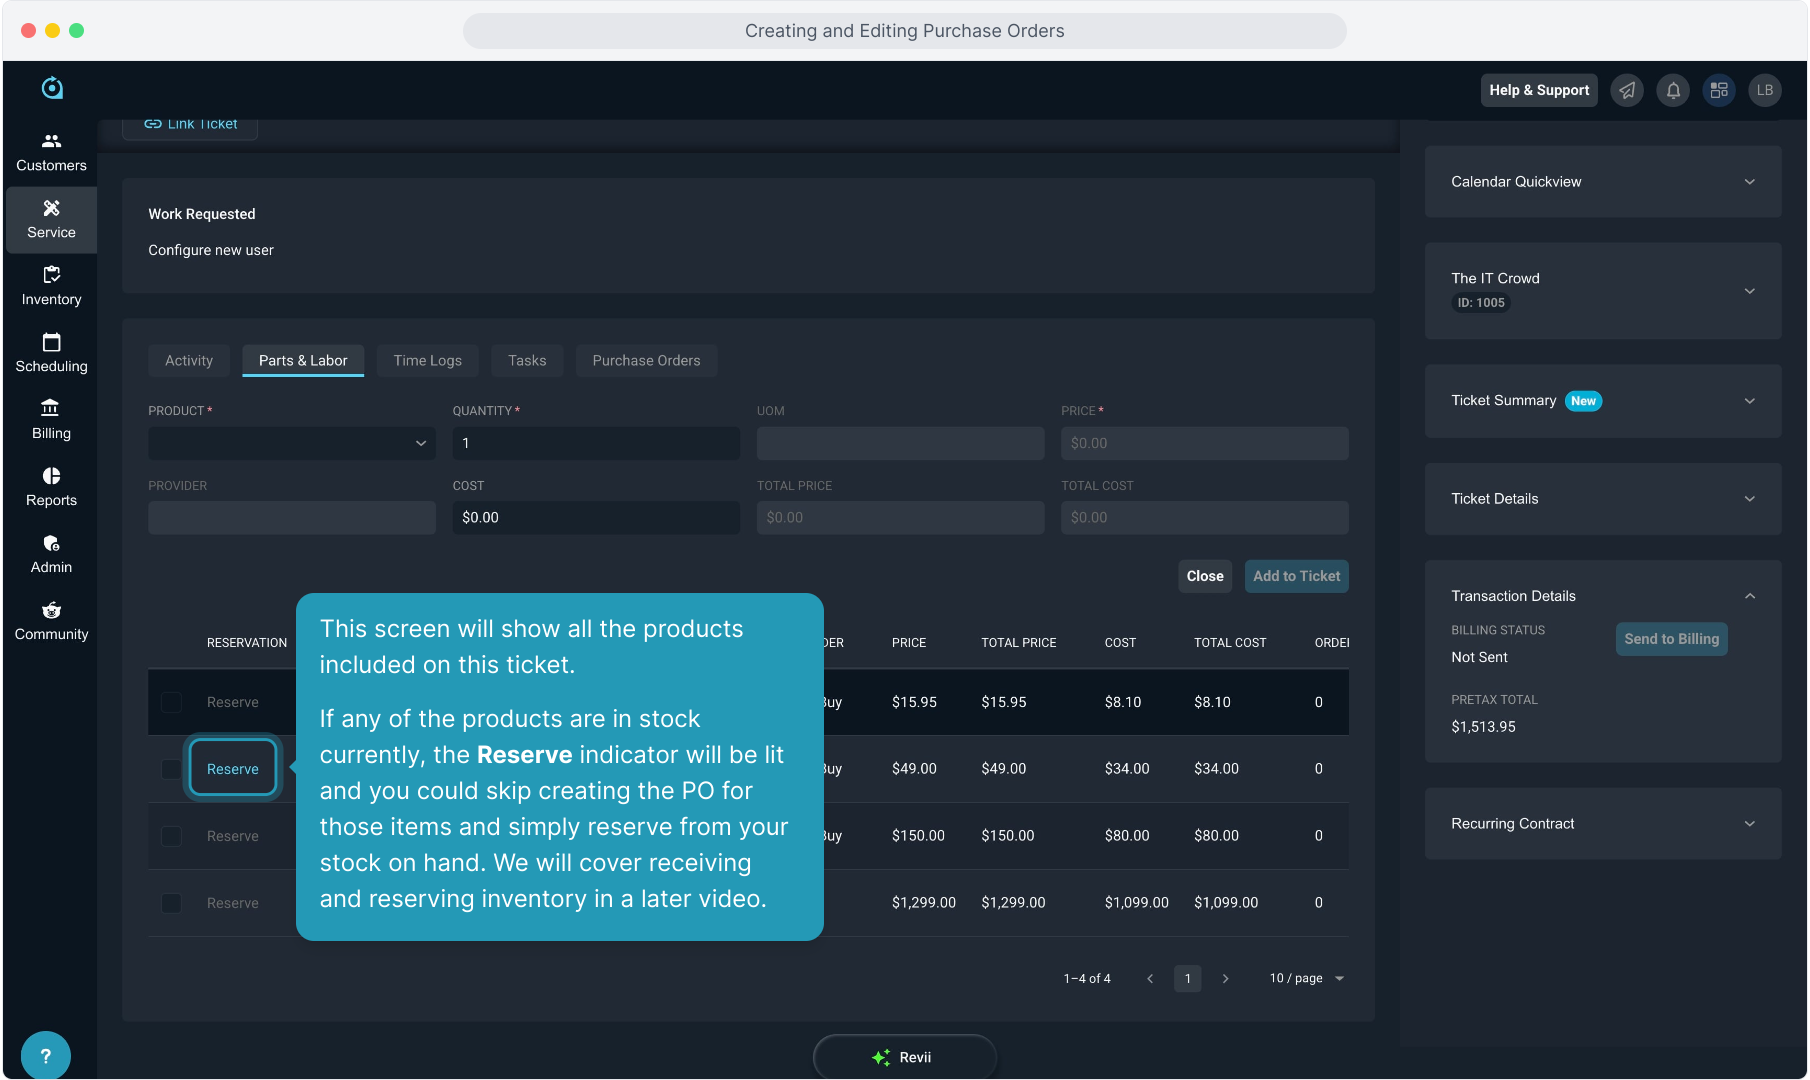
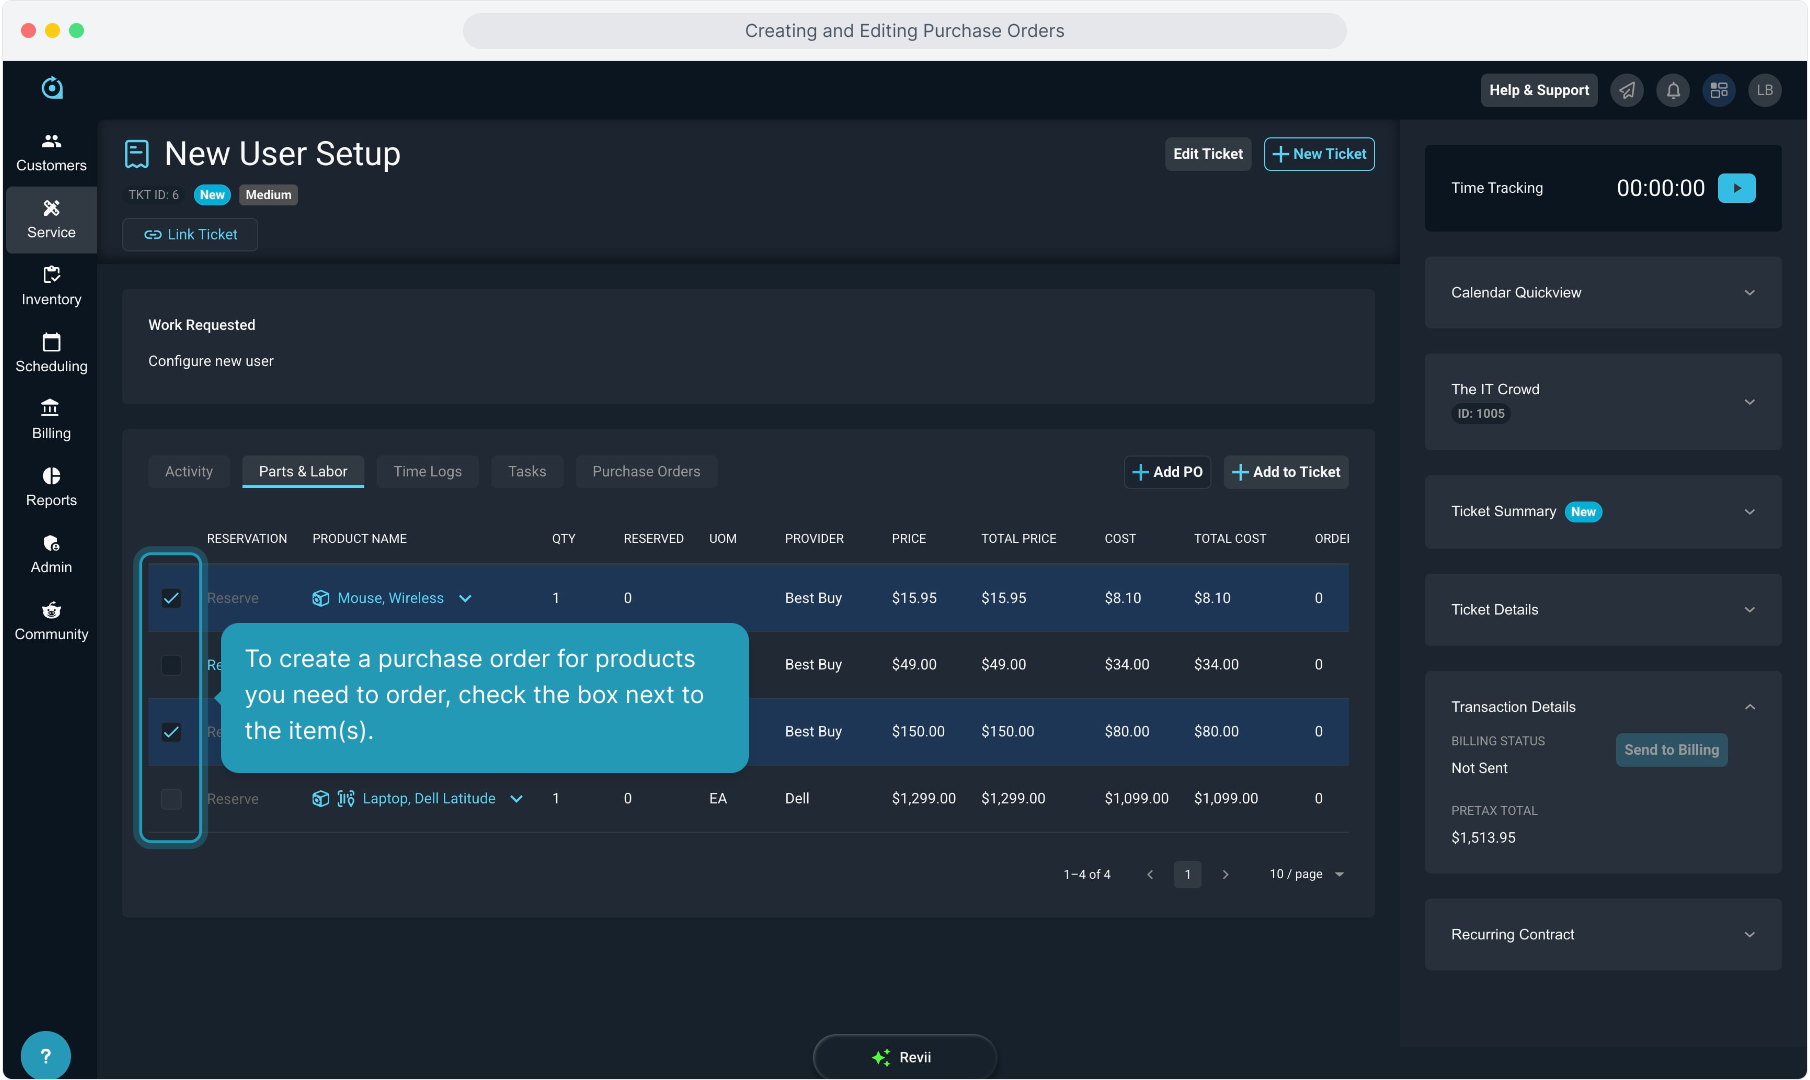
3. This screen will show all the products included on this ticket.
If any of the products are in stock currently, the Reserve indicator will be lit and you could skip creating the PO for those items and simply reserve from your stock on hand. We will cover receiving and reserving inventory in a later video.
4. To create a purchase order for products you need to order, check the box next to the item(s).
5. Each PO is limited to a single provider, so once you select the first product, it locks the ability to select any products from a different provider.
In this example, once I select a product from Best Buy, I can only select other products from that provider and would not be able to select the product from Dell on this same PO.

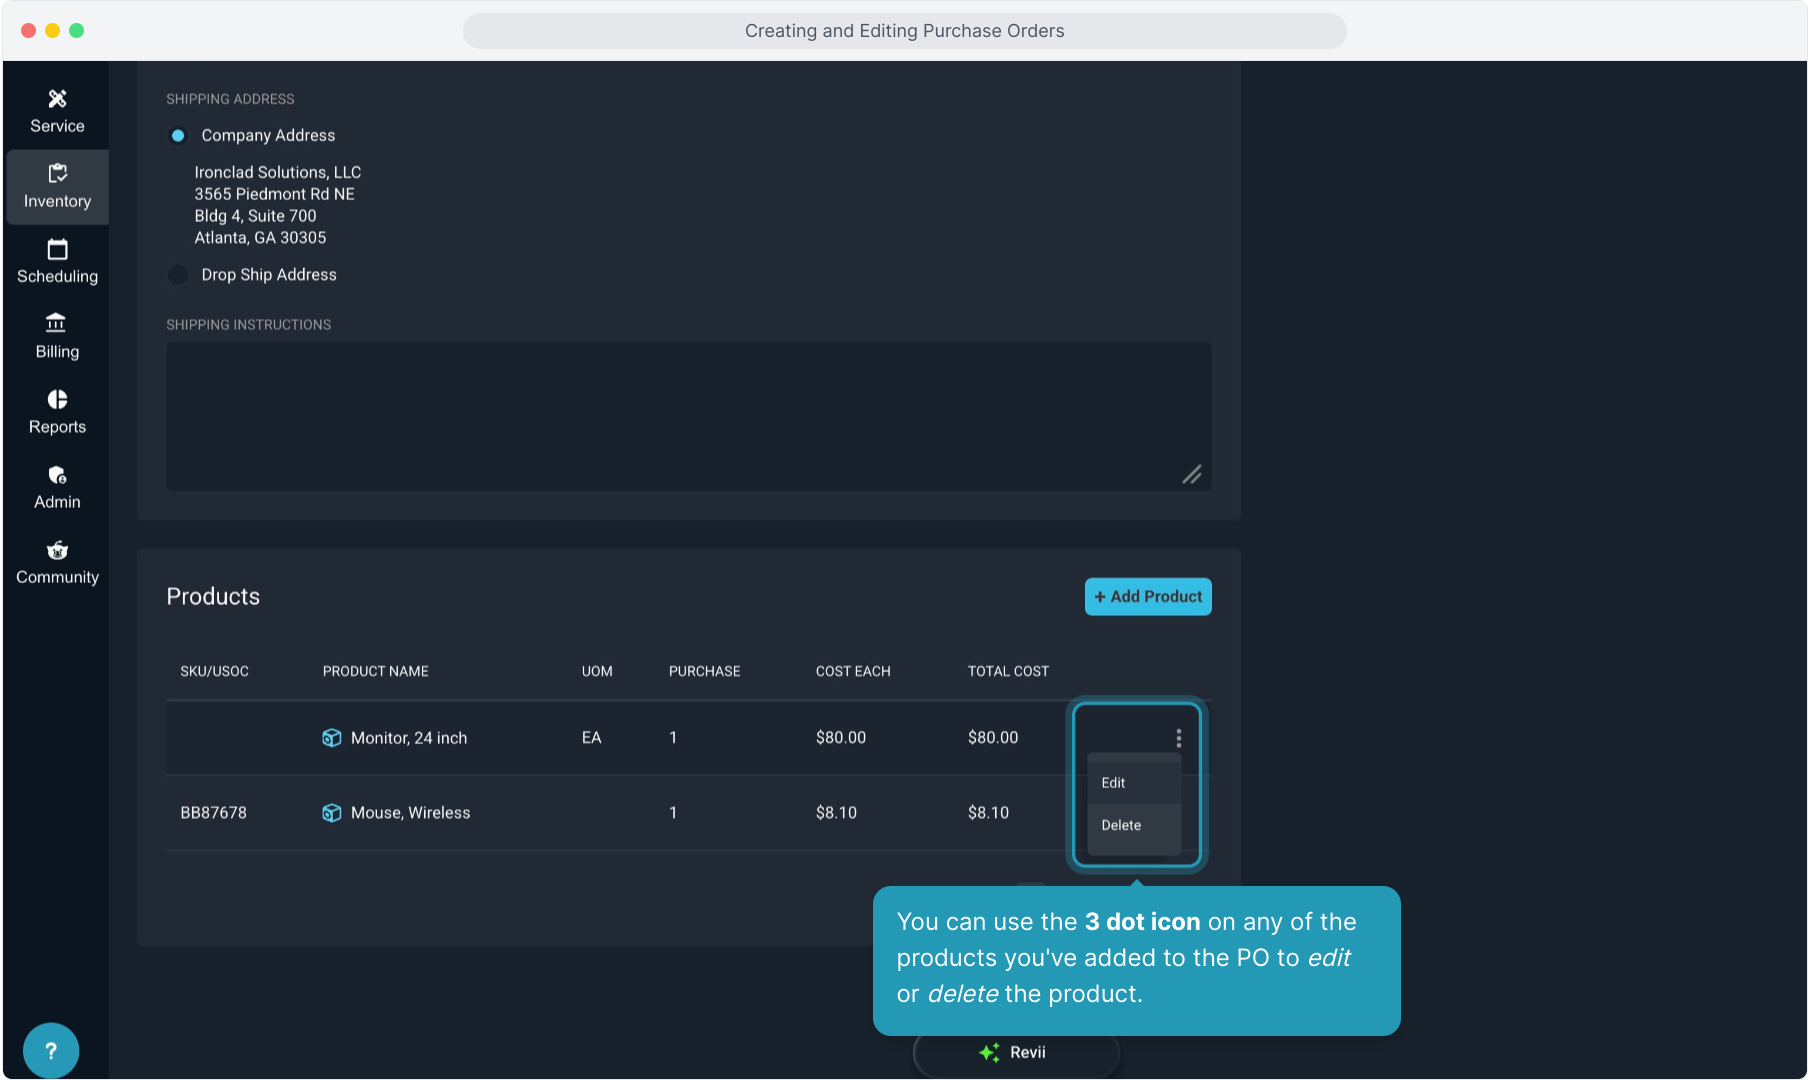
6. You can use the 3 dot icon on any of the products you've added to the PO to edit or delete the product.
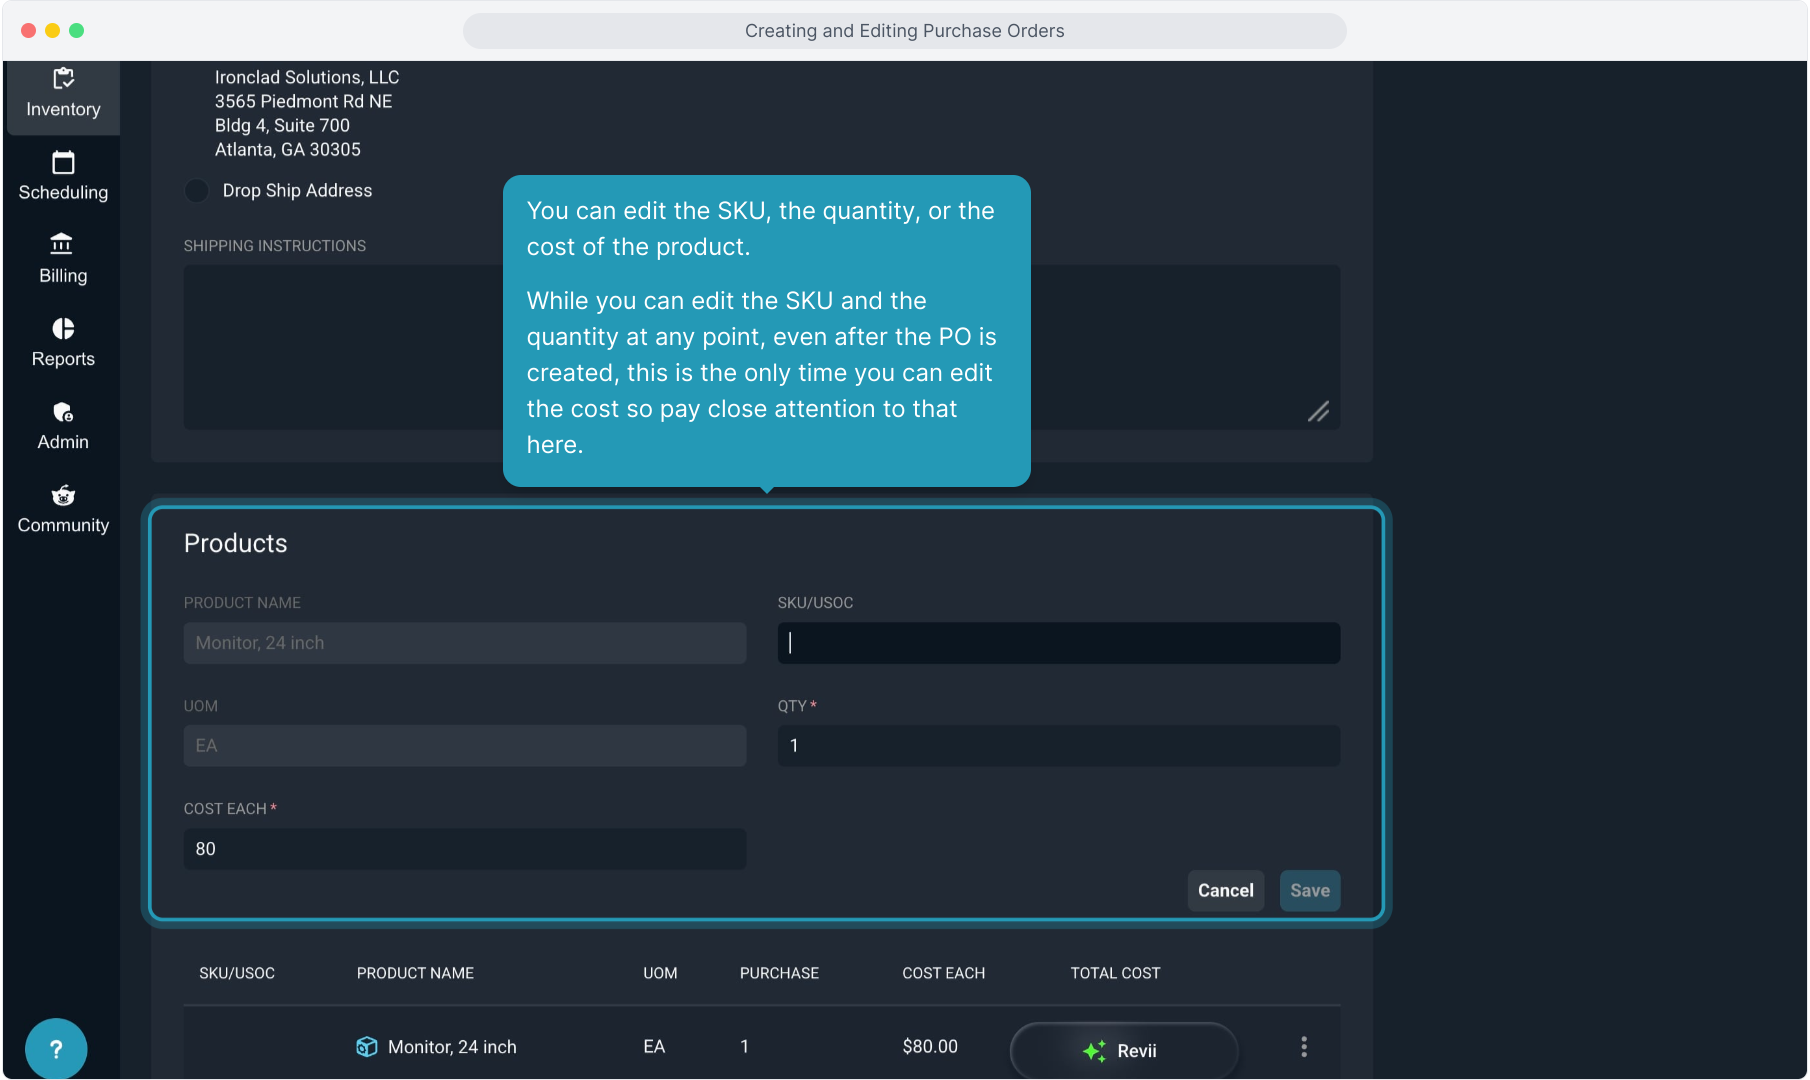
7. You can edit the SKU, the quantity, or the cost of the product.
While you can edit the SKU and the quantity at any point, even after the PO is created, this is the only time you can edit the cost so pay close attention to that here.
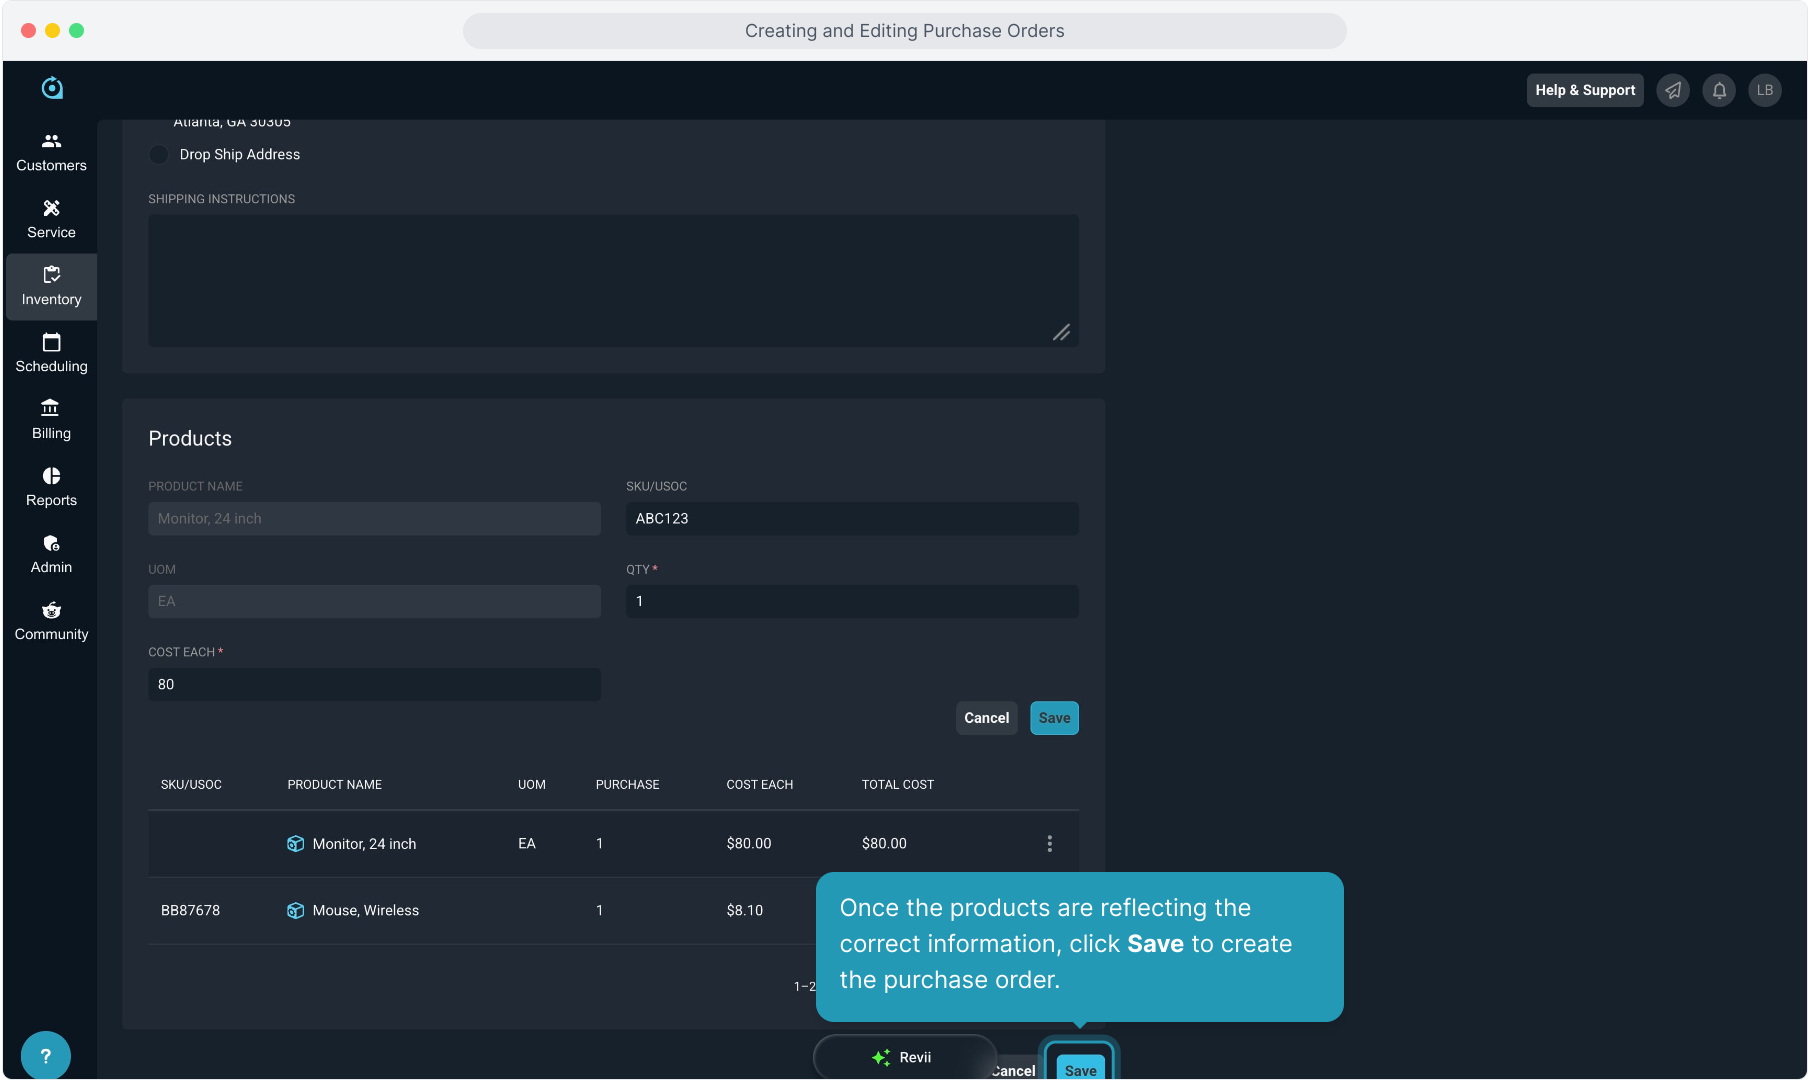
8. Once the products are reflecting the correct information, click Save to create the purchase order.
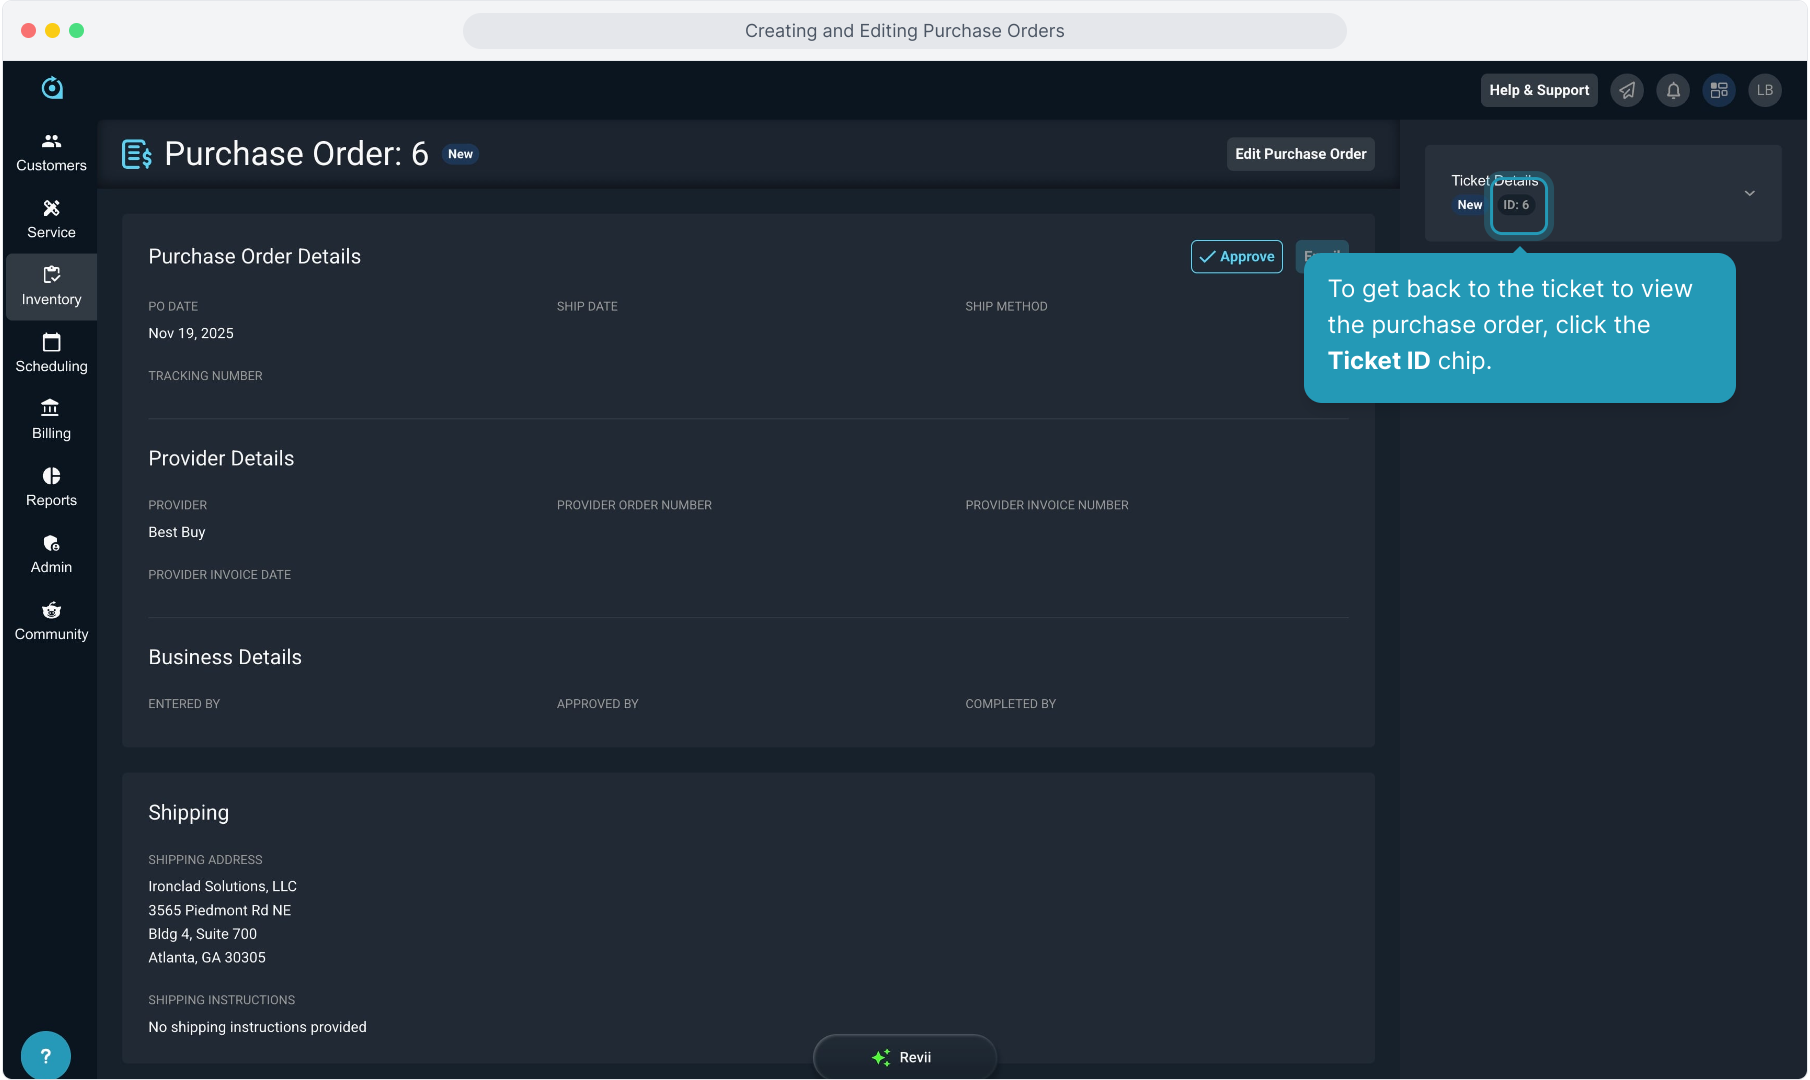
9. To get back to the ticket to view the purchase order, click the Ticket ID chip.
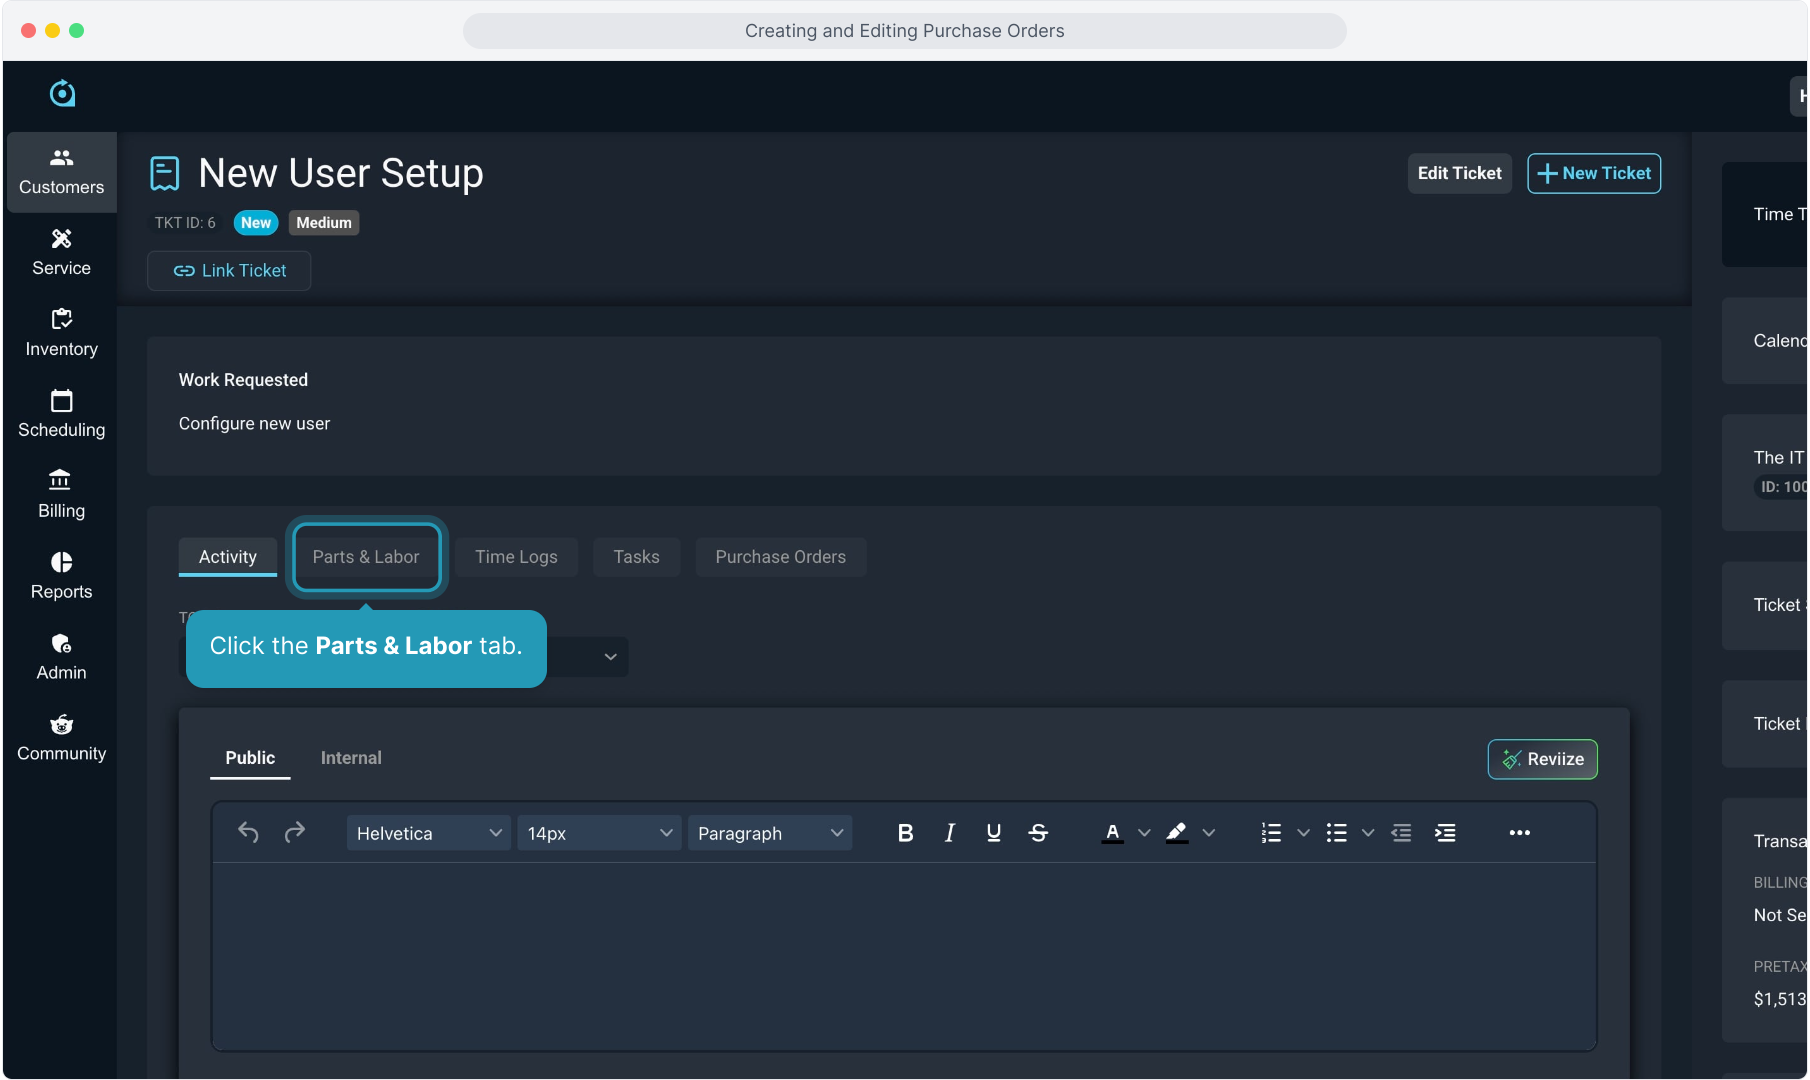
10. Click the Parts & Labor tab.
11. You will see in the Ordered column the number of each product you just ordered by creating the PO. Clicking the down arrow on the number will show you the PO number(s) associated and you can hyperlink directly to the PO.

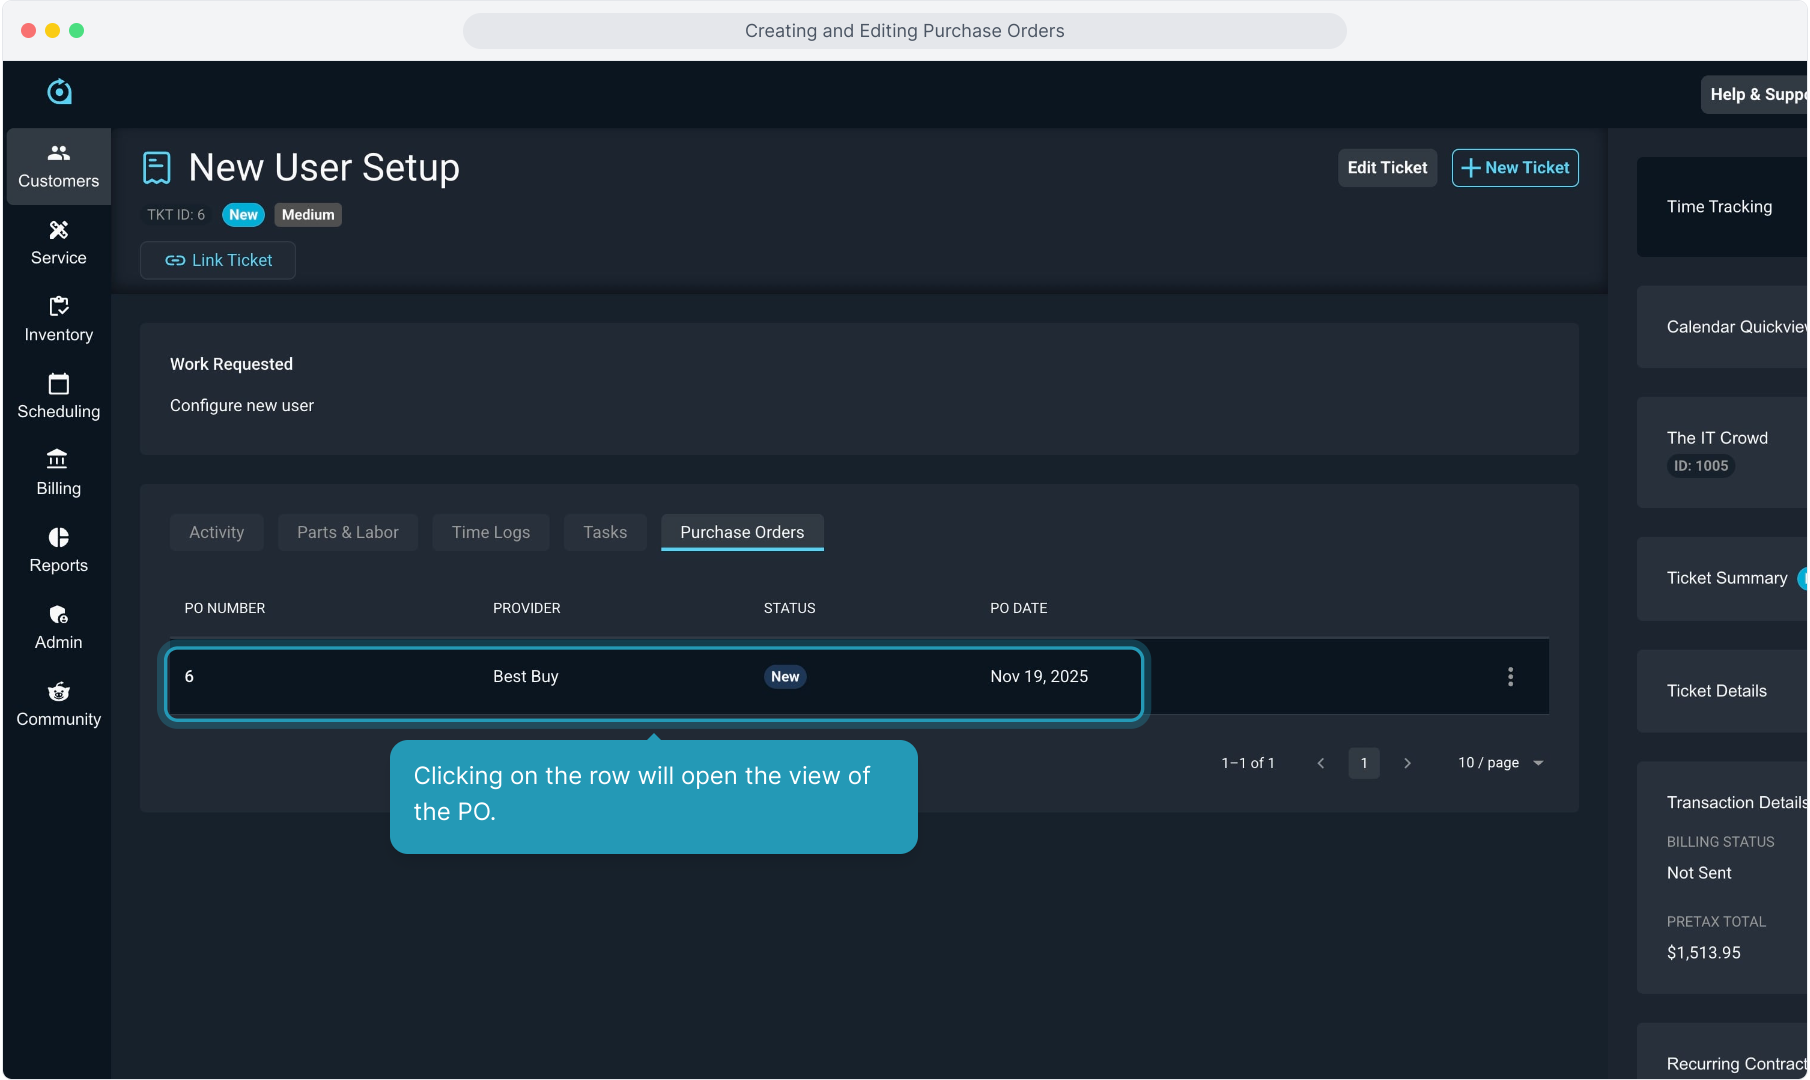
12. You can view all POs for the ticket by clicking the Purchase Orders tab on the ticket.

13. Clicking on the row will open the view of the PO.
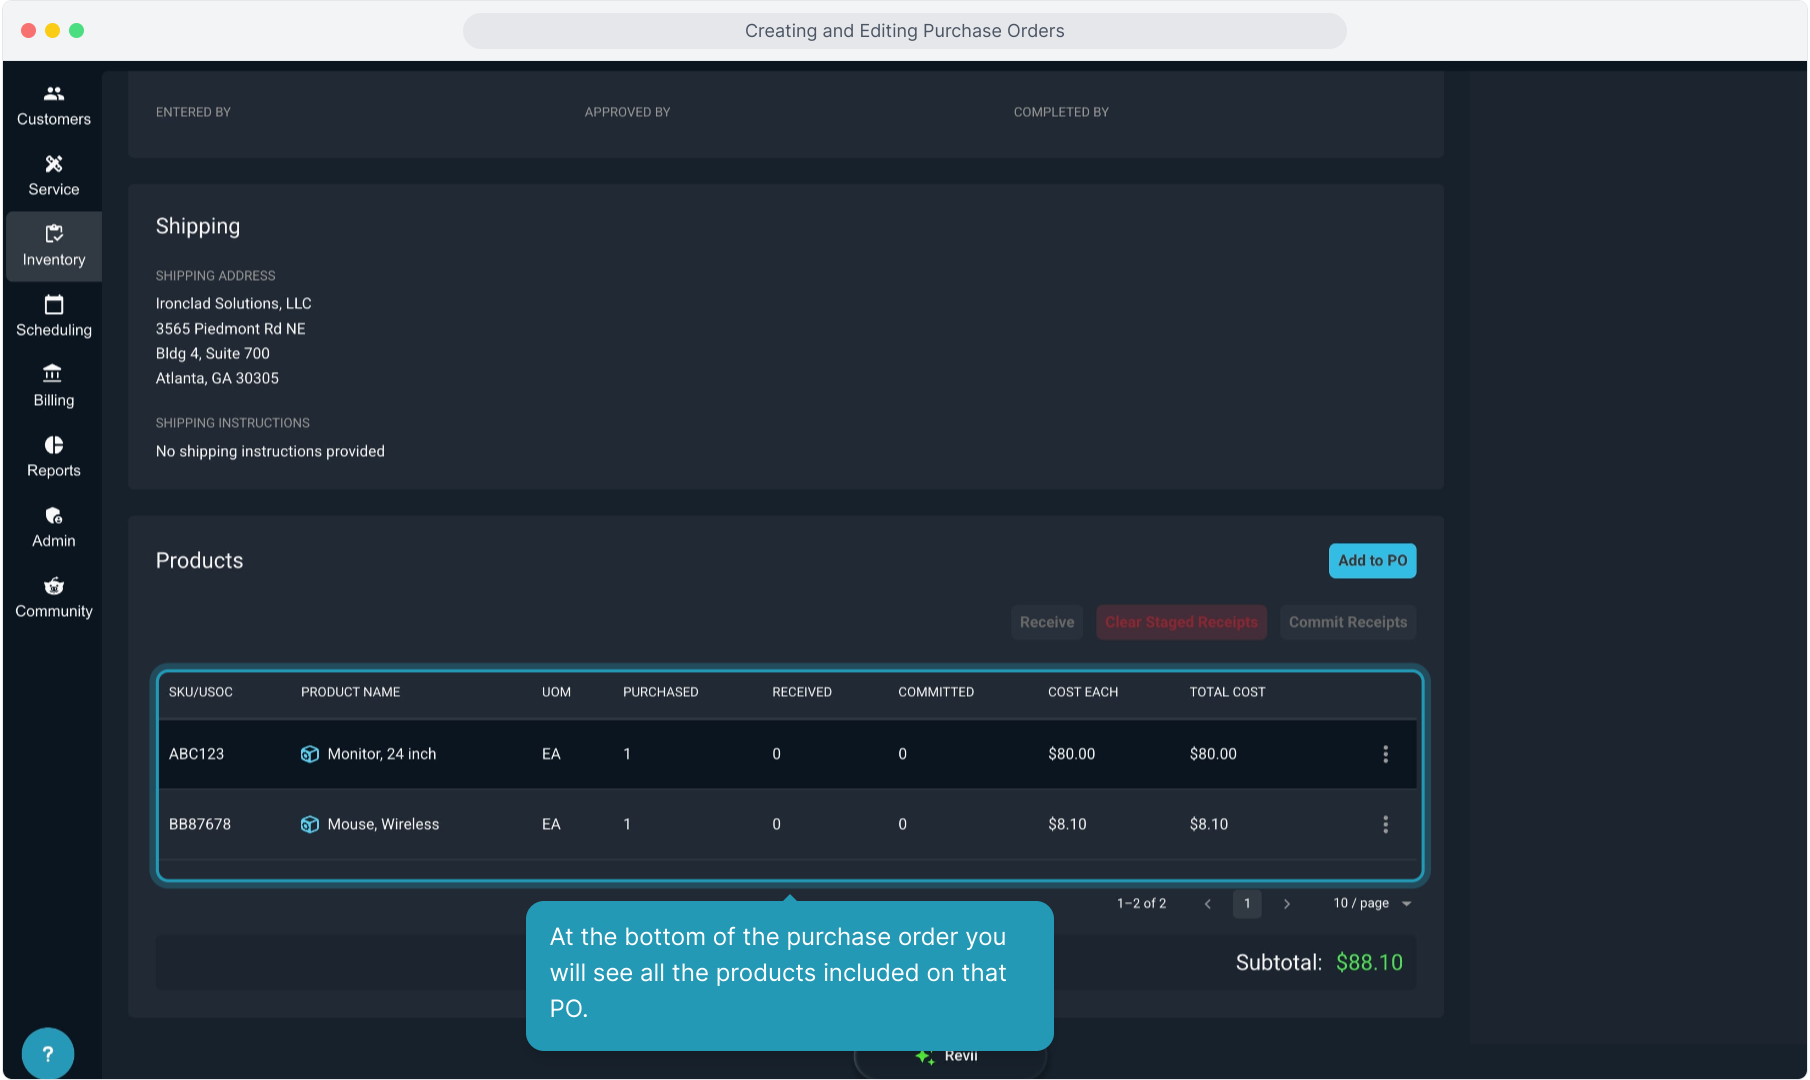
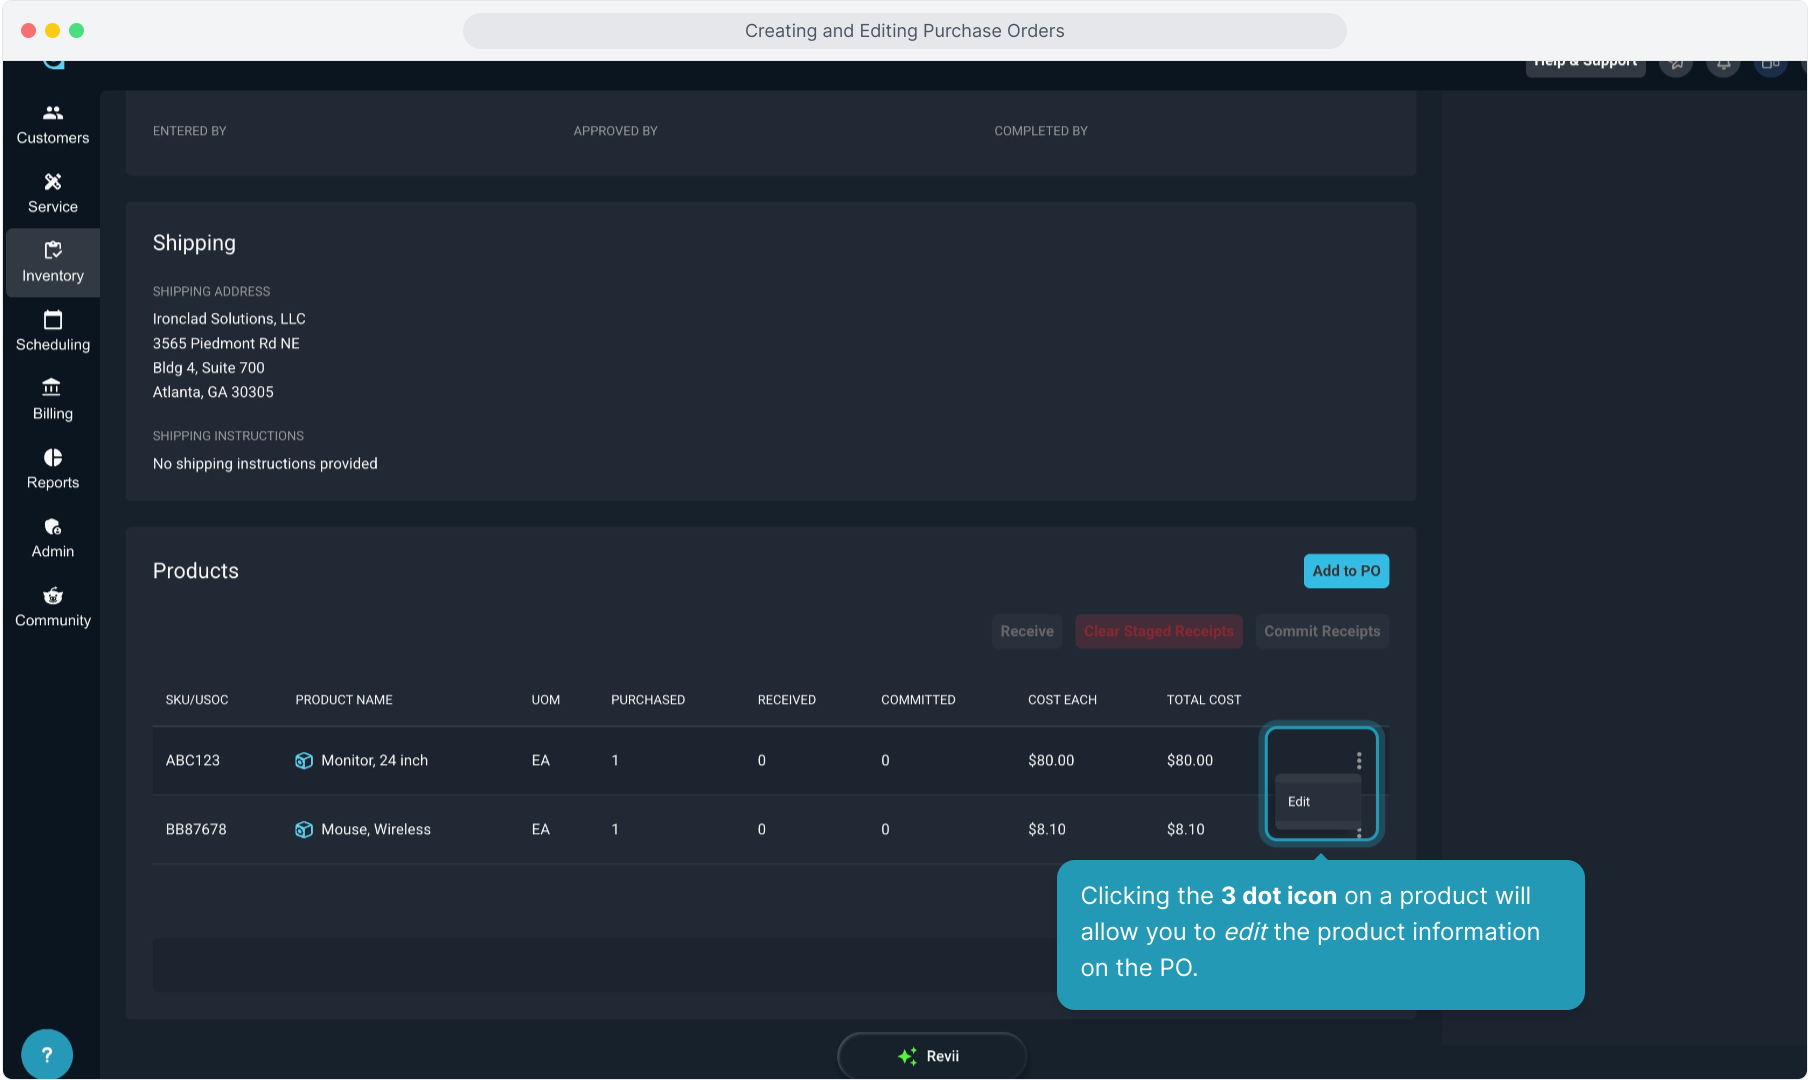
14. At the bottom of the purchase order you will see all the products included on that PO.
15. Clicking the 3 dot icon on a product will allow you to edit the product information on the PO.
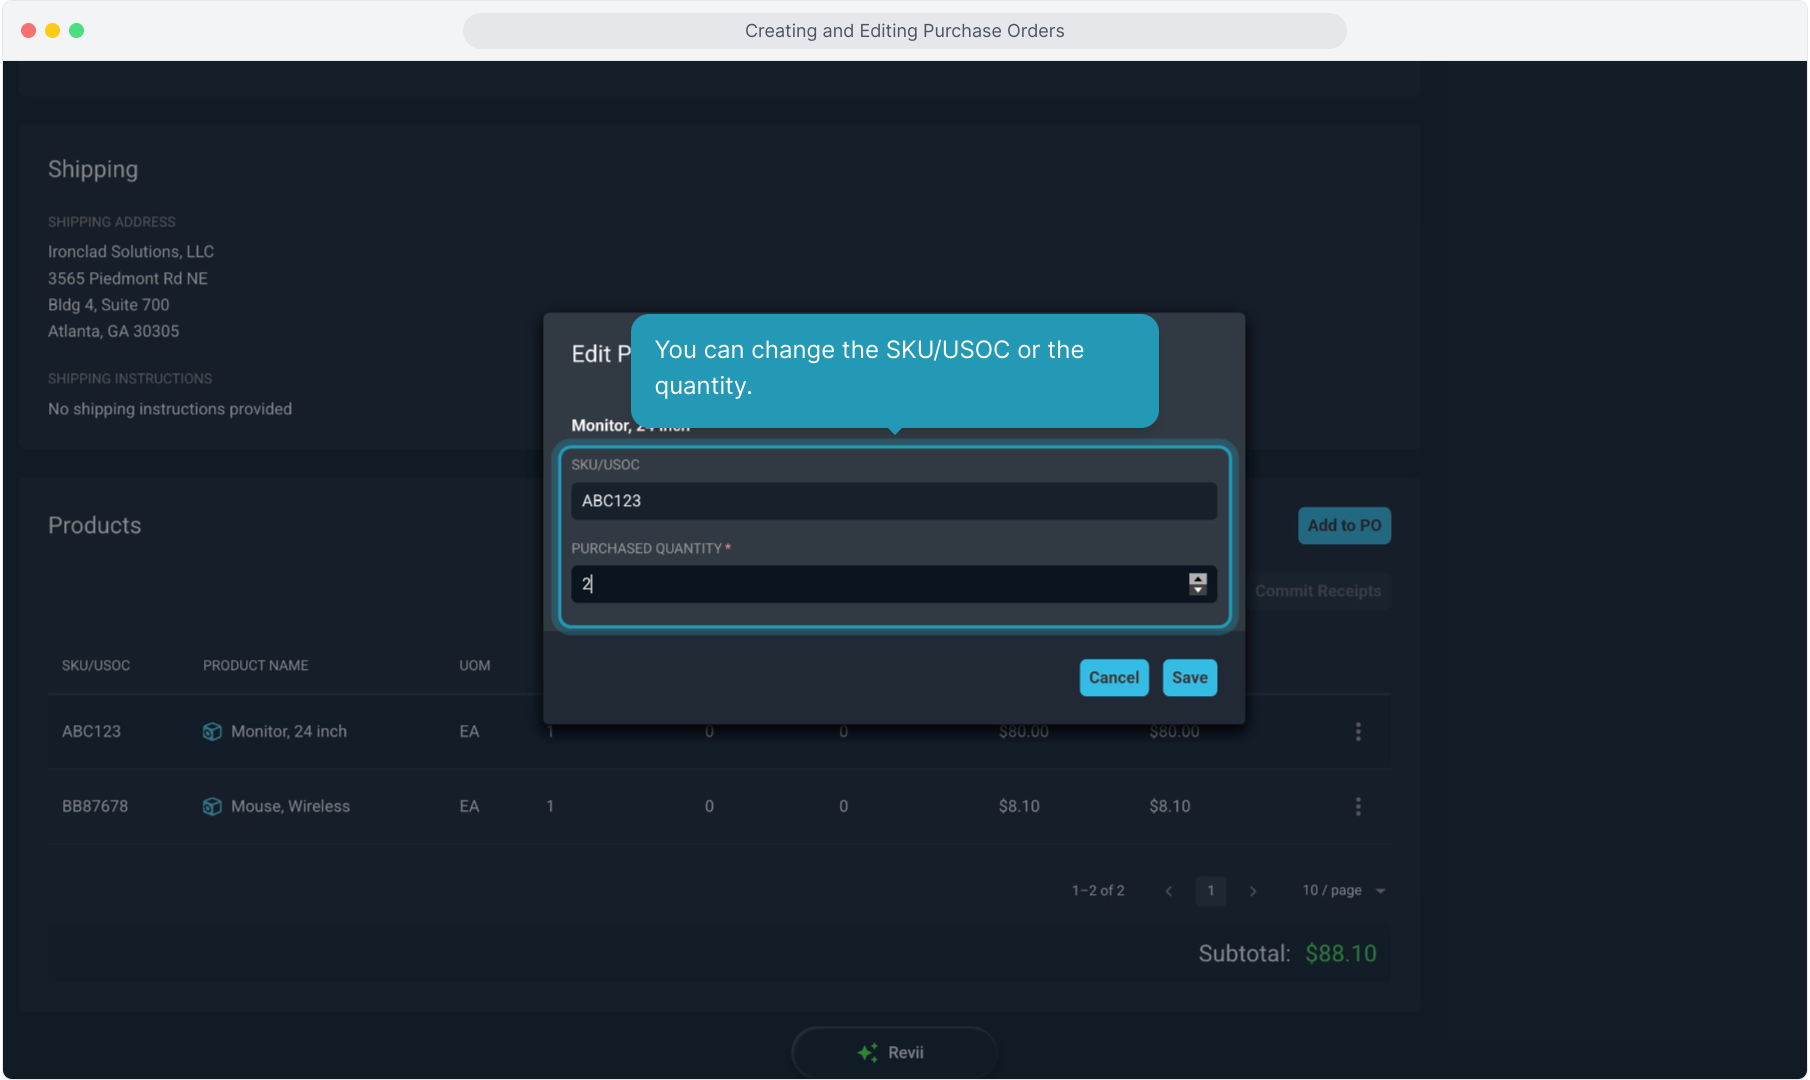
16. You can change the SKU/USOC or the quantity.
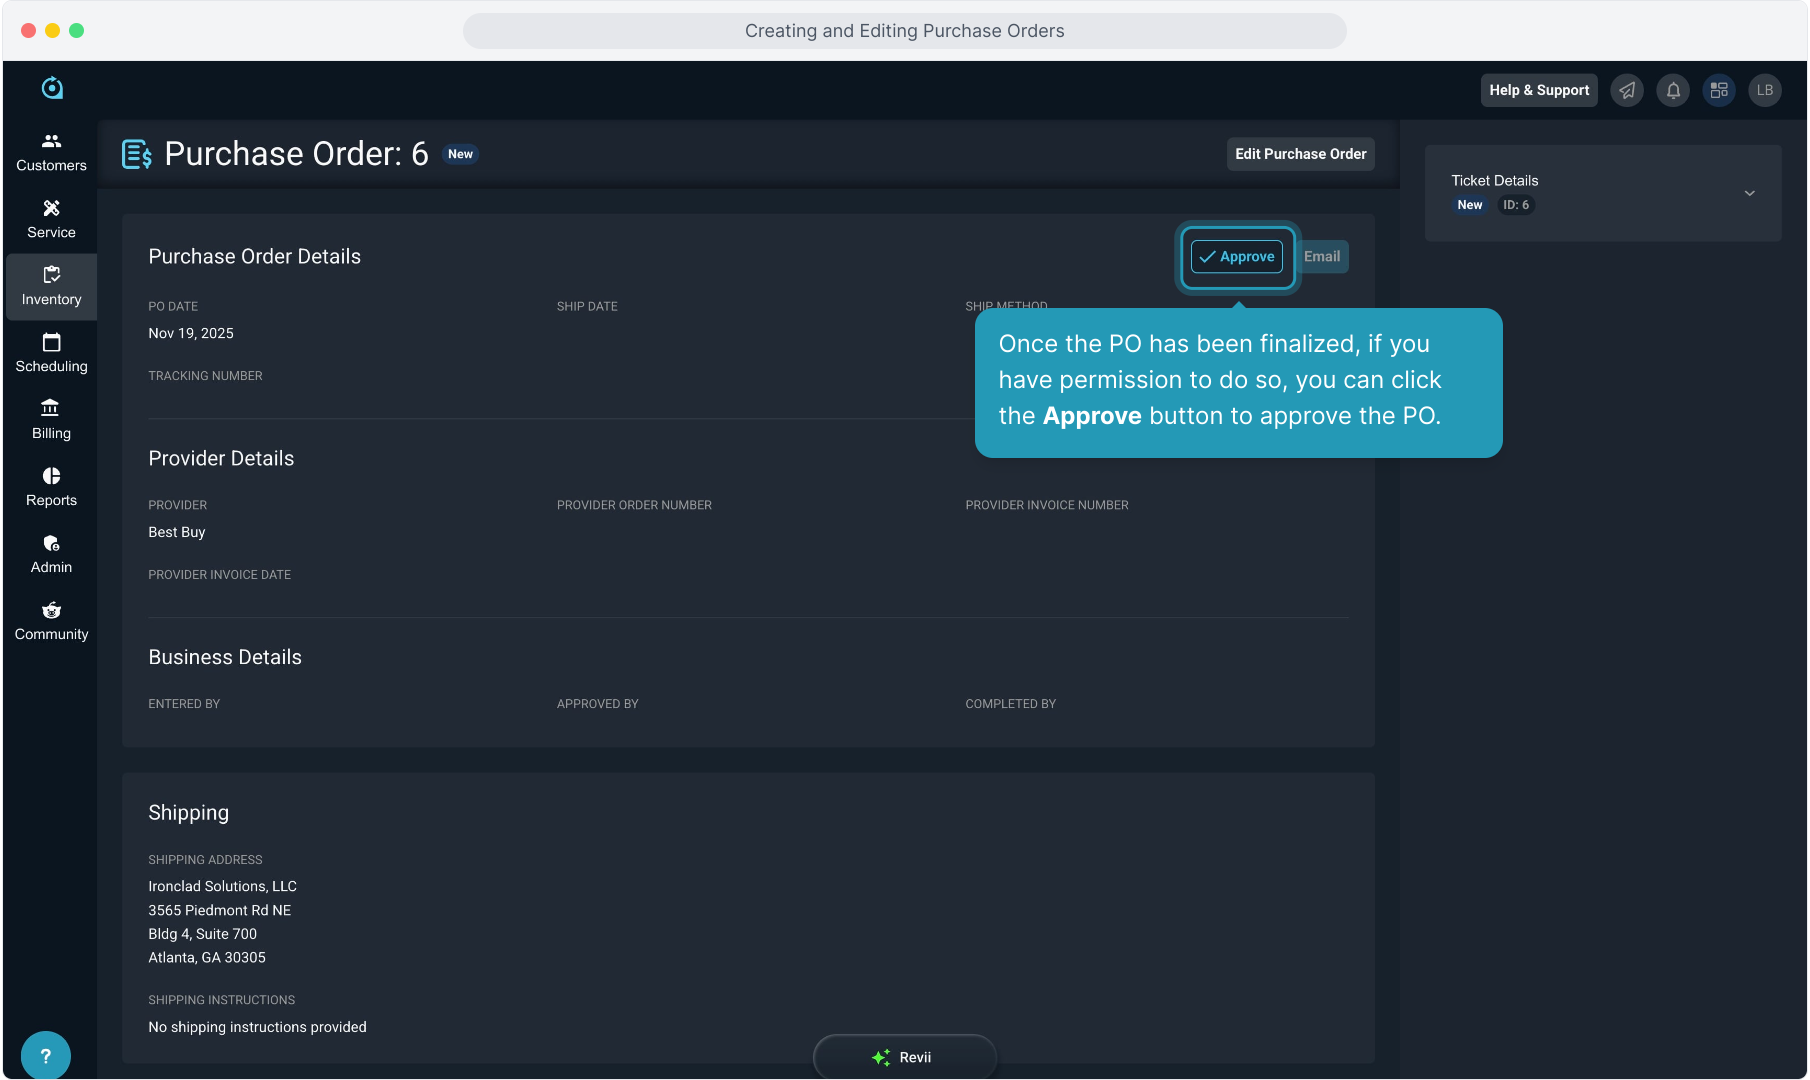
17. Once the PO has been finalized, if you have permission to do so, you can click the Approve button to approve the PO.
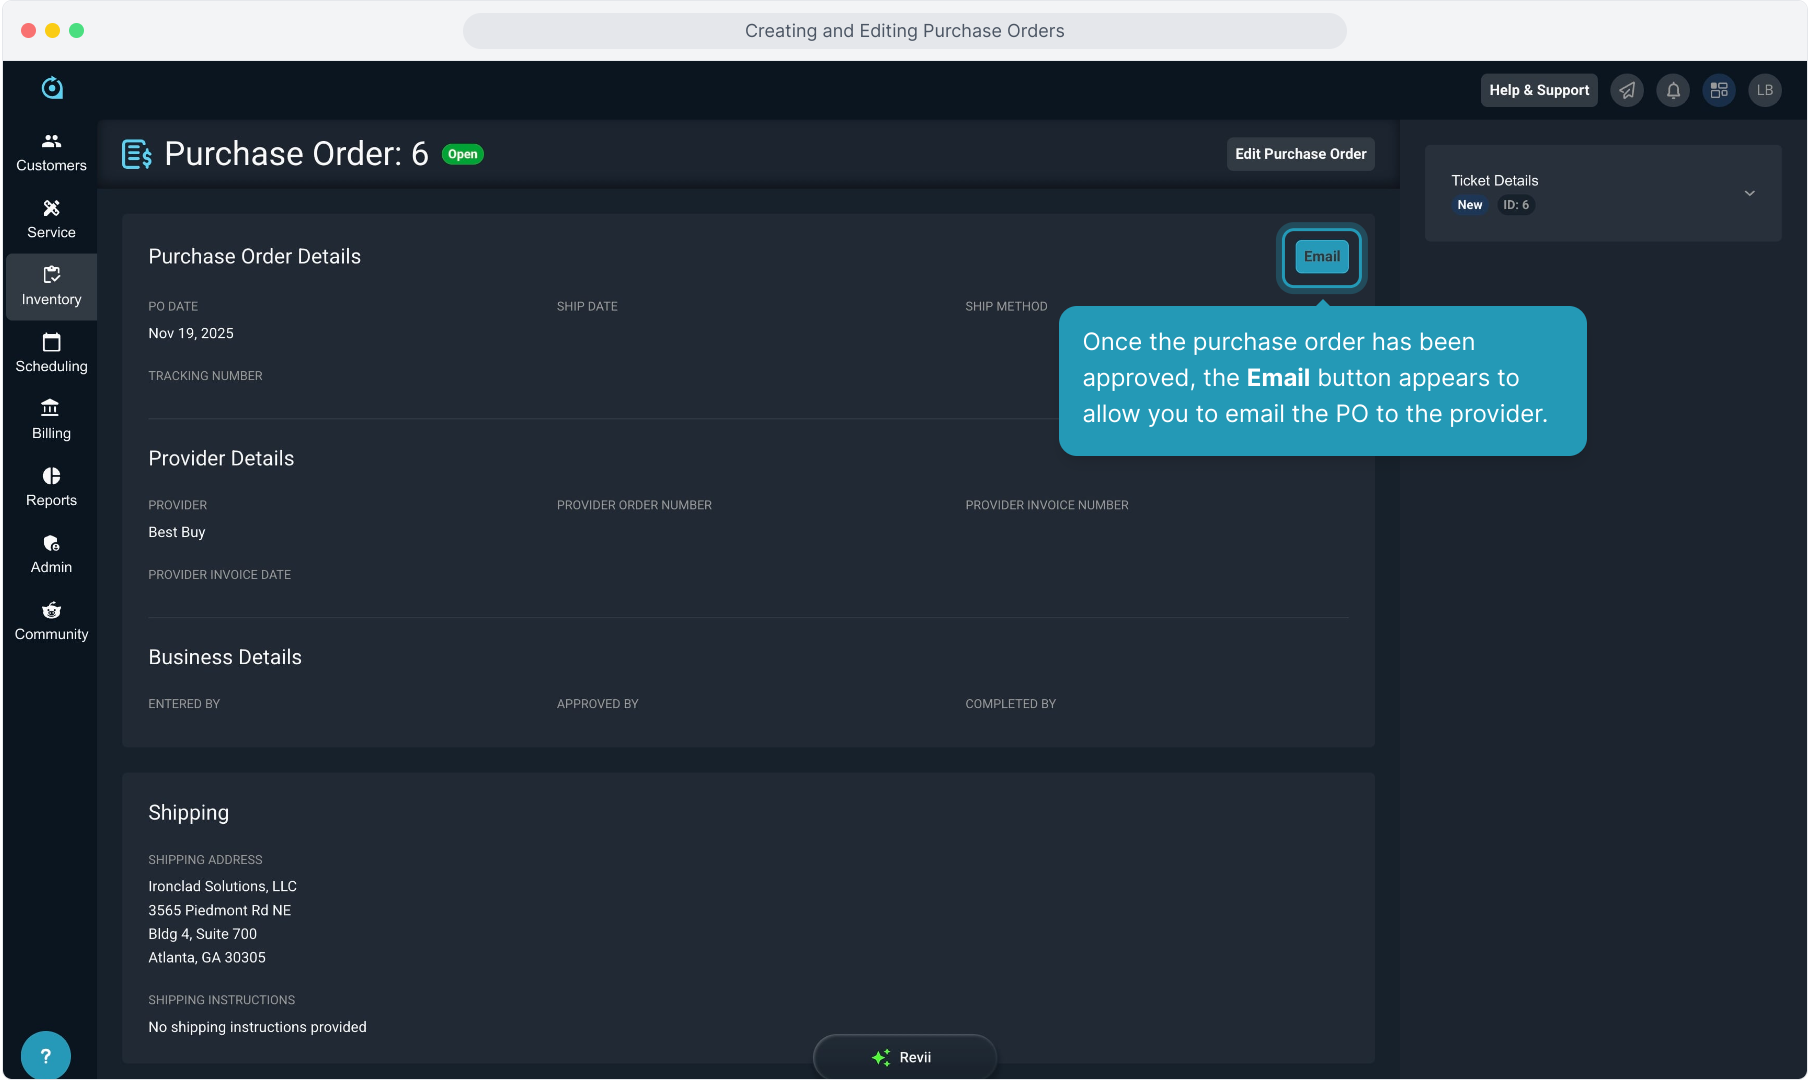
18. Once the purchase order has been approved, the Email button appears to allow you to email the PO to the provider.
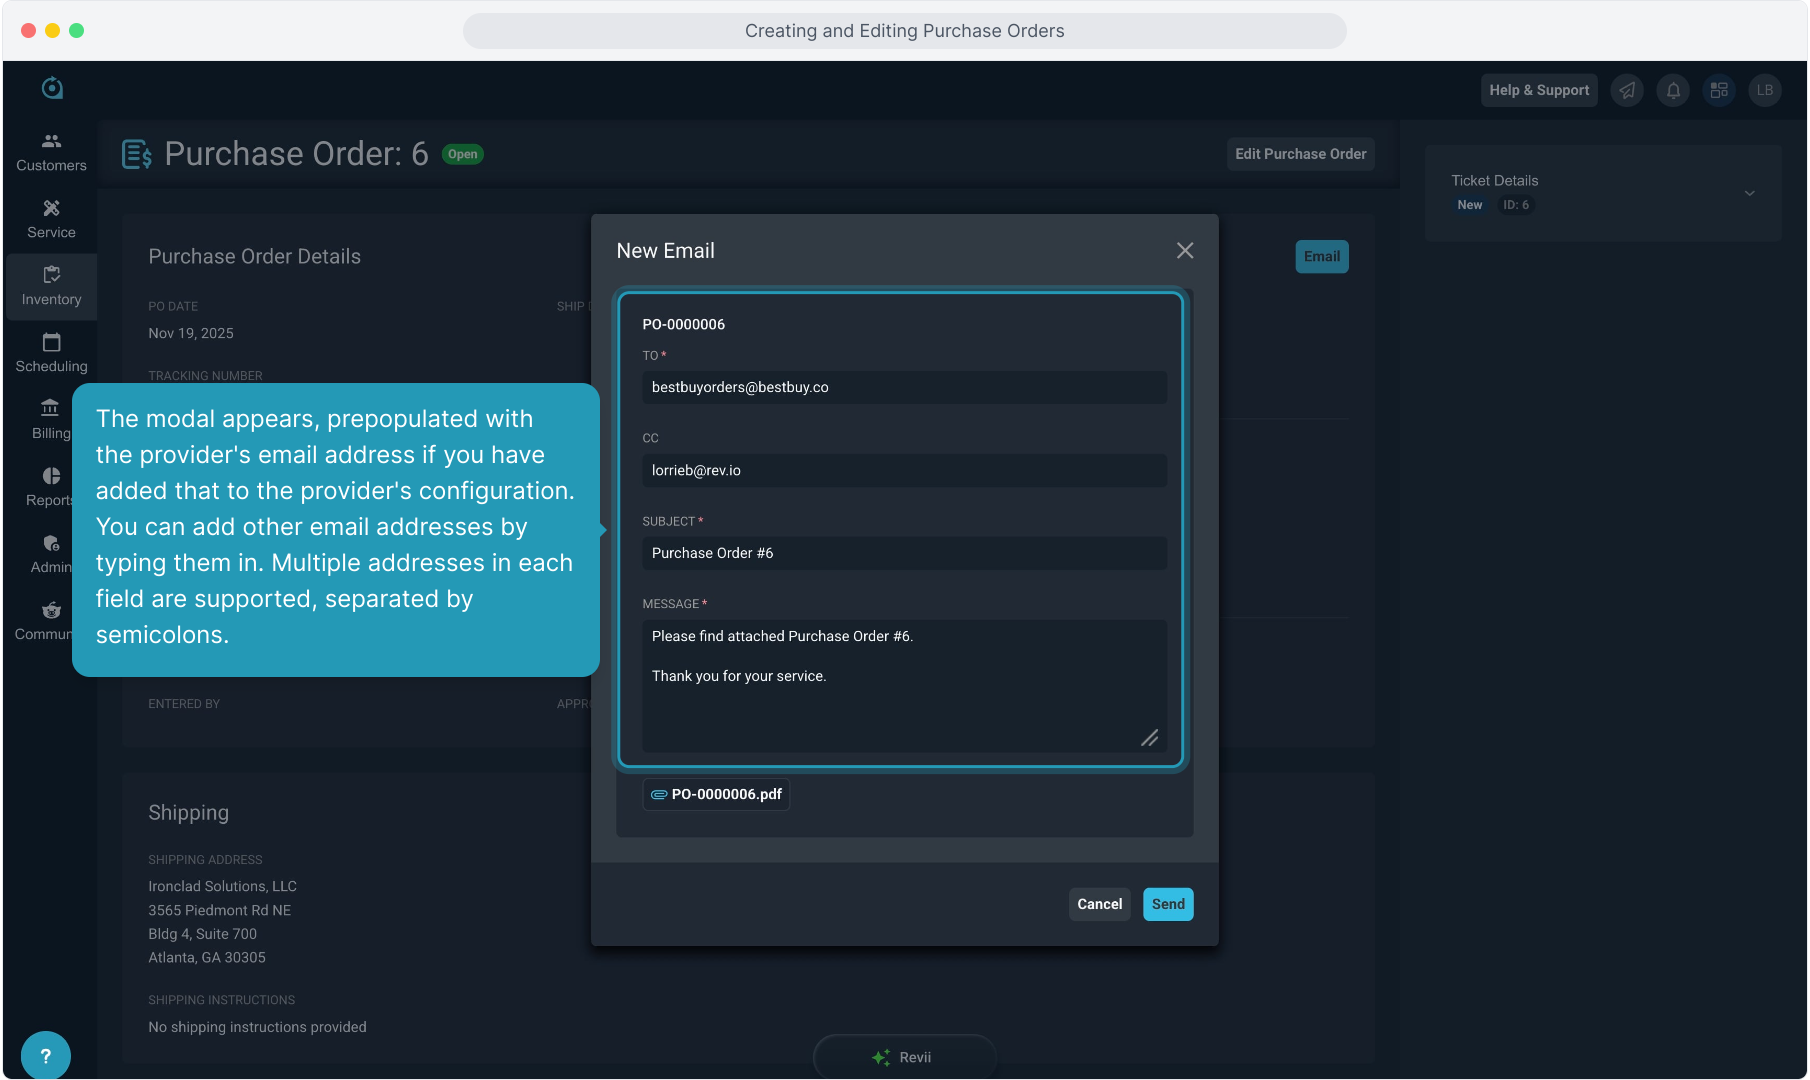
19. The modal appears, prepopulated with the provider's email address if you have added that to the provider's configuration. You can add other email addresses by typing them in. Multiple addresses in each field are supported, separated by semicolons.
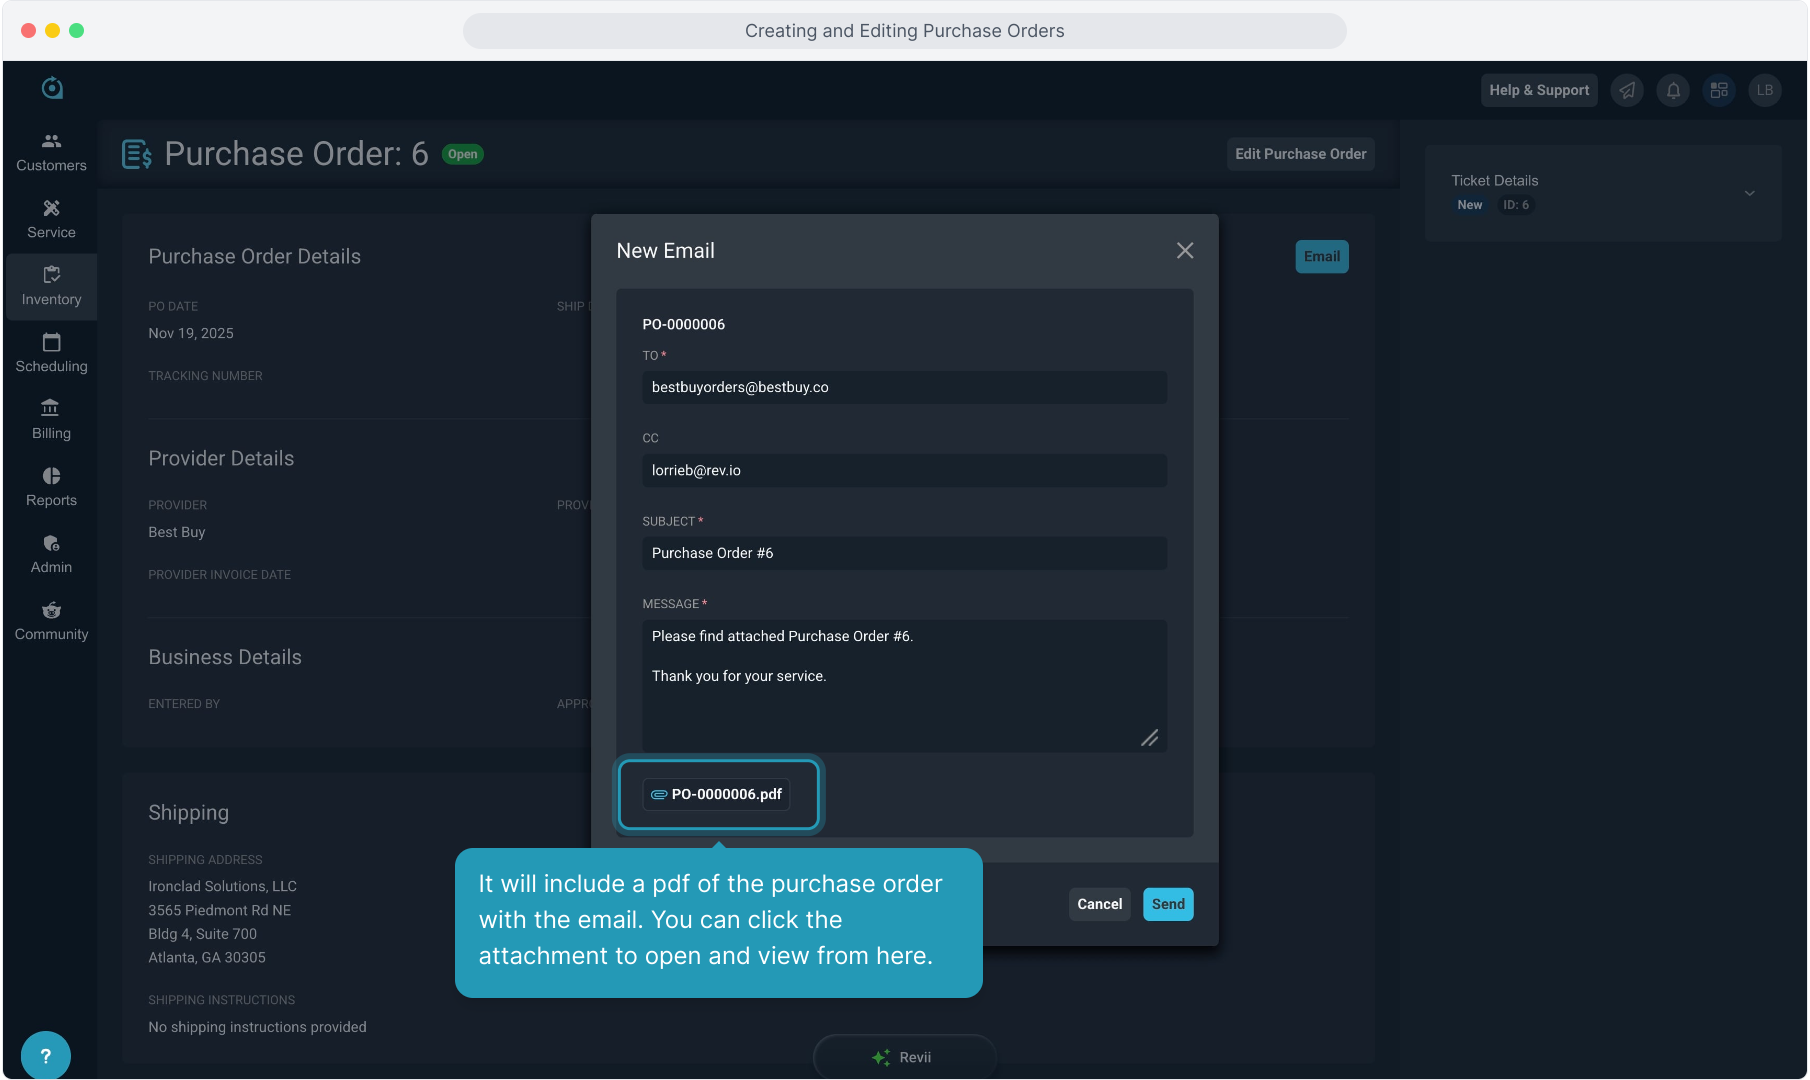
20. It will include a pdf of the purchase order with the email. You can click the attachment to open and view from here.
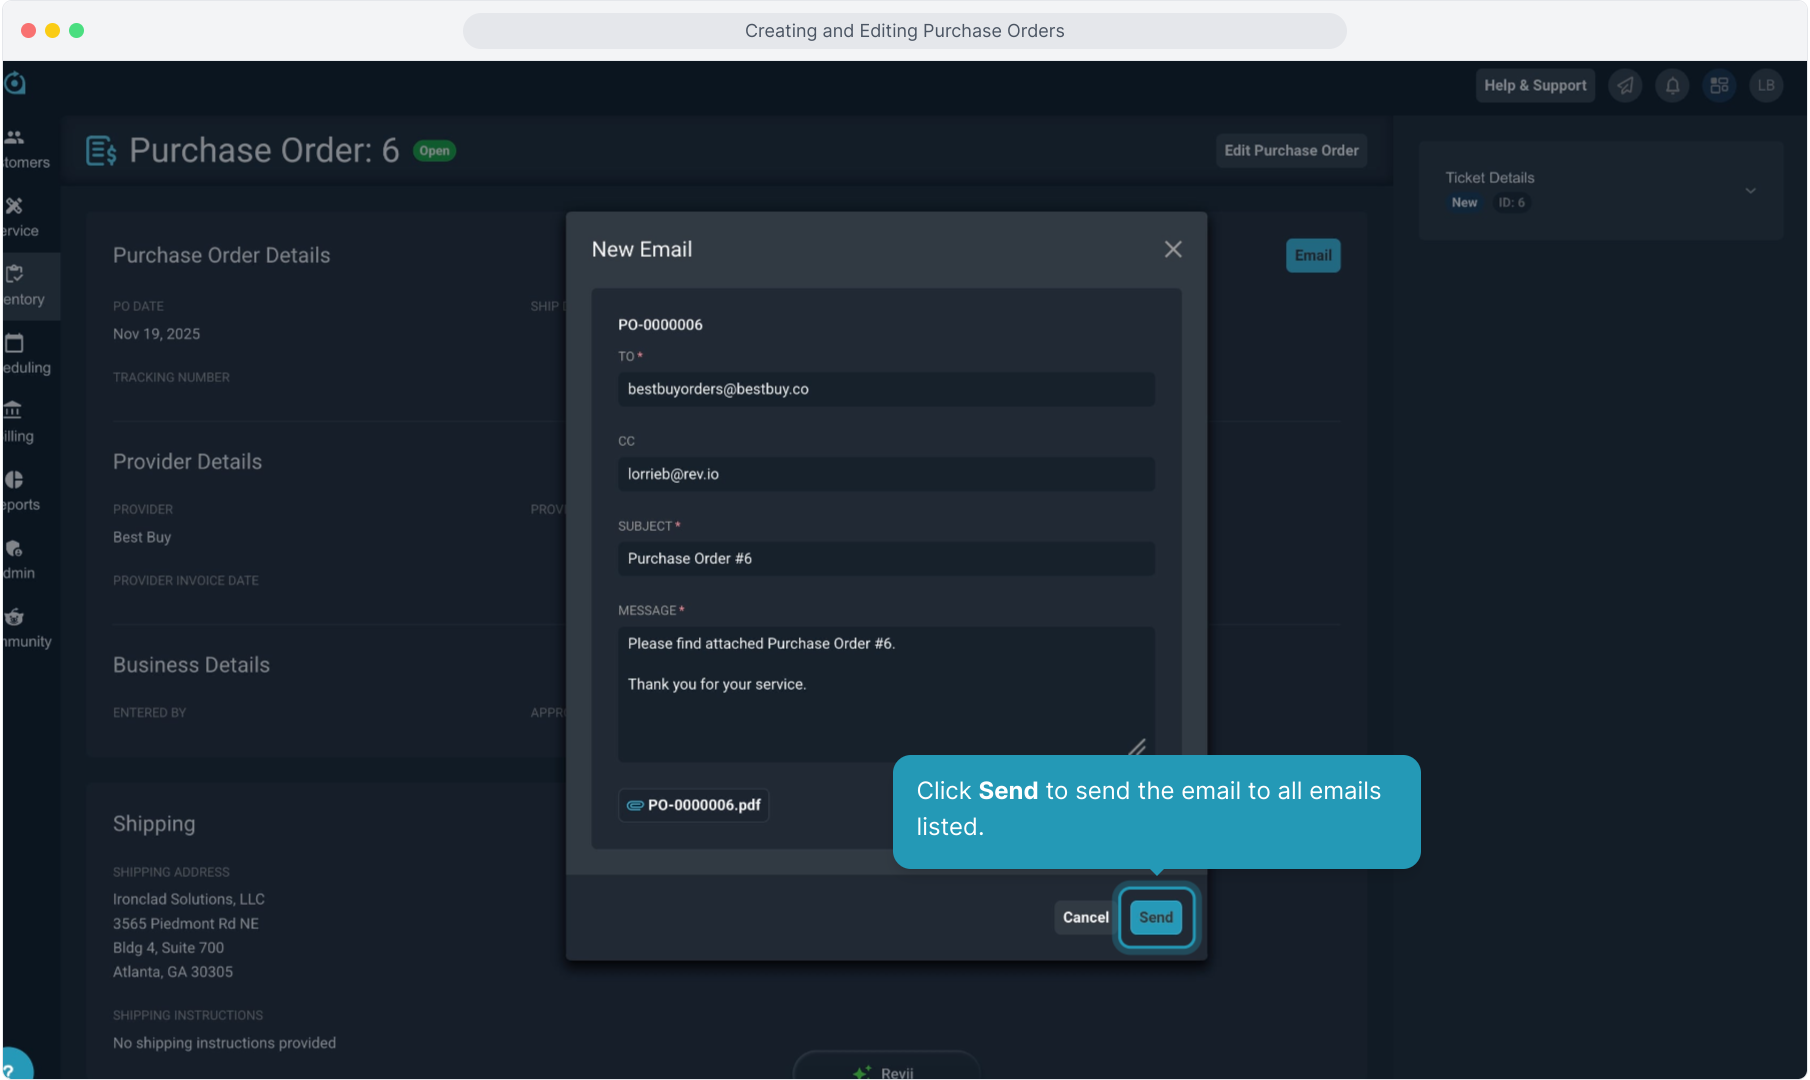
21. Click Send to send the email to all emails listed.
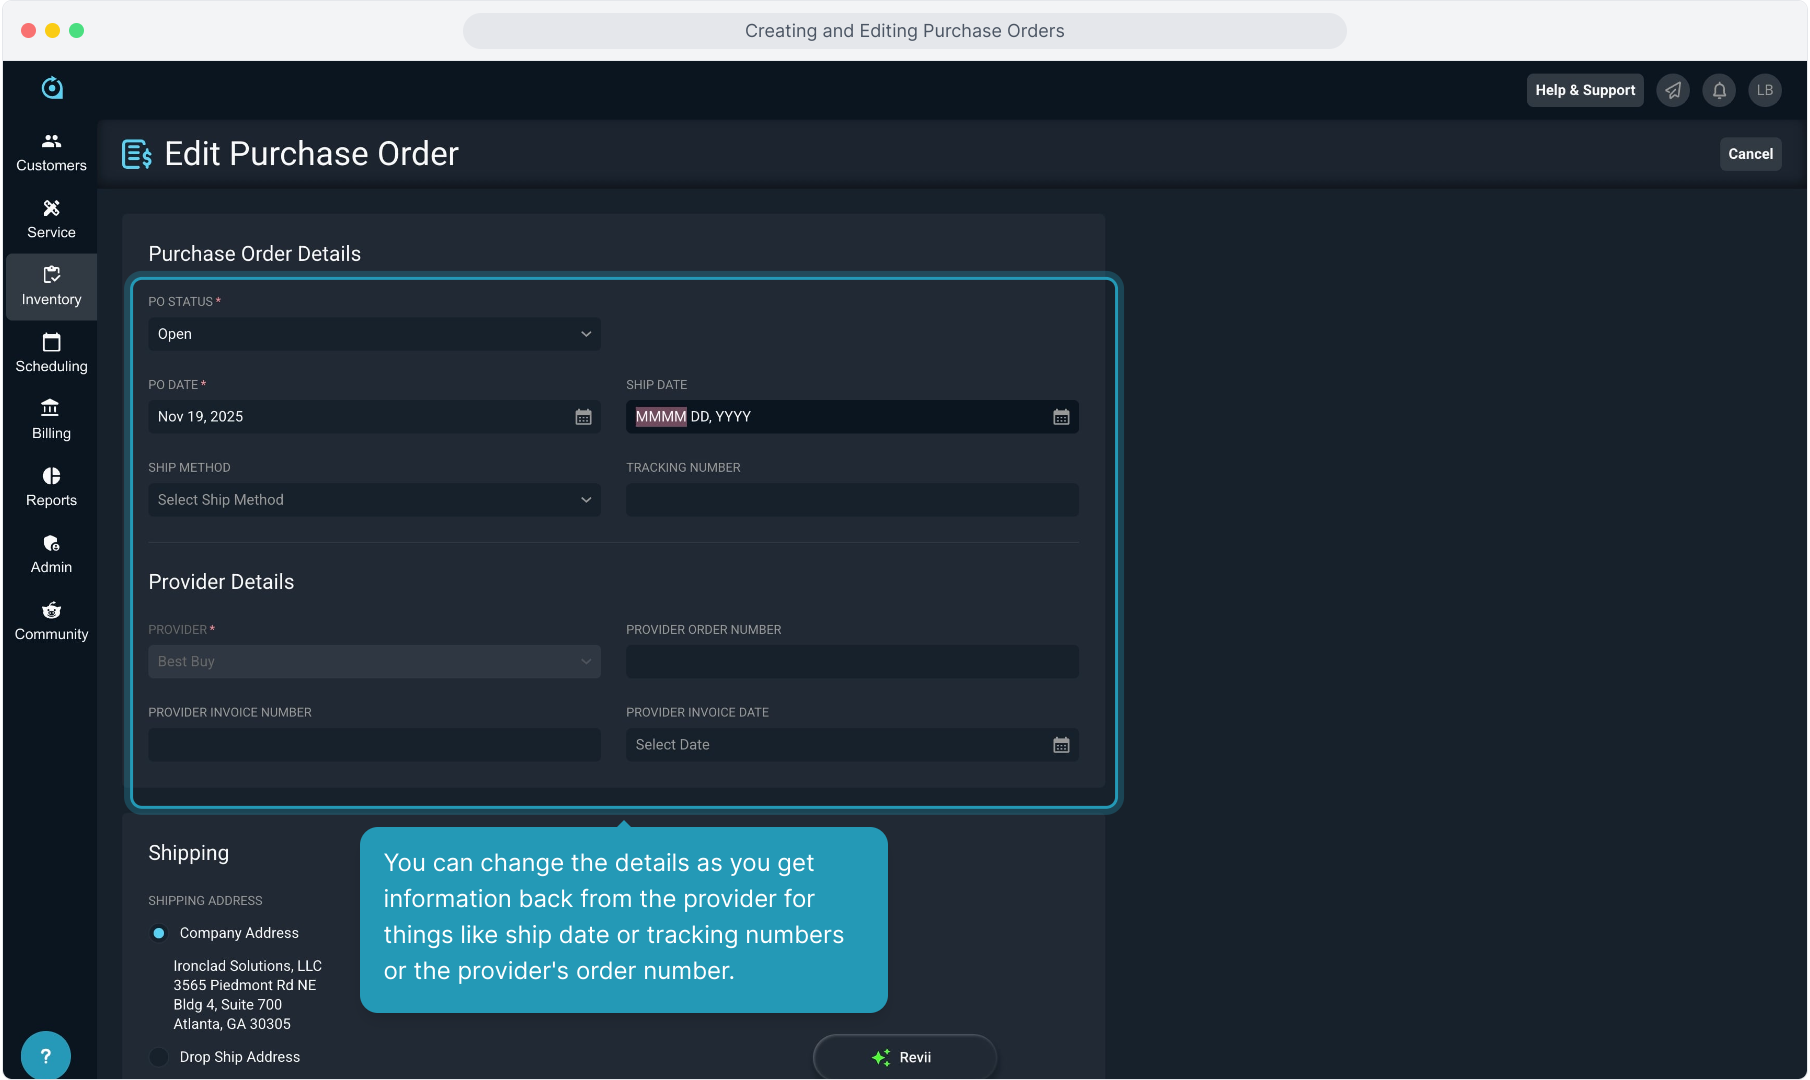
22. You can edit the details by clicking Edit Purchase Order.
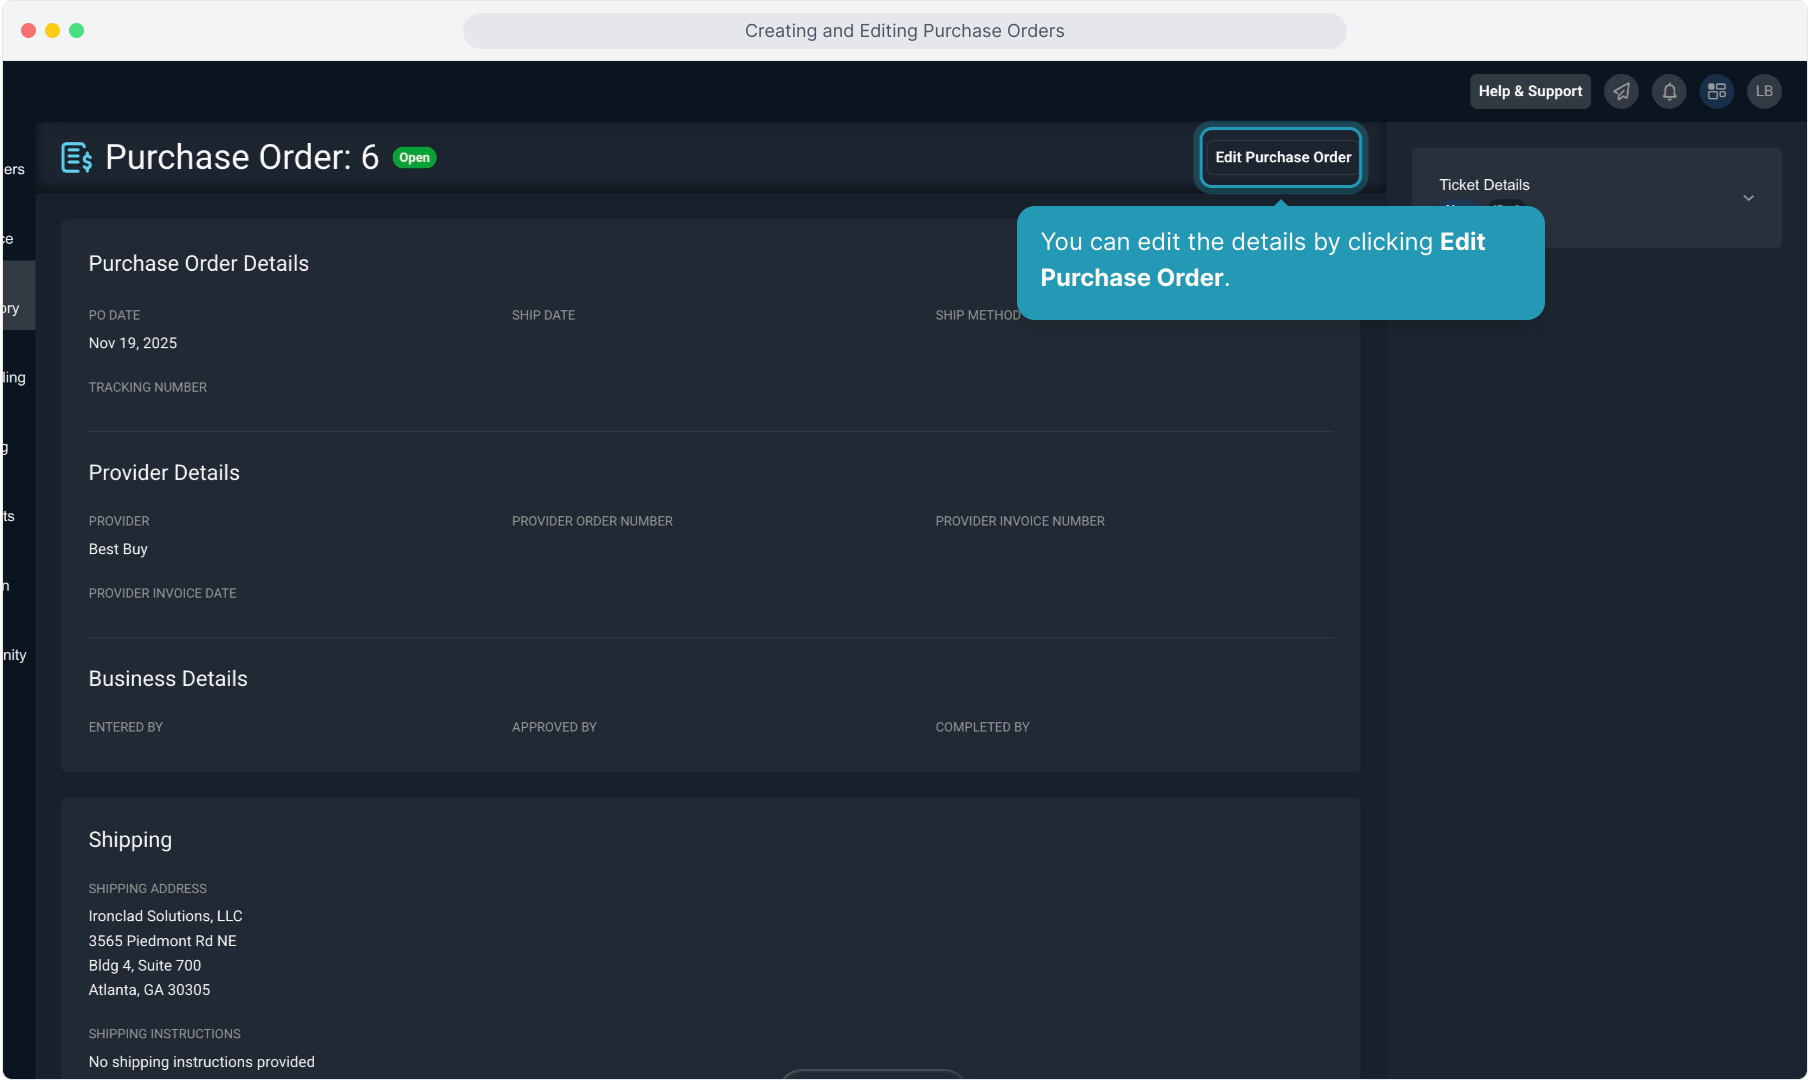
23. You can change the details as you get information back from the provider for things like ship date or tracking numbers or the provider's order number.