
Custom Fields Manager: Custom Field Builder Tab
The Custom Field Builder tab in the Custom Fields Manager allows you to create and define custom fields for specific areas of the system. You can choose from a variety of field types, including text, text area, number, date, dropdown, multi-select, and checkbox, and configure additional settings to ensure data is captured consistently and accurately. See the Add/Edit Custom Fields article for more information about creating new custom fields.
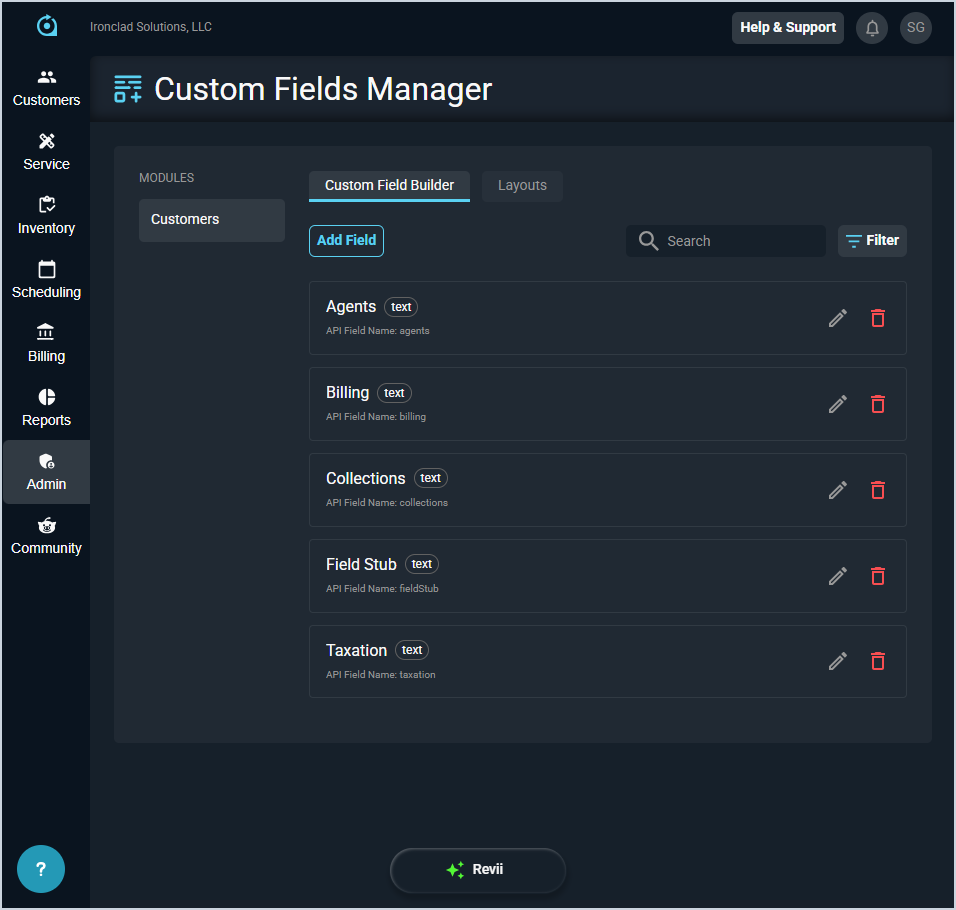
Each field on the Custom Field Builder tab is defined below.
| No. | Label | Definition |
| 1 | <Display Name> | Name of the custom field. |
| 2 | <Field Type> | Type of custom field. Field Type options include Text, Text Area, Number, Date, Dropdown, Multi-Select, and Checkbox. |
| 3 | API Field Name | Name of the API field for the custom field. This name is either entered as the Field Name when creating or editing the custom field, or auto-generated based on the Display Name. |
These actions are available on the Custom Field Builder tab.
- Add a new custom field by clicking the Add Field button at the top of the screen. See the Add/Edit Custom Fields article for more information.
- Search the custom fields displayed on this screen by entering text in the Search field. The list updates to display records matching your search in the column you selected.
- Filter the custom fields displayed on this screen by clicking the Filter button and selecting the Show Inactive option. The list hides inactive custom fields by default, but this option shows all custom fields regardless of status.
- Edit a custom field by clicking the pencil icon at the end of the row. See the Add/Edit Custom Fields article for more information.
- Deactivate a custom field by clicking the delete icon at the end of the row. NOTE: Custom fields deactivated in this way can be reactivated at any time by setting the Show Inactive filter and editing the custom field to set the Active option again.