How To Guide: Multi-Location Leads & Quotes
1. Introduction
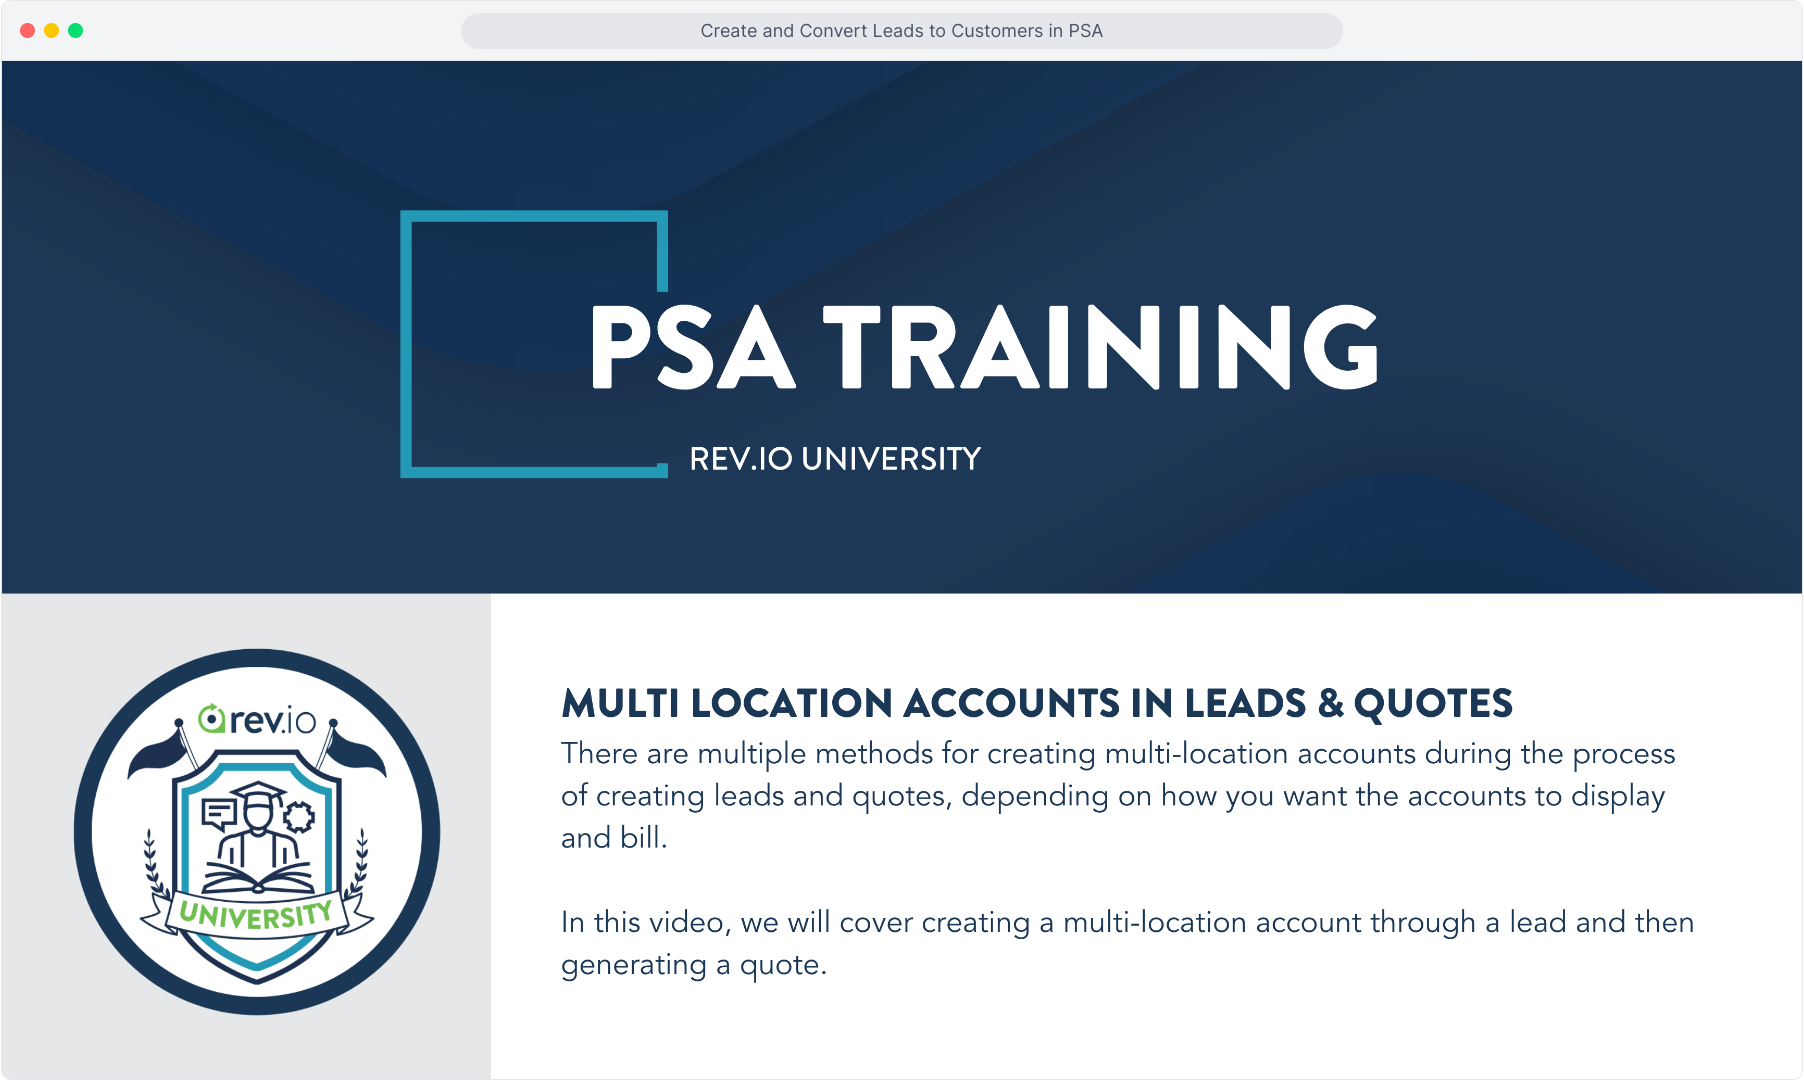
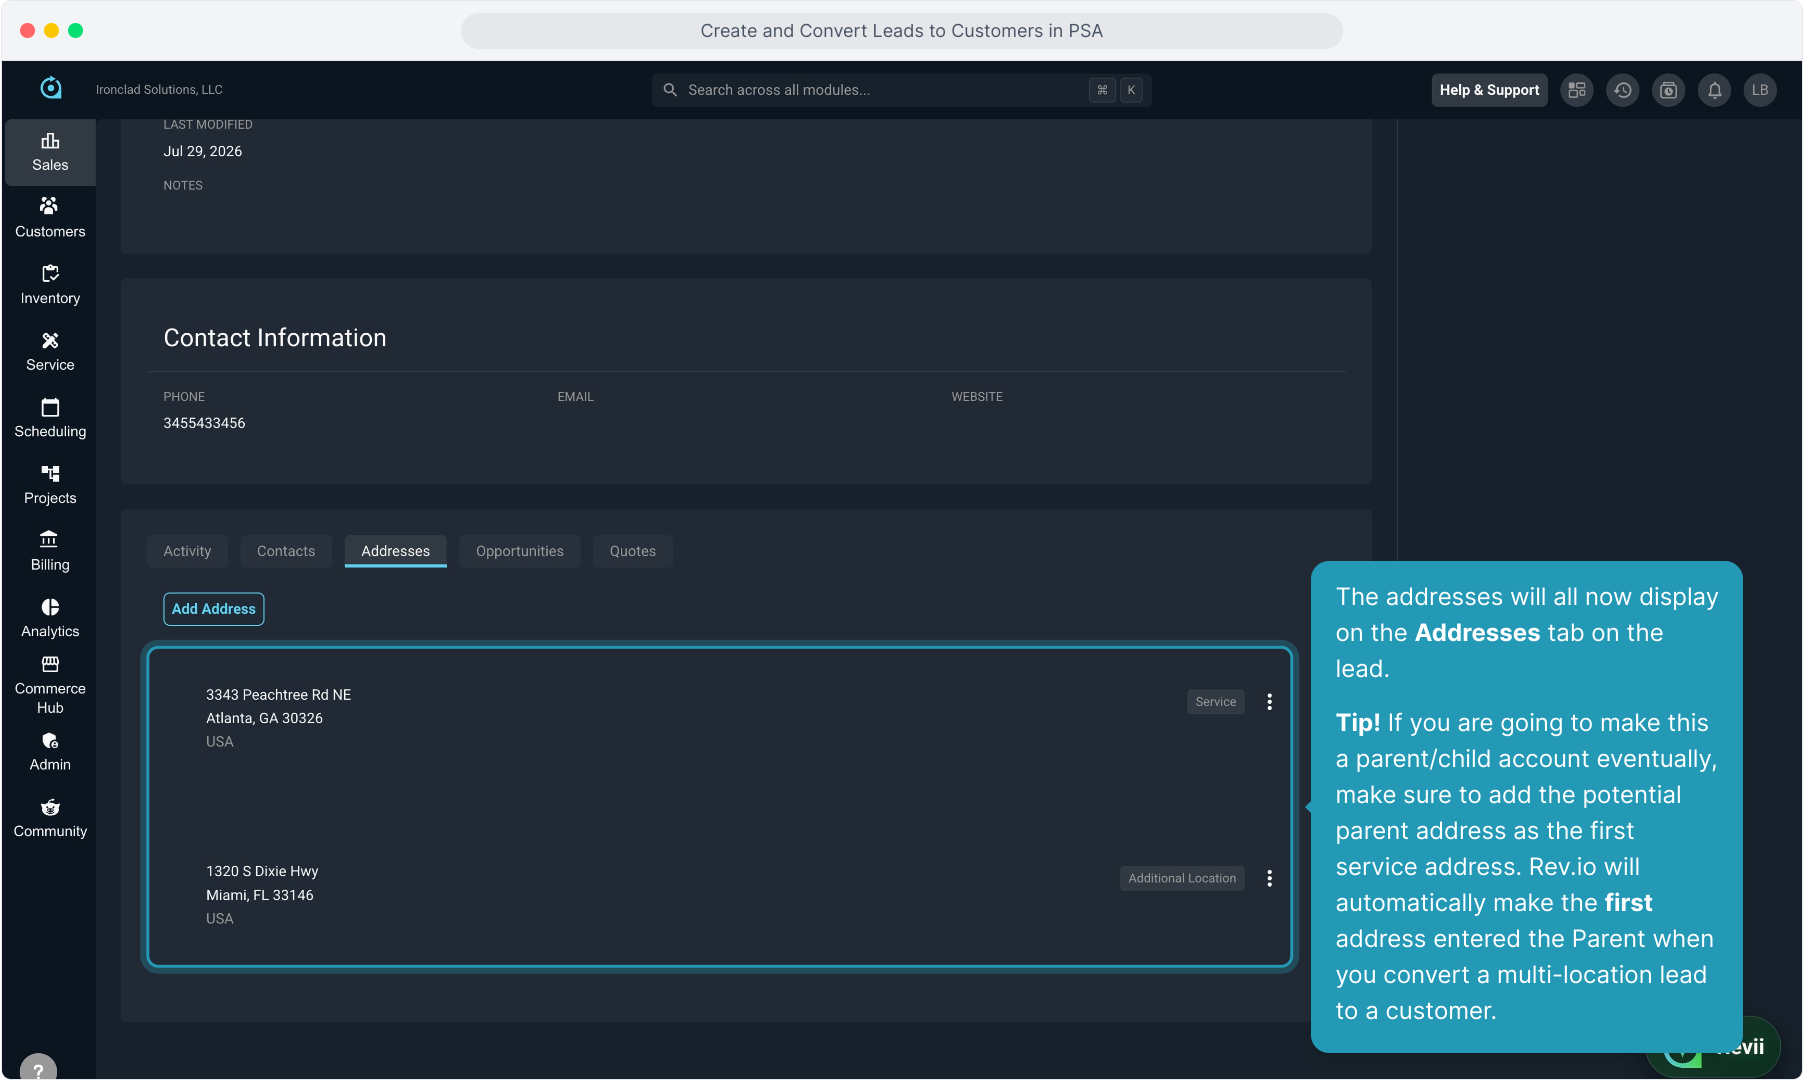
2. From the lead, you'll want to create all the different service addresses here so that they are available to you when you create the quote.
Click the Addresses tab and then click Add Address to add all necessary additional locations.
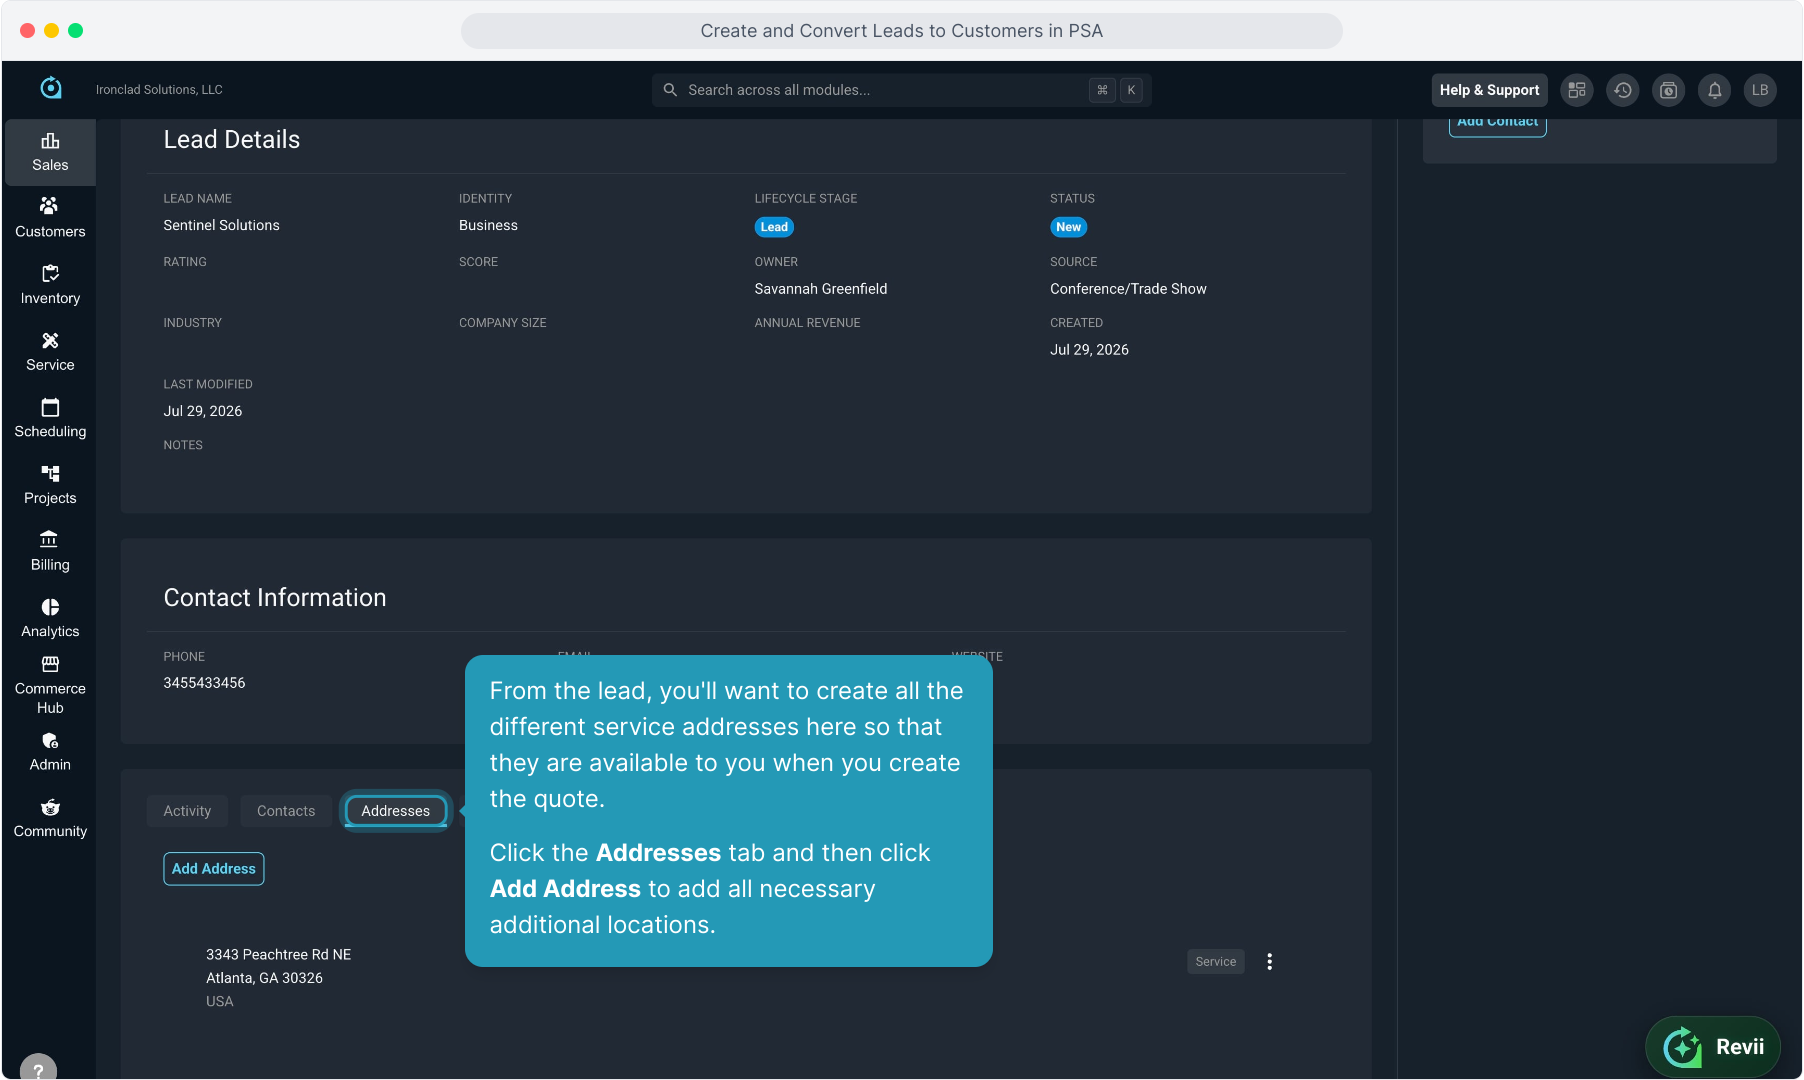
3. When adding the additional addresses, make sure to select the Address Type of Additional Location for each and save each address.
4. The addresses will all now display on the Addresses tab on the lead.
Tip! If you are going to make this a parent/child account eventually, make sure to add the potential parent address as the first service address. Rev.io will automatically make the first address entered the Parent when you convert a multi-location lead to a customer.
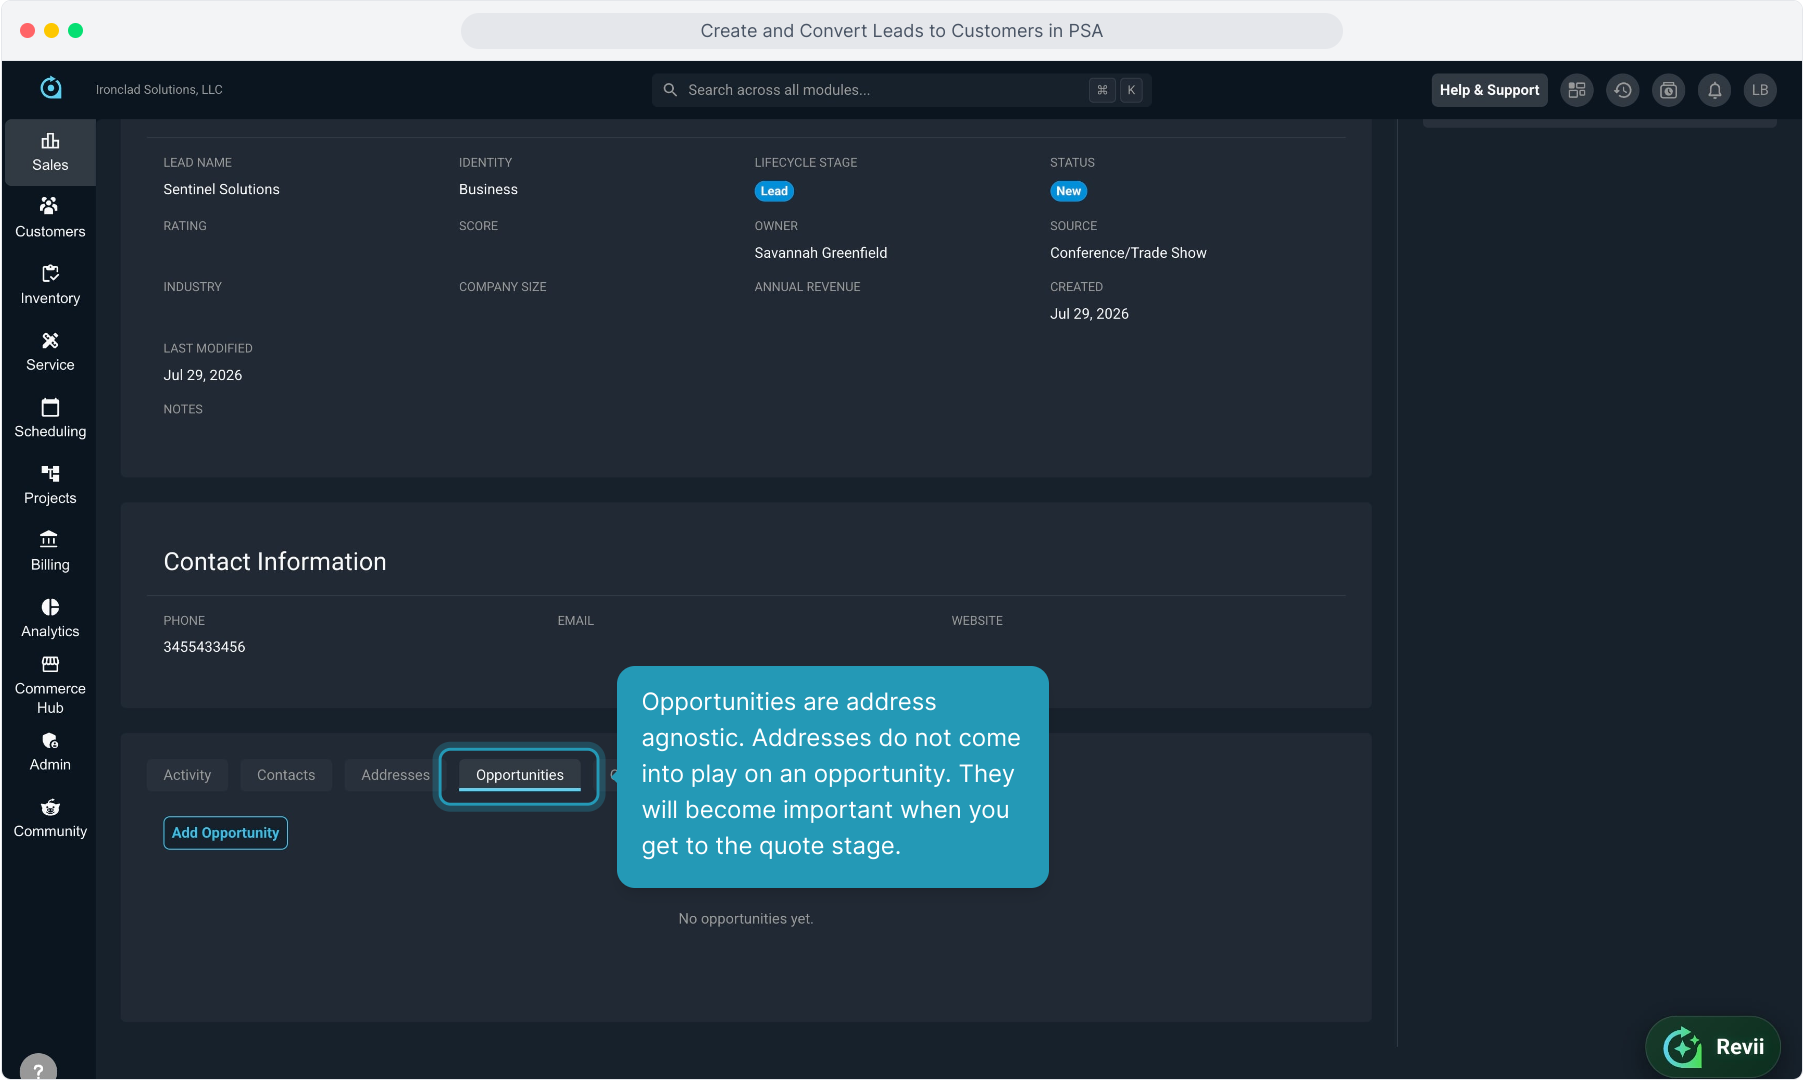
5. Opportunities are address agnostic. Addresses do not come into play on an opportunity. They will become important when you get to the quote stage.
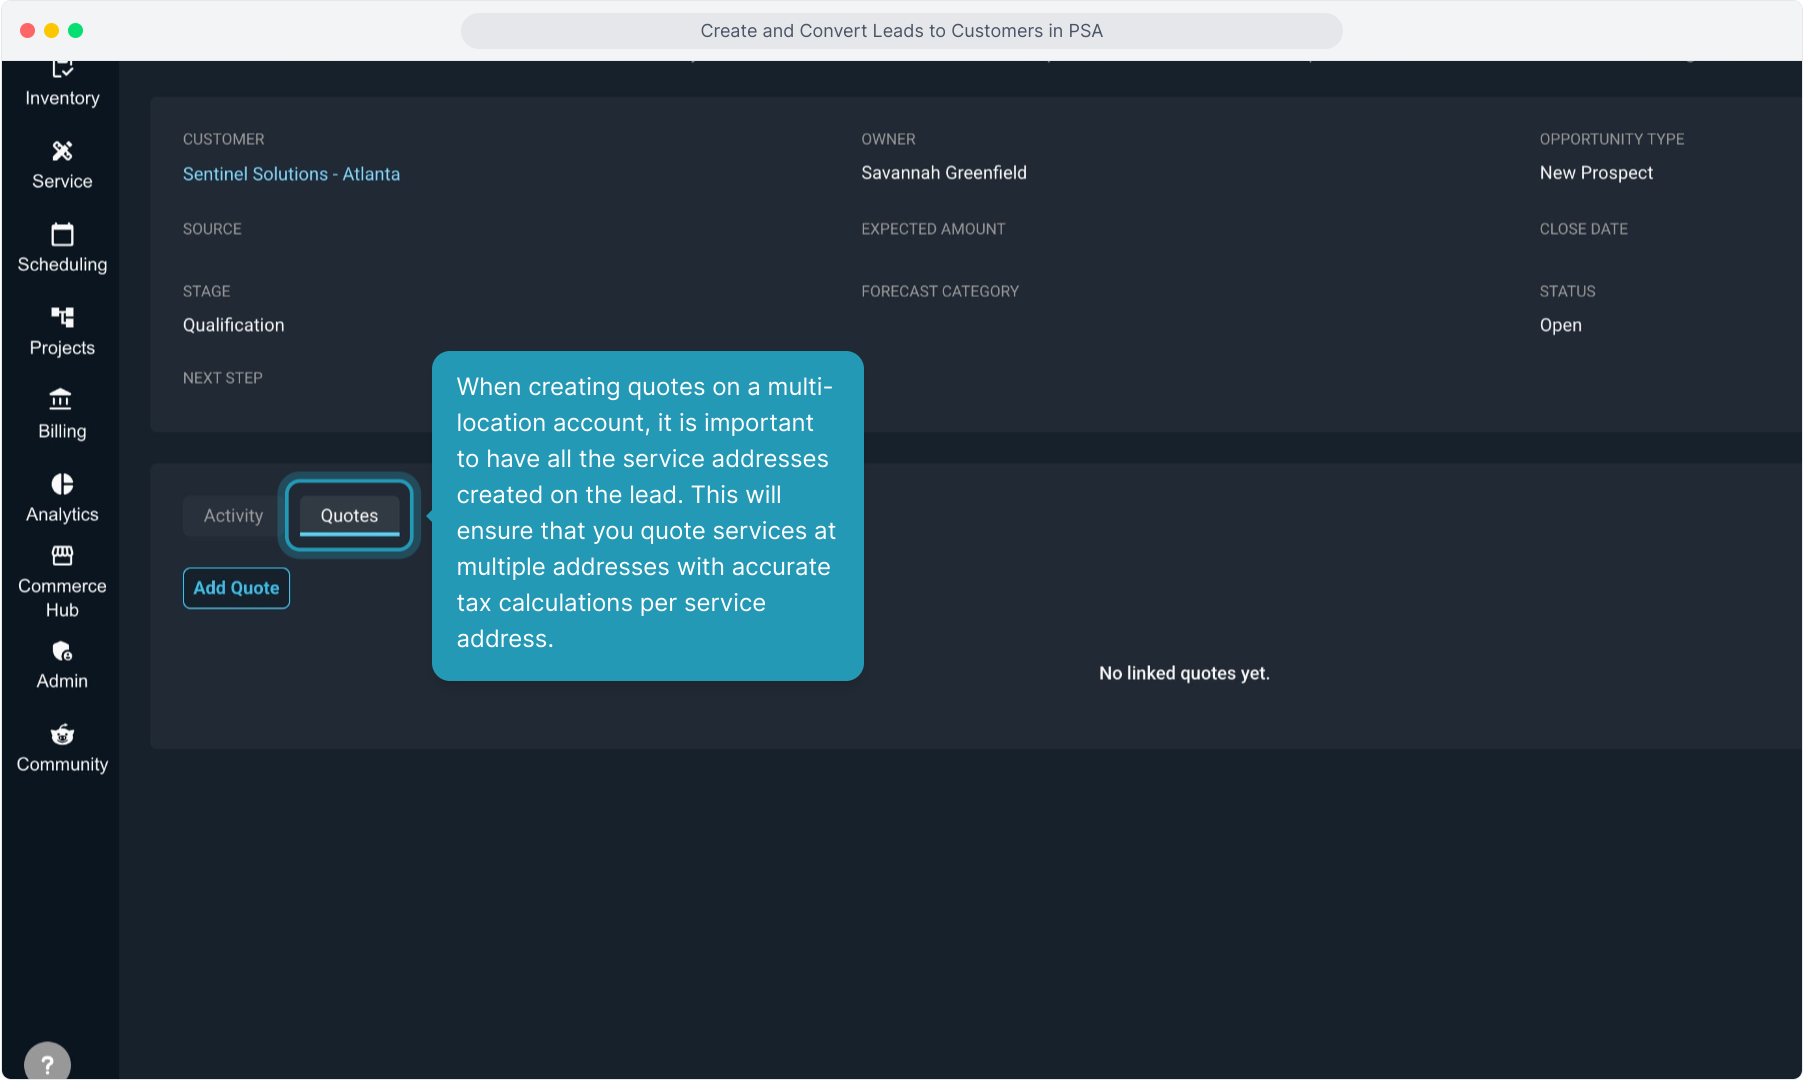
6. When creating quotes on a multi-location account, it is important to have all the service addresses created on the lead. This will ensure that you quote services at multiple addresses with accurate tax calculations per service address.
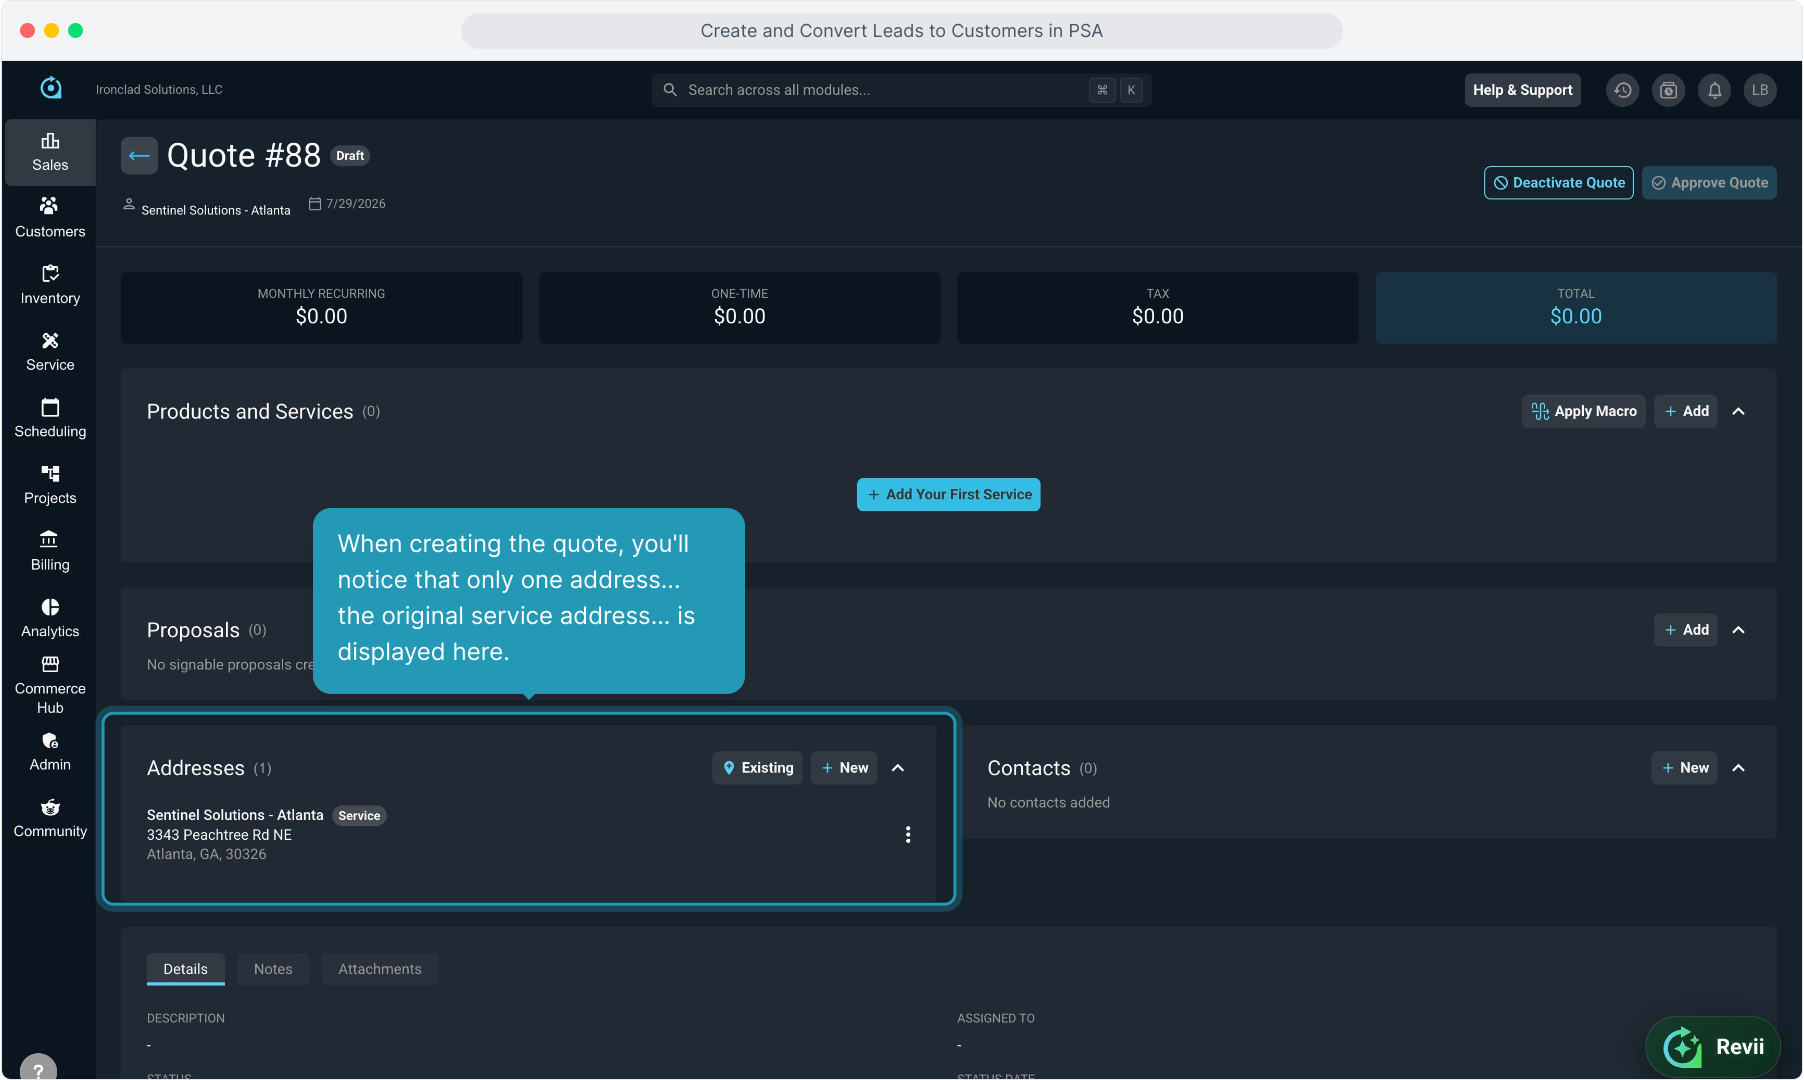
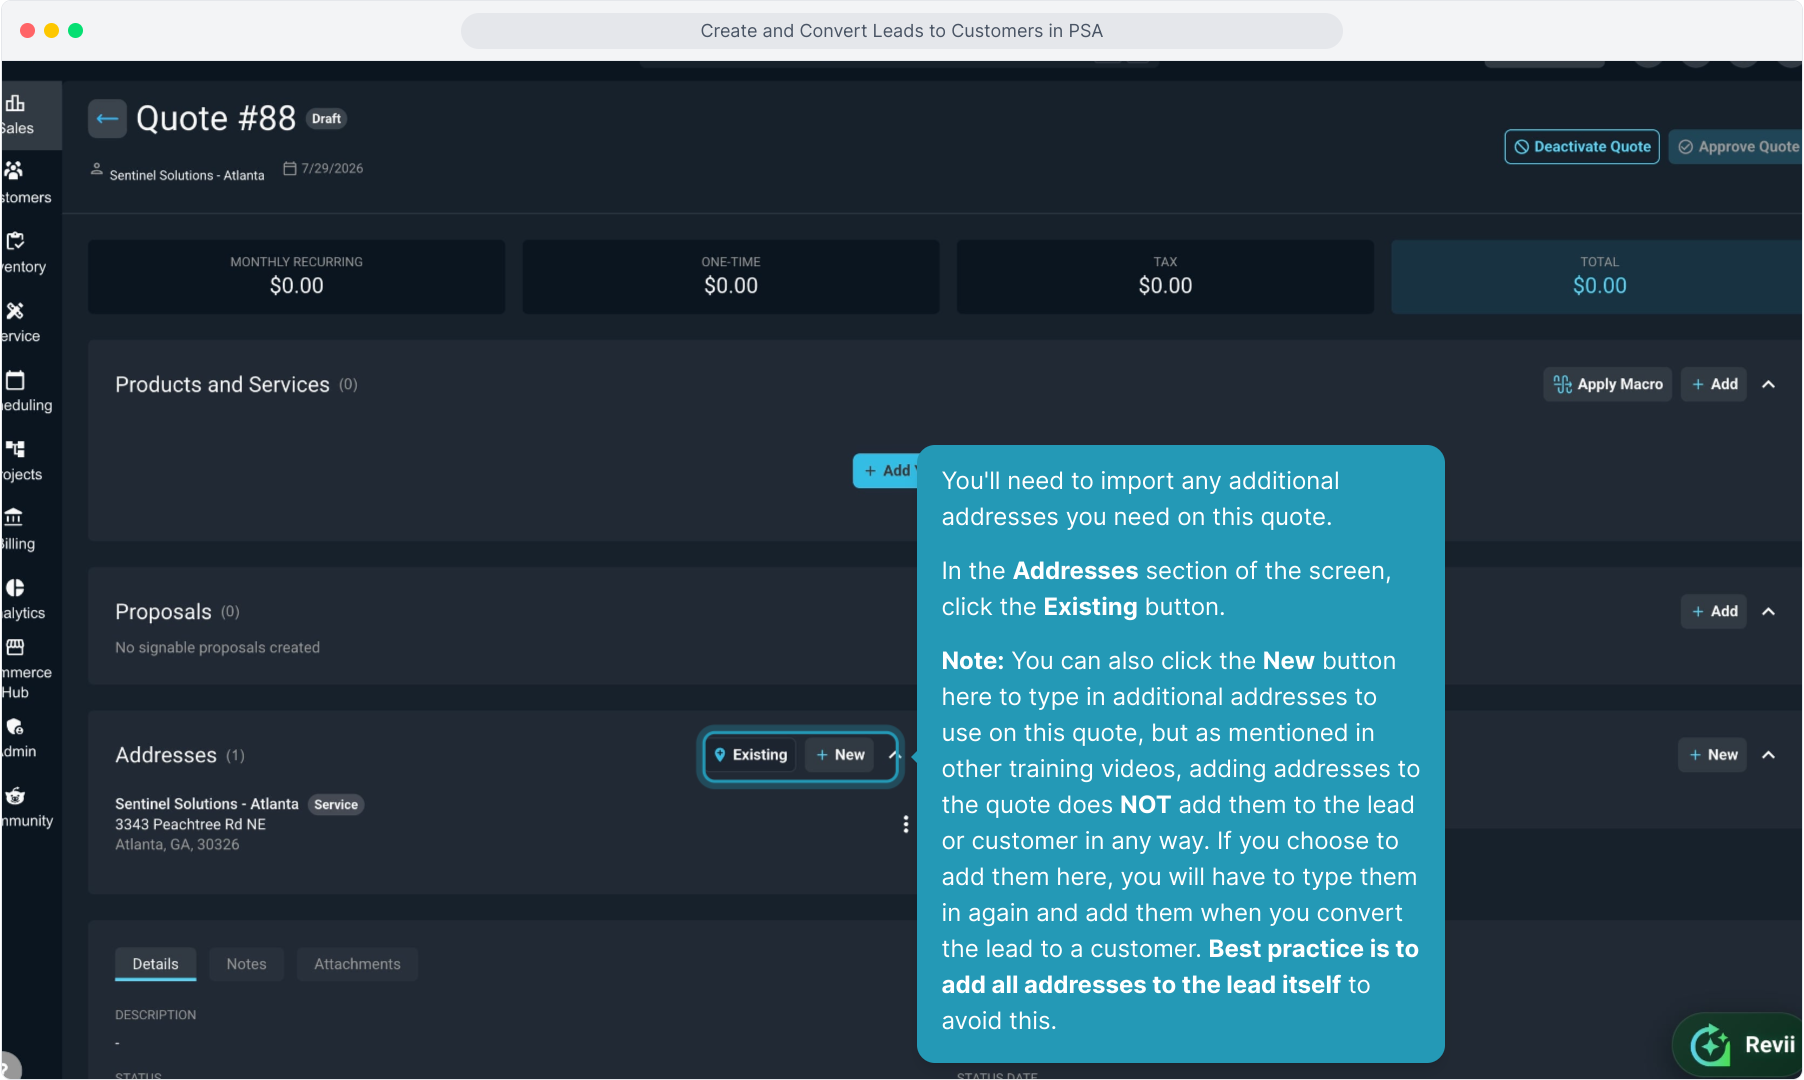
7. When creating the quote, you'll notice that only one address... the original service address... is displayed here.
8. You'll need to import any additional addresses you need on this quote.
In the Addresses section of the screen, click the Existing button.
Note: You can also click the New button here to type in additional addresses to use on this quote, but as mentioned in other training videos, adding addresses to the quote does NOT add them to the lead or customer in any way. If you choose to add them here, you will have to type them in again and add them when you convert the lead to a customer. Best practice is to add all addresses to the lead itself to avoid this.
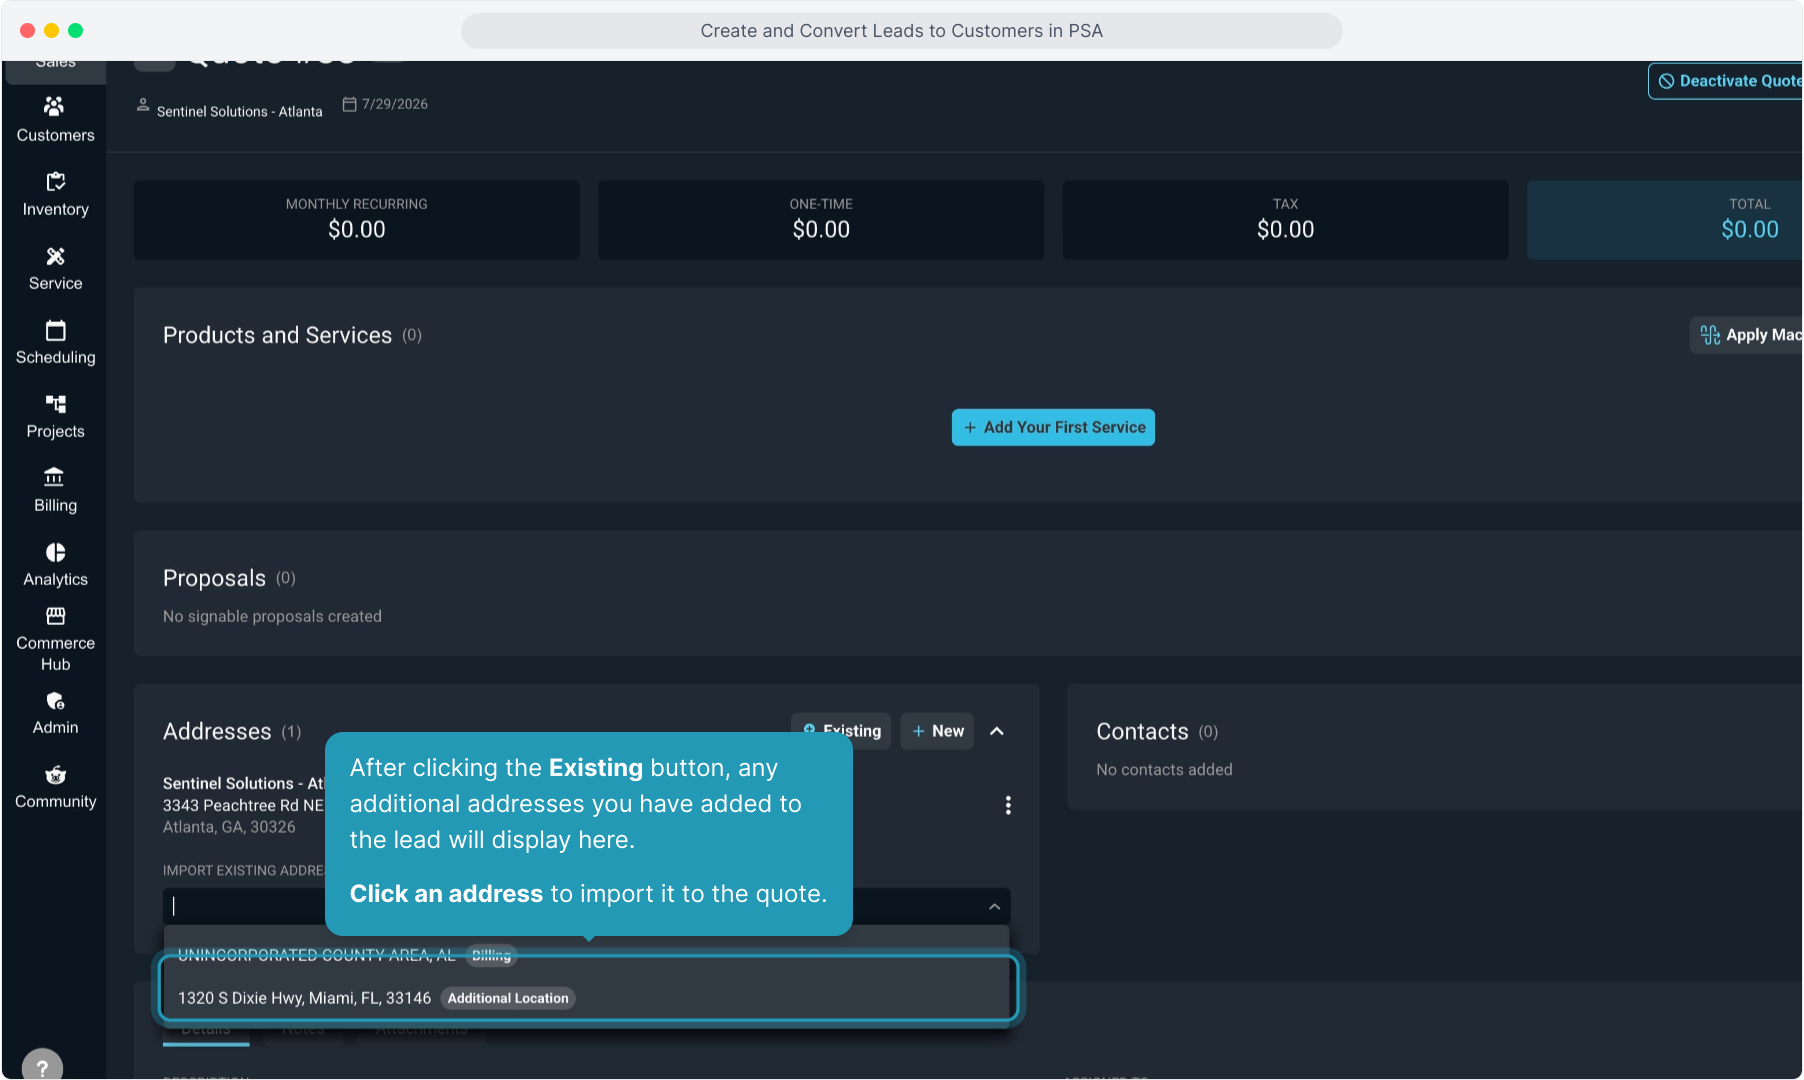
9. After clicking the Existing button, any additional addresses you have added to the lead will display here.
Click an address to import it to the quote.
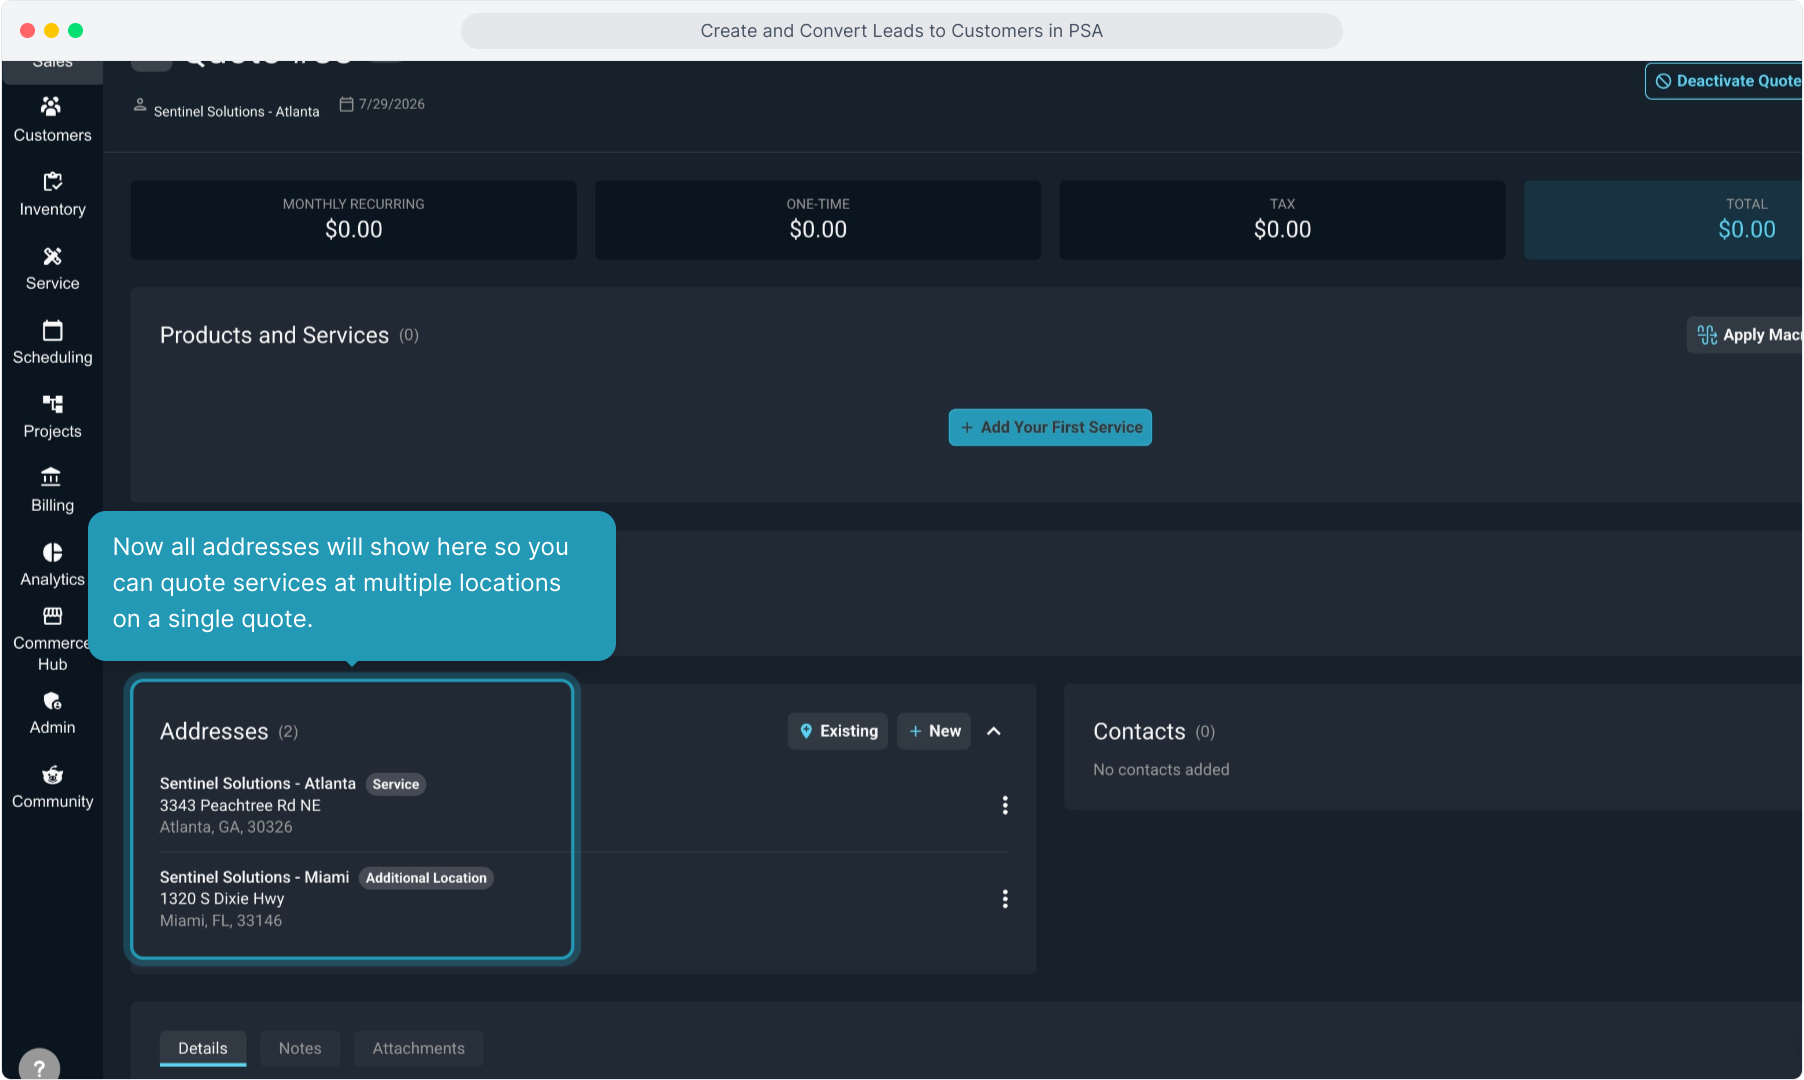
10. Now all addresses will show here so you can quote services at multiple locations on a single quote.
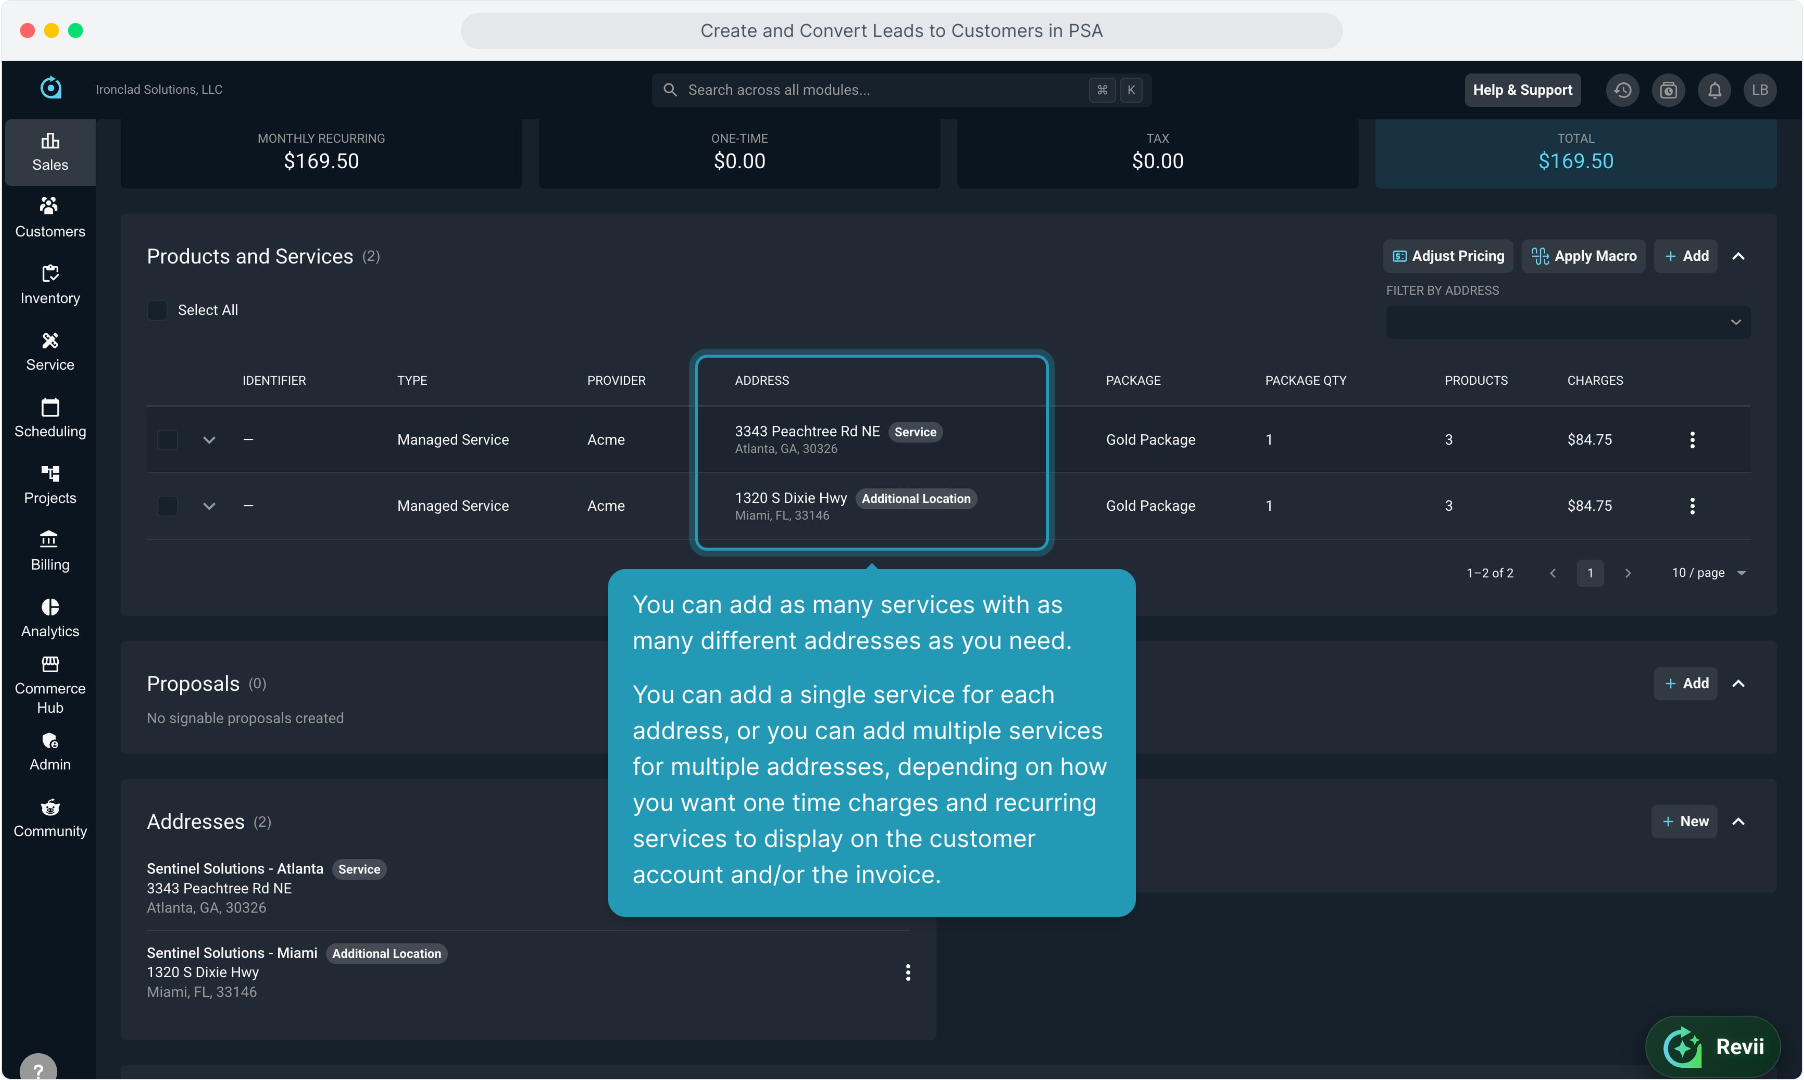
11. When you add any service, all the addresses you imported from the lead will display for selection.
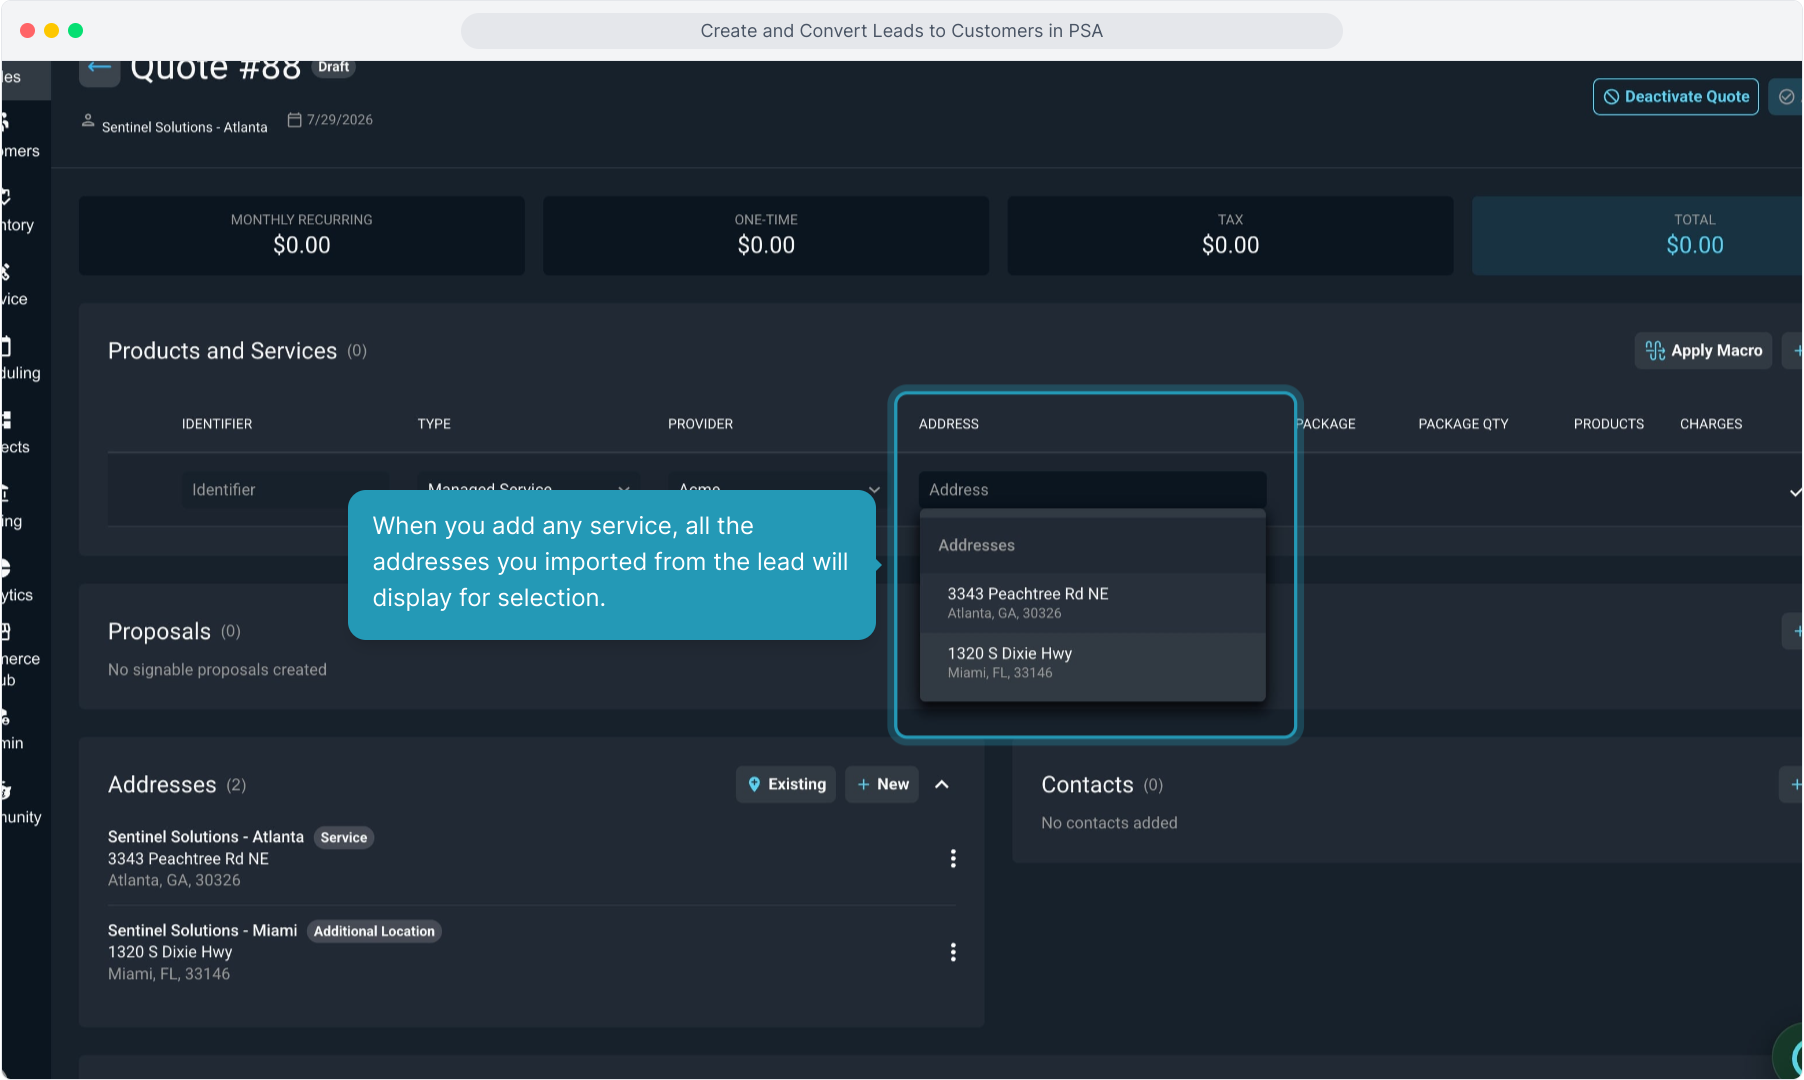
12. You can add as many services with as many different addresses as you need.
You can add a single service for each address, or you can add multiple services for multiple addresses, depending on how you want one time charges and recurring services to display on the customer account and/or the invoice.
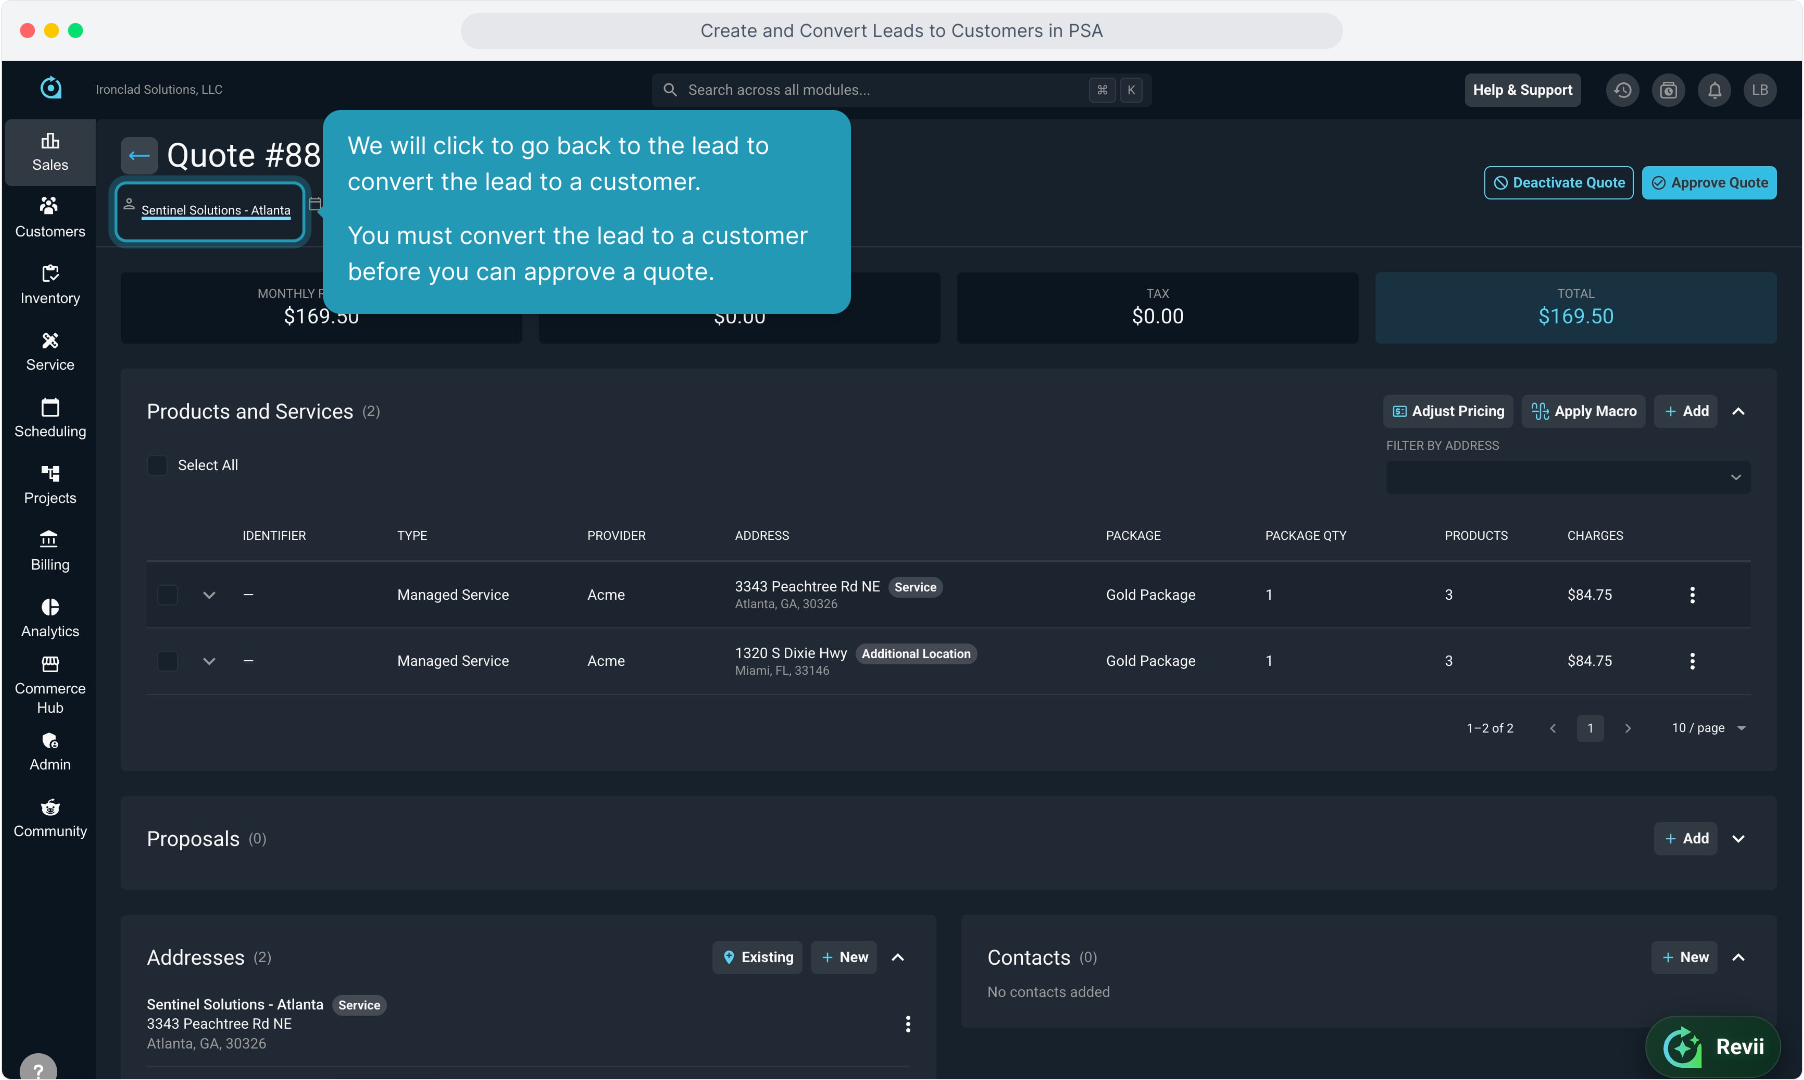
13. We will click to go back to the lead to convert the lead to a customer.
You must convert the lead to a customer before you can approve a quote.
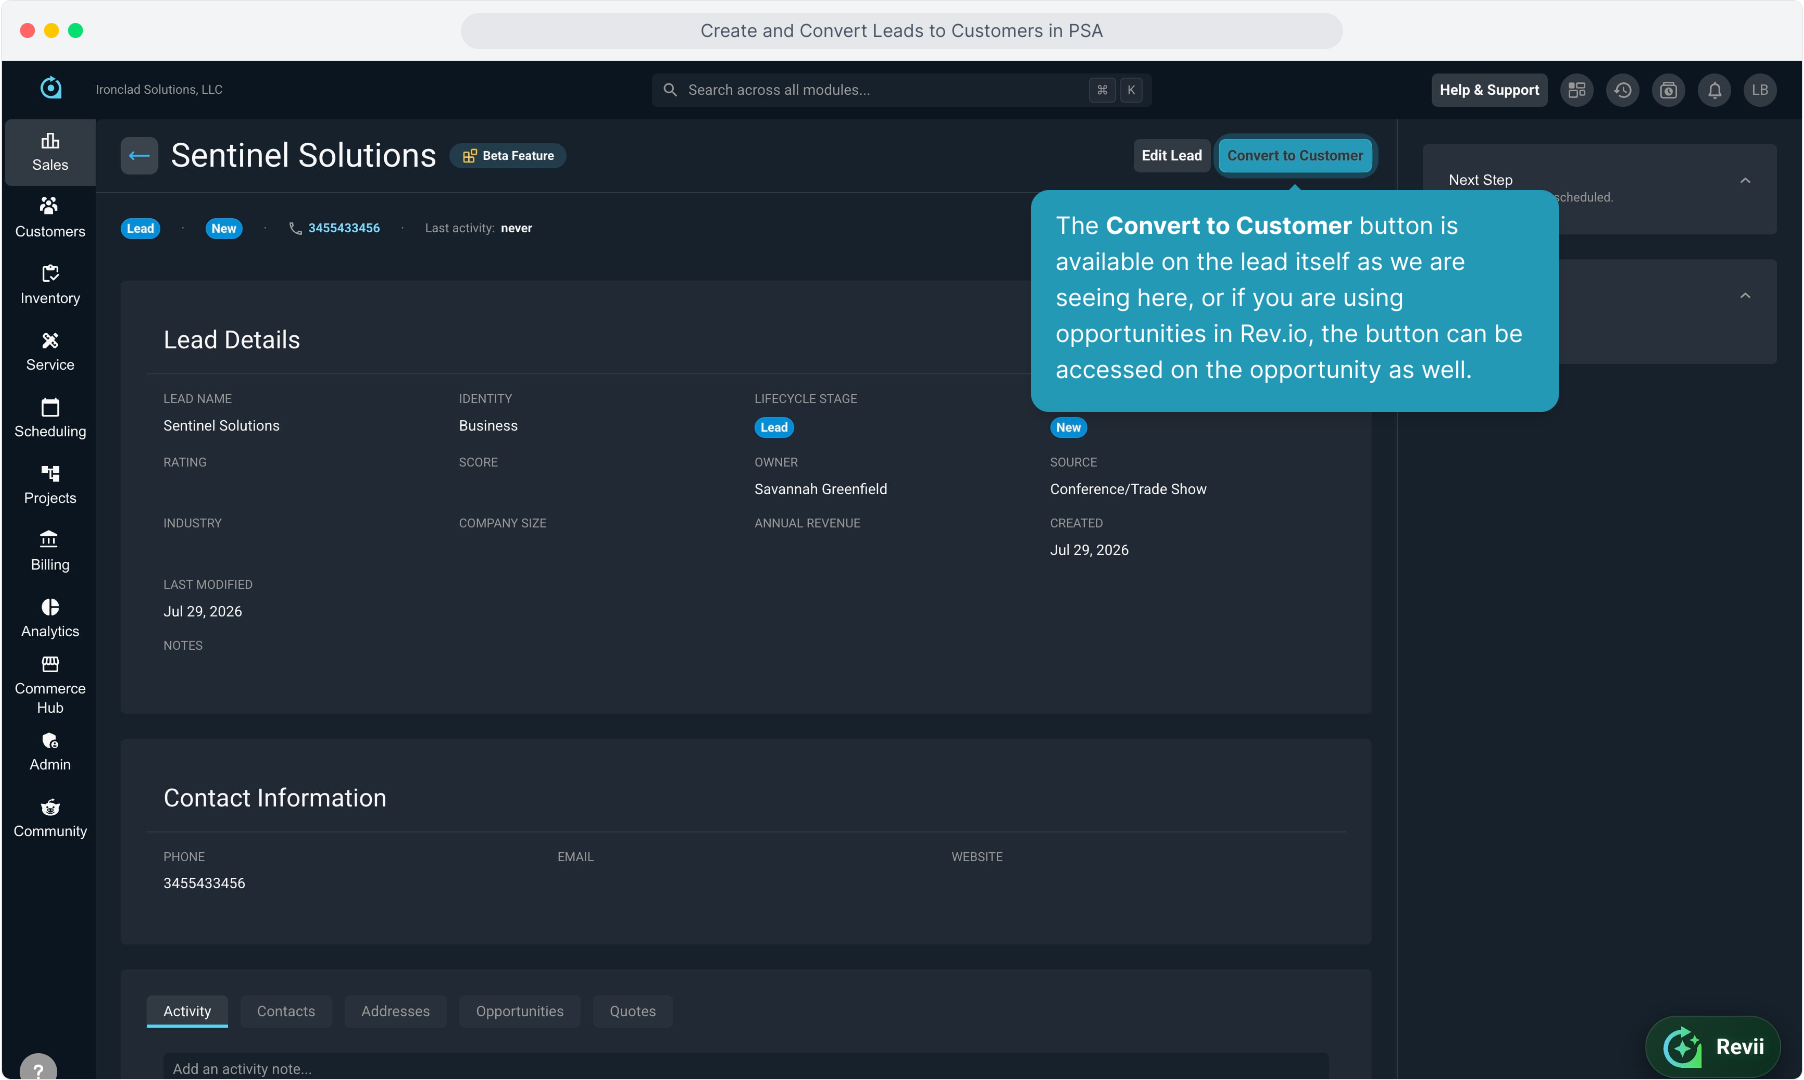
14. The Convert to Customer button is available on the lead itself as we are seeing here, or if you are using opportunities in Rev.io, the button can be accessed on the opportunity as well.
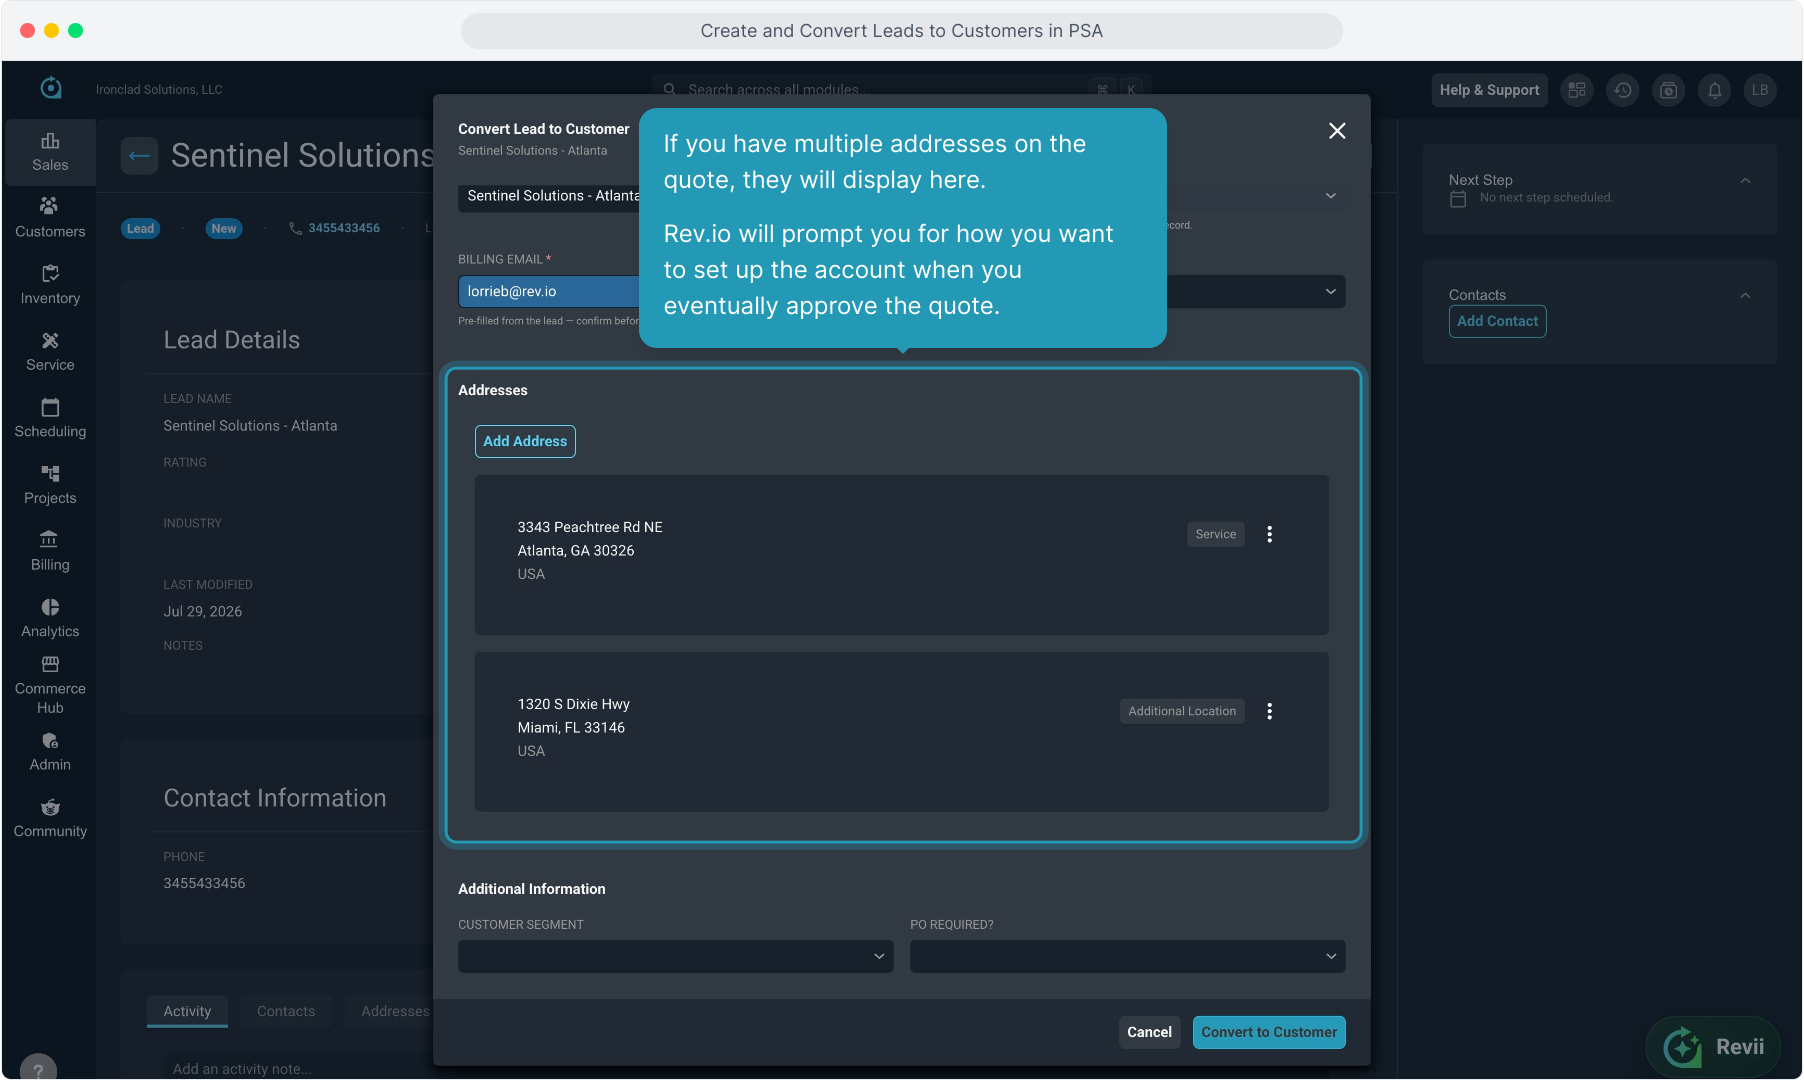
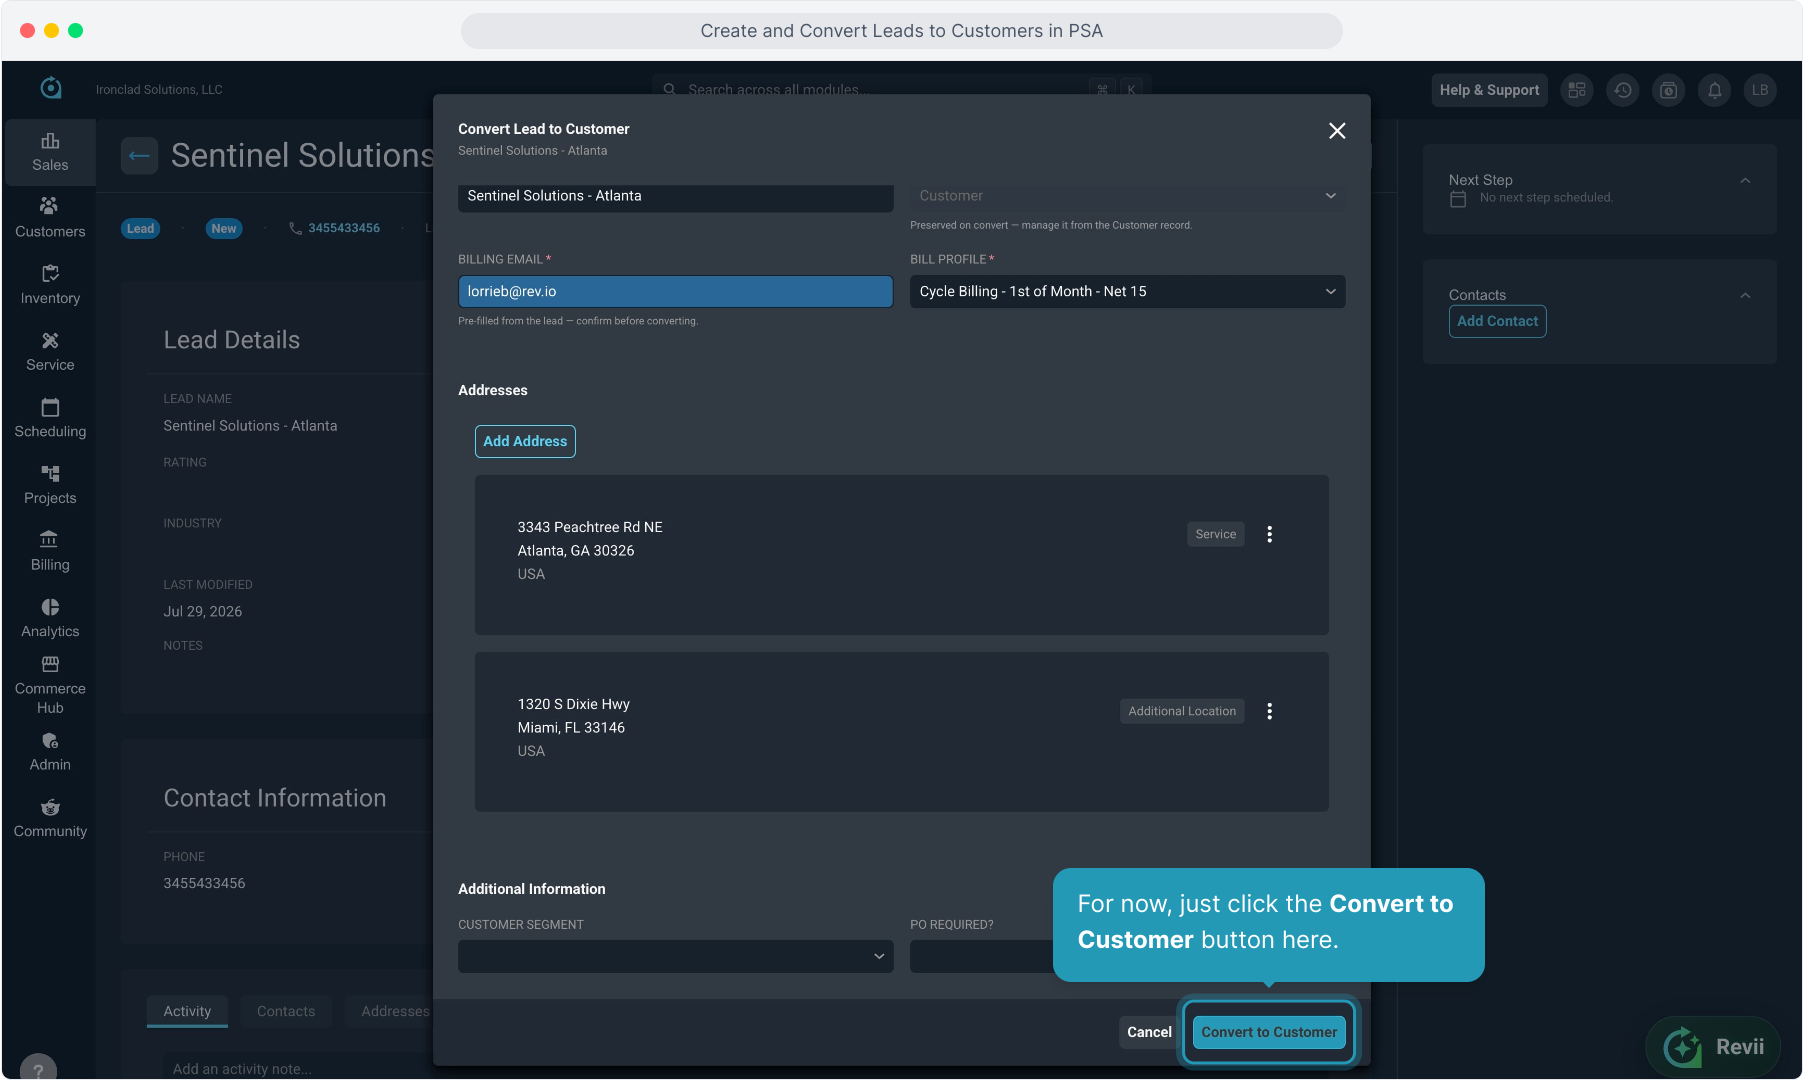
15. If you have multiple addresses on the quote, they will display here.
Rev.io will prompt you for how you want to set up the account when you eventually approve the quote.
16. For now, just click the Convert to Customer button here.
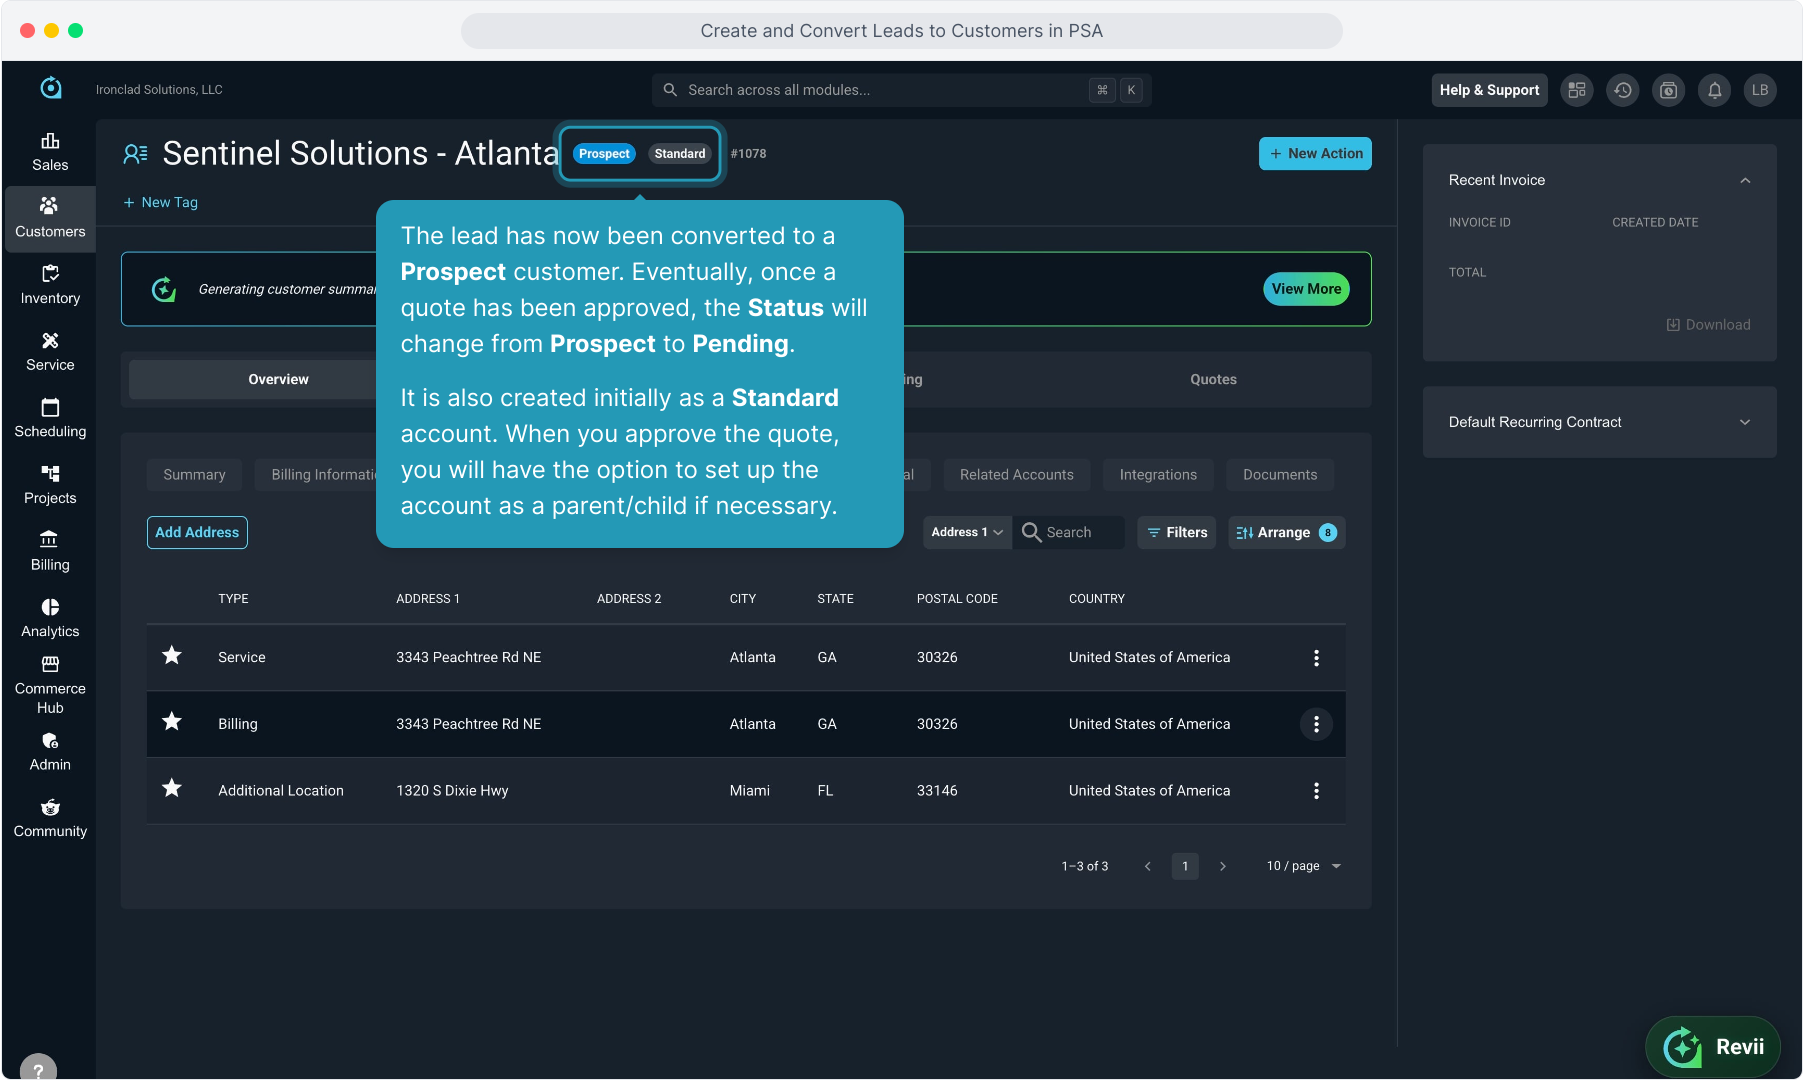
17. The lead has now been converted to a Prospect customer. Eventually, once a quote has been approved, the Status will change from Prospect to Pending.
It is also created initially as a Standard account. When you approve the quote, you will have the option to set up the account as a parent/child if necessary.
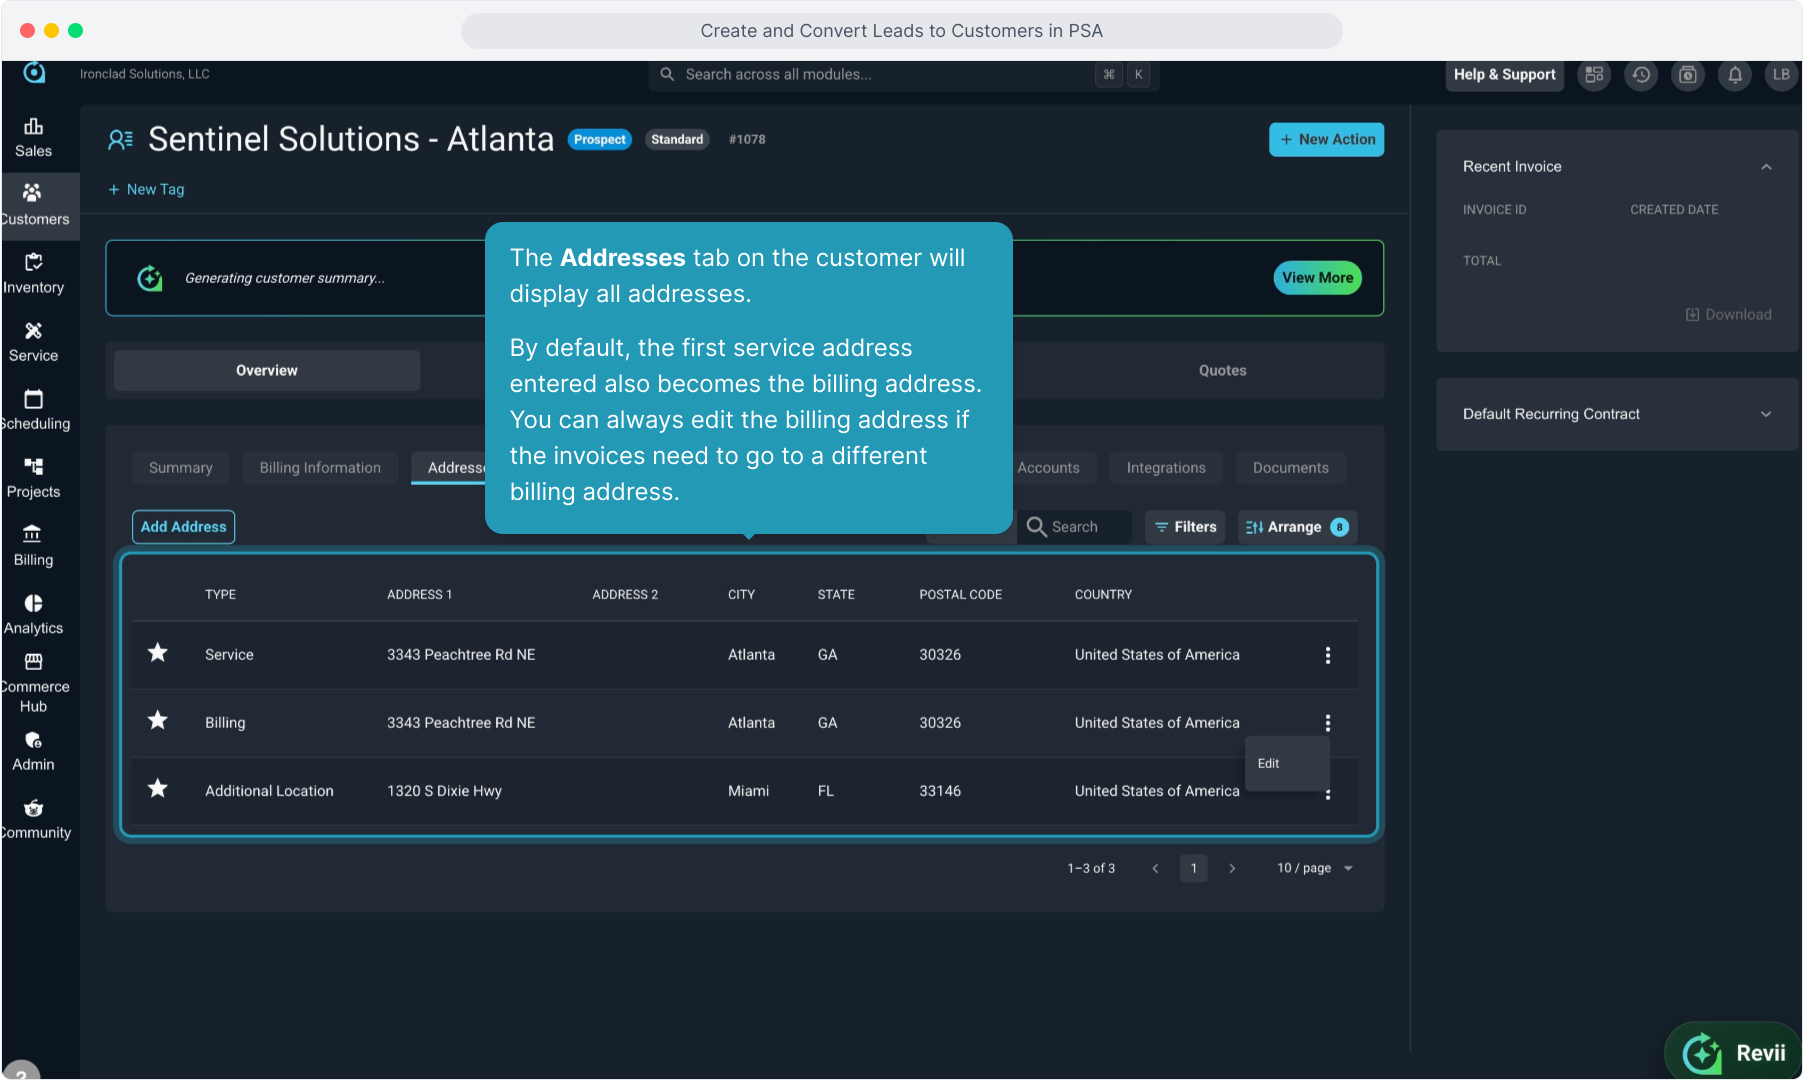
18. The Addresses tab on the customer will display all addresses.
By default, the first service address entered also becomes the billing address. You can always edit the billing address if the invoices need to go to a different billing address.
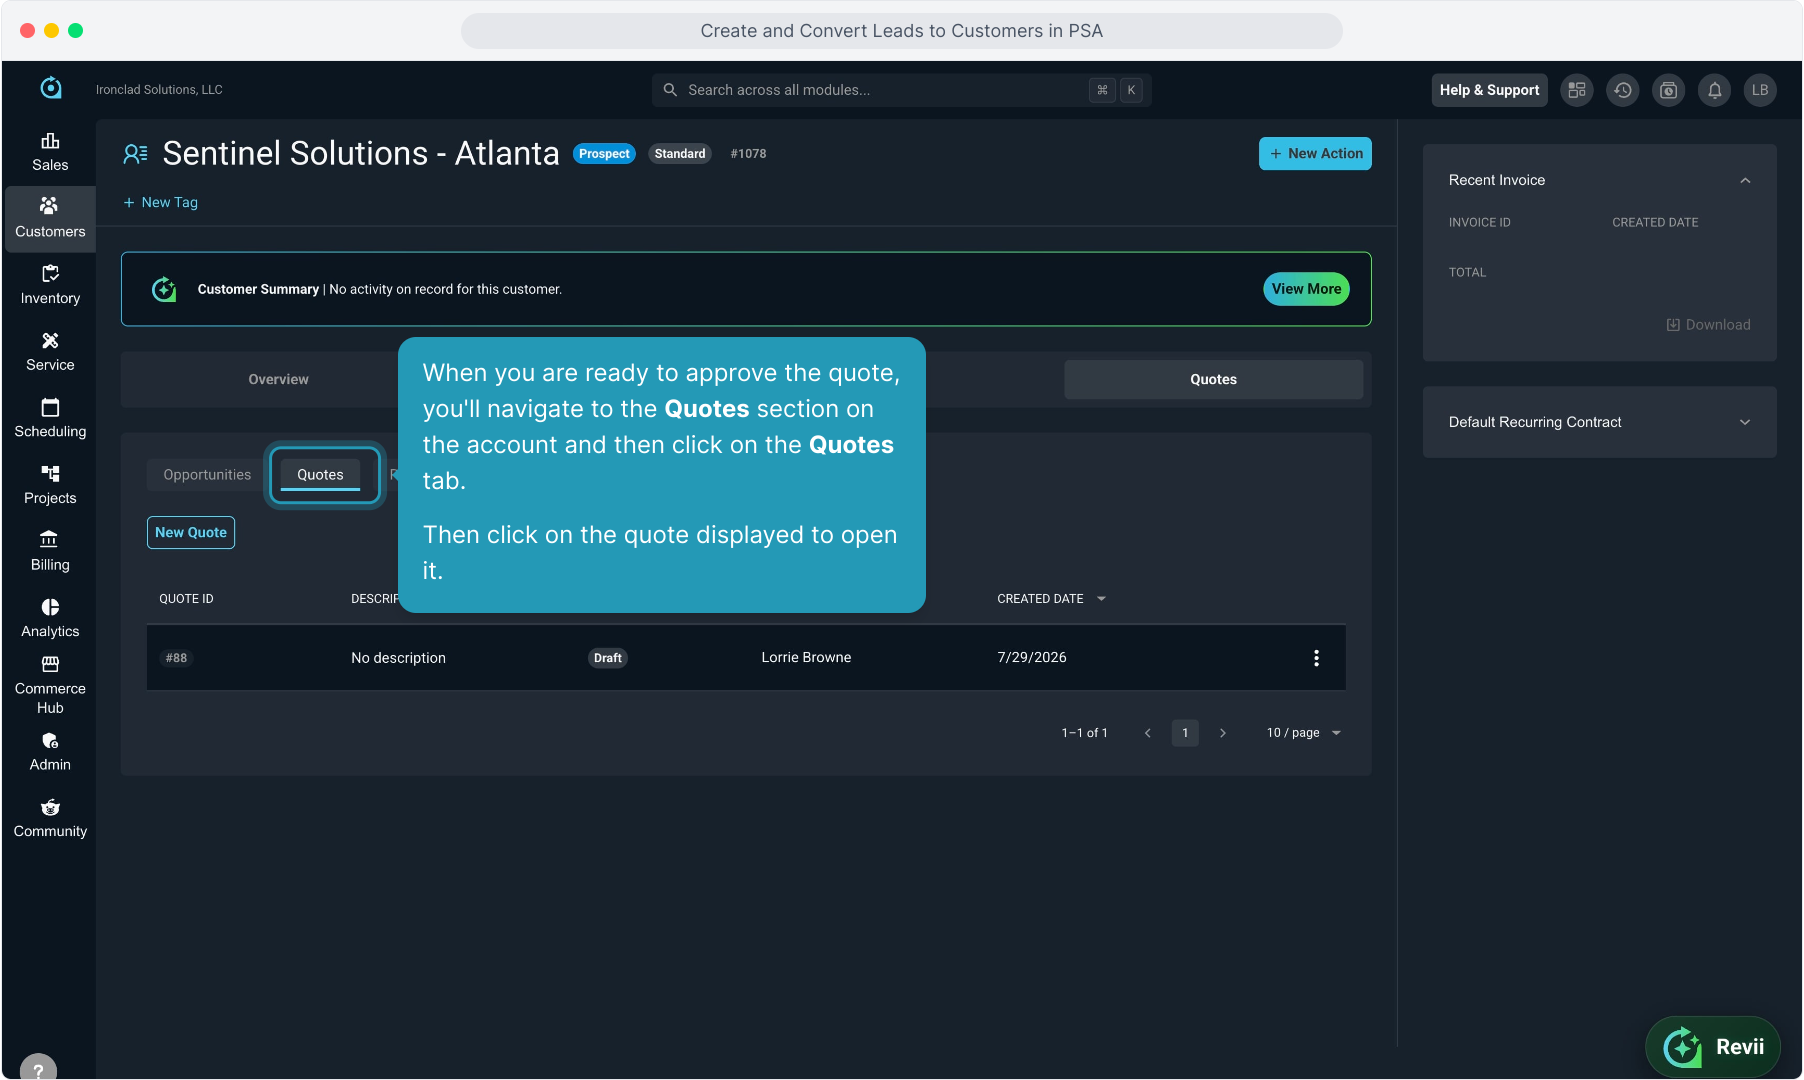
19. When you are ready to approve the quote, you'll navigate to the Quotes section on the account and then click on the Quotes tab.
Then click on the quote displayed to open it.
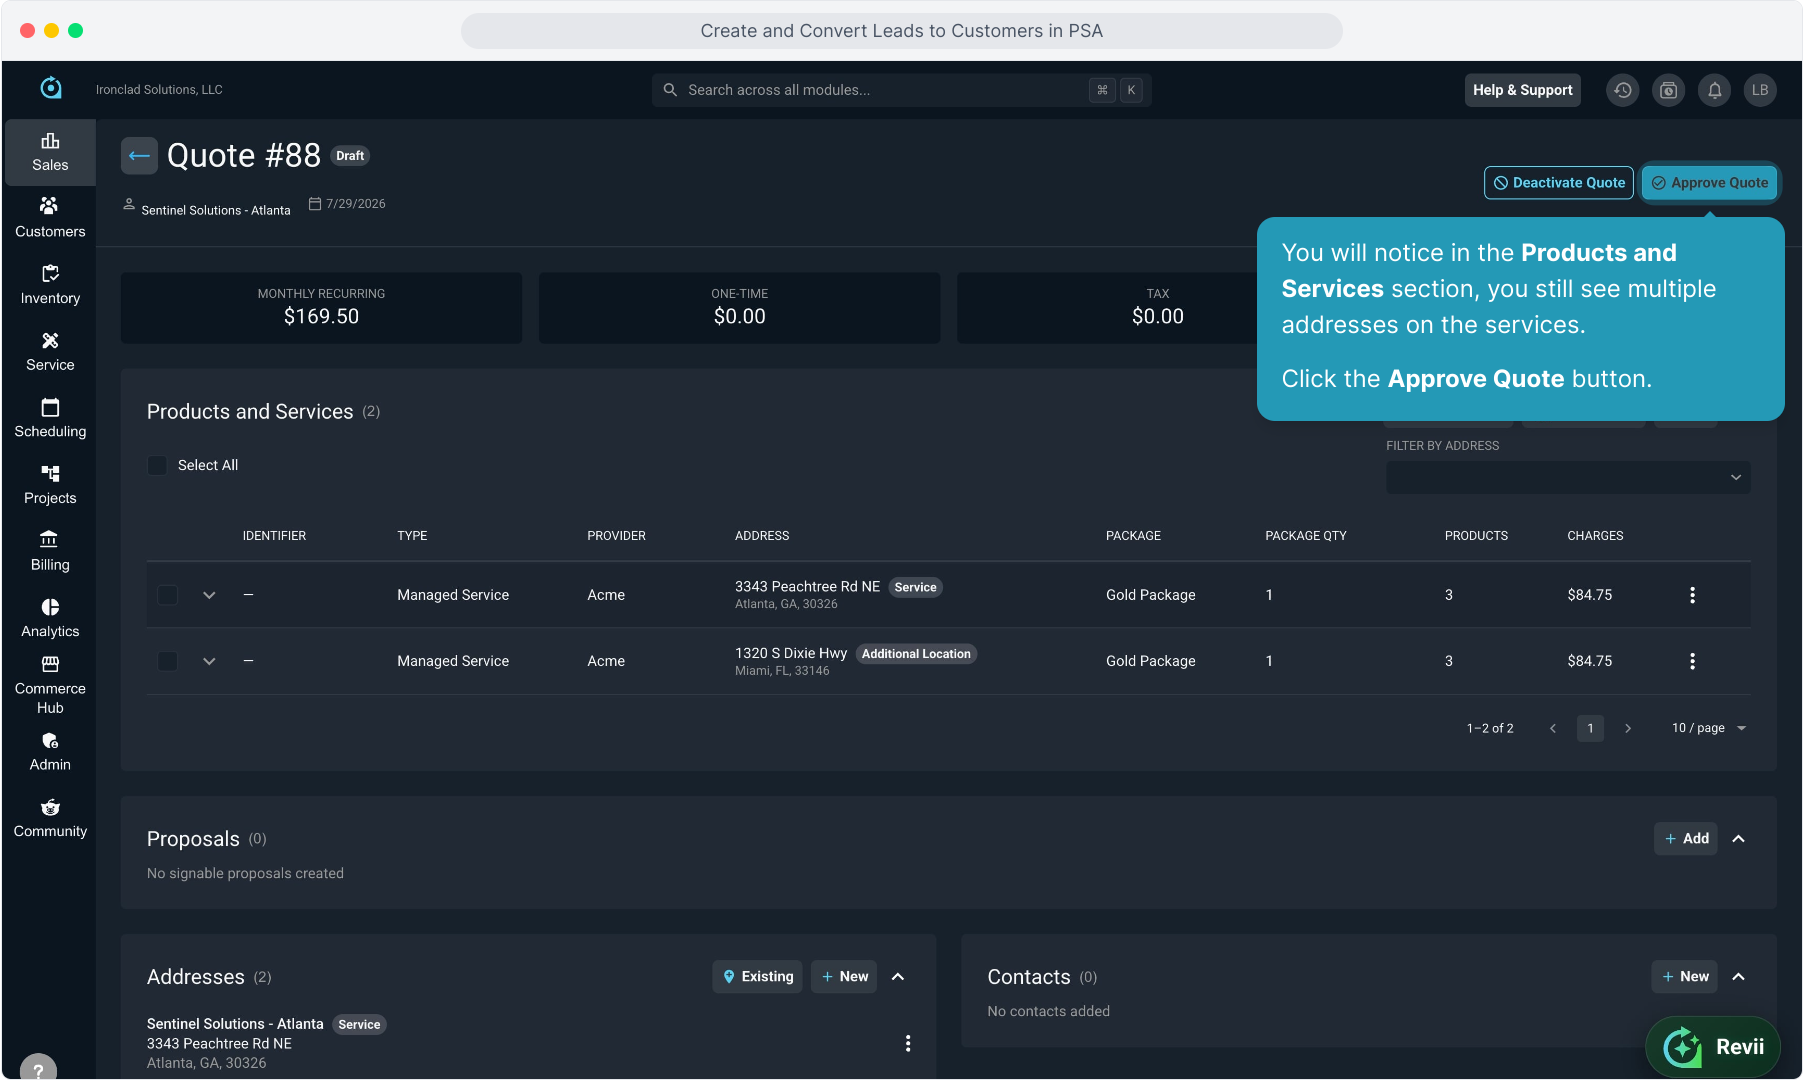
20. You will notice in the Products and Services section, you still see multiple addresses on the services.
Click the Approve Quote button.
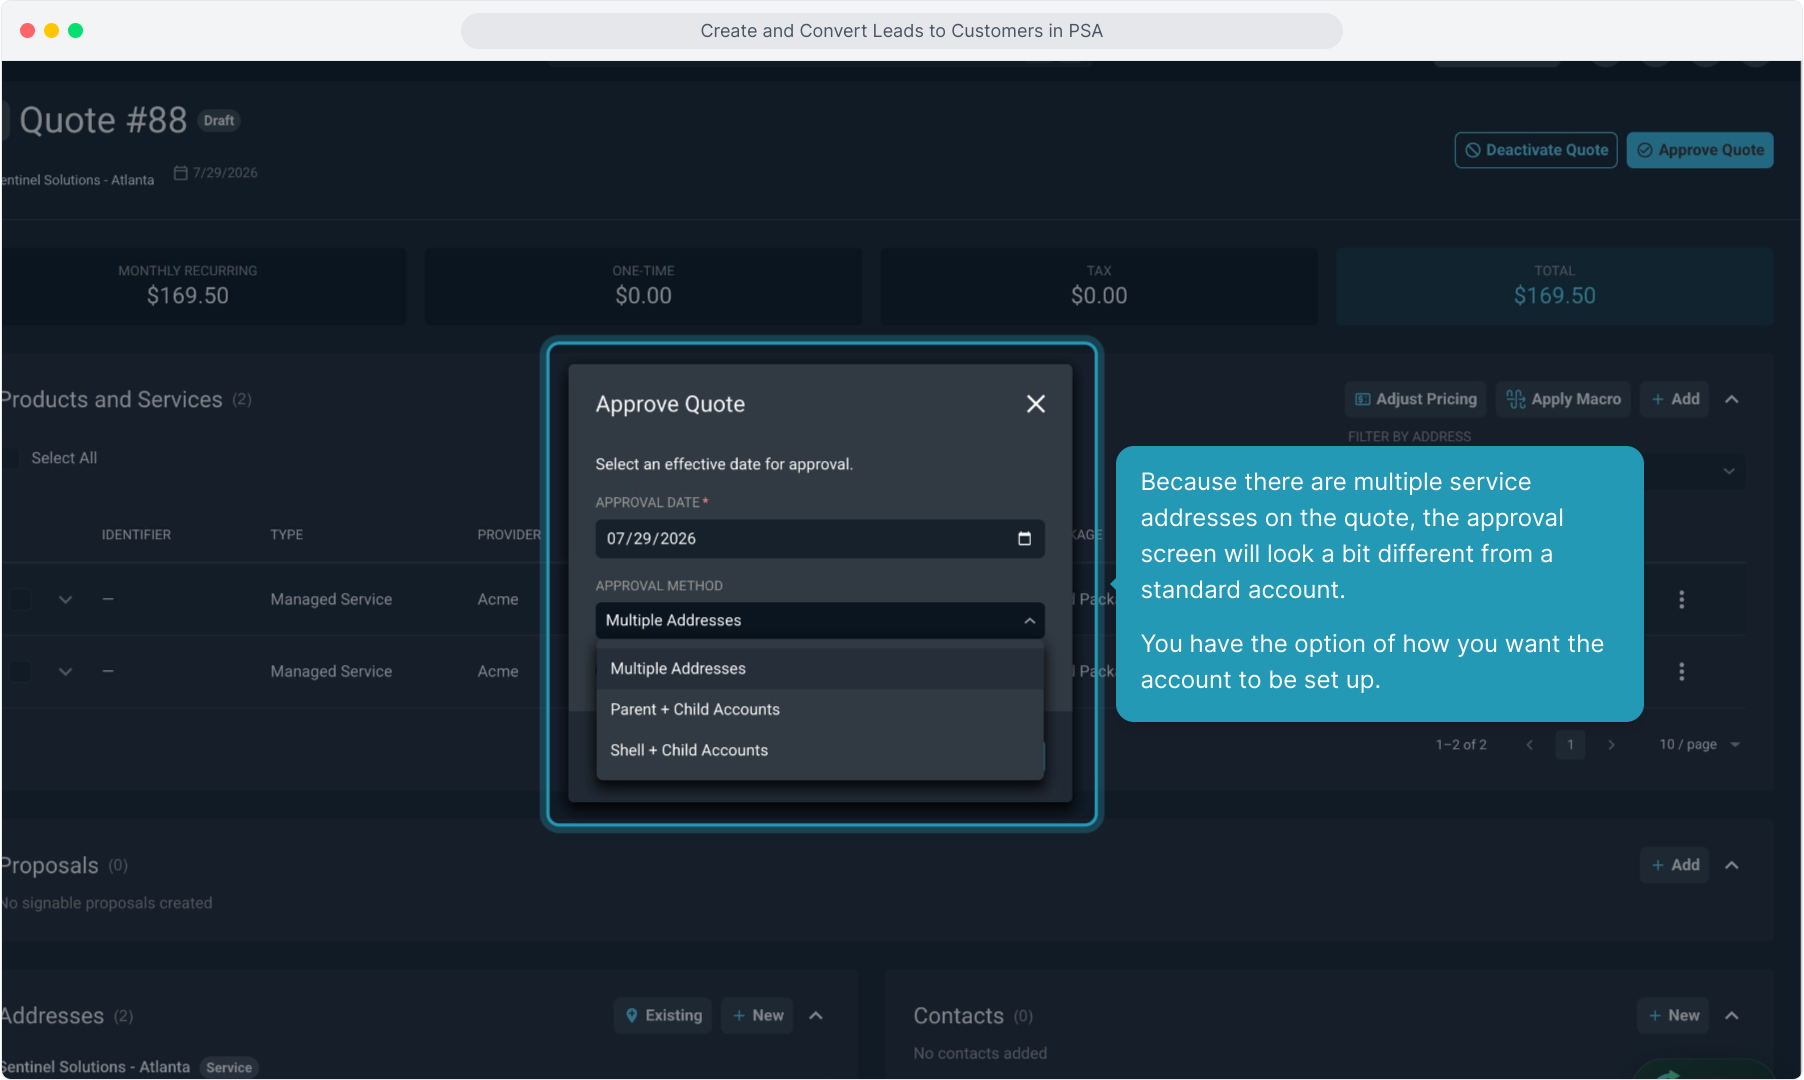
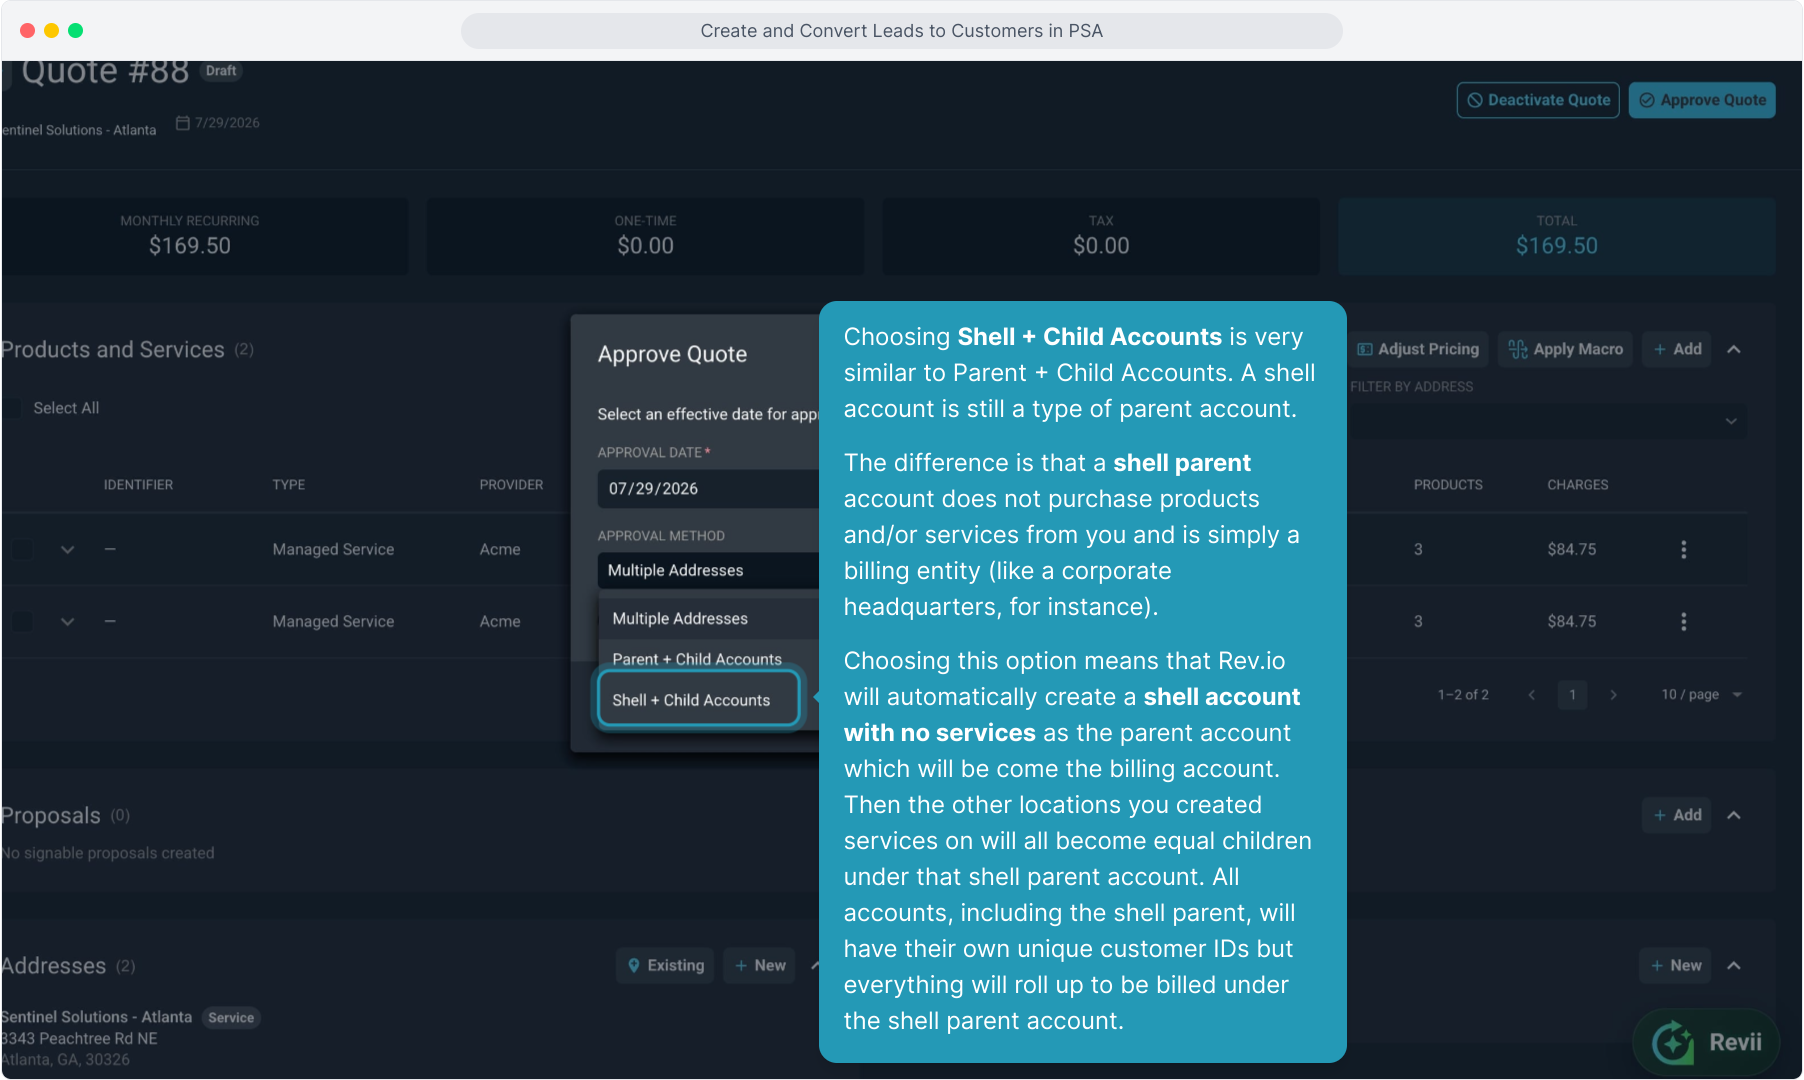
21. Because there are multiple service addresses on the quote, the approval screen will look a bit different from a standard account.
You have the option of how you want the account to be set up.
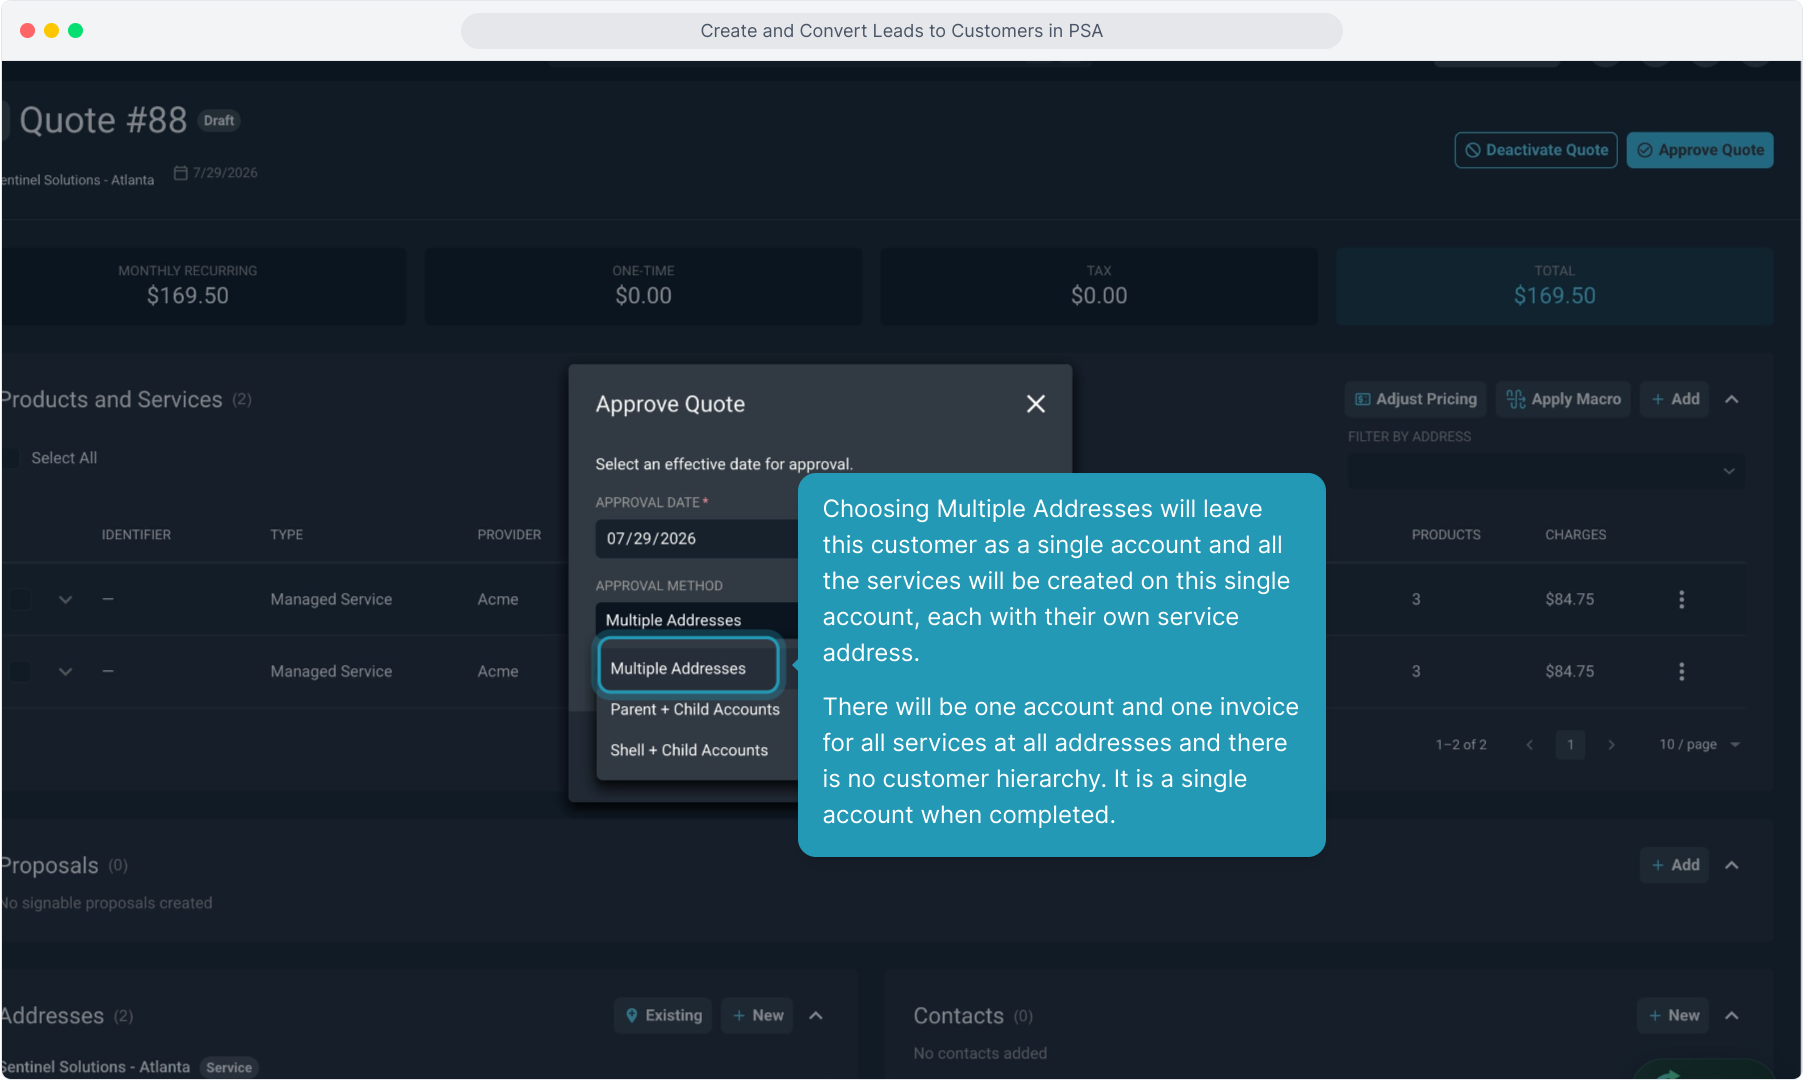
22. Choosing Multiple Addresses will leave this customer as a single account and all the services will be created on this single account, each with their own service address.
There will be one account and one invoice for all services at all addresses and there is no customer hierarchy. It is a single account when completed.
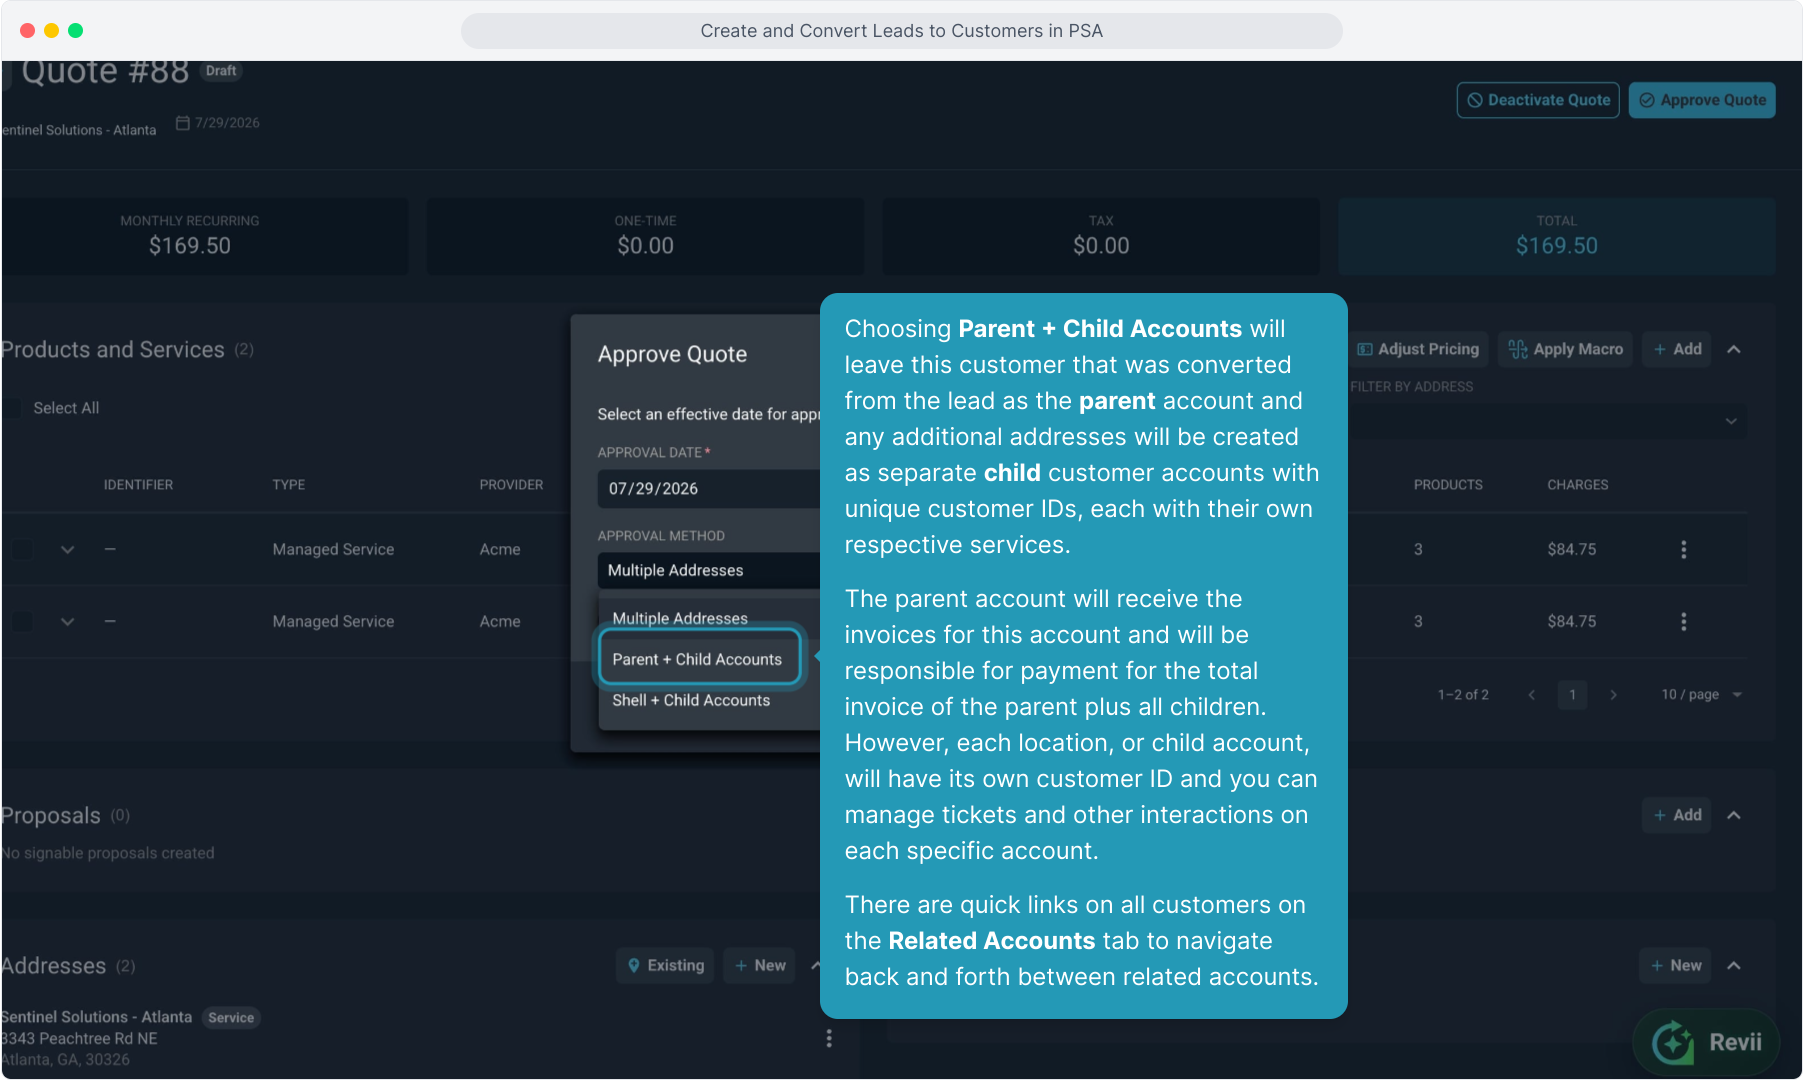
23. Choosing Parent + Child Accounts will leave this customer that was converted from the lead as the parent account and any additional addresses will be created as separate child customer accounts with unique customer IDs, each with their own respective services.
The parent account will receive the invoices for this account and will be responsible for payment for the total invoice of the parent plus all children. However, each location, or child account, will have its own customer ID and you can manage tickets and other interactions on each specific account.
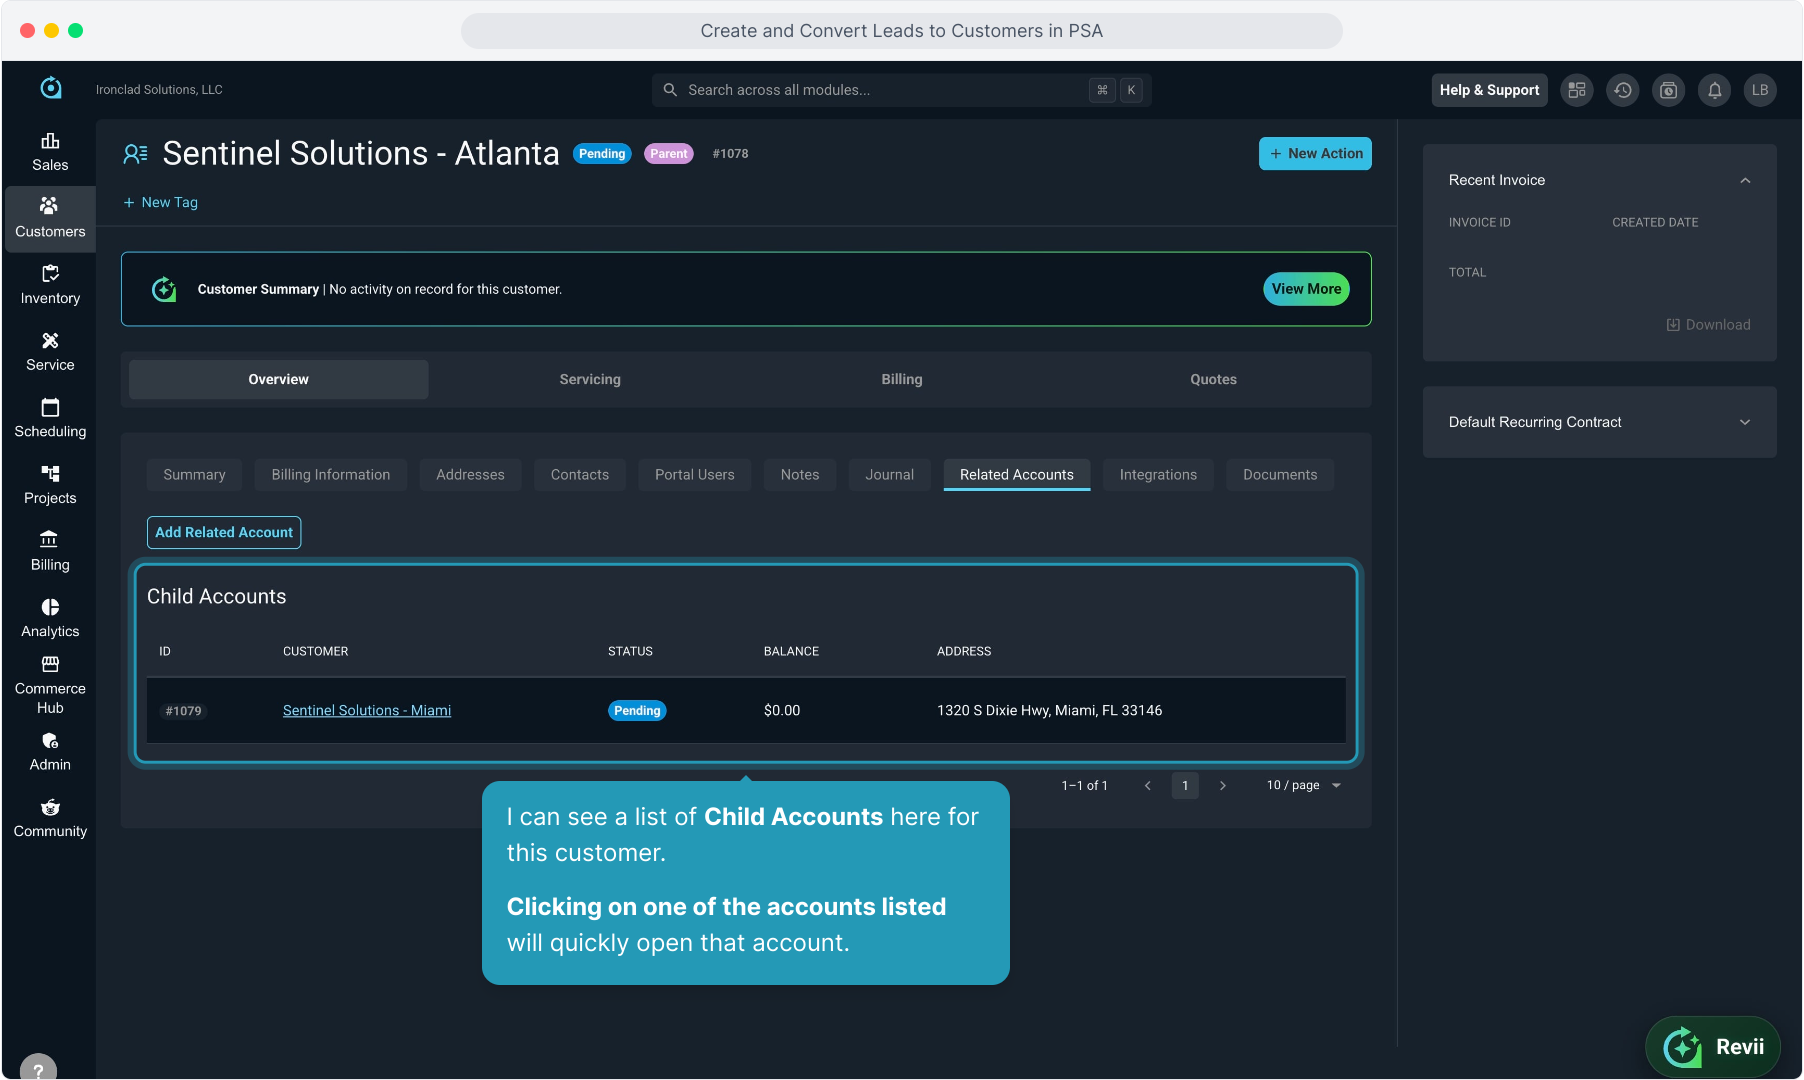
There are quick links on all customers on the Related Accounts tab to navigate back and forth between related accounts.
24. Choosing Shell + Child Accounts is very similar to Parent + Child Accounts. A shell account is still a type of parent account.
The difference is that a shell parent account does not purchase products and/or services from you and is simply a billing entity (like a corporate headquarters, for instance).
Choosing this option means that Rev.io will automatically create a shell account with no services as the parent account which will be come the billing account. Then the other locations you created services on will all become equal children under that shell parent account. All accounts, including the shell parent, will have their own unique customer IDs but everything will roll up to be billed under the shell parent account.
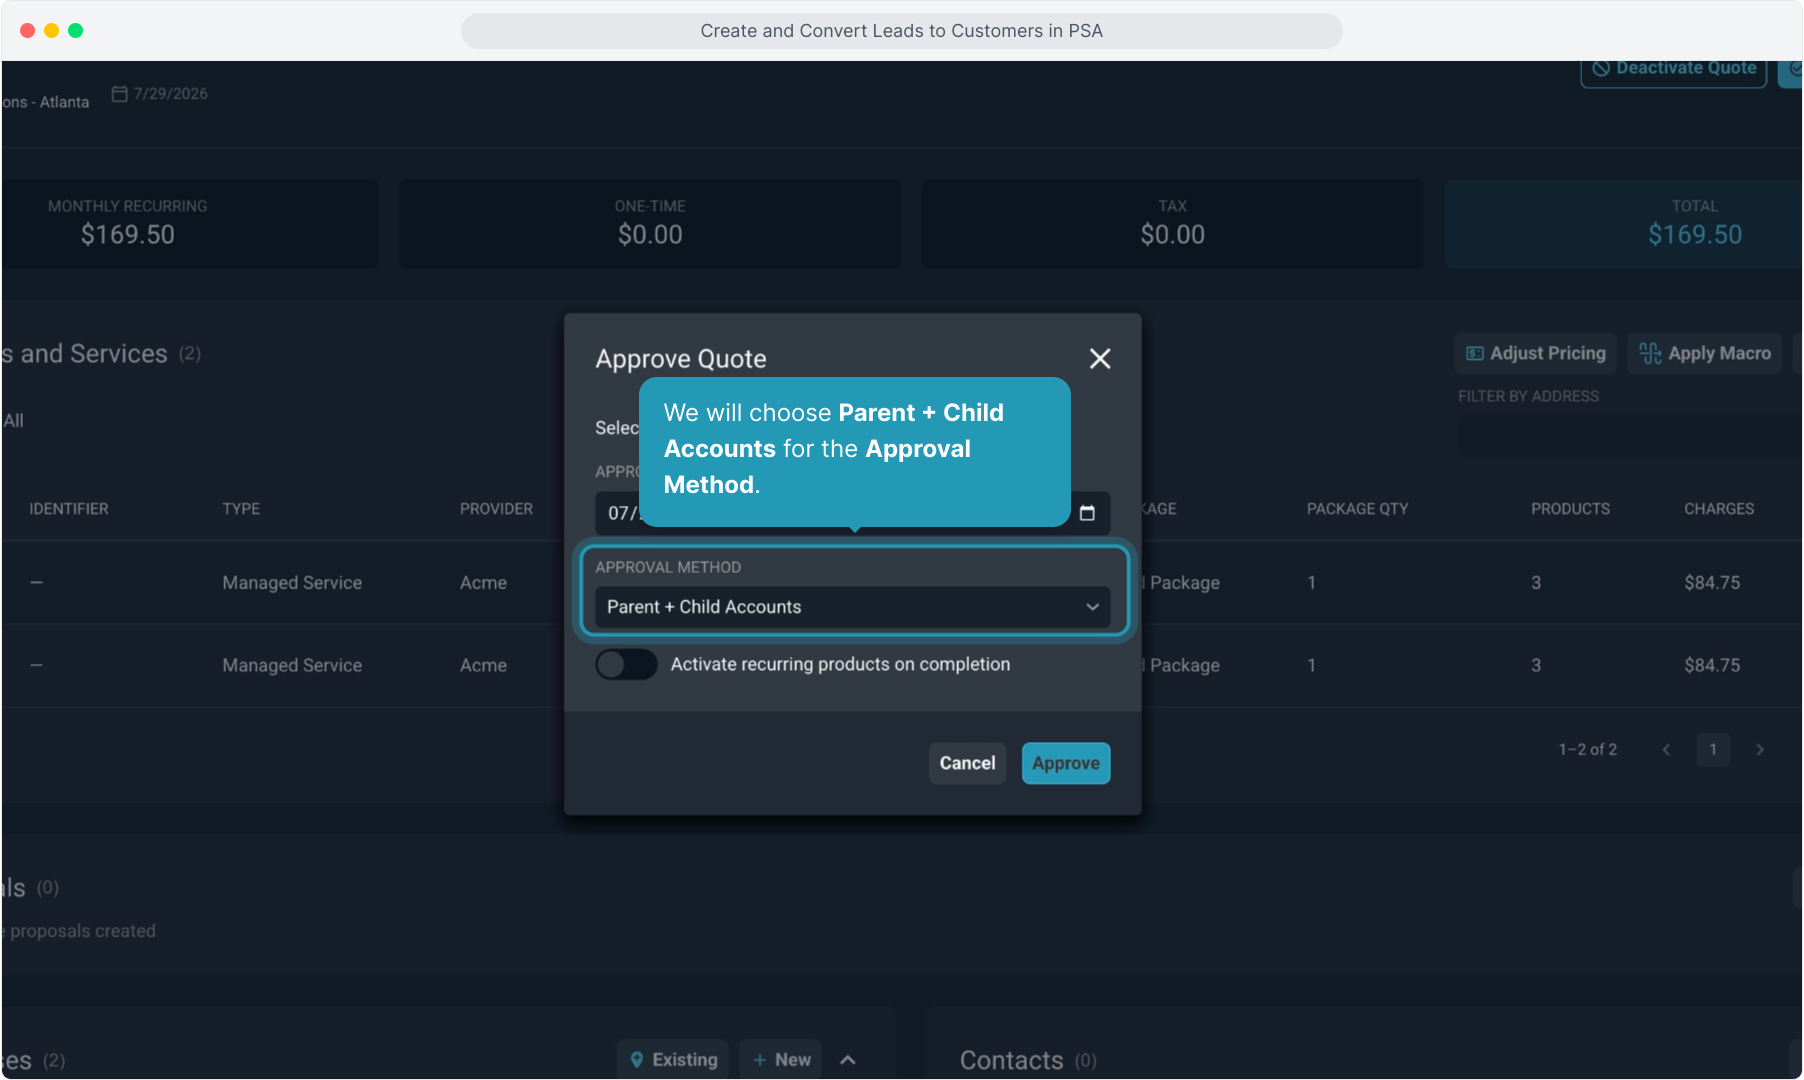
25. We will choose Parent + Child Accounts for the Approval Method.
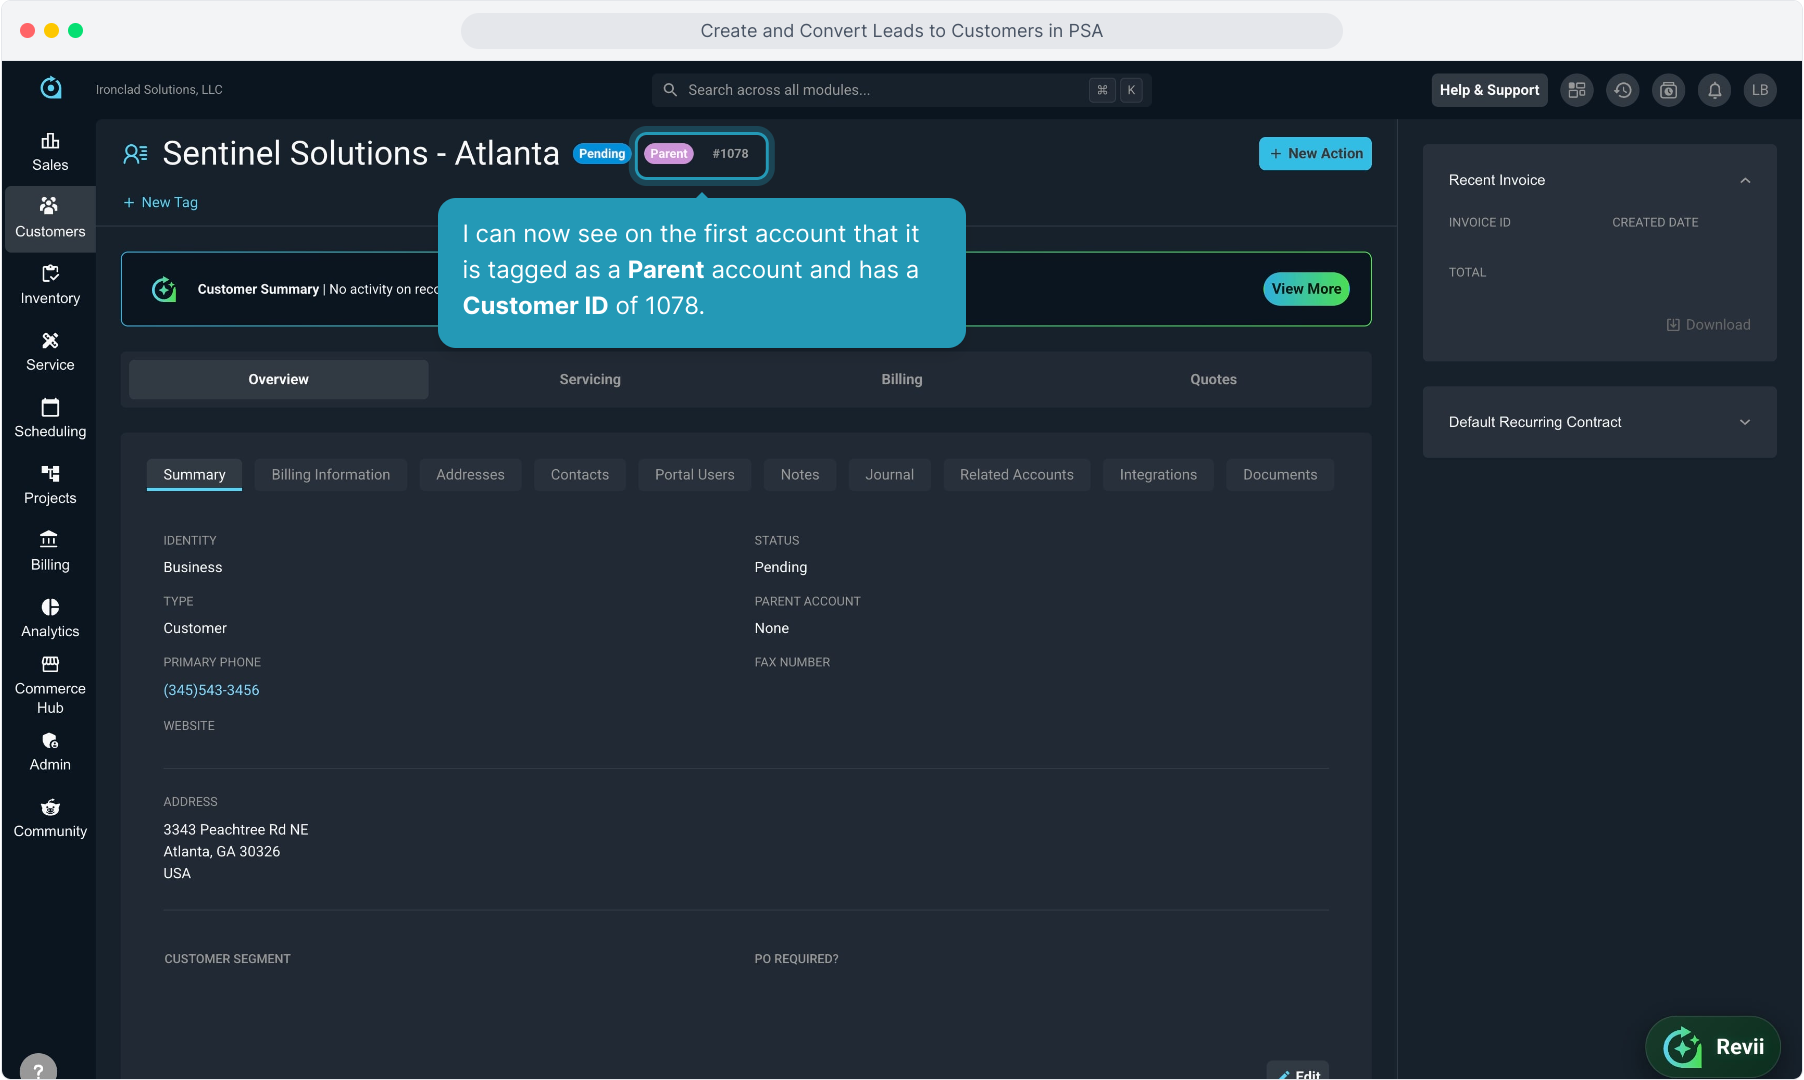
26. I can now see on the first account that it is tagged as a Parent account and has a Customer ID of 1078.
27. To view all accounts in this customer hierarchy, click the Related Accounts tab.
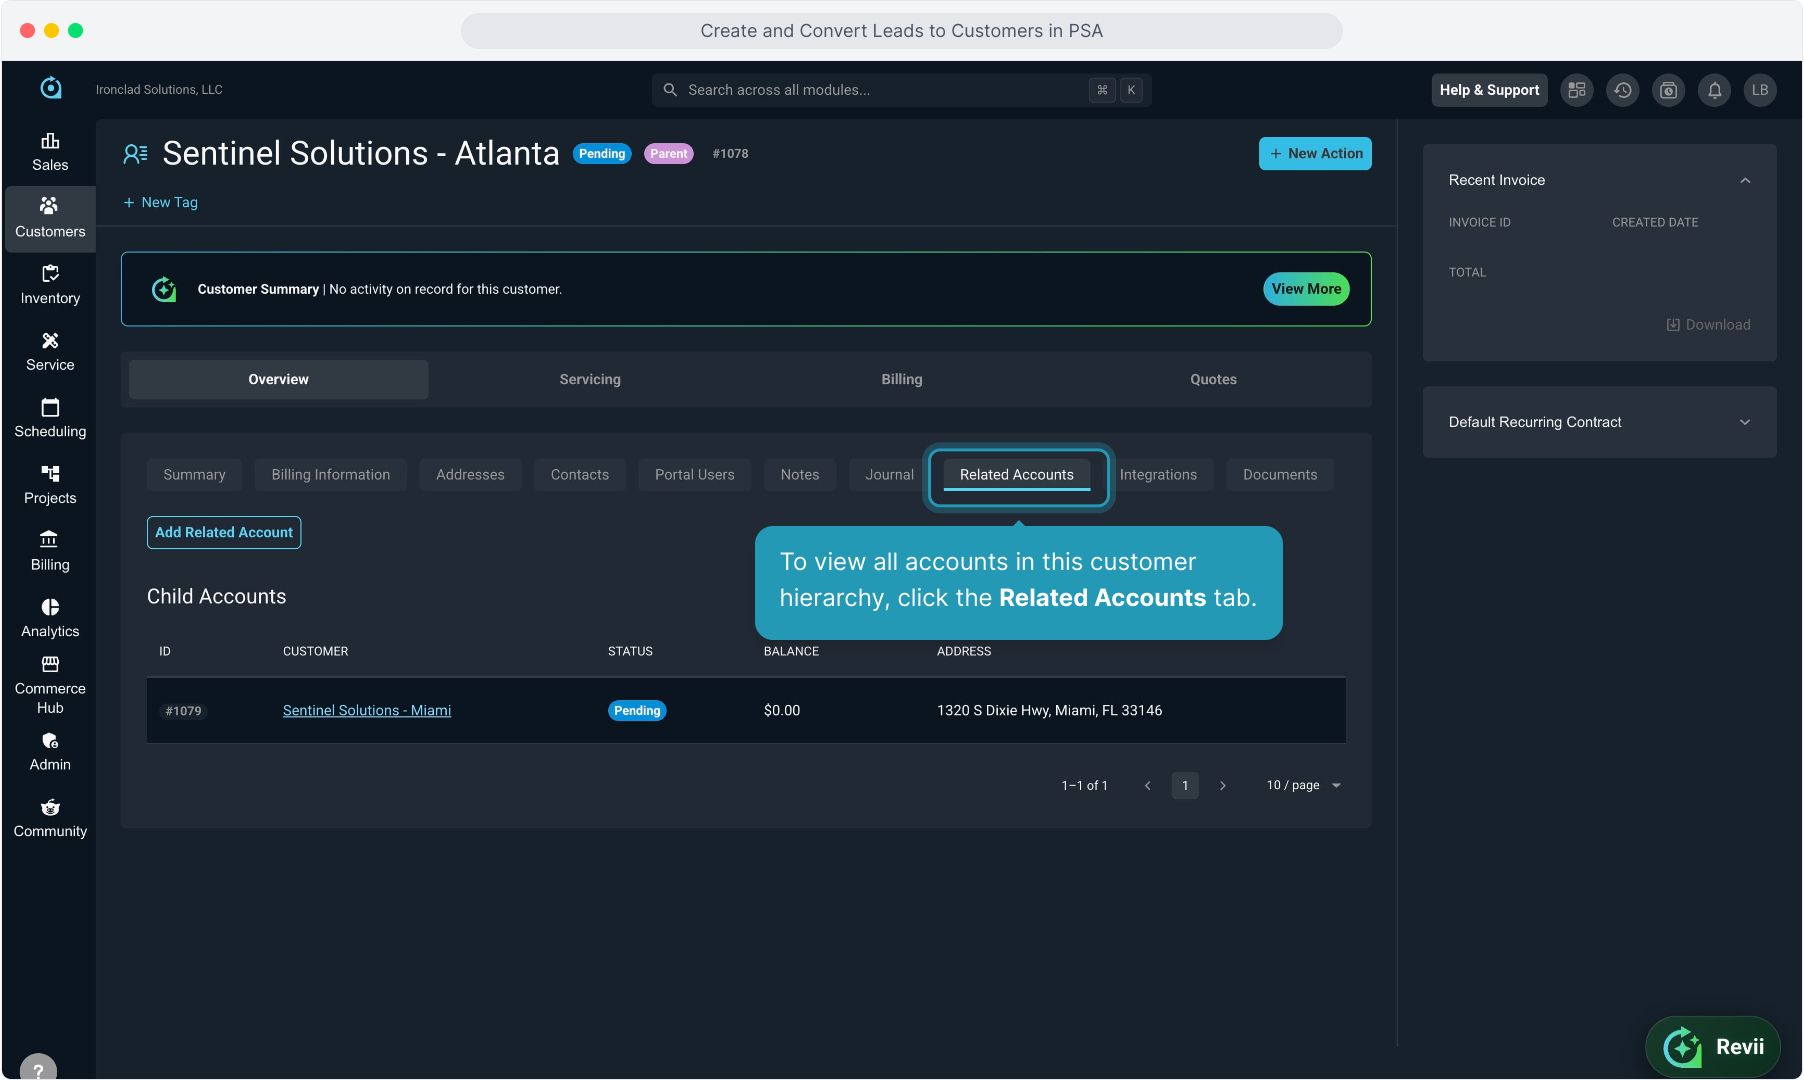
28. I can see a list of Child Accounts here for this customer.
Clicking on one of the accounts listed will quickly open that account.
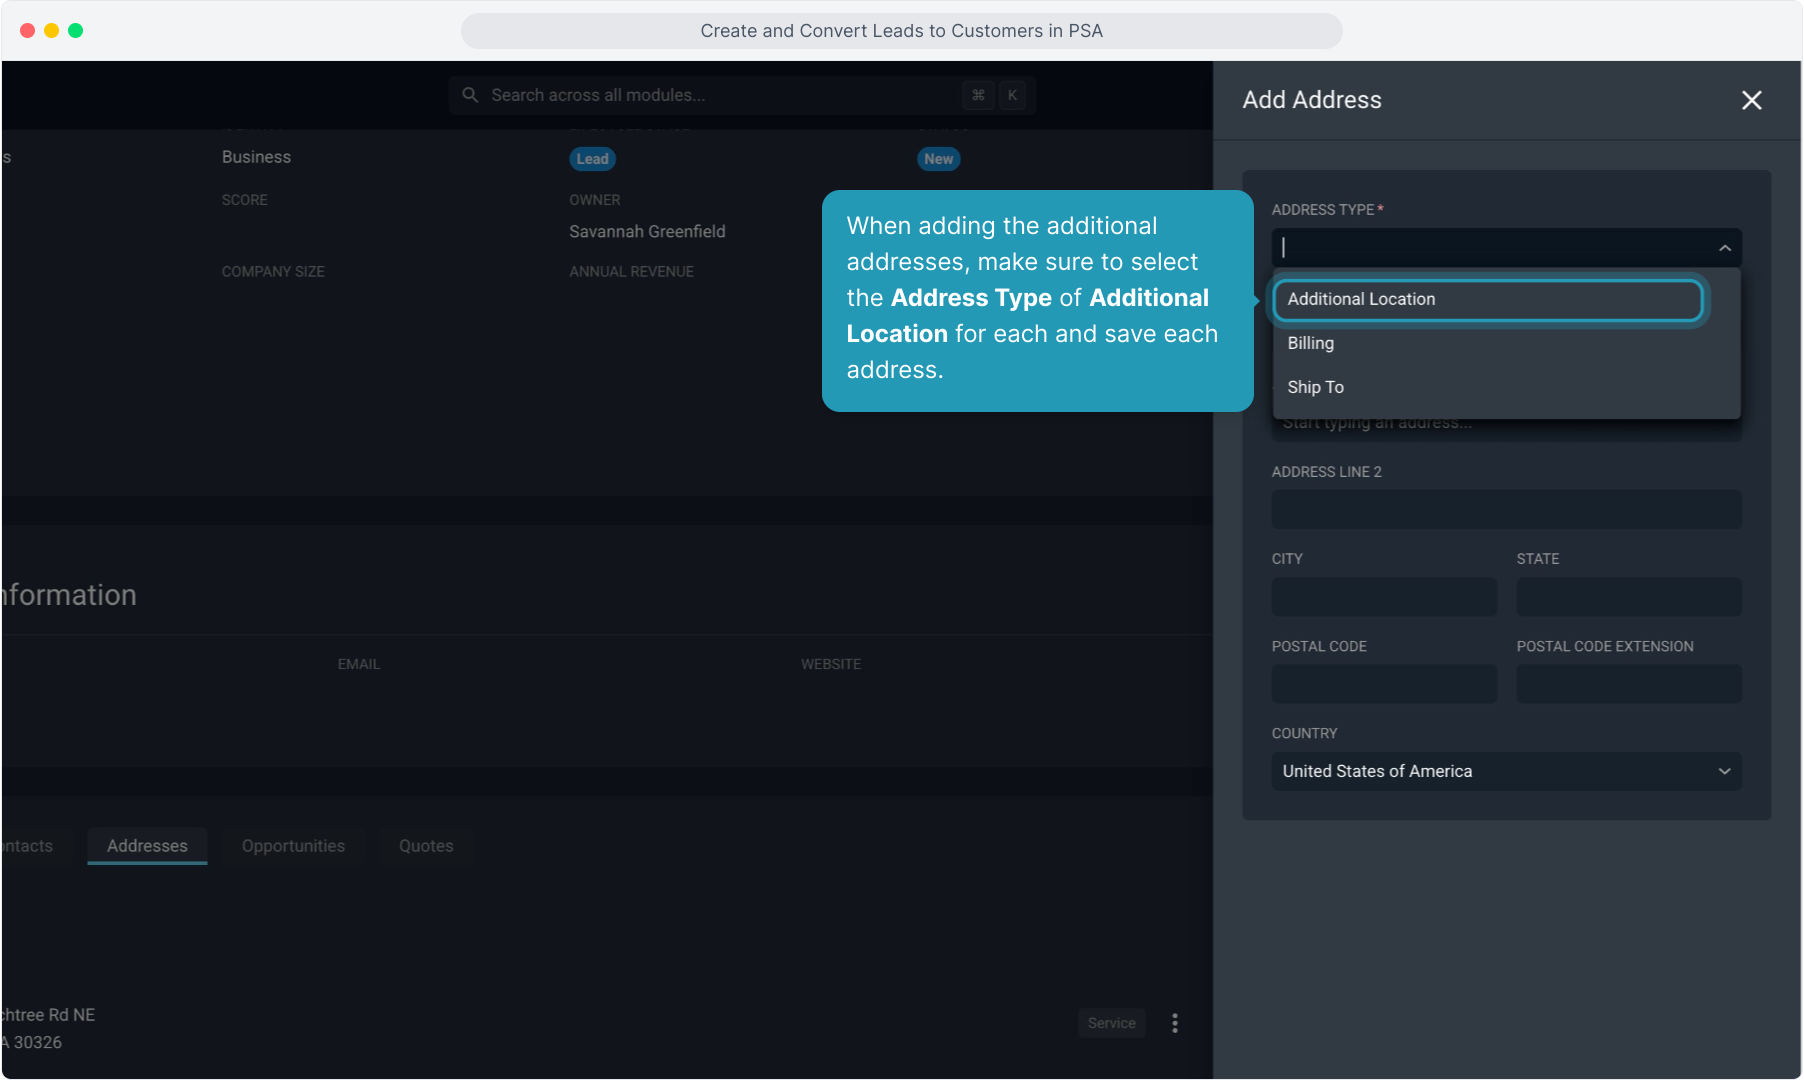
29. Once on the child account, I can see that it is tagged as a Child account and that it has its own unique Customer ID of 1079.
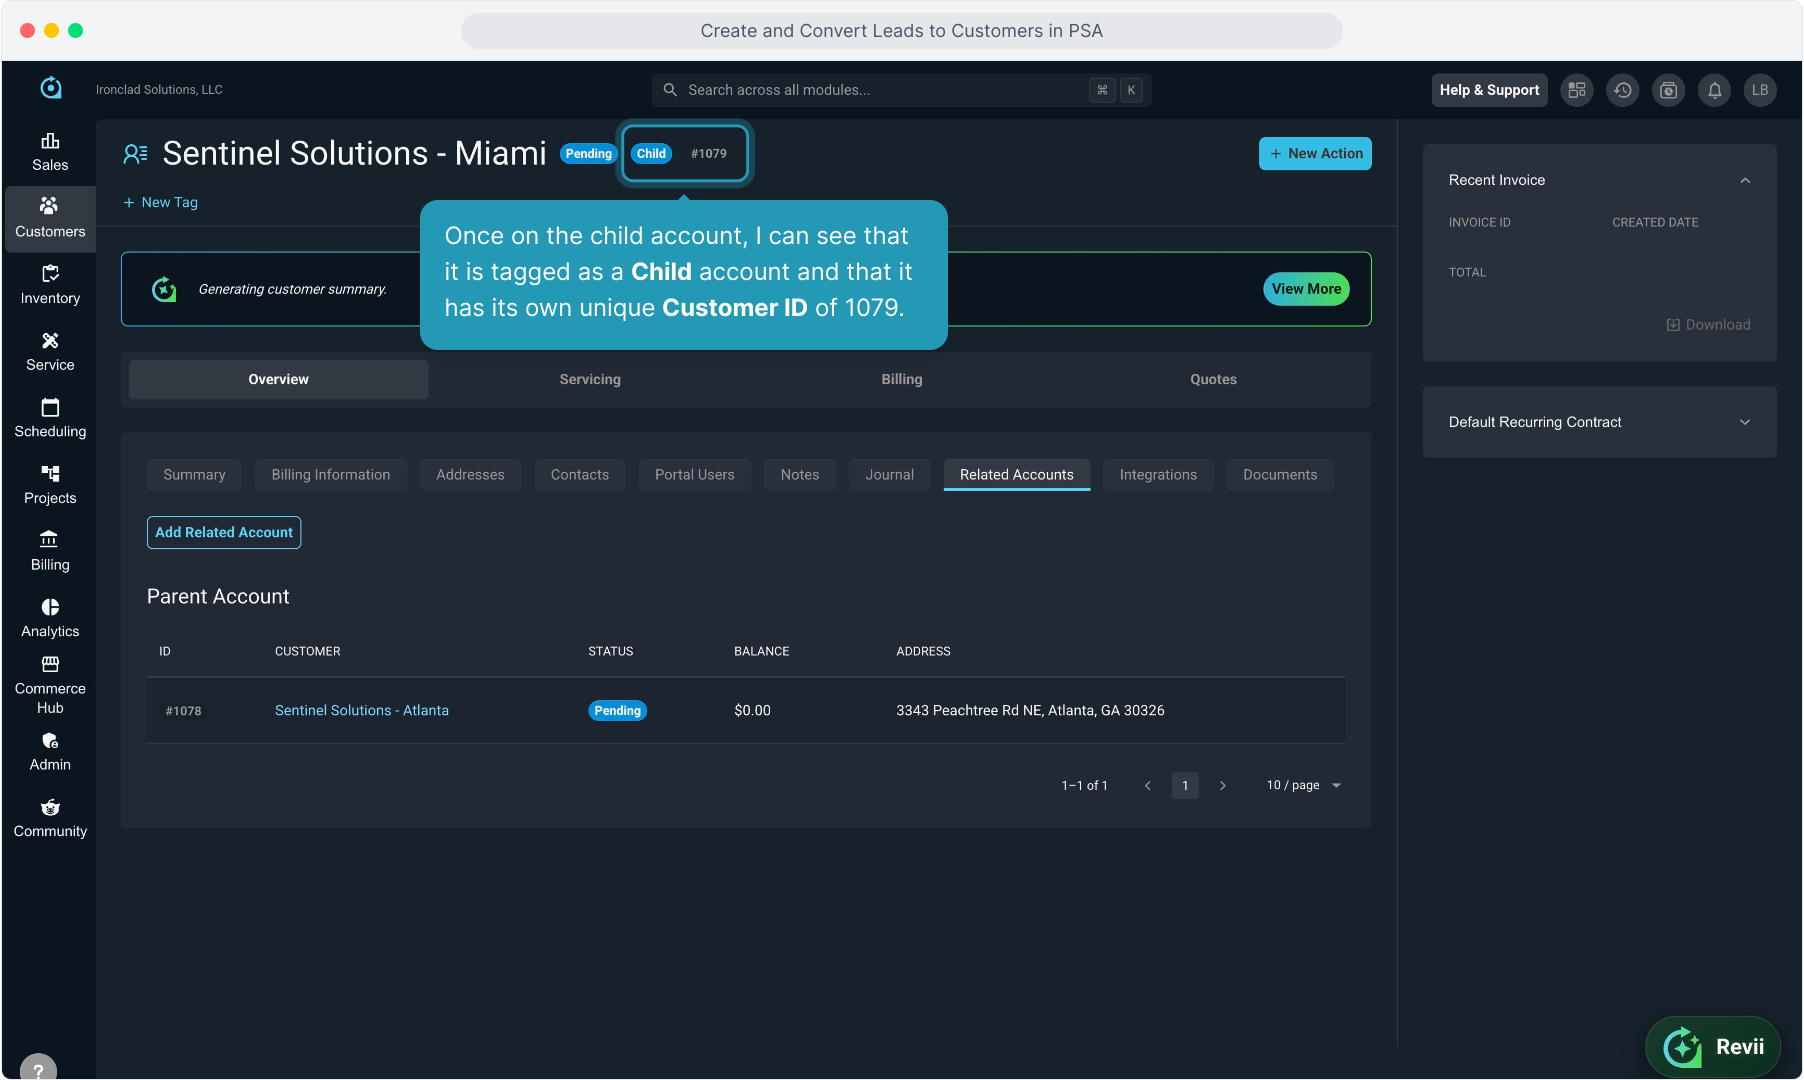
30. And on its Related Accounts tab, there is a list of the parent account and, if there were other child locations, a list of the sibling accounts.