How To Guide: Managing Tickets - Parts & Labor Tab
1. Introduction

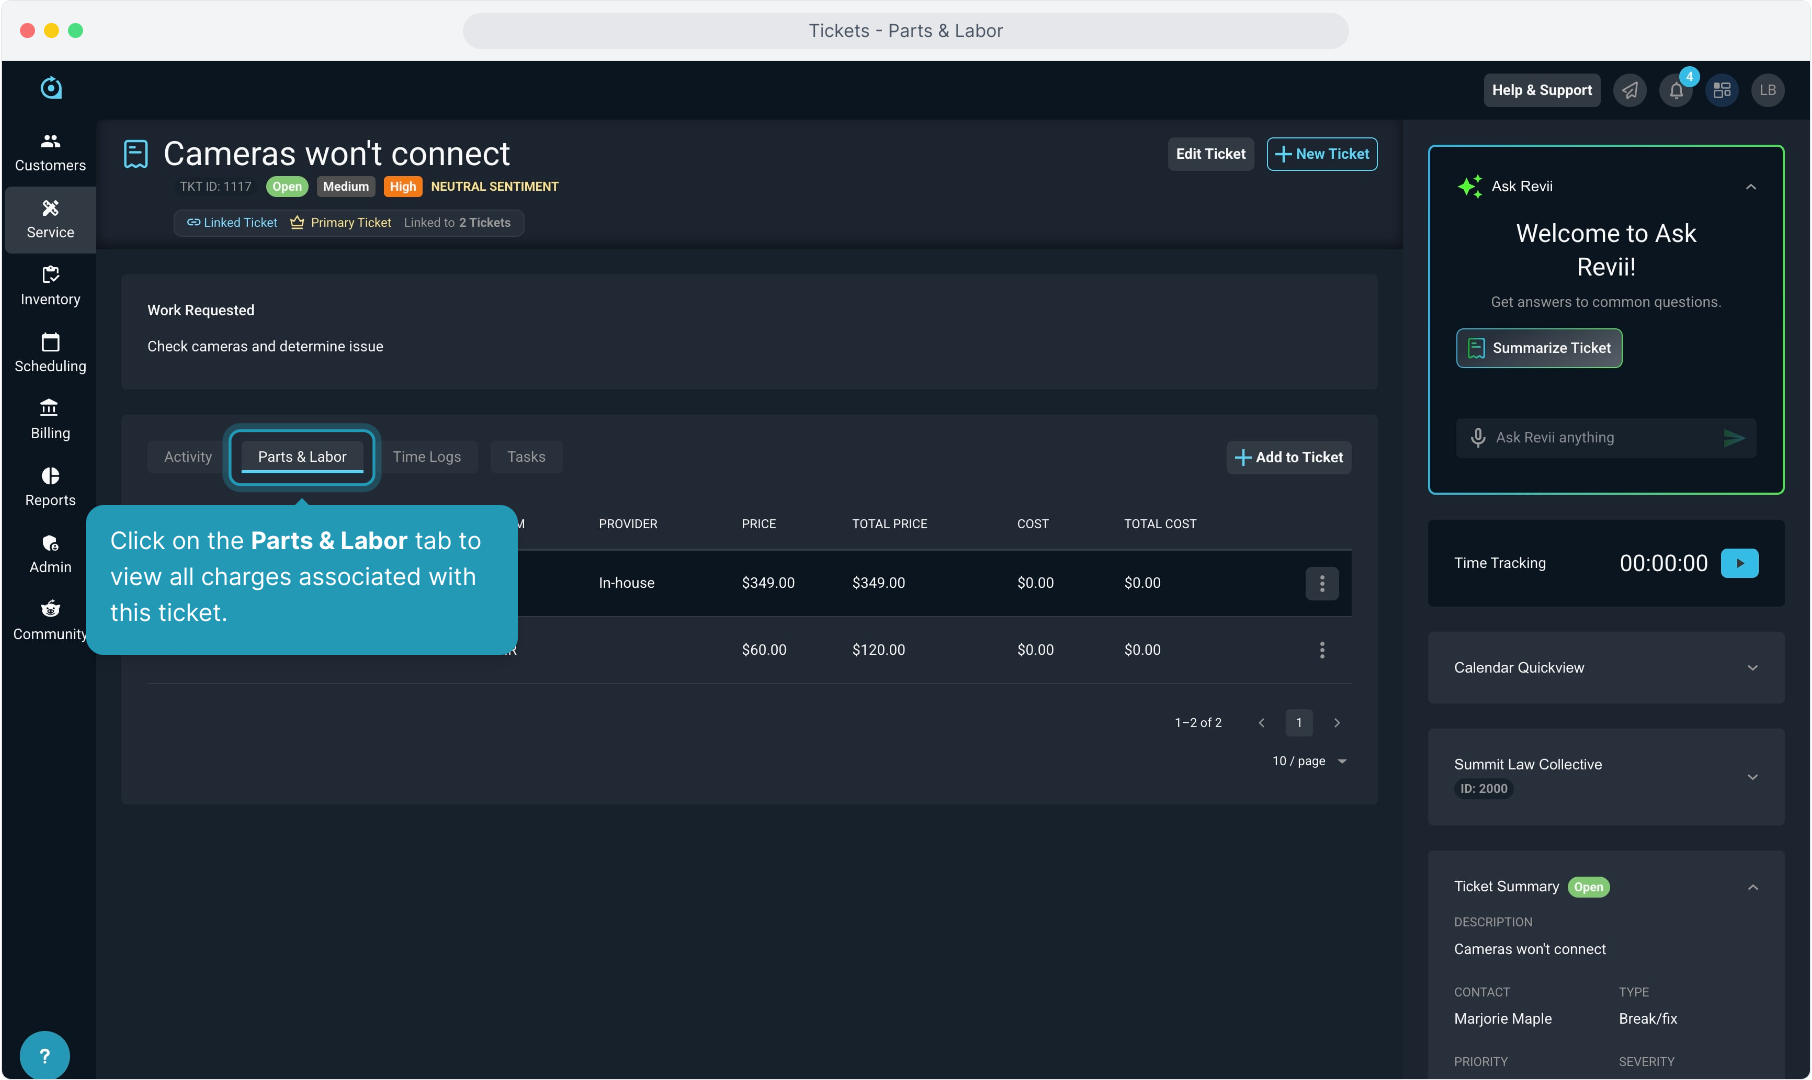
2. Click on the Parts & Labor tab to view all charges associated with this ticket.
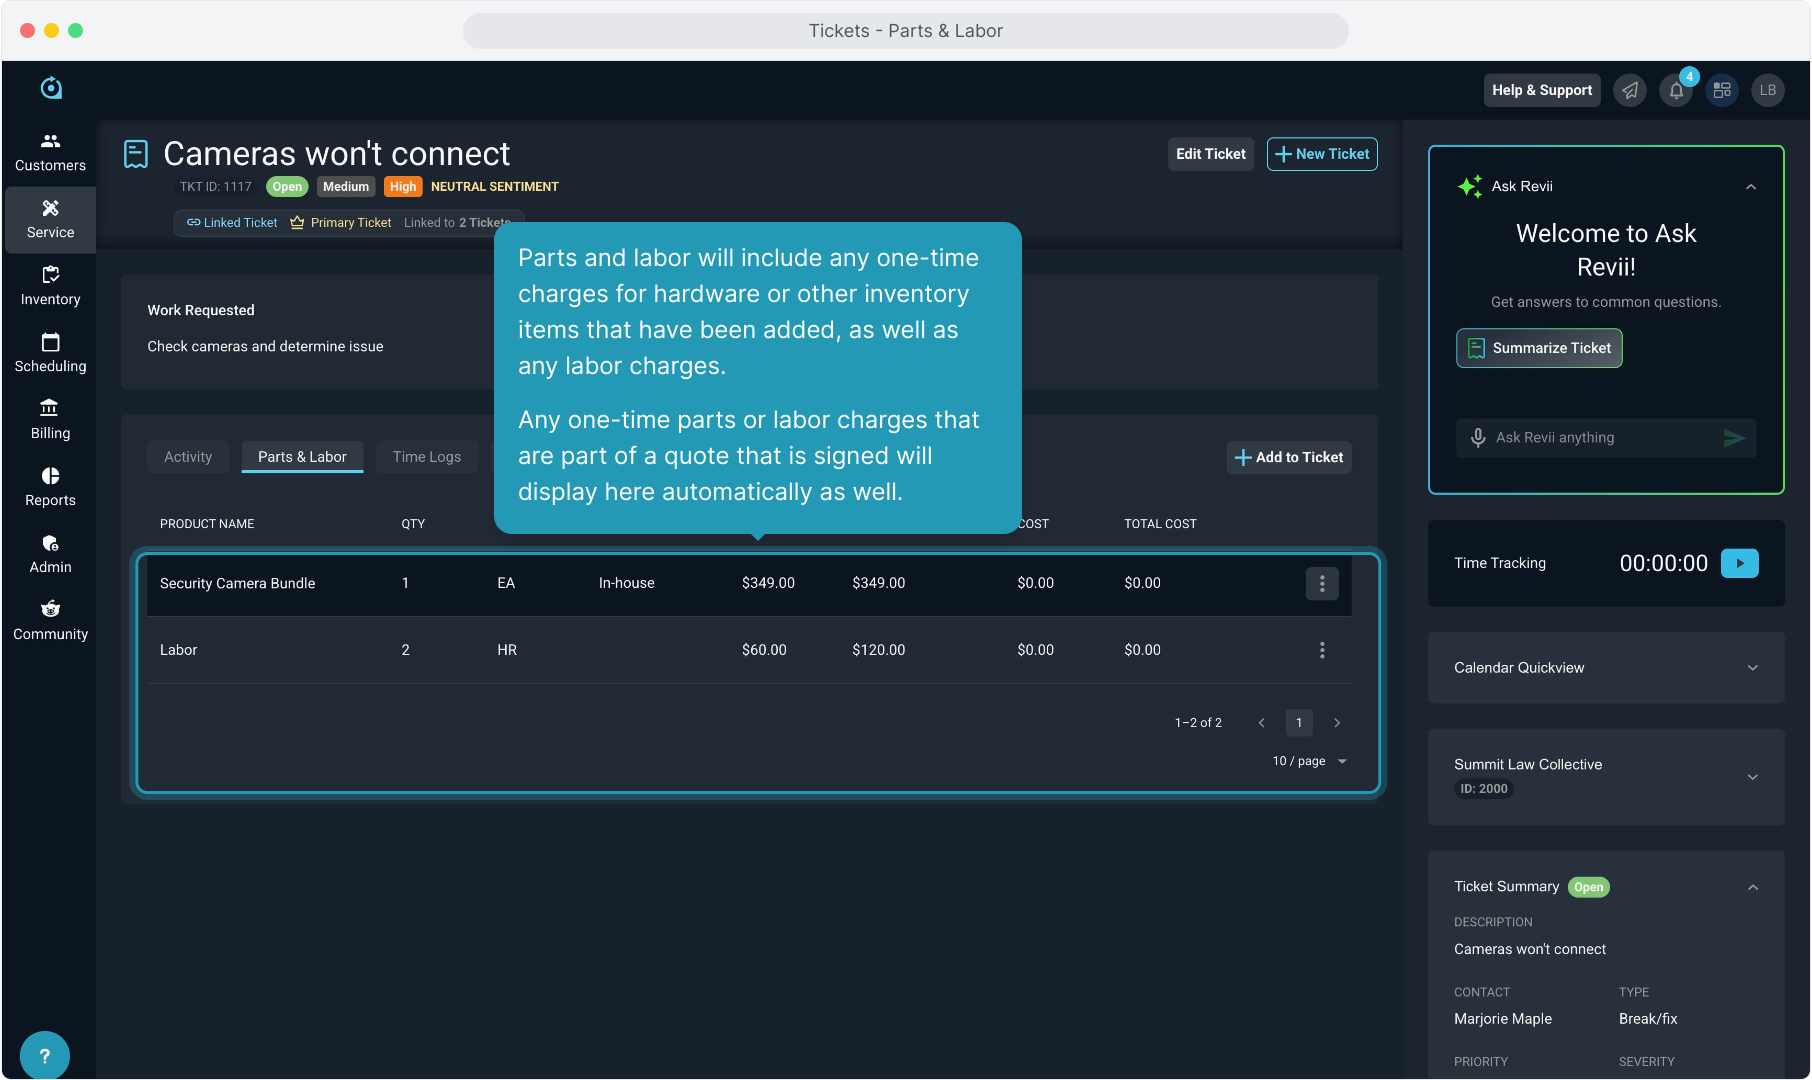
3. Parts and labor will include any one-time charges for hardware or other inventory items that have been added, as well as any labor charges.
Any one-time parts or labor charges that are part of a quote that is signed will display here automatically as well.
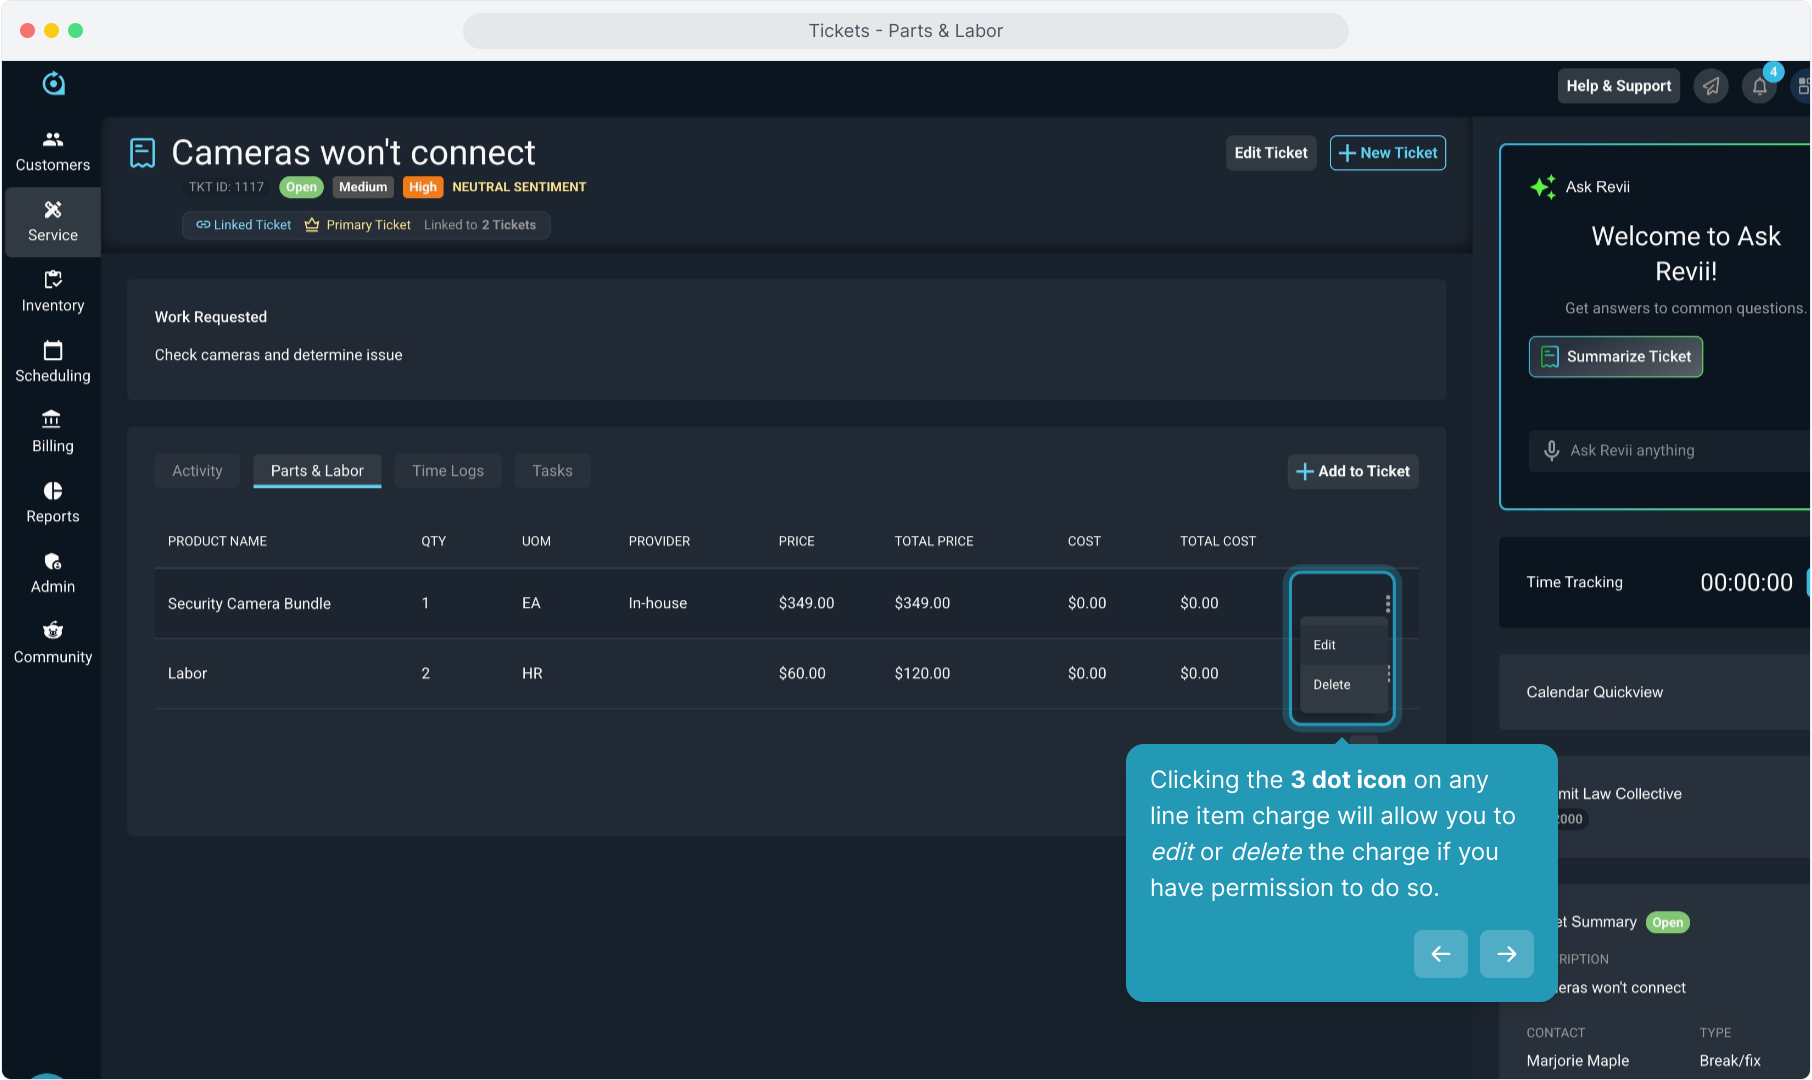
4. Clicking the 3 dot icon on any line item charge will allow you to edit or delete the charge if you have permission to do so.
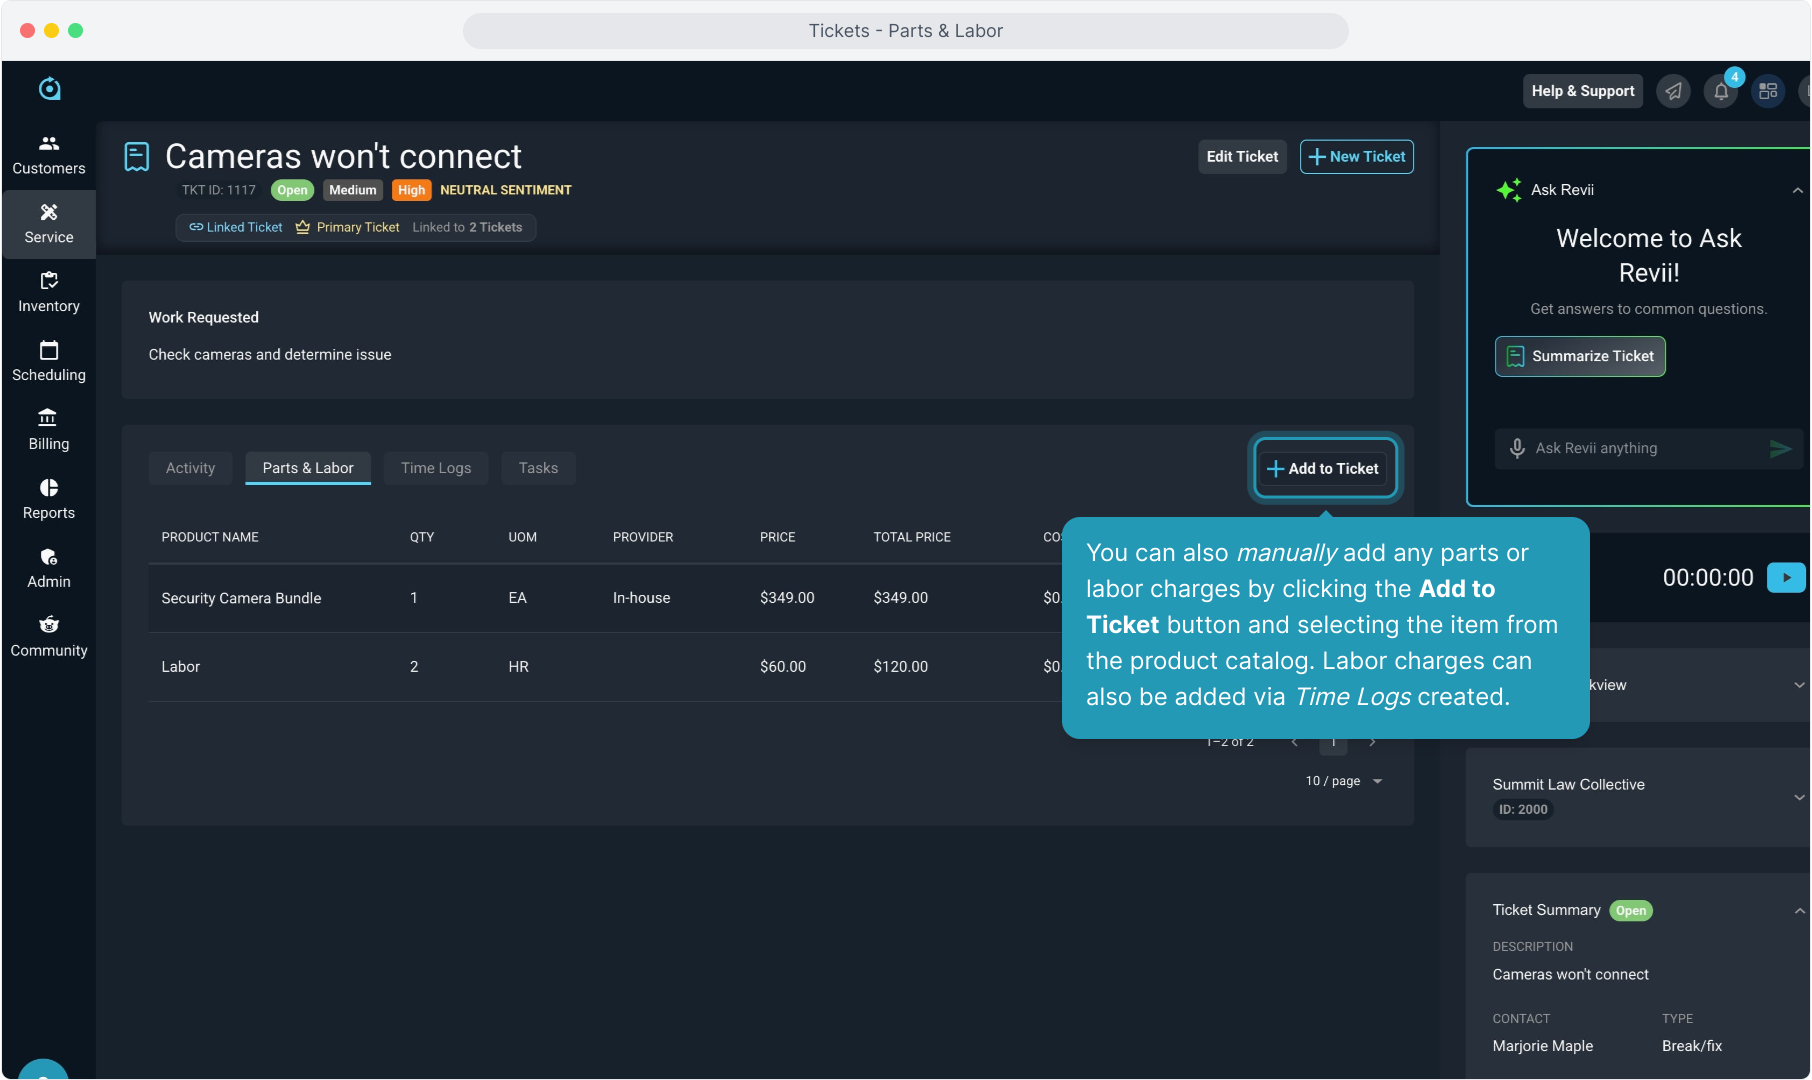
5. You can also manually add any parts or labor charges by clicking the Add to Ticket button and selecting the item from the product catalog. Labor charges can also be added via Time Logs created.
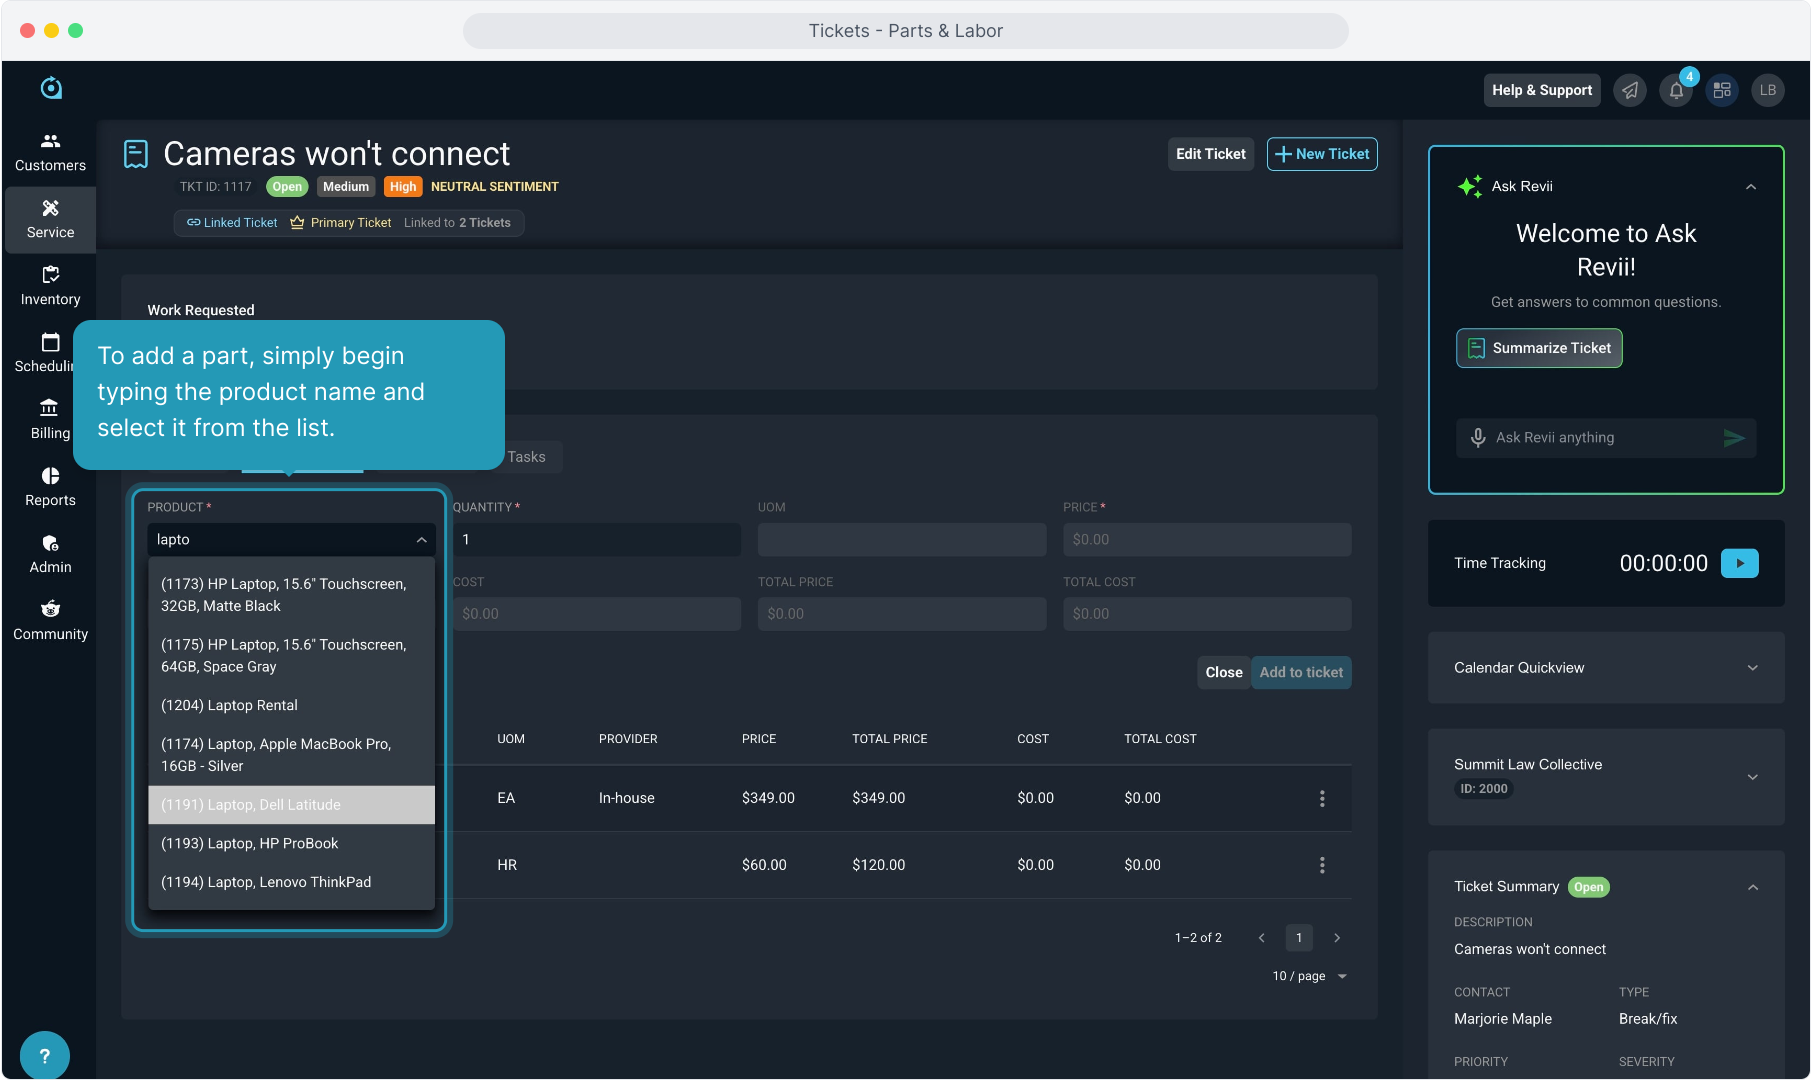
6. To add a part, simply begin typing the product name and select it from the list.
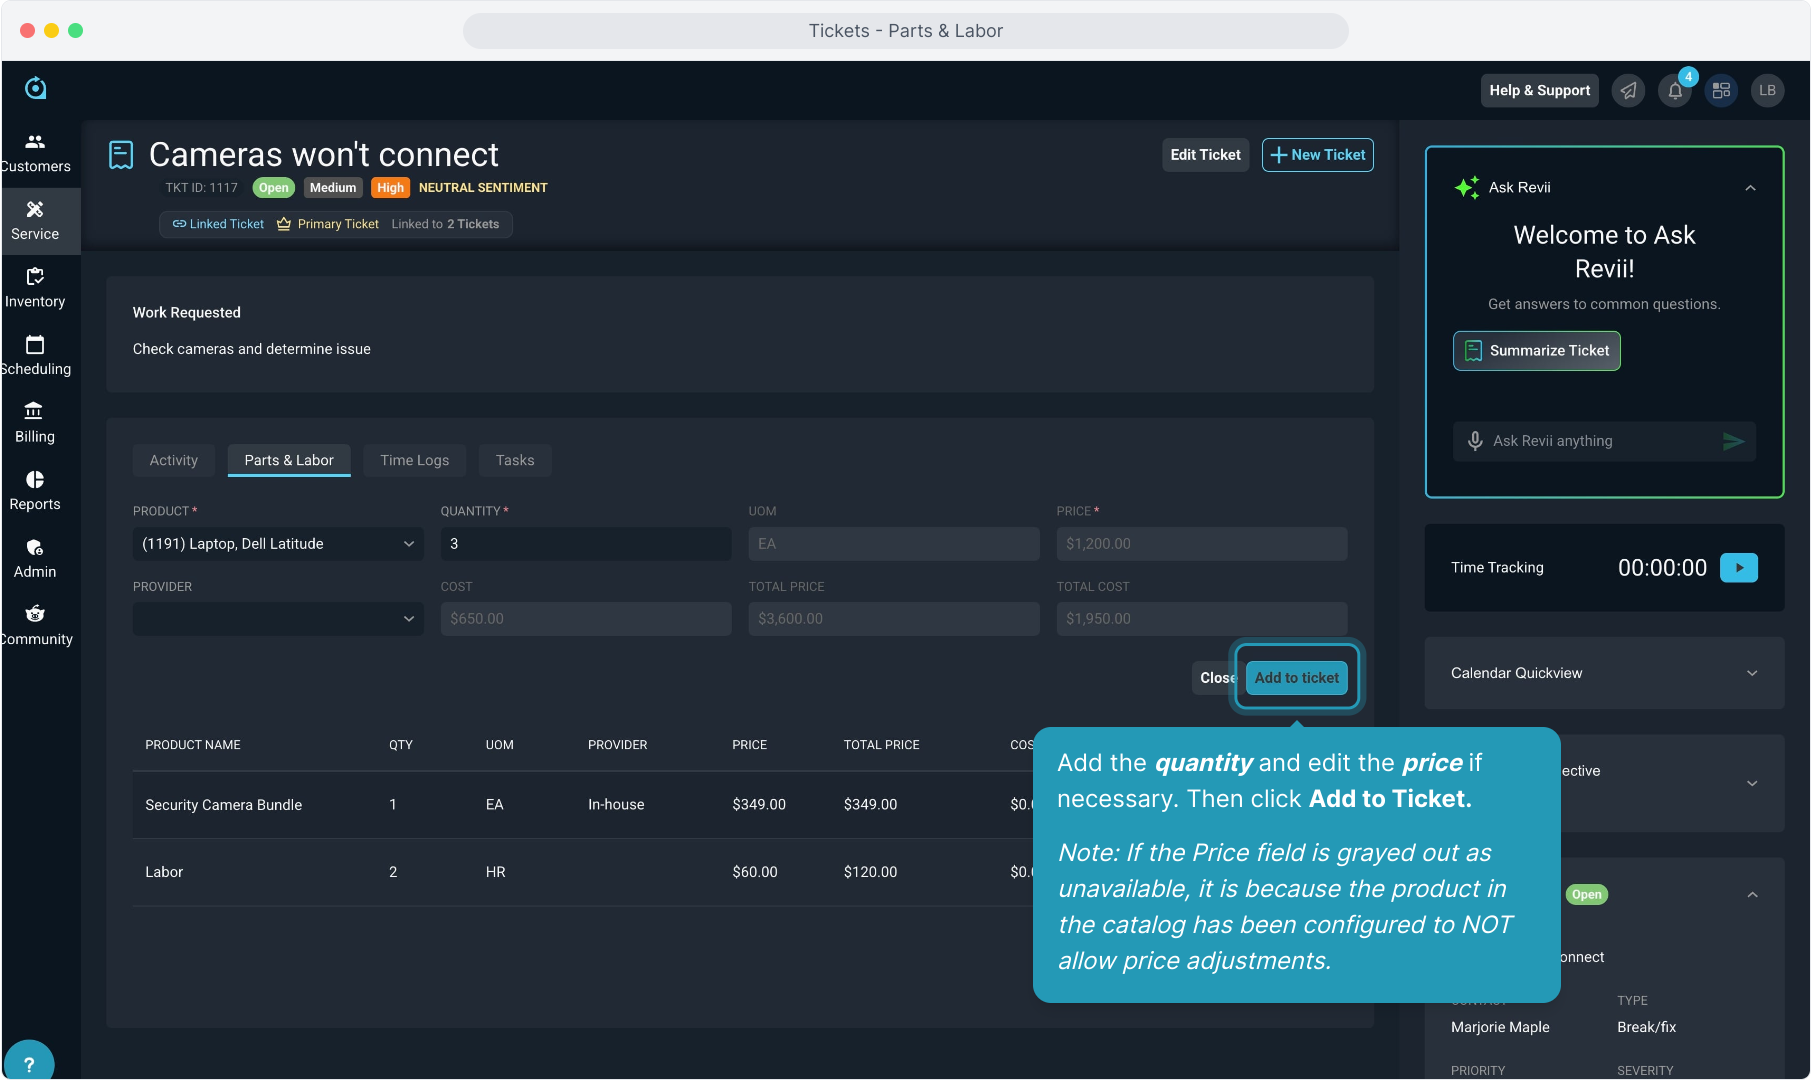
7. Add the quantity and edit the price if necessary. Then click Add to Ticket.
Note: If the Price field is grayed out as unavailable, it is because the product in the catalog has been configured to NOT allow price adjustments.
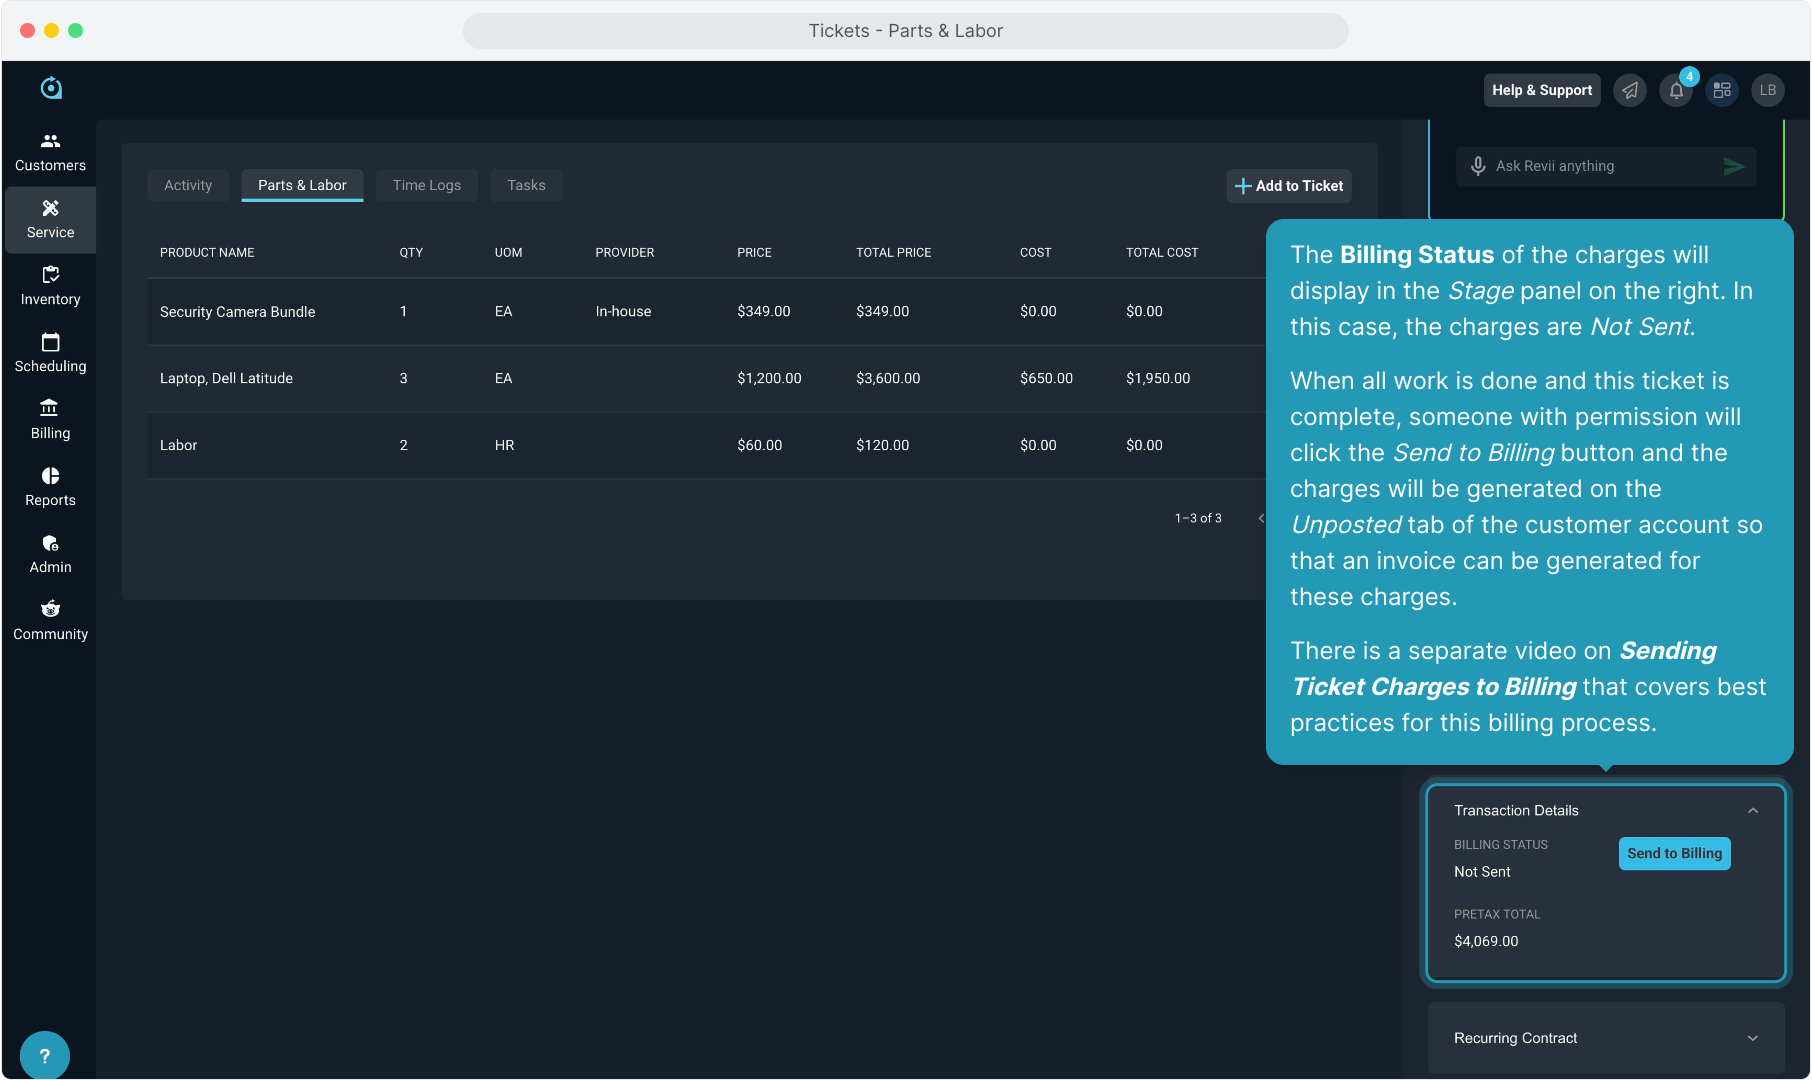
8. The Billing Status of the charges will display in the Stage panel on the right. In this case, the charges are Not Sent.
When all work is done and this ticket is complete, someone with permission will click the Send to Billing button and the charges will be generated on the Unposted tab of the customer account so that an invoice can be generated for these charges.
There is a separate video on Sending Ticket Charges to Billing that covers best practices for this billing process.