
System Settings: SLA Policies
The SLA Policies section on the System Settings screen allows you to create and manage SLA policies that can be applied to tickets to define response and resolution time targets. SLA policies help ensure your team is meeting service commitments and give you visibility into your overall SLA performance across your instance.
| NOTE: New SLA policies are created in a draft status and must be activated before they take effect. To activate an SLA policy, click the ellipsis at the end of the policy row and select Activate. |
Each field in the SLA Policies category is defined below.
| No. | Label | Definition |
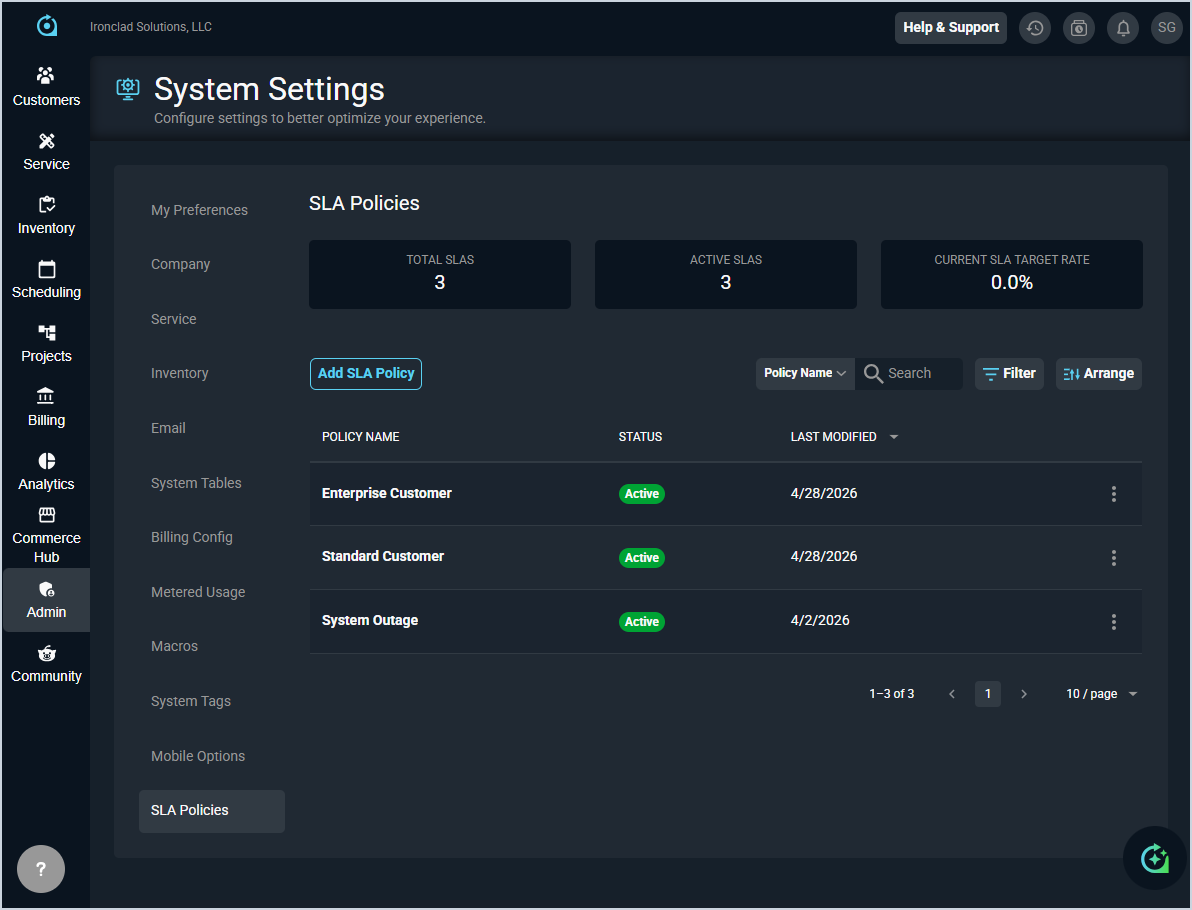
| Summary Cards | ||
| 1 | Total SLAs | Total number of SLA policies configured in your instance. |
| 2 | Active SLAs | Number of SLA policies currently set to Active. |
| 3 | Current SLA Target Rate | Overall SLA target rate across all active policies. |
| List View | ||
| 4 | Policy Name | Name of the SLA policy. |
| 5 | Status | Current status of the SLA policy, displayed as a badge. Status options include Active and Inactive. |
| 6 | Last Modified | Date the SLA policy was last updated. |
The following actions are available in the SLA Policies category.
- Add a new SLA policy by clicking the Add SLA Policy button. See the Create/Edit SLA Policies article for more information.
- Search the SLA policies by selecting a column from the dropdown above the grid and entering text in the Search field. The list view updates to display records matching your search in the column you selected.
- Filter the SLA policies displayed on this view by clicking the Filter button and selecting from the available filter options.
- Customize which columns display in the list view and the order in which they display by clicking the Arrange button and making the desired changes. See the Arrange Columns article for more information.
- Sort the results in the table by clicking the column label in the table header.
- Edit or delete an SLA policy by clicking the ellipsis at the end of the row and selecting from the available menu options.