
Ticket List View
The Ticket List view displays every ticket in your database, regardless of customer or status. A ‘ticket’ in Rev.io is the main record that tracks customer requests for service and stores details for the services provided. From the ticket, you can enter work requested, work performed, parts and labor, time logs, and more.
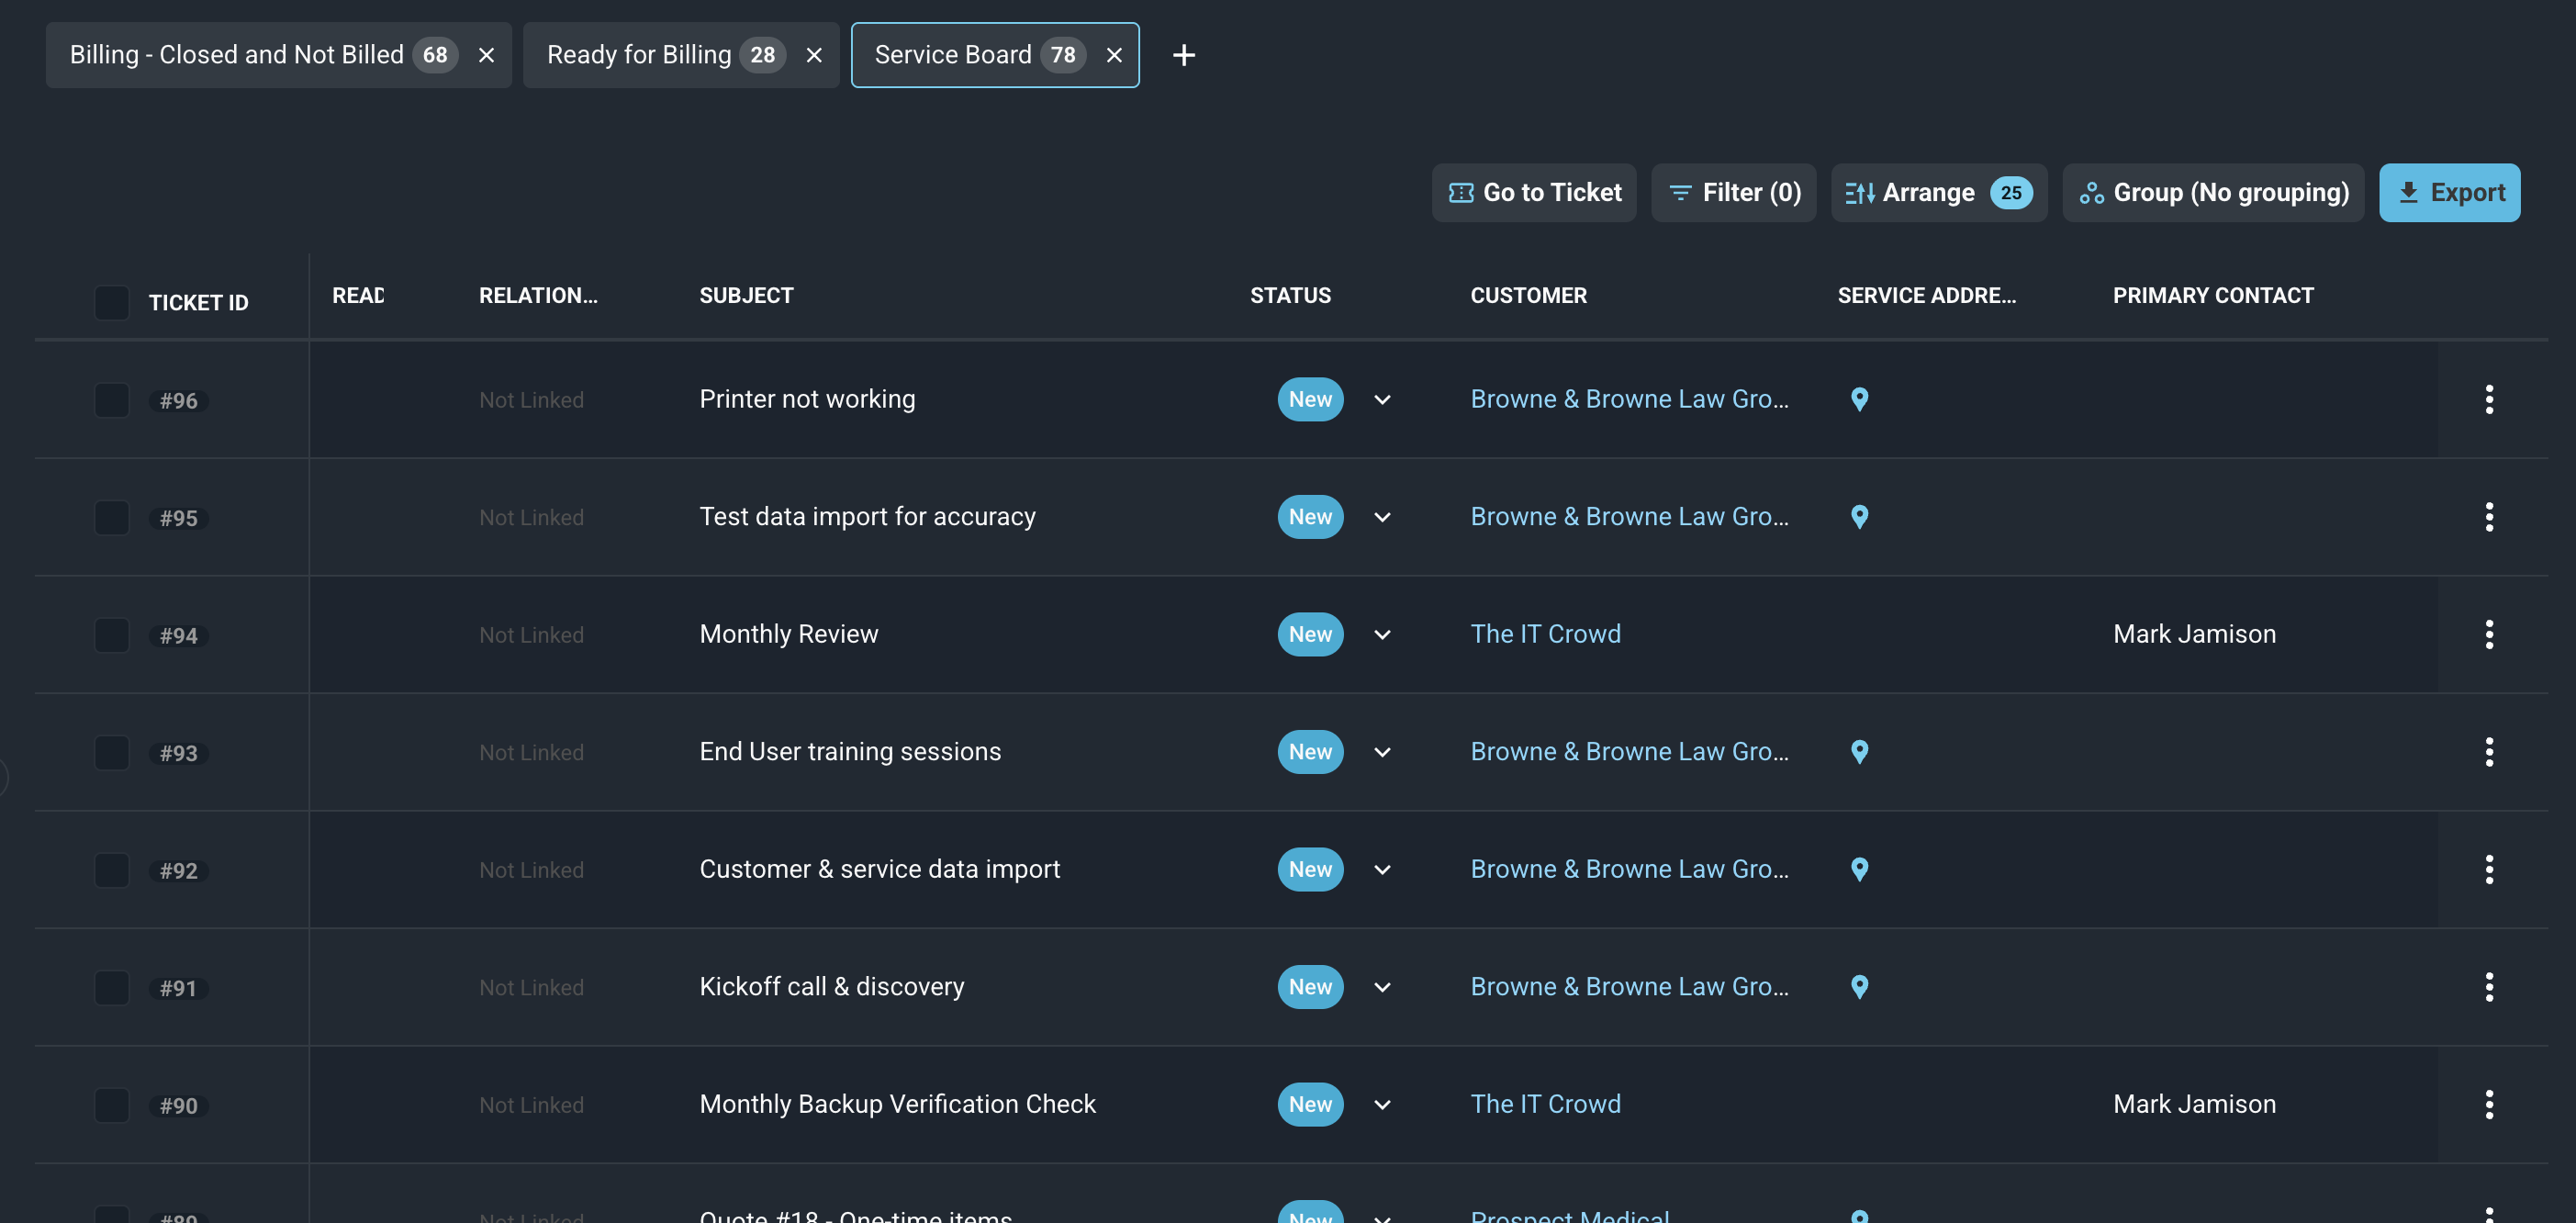
The left side of the Tickets list view lists your Favorites, Boards, My Views, and views that have been shared with you. Boards you open appear as tabs above the ticket list, and the + button next to the tabs opens additional boards. Boards can also be displayed on the Dispatch Board. See the Create Ticket Boards article for more information.
Use the arrow icon to the right of this panel to open and close this view screen when you need to.
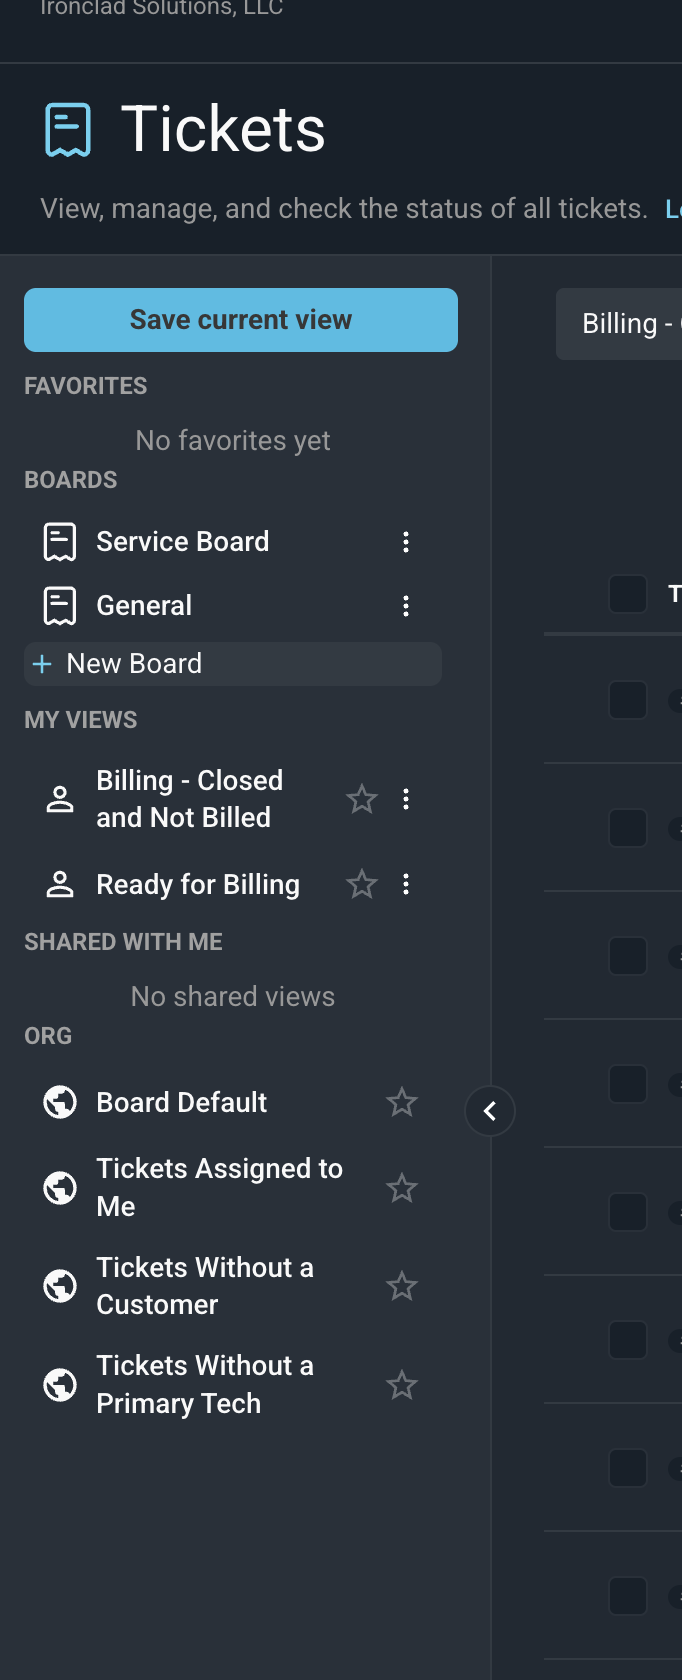
Each field on the Tickets List view is defined below.
| NOTE: Fields shown in the list view can vary based on the data entered for the customer, contact, or ticket creation. If a field is left blank while editing these records, it will not appear on the Ticket List view. Similarly, if a column is hidden using the Arrange columns option, it will not appear in the list view. |
| Label | Definition |
| Ticket ID | Numerical identifier for the ticket in your database. |
| Read | Message icon indicates there is an unread email on the ticket. |
| Relationship | Indicates whether the ticket is linked to another ticket or is the primary ticket in a linked ticket relationship. See the Linking Related Tickets article for more information about ticket relationships. |
| Subject | Description of the work being done for the ticket. |
| Customer | Customer for which the ticket was created. |
| Service Address | Service address for the ticket. Note: This is the address used for taxing. |
| Primary Contact | Name of the primary contact on the customer record for which the ticket was created. |
| Associated Contacts | Number of additional contacts on the ticket. |
| Status | Status of the ticket. Default ticket Status options include New, Open, Pending, Closed, and Void. |
| Billing Status | Status of whether the ticket has been sent to billing. Billing Status options include Not Sent and Sent. See the Sending Tickets to Billing article for more information. |
| Primary Tech | Primary tech assigned to work the ticket. |
| Associated Techs | Number of additional techs assigned to work the ticket. When their work is complete and they are no longer needed on the ticket, you can edit the ticket and mark Associated Techs as Complete. |
| Type | Type of ticket. Default Type options include Phone Support, Service Call, Installation, and Break/Fix. |
| Priority | Level of priority/importance for the ticket. Default Priority options include High, Medium, and Low. |
| Severity | Level of severity/urgency for the ticket. Default Severity options include Emergency, High, Medium, and Low. |
| Created | Date the ticket was created. |
| Updated | Date the ticket was last updated. |
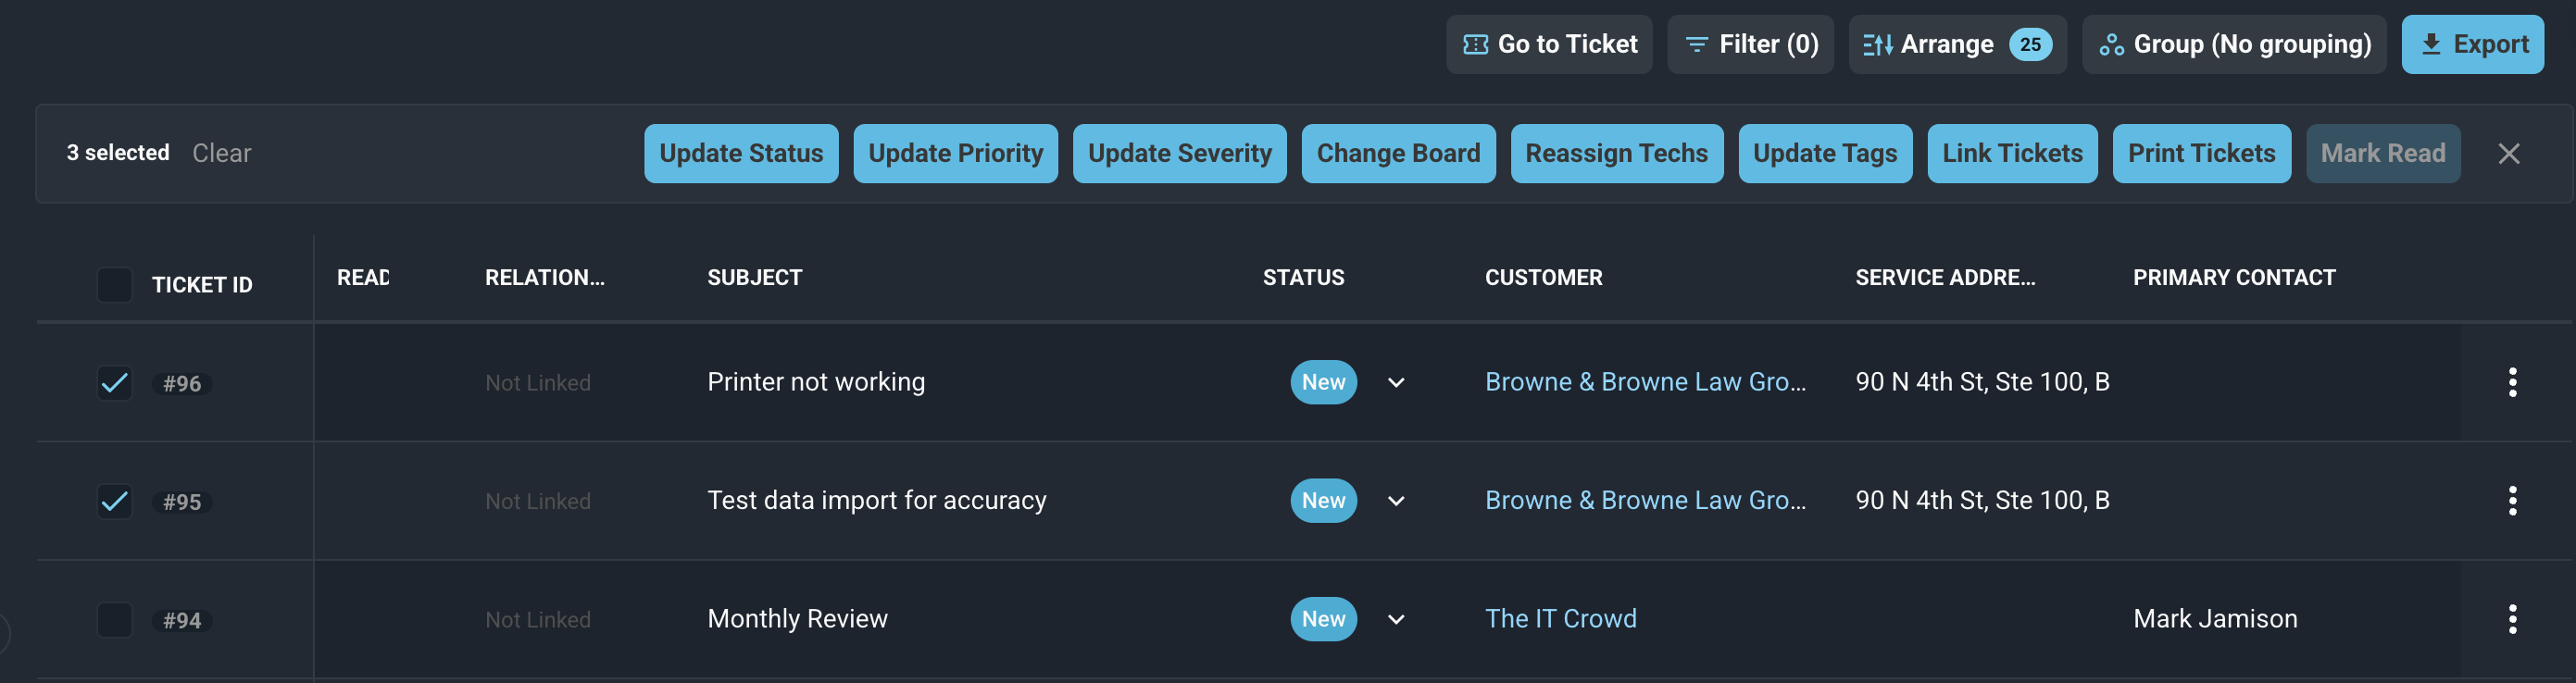
These actions are available on the Tickets List view.
- Create a new ticket by clicking the Add Ticket button and entering the relevant details. See the Create/Edit Tickets article for more information.
- Select one or more tickets by clicking the checkbox at the start of each row. The bulk action buttons display above the list only after you select at least one ticket. They include Update Status, Update Priority, Update Severity, Change Board, Reassign Techs, Update Tags, Link Tickets, Print Tickets, and Mark Read.
- Mark the unread email on several tickets as read by selecting the tickets and clicking the Mark Read button above the list. The unread email indicators clear for all of the selected tickets. If the Mark Read button is grayed out, the message “Select at least 2 tickets with unread email to mark them read.” displays.
- Create a linked relationship for two or more tickets by clicking the checkbox at the start of each row and clicking the Link Tickets button above the grid. See the Linking Related Tickets article for more information about ticket relationships. NOTE: Linking or unlinking tickets automatically adds a note to the System Entries section on each ticket's Activity tab.
- Search the tickets displayed on this view by selecting a column from the dropdown above the grid and entering text in the Search field. The list view updates to display records matching your search in the column you selected.
- Filter the tickets displayed on this view by clicking the Filter button above the grid and selecting the Show Closed/Voided Tickets option. The list view hides tickets with either a Closed or Void status by default so you can focus on the tickets that need your attention most. This option shows all tickets in the list view, regardless of their status.
- Filter the tickets displayed on this view by clicking the Filter button above the grid and selecting the Show My Tickets option. This option hides tickets that are not assigned to you so you can focus on the tickets that need your attention.
- Filter the tickets displayed on this view by clicking the Filter button above the grid and selecting the Show Tickets Without Customers option. This option hides any tickets that have an assigned customer, allowing you to focus on tickets that still need to be assigned.
- Filter the tickets displayed on this view by clicking the Filter button above the grid and selecting the Show Non-Linked Tickets option. This option hides any tickets that have already been linked to another ticket, allowing you to focus on tickets for individual issues.
- Customize which columns display in the list view and the order in which they display by clicking the Arrange button and making the desired changes. See the Arrange Columns article for more information.
- Sort the results in the table by clicking the column label in the table header.
- View more details for the ticket by clicking the row. See the View Ticket: Details article for more information.
- Edit the ticket by clicking the ellipsis at the end of the row and selecting Edit from the menu options. See the Create/Edit Tickets article for more information.