How To Guide: Invoicing Parts & Labor Charges from Tickets
1. Introduction
2. From a customer's Tickets tab in the Servicing section, the list of tickets will display Billing Status information on which ticket charges have been billed with the indicator of Sent or Not Sent to billing.

3. There are currently two ways you can invoice your customer for charges incurred on a ticket.
First we will look at sending charges to billing to be billed with the next regularly scheduled monthly recurring bill. We'll click to open this ticket.

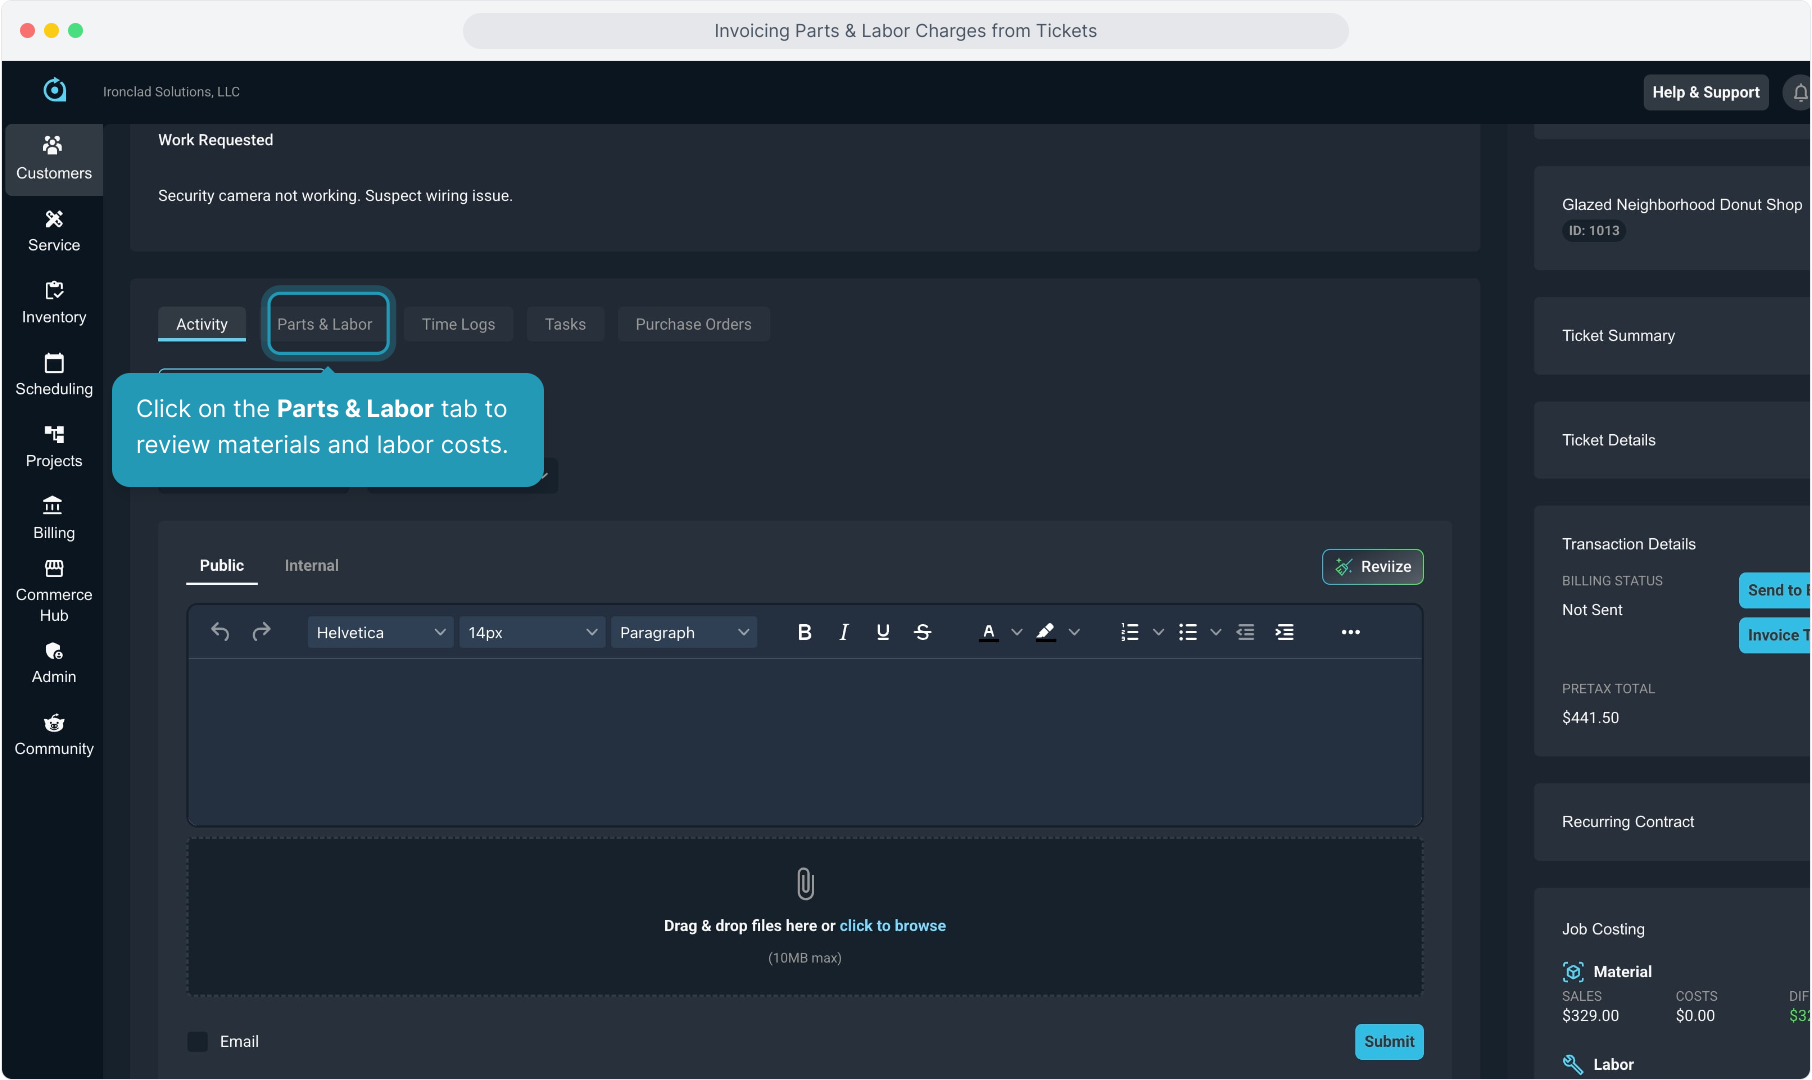
4. Click on the Parts & Labor tab to review materials and labor costs.
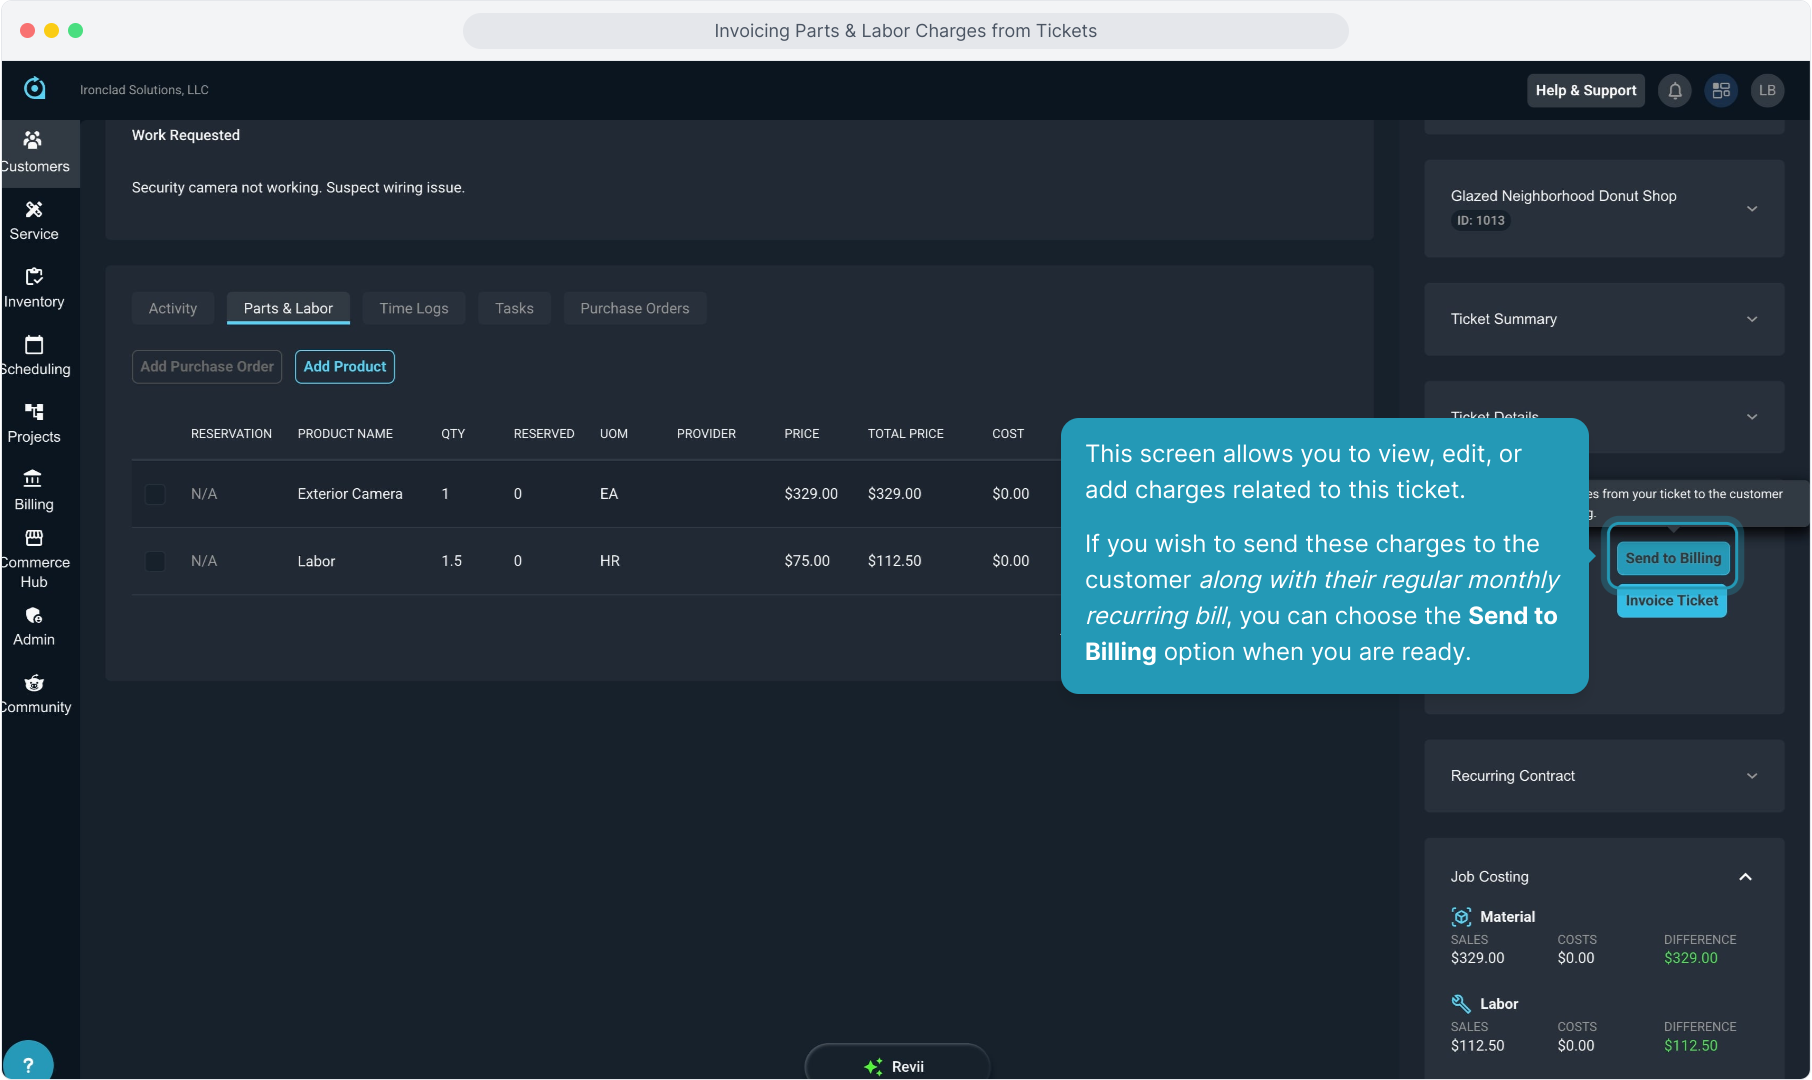
5. This screen allows you to view, edit, or add charges related to this ticket.
If you wish to send these charges to the customer along with their regular monthly recurring bill, you can choose the Send to Billing option when you are ready.
6. Once you send the charges to billing, it closes the window to be able to add any additional parts or labor charges to this ticket and you cannot void the ticket.
Sending the charges to billing is not reversible. If you are finished billing this ticket, click OK.

7. Invoicing a ticket is typically done at the completion of working the ticket, regardless of which method of billing you choose.
Currently, you will need to manually change the status of the ticket to Closed. Click the Edit Ticket button to modify the ticket details and information.

8. You can manually select Closed as the ticket Status here.
Future development will allow tickets to automatically close if charges are sent to be billed.

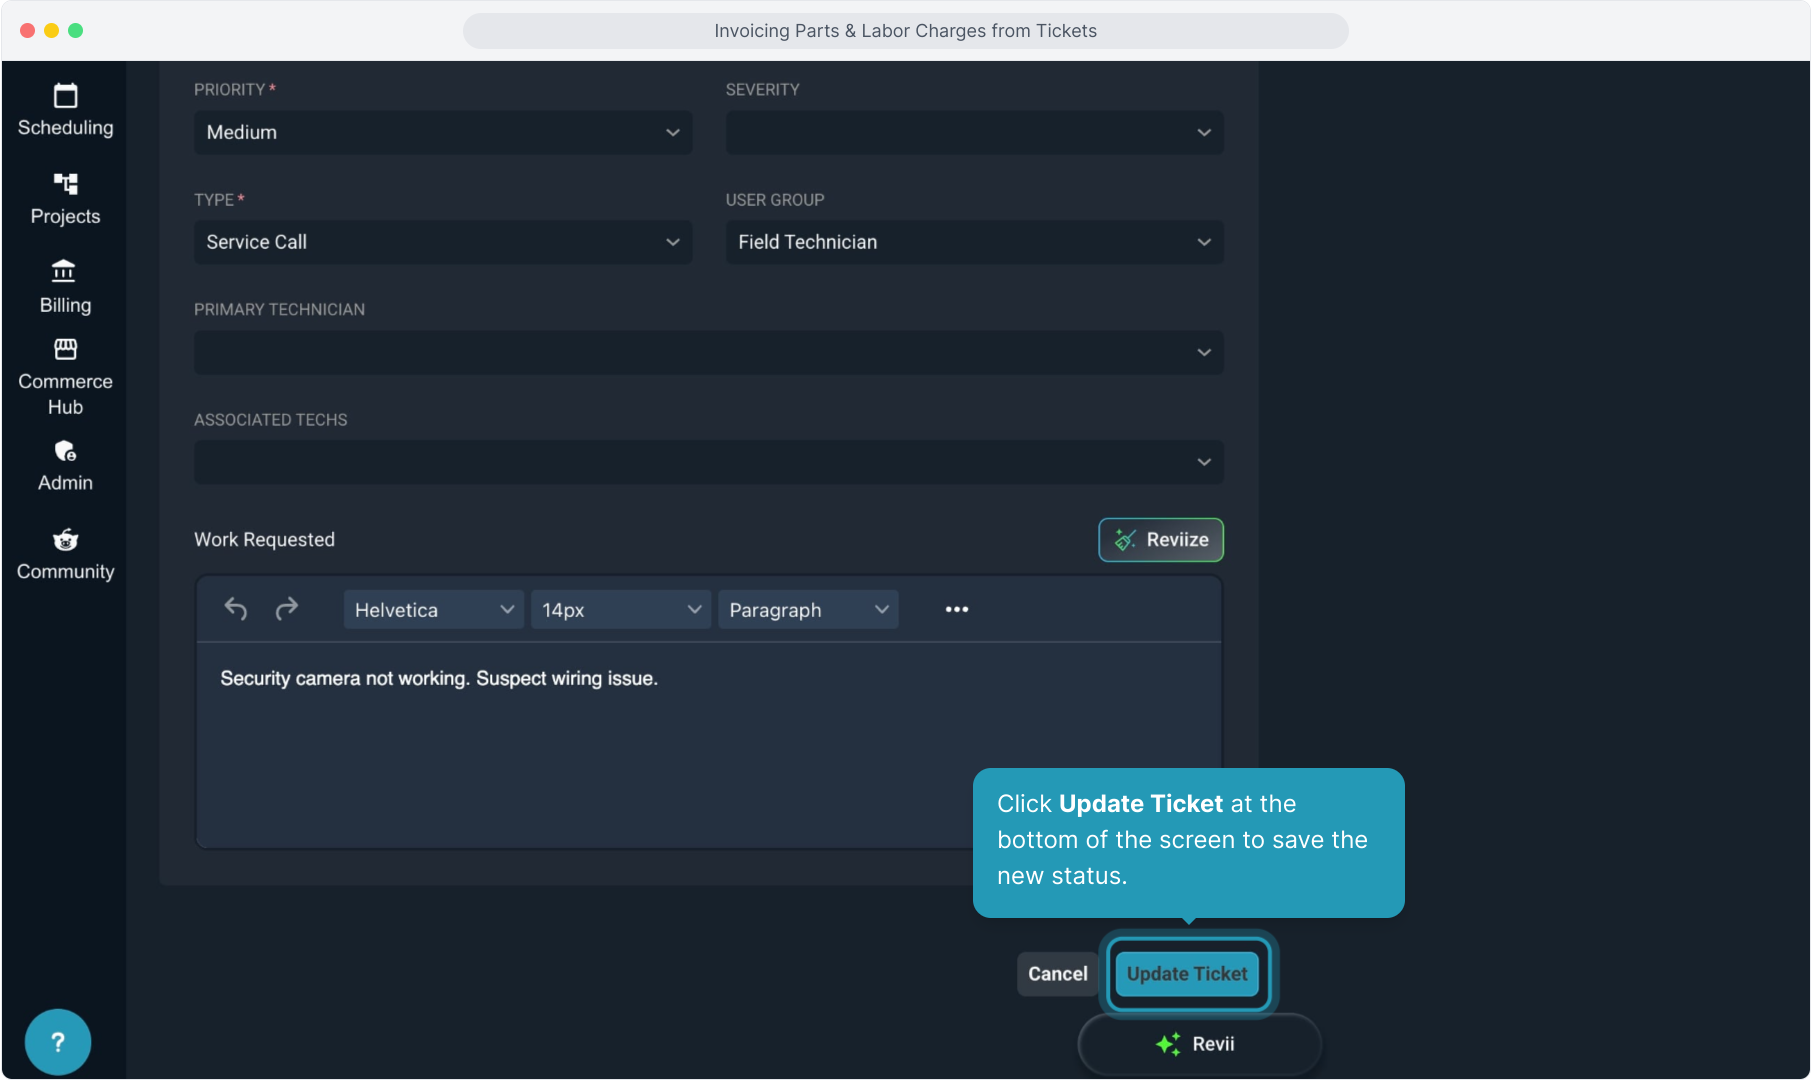
9. Click Update Ticket at the bottom of the screen to save the new status.
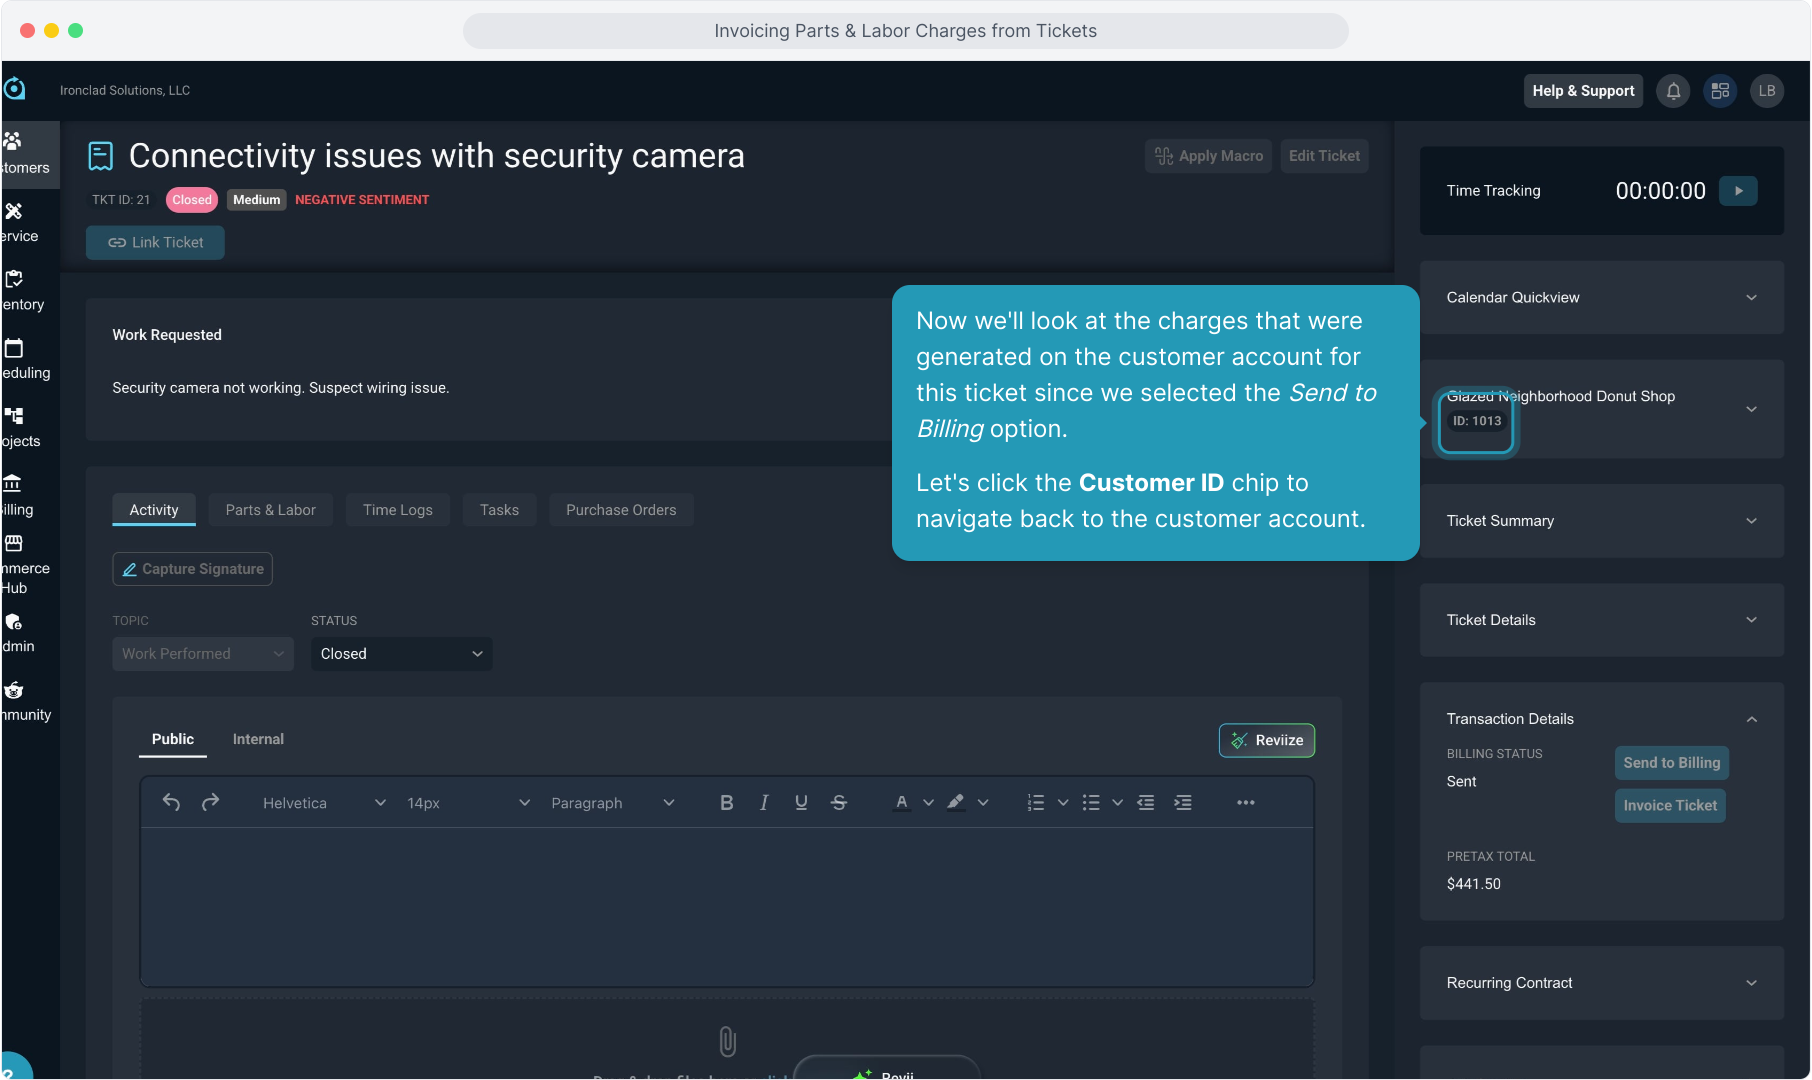
10. Now we'll look at the charges that were generated on the customer account for this ticket since we selected the Send to Billing option. Let's click the Customer ID chip to navigate back to the customer account.
11. Click the Billing section tab.

12. Click the Unposted tab where all charges remain until the next cycle invoice (bill) is generated.

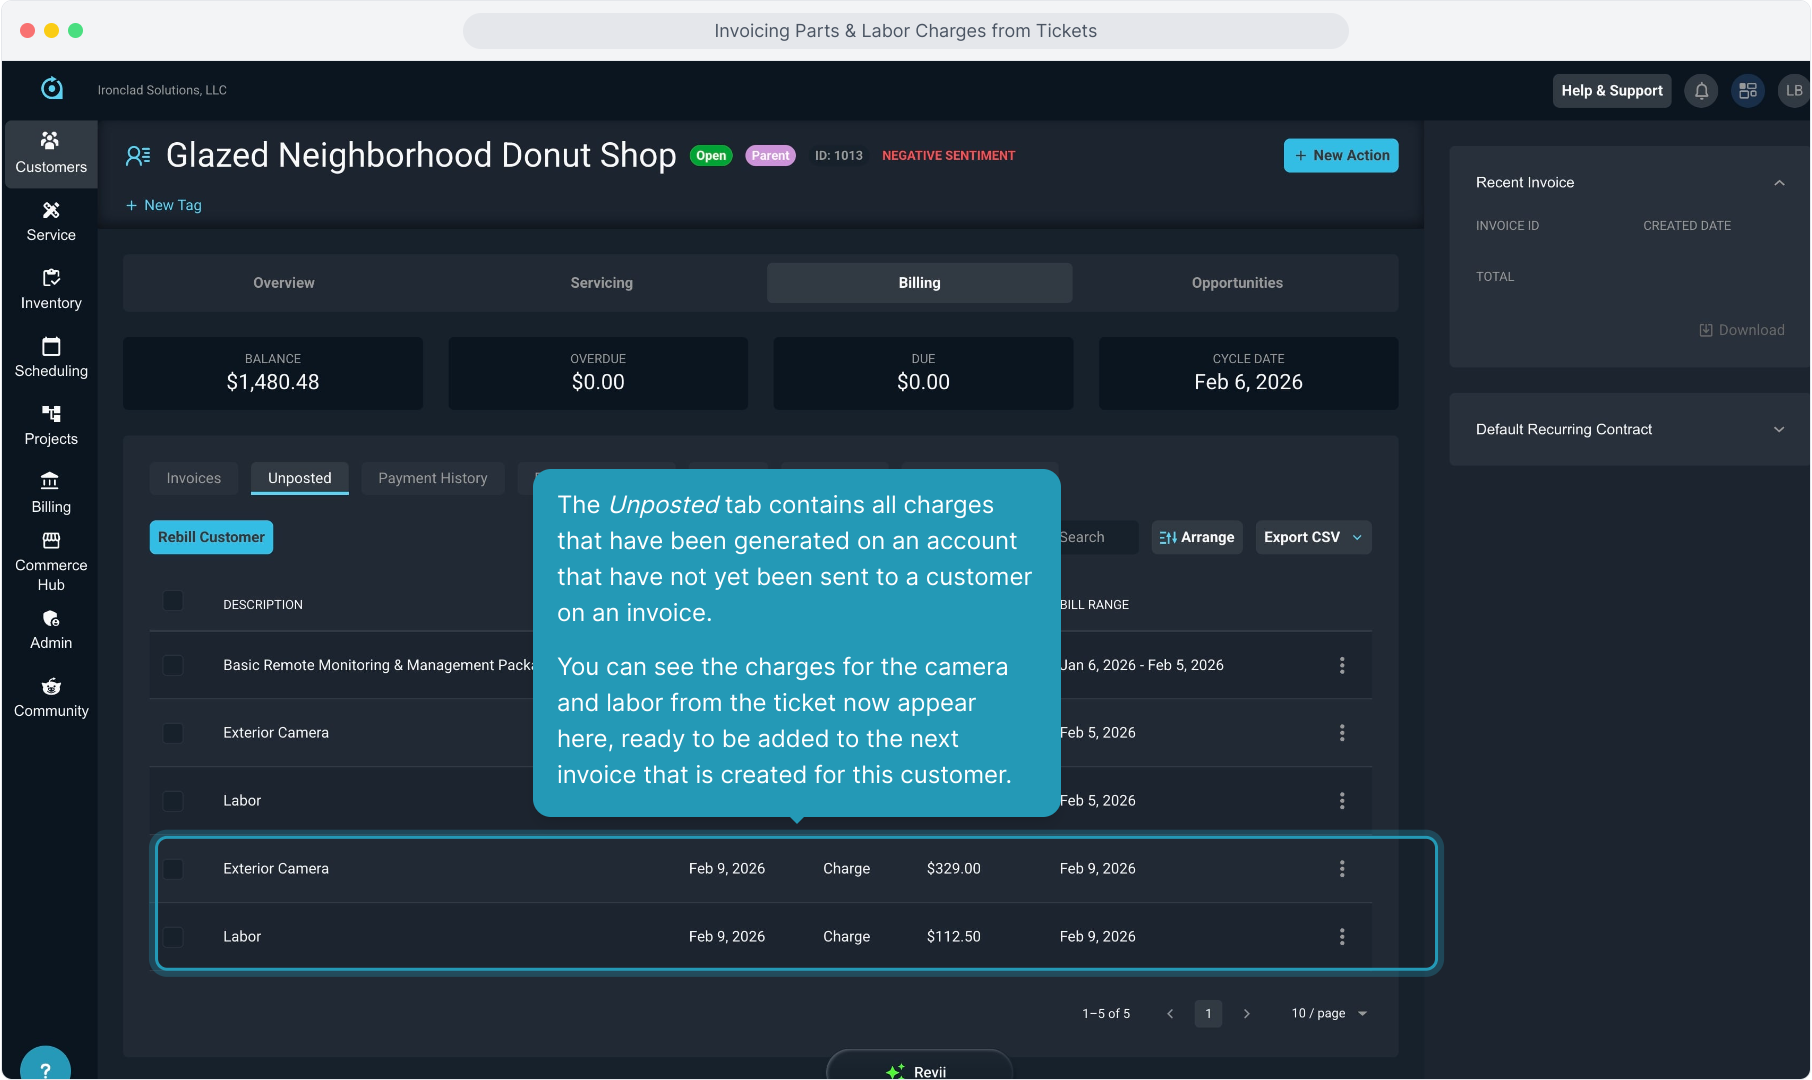
13. The Unposted tab contains all charges that have been generated on an account that have not yet been sent to a customer on an invoice.
You can see the charges for the camera and labor from the ticket now appear here, ready to be added to the next invoice that is created for this customer.
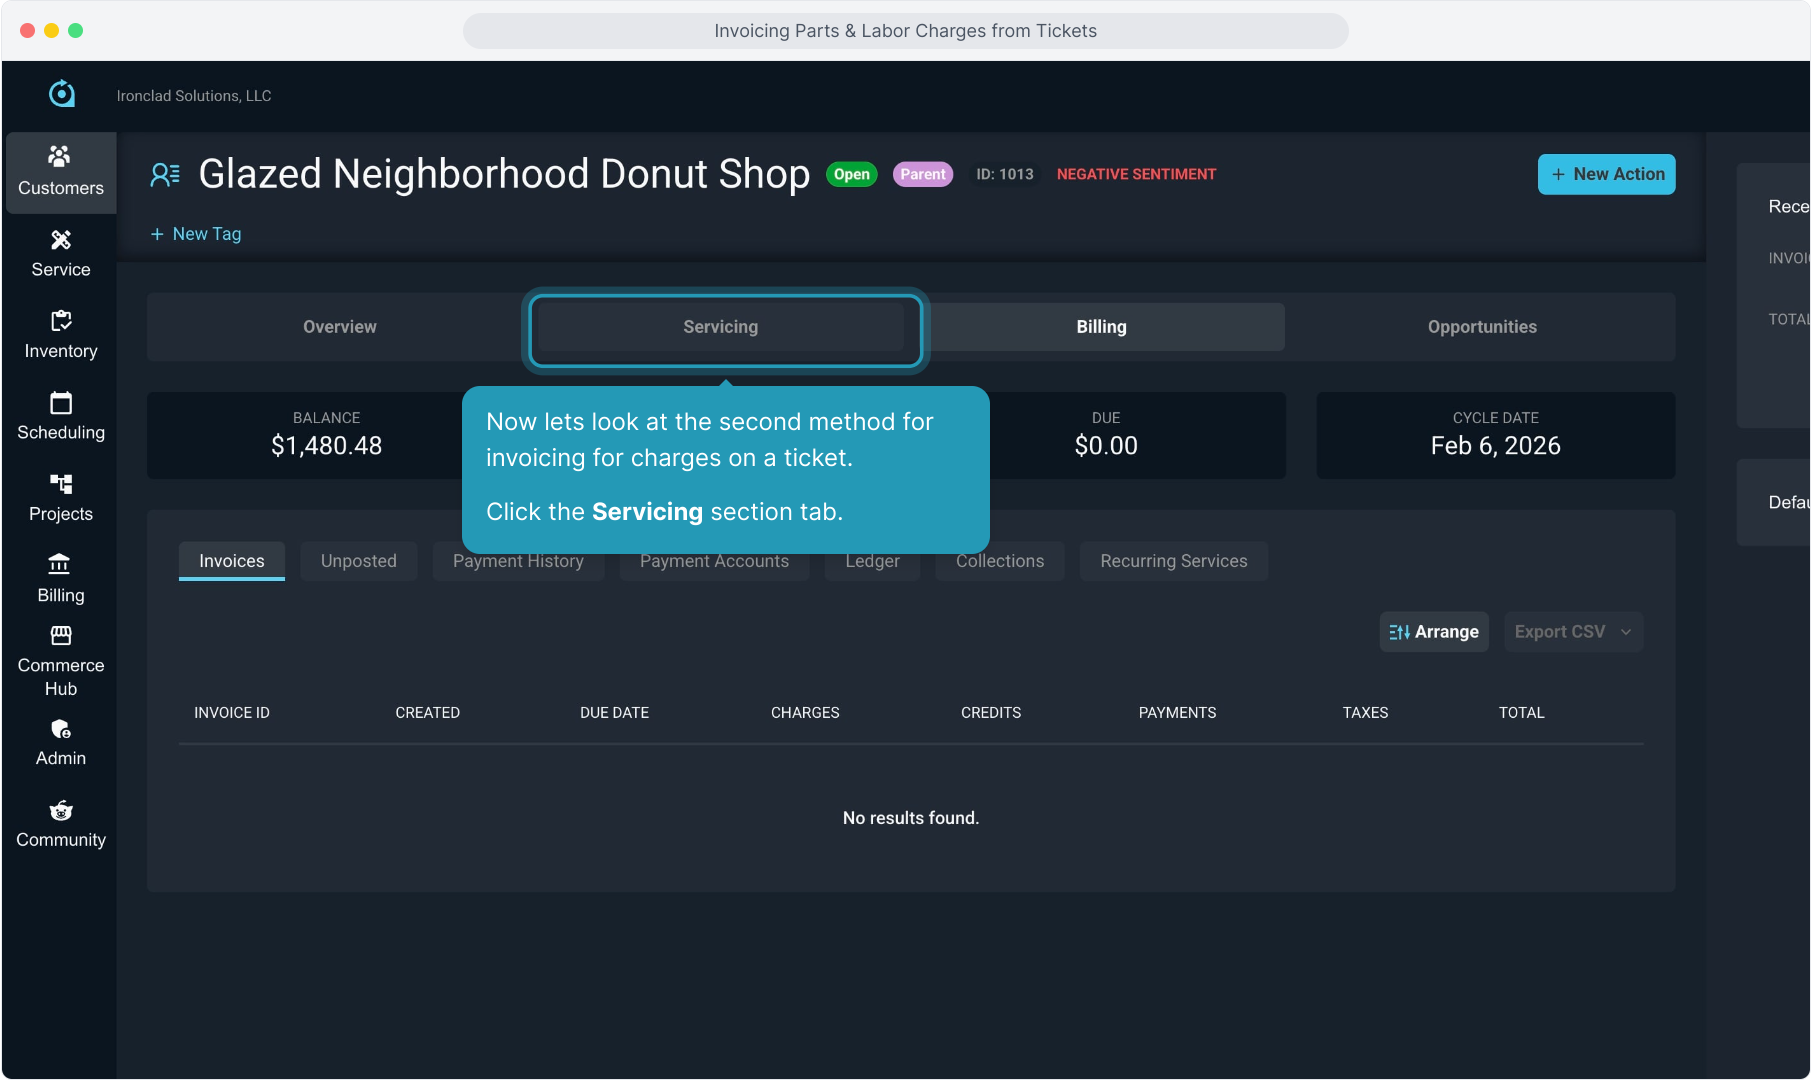
14. Now lets look at the second method for invoicing for charges on a ticket. Click the Servicing section tab.
15. The system will default to the Tickets tab. We will select another ticket that has charges related to it that have not yet been billed.

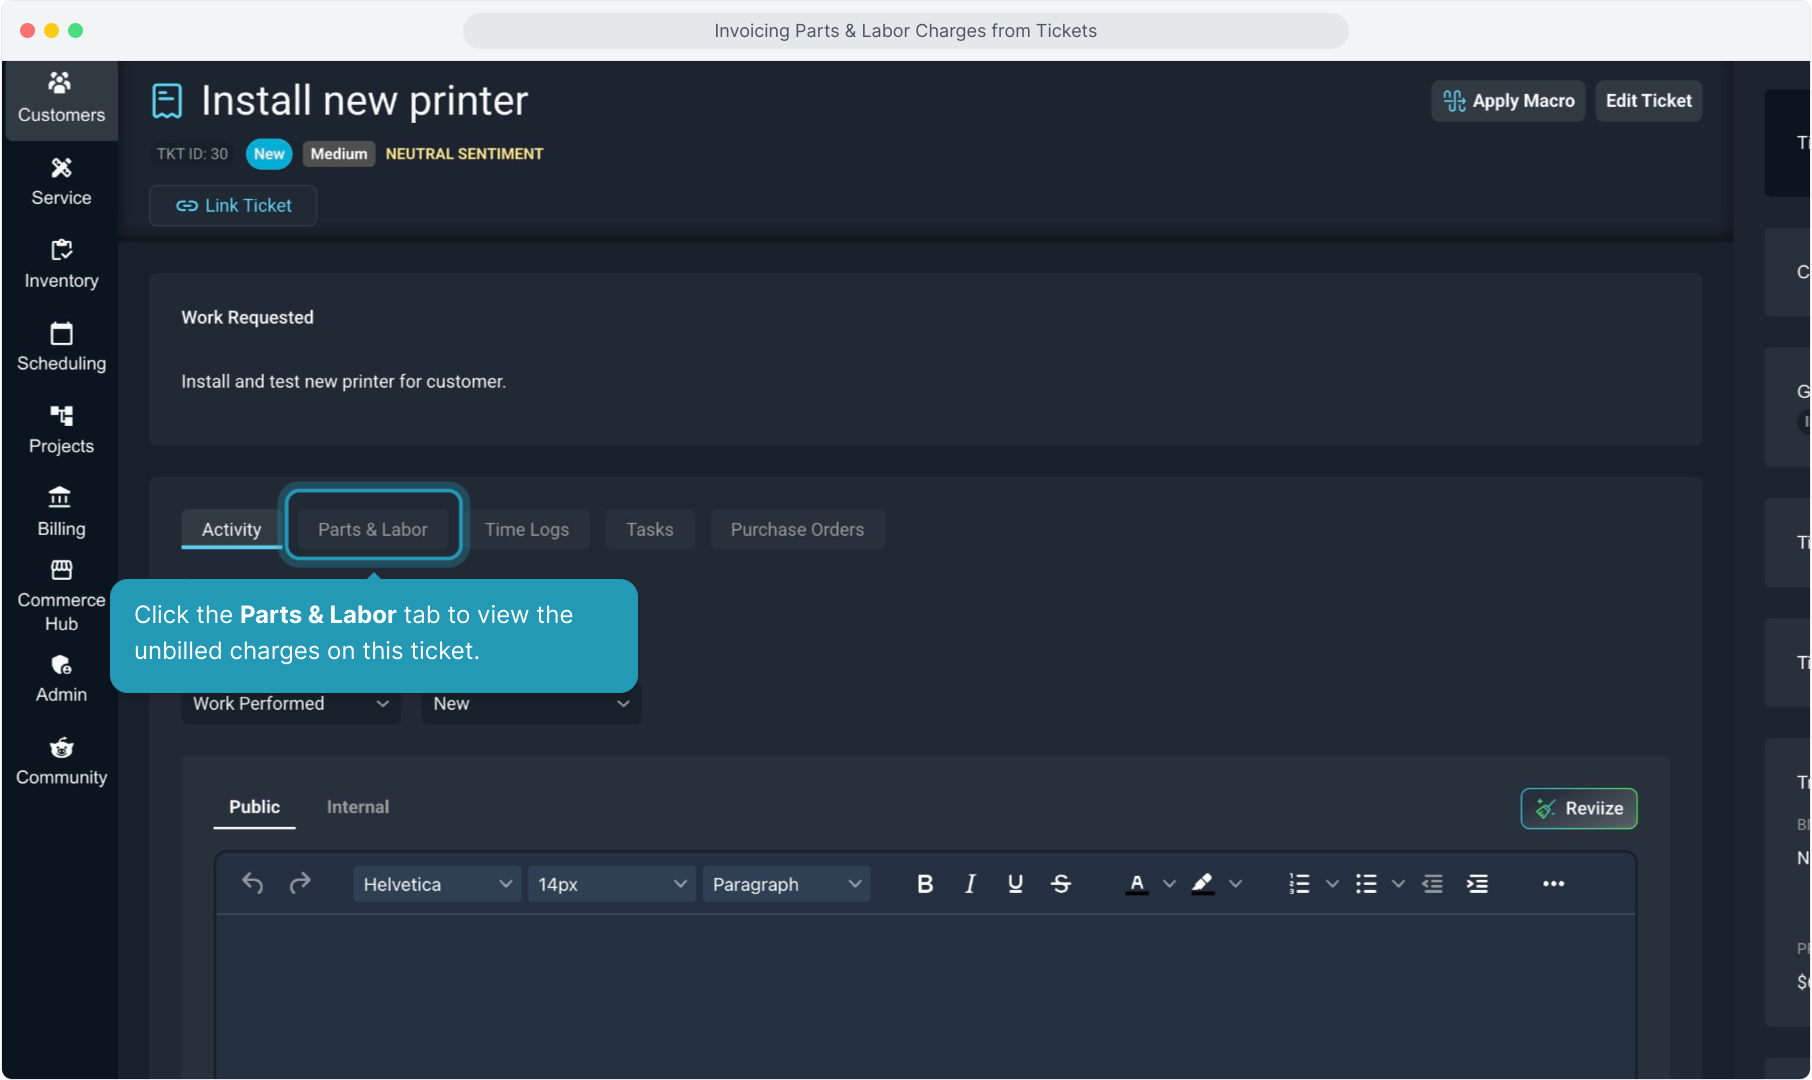
16. Click the Parts & Labor tab to view the unbilled charges on this ticket.
17. After reviewing the charges, this time we will select the Invoice Ticket option.
This method will allow you to quickly and immediately create an invoice for just the charges related to this particular ticket. Using this method will allow you to bill right away for these charges and not have to wait until the customer's next cycle bill to invoice for these particular charges.

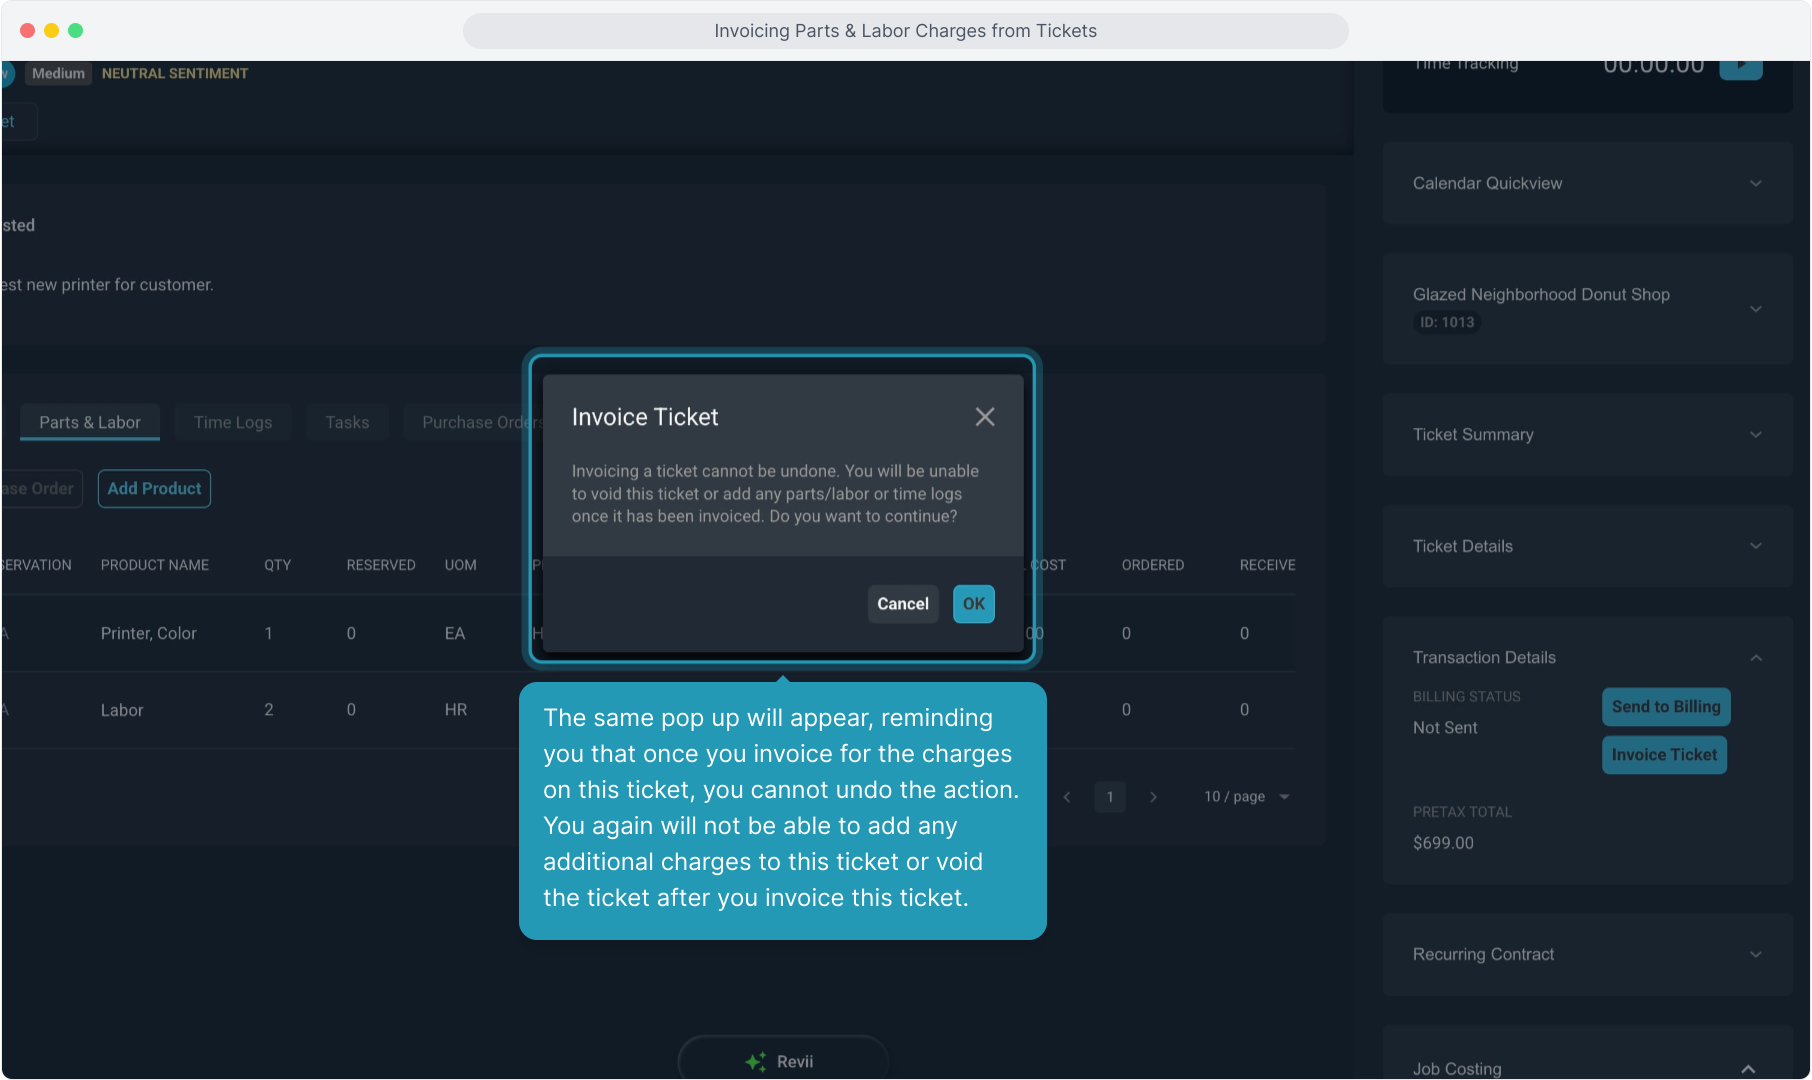
18. The same pop up will appear, reminding you that once you invoice for the charges on this ticket, you cannot undo the action. You again will not be able to add any additional charges to this ticket or void the ticket after you invoice this ticket.
19. Remember you will manually need to change the status of this ticket to Closed since you can no longer add charges or void the ticket. Click the Edit Ticket button as we showed earlier and follow those steps.

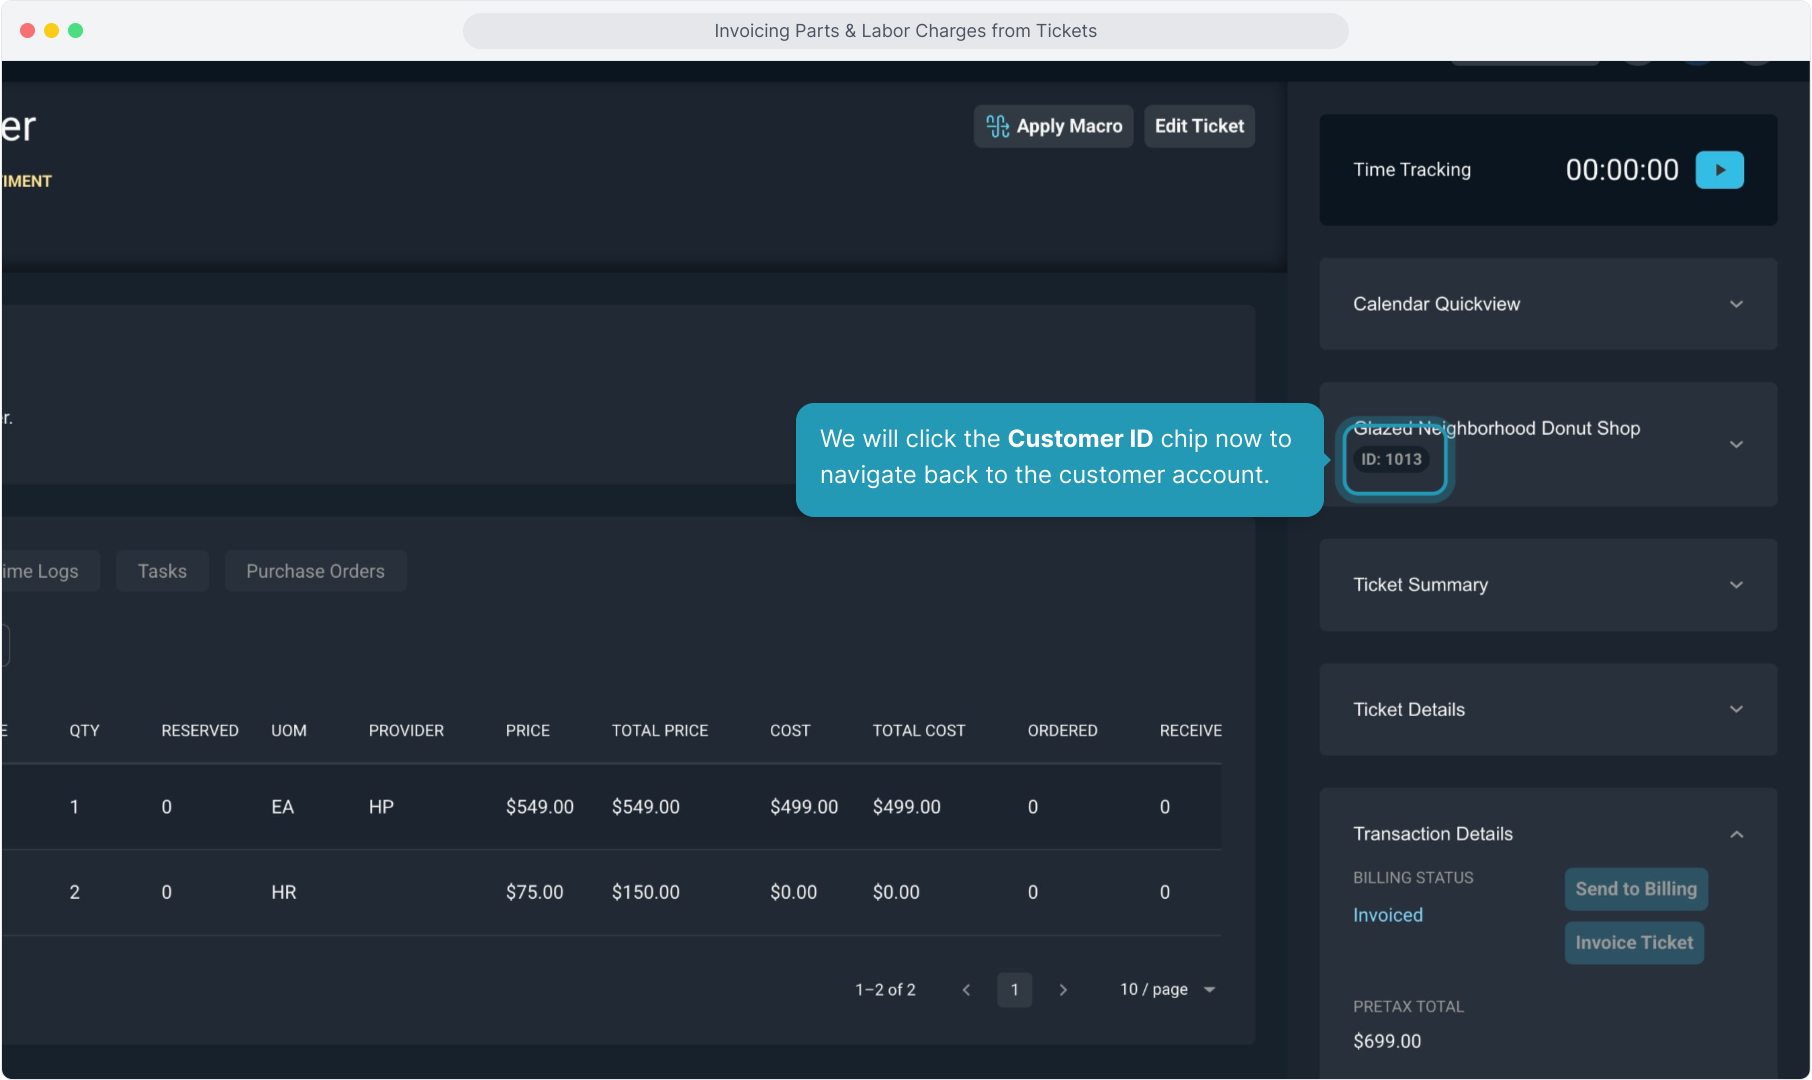
20. We will click the Customer ID chip now to navigate back to the customer account.
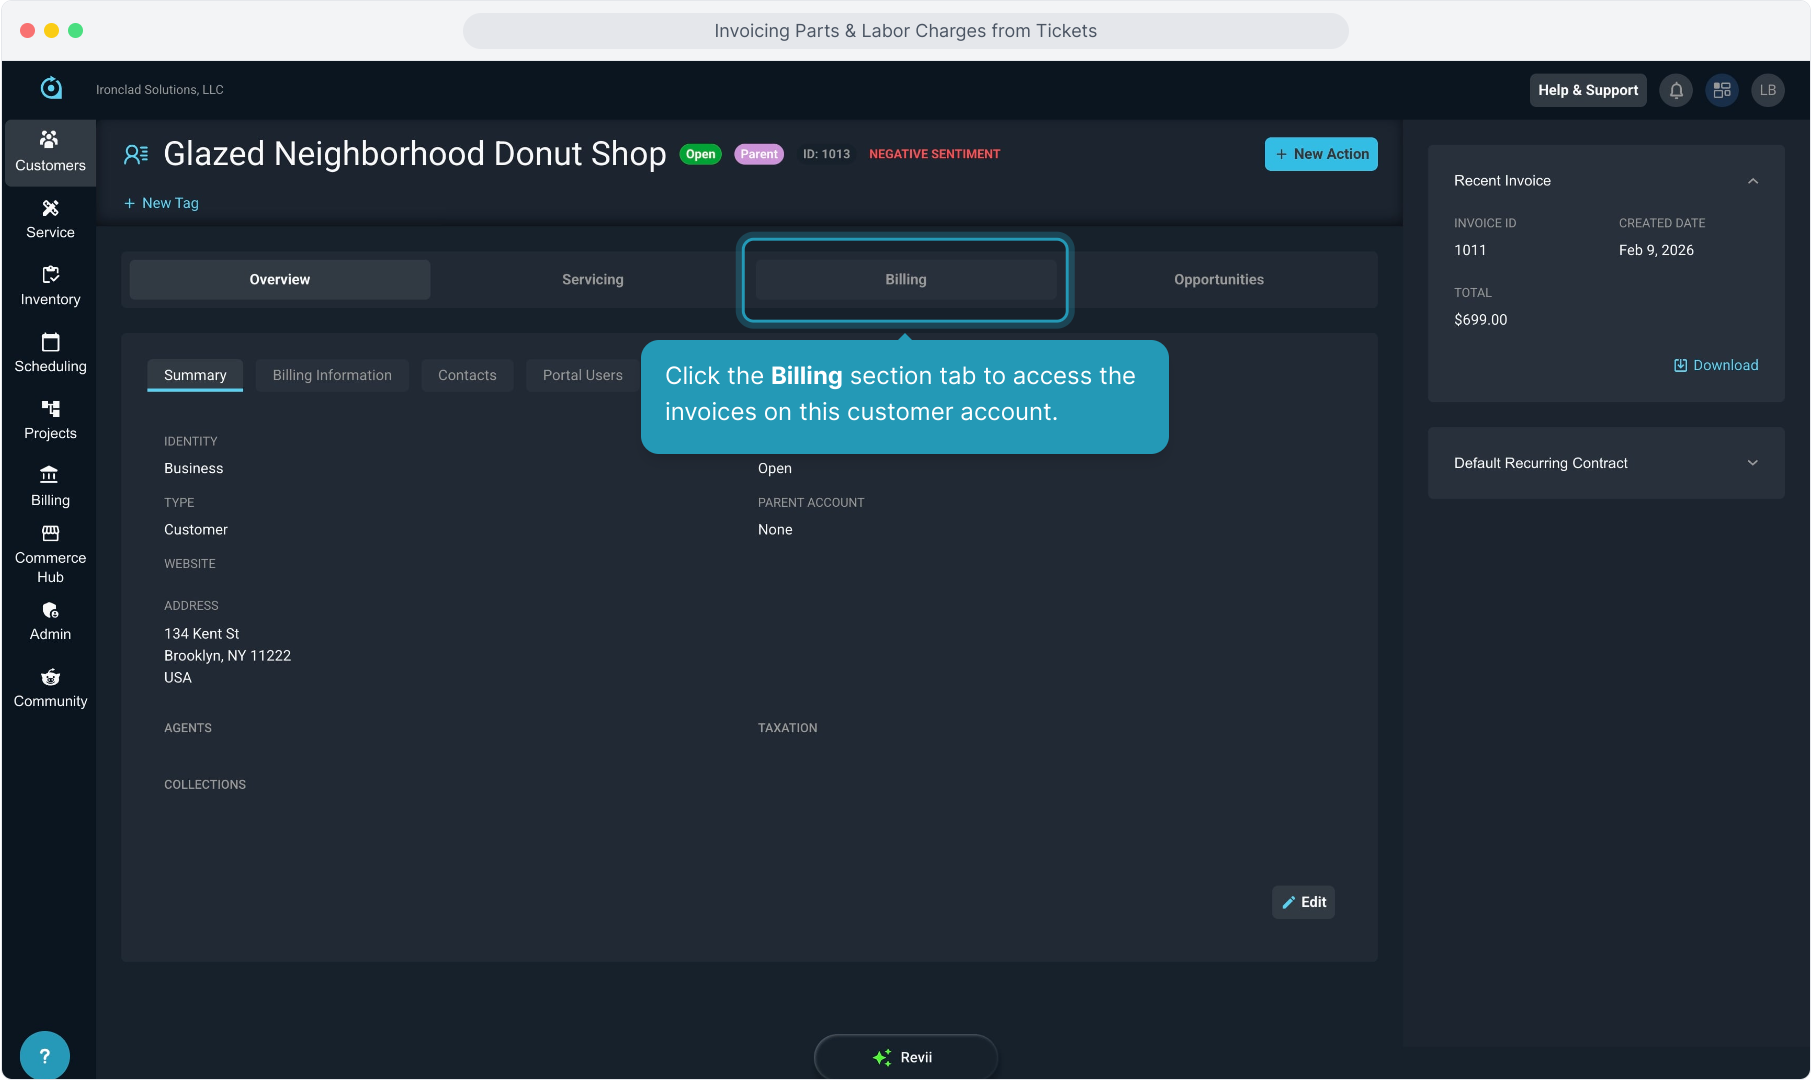
21. Click the Billing section tab to access the invoices on this customer account.
22. Click the Invoices tab to view all customer invoices (bills).
Invoicing from the ticket this way means that the charges are immediately put onto an invoice and you will not see them on the Unposted tab in the same way that you saw them when using the Send to Billing option earlier.

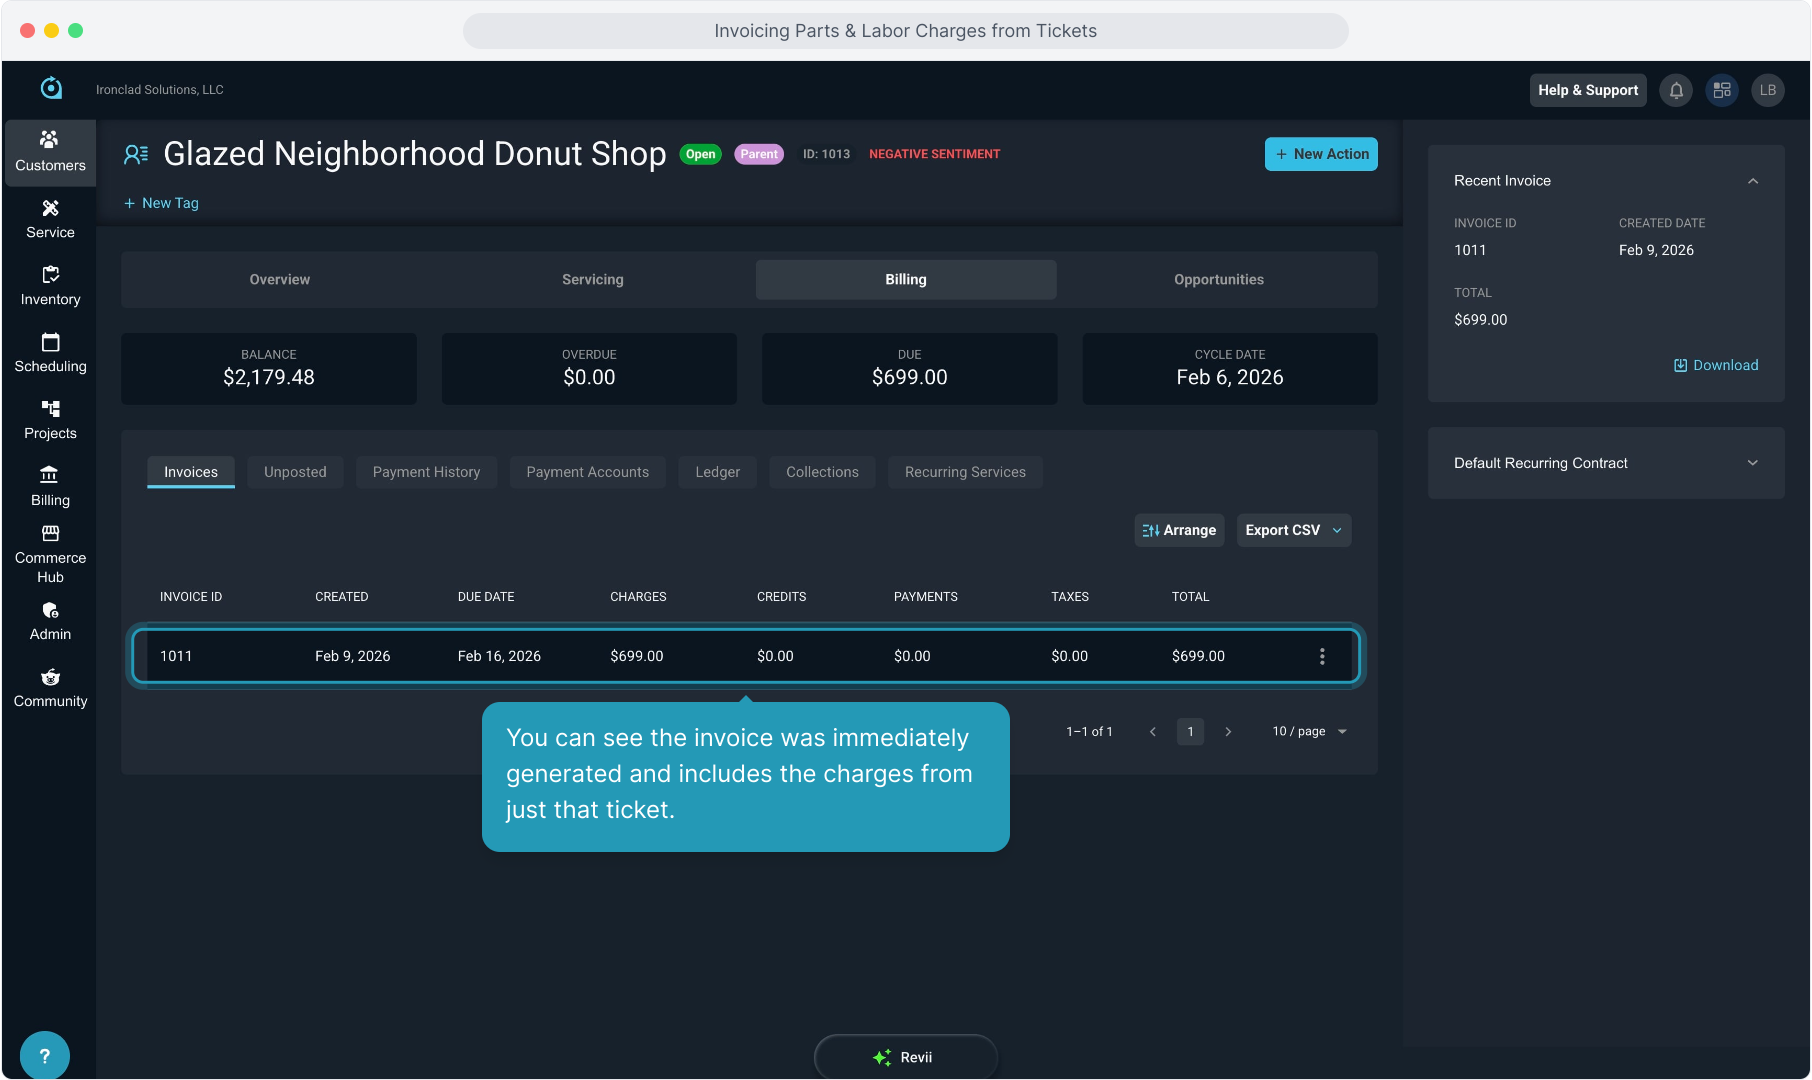
23. You can see the invoice was immediately generated and includes the charges from just that ticket.
24. Clicking on the invoice from the list will open the invoice for you to view.

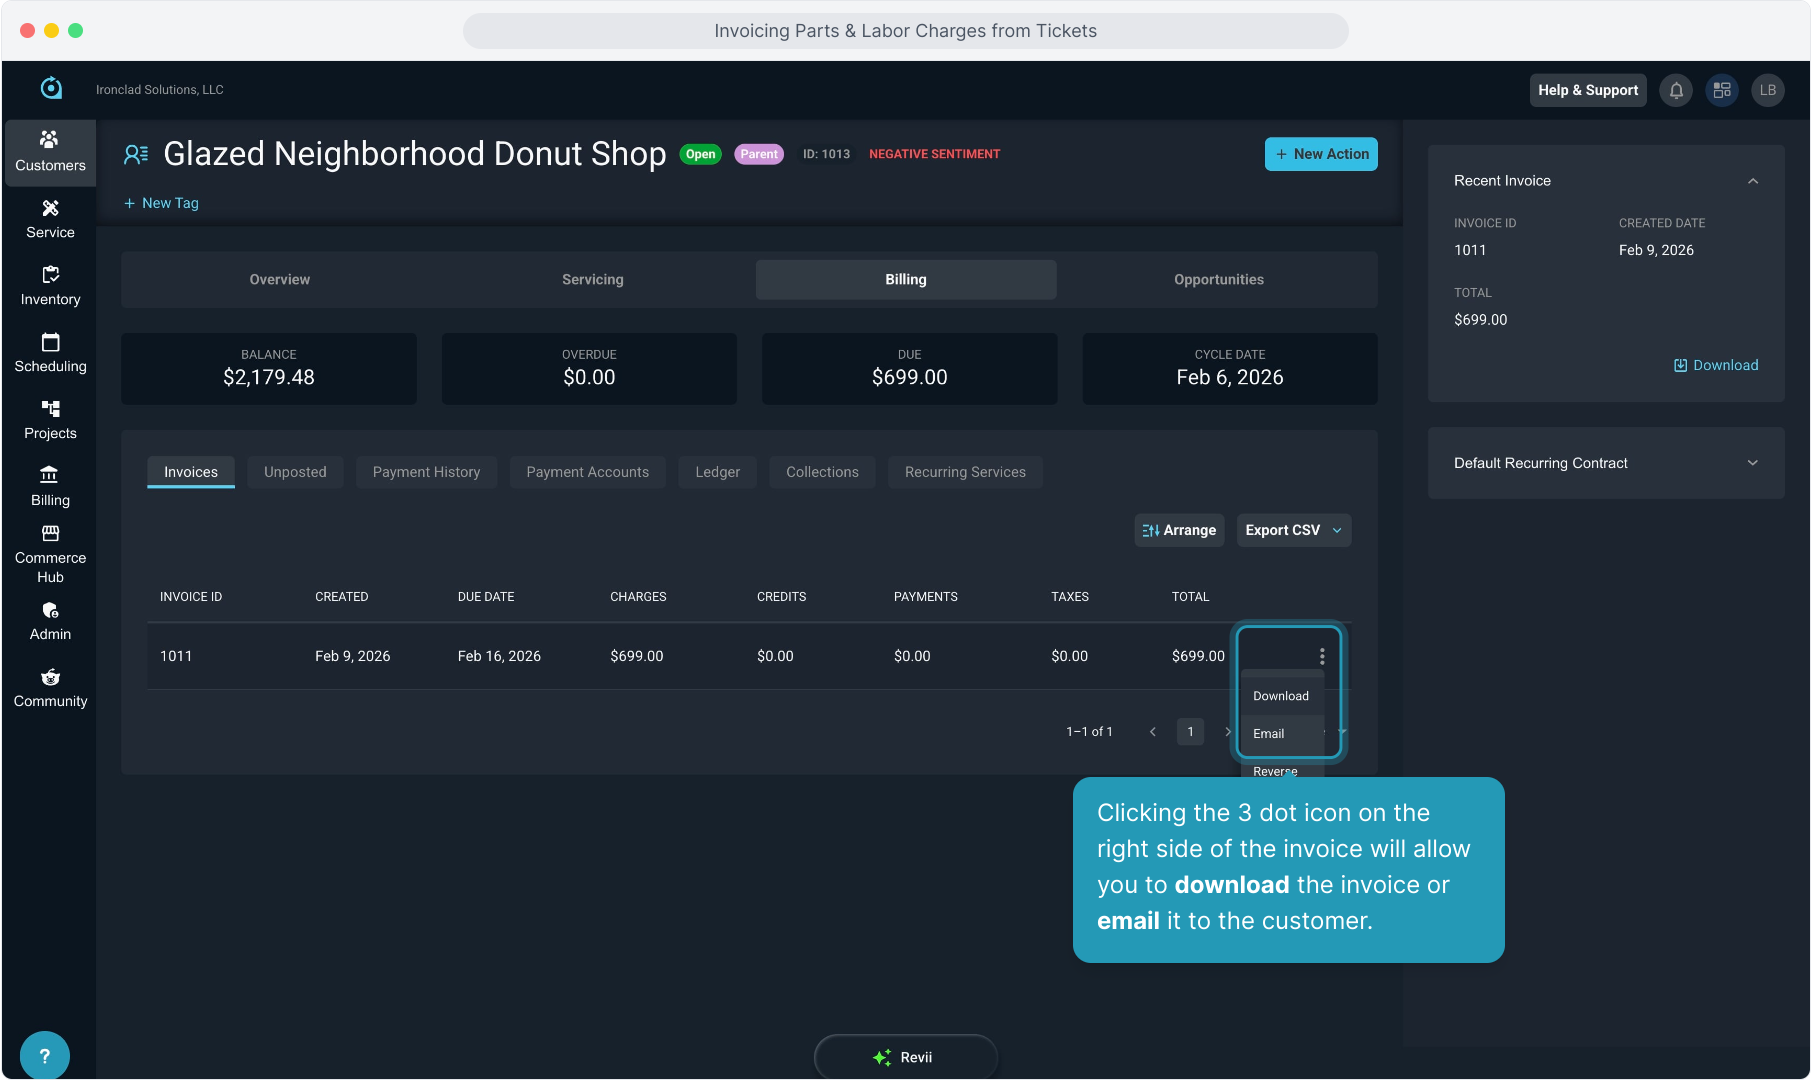
25. Clicking the 3 dot icon on the right side of the invoice will allow you to download the invoice or email it to the customer.
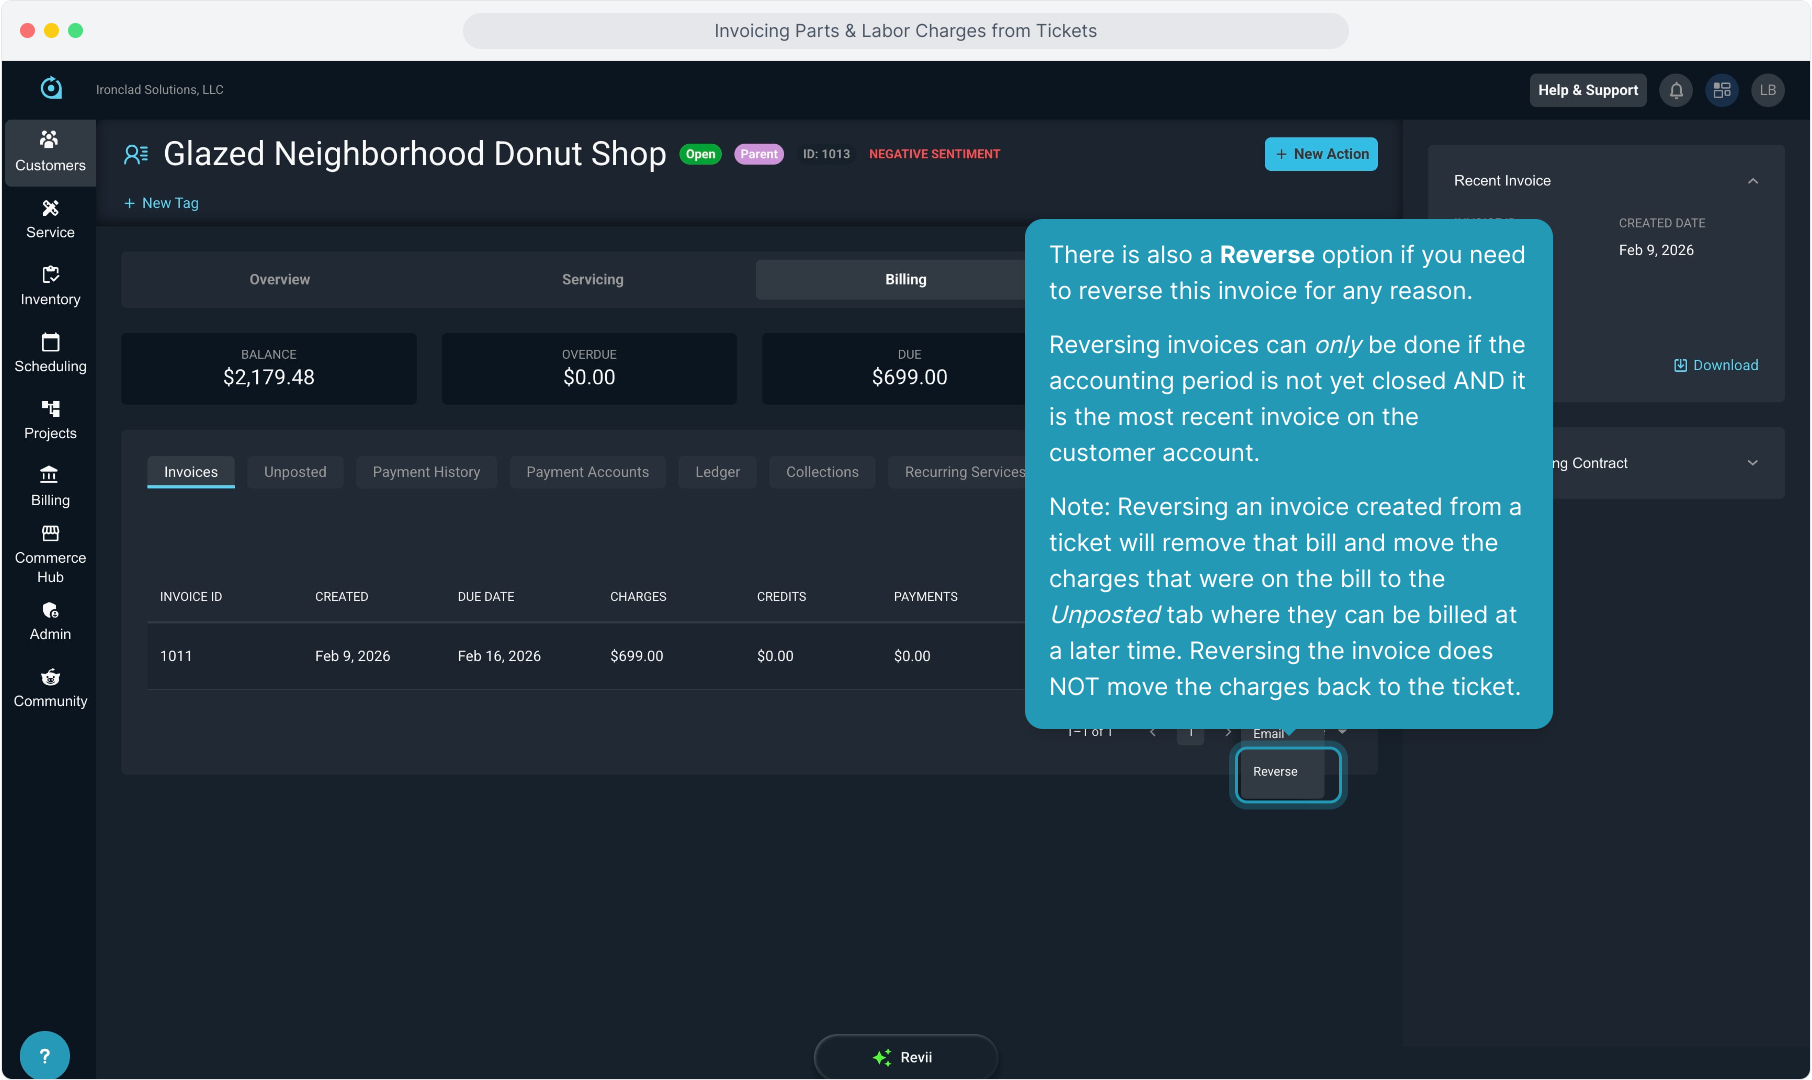
26. There is also a Reverse option if you need to reverse this invoice for any reason. Reversing invoices can only be done if the accounting period is not yet closed AND it is the most recent invoice on the customer account.
Note: Reversing an invoice created from a ticket will remove that bill and move the charges that were on the bill to the Unposted tab where they can be billed at a later time. Reversing the invoice does NOT move the charges back to the ticket.
27. Another thing you may want to consider is setting up a ticket Status to help your team find the tickets that are ready to be billed.
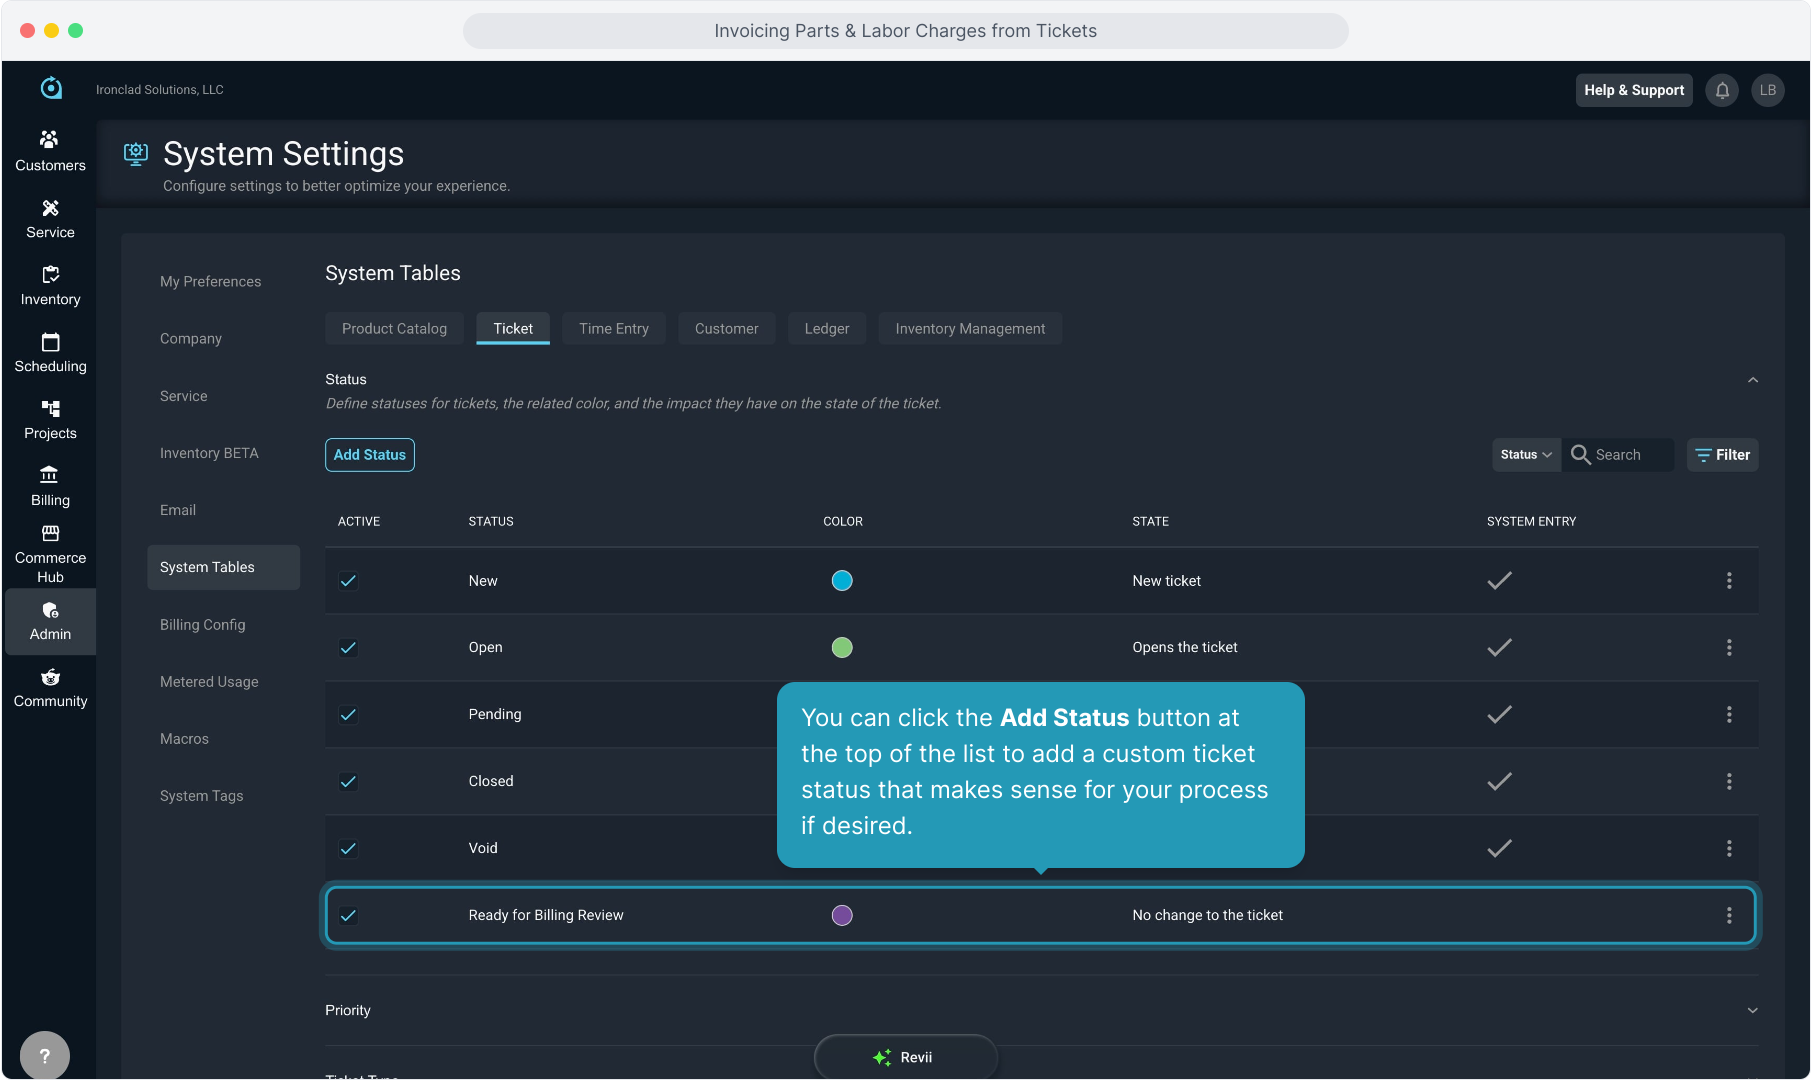
A user with permission to do so can navigate to Admin > System Settings > System Tables > Ticket to create additional ticket statuses.

28. You can click the Add Status button at the top of the list to add a custom ticket status that makes sense for your process if desired.
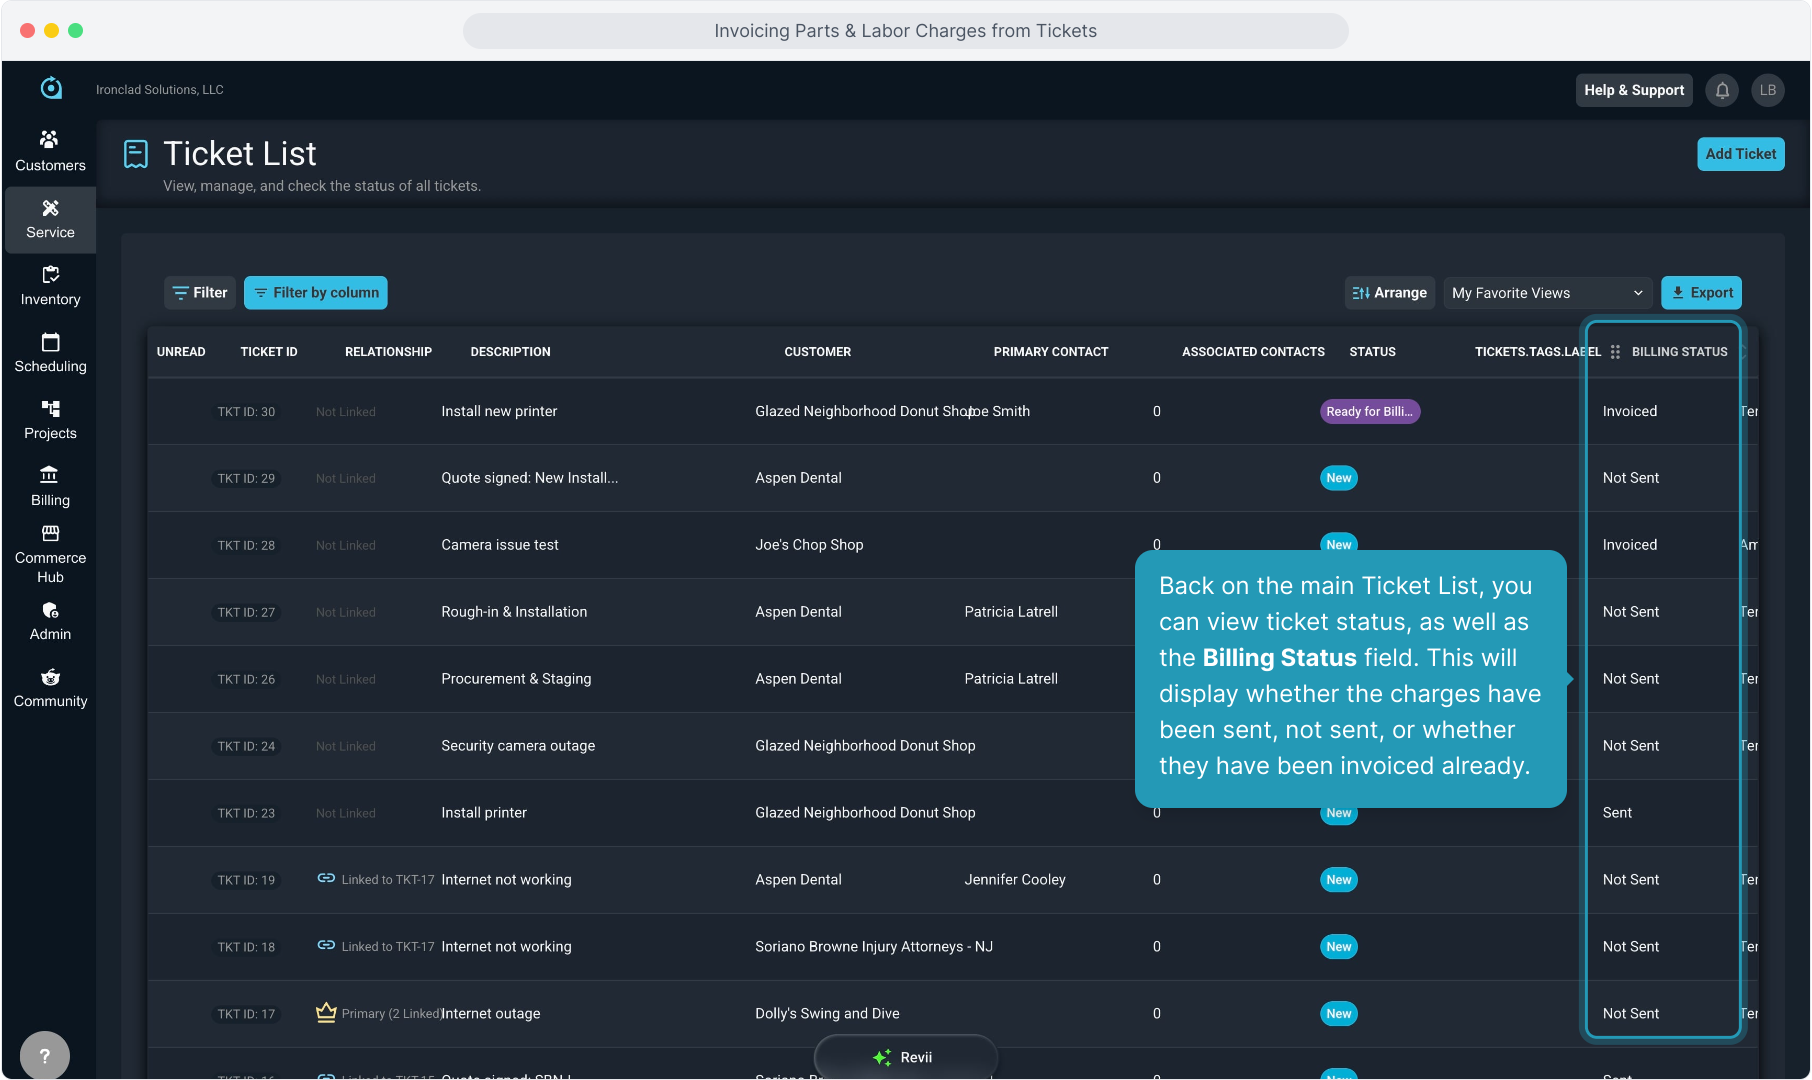
29. Back on the main Ticket List, you can view ticket status, as well as the Billing Status field. This will display whether the charges have been sent, not sent, or whether they have been invoiced already.
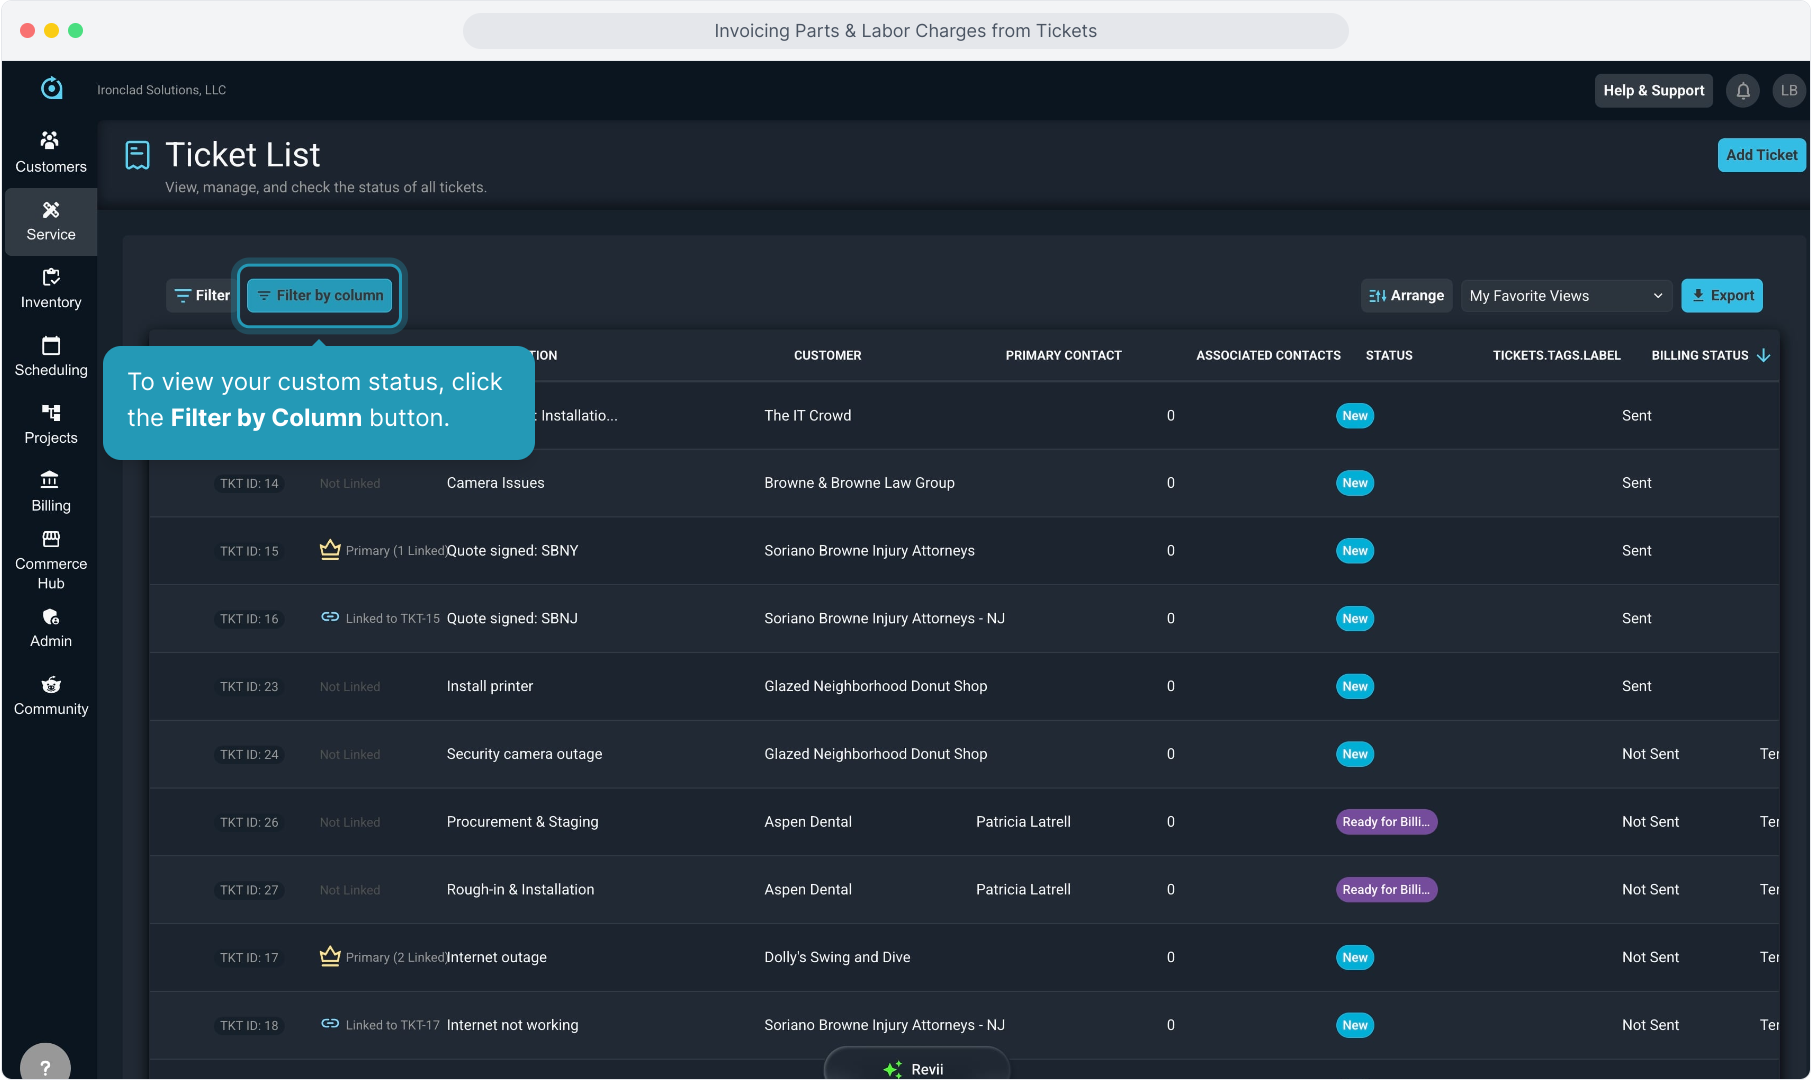
30. To view your custom status, click the Filter by Column button.
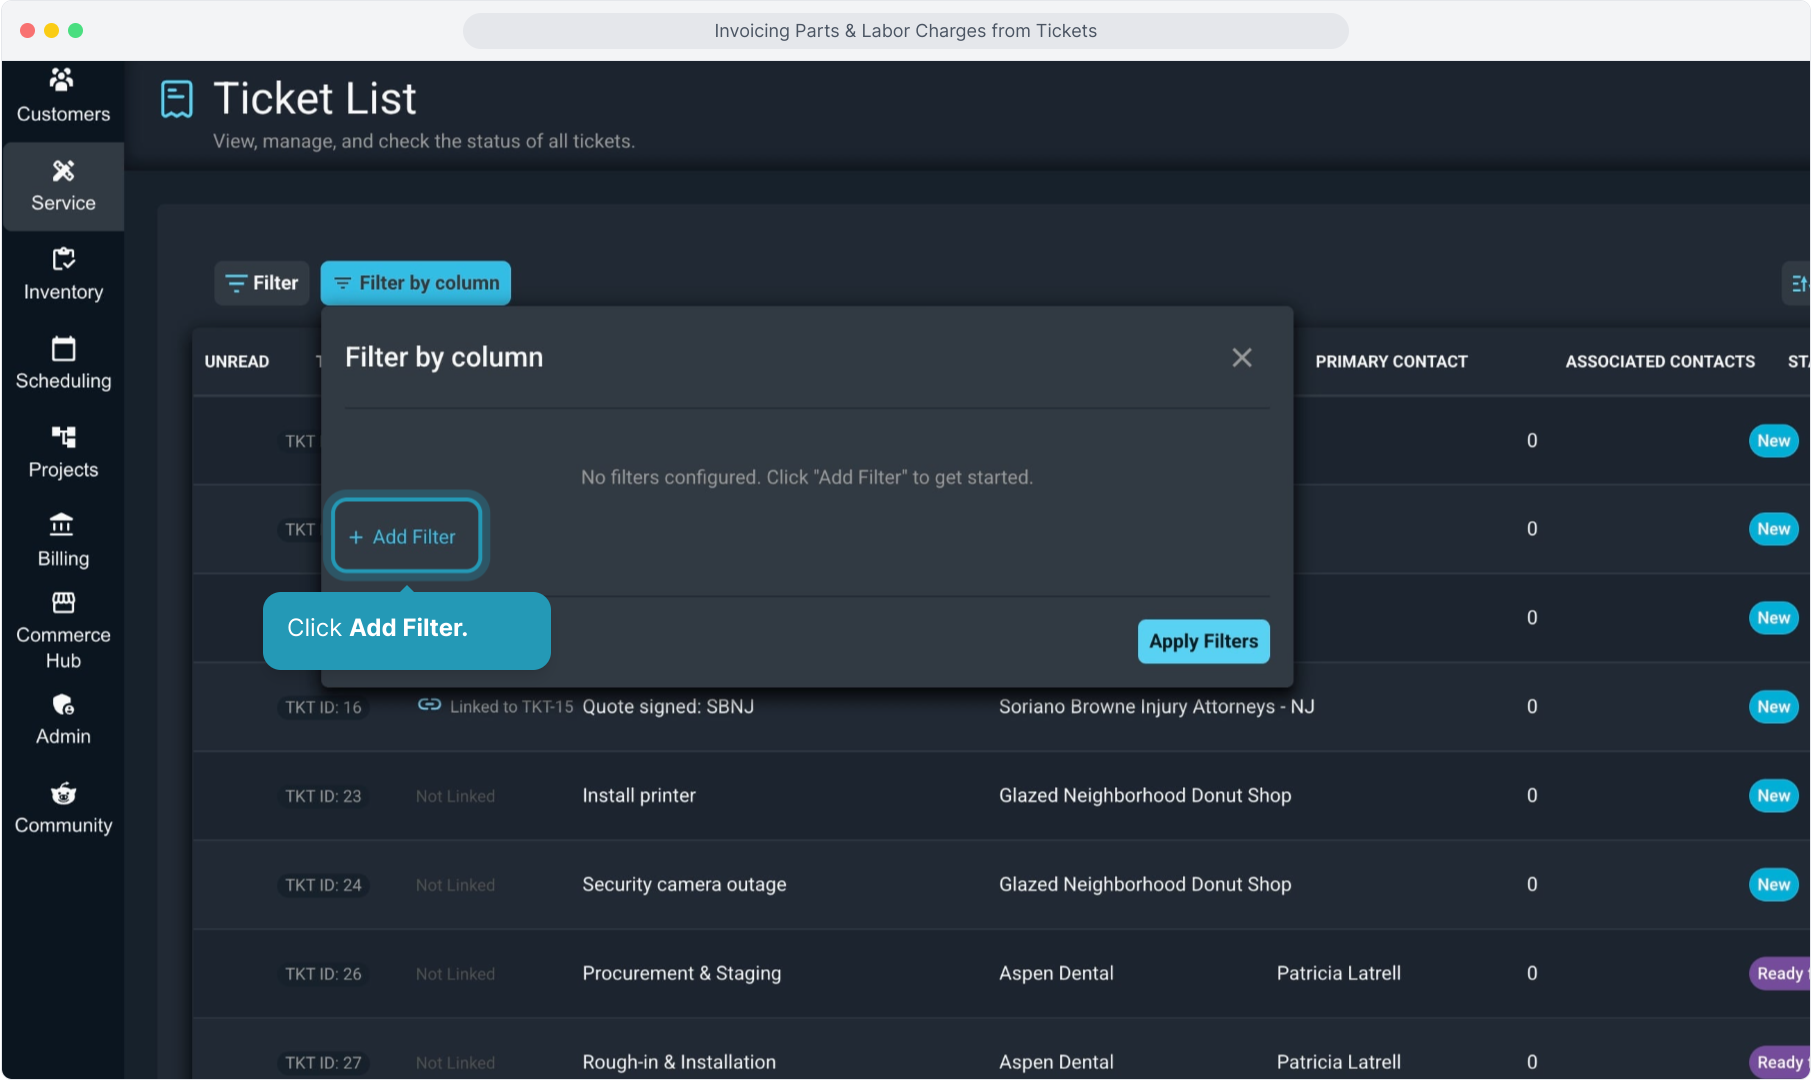
31. Click Add Filter.
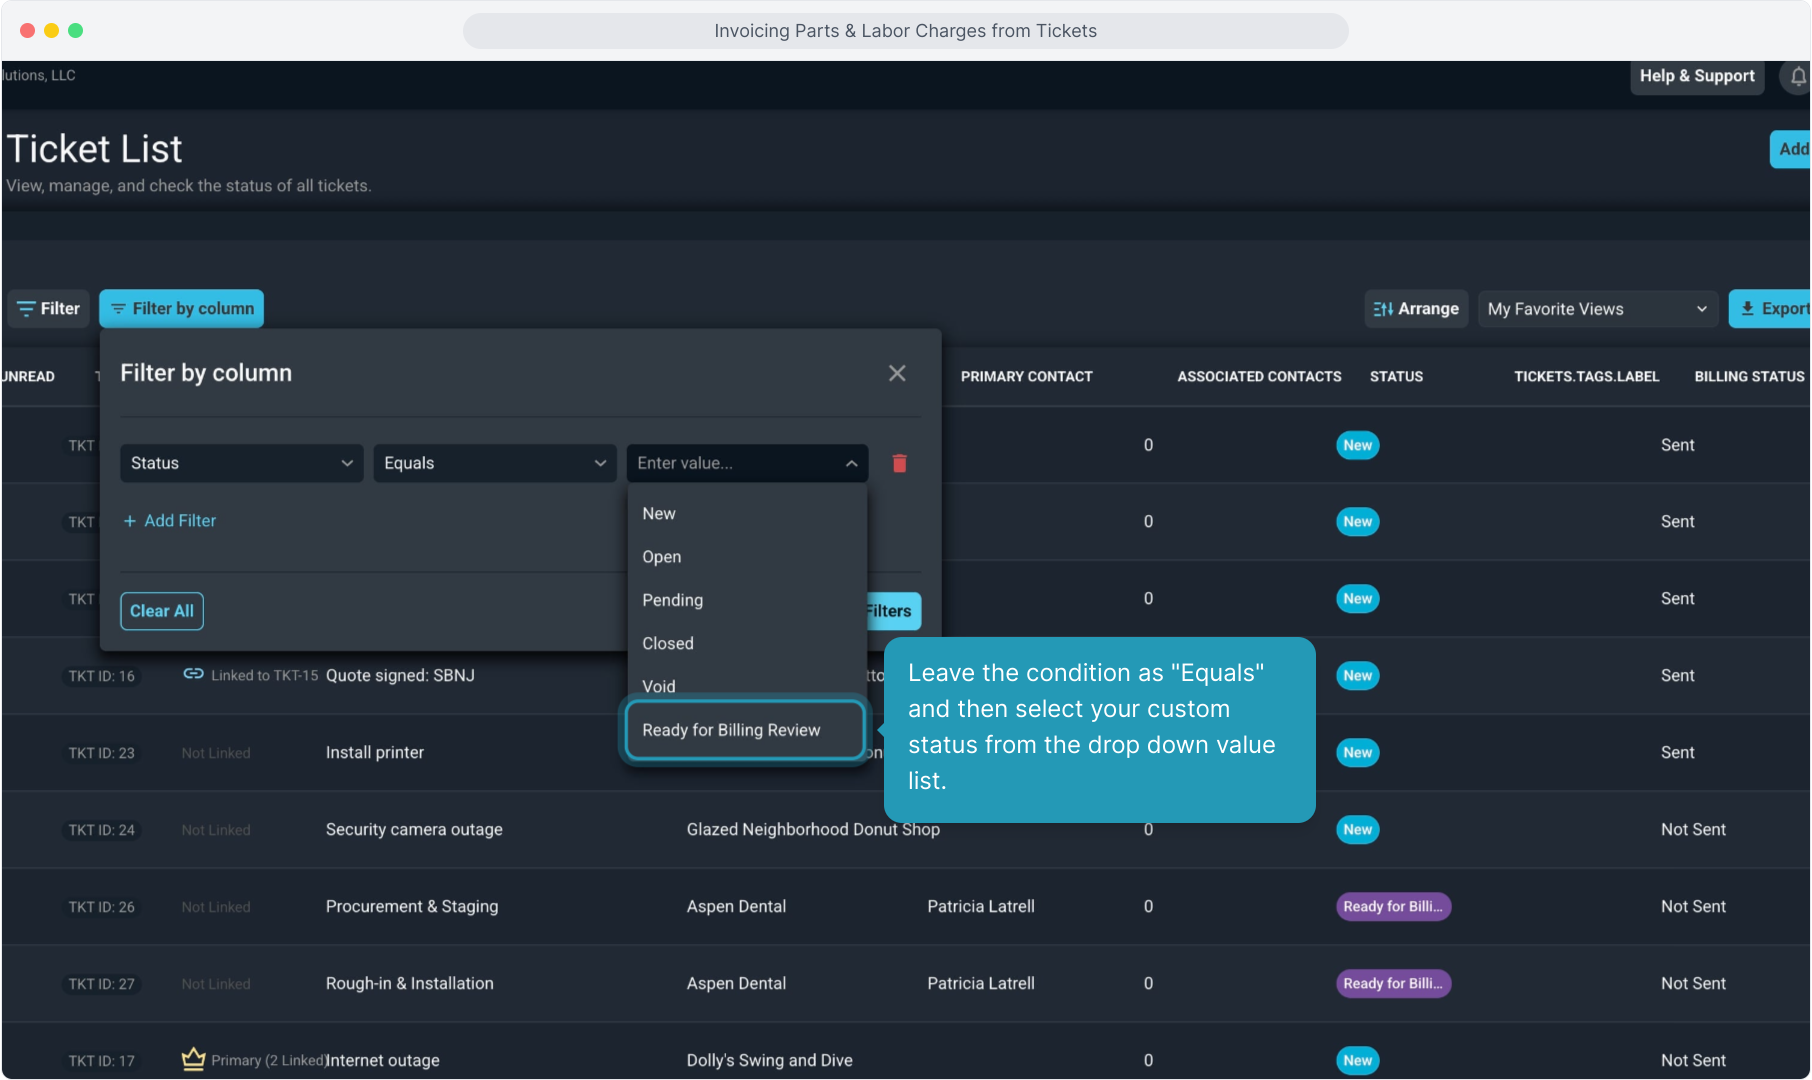
32. From the field list drop down, select Status.

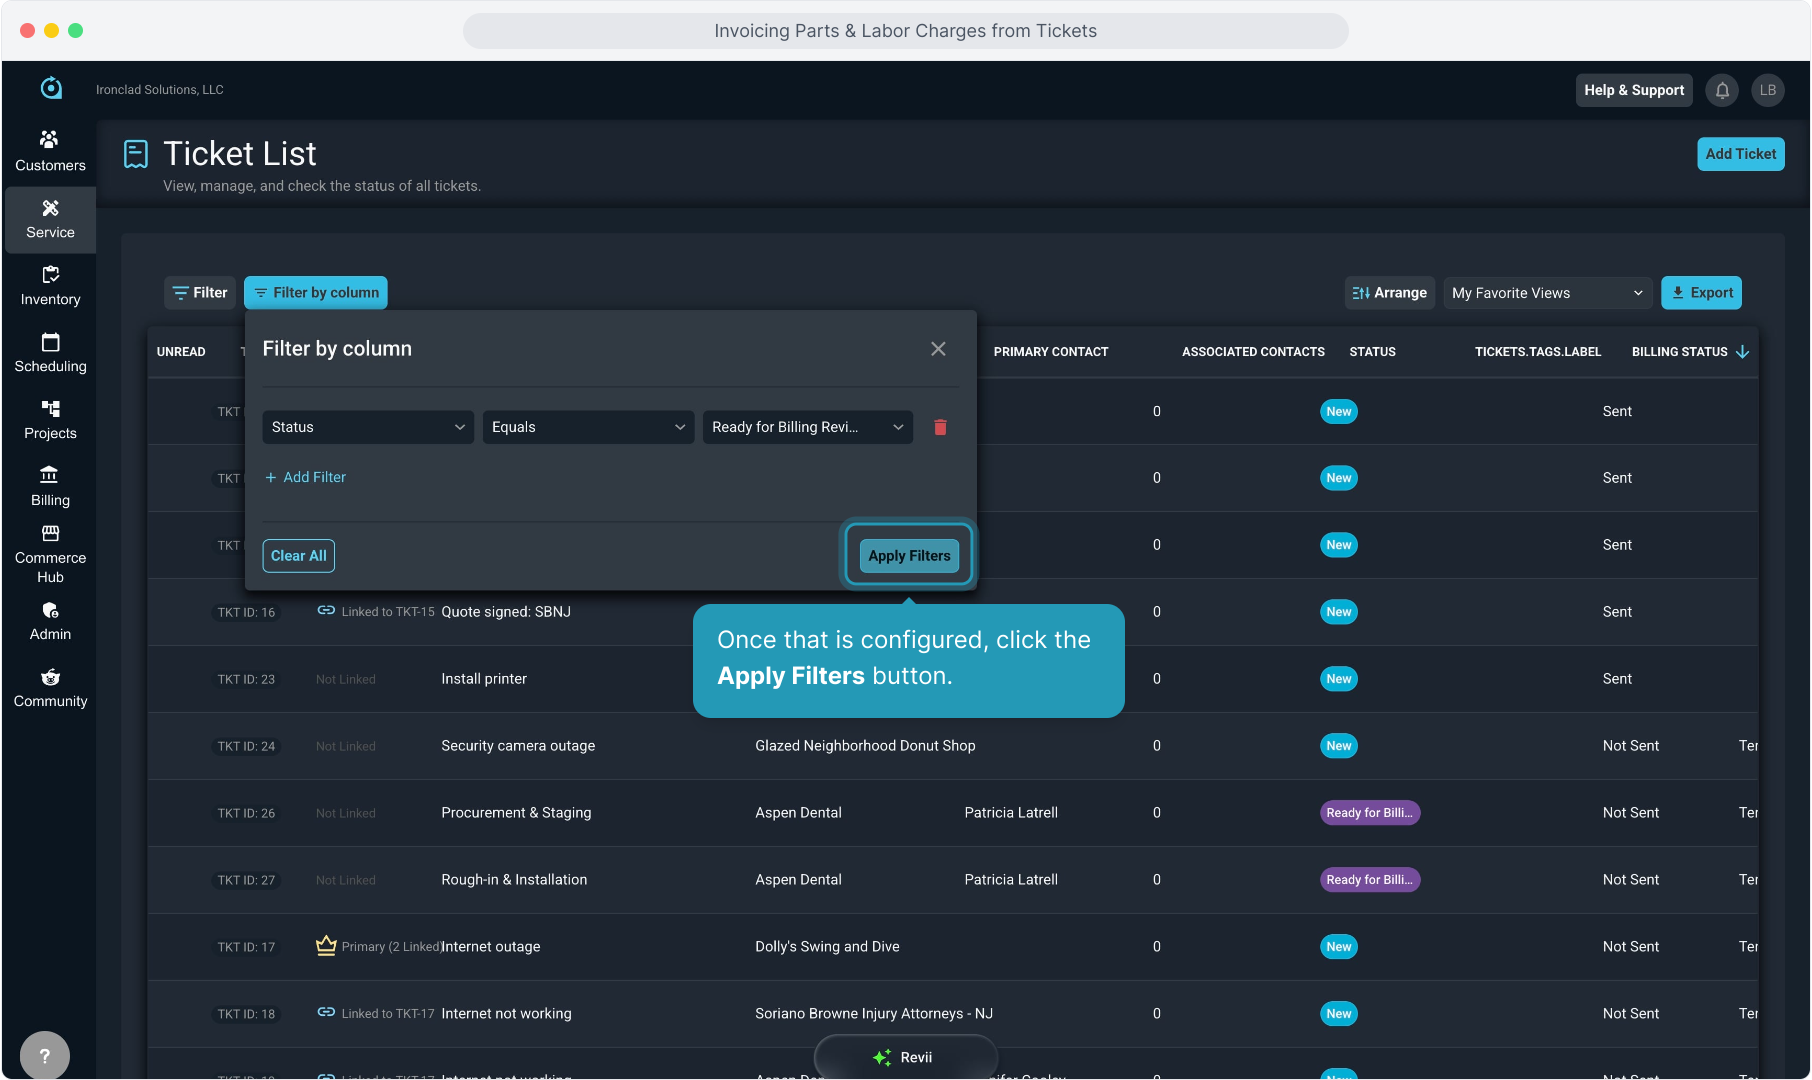
33. Leave the condition as "Equals" and then select your custom status from the drop down value list.
34. Once that is configured, click the Apply Filters button.
35. You can click the X to close the filter dialog box so you can see all the results.

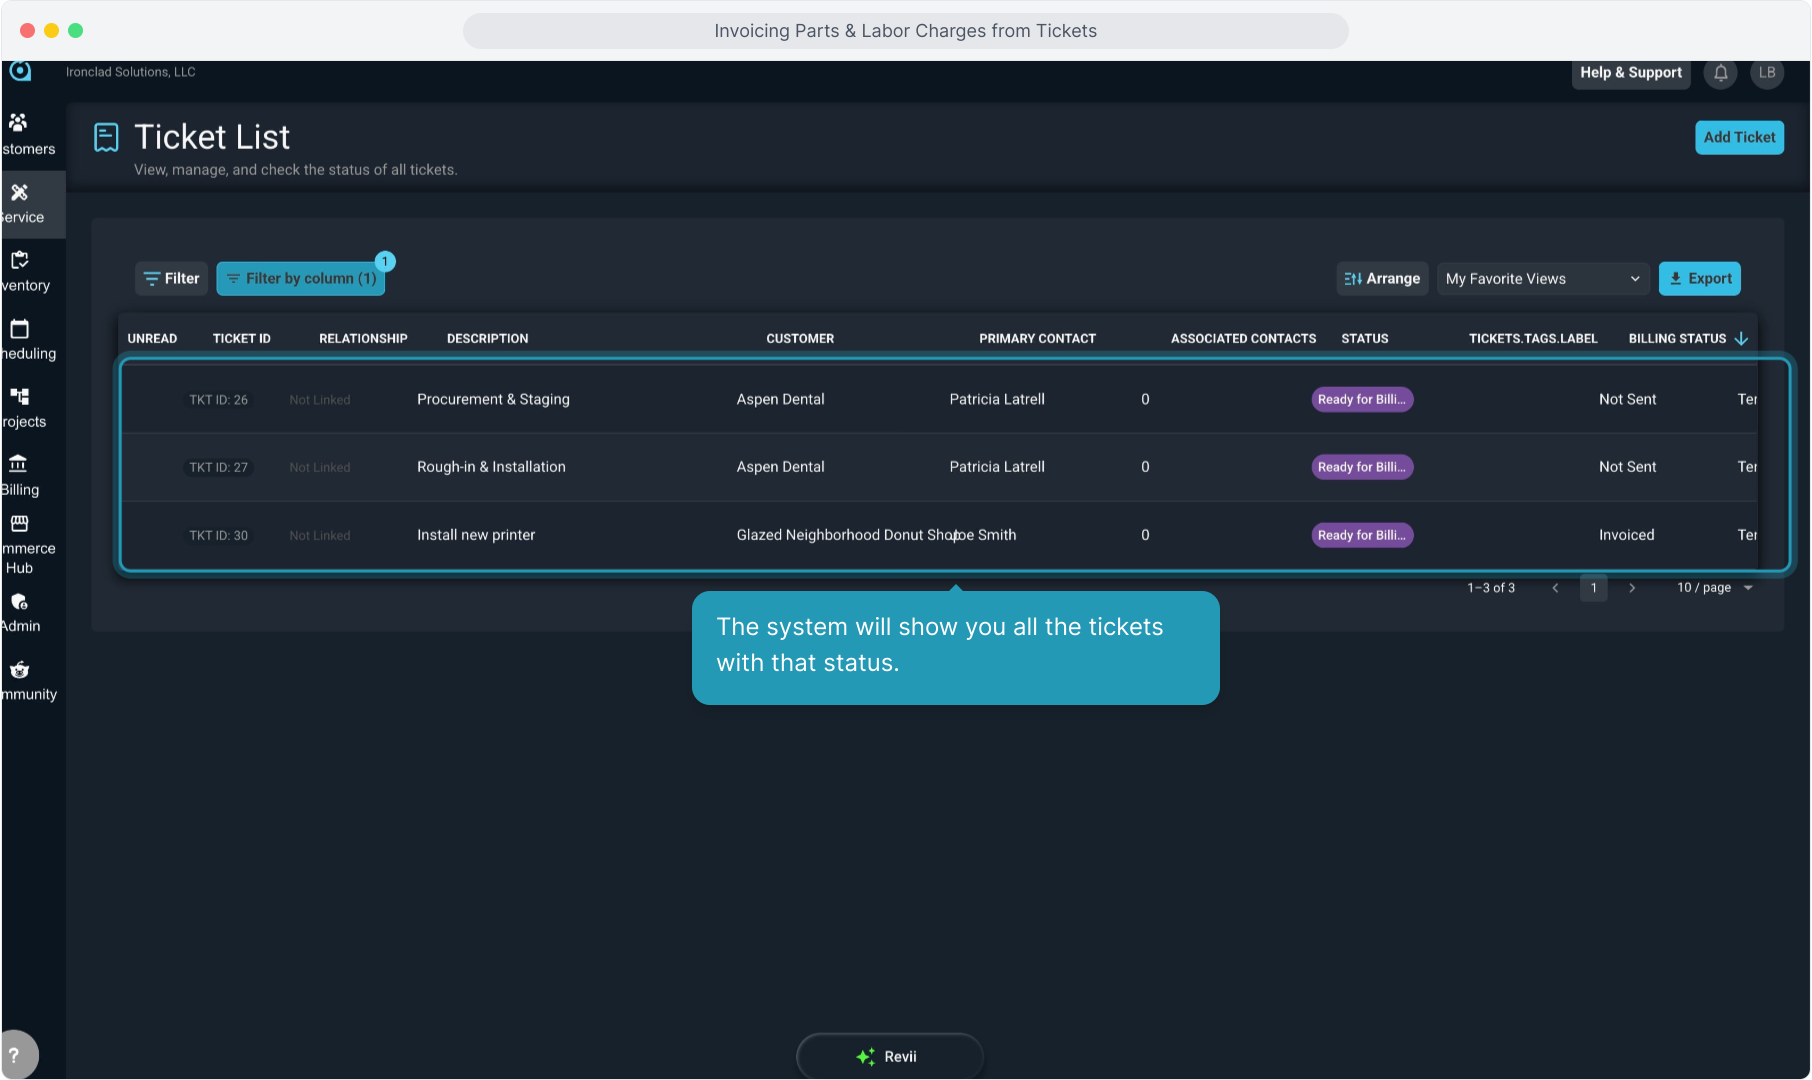
36. The system will show you all the tickets with that status.
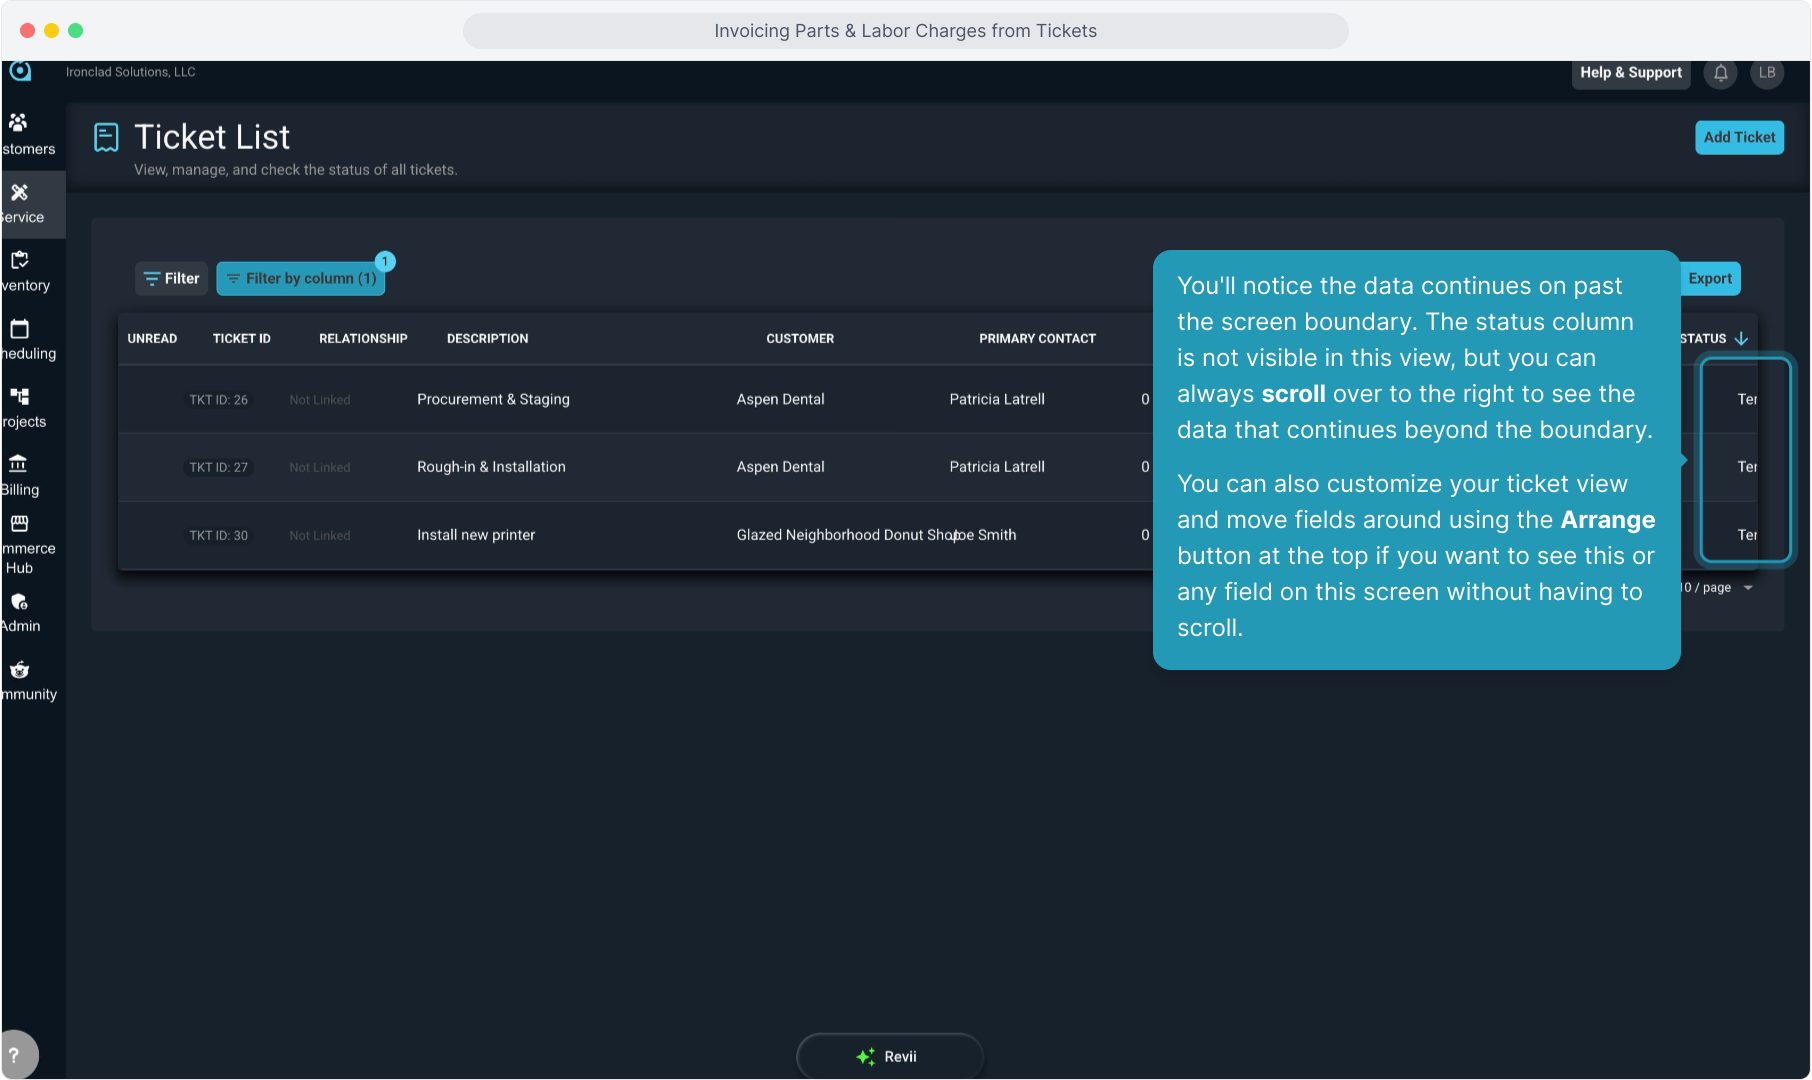
37. You'll notice the data continues on past the screen boundary. The status column is not visible in this view, but you can always scroll over to the right to see the data that continues beyond the boundary.
You can also customize your ticket view and move fields around using the Arrange button at the top if you want to see this or any field on this screen without having to scroll.
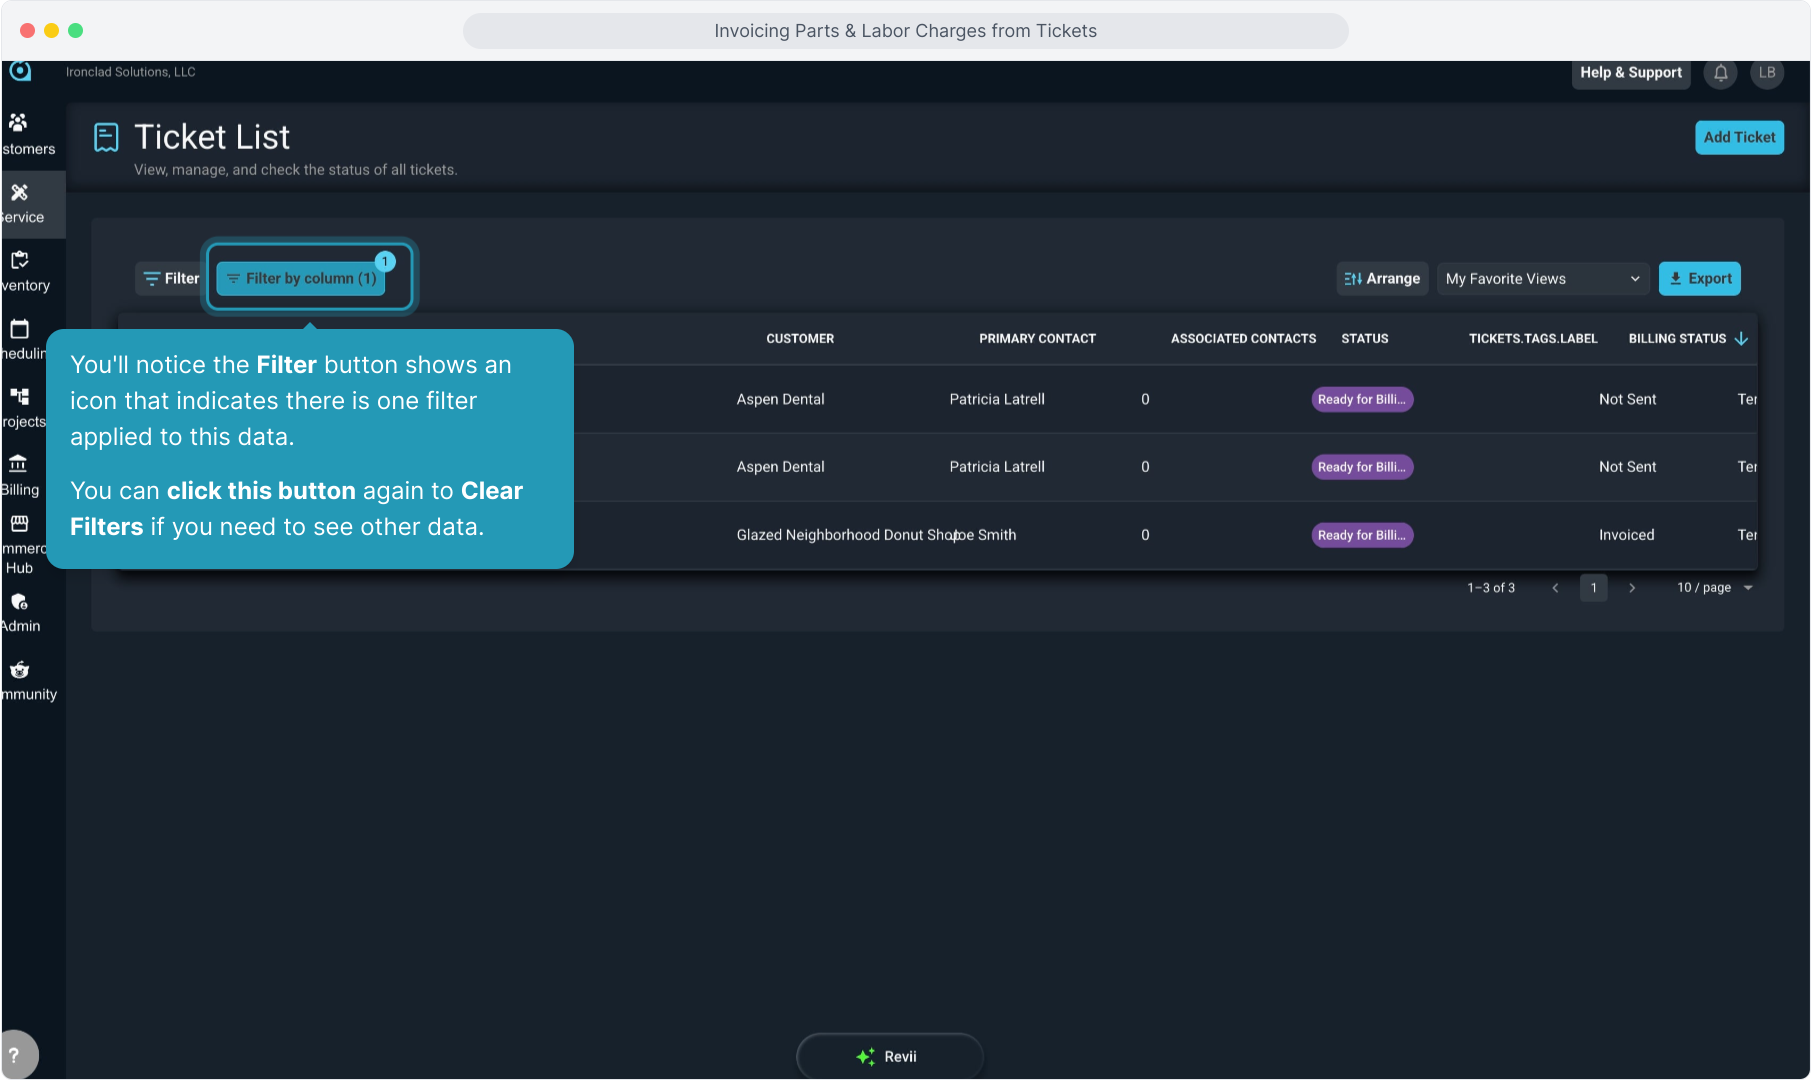
38. You'll notice the Filter button shows an icon that indicates there is one filter applied to this data. You can click this button again to Clear Filters if you need to see other data.
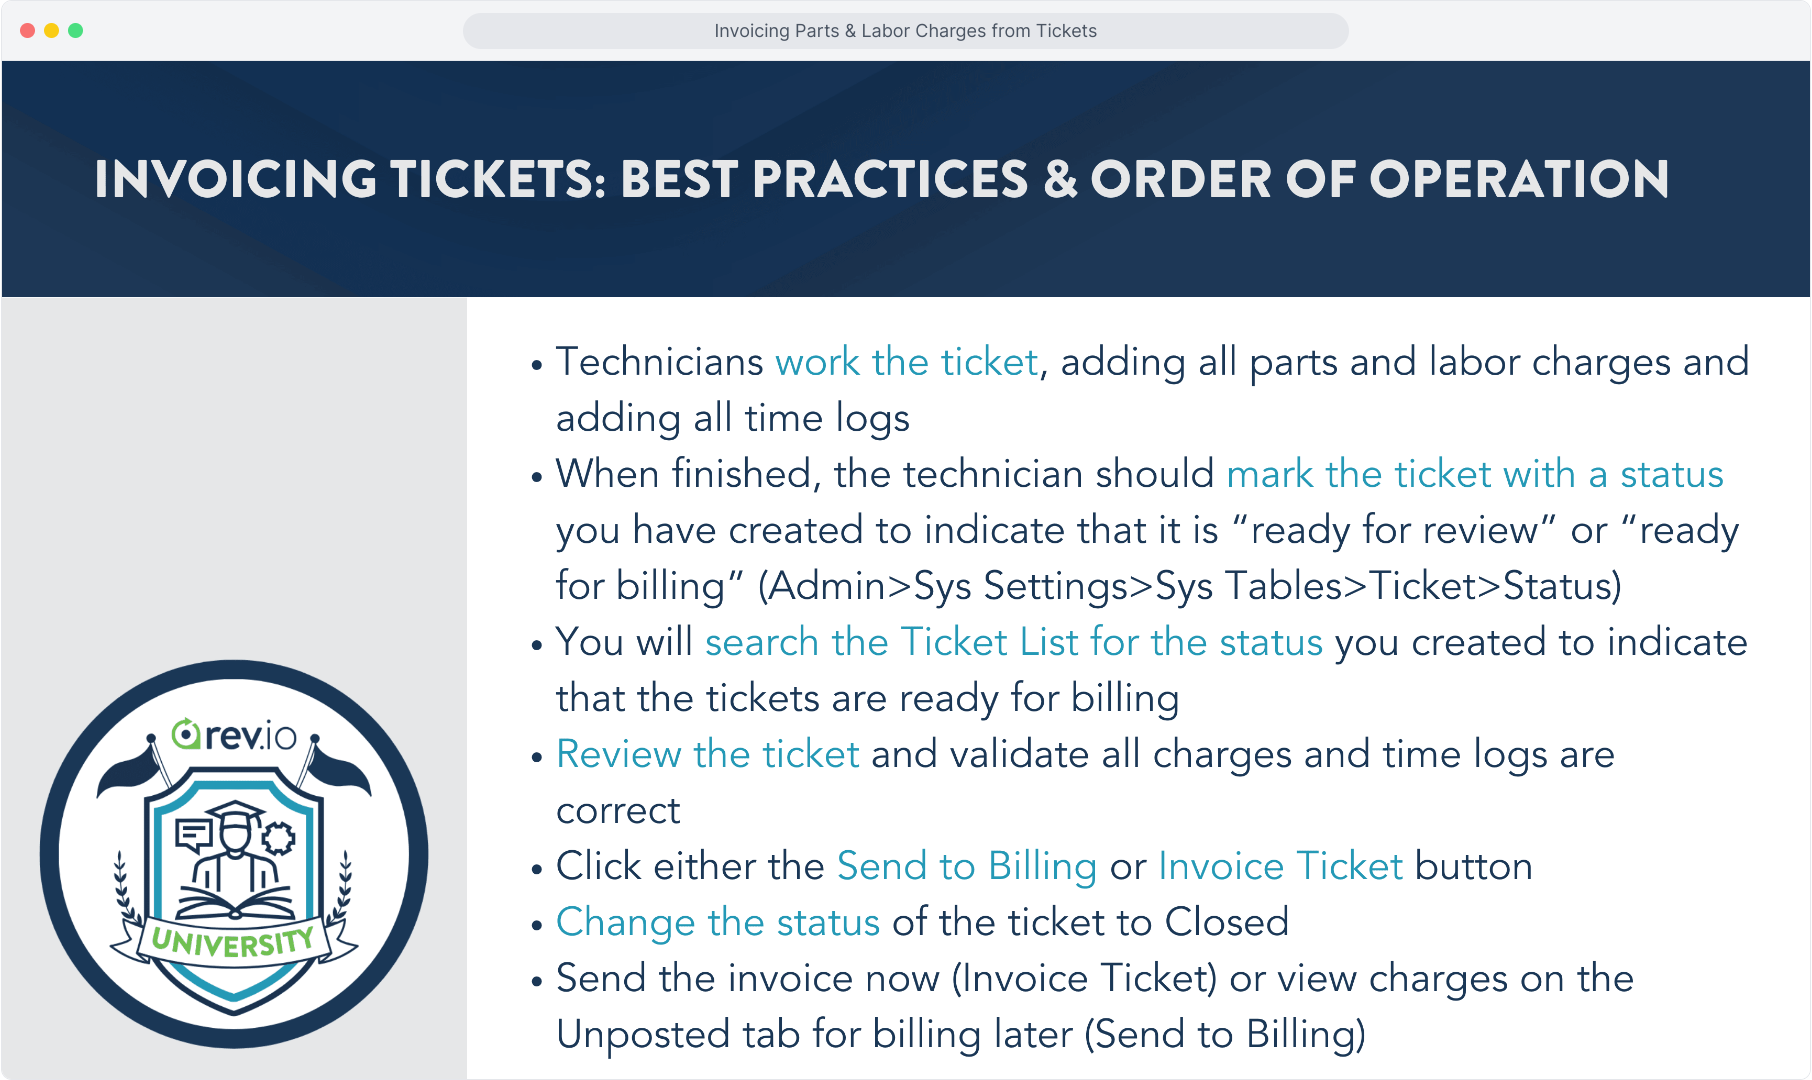
39. Best Practices Reminders