
System Settings: Macros
The Macros category on the System Settings screen allows you to configure various templates that can populate fields on certain screens with standardized field descriptions. For example, when creating a ticket, you can select a service macro to populate the ticket fields with several specific options.
New Ticket Macros
The New Ticket Macros section allows you to define values that can be applied when creating a new ticket. See the Add/Edit New Ticket Macros article for more information on configuring new ticket macros.
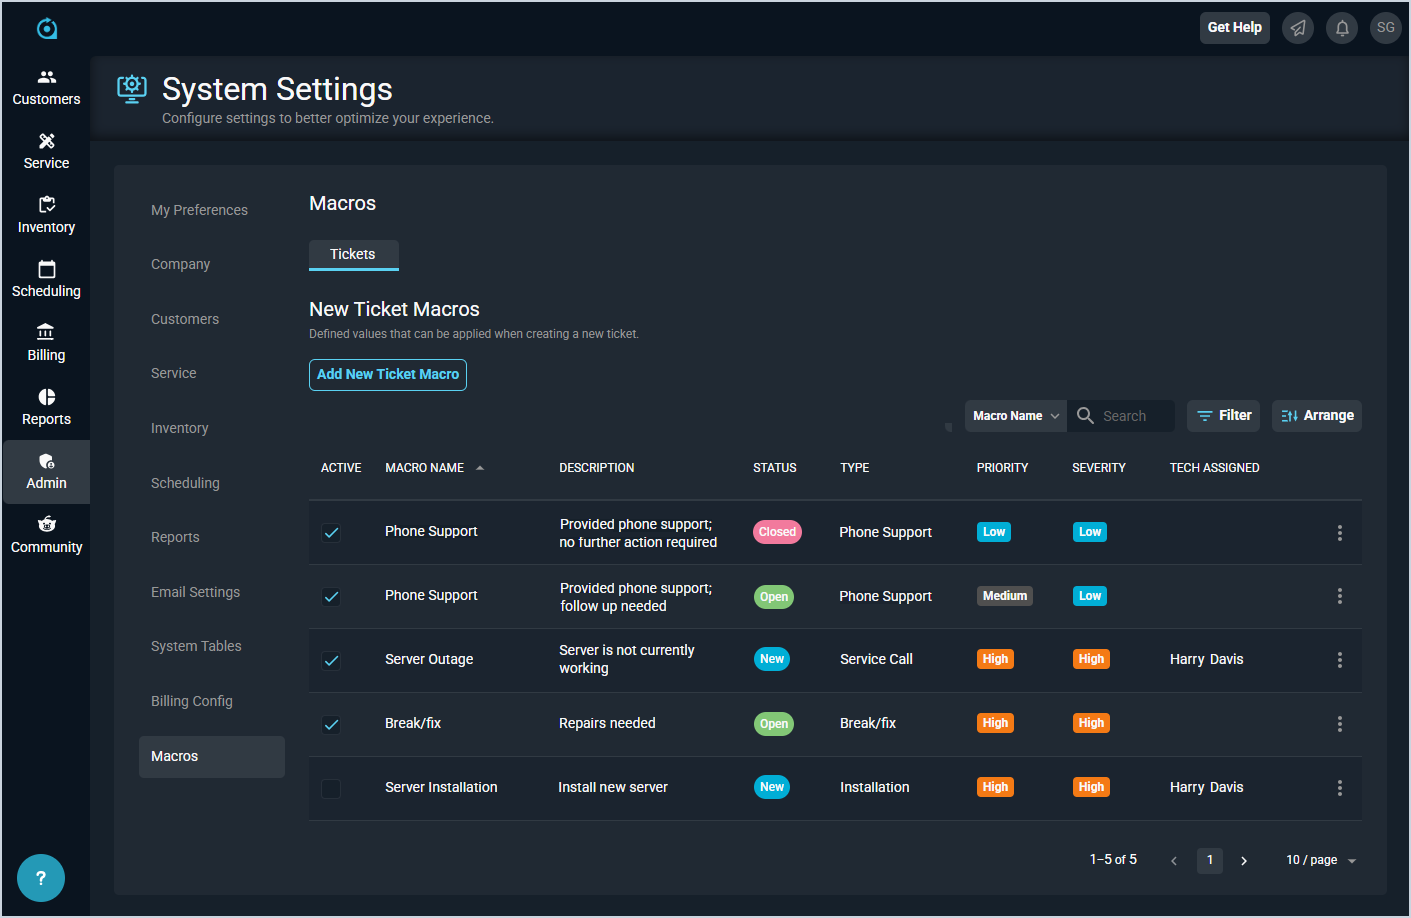
Each field in the New Ticket Macros section is defined below.
| No. | Label | Definition |
| 1 | Active | A checkmark indicates that the macro is active in your instance. |
| 2 | Macro Name | Name of the macro. |
| 3 | Description | Description for the ticket created using the macro. |
| 4 | Status | Status for the ticket created using the macro. |
| 5 | Type | Type for the ticket created using the macro. |
| 6 | Priority | Priority for the ticket created using the macro. |
| 7 | Severity | Severity for the ticket created using the macro. |
| 8 | Tech Assigned | Tech Assigned for the ticket created using the macro. |
Ticket Activity Macros
The Ticket Activity Macros section allows you to define actions and values that can be applied to an existing ticket. See the Add/Edit Ticket Activity Macros article for more information on configuring macros.
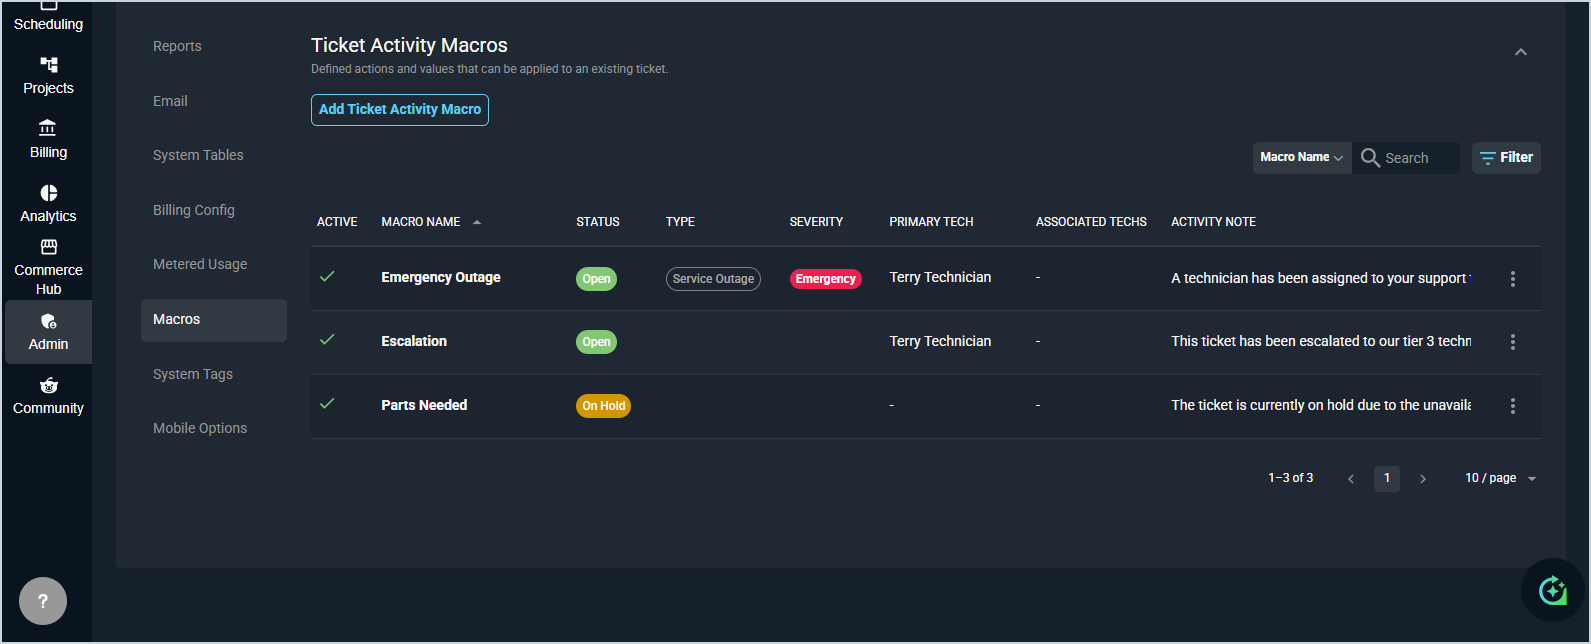
Each field in the Ticket Activity Macros section is defined below.
| No. | Label | Definition |
| 1 | Active | A checkmark indicates that the macro is active in your instance. |
| 2 | Macro Name | Name of the macro. |
| 3 | Status | Status applied to the ticket when the macro is used. |
| 4 | Type | Type applied to the ticket when the macro is used. |
| 5 | Severity | Severity applied to the ticket when the macro is used. |
| 6 | Primary Tech | Primary tech assigned to the ticket when the macro is used. |
| 7 | Associated Techs | Additional techs associated with the ticket when the macro is used. |
| 8 | Activity Note | Activity note added to the ticket when the macro is used. |
Available Actions
These actions are available on the Tickets tab.
- Add a new ticket macro by clicking the Add New Ticket Macro button in the New Ticket Macros section. See the Add/Edit New Ticket Macros article for more information.
- Add an activity macro by clicking the Add Ticket Activity Macro button in the Ticket Activity Macros section. See the Add/Edit Ticket Activity Macros article for more information.
- Search the macros in either section by selecting a column from the dropdown and entering text in the Search field.
- Filter the macros in either section by clicking the Filter button.
- Customize which columns display in the list view and the order in which they display by clicking the Arrange button and making the desired changes. See the Arrange Columns article for more information.
- Sort the results in either section by clicking the column label in the table header.
- Change the status of the macro by clicking to place or remove a checkmark in the Active column. NOTE: The Status column on this screen applies to the Status of tickets created/updated using the macro and not the macro itself.
- Edit the macro by clicking the ellipsis at the end of the row and selecting Edit from the menu. See the Add/Edit New Ticket Macros or Add/Edit Ticket Activity Macros article for more information.
- Delete a macro by clicking the ellipsis at the end of the row and selecting Delete from the menu.