How To Guide: Outlook Calendar Integration - User Configuration
1. Welcome to the User configuration step of the Microsoft Outlook calendar integration. All users will have to link their calendars to enable the sync. In order to do this, an administrator must have enabled the integration before you can configure your user.
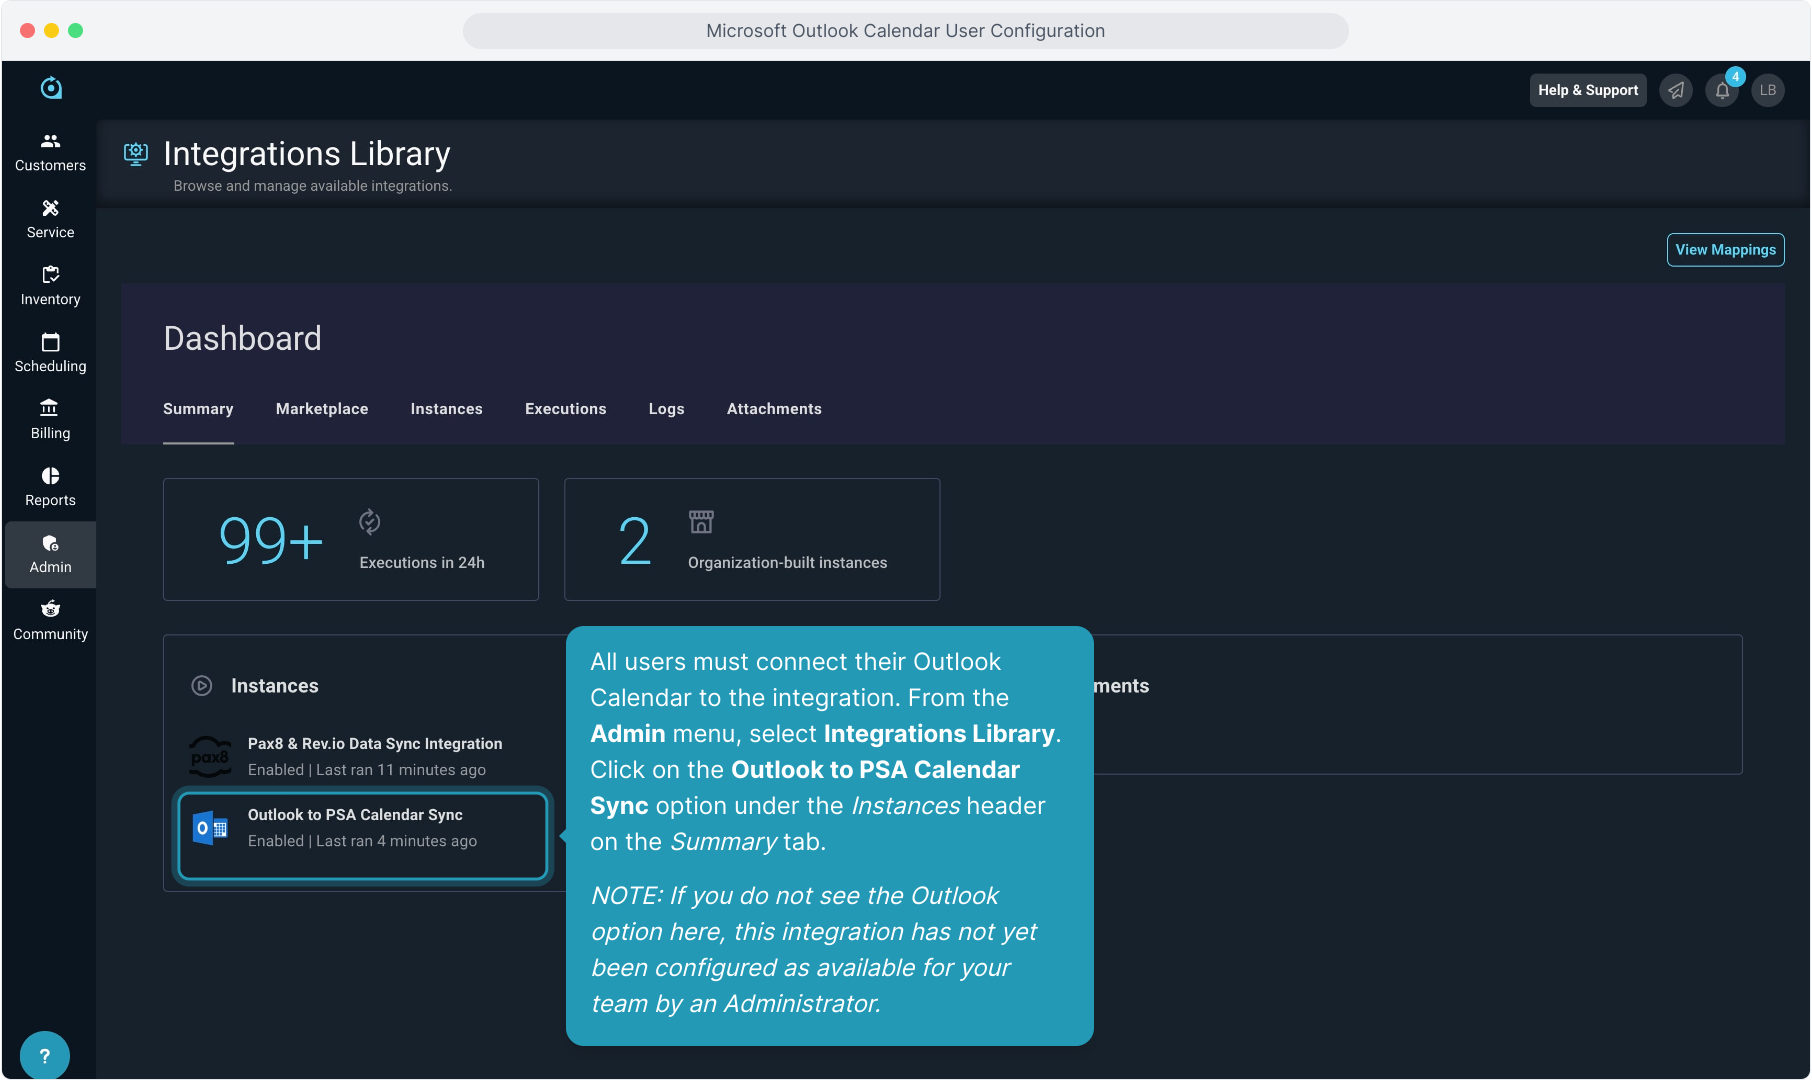
2. All users must connect their Outlook Calendar to the integration. From the Admin menu, select Integrations Library. Click on the Outlook to PSA Calendar Sync option under the Instances header on the Summary tab.
NOTE: If you do not see the Outlook option here, this integration has not yet been configured as available for your team by an Administrator.
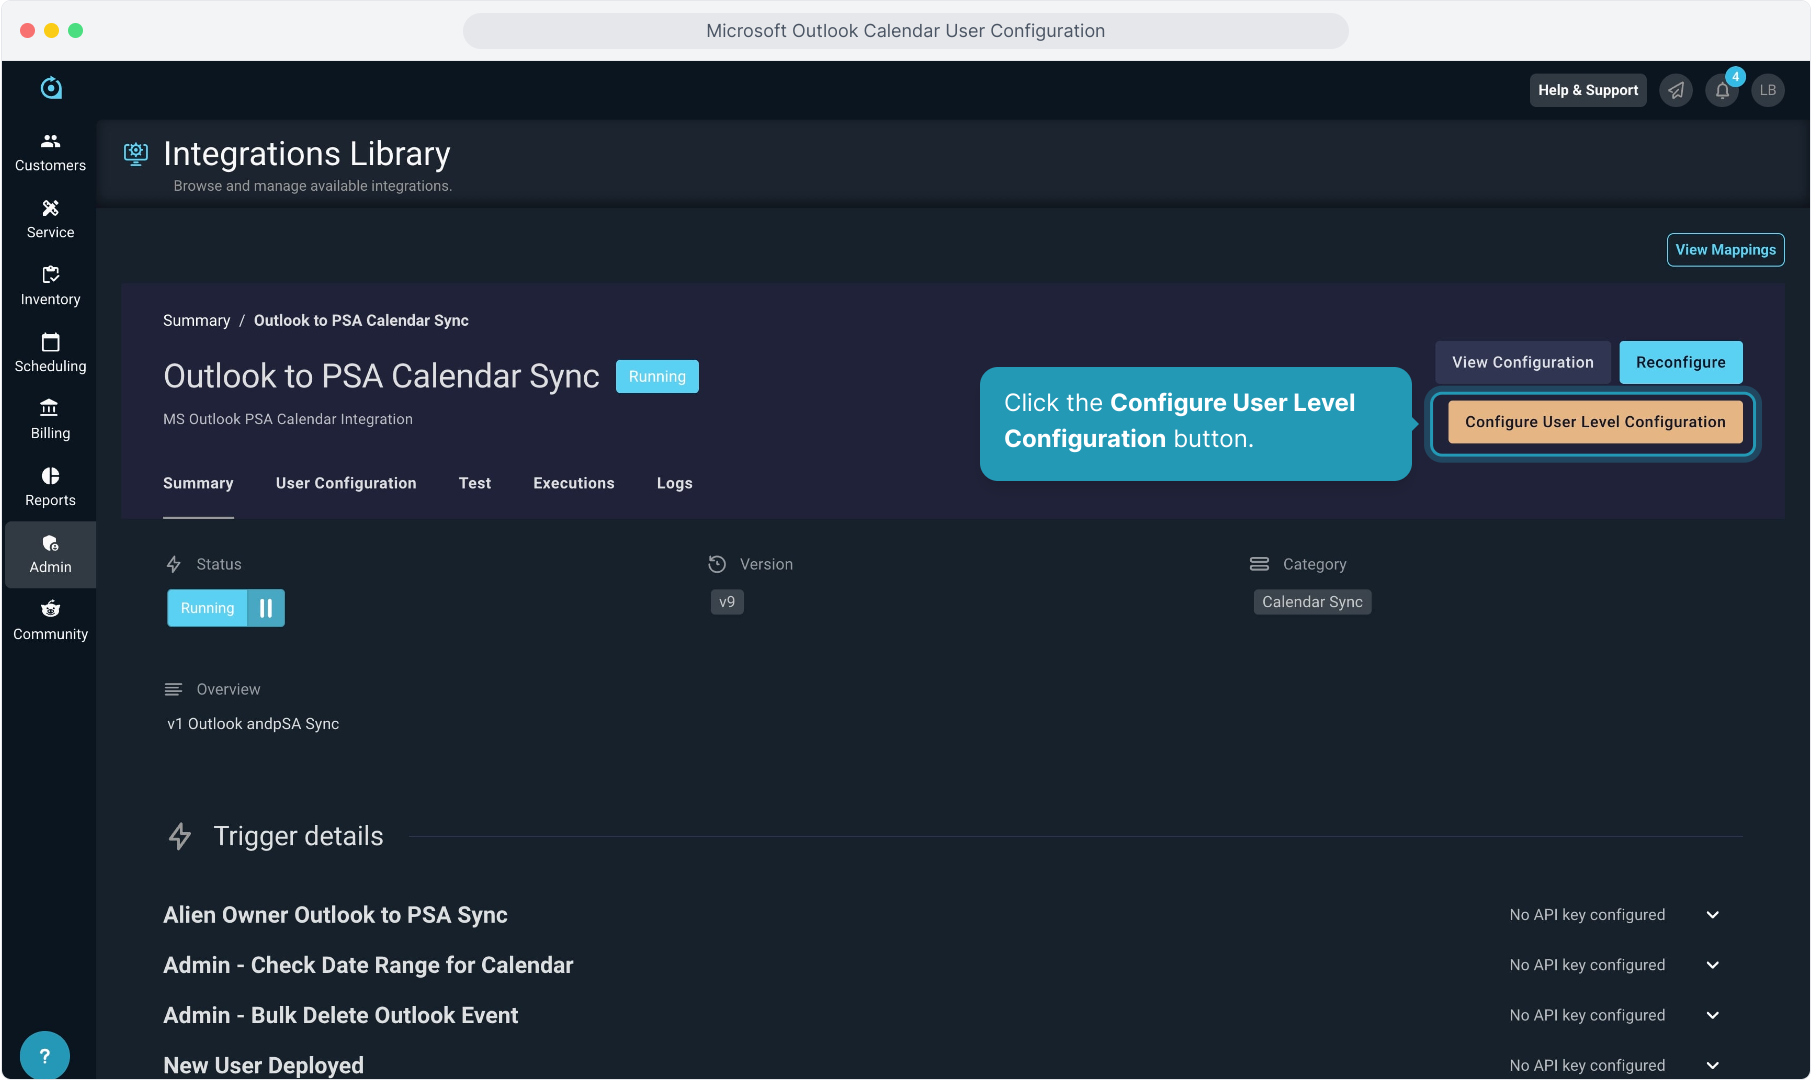
3. Click the Configure User Level Configuration button.
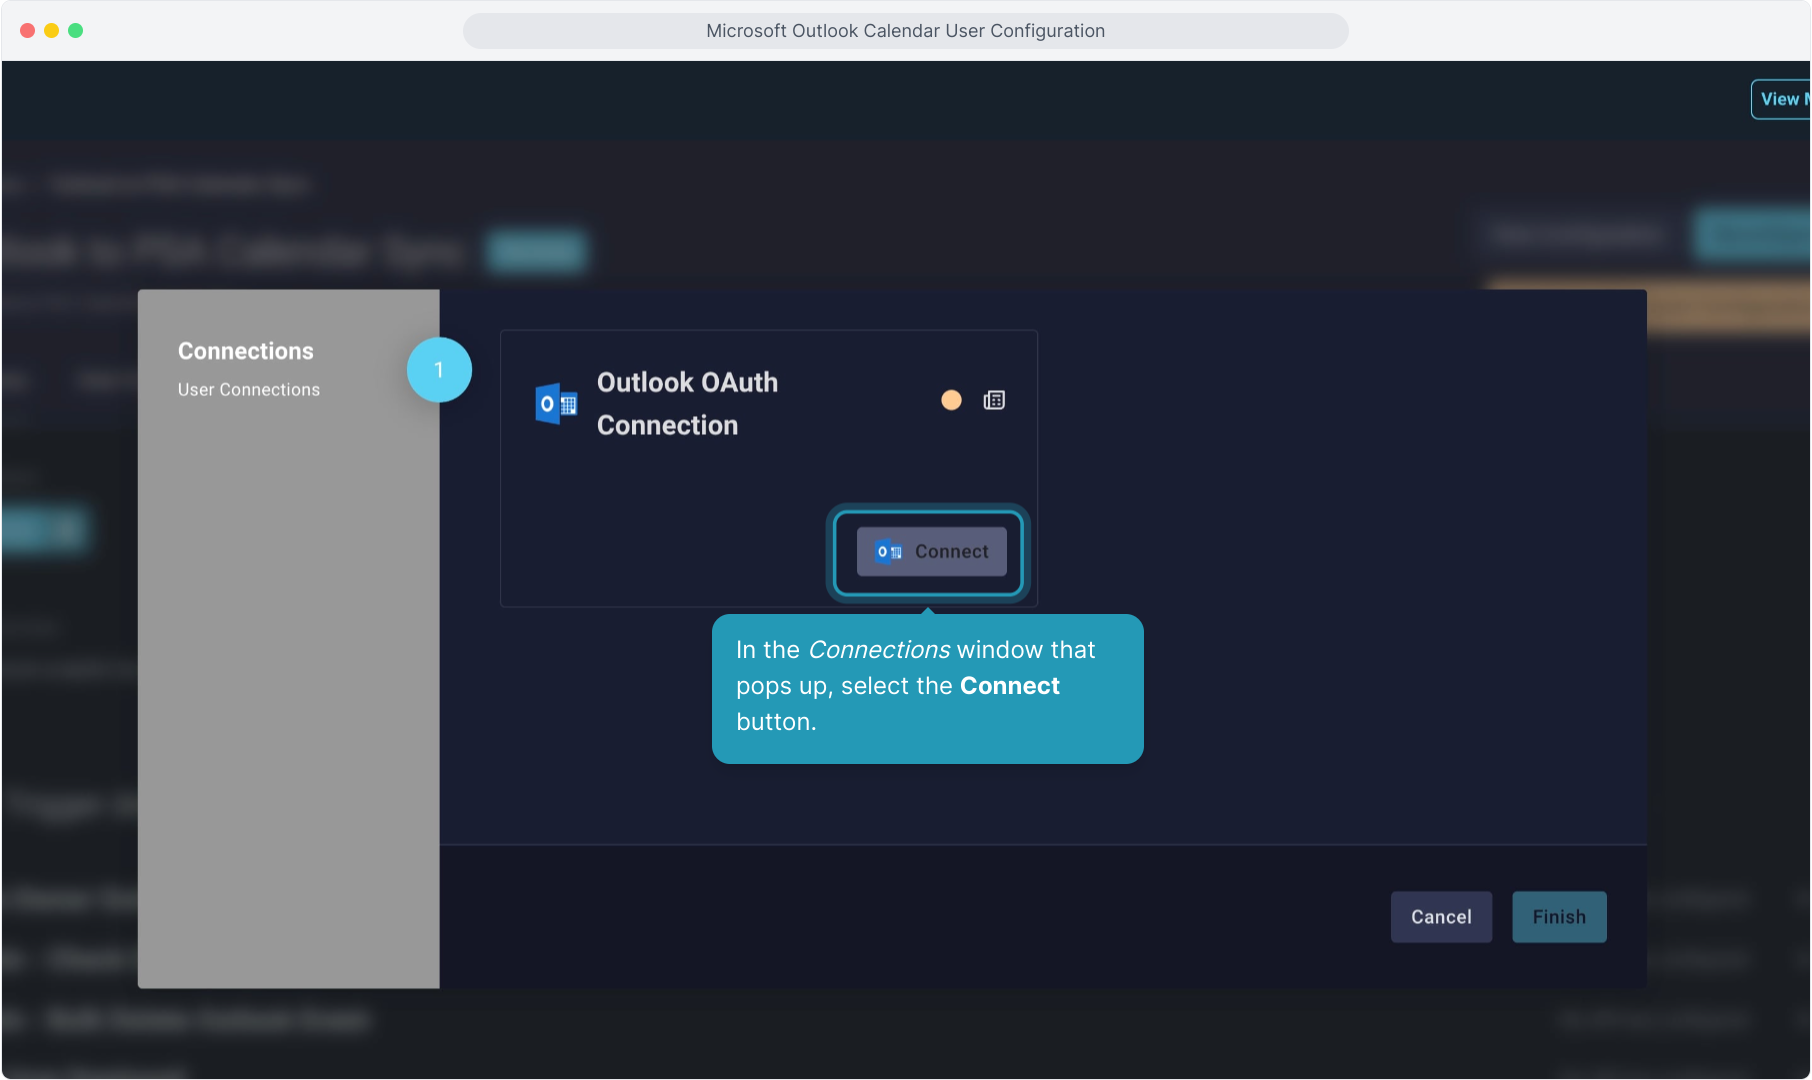
4. In the Connections window that pops up, select the Connect button.
5. Microsoft will ask you to accept the integration to link your calendar. You may be prompted to enter your password or authenticate. Do so if prompted.
Click the Accept button.
It will prompt you to close this window to return to PSA.

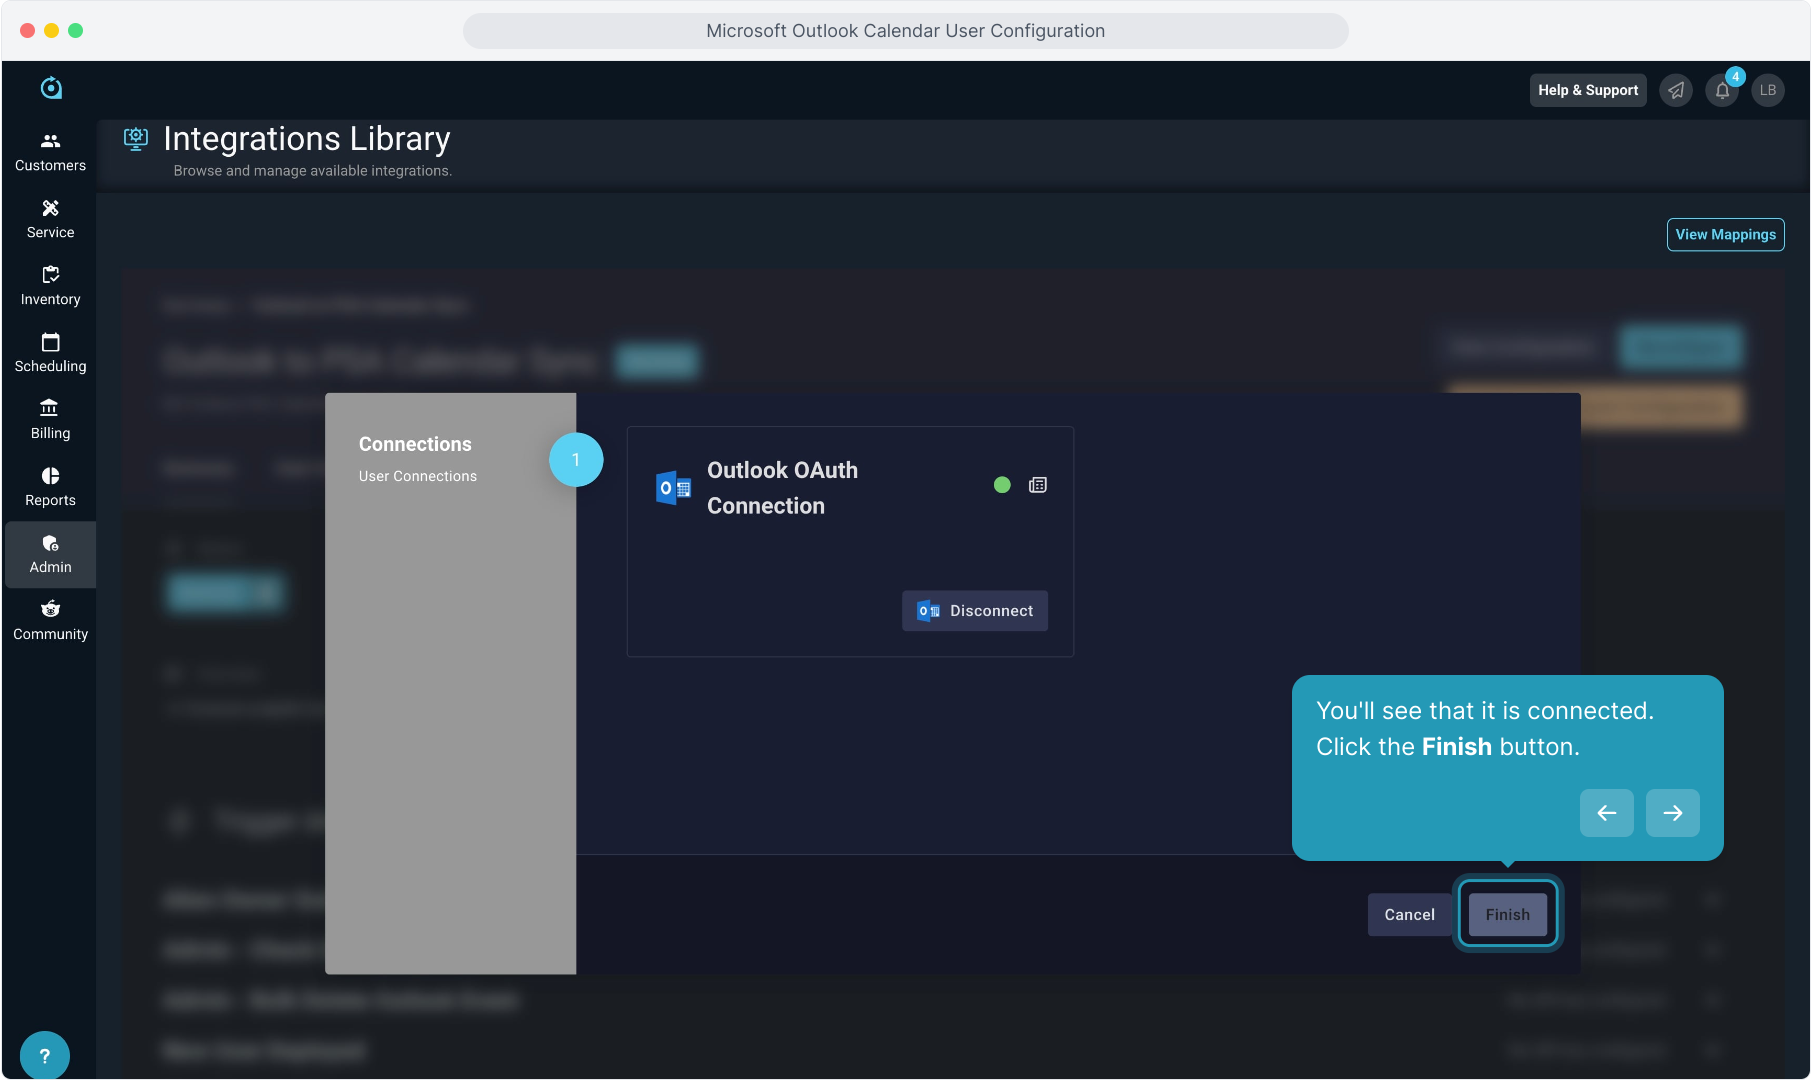
6. You'll see that it is connected. Click the Finish button.
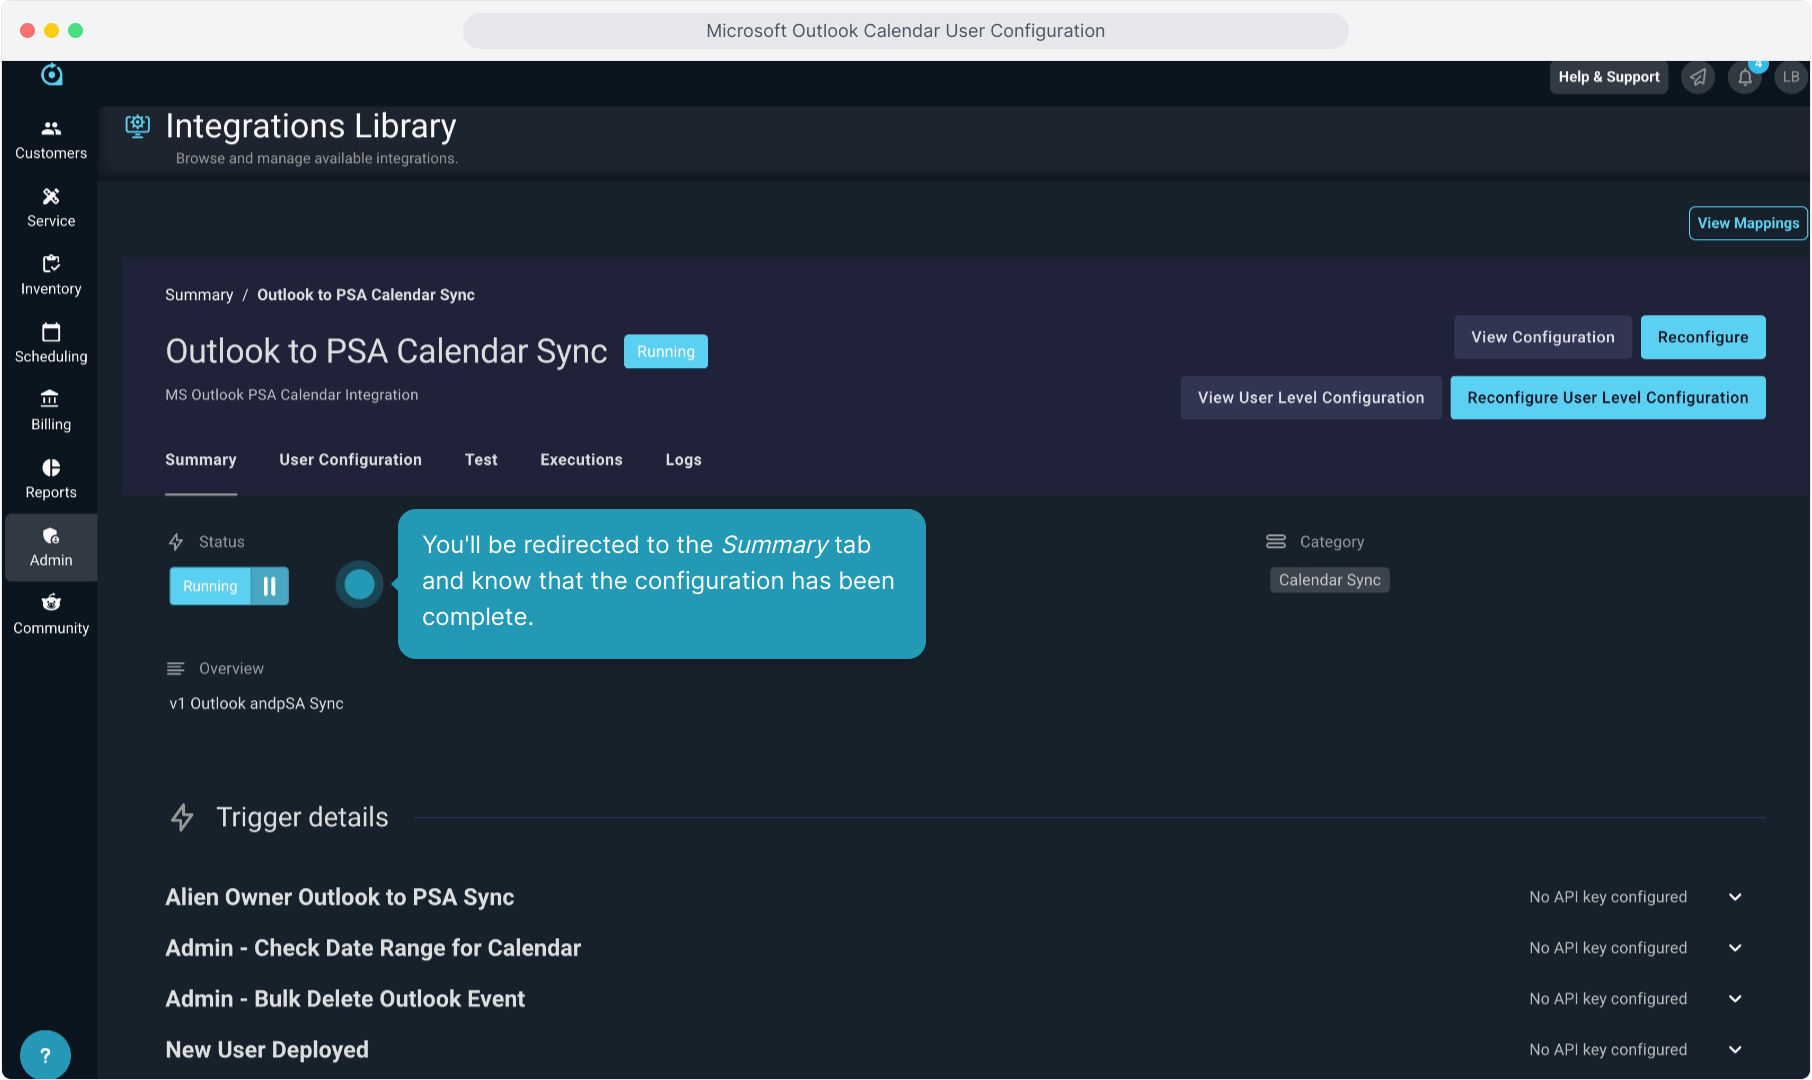
7. You'll be redirected to the Summary tab and know that the configuration has been complete.
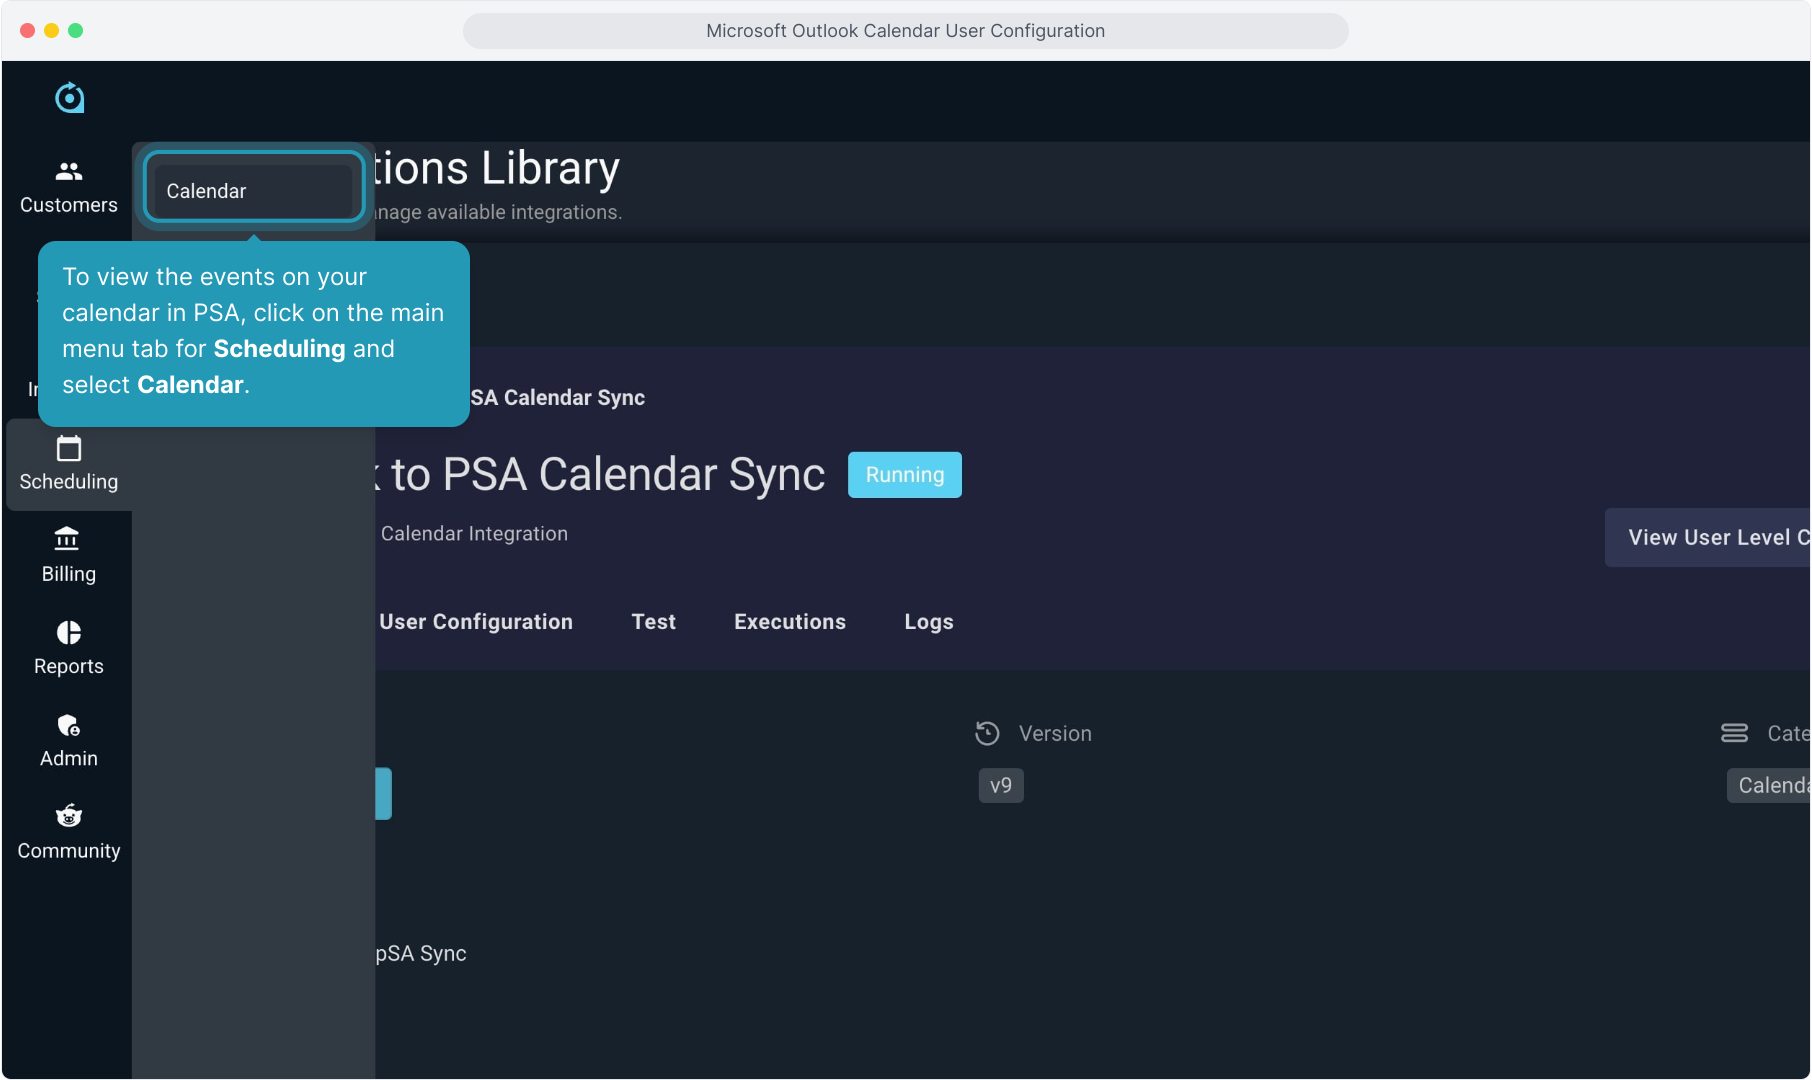
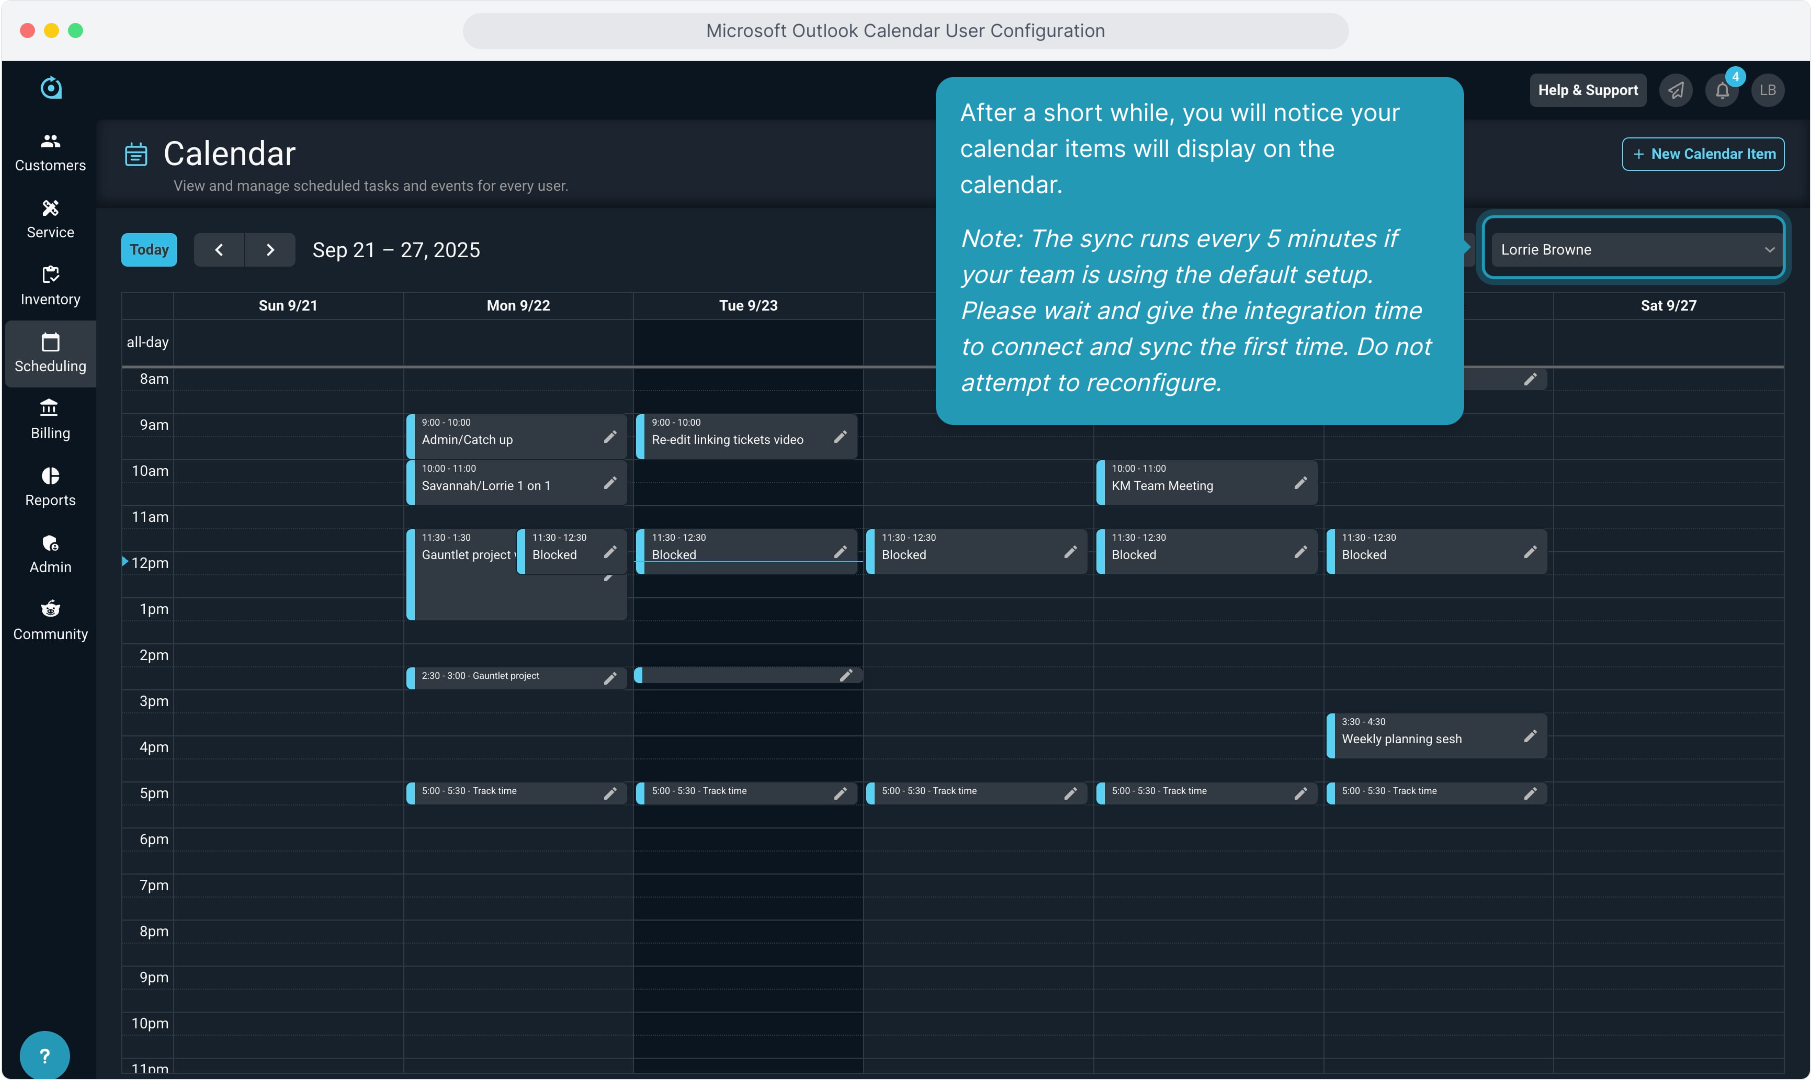
8. To view the events on your calendar in PSA, click on the main menu tab for Scheduling and select Calendar.
9. After a short while, you will notice your calendar items will display on the calendar.
Note: The sync runs every 5 minutes if your team is using the default setup. Please wait and give the integration time to connect and sync the first time. Do not attempt to reconfigure.
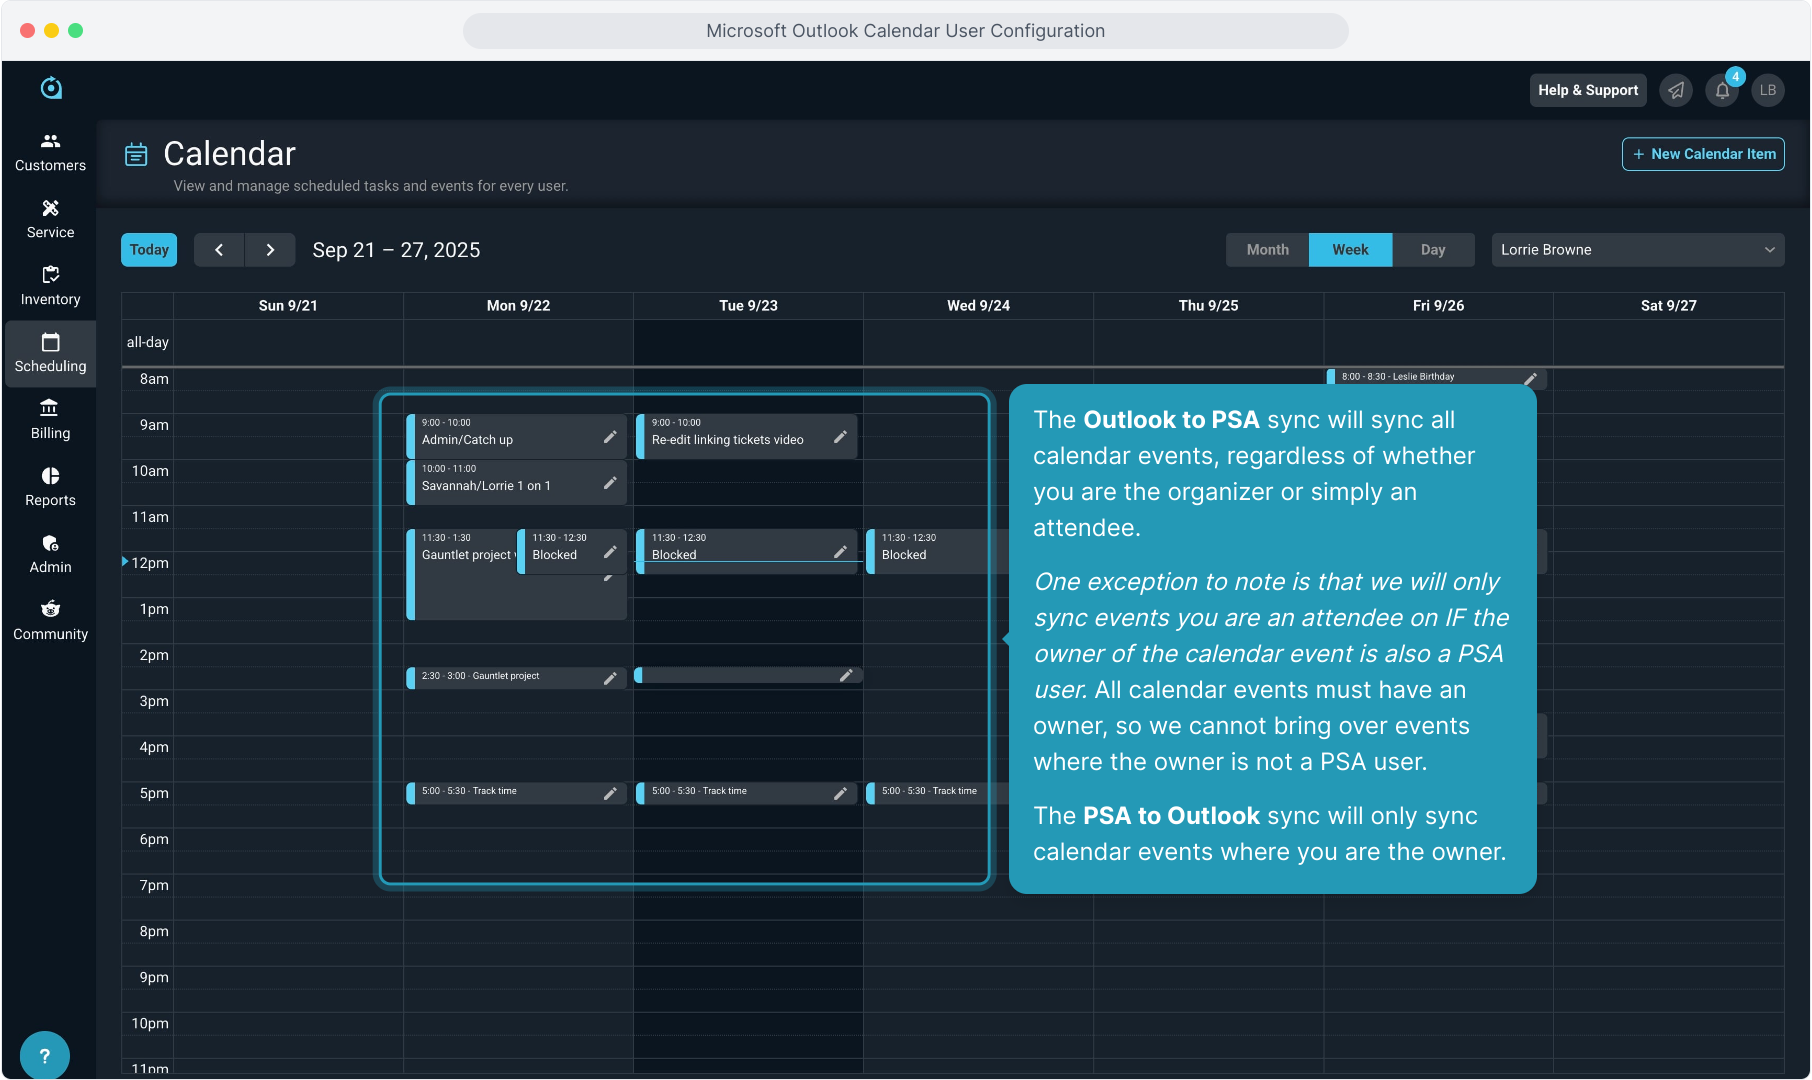
10. The Outlook to PSA sync will sync all calendar events, regardless of whether you are the organizer or simply an attendee.
One exception to note is that we will only sync events you are an attendee on IF the owner of the calendar event is also a PSA user. All calendar events must have an owner, so we cannot bring over events where the owner is not a PSA user.
The PSA to Outlook sync will only sync calendar events where you are the owner.
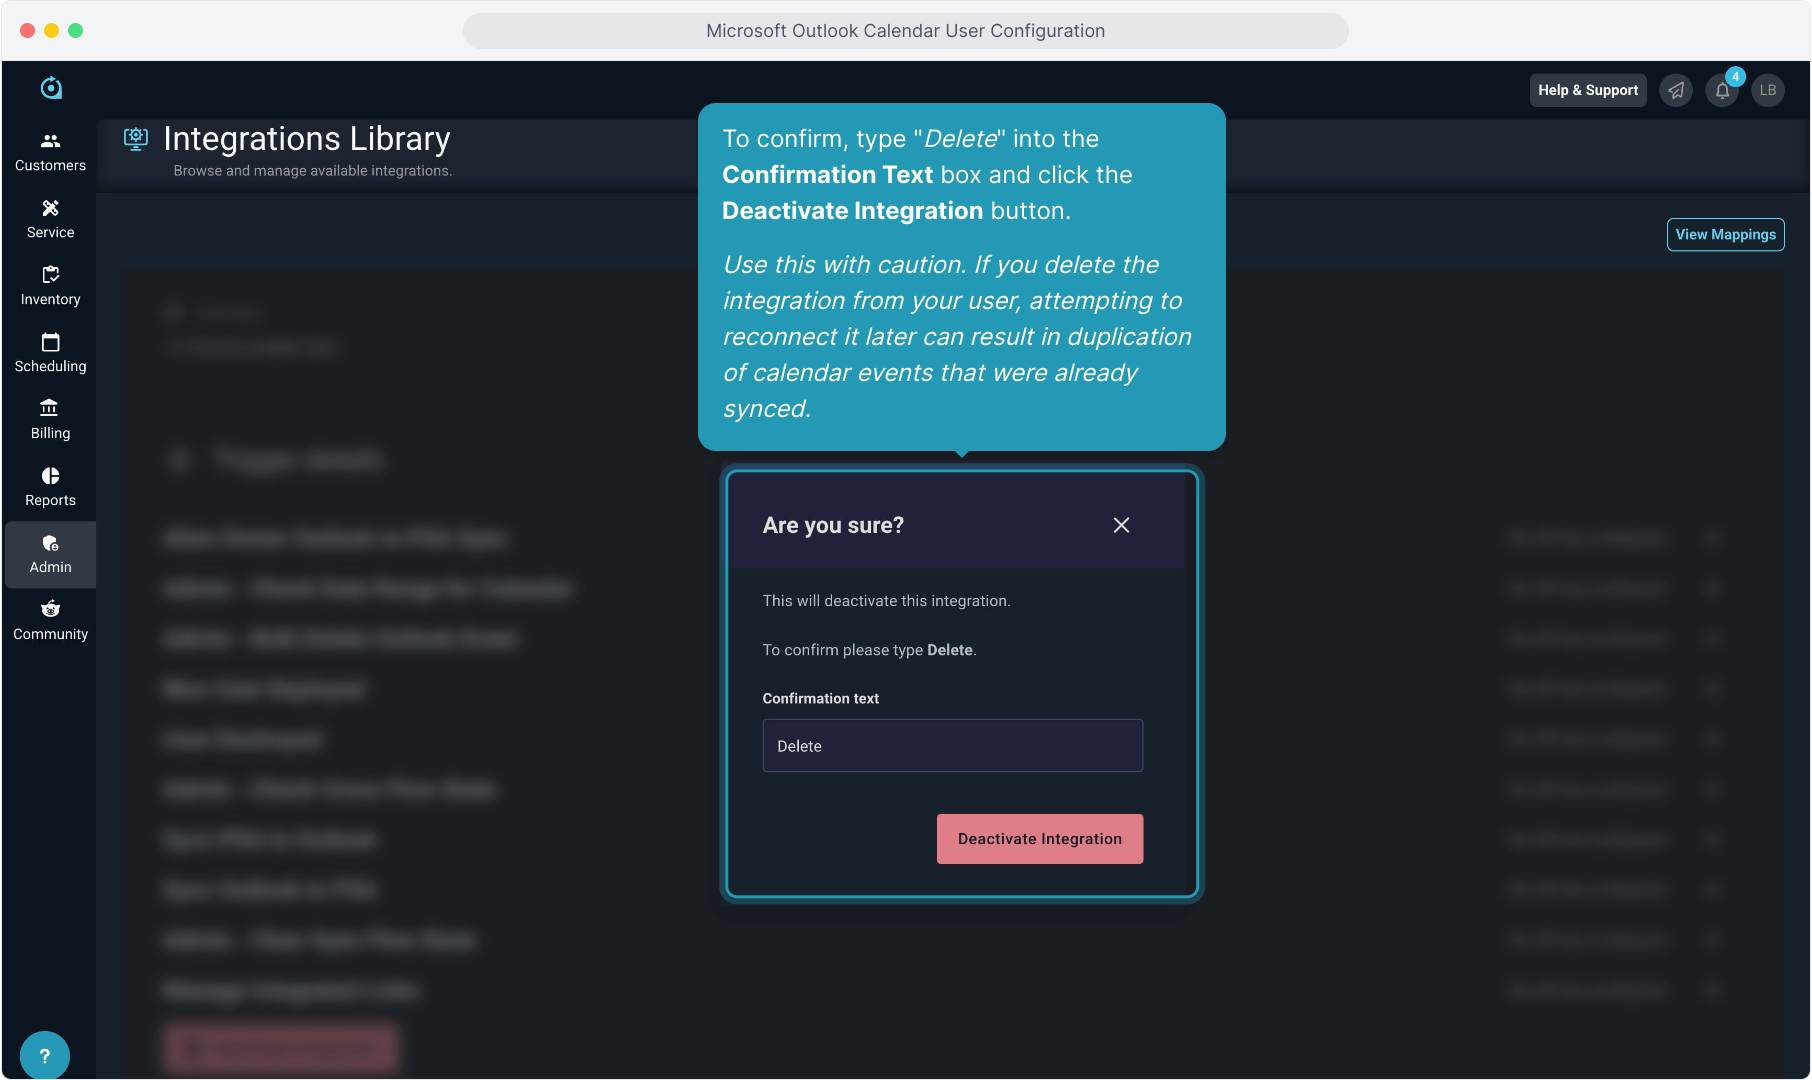
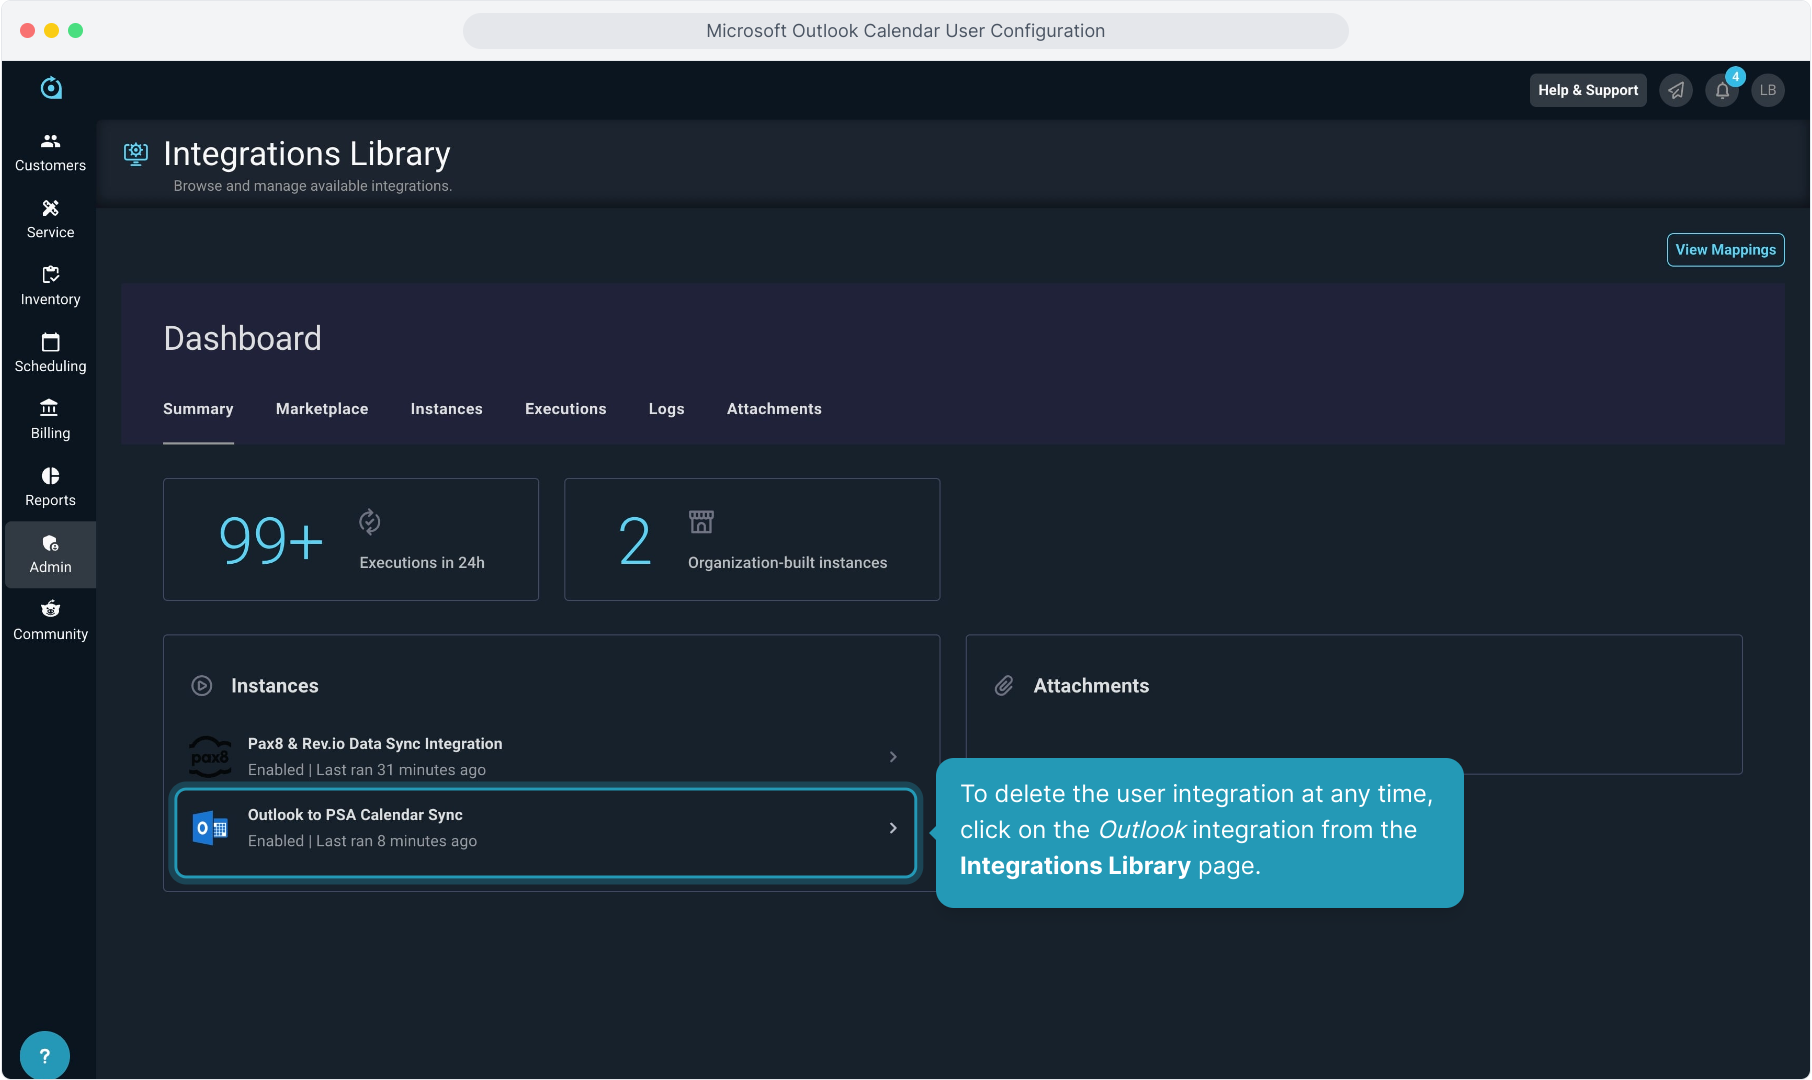
11. To delete the user integration at any time, click on the Outlook integration from the Integrations Library page.
12. Click the Deactivate Integration button.

13. To confirm, type "Delete" into the Confirmation Text box and click the Deactivate Integration button.
Use this with caution. If you delete the integration from your user, attempting to reconnect it later can result in duplication of calendar events that were already synced.