How To Guide: Create a One-Time Invoice Template
1. Introduction
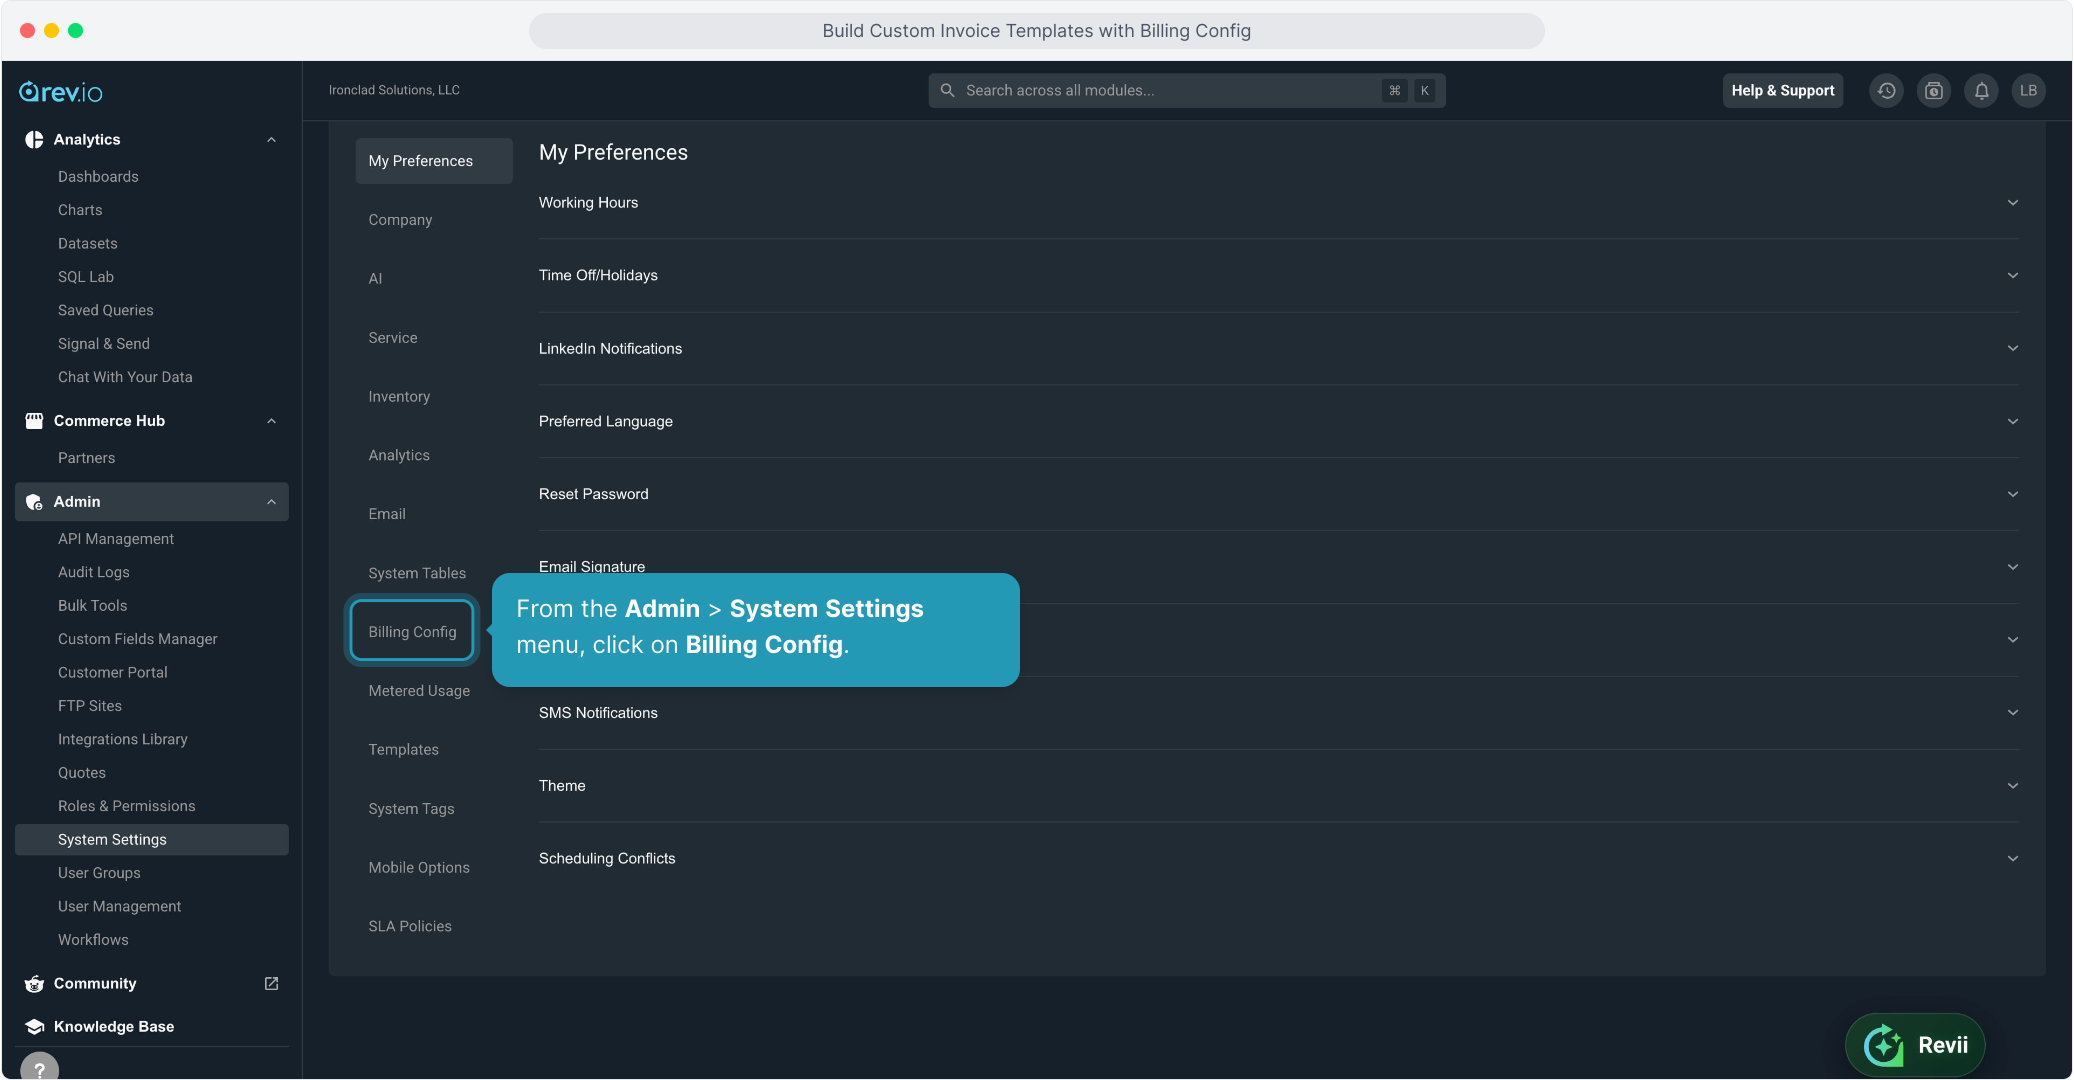
2. From the Admin > System Settings menu, click on Billing Config.
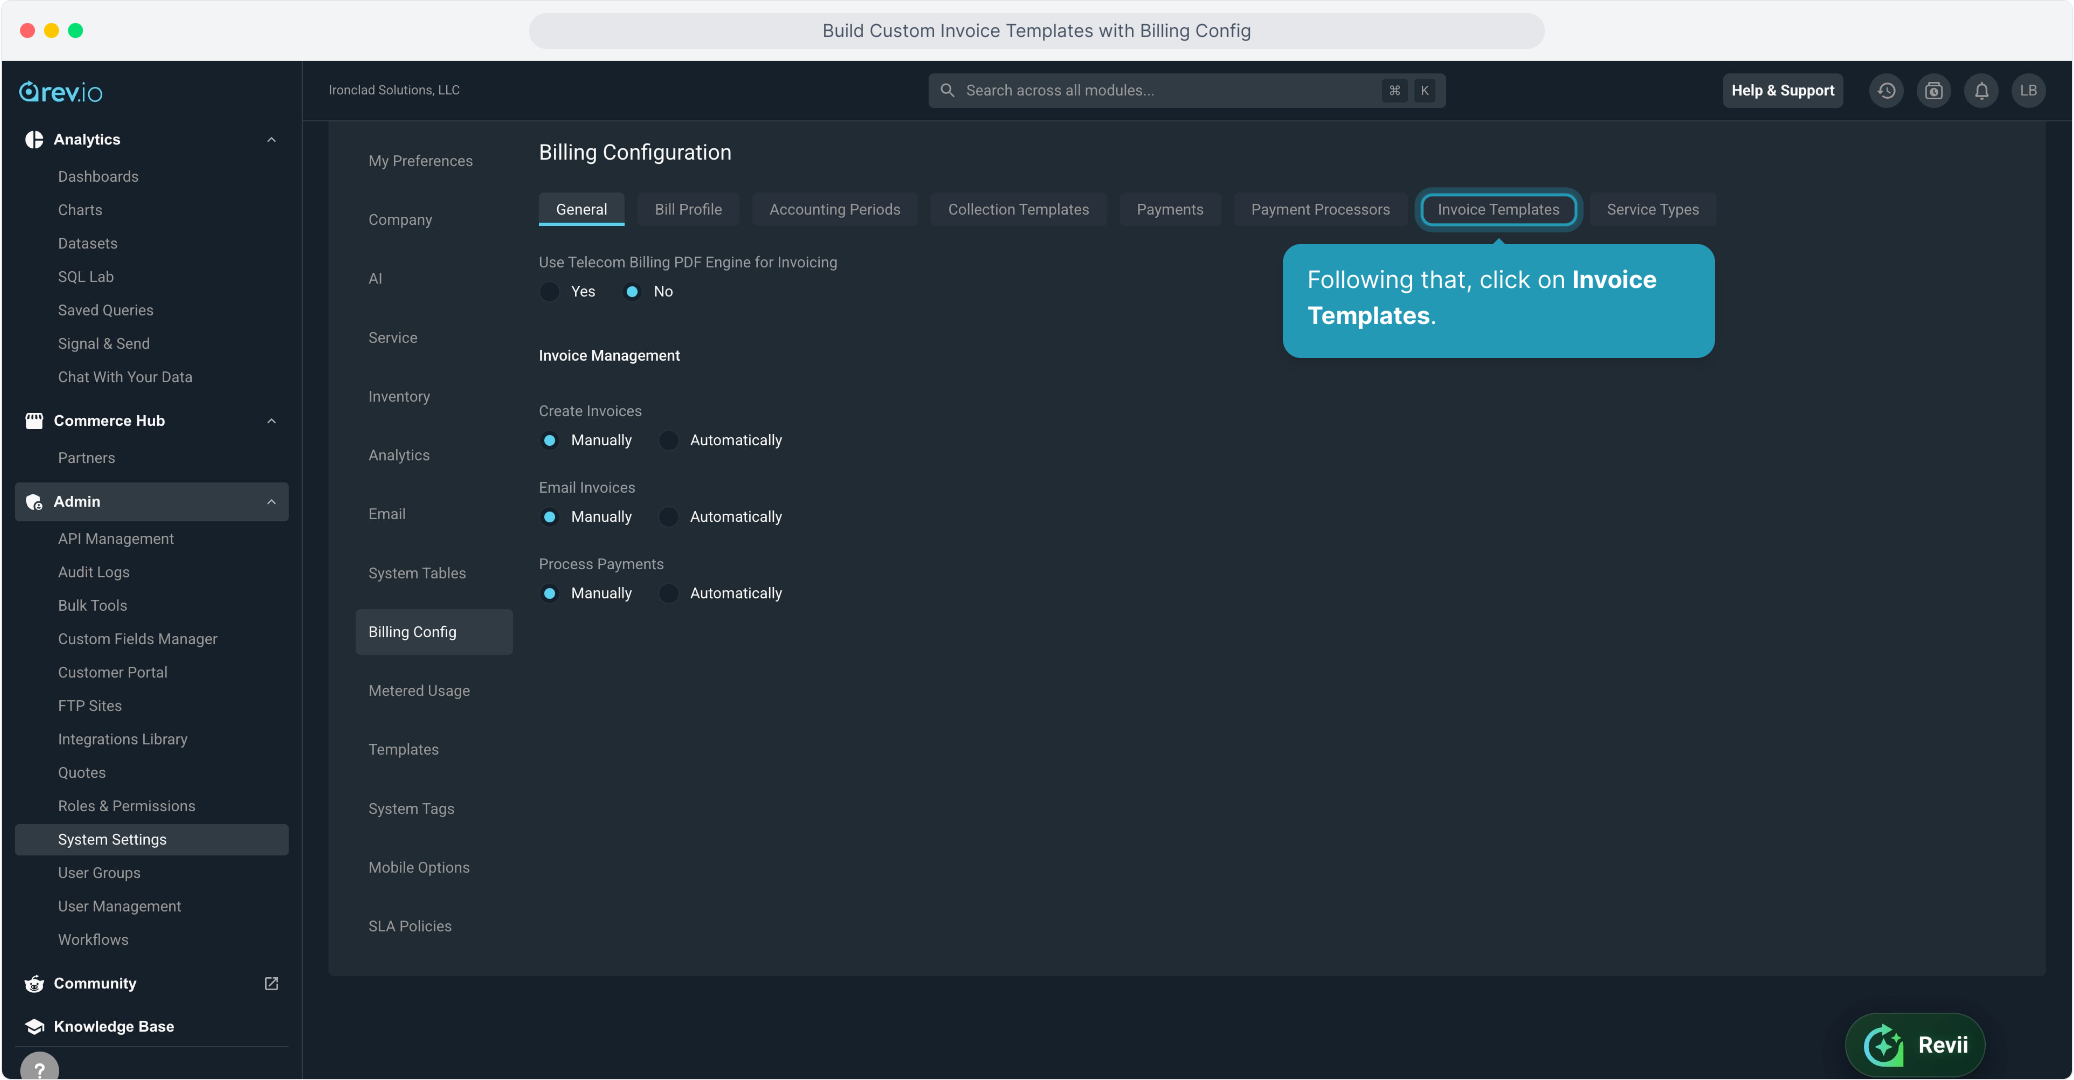
3. Following that, click on Invoice Templates.
4. Click on New Template.
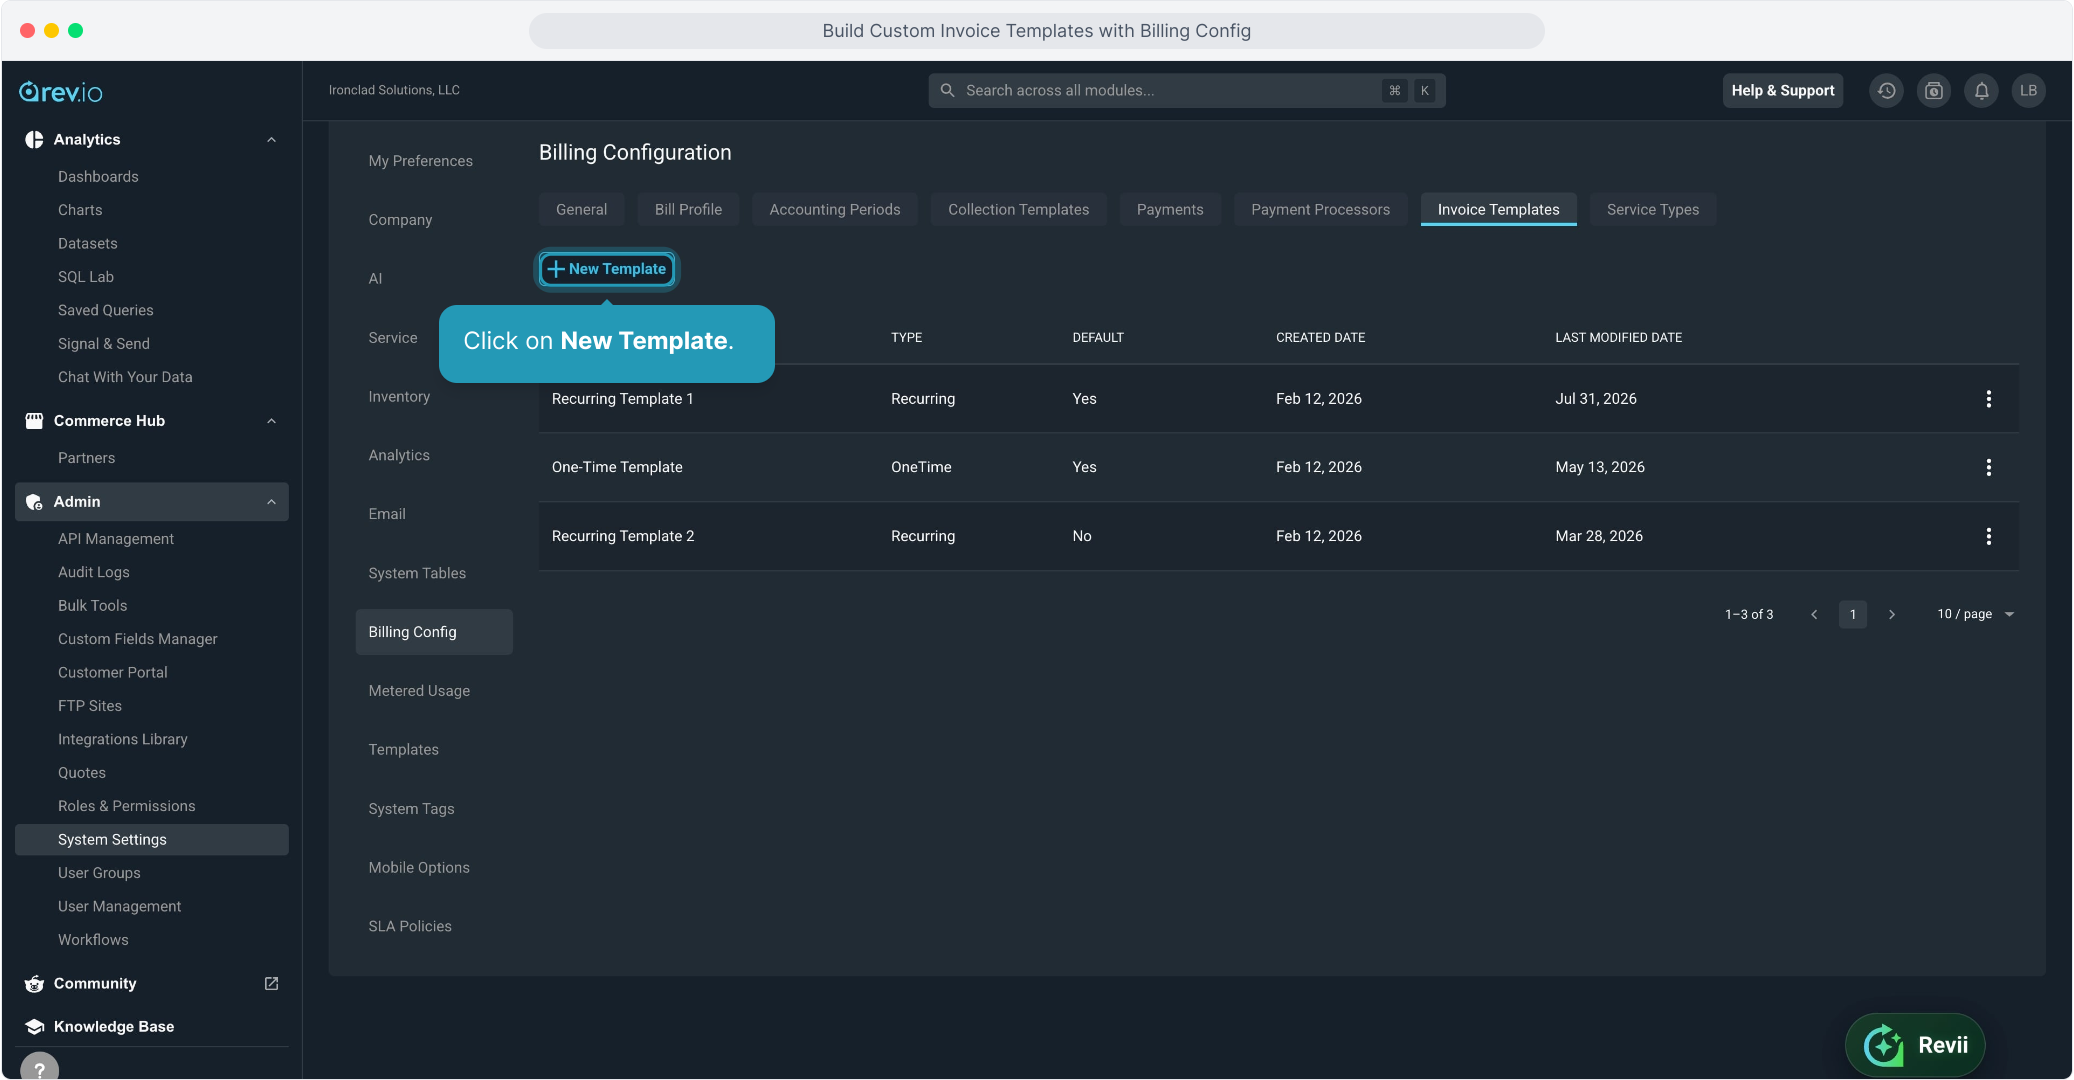
5. Name your template.
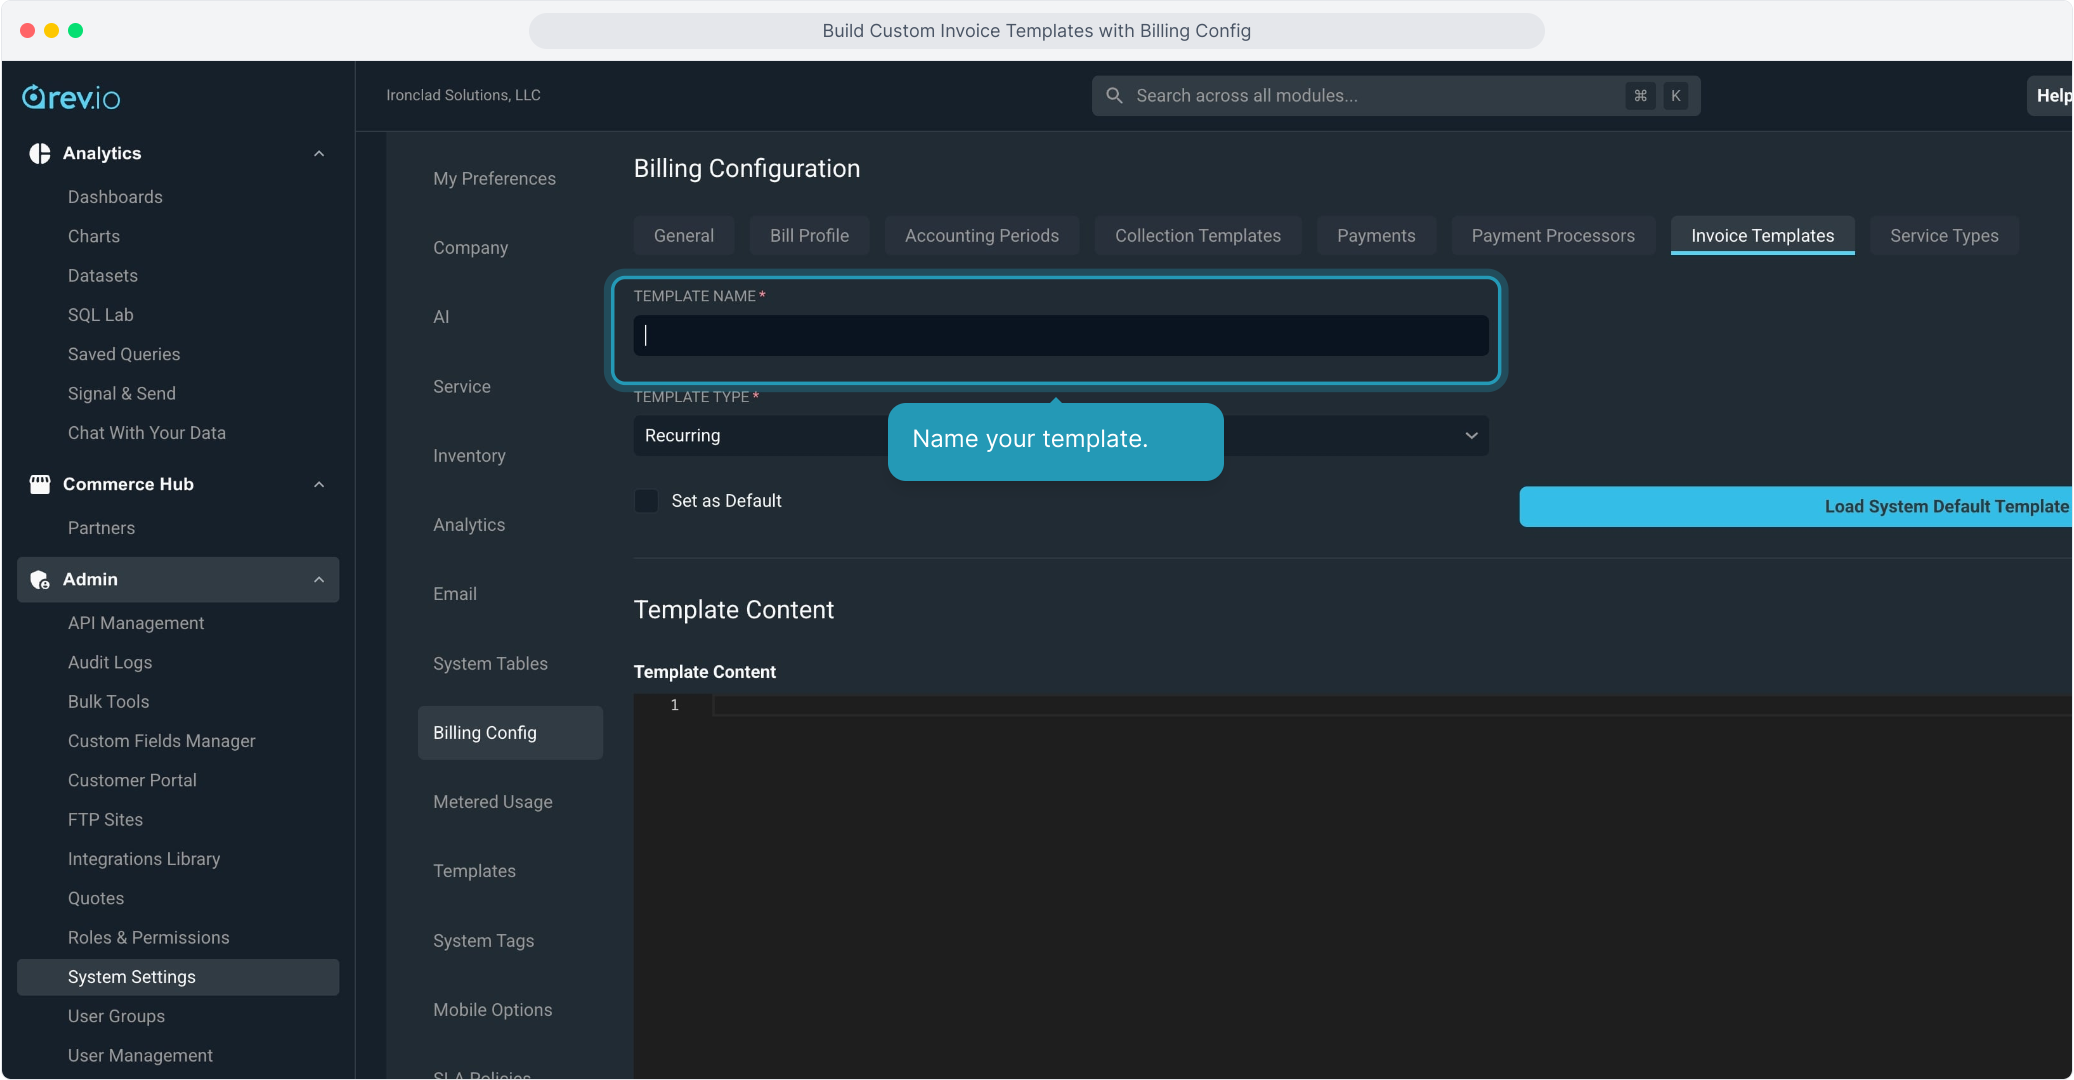
6. Now, select One-Time from the dropdown Template Type list.
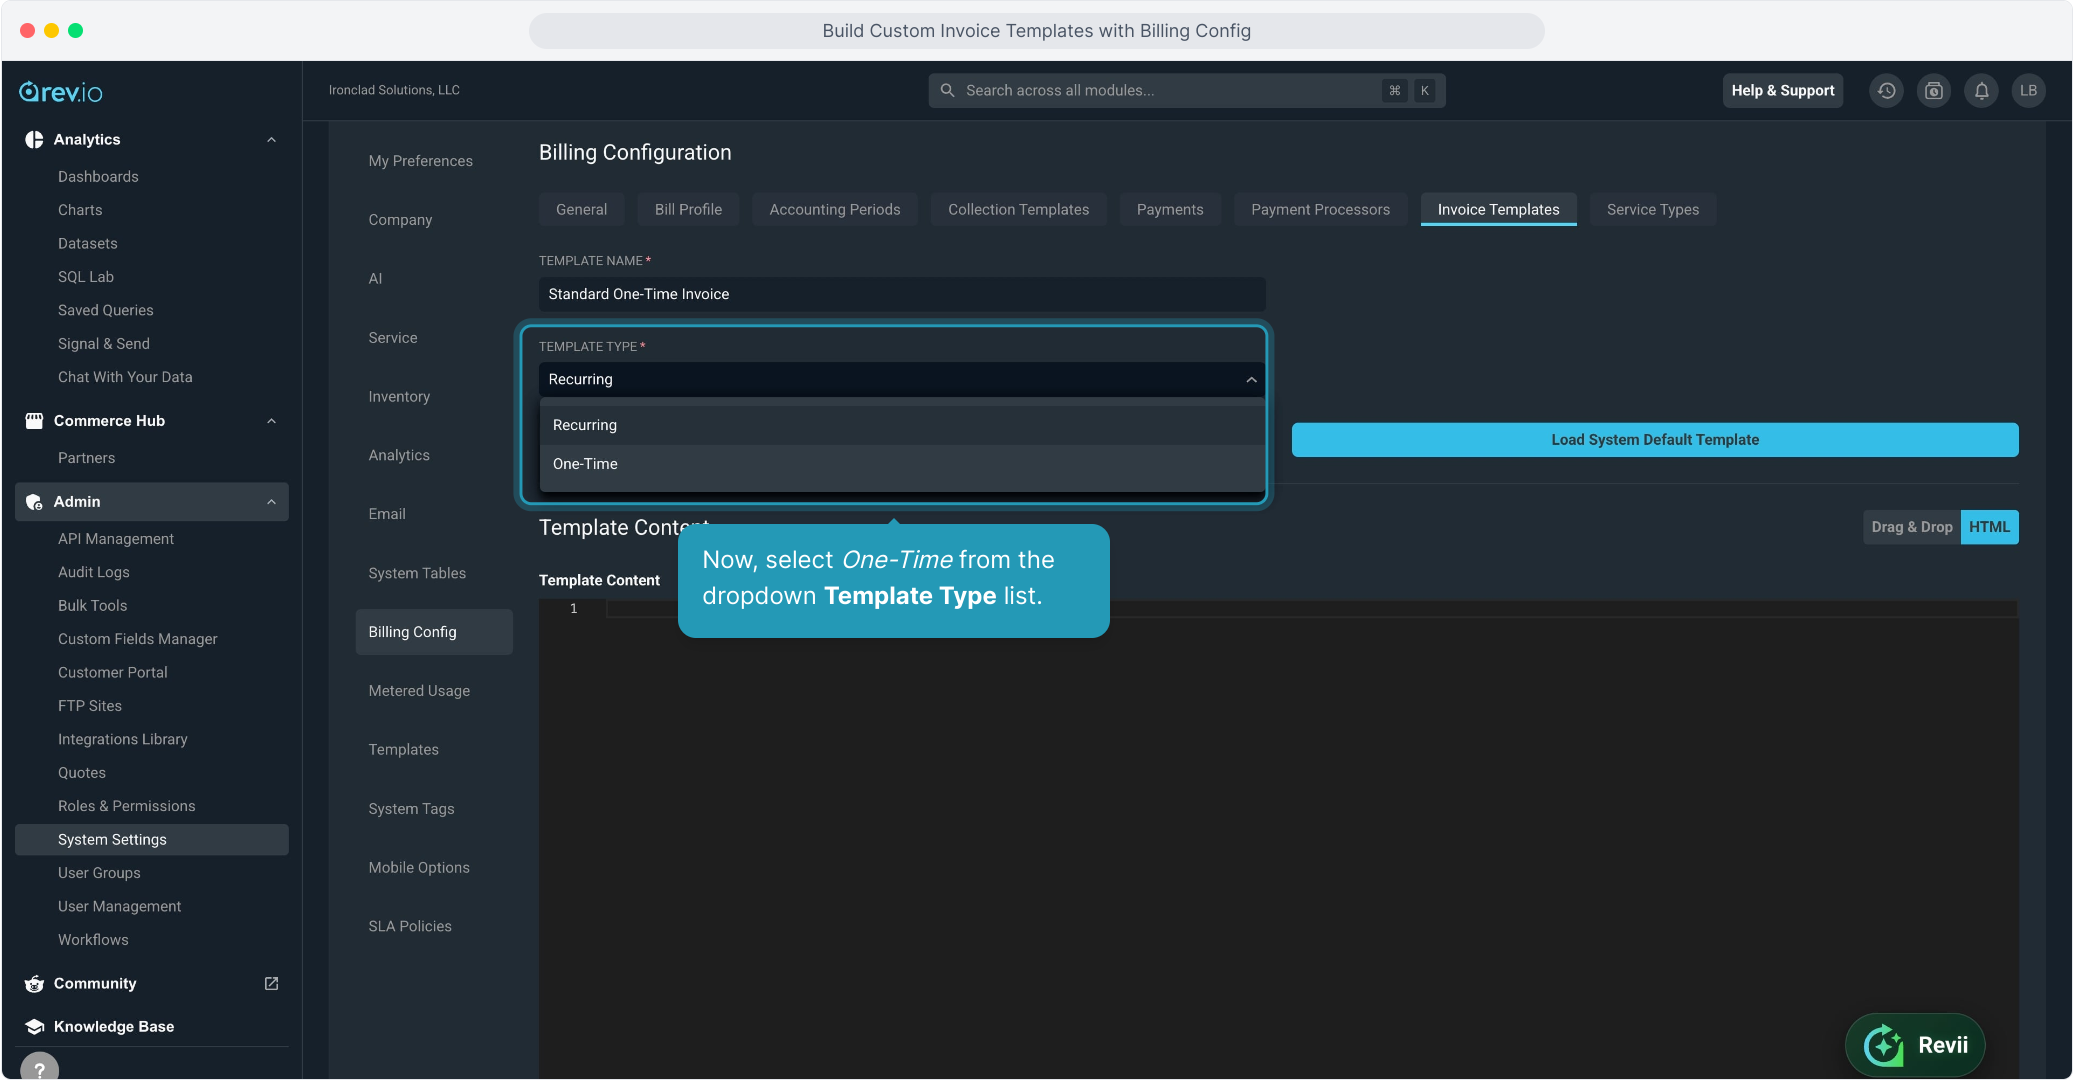
7. You can set this template as your default One-Time template now or at any time after it is created if you would like to do so
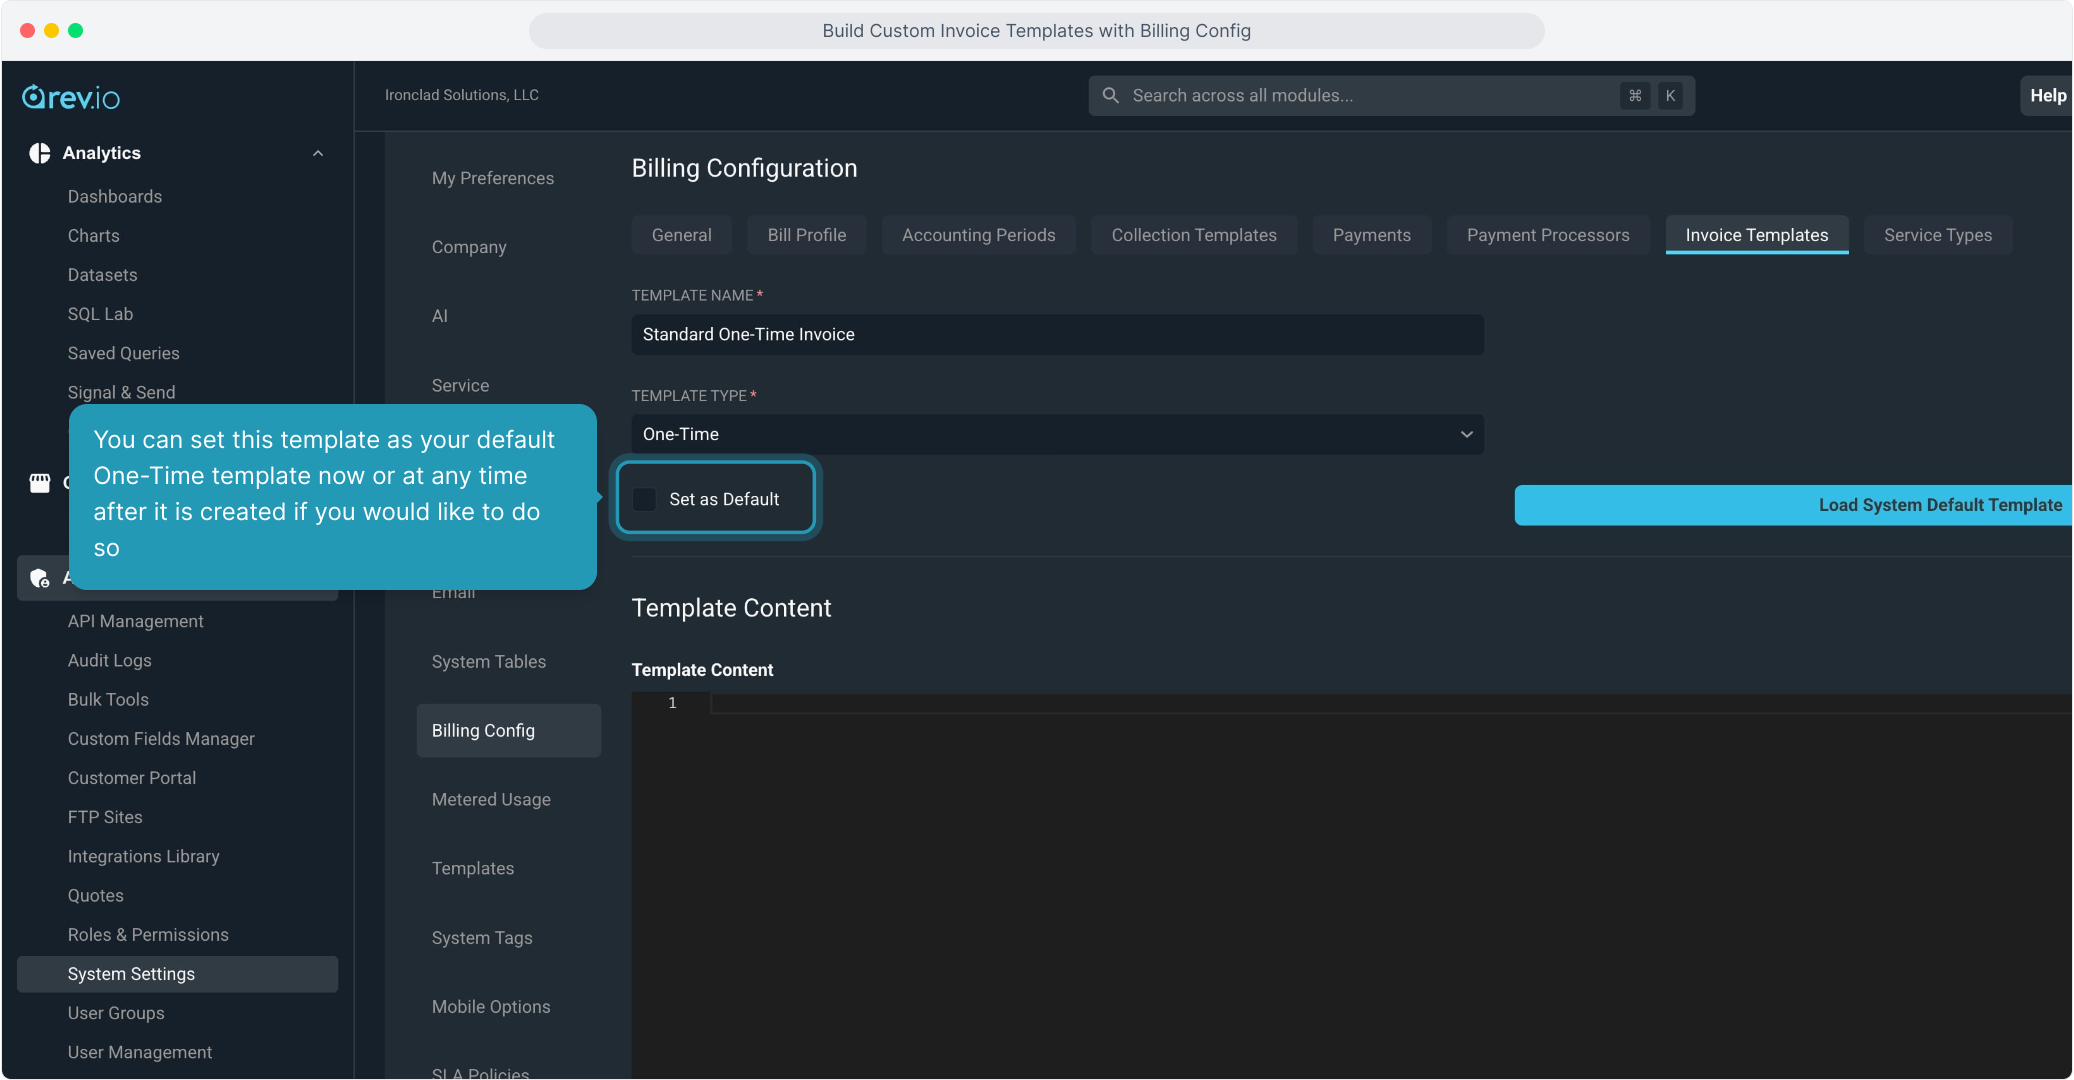
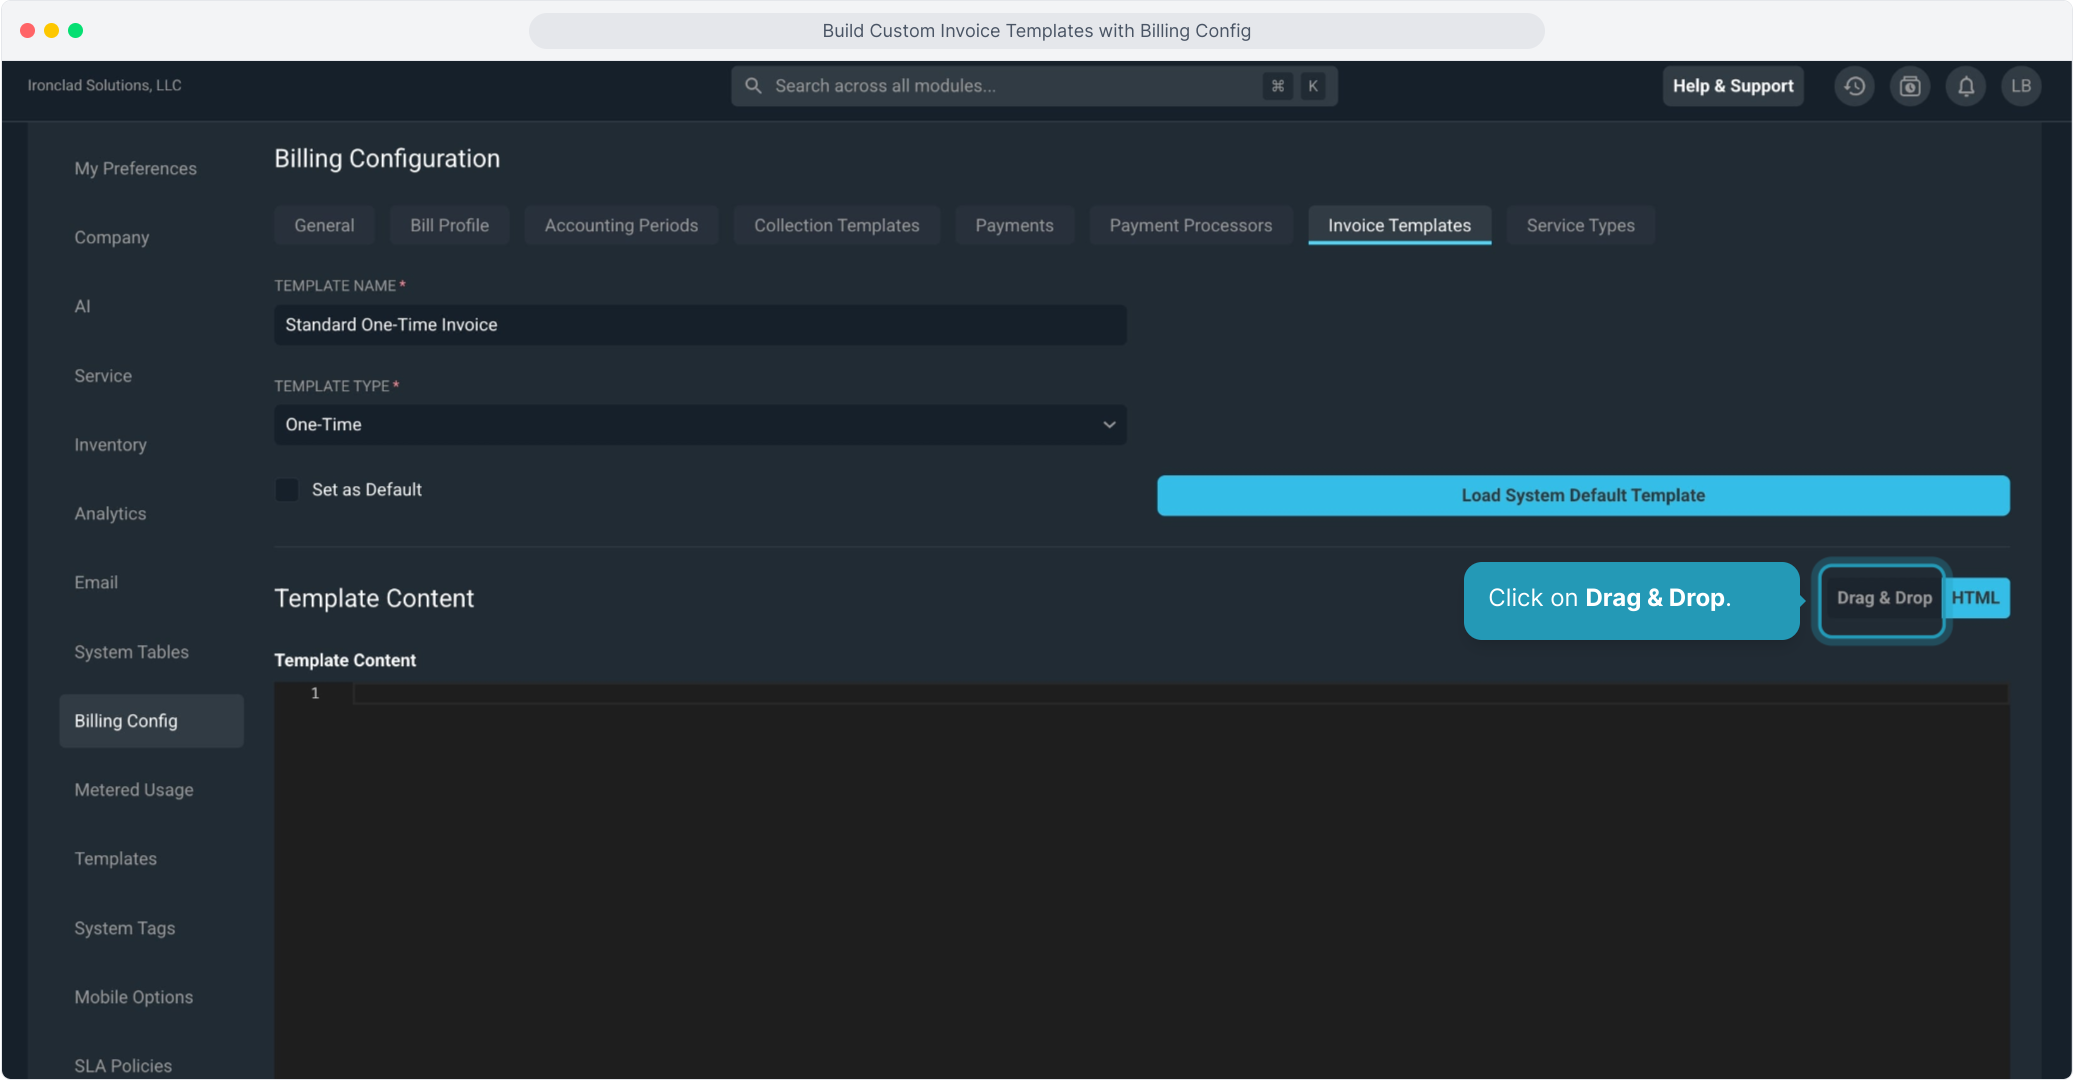
8. Click on Drag & Drop.
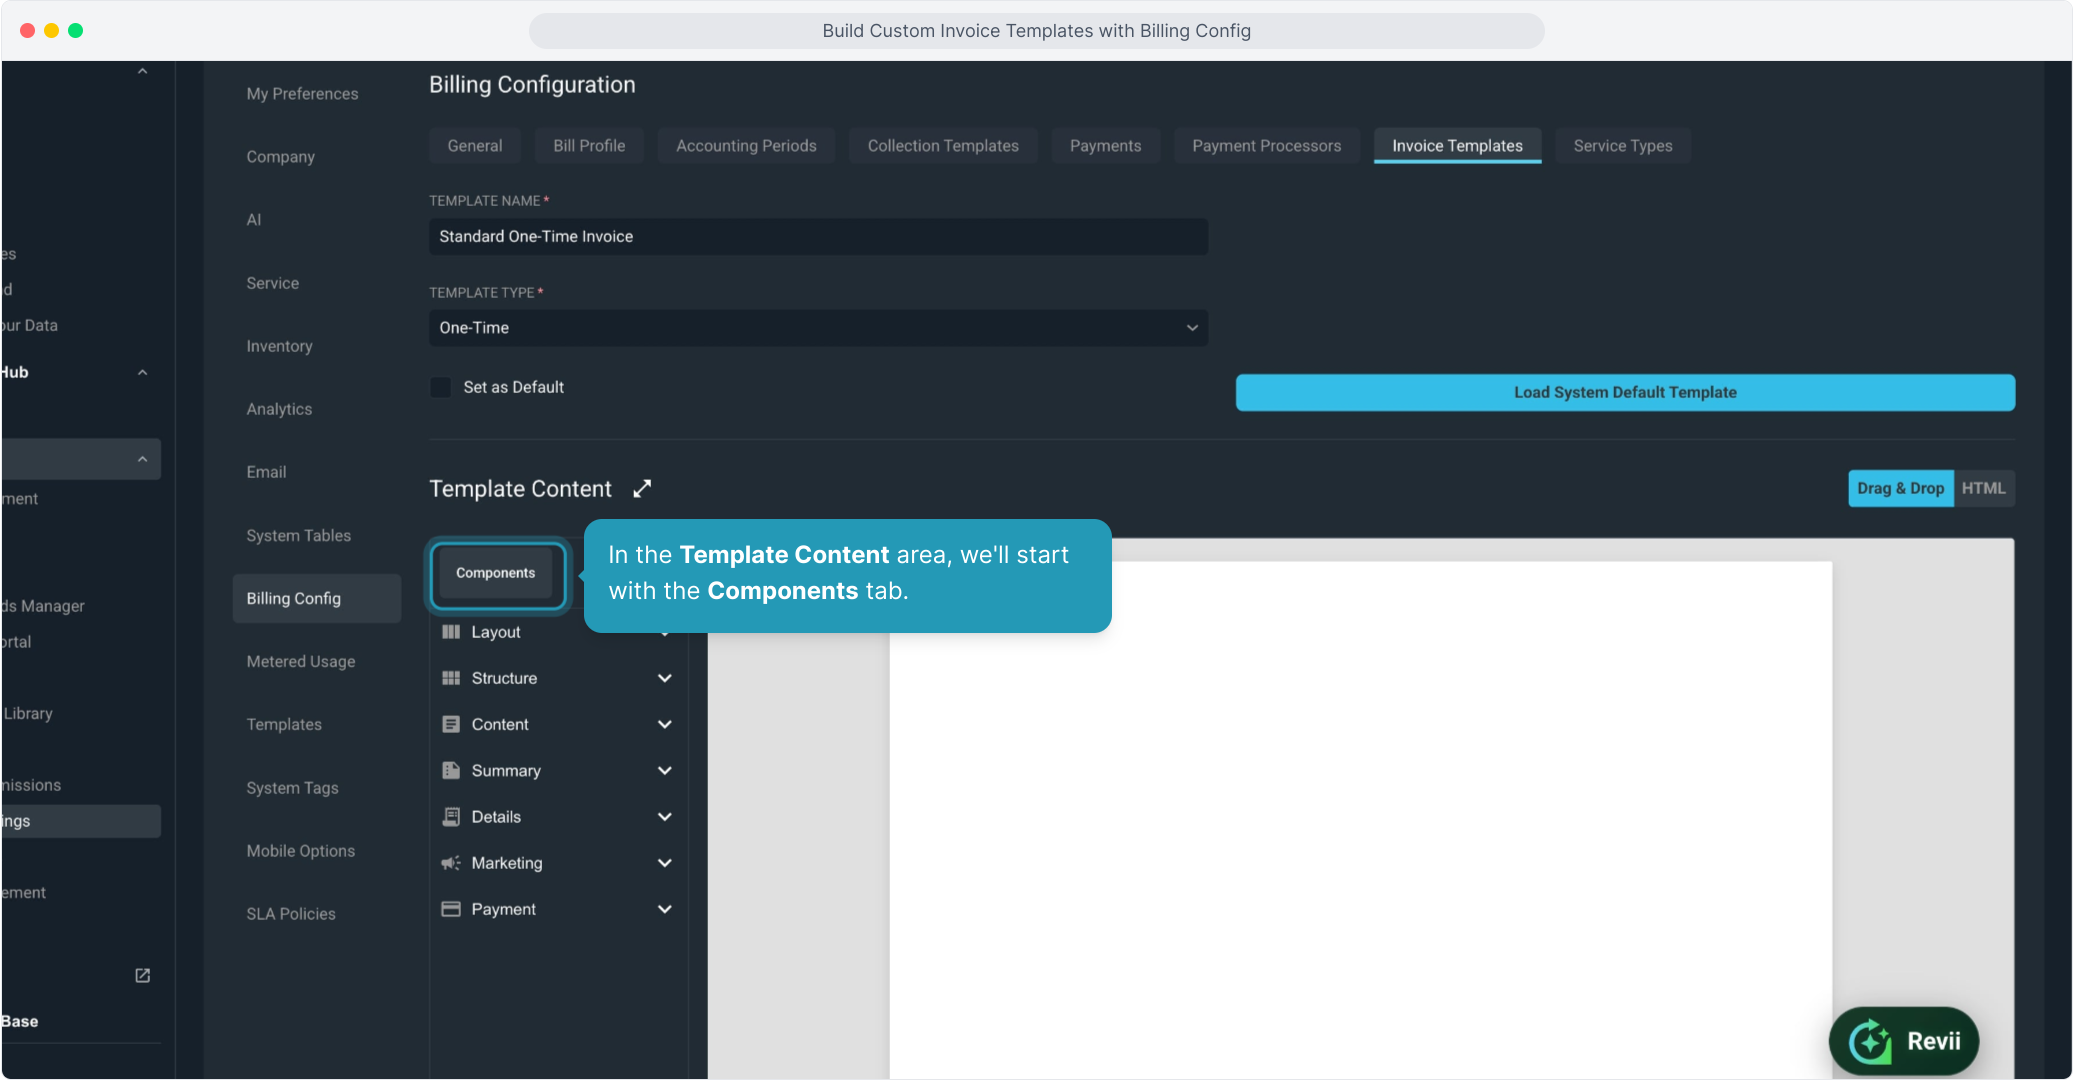
9. In the Template Content area, we'll start with the Components tab.
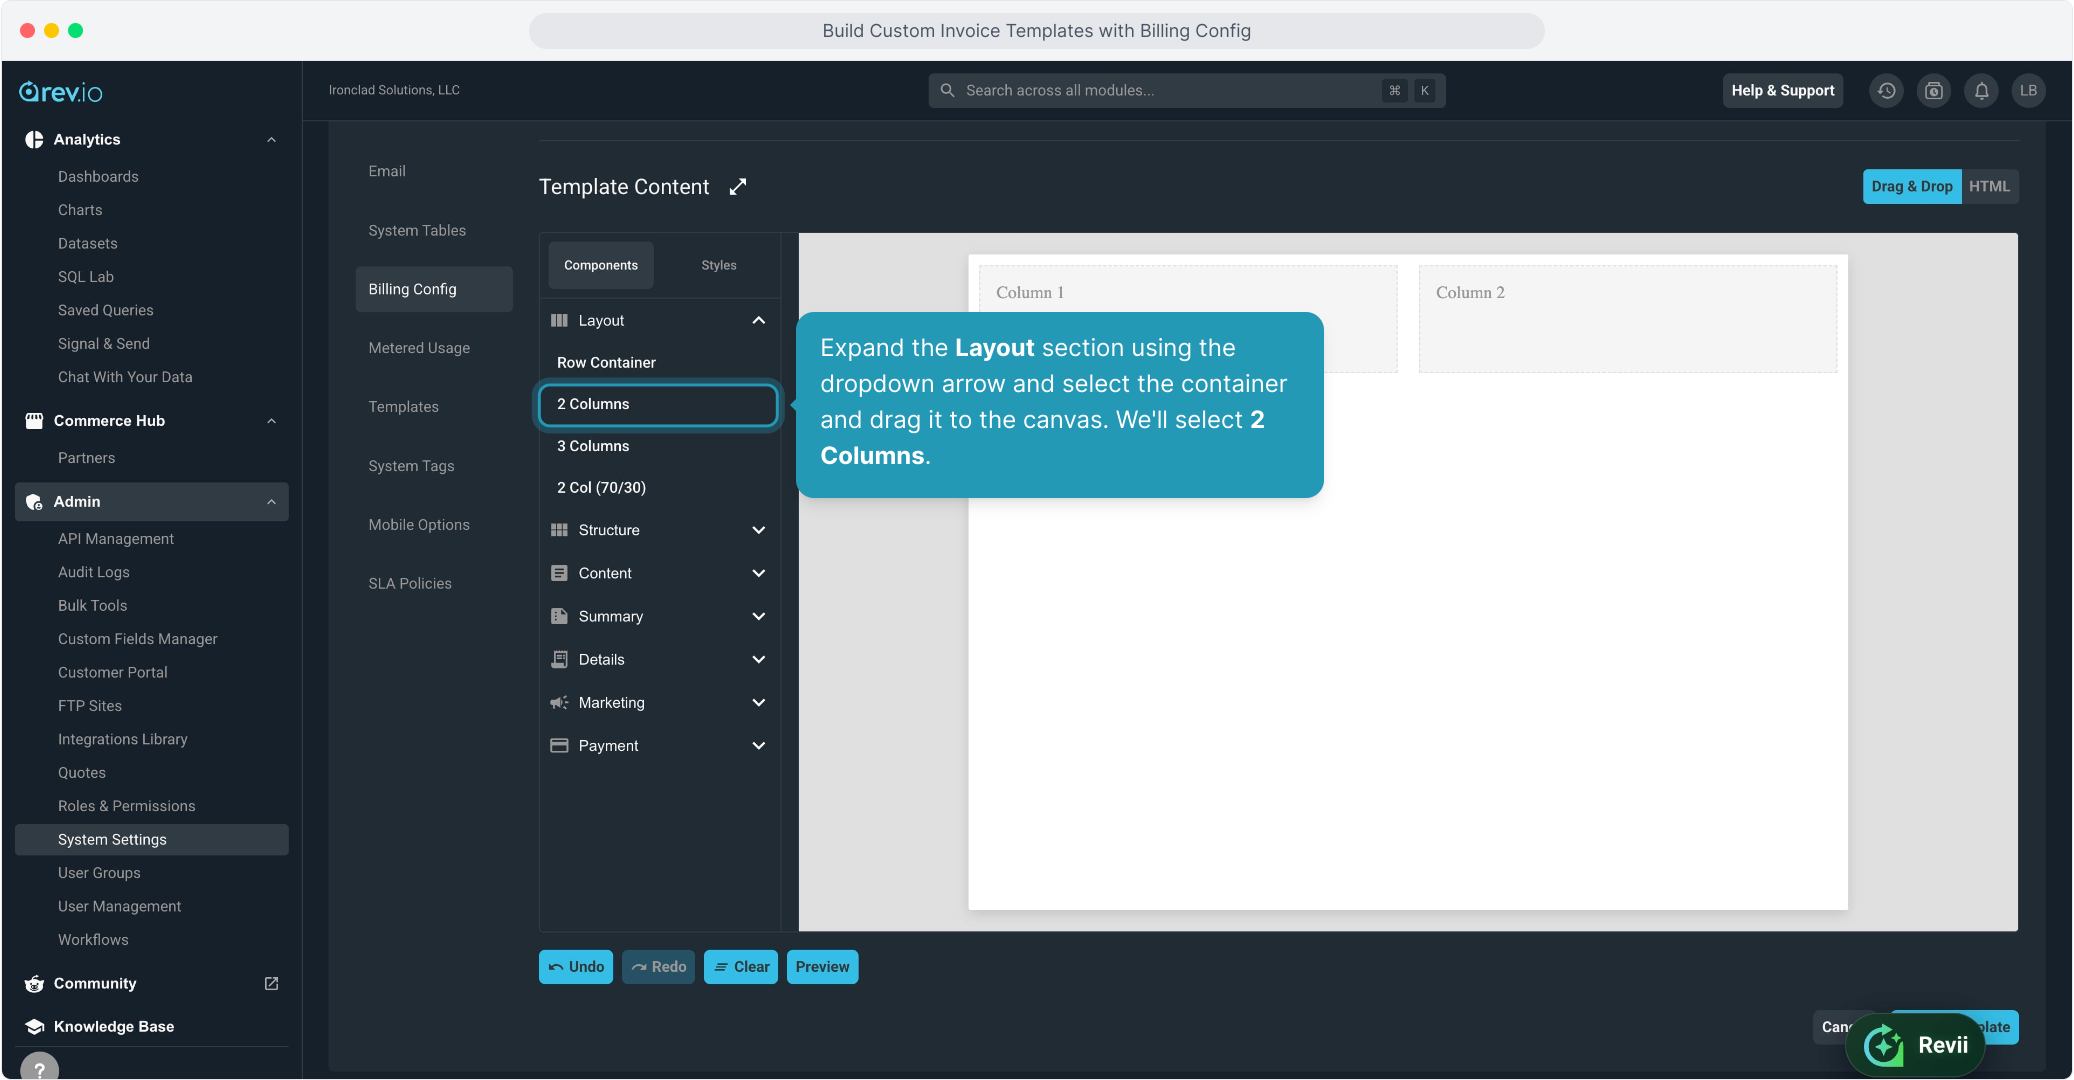
10. Expand the Layout section using the dropdown arrow and select the container and drag it to the canvas. We'll select 2 Columns.
11. You'll then see the 2 columns created on the canvas.
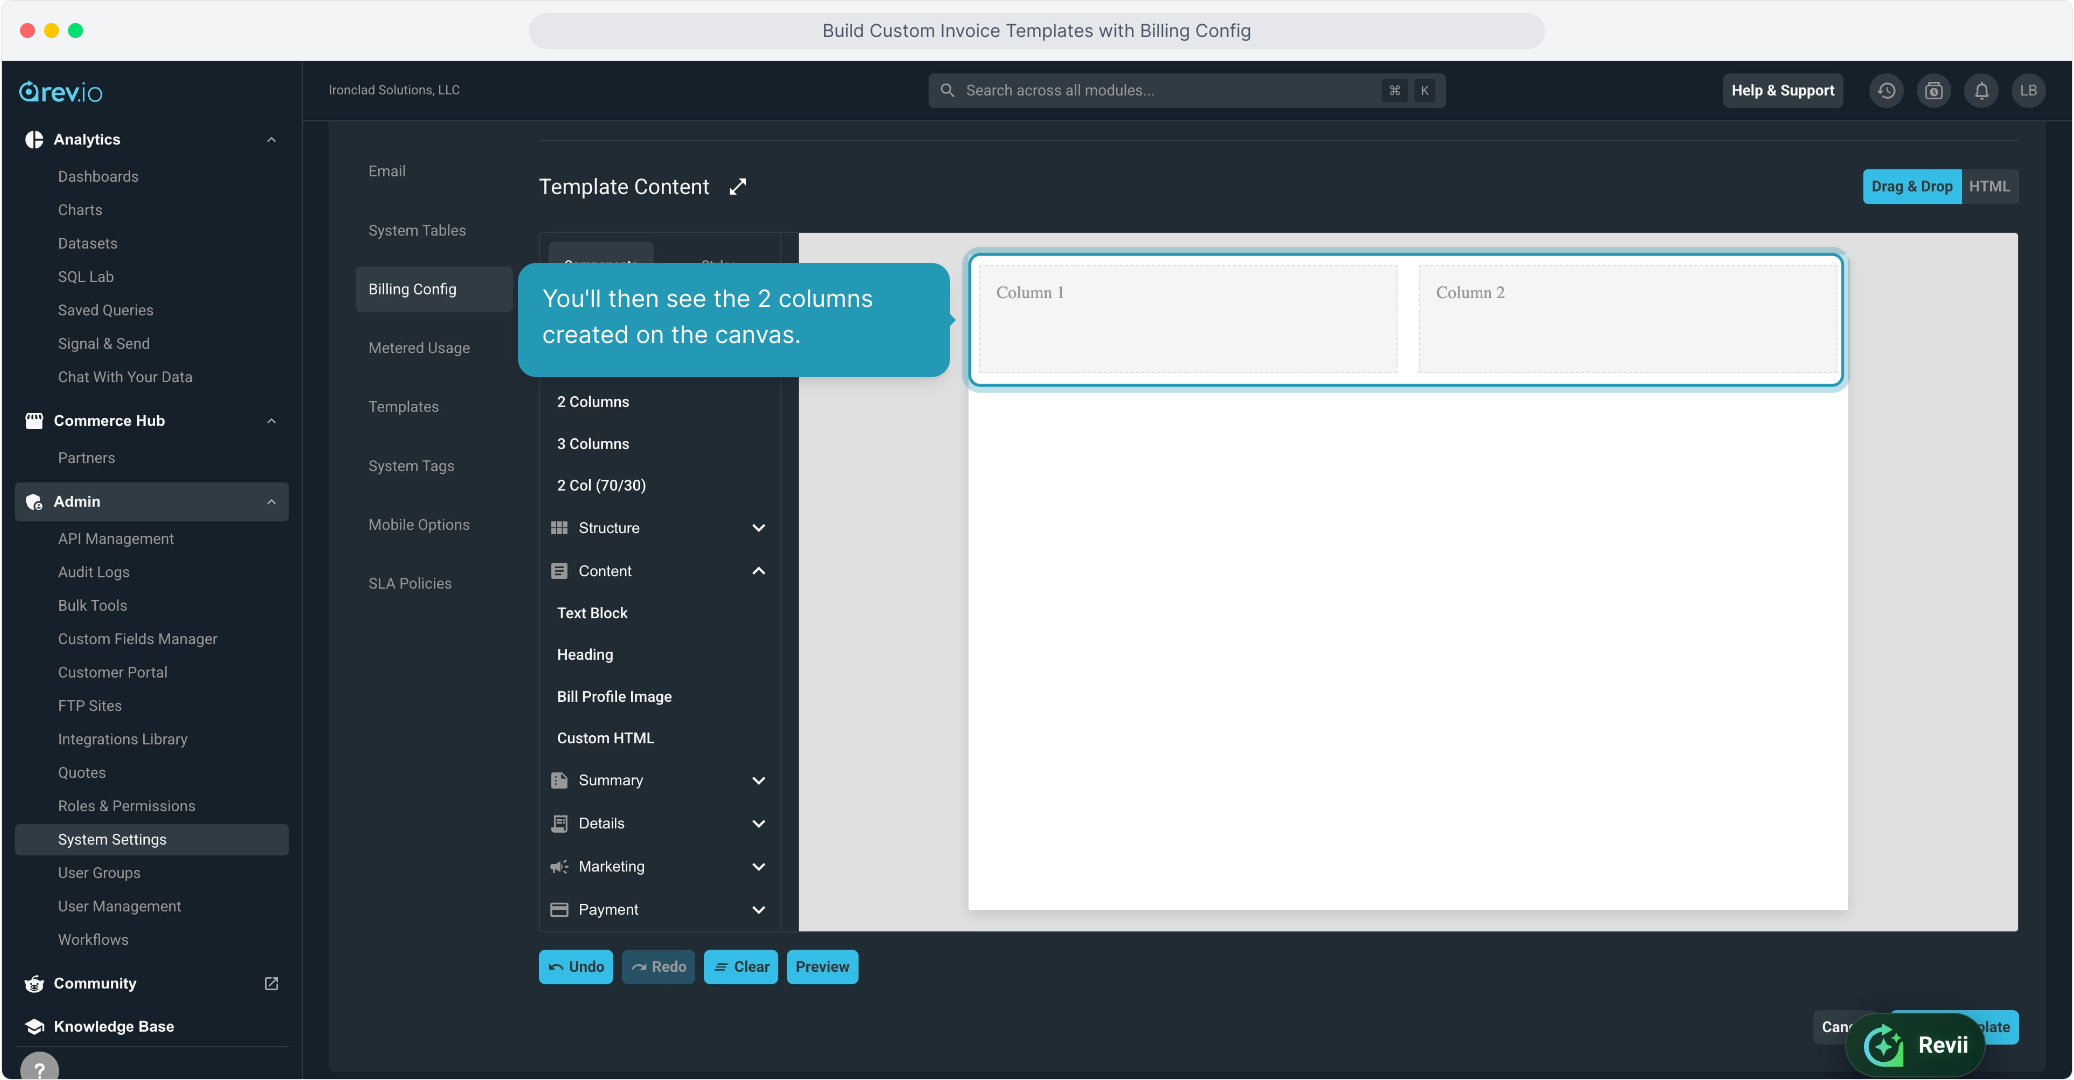
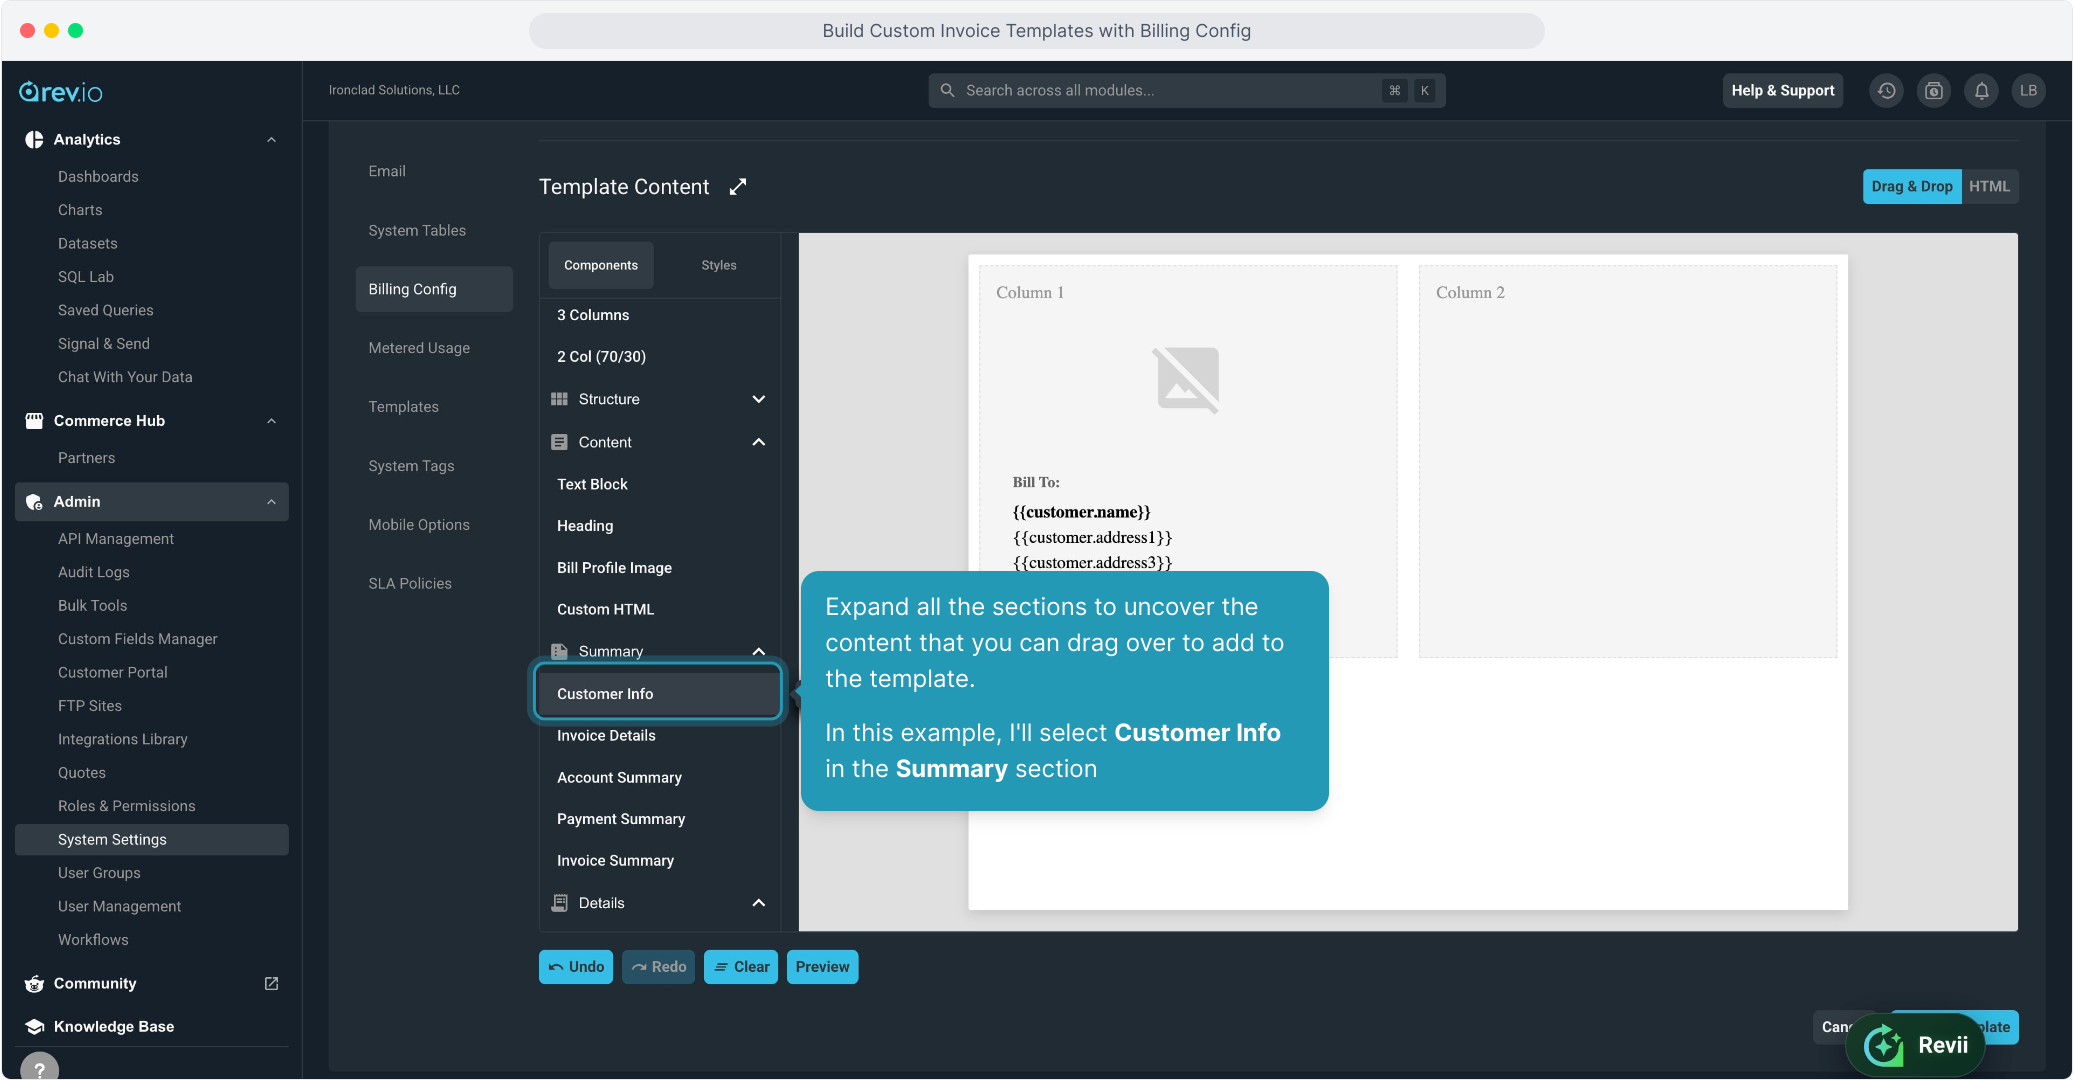
12. Expand all the sections to uncover the content that you can drag over to add to the template.
In this example, I'll select Customer Info in the Summary section
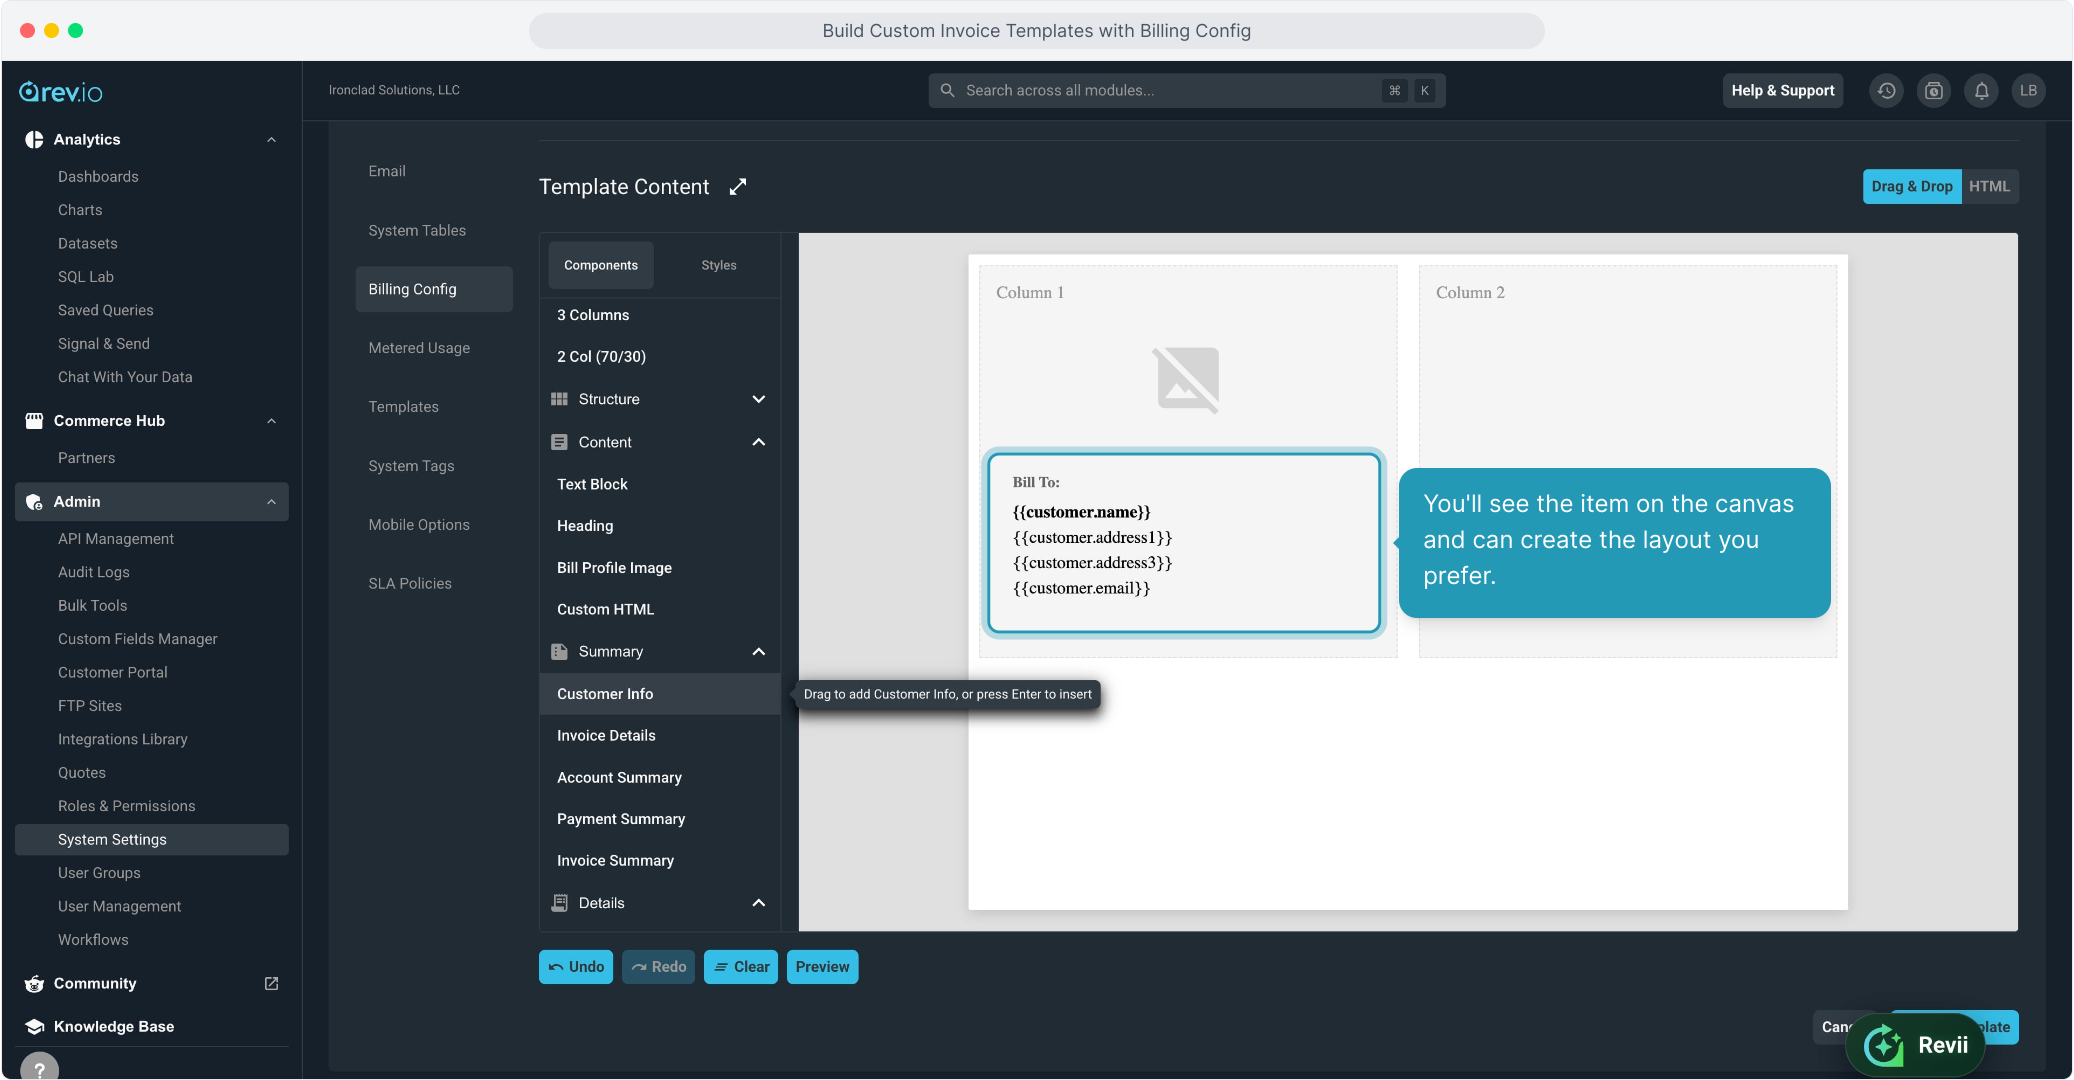
13. You'll see the item on the canvas and can create the layout you prefer.
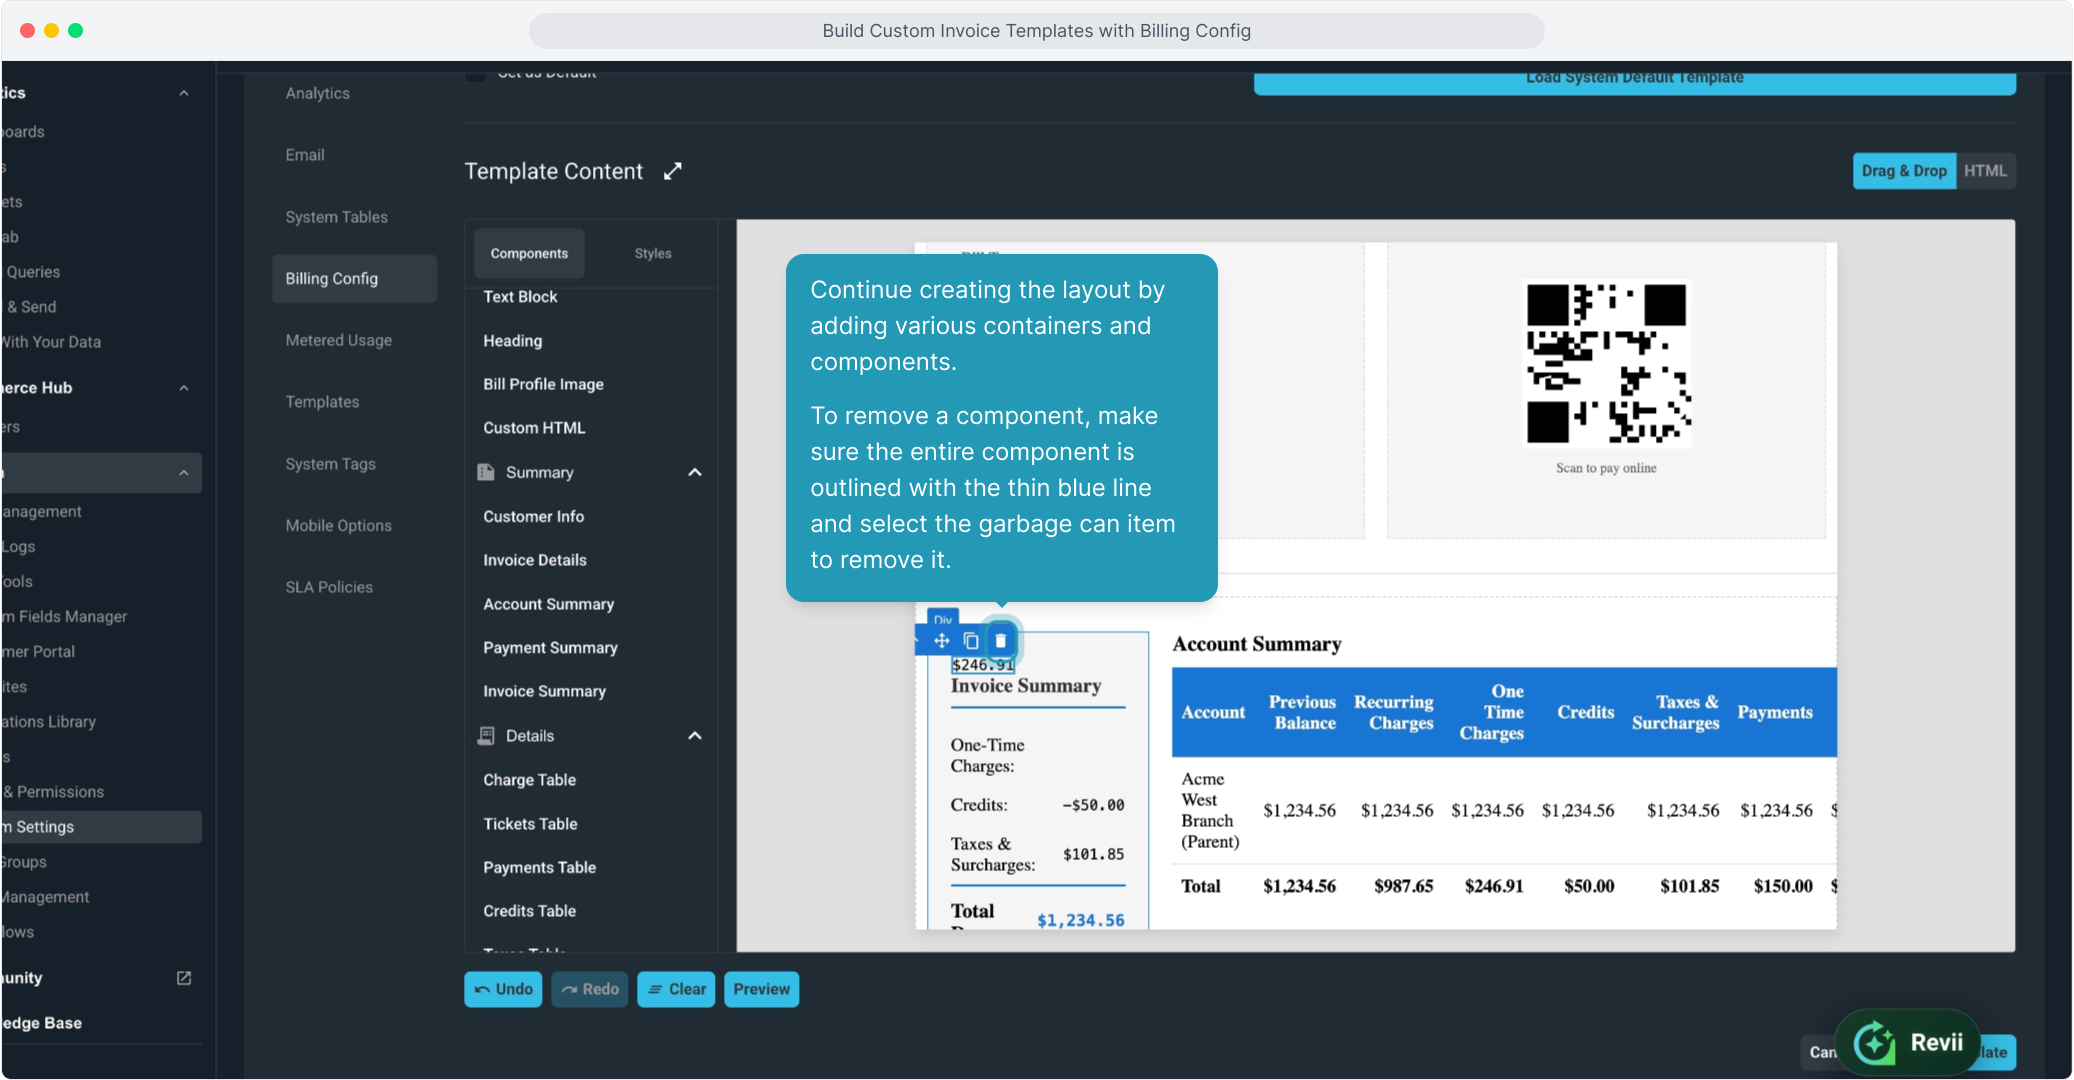
14. Continue creating the layout by adding various containers and components.
To remove a component, make sure the entire component is outlined with the thin blue line and select the garbage can item to remove it.
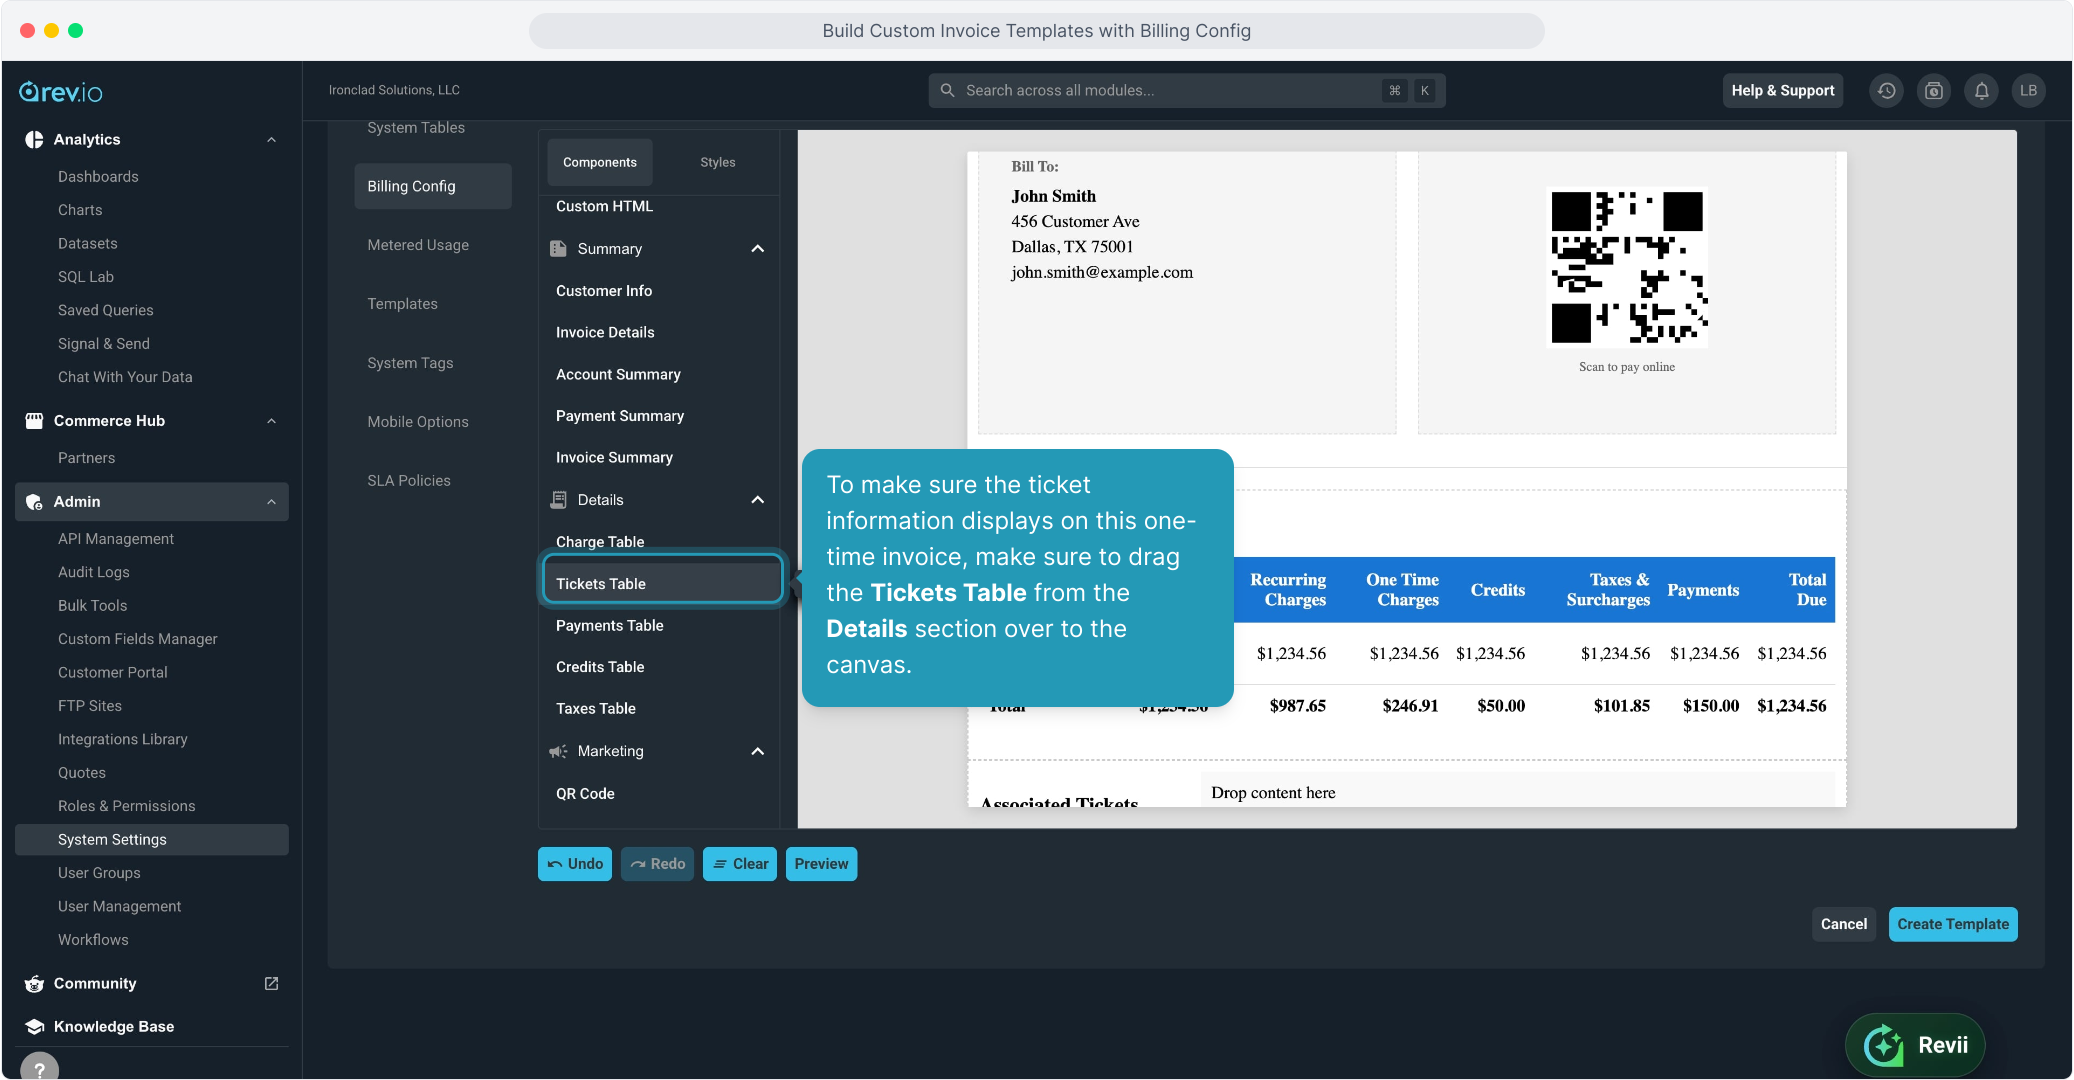
15. To make sure the ticket information displays on this one-time invoice, make sure to drag the Tickets Table from the Details section over to the canvas.
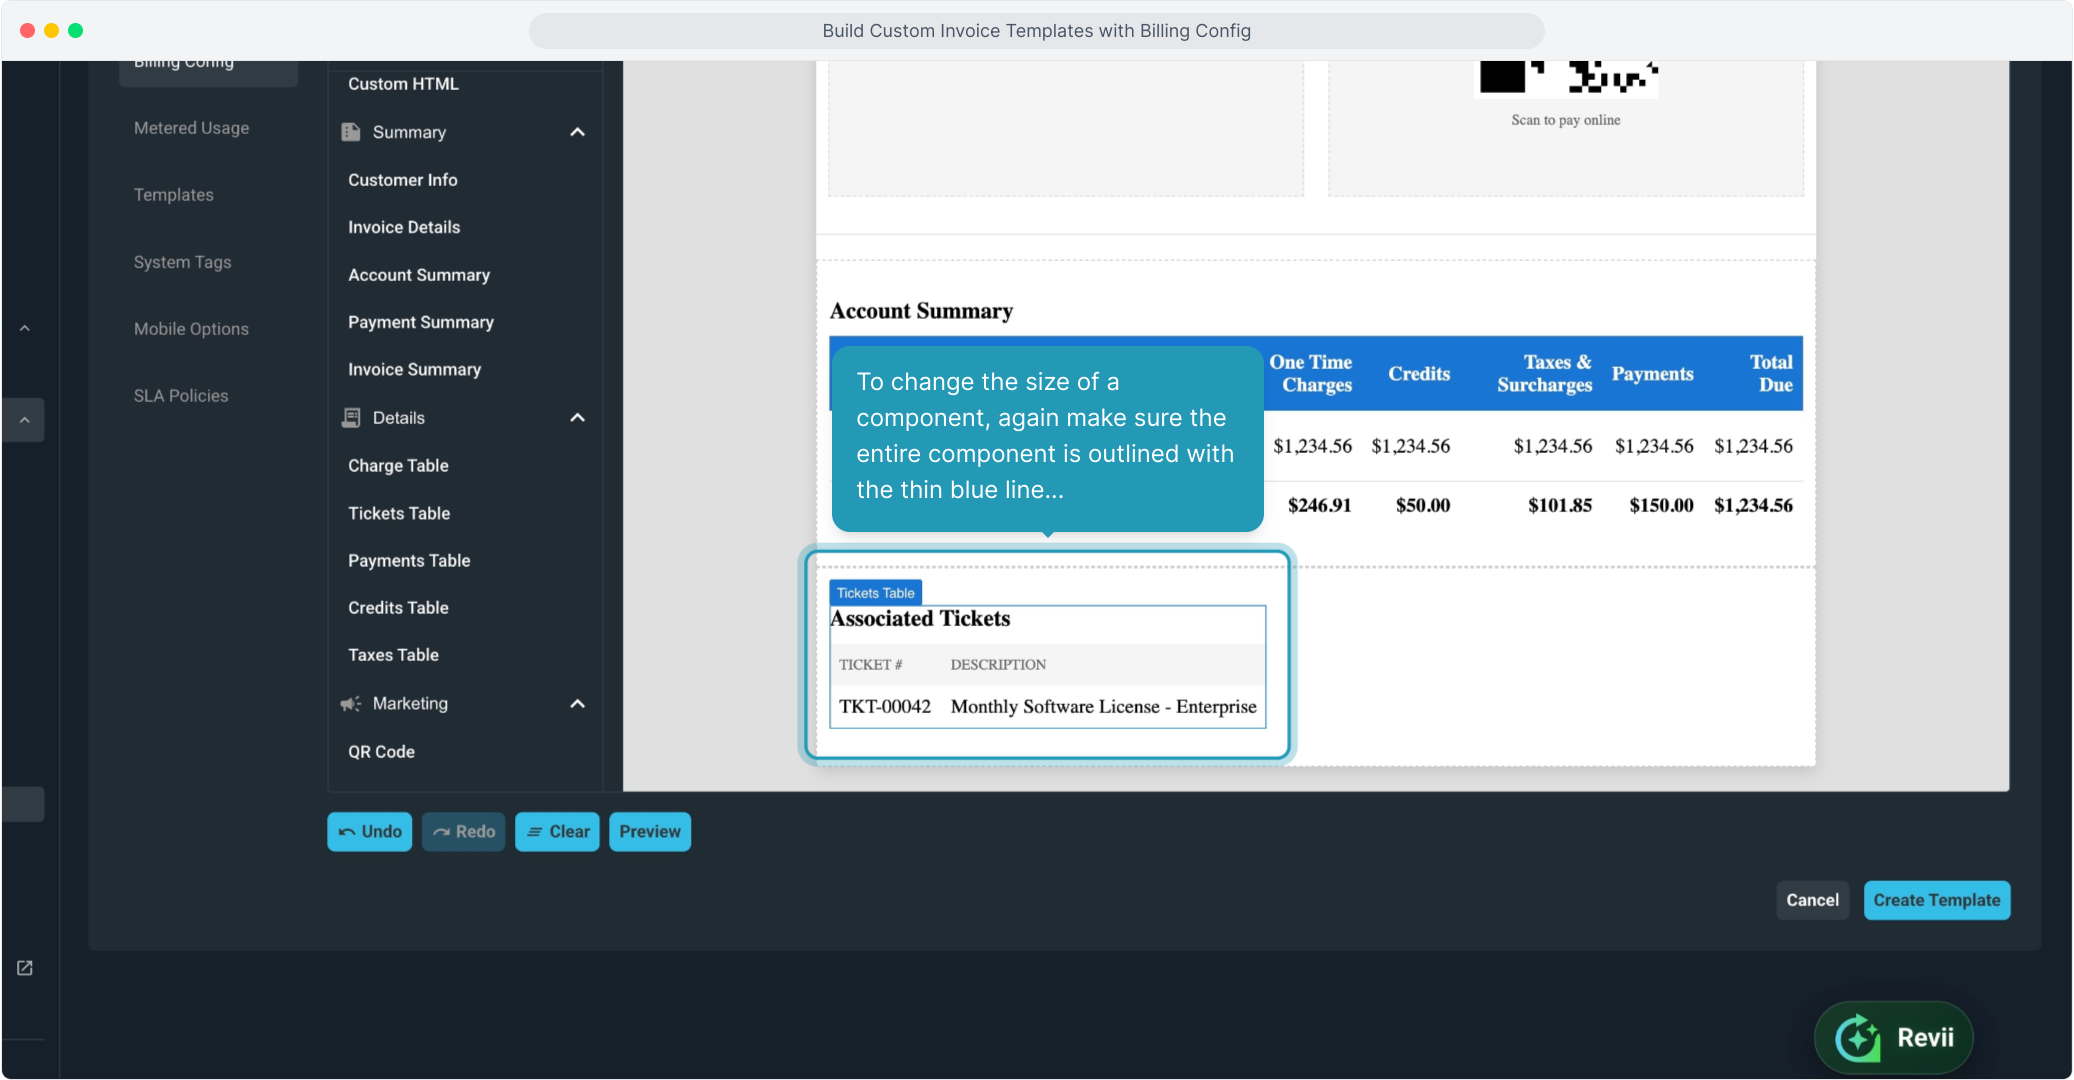
16. To change the size of a component, again make sure the entire component is outlined with the thin blue line...
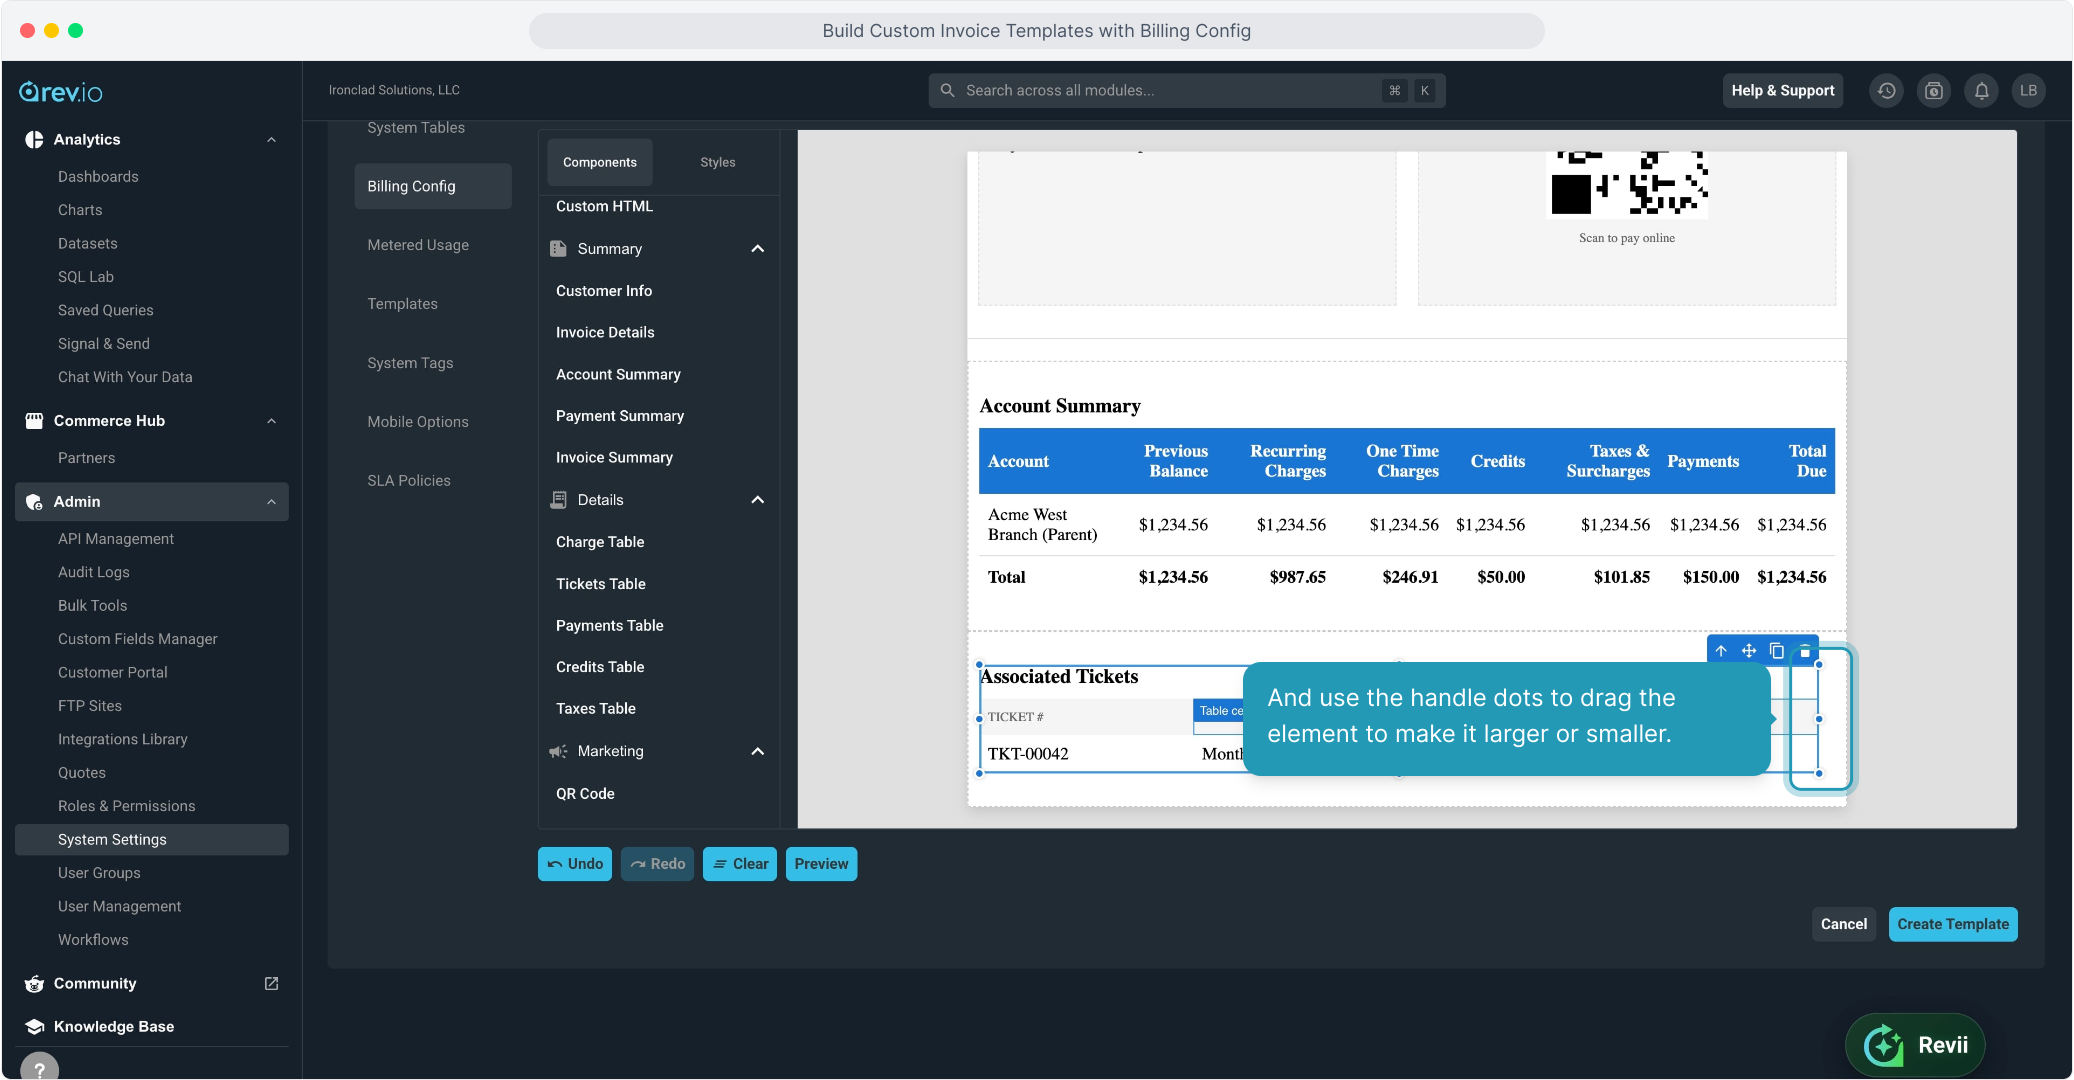
17. And use the handle dots to drag the element to make it larger or smaller.
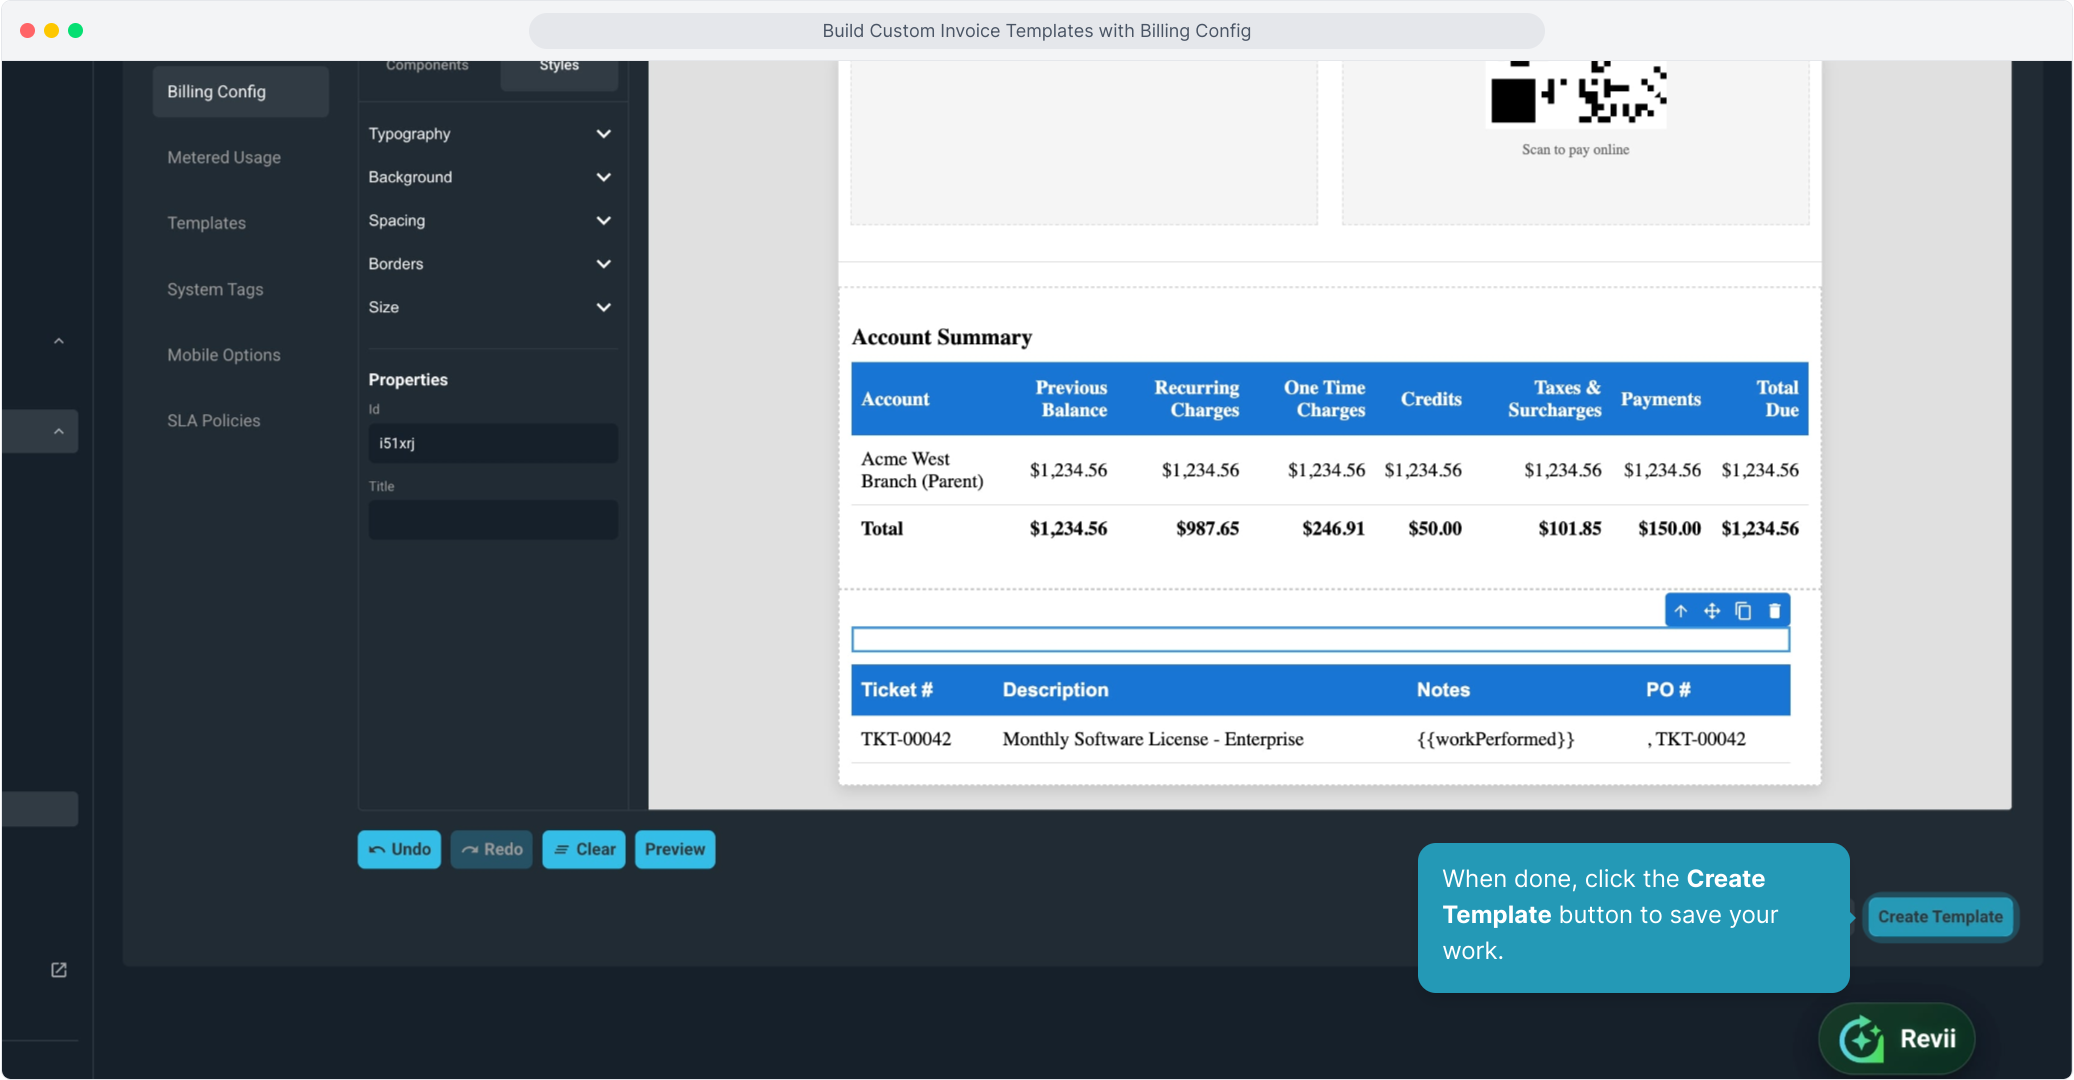
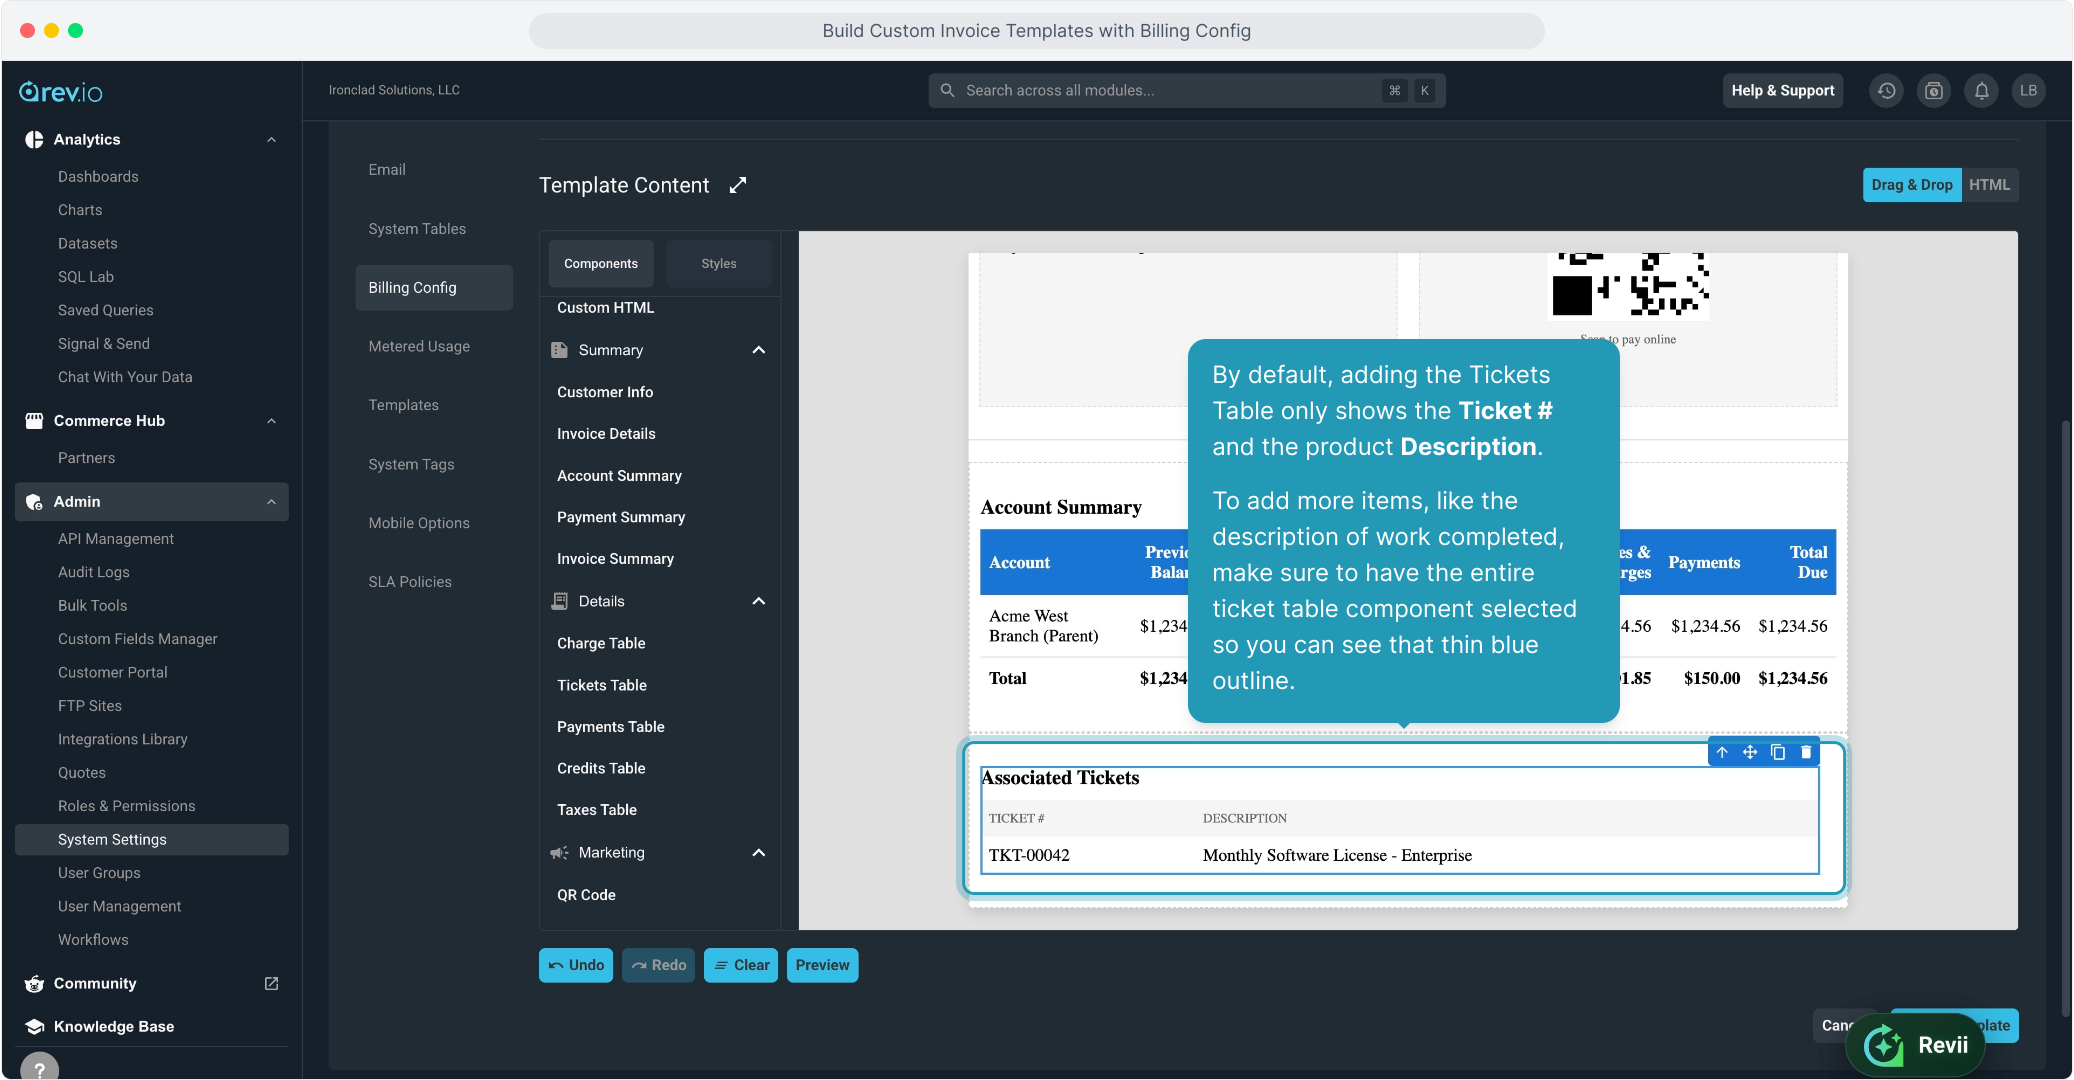
18. By default, adding the Tickets Table only shows the Ticket # and the product Description.
To add more items, like the description of work completed, make sure to have the entire ticket table component selected so you can see that thin blue outline.
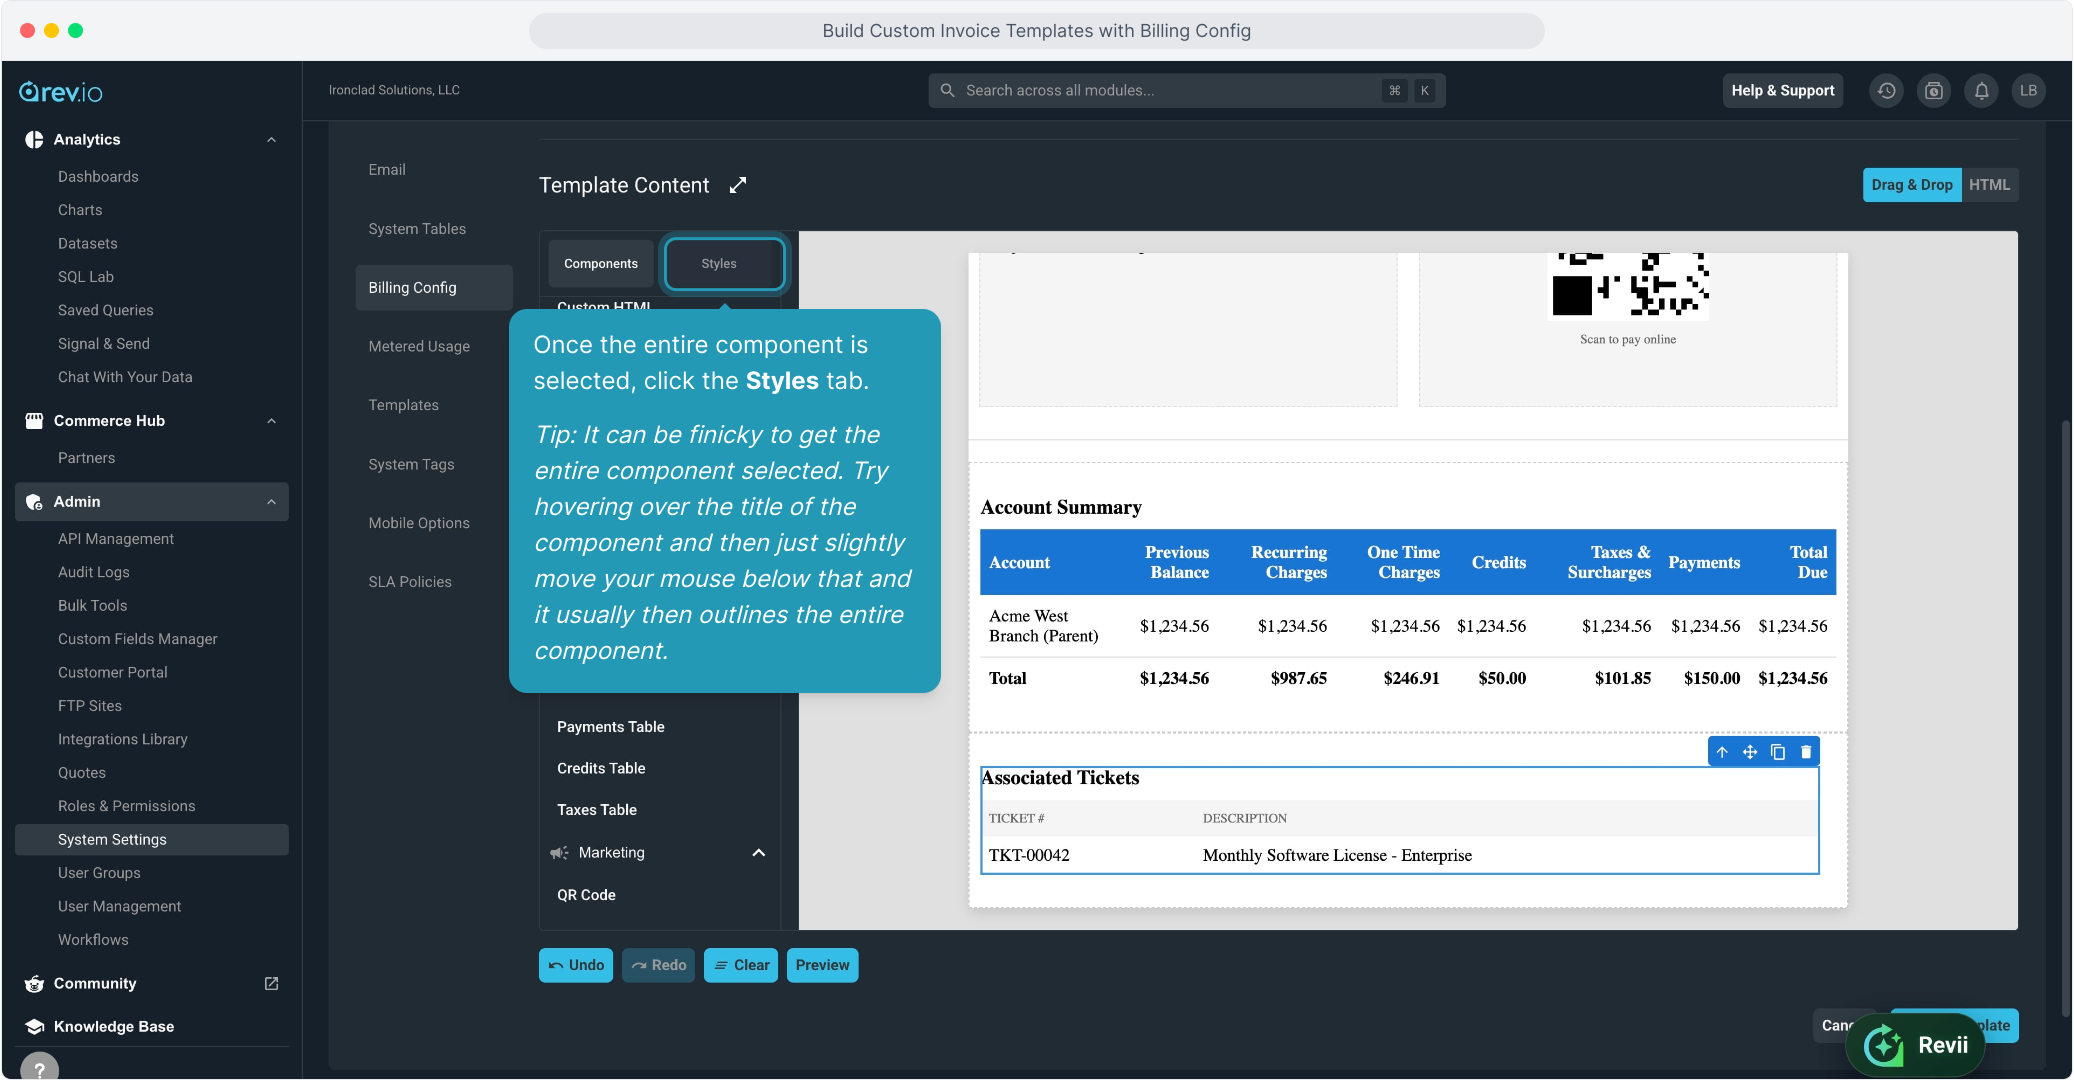
19. Once the entire component is selected, click the Styles tab.
Tip: It can be finicky to get the entire component selected. Try hovering over the title of the component and then just slightly move your mouse below that and it usually then outlines the entire component.
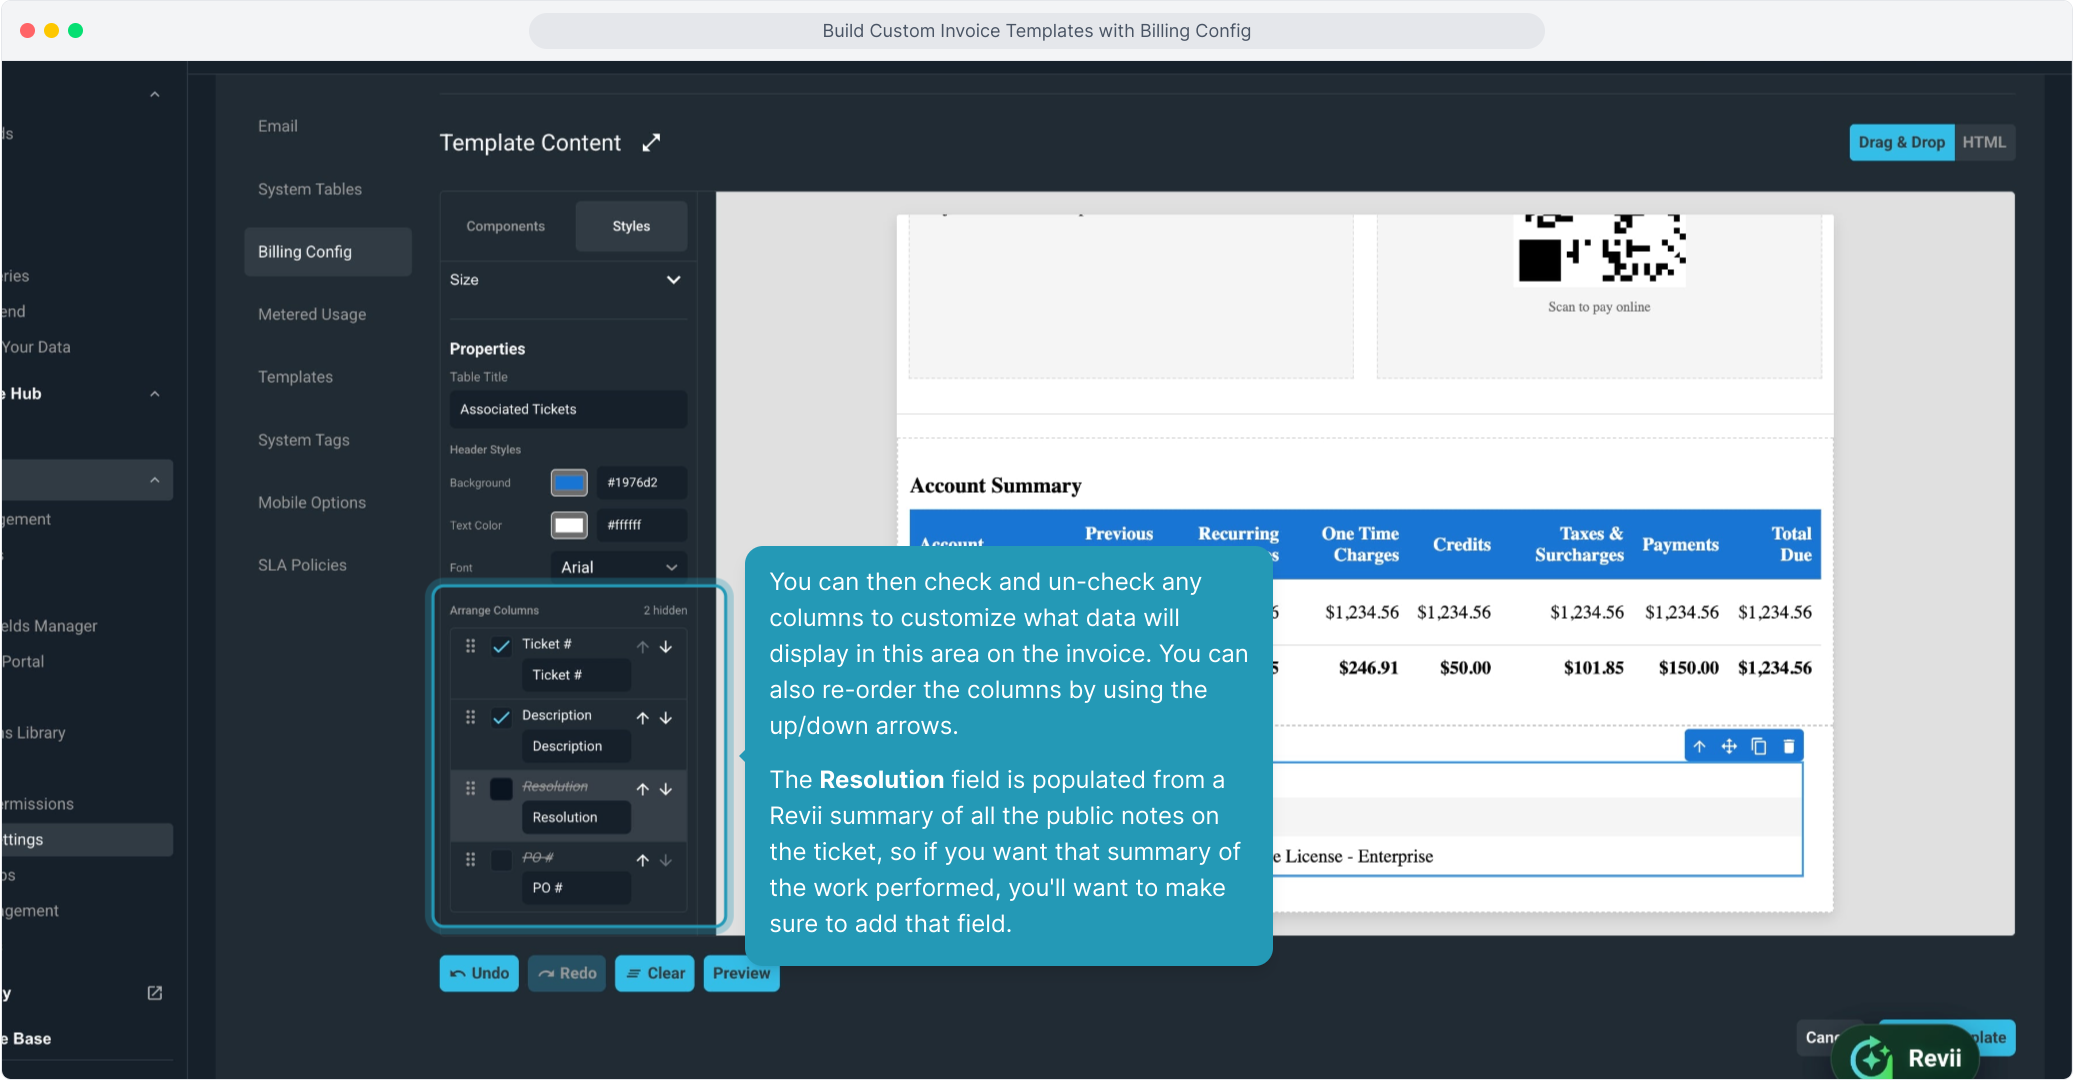
20. You can then check and un-check any columns to customize what data will display in this area on the invoice. You can also re-order the columns by using the up/down arrows.
The Resolution field is populated from a Revii summary of all the public notes on the ticket, so if you want that summary of the work performed, you'll want to make sure to add that field.
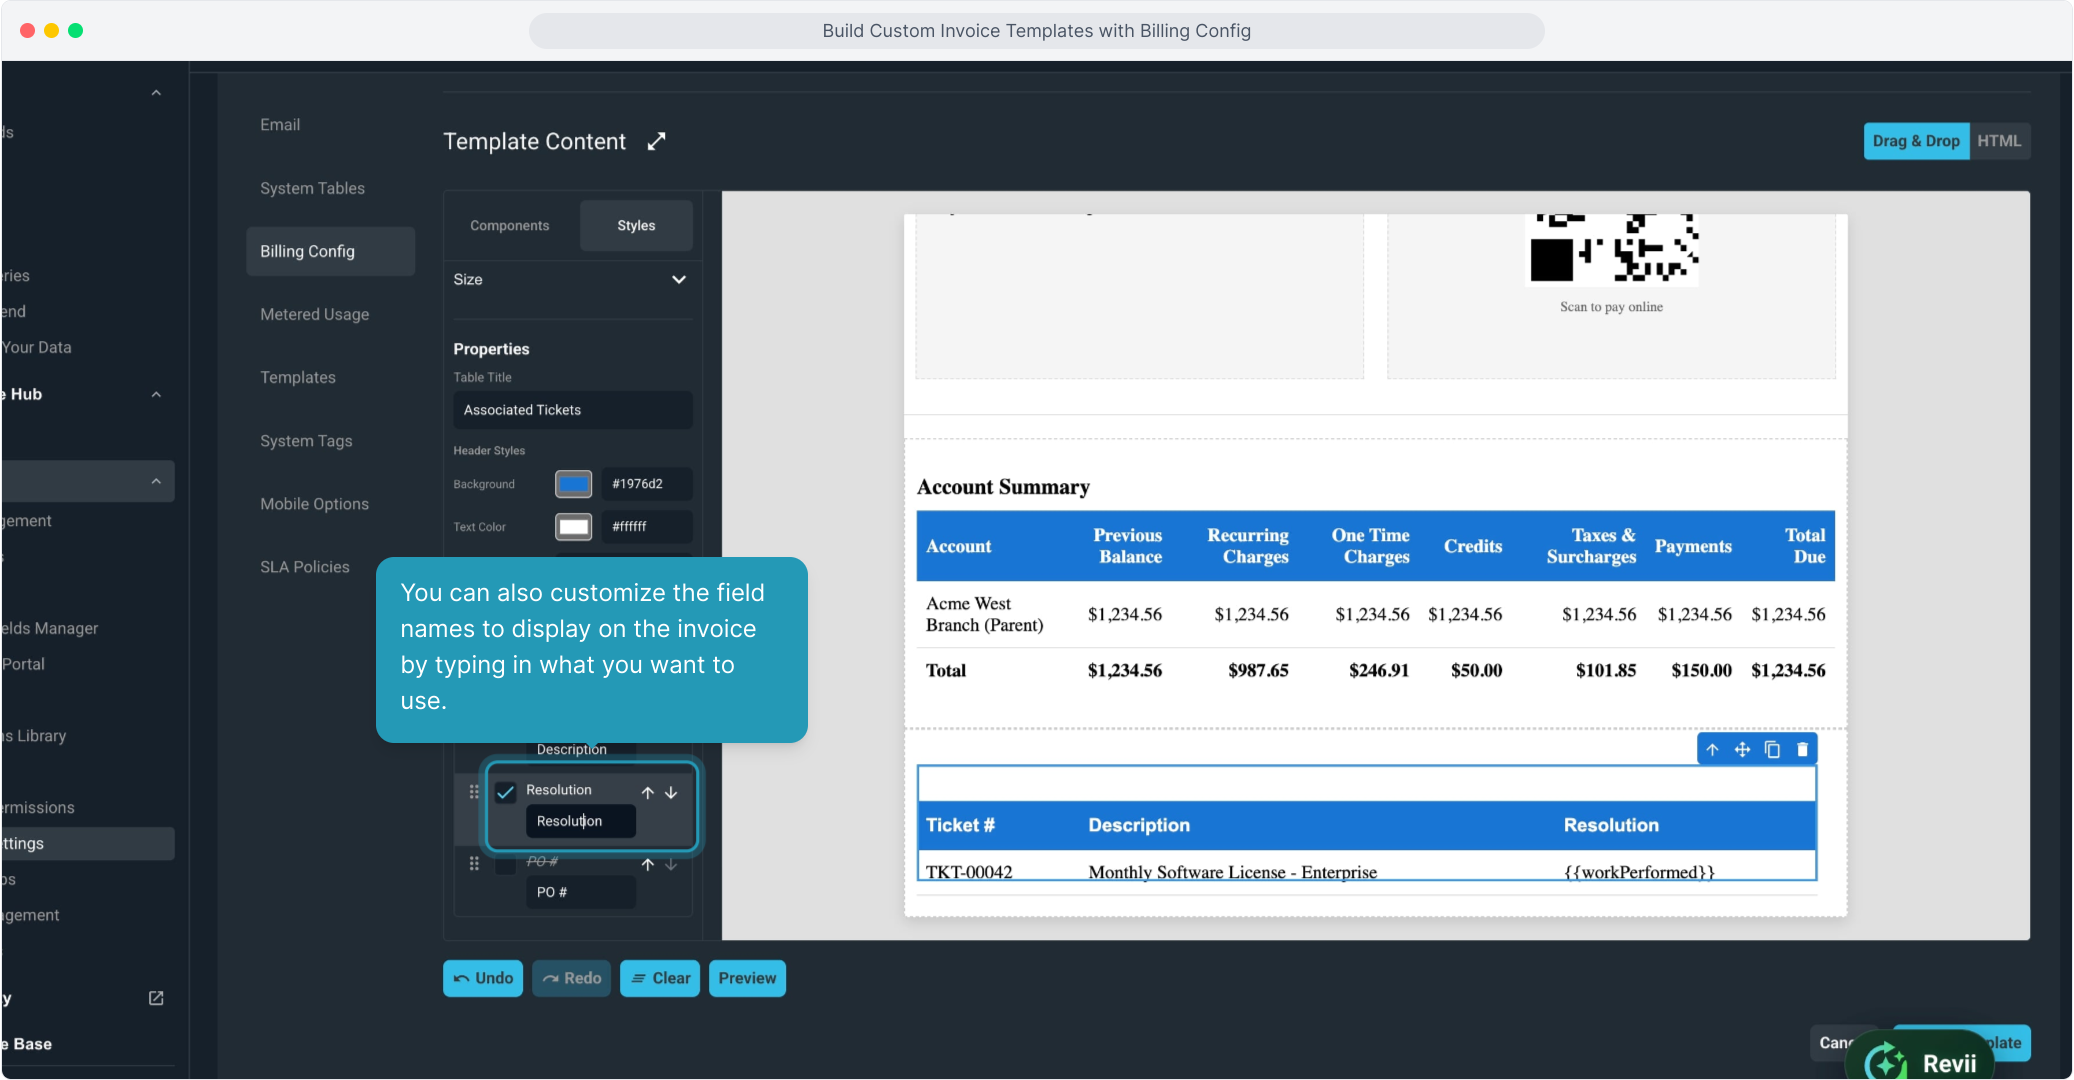
21. You can also customize the field names to display on the invoice by typing in what you want to use.
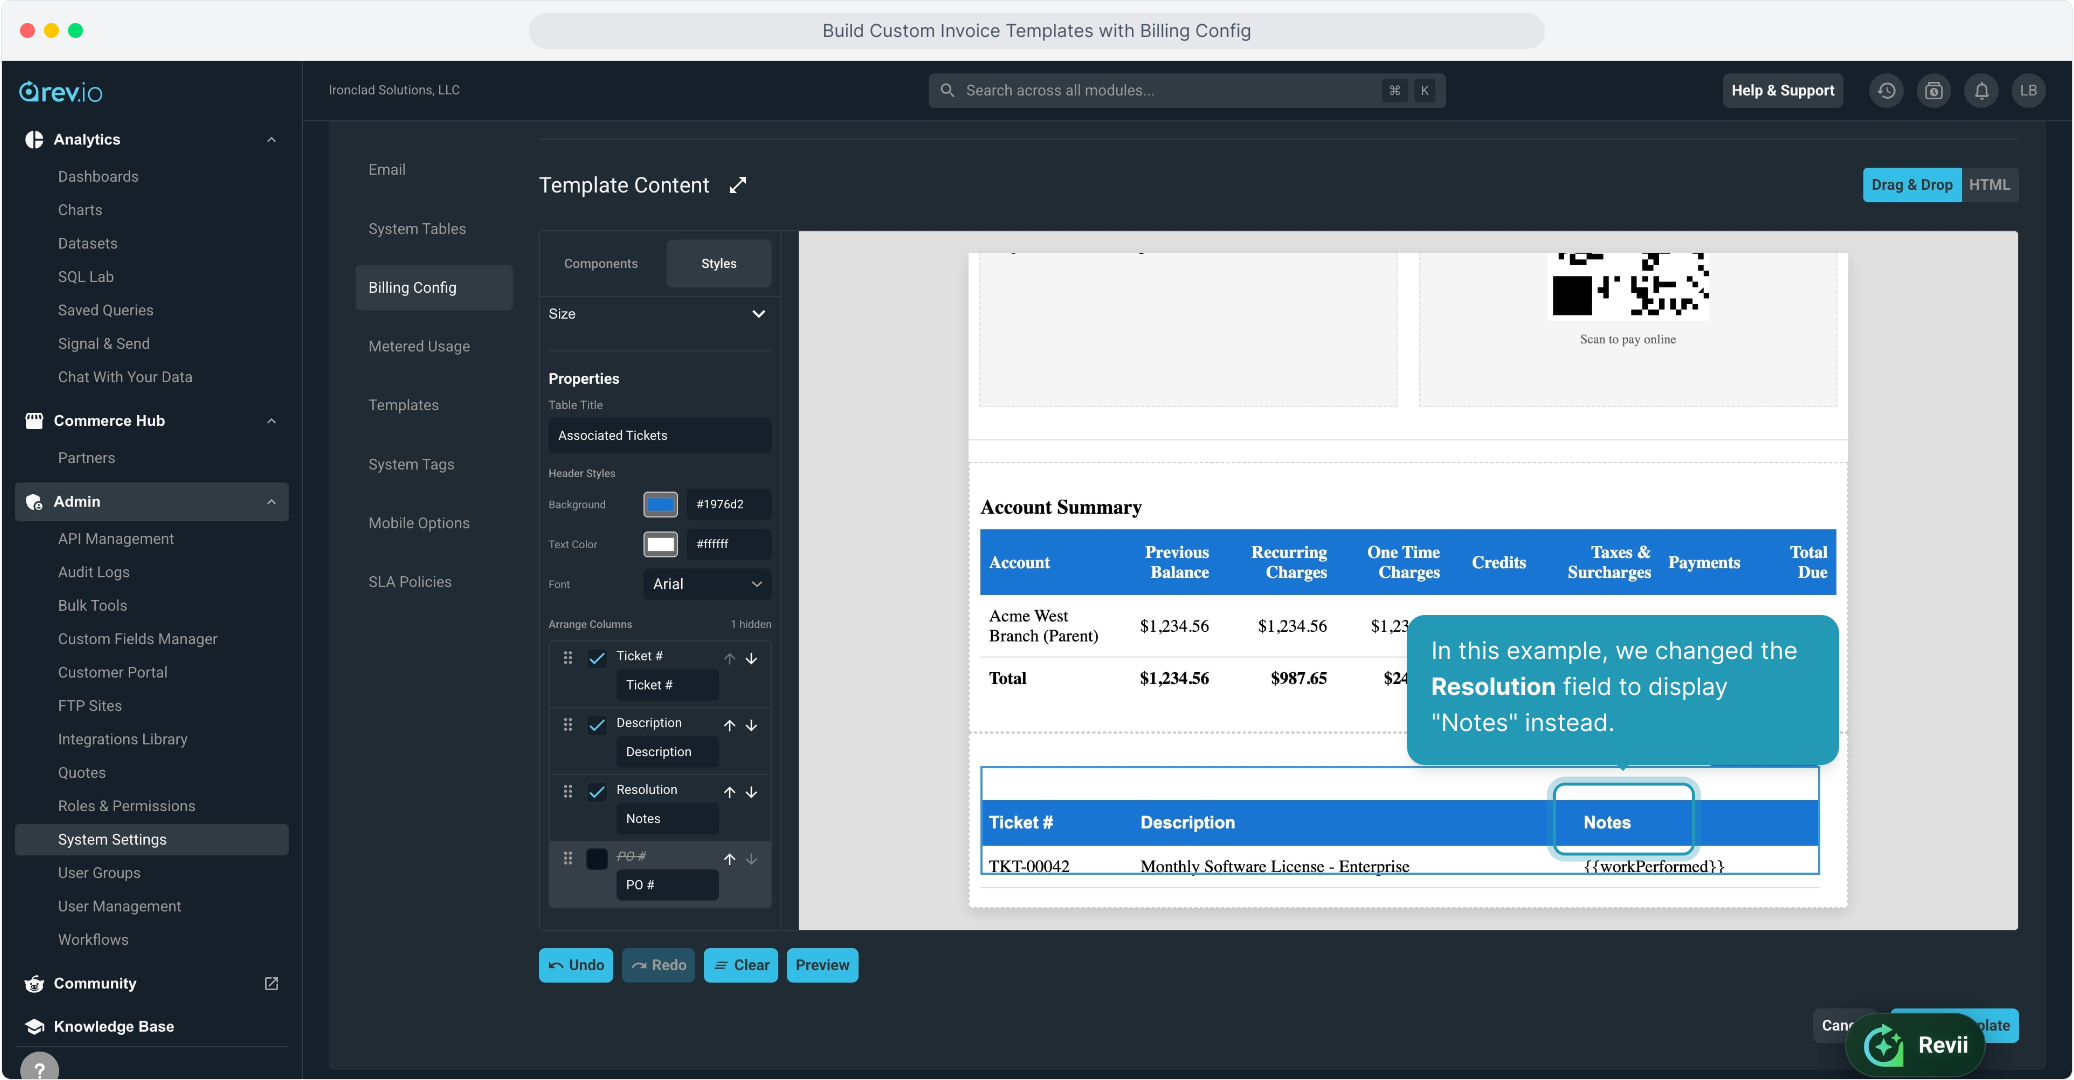
22. In this example, we changed the Resolution field to display "Notes" instead.
23. When done, click the Create Template button to save your work.