How To Guide: Managing Tickets - Tasks
1. Introduction
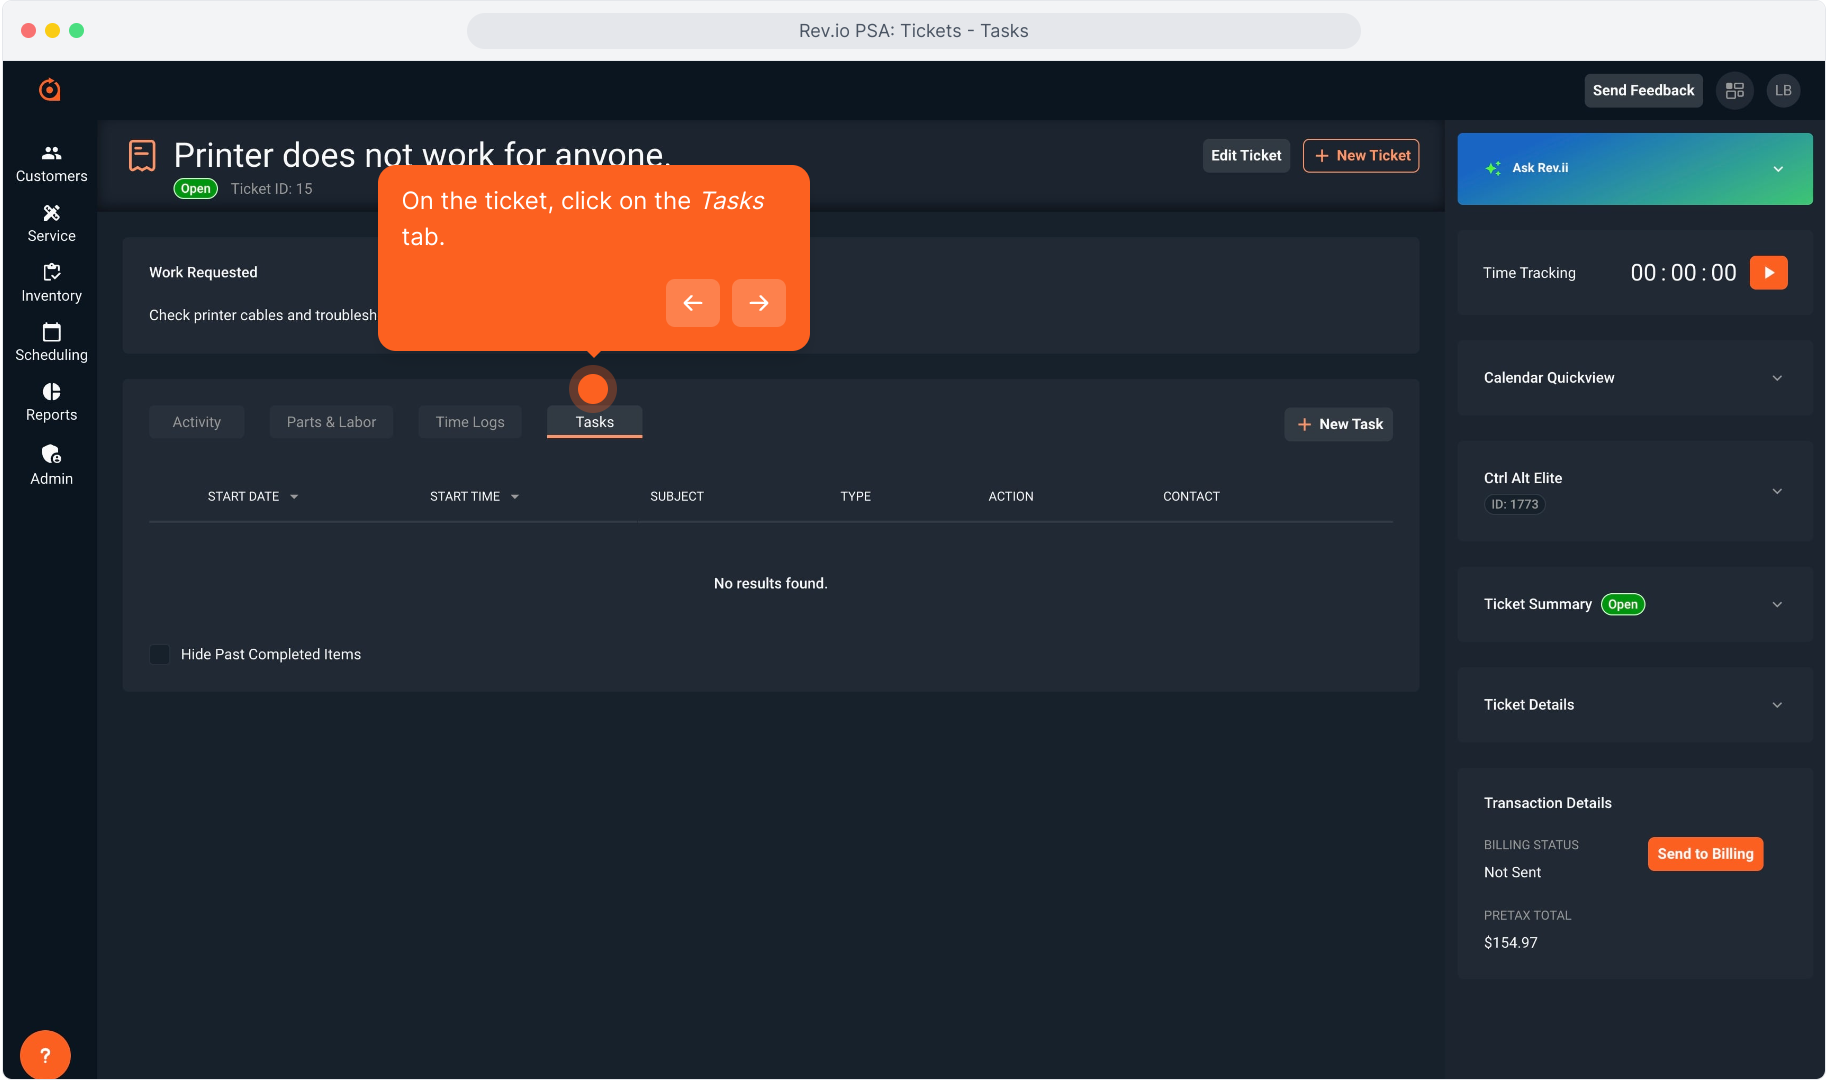
2. On the ticket, click on the Tasks tab.
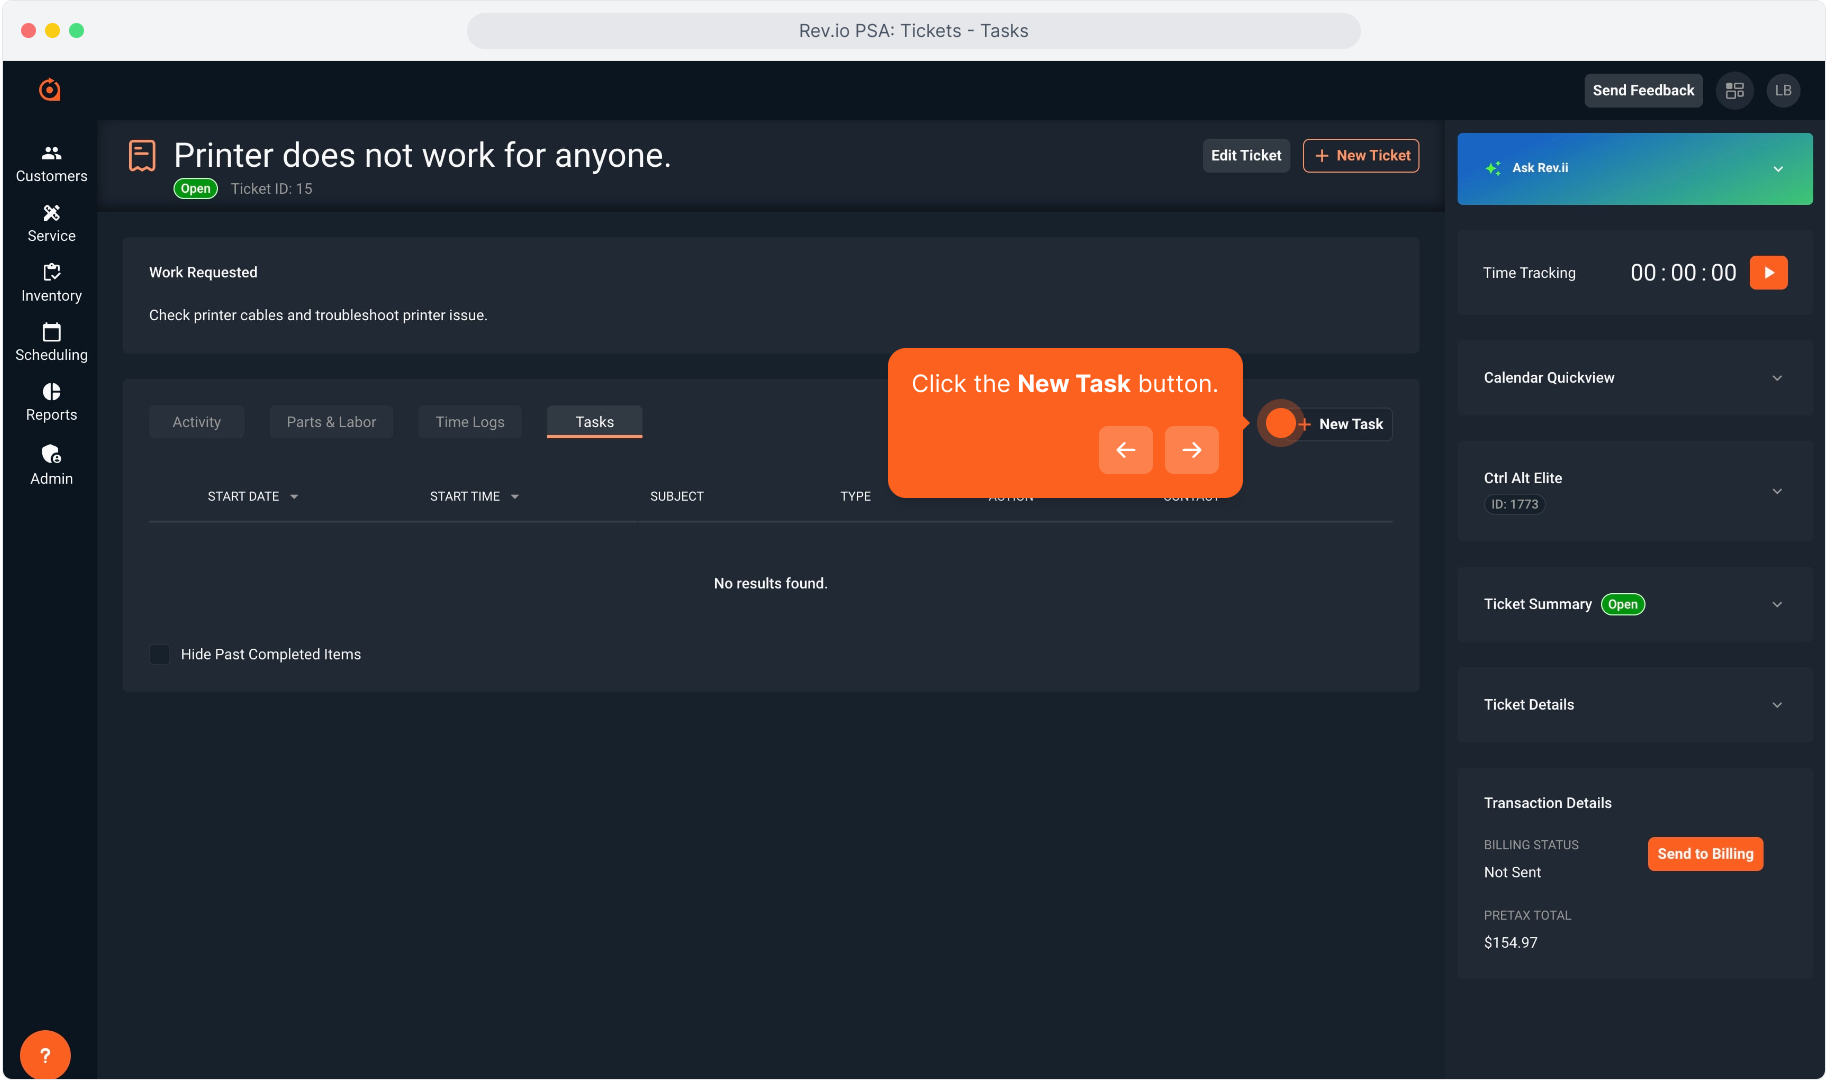
3. Click the New Task button.
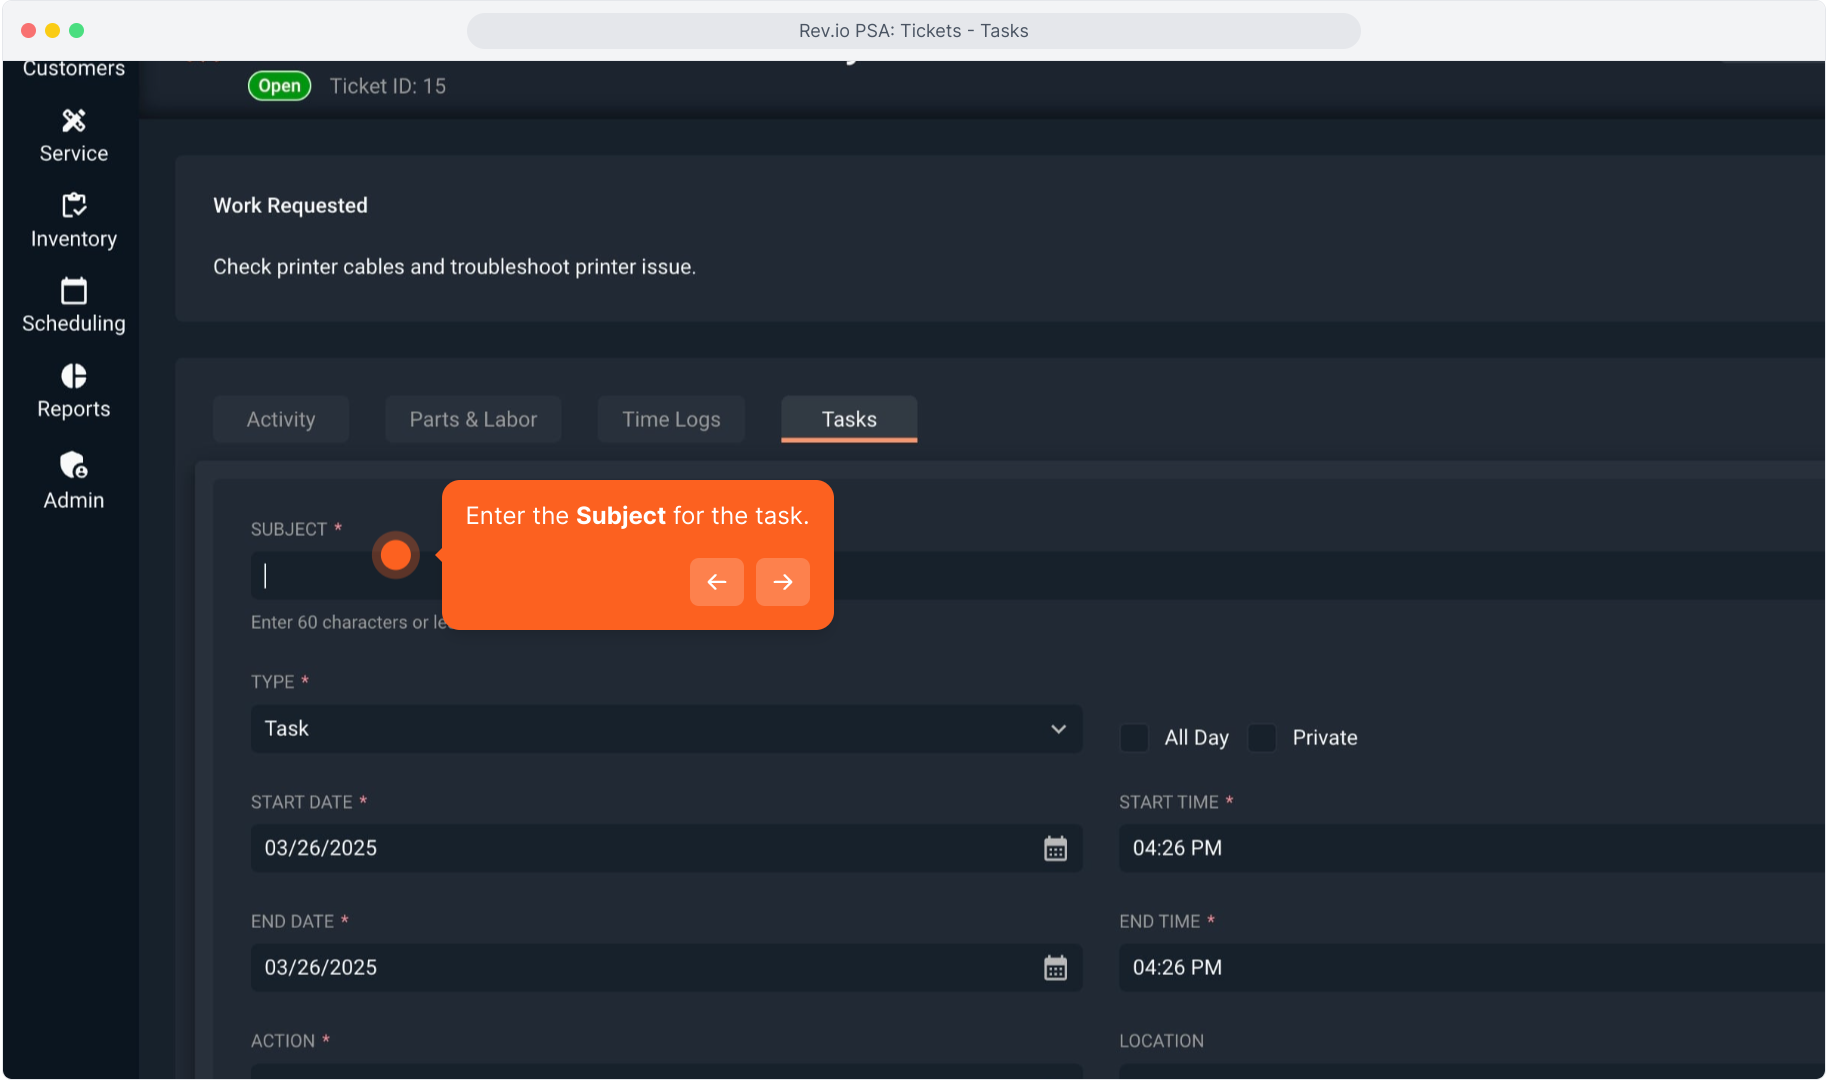
4. Enter the Subject for the task.
5. Intentionally blank.
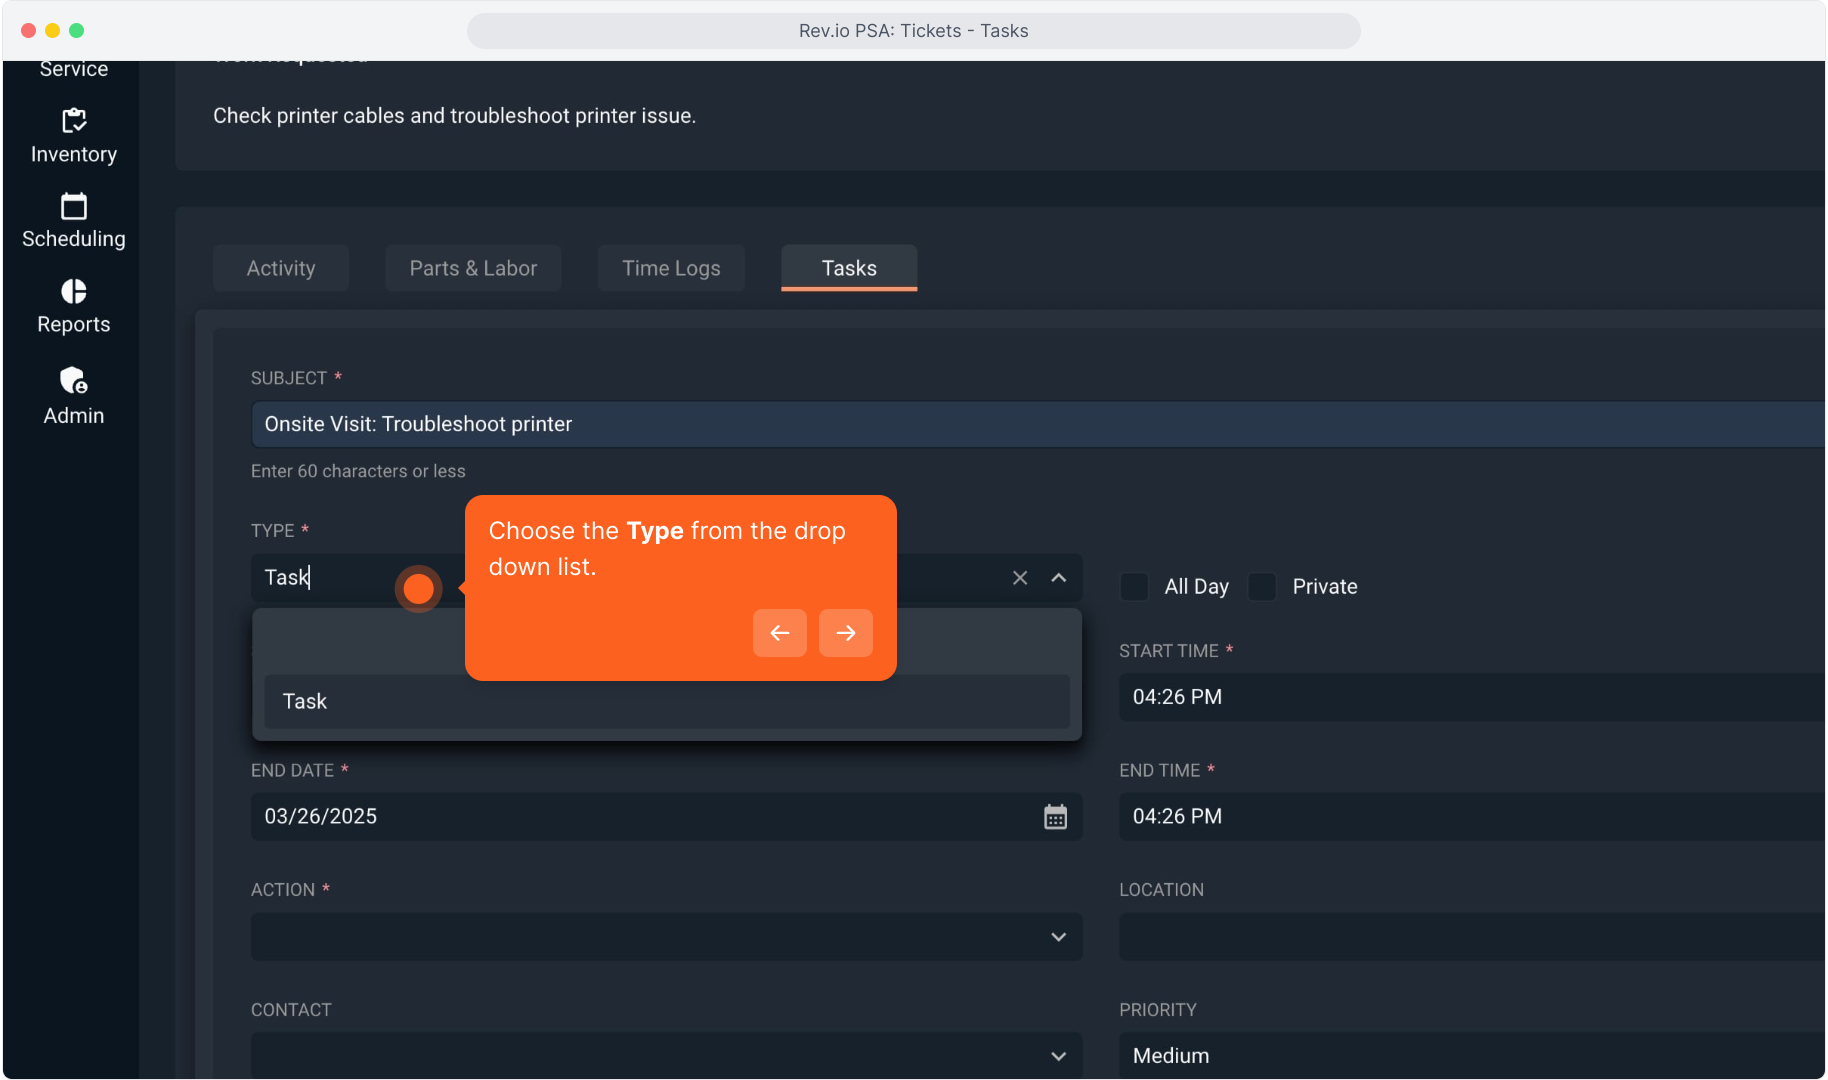
6. Choose the Type from the drop down list.
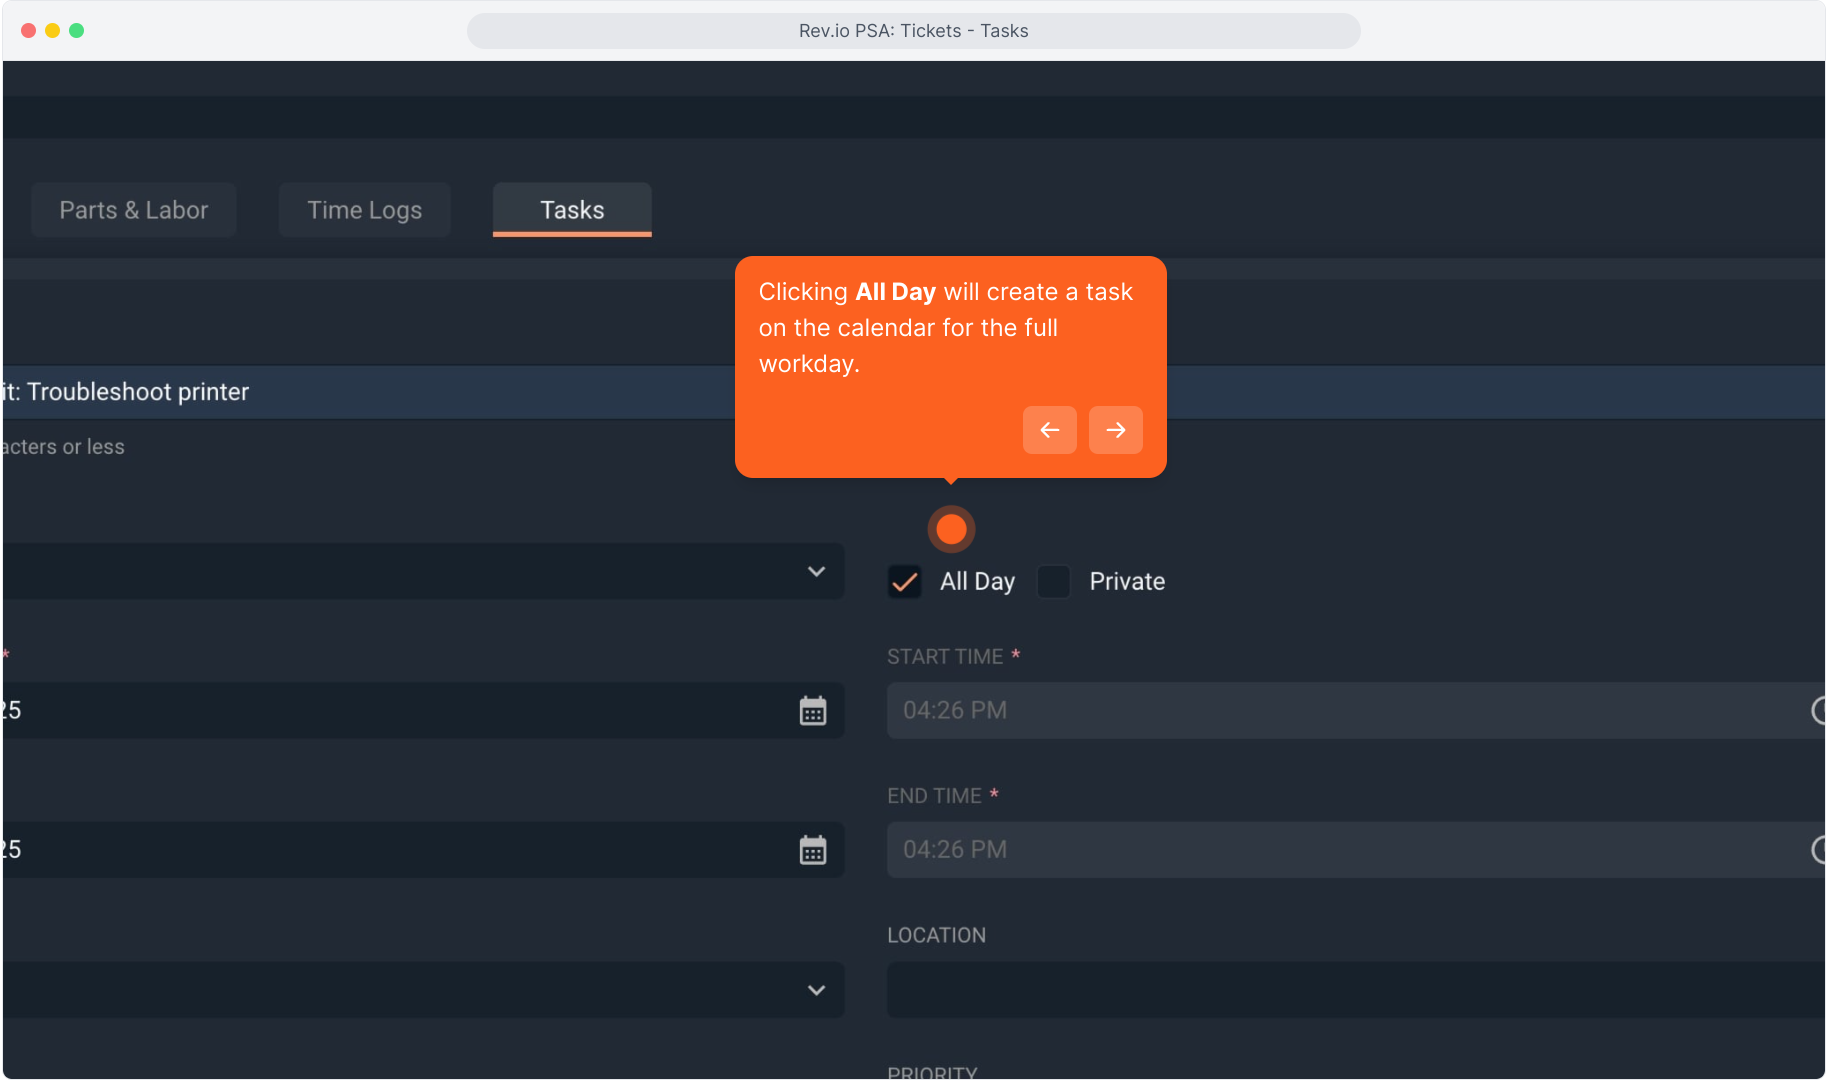
7. Clicking All Day will create a task on the calendar for the full workday.
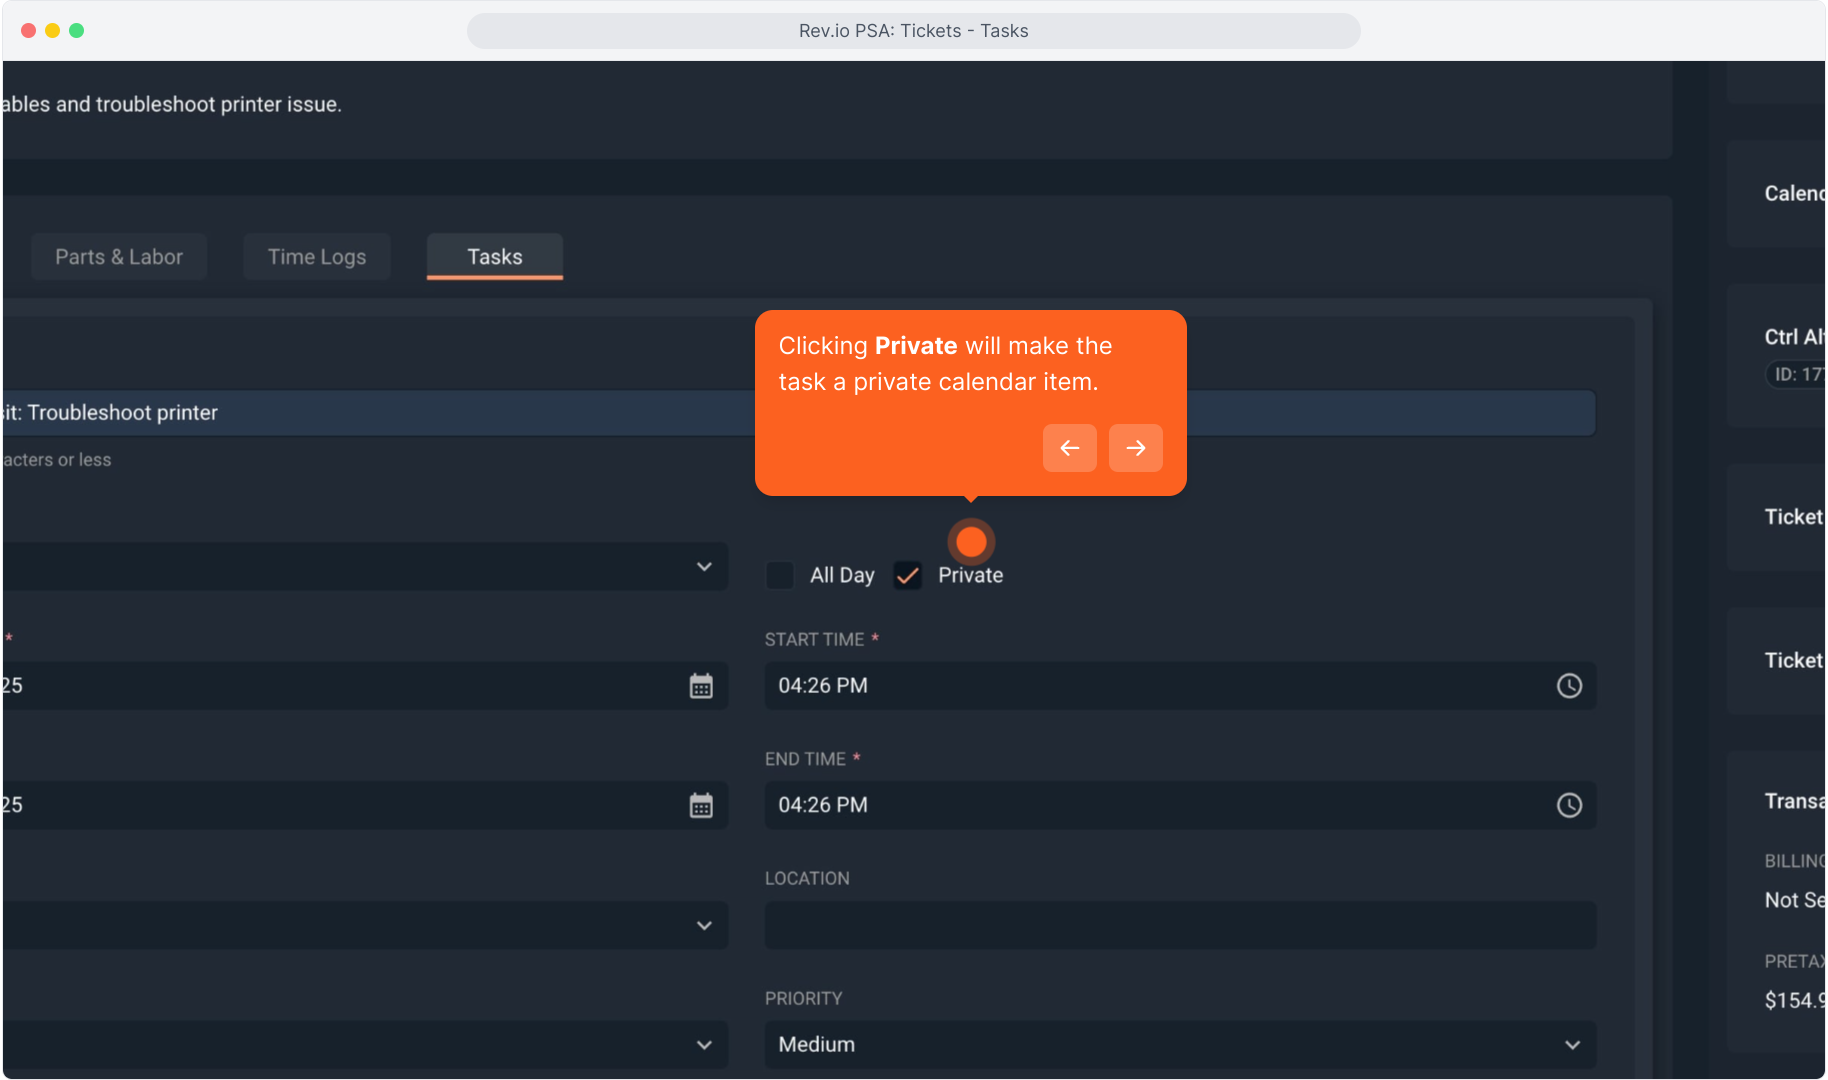
8. Clicking Private will make the task a private calendar item.
9. Select the Start Date for the task.

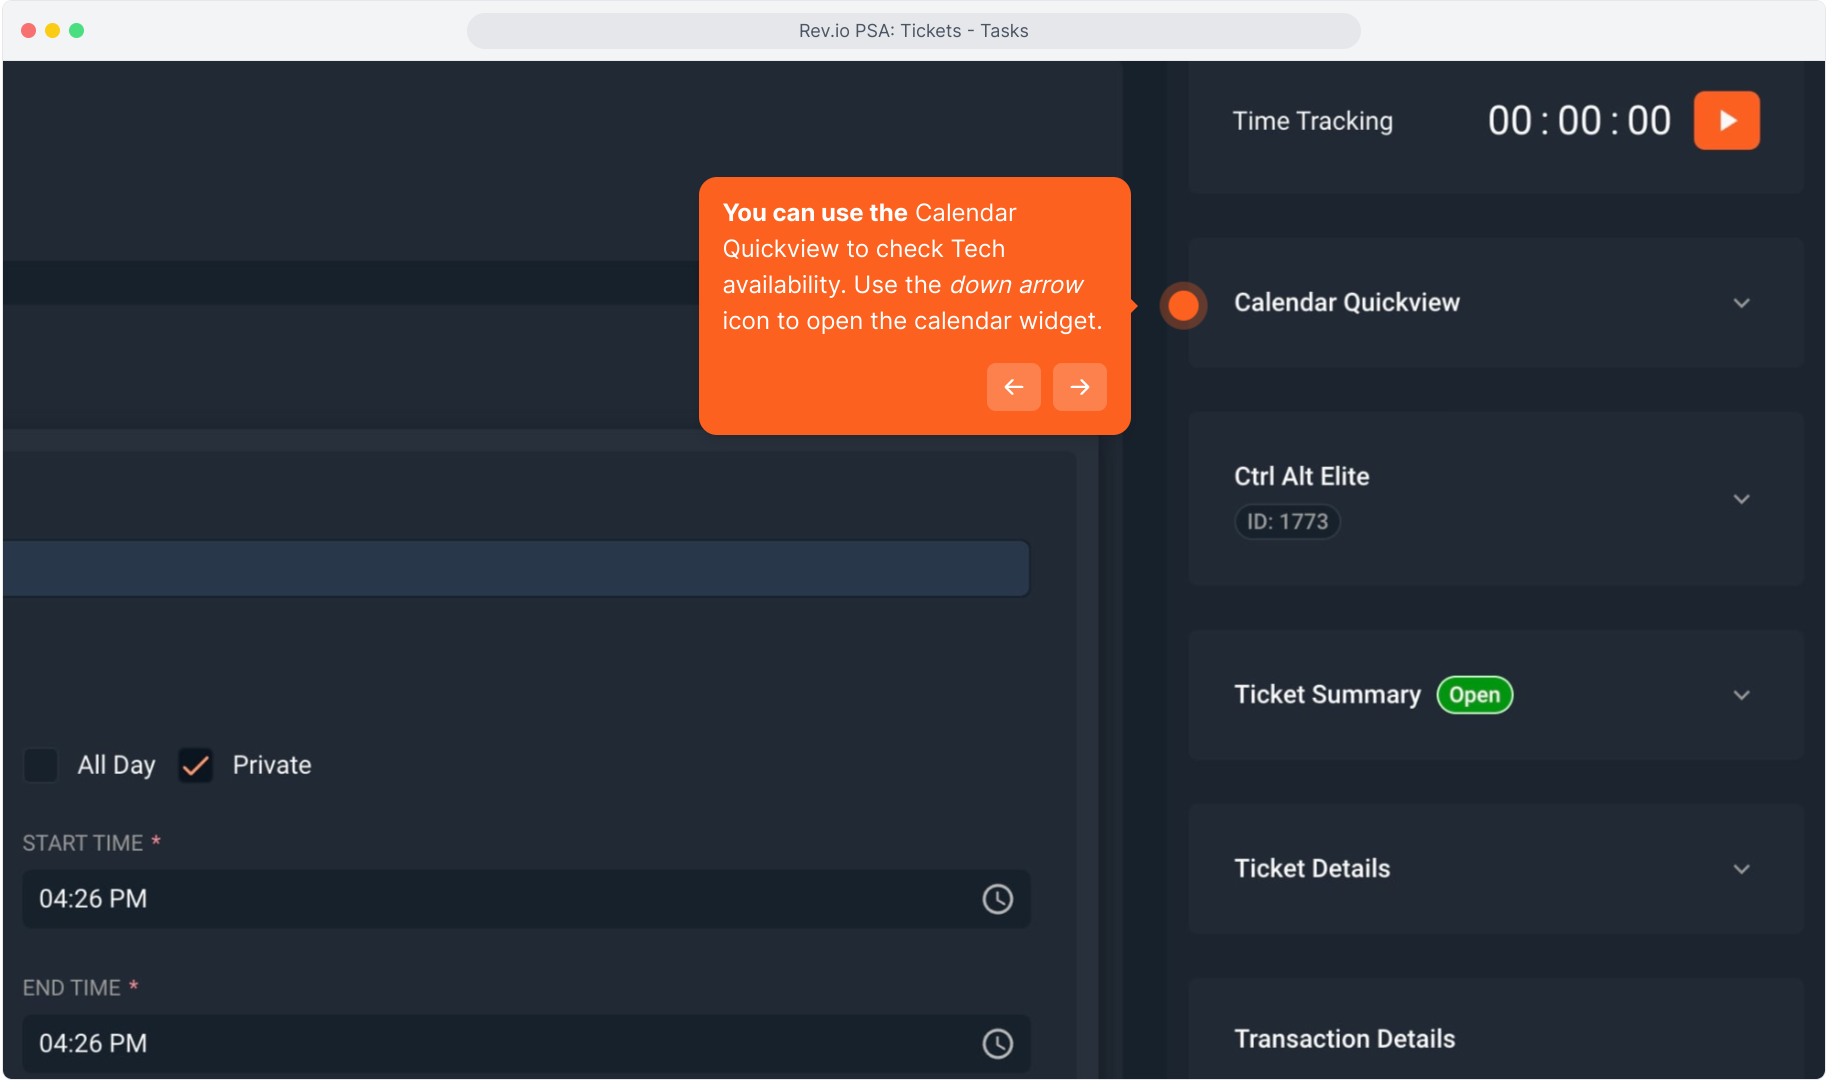
10. You can use the Calendar Quickview to check Tech availability. Use the down arrow icon to open the calendar widget.
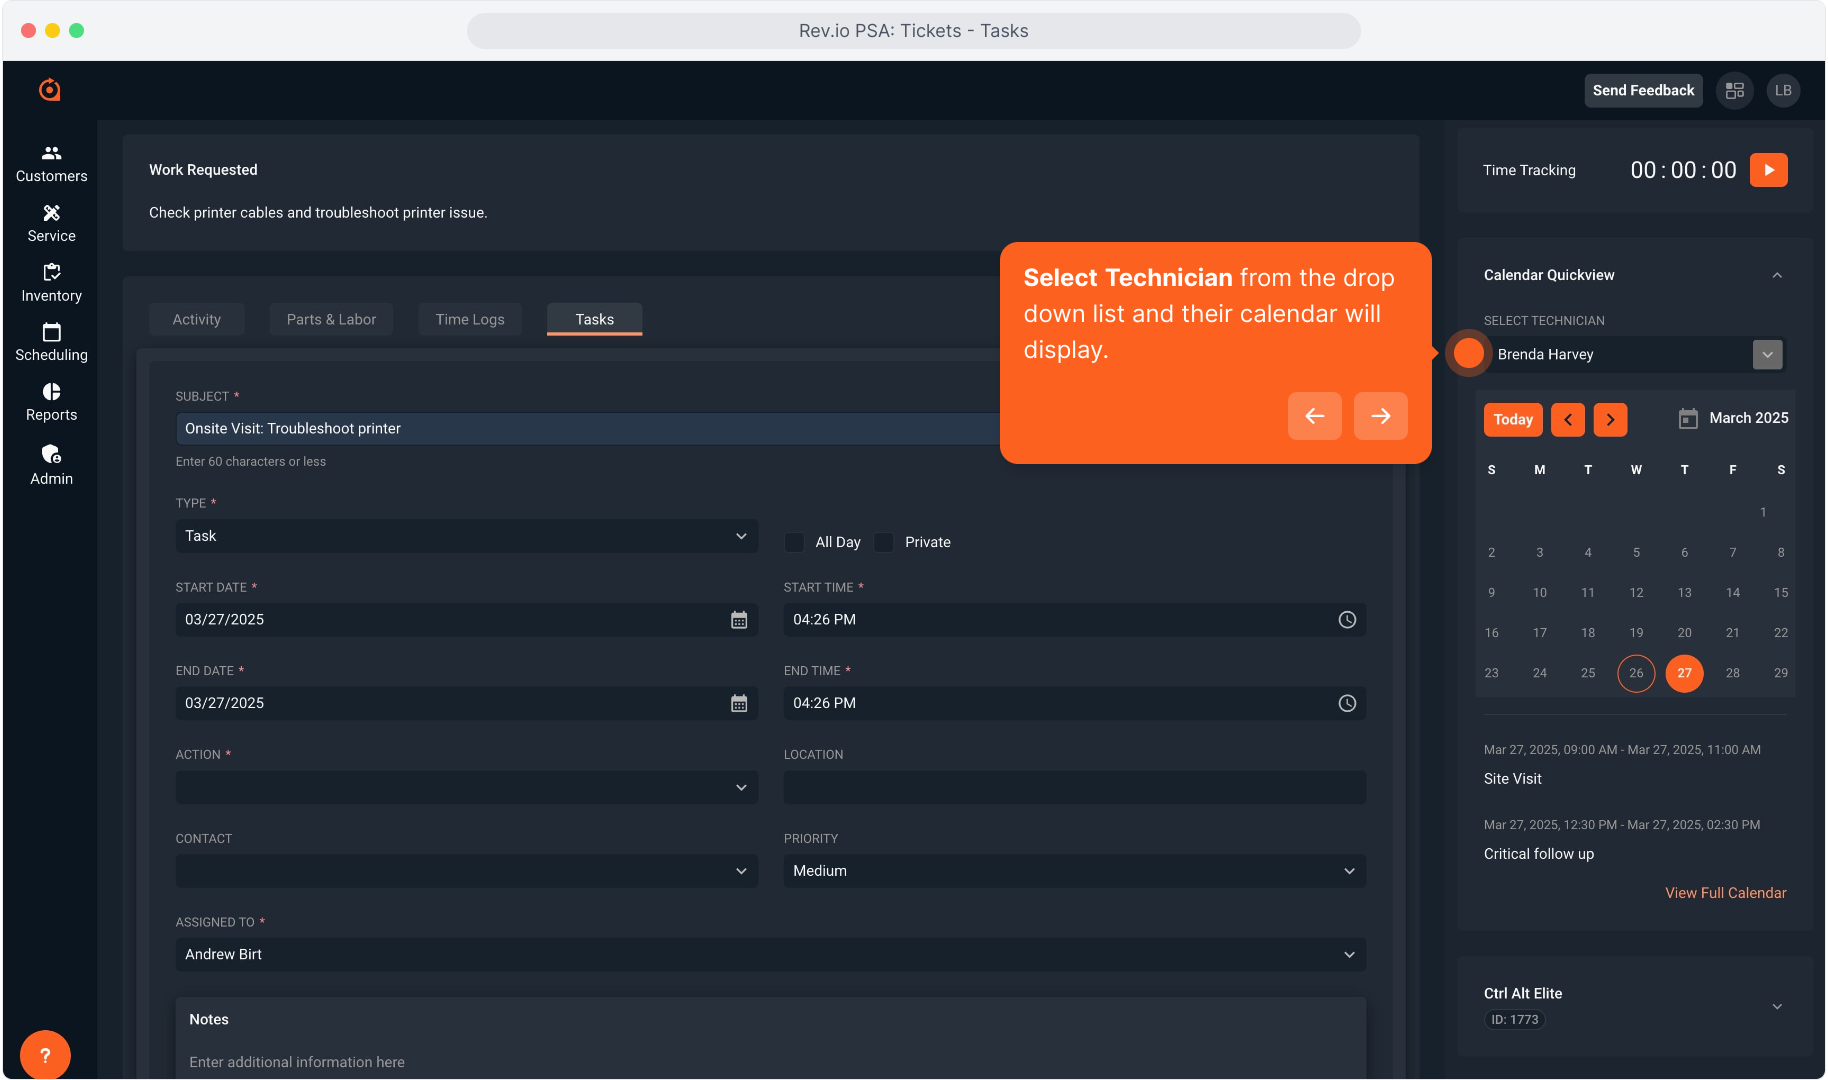
11. Select Technician from the drop down list and their calendar will display.
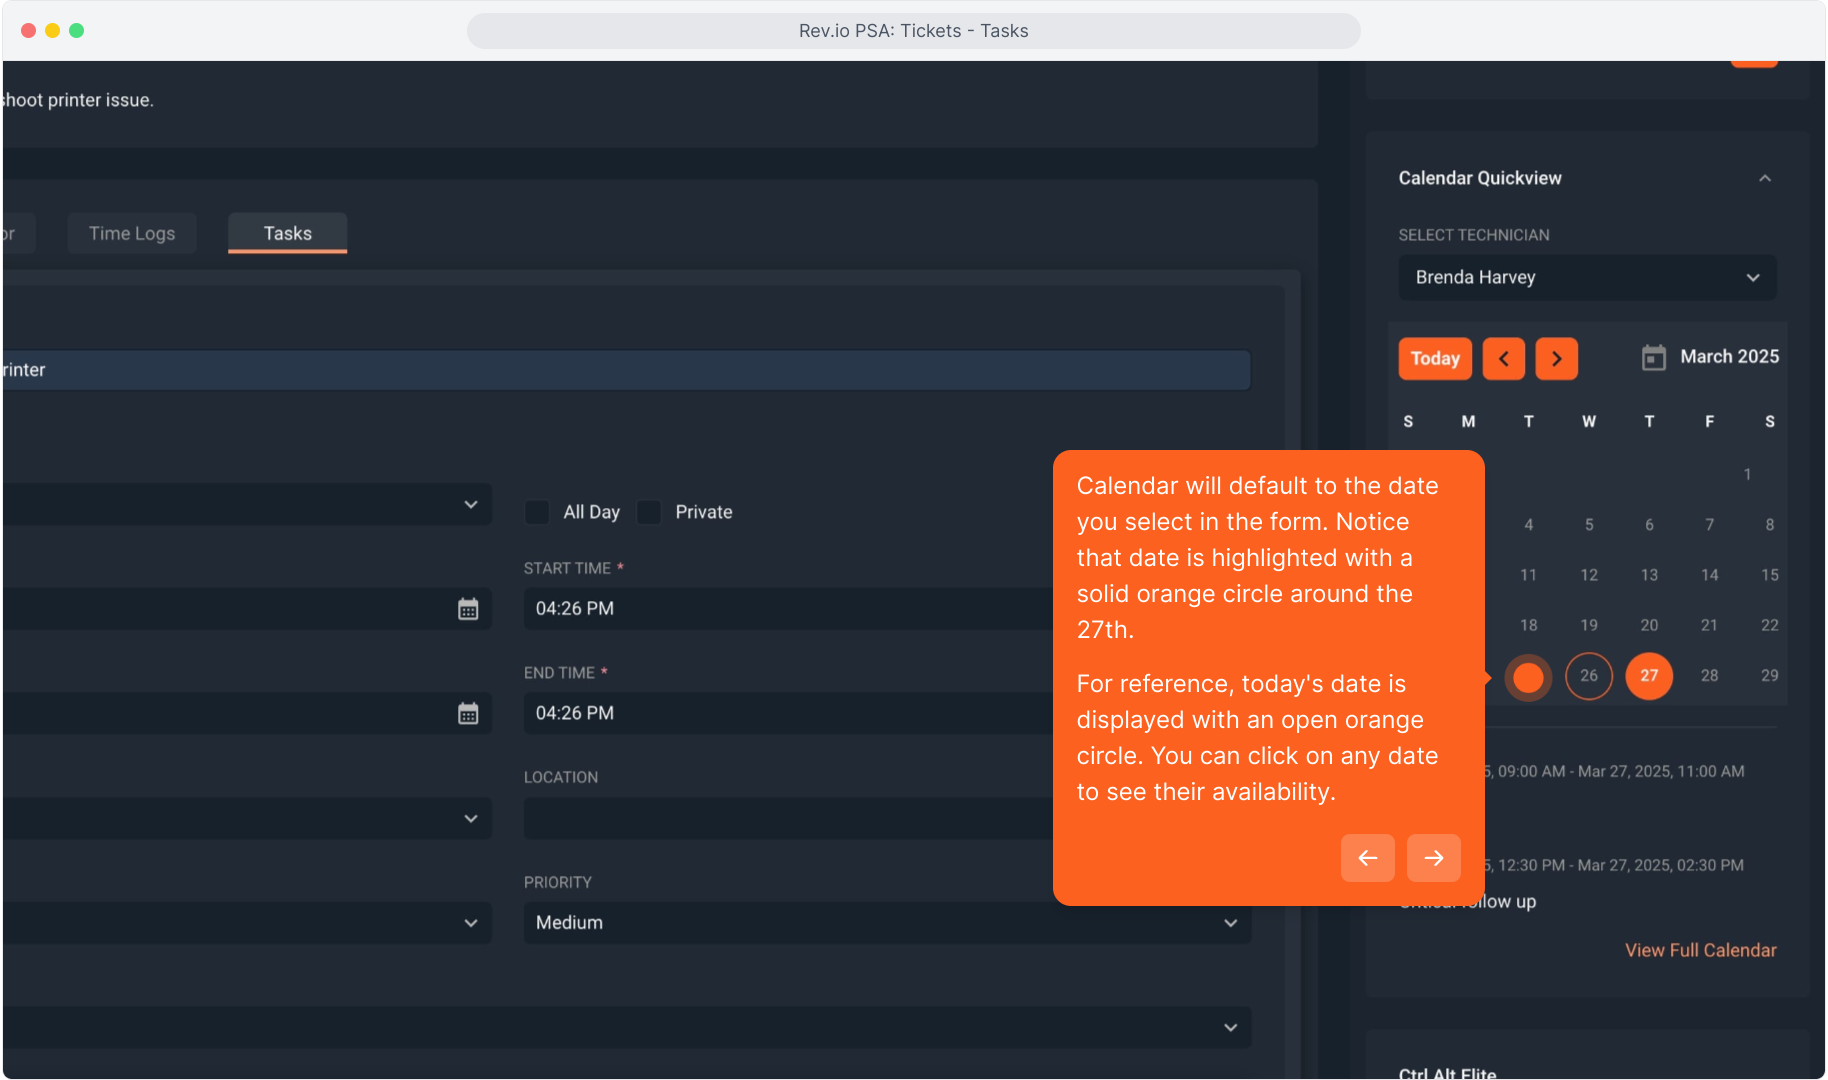
12. Calendar will default to the date you select in the form. Notice that date is highlighted with a solid orange circle around the 27th.
For reference, today's date is displayed with an open orange circle. You can click on any date to see their availability.
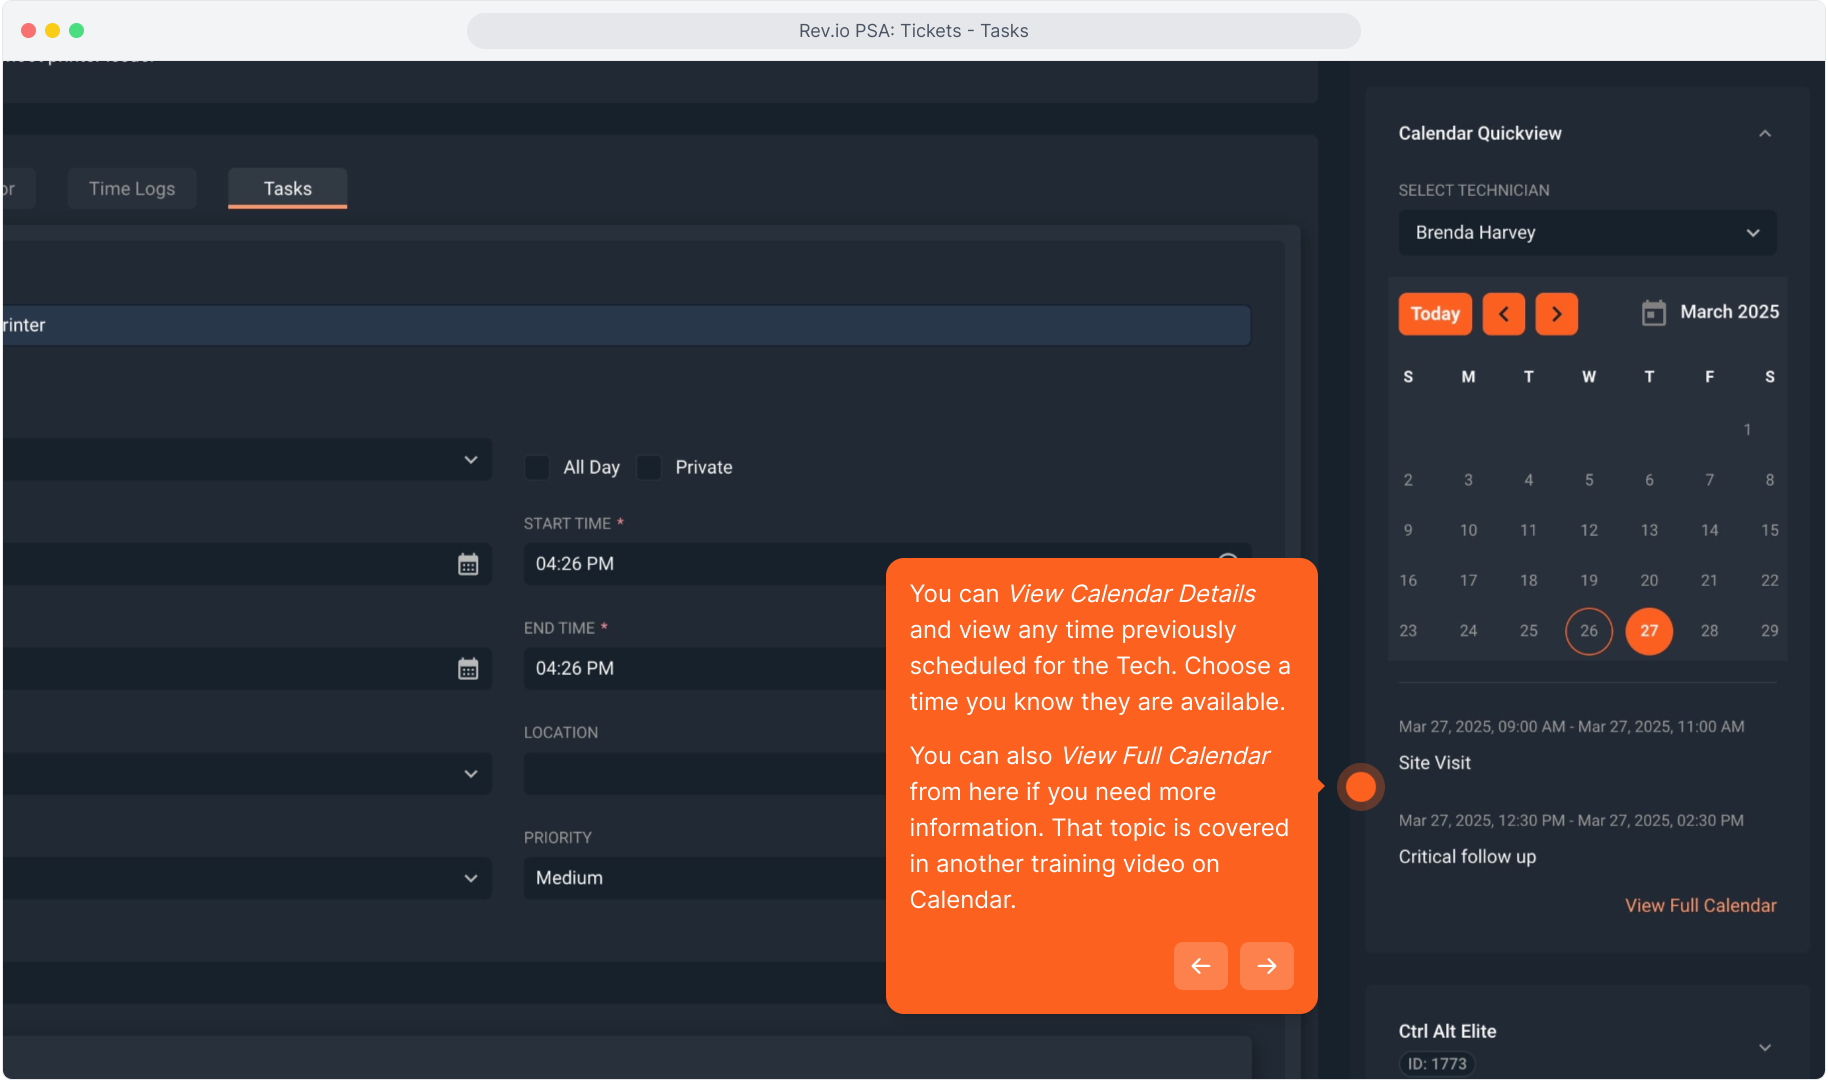
13. You can View Calendar Details and view any time previously scheduled for the Tech. Choose a time you know they are available.
You can also View Full Calendar from here if you need more information. That topic is covered in another training video on Calendar.
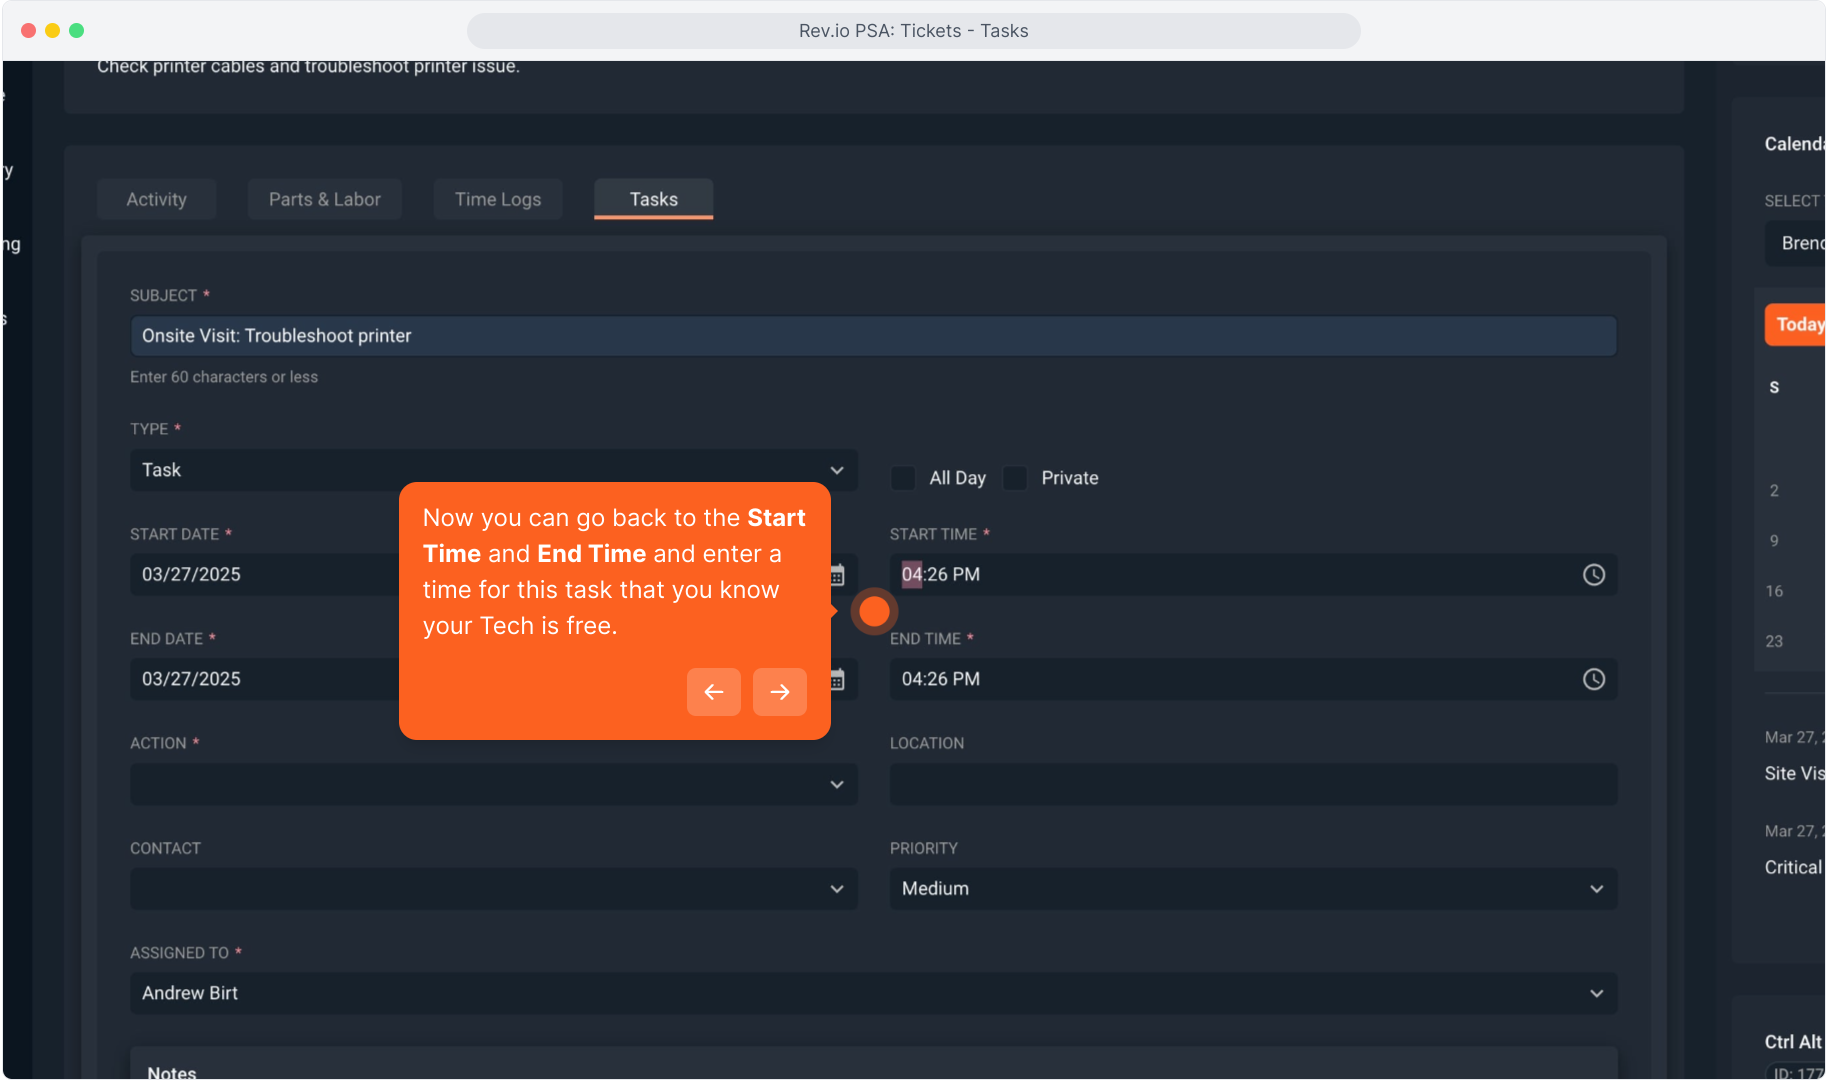
14. Now you can go back to the Start Time and End Time and enter a time for this task that you know your Tech is free.
15. Intentionally blank.
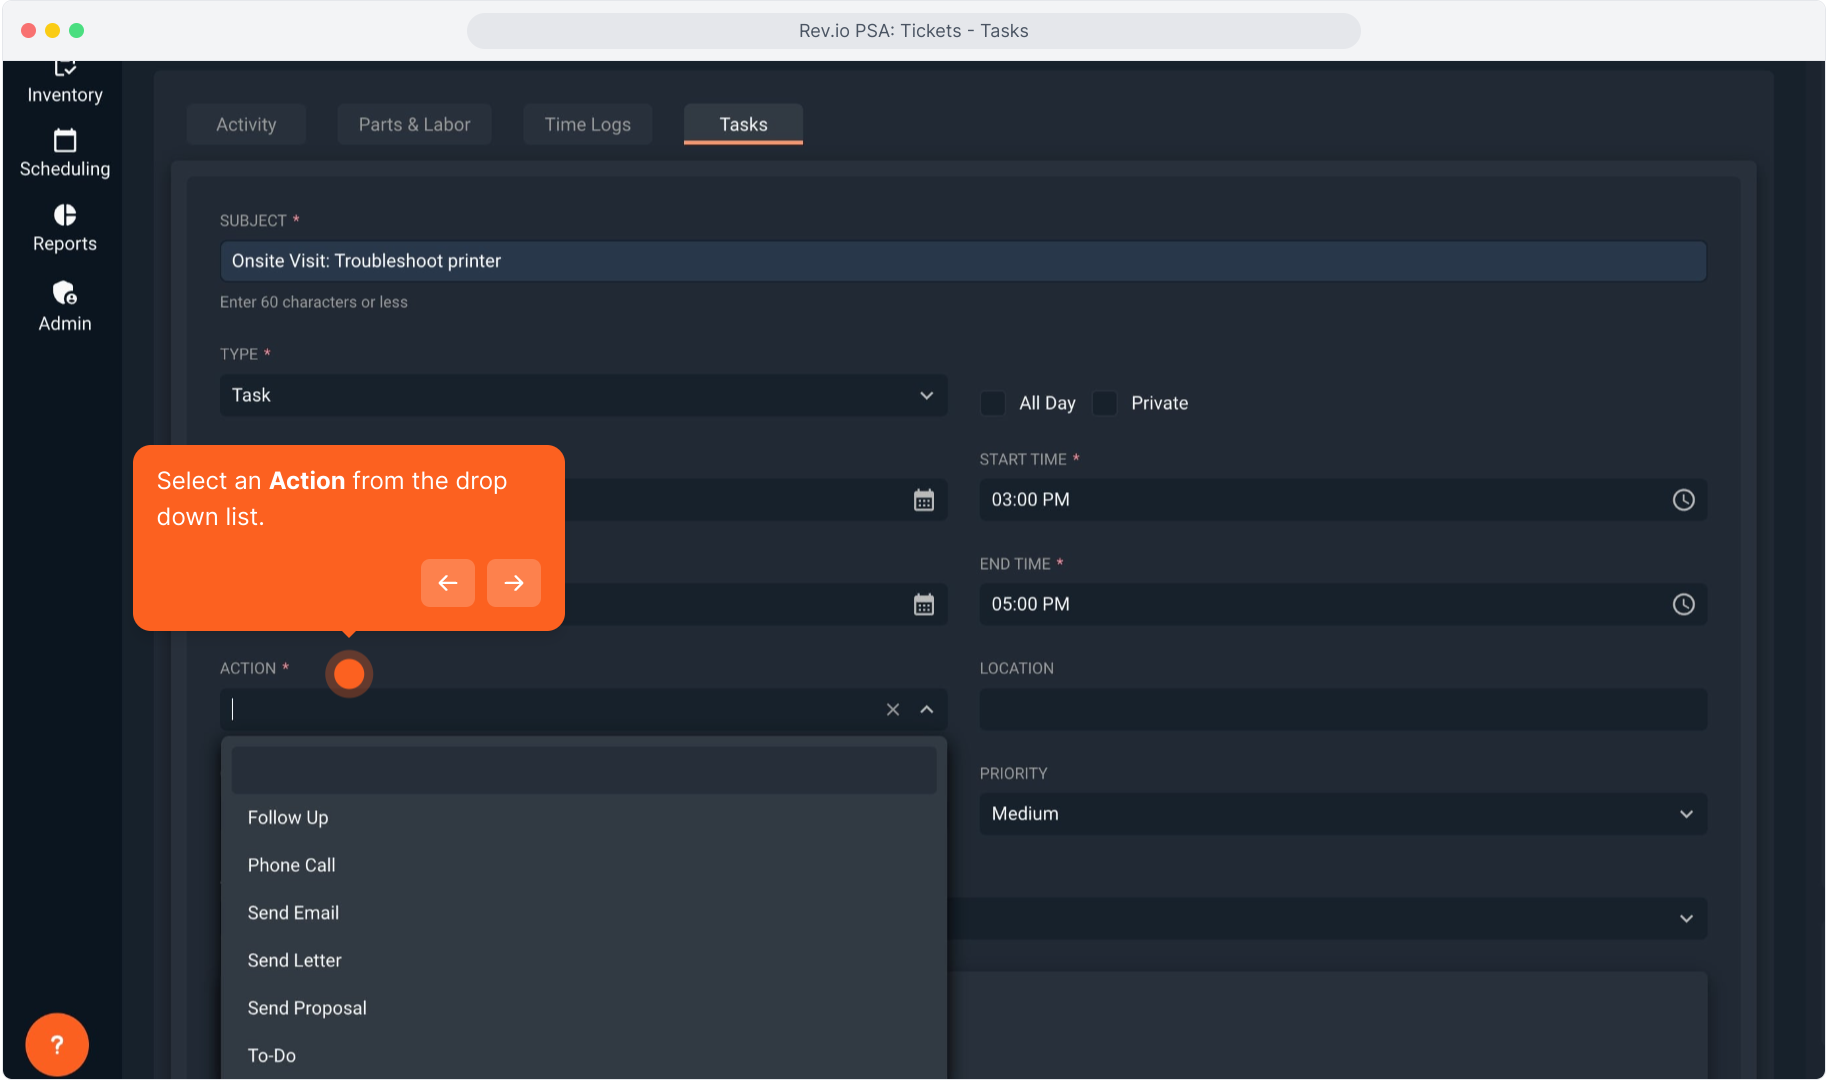
16. Select an Action from the drop down list.
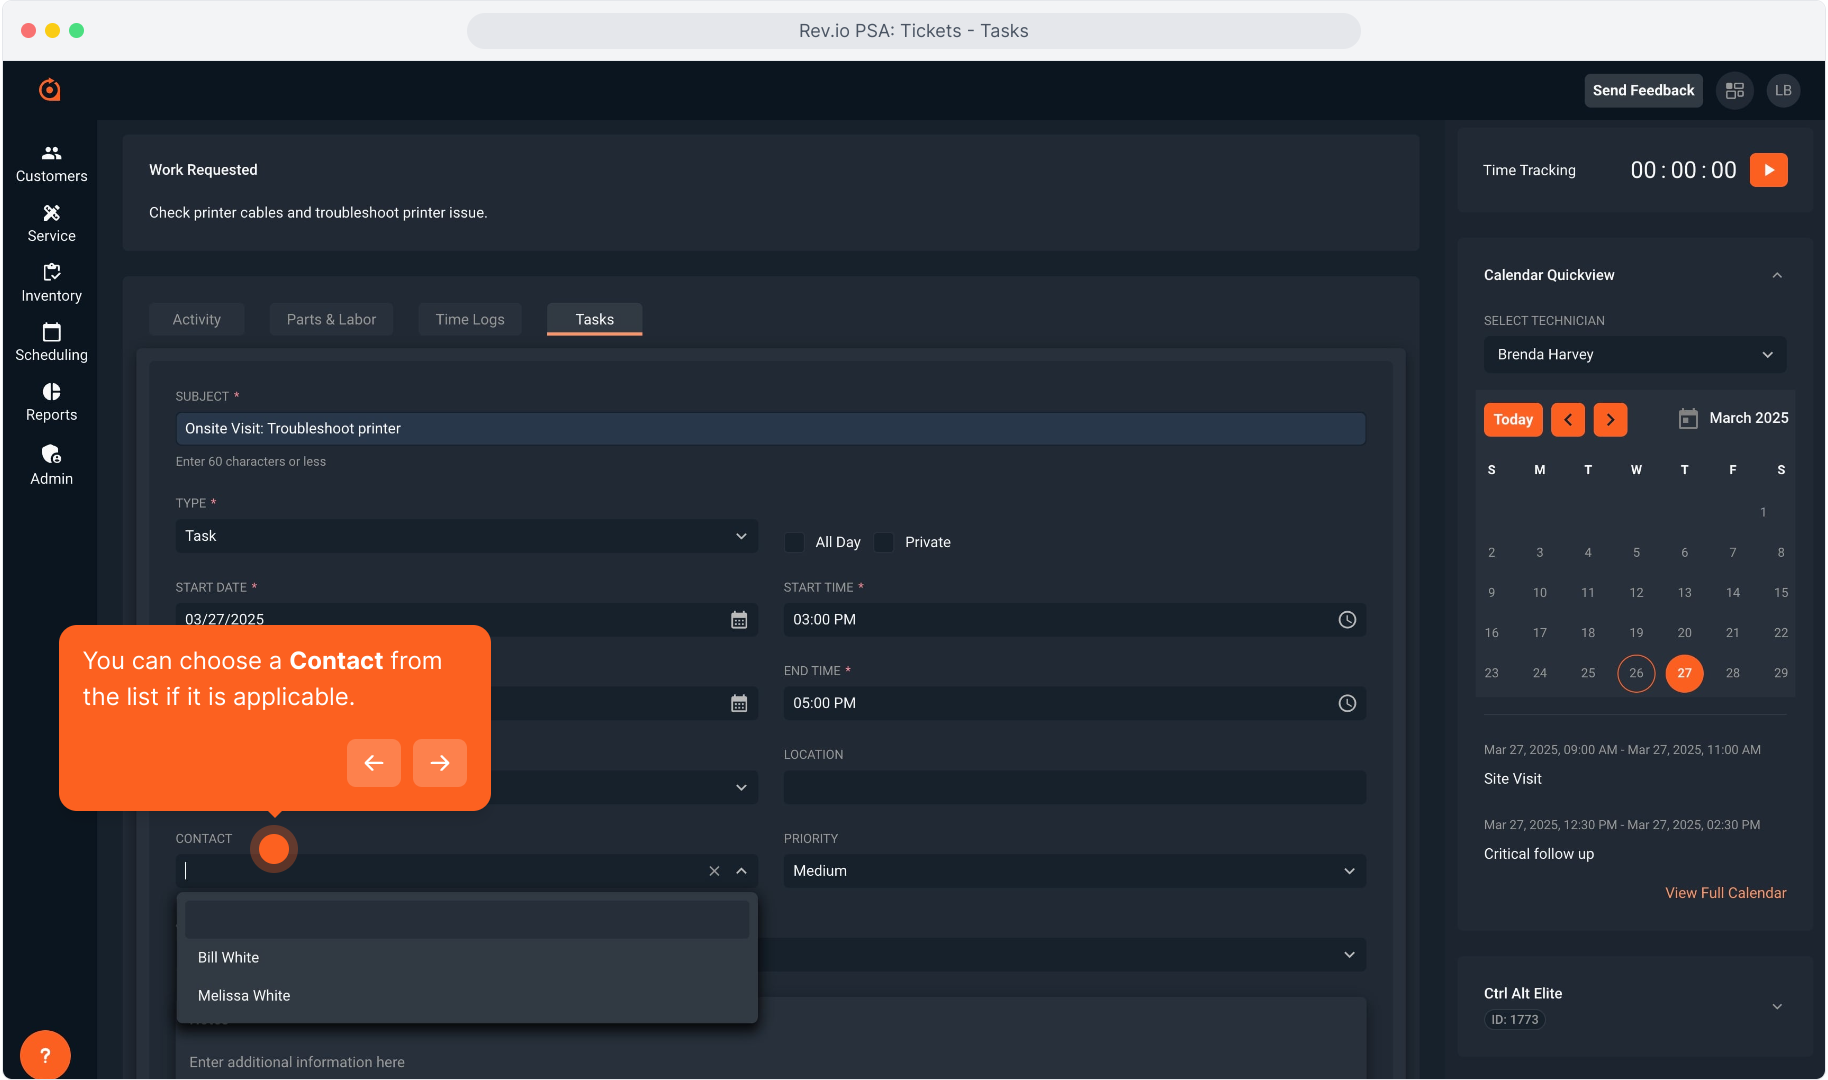
17. You can choose a Contact from the list if it is applicable.
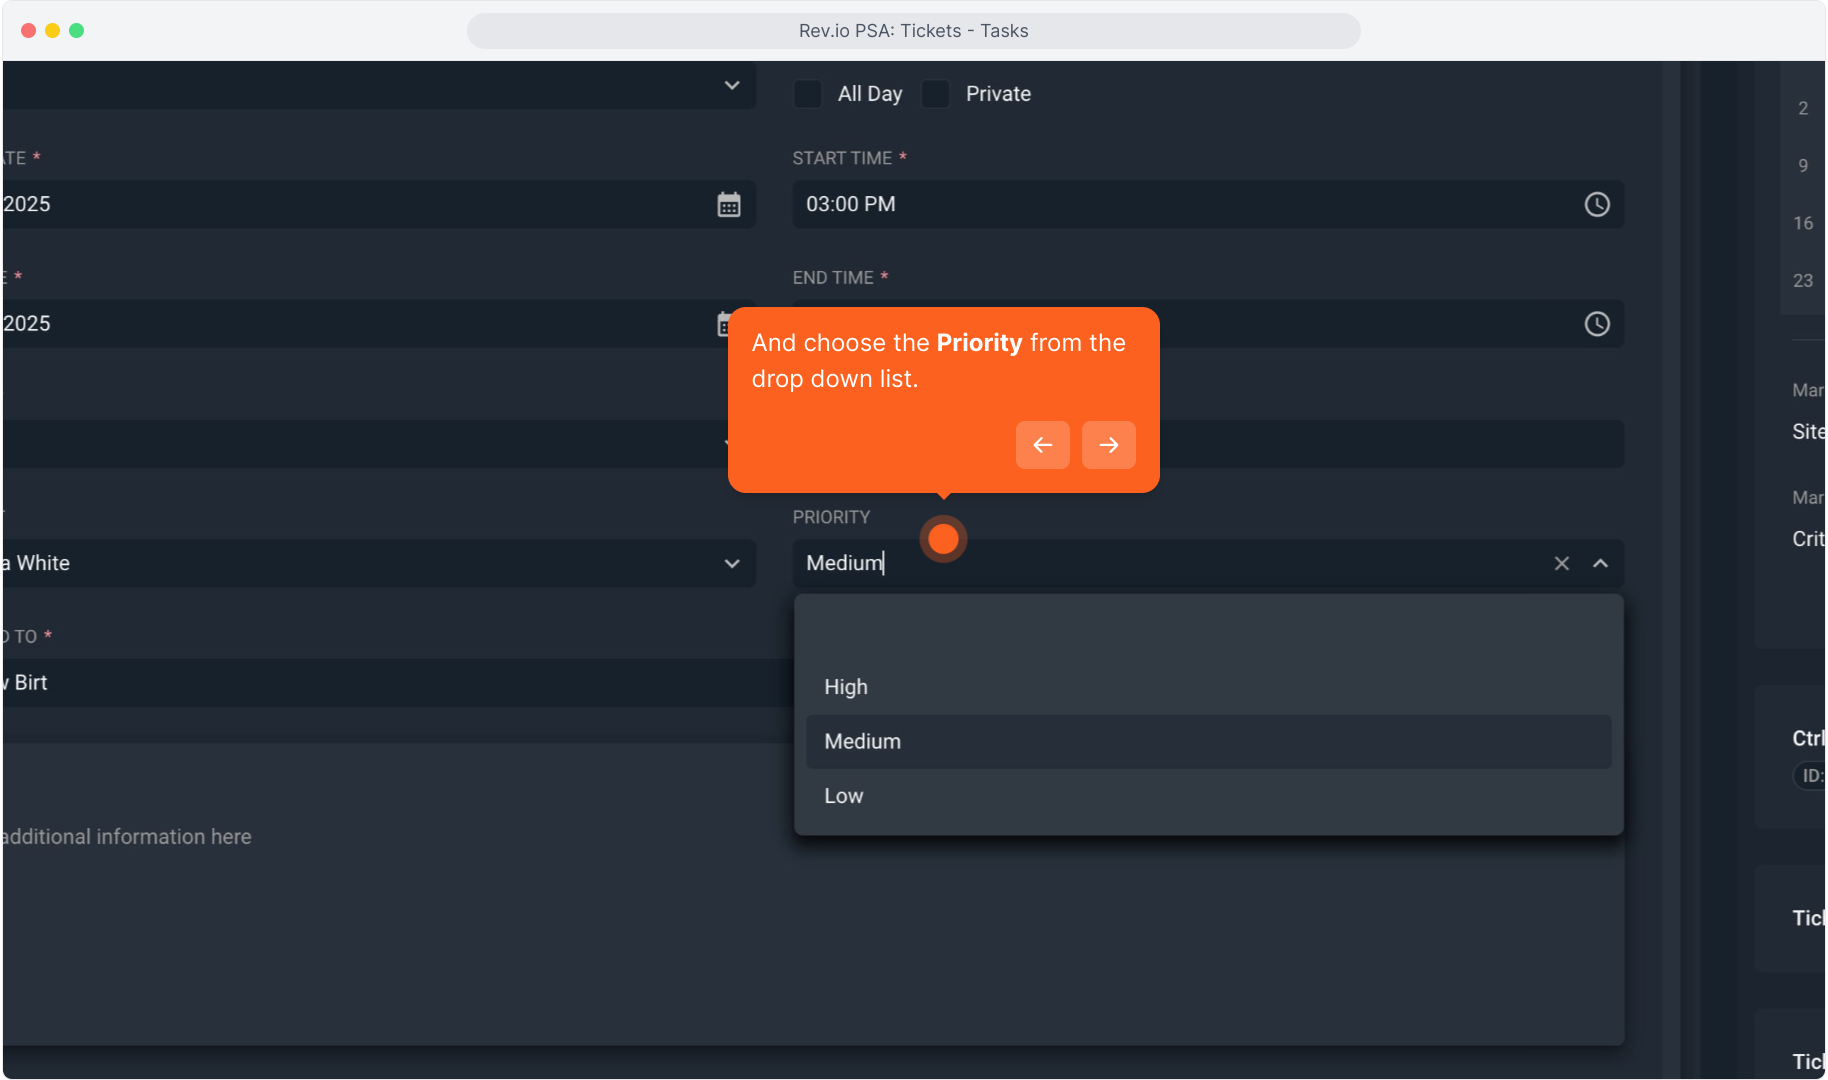
18. And choose the Priority from the drop down list.
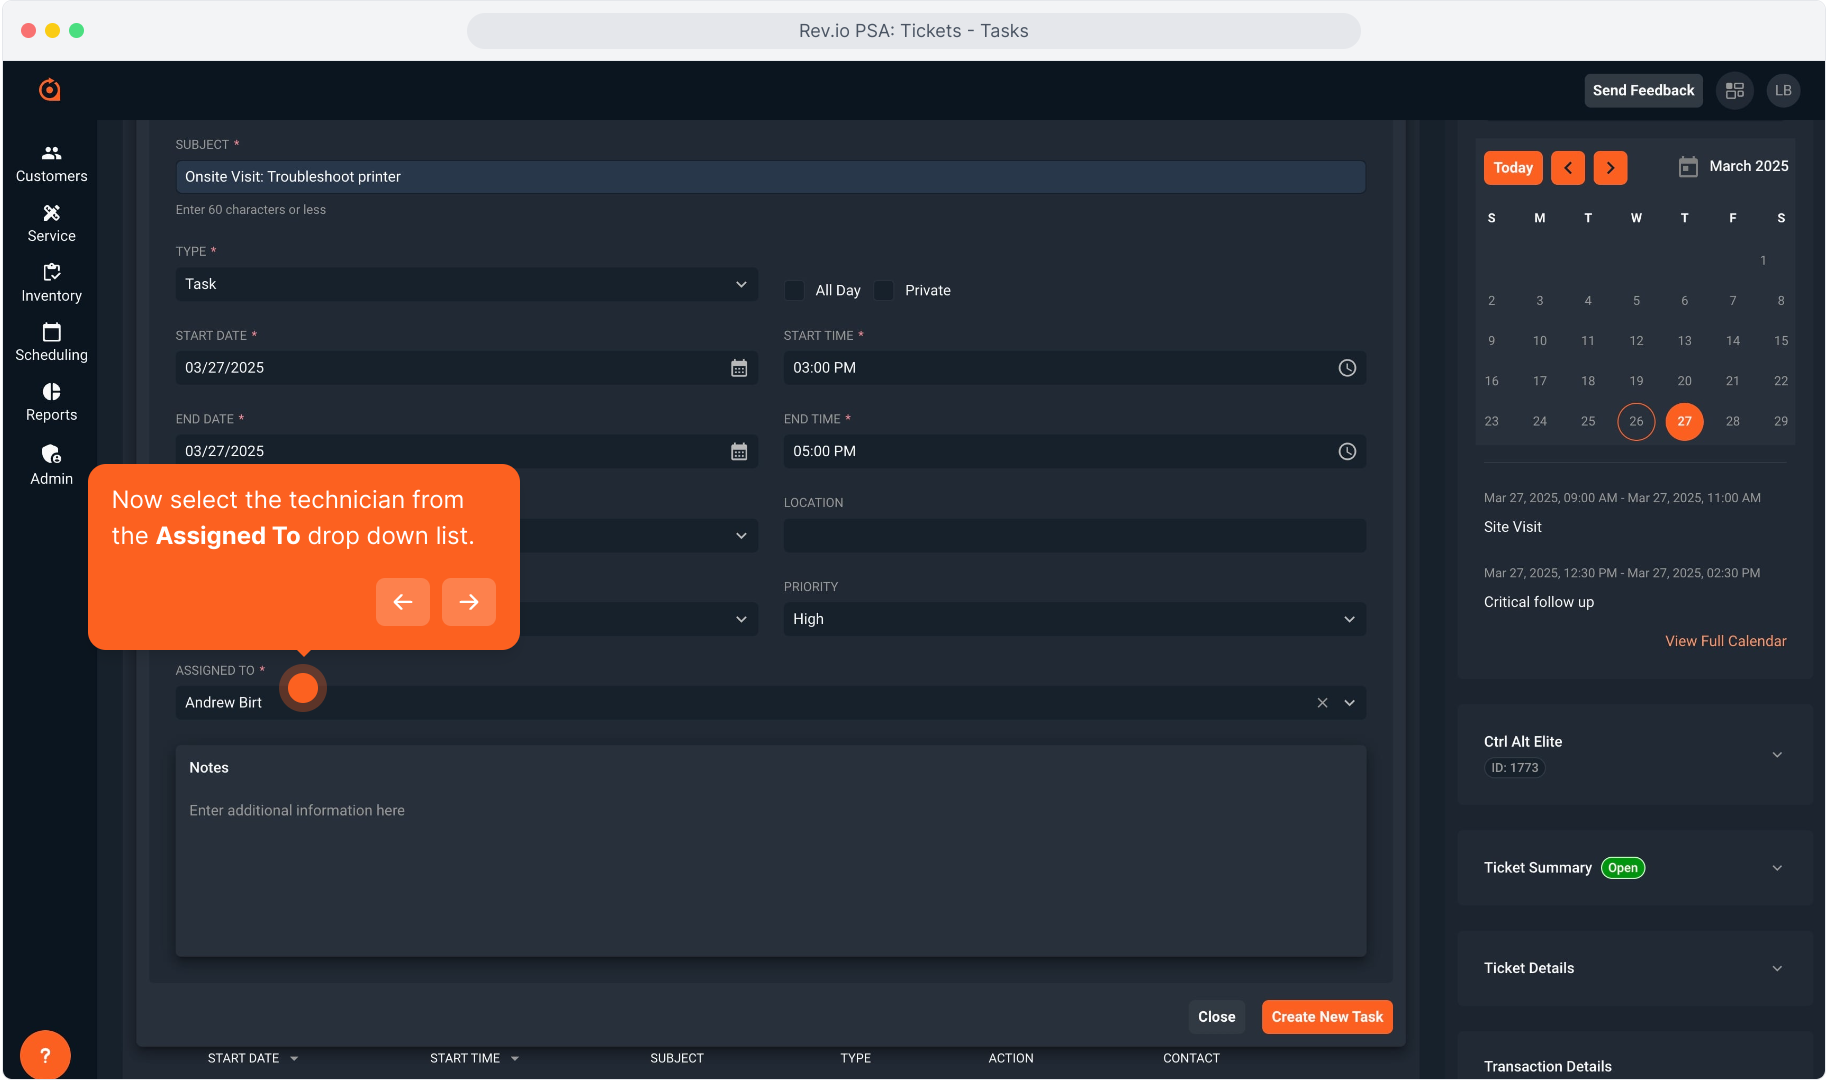
19. Now select the technician from the Assigned To drop down list.
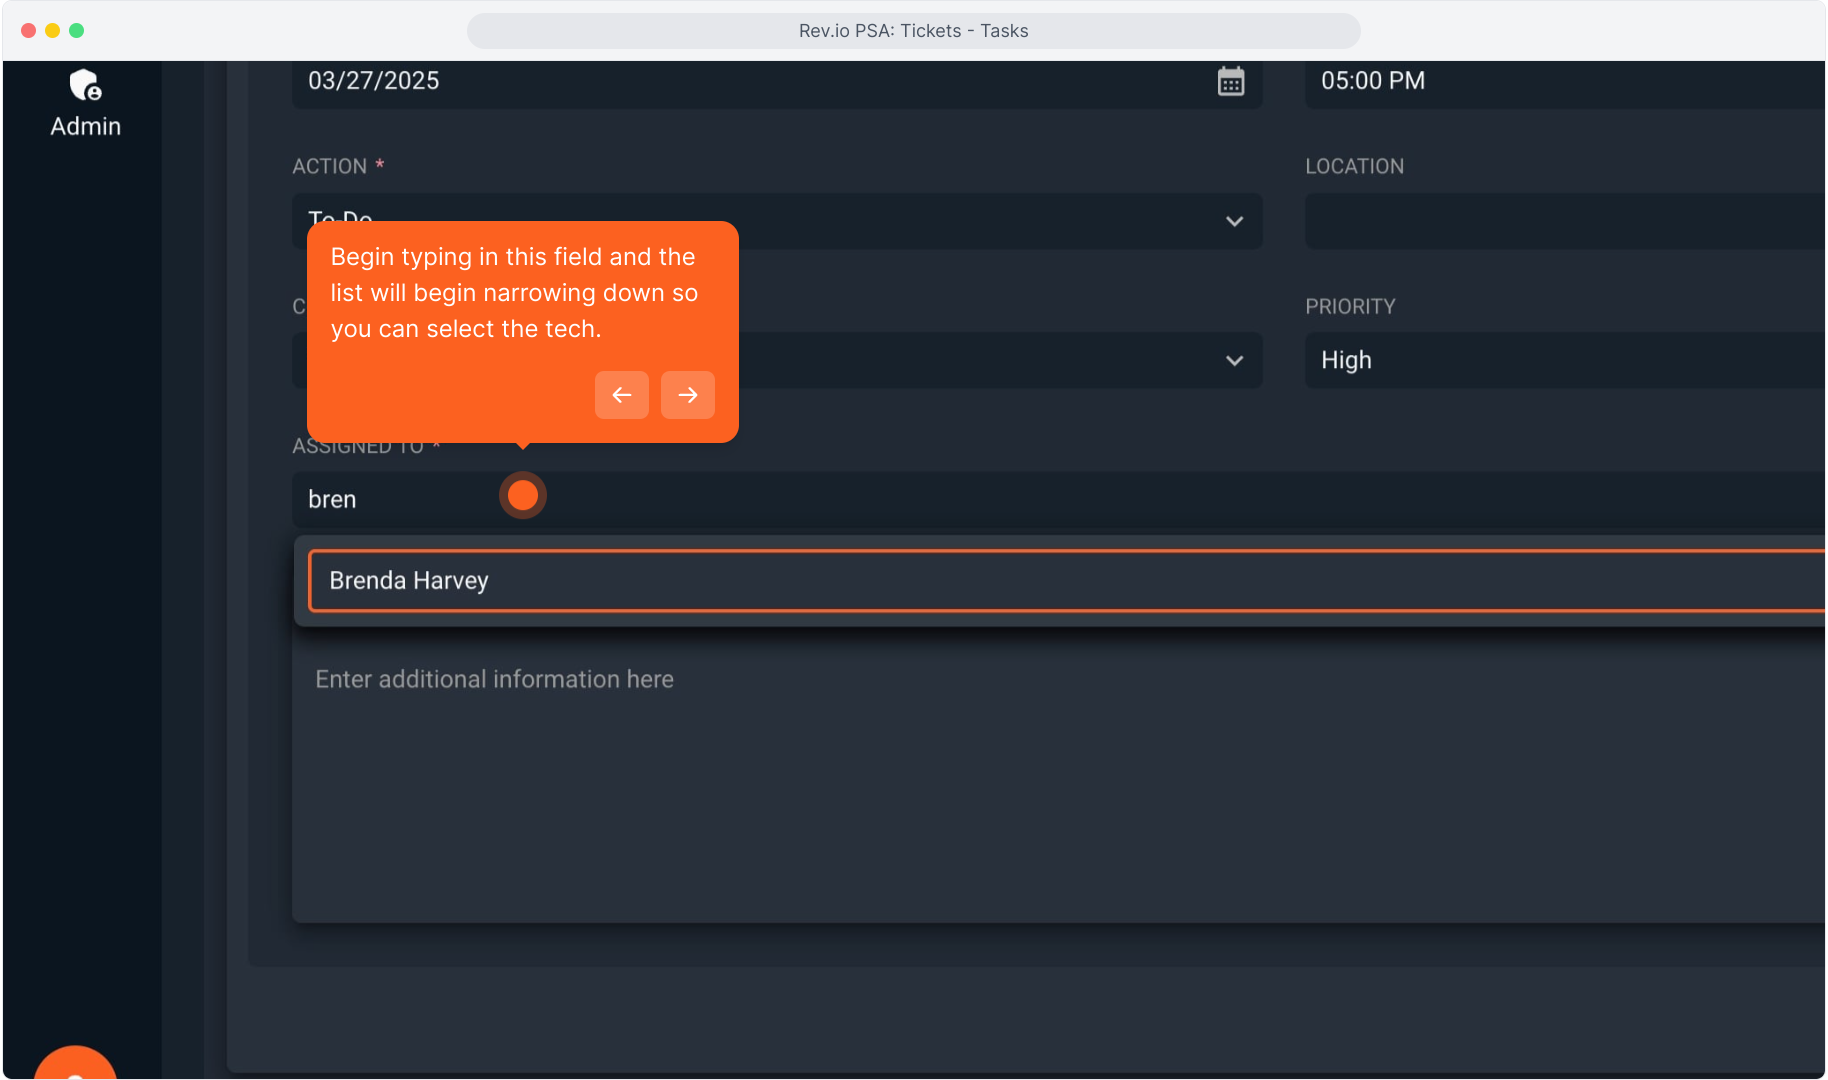
20. Begin typing in this field and the list will begin narrowing down so you can select the tech.
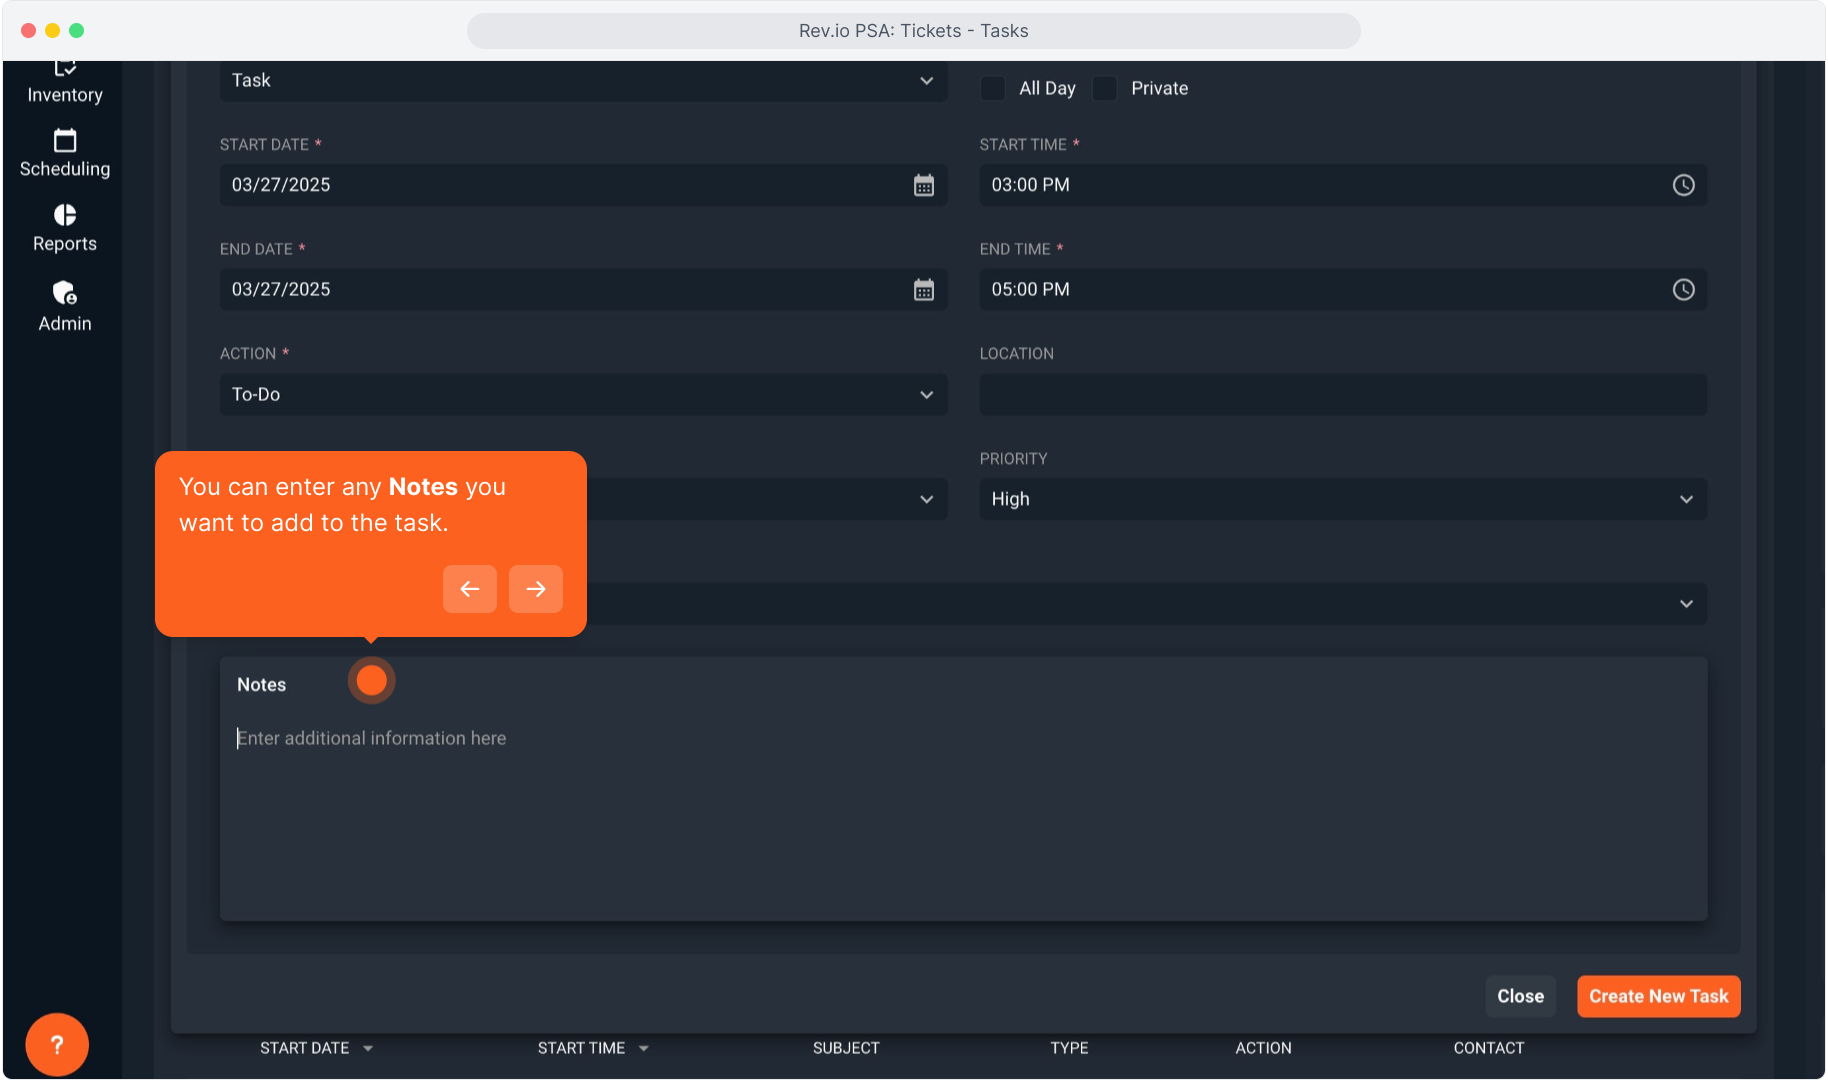
21. You can enter any Notes you want to add to the task.
22. Intentionally blank.
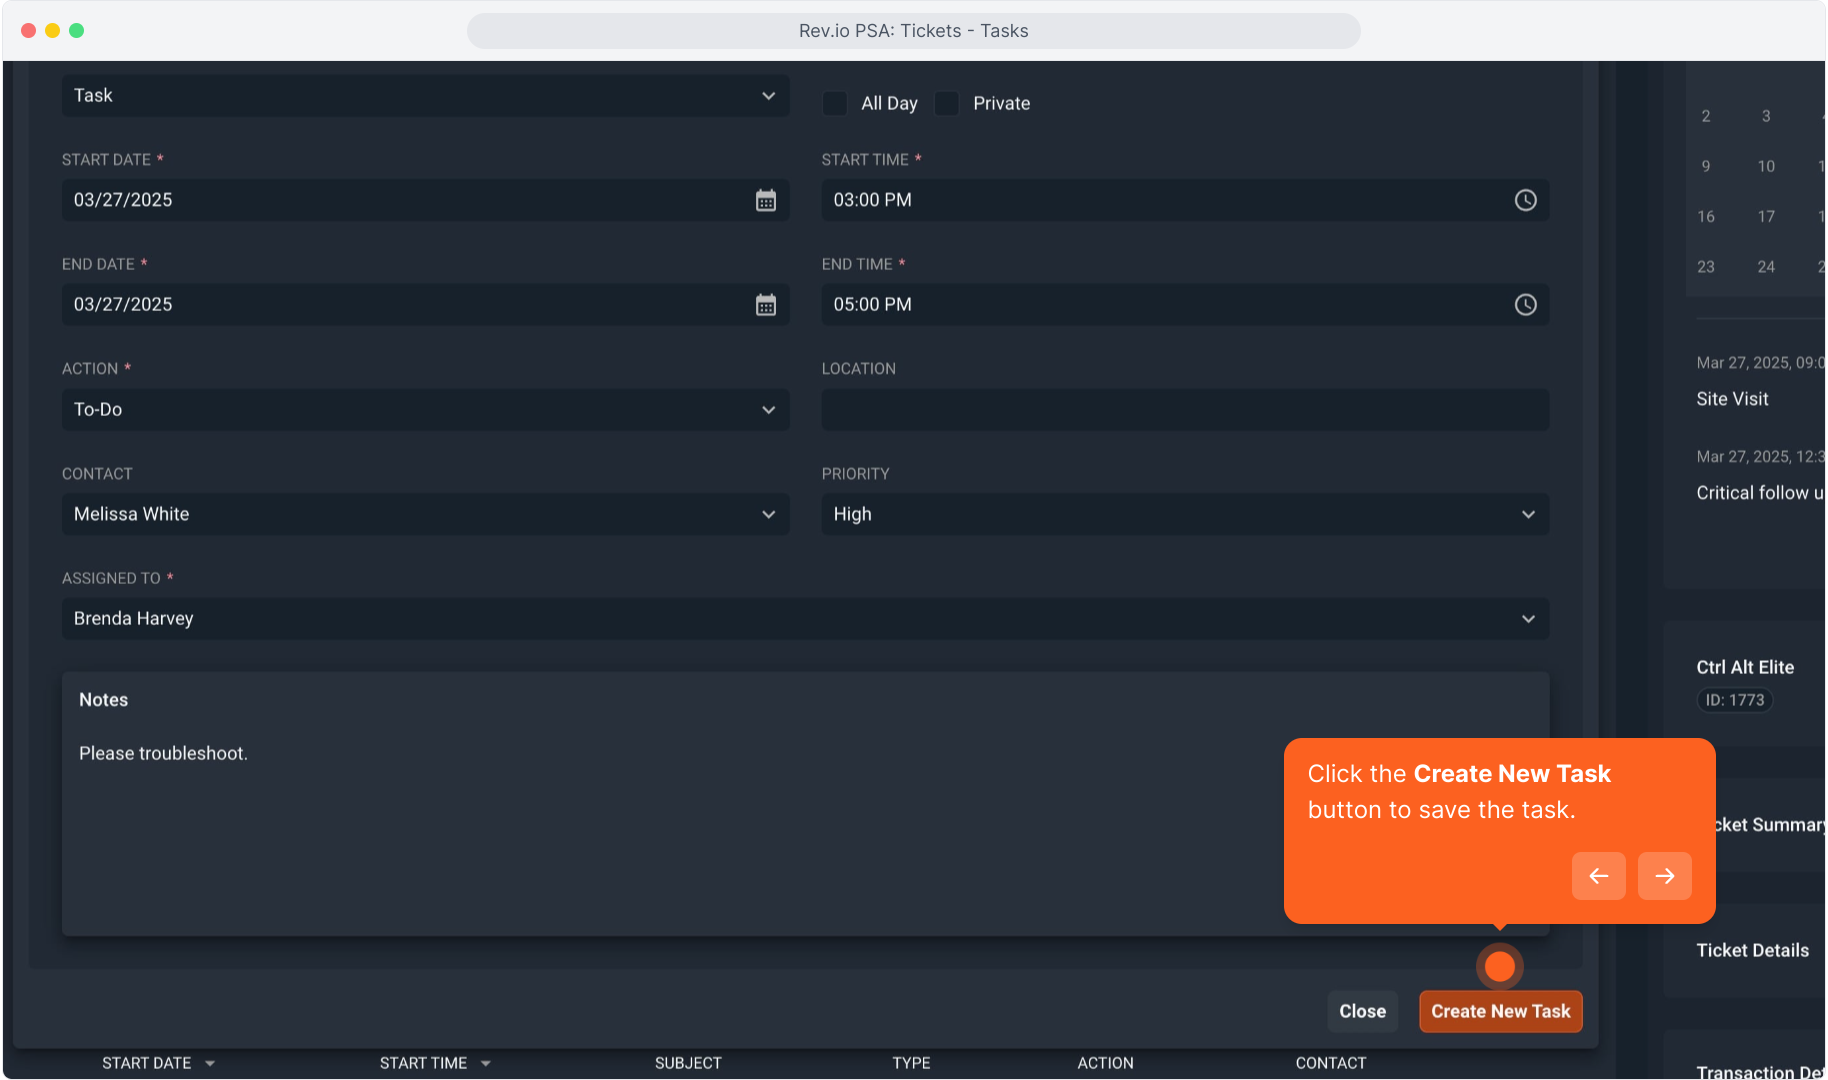
23. Click the Create New Task button to save the task.
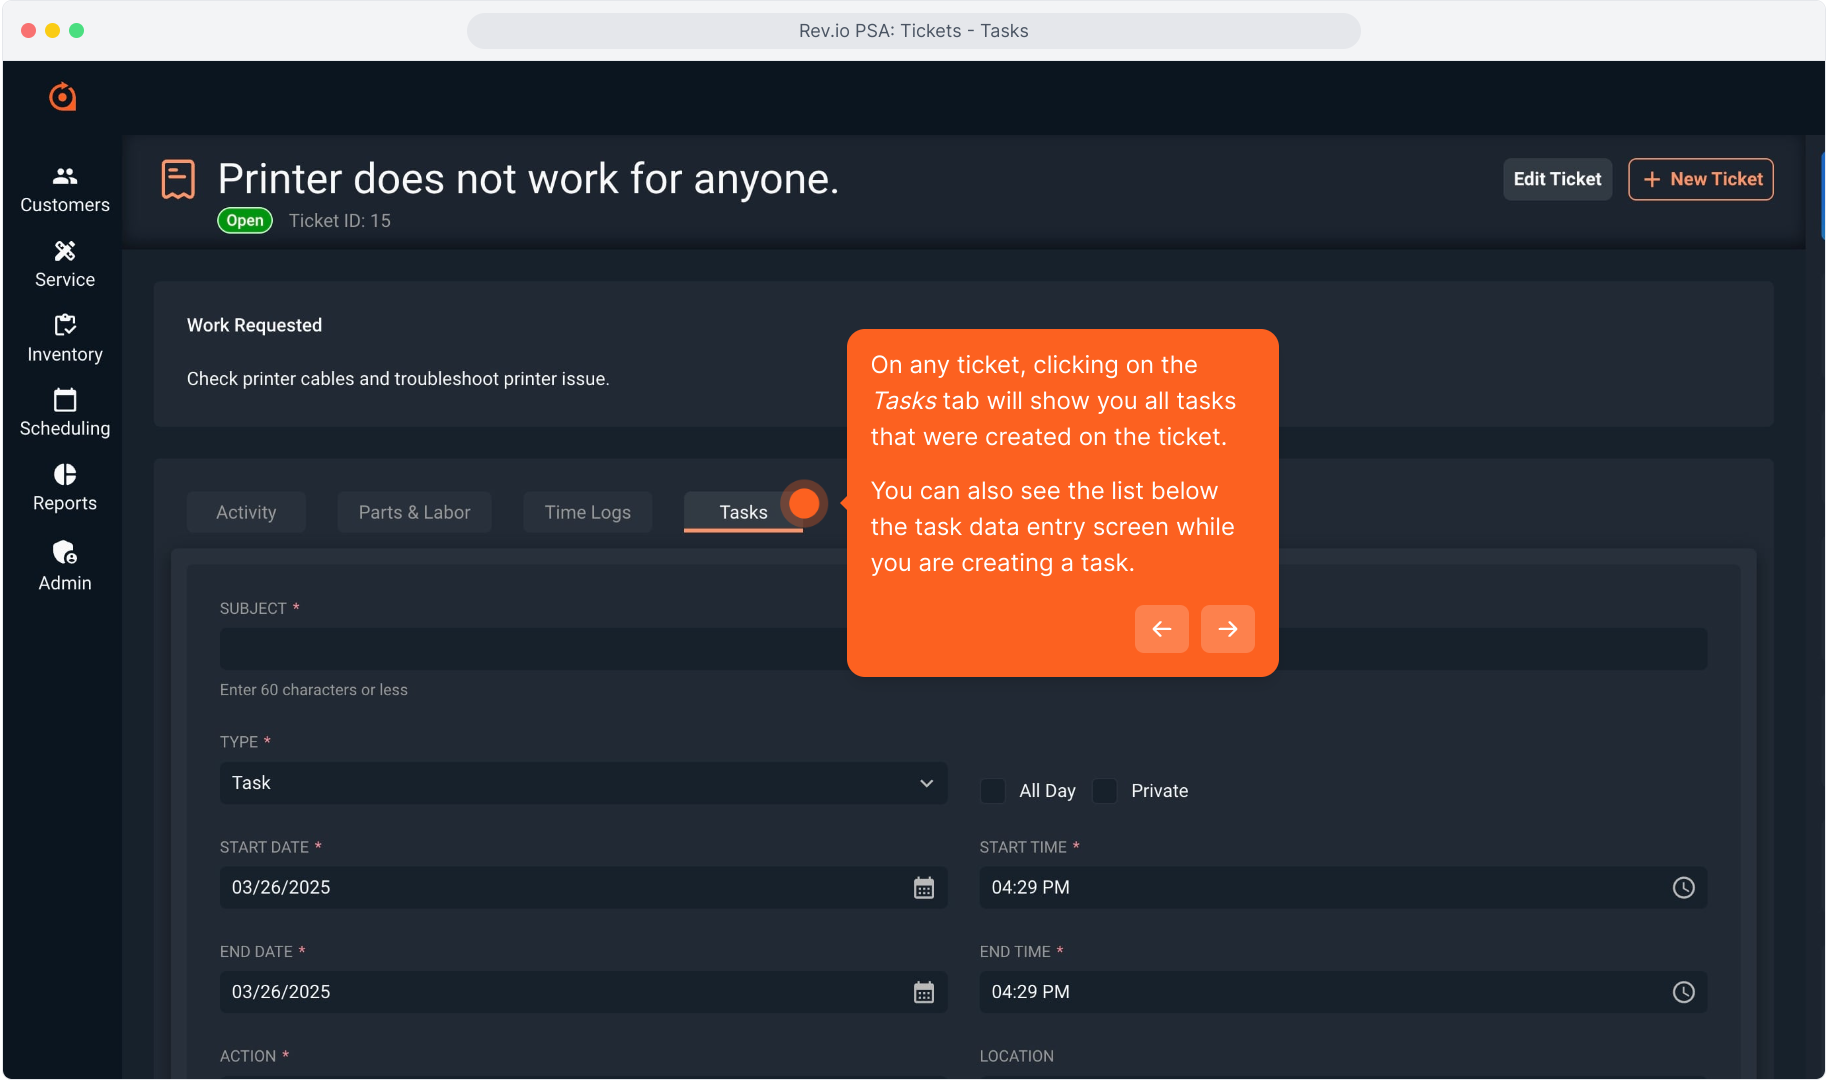
24. On any ticket, clicking on the Tasks tab will show you all tasks that were created on the ticket.
You can also see the list below the task data entry screen while you are creating a task.
25. Intentionally blank.
26. You can click the Close button to close the data entry screen if desired.

27. On the task list, you can click to Hide Past Completed Items if you only want to see open tasks.

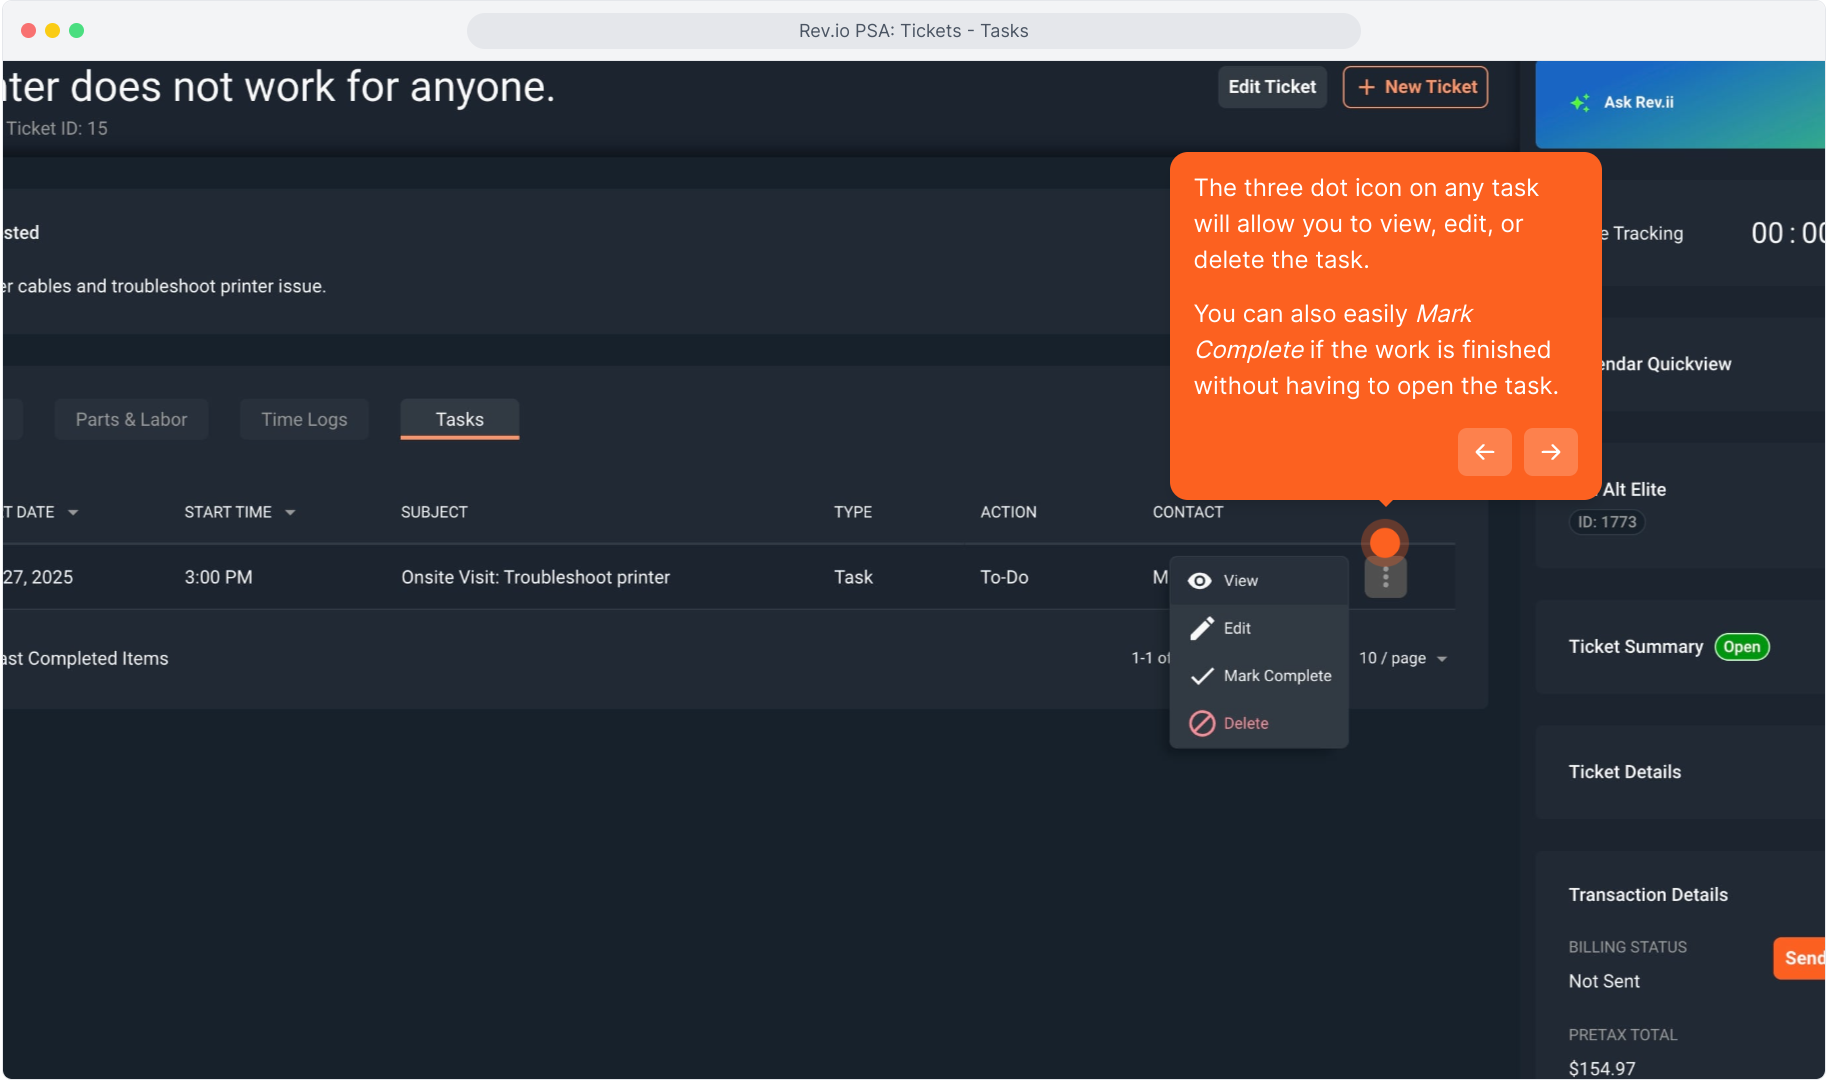
28. The three dot icon on any task will allow you to view, edit, or delete the task.
You can also easily Mark Complete if the work is finished without having to open the task.
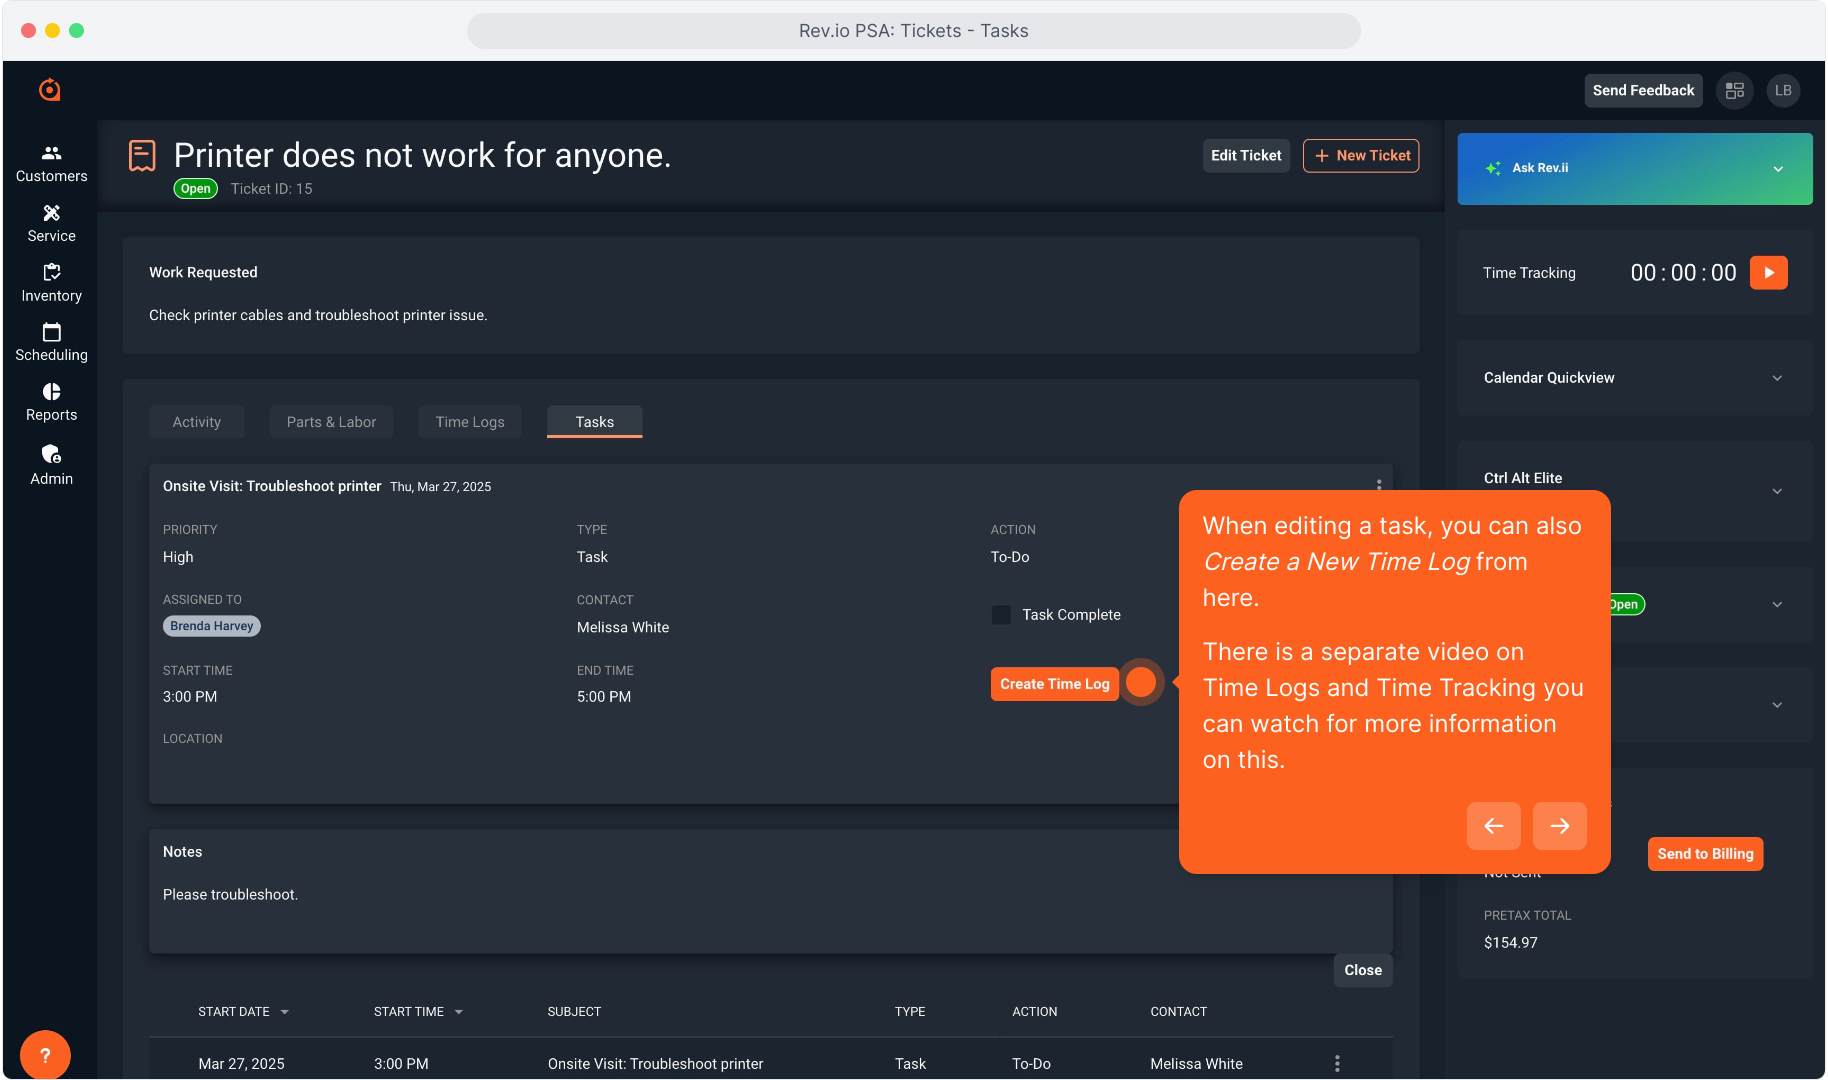
29. When editing a task, you can also Create a New Time Log from here.
There is a separate video on Time Logs and Time Tracking you can watch for more information on this.
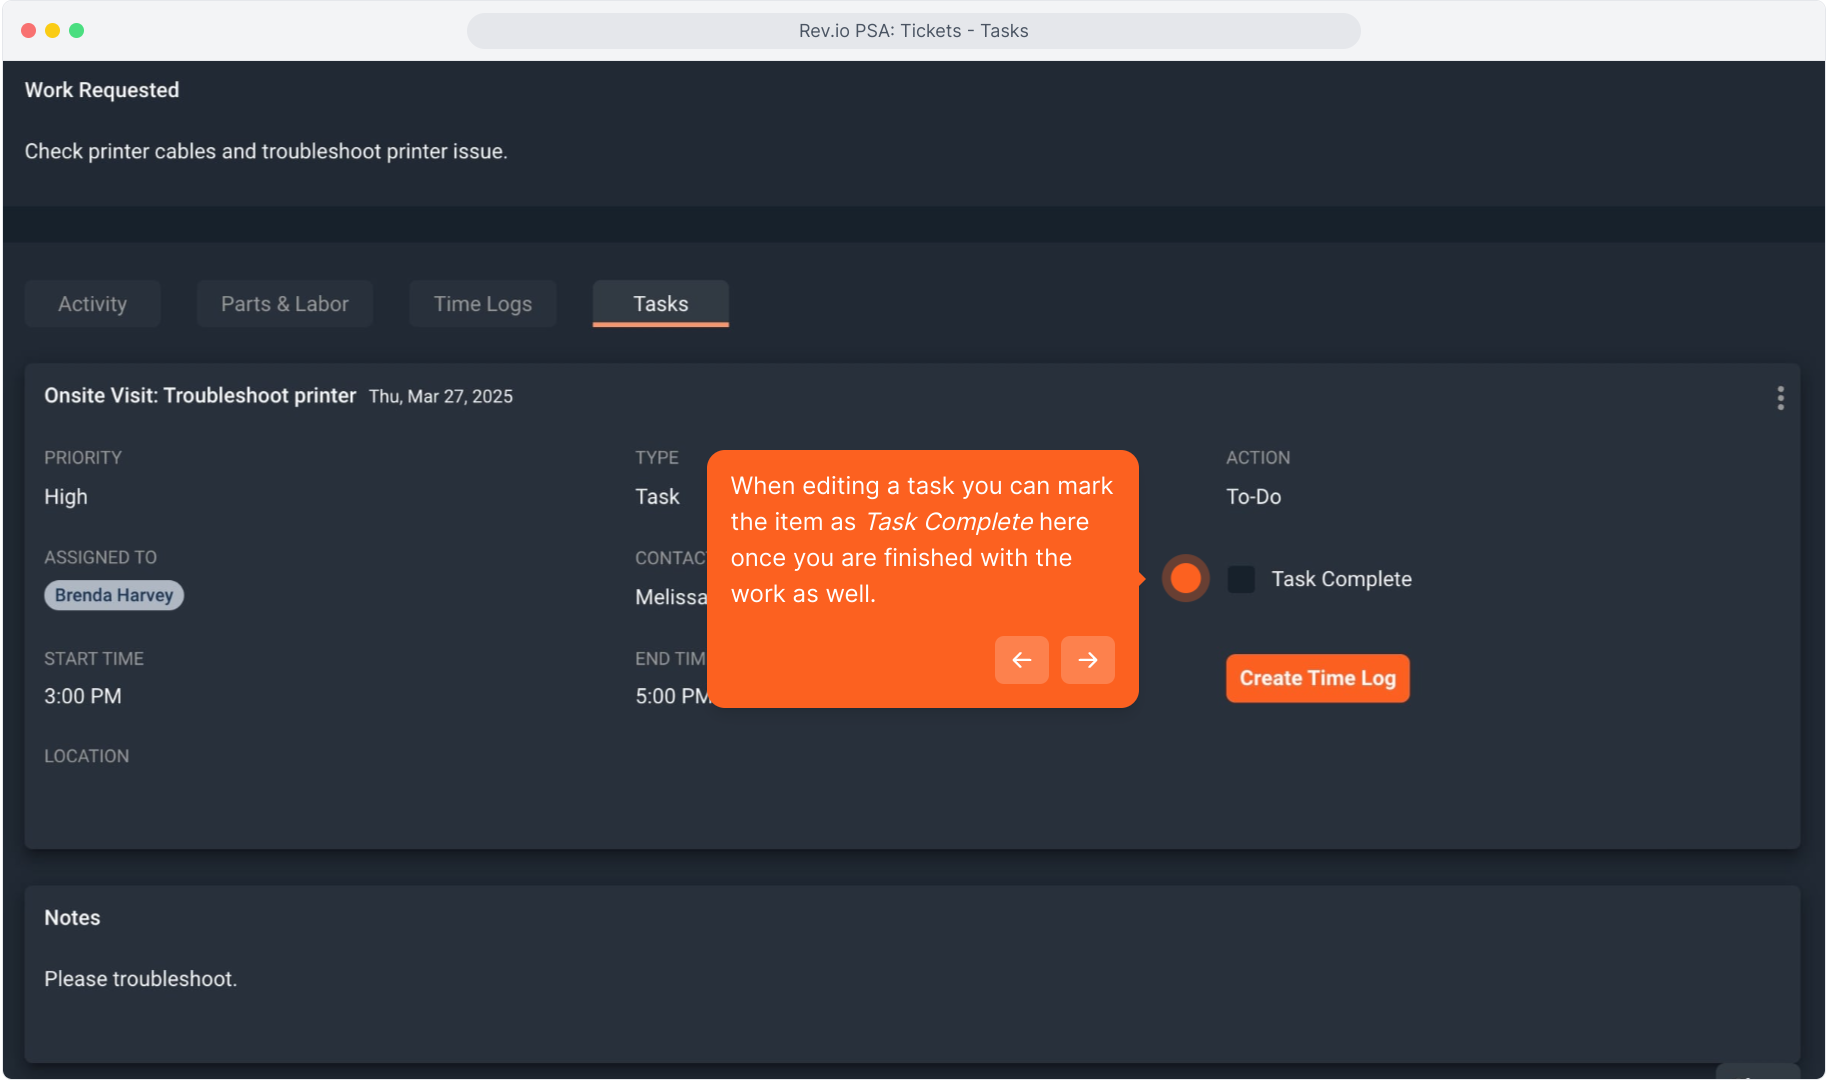
30. When editing a task you can mark the item as Task Complete here once you are finished with the work as well.
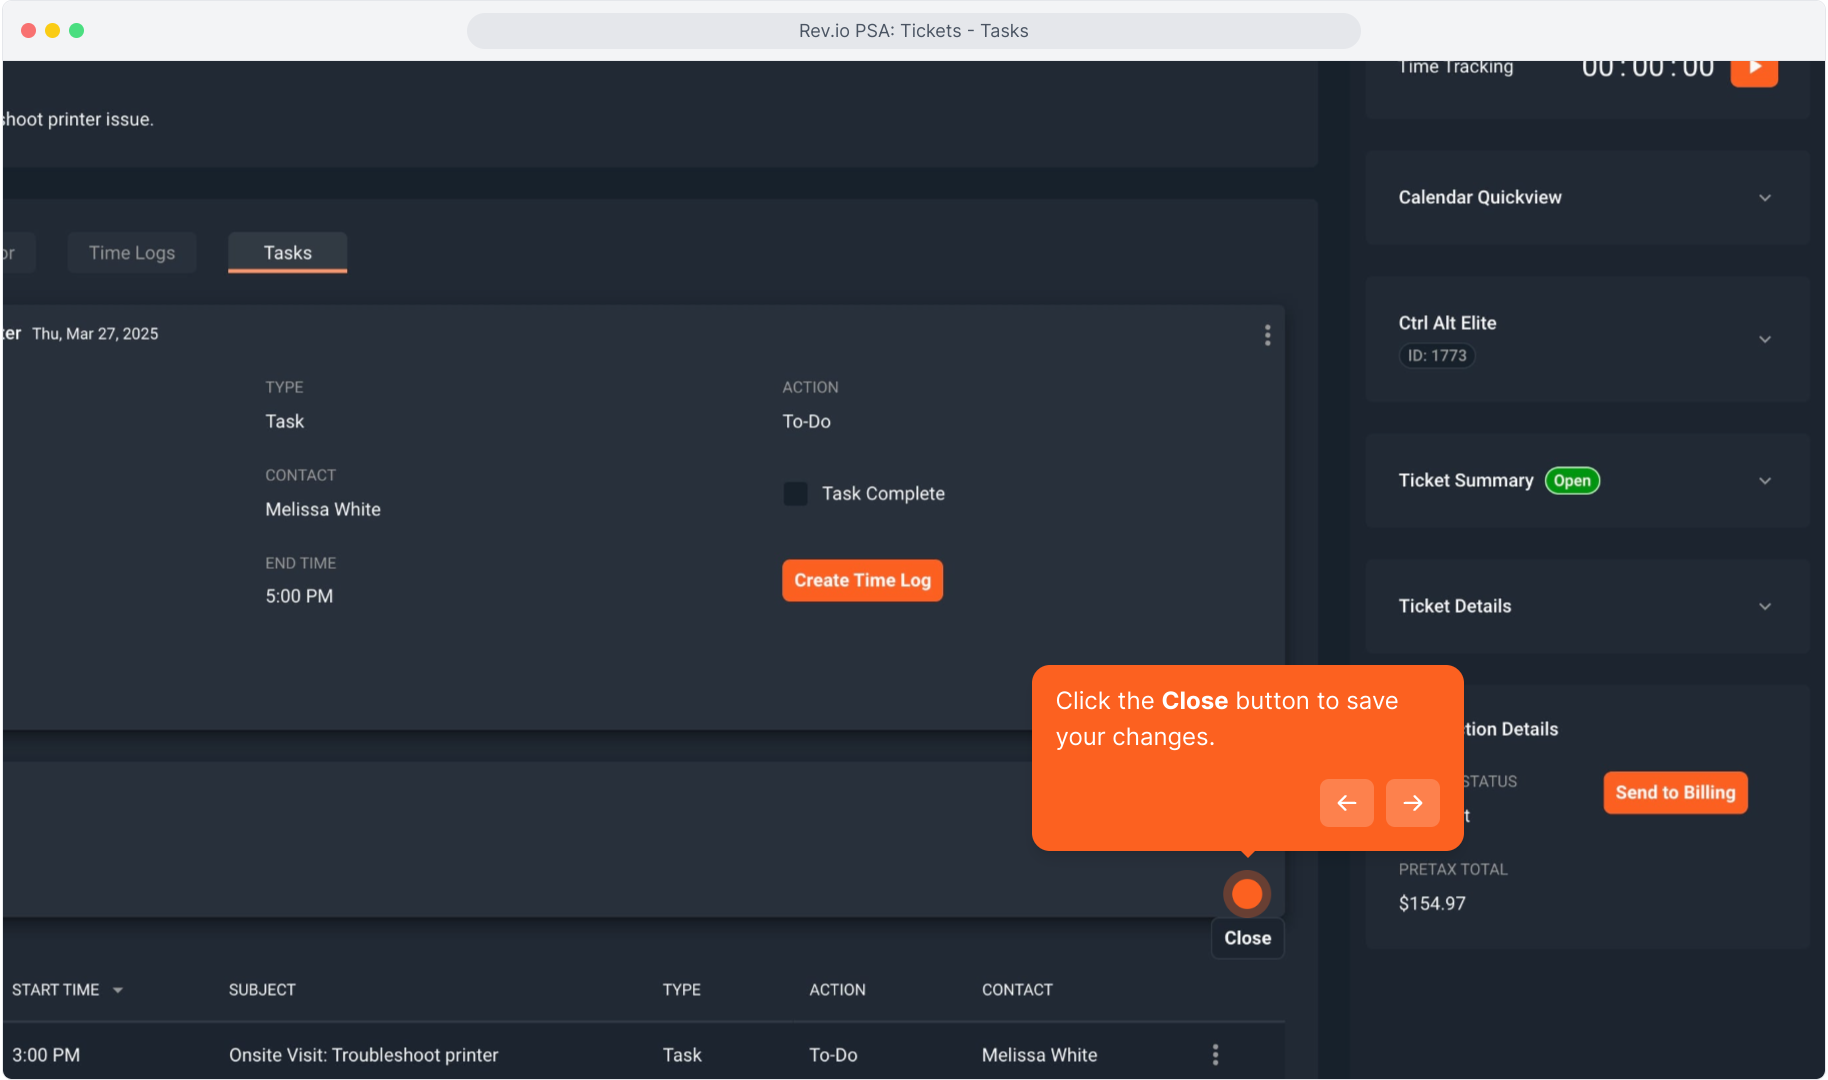
31. Click the Close button to save your changes.
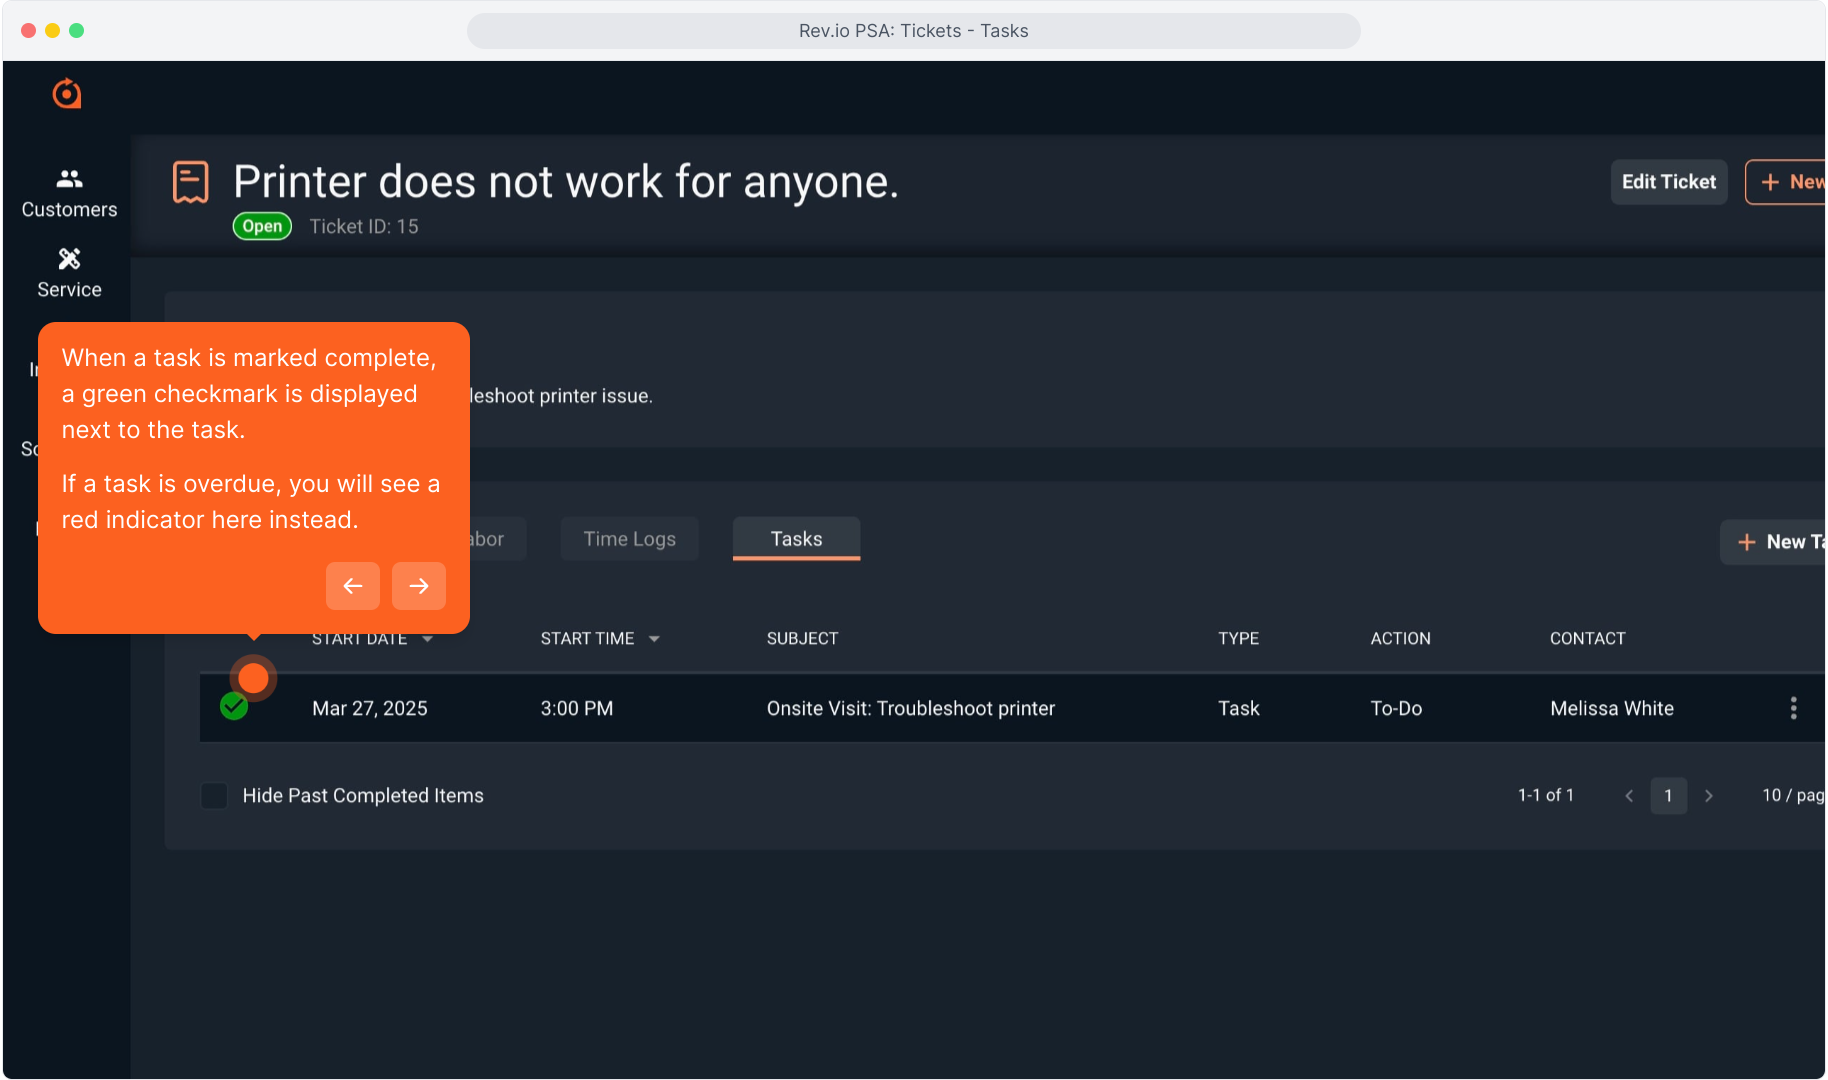
32. When a task is marked complete, a green checkmark is displayed next to the task.
If a task is overdue, you will see a red indicator here instead.