
Create/Edit Flows
The Create/Edit Flow screen allows you to build and manage flows. To create a new flow, navigate to Admin > Workflows, click the Flow Builder tab, and click the Add Flow button. To edit an existing flow, click the ellipsis at the end of the flow row and select Edit.
| NOTE: Each flow includes a Visual Map that generates automatically as you build out your phases and routes. You can switch to the Visual Map at any time to see how your flow is taking shape, rearrange the layout for clarity, and export it for use outside of Rev.io. See the Workflows: Visual Map article for more information. |
Creating Flows
A flow is a structured process made up of phases, actions, and routes that can be assigned to a ticket to guide your team through the steps required to complete the work.
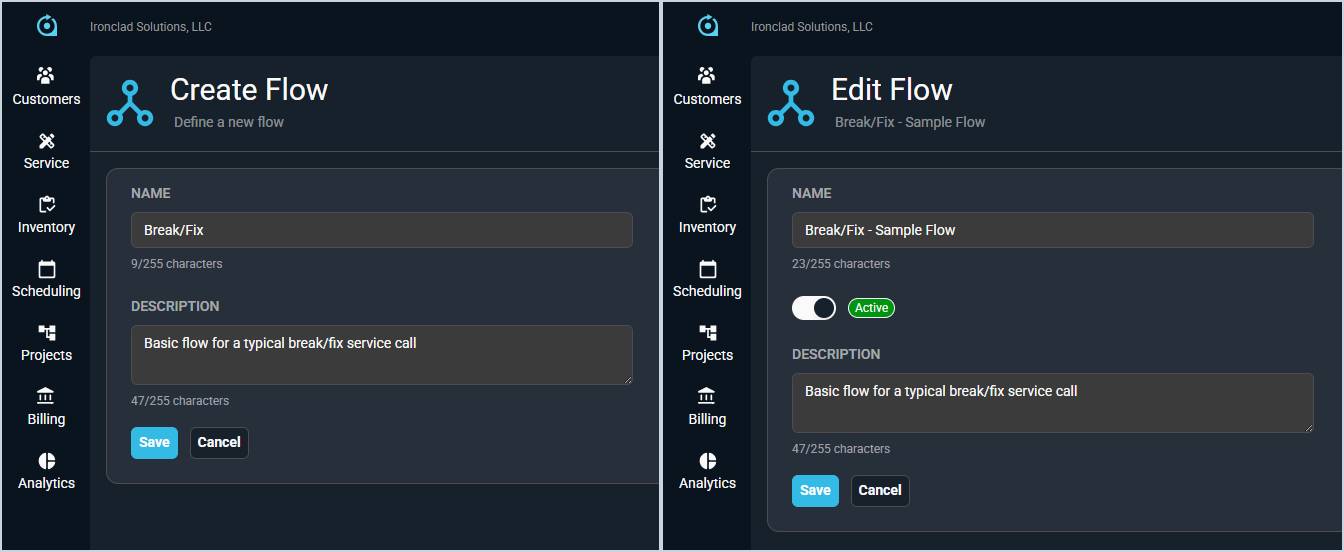
When creating or editing a flow, you can update the following details.
| No. | Label | Definition |
| 1 | Name | Name of the flow. |
| 2 | Status | Current status of the flow. Status options include Active and Inactive. |
| 3 | Description | Description of the flow. |
Adding Phases
Phases are the stages of work that make up a flow. Each phase contains one or more actions that must be addressed before the flow can advance. To add a phase, click the + Add Phase button and complete the fields below.
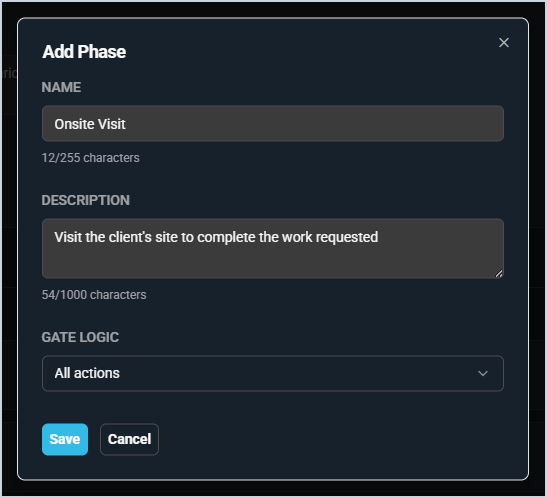
| No. | Label | Definition |
| 1 | Name | Name of the phase as it will appear on the ticket and in the Visual Map. |
| 2 | Description | Description of the phase that provides additional context for the person completing it. |
| 3 | Gate Logic | Determines which actions must be completed before a route can be selected and the flow can advance. See the table below for more information about gate logic options. |
Gate logic options are defined below.
| Label | Definition |
| All Actions | Every action in the phase must be completed before a route can be selected. |
| Specific Actions | Only the actions you select must be completed before a route can be selected. |
| Any Action | At least one action in the phase must be completed before a route can be selected. |
Building Out Phases
Once a phase is created, you can add actions and routes to it directly from the flow builder. Each phase displays its actions and routes in an expandable card. Click the chevron on the left side of the phase header to expand or collapse it.
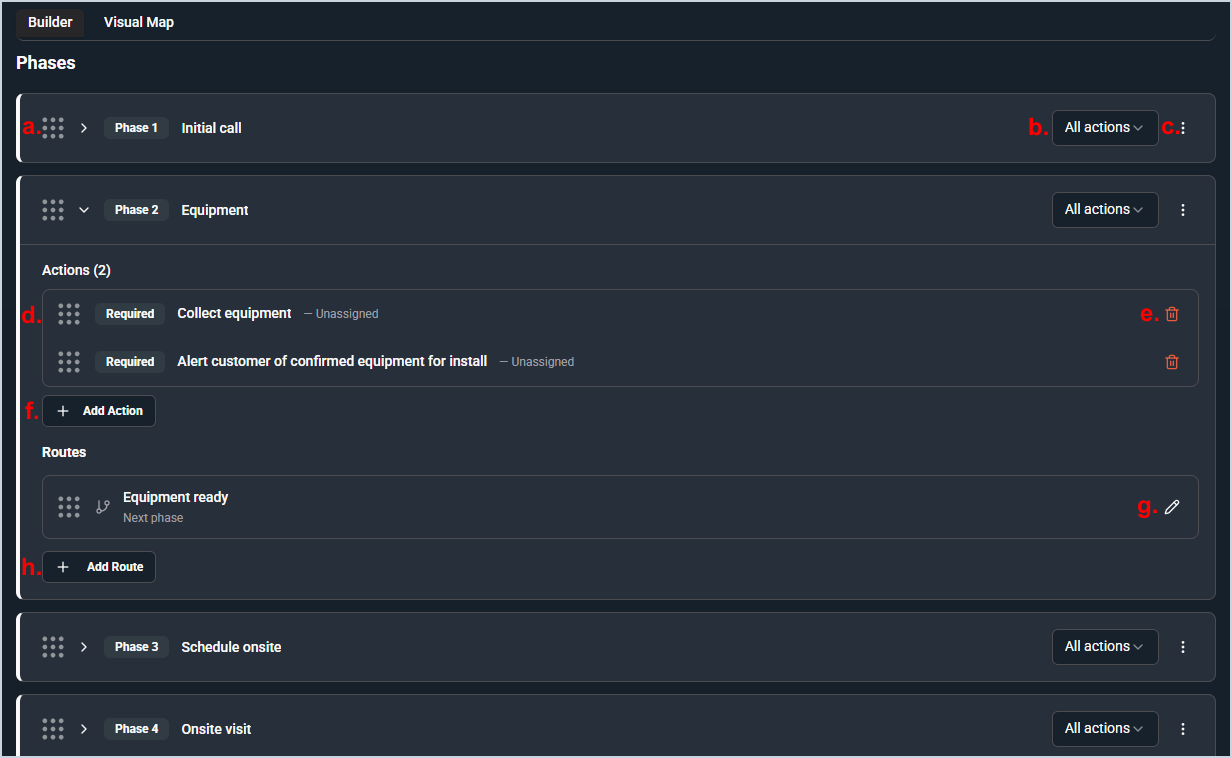
The following actions are available on a phase.
| Area | Label | Definition |
| a | Reorder Phases | Reorder phases by clicking and dragging the grid icon to the left of the phase header. |
| b | Change Gate Logic | Change the gate logic of the phase by clicking the dropdown at the end of the phase header and selecting All Actions, Specific Actions, or Any Action. |
| c | Edit Phase Details | Edit the phase name, description, or gate logic by clicking the ellipsis at the end of the phase row and selecting Edit. |
| d | Reorder Actions or Routes | Reorder actions or routes within a phase by clicking and dragging the grid icon to the left of the row. |
| e | Remove an Action | Remove an action from the phase by clicking the delete icon at the end of the action row. |
| f | Add Action | Add an action to the phase by clicking the + Add Action button and selecting an action from the Action Library. See the Create/Edit Workflow Actions article for more information. |
| g | Edit a Route | Edit a route by clicking the edit icon at the end of the route row. |
| h | Add Route | Add a route to the phase by clicking the + Add Route button. See the Adding Routes section below for more information. |
Adding Routes
Routes define the paths available when moving from one phase to the next. When the gate logic conditions for a phase are met, the technician is prompted to select a route, which determines which phase launches next. Routes allow a flow to be non-linear, branching based on the outcome of the work in that phase.
To add a route, click the + Add Route button within the phase, enter a name for the route, and select the destination phase. Routes can also point to phases in other flows, allowing you to chain flows together.
| NOTE: Route selection is always manual. The technician is prompted to select a route once the gate logic conditions for the current phase are met. Automatic advancement through phases is planned for a future release. |
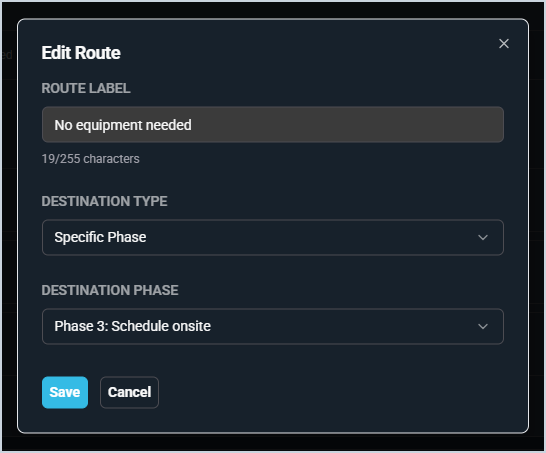
Each field on the Add/Edit Route modal is defined below.
| No. | Label | Definition |
| 1 | Route Label | Name of the route as it will appear on the ticket and in the Visual Map. |
| 2 | Destination Type | Type of destination the route leads to. Destination Type options include Specific Phase and Next Phase. |
| 3 | Destination Phase | Phase the route leads to when selected. Available when Destination Type is set to Specific Phase. |