
Add/Edit New Ticket Macros
The New Macro and Edit Macro screens allow you to create and edit new ticket macros in your instance. New ticket macros define predefined values that can be applied when creating a new ticket, saving time on common ticket configurations. To add a new ticket macro, click the Add New Ticket Macro button from the New Ticket Macros section on the Tickets tab in the Macros category on the System Settings screen.
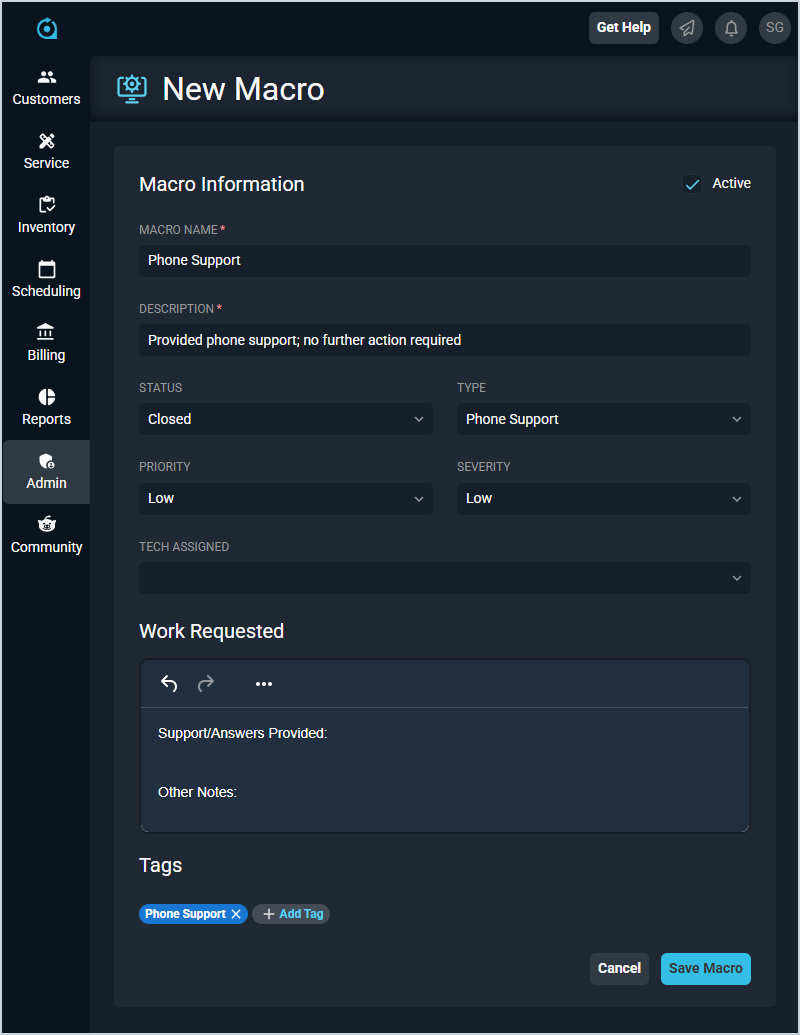
Each field on the New Macro screen is defined below.
| No. | Label | Definition |
| 1 | Active | Check this option to make the macro active and available for use when creating tickets. |
| 2 | Macro Name | Name of the macro. |
| 3 | Description | Description that will populate on the ticket when the macro is applied. |
| 4 | Status | Status that will be applied to the ticket when the macro is used. |
| 5 | Type | Ticket type that will be applied to the ticket when the macro is used. |
| 6 | Priority | Priority that will be applied to the ticket when the macro is used. |
| 7 | Severity | Severity that will be applied to the ticket when the macro is used. |
| 8 | Tech Assigned | Tech that will be assigned to the ticket when the macro is used. |
| 9 | Work Requested | Work requested text that will populate on the ticket when the macro is applied. |
| 10 | Tags | Tags that will be applied to the ticket when the macro is used. Click the + Add Tag button to add tags to the macro. |