How To Guide: Correcting Billing Errors
1. Introduction
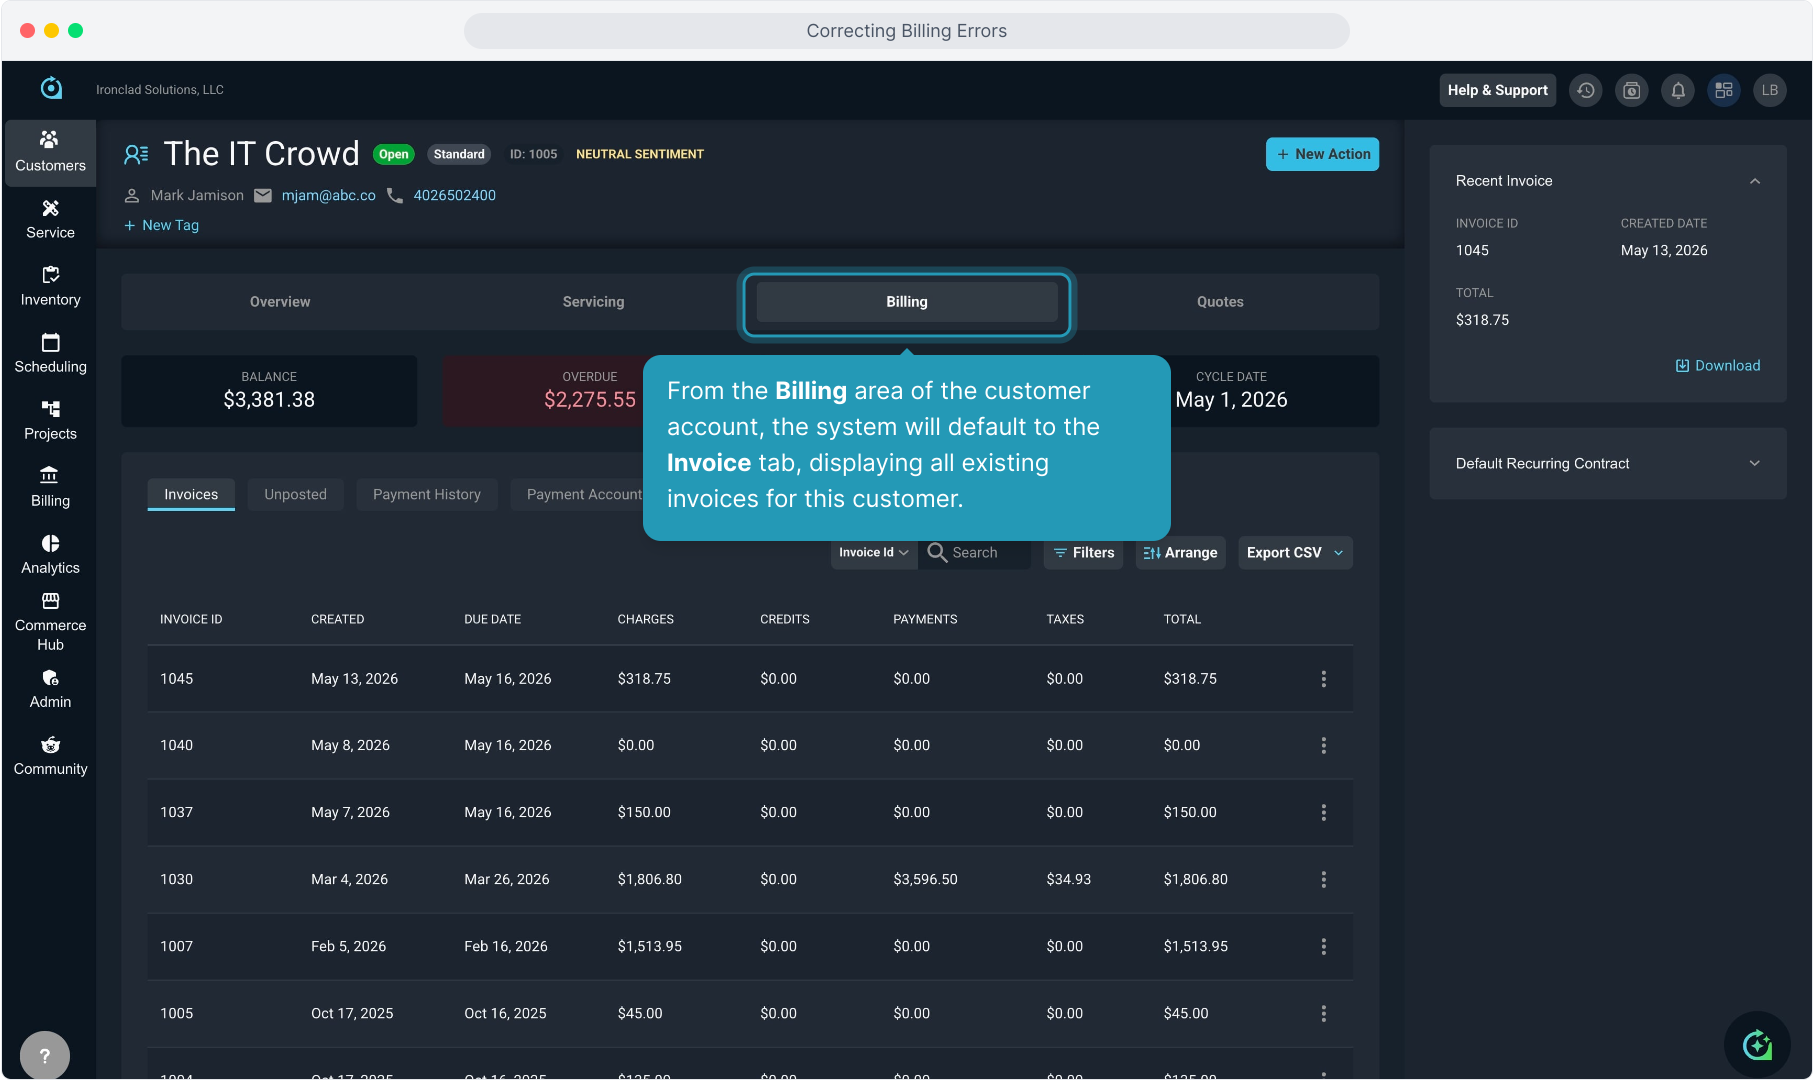
2. From the Billing area of the customer account, the system will default to the Invoice tab, displaying all existing invoices for this customer.
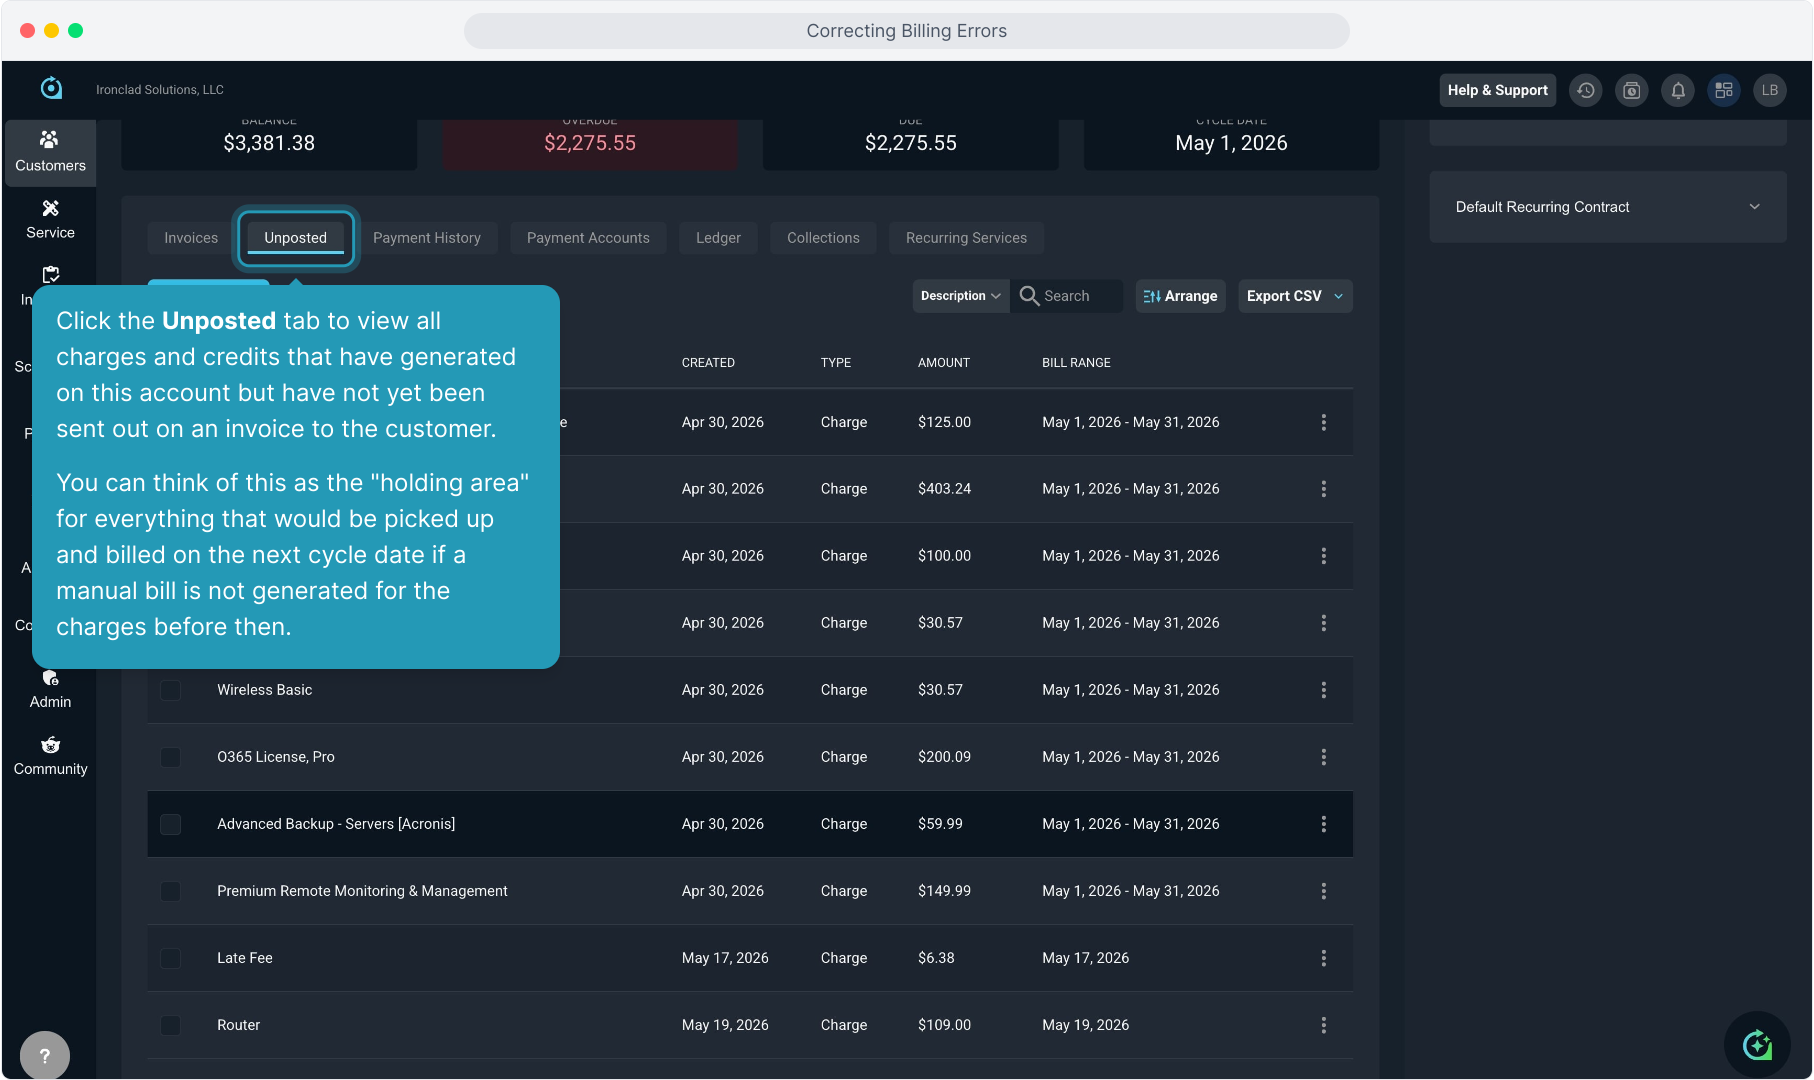
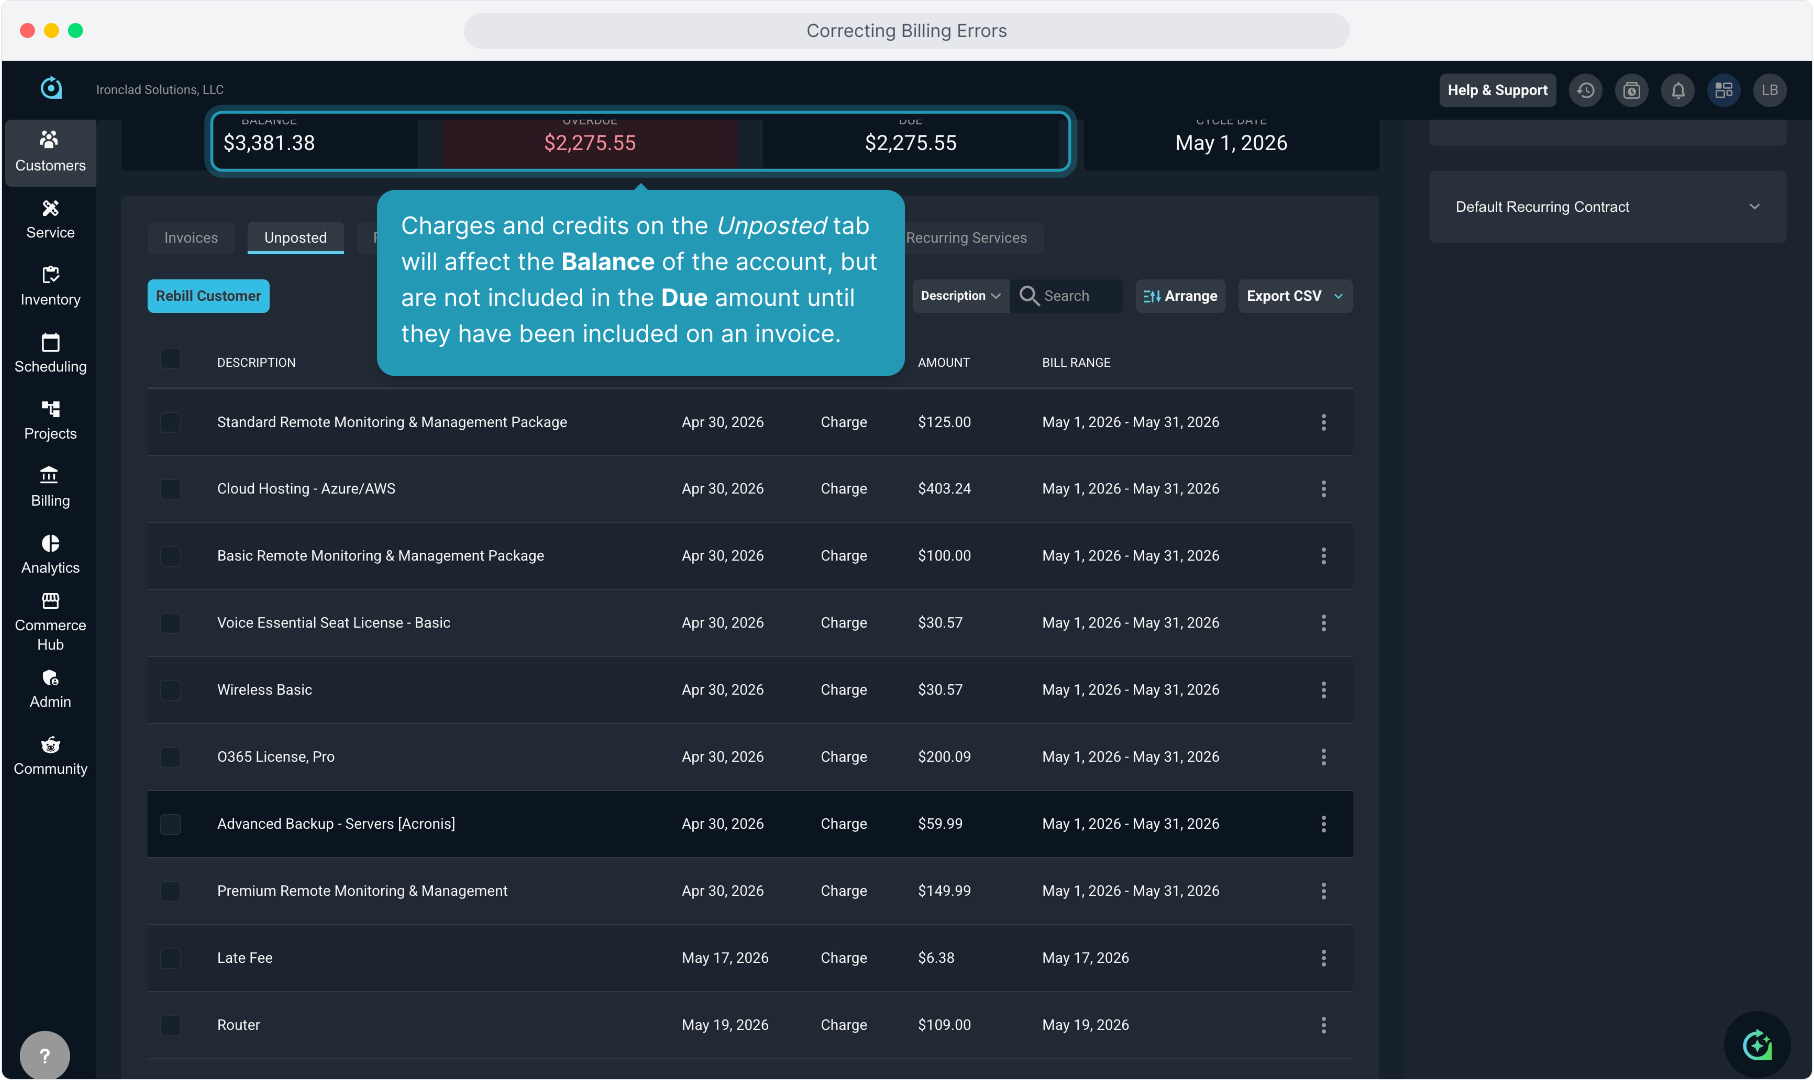
3. Click the Unposted tab to view all charges and credits that have generated on this account but have not yet been sent out on an invoice to the customer.
You can think of this as the "holding area" for everything that would be picked up and billed on the next cycle date if a manual bill is not generated for the charges before then.
4. Charges and credits on the Unposted tab will affect the Balance of the account, but are not included in the Due amount until they have been included on an invoice.
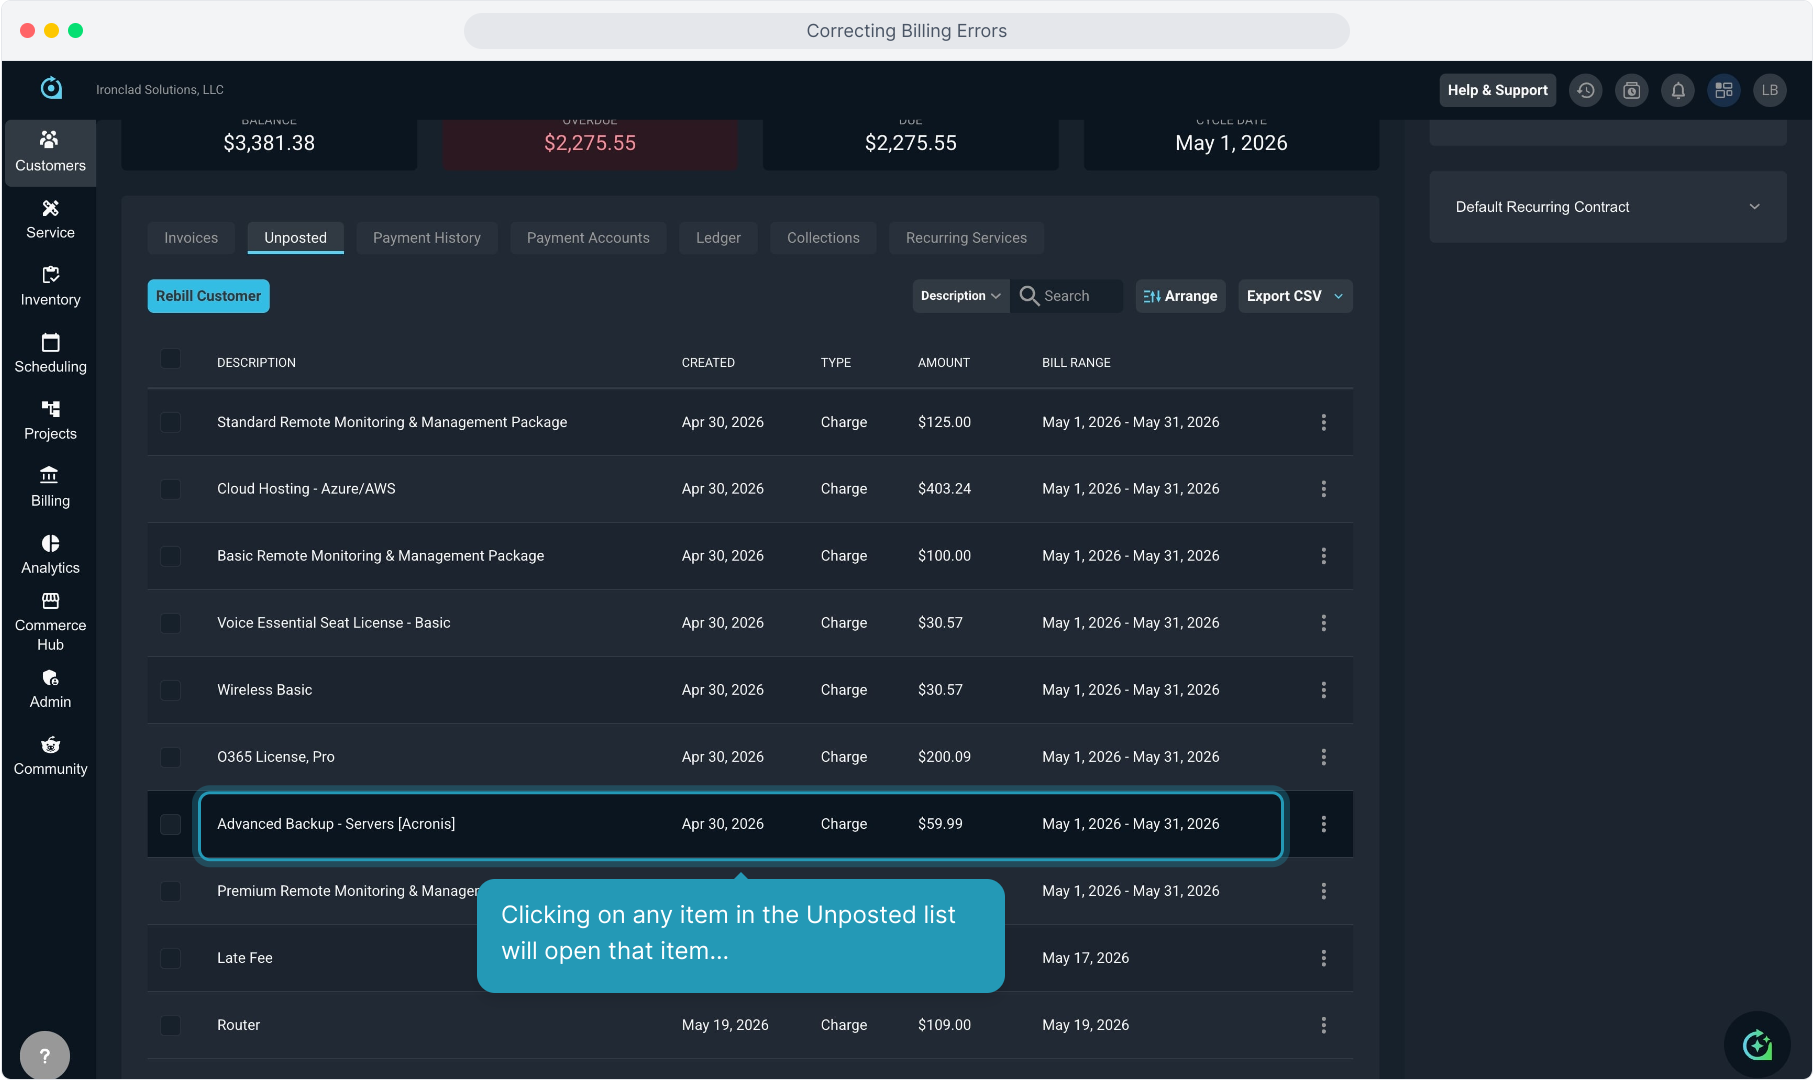
5. Clicking on any item in the Unposted list will open that item...
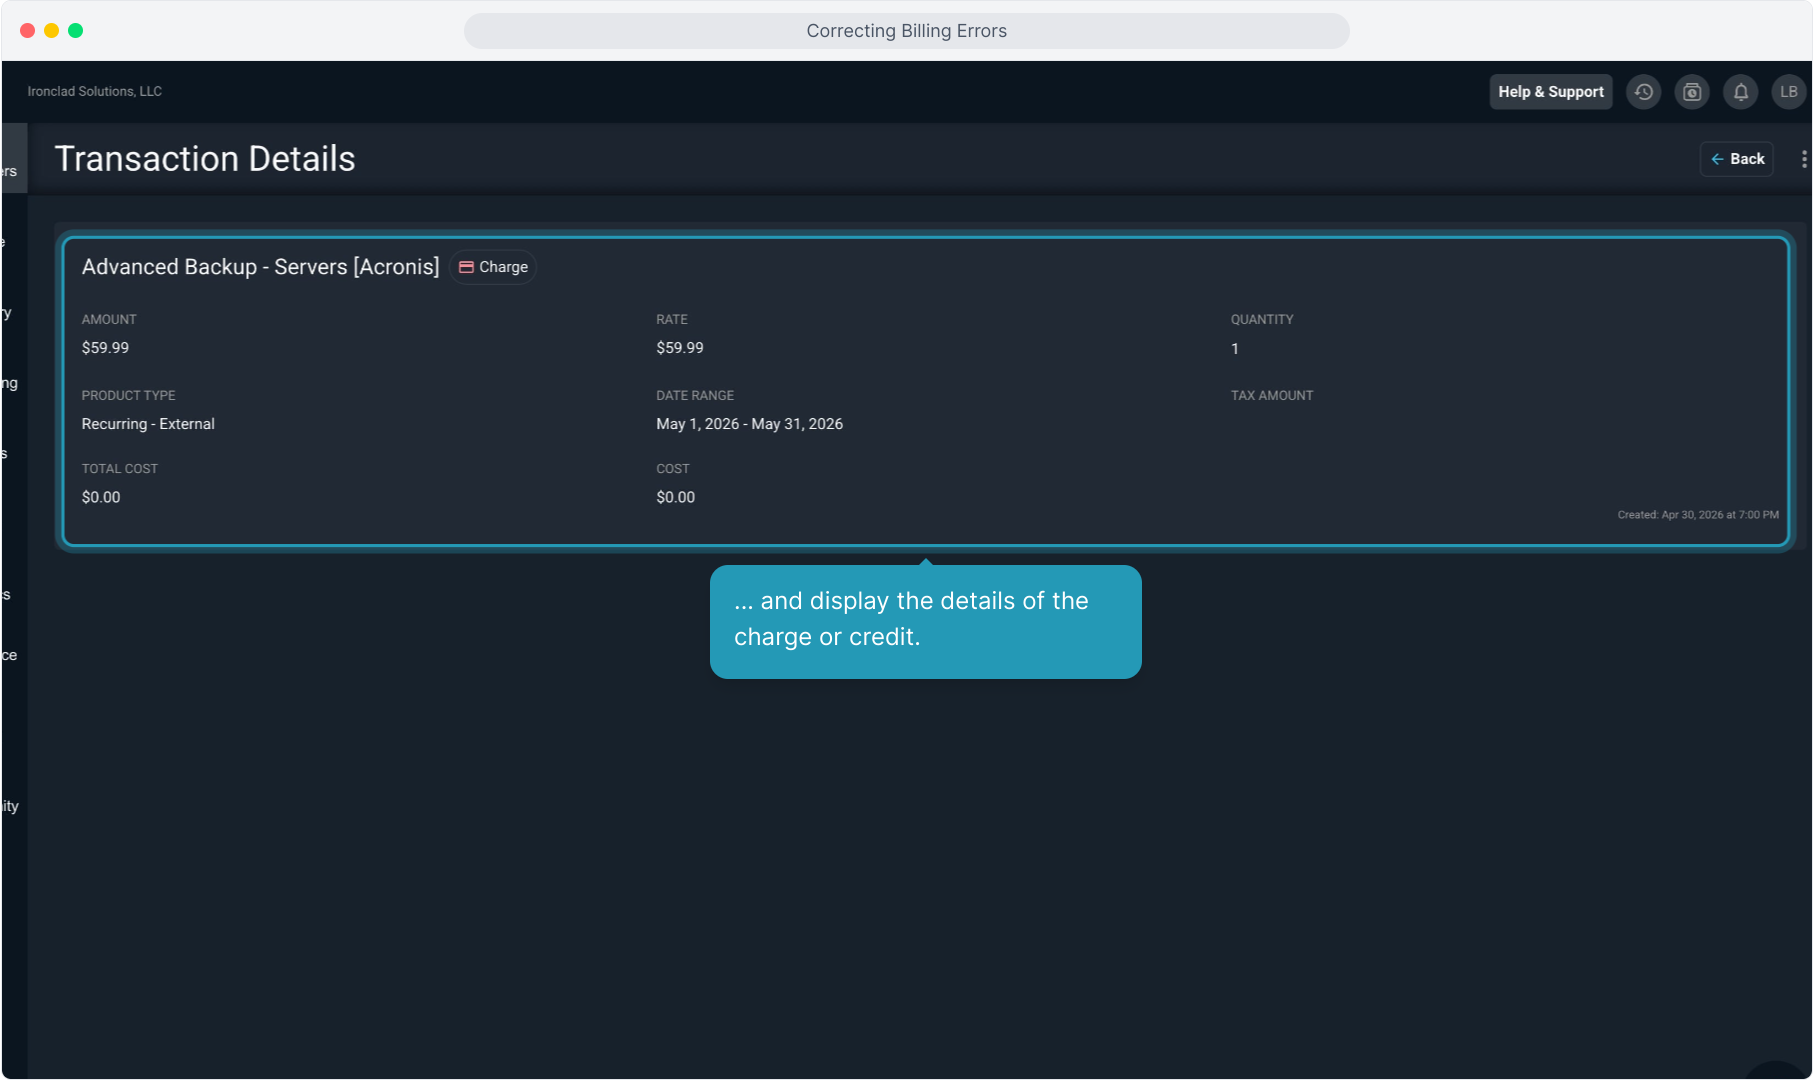
6. ... and display the details of the charge or credit.
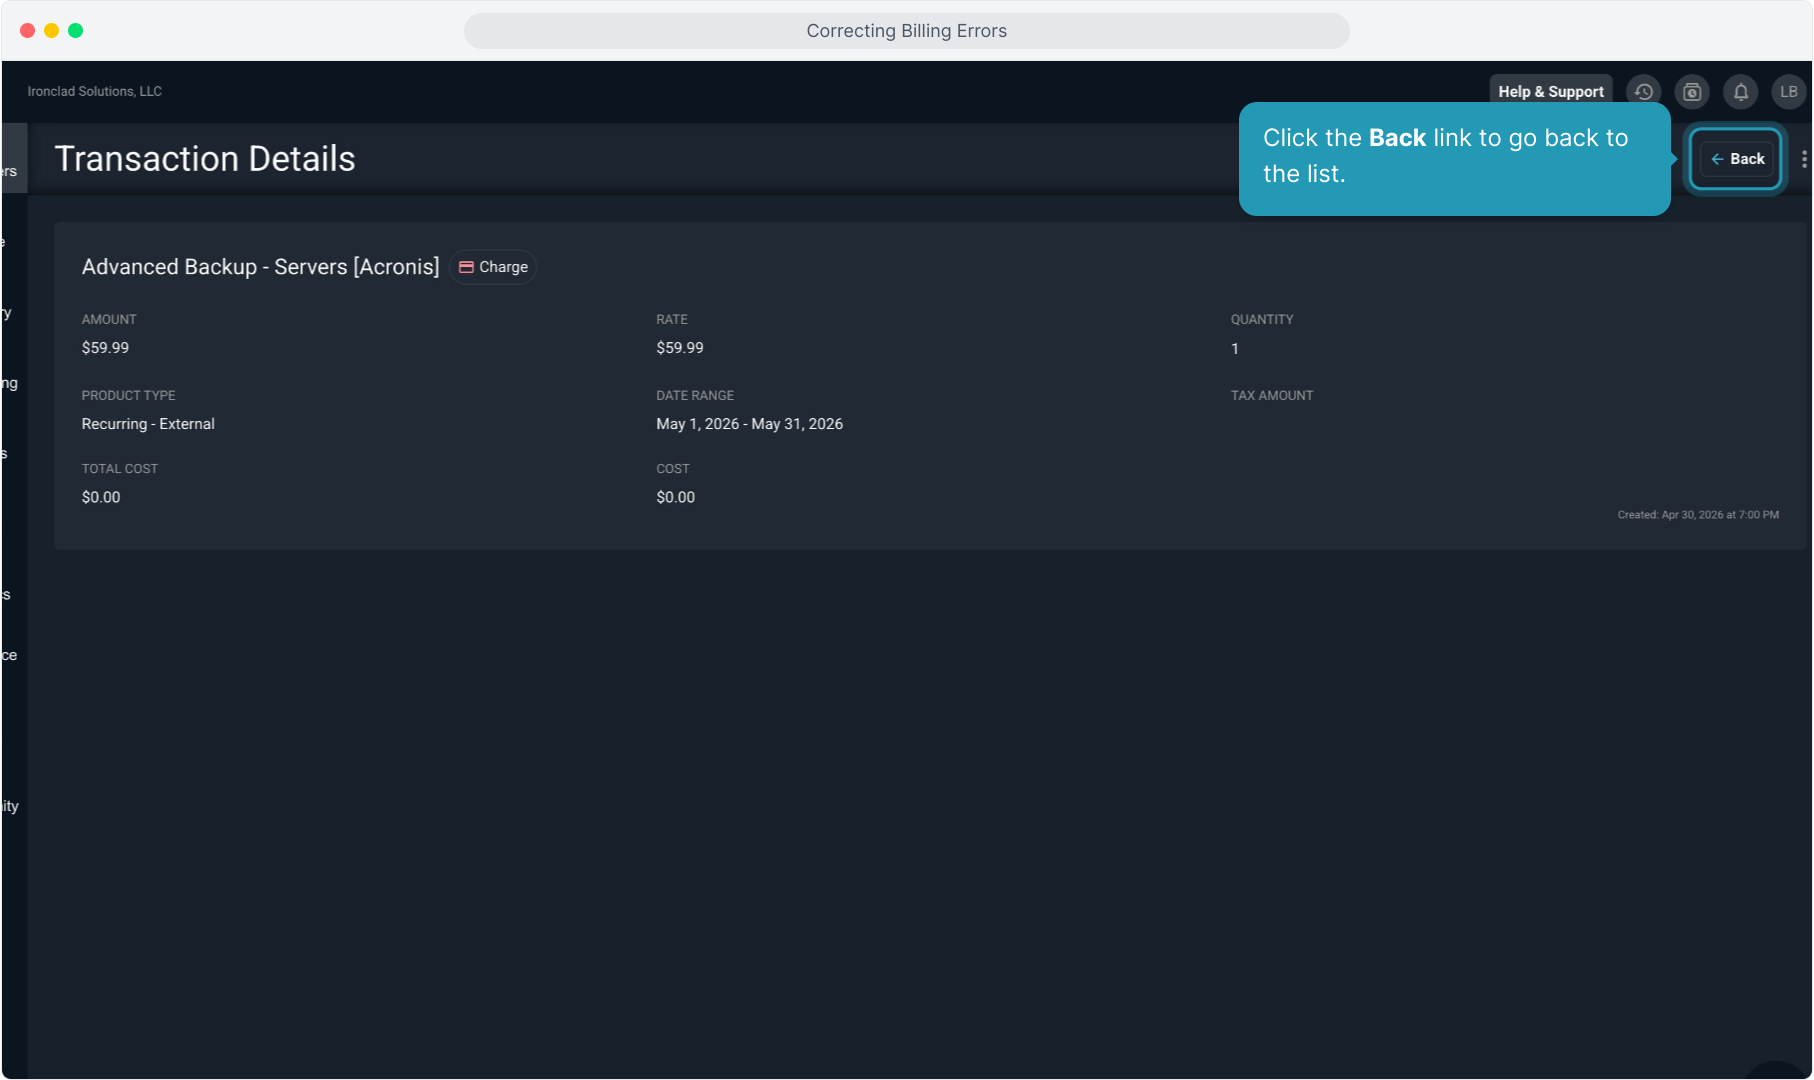
7. Click the Back link to go back to the list.
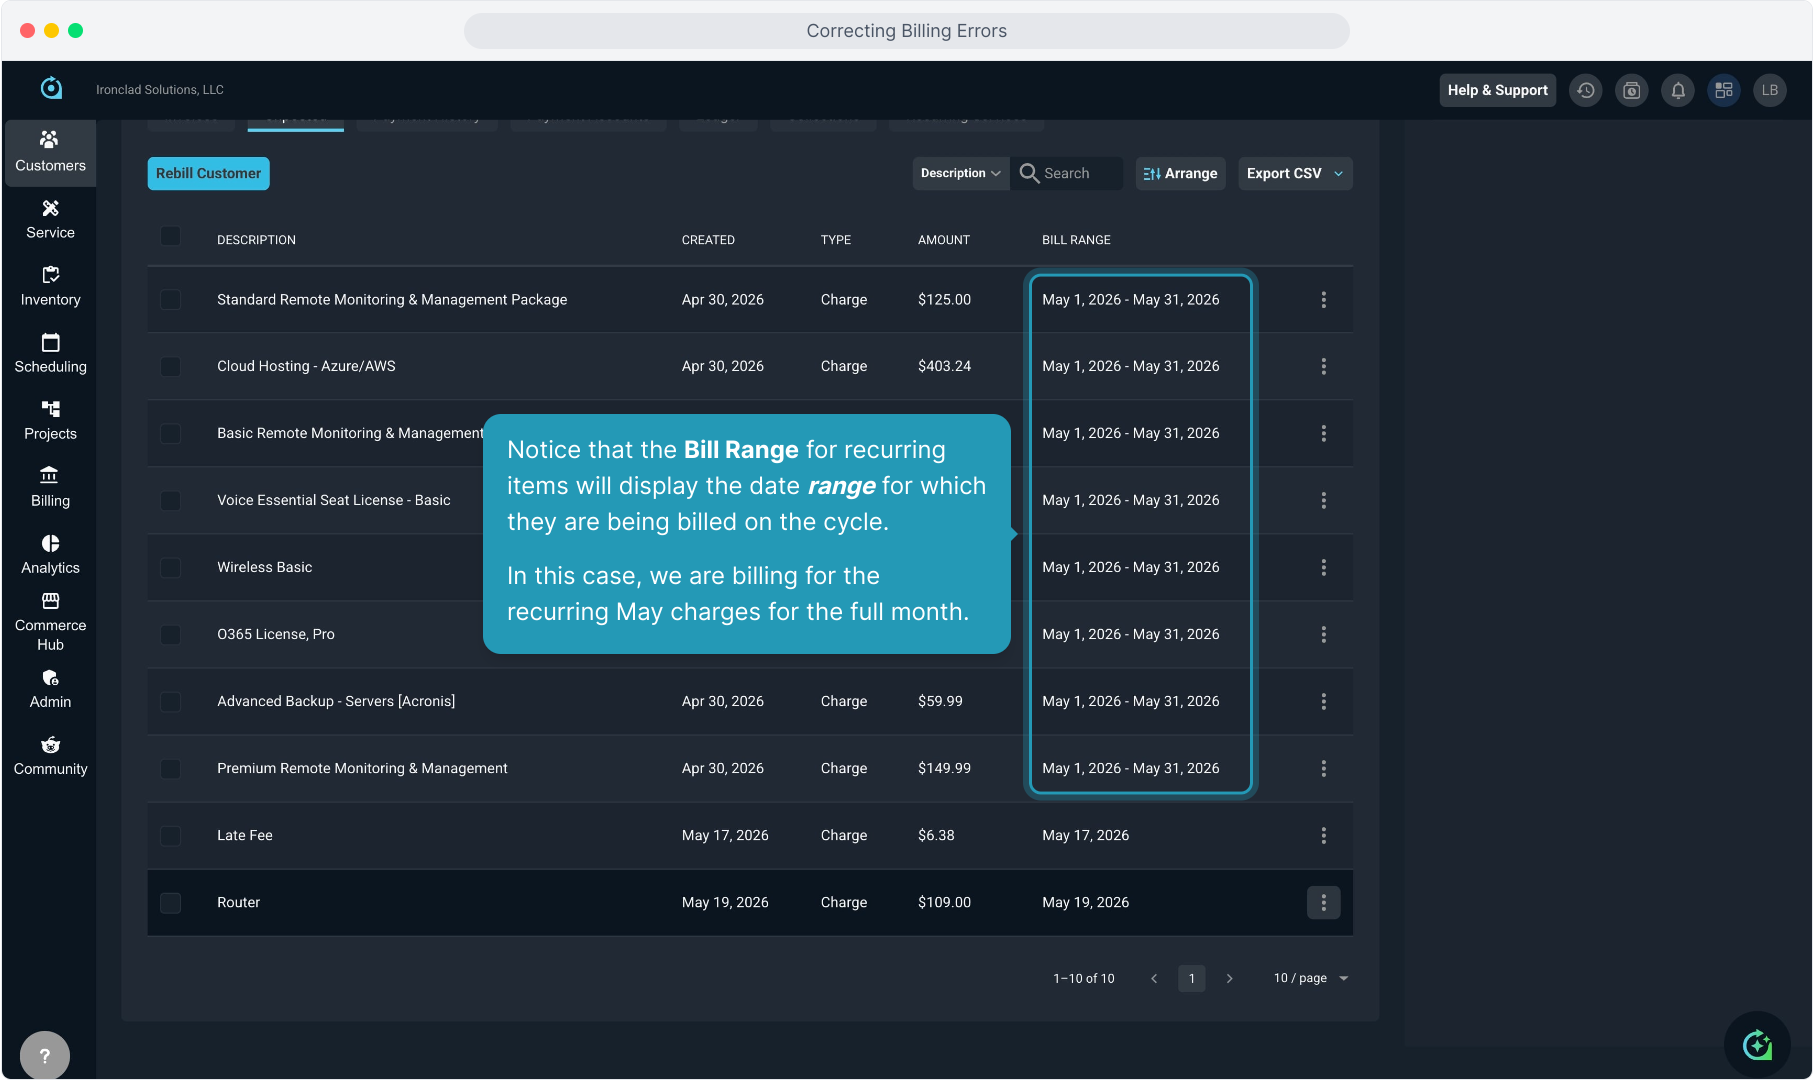
8. Notice that the Bill Range for recurring items will display the date range for which they are being billed on the cycle.
In this case, we are billing for the recurring May charges for the full month.
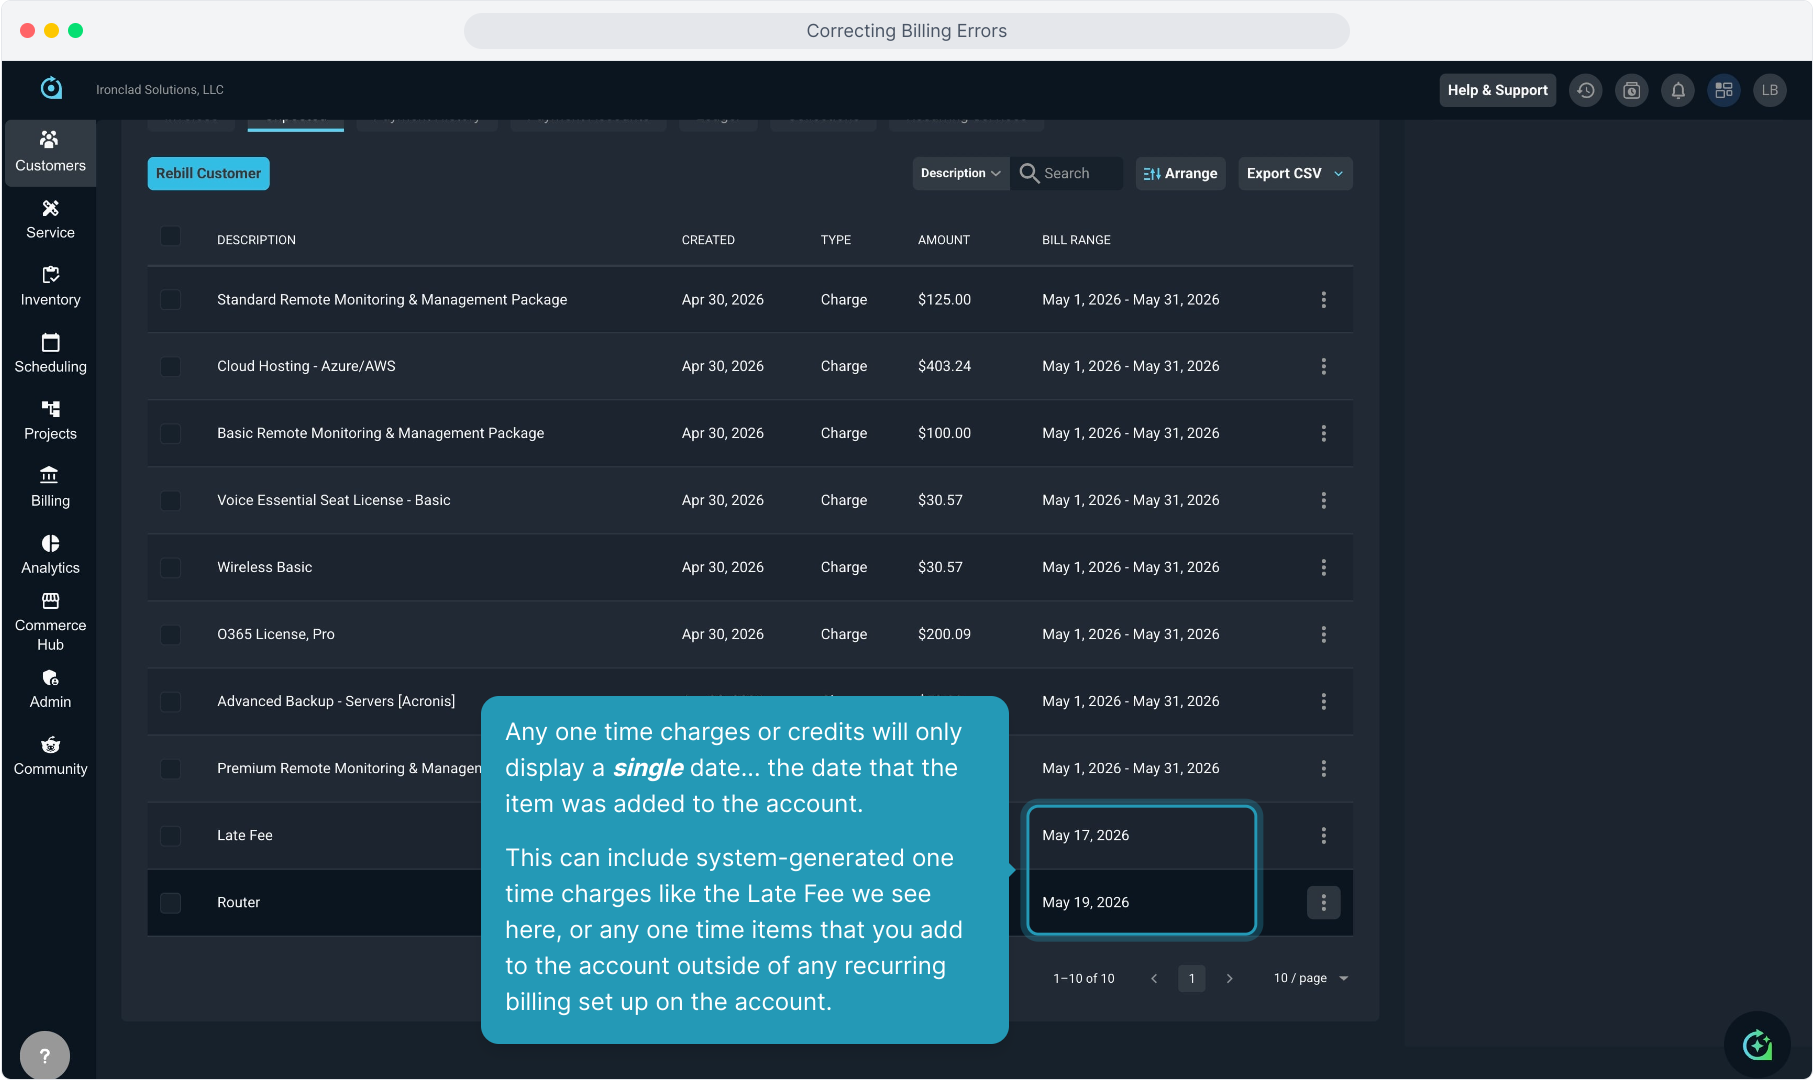
9. Any one time charges or credits will only display a single date... the date that the item was added to the account.
This can include system-generated one time charges like the Late Fee we see here, or any one time items that you add to the account outside of any recurring billing set up on the account.
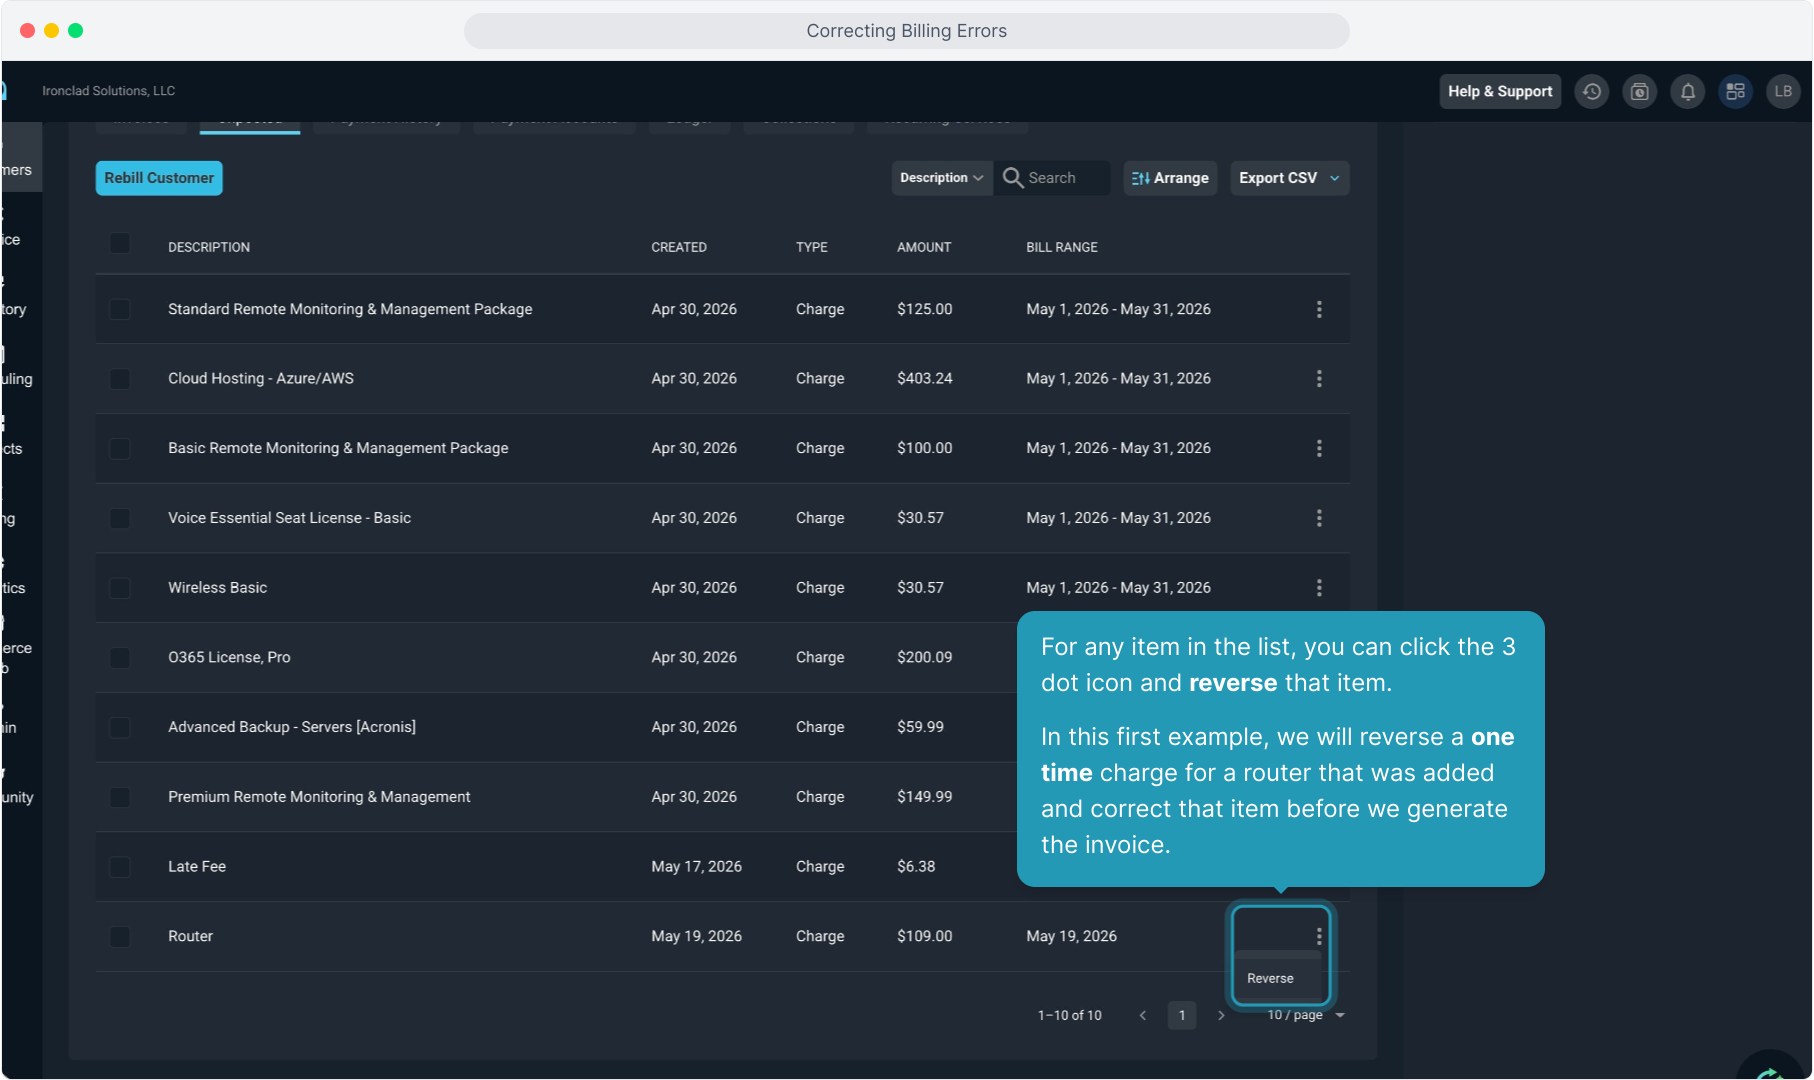
10. For any item in the list, you can click the 3 dot icon and reverse that item.
In this first example, we will reverse a one time charge for a router that was added and correct that item before we generate the invoice.
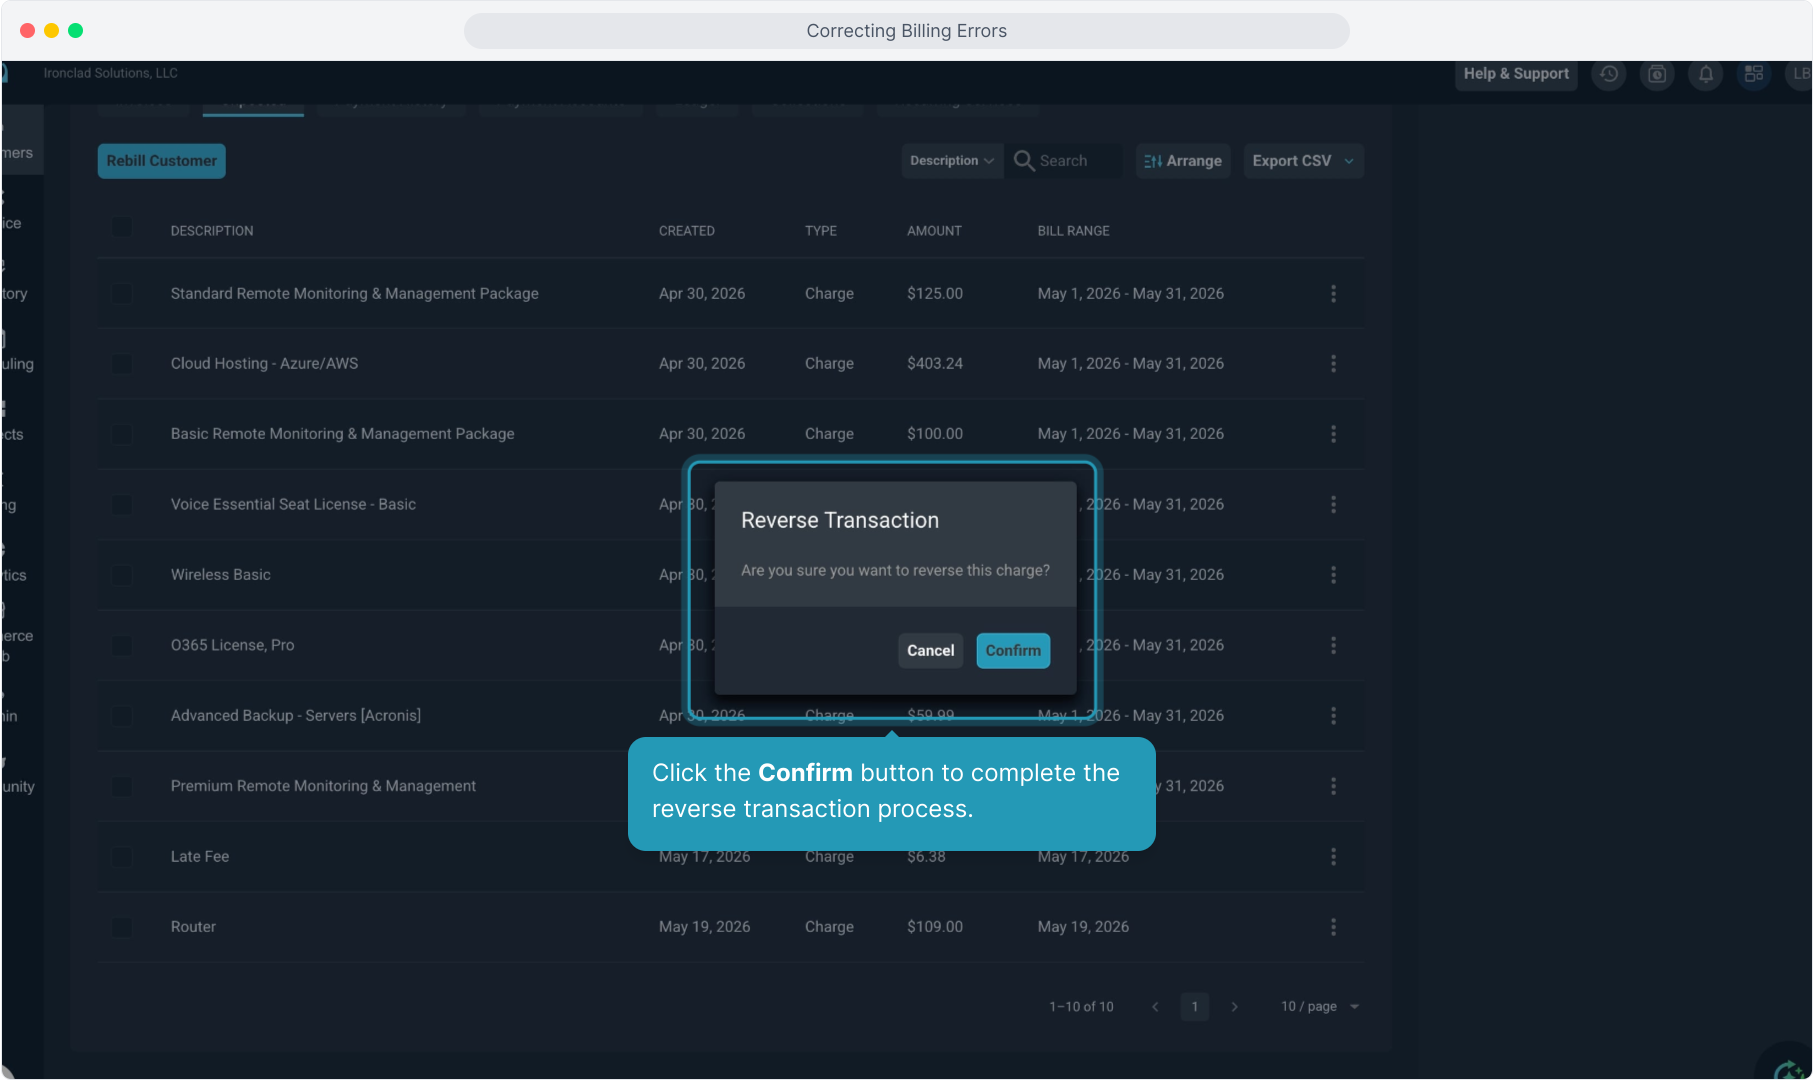
11. Click the Confirm button to complete the reverse transaction process.
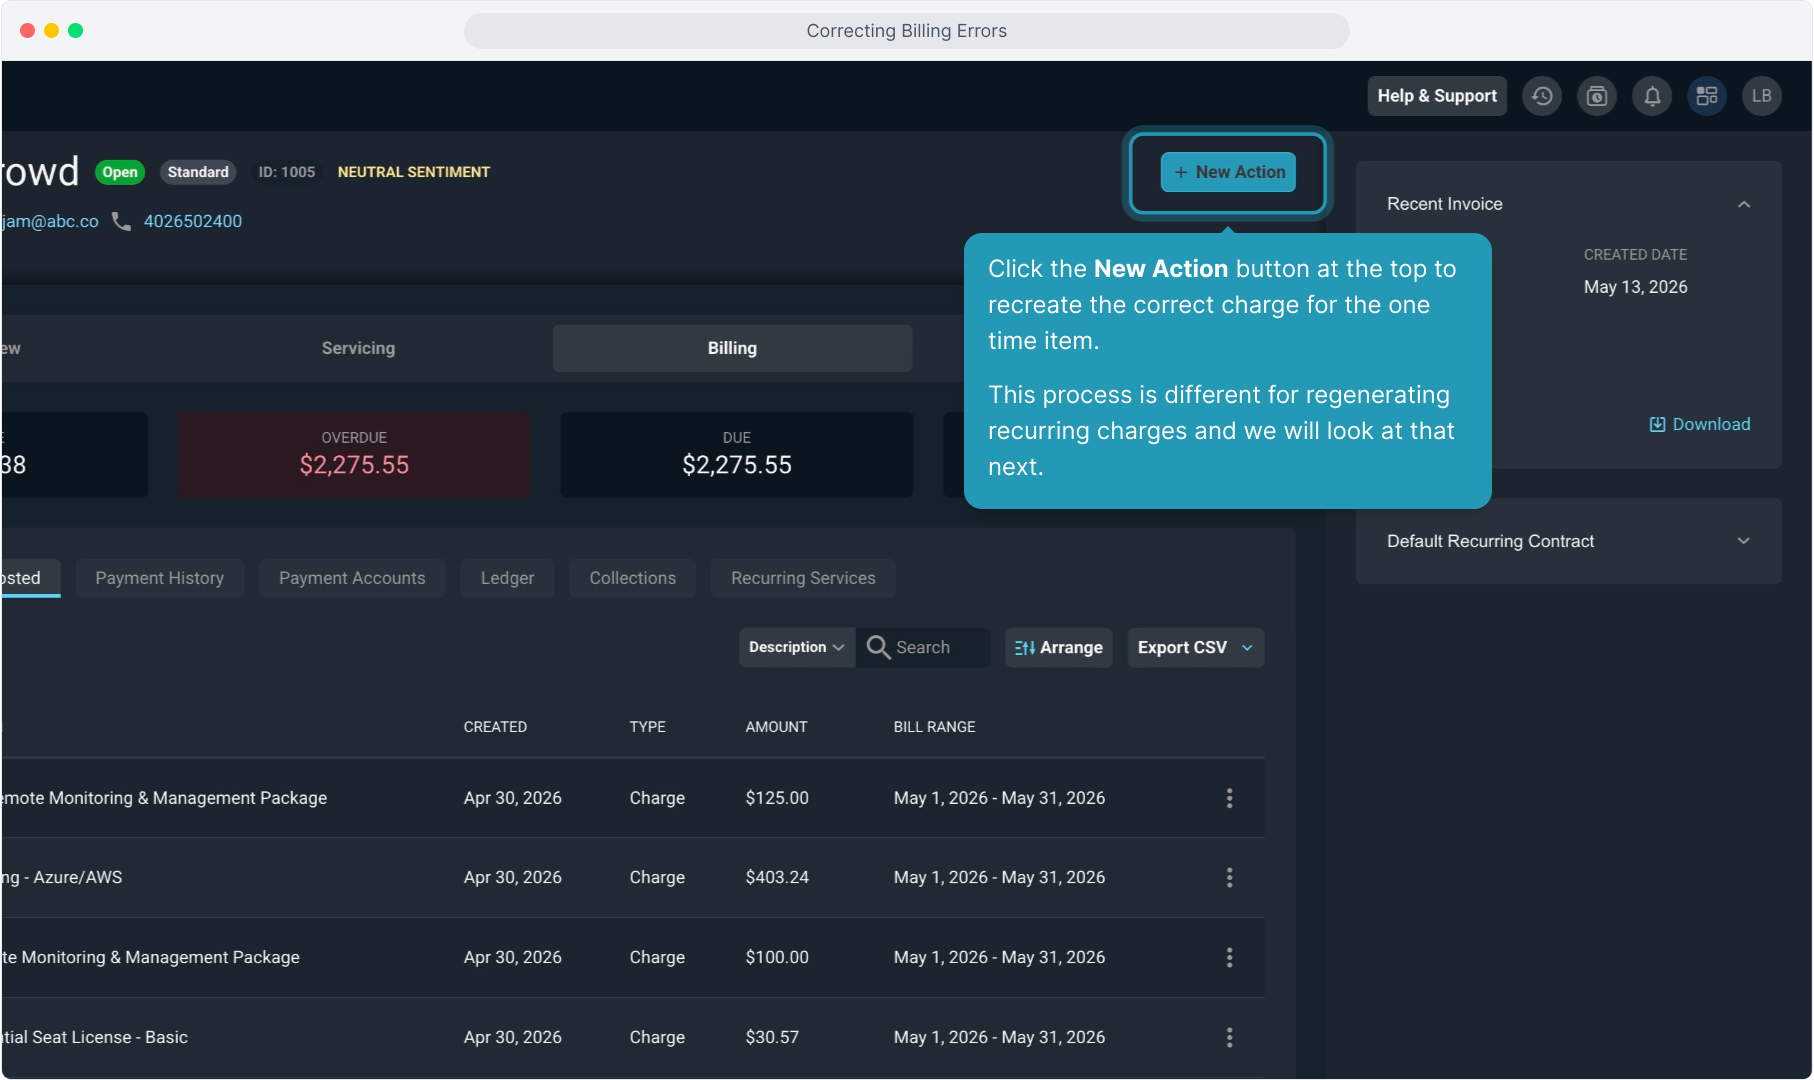
12. Click the New Action button at the top to recreate the correct charge for the one time item.
This process is different for regenerating recurring charges and we will look at that next.
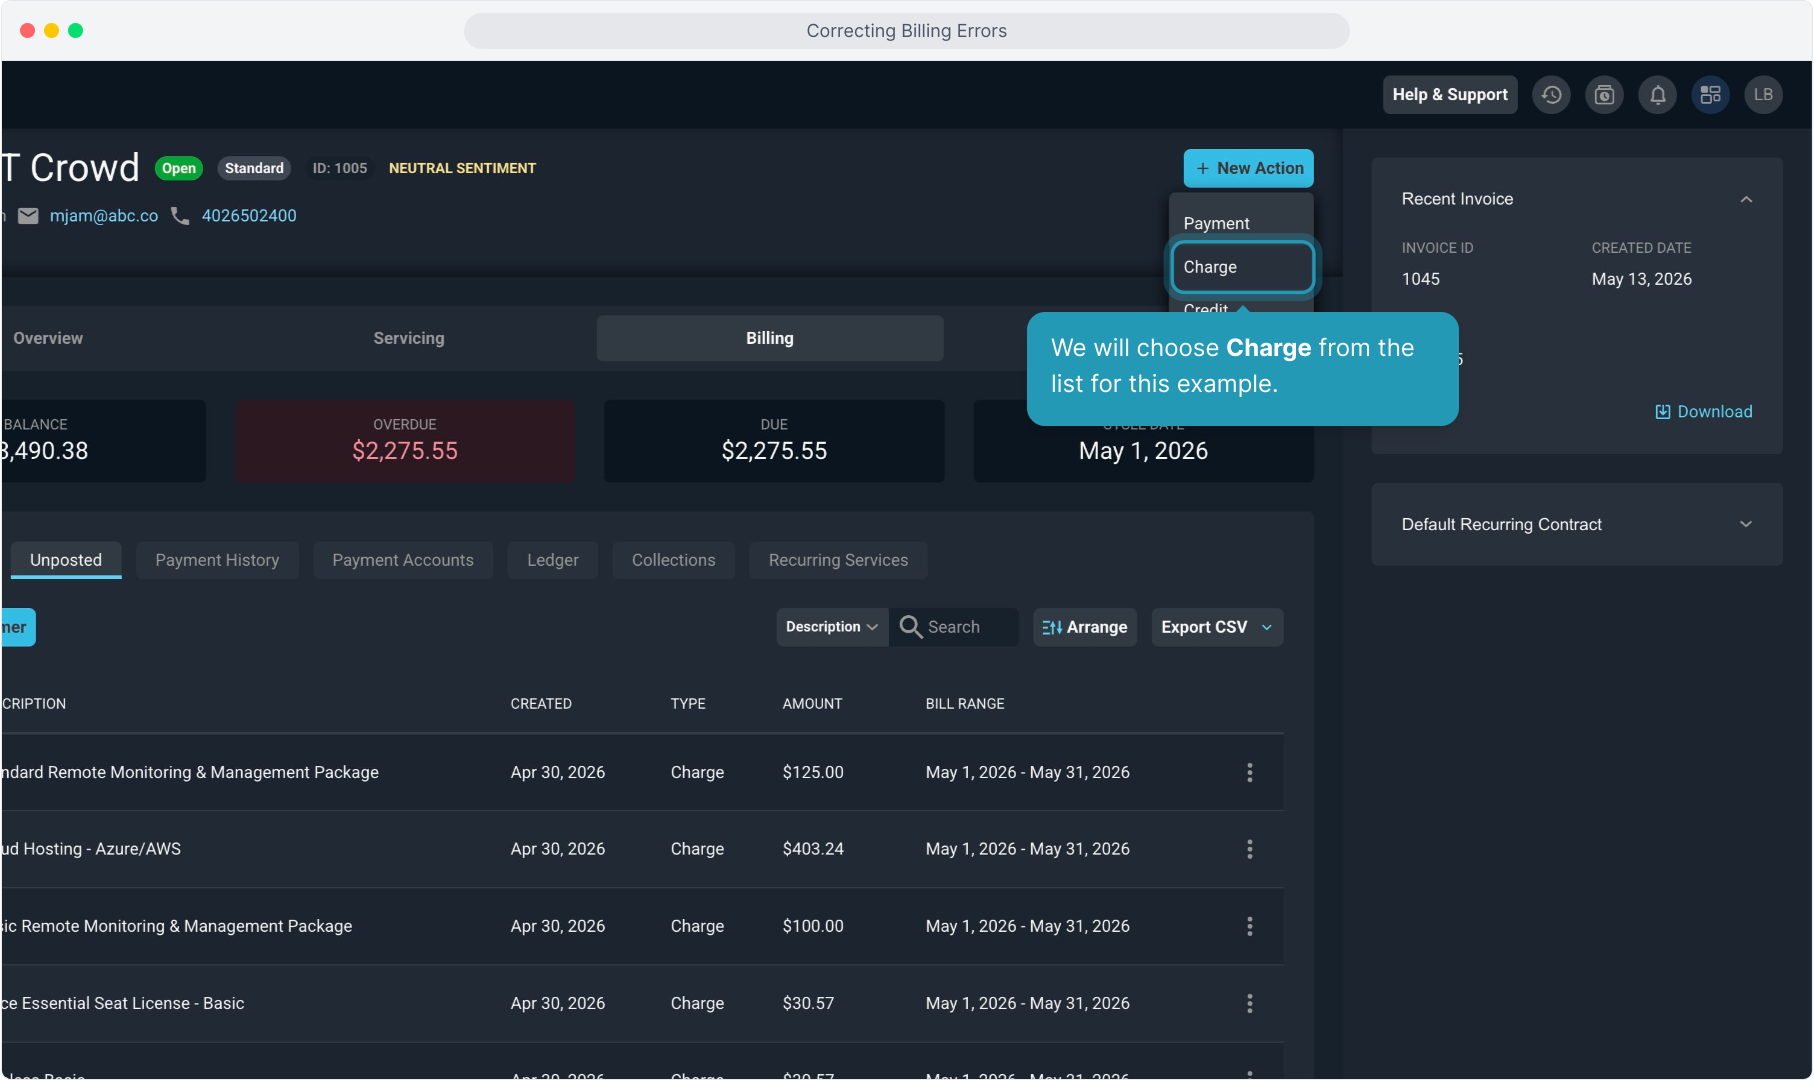
13. We will choose Charge from the list for this example.
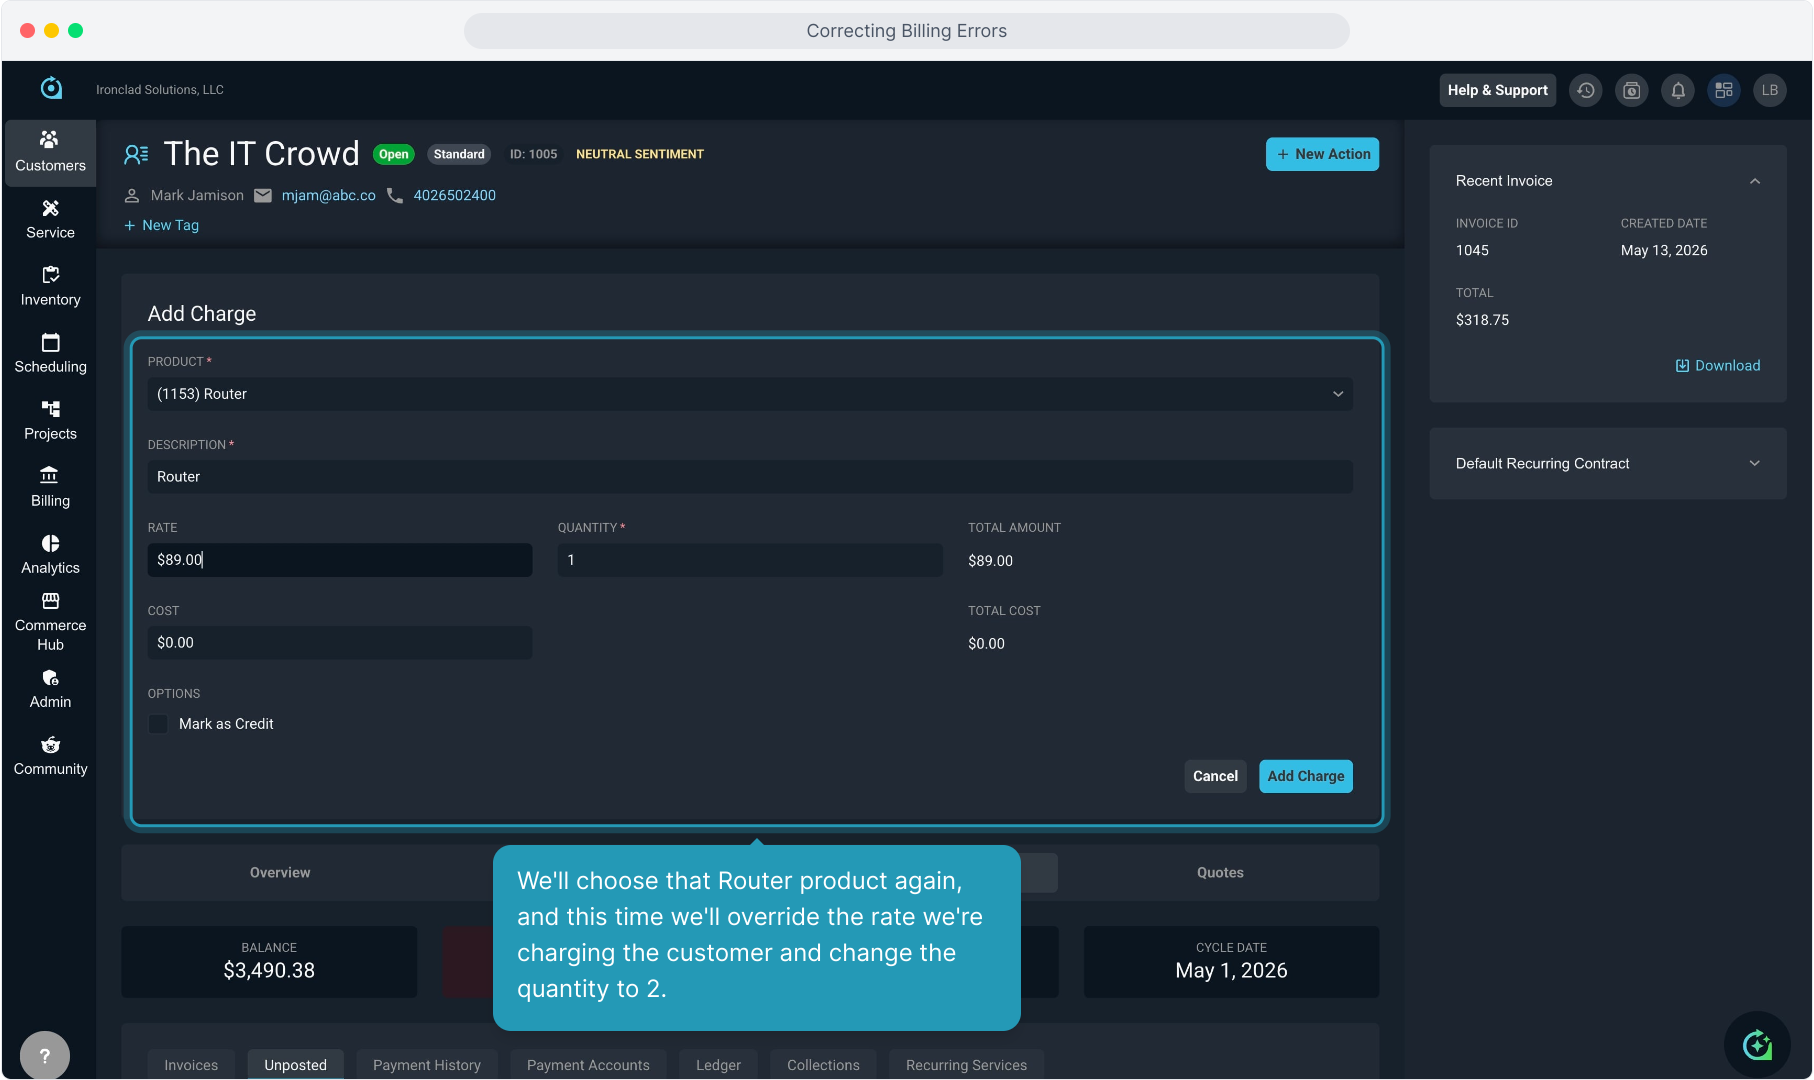
14. We'll choose that Router product again, and this time we'll override the rate we're charging the customer and change the quantity to 2.
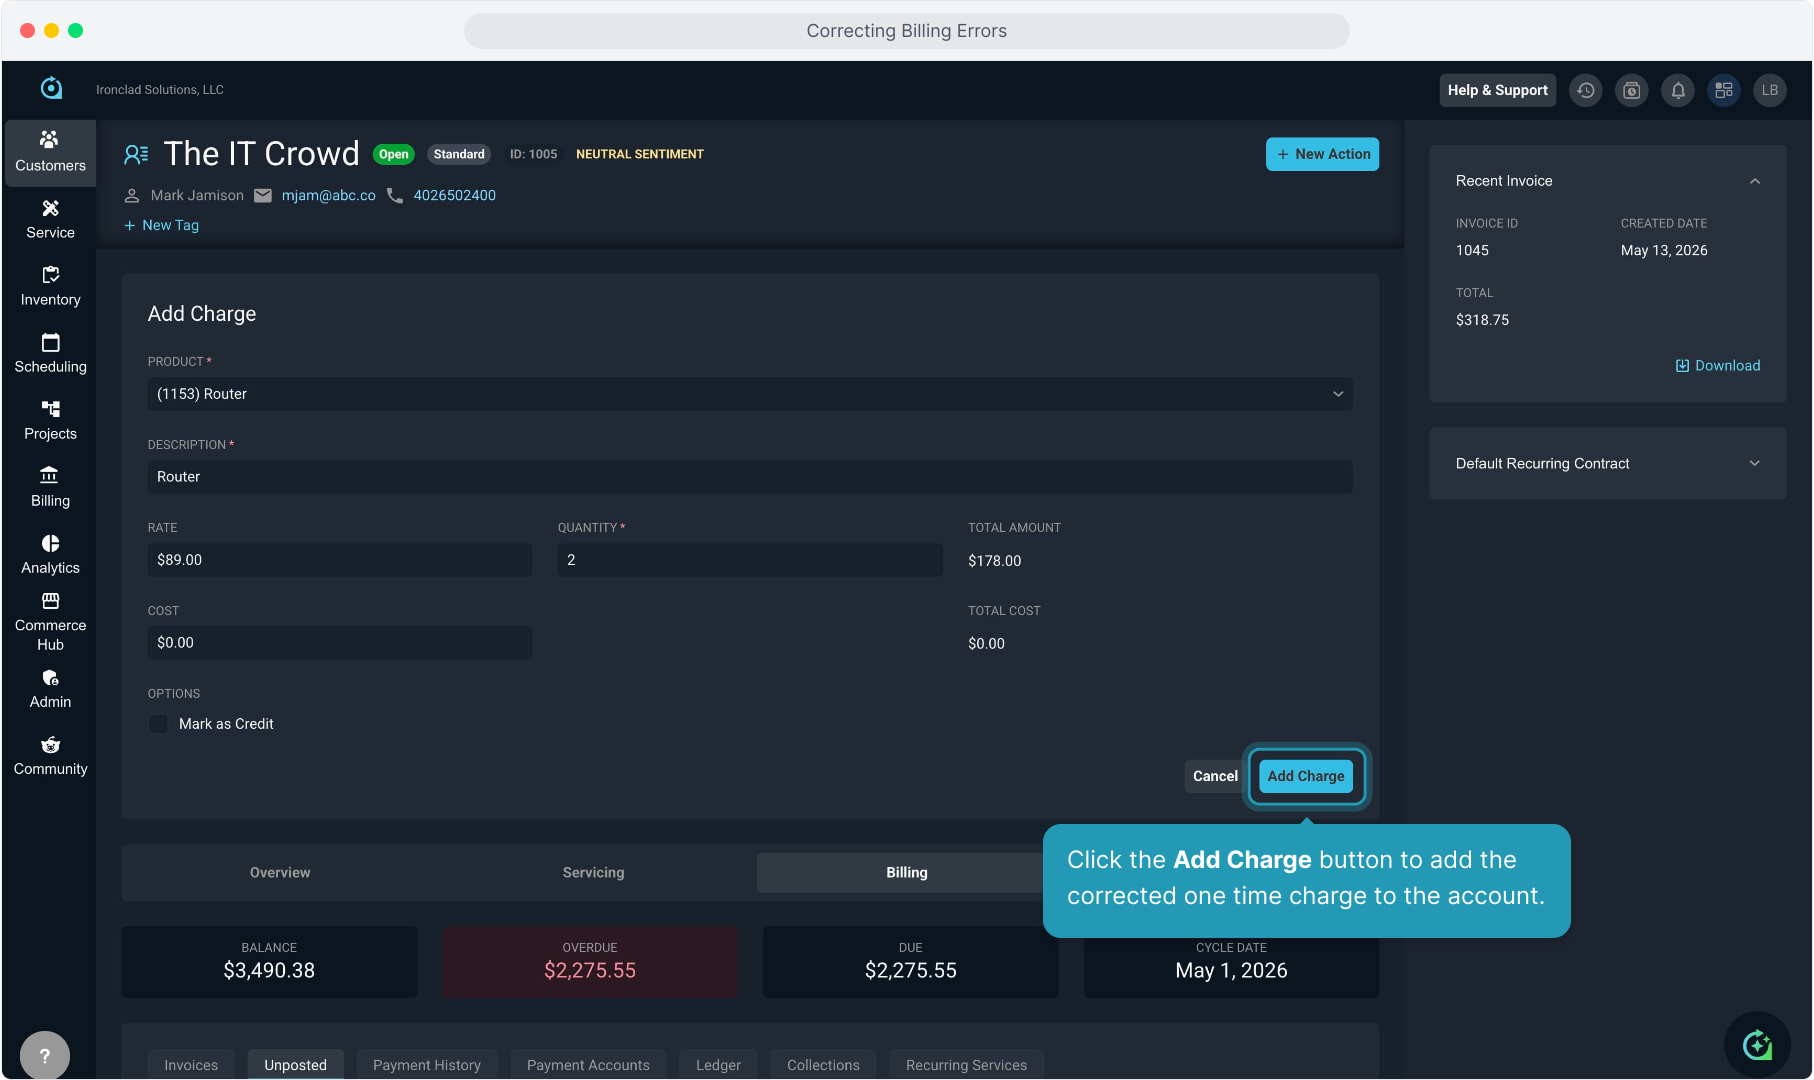
15. Click the Add Charge button to add the corrected one time charge to the account.
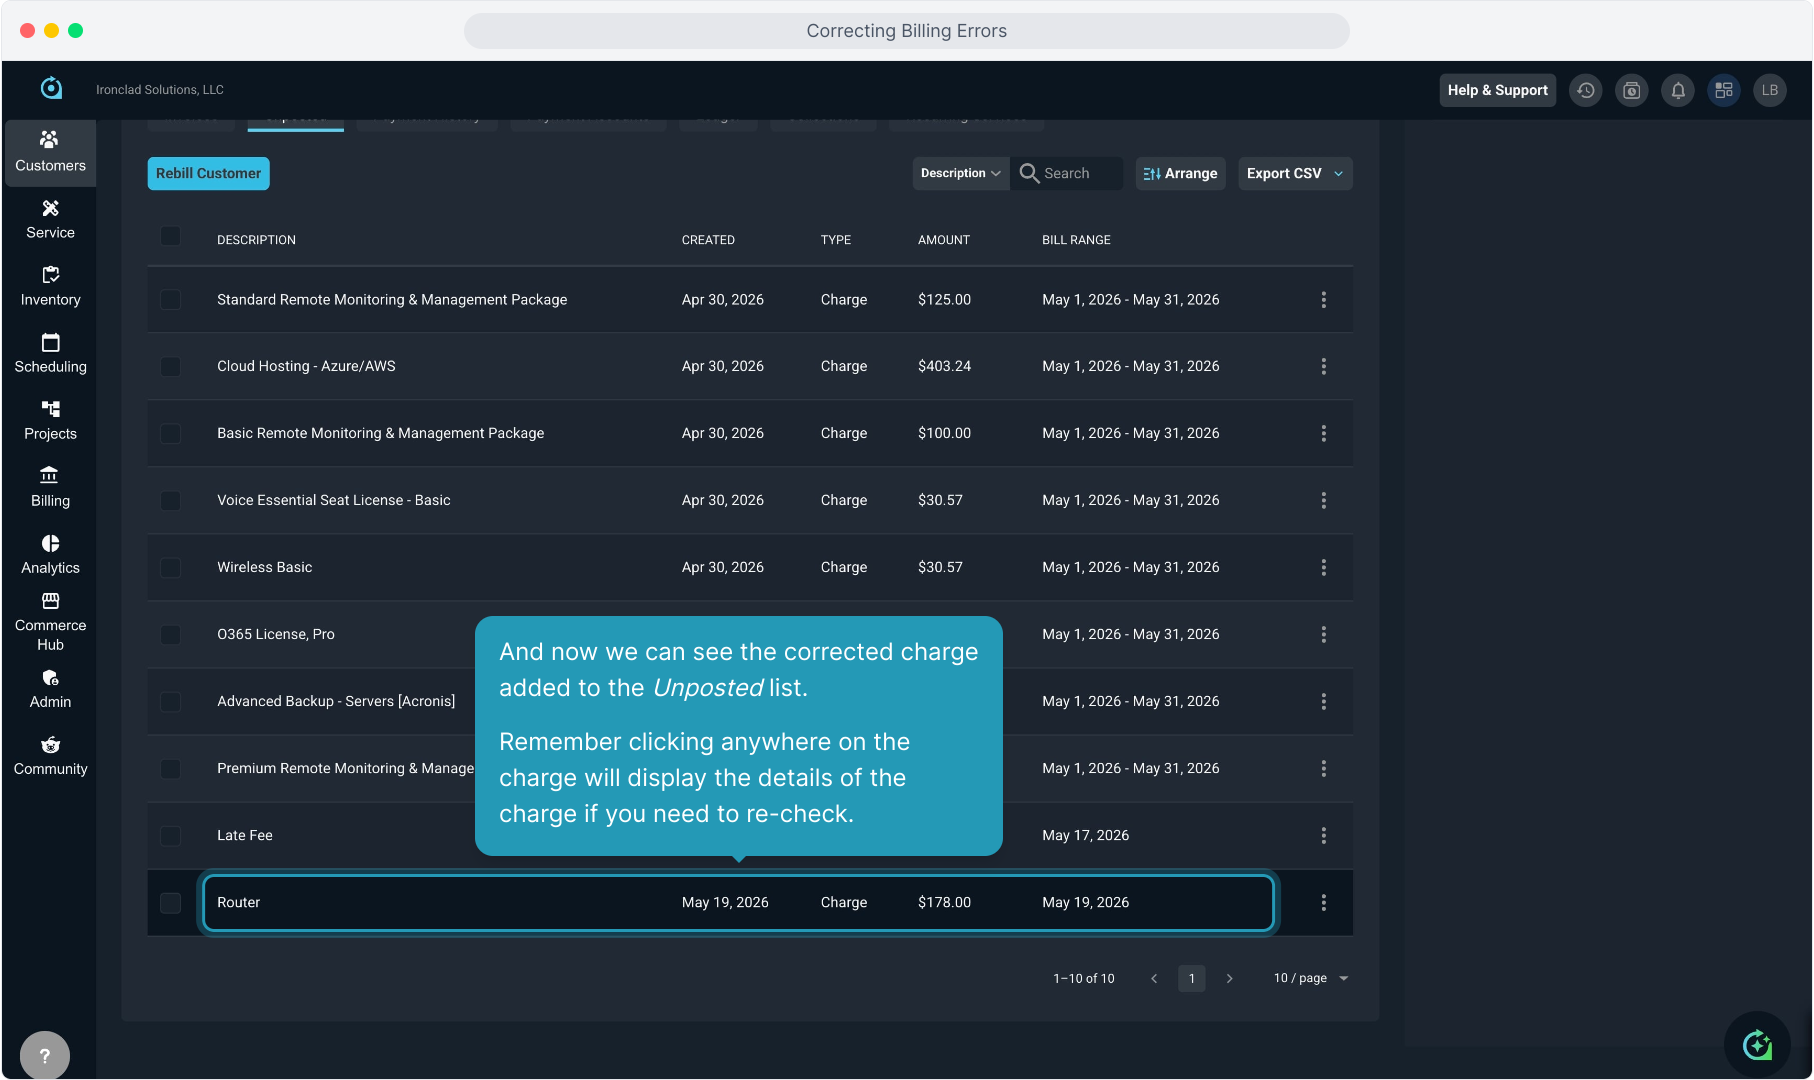
16. And now we can see the corrected charge added to the Unposted list.
Remember clicking anywhere on the charge will display the details of the charge if you need to re-check.
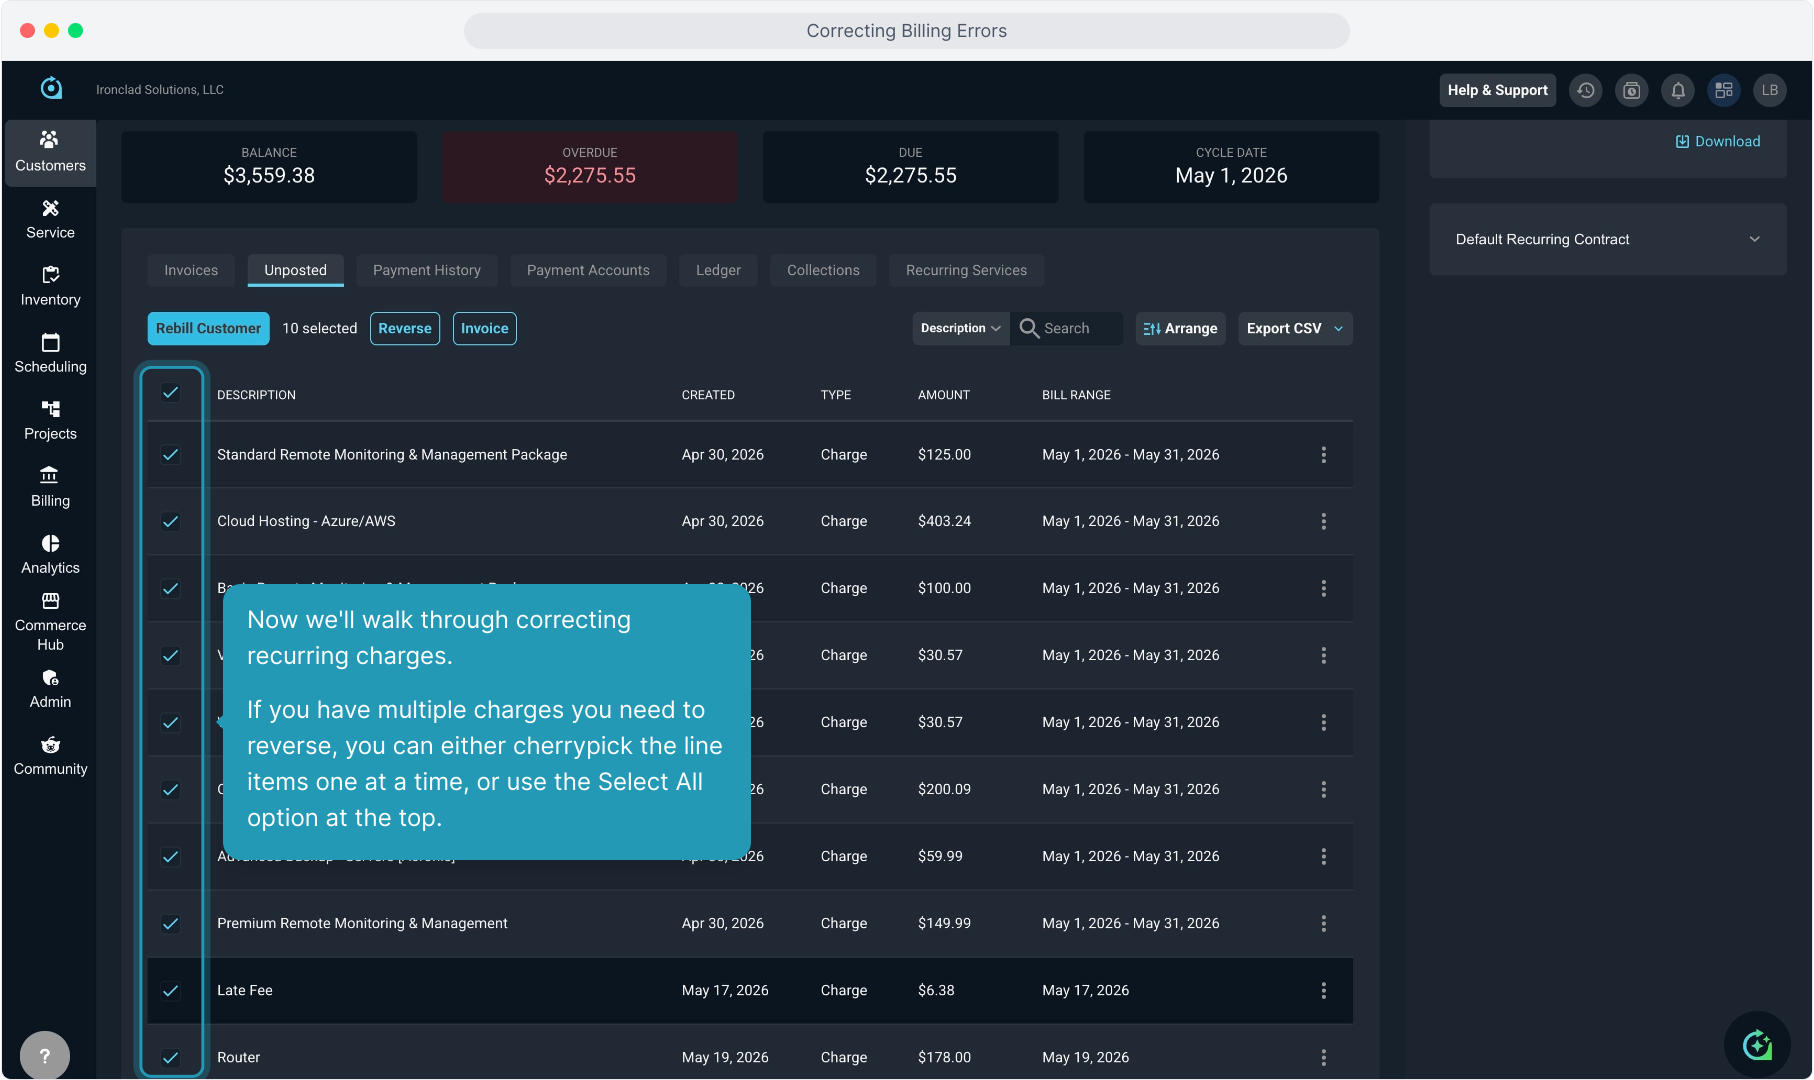
17. Now we'll walk through correcting recurring charges.
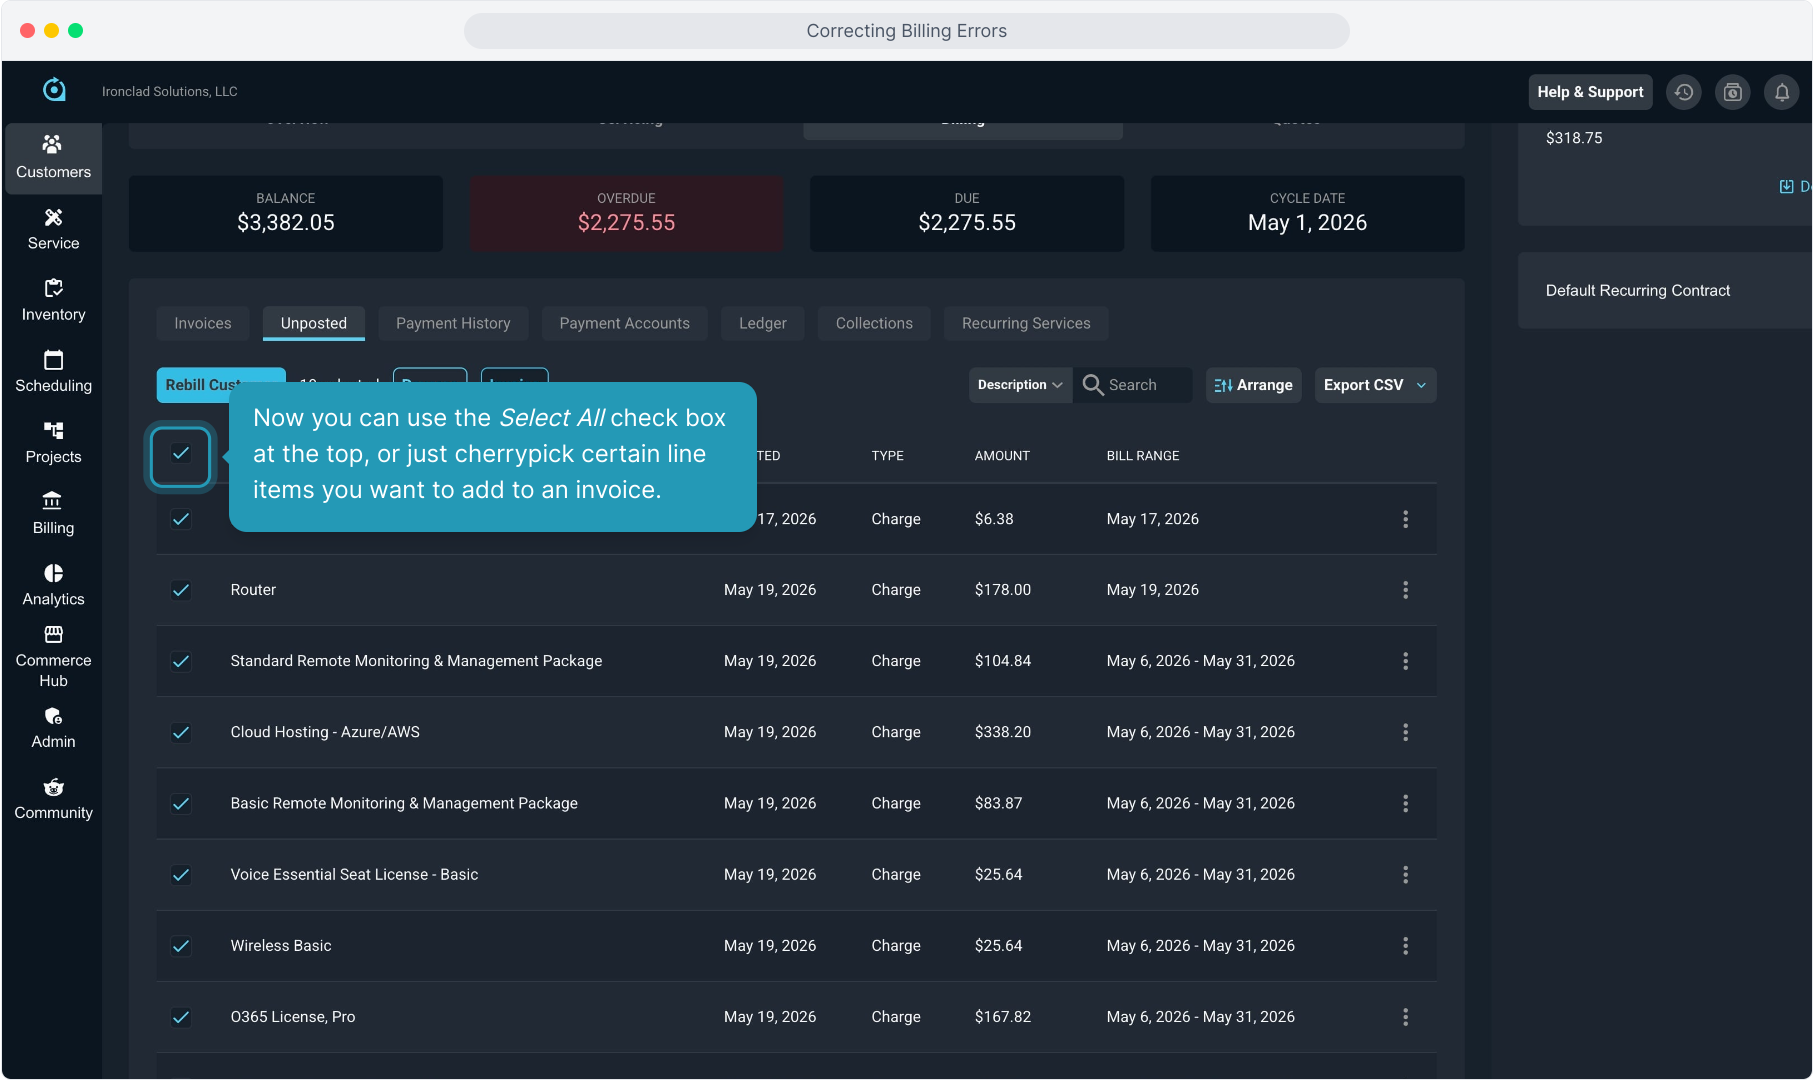
If you have multiple charges you need to reverse, you can either cherrypick the line items one at a time, or use the Select All option at the top.
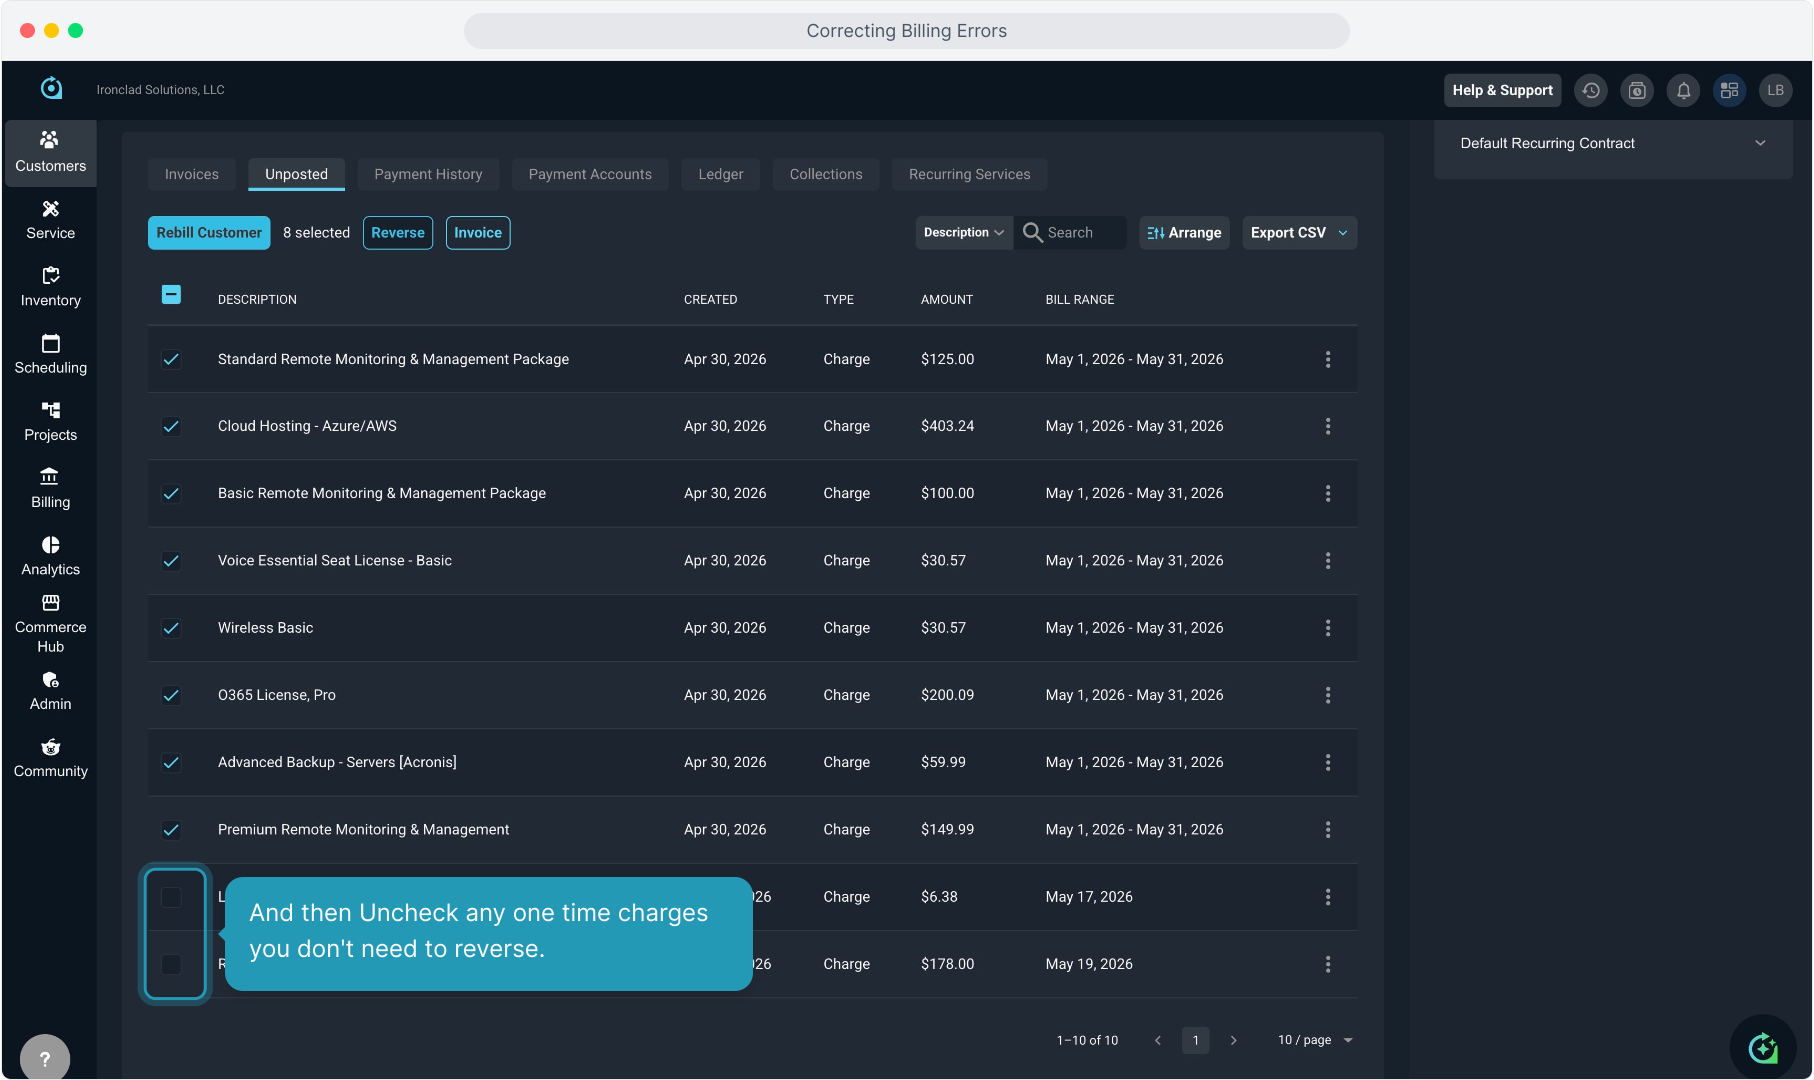
18. And then Uncheck any one time charges you don't need to reverse.
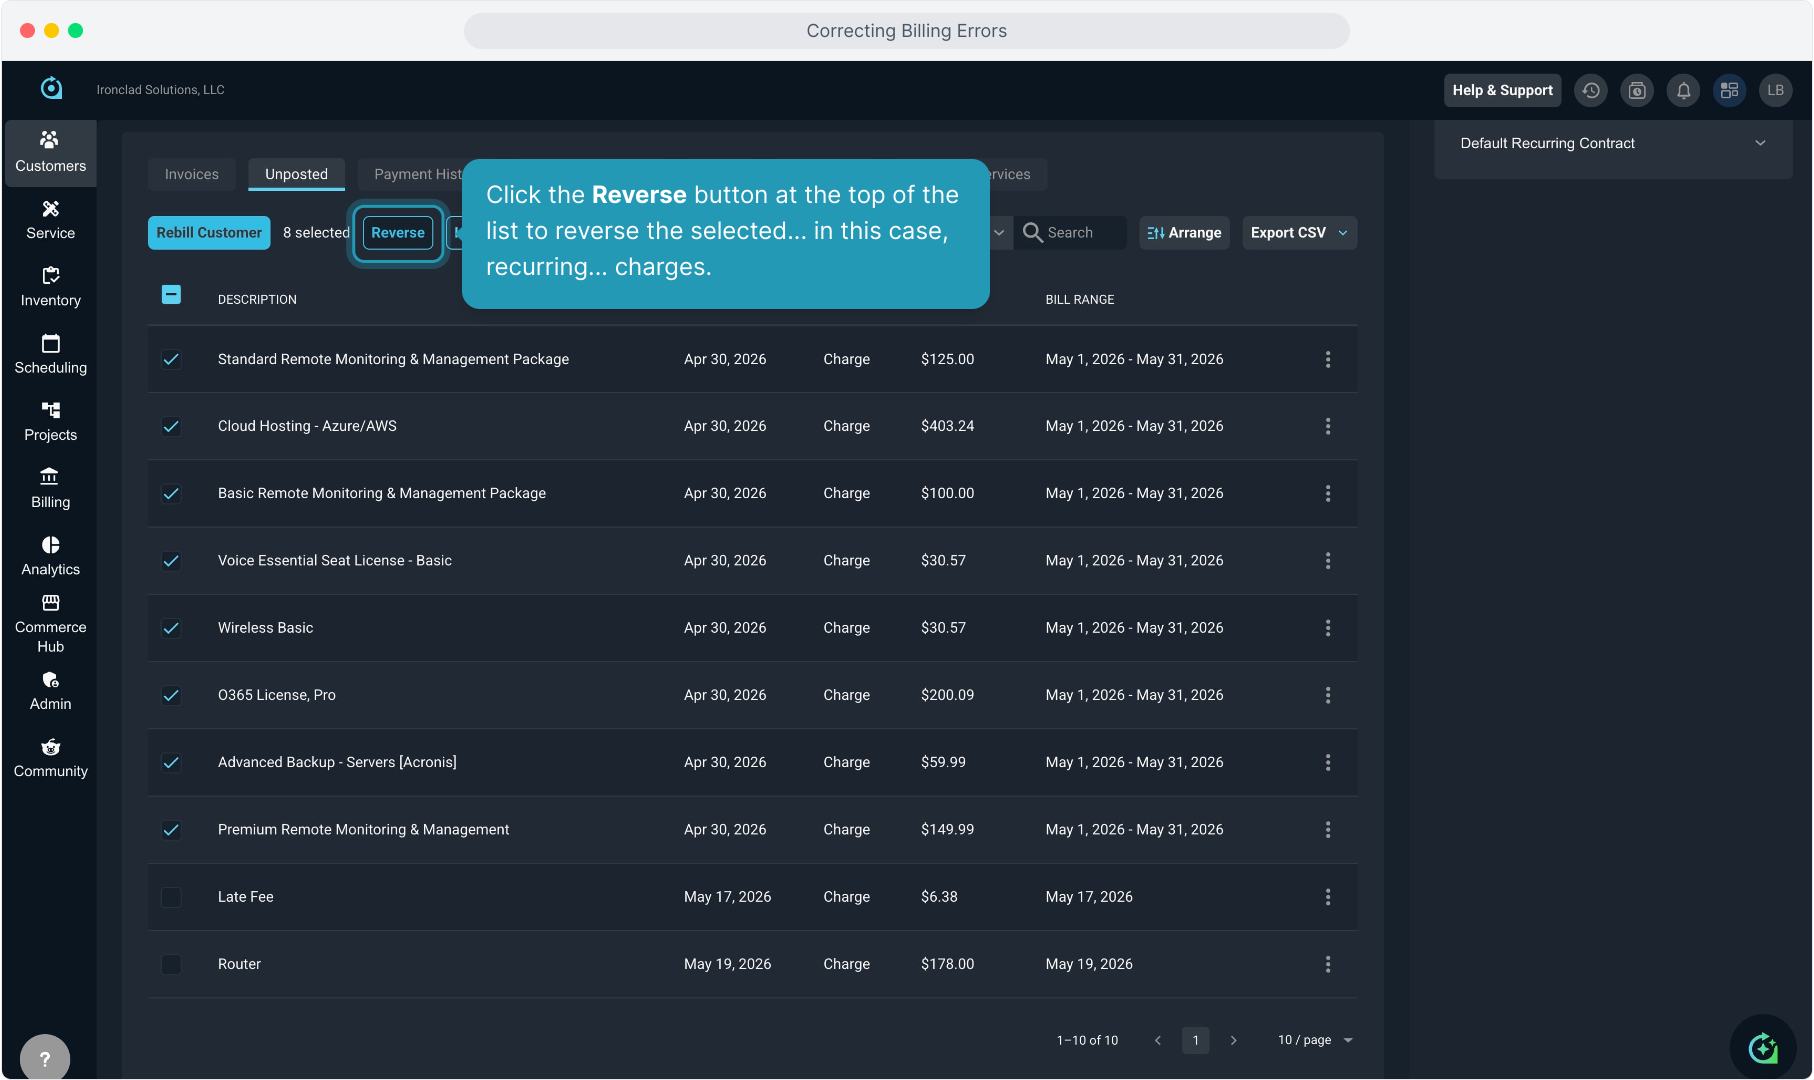
19. Click the Reverse button at the top of the list to reverse the selected... in this case, recurring... charges.
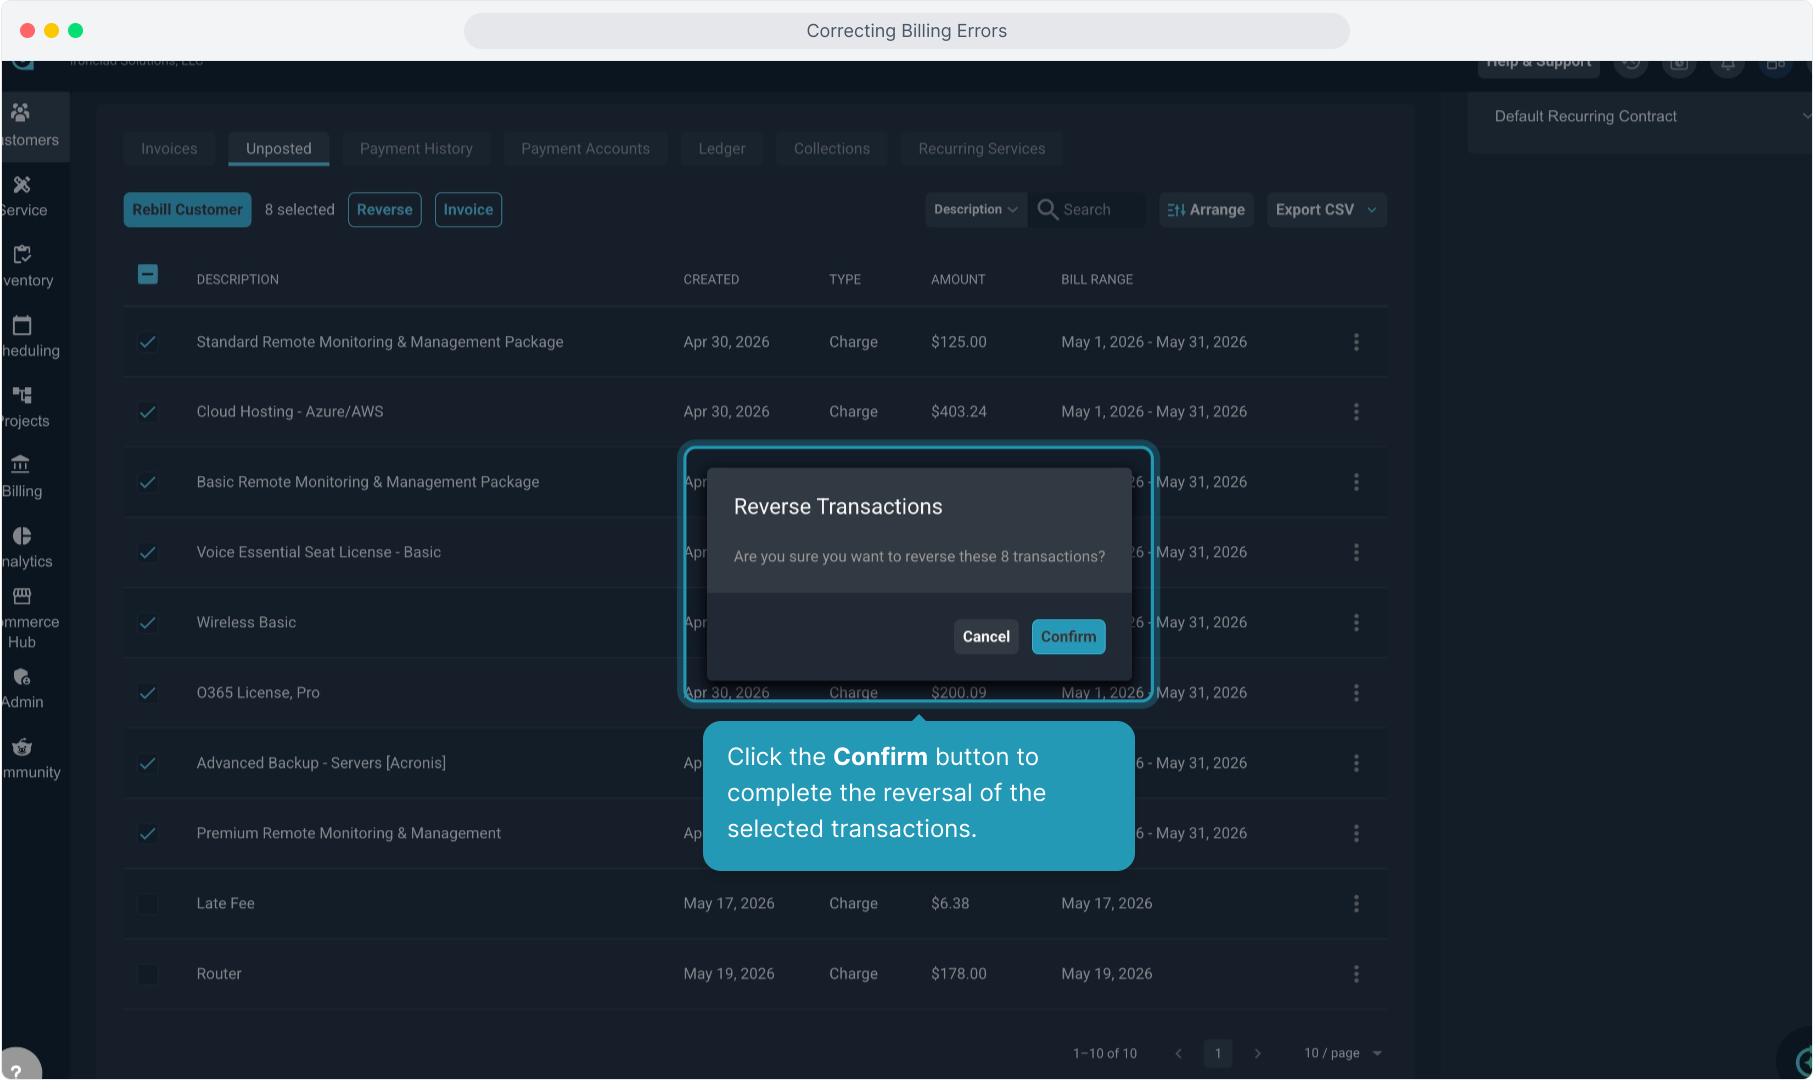
20. Click the Confirm button to complete the reversal of the selected transactions.
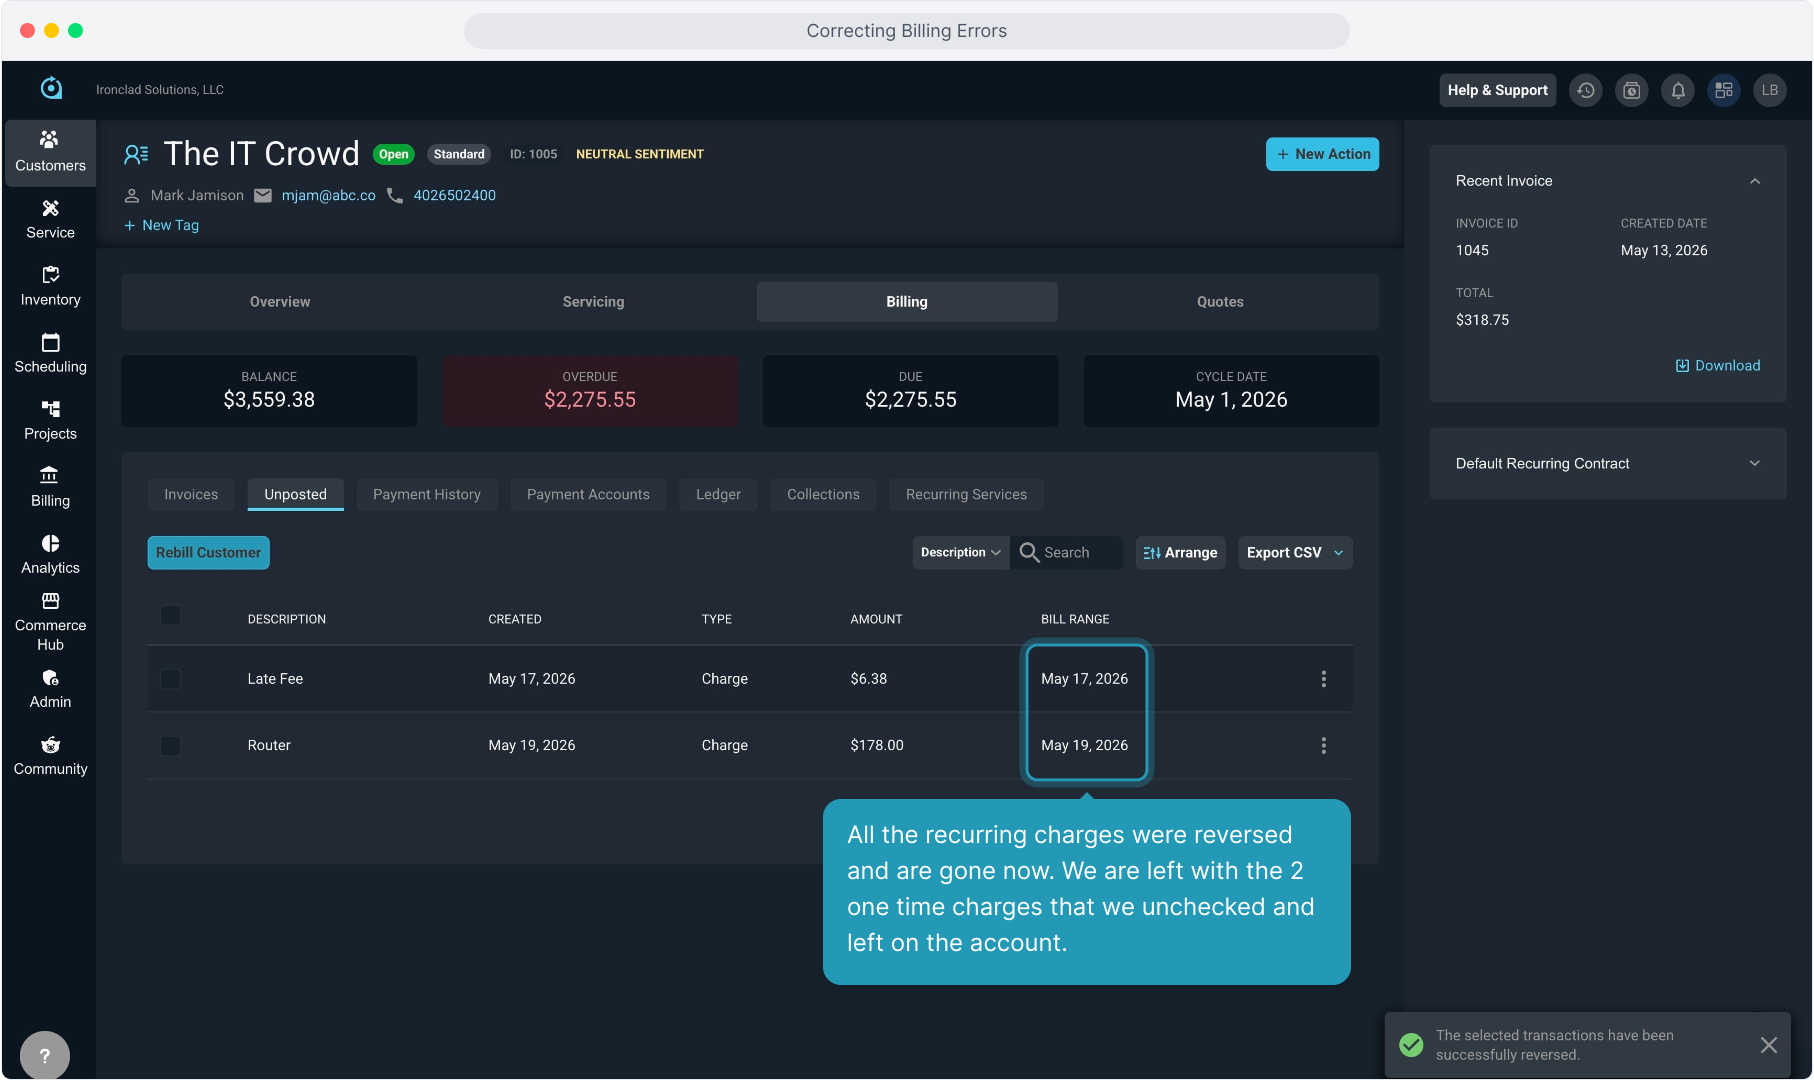
21. All the recurring charges were reversed and are gone now. We are left with the 2 one time charges that we unchecked and left on the account.
22. To have the system regenerate the recurring charges, we will use the Rebill Customer button.
This can be handy if we charged for the wrong date range. We can also use it to regenerate charges that were created with the wrong rate or quantity on the recurring service. For that use case, you'll want to make sure you go correct the recurring service issues before you attempt to Rebill Customer.

23. The reason we treat one time charges and these recurring charges differently is that we can use the Rebill function to regenerate recurring charges on the customer, but any one time charges or credits must be manually added back to the account separately.
Recurring services exist on the recurring service tab and we can force the system to regenerate those, but one time charges are added as needed, so they have to be re-added manually whenever necessary.

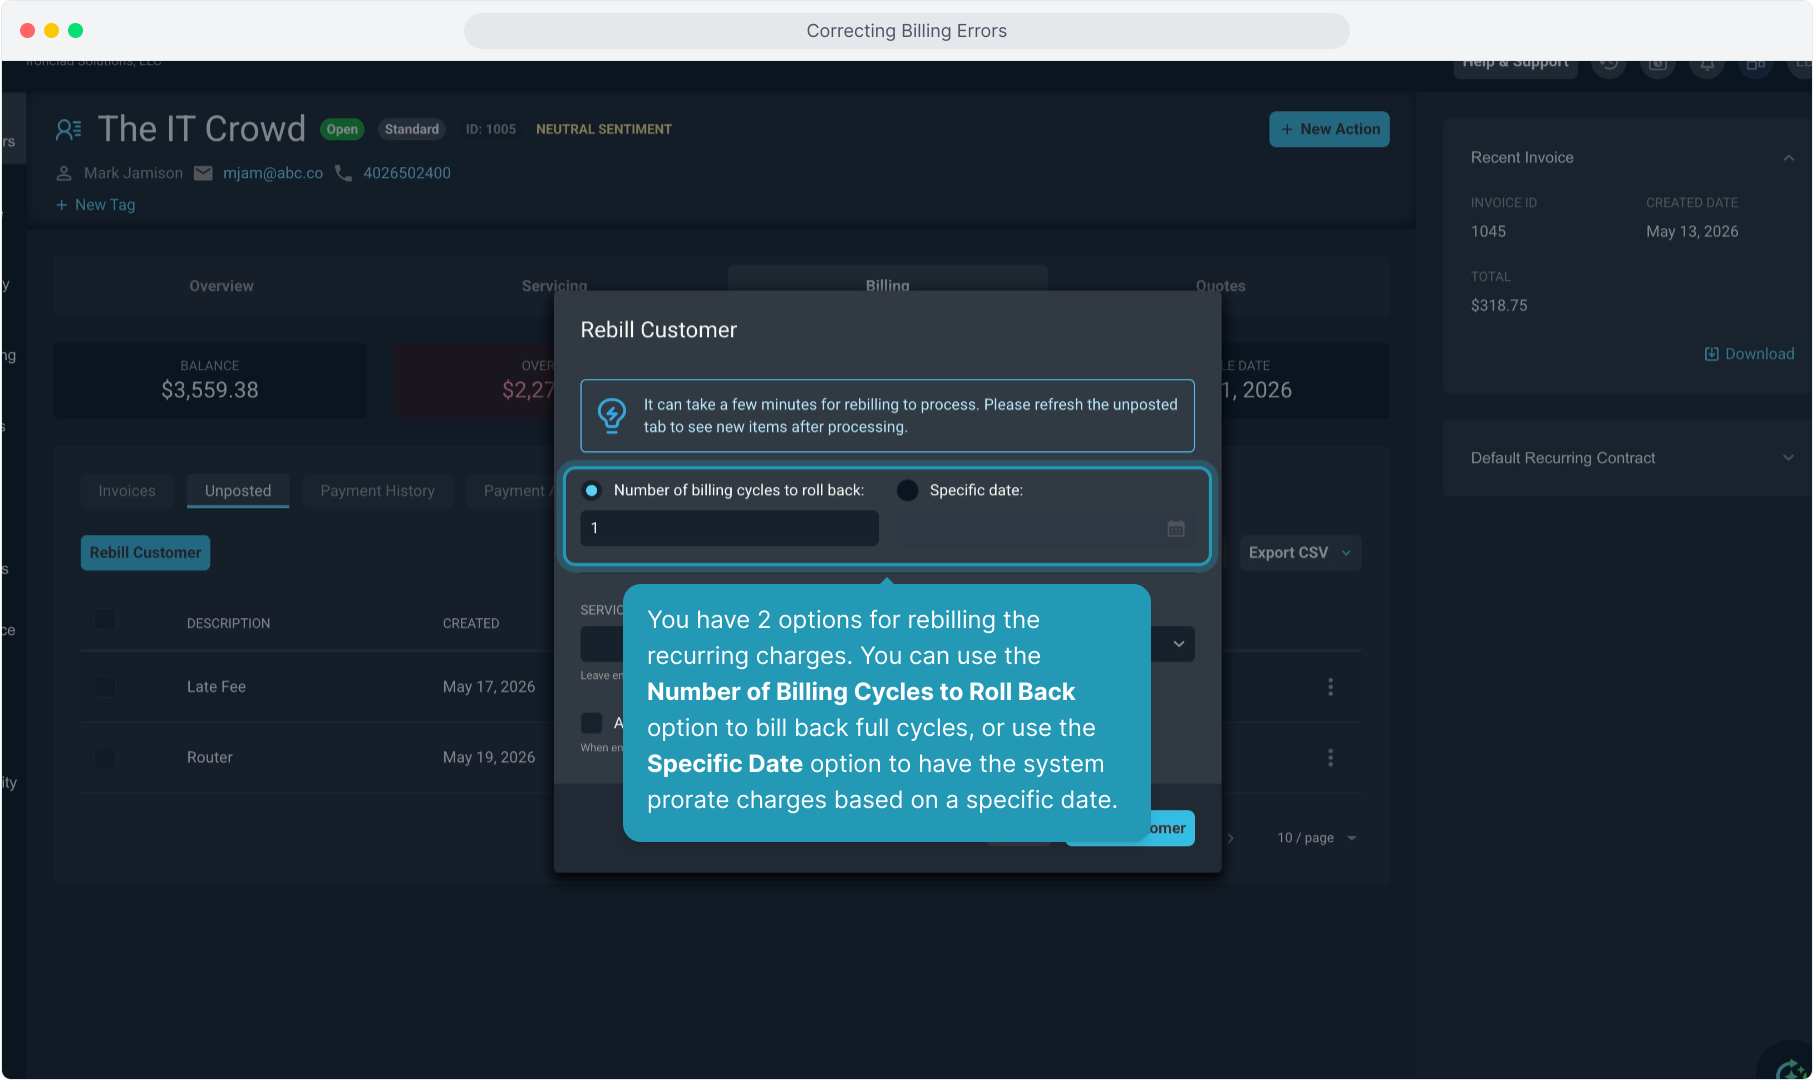
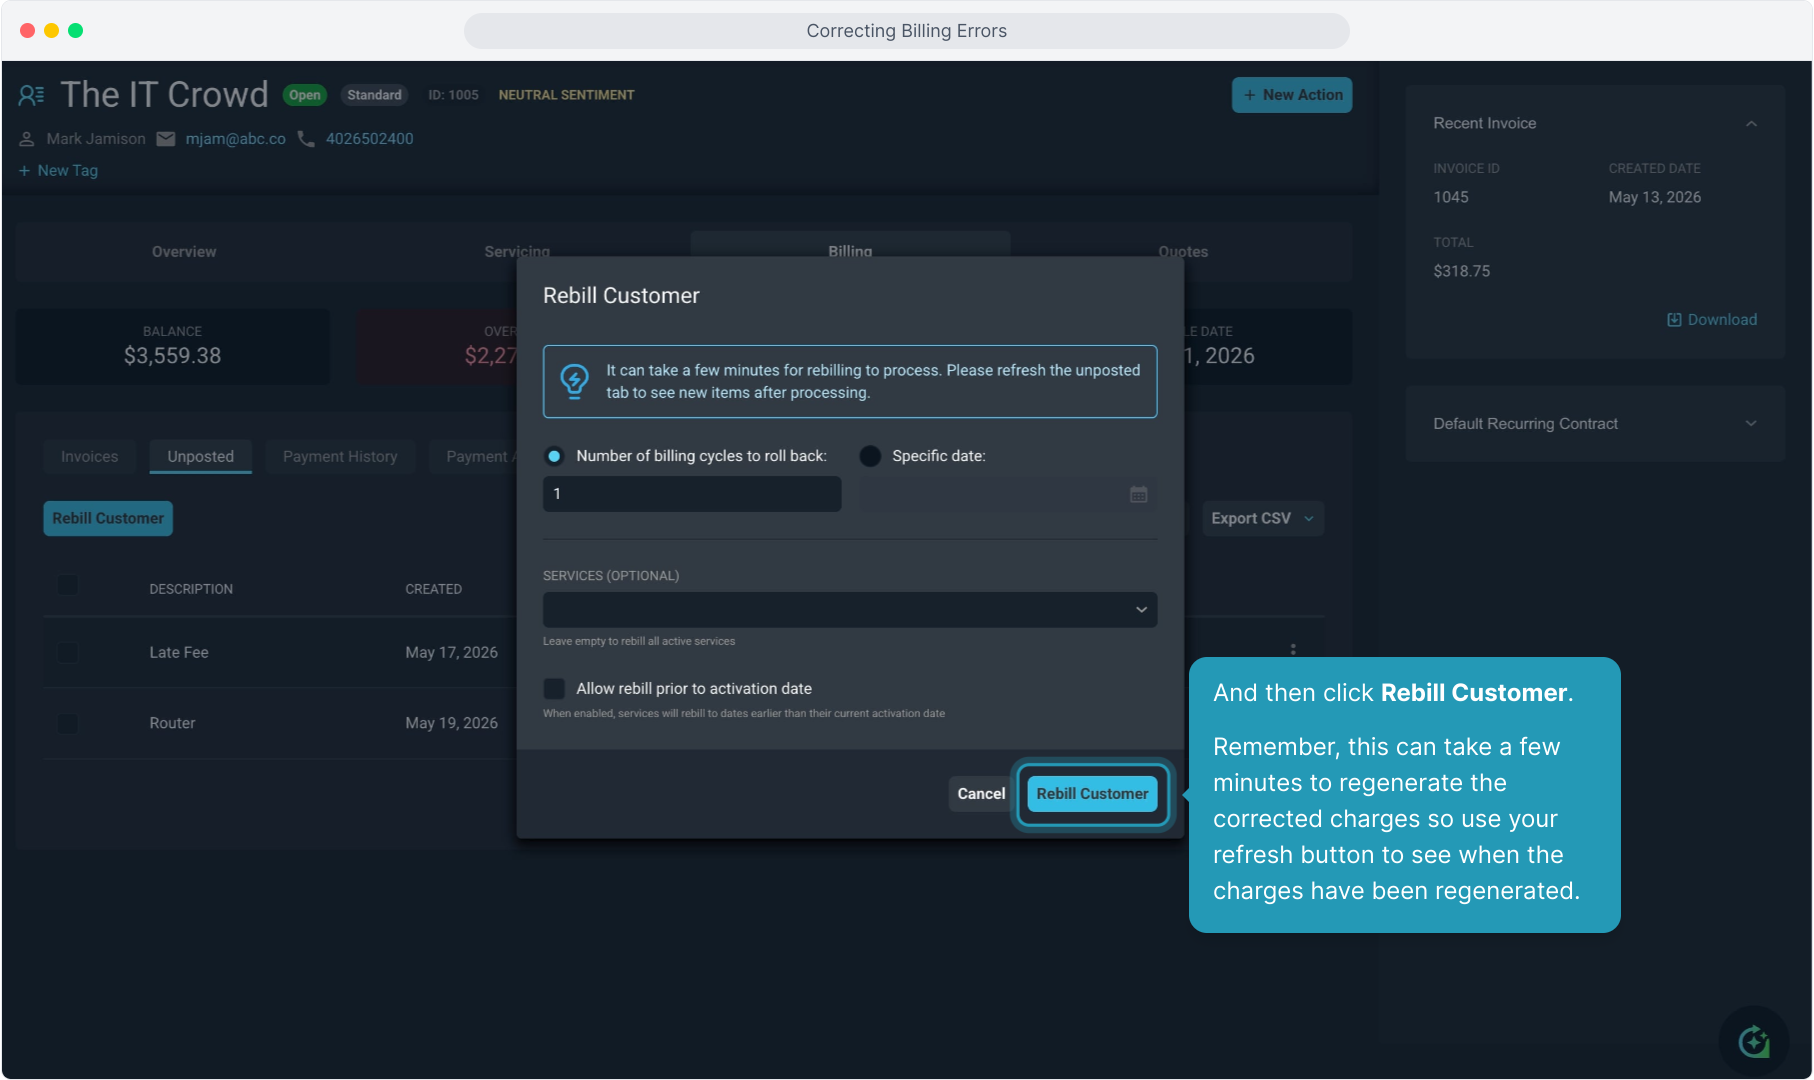
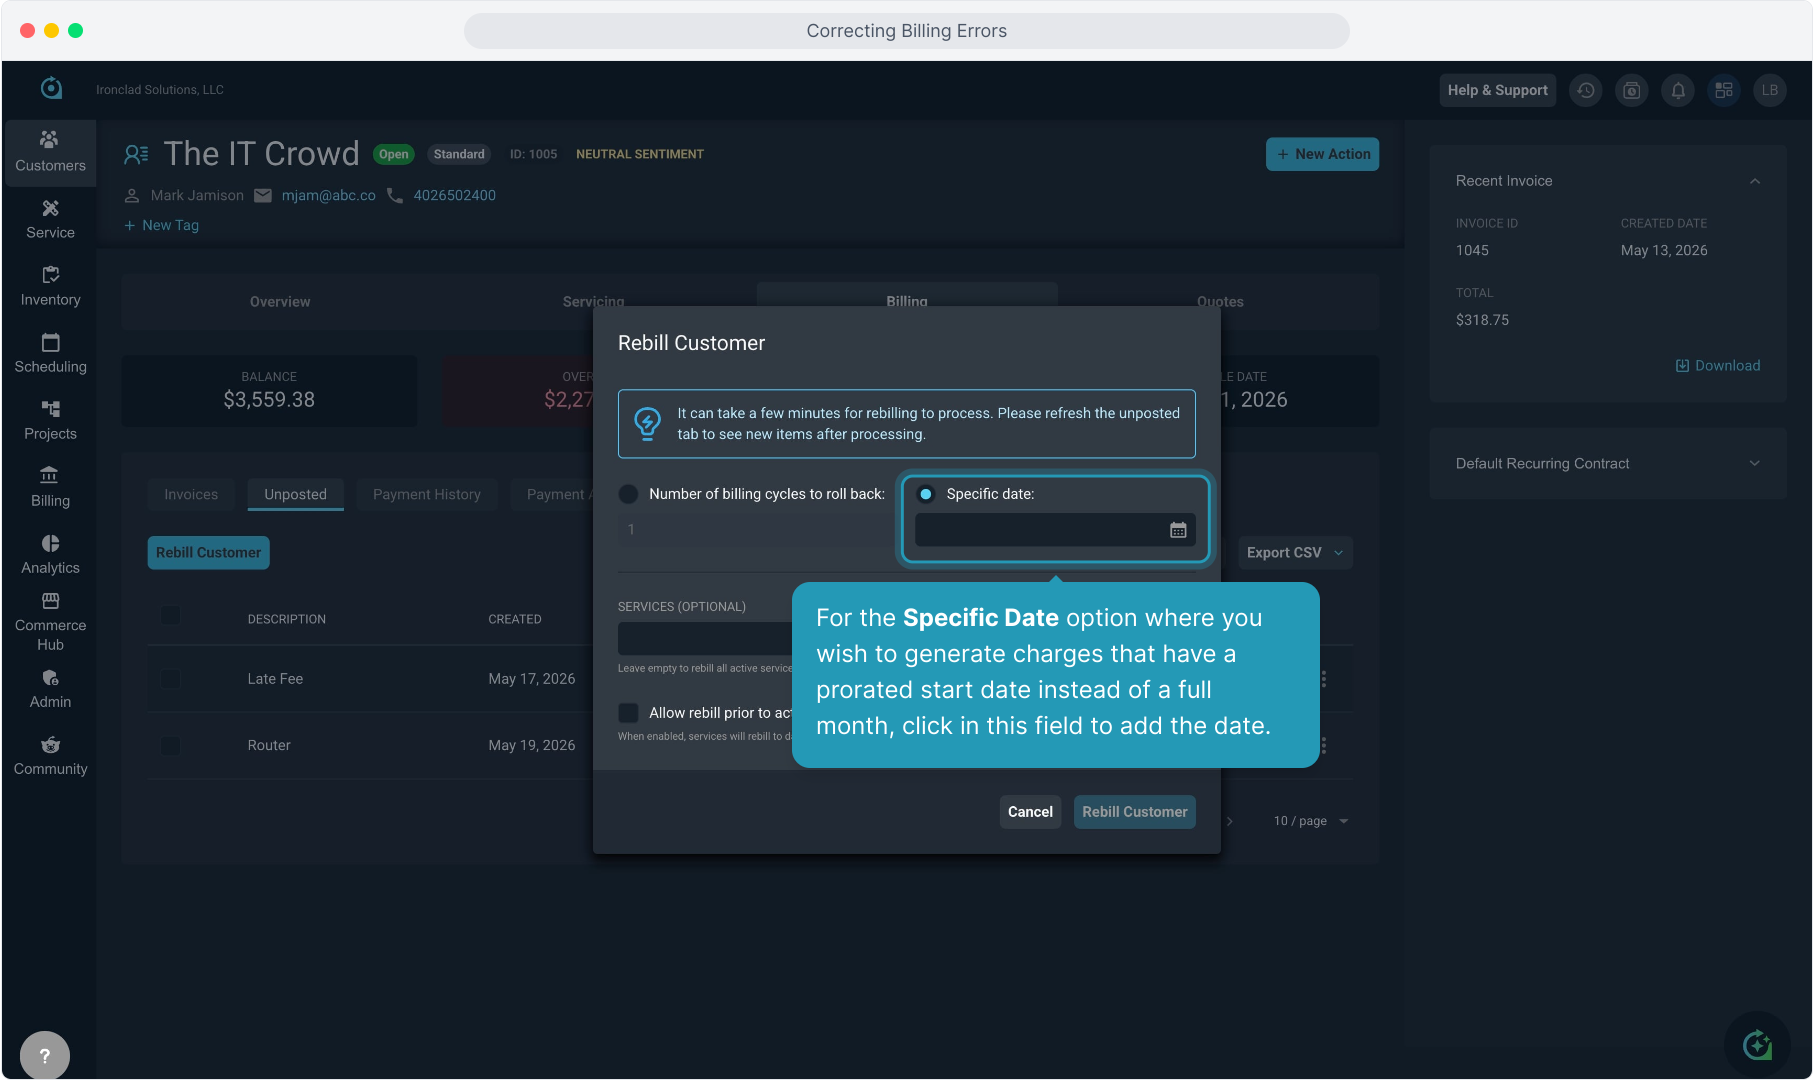
24. You have 2 options for rebilling the recurring charges. You can use the Number of Billing Cycles to Roll Back option to bill back full cycles, or use the Specific Date option to have the system prorate charges based on a specific date.
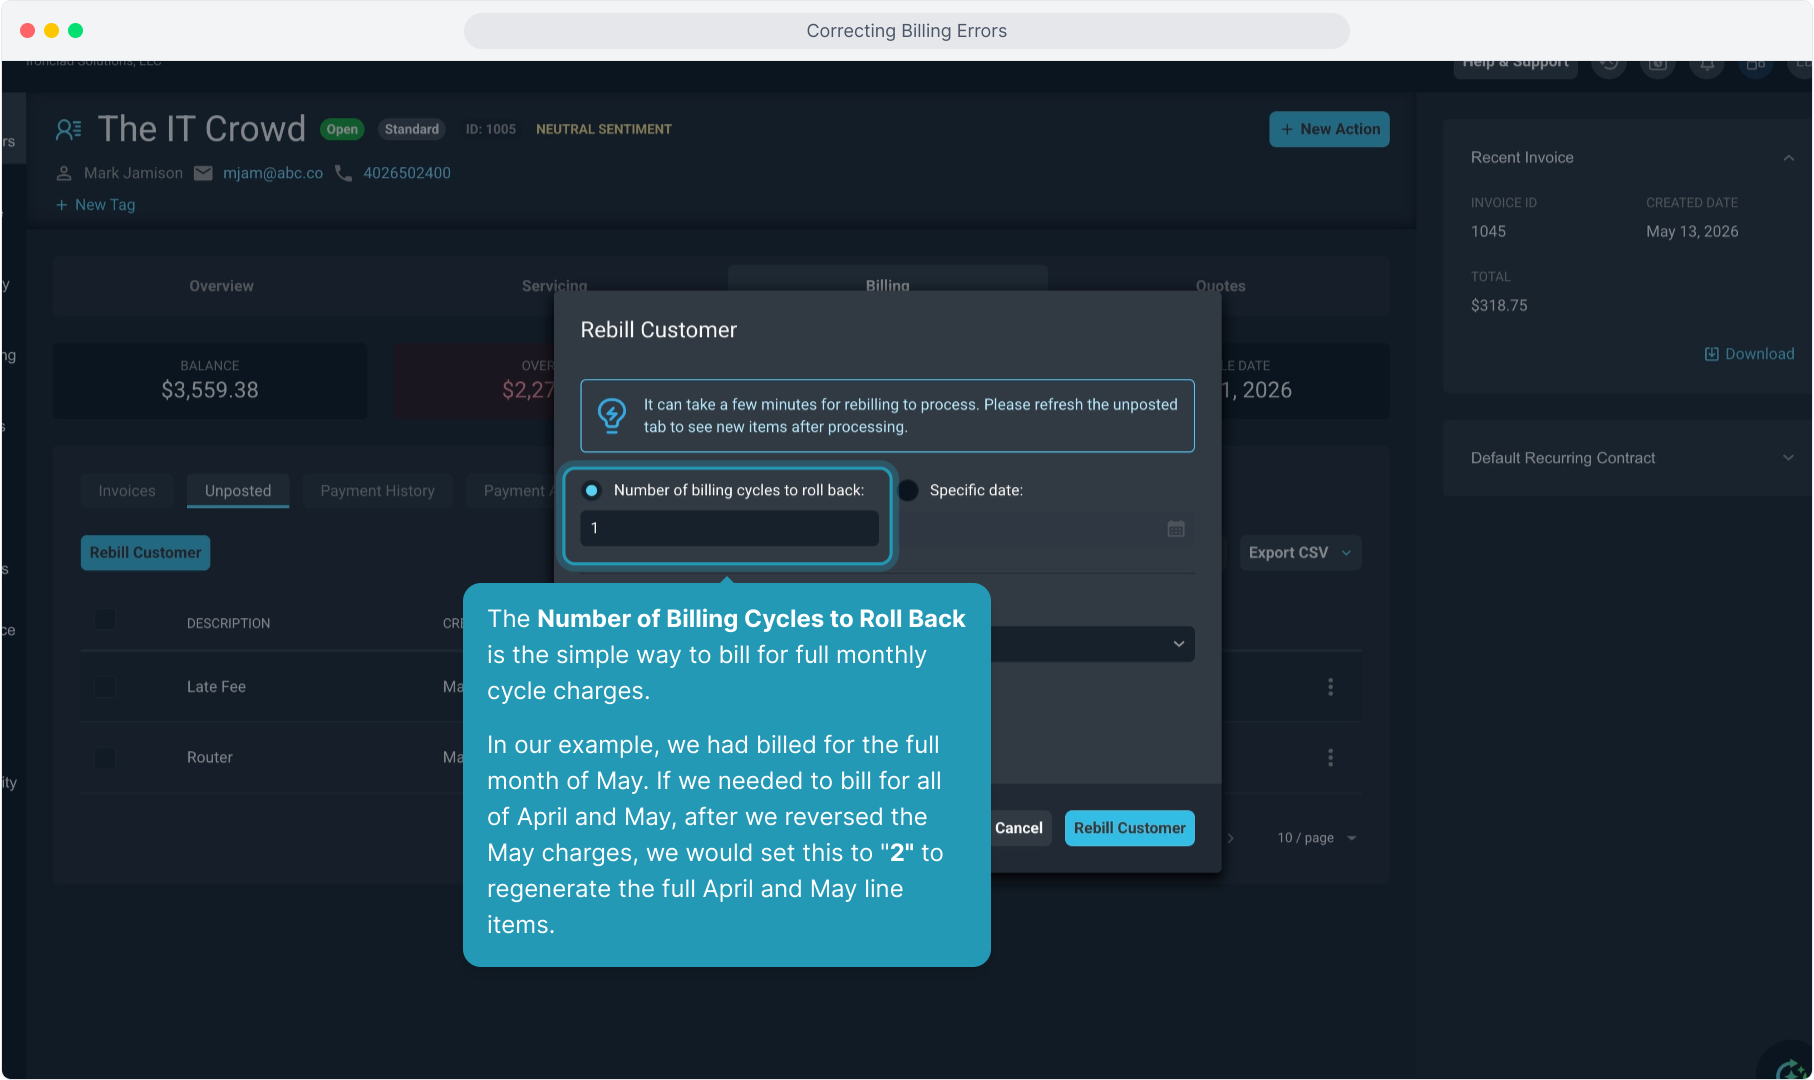
25. The Number of Billing Cycles to Roll Back is the simple way to bill for full monthly cycle charges.
In our example, we had billed for the full month of May. If we needed to bill for all of April and May, after we reversed the May charges, we would set this to "2" to regenerate the full April and May line items.
26. And then click Rebill Customer.
Remember, this can take a few minutes to regenerate the corrected charges so use your refresh button to see when the charges have been regenerated.
27. For the Specific Date option where you wish to generate charges that have a prorated start date instead of a full month, click in this field to add the date.
28. You will need to select the day BEFORE you want the charges to begin in this selection.
You are telling the system here that you have reversed the incorrect items and are resetting the date that the customer is "billed through". That way, the system will see that we need to pick up and rebill the charges using the date after what the customer is now "billed through".
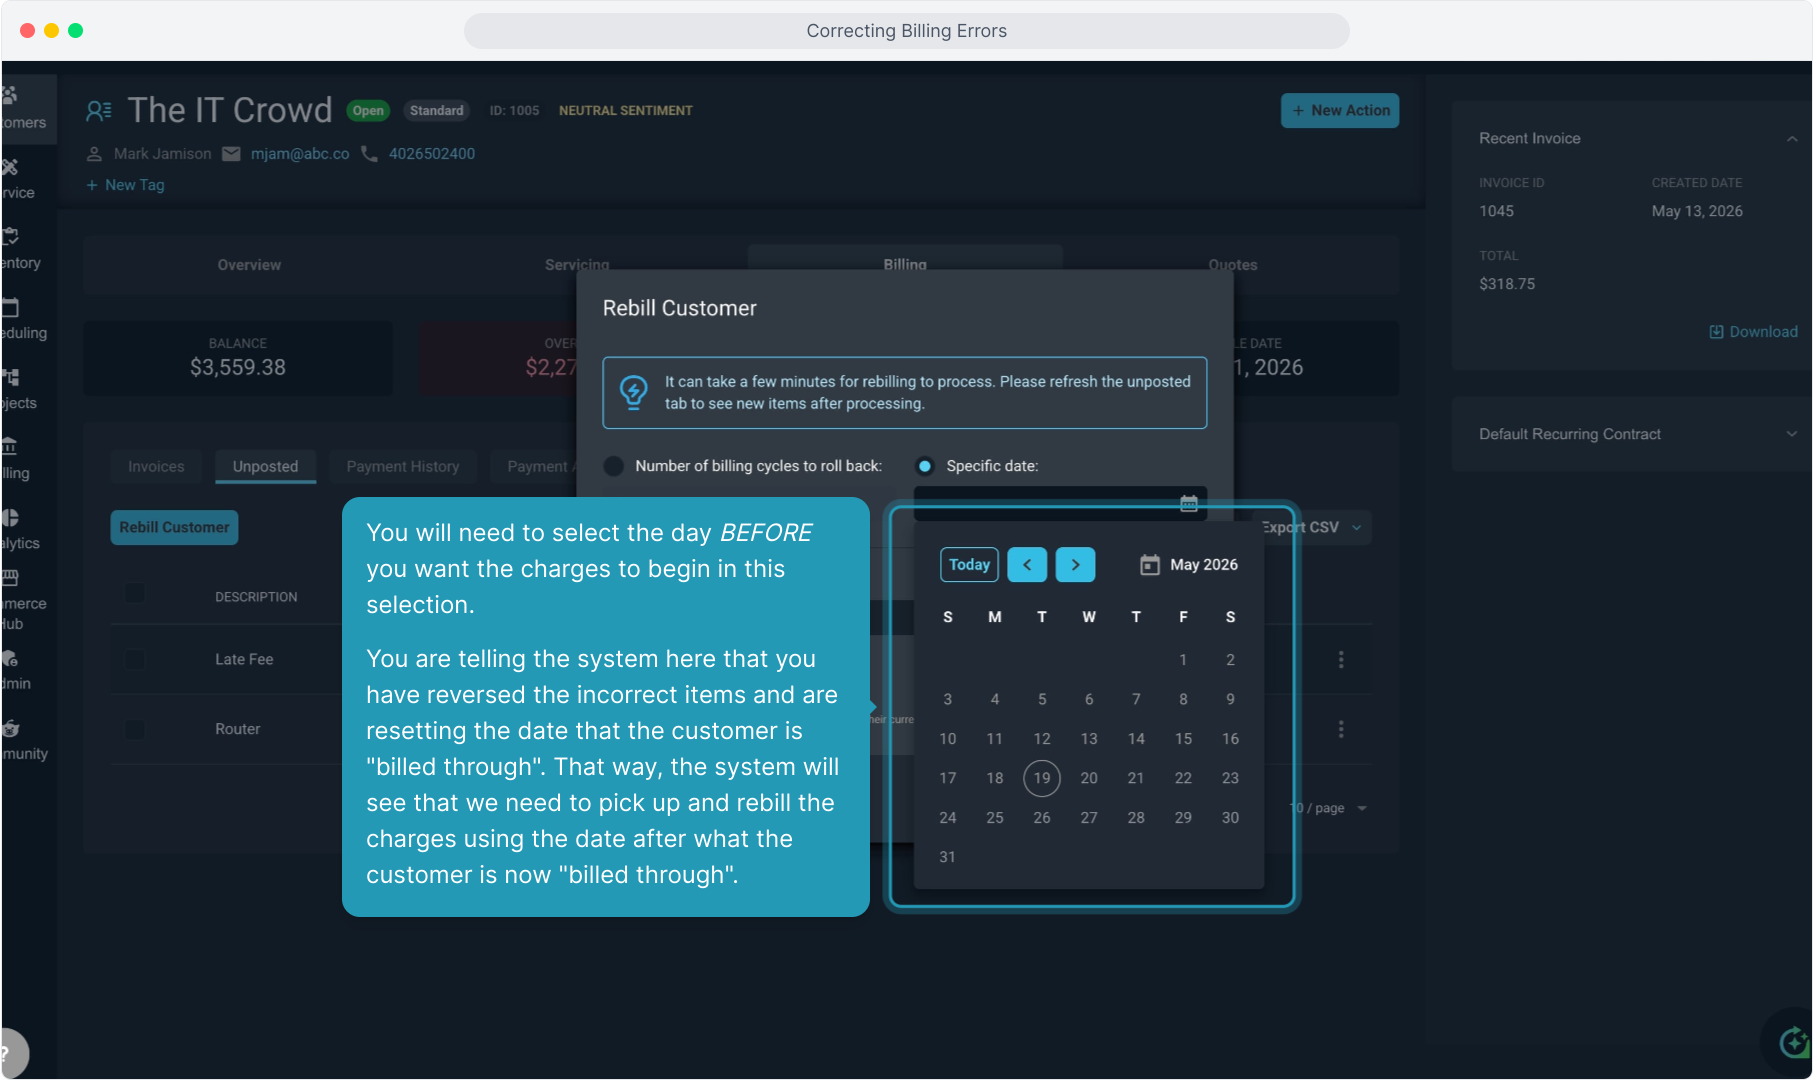
29. If the customer should be billed starting May 6th, which is mid-cycle for them since their cycle date is the first of the month, we will need to set this date to May 5th here.
This indicates that the customer does not need charges generated for May 5th or any date prior to that.

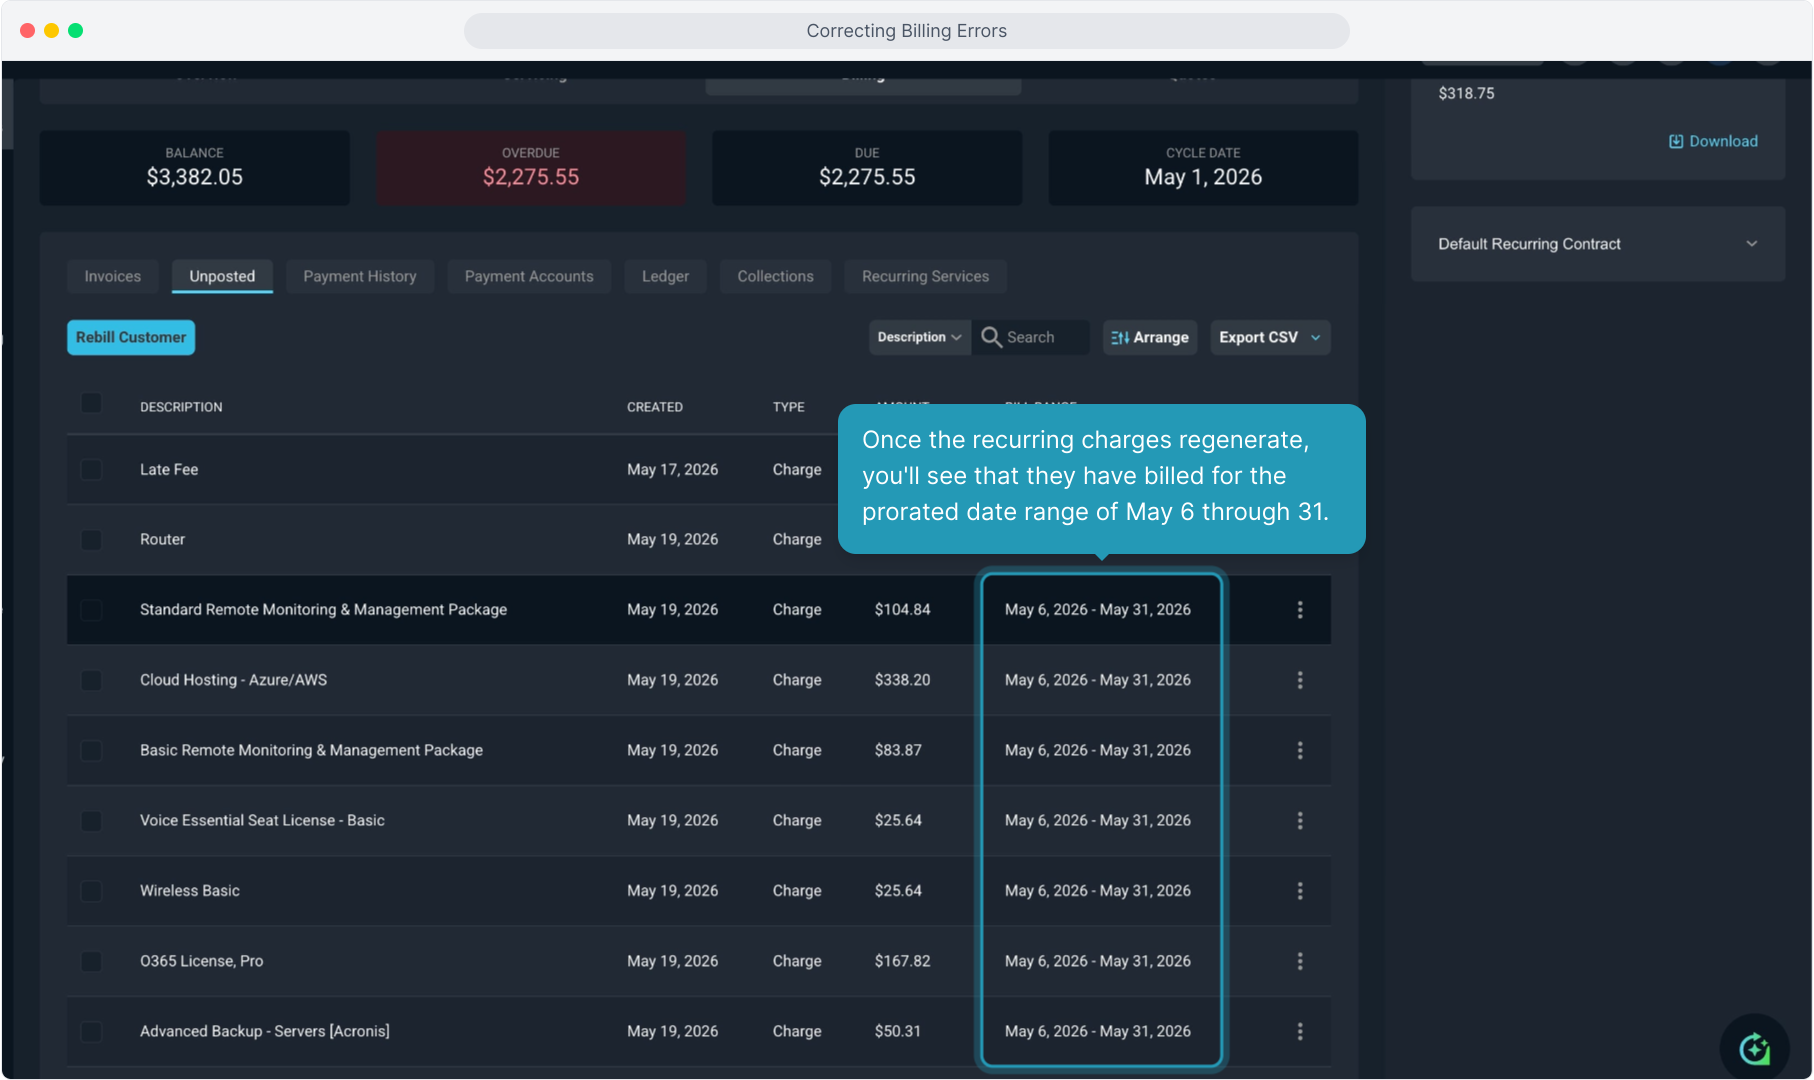
30. Once the recurring charges regenerate, you'll see that they have billed for the prorated date range of May 6 through 31.
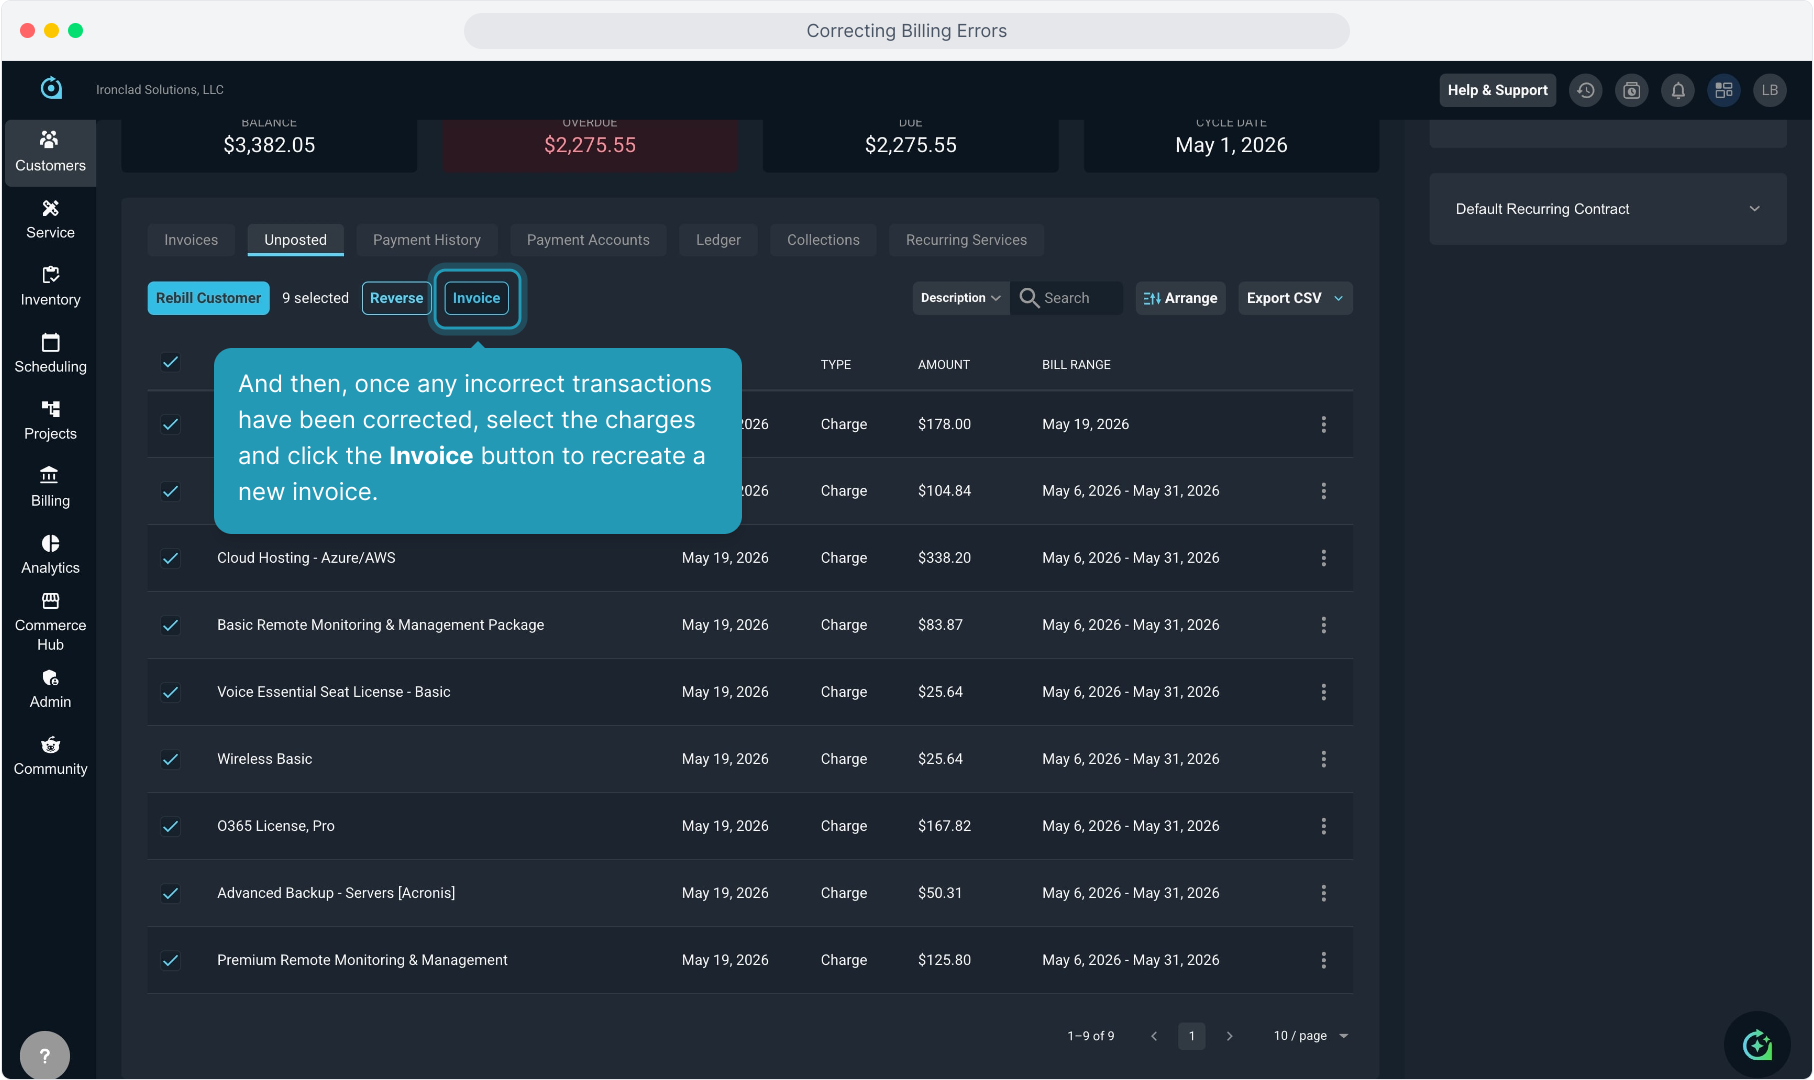
31. Now you can use the Select All check box at the top, or just cherrypick certain line items you want to add to an invoice.
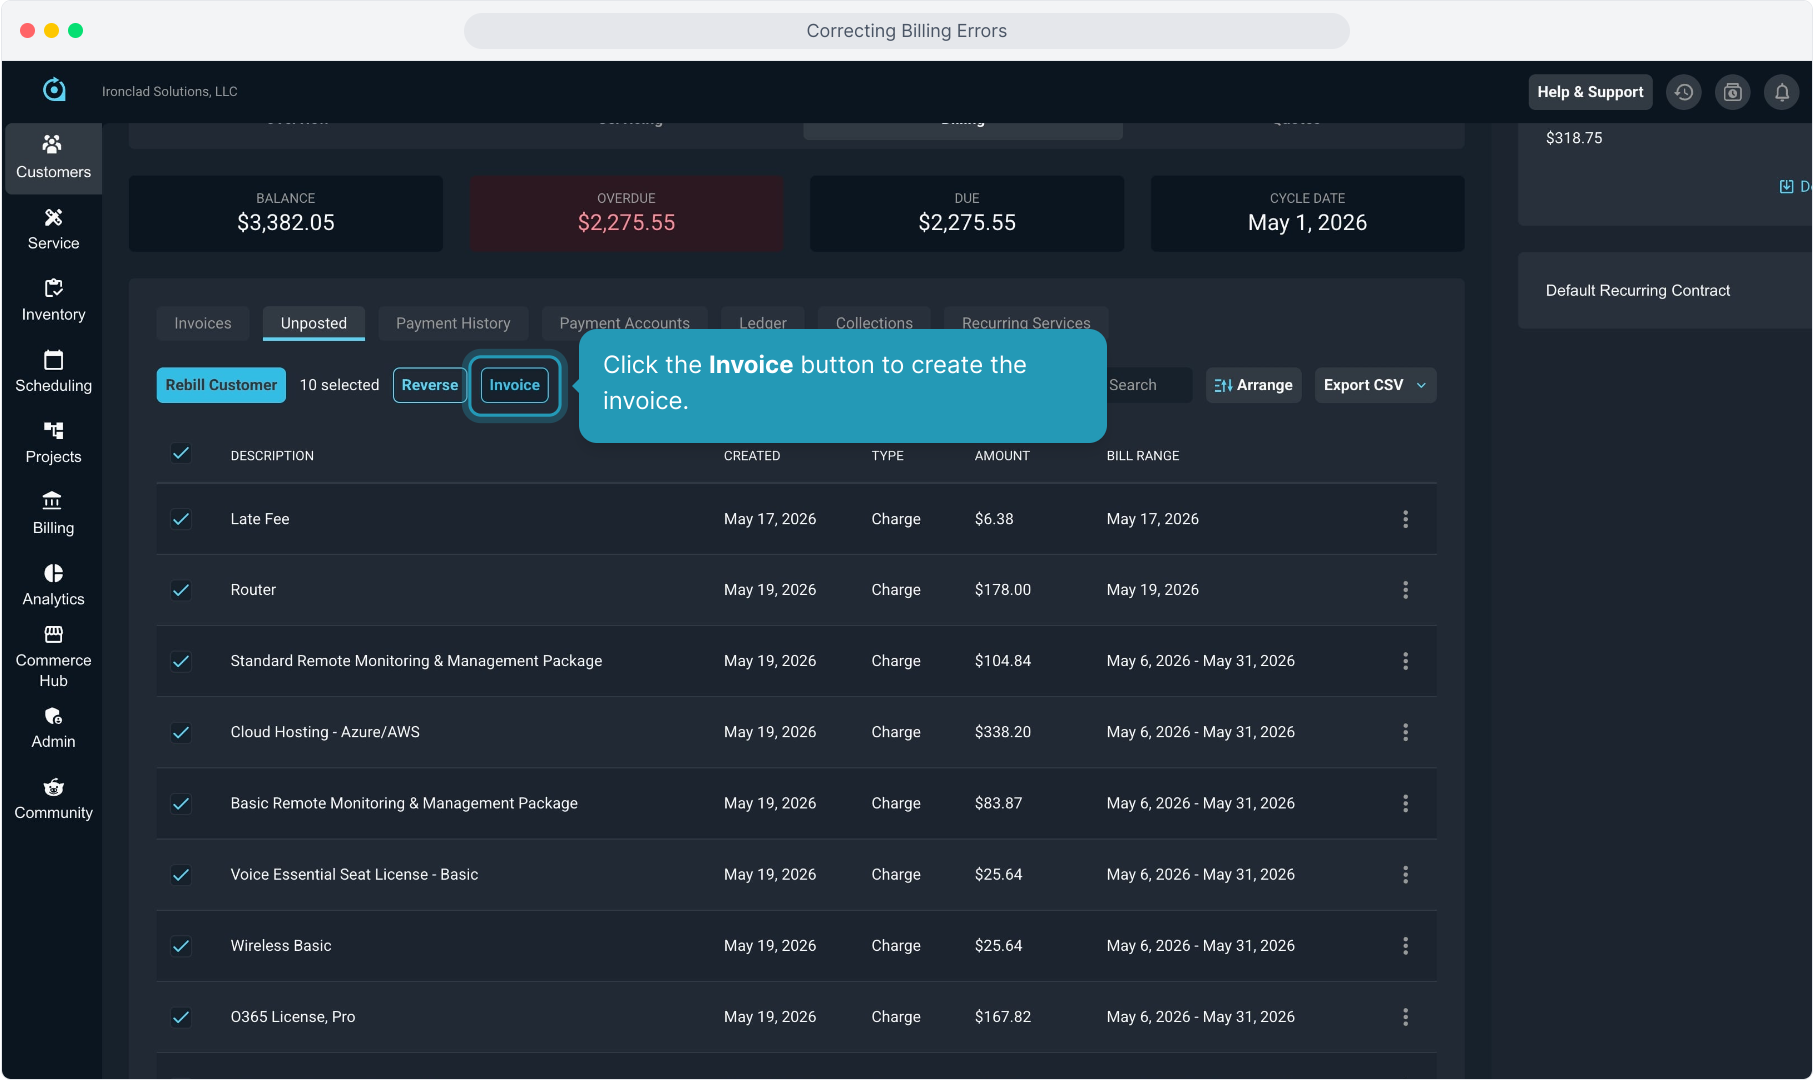
32. Click the Invoice button to create the invoice.
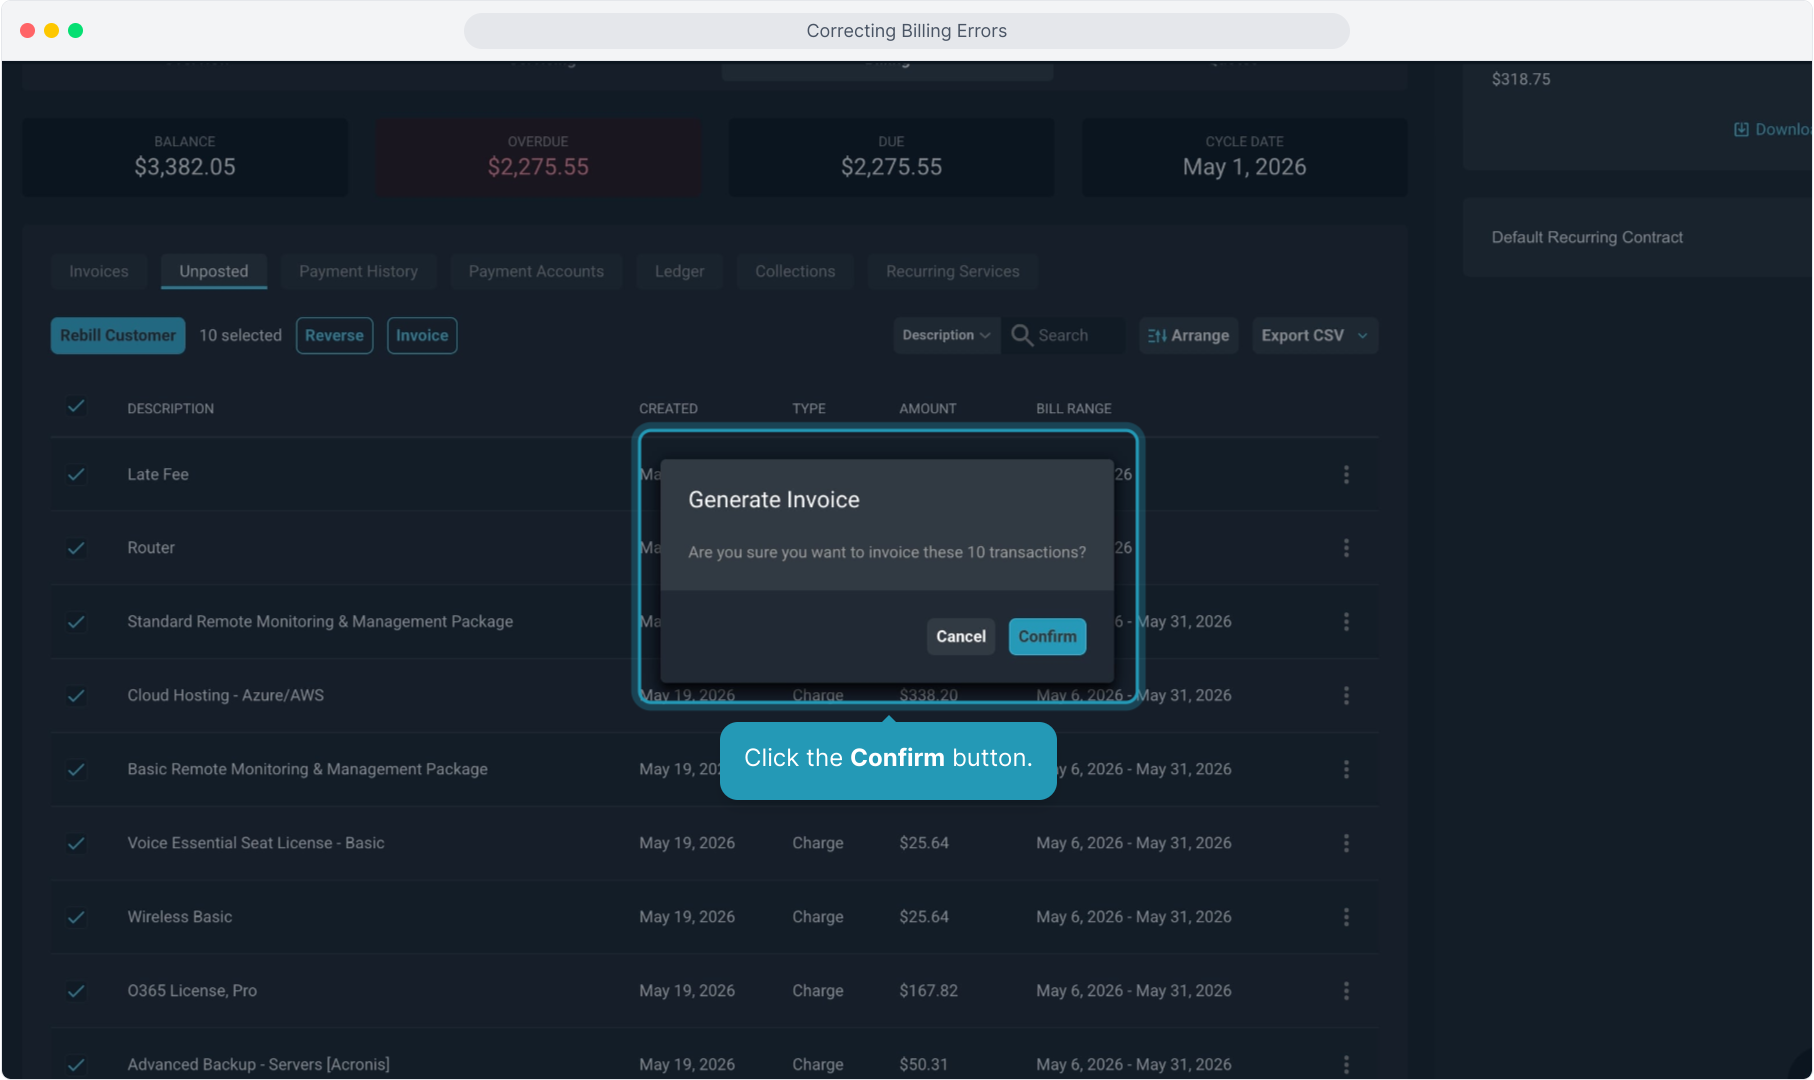
33. Click the Confirm button.
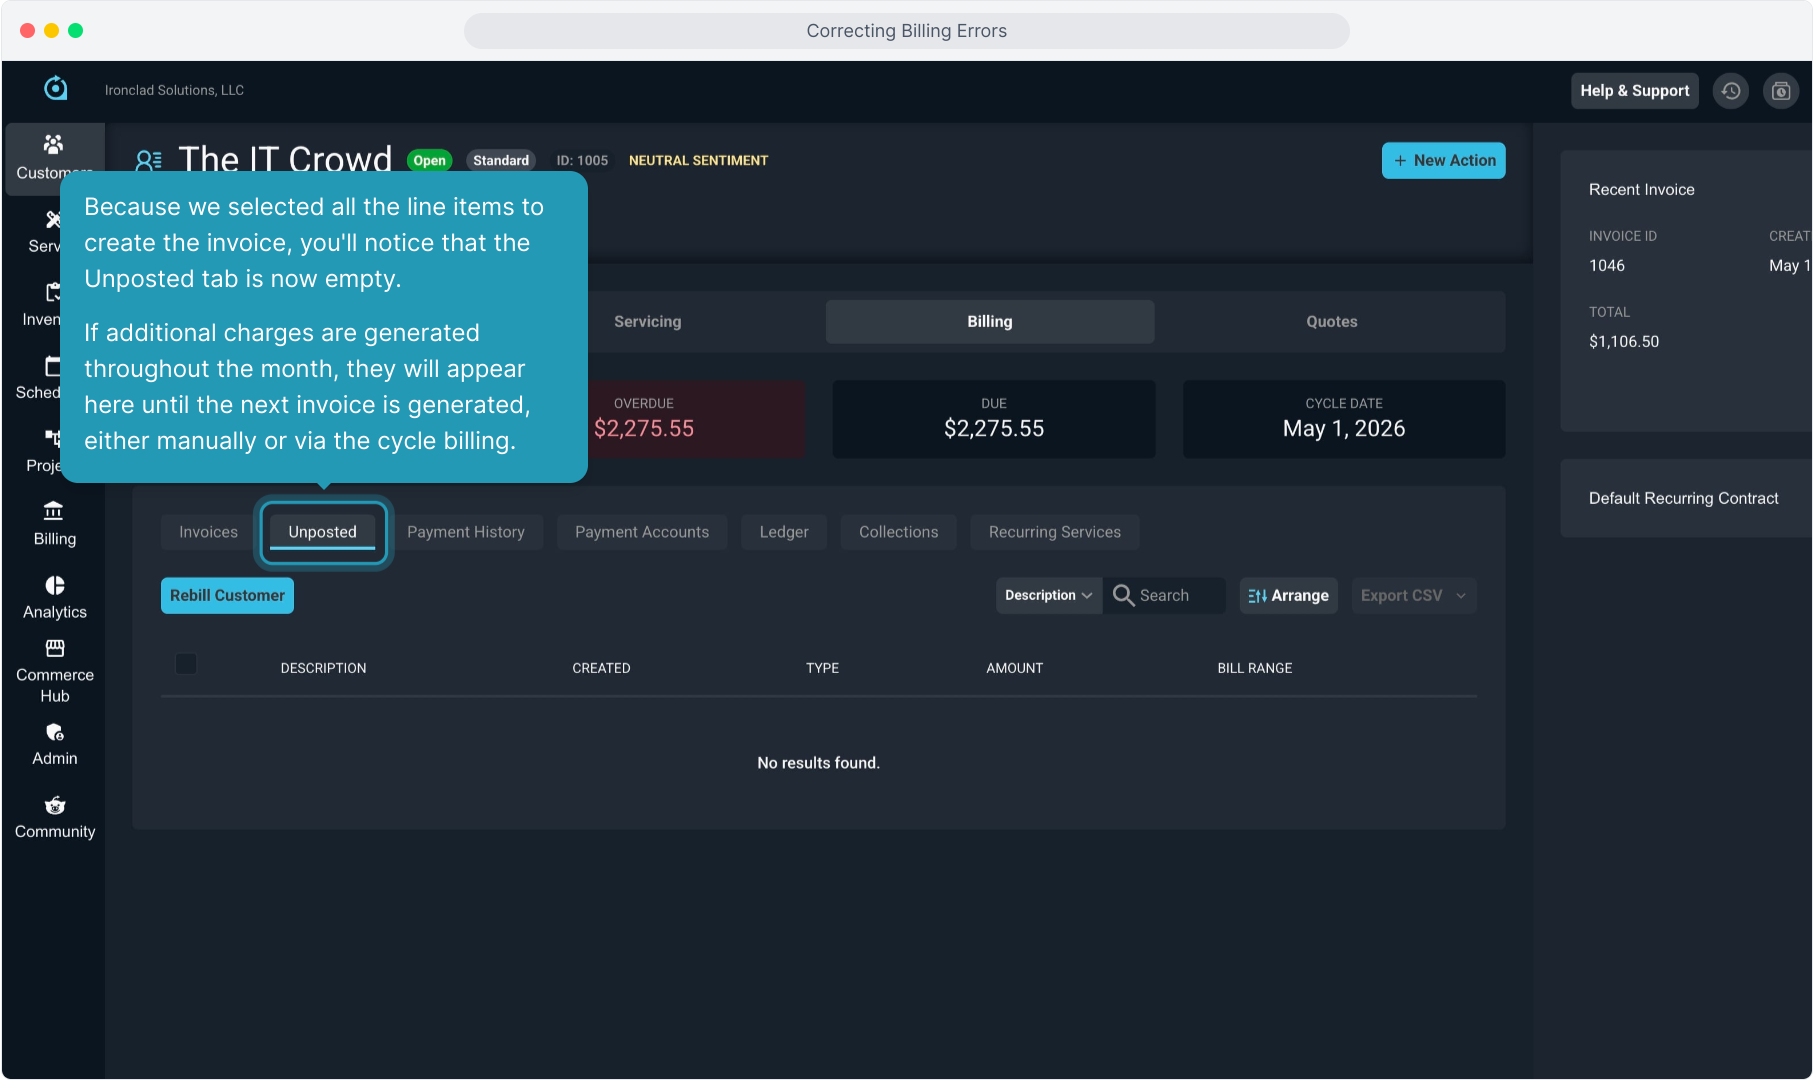
34. Because we selected all the line items to create the invoice, you'll notice that the Unposted tab is now empty.
If additional charges are generated throughout the month, they will appear here until the next invoice is generated, either manually or via the cycle billing.
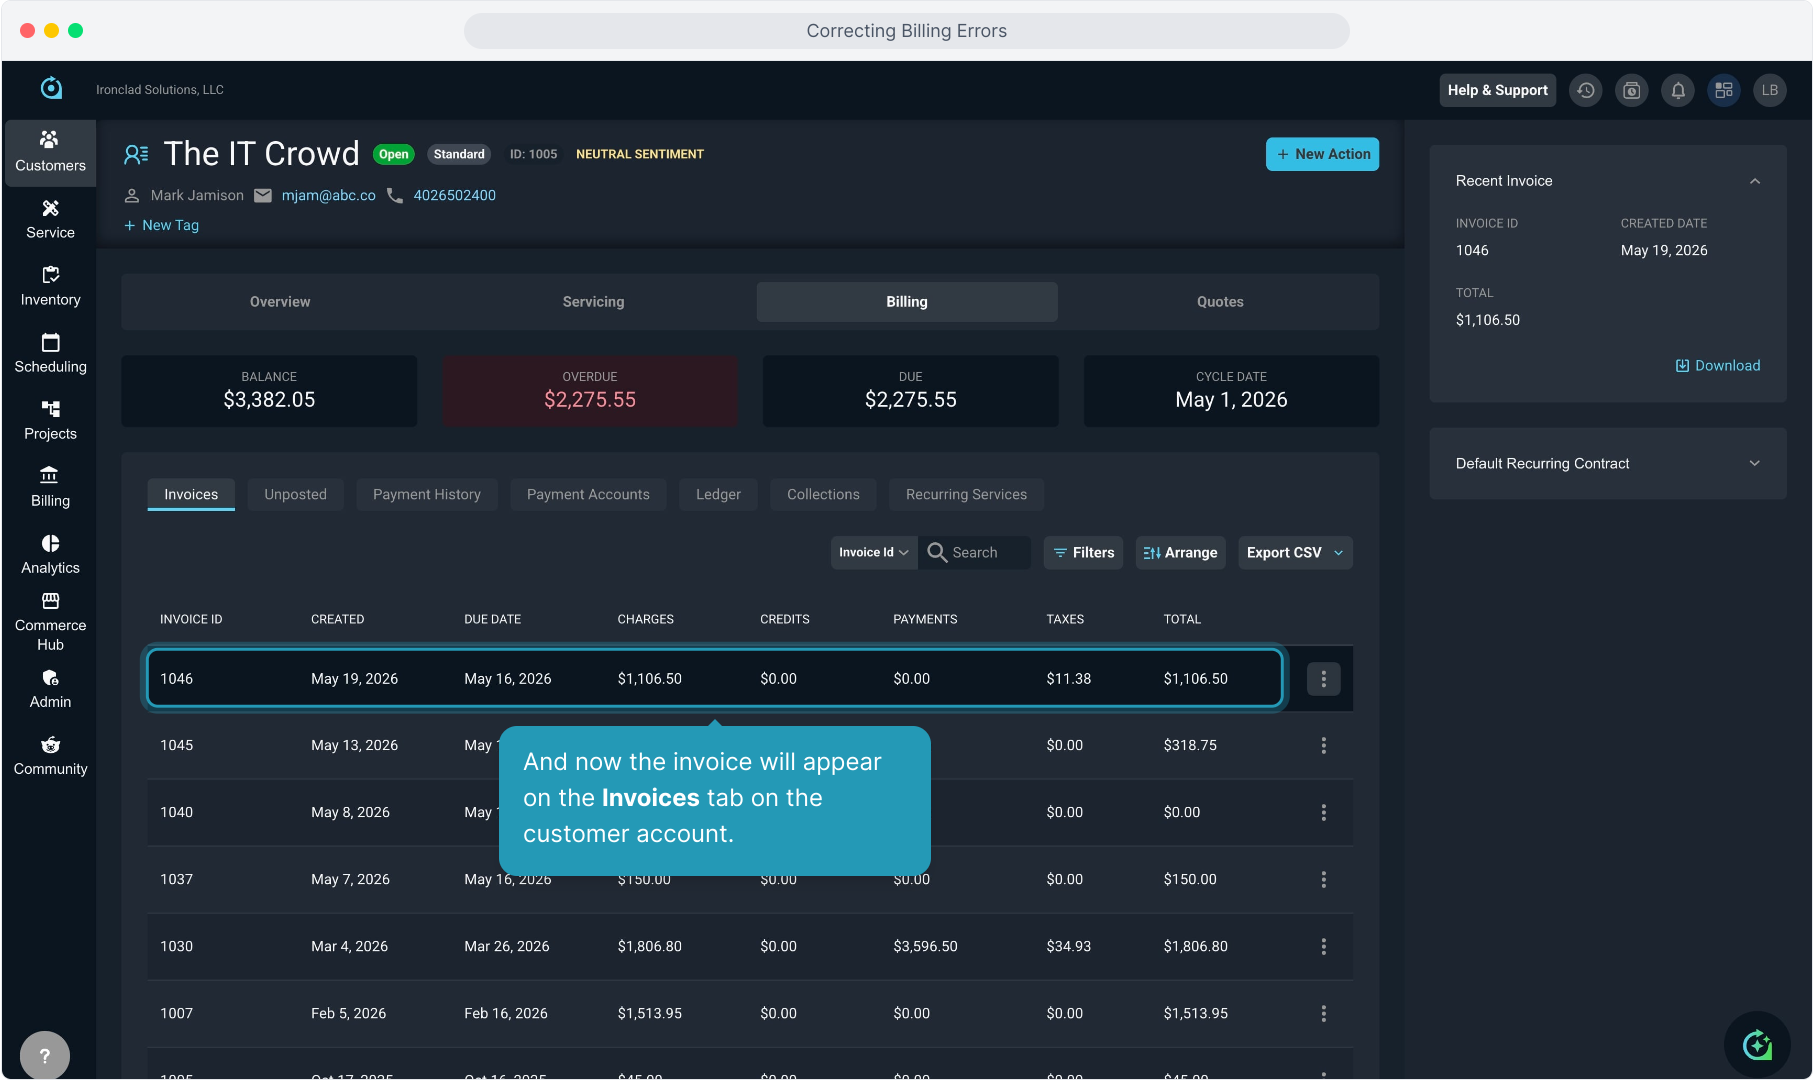
35. And now the invoice will appear on the Invoices tab on the customer account.
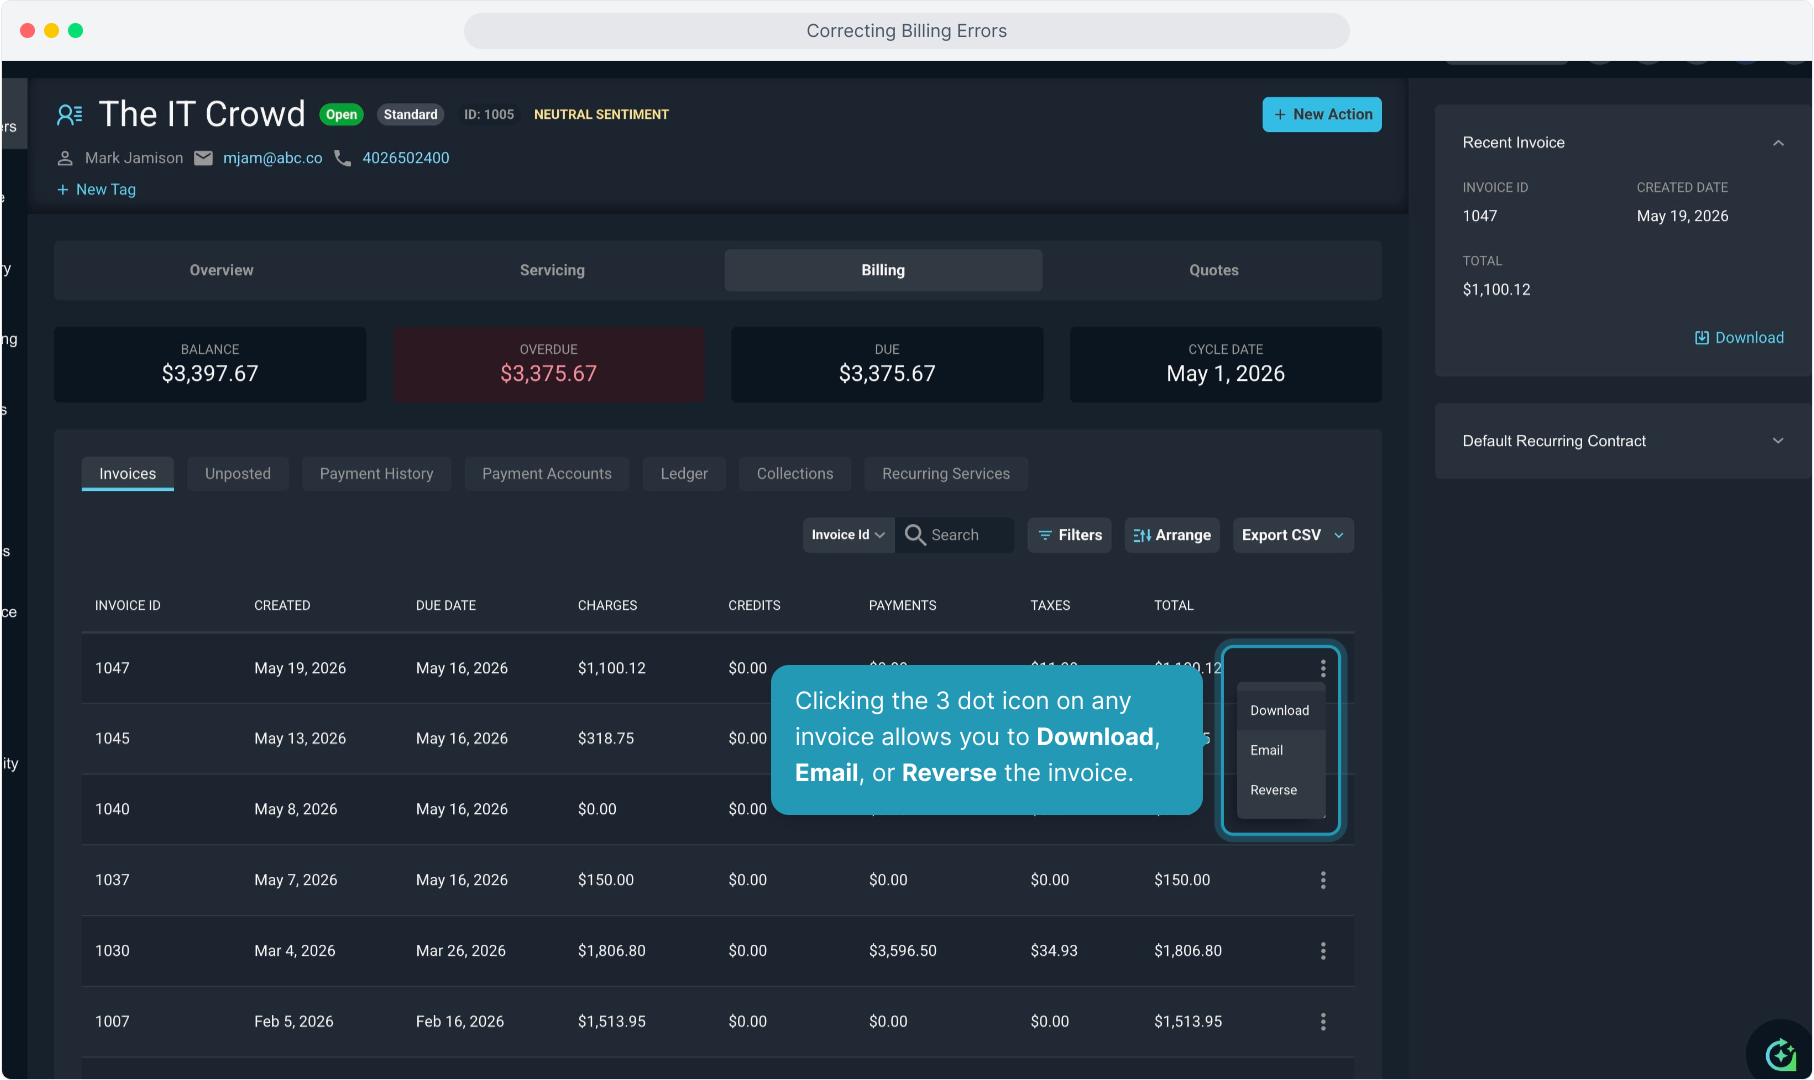
36. Clicking the 3 dot icon on any invoice allows you to Download, Email, or Reverse the invoice.
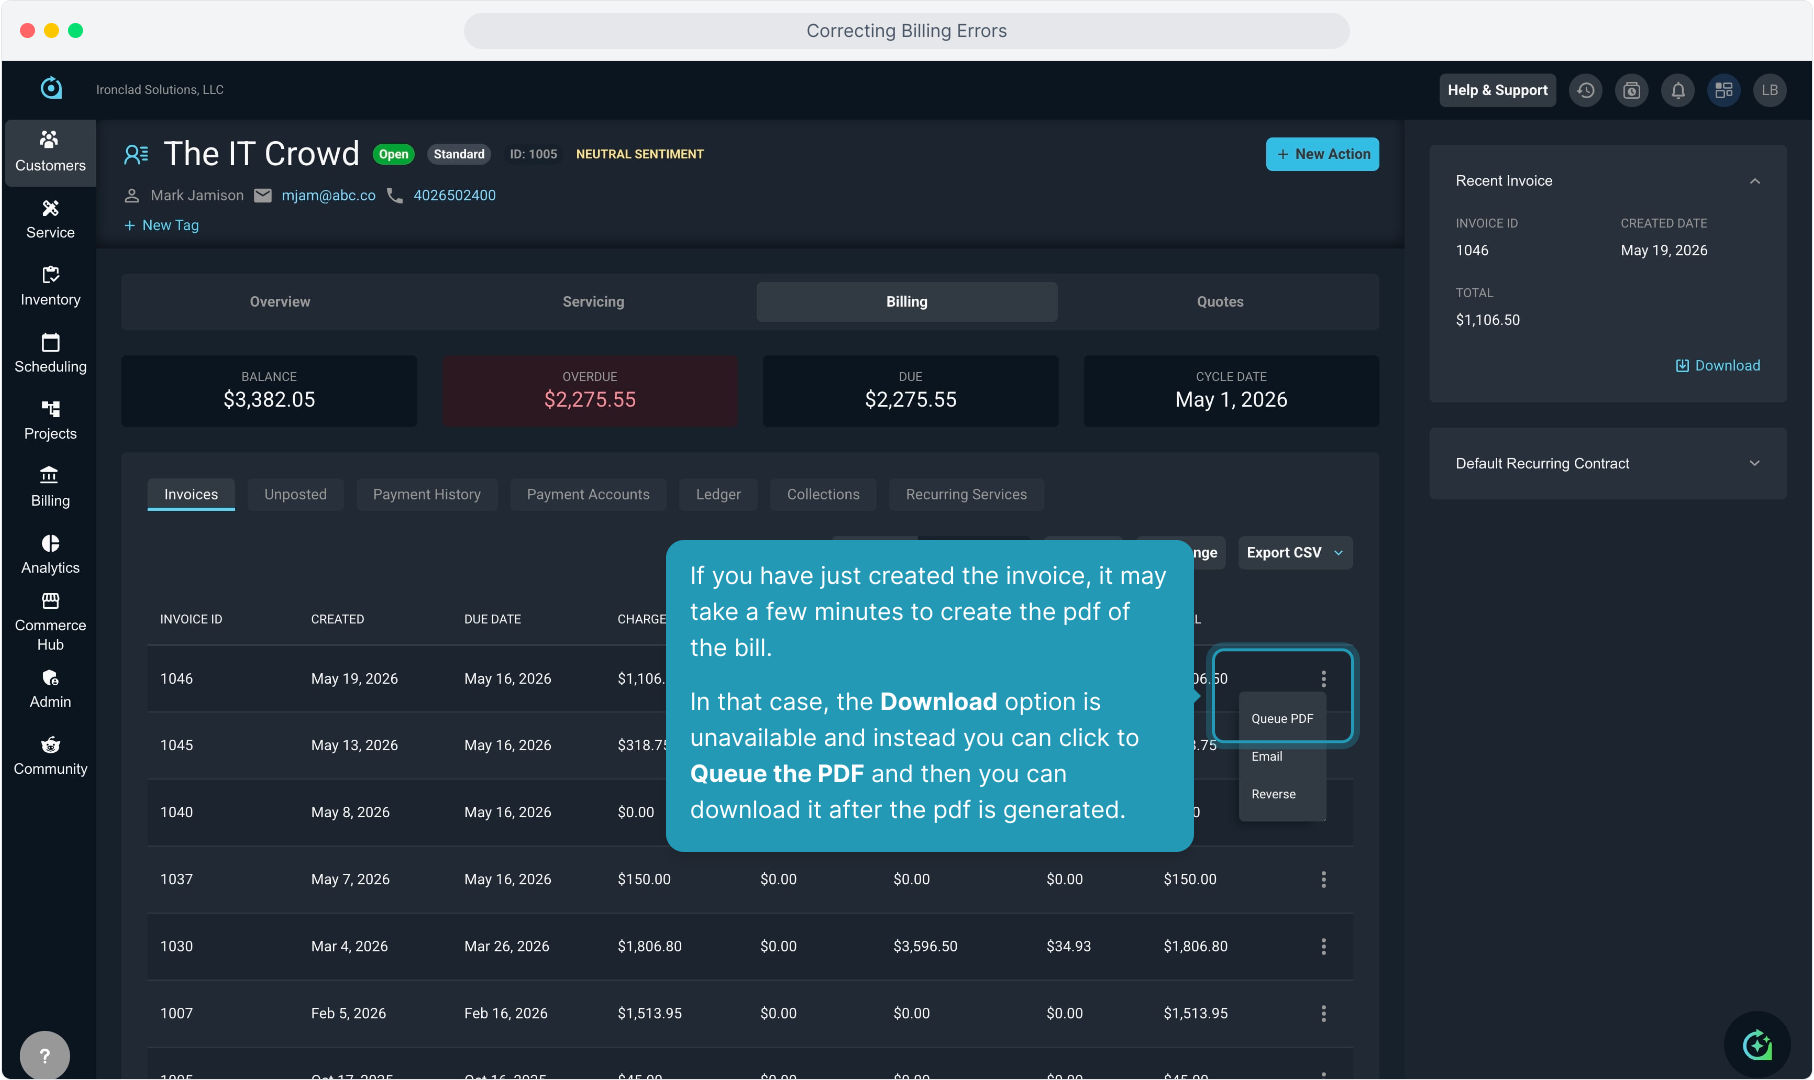
37. If you have just created the invoice, it may take a few minutes to create the pdf of the bill.
In that case, the Download option is unavailable and instead you can click to Queue the PDF and then you can download it after the pdf is generated.
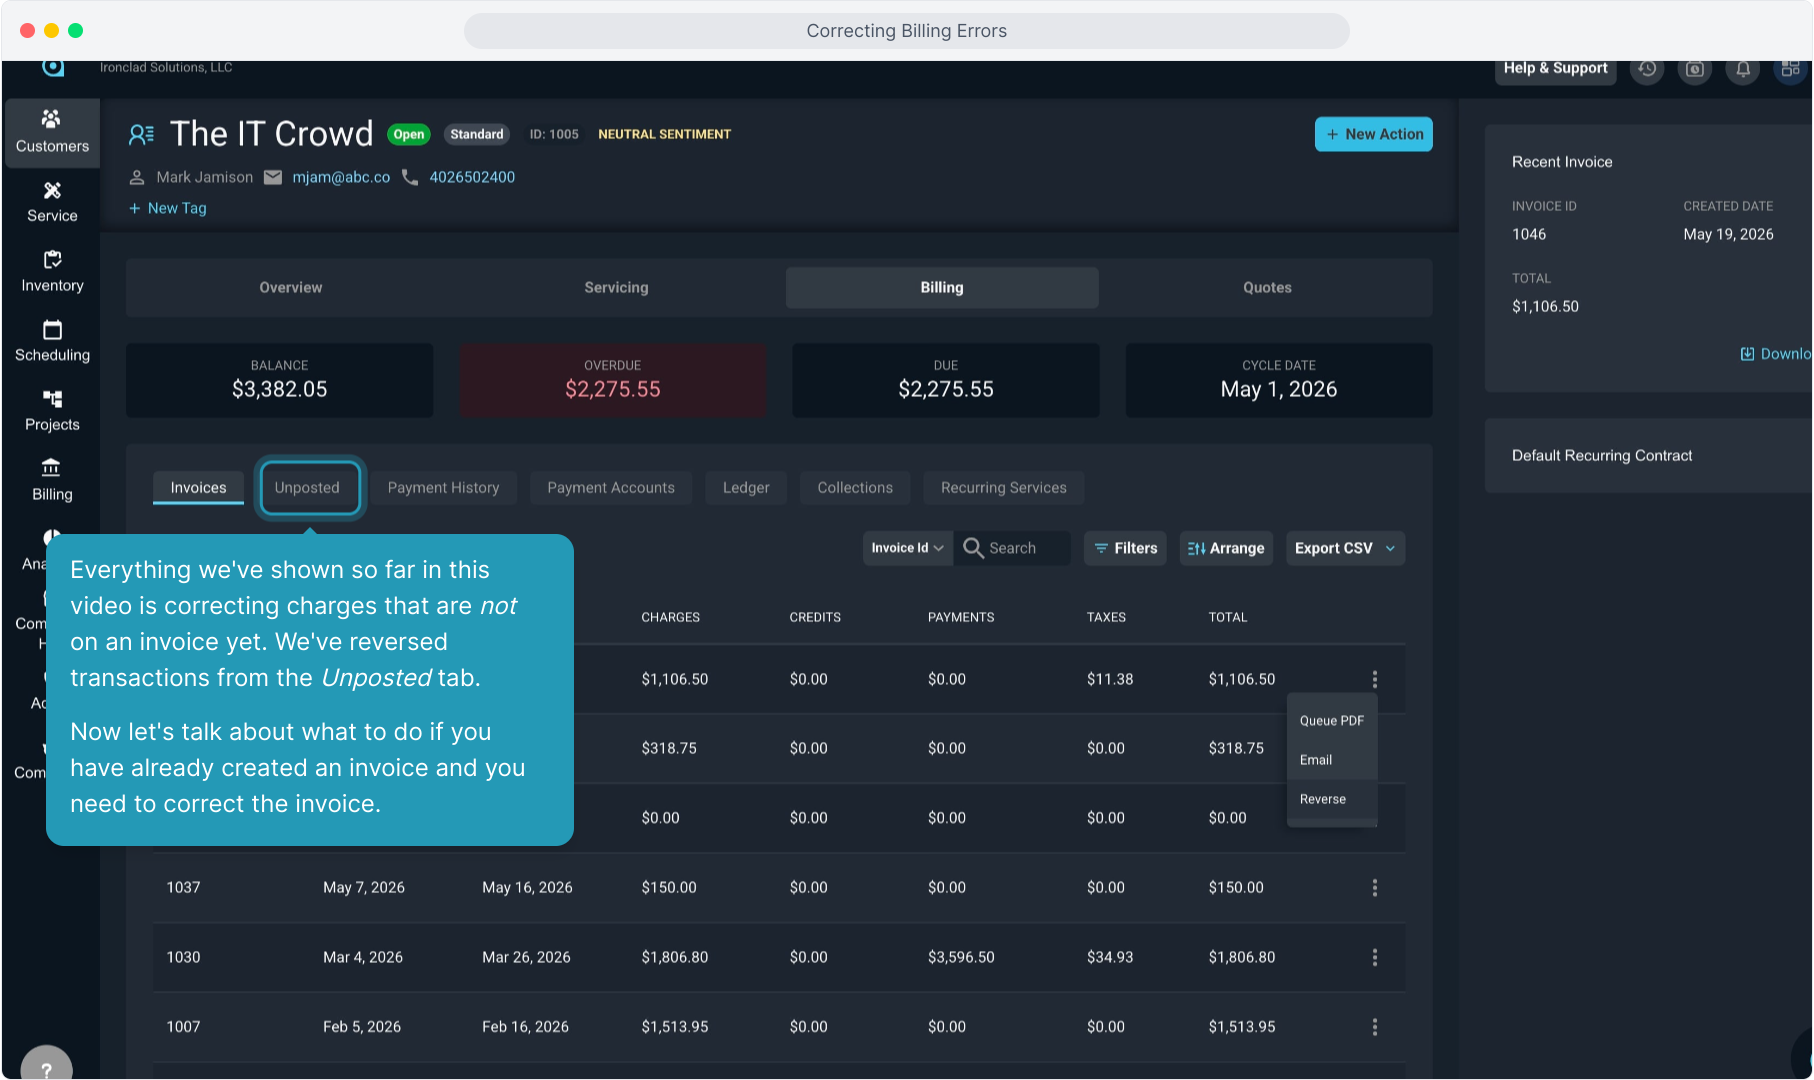
38. Everything we've shown so far in this video is correcting charges that are not on an invoice yet. We've reversed transactions from the Unposted tab.
Now let's talk about what to do if you have already created an invoice and you need to correct the invoice.
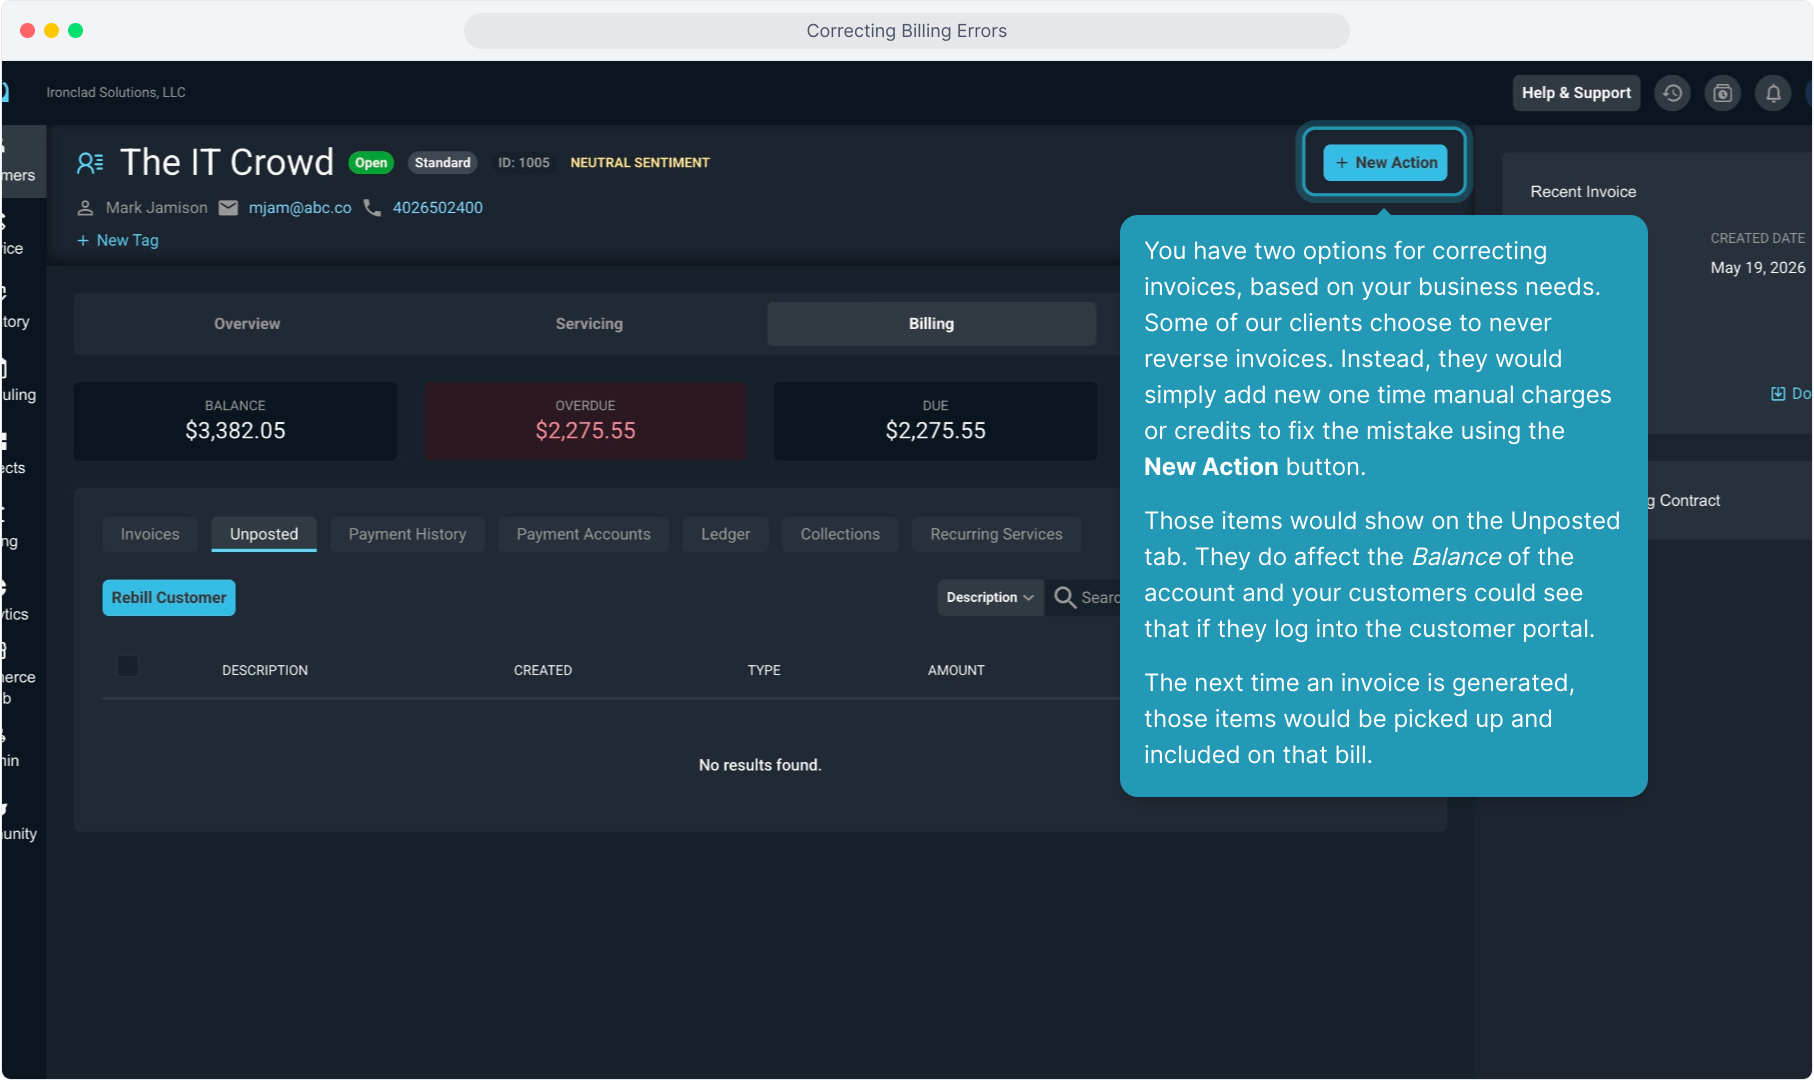
39. You have two options for correcting invoices, based on your business needs. Some of our clients choose to never reverse invoices. Instead, they would simply add new one time manual charges or credits to fix the mistake using the New Action button.
Those items would show on the Unposted tab. They do affect the Balance of the account and your customers could see that if they log into the customer portal.
The next time an invoice is generated, those items would be picked up and included on that bill.
40. The other option is to Reverse the invoice using the 3 dot icon, correct the individual transactions as shown earlier in this video, and then create a brand new replacement invoice.

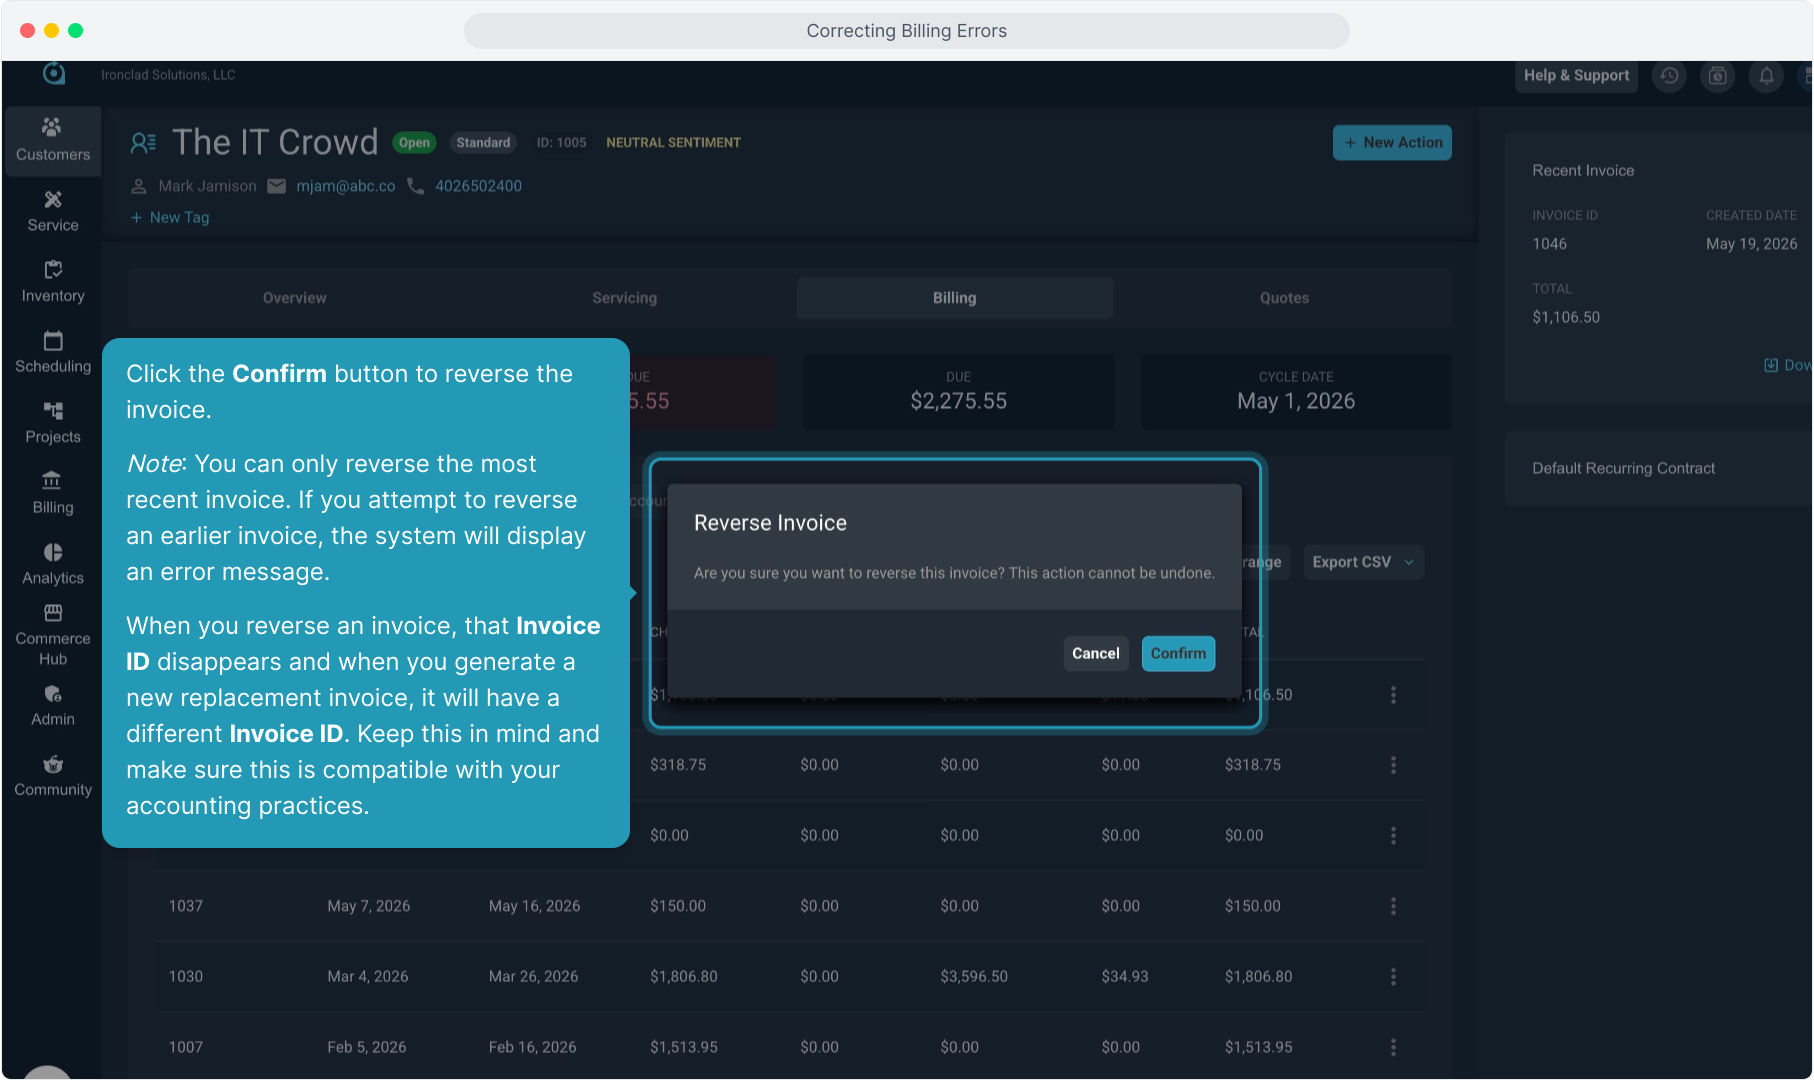
41. Click the Confirm button to reverse the invoice.
Note: You can only reverse the most recent invoice. If you attempt to reverse an earlier invoice, the system will display an error message.
When you reverse an invoice, that Invoice ID disappears and when you generate a new replacement invoice, it will have a different Invoice ID. Keep this in mind and make sure this is compatible with your accounting practices.
42. Reversing an invoice will take all the charges on that invoice and move them back onto the Unposted tab. It's almost like an "un-do" button.
From there, you can then reverse and recreate transactions or rebill the customer as demonstrated earlier.

43. And then, once any incorrect transactions have been corrected, select the charges and click the Invoice button to recreate a new invoice.