How To Guide: Inventory - Product Catalog
1. Introduction
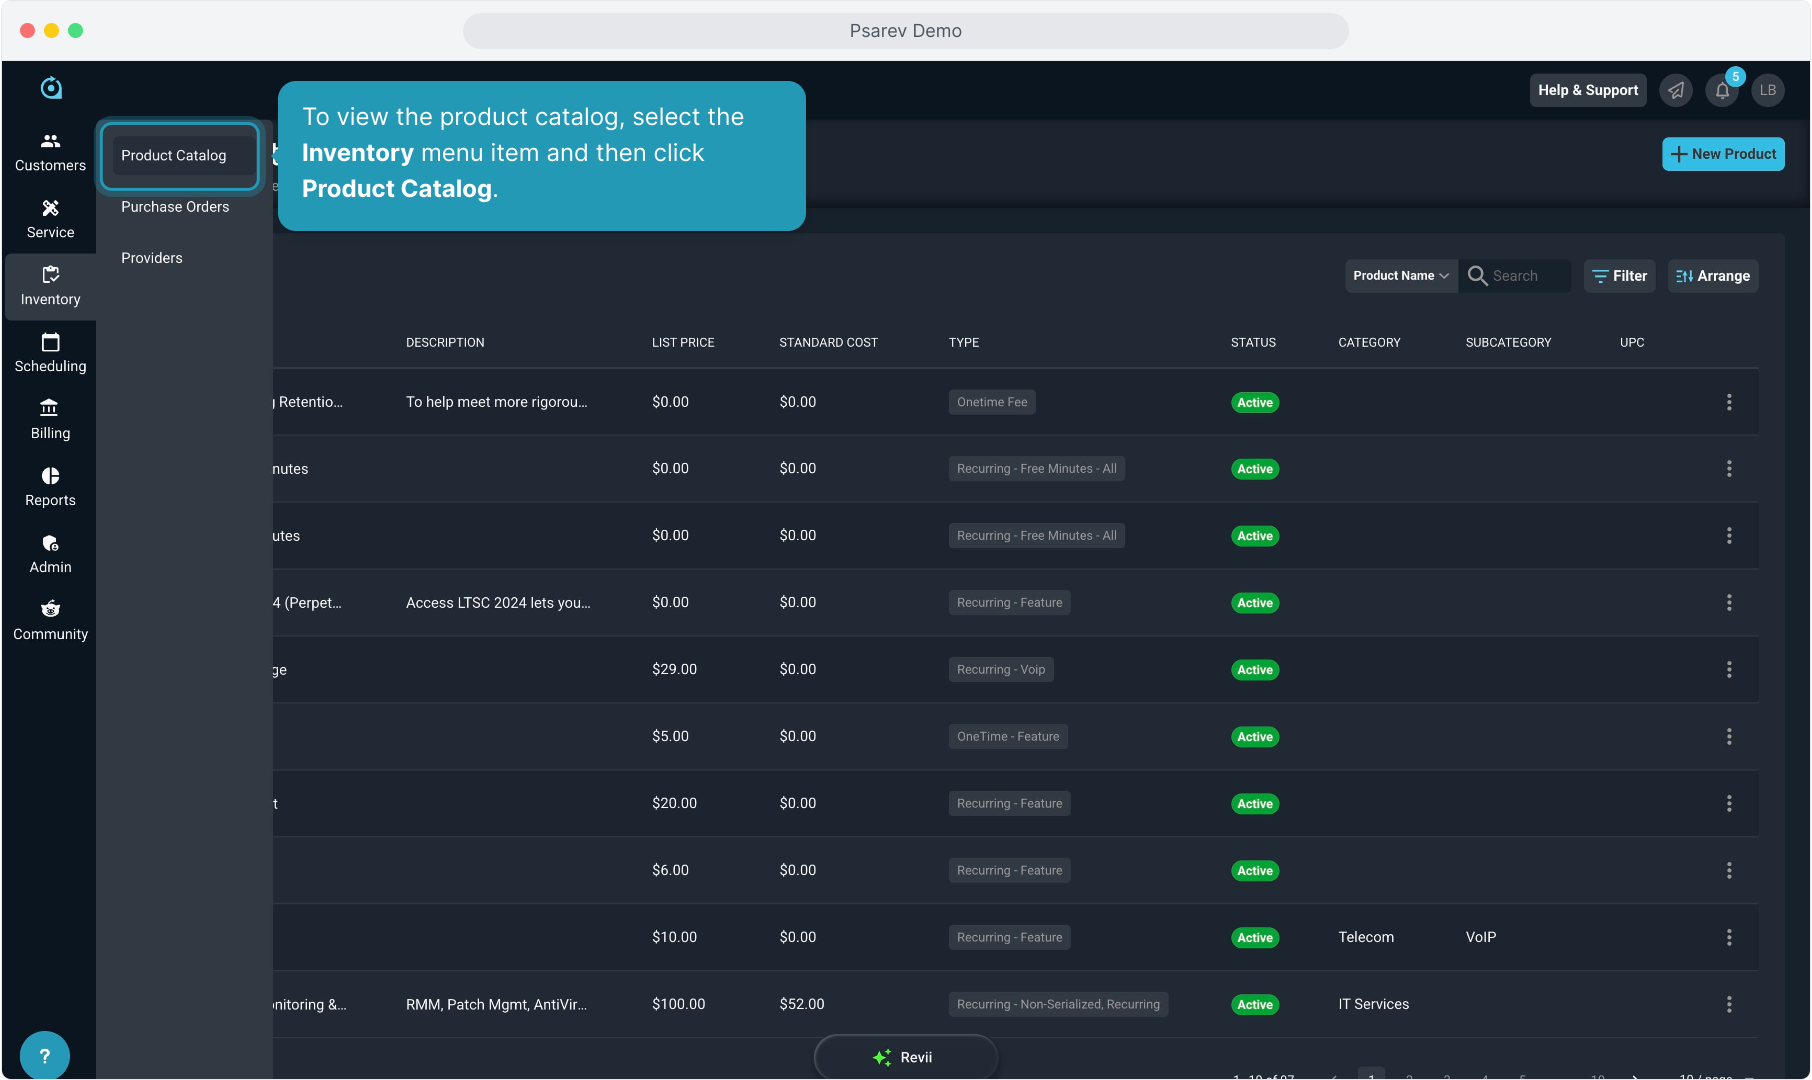
2. To view the product catalog, select the Inventory menu item and then click Product Catalog.
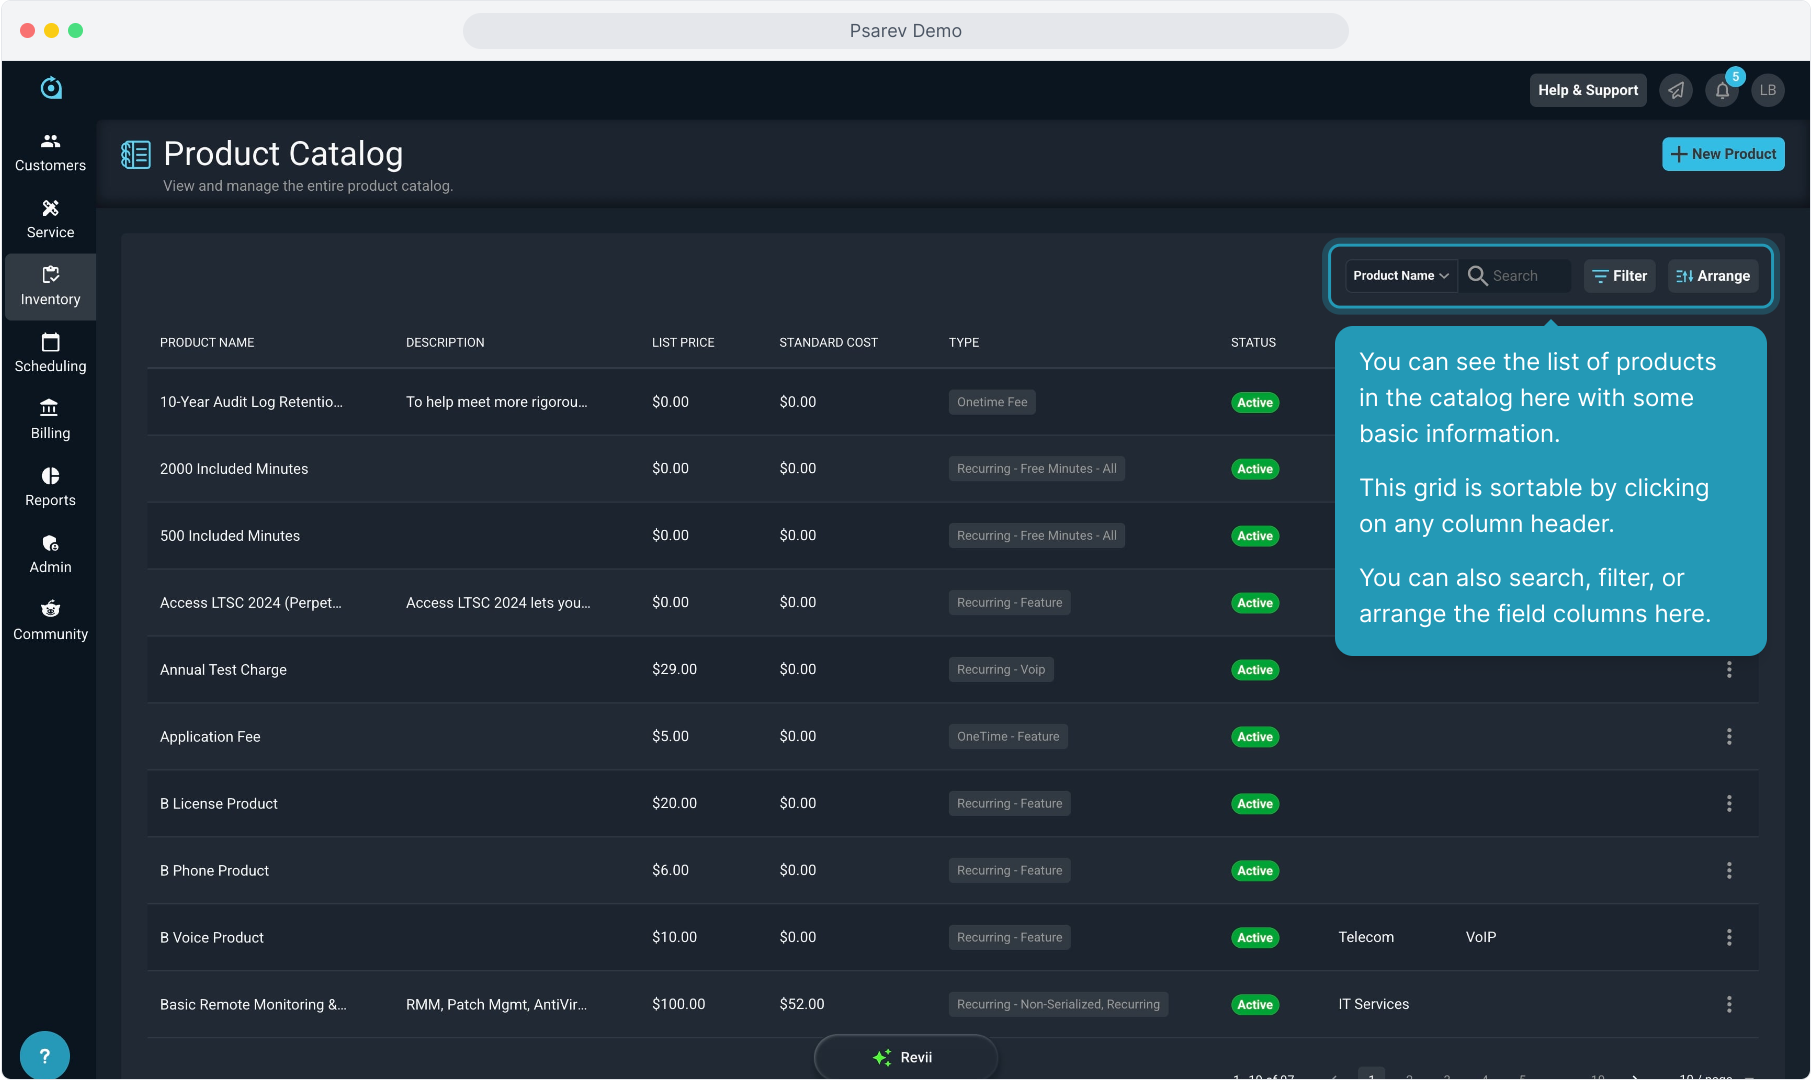
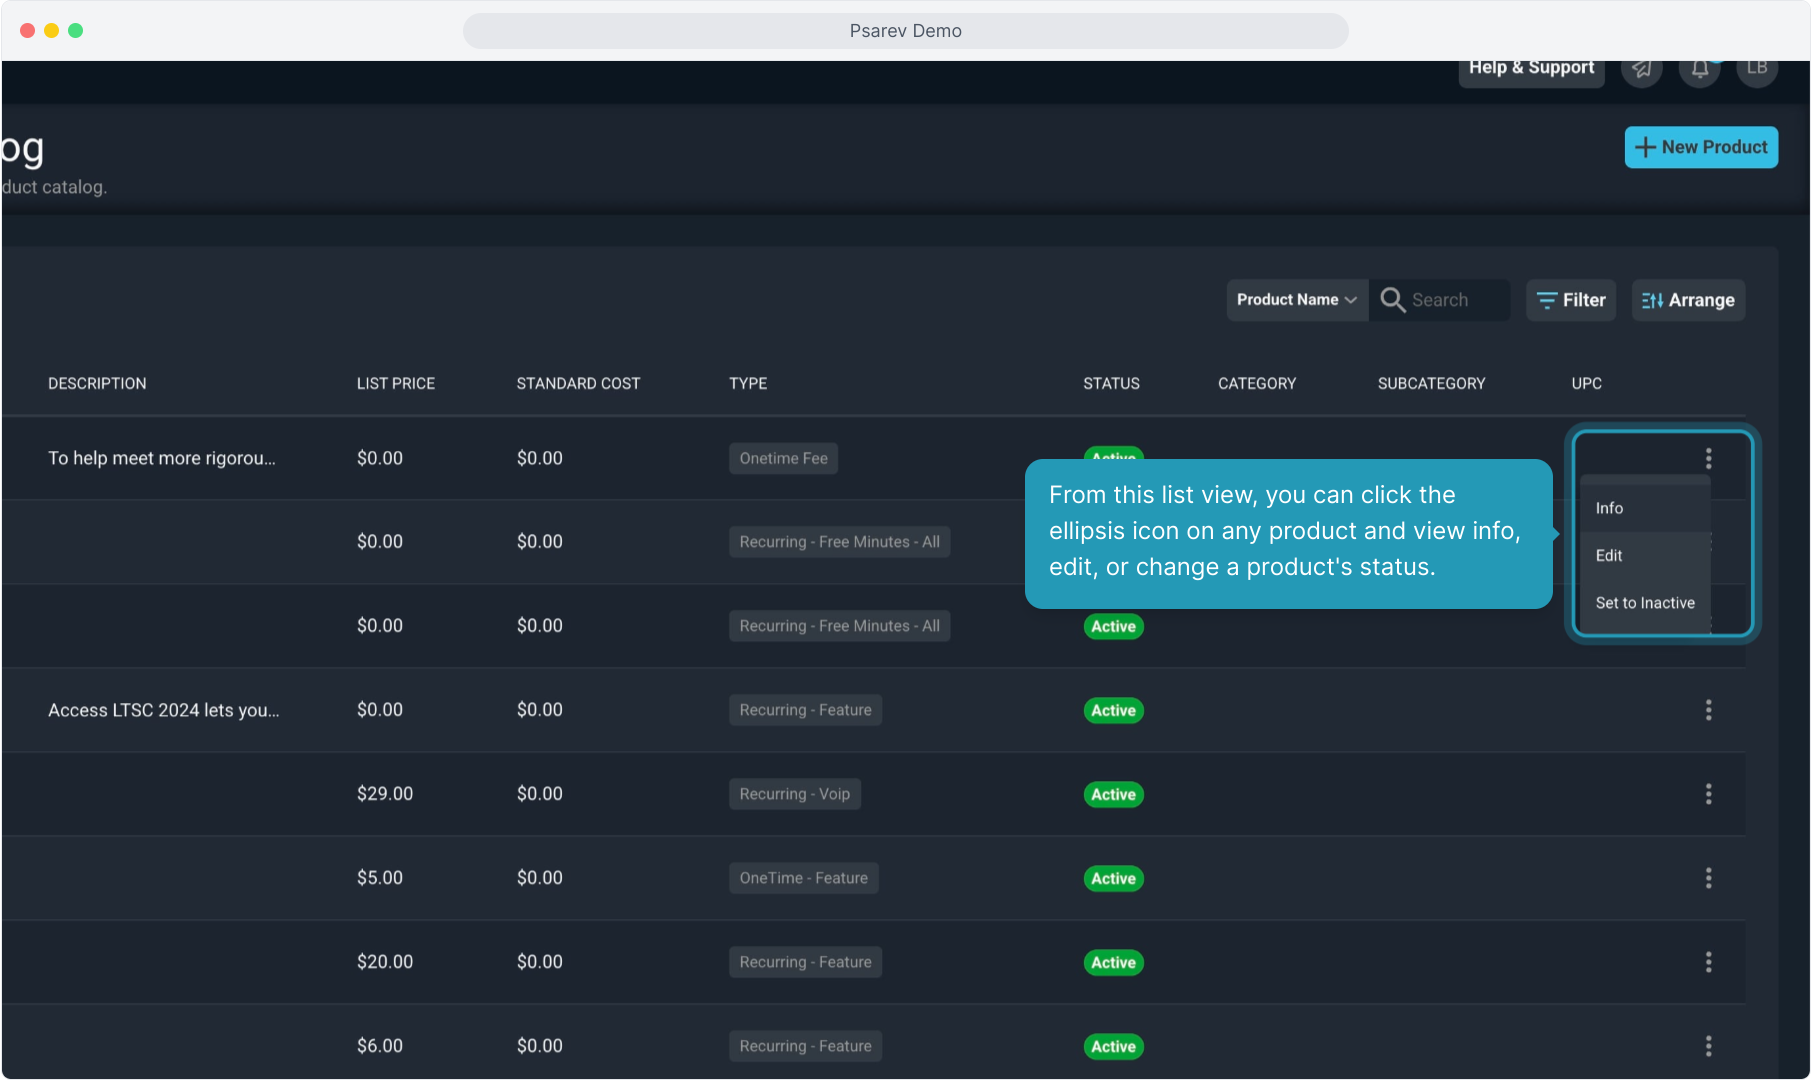
3. You can see the list of products in the catalog here with some basic information.
This grid is sortable by clicking on any column header. You can also search, filter, or arrange the field columns here.
4. From this list view, you can click the ellipsis icon on any product and view info, edit, or change a product's status.
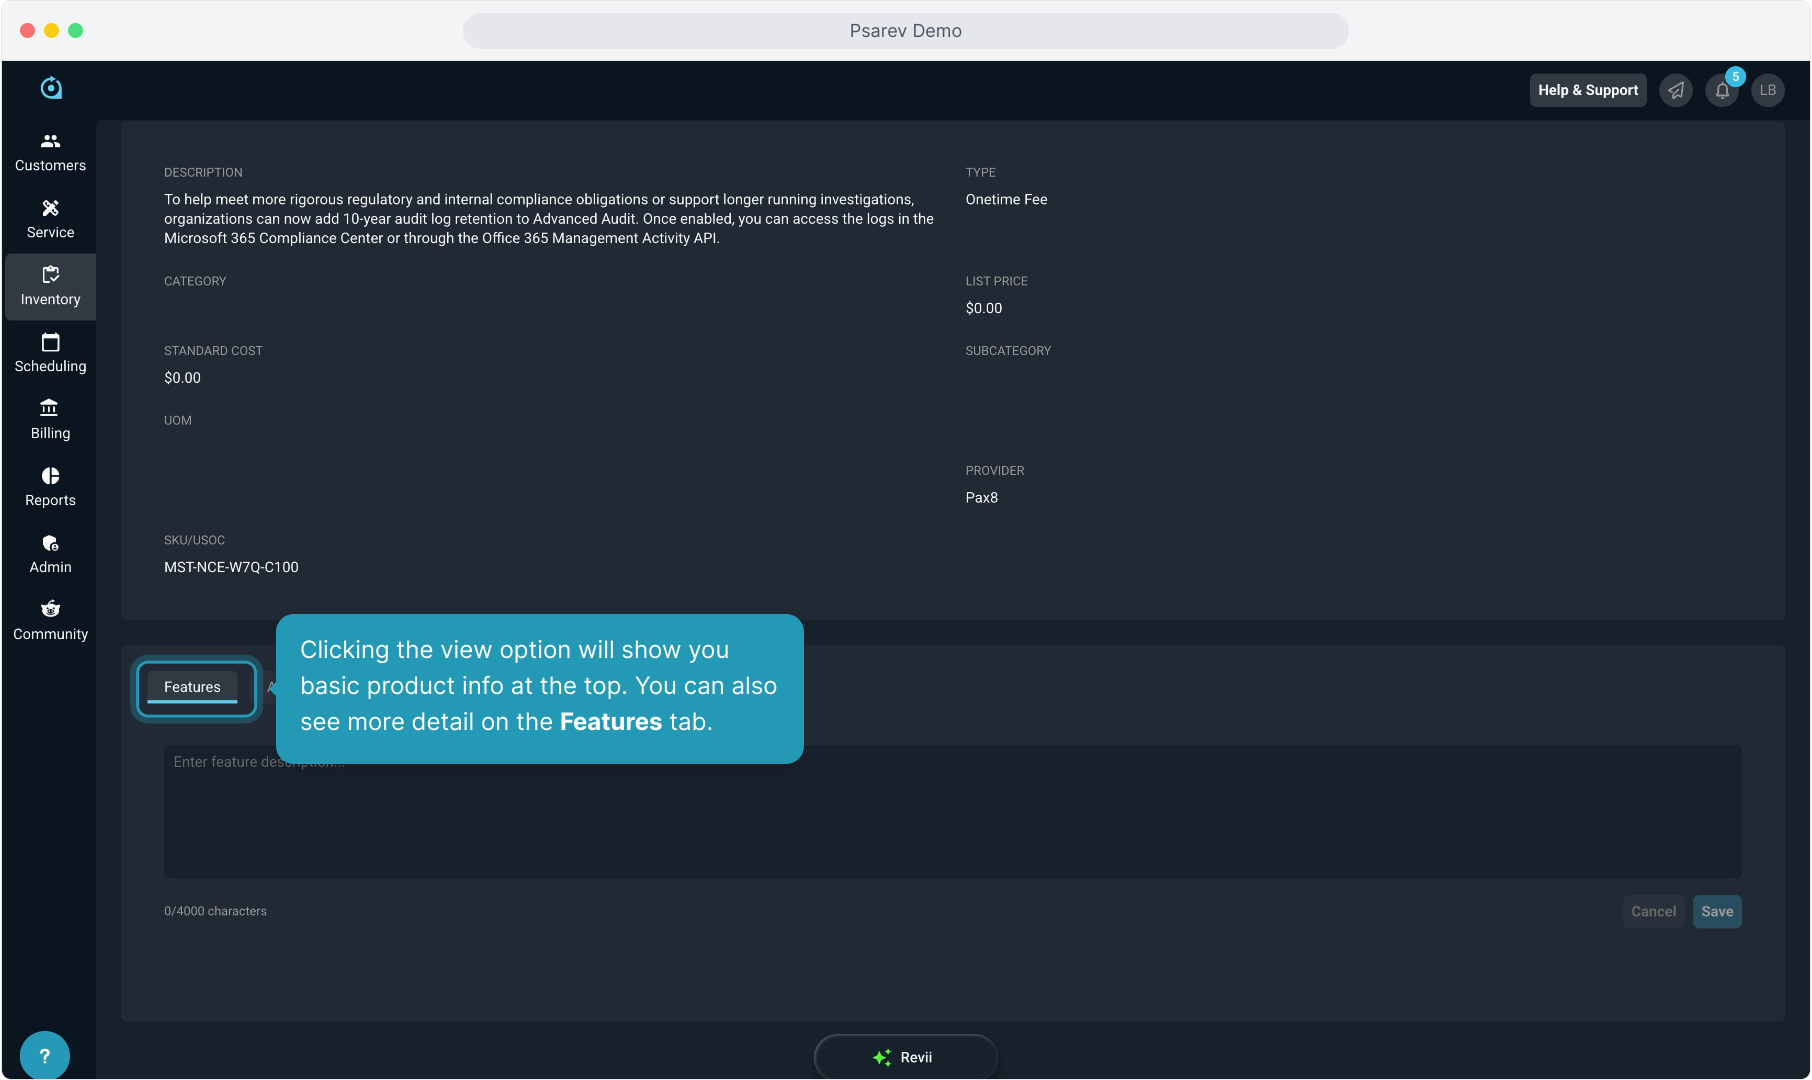
5. Clicking the view option will show you basic product info at the top. You can also see more detail on the Features tab.
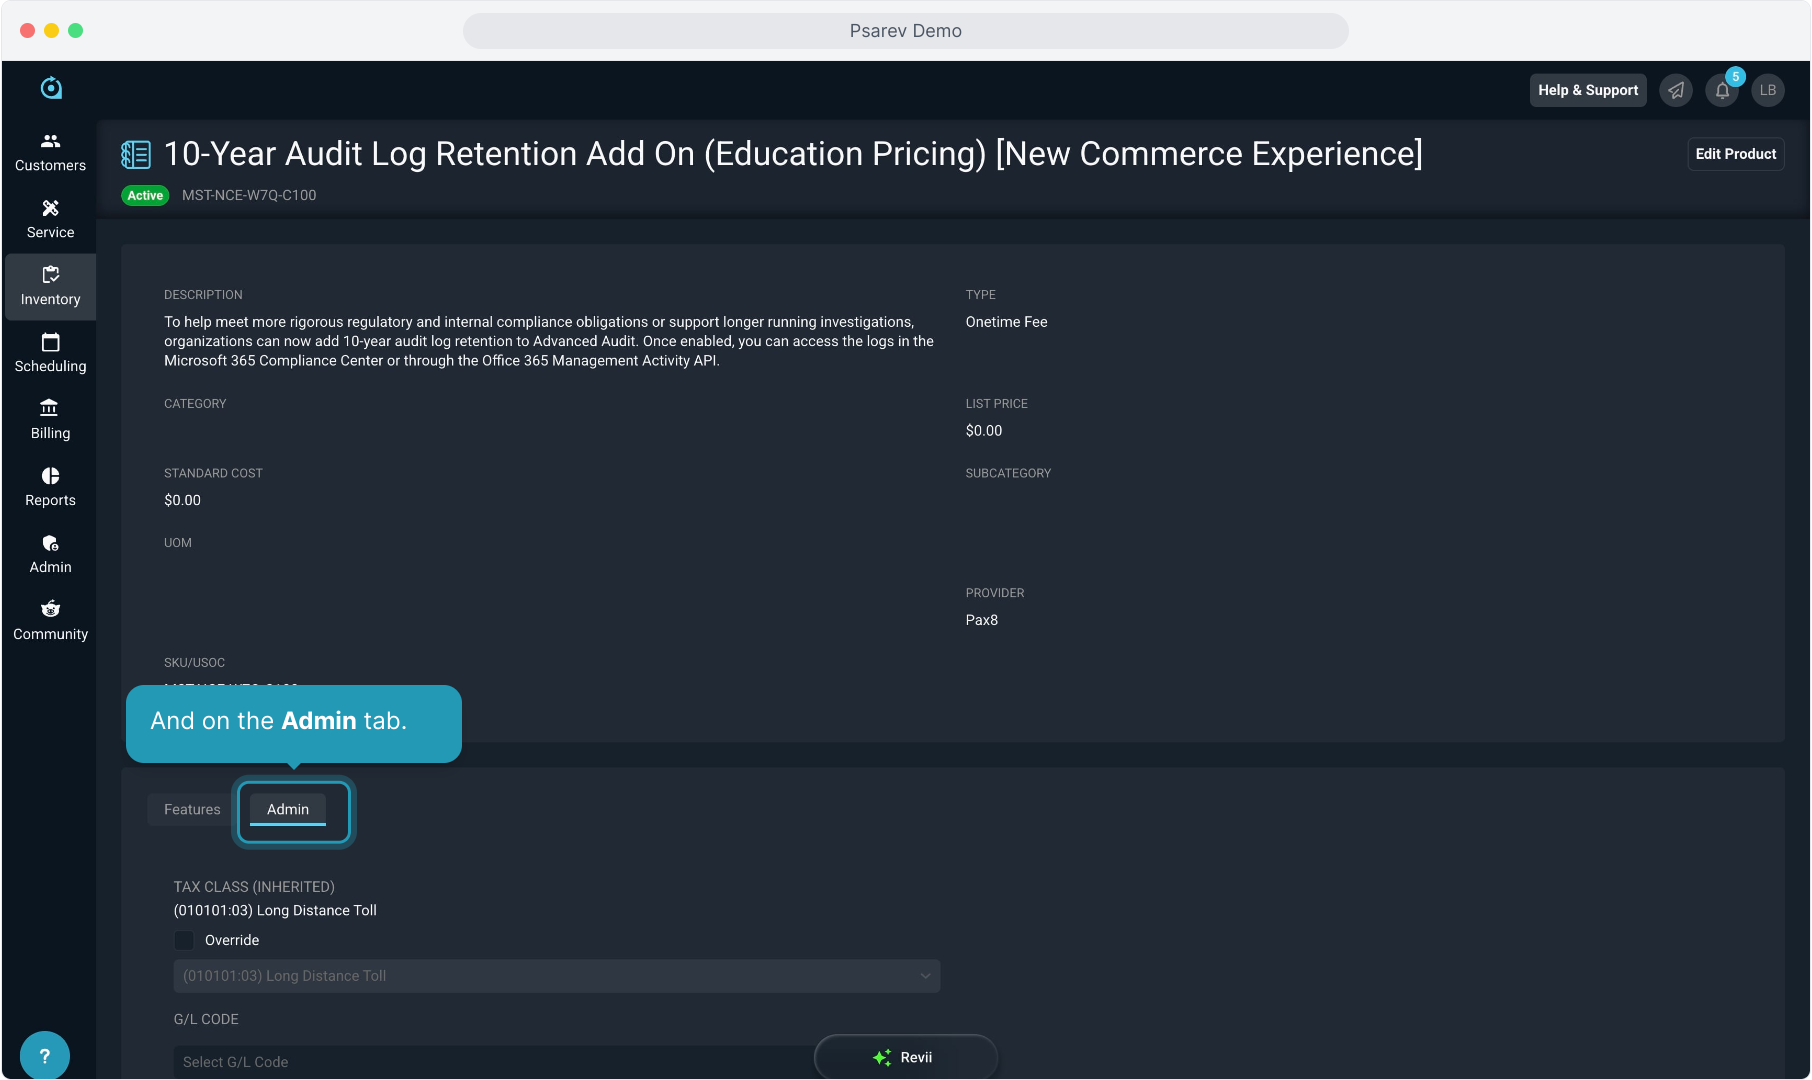
6. And on the Admin tab.
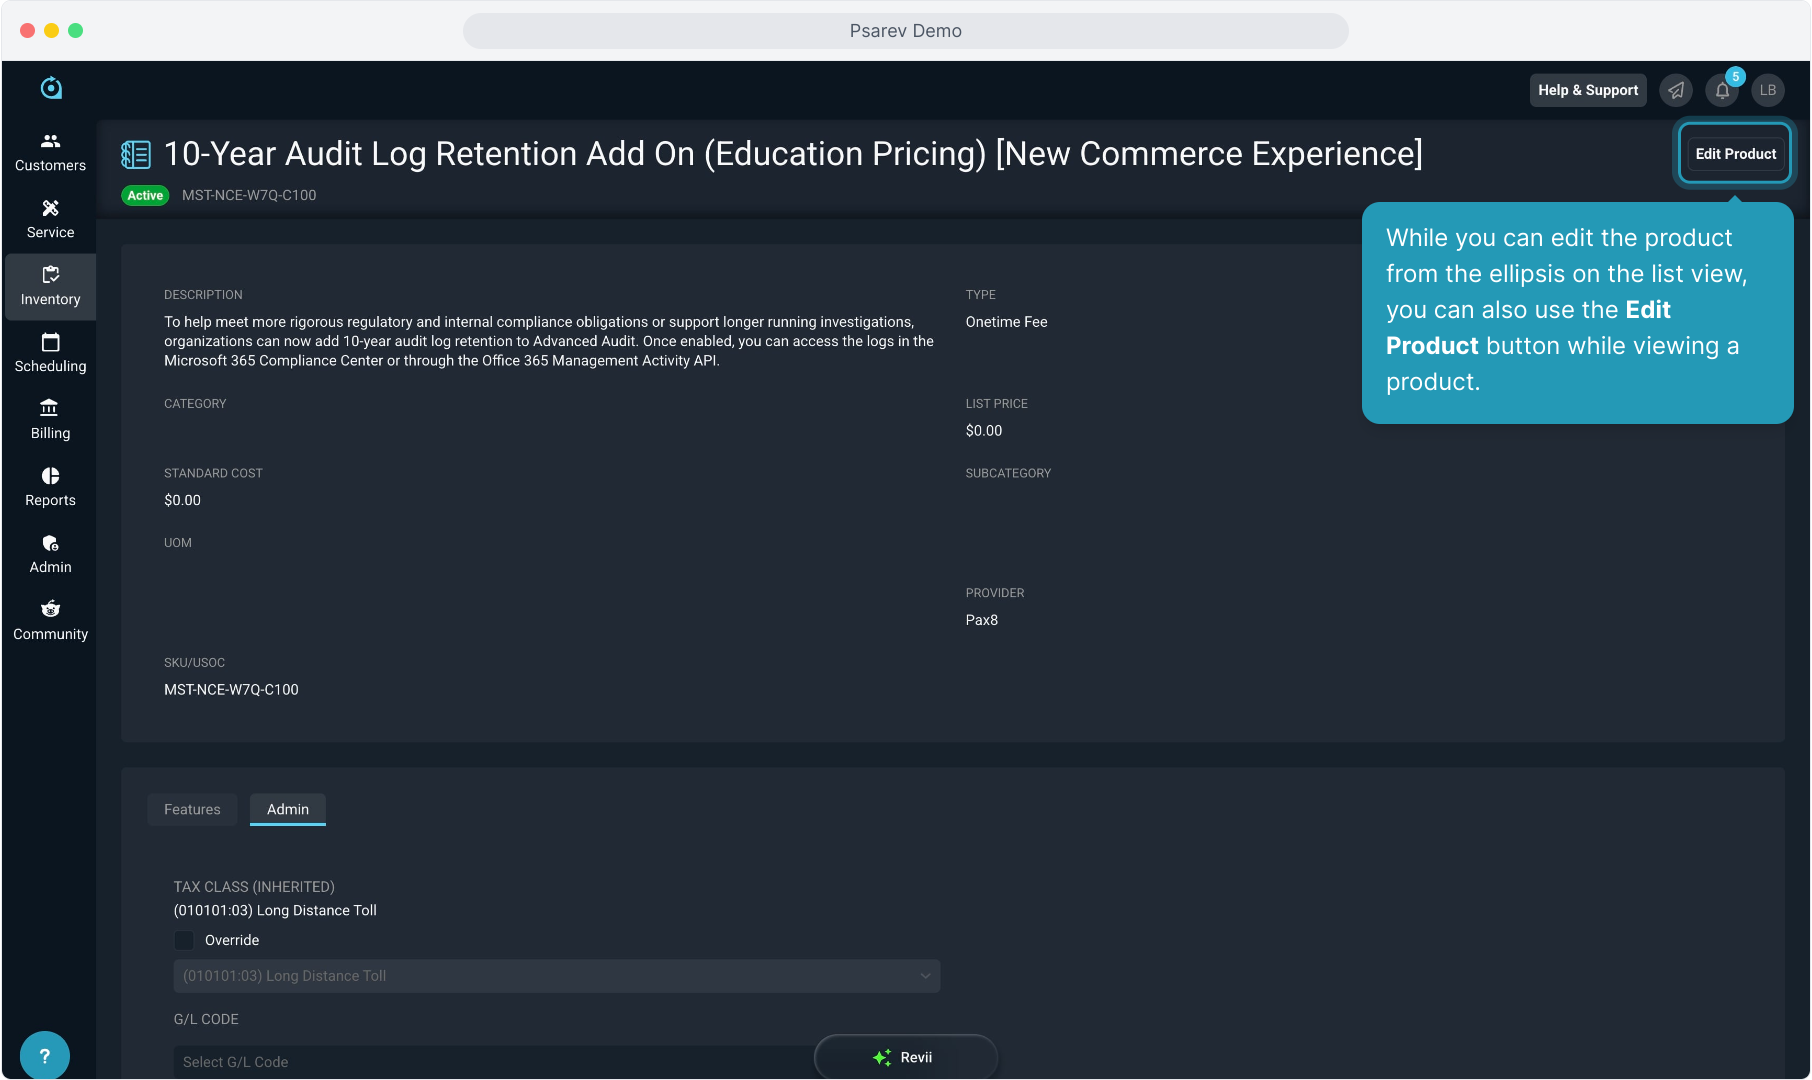
7. While you can edit the product from the ellipsis on the list view, you can also use the Edit Product button while viewing a product.
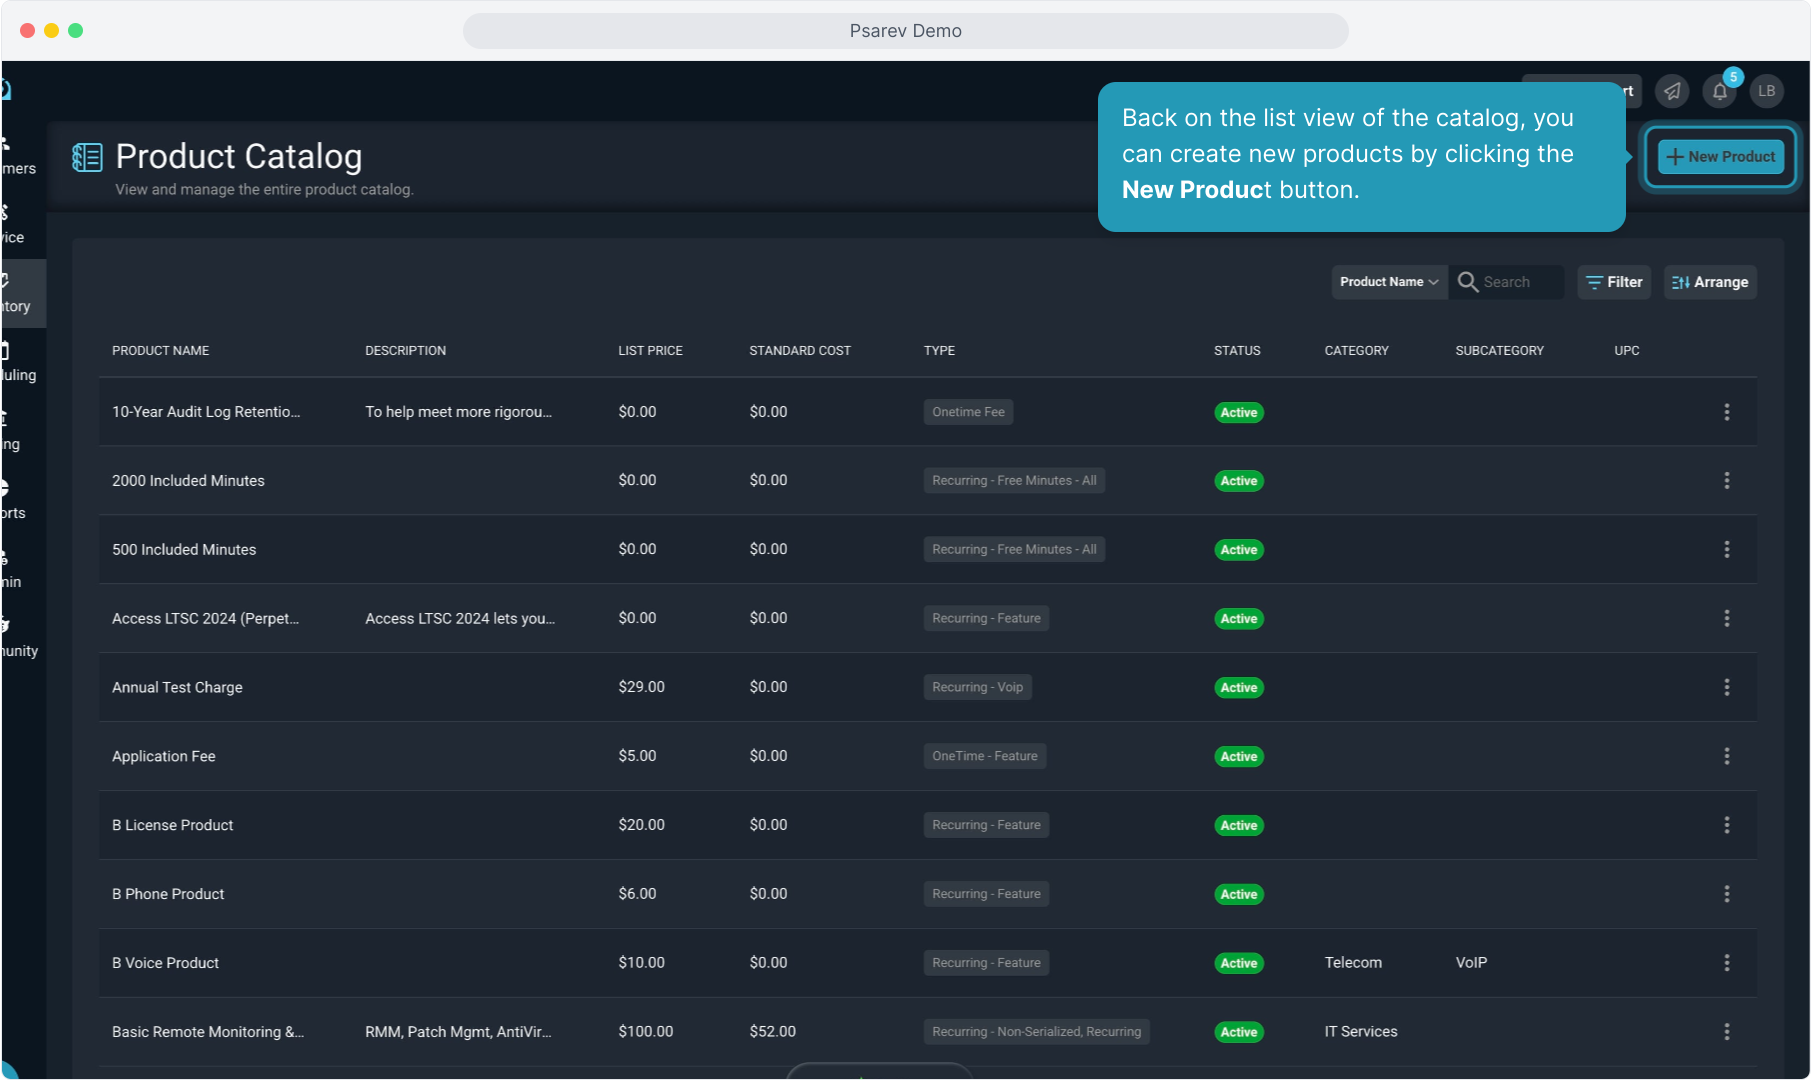
8. Back on the list view of the catalog, you can create new products by clicking the New Product button.
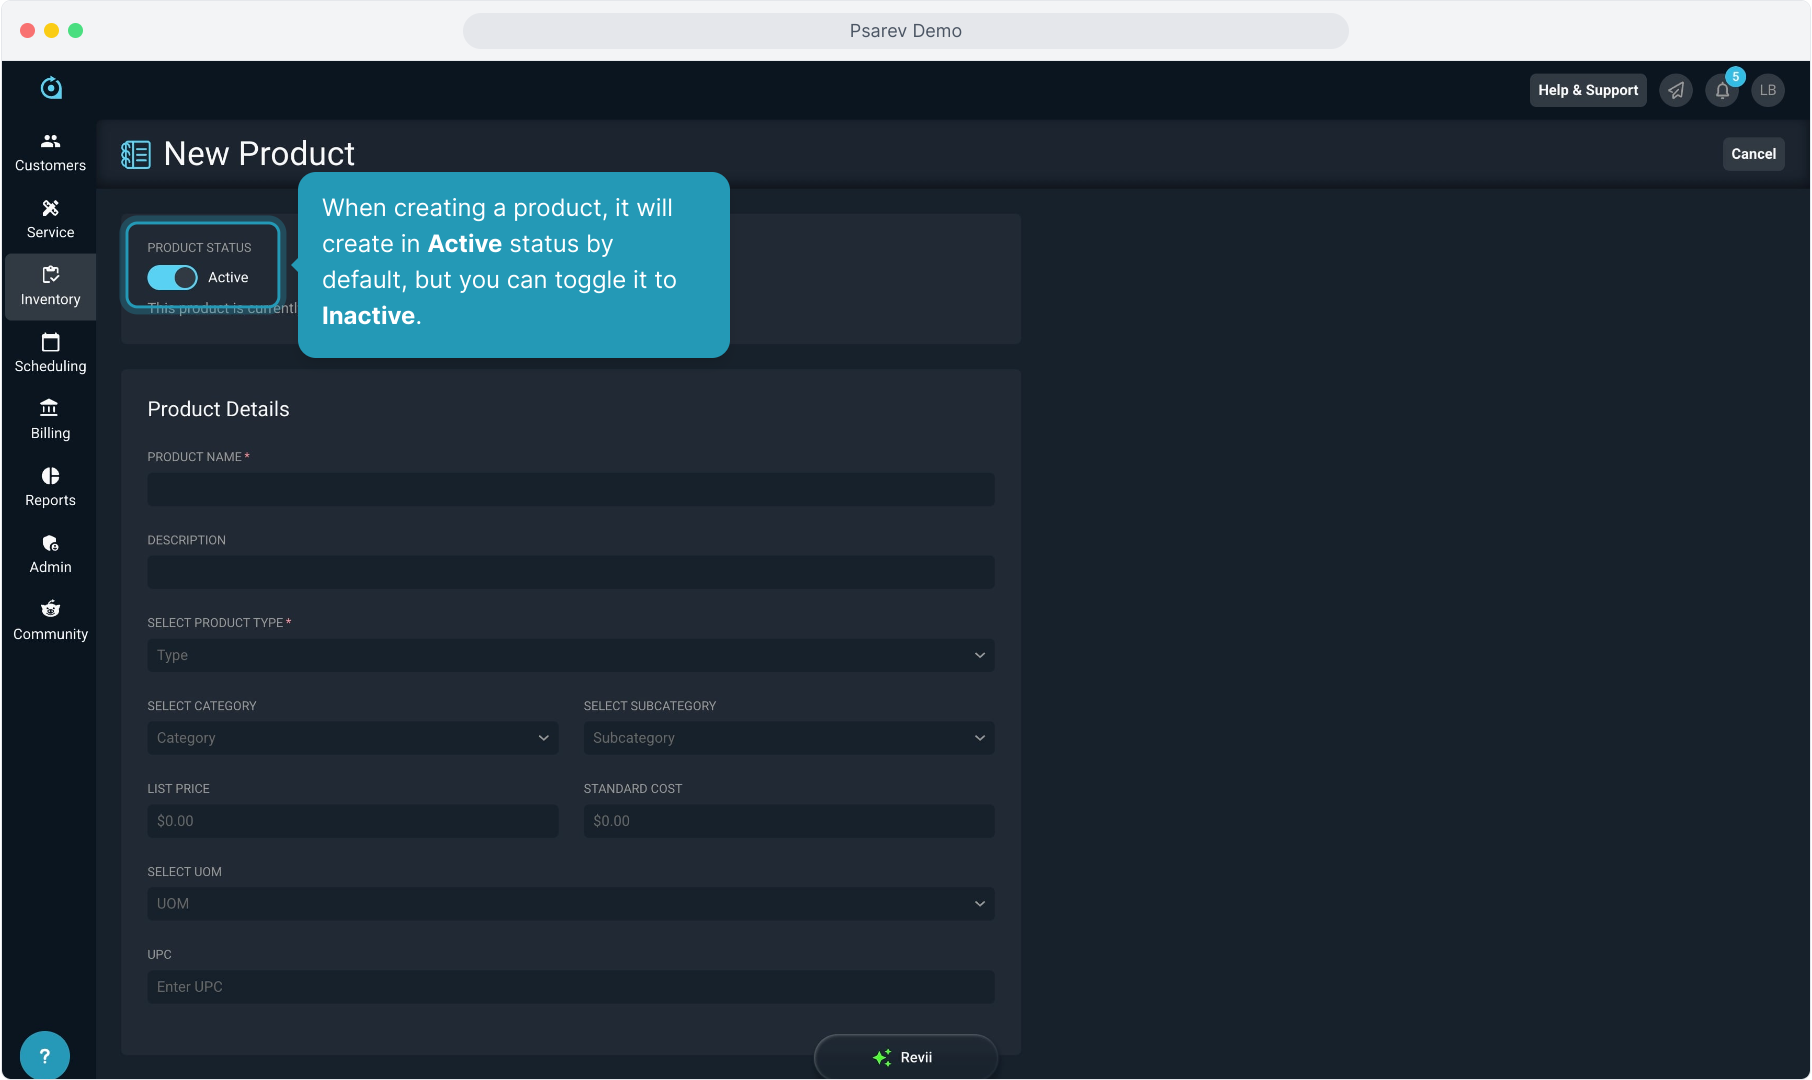
9. When creating a product, it will create in Active status by default, but you can toggle it to Inactive.
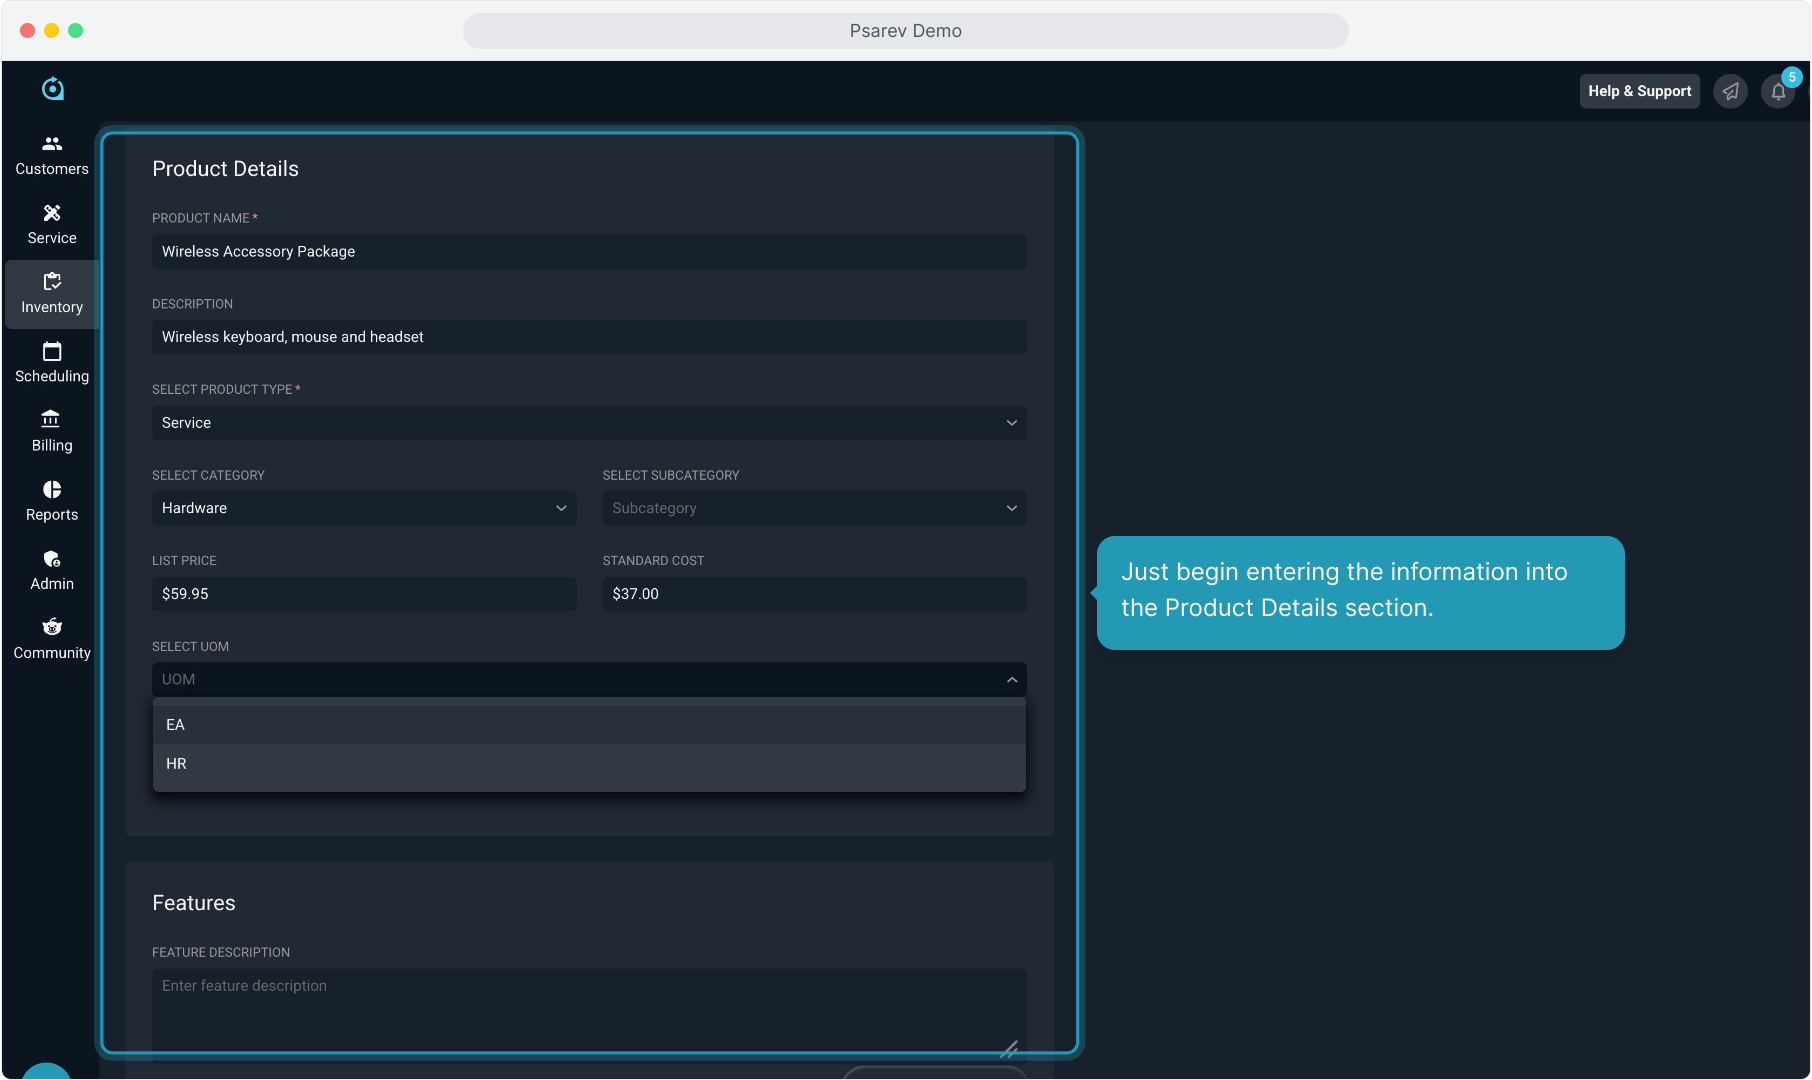
10. Just begin entering the information into the Product Details section.
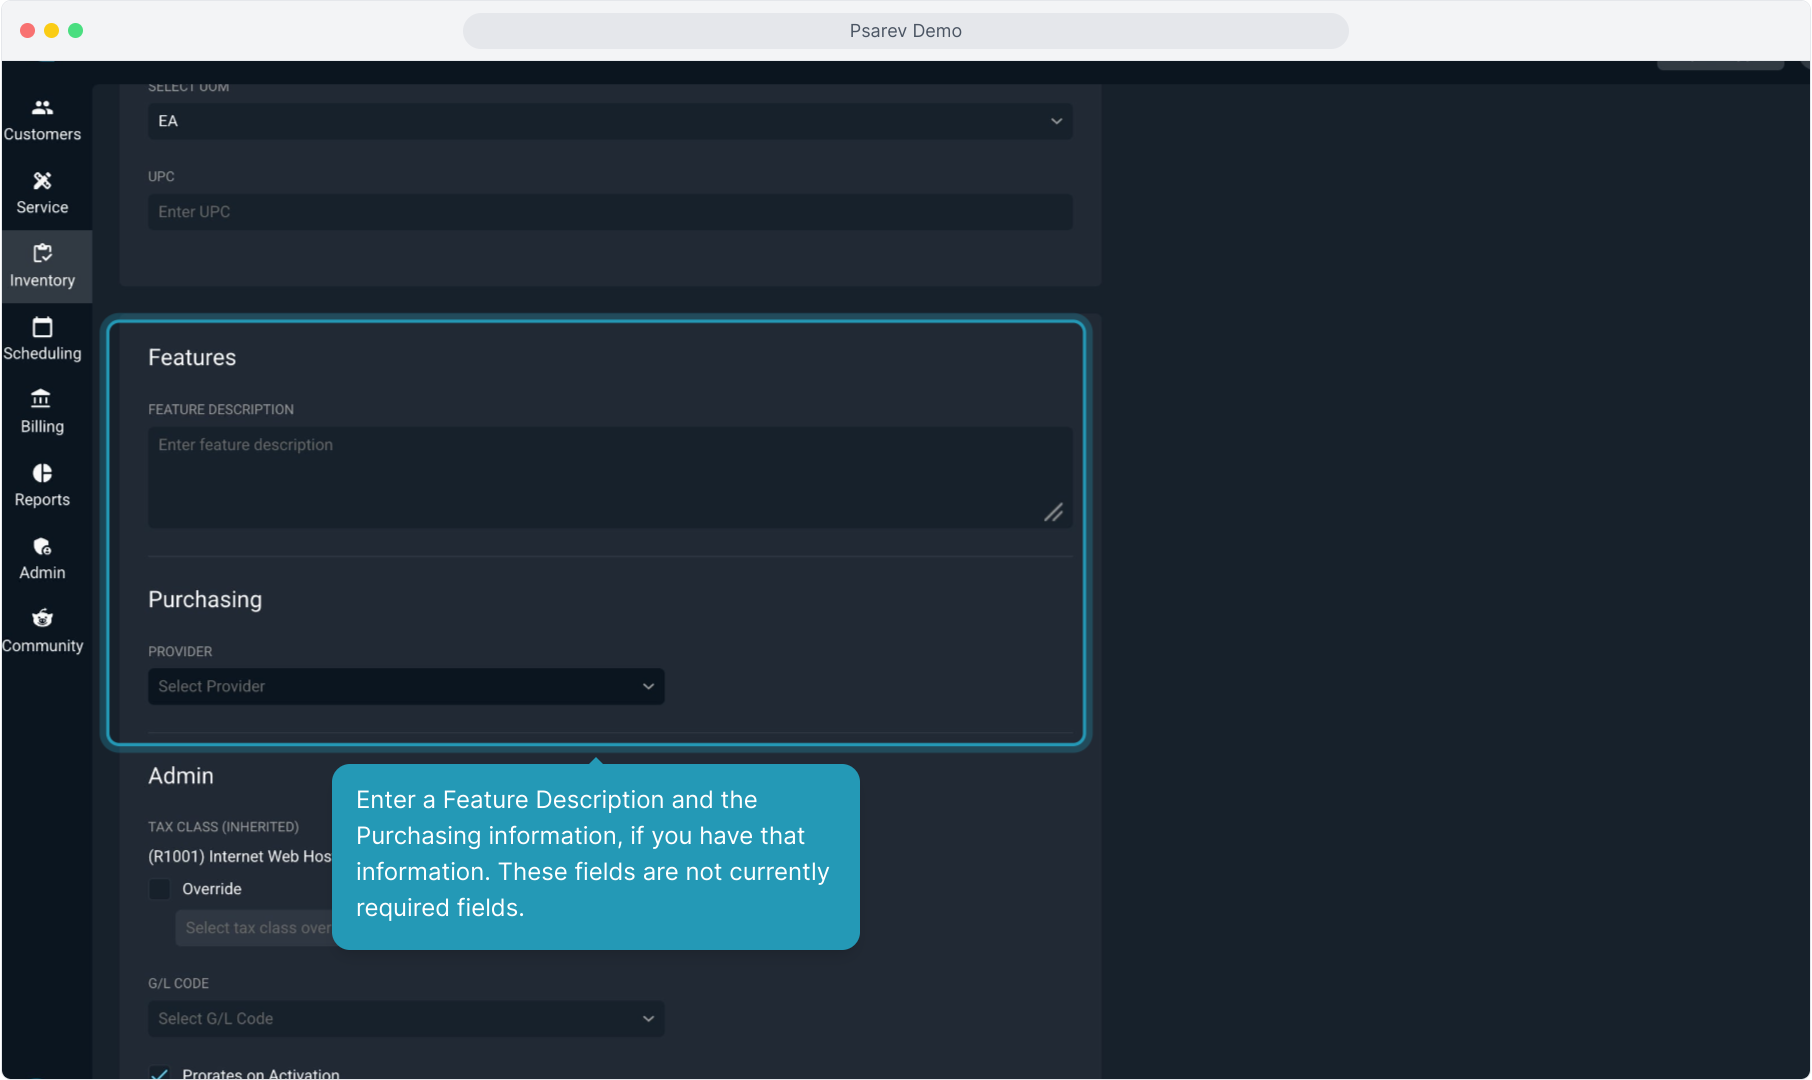
11. Enter a Feature Description and the Purchasing information, if you have that information. These fields are not currently required fields.
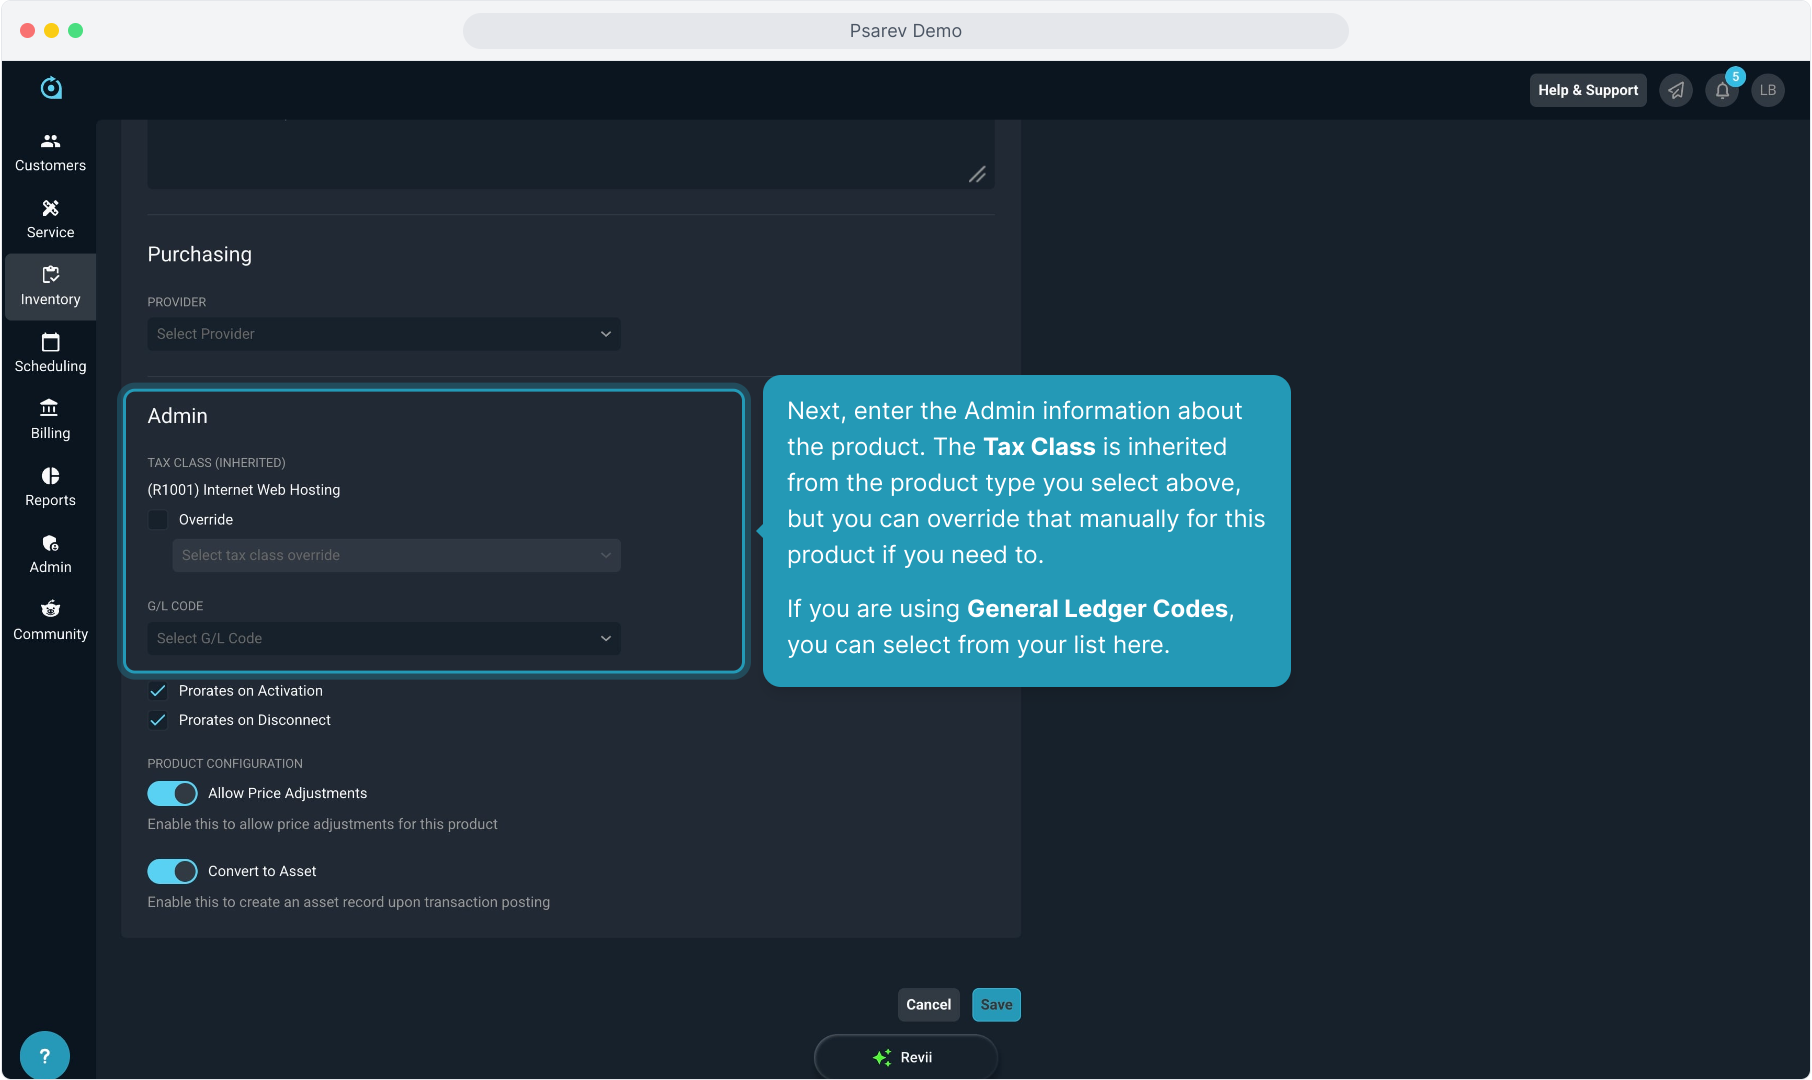
12. Next, enter the Admin information about the product. The Tax Class is inherited from the product type you select above, but you can override that manually for this product if you need to.
If you are using General Ledger Codes, you can select from your list here.
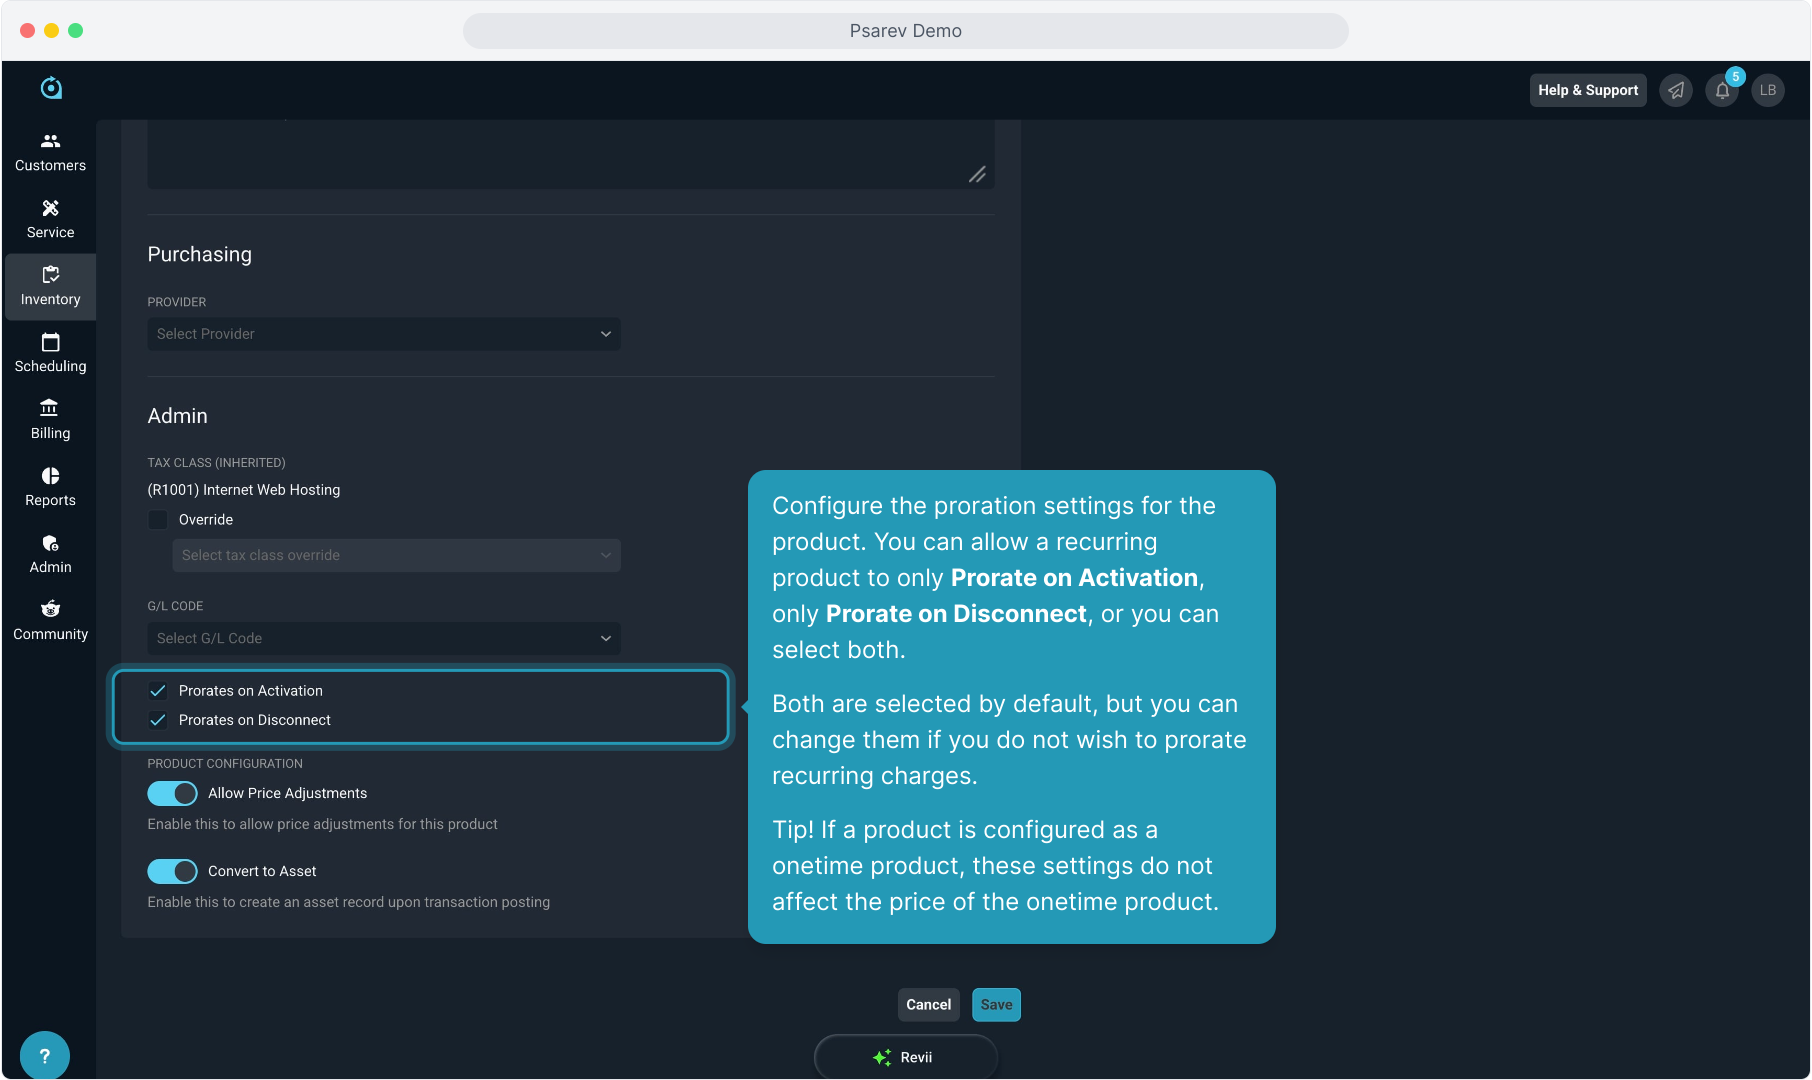
13. Configure the proration settings for the product. You can allow a recurring product to only Prorate on Activation, only Prorate on Disconnect, or you can select both.
Both are selected by default, but you can change them if you do not wish to prorate recurring charges.
Tip! If a product is configured as a onetime product, these settings do not affect the price of the onetime product.
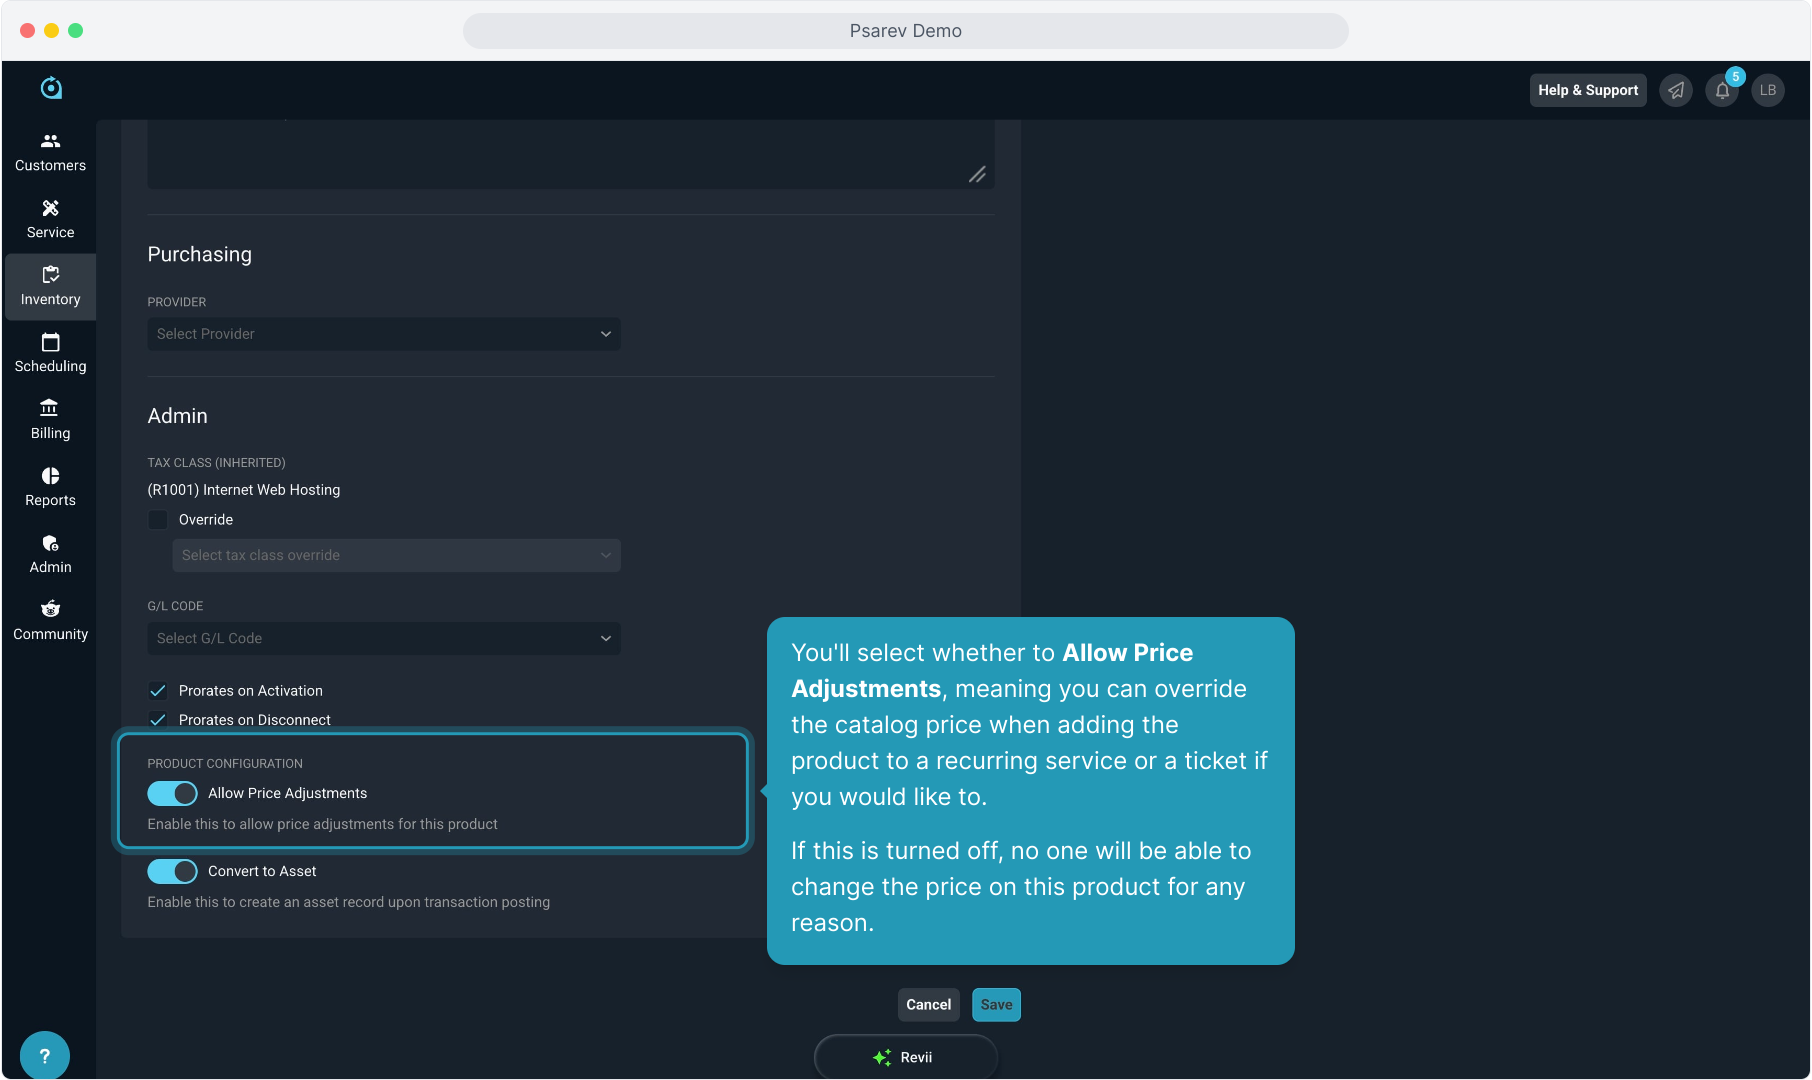
14. You'll select whether to Allow Price Adjustments, meaning you can override the catalog price when adding the product to a recurring service or a ticket if you would like to.
If this is turned off, no one will be able to change the price on this product for any reason.
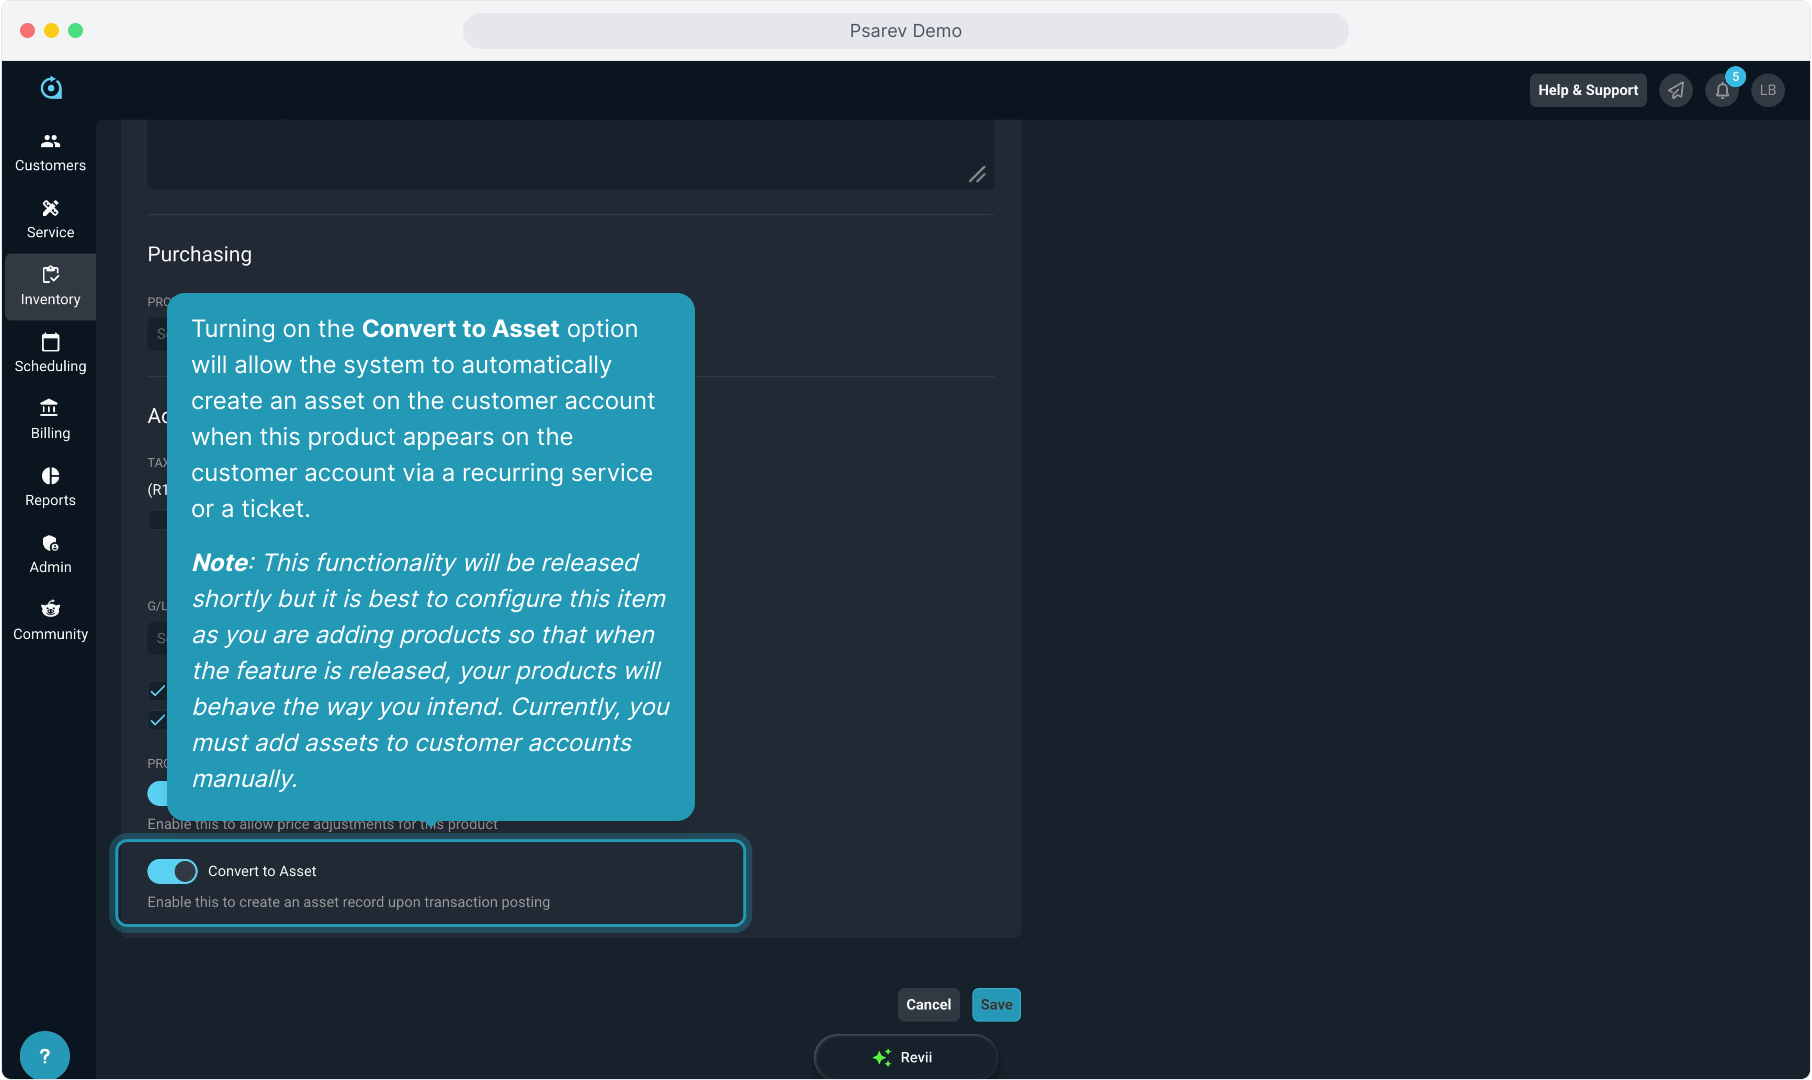
15. Turning on the Convert to Asset option will allow the system to automatically create an asset on the customer account when this product appears on the customer account via a recurring service or a ticket.
Note: This functionality will be released shortly but it is best to configure this item as you are adding products so that when the feature is released, your products will behave the way you intend. Currently, you must add assets to customer accounts manually.
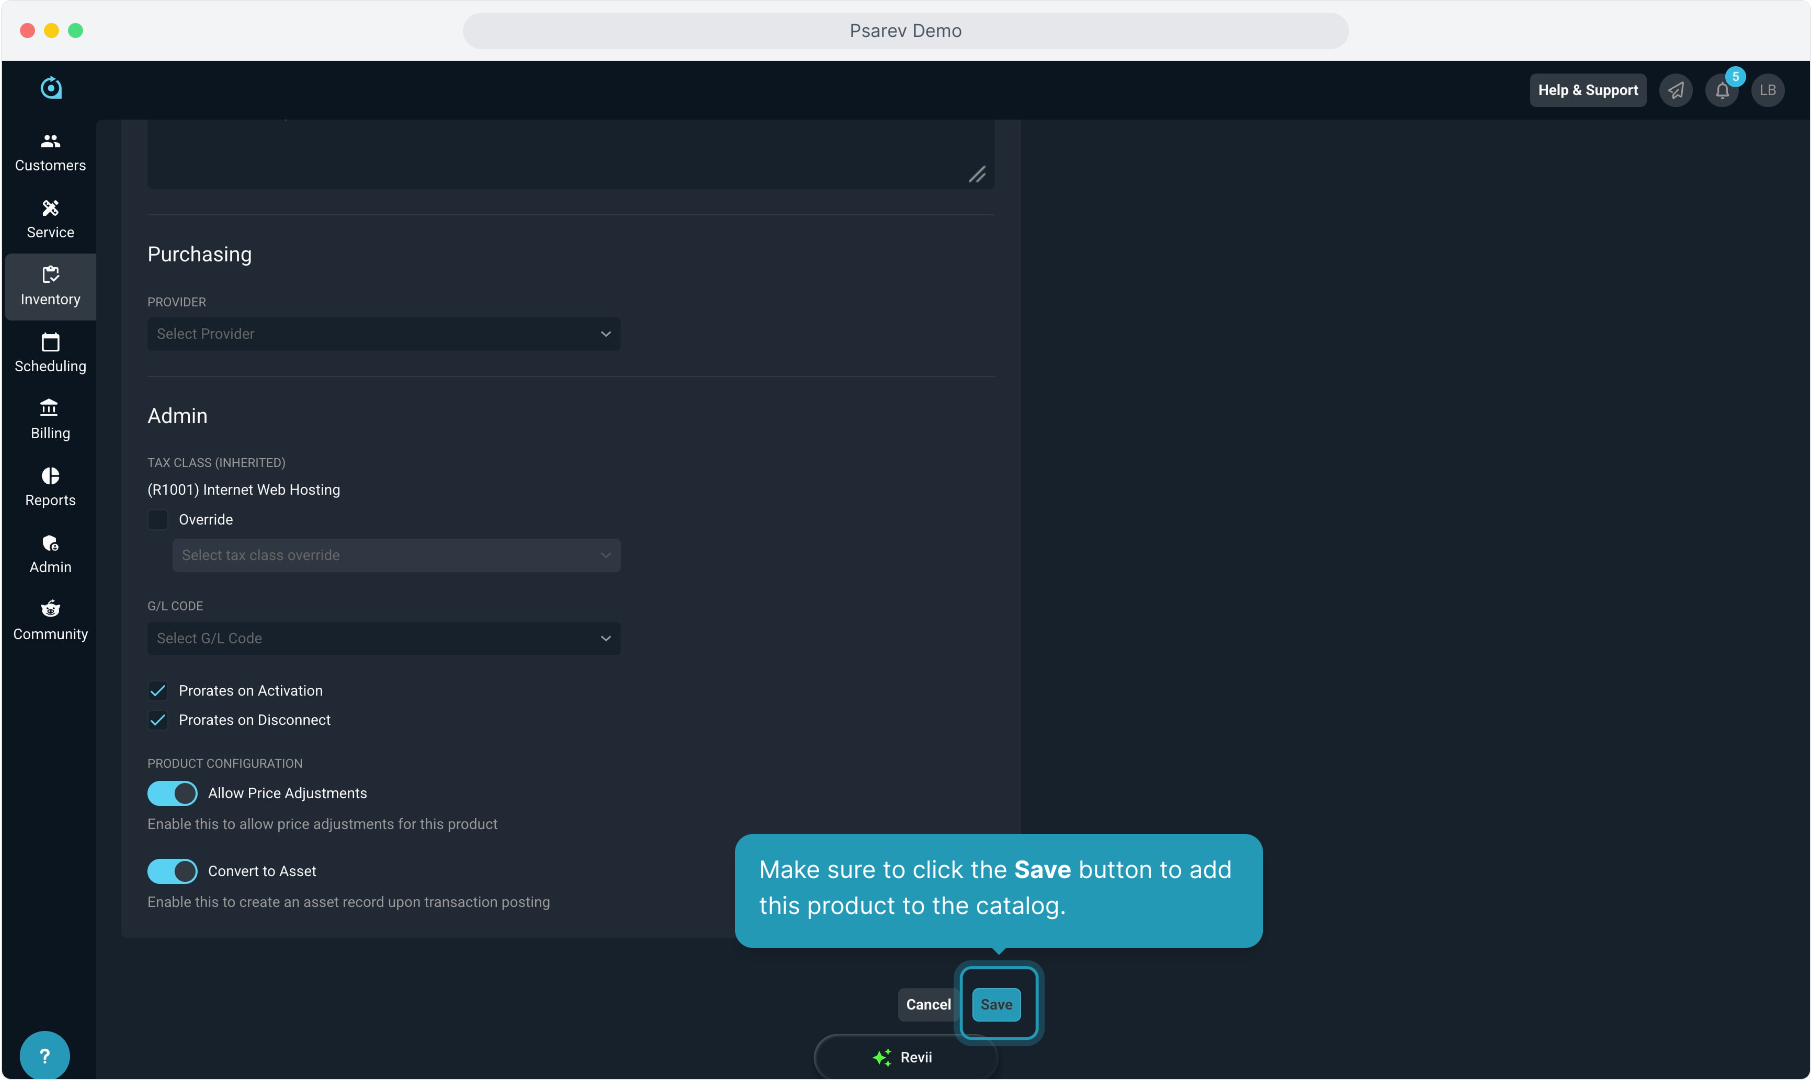
16. Make sure to click the Save button to add this product to the catalog.