Validating Outgoing Email Addresses
To ensure your clients receive ticket updates and emails from your Rev.io instance, you'll need to connect and authenticate your outgoing email addresses in the Email Settings section on the System Settings screen. Authenticated emails are less likely to be flagged as spam, keeping your service desk communications reliable and professional. For more information about the fields available in the Email Settings category, see the System Settings: Email Settings article.
Follow the steps below to validate your outgoing email addresses.
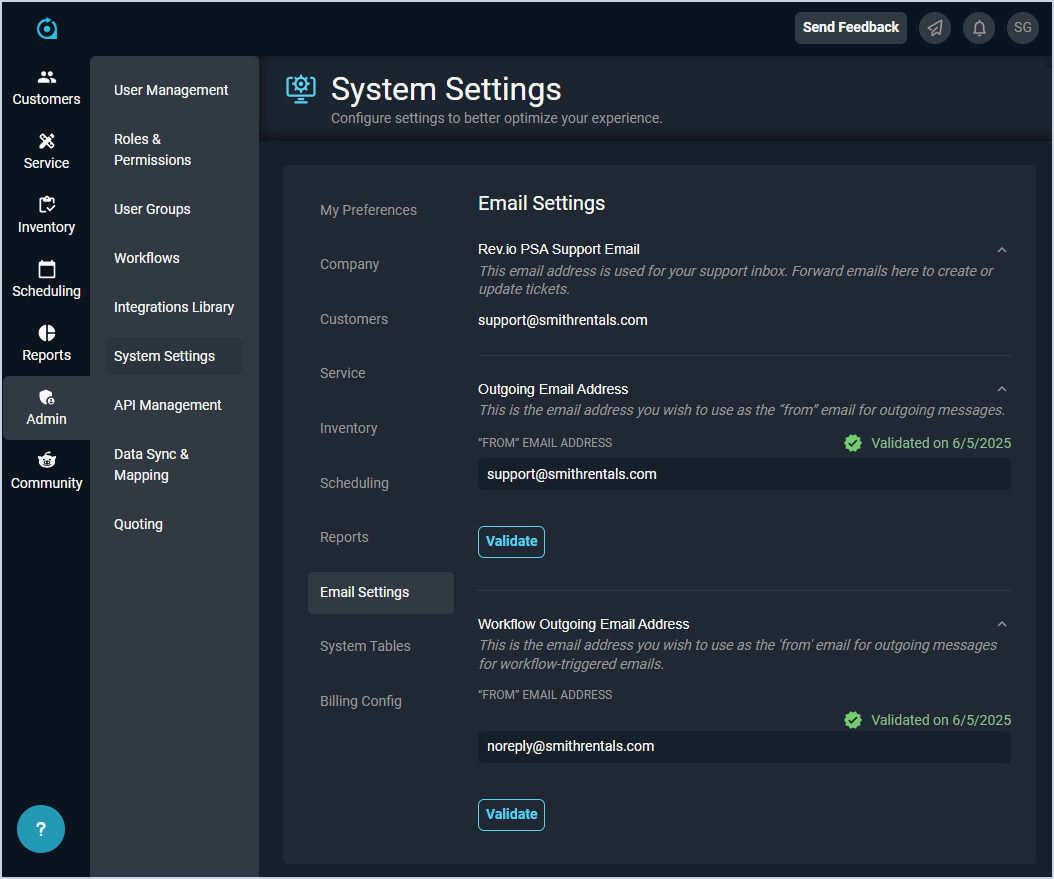
- On the sidebar menu, select the Admin module.
- Click the System Settings subcategory.
- Click the Email Settings section on the System Settings screen.
- In the Outgoing Email Address section, enter the email address you want to display as the "From" email address when sending emails in Rev.io for tickets, purchase orders, etc.
- Click the Save button to save the entered address.
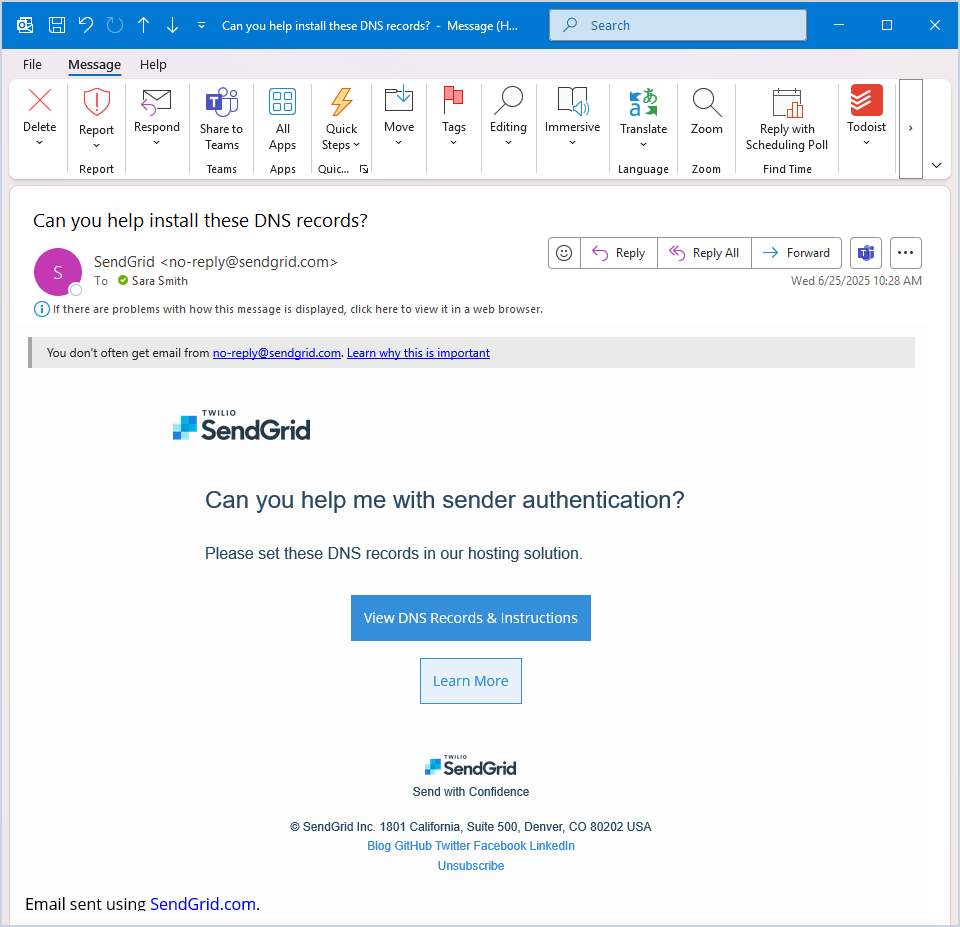
- You will receive a validation email to the email address belonging to the user logged into Rev.io . The validation email is NOT sent to the email address entered in the Outgoing Email Address field. This email will come from SendGrid <no-reply@sendgrid.com>. SendGrid allows us to impersonate you to send emails using your Outgoing Email Address.
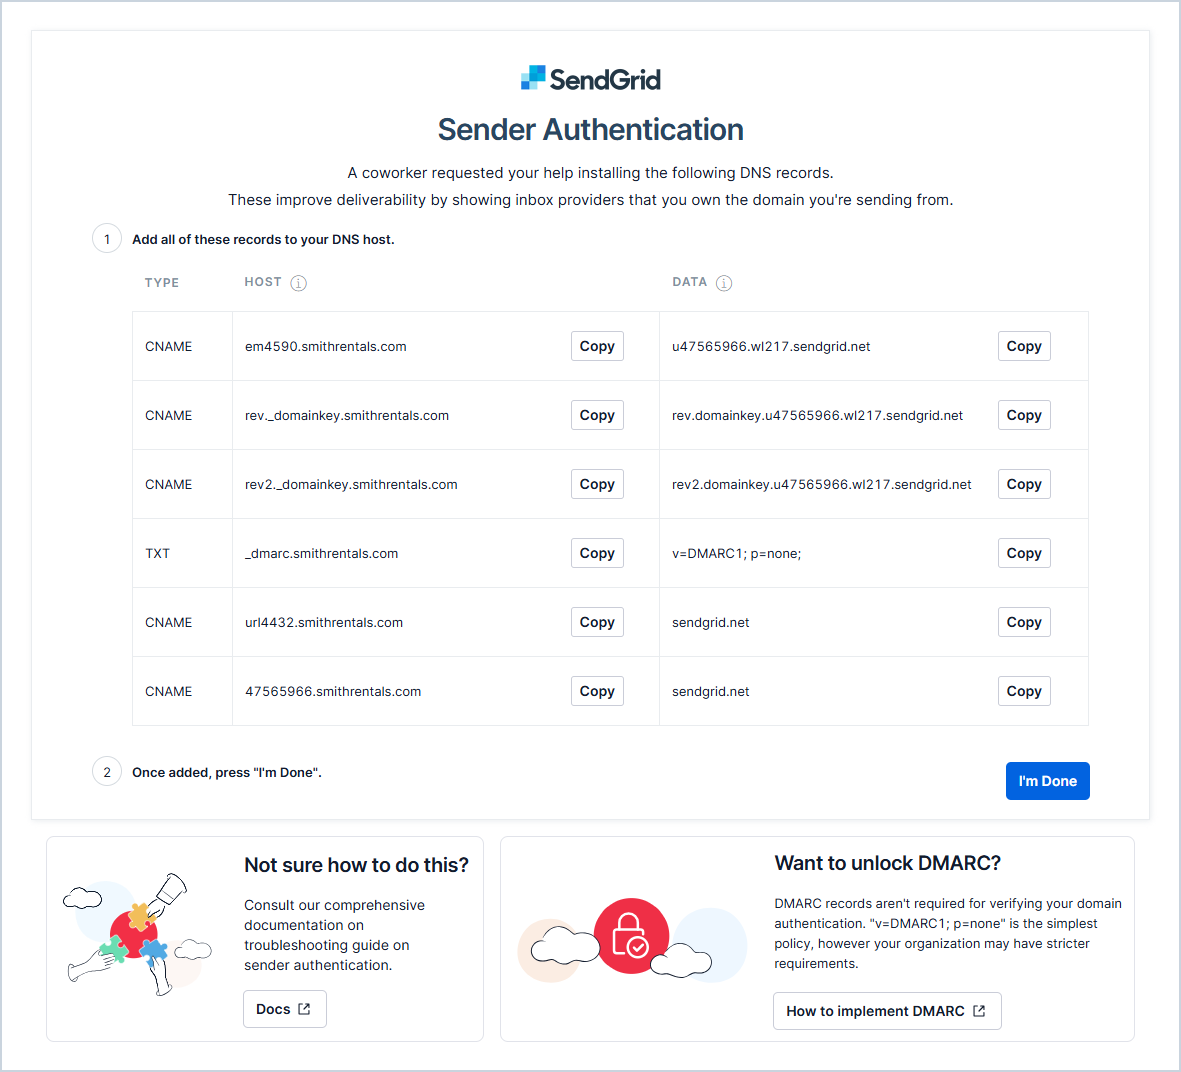
- Forward the email with the authentication information to your IT team. They will need to click the link in the email and follow the instructions there to install DNS records by copying the records to your DNS host. When they've finished installing all of the records, they will need to click the I'm Done button at the bottom of the screen.
NOTE: If you don't know who hosts your domain, you can use publicly available domain lookup tools, like NsLookup, to determine who manages your DNS records by searching public information. Azure, Google, and GoDaddy are some examples of domain providers.
- Once you receive confirmation from your IT team that the setup is complete, return to the Email Settings screen and click the Validate button. If the email address is properly configured, you'll see a green "Validated on MM/DD/YYYY" message near the field. If the email address is not properly configured, you'll receive an error message.
- Repeat steps 4-8 in the Workflow Outgoing Email Address field for the email address you want to use as the "From" email address when sending workflow notification emails. NOTE: If you enter an email address using the same domain as the Outgoing Email Address, you will not need to validate again.
| ️If you receive an error when validating, click the Help & Support button at the top of the screen to report the issue to our support team. |


