Creating Tickets from Incoming Emails
Rev.io automatically creates tickets from emails sent to the monitored inbox you configured during your onboarding process. When a customer sends an email to this inbox, the system captures the message and generates a ticket, allowing your team to track, manage, and respond to customer requests directly within Rev.io. This article outlines how email-to-ticket processing works and what to expect when customers submit requests using this method. During your onboarding process, we configured your support inbox
| NOTE: The monitored inbox displays as the Rev.io Support Inbox in the Email category on the System Settings screen. |
Information Saved from the Incoming Email
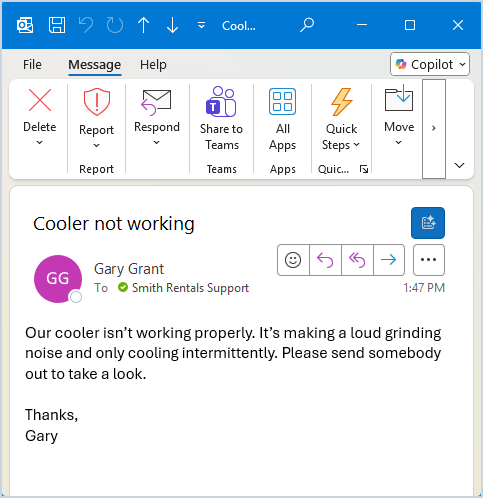
When a ticket is created from an incoming email, the content of the email is used to populate key fields on the ticket. If the sender’s email address matches an existing contact in the system, that contact is added as the Primary Contact on the ticket, and the corresponding customer is associated with the ticket. The subject of the email is added as the ticket Description and the body of the email is added to the Work Requested field, providing immediate context for the request. The Technician Assigned and Priority fields are set automatically based on the default contract associated with the customer account.
Viewing New Tickets and Emails
As with any ticket created in the system, new tickets display at the top of the ticket list, allowing you to easily tackle incoming requests, and on the Tickets tab in the Servicing section of the customer profile screen.
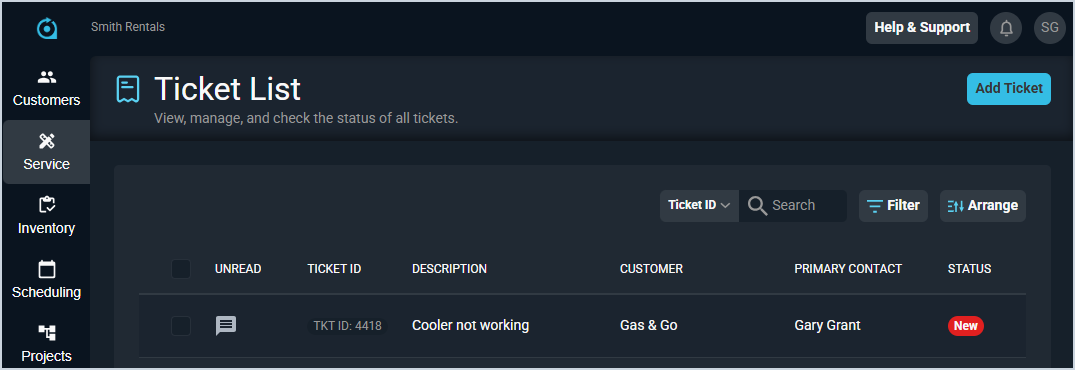
Viewing from the Ticket List
As shown in the screenshot below, the unread email icon displays at the start of the row to indicate that there is an unread email on the ticket. In this case, the unread email is the initial service request from the customer. Additionally, the information from the email has populated the respective fields on the ticket, allowing you to easily assess where the ticket came from.
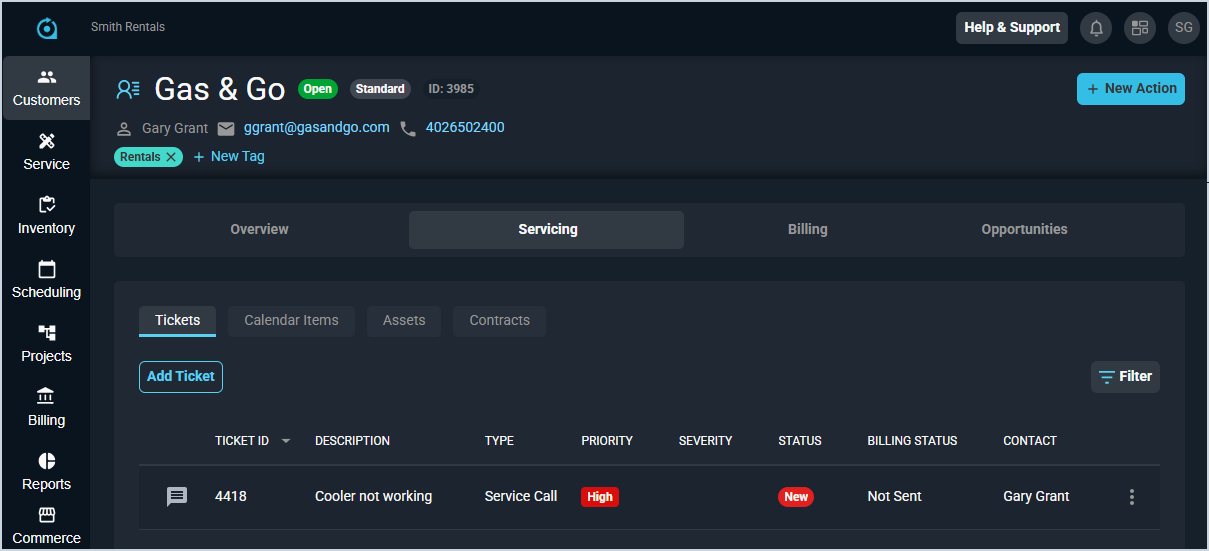
Viewing from the Customer Profile
As with any other ticket in Rev.io, you can access it from the customer profile screen. As shown in this screenshot, the Priority is assigned to the ticket based on the default contract on the customer account.
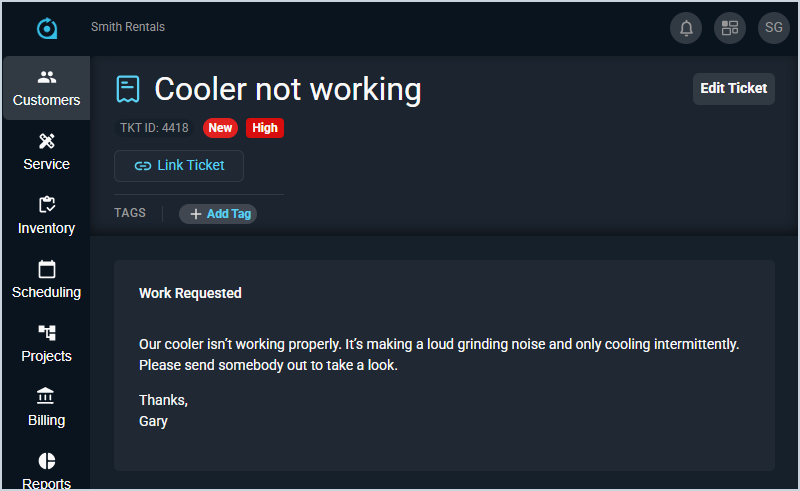
Viewing the Ticket Details
Clicking on the ticket opens the ticket details screen, allowing you to see more information for the ticket. As shown in the screenshot below, the body of the email received is copied into the Work Requested field on the ticket.