
Create/Edit Workflow Notifications
The Create/Edit Workflow Notification screens allow you to create and edit workflow notifications in your instance. Workflow notifications are automated alerts that fire when a specific event occurs in the system, such as a ticket being created or a ticket status being updated.
Step 1: Name & Triggering Event
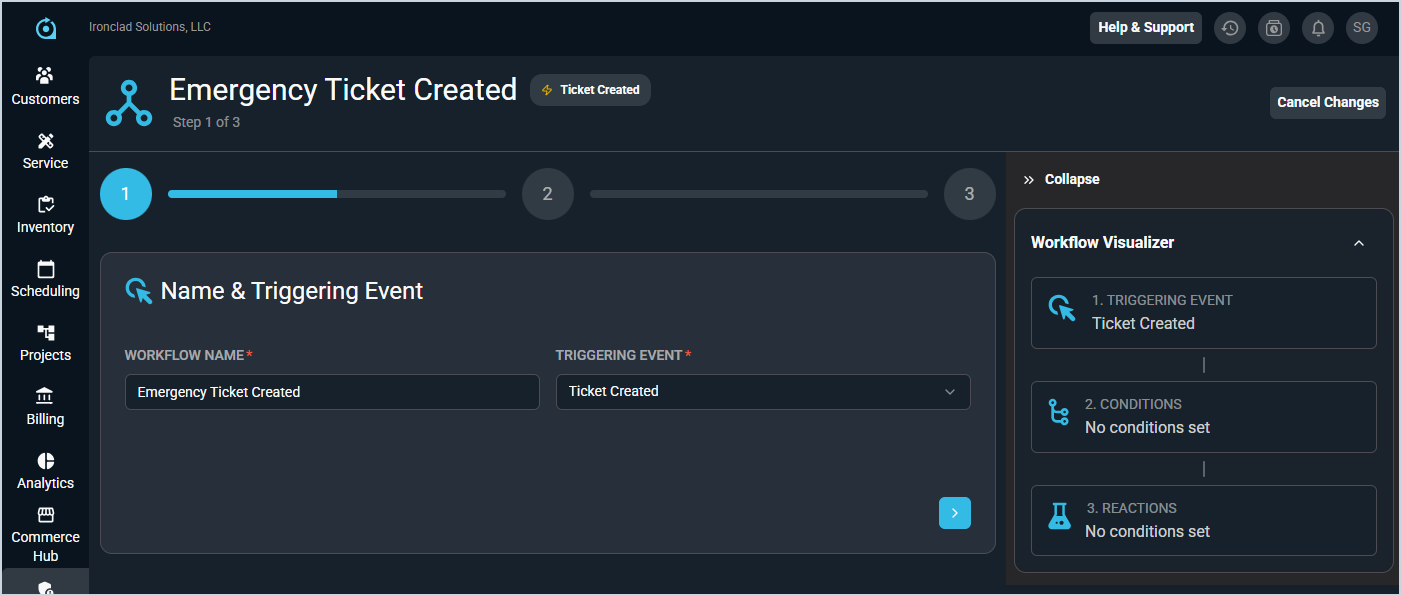
Each field on the Name & Triggering Event step is defined below.
| No. | Label | Definition |
| 1 | Workflow Name | Name of the workflow notification. |
| 2 | Triggering Event | Event that triggers the workflow notification. Available triggering events vary by context and include options such as Ticket Created, Ticket Status Updated, Ticket Tech Assigned, Ticket Activity Note Created, Calendar Item Created, and Calendar Item Modified. |
Step 2: Set Conditions

Each field on the Set Conditions step is defined below.
| No. | Label | Definition |
| 1 | Add Condition | Click to add a condition to the workflow. |
| 2 | Match | Click to select the condition the workflow needs to match in order to trigger. Match options include Match All, Match At Least One, and Match None. |
| 3 | <Field> | Select the field that triggers the workflow. Field options vary depending on the Triggering Event selected. |
| 4 | <Filtering Operator> | Select the operator that relates the record to the condition. Operator options include Equals, Does Not Equal, Contains, Does Not Contain, Starts With, Does Not Start With, Ends With, and Does Not End With. |
| 5 | <Value> | Enter or select the value that should/should not exist in the field selected for the workflow to trigger. Value options vary based on the field selected, but can include True/False, calendar dates, dropdown options for the field selected, or free-form text. |
The following actions are available on the Set Conditions step.
- Add a condition by clicking the Add Condition button.
- Reorder conditions by clicking and dragging the grid icon at the start of each condition row.
- Remove a condition by clicking the delete icon at the end of the condition row.
Step 3: Set Reaction
| NOTE: This section covers the fields shown when configuring a workflow with the Email Reaction Type. For more information on the other Reaction Types, see the Configuring SMS Workflow Notifications, Configuring In-App Workflow Notifications, and Configuring Slack/Microsoft Teams Workflow Notifications articles. |
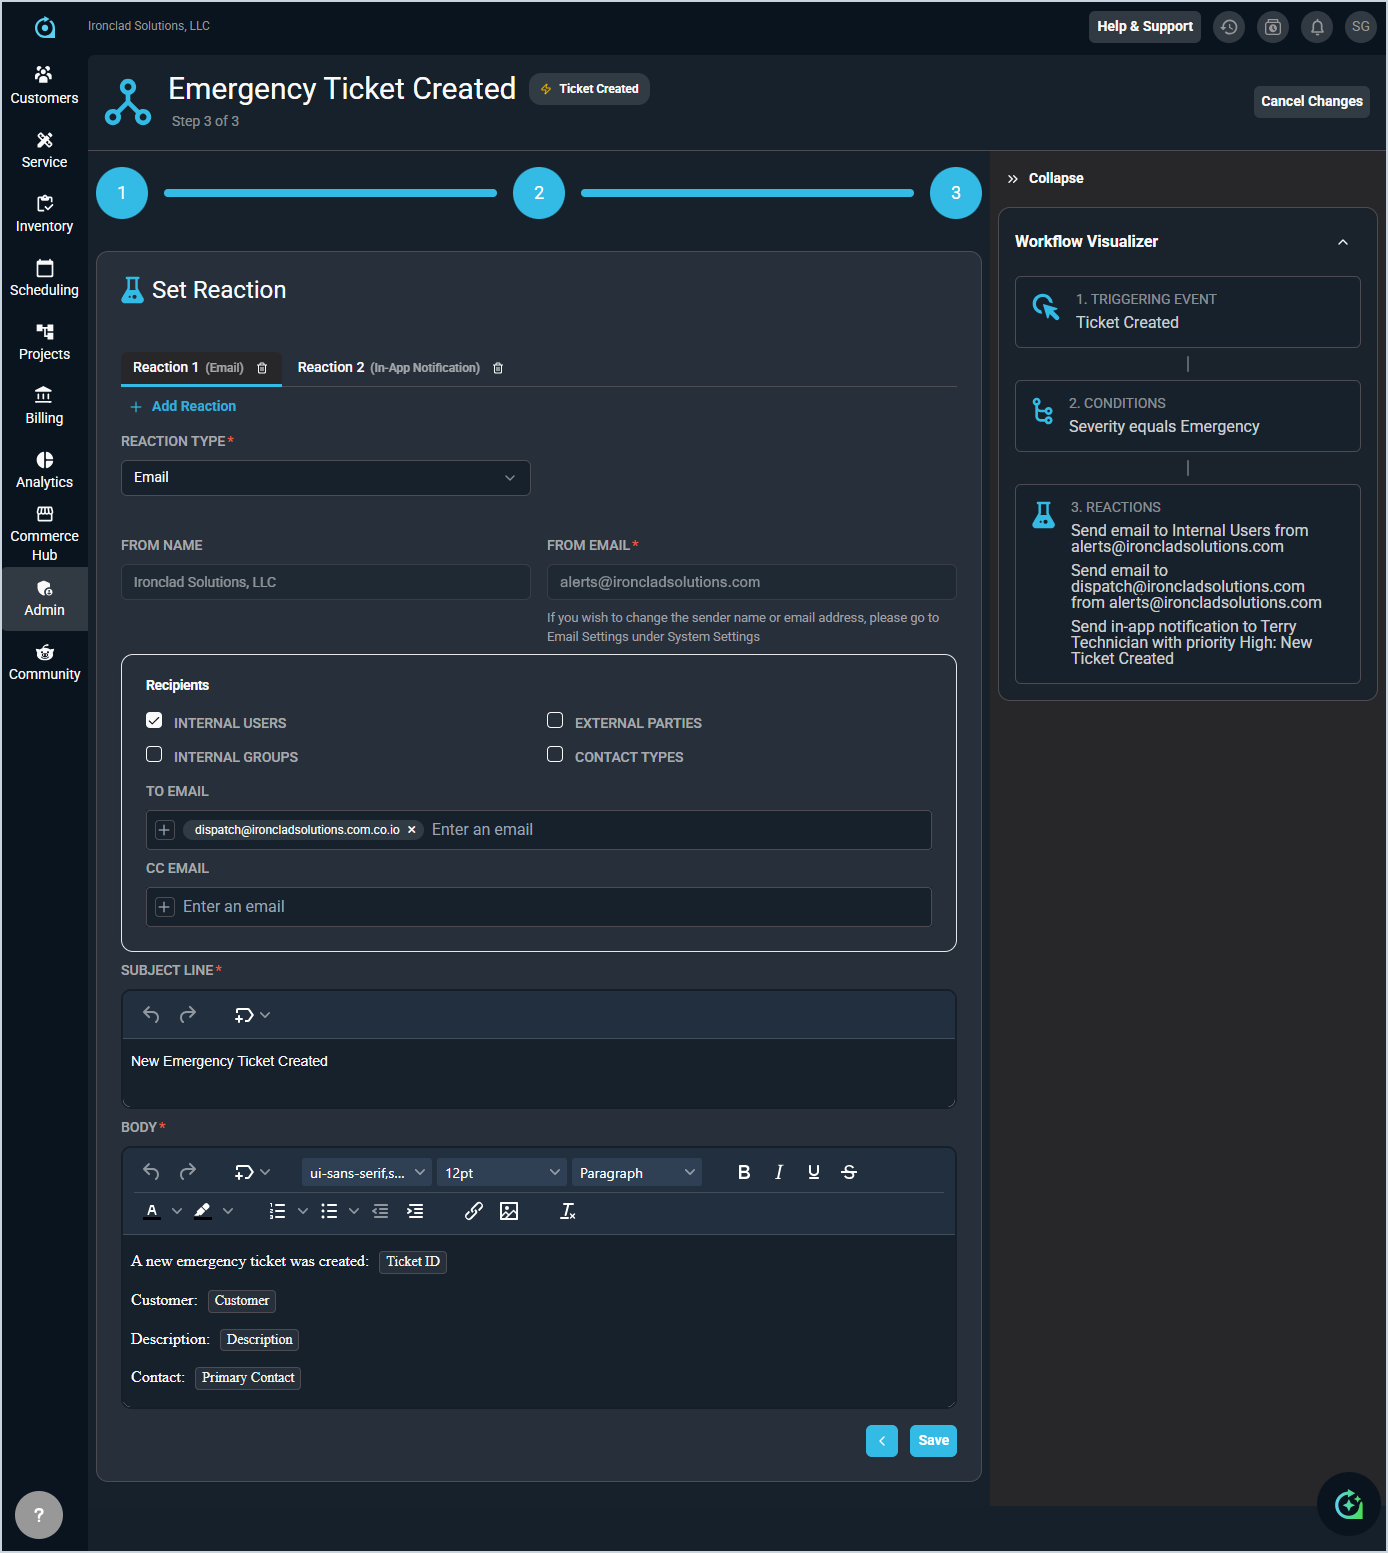
Each field on the Set Reaction step for email reactions is defined below.
| No. | Label | Definition | |
| 1 | Reaction Type | Select the reaction type for the system to use when the workflow triggers. The fields for the Email option are shown below. For information on other Reaction Types, see the Configuring SMS Workflow Notifications, Configuring In-App Workflow Notifications, and Configuring Slack/Microsoft Teams Workflow Notifications articles. | |
| 2 | From Name | The name on the email address that the notification email sends from when the workflow triggers. NOTE: This field is read-only on this screen. | |
| 3 | From Email | The email address that the notification email sends from when the workflow triggers. NOTE: This field can only be updated by an administrator in the Admin module. | |
| 4 | Recipients | If desired, select a recipient option instead of, or in addition to, entering a specific email address.
| |
| 5 | To Email | Enter the email address where an email should be sent when the workflow triggers.
| |
| 6 | Subject Line | Enter the subject line for the email to be sent when the workflow triggers. For more information about using tokens in the subject line, see the Using Tokens on Workflow Notifications article. | |
| 7 | Body | Enter the body of the email to be sent when the workflow triggers. For more information about using tokens in the body, see the Using Tokens on Workflow Notifications article. | |
| 8 | Create/Save | Click to create/save the workflow with the information entered. |
Available Actions
The following actions are available on the Create/Edit Workflow Notification screens.
- Navigate between steps using the arrows at the bottom of each step or by clicking the step numbers at the top of the screen.
- Collapse or expand the Workflow Visualizer sidebar by clicking the double arrow icon on the right side of the screen.
- Save the workflow notification by clicking the Create or Save button on the Set Reaction step.