
System Settings: Billing Config
The Billing Config category on the System Settings screen allows you to configure various billing settings for your Rev.io instance, including bill profiles, collection templates, payments, and processors. The functionality available in the Billing Config category is derived from our legacy Billing platform.
General
The General tab contains top-level billing configuration settings for your Rev.io instance, including your invoice engine preference and how invoice management tasks are handled. Changes made in this section are saved automatically.

Each field in the General section is defined below.
| No. | Label | Definition | |
| 1 | Use Telecom Billing PDF Engine for Invoicing | Select Yes to use the Telecom Billing PDF engine for generating invoices. Select No to use the default invoice engine.
| |
| Invoice Management | |||
| 2 | Create Invoices | Determines how invoices are created. Select Manually to create invoices on demand, or Automatically to have the system generate them.
| |
| 3 | Email Invoices | Determines how invoices are emailed to customers. Select Manually to send emails on demand, or Automatically to have the system send them. | |
| 4 | Process Payments | Determines how payments are processed. Select Manually to process payments on demand, or Automatically to have the system process them. | |
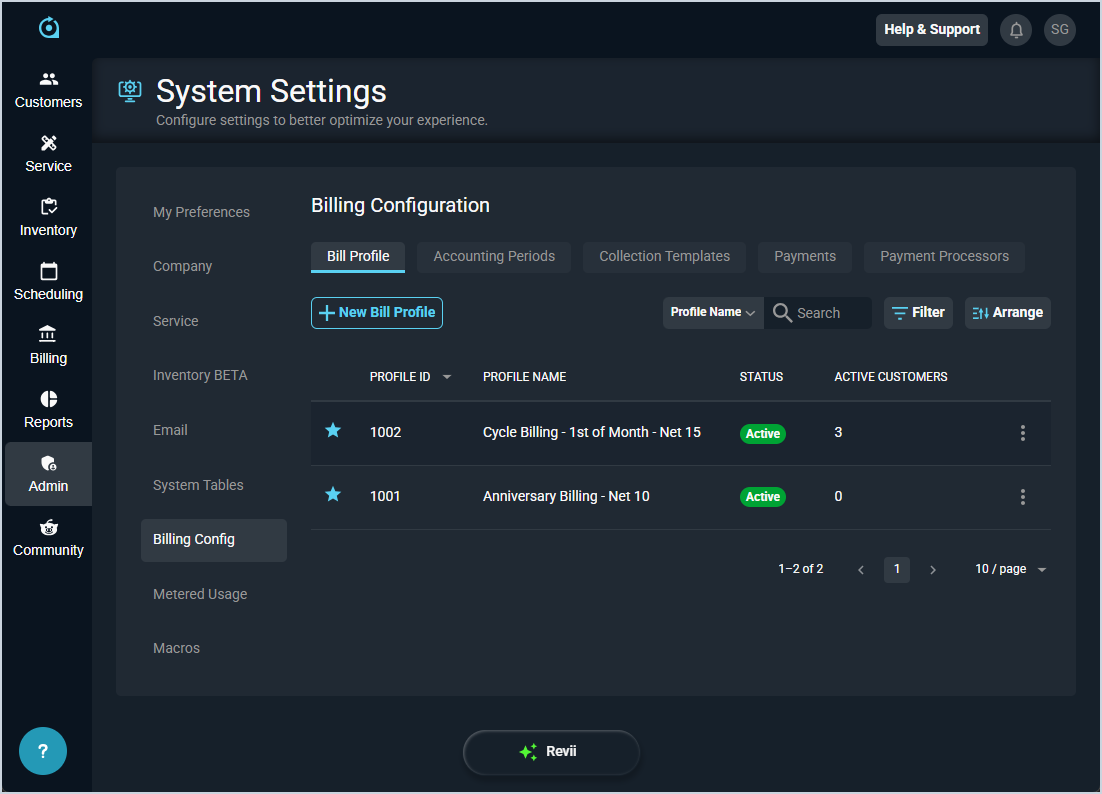
Bill Profile
The Bill Profile section allows you to designate rules for billing your customers, including returned payment fees, late fees, NET terms, collection template, and cycle date. Rev.io ships with default bill profiles that you can use as soon as you add your company logo and enter your remit address.
Each field in the Bill Profile section is defined below.
| No. | Label | Definition |
| 1 | Profile ID | Numerical identifier for the bill profile. |
| 2 | Profile Name | Name of the bill profile. |
| 3 | Status | Status of the bill profile. Status options include Active and Inactive. |
| 4 | Active Customers | Number of active customers in your database using the bill profile. |
These actions are available in the Bill Profile section.
- Create a new bill profile by clicking the New Bill Profile button. See the Create/Edit Bill Profiles article for more information.
- Search the bill profiles displayed in this section by selecting a column from the dropdown above the grid and entering text in the Search field. The list view updates to display records matching your search in the column you selected.
- Filter the bill profiles displayed on this view by clicking the Filter button above the grid.
- Customize which columns display in the list view and the order in which they display by clicking the Arrange button and making the desired changes. See the Arrange Columns article for more information.
- View the bill profile by clicking anywhere in the bill profile's row.
- Edit the bill profile by clicking the menu at the end of the row and selecting Edit from the menu options. See the Create/Edit Bill Profiles article for more information.
- Copy the bill profile by clicking the menu at the end of the row and selecting Copy from the menu options.
Accounting Periods
The Accounting Periods section allows you to configure your settings for closing accounting periods in your instance.

Each field in the Accounting Periods section is defined below.
| No. | Label | Definition |
| Automation | ||
| 1 | Automatically Close Accounting Periods | Select this option to automatically close accounting periods in your instance |
| 2 | Close Day | Day of the month you want the accounting period to close automatically. |
| 3 | Delay Months | Number of months you want to delay closing the accounting period automatically. |
| Closed Periods | ||
| 4 | End Date | End date for the accounting period you want to manually close. |
These actions are available in the Accounting Periods section.
- Set accounting periods to close automatically by clicking the Automatically Close Accounting Periods option and specifying the close day and the number of months to delay closing.
- Manually close an accounting period by selecting an End Date and clicking the Manually Close Accounting Period button. The manually closed period will be added to the grid at the bottom of this section.
- Review the list of manually closed accounting periods in the grid at the bottom of this section.
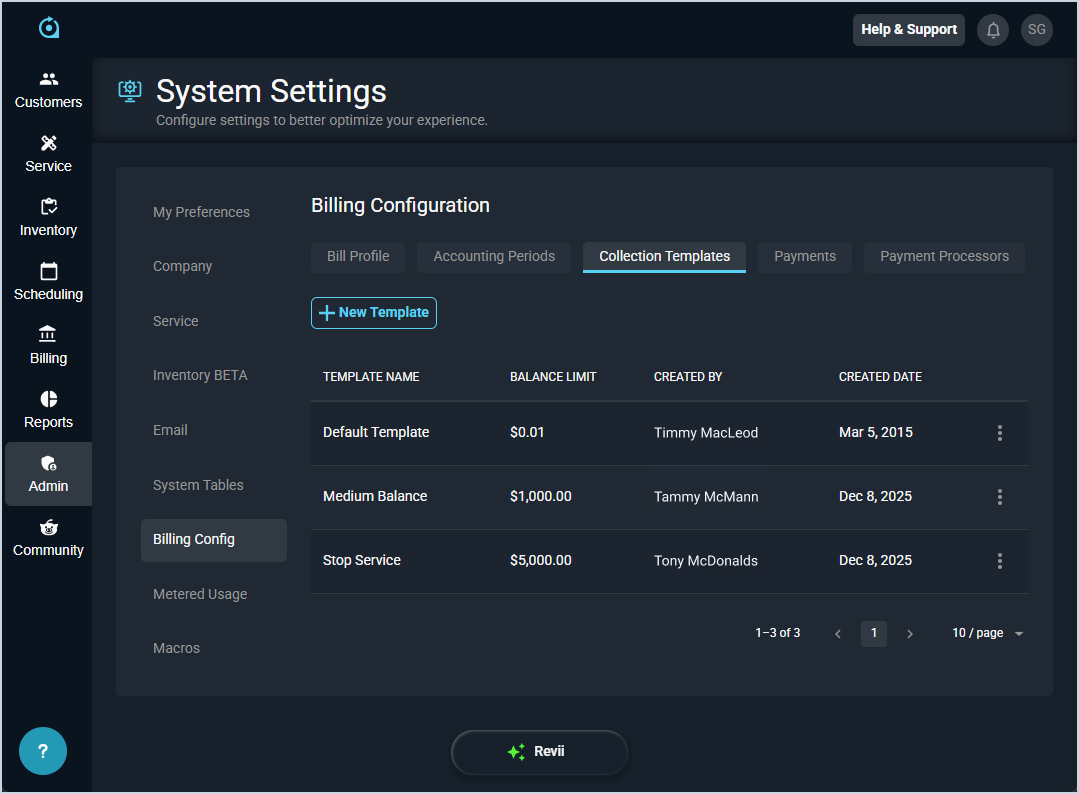
Collection Templates
The Collection Templates section allows you to build out templates with various collections steps that you can assign to bill profiles in Rev.io. For information on customer accounts actively in the collection process, see the Collections List View article.
Each field in the Collection Templates section is defined below.
| No. | Label | Definition |
| 1 | Template Name | Name of the collection template. |
| 2 | Balance Limit | Amount in dollars and cents that must be met to apply the template. |
| 3 | Created By | Name of the user who created the template. |
| 4 | Created Date | Date the template was created. |
These actions are available in the Collection Templates section.
- Create a new collection template by clicking the New Template button. See the Add/Edit Collection Templates article for more information.
- View the collection template by clicking the menu at the end of the row and selecting View from the menu options.
- Edit the collection template by clicking the menu at the end of the row and selecting Edit from the menu options. See the Add/Edit Collection Templates article for more information.
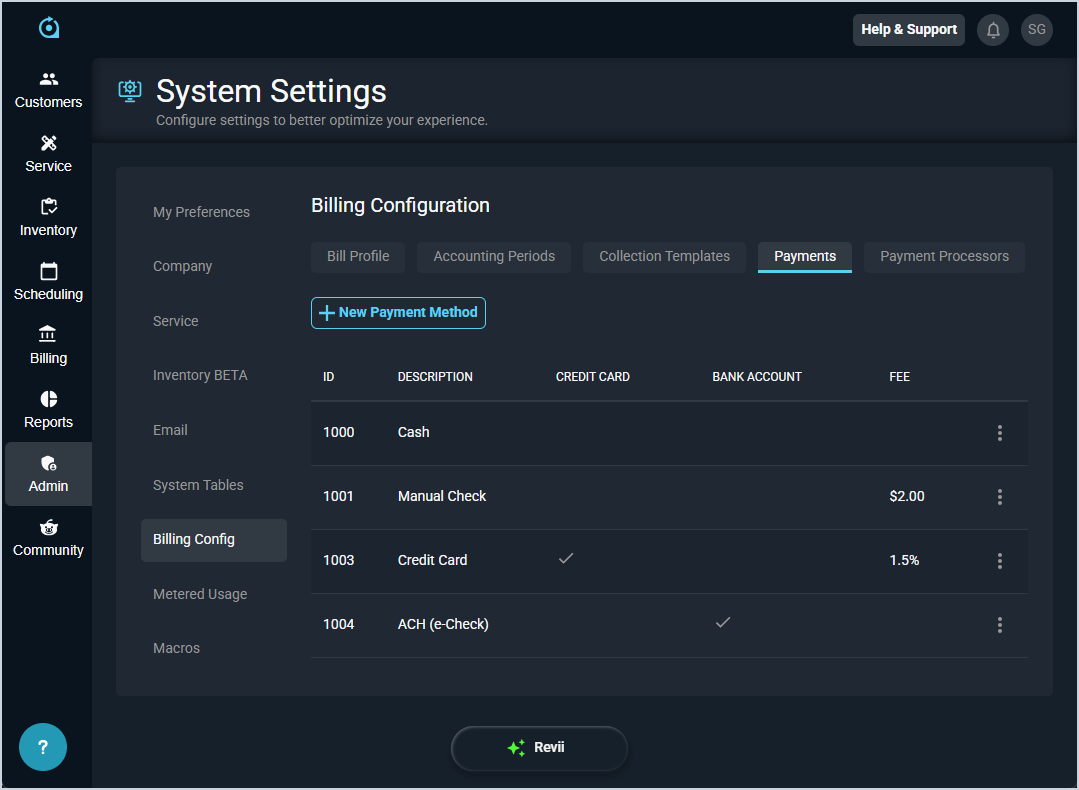
Payments
The Payments section allows you to define various payment method options in your database, along with any fees associated.
Each field in the Payments section is defined below.
| No. | Label | Definition |
| 1 | ID | Numerical identifier for the payment method. |
| 2 | Description | Description for the payment method. |
| 3 | Credit Card | Indicates whether the payment method is a credit card. |
| 4 | Bank Account | Indicates whether the payment method is a bank account. |
| 5 | Fee | Amount of the fee applied to the payment method. |
These actions are available in the Payments section.
- Create a new payment method by clicking the New Payment Method button. See the Add/Edit Payment Methods article for more information.
- Edit the payment method by clicking the menu at the end of the row and selecting Edit from the menu options. See the Add/Edit Payment Methods article for more information.
- Delete the payment method by clicking the menu at the end of the row and selecting Delete from the menu options.
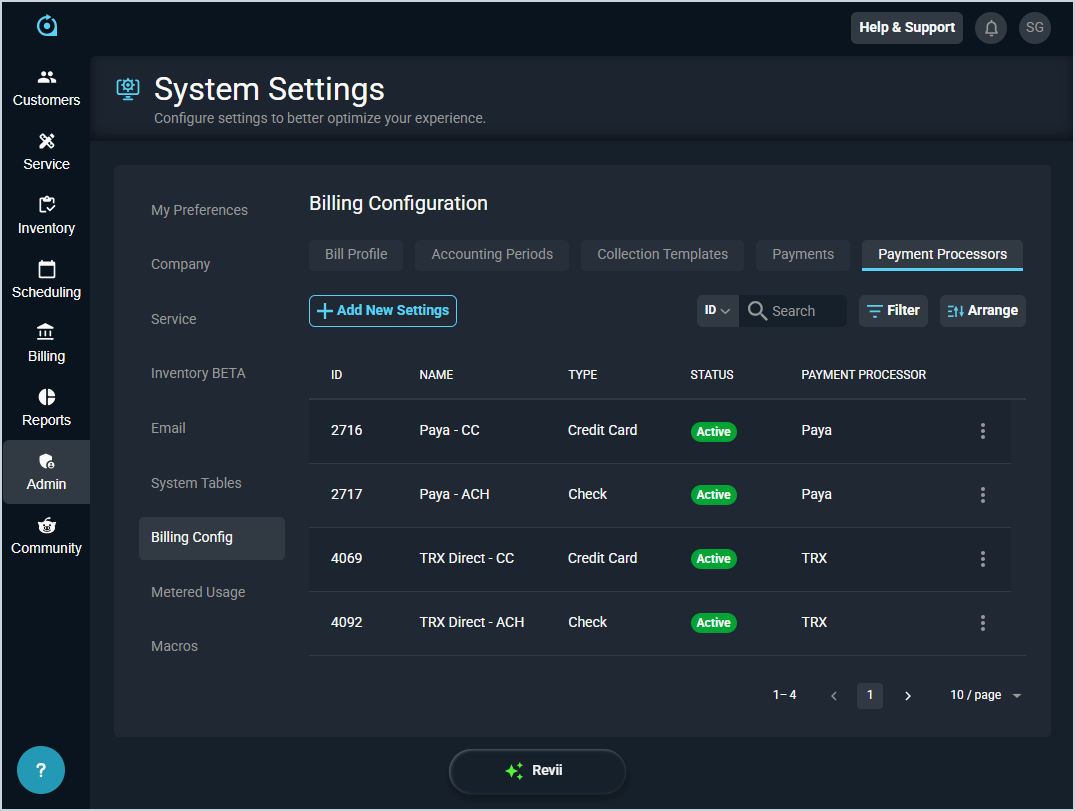
Payment Processors
The Payment Processors section allows you to define various payment method options in your database, along with any fees associated.
Each field in the Payment Processors section is defined below.
| No. | Label | Definition |
| 1 | ID | Numerical identifier for the payment processor setting. |
| 2 | Name | Name of the payment processor setting. |
| 3 | Type | Type of transaction for the payment processor. Type options include Credit Card or Bank Account (ACH/EFT). |
| 4 | Status | Status of the payment processor setting. Status options include Active and Inactive. |
| 5 | Payment Processor | Name of the payment processor. |
These actions are available in the Payment Processors section.
- Create a new payment processor setting by clicking the Add New Settings button. See the Add/Edit Payment Processors article for more information.
- Edit the payment processor setting by clicking the menu at the end of the row and selecting Edit from the menu options. See the Add/Edit Payment Processors article for more information.
- Deactivate the payment processor setting by clicking the menu at the end of the row and selecting Deactivate from the menu options.
Invoice Templates
The Invoice Templates section allows you to create and manage the templates used to generate invoices for your customers. Templates can be configured as one-time or recurring to match your billing needs, and you can set one default template for each type.

Each field in the Invoice Templates section is defined below.
| No. | Label | Definition |
| 1 | Name | Name of the invoice template. |
| 2 | Type | Type of invoice the template is used for. Type options include OneTime and Recurring. |
| 3 | Default | Indicates whether the template is set as the default for its invoice type. |
| 4 | Created Date | Date the template was created. |
| 5 | Last Modified Date | Date the template was last modified. |
These actions are available in the Invoice Templates section.
- Create a new invoice template by clicking the + New Template button. See the Add/Edit Invoice Templates article for more information.
- Sort the results in the table by clicking the column label in the table header.
- Edit the invoice template by clicking the menu at the end of the row and selecting Edit from the menu options.
- Duplicate the invoice template by clicking the menu at the end of the row and selecting Duplicate from the menu options.
- Delete the invoice template by clicking the menu at the end of the row and selecting Delete from the menu options.
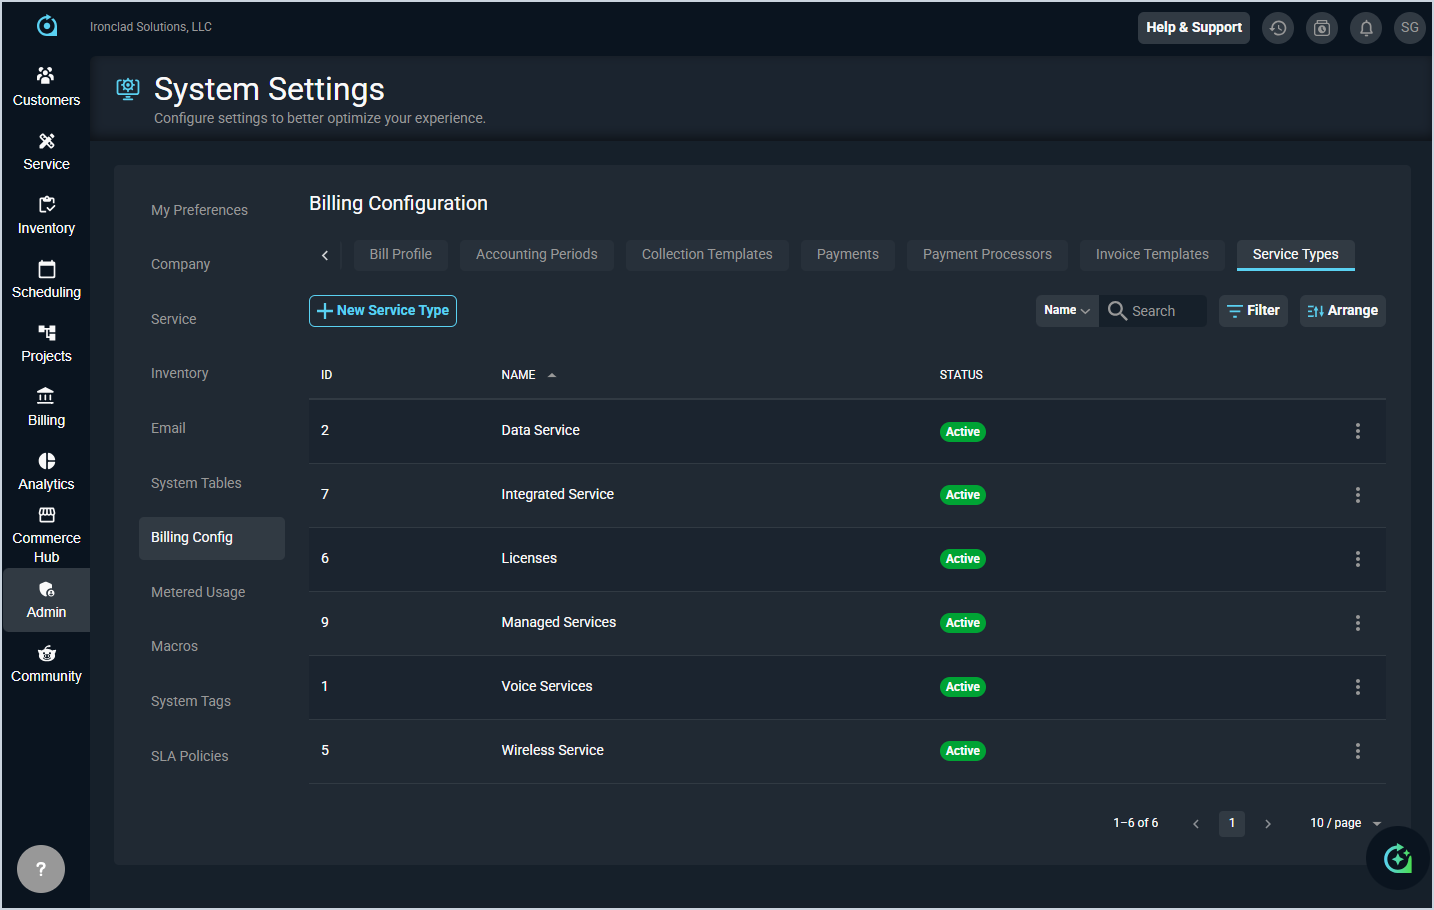
Service Types
The Service Types section allows you to define the categories used to classify services on customer accounts and quotes. Service types are referenced when adding a service to a quote, helping to identify the nature of the offering being provided.
Each field in the Service Types section is defined below.
| No. | Label | Definition |
| 1 | ID | Numerical identifier for the service type. |
| 2 | Name | Name of the service type. |
| 3 | Status | Status of the service type. Status options include Active and Inactive. |
These actions are available in the Service Types section.
- Create a new service type by clicking the New Service Type button.
- Search the service types displayed in this section by selecting a column from the dropdown above the grid and entering text in the Search field. The list view updates to display records matching your search in the column you selected.
- Filter the service types displayed on this view by clicking the Filter button above the grid.
- Customize which columns display in the list view and the order in which they display by clicking the Arrange button and making the desired changes.
- Edit the service type by clicking the menu at the end of the row and selecting Edit from the menu options.