
How To Guide: Dispatch Board

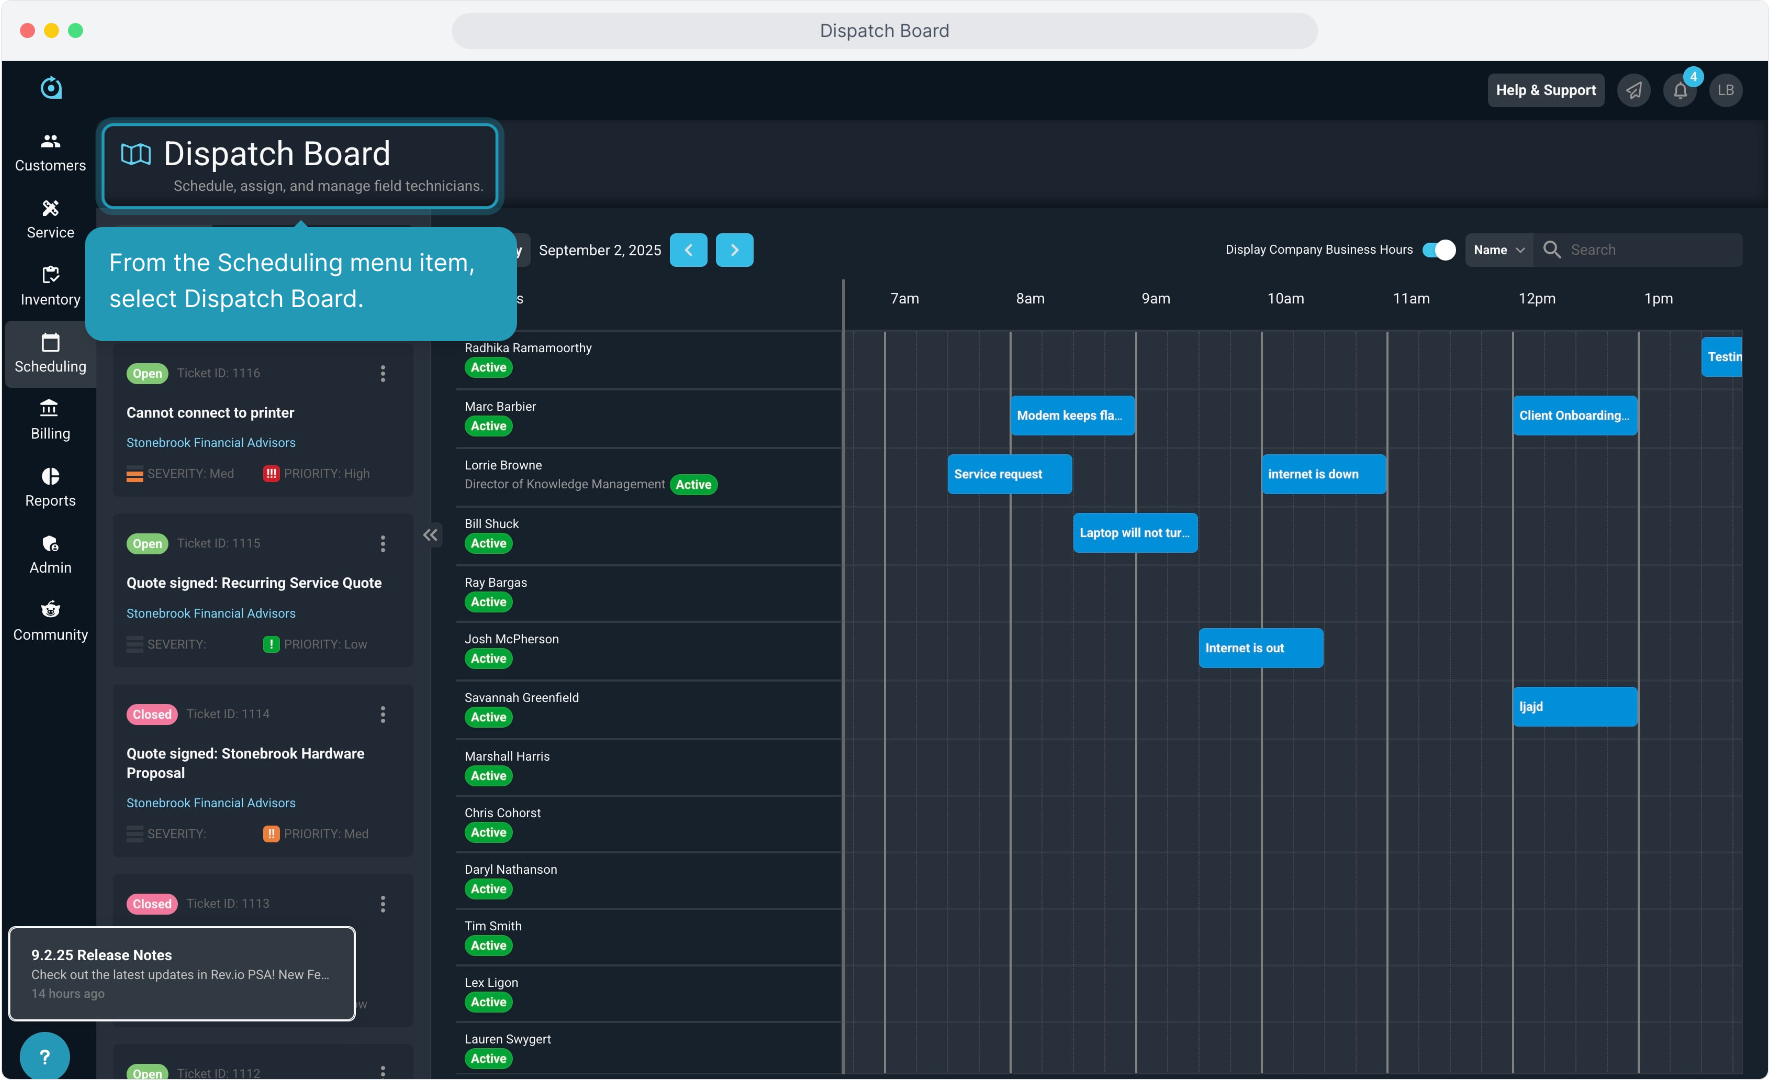
2. From the Scheduling menu item, select Dispatch Board.
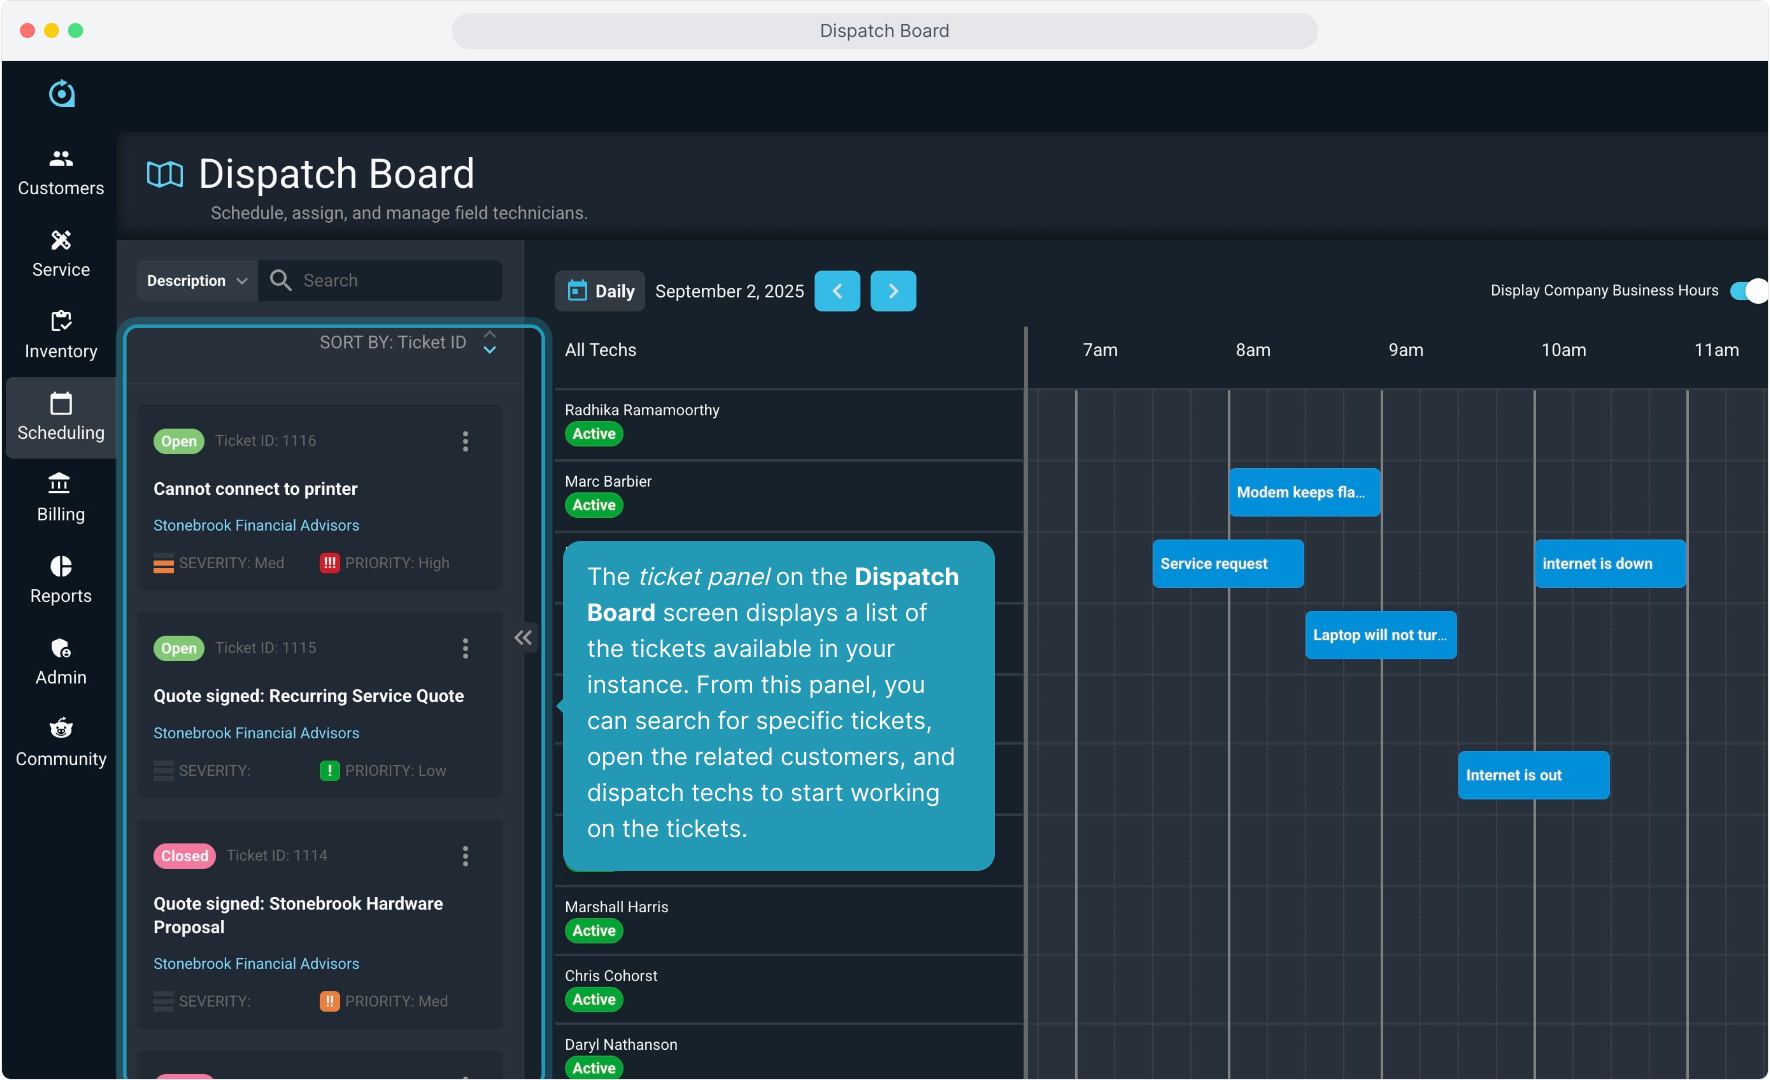
3. The ticket panel on the Dispatch Board screen displays a list of the tickets available in your instance. From this panel, you can search for specific tickets, open the related customers, and dispatch techs to start working on the tickets.
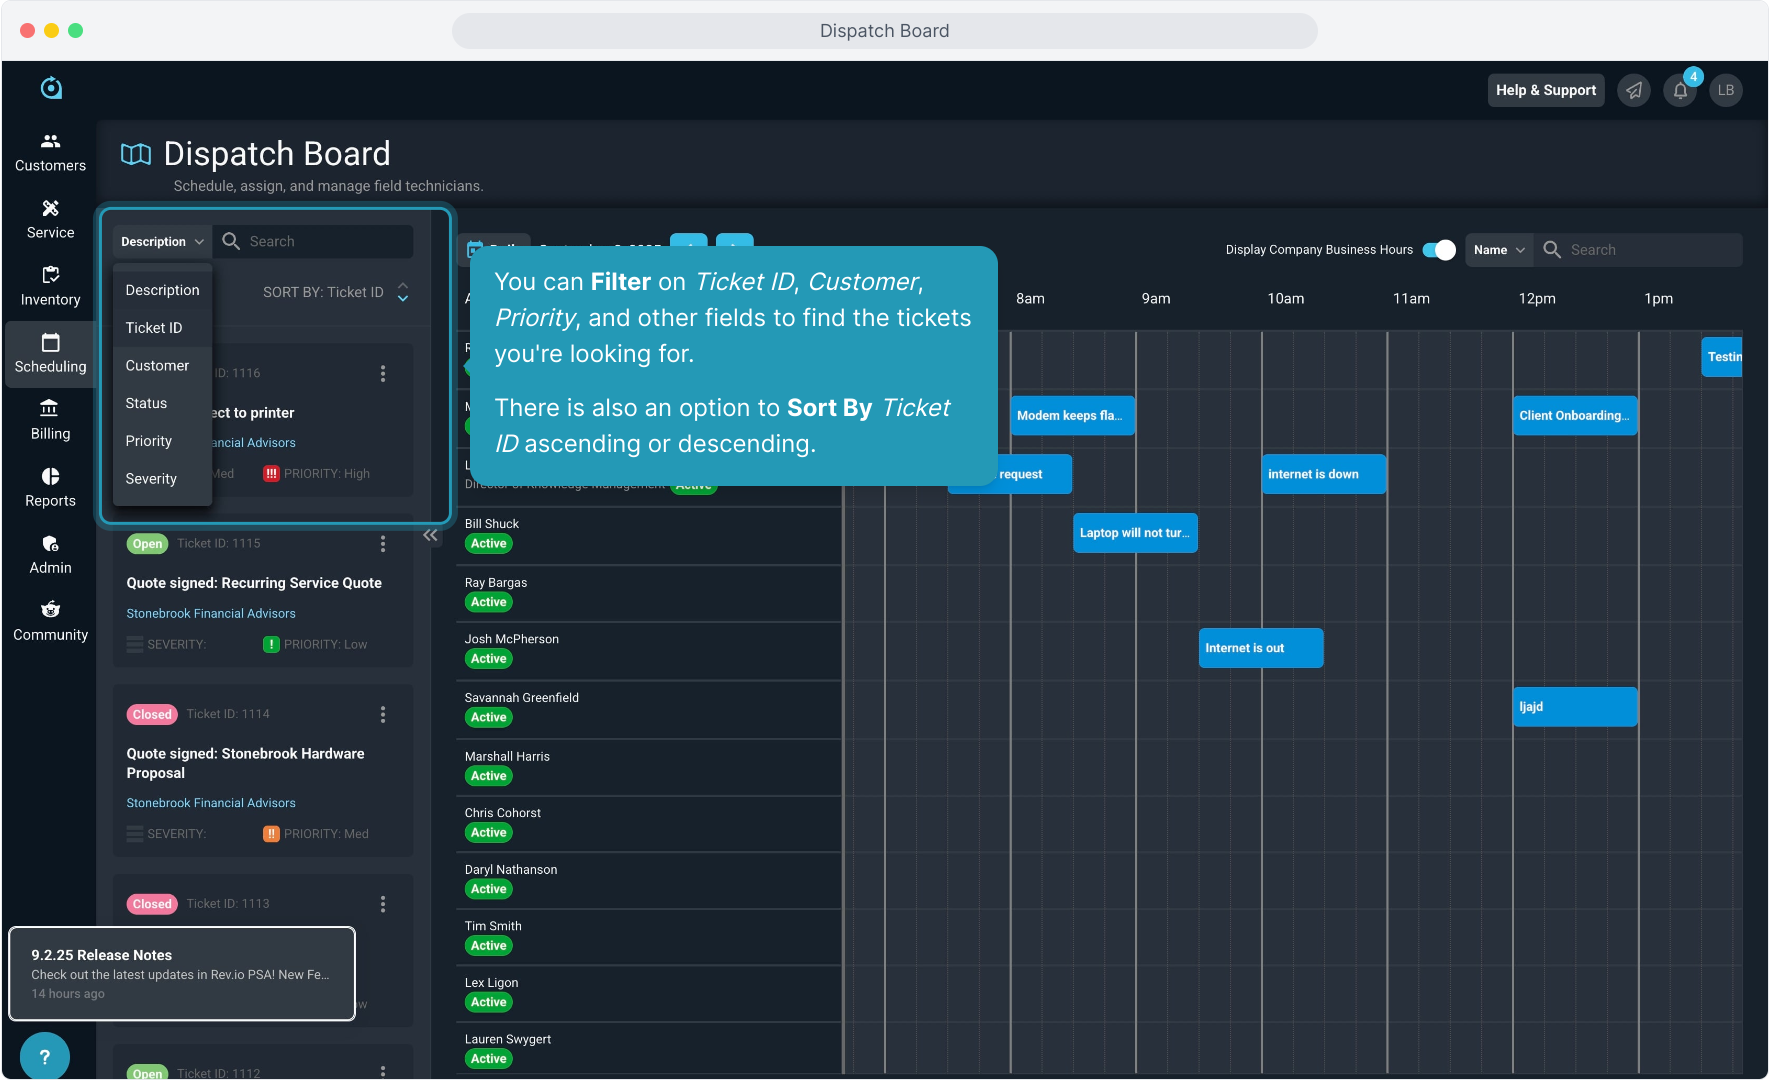
4. You can Filter on Ticket ID, Customer, Priority, and other fields to find the tickets you're looking for. There is also an option to Sort By Ticket ID ascending or descending.
5. The ticket you search for will display.
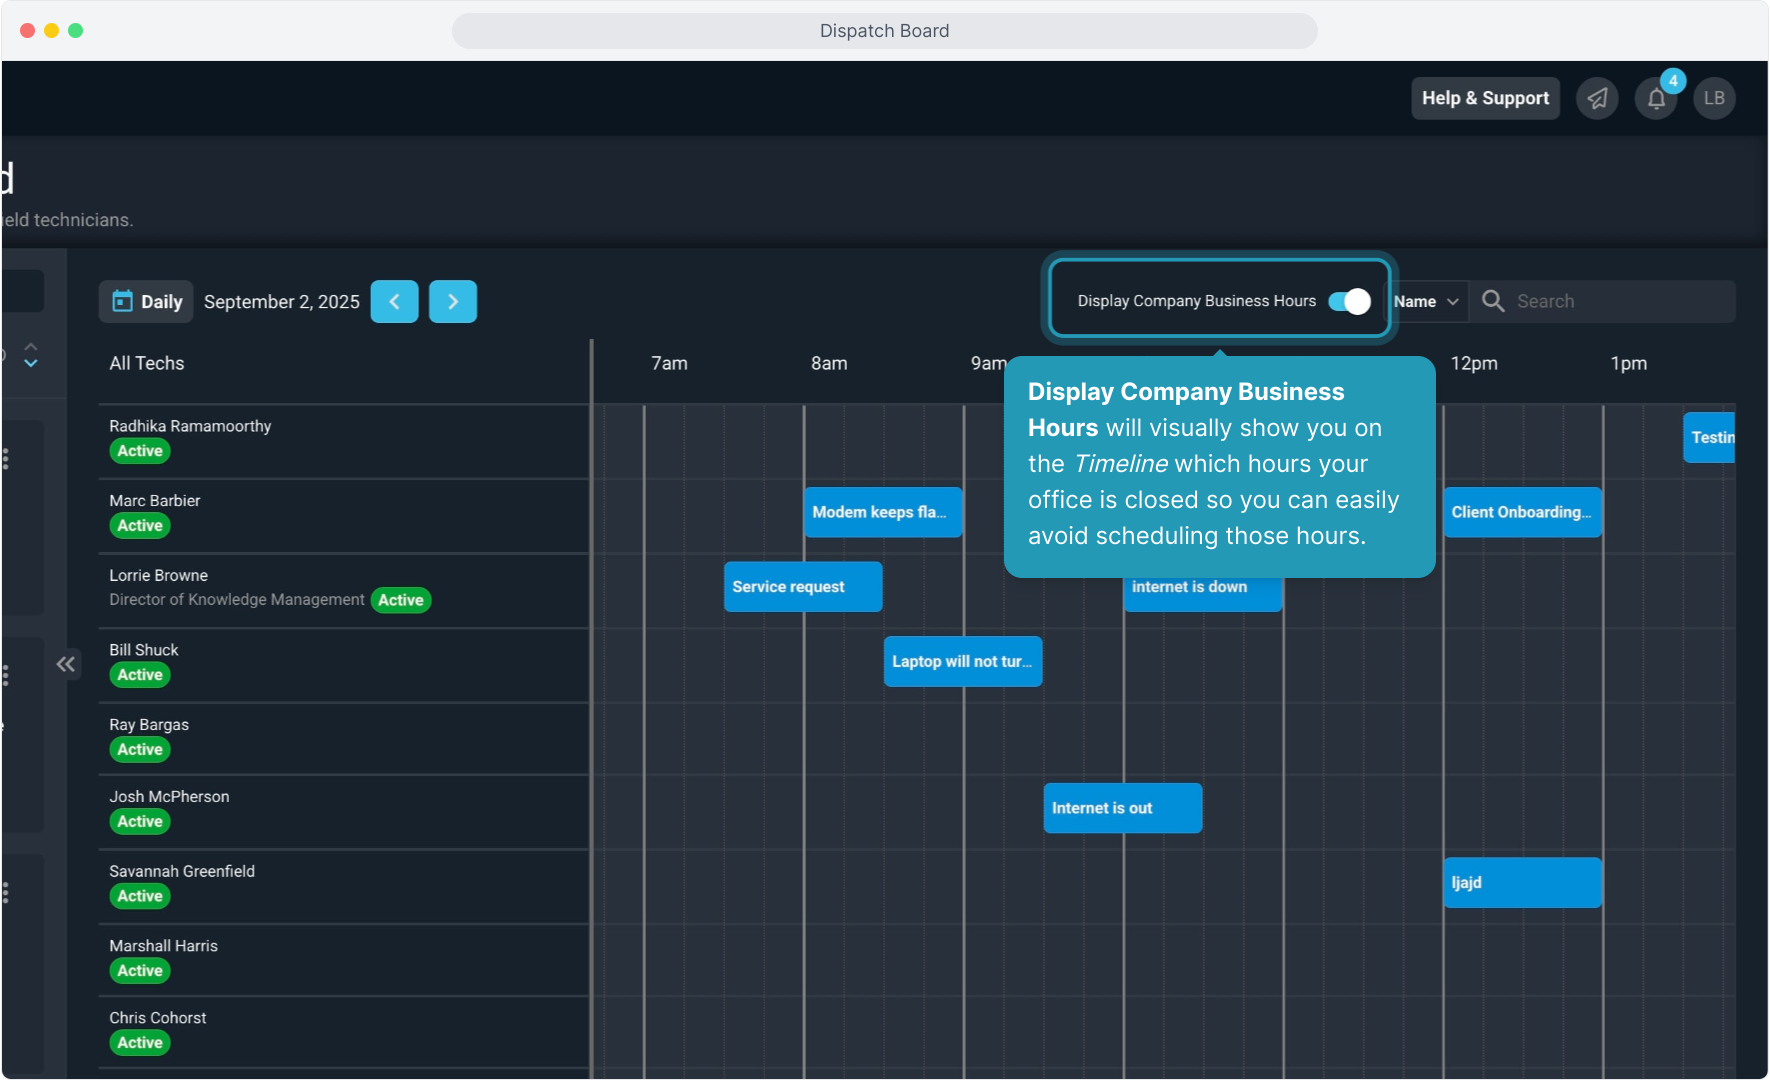
6. Display Company Business Hours will visually show you on the Timeline which hours your office is closed so you can easily avoid scheduling those hours.
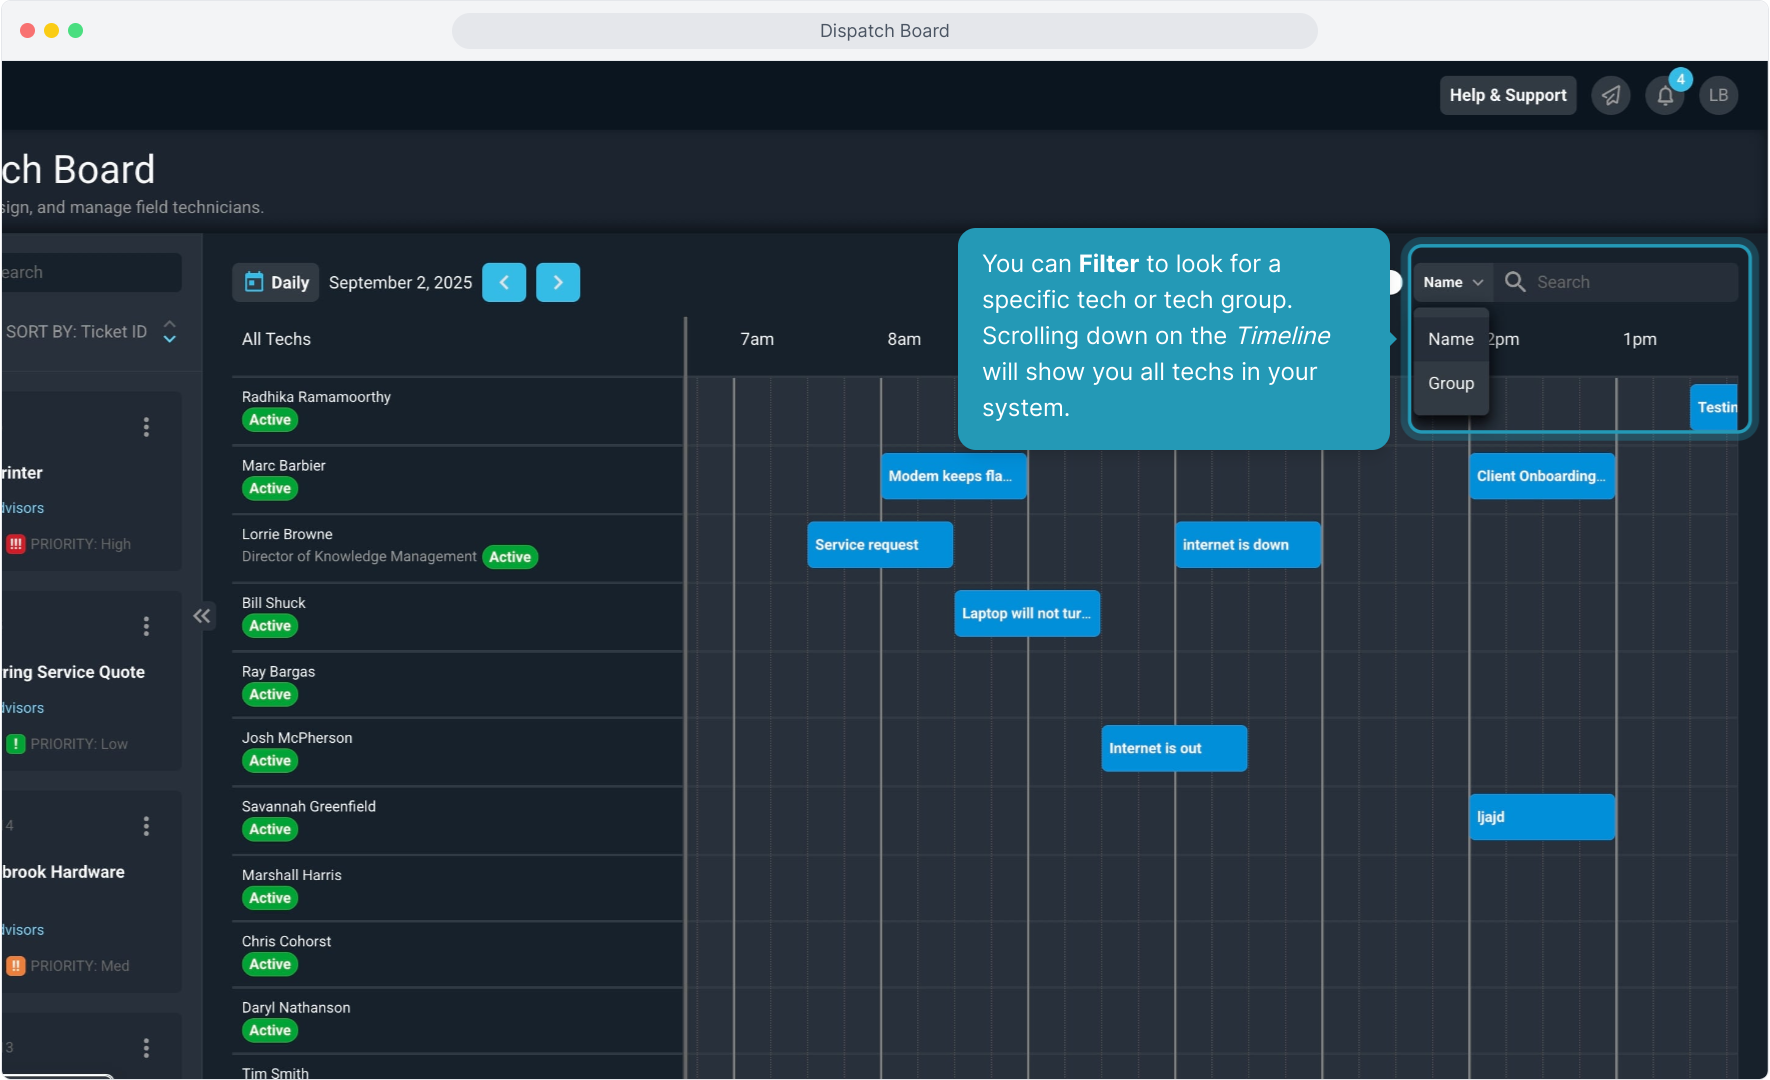
7. You can Filter to look for a specific tech or tech group. Scrolling down on the Timeline will show you all techs in your system.
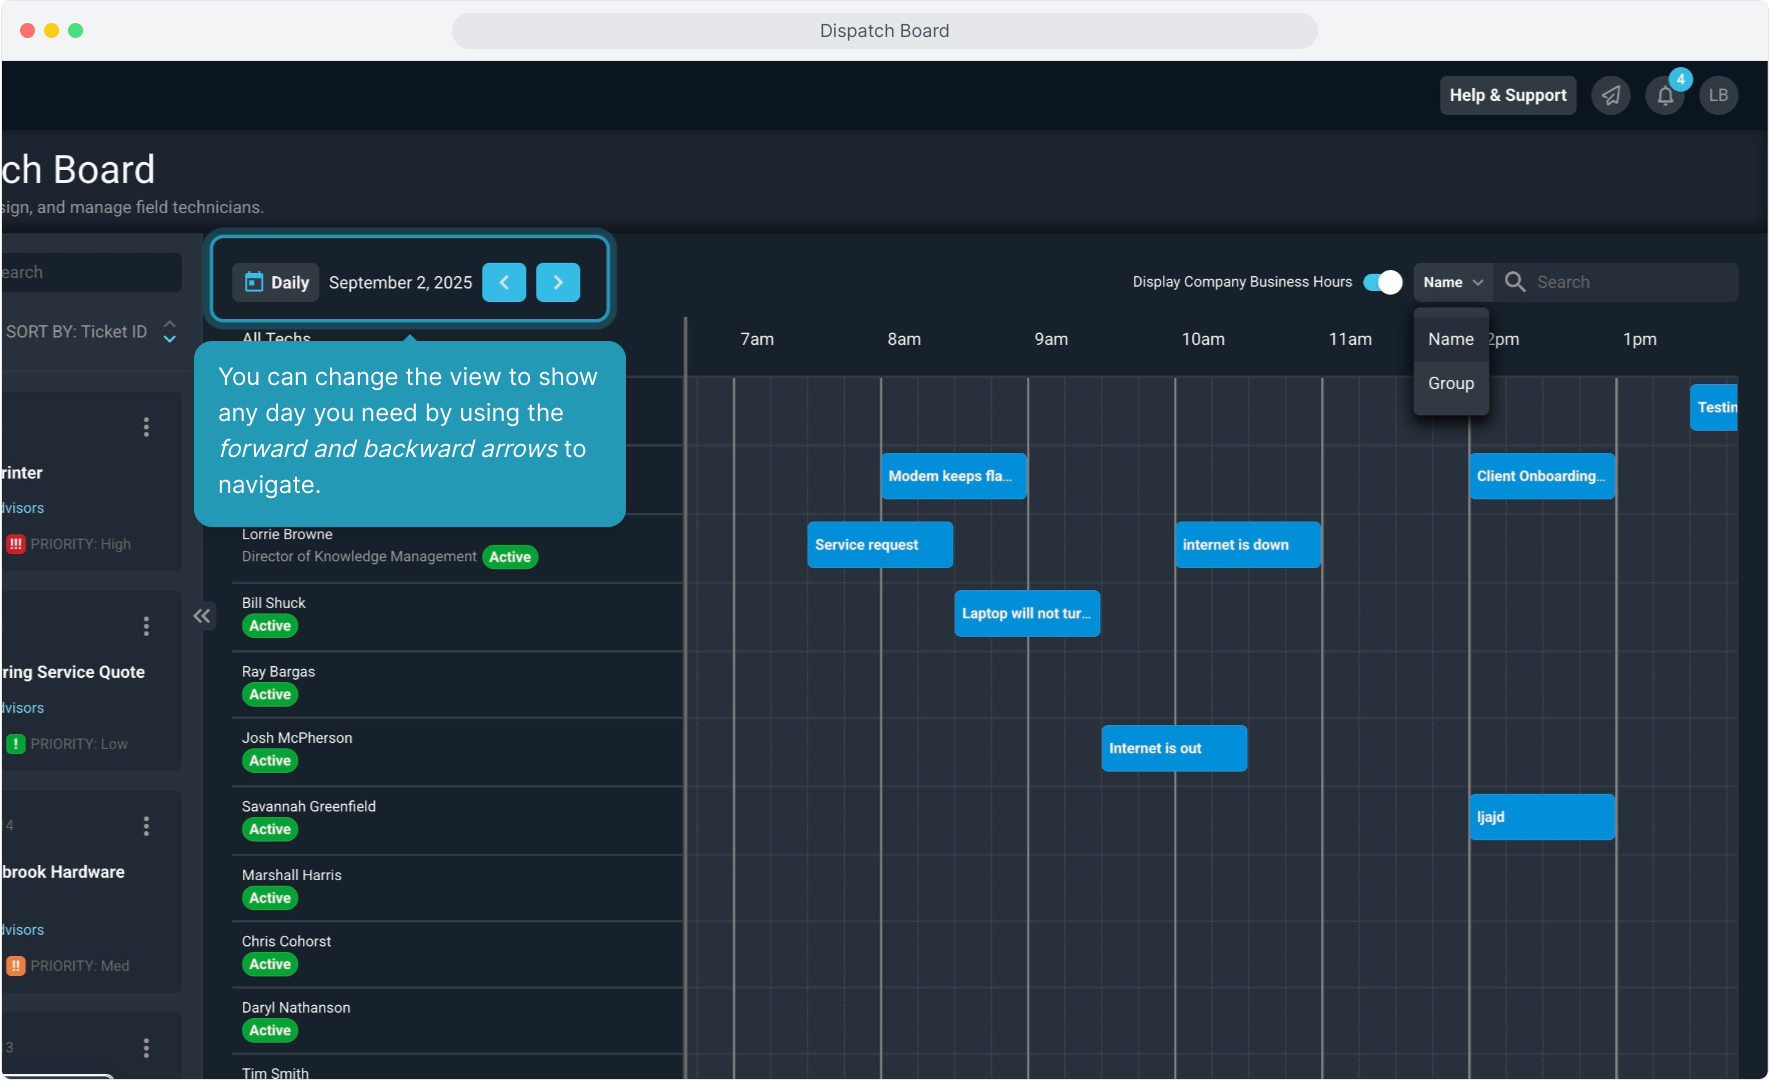
8. You can change the view to show any day you need by using the forward and backward arrows to navigate.
9. Once you find the ticket, clicking the 3 dot icon will allow you to either View the Ticket or Dispatch a tech for that ticket.

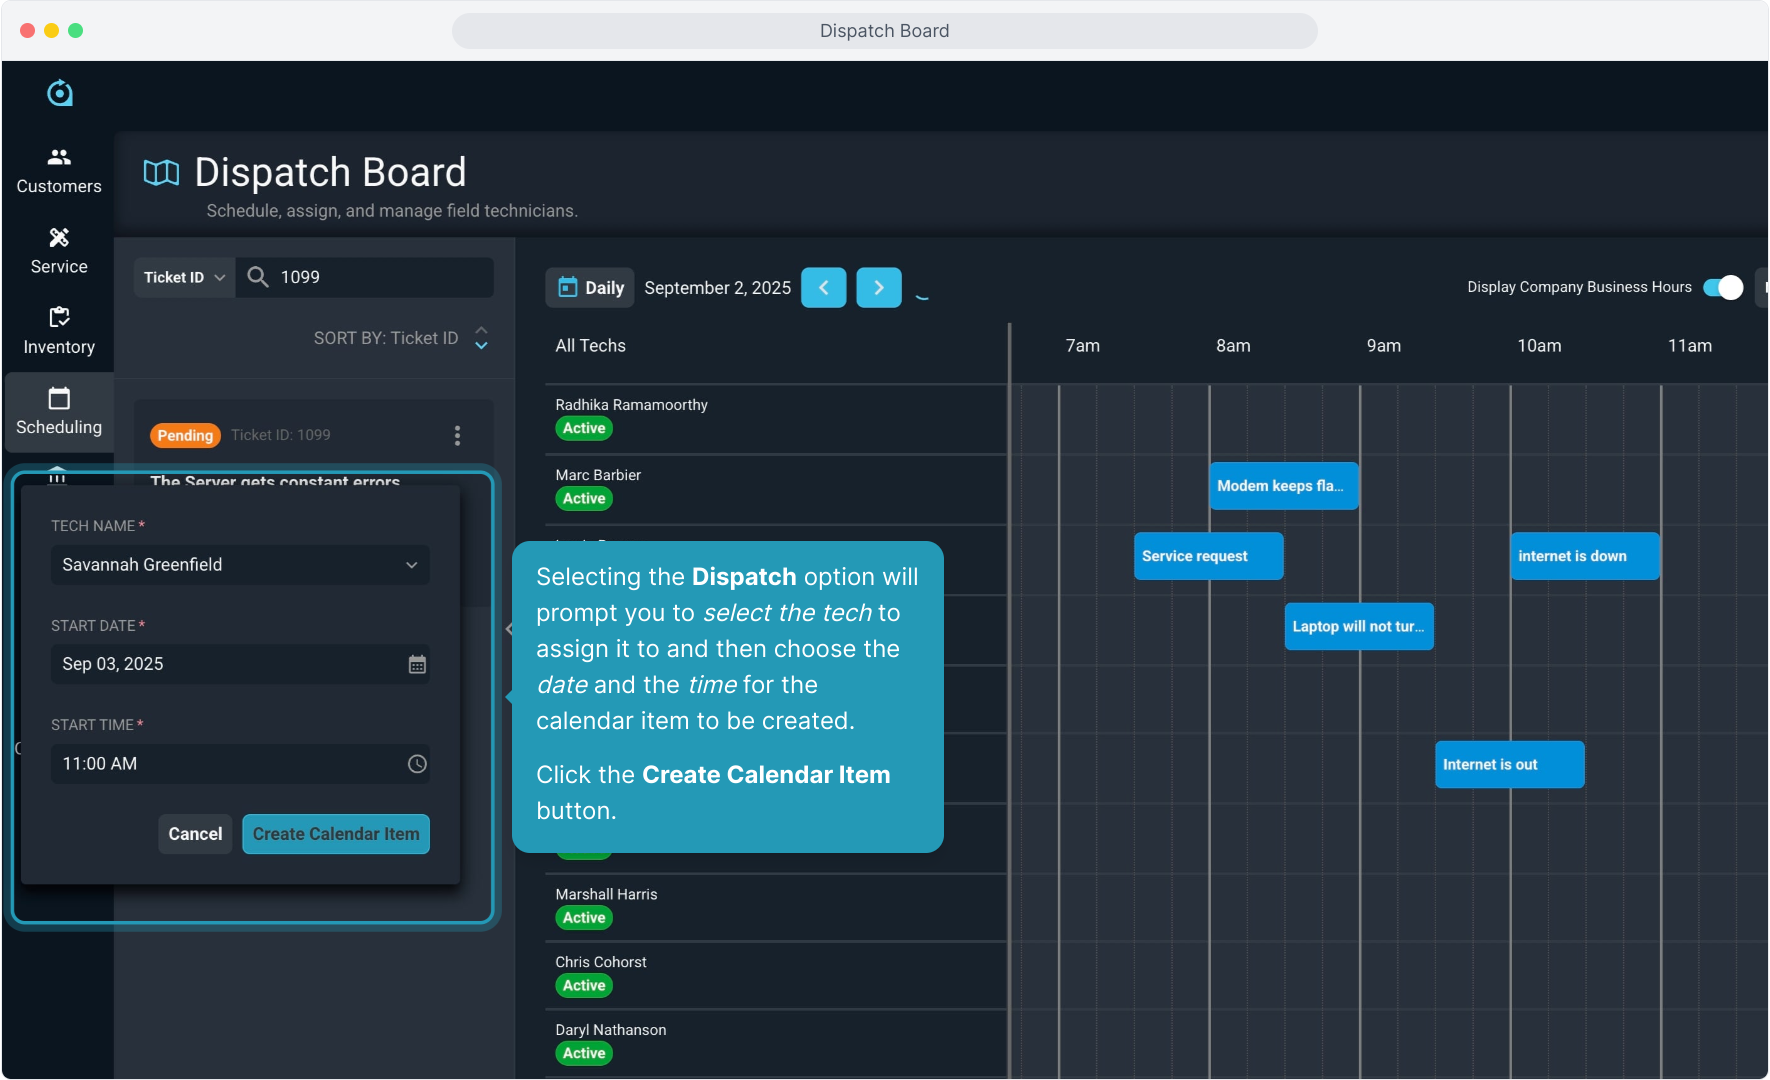
10. Selecting the Dispatch option will prompt you to select the tech to assign it to and then choose the date and the time for the calendar item to be created.
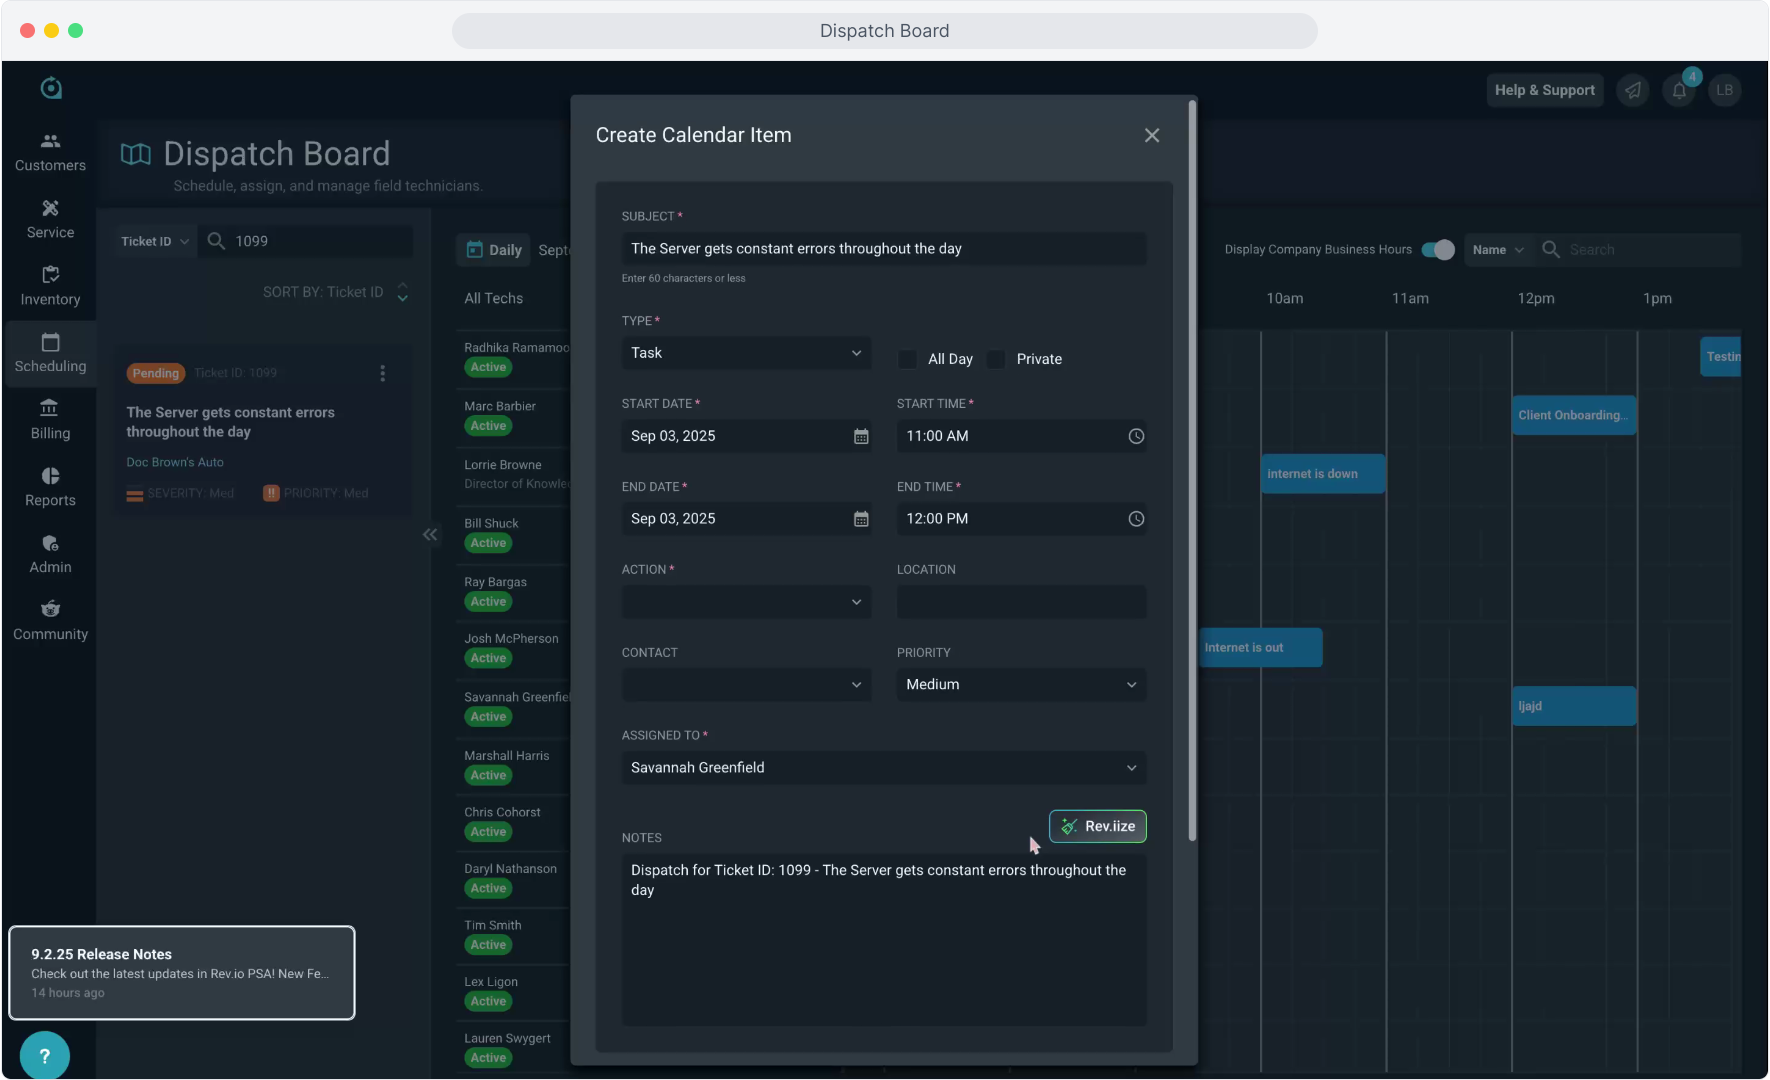
Click the Create Calendar Item button.
11. Fill in the information, making sure to populate any required fields.
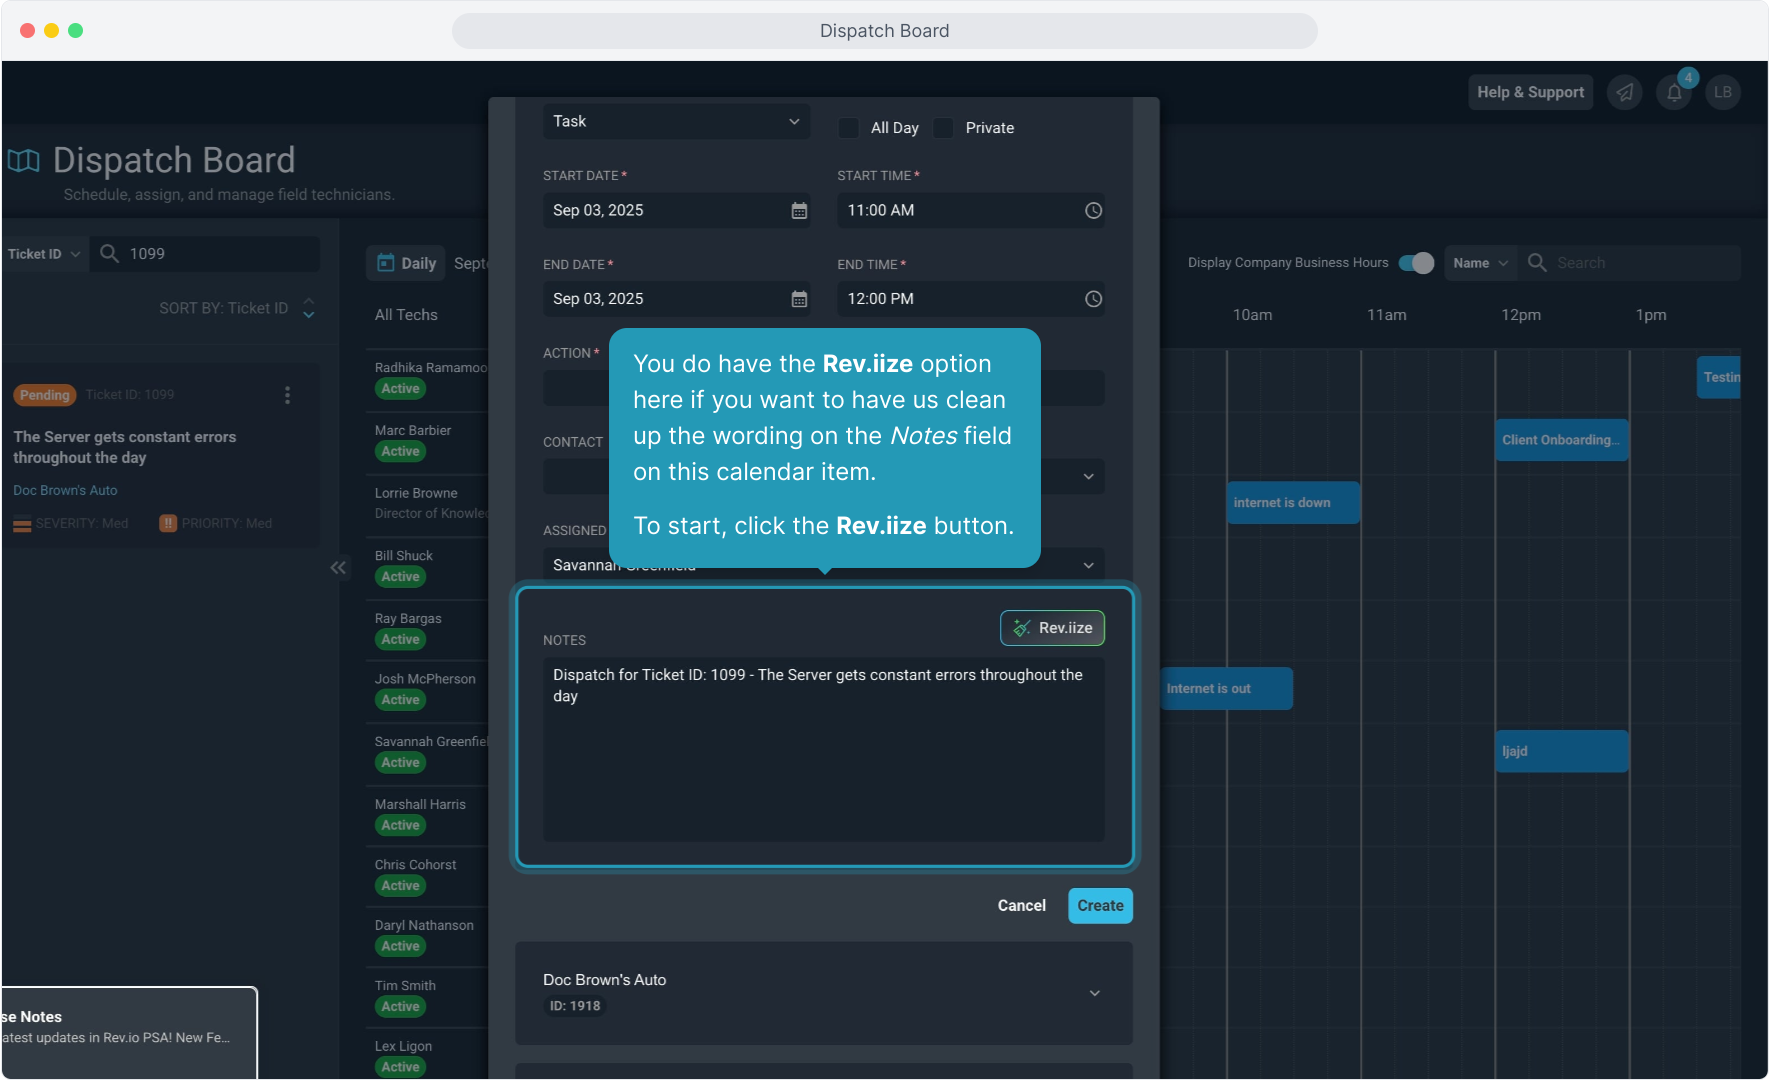
12. You do have the Rev.iize option if you want to have us clean up the wording on the Notes field on this calendar item. To start, click the Rev.iize button.
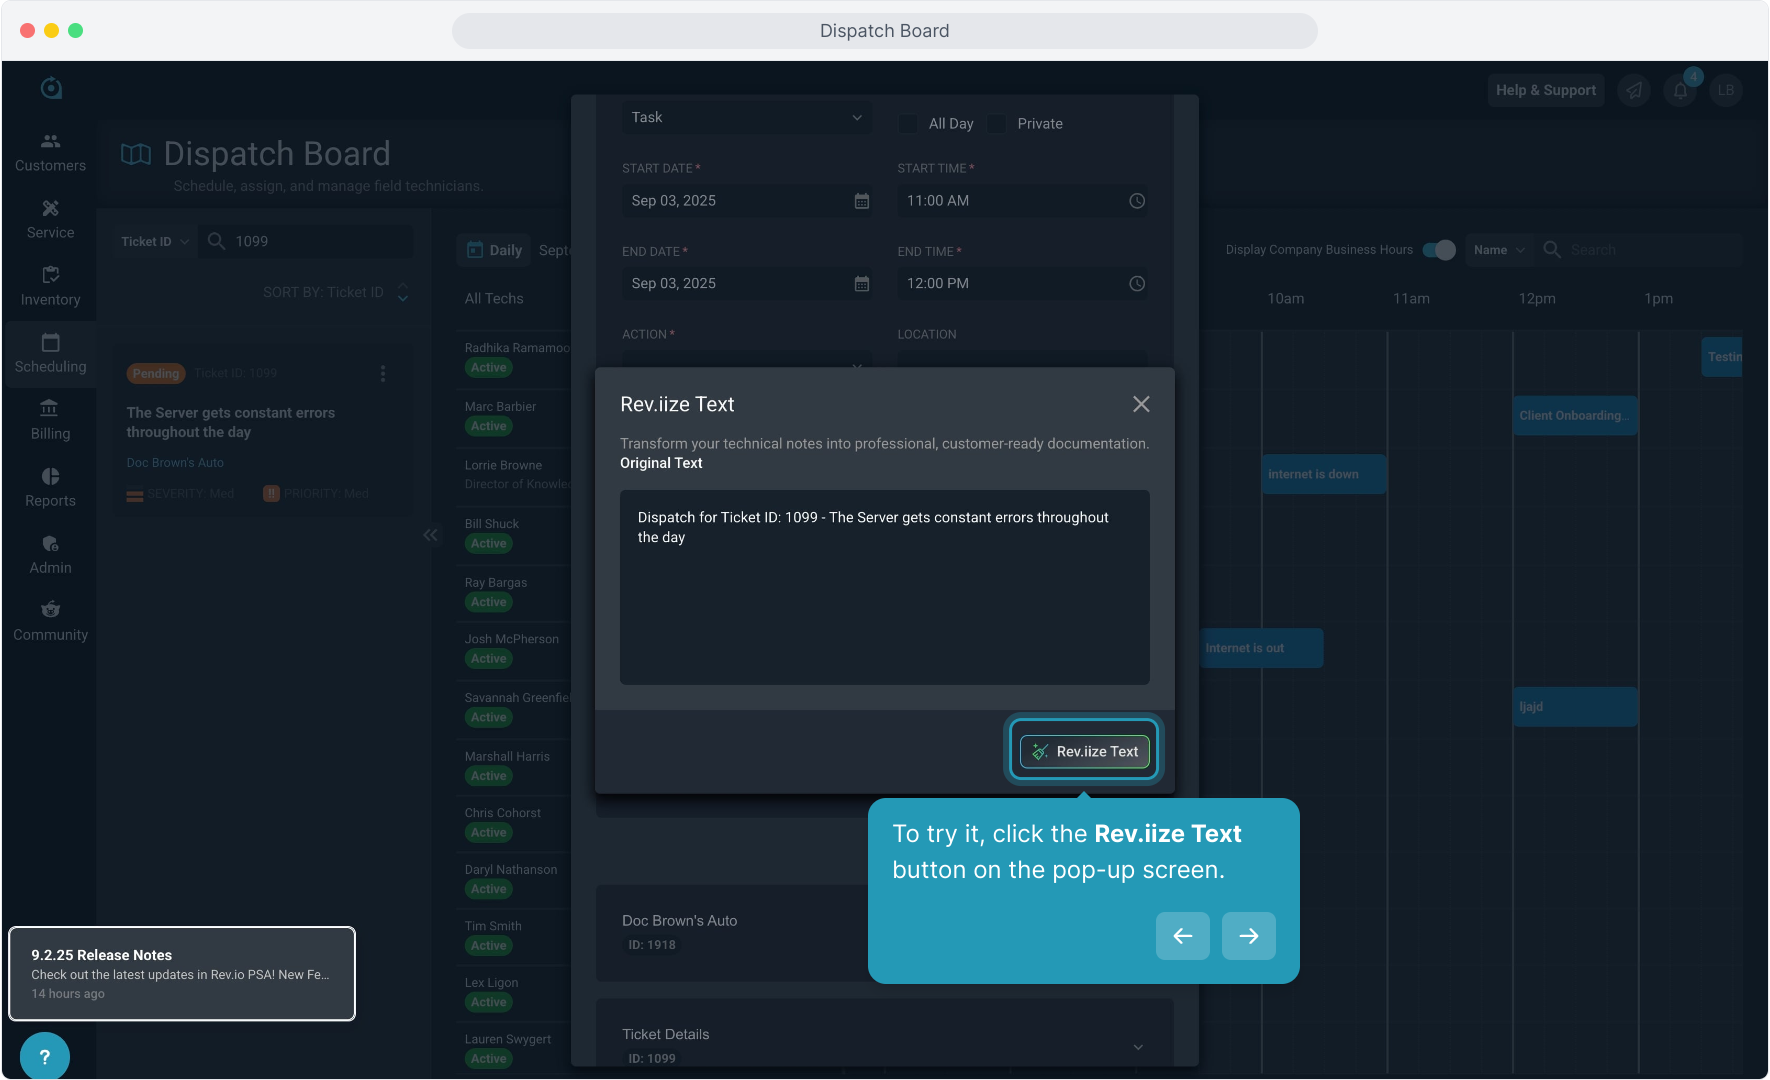
13. To try it, click the Rev.iize Text button on the pop-up screen.
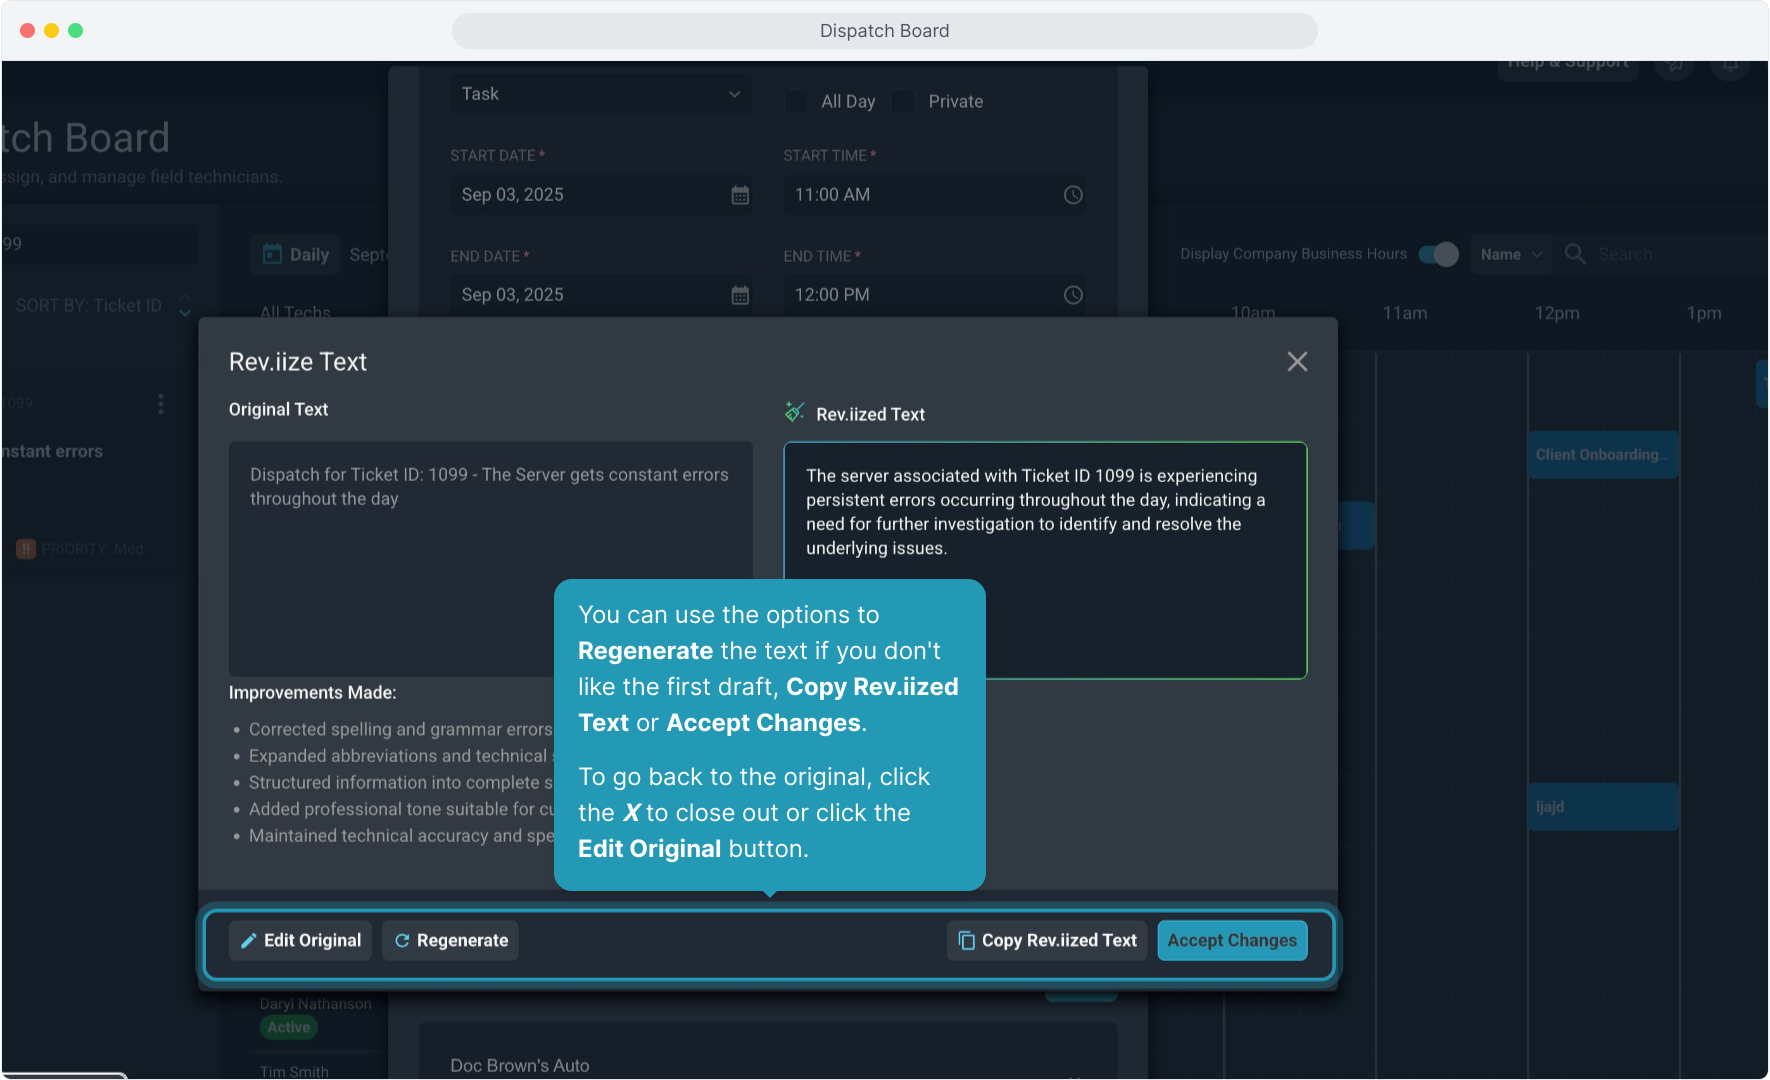
14. You can use the options to Regenerate the text if you don't like the first draft, Copy Rev.iized Text or Accept Changes.
To go back to the original, click the X to close out or click the Edit Original button.
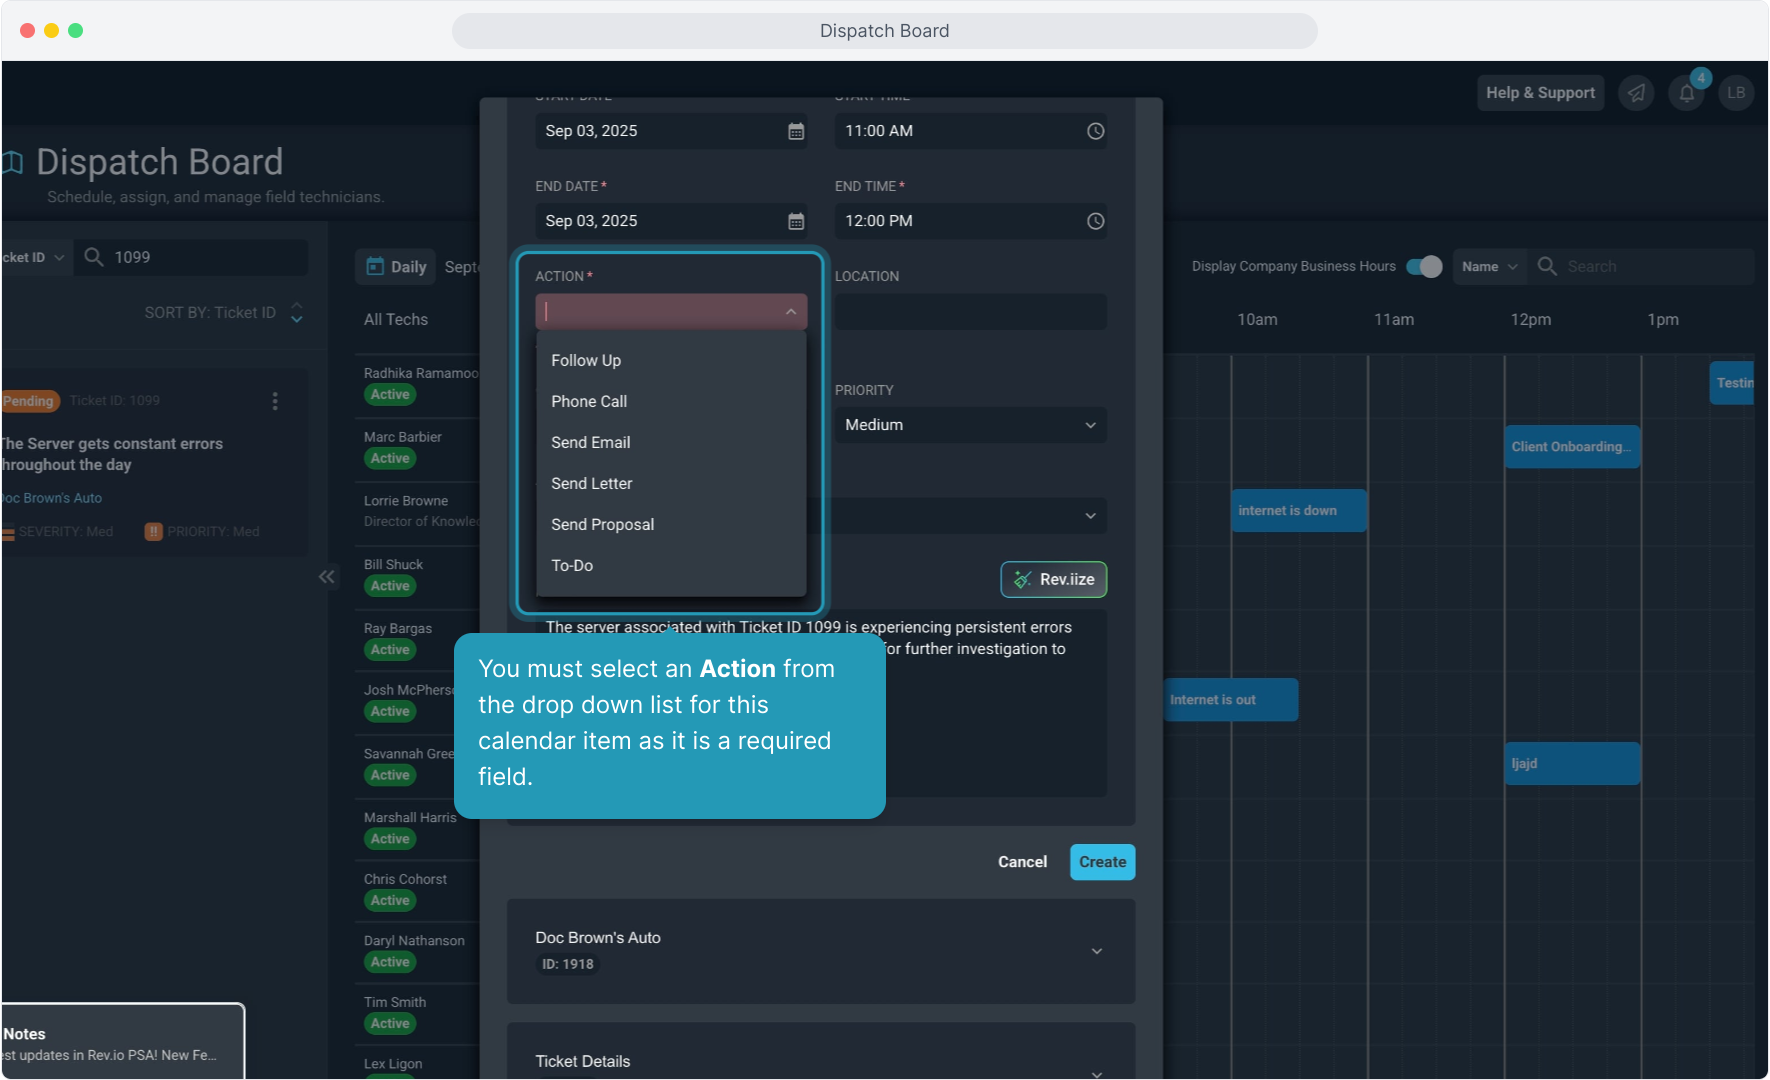
15. You must select an Action from the drop down list for this calendar item as it is a required field.
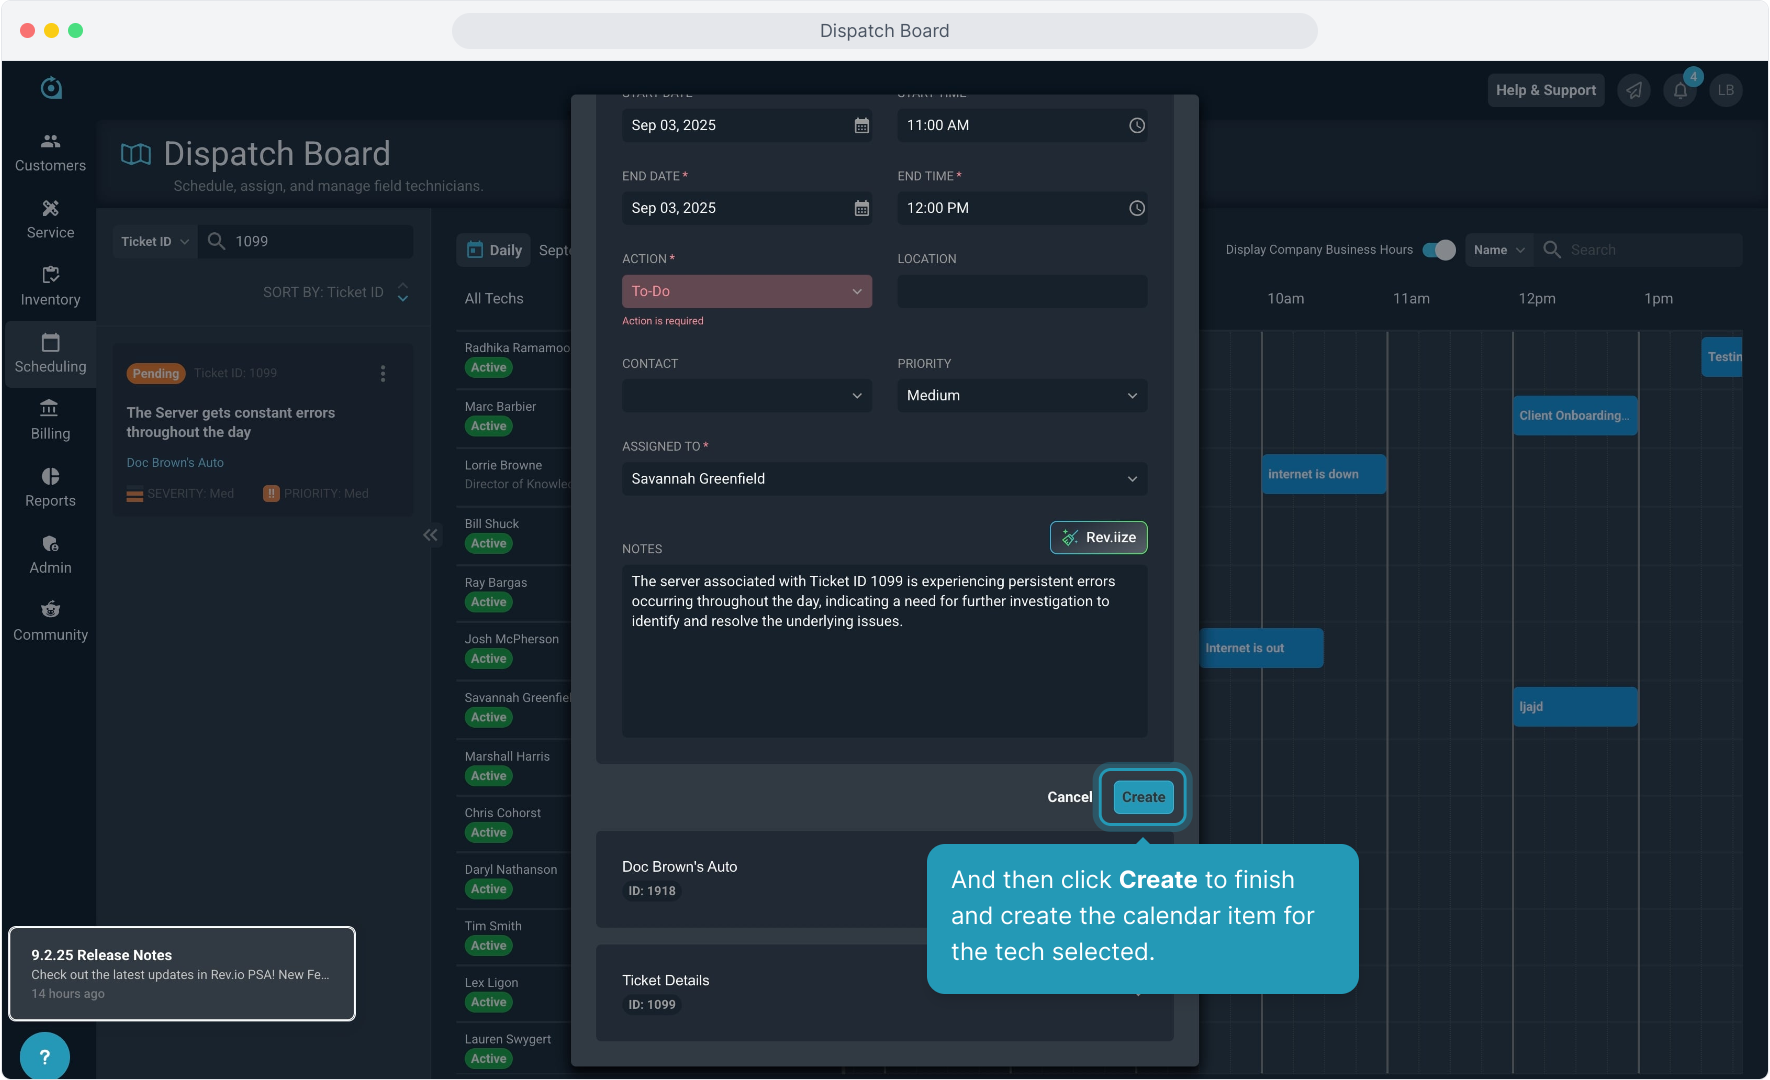
16. And then click Create to finish and create the calendar item for the tech selected.
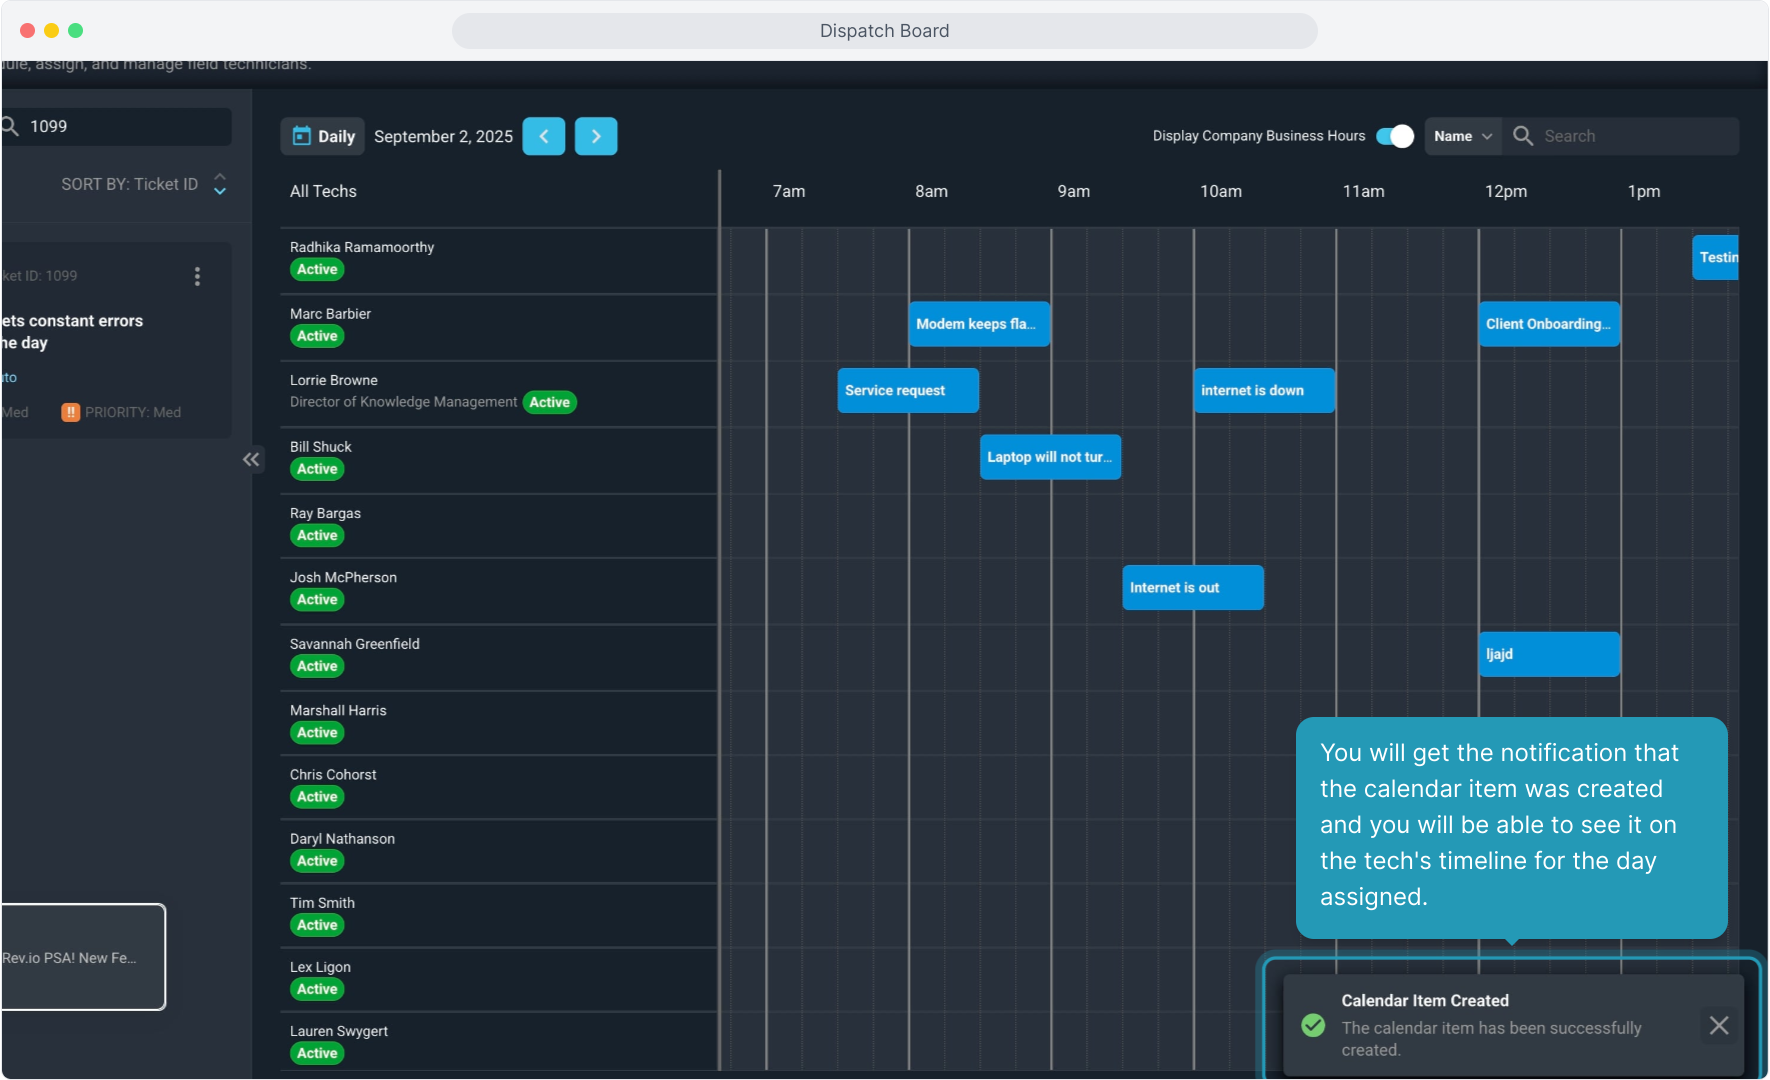
17. You will get the notification that the calendar item was created and you will be able to see it on the tech's timeline for the day assigned.
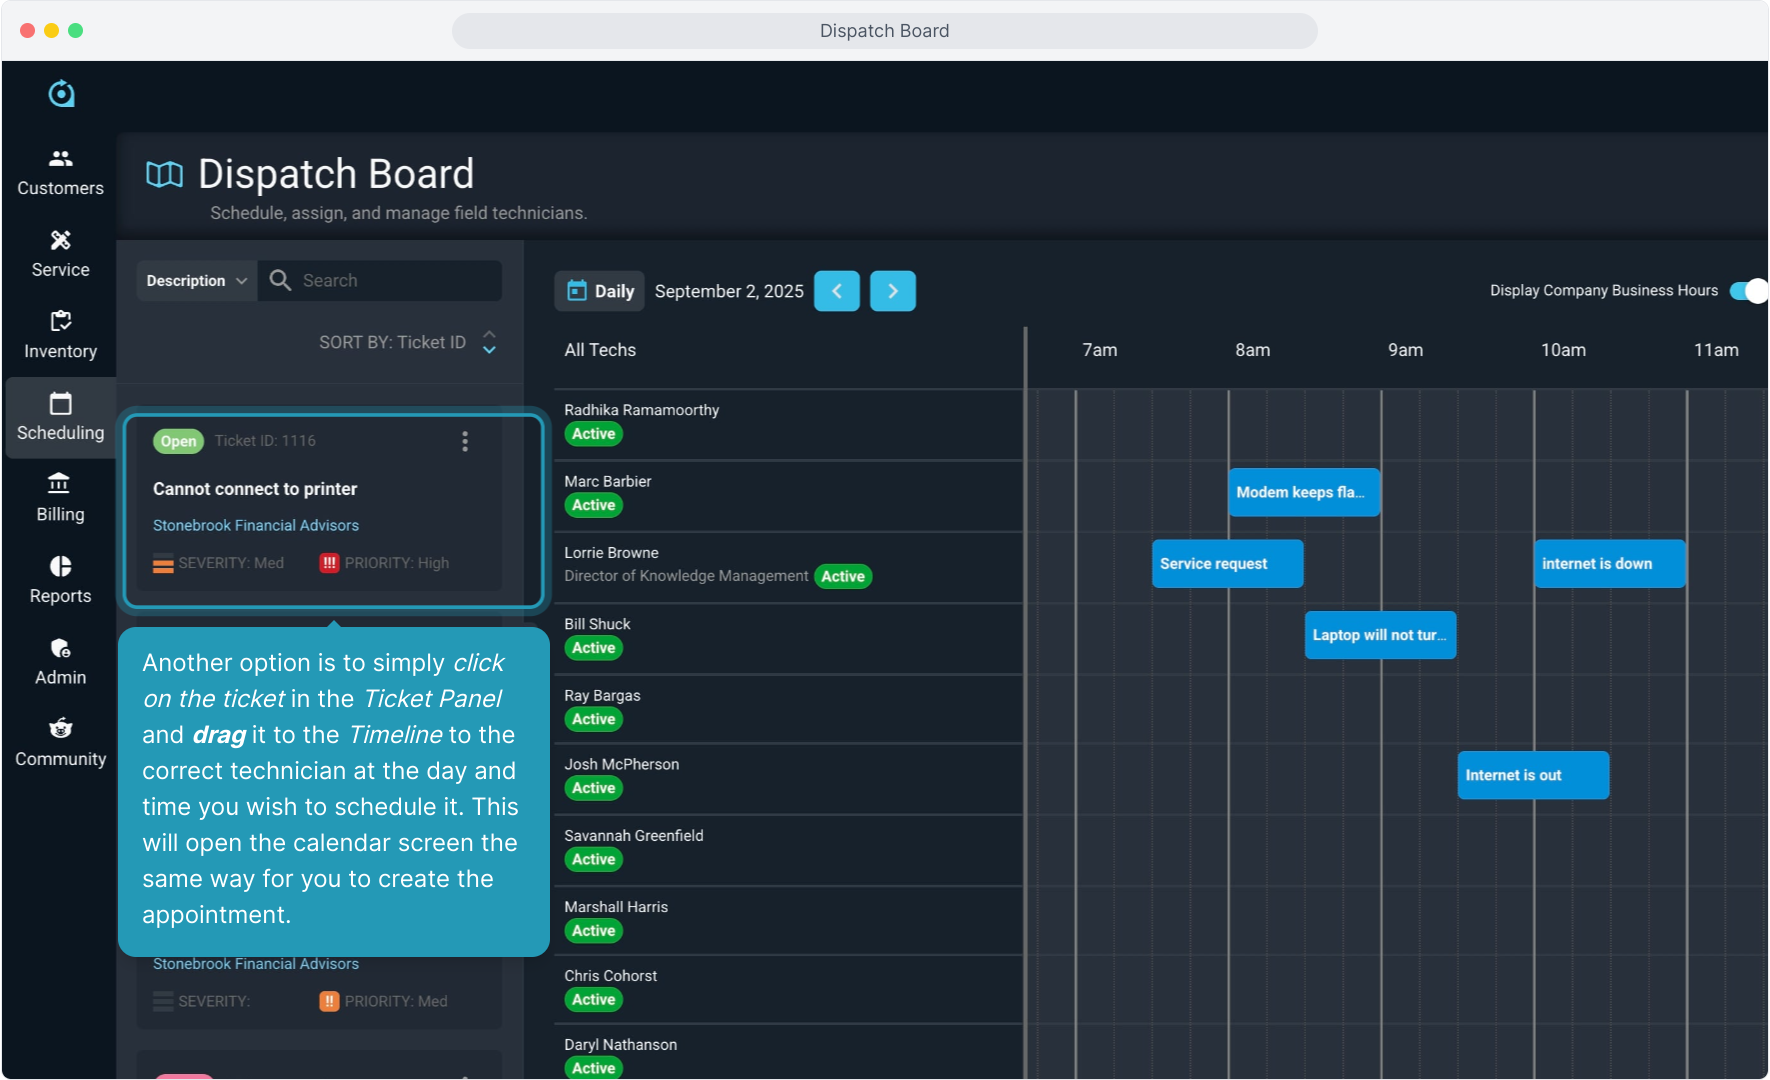
18. Another option is to simply click on the ticket in the Ticket Panel and drag it to the Timeline to the correct technician at the day and time you wish to schedule it. This will open the calendar screen the same way for you to create the appointment.
19. Intentionally blank.
20. Then just select the Action desired, Rev.iize the note if you wish, and click Create, just like you did using the other option.
