
View Ticket: Stage
The stage panel on the right side of the ticket screen displays additional details for the ticket and provides quick access to time tracking, customer information, transaction details, and more. Some widgets on the stage panel display collapsed by default. Click a section header to expand or collapse it.
| Basic information for the ticket and several tabs to manage the ticket display on the main Ticket Details screen. See the View Ticket: Details article for more information. |
Whether or not the stage displays on the ticket screen is controlled by the Show the Stage/Hide the Stage icon in the top toolbar. Collapse or expand the Stage side panel by clicking the Show the Stage/Hide the Stage icon in the top toolbar.

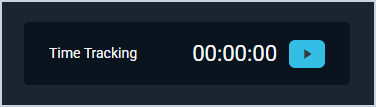
Time Tracking
The Time Tracking widget displays a timer for tracking time spent on the ticket.
| No. | Label | Definition |
| 1 | Time Tracking | Click the Start/Play button to start a timer for time tracking on the ticket. See the Tracking Time on Tickets article for more information. |
The following actions are available in this widget.
- Start a timer for tracking time on the ticket by clicking the Start/Play button in the Time Tracking section. See the Tracking Time on Tickets article for more information.
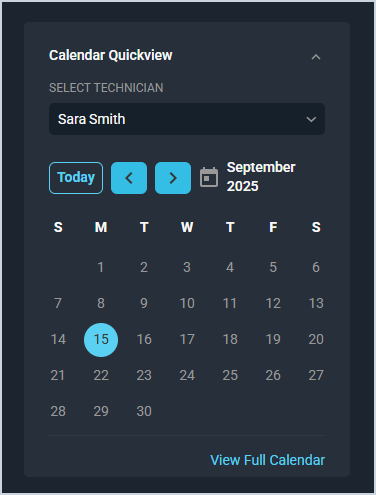
Calendar Quickview
The Calendar Quickview widget displays a preview of the assigned technician's upcoming calendar items.
| No. | Label | Definition |
| 1 | Calendar Quickview | View a preview of the tech's calendar. Click View Full Calendar to open the tech's full calendar. See the View the Calendar article for more information. |
The following actions are available in this widget.
- View a preview of the assigned tech's calendar in the Calendar Quickview section and open the tech's full calendar by clicking View Full Calendar. See the View the Calendar article for more information.
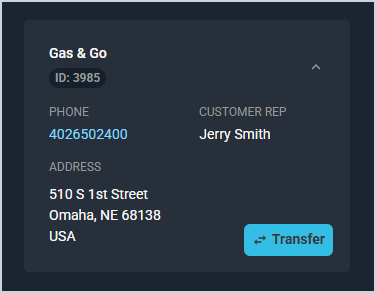
Customer Details
The Customer Details widget displays basic information about the customer associated with the ticket. Click the Transfer button to transfer the ticket from the current customer to a different customer. See the Customer Information Section article for more information.
The following actions are available in the Customer Details widget.
- View the customer profile by clicking the customer name link.
- Transfer the ticket to a different customer by clicking the Transfer button. See the Transferring Tickets to Different Customers article for more information.
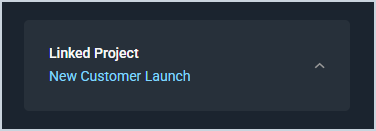
Linked Project
The Linked Project widget displays the project associated with the ticket, if applicable.
The following actions are available in this widget.
- View the linked project by clicking the project name link. See the View Project: Details article for more information.
Ticket Summary
The Ticket Summary widget displays a high-level overview of the ticket's key details.
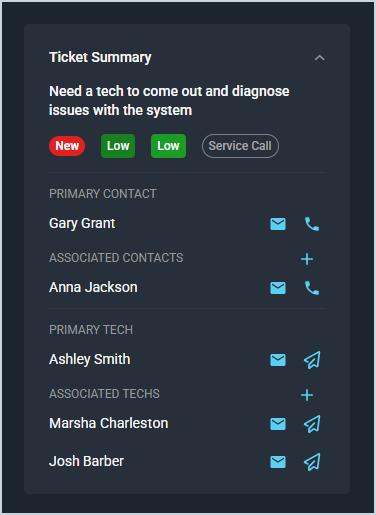
| No. | Label | Definition |
| 1 | <Description> | Description of the work being done for the ticket. |
| 2 | <Status> | Status of the ticket. |
| 3 | <Severity> | Level of severity/urgency for the ticket. |
| 4 | <Priority> | Level of priority/importance for the ticket. |
| 5 | <Type> | Type of ticket. |
| 6 | Primary Contact | Contact on the customer record for which the ticket was created. |
| 7 | Associated Contacts | Associated contacts on the customer record for which the ticket was created. |
| 8 | Primary Tech | Primary tech assigned to work the ticket. |
| 9 | Associated Techs | Associated techs assigned to work on the ticket. |
The following actions are available in this widget.
- Send an email to a contact or technician by clicking the email icon next to their name.
- Call a contact by clicking the phone icon next to their name.
- Send a technician an in-app direct message notification by clicking the paper airplane icon next to their name.
- Add an associated contact or technician to the ticket by clicking the + icon in the Associated Contacts or Associated Techs section.
Ticket Details
The Ticket Details widget displays timestamp and time tracking information for the ticket.
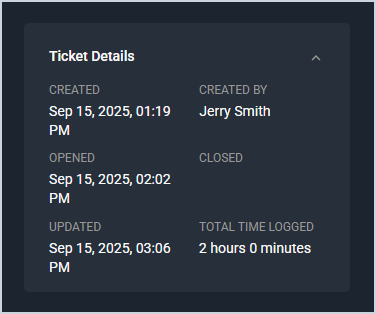
| No. | Label | Definition |
| 1 | Created | Date and time the ticket was created. |
| 2 | Created By | Name of the person who created the ticket. |
| 3 | Opened | Date and time the ticket was opened. |
| 4 | Closed | Date and time the ticket was closed. |
| 5 | Updated | Date and time the ticket was last updated. |
| 6 | Total Time Logged | Total time in hours and minutes logged to the ticket. |
The following actions are available in this widget.
- For more information on the ticket and several tabs to manage the ticket, see the View Ticket - Details article.
Transaction Details
The Transaction Details widget displays the billing status and pretax total for the ticket and allows you to send the ticket to billing for processing.
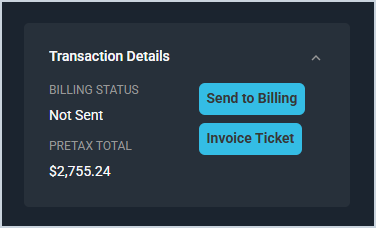
| No. | Label | Definition |
| 1 | Billing Status | Status of whether the ticket has been sent to Rev.io Billing. Billing Status options include Not Sent and Sent. |
| 2 | Pretax Total | Total of parts and labor charges for the ticket before tax. |
The following actions are available in this widget.
- Send the ticket to billing by clicking the Send to Billing button. Sending a ticket to billing updates the Billing Status to Sent and cannot be undone. See the Sending Tickets to Billing article for more information. NOTE: Sending tickets to billing requires the Send a Ticket to Billing permission.
- Generate an invoice for the ticket by clicking the Invoice Ticket button.
Recurring Contract
The Recurring Contract widget displays details for the contract associated with the ticket, if applicable.
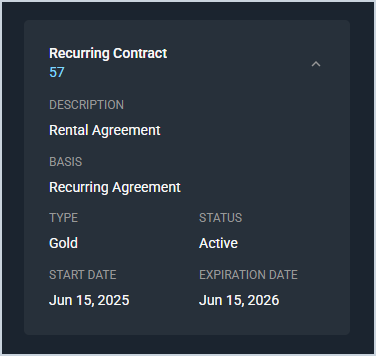
| No. | Label | Definition |
| 1 | <Contract ID> | Numerical identifier for the customer's contract tied to the ticket. |
| 2 | Description | Description for the customer's contract tied to the ticket. |
| 3 | Basis | Basis for the customer's contract tied to the ticket. |
| 4 | Type | Type the customer's contract tied to the ticket. |
| 5 | Status | Status for the customer's contract tied to the ticket. |
| 6 | Start Date | Start date for the customer's contract tied to the ticket. |
| 7 | Expiration Date | Expiration date for the customer's contract tied to the ticket. |
The following actions are available in this widget.
- View the full details for the contract by clicking the Contract ID. See the View Contract: Details article for more information.
Job Costing
The Job Costing widget displays a cost and revenue summary for the ticket, giving you a view of profitability at the ticket level. This widget includes the following categories:
- Material. Sales, costs, and difference for inventory and material items.
- Labor. Sales, costs, and difference for labor and time-based items.
- Total. Combined sales, costs, and difference across all categories.
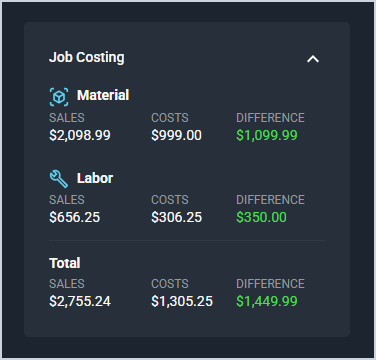
| No. | Label | Definition |
| 1 | Sales | Sales amount for material, labor, or total charges on the ticket. |
| 2 | Costs | Costs associated with the project for material, labor, or total costs on the ticket. |
| 3 | Difference | Difference between material, labor, or total sales and costs on the ticket. A positive value indicates profit; a negative value indicates a loss. |
Areas on the Ticket Details Screen
For information on other areas of the Ticket Details screen, see the related articles.