How To Guide: Managing Projects
1. Introduction
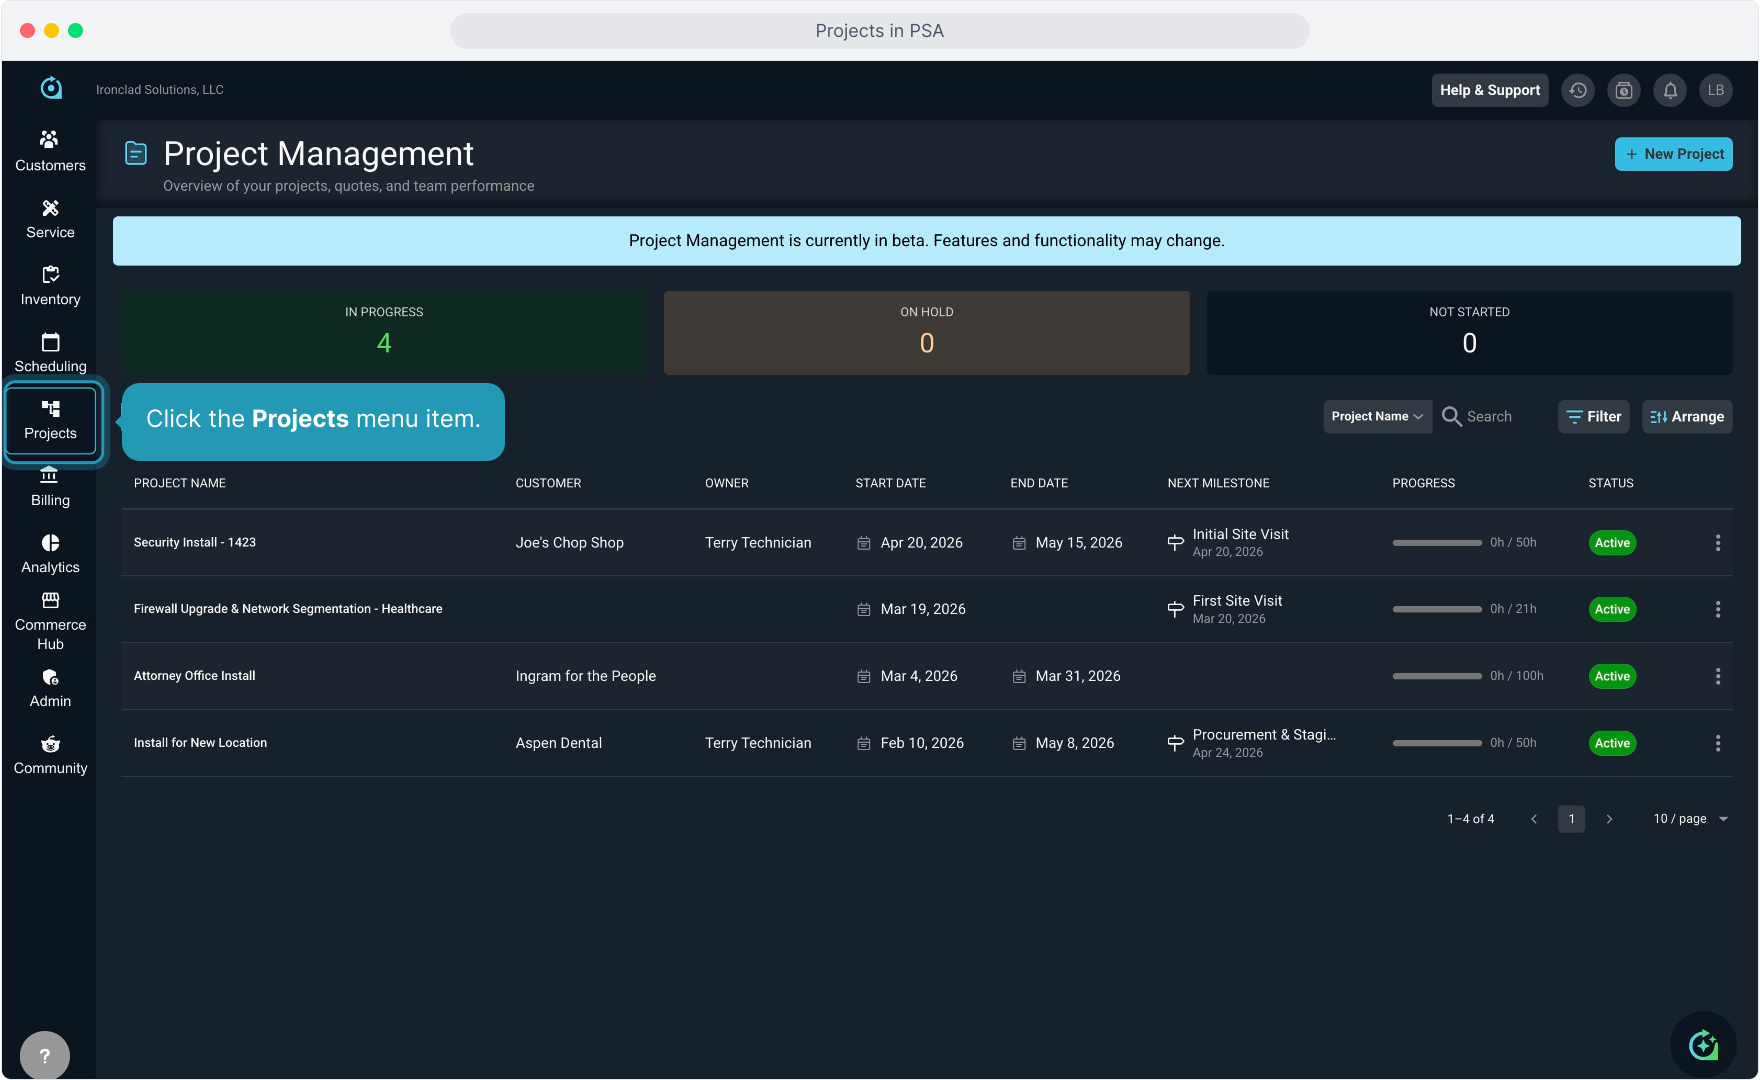
2. Click the Projects menu item.
3. The system defaults to showing All Projects, but you can slide to view My Projects as well.
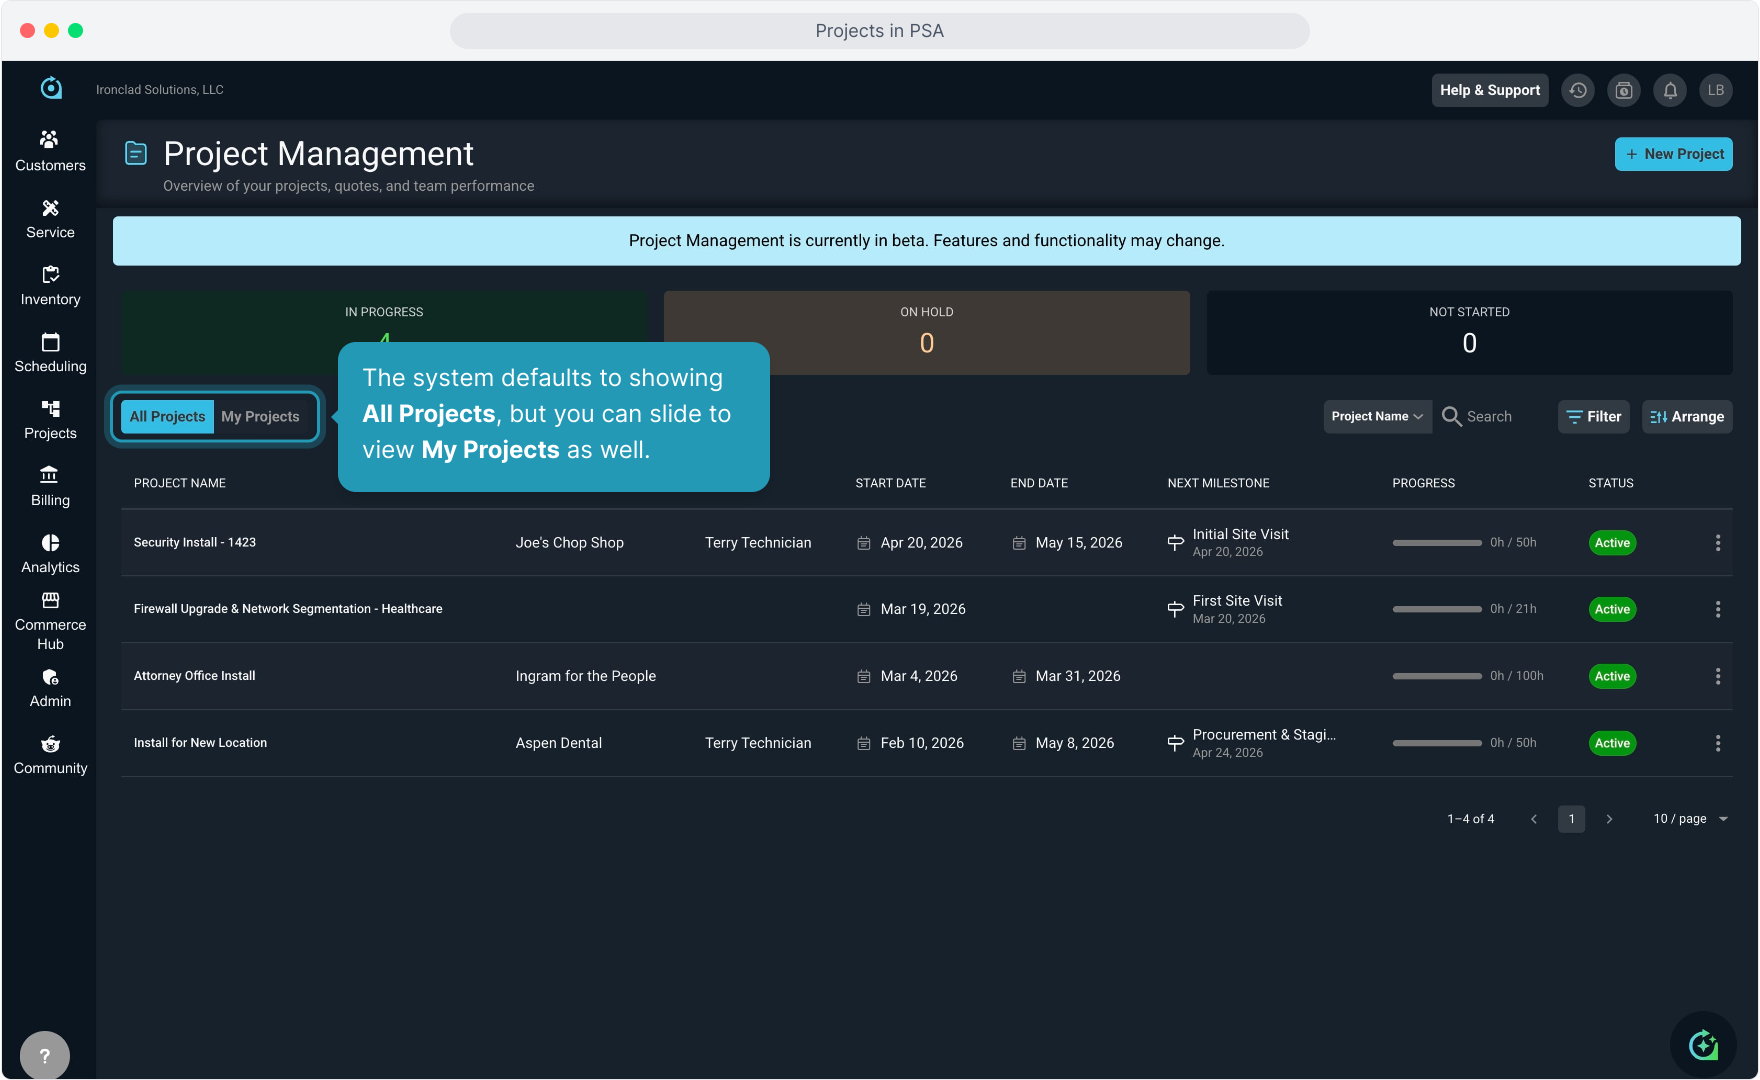
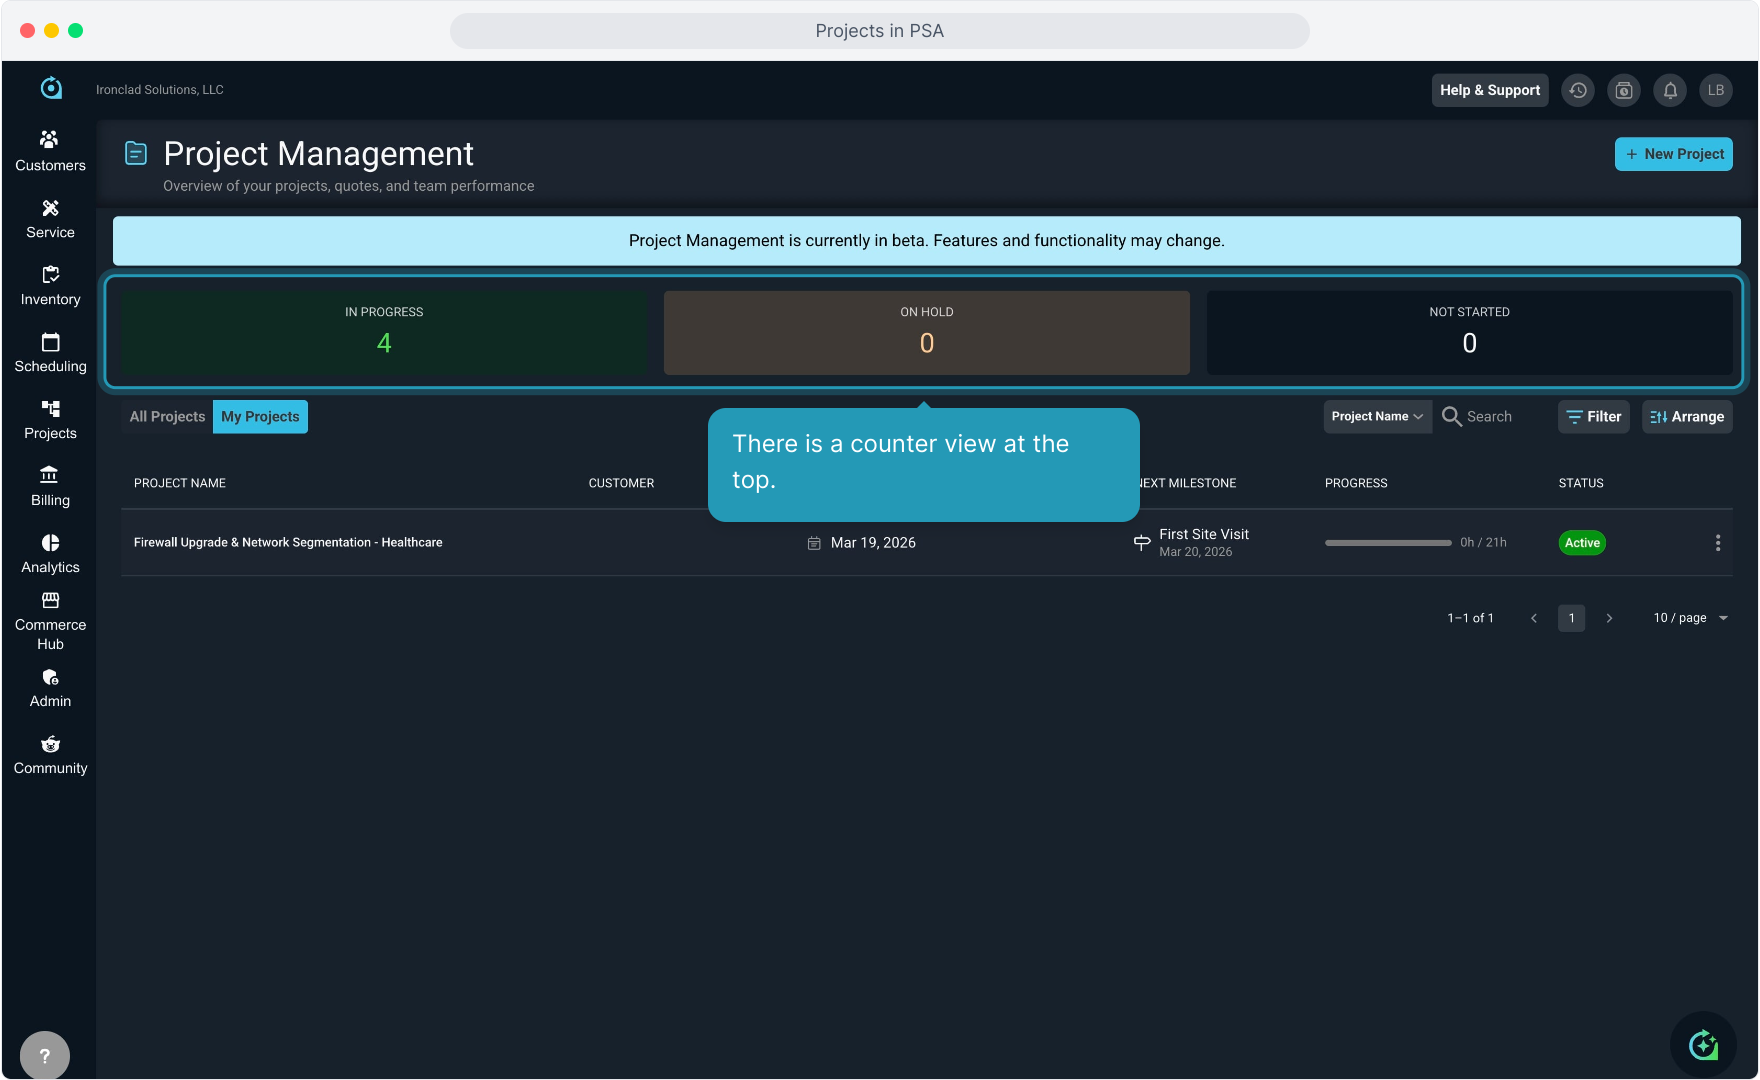
4. There is a counter view at the top.
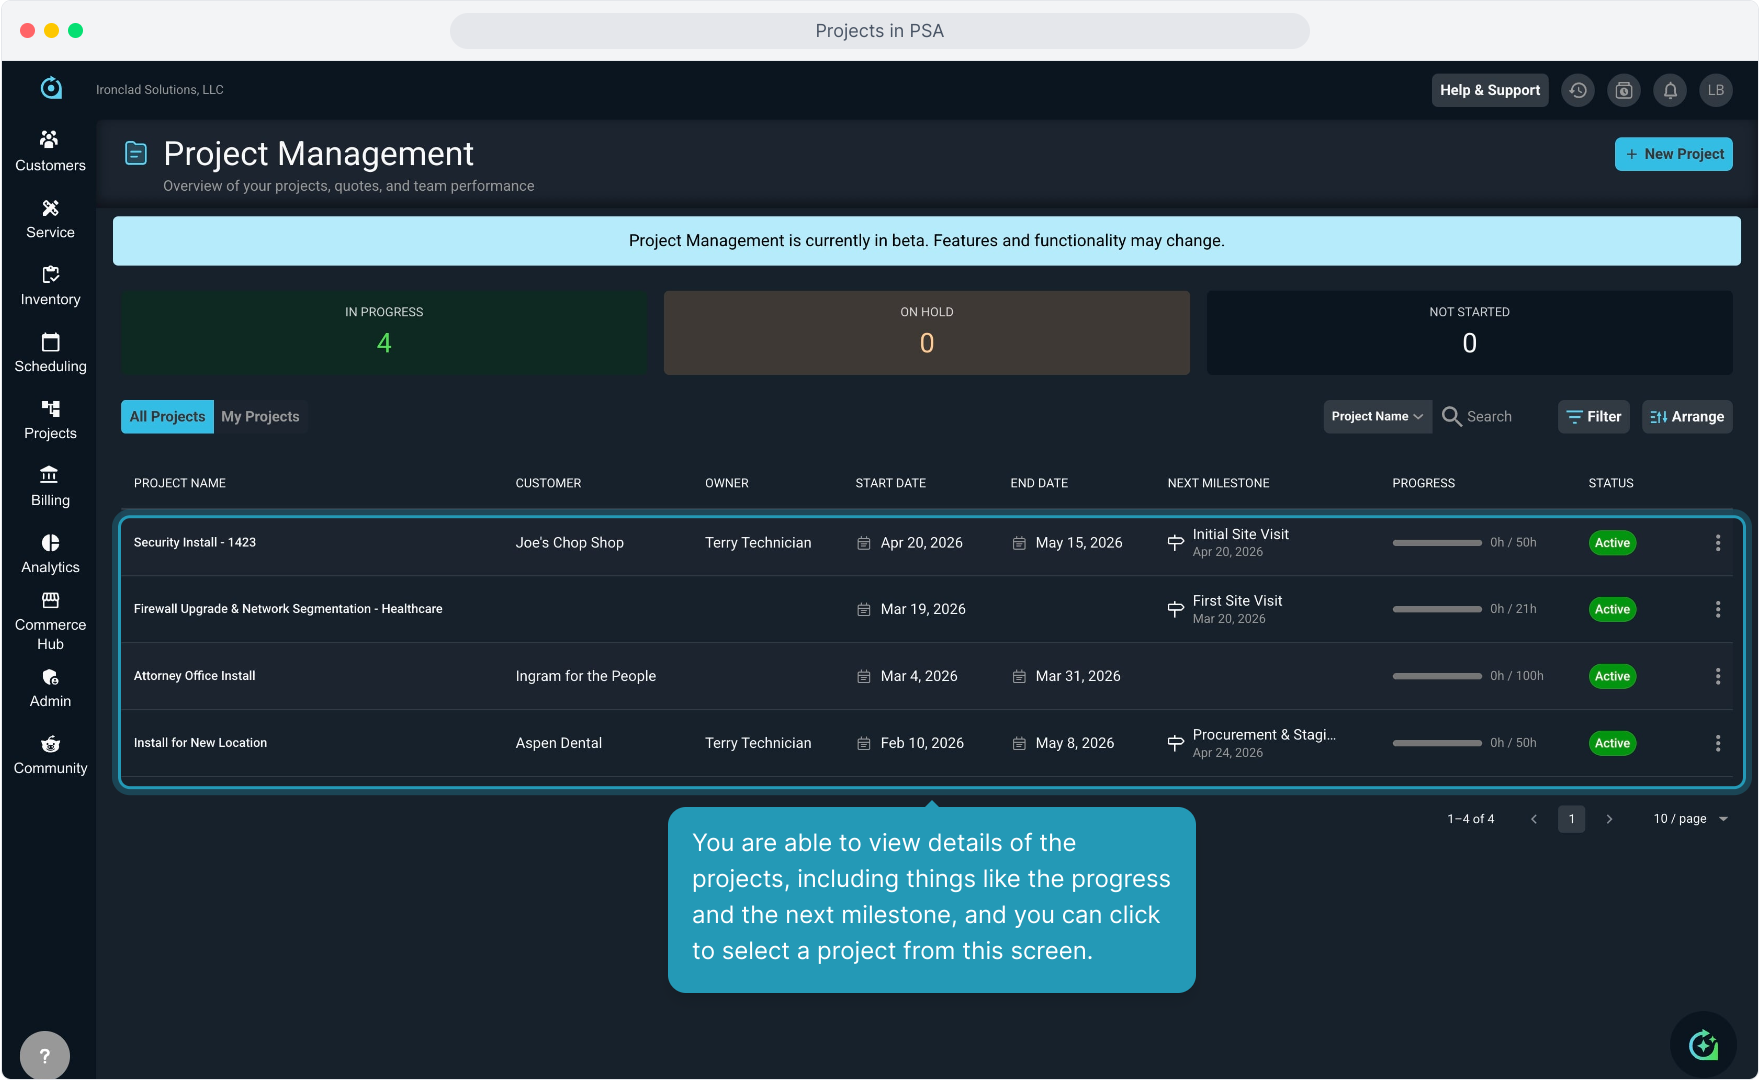
5. You are able to view details of the projects, including things like the progress and the next milestone, and you can click to select a project from this screen.
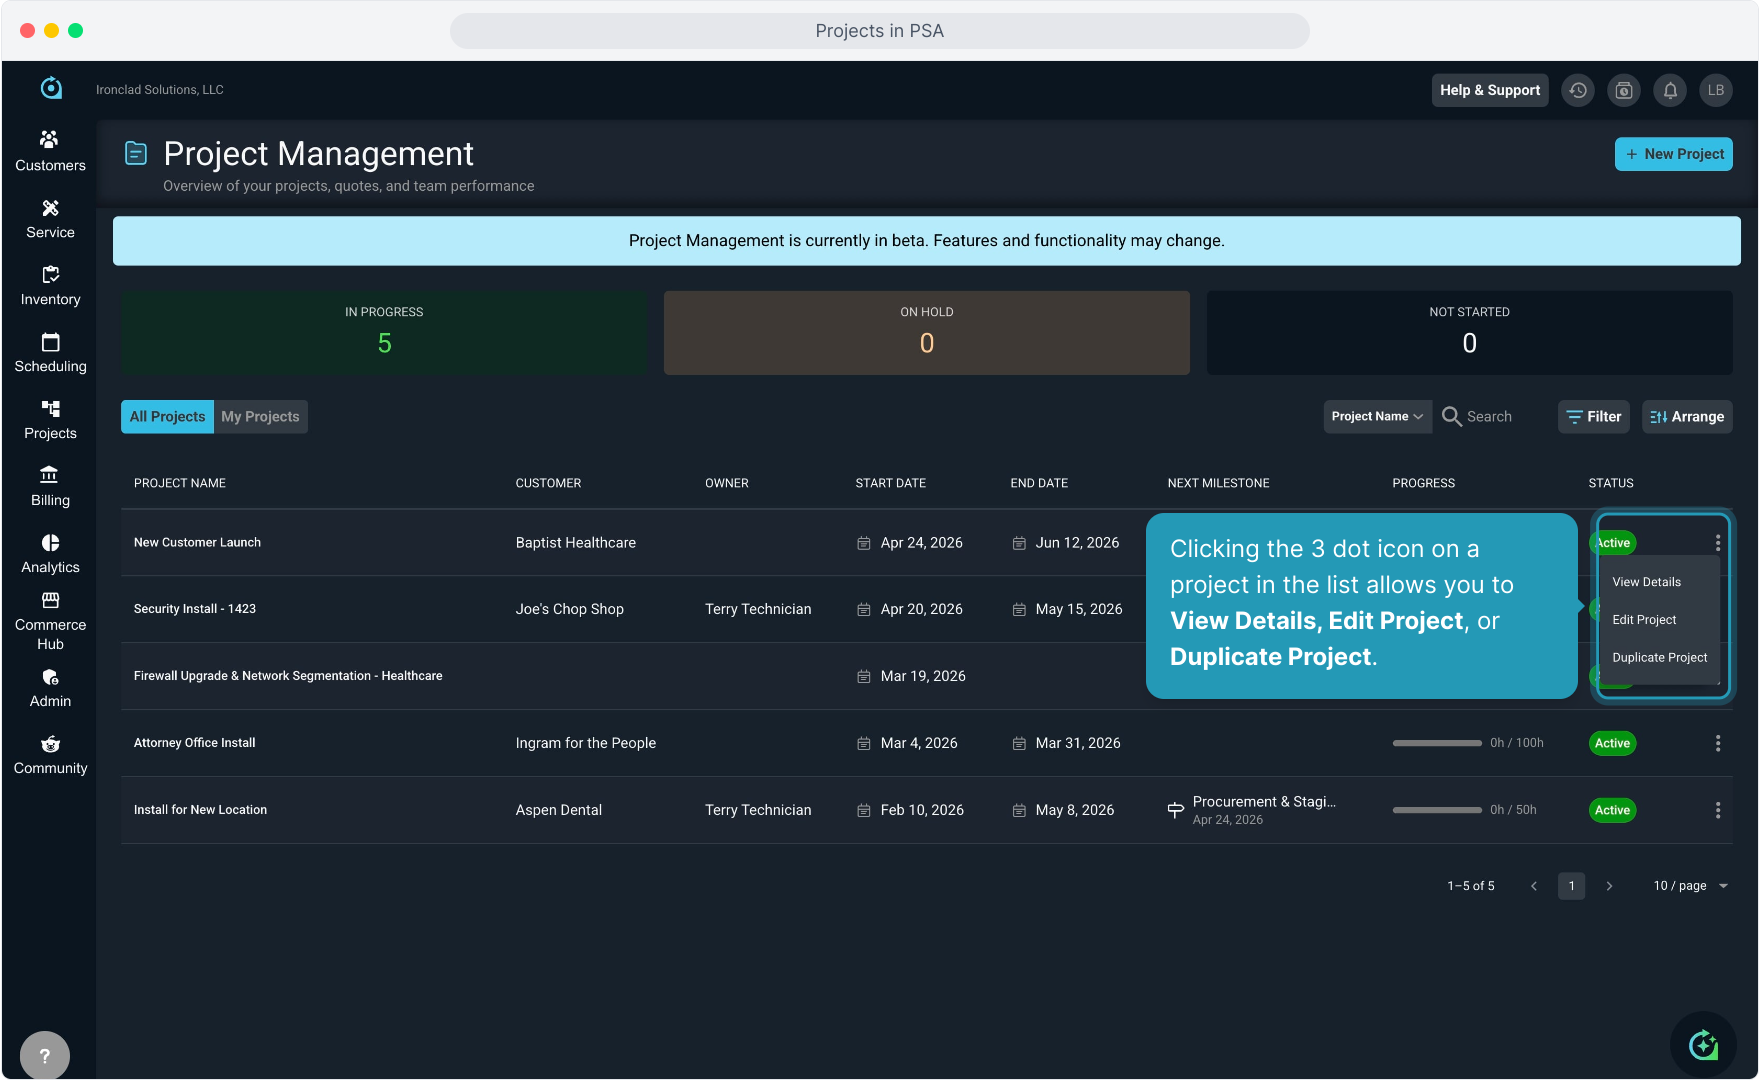
6. Clicking the 3 dot icon on a project in the list allows you to View Details, Edit Project, or Duplicate Project.
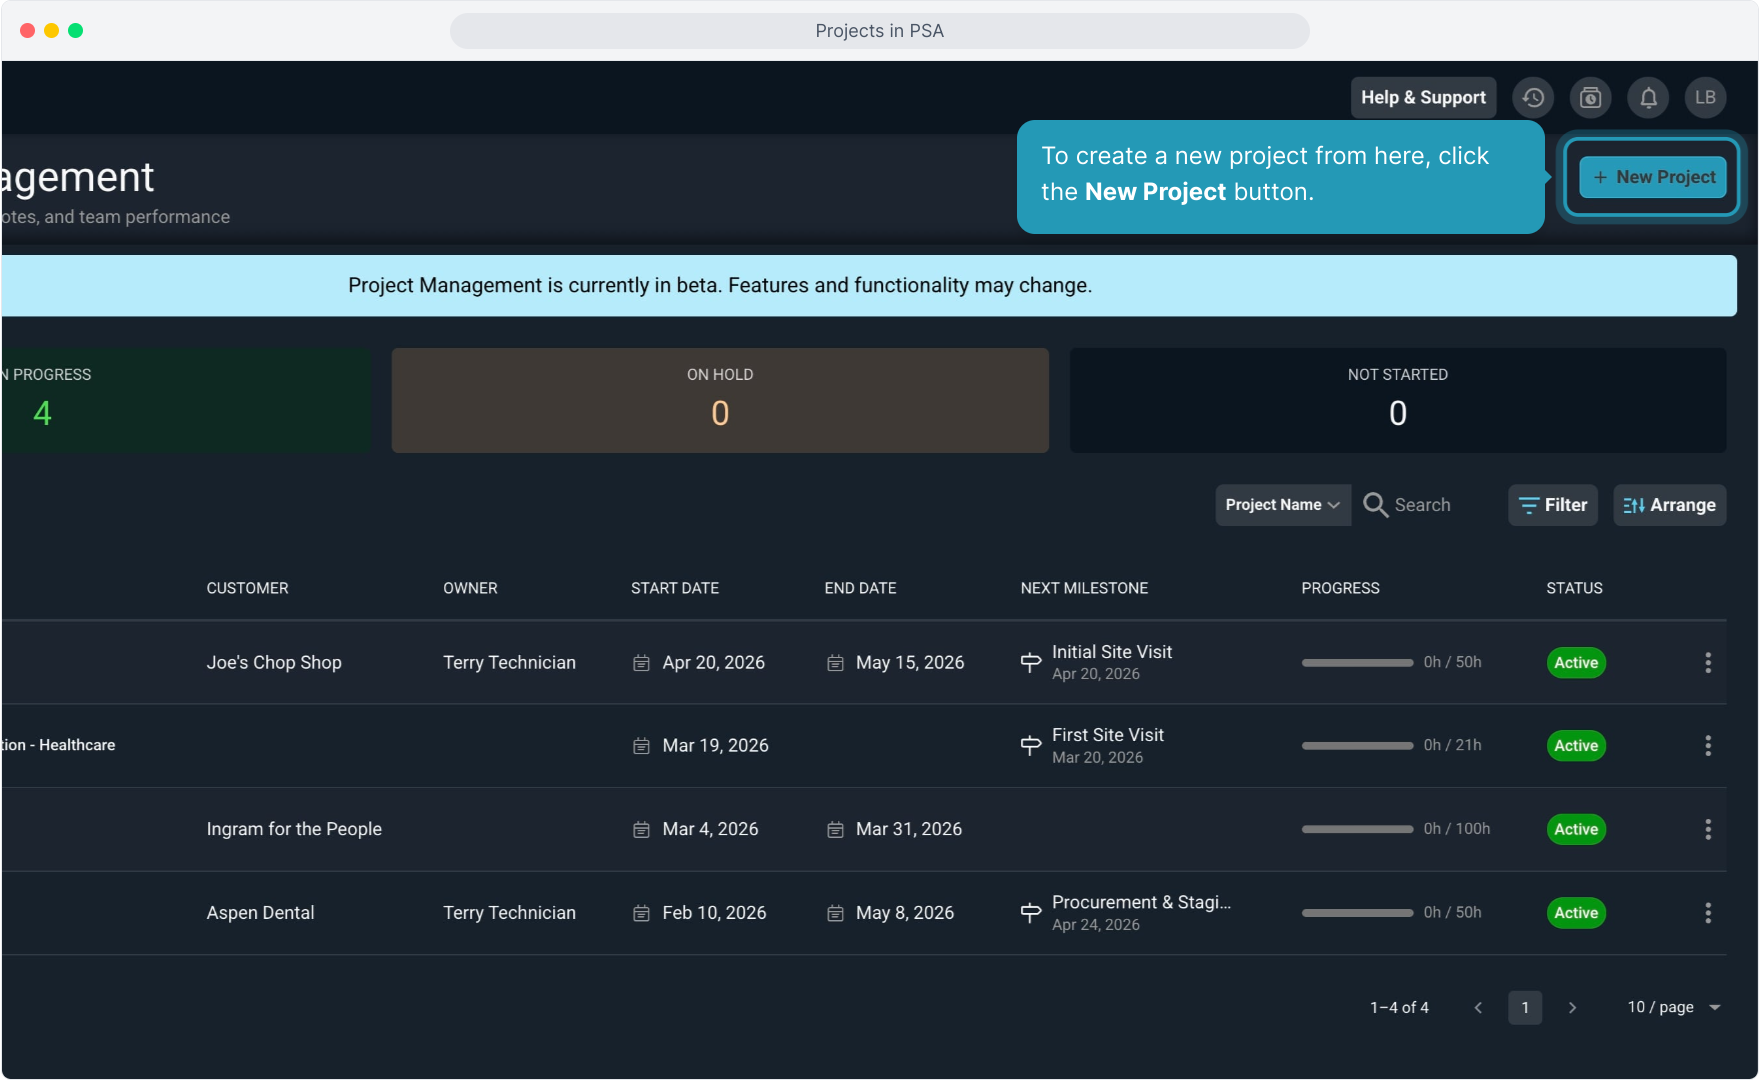
7. To create a new project from here, click the New Project button.
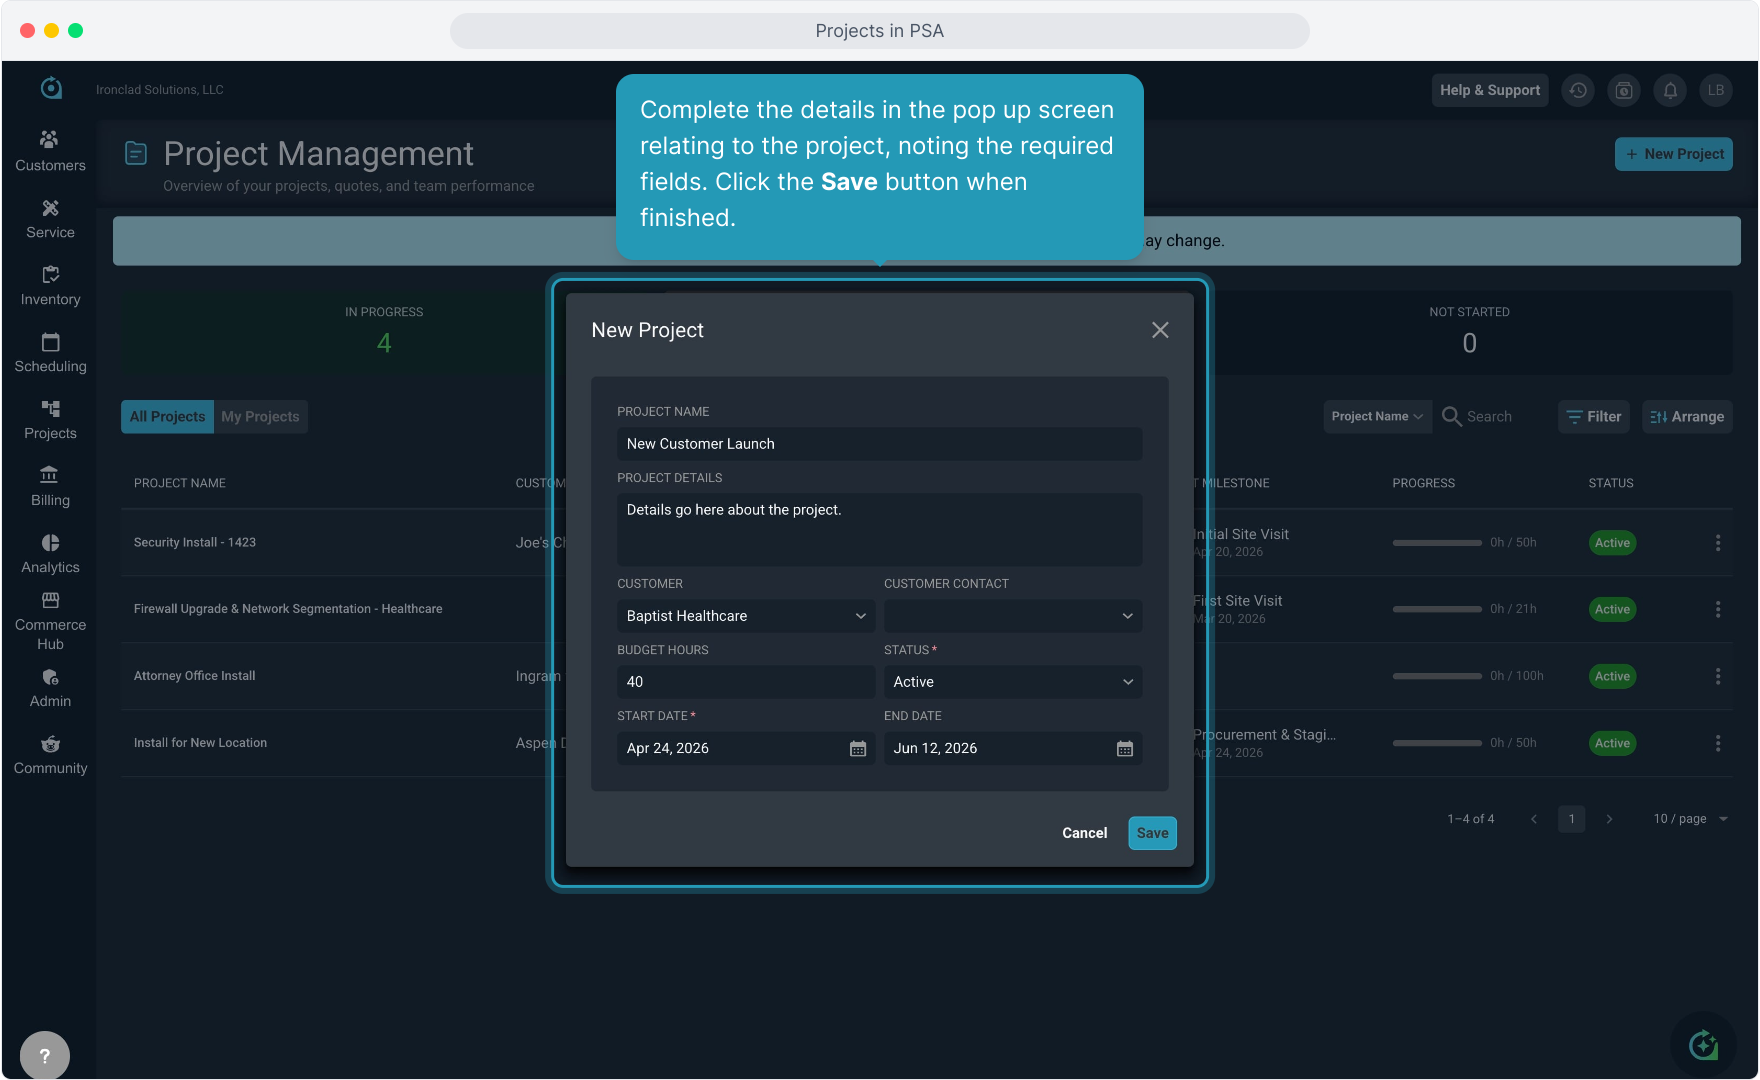
8. Complete the details in the pop up screen relating to the project, noting the required fields. Click the Save button when finished.
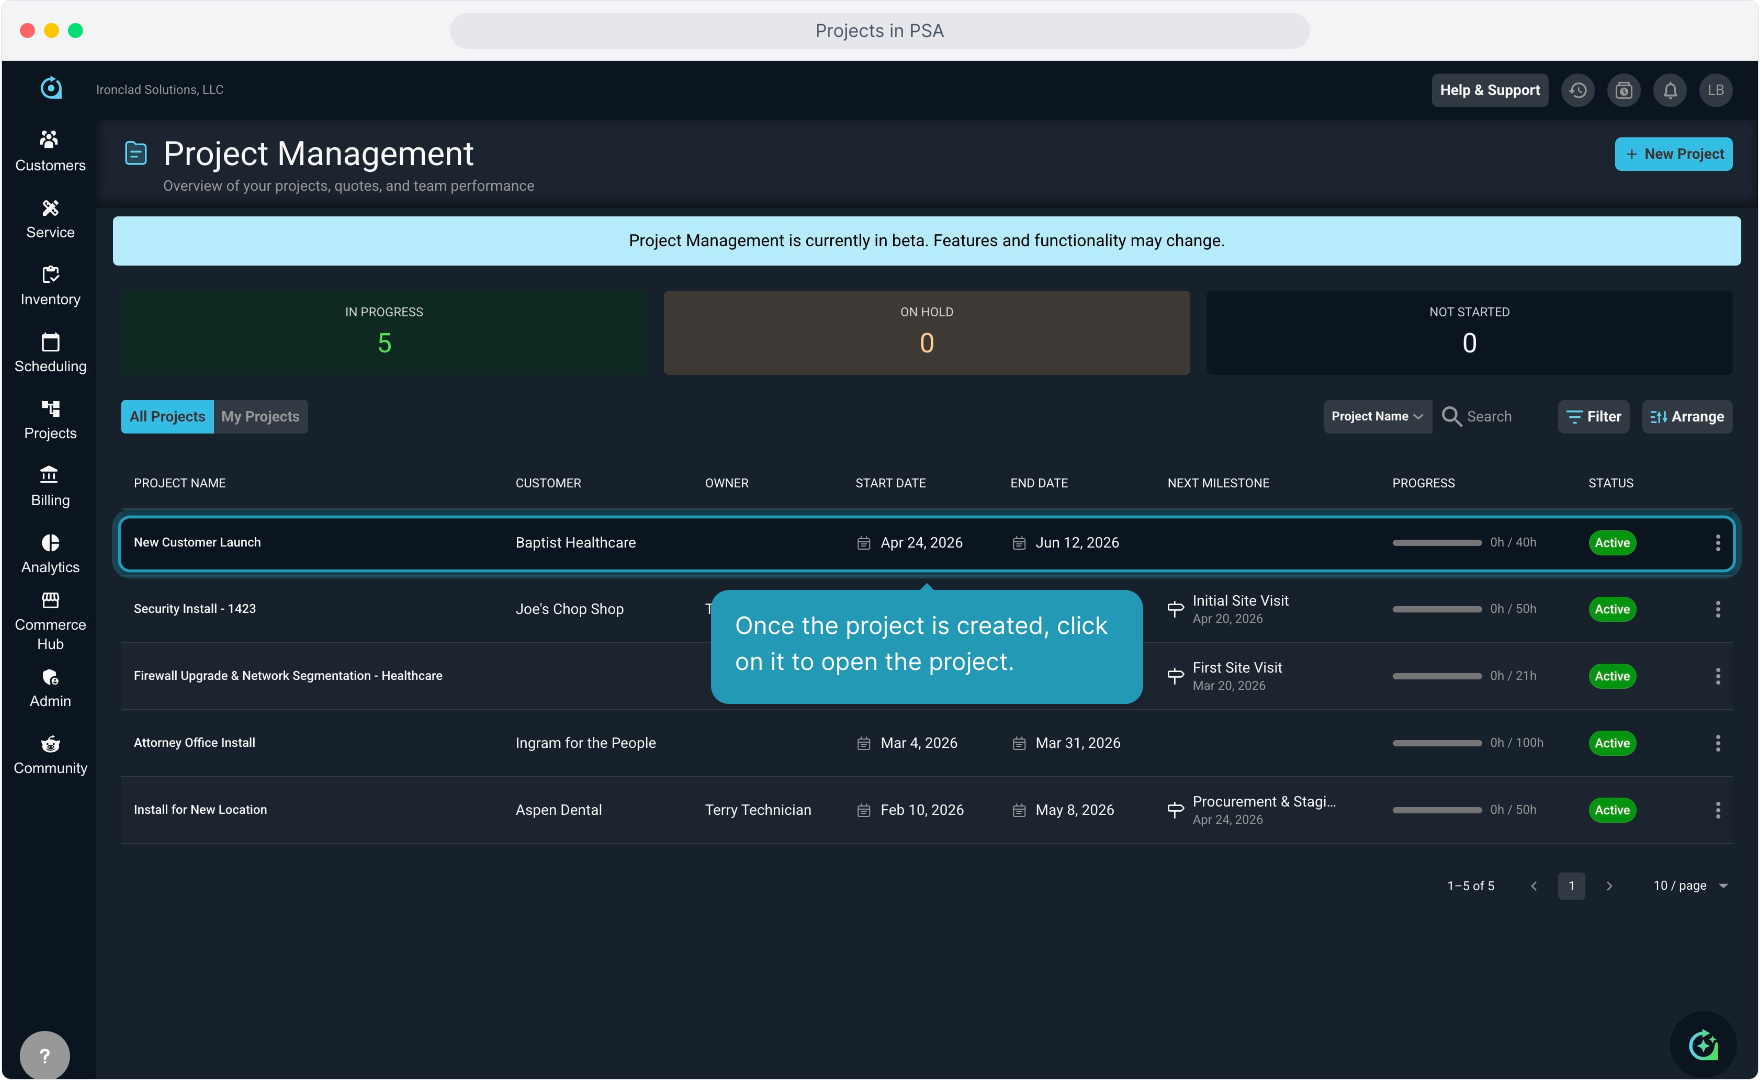
9. Once the project is created, click on it to open the project.
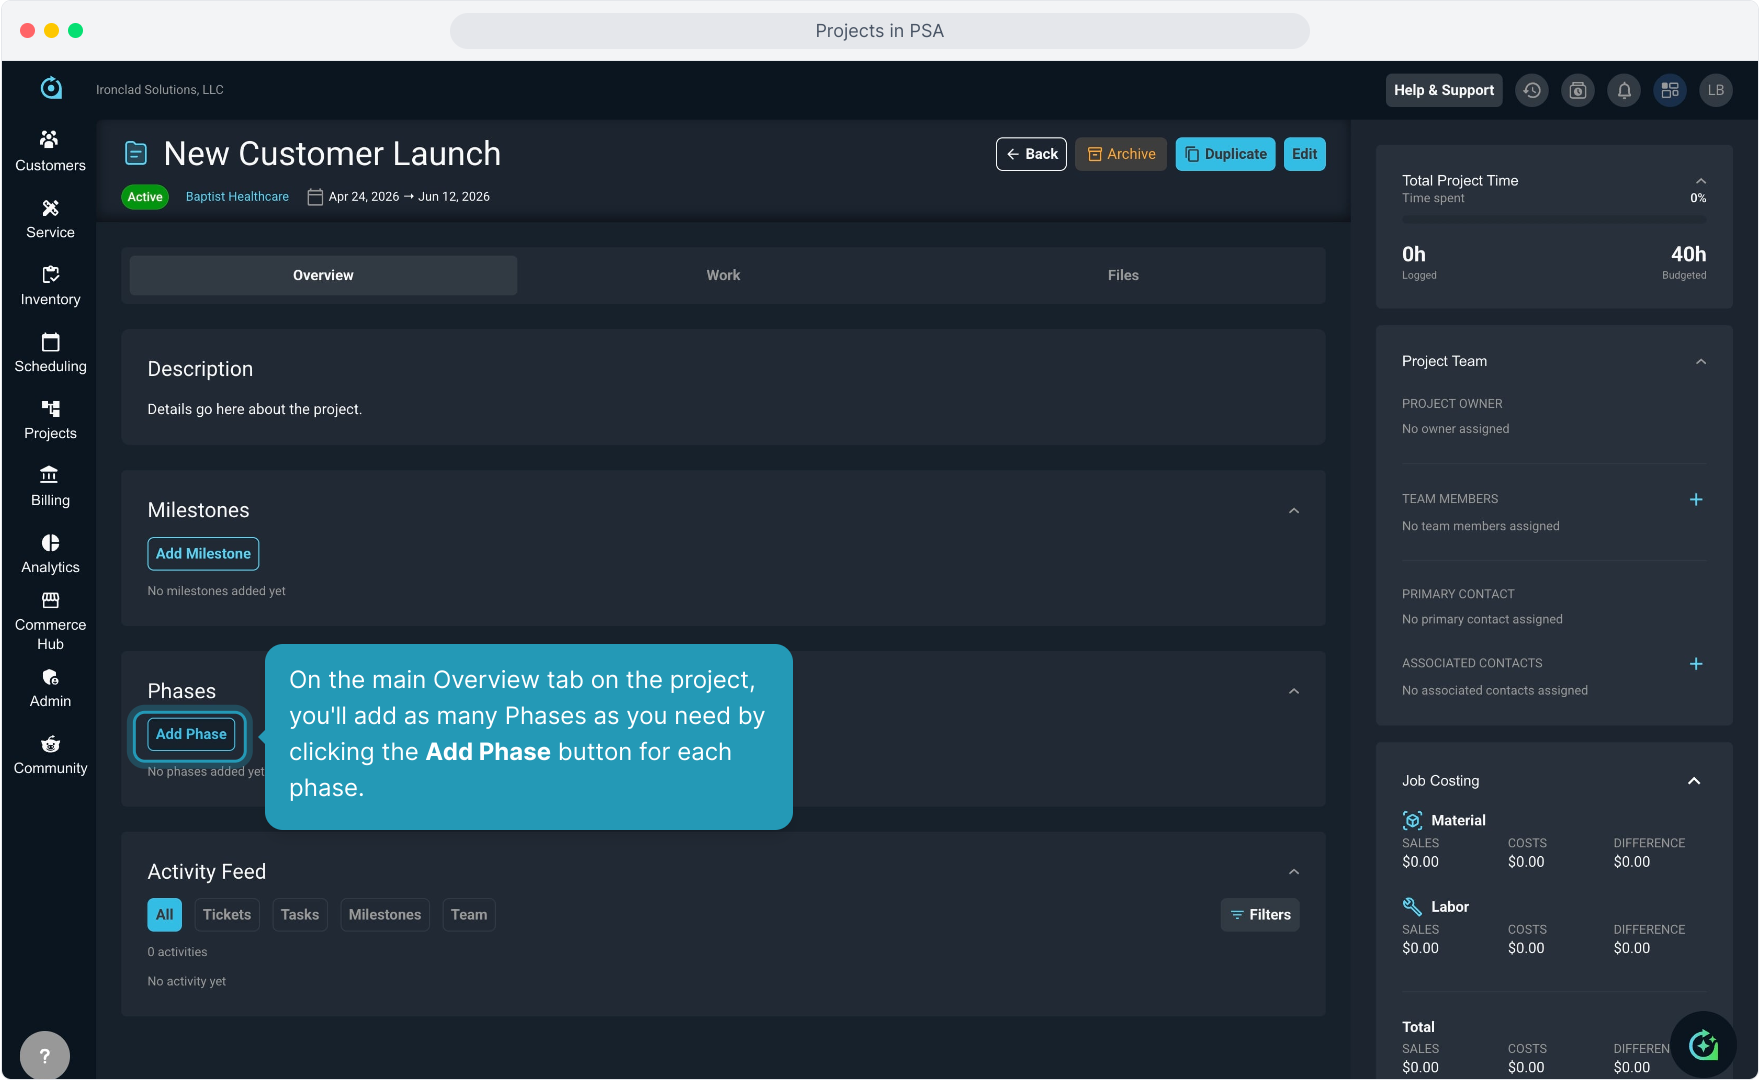
10. On the main Overview tab on the project, you'll add as many Phases as you need by clicking the Add Phase button for each phase.
11. Complete the information about the phase and click the Create Phase button.

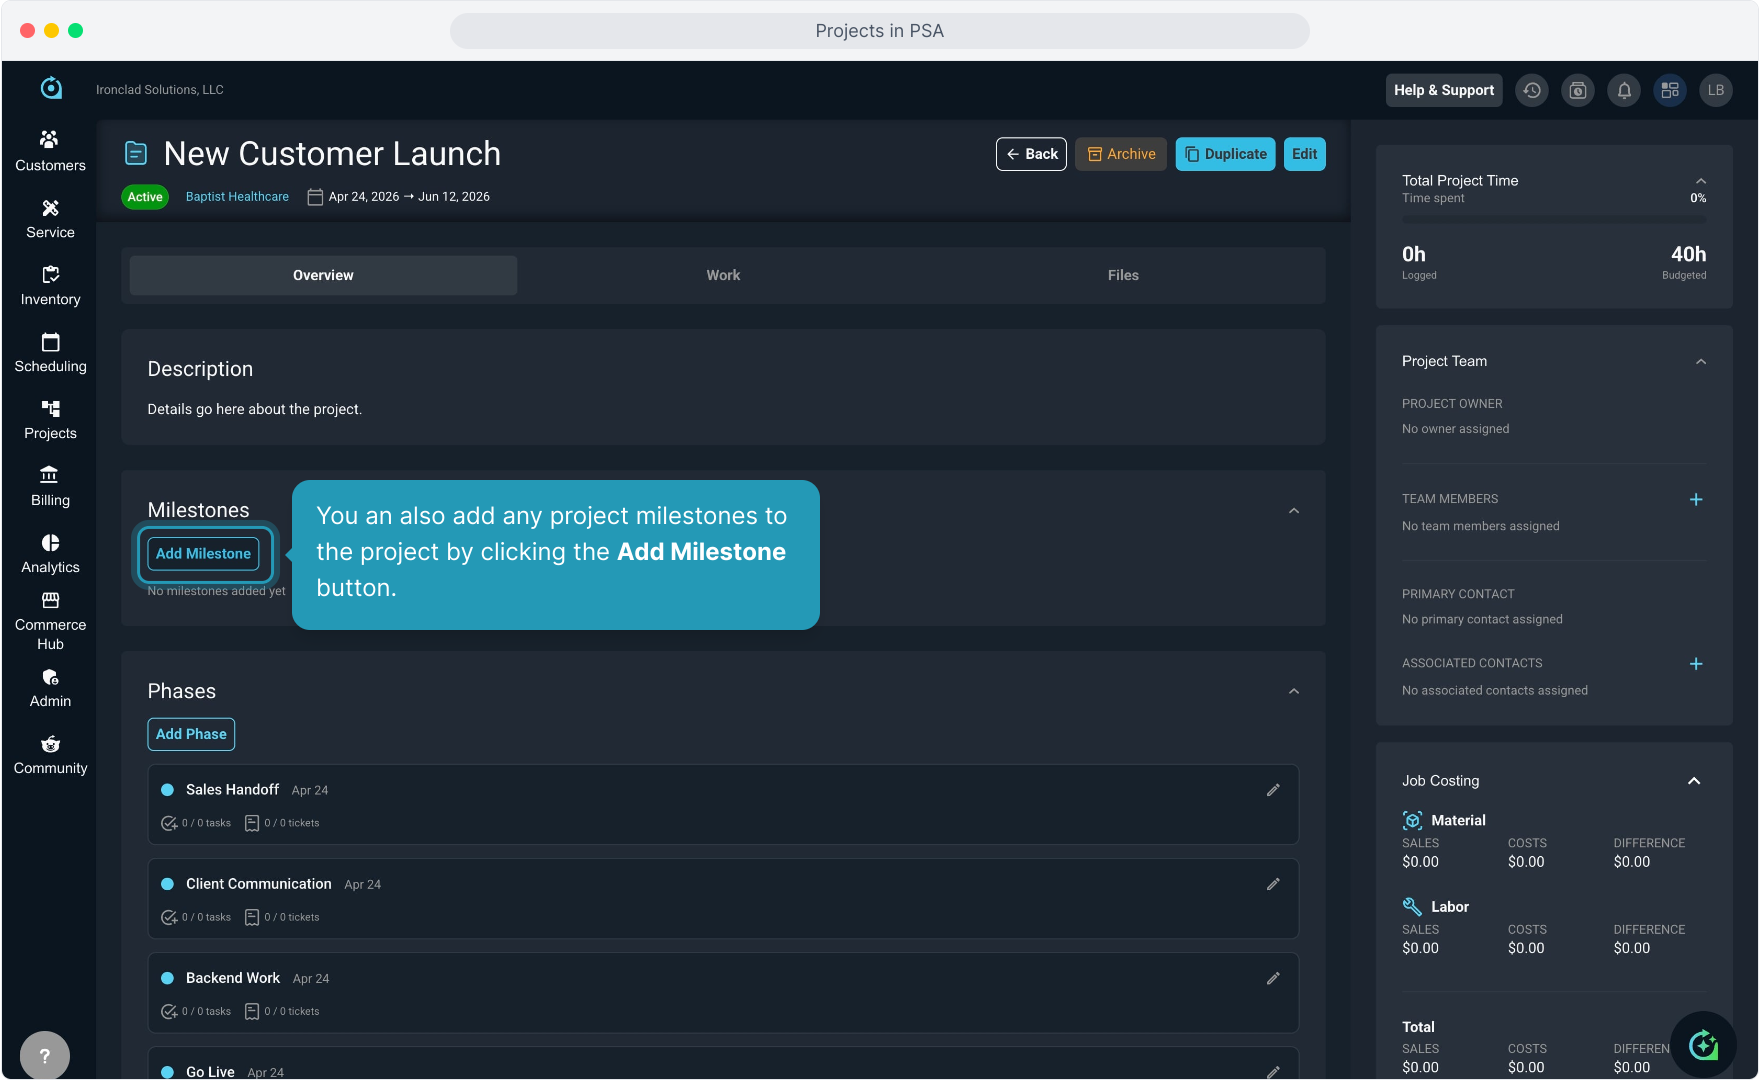
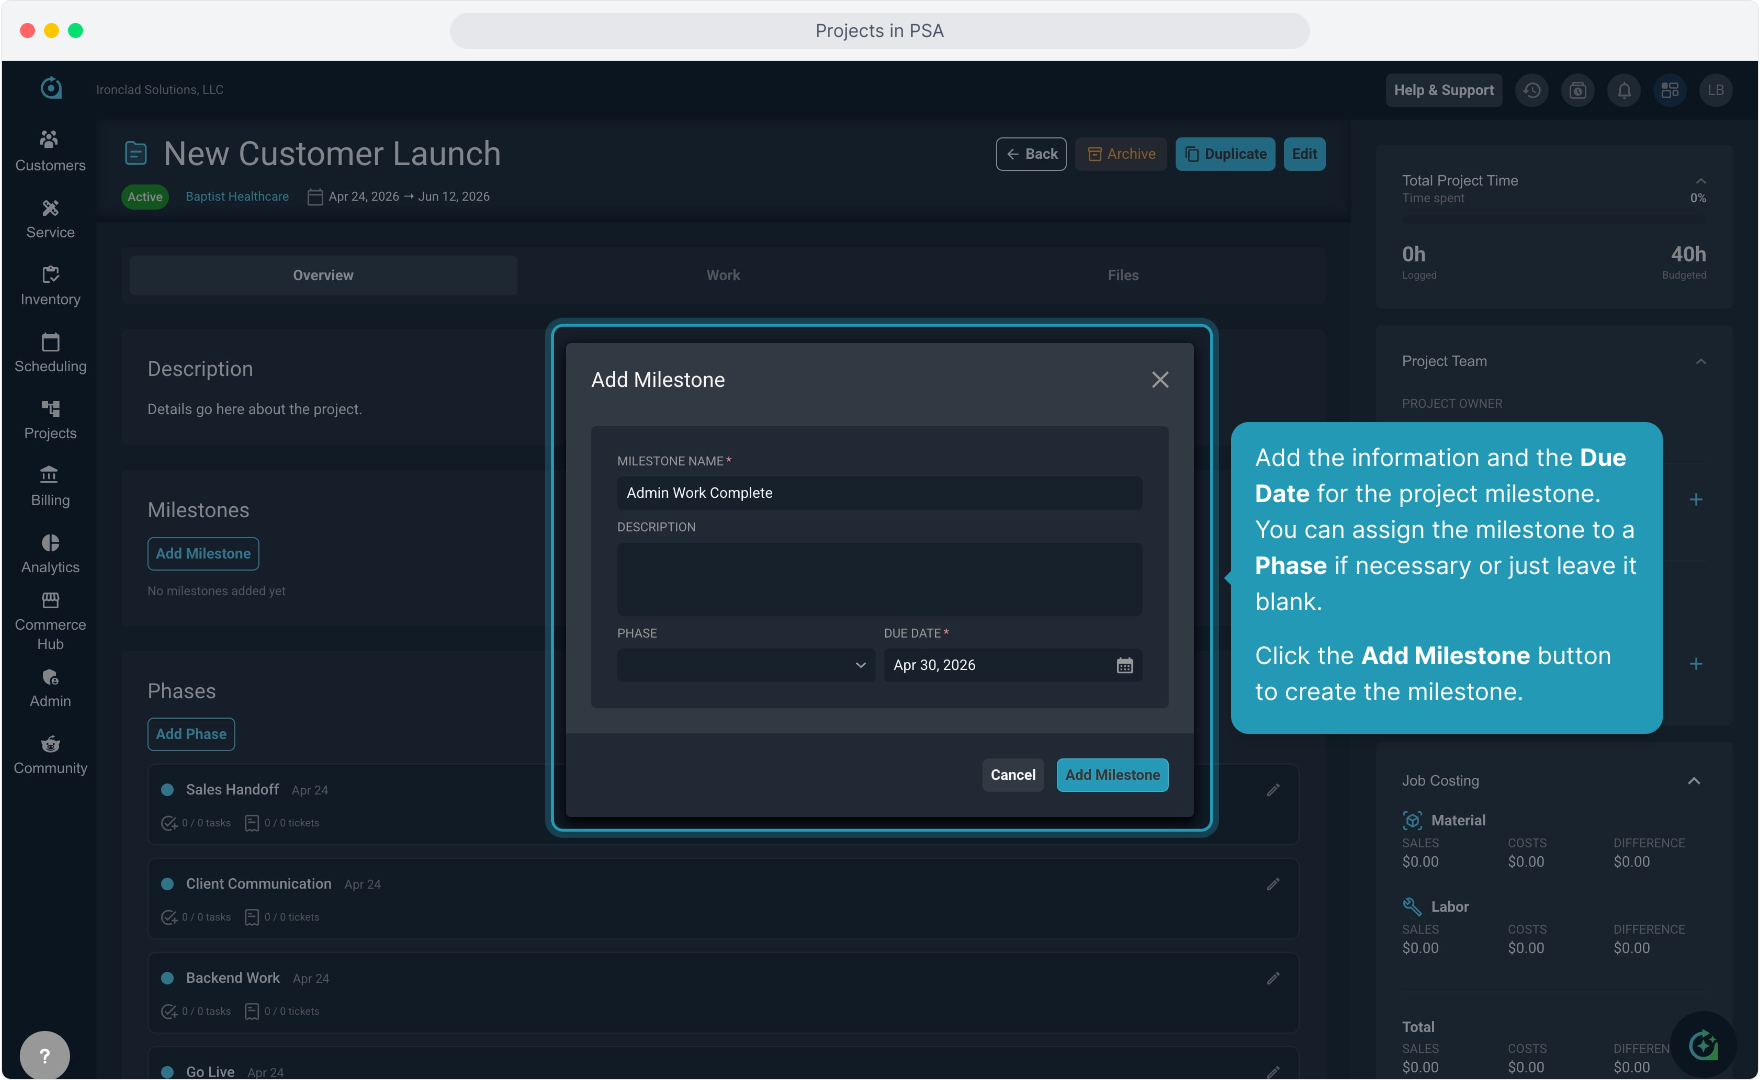
12. You an also add any project milestones to the project by clicking the Add Milestone button.
13. Add the information and the Due Date for the project milestone. You can assign the milestone to a Phase if necessary or just leave it blank.
Click the Add Milestone button to create the milestone.
14. The Activity Feed section allows you to view all project activities and updates.

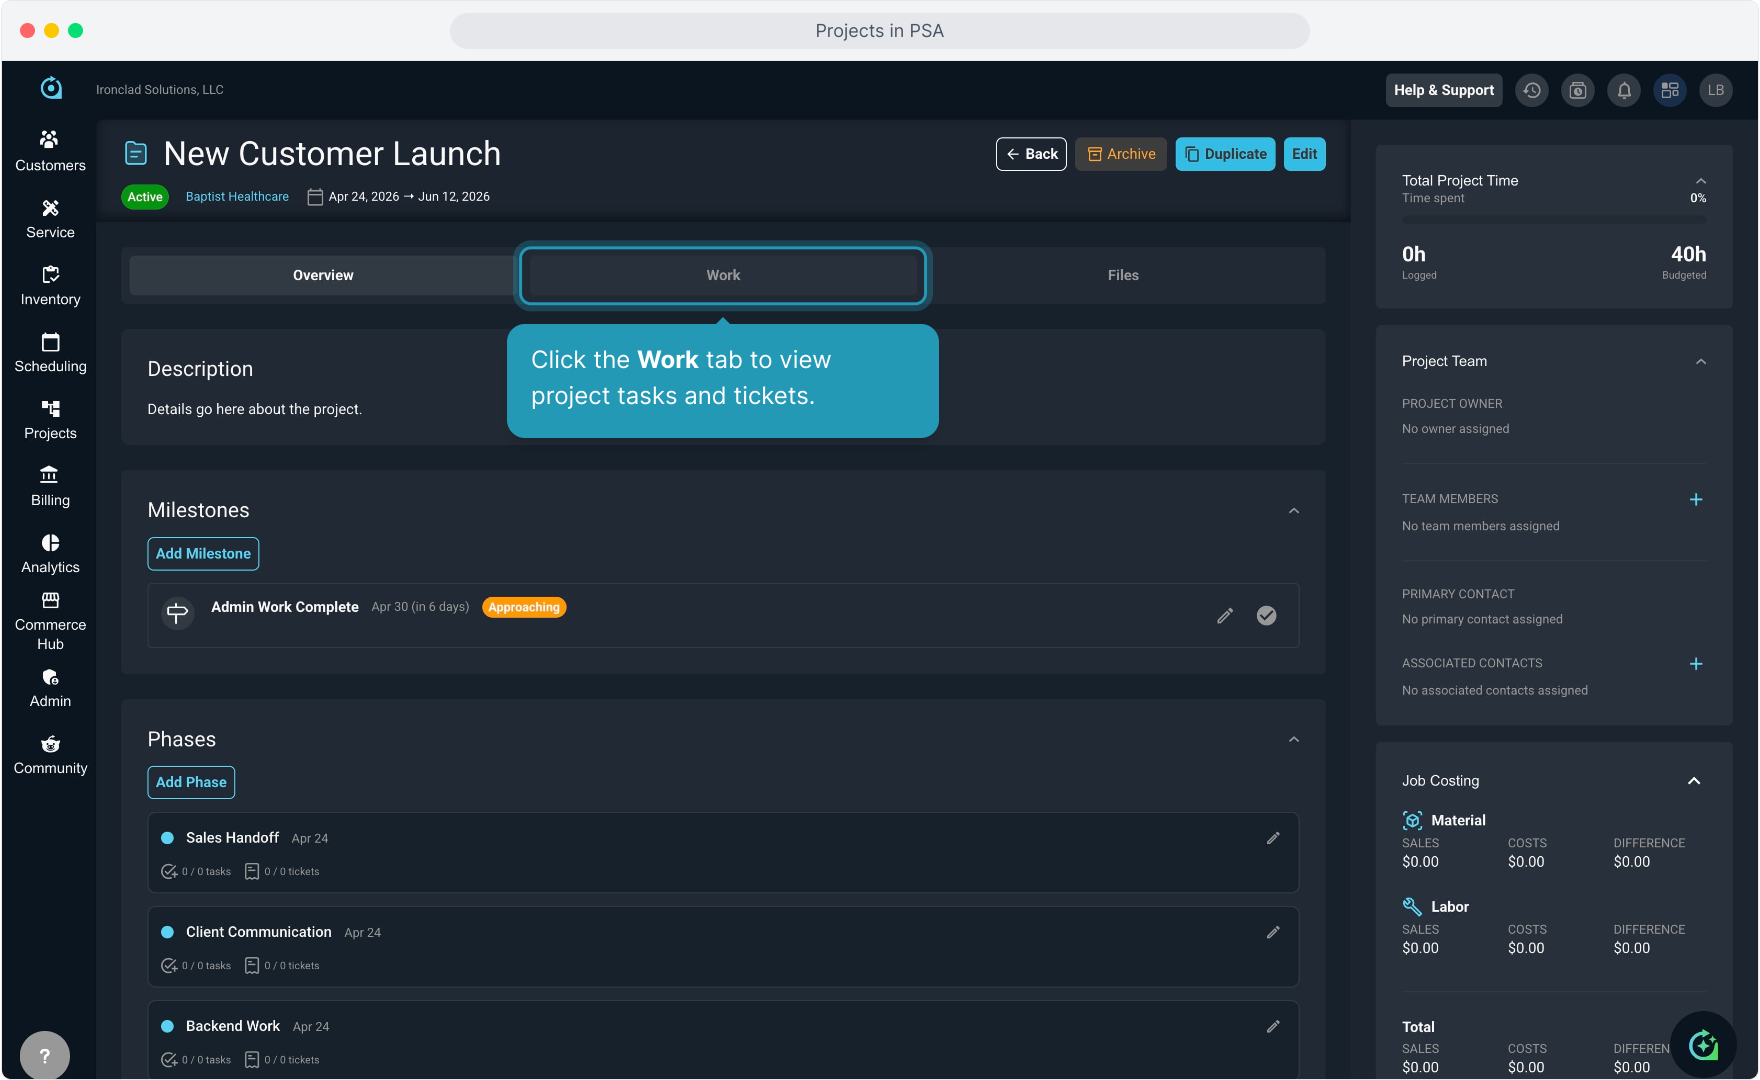
15. Click the Work tab to view project tasks and tickets.
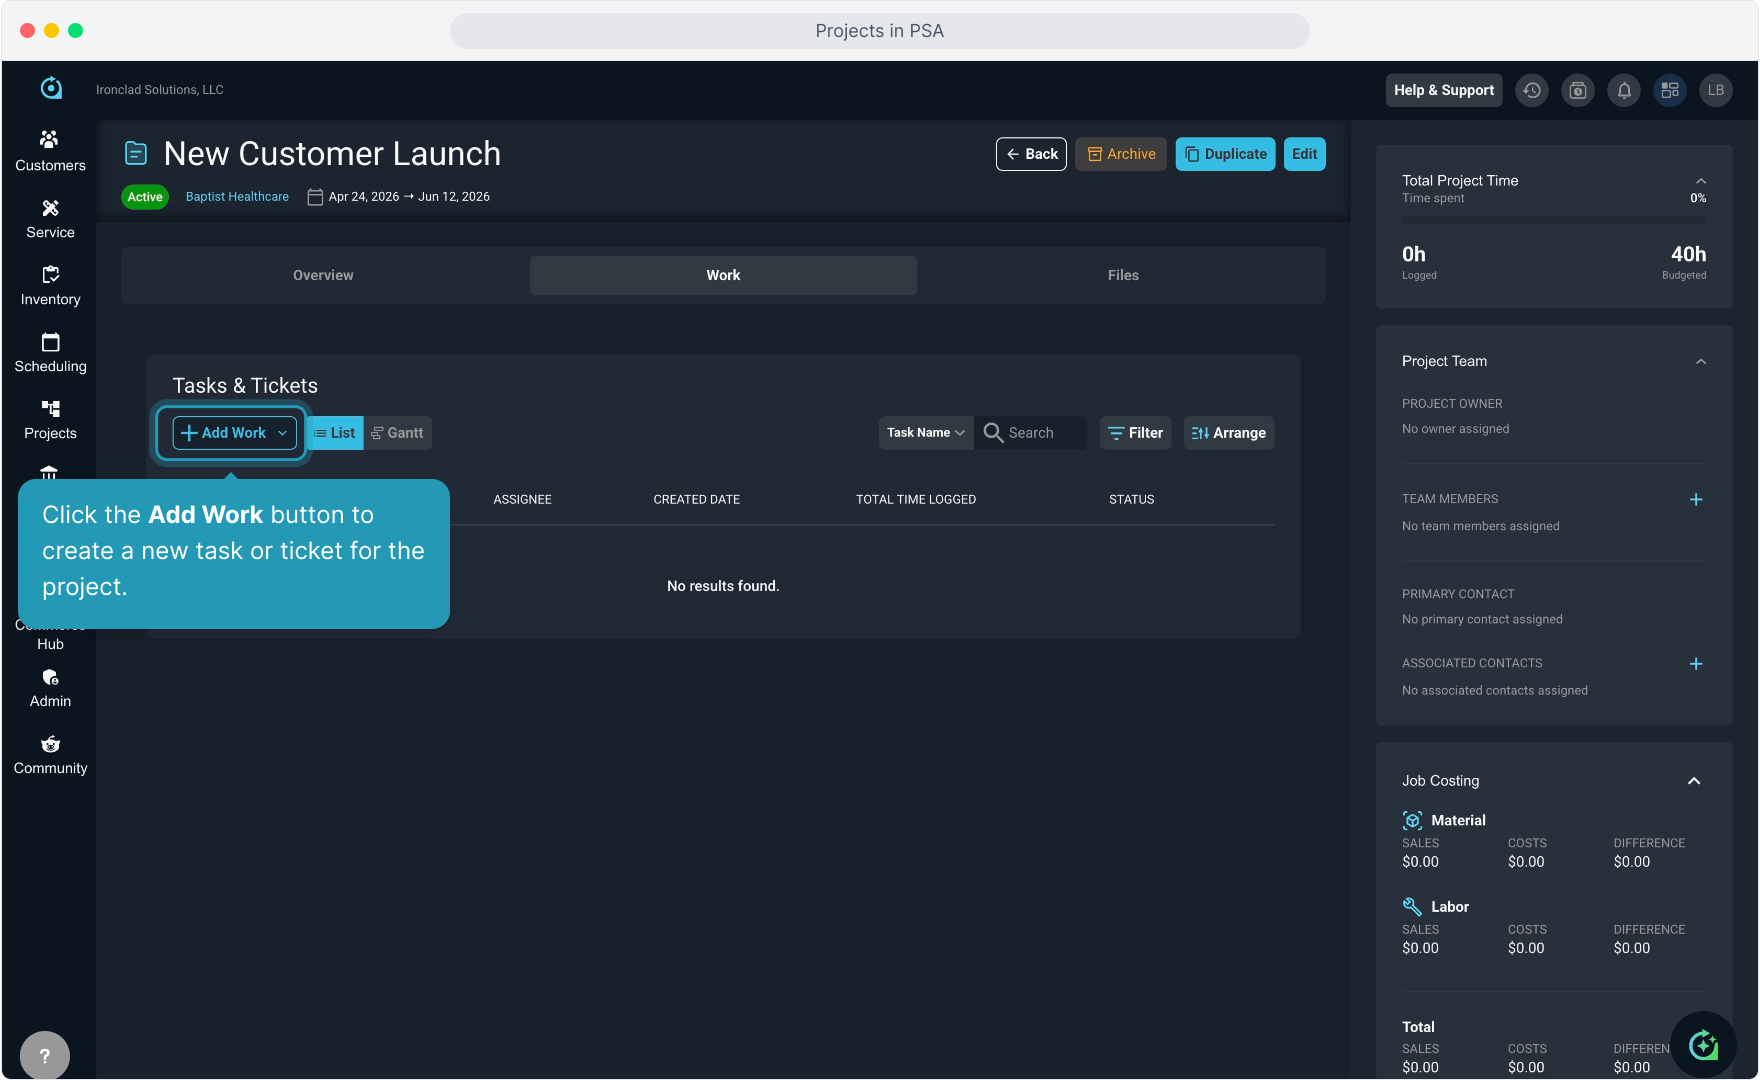
16. Click the Add Work button to create a new task or ticket for the project.
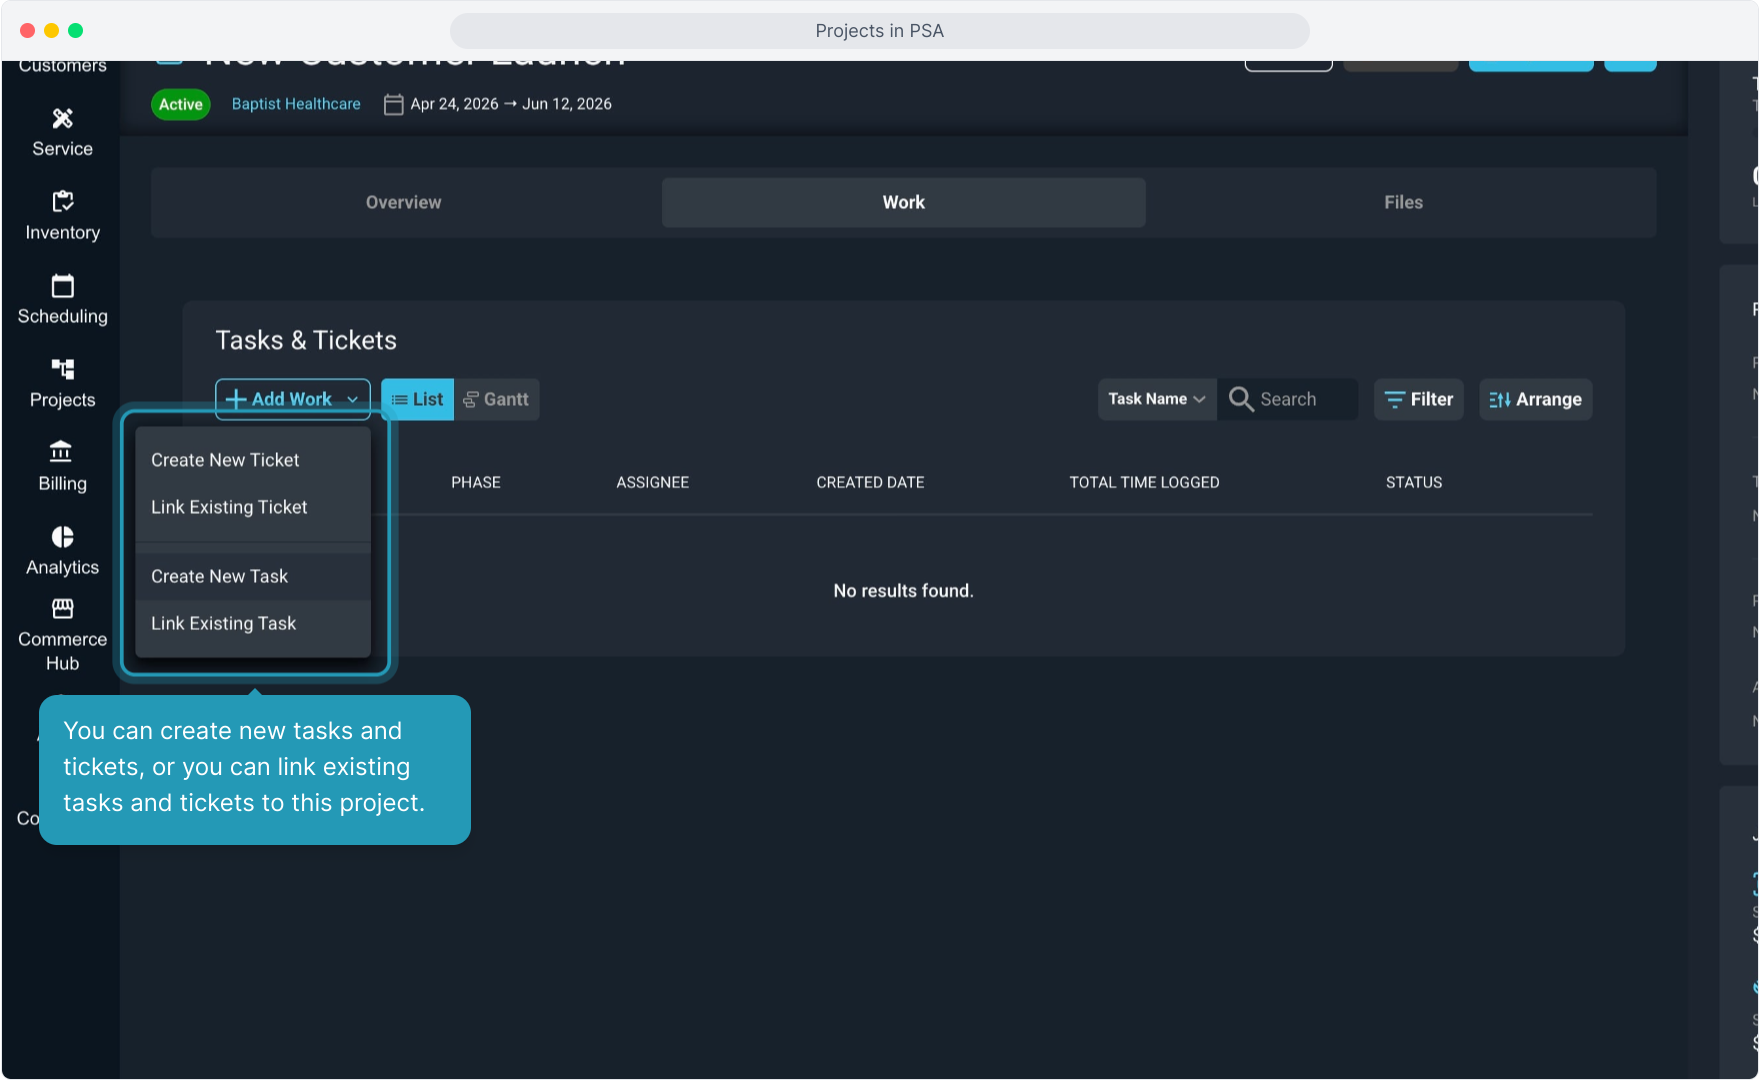
17. You can create new tasks and tickets, or you can link existing tasks and tickets to this project.
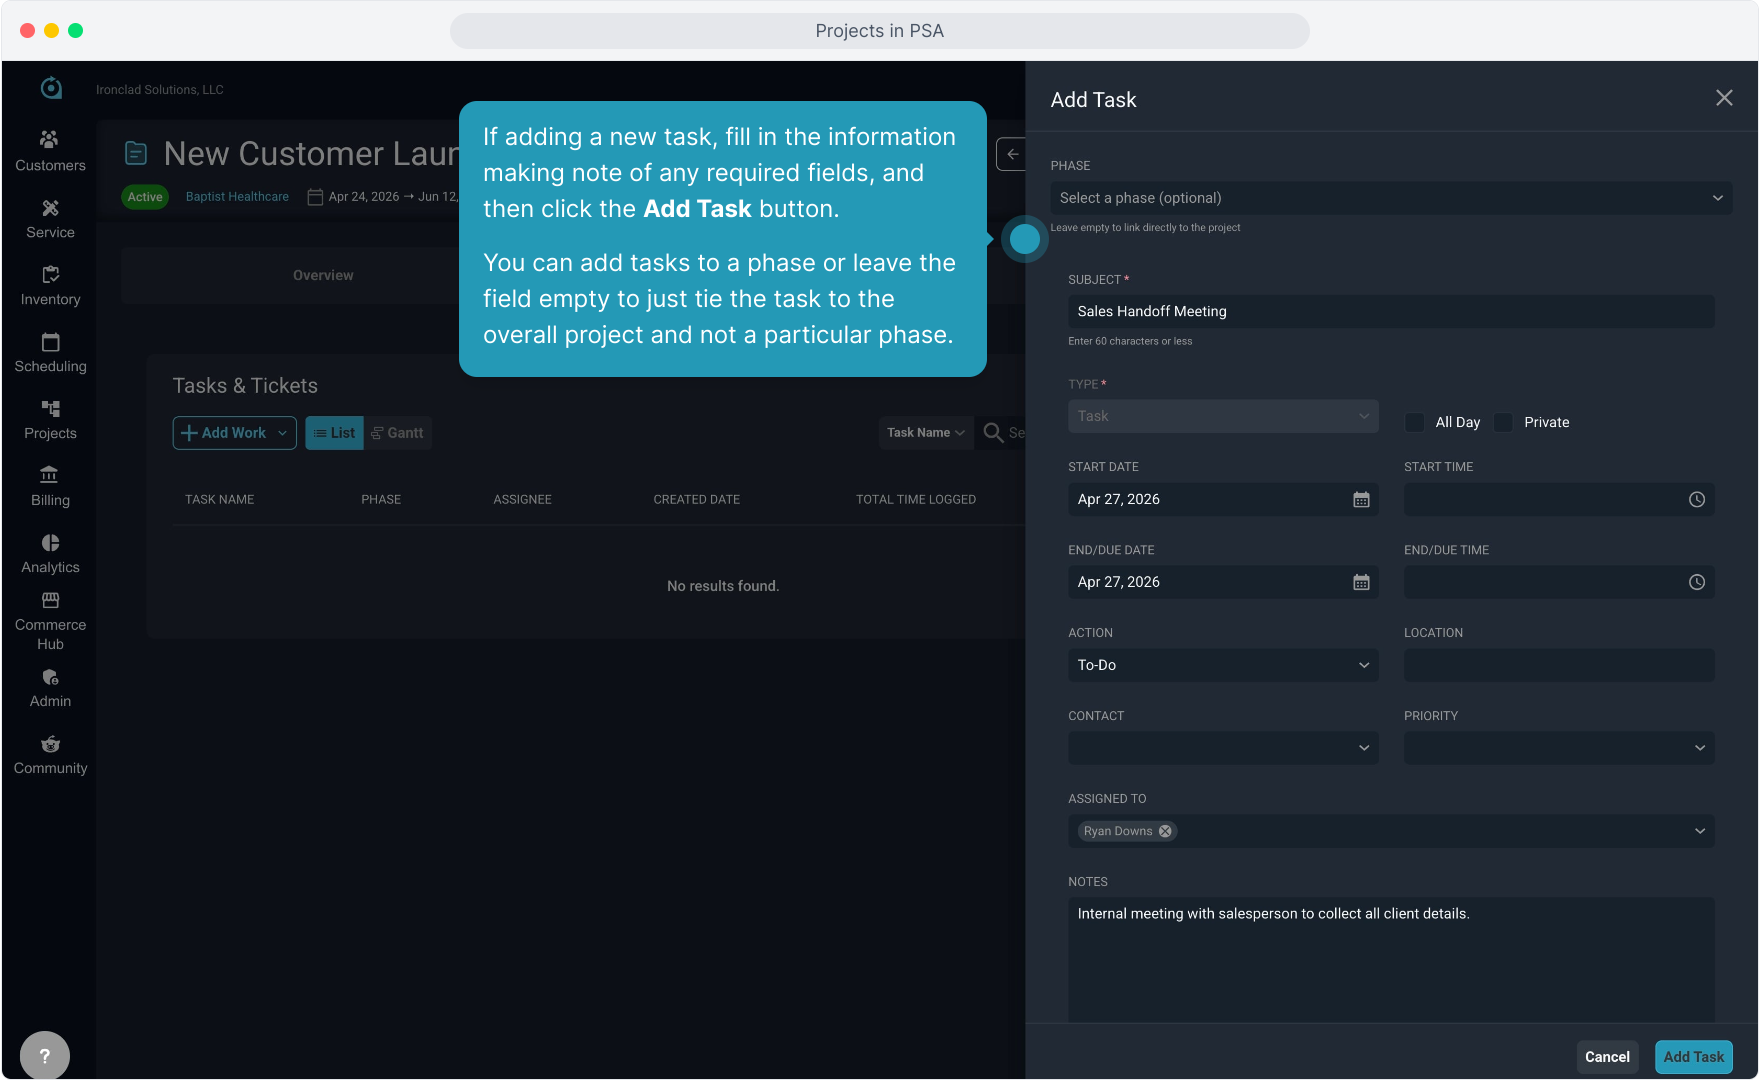
18. If adding a new task, fill in the information making note of any required fields, and then click the Add Task button.
You can add tasks to a phase or leave the field empty to just tie the task to the overall project and not a particular phase.
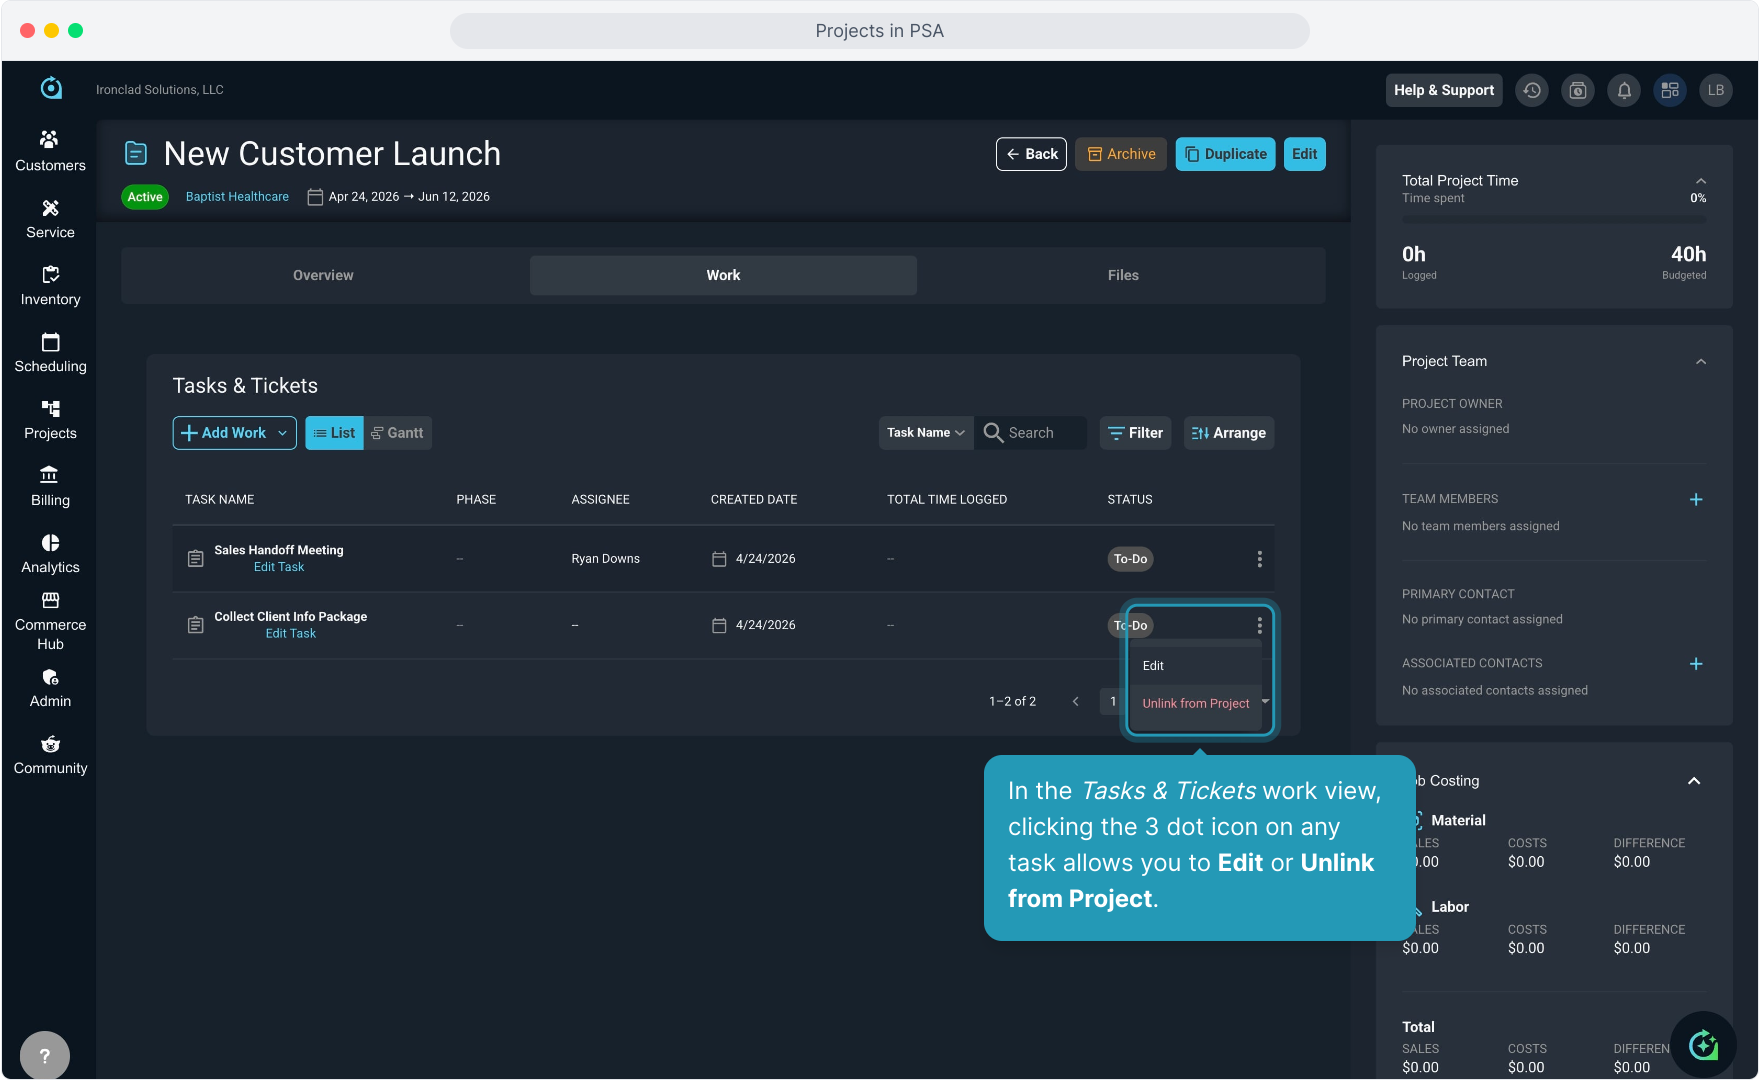
19. In the Tasks & Tickets work view, clicking the 3 dot icon on any task allows you to Edit or Unlink from Project.
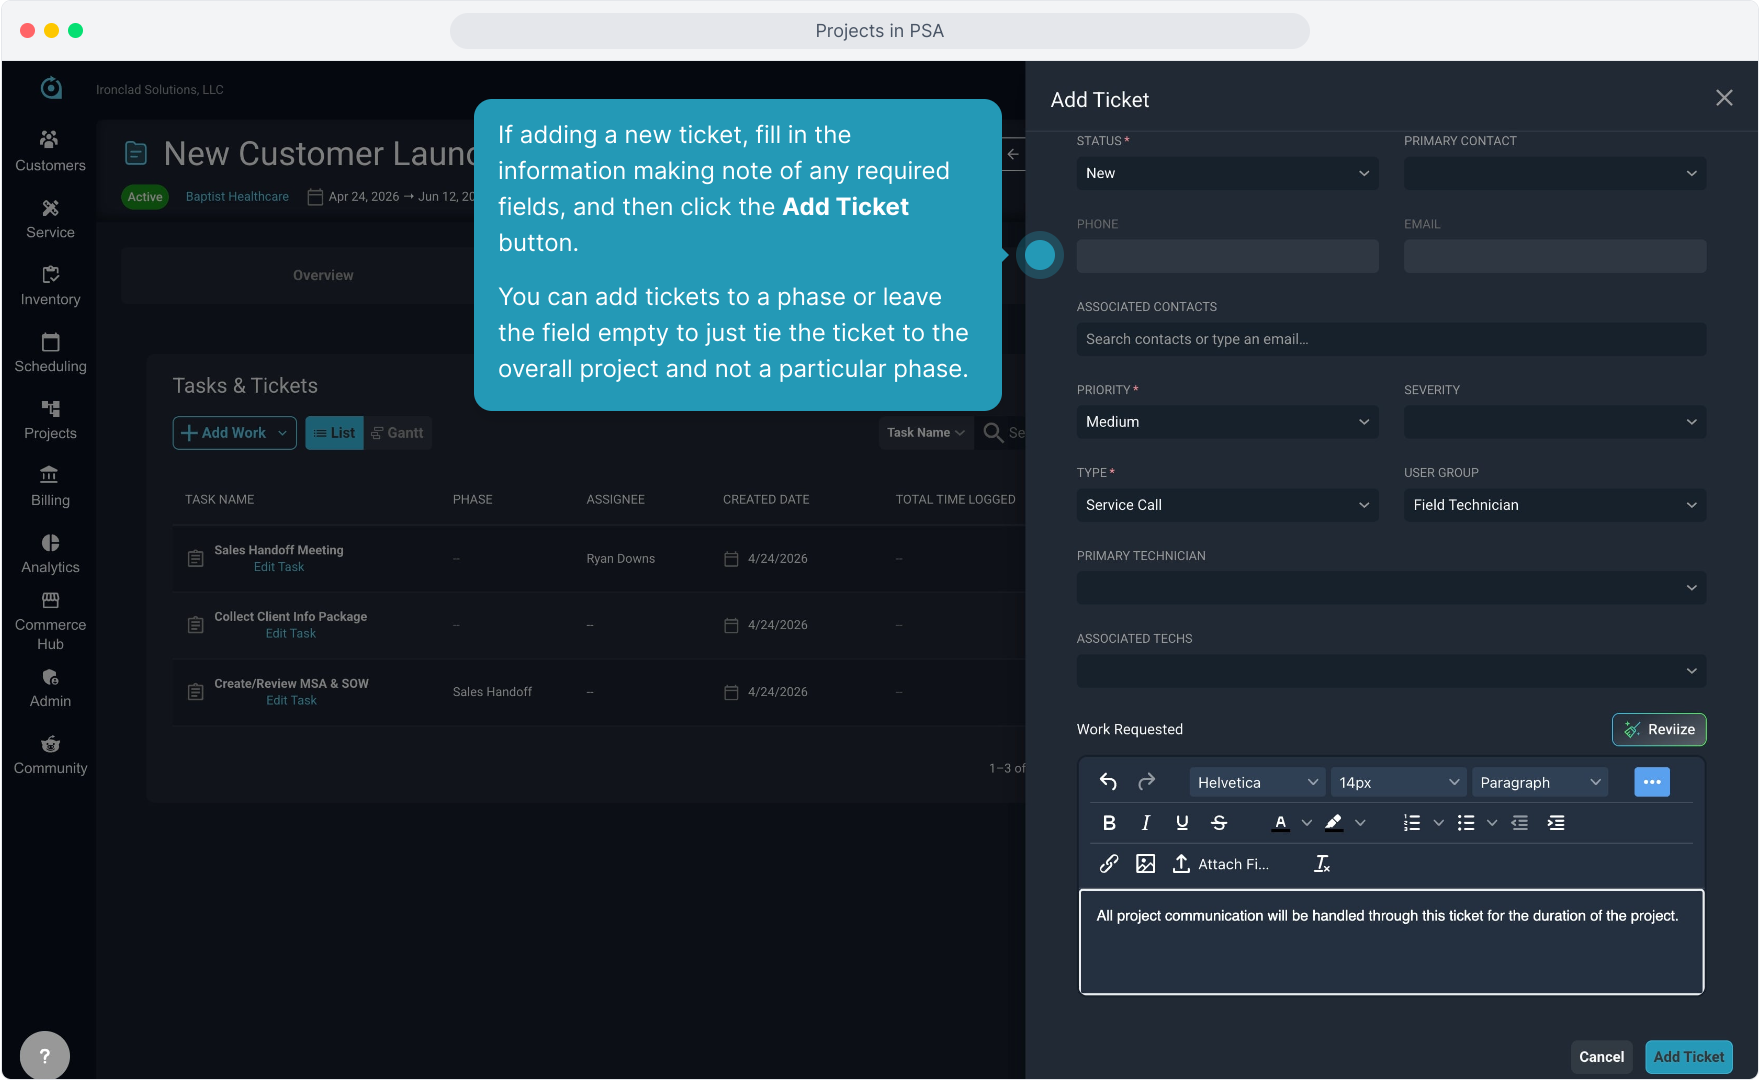
20. If adding a new ticket, fill in the information making note of any required fields, and then click the Add Ticket button.
You can add tickets to a phase or leave the field empty to just tie the ticket to the overall project and not a particular phase.
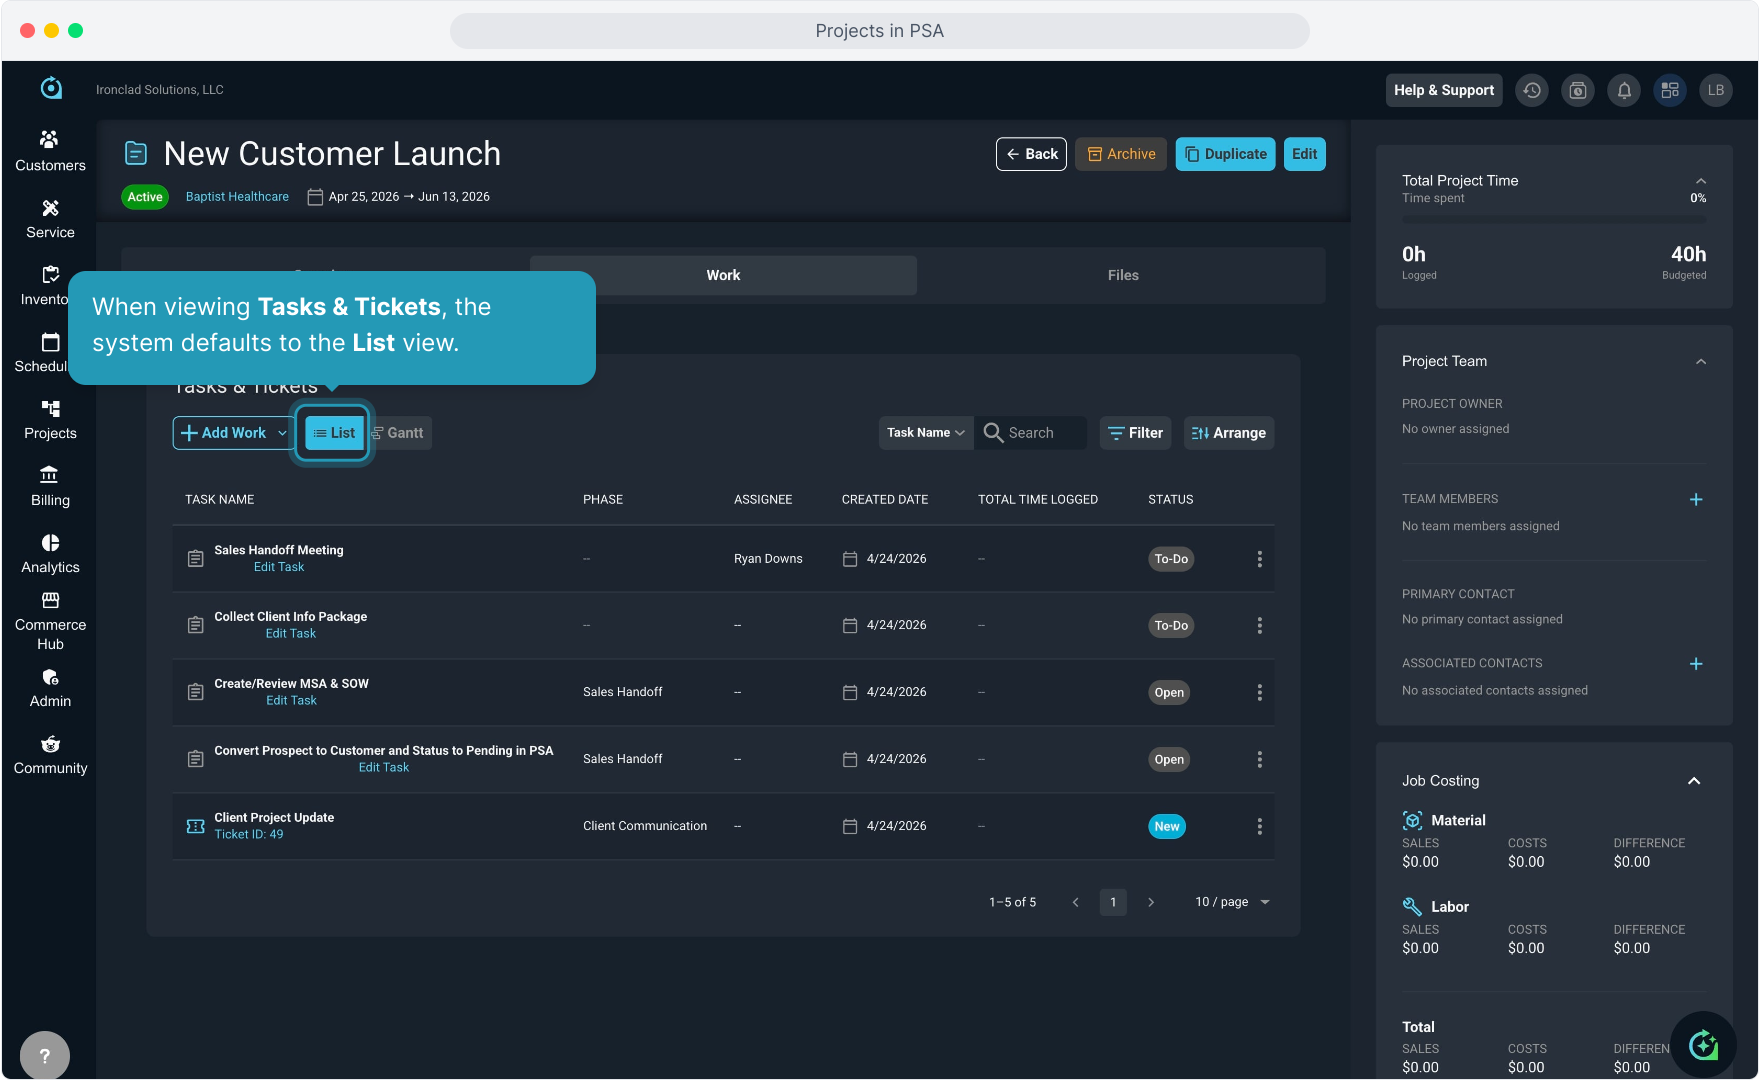
21. When viewing Tasks & Tickets, the system defaults to the List view.
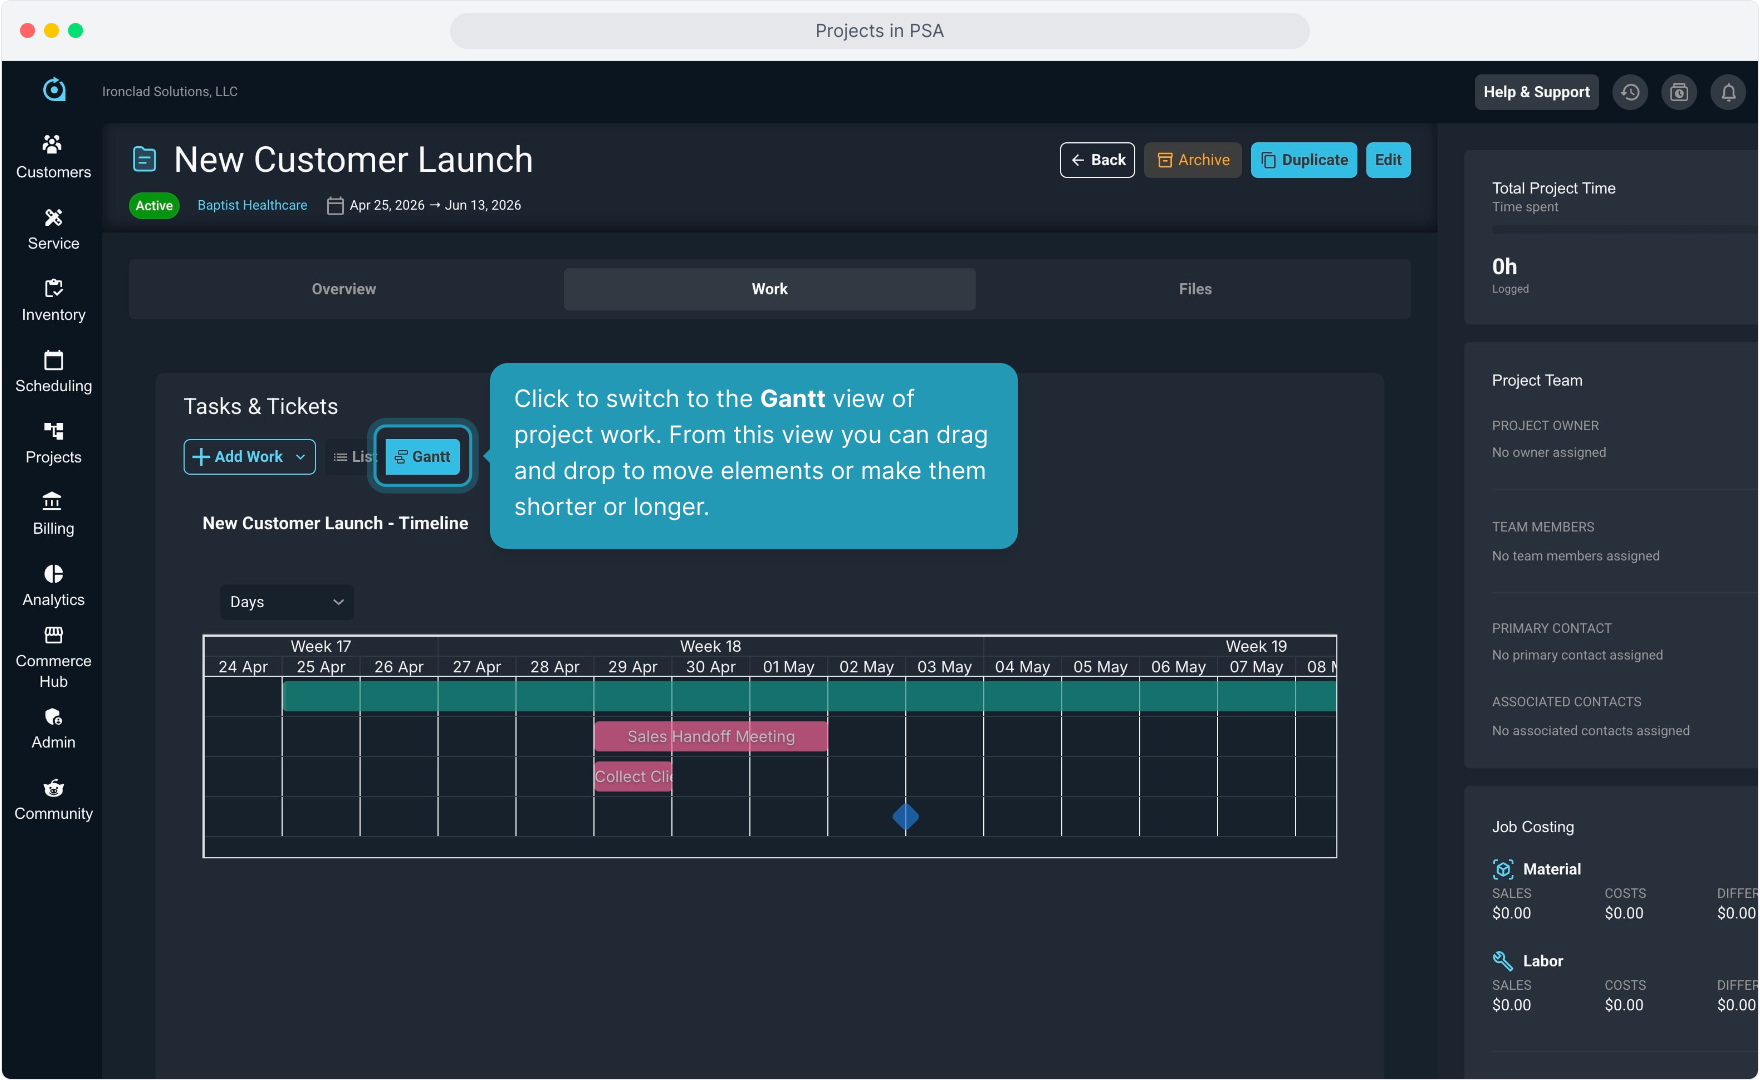
22. Click to switch to the Gantt view of project work. From this view you can drag and drop to move elements or make them shorter or longer.
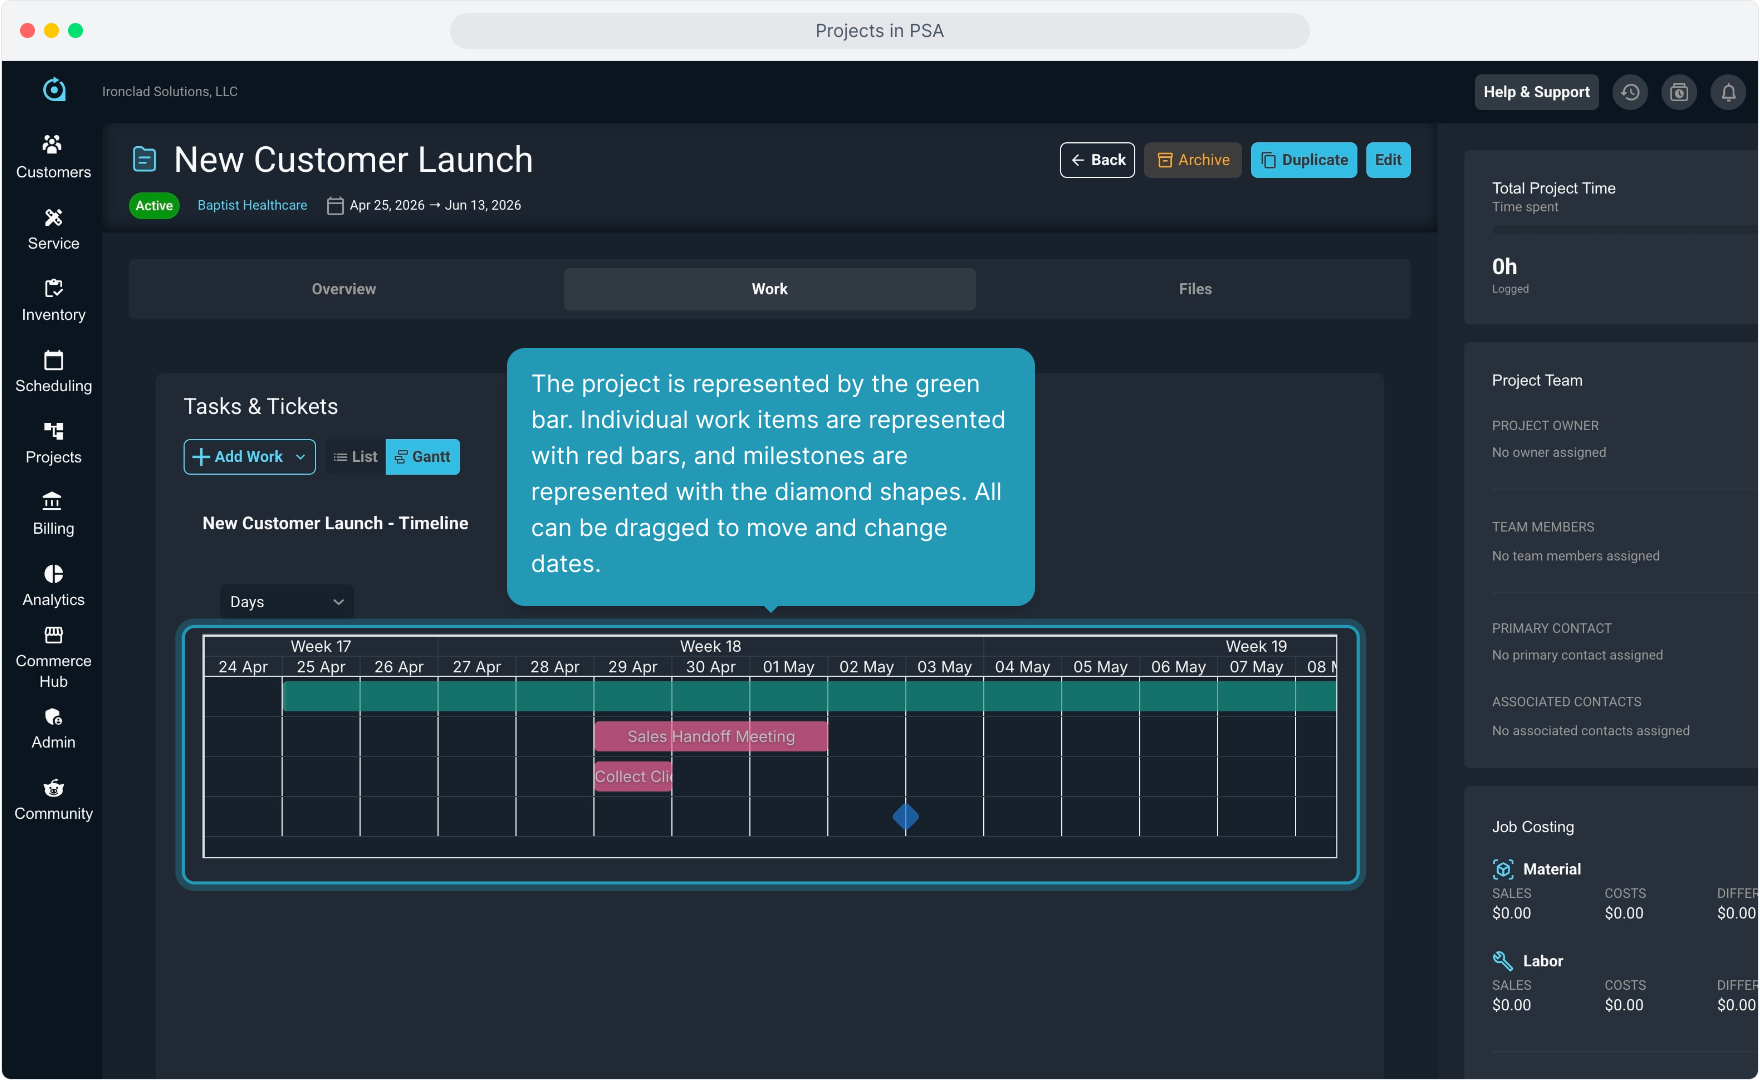
23. The project is represented by the green bar. Individual work items are represented with red bars, and milestones are represented with the diamond shapes. All can be dragged to move and change dates.
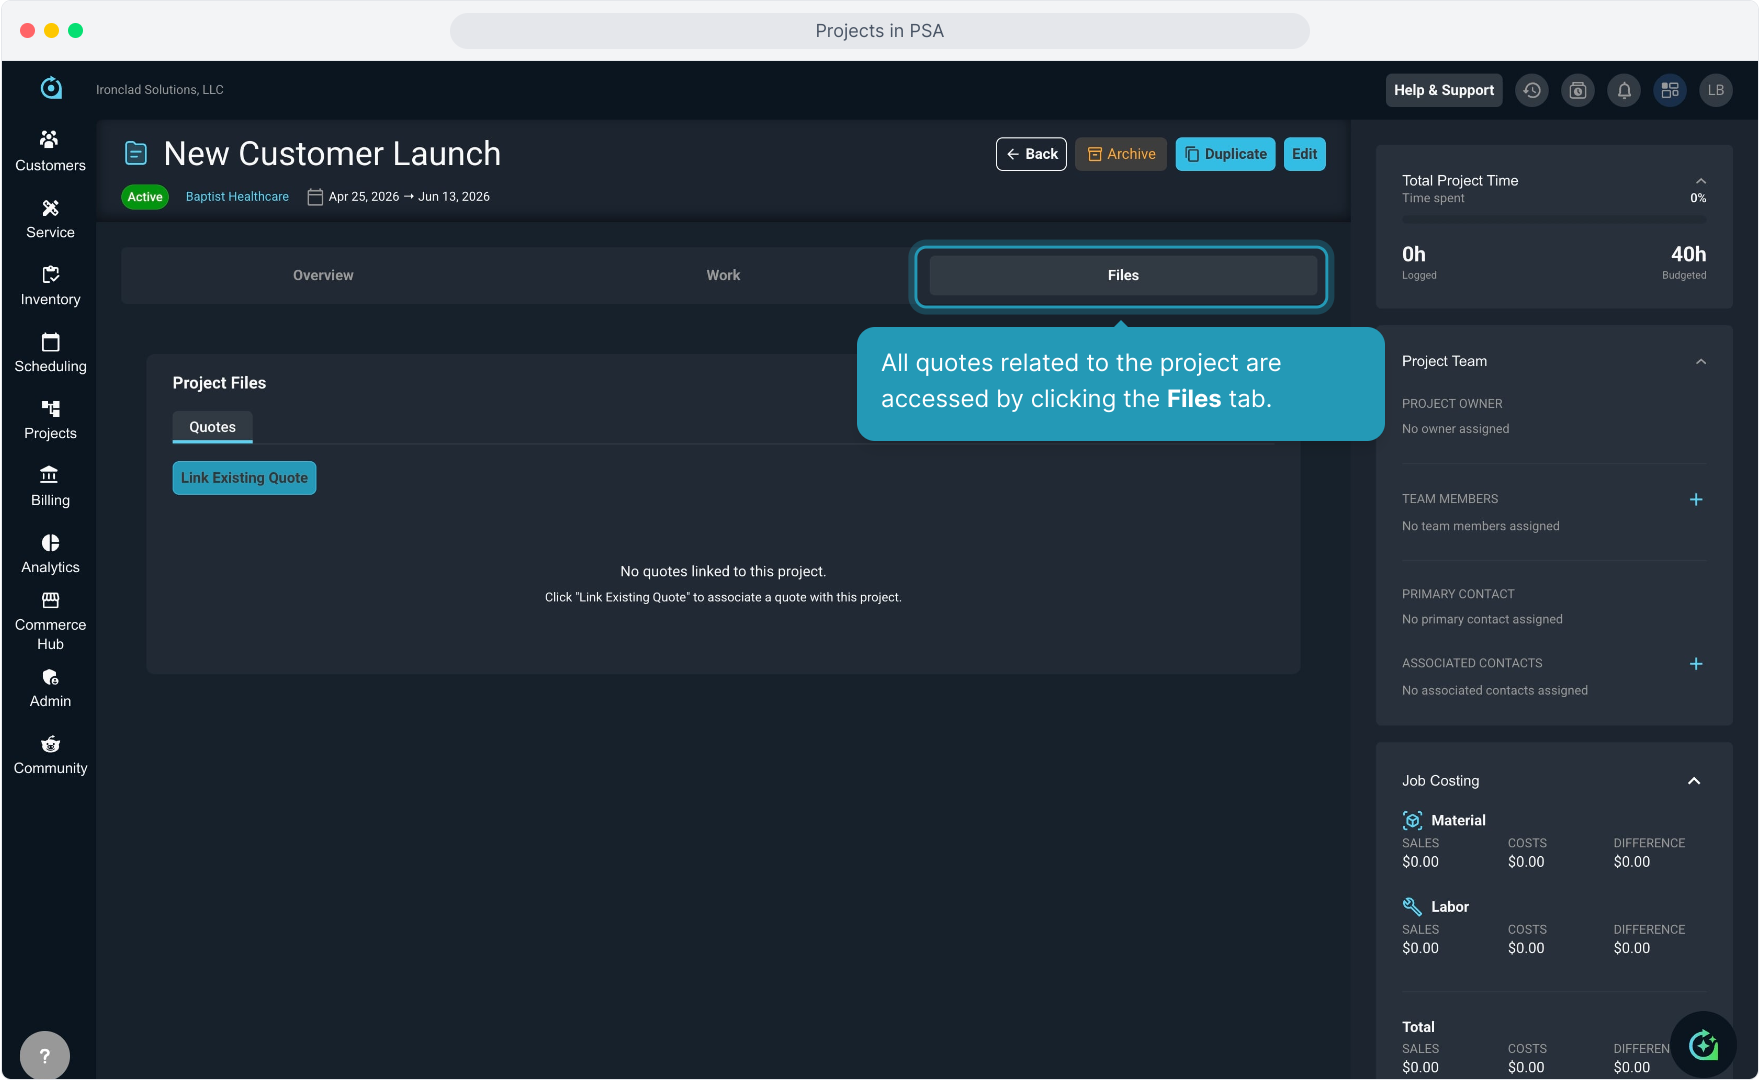
24. All quotes related to the project are accessed by clicking the Files tab.
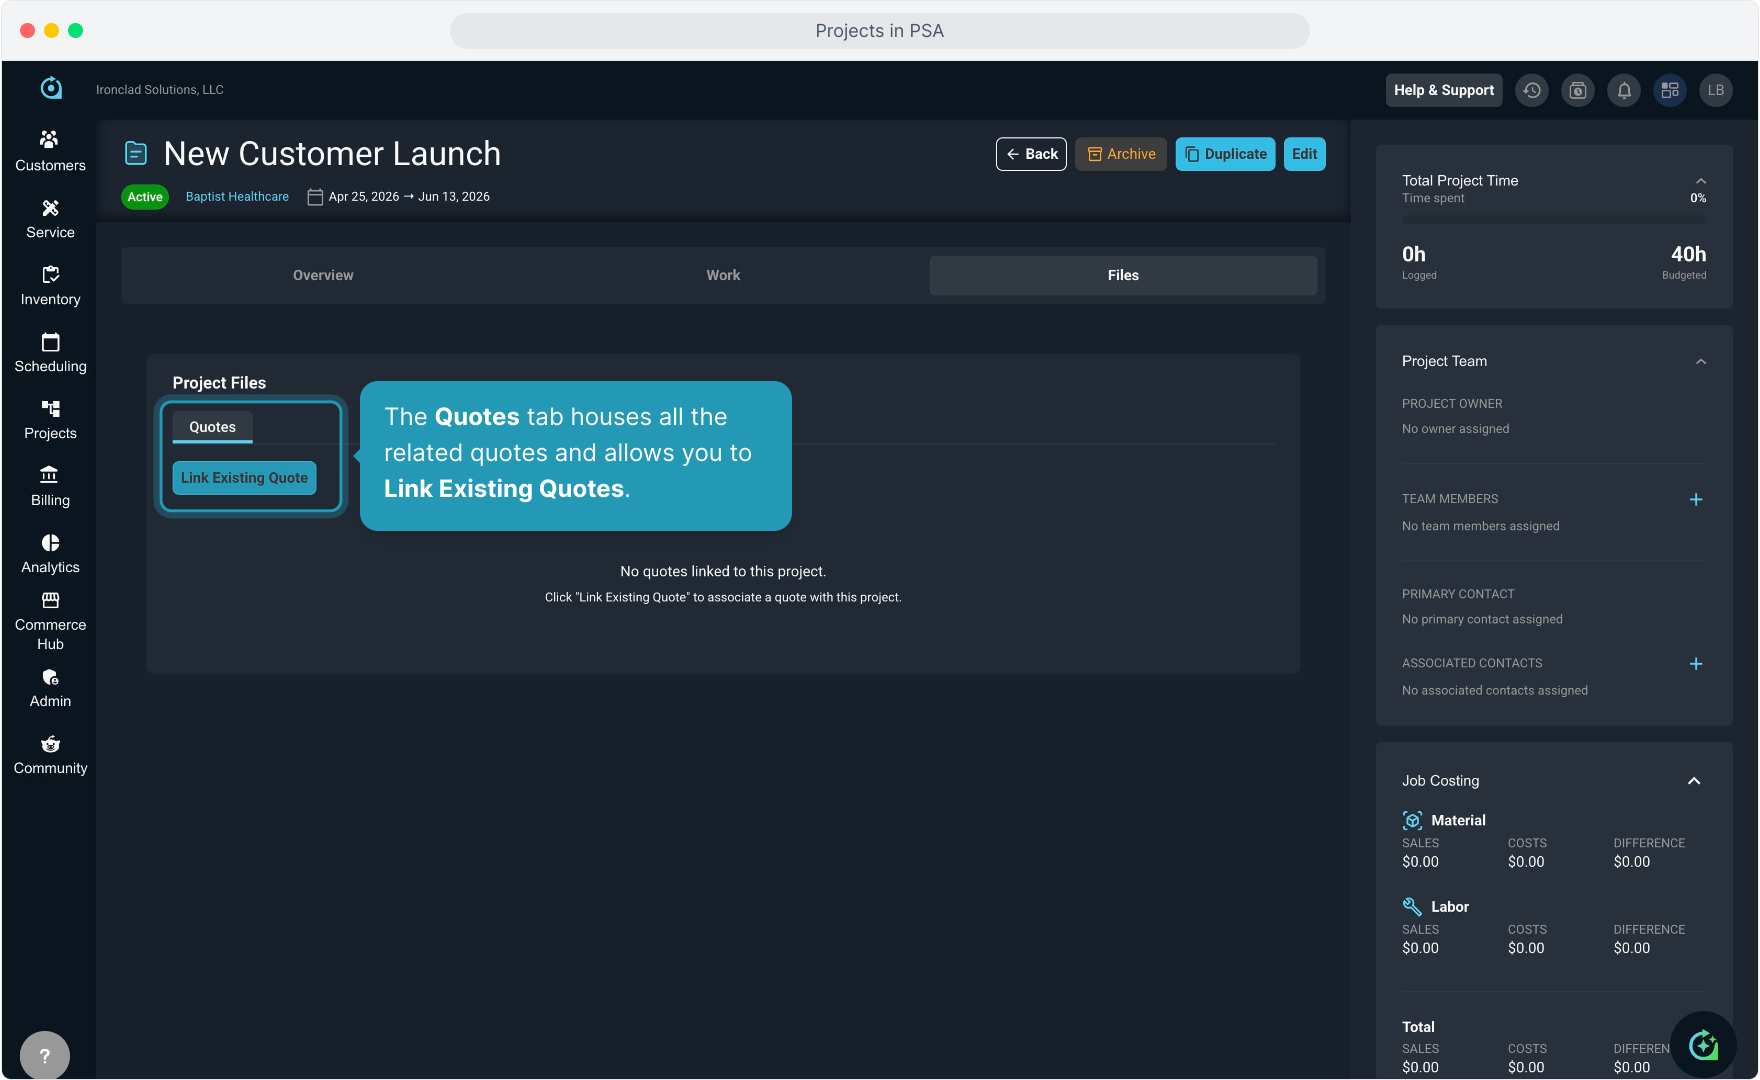
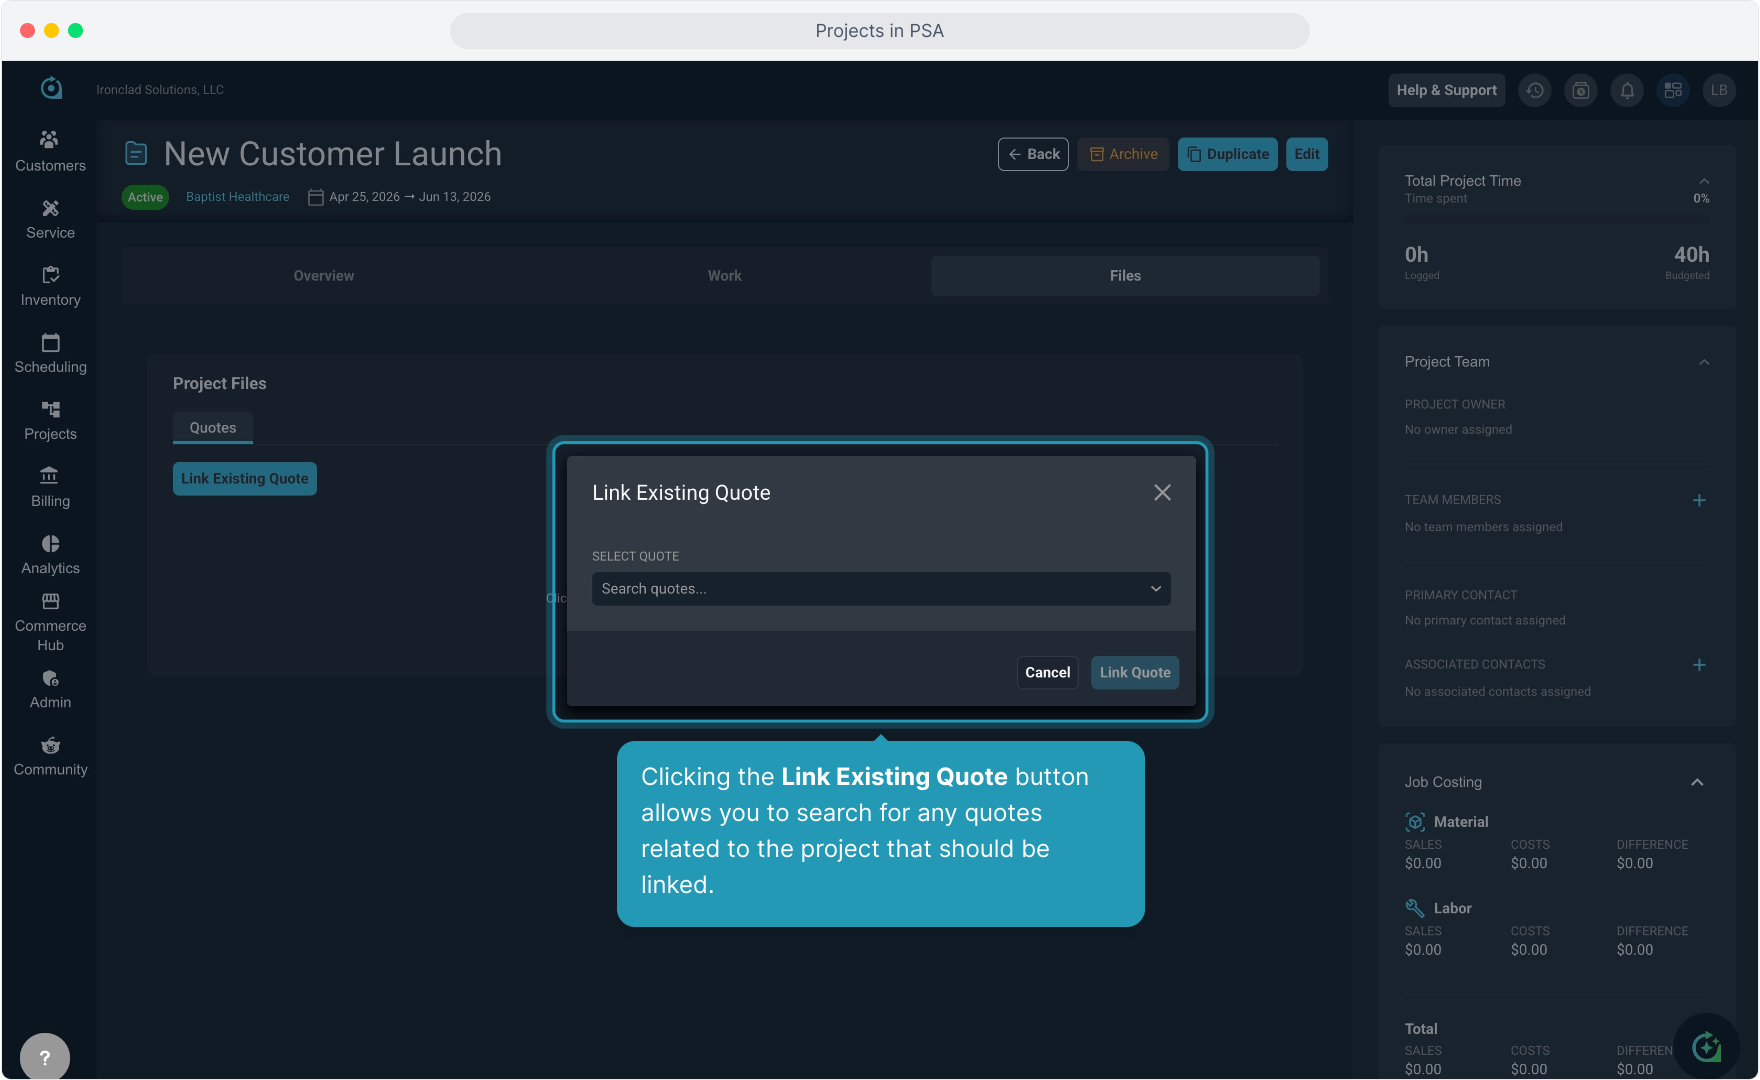
25. The Quotes tab houses all the related quotes and allows you to Link Existing Quotes.
26. Clicking the Link Existing Quote button allows you to search for any quotes related to the project that should be linked.
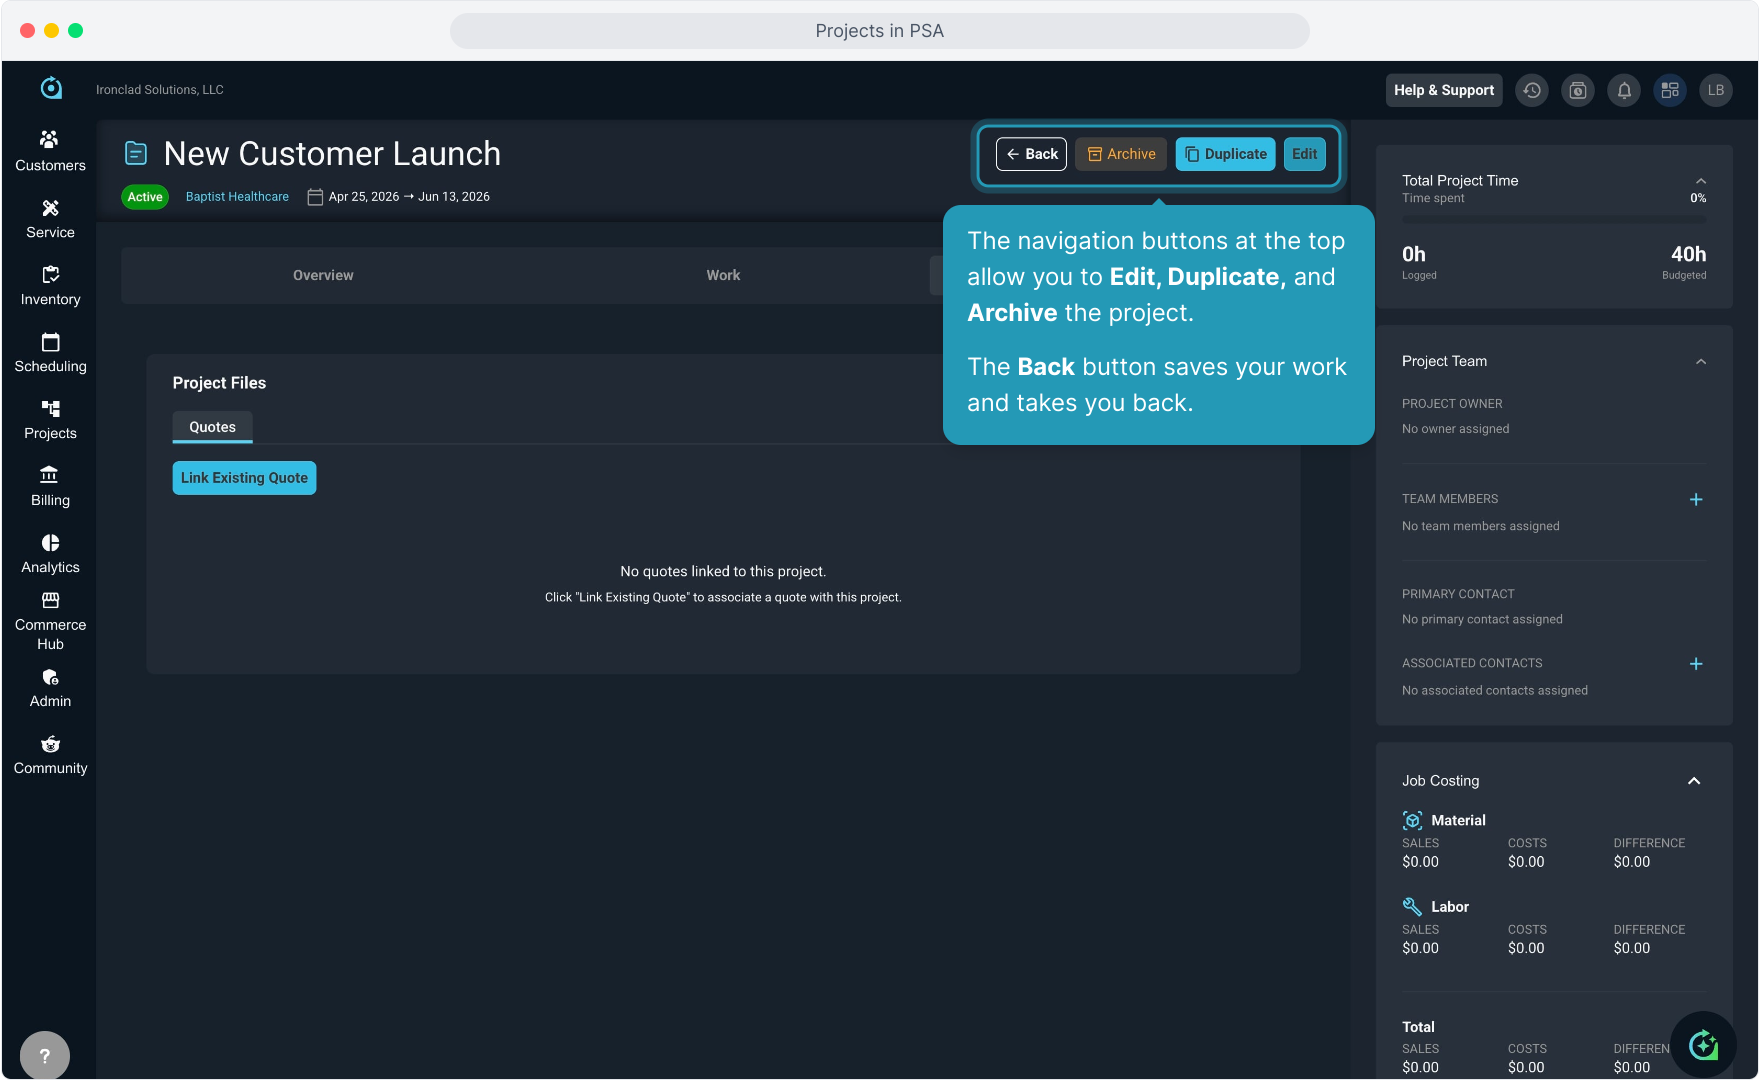
27. The navigation buttons at the top allow you to Edit, Duplicate, and Archive the project.
The Back button saves your work and takes you back.
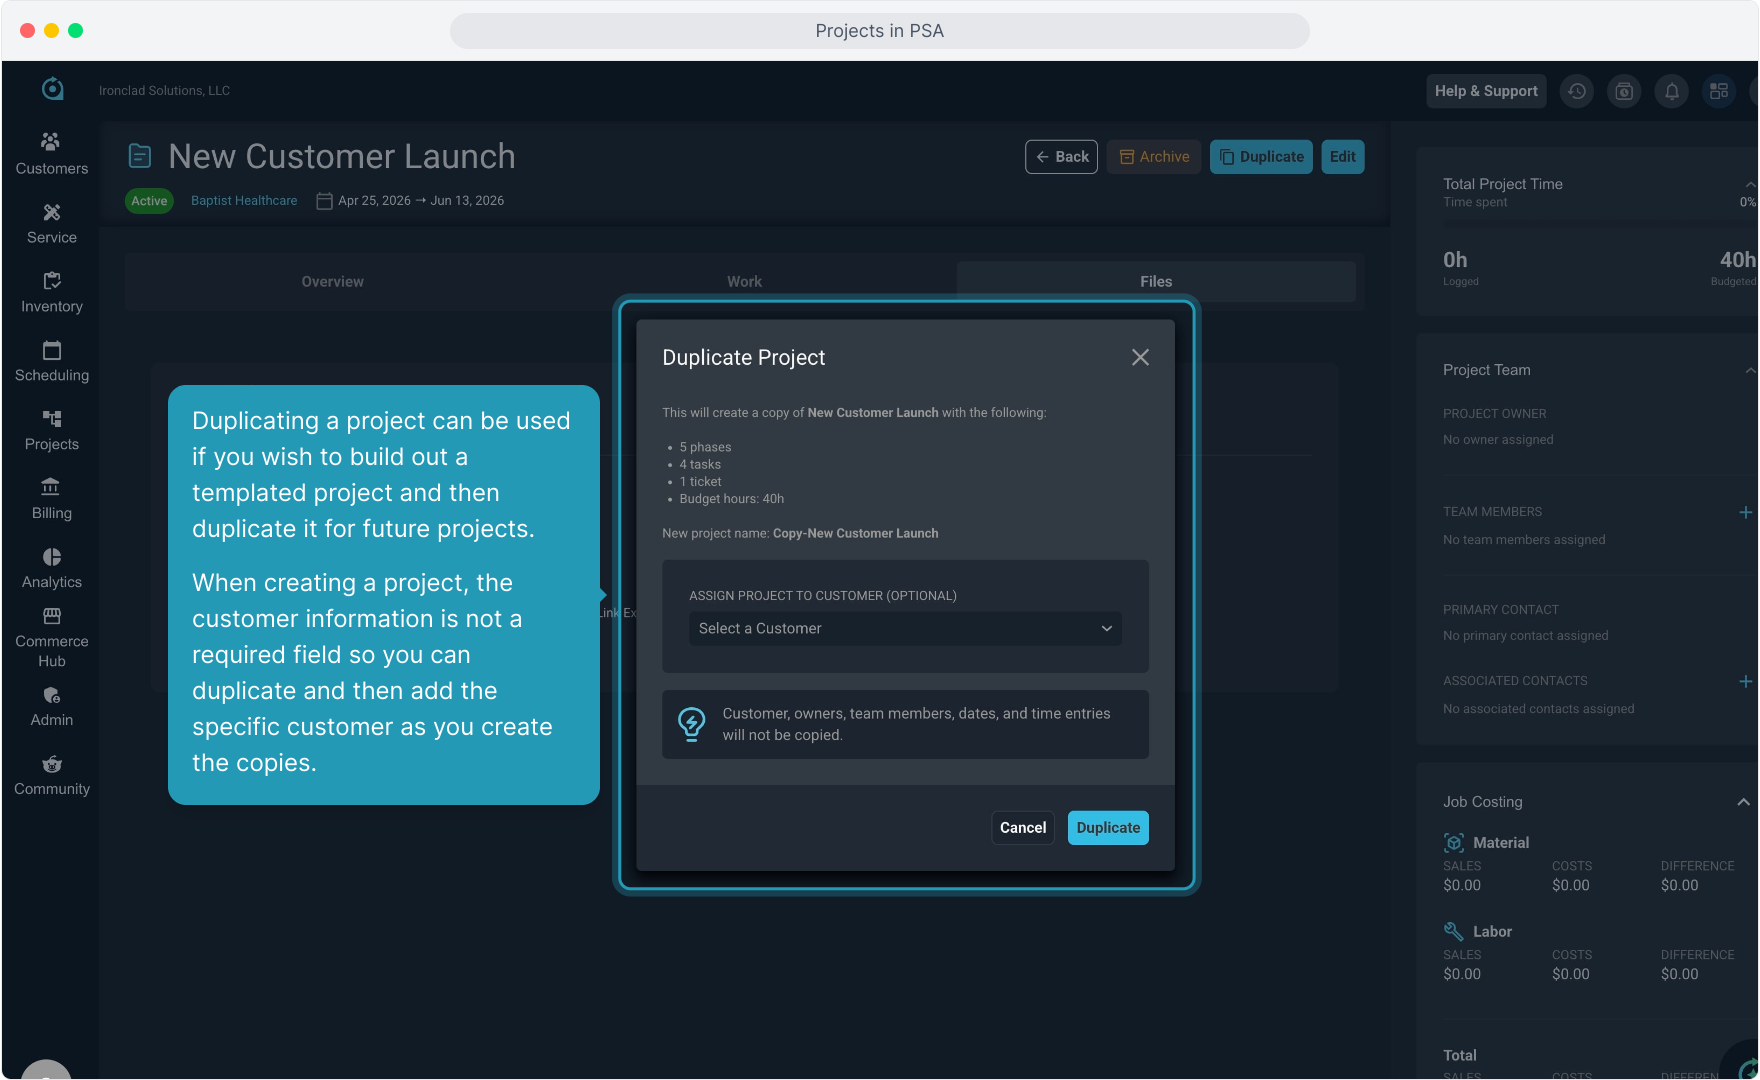
28. Duplicating a project can be used if you wish to build out a templated project and then duplicate it for future projects.
When creating a project, the customer information is not a required field so you can duplicate and then add the specific customer as you create the copies.
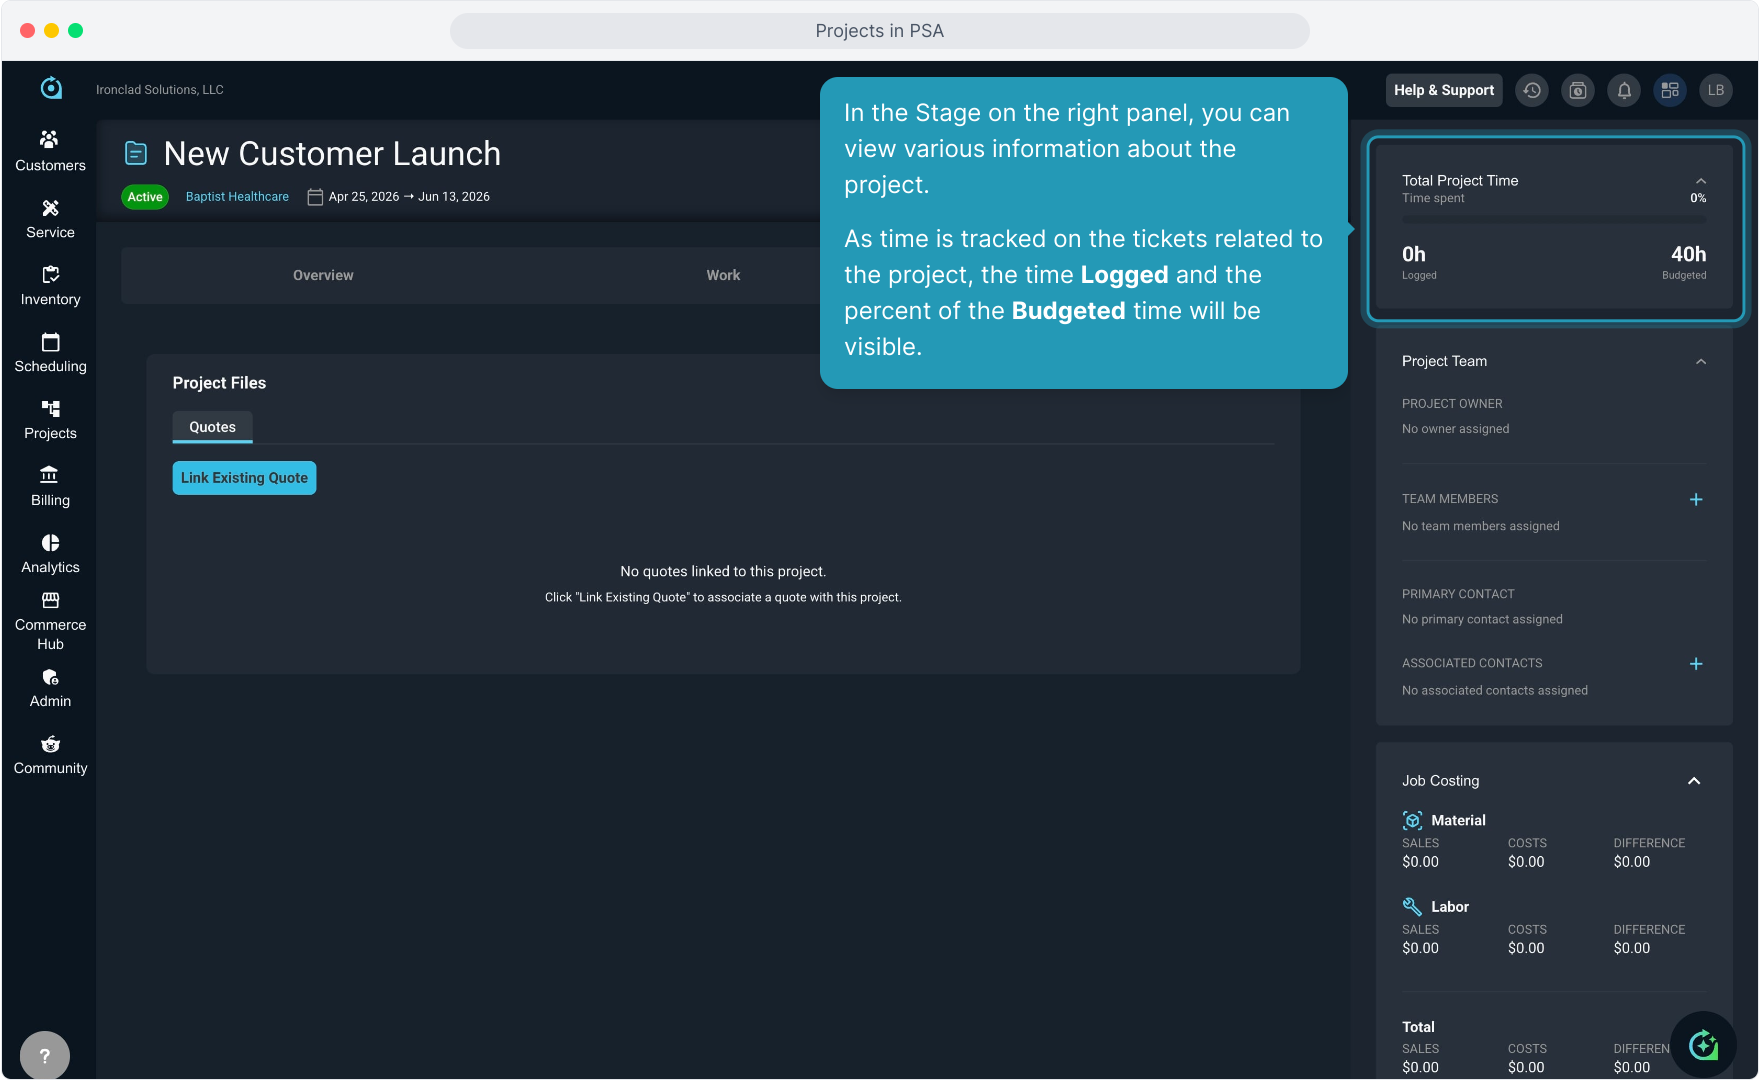
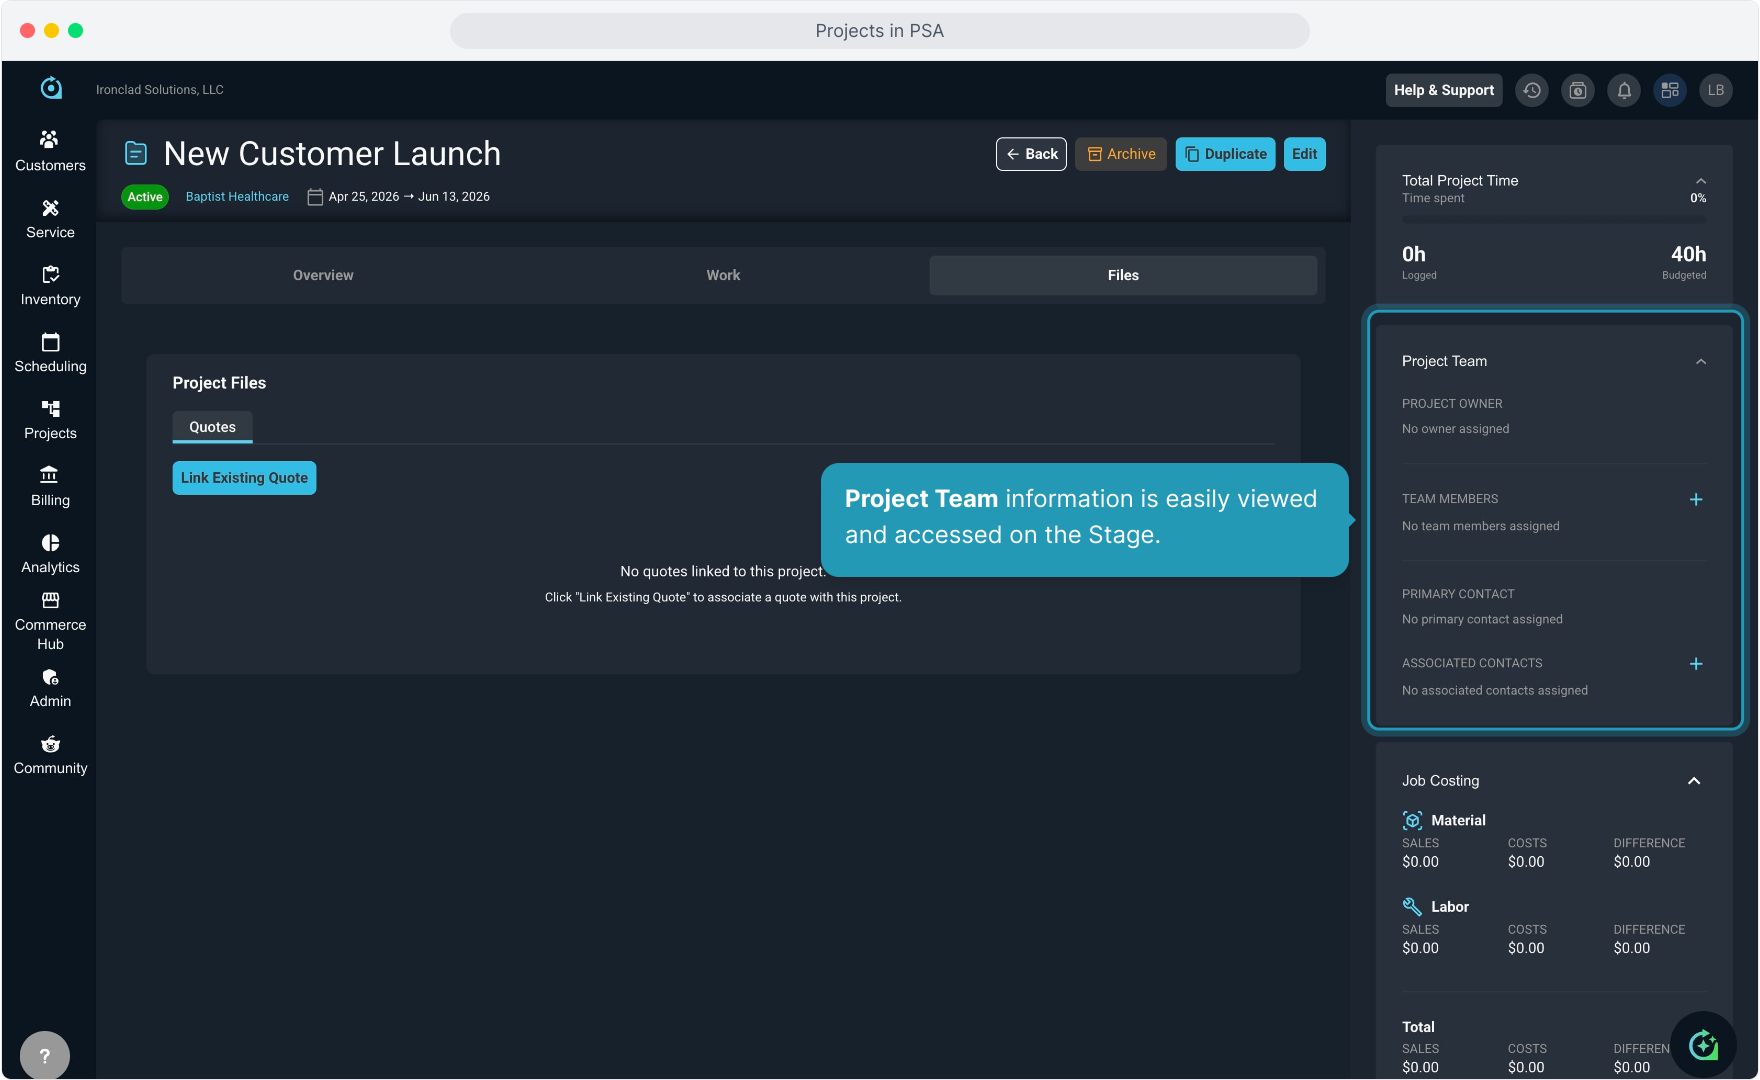
29. In the Stage on the right panel, you can view various information about the project.
As time is tracked on the tickets related to the project, the time Logged and the percent of the Budgeted time will be visible.
30. Project Team information is easily viewed and accessed on the Stage.
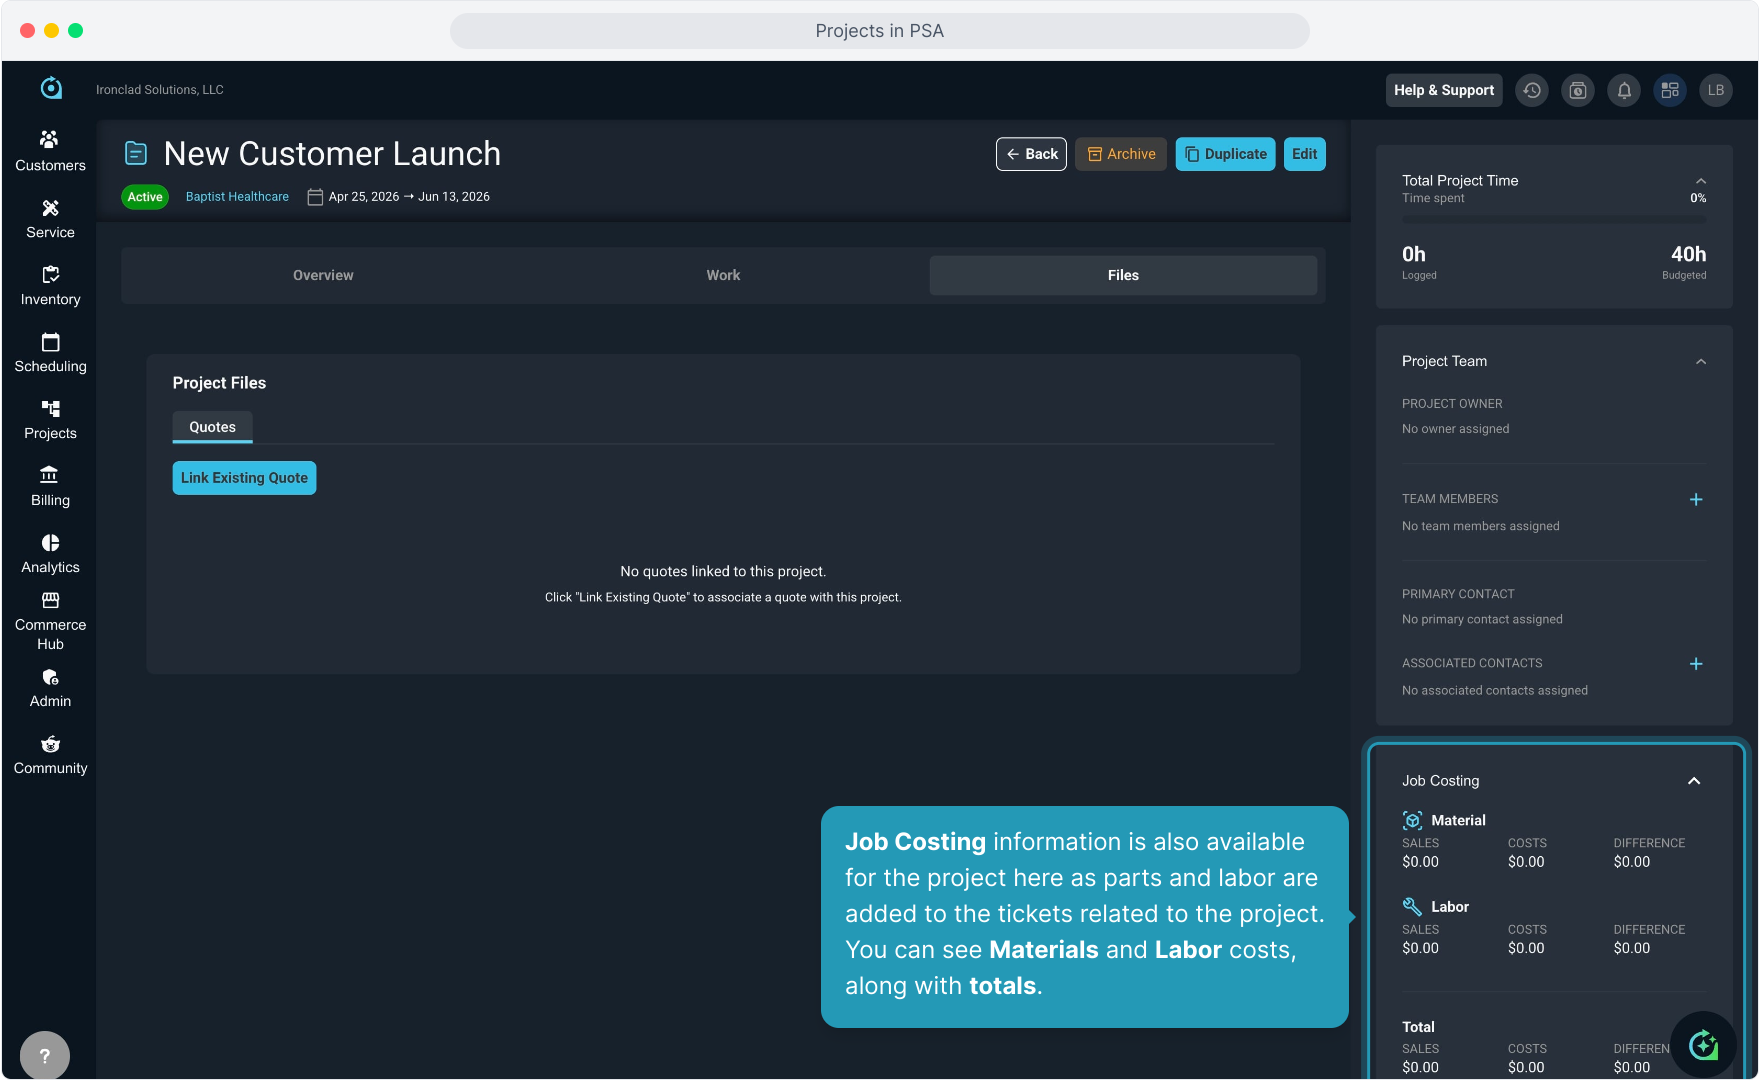
31. Job Costing information is also available for the project here as parts and labor are added to the tickets related to the project. You can see Materials and Labor costs, along with totals.
32. Back on the Overview tab of the project, past due items will be clearly marked.
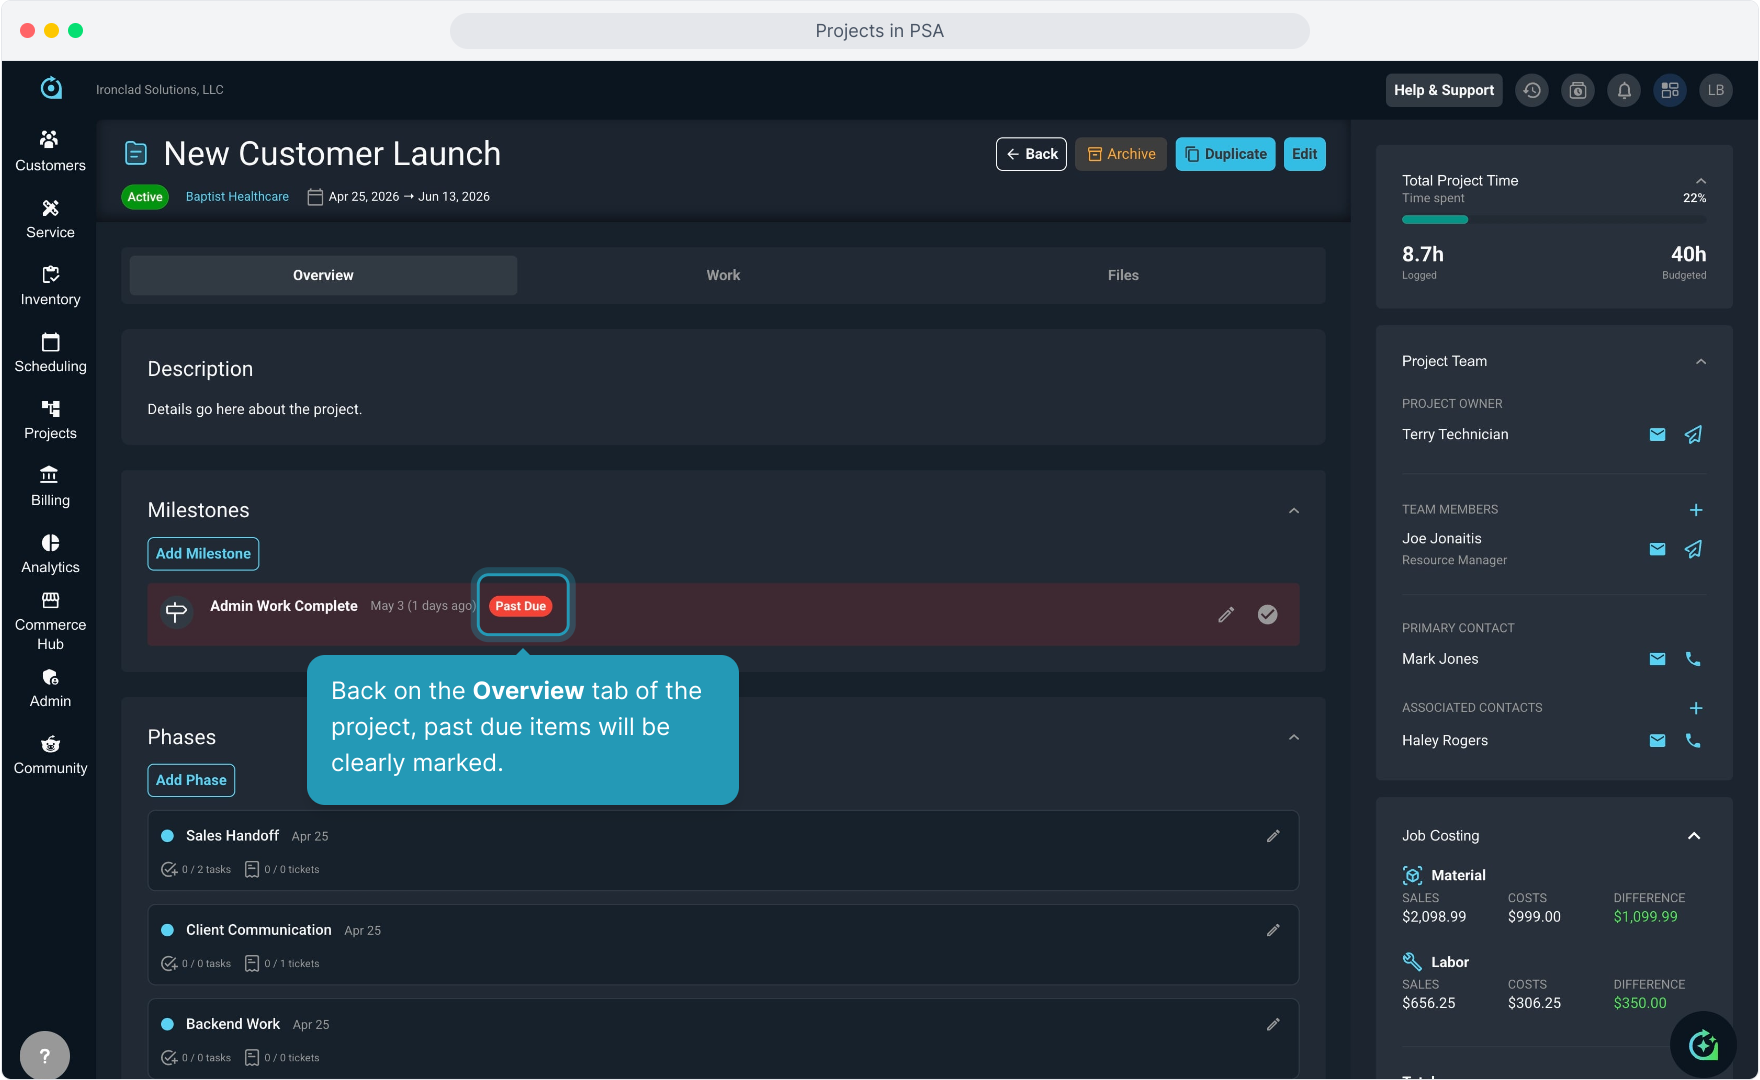
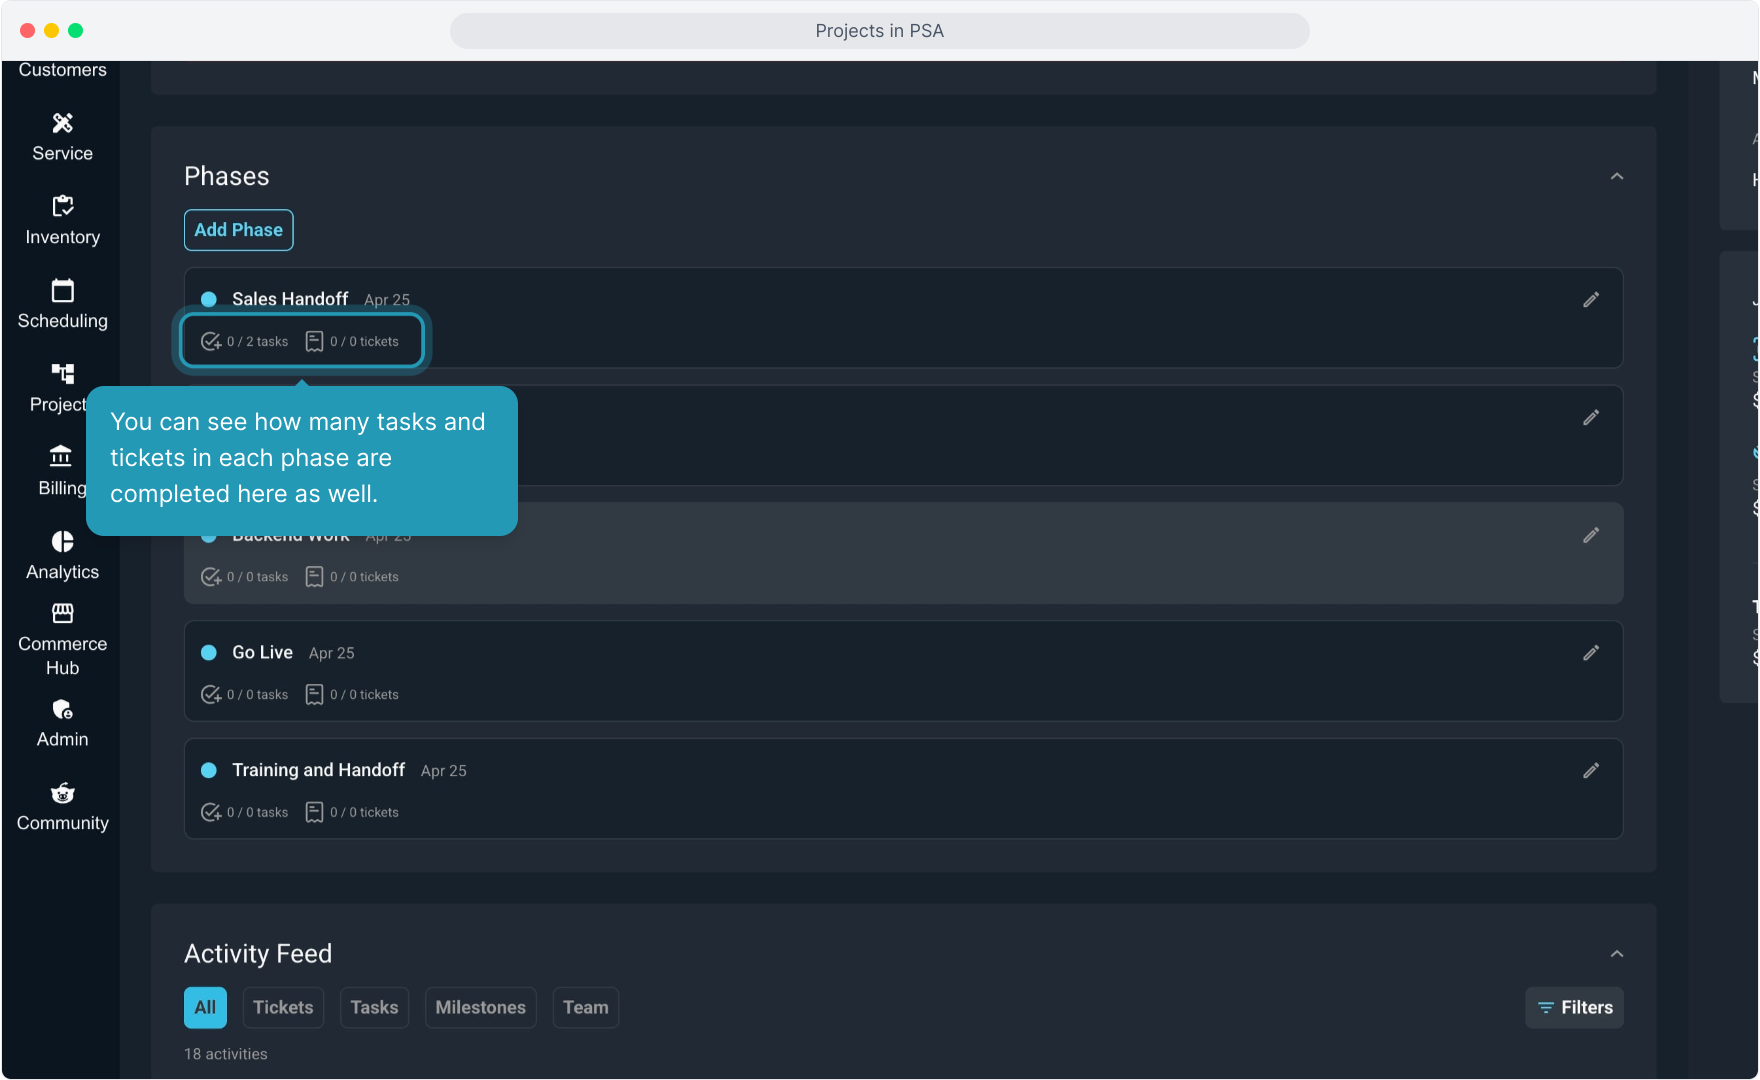
33. You can see how many tasks and tickets in each phase are completed here as well.