How To Guide: General Stock Purchase Orders
1. Introduction
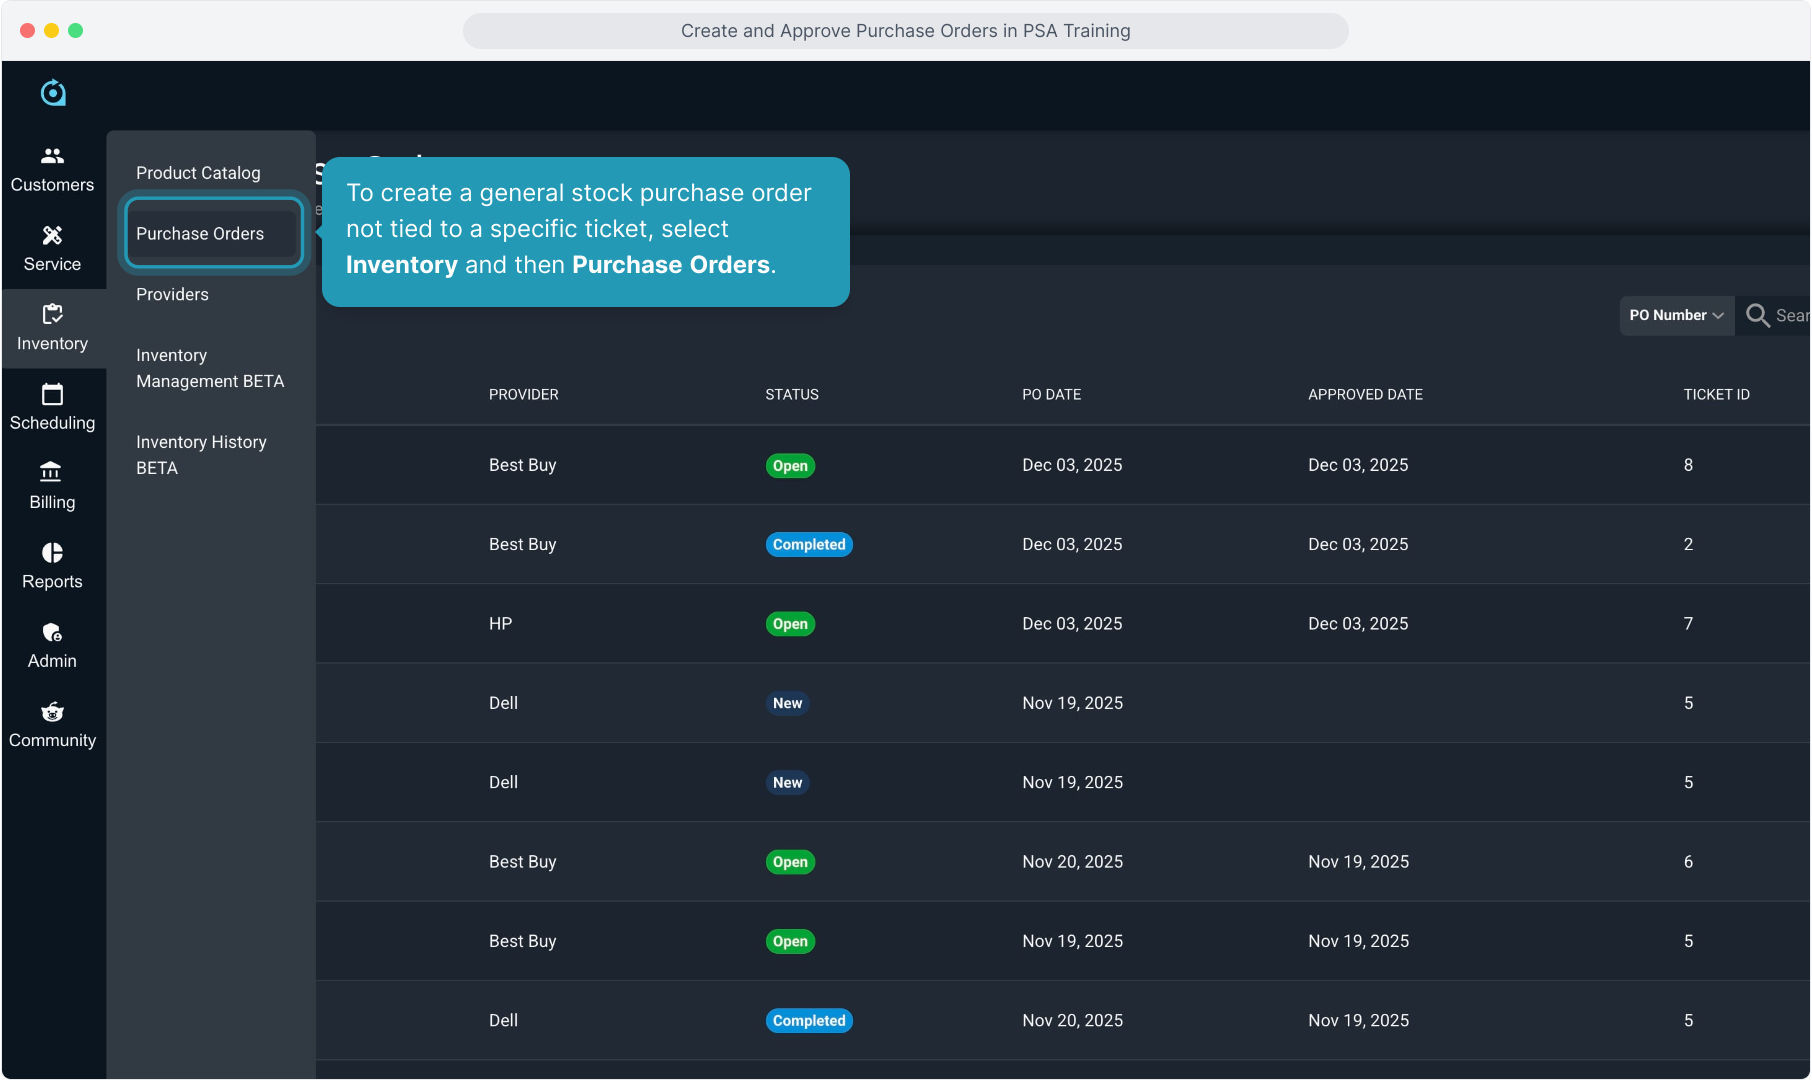
2. To create a general stock purchase order not tied to a specific ticket, select Inventory and then Purchase Orders.
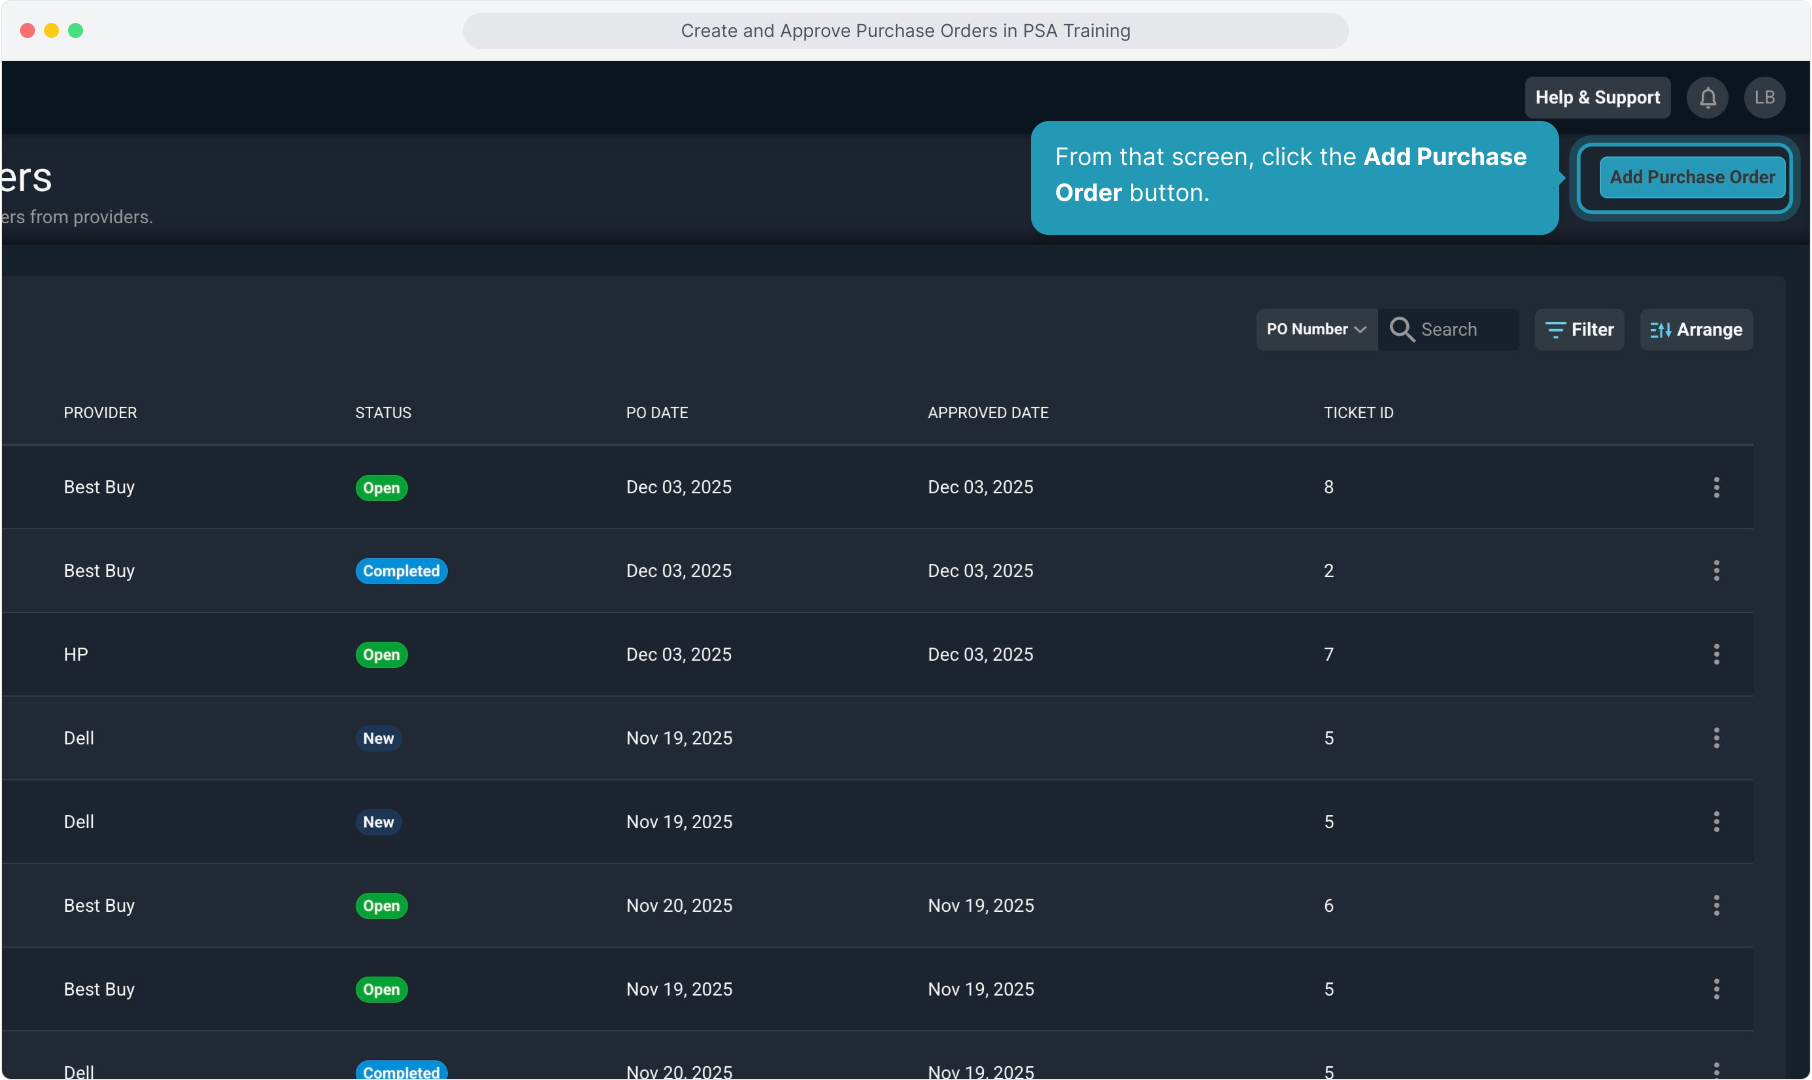
3. From that screen, click the Add Purchase Order button.
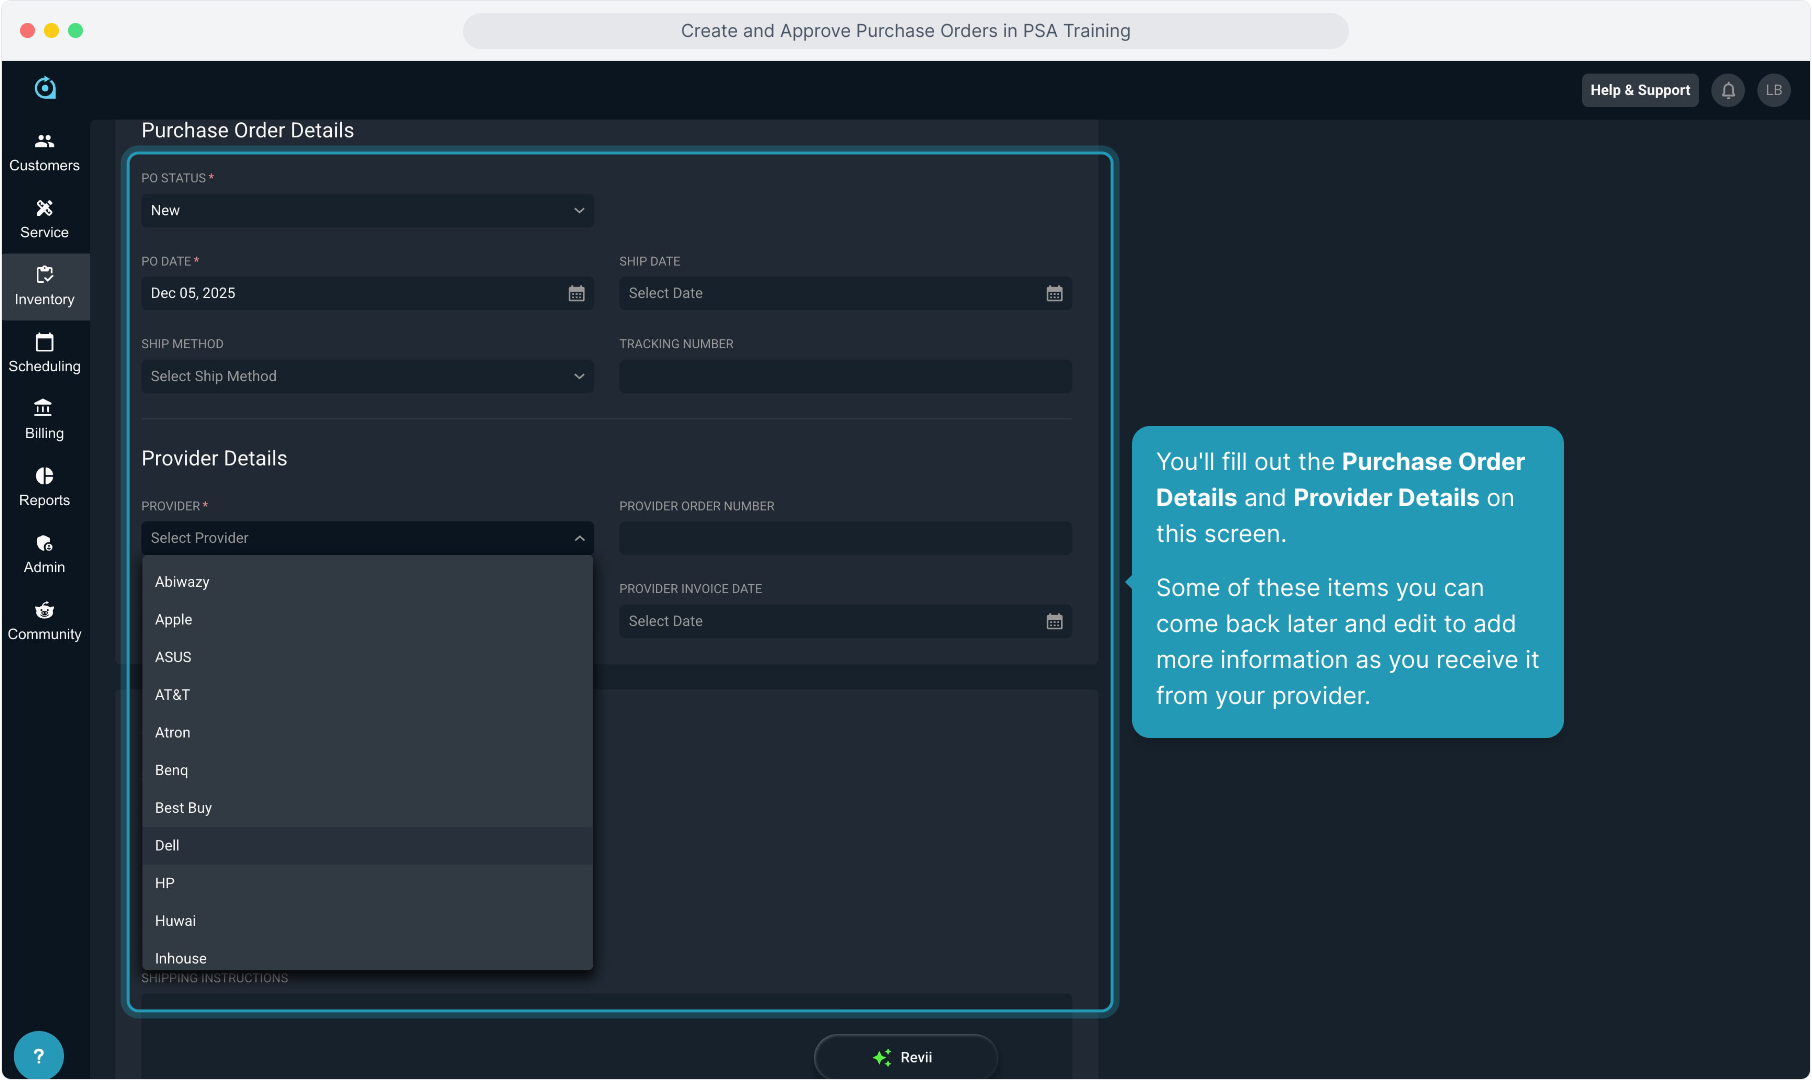
4. You'll fill out the Purchase Order Details and Provider Details on this screen.
Some of these items you can come back later and edit to add more information as you receive it from your provider.
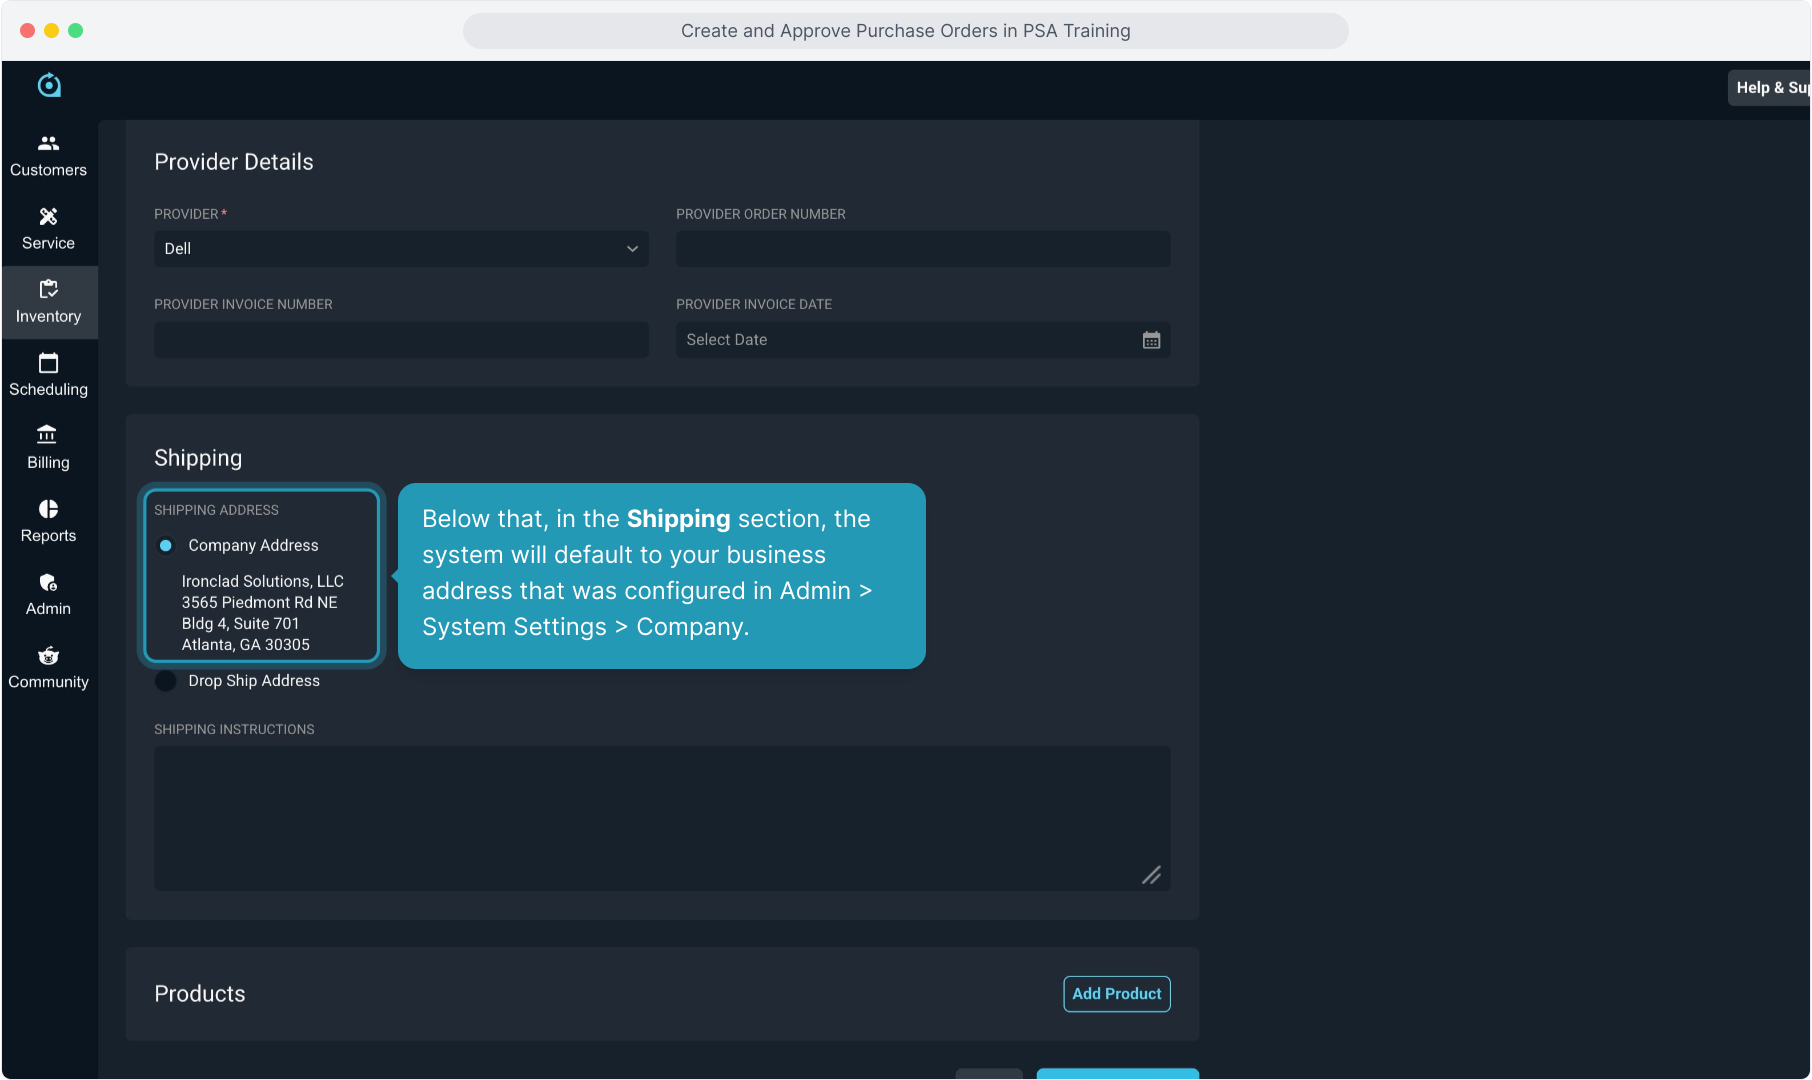
5. Below that, in the Shipping section, the system will default to your business address that was configured in Admin > System Settings > Company.
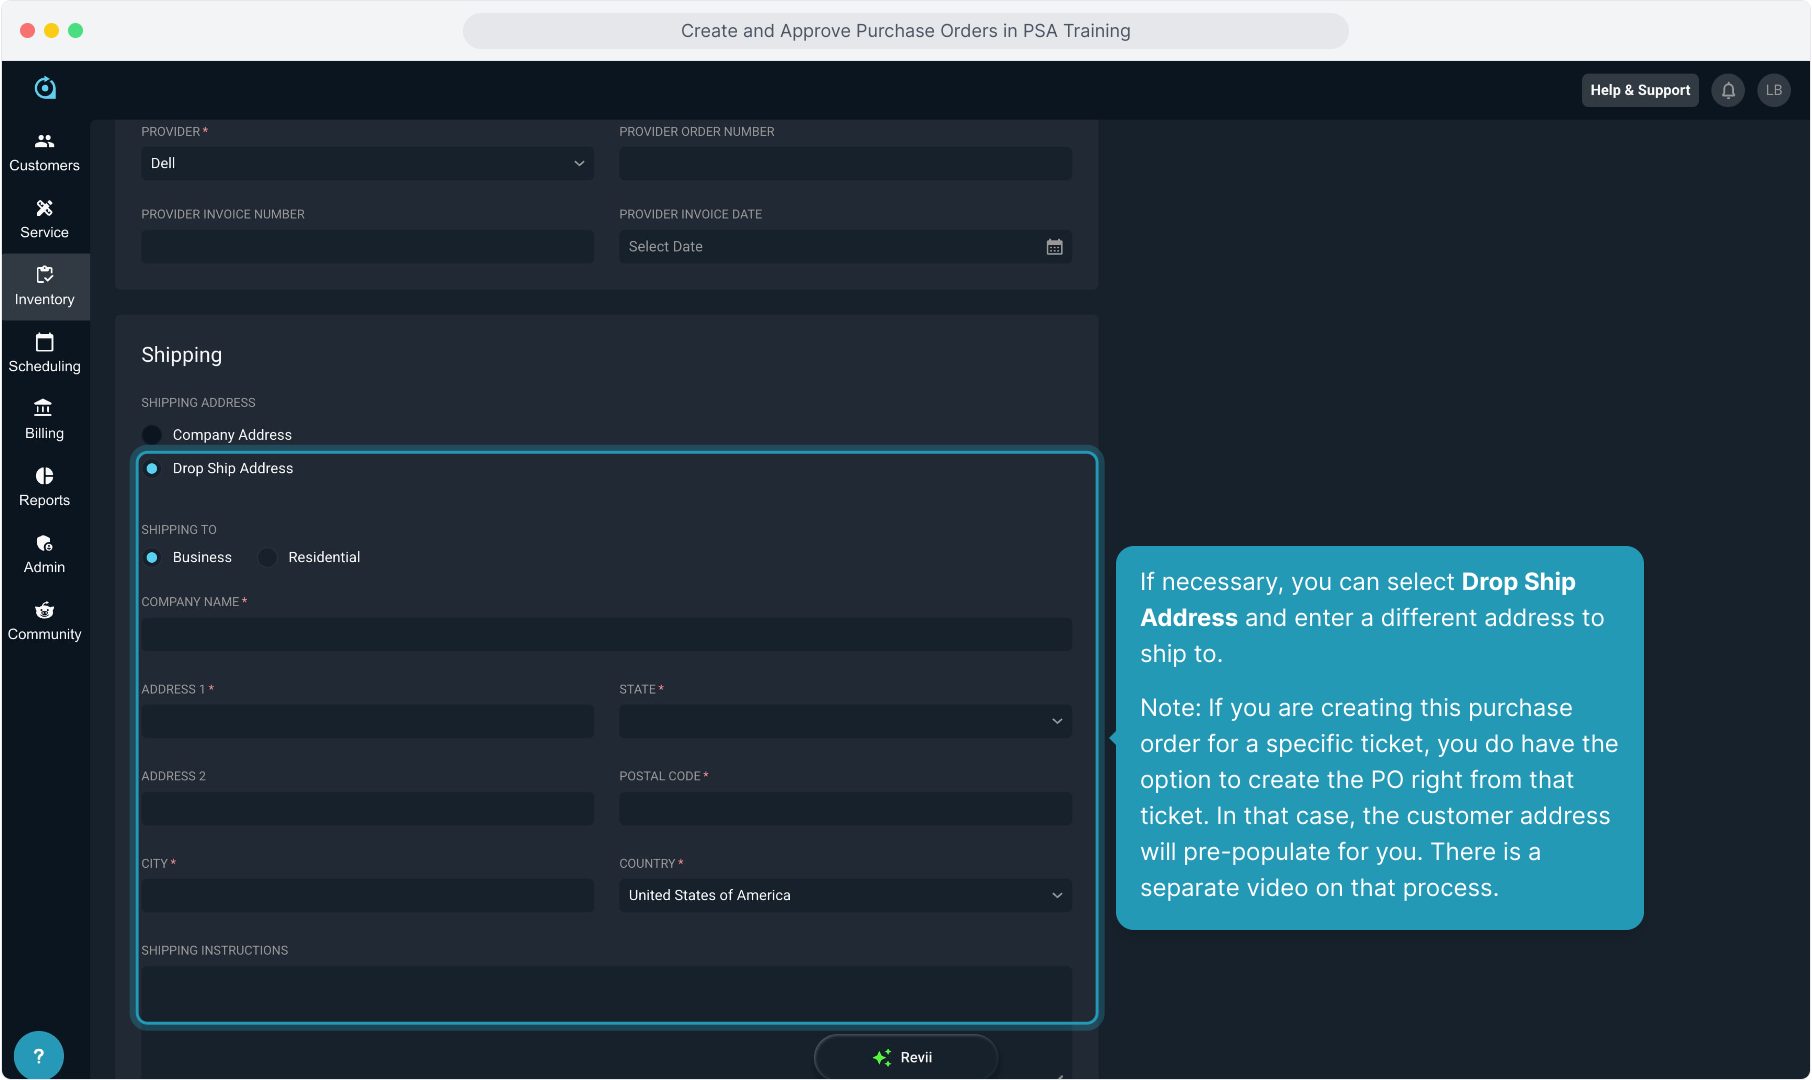
6. If necessary, you can select Drop Ship Address and enter a different address to ship to.
Note: If you are creating this purchase order for a specific ticket, you do have the option to create the PO right from that ticket. In that case, the customer address will pre-populate for you. There is a separate video on that process.
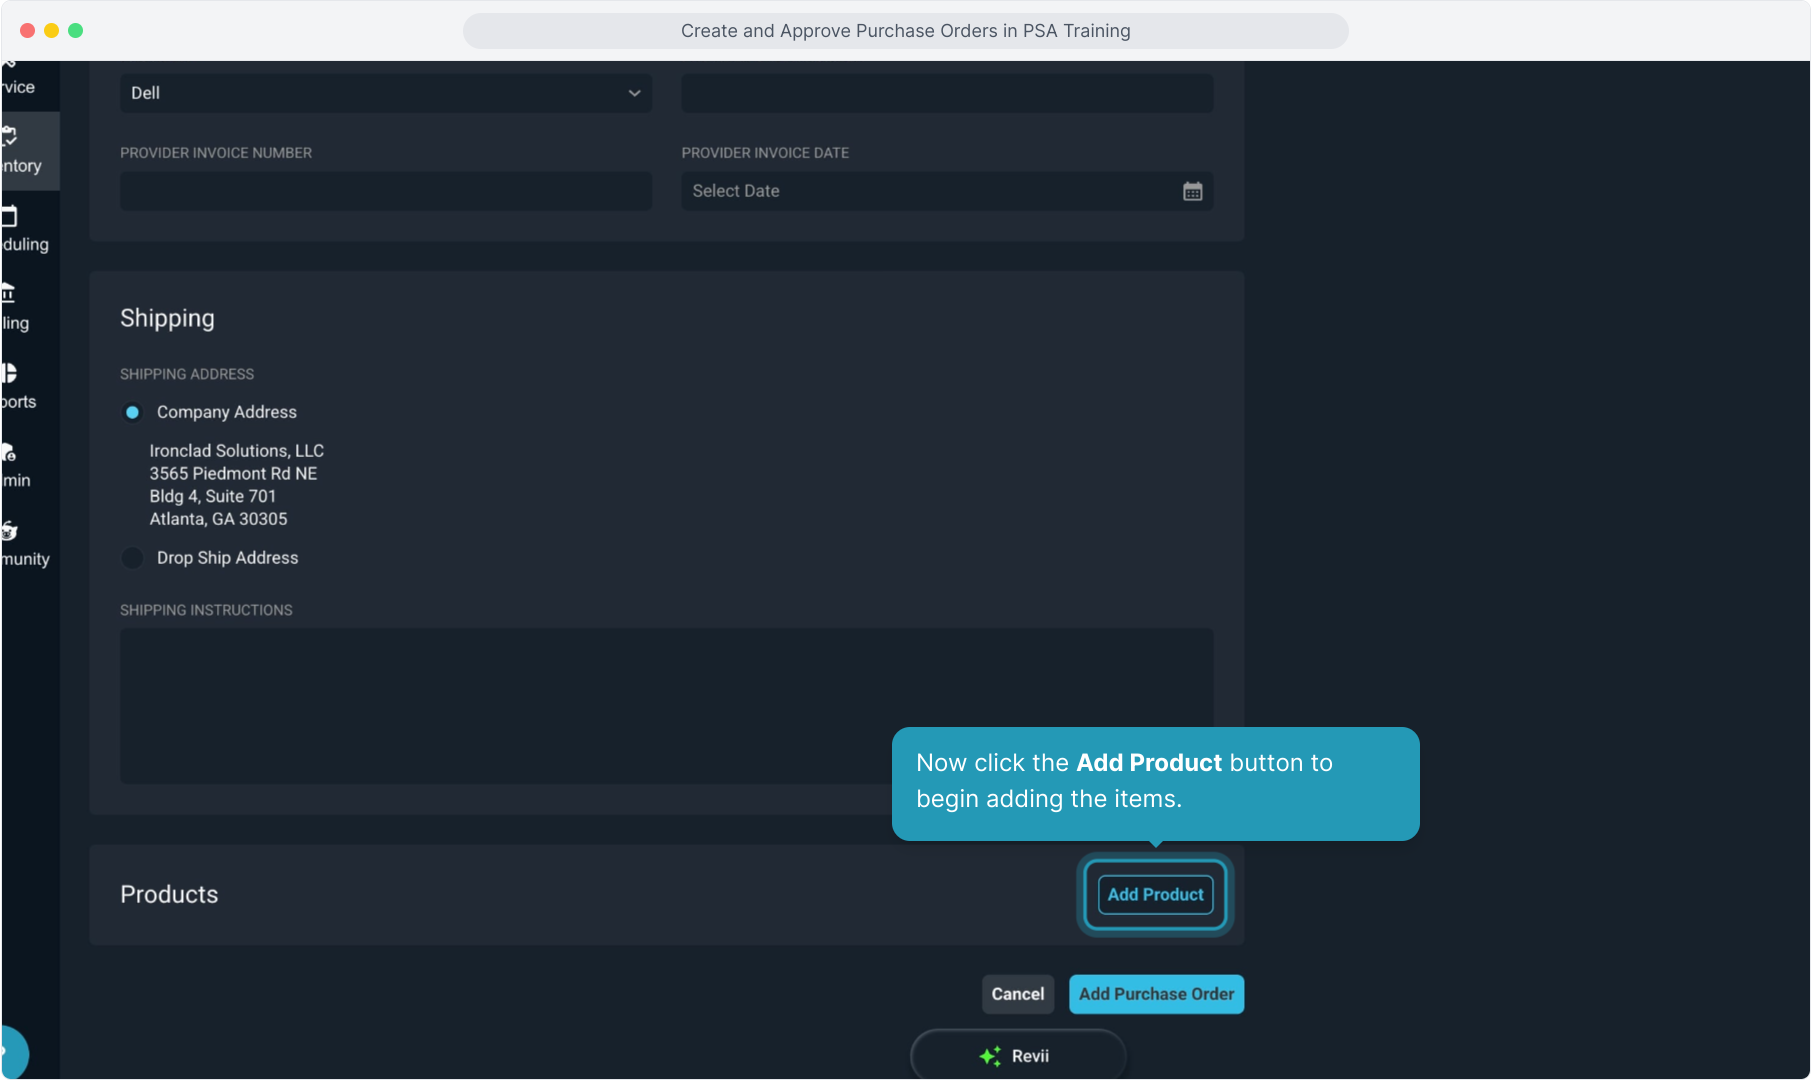
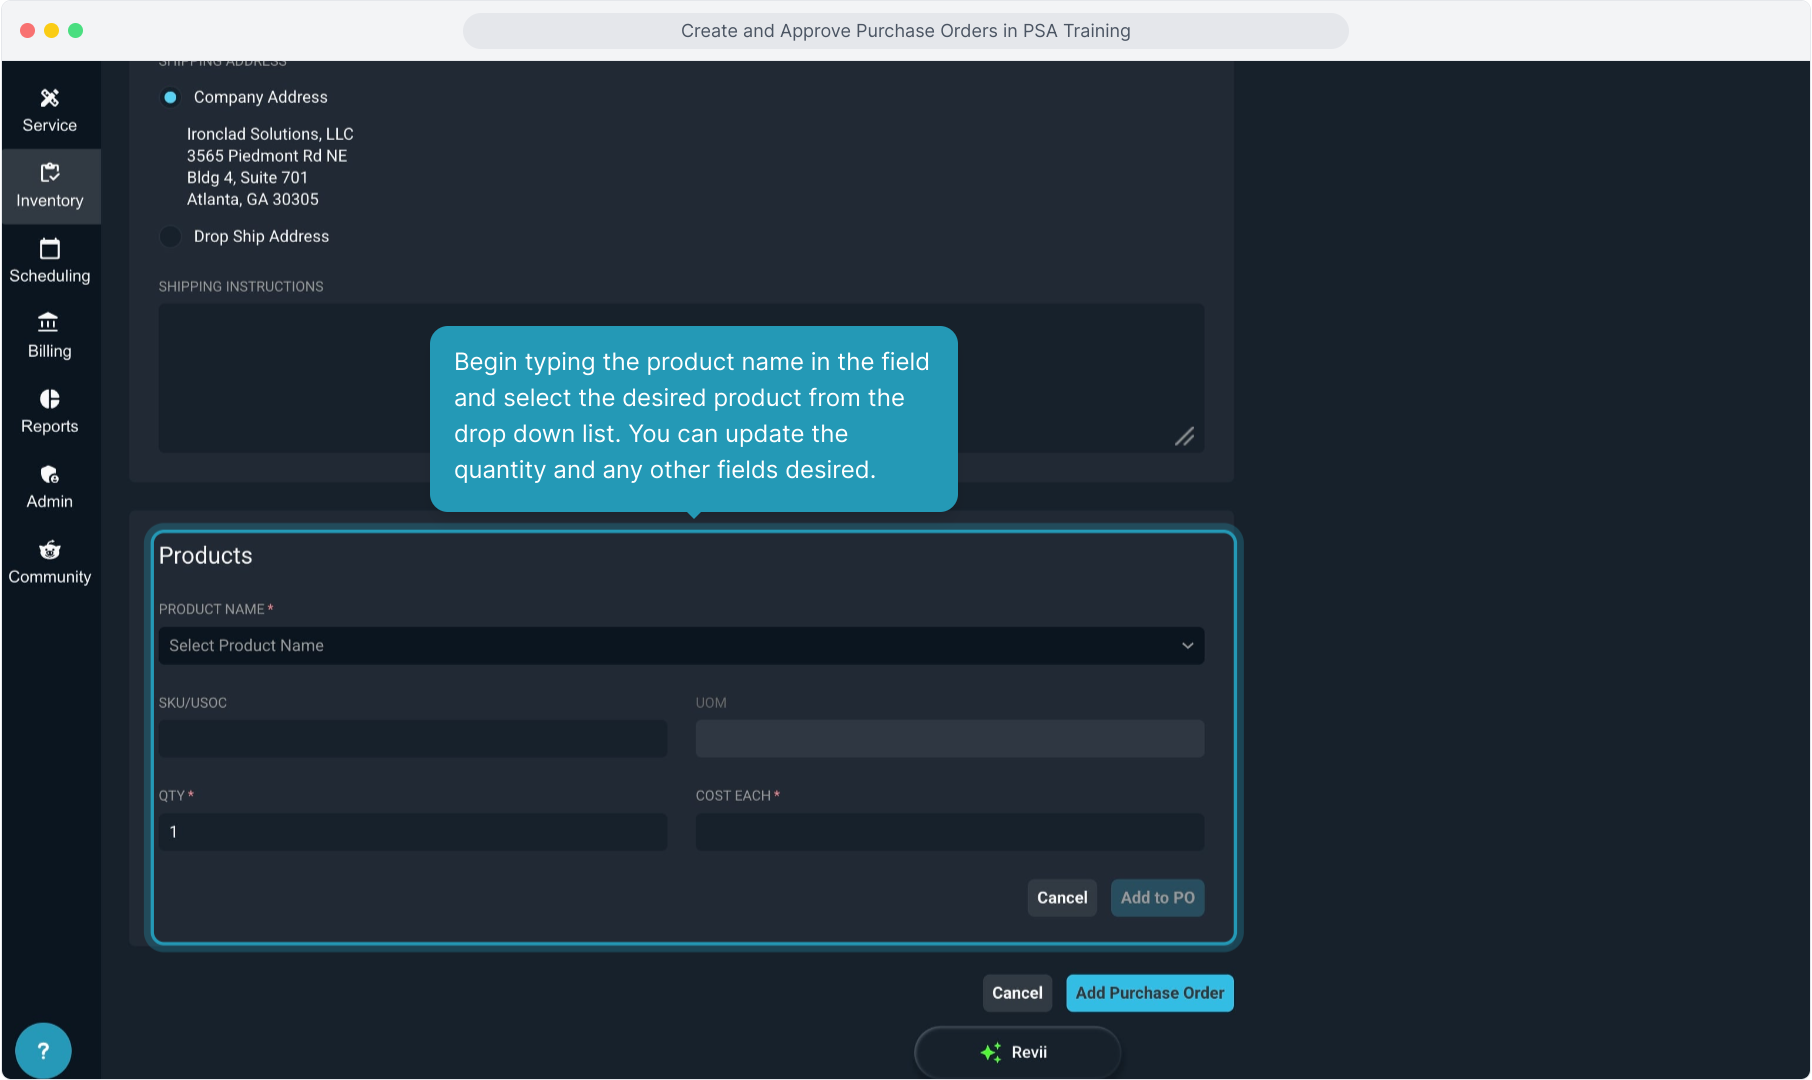
7. Now click the Add Product button to begin adding the items.
8. Begin typing the product name in the field and select the desired product from the drop down list. You can update the quantity and any other fields desired.
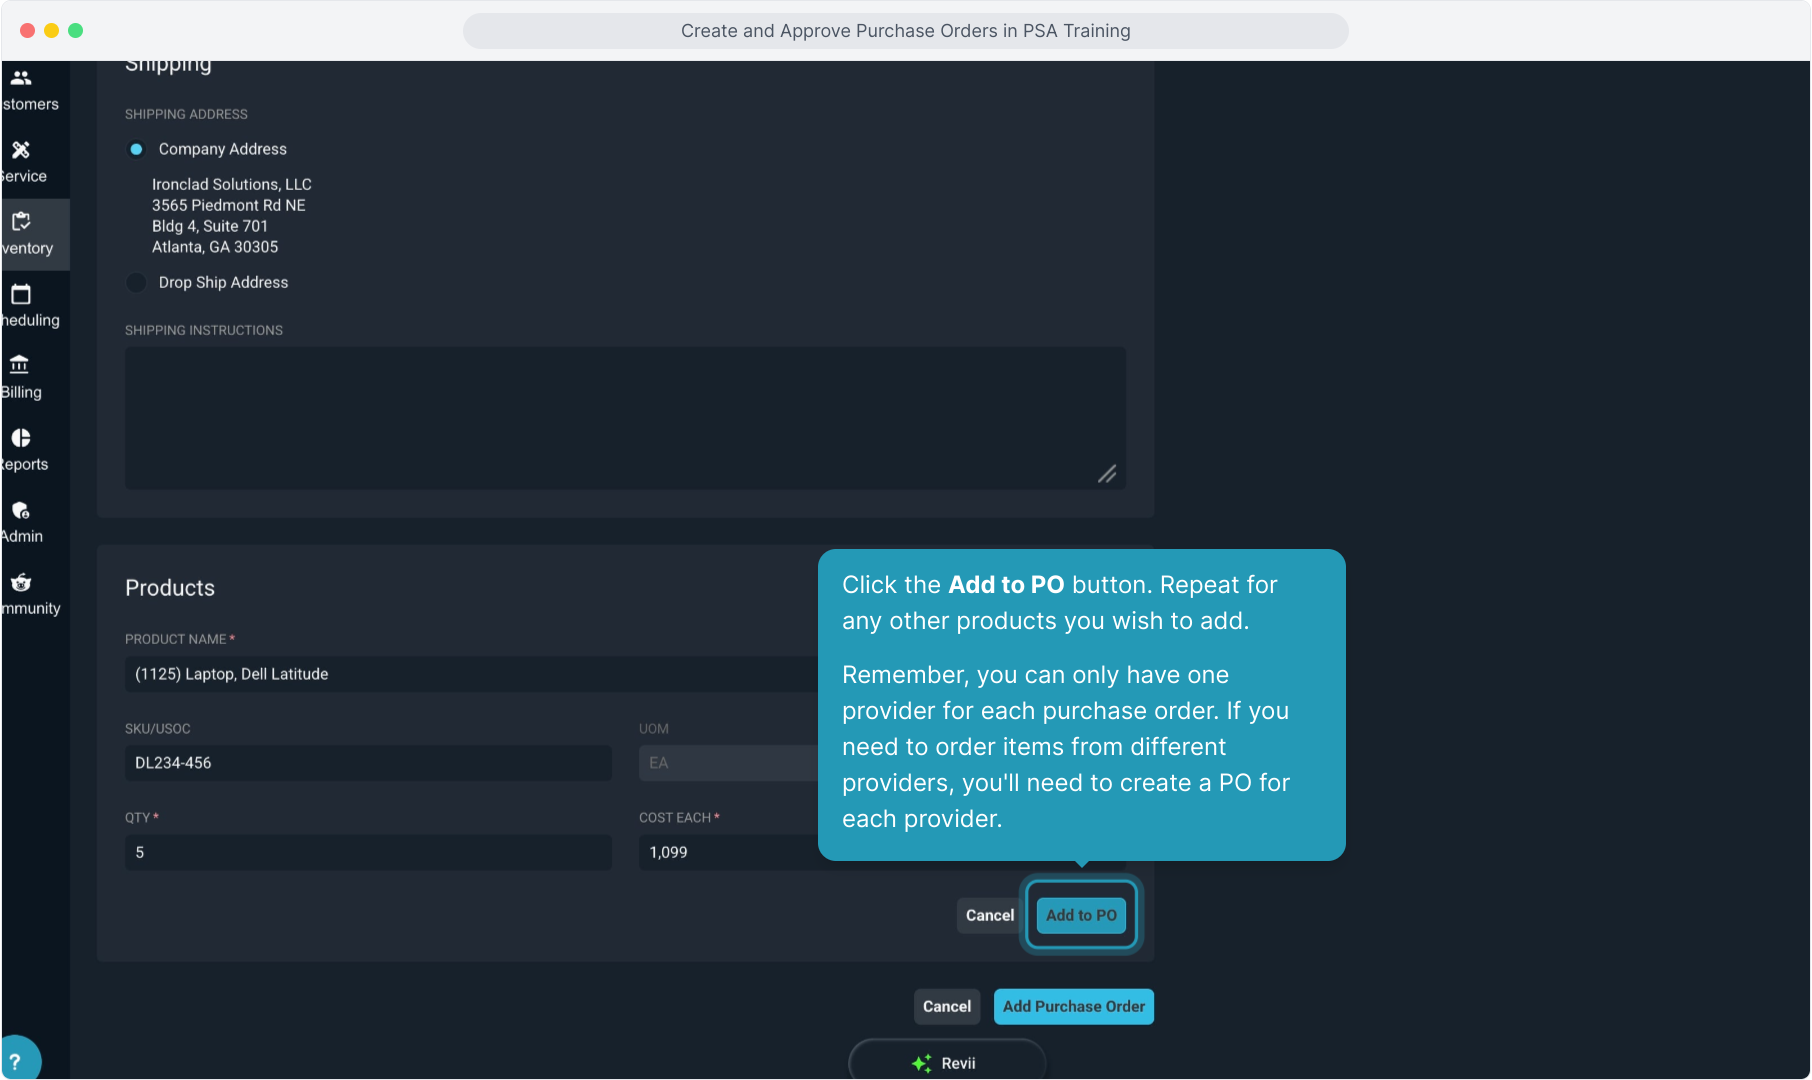
9. Click the Add to PO button. Repeat for any other products you wish to add.
Remember, you can only have one provider for each purchase order. If you need to order items from different providers, you'll need to create a PO for each provider.
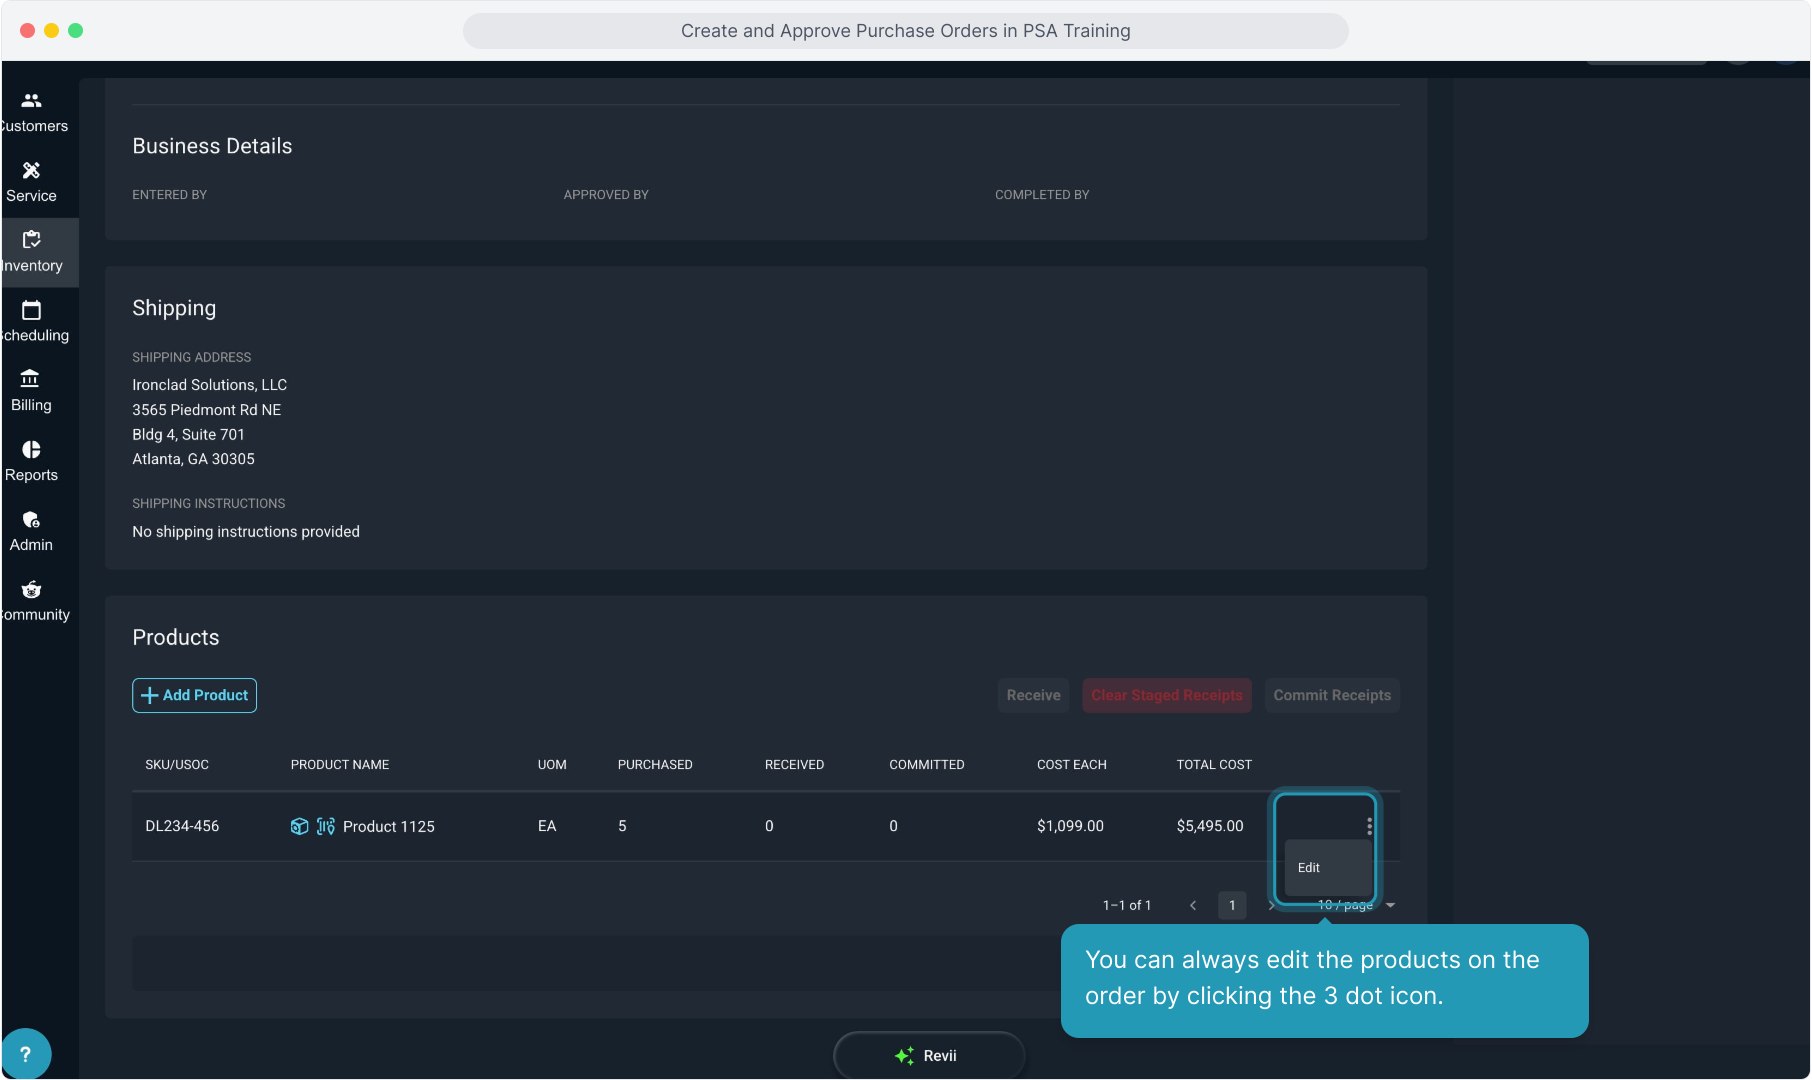
10. You can always edit the products on the order by clicking the 3 dot icon.
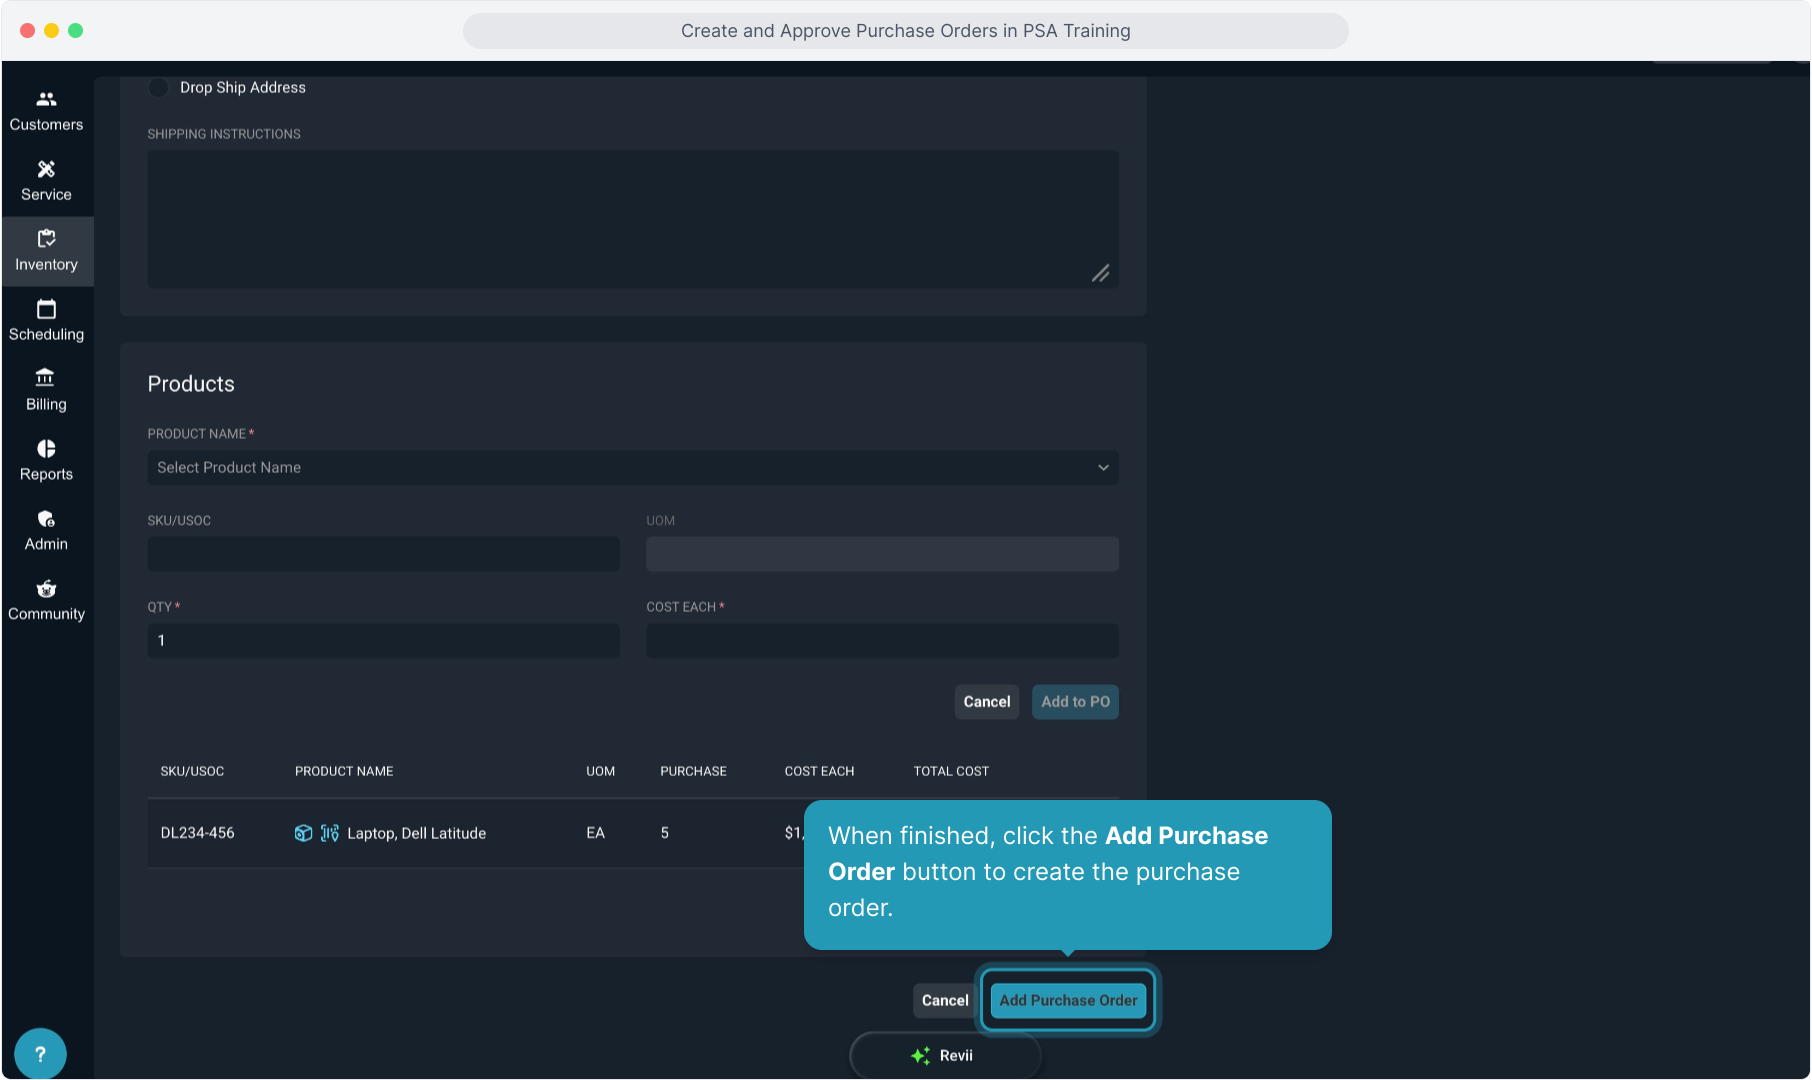
11. When finished, click the Add Purchase Order button to create the purchase order.
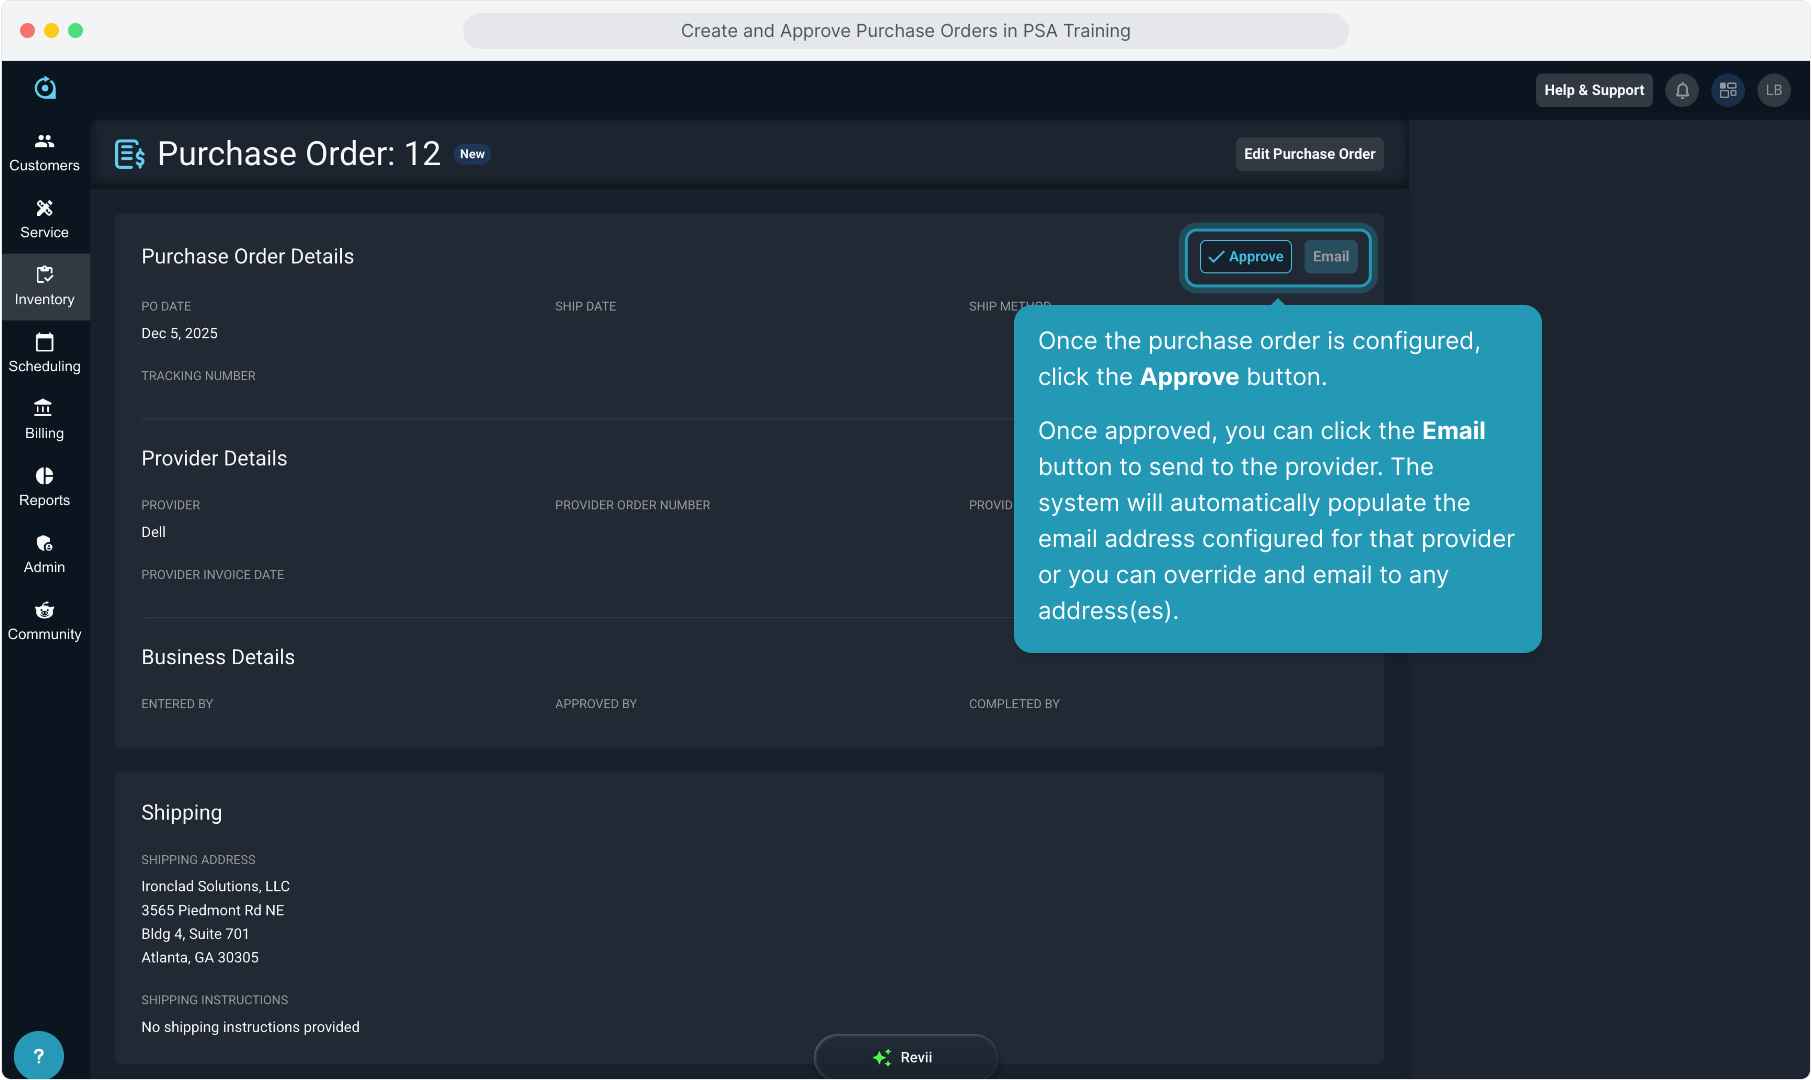
12. Once the purchase order is configured, click the Approve button.
Once approved, you can click the Email button to send to the provider. The system will automatically populate the email address configured for that provider or you can override and email to any address(es).