
System Settings: Service
The Service category on the System Settings screen allows you to enter settings for tickets created in your instance, including default status, type, priority, and rep group. When creating new tickets, the options set here will be pre-selected, but can always be changed on individual tickets as needed.
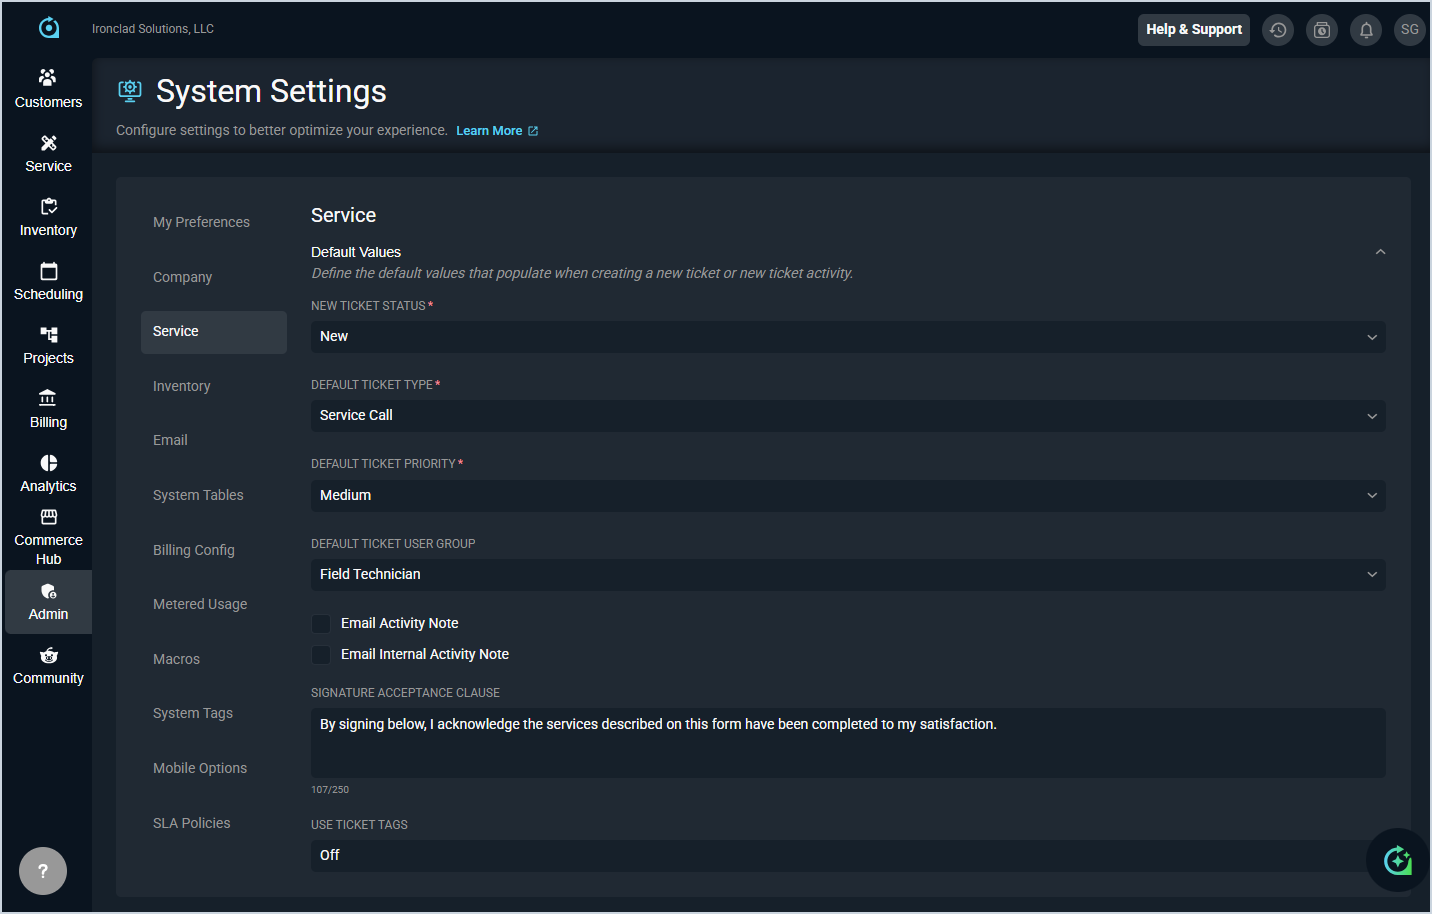
Each field in the Default Values section is defined below.
| No. | Label | Definition |
| 1 | New Ticket Status | Default status assigned to tickets when they are created. |
| 2 | Default Ticket Type | Default type assigned to tickets when they are created. |
| 3 | Default Ticket Priority | Default priority assigned to tickets when they are created. |
| 4 | Default Ticket User Group | Default user group assigned to tickets when they are created. |
| 5 | Email Activity Note | Check this option to automatically set the Email field on the ticket Activity tab when creating new public activity notes. See the Add Ticket Activity article for more information. |
| 6 | Email Internal Activity Note | Check this option to automatically set the Email field on the ticket Activity tab when creating new internal activity notes. See the Add Ticket Activity article for more information. |
| 7 | Signature Acceptance Clause | The acceptance clause displayed to customers when capturing a signature on a ticket. Maximum 250 characters. |
| 8 | Use Ticket Tags | Controls which tags are available for use on tickets. Options include System Tags Only, Custom Tags Only, and Both. See the Ticket Tags section on the System Settings: System Tables - Ticket article for more information on configuring ticket tags. |
These actions are available in the Service category.
- Configure your service defaults by completing the fields in the Default Values section and clicking the Save button.
- See the System Settings Overview article for more information about the other categories on the System Settings screen.