
View Collection Step Details
The Collection Step Details screen lets you drill into a specific collection step from the Collections list view to see the customers currently in queue that require action. From this screen, you can process the step directly or assign it to one or more users, making it easy to manage responsibility and keep collections moving forward.
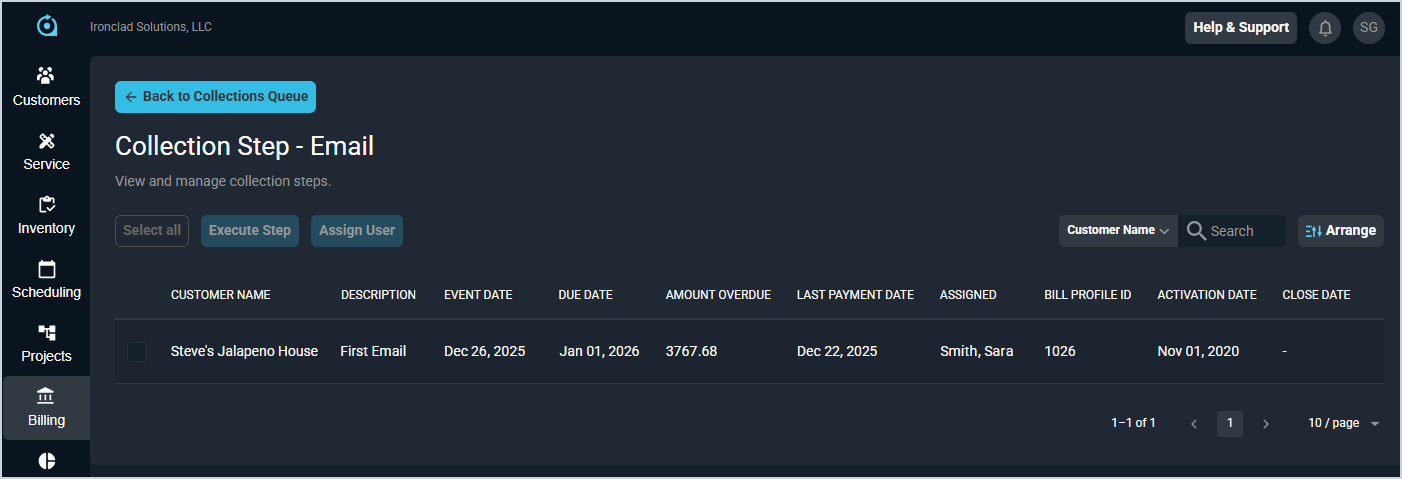
Each field on the Collection Step Details screen is defined below.
| No. | Label | Definition |
| 1 | Customer Name | Name of the customer requiring the collection step. |
| 2 | Description | Description of the collection step entered on the collections template. See the Add/Edit Collection Templates article for more information. |
| 3 | Event Date | Date the customer entered the queue for the collection step. |
| 4 | Due Date | Date the overdue payment was due. |
| 5 | Amount Overdue | Amount overdue on the customer account. |
| 6 | Last Payment Date | Date the last payment was made on the customer account. |
| 7 | Assigned | User in the system assigned to execute the step. At this time, the user is not notified in the system when they are assigned a collection step. |
| 8 | Bill Profile ID | Numerical identifier for the bill profile assigned to the customer. |
| 9 | Activation Date | Date the customer was activated in your instance. |
| 10 | Close Date | Date the customer was closed in your instance, if applicable. |
These actions are available on the Collection Step Details screen.
- Take actions for all customers on the screen at once by clicking the Select All button and then clicking the Execute Step or Assign User button.
- Execute the step for a customer by selecting the checkbox at the start of the row and clicking the Execute Step button.
- Assign a user to execute the step by selecting the checkbox at the start of the row and clicking the Assign User button.
- Search the customers displayed on this view by selecting a column from the dropdown above the grid and entering text in the Search field. The list view updates to display records matching your search in the column you selected.
- Customize which columns display in the list view and the order in which they display by clicking the Arrange button and making the desired changes. See the Arrange Columns article for more information.