How To Guide: Billing Configuration - Bill Profile
1. Introduction
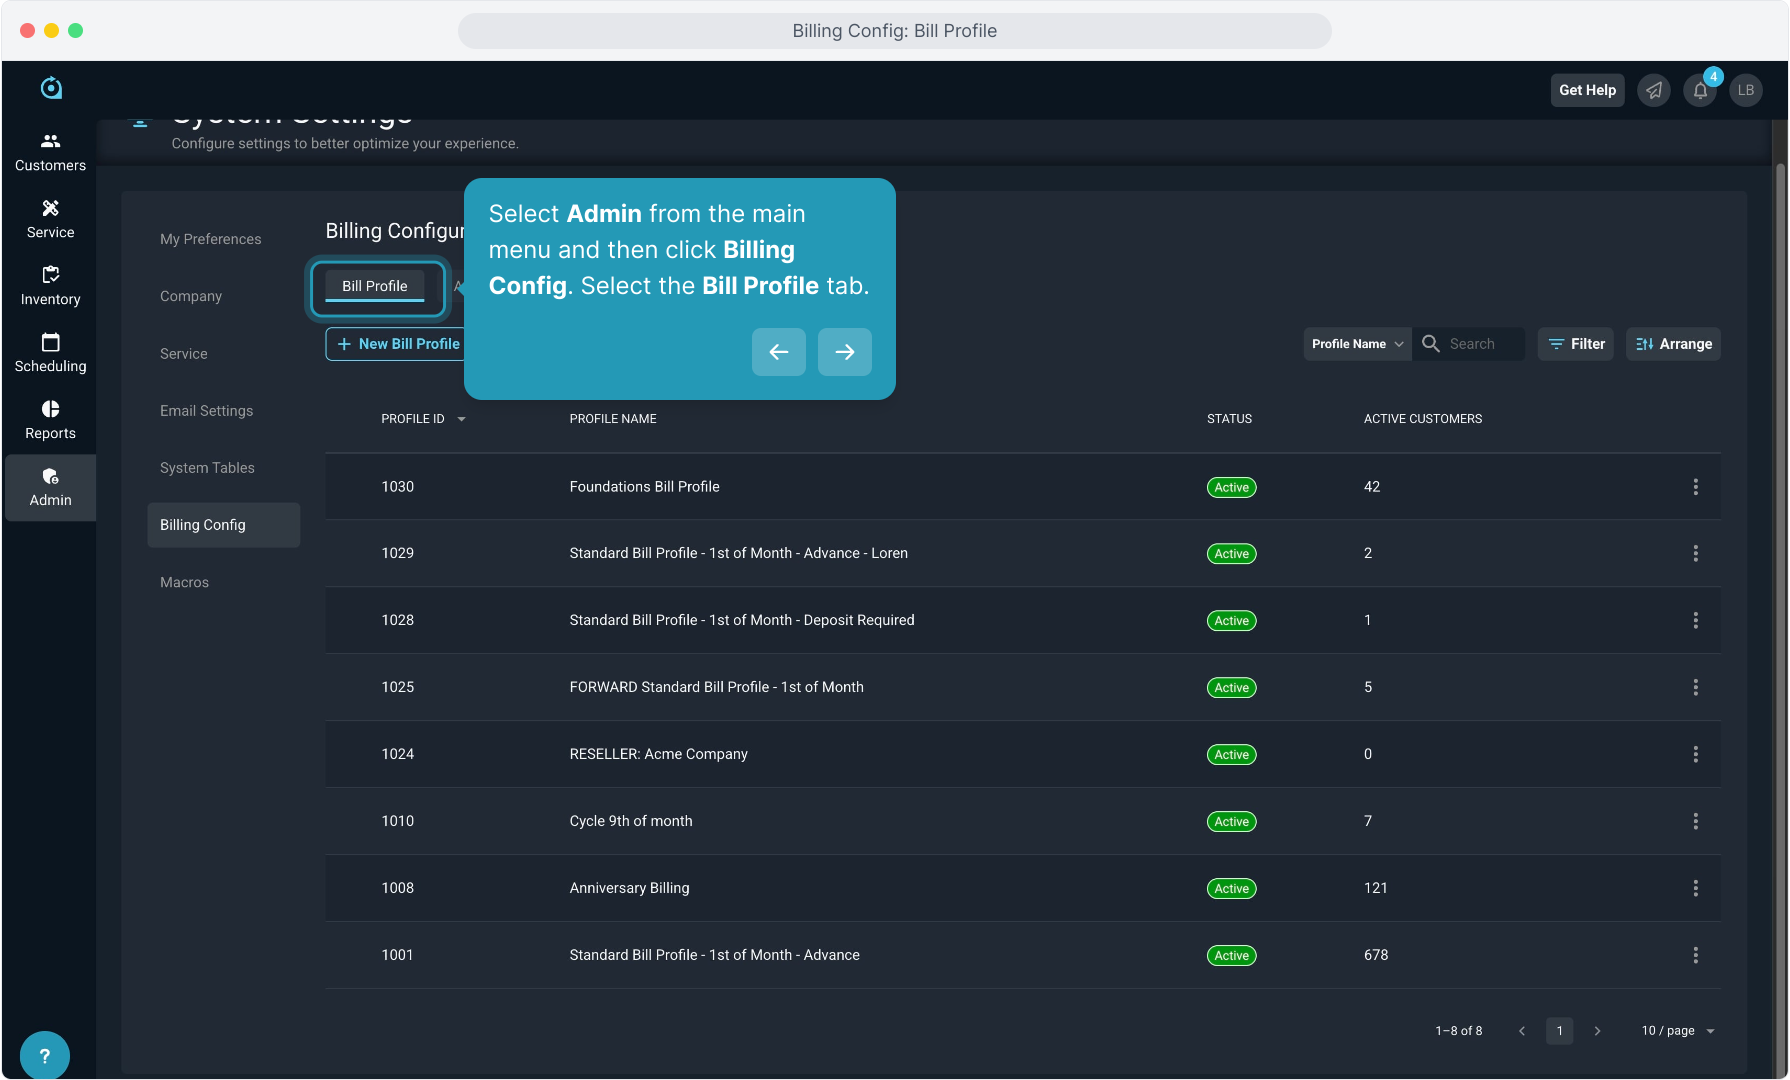
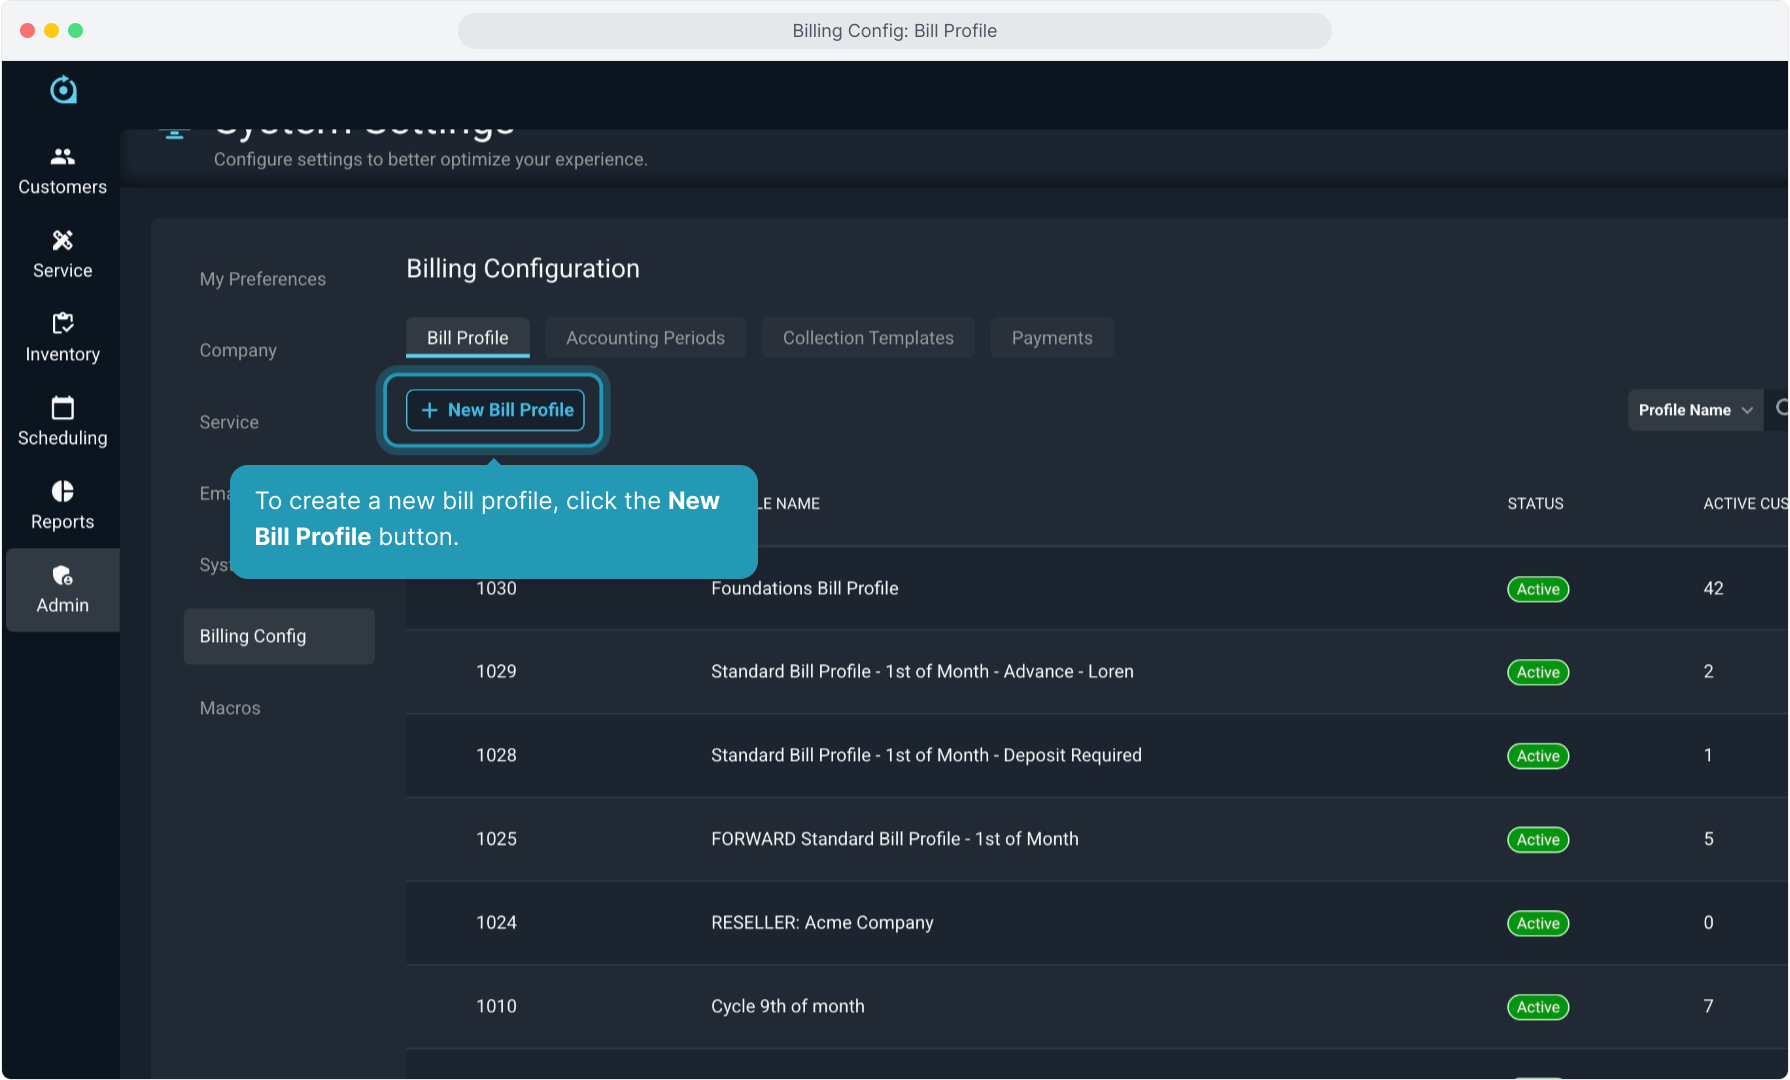
2. Select Admin from the main menu and then click Billing Config. Select the Bill Profile tab.
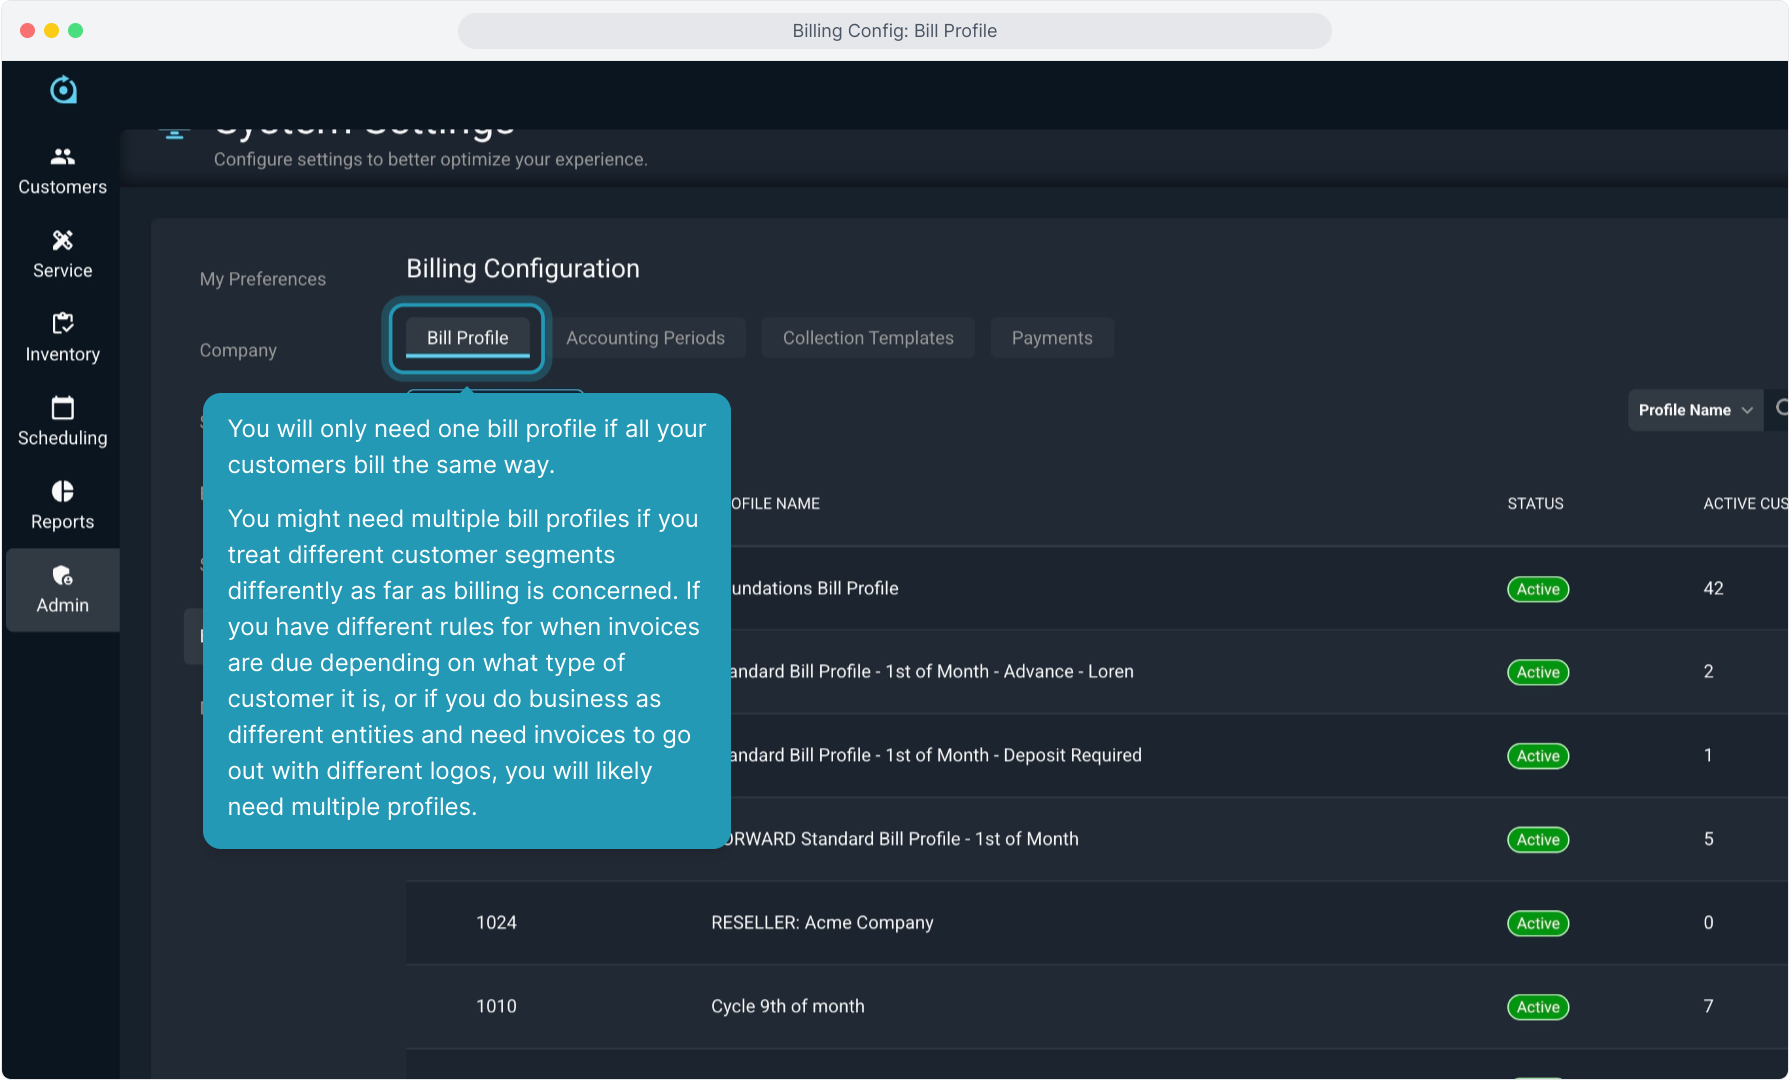
3. You will only need one bill profile if all your customers bill the same way.
You might need multiple bill profiles if you treat different customer segments differently as far as billing is concerned. If you have different rules for when invoices are due depending on what type of customer it is, or if you do business as different entities and need invoices to go out with different logos, you will likely need multiple profiles.
4. To create a new bill profile, click the New Bill Profile button.
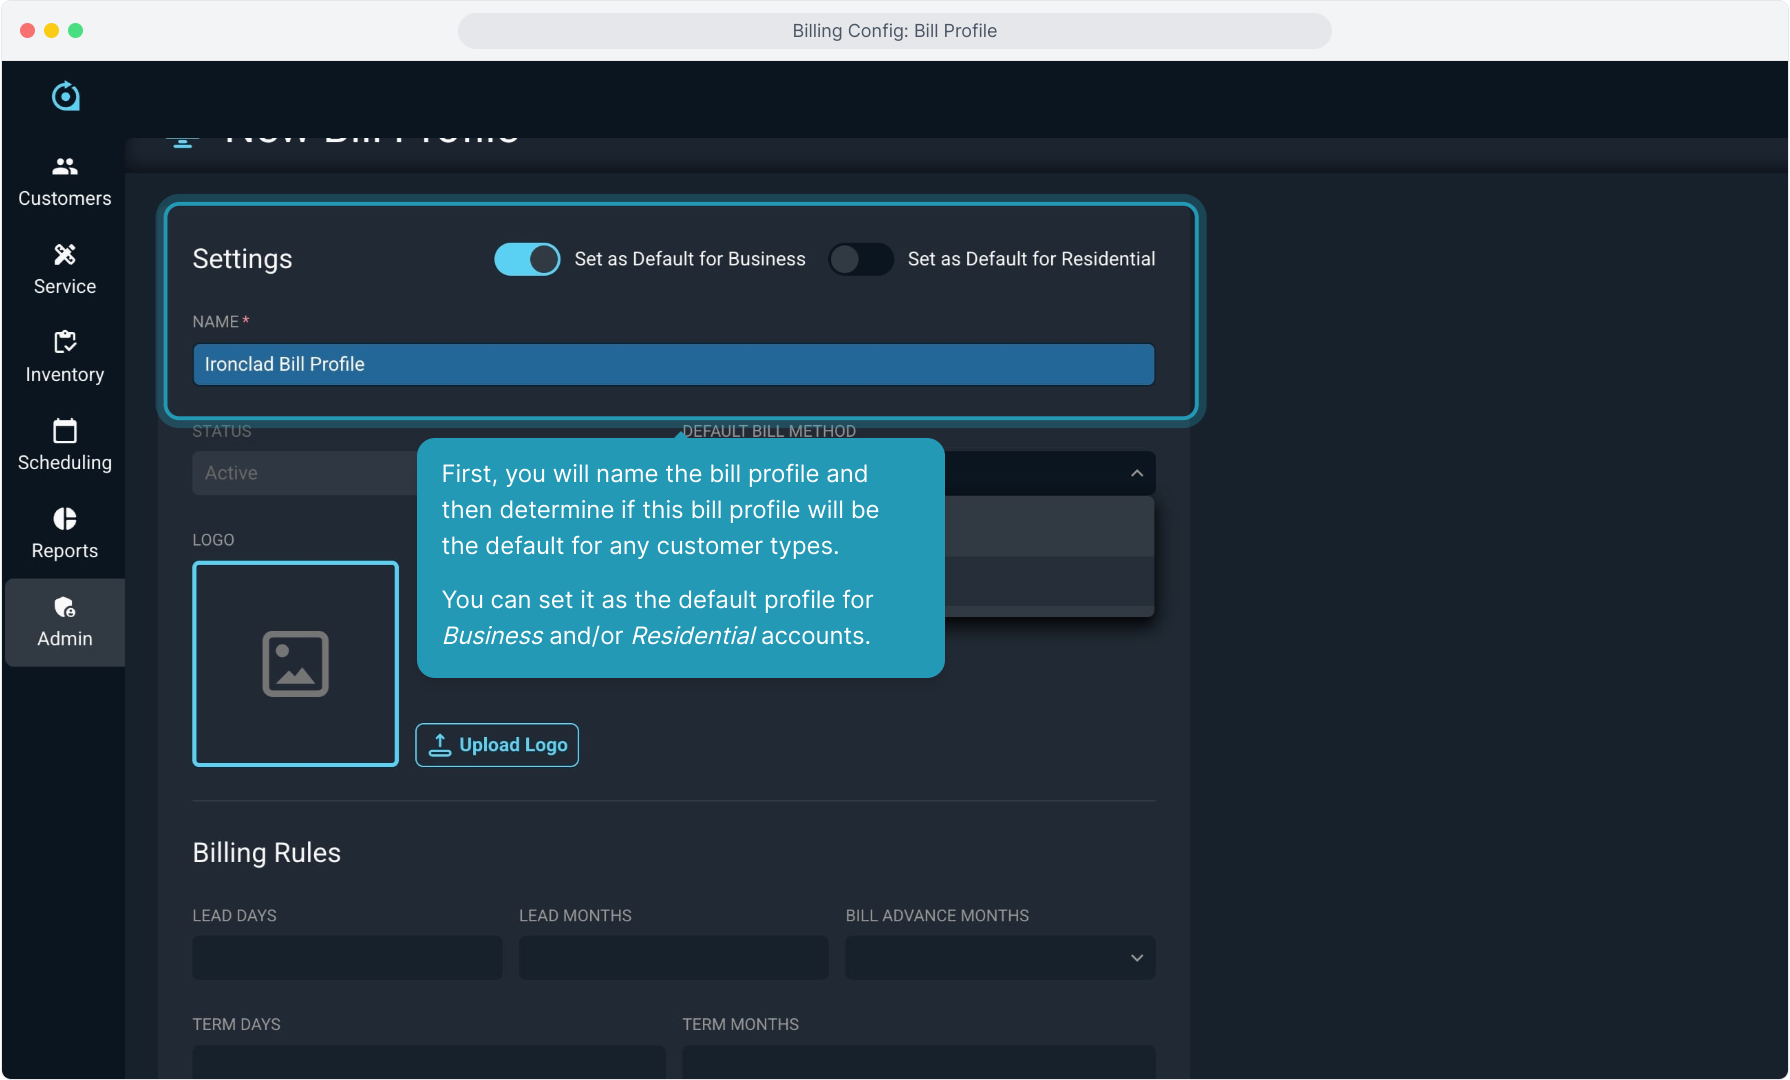
5. First, you will name the bill profile and then determine if this bill profile will be the default for any customer types.
You can set it as the default profile for Business and/or Residential accounts.
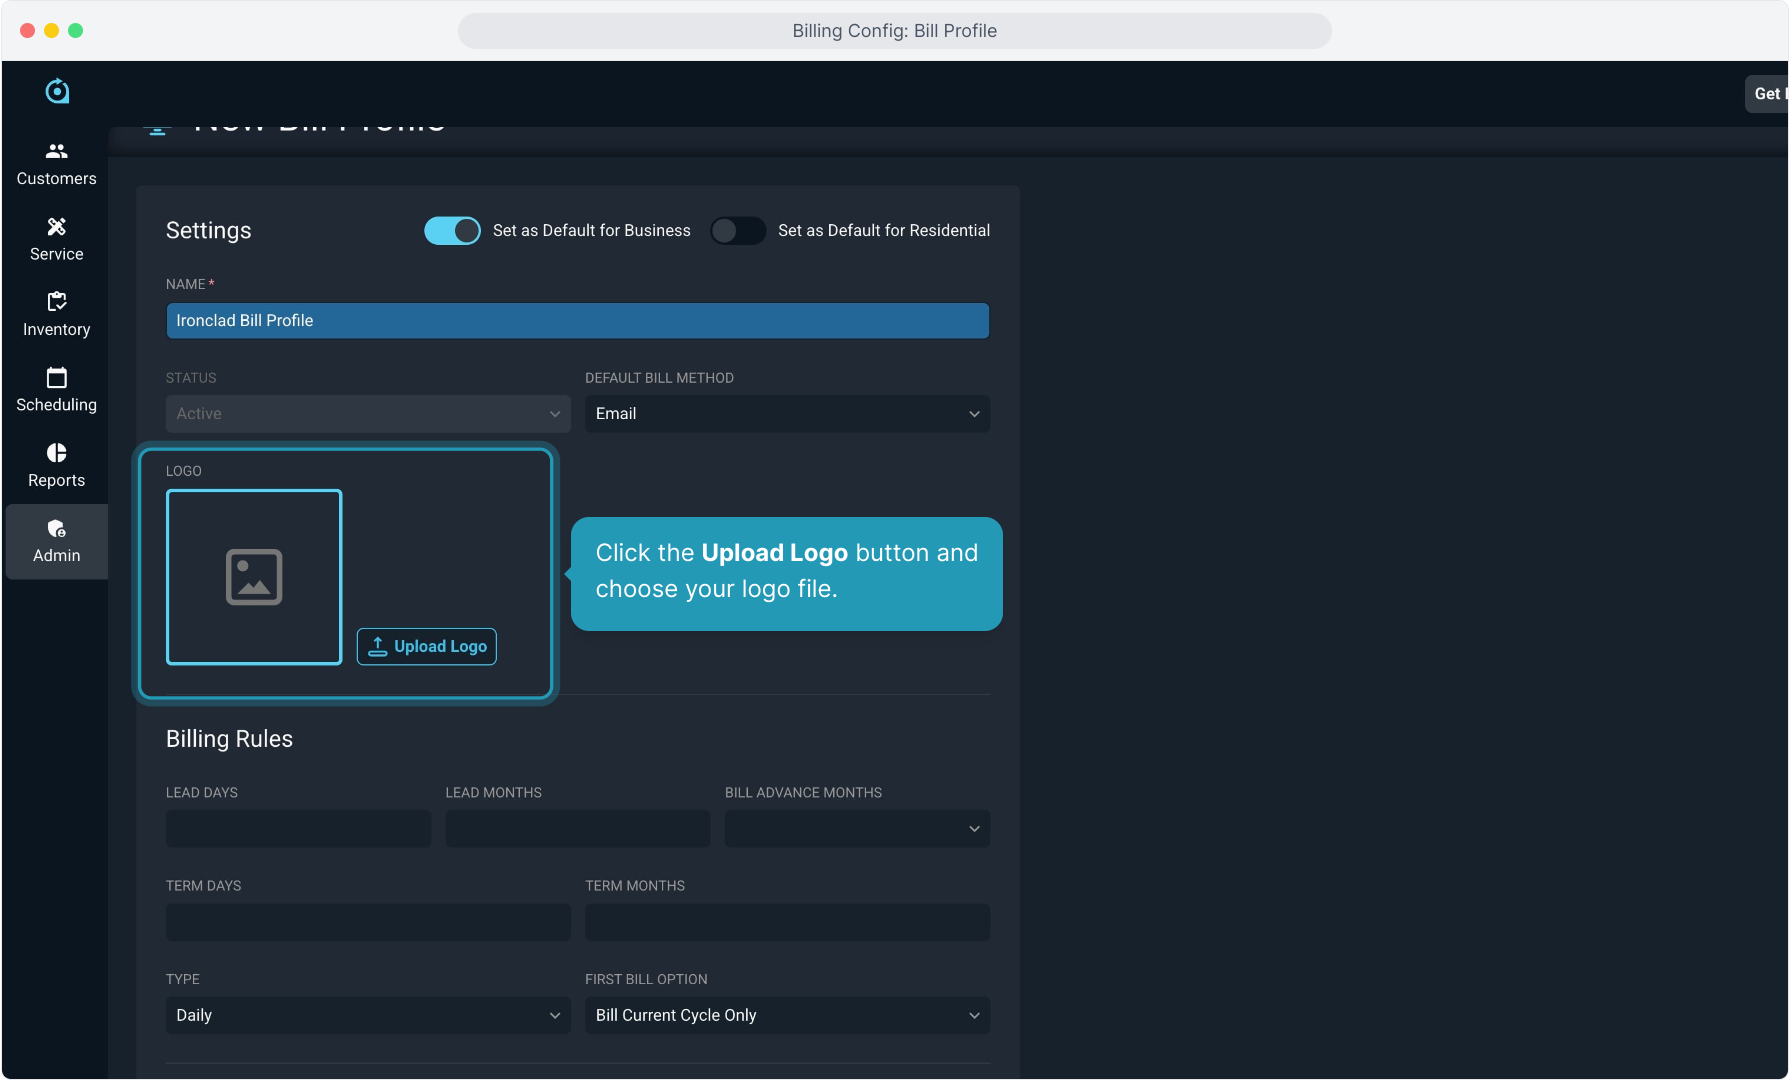
6. You will determine whether the Default Bill Method for this group of customers is Email or Paper.

7. Click the Upload Logo button and choose your logo file.
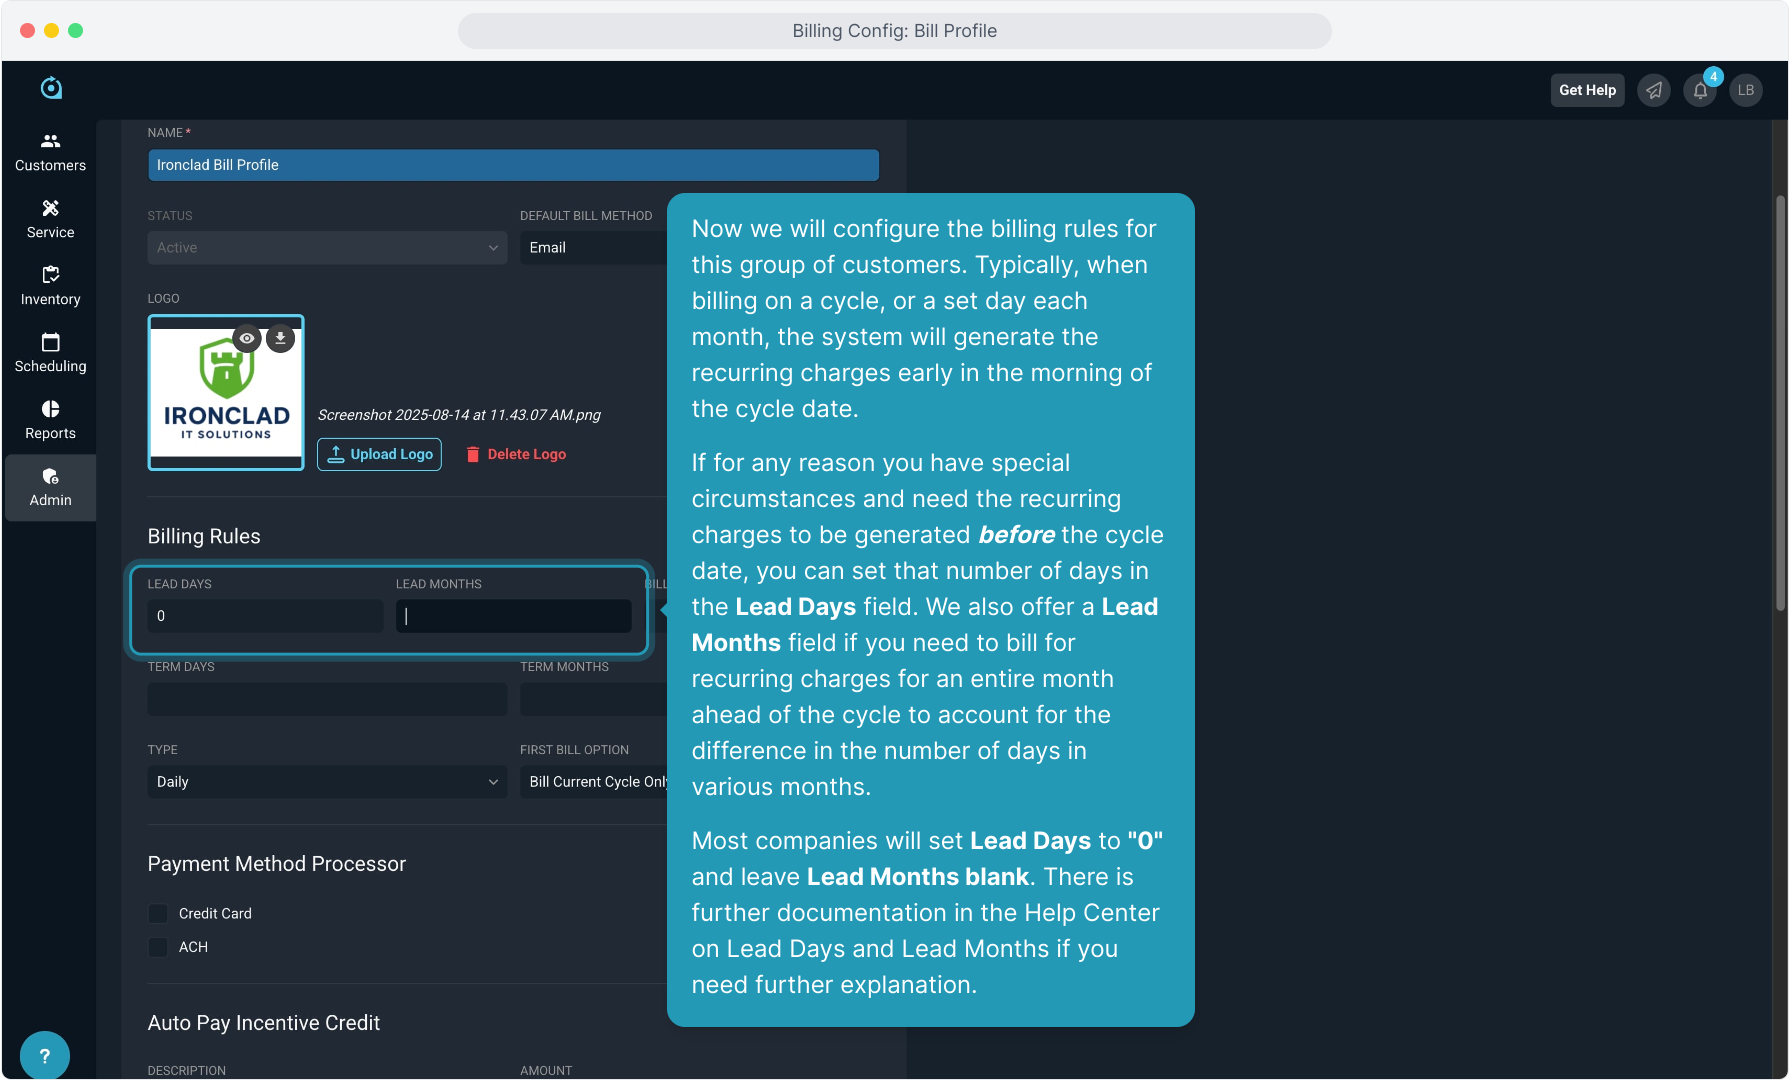
8. Now we will configure the billing rules for this group of customers. Typically, when billing on a cycle, or a set day each month, the system will generate the recurring charges early in the morning of the cycle date.
If for any reason you have special circumstances and need the recurring charges to be generated before the cycle date, you can set that number of days in the Lead Days field. We also offer a Lead Months field if you need to bill for recurring charges for an entire month ahead of the cycle to account for the difference in the number of days in various months.
Most companies will set Lead Days to "0" and leave Lead Months blank. There is further documentation in the Help Center on Lead Days and Lead Months if you need further explanation.
9. Bill Advance Months controls whether you invoice customers in advance or in arrears.
Examples:
If you invoice customers on the 1st of a month for the upcoming month, you bill in advance and should set Advance Months to "1".
If you invoice customers on the 1st of a month for the previous month, you bill in arrears and should set Advance Months to "0".

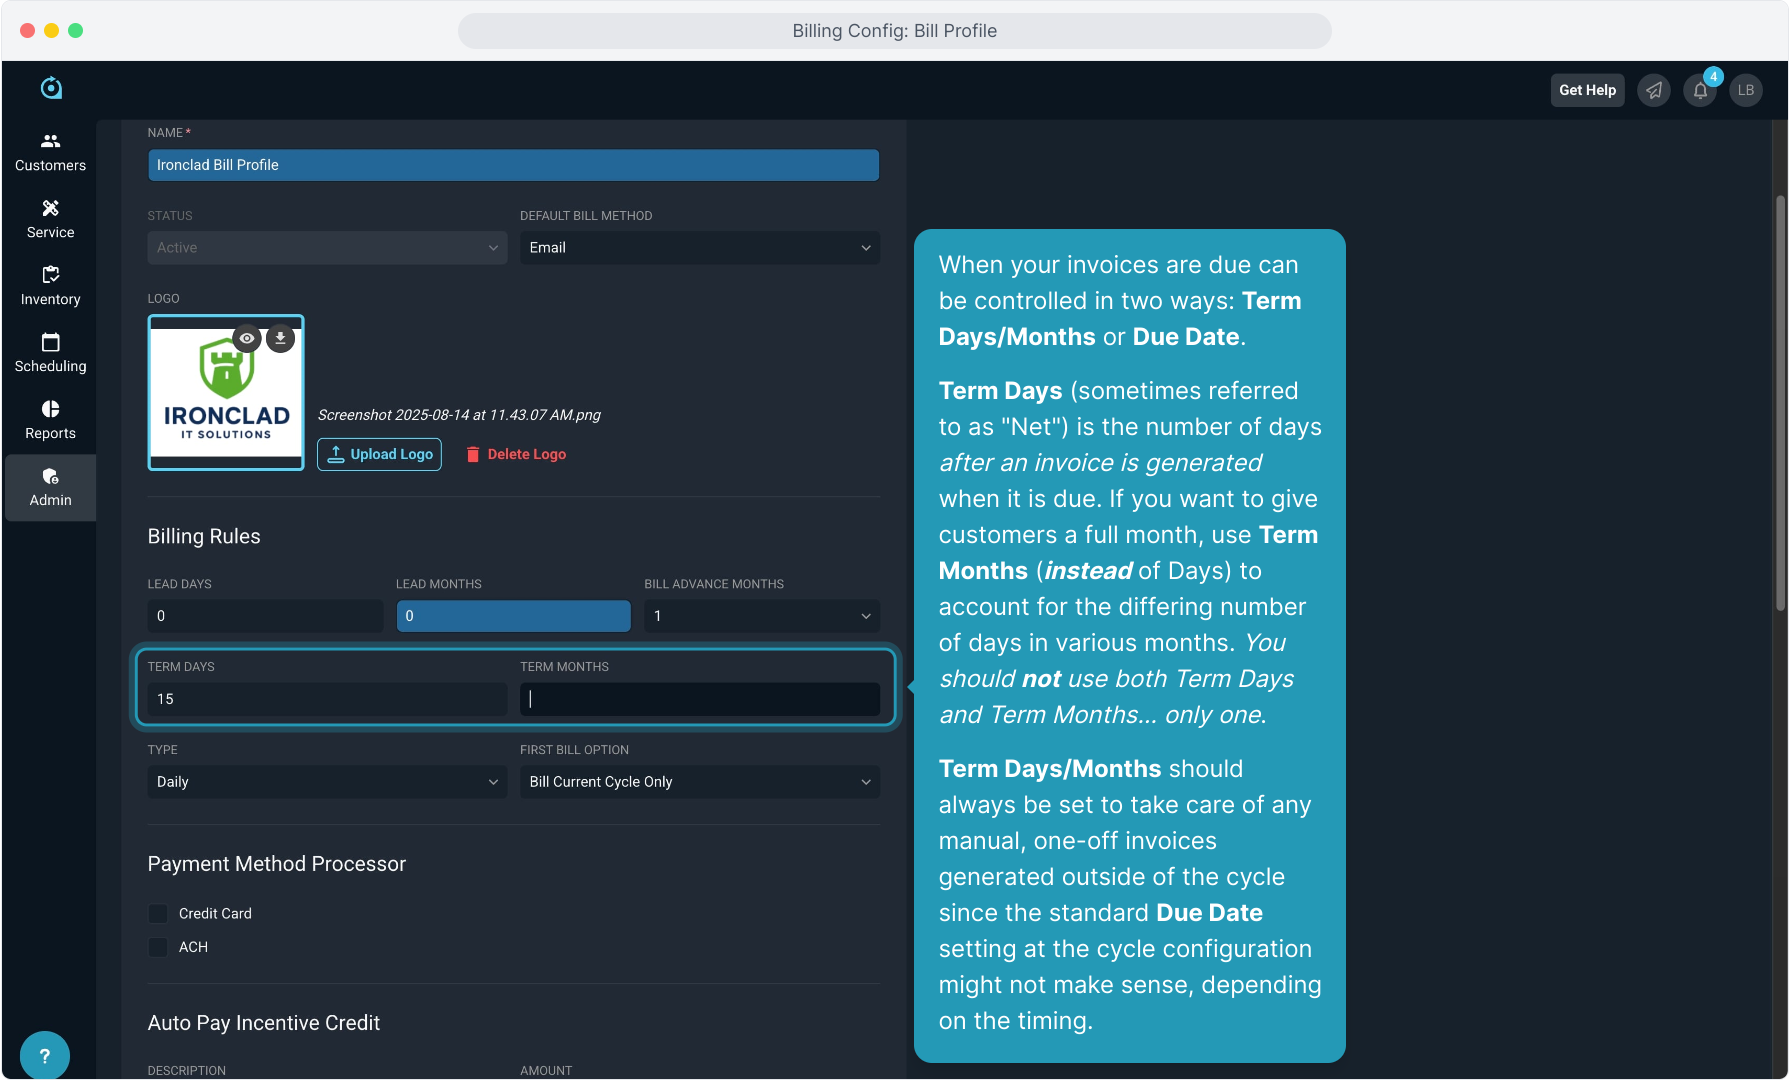
10. When your invoices are due can be controlled in two ways: Term Days/Months or Due Date.
Term Days (sometimes referred to as "Net") is the number of days after an invoice is generated when it is due. If you want to give customers a full month, use Term Months (instead of Days) to account for the differing number of days in various months. You should not use both Term Days and Term Months... only one.
Term Days/Months should always be set to take care of any manual, one-off invoices generated outside of the cycle since the standard Due Date setting at the cycle configuration might not make sense, depending on the timing.
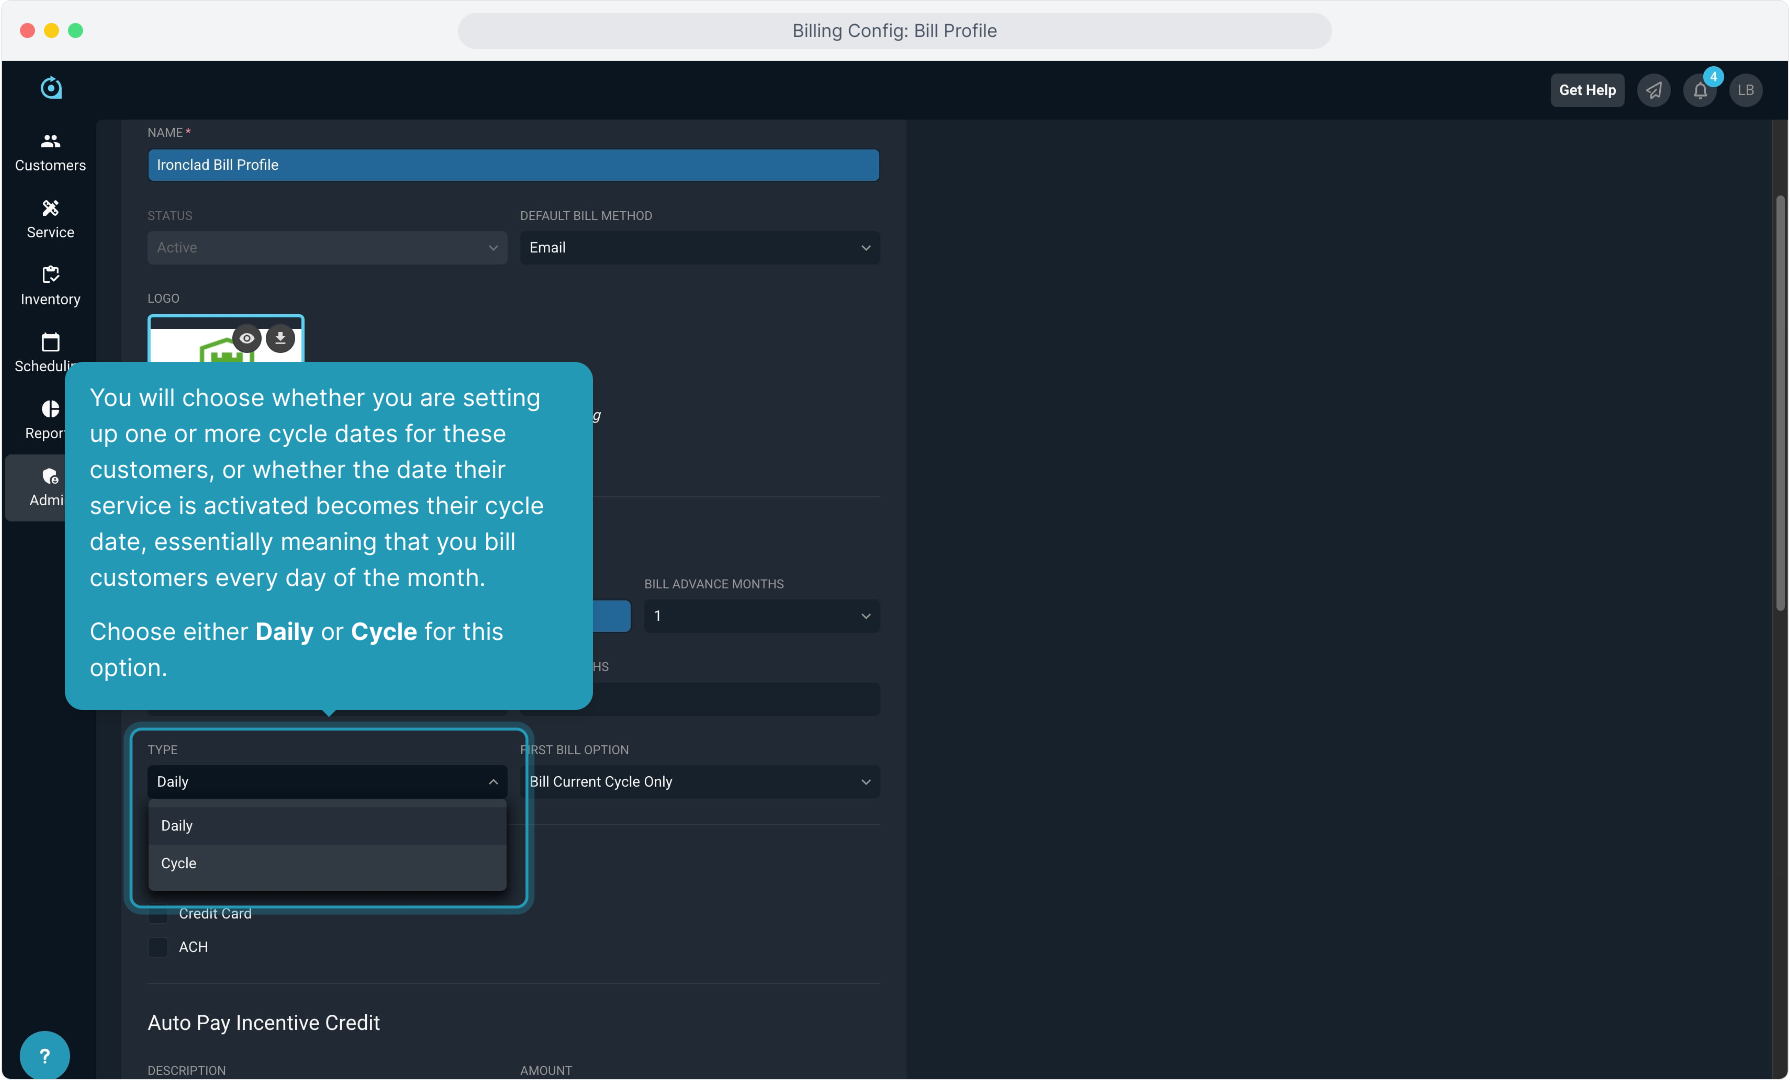
11. You will choose whether you are setting up one or more cycle dates for these customers, or whether the date their service is activated becomes their cycle date, essentially meaning that you bill customers every day of the month.
Choose either Daily or Cycle for this option.
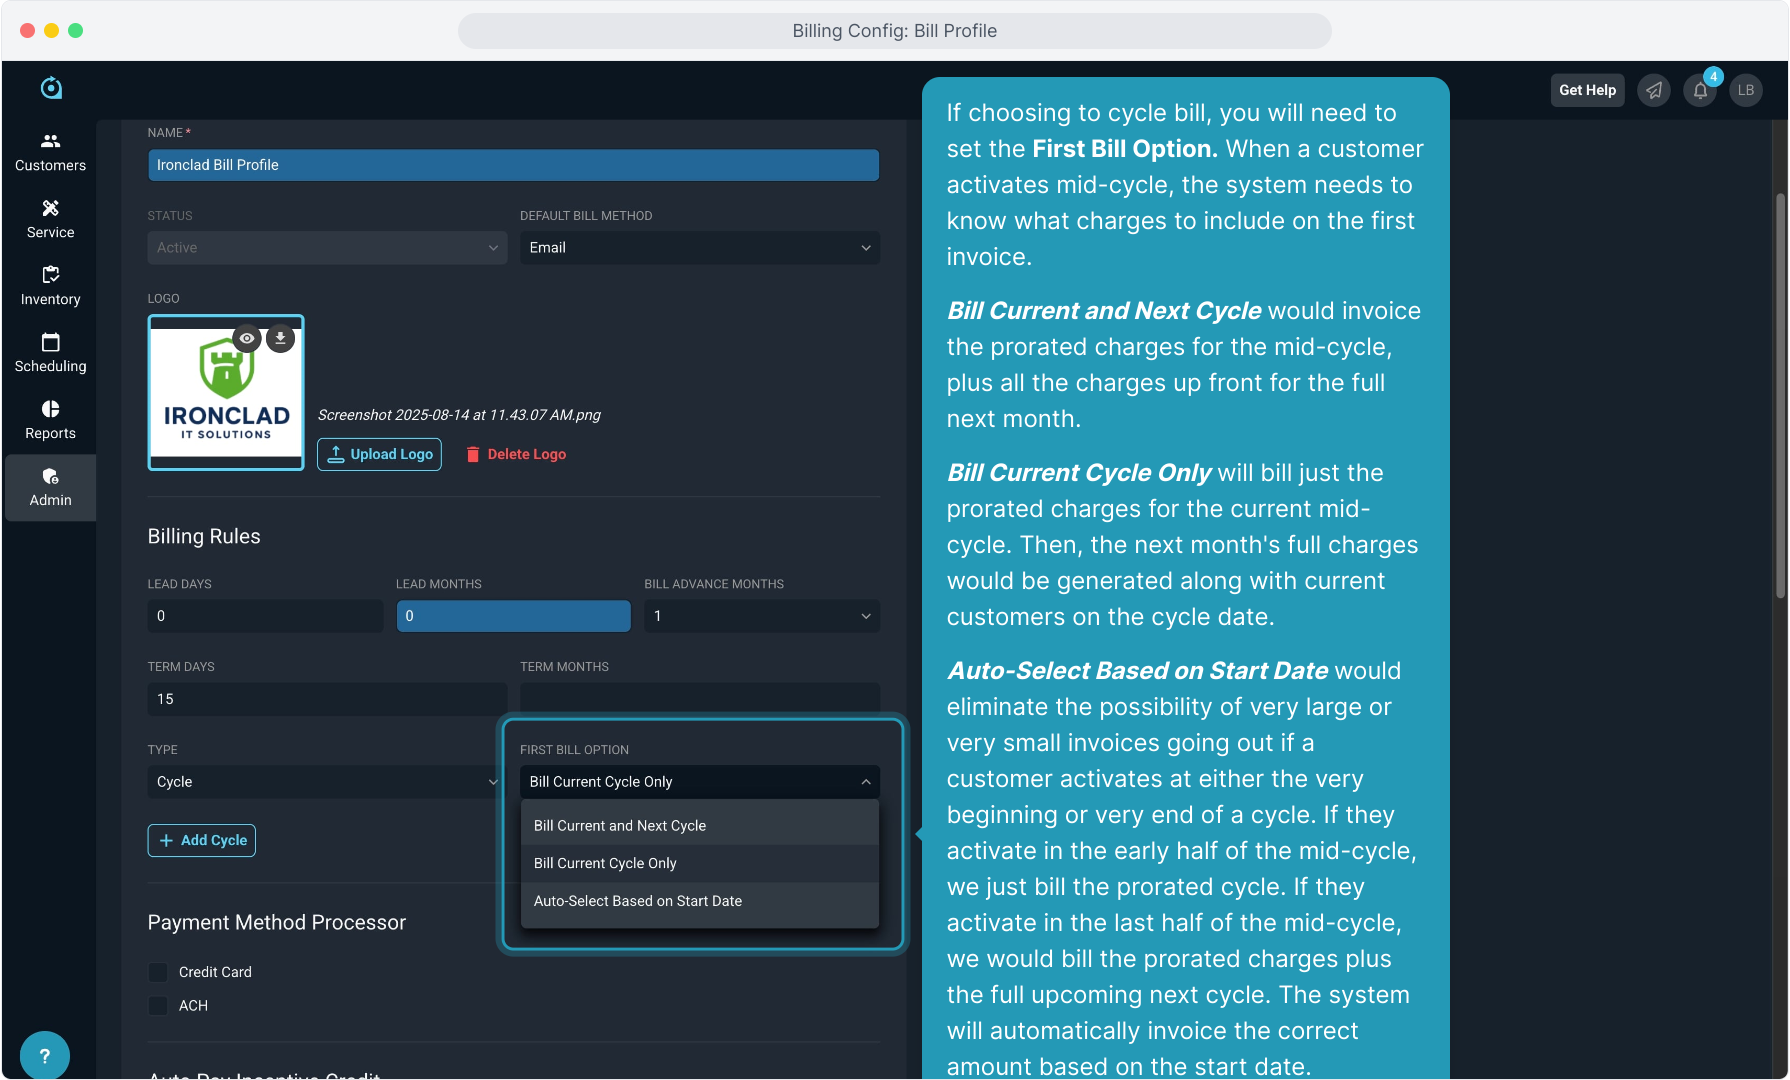
12. If choosing to cycle bill, you will need to set the First Bill Option. When a customer activates mid-cycle, the system needs to know what charges to include on the first invoice.
Bill Current and Next Cycle would invoice the prorated charges for the mid-cycle, plus all the charges up front for the full next month.
Bill Current Cycle Only will bill just the prorated charges for the current mid-cycle. Then, the next month's full charges would be generated along with current customers on the cycle date.
Auto-Select Based on Start Date would eliminate the possibility of very large or very small invoices going out if a customer activates at either the very beginning or very end of a cycle. If they activate in the early half of the mid-cycle, we just bill the prorated cycle. If they activate in the last half of the mid-cycle, we would bill the prorated charges plus the full upcoming next cycle. The system will automatically invoice the correct amount based on the start date.
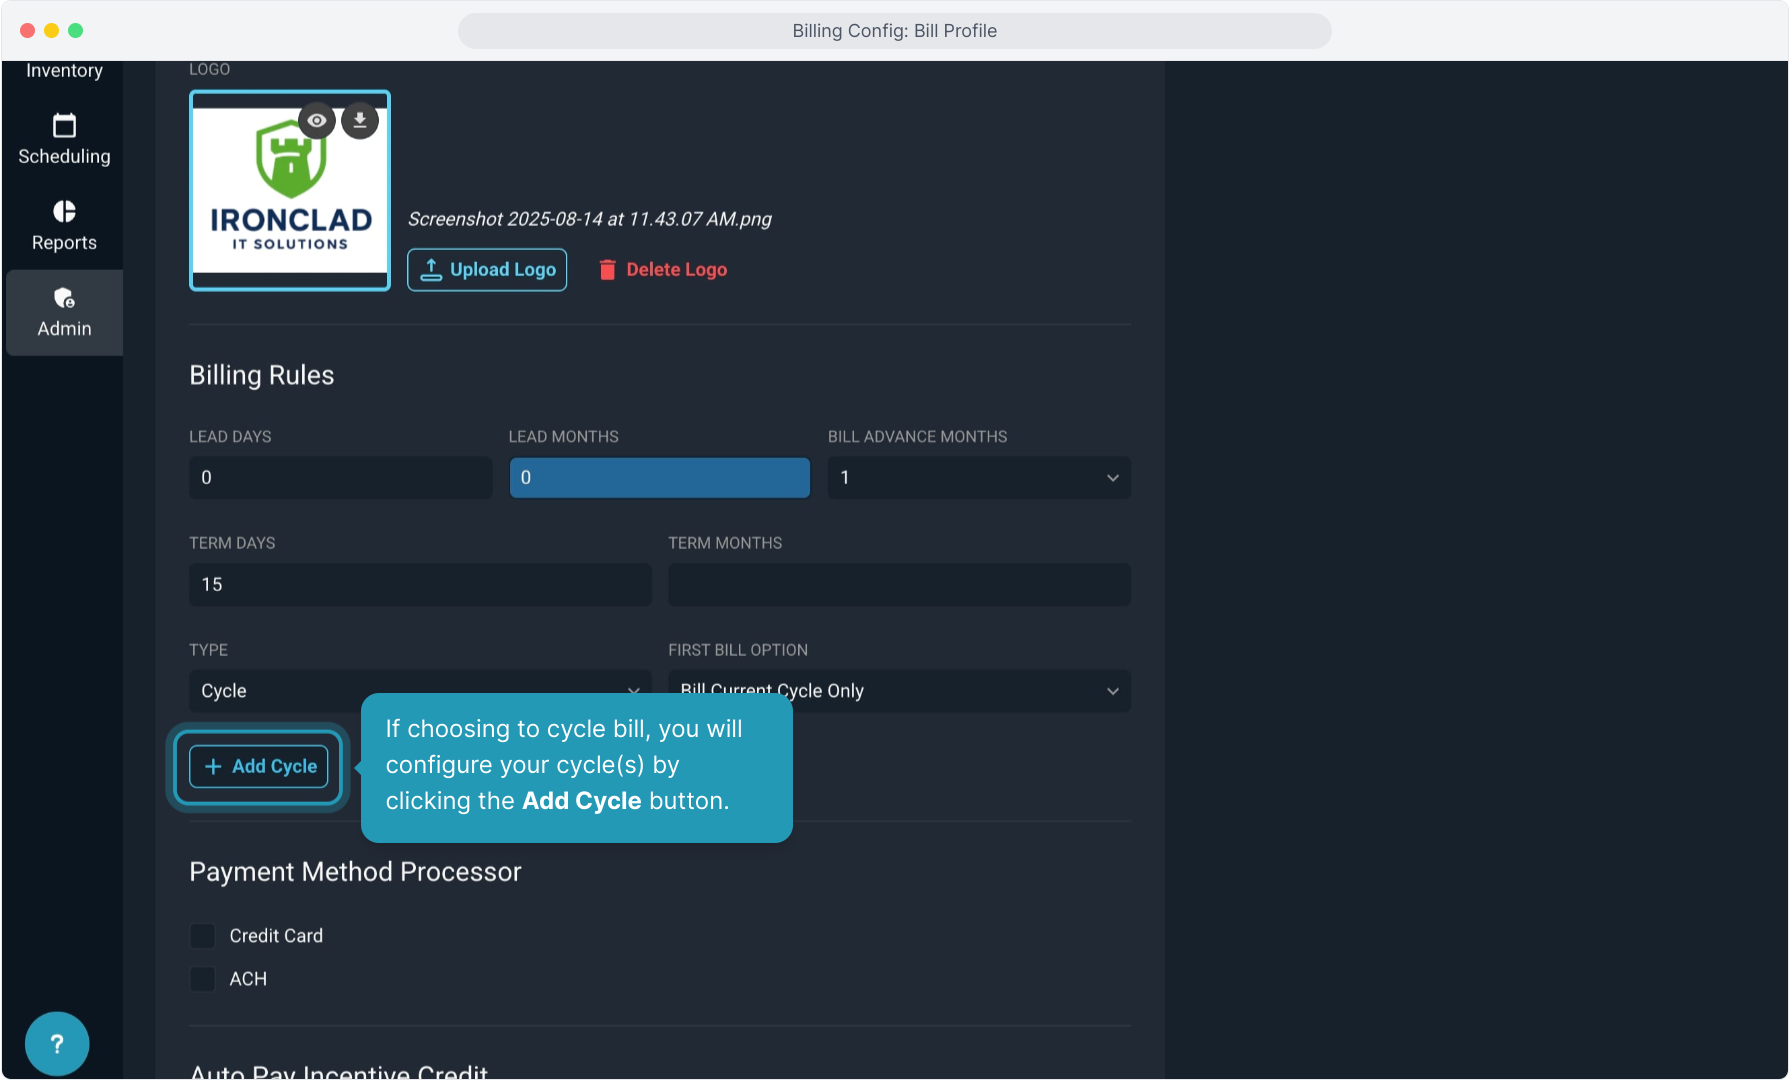
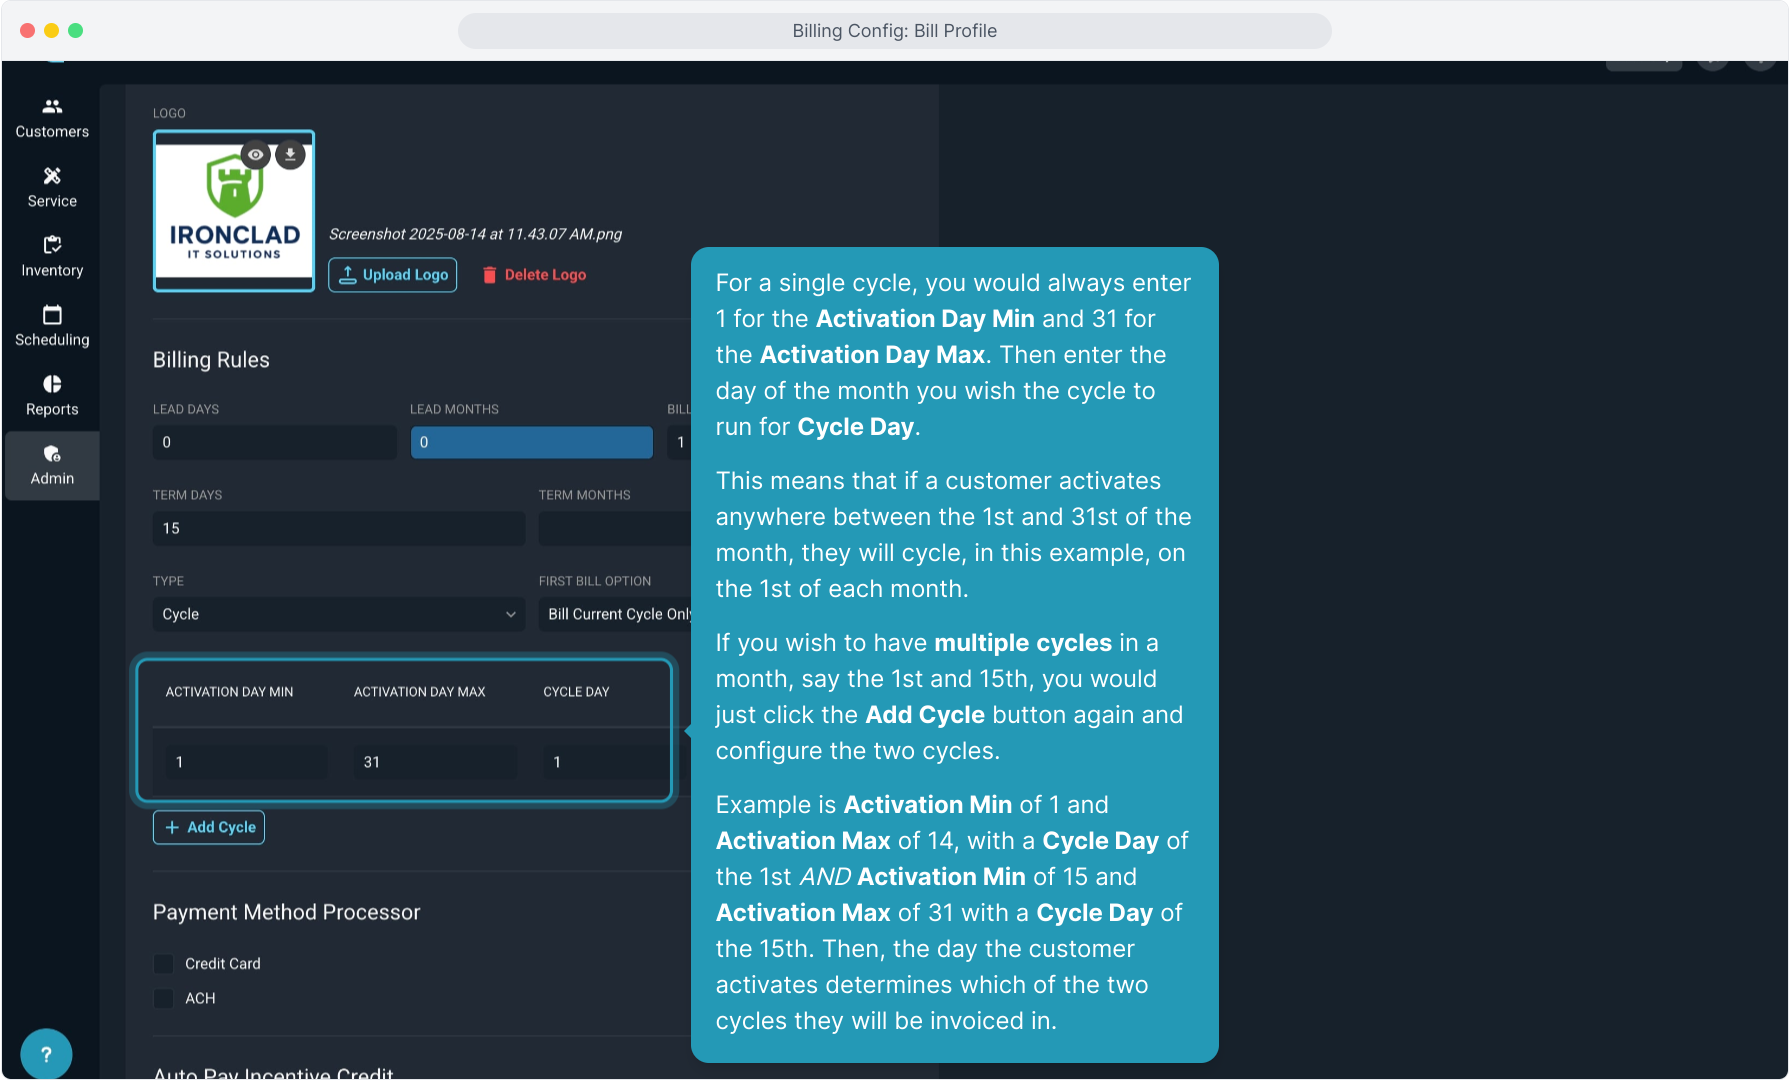
13. If choosing to cycle bill, you will configure your cycle(s) by clicking the Add Cycle button.
14. For a single cycle, you would always enter 1 for the Activation Day Min and 31 for the Activation Day Max. Then enter the day of the month you wish the cycle to run for Cycle Day.
This means that if a customer activates anywhere between the 1st and 31st of the month, they will cycle, in this example, on the 1st of each month.
If you wish to have multiple cycles in a month, say the 1st and 15th, you would just click the Add Cycle button again and configure the two cycles.
Example is Activation Min of 1 and Activation Max of 14, with a Cycle Day of the 1st AND Activation Min of 15 and Activation Max of 31 with a Cycle Day of the 15th. Then, the day the customer activates determines which of the two cycles they will be invoiced in.
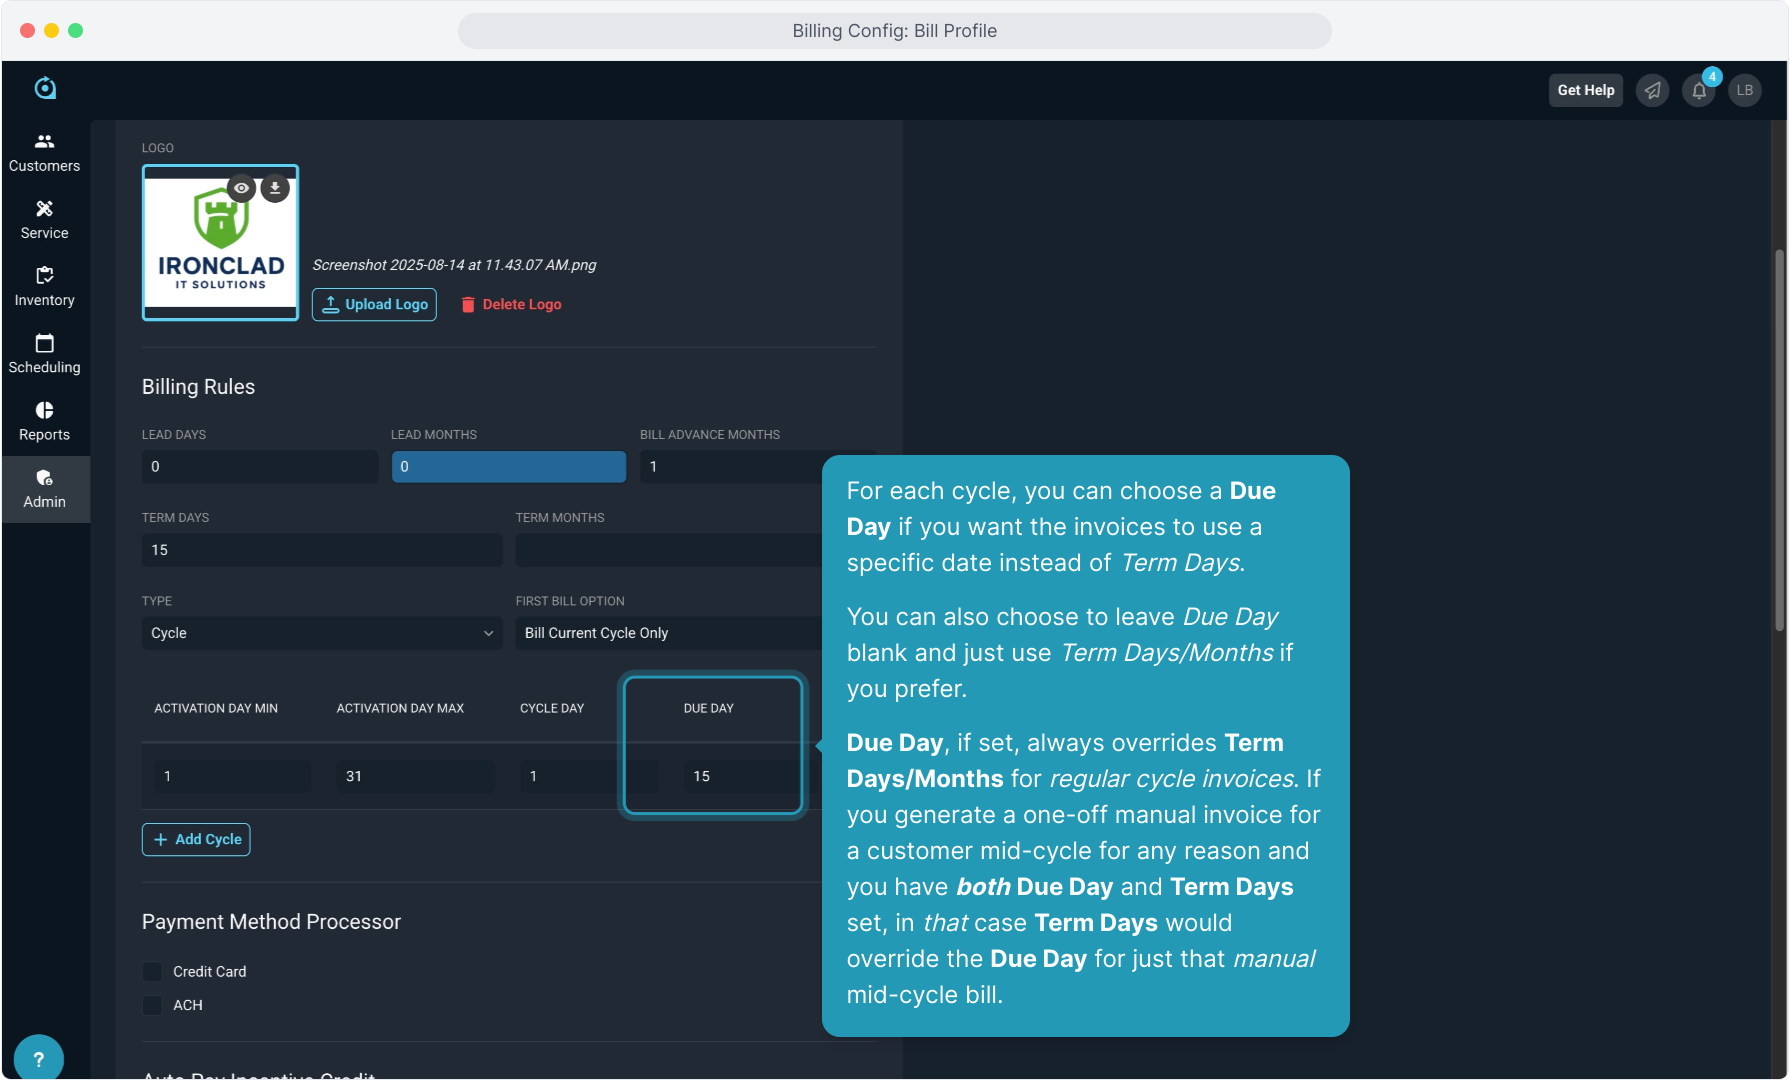
15. For each cycle, you can choose a Due Day if you want the invoices to use a specific date instead of Term Days.
You can also choose to leave Due Day blank and just use Term Days/Months if you prefer.
Due Day, if set, always overrides Term Days/Months for regular cycle invoices. If you generate a one-off manual invoice for a customer mid-cycle for any reason and you have both Due Day and Term Days set, in that case Term Days would override the Due Day for just that manual mid-cycle bill.
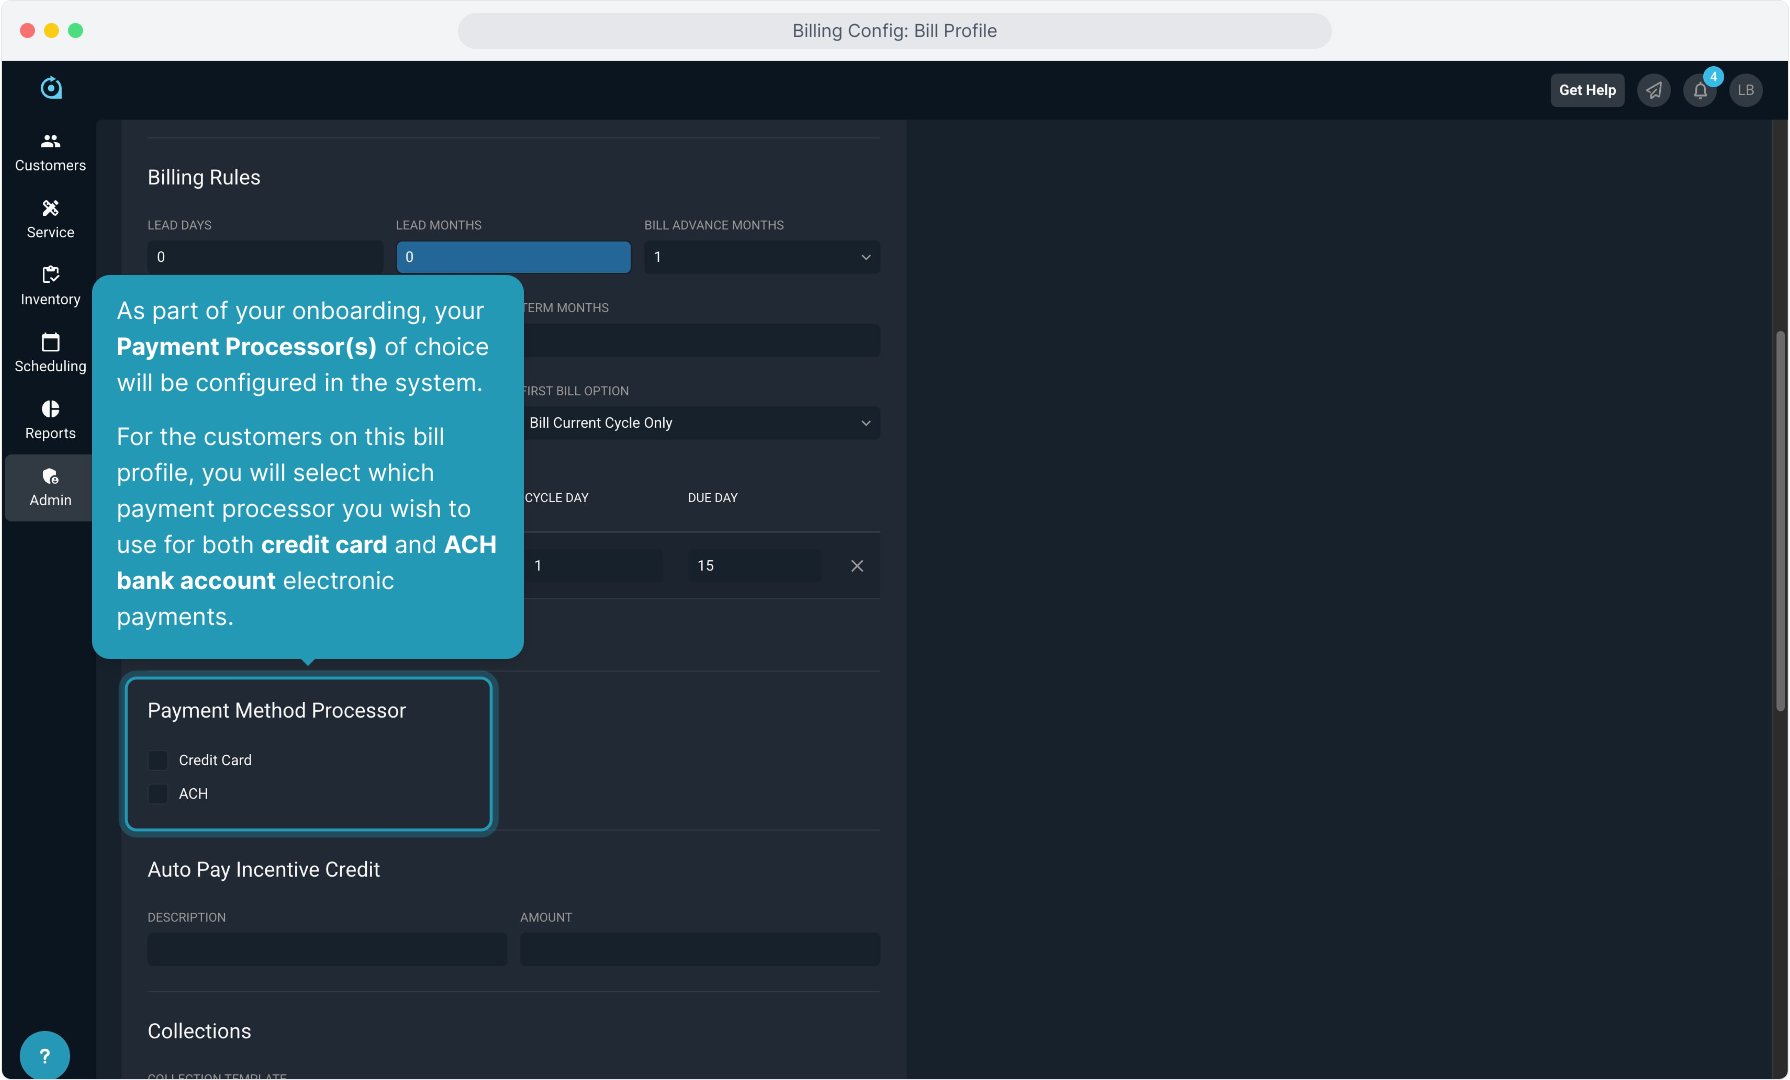
16. As part of your onboarding, your Payment Processor(s) of choice will be configured in the system.
For the customers on this bill profile, you will select which payment processor you wish to use for both credit card and ACH bank account electronic payments.
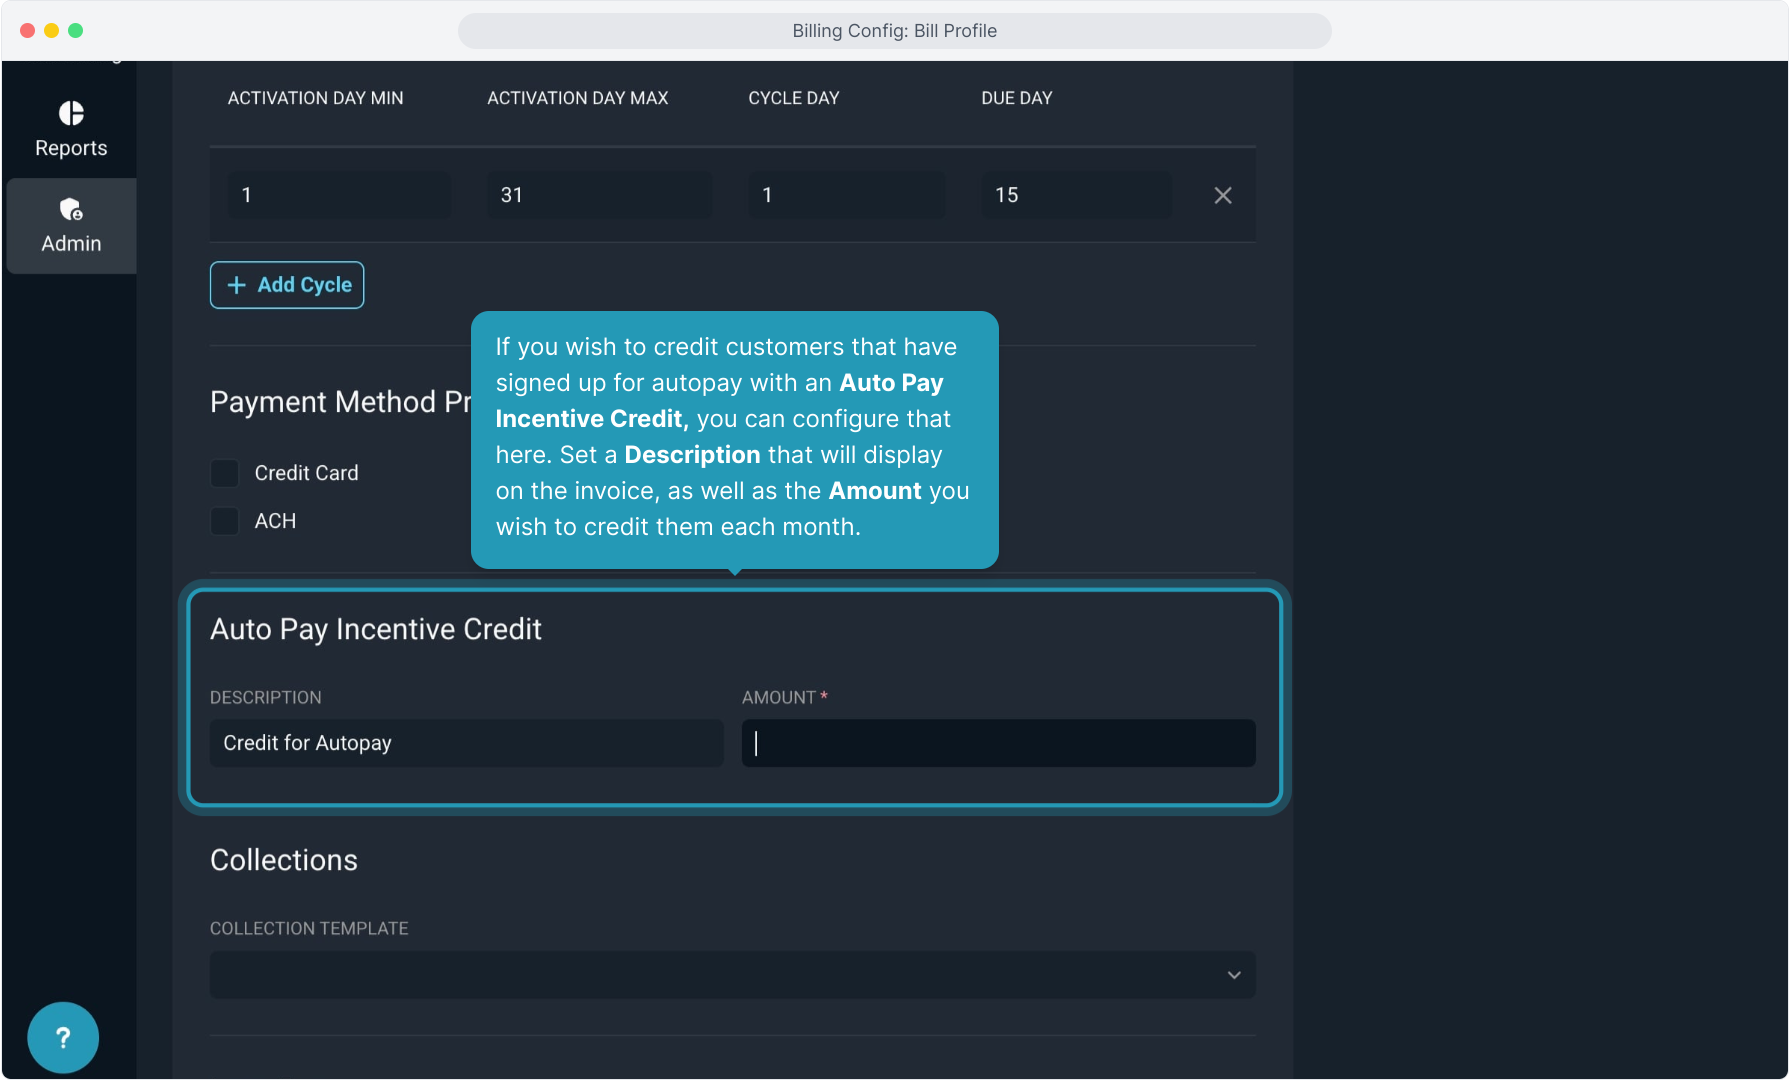
17. If you wish to credit customers that have signed up for autopay with an Auto Pay Incentive Credit, you can configure that here. Set a Description that will display on the invoice, as well as the Amount you wish to credit them each month.
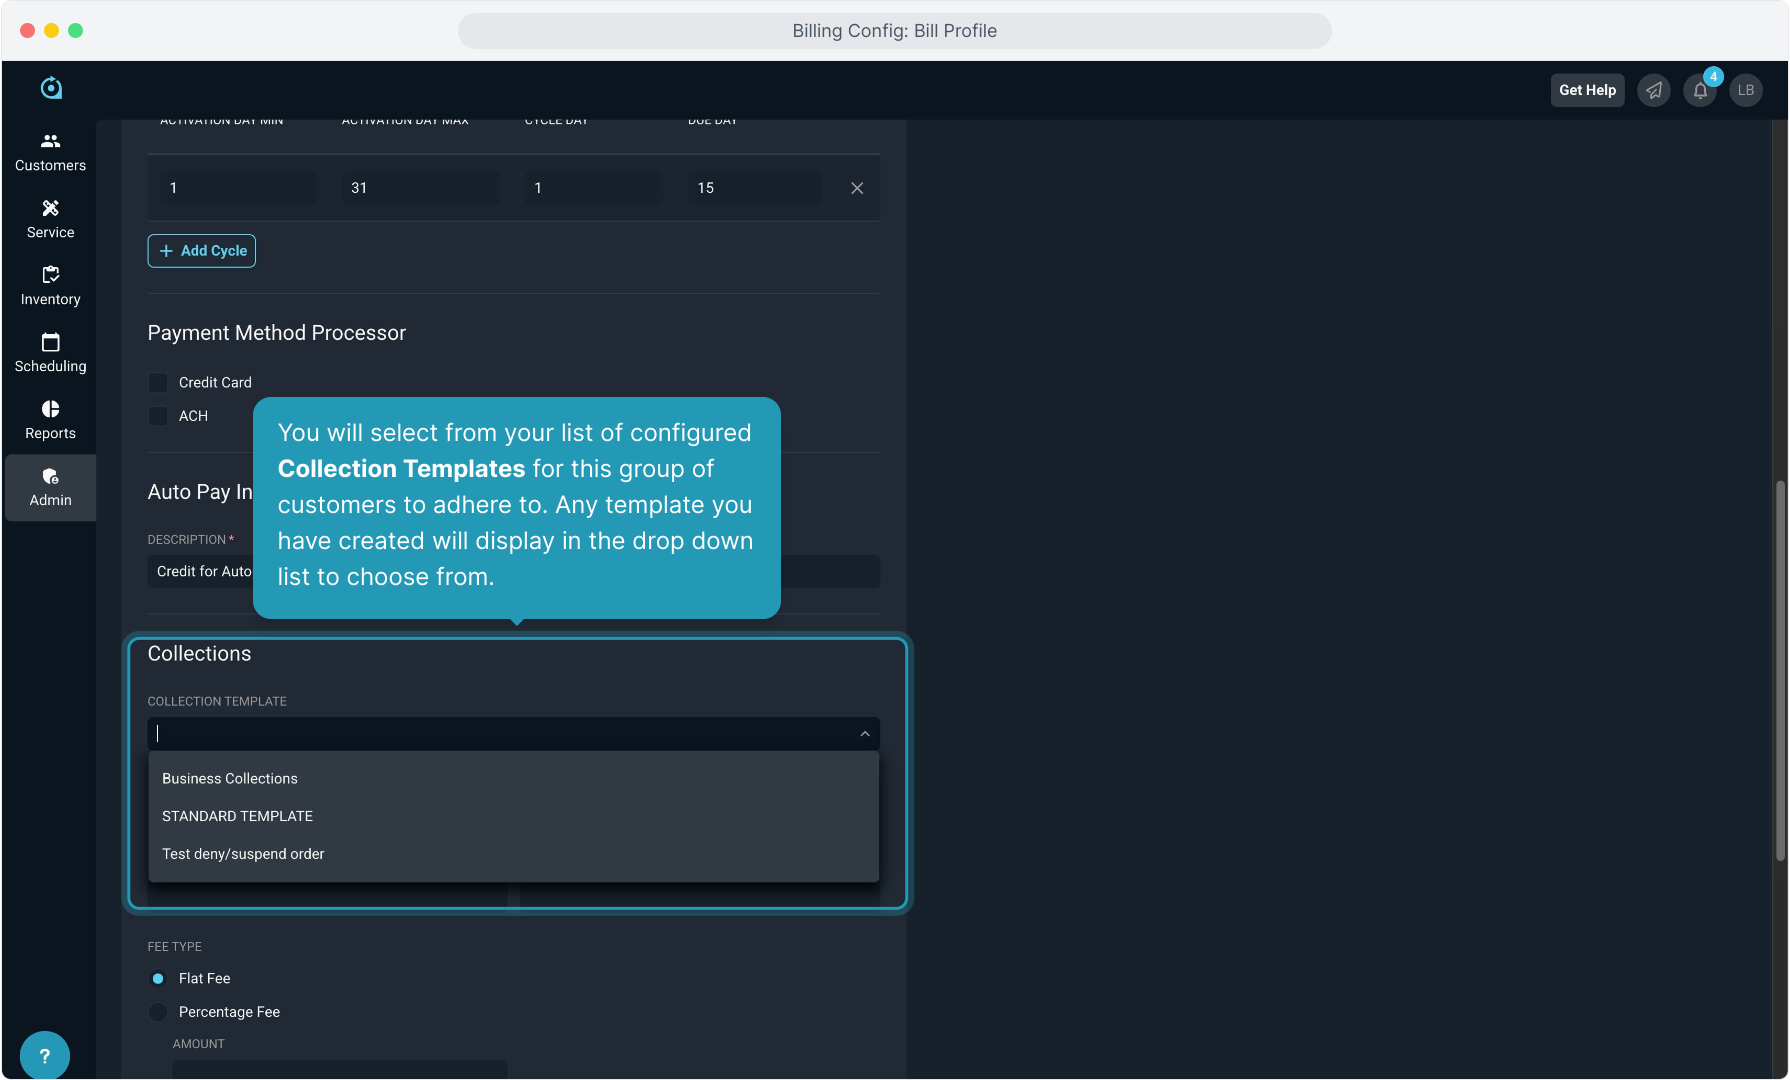
18. You will select from your list of configured Collection Templates for this group of customers to adhere to. Any template you have created will display in the drop down list to choose from.
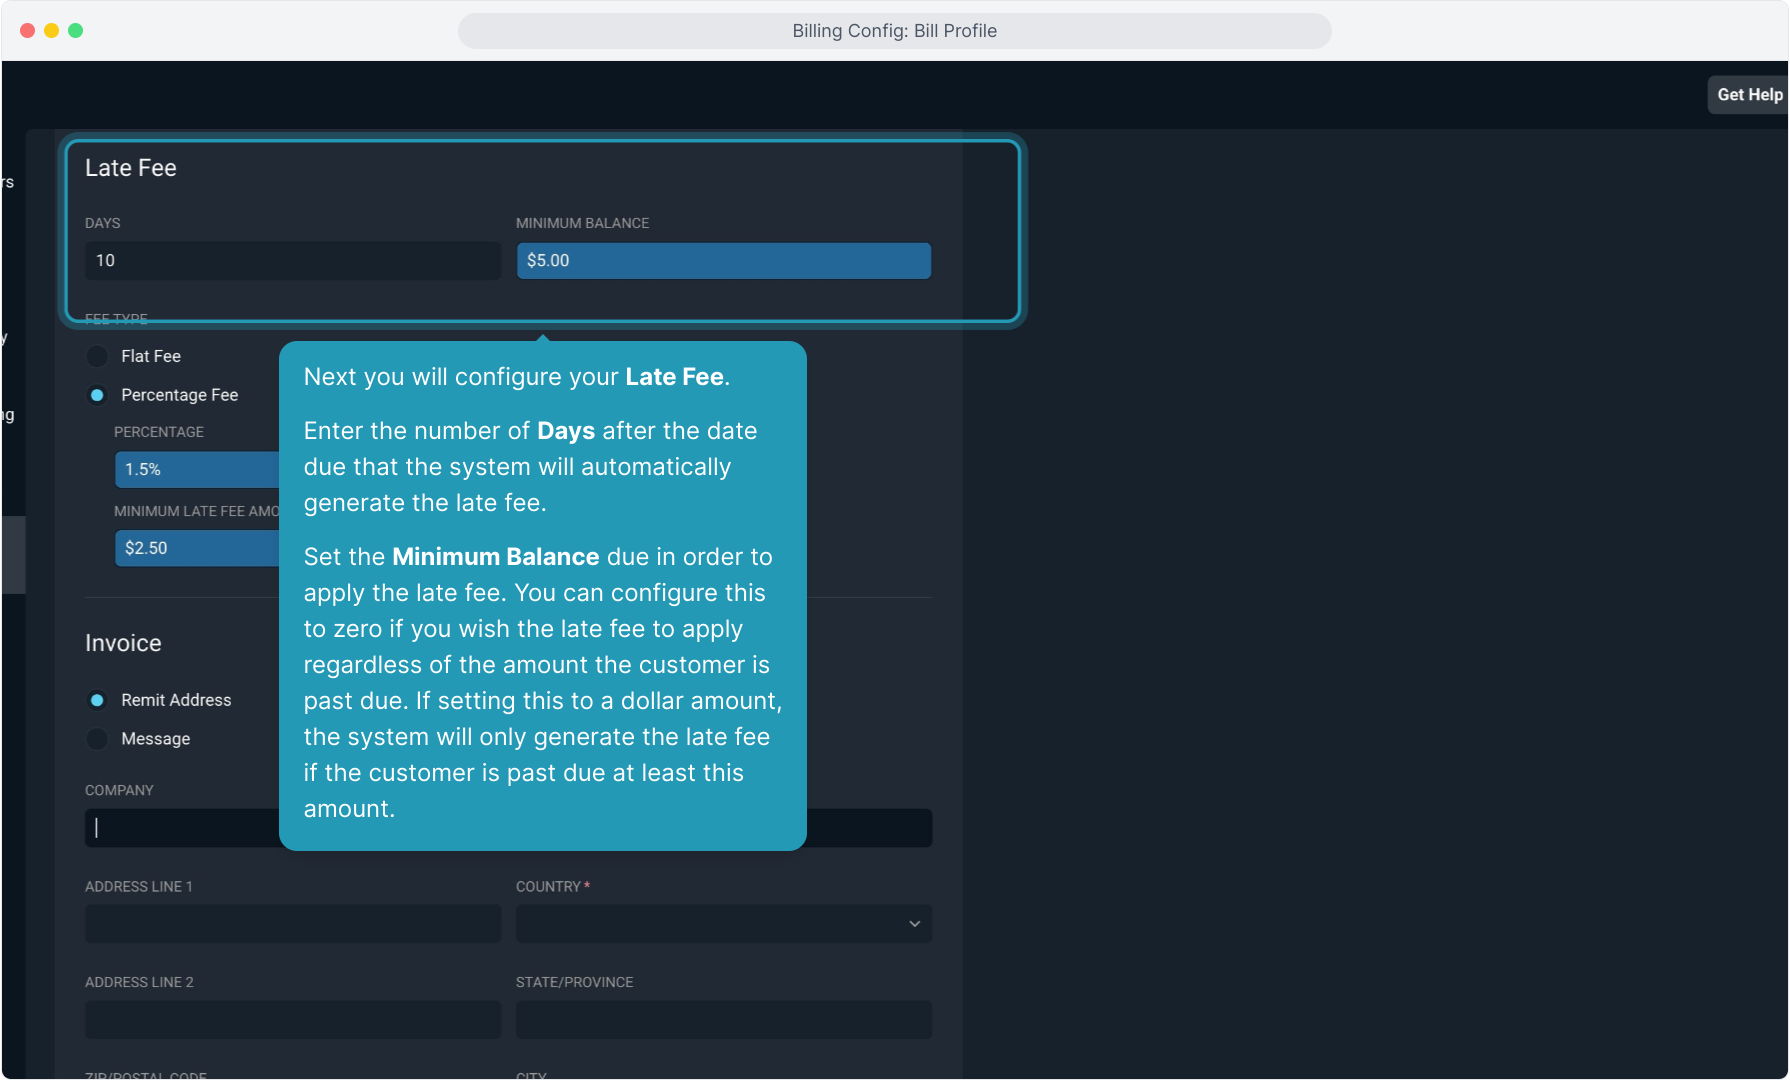
19. Next you will configure your Late Fee.
Enter the number of Days after the date due that the system will automatically generate the late fee.
Set the Minimum Balance due in order to apply the late fee. You can configure this to zero if you wish the late fee to apply regardless of the amount the customer is past due. If setting this to a dollar amount, the system will only generate the late fee if the customer is past due at least this amount.
20. The late fee can be either a Flat Fee dollar amount, regardless of the amount past due, or it can be a Percentage of the amount past due.
If using Percentage, you can also set a Minimum Late Fee Amount, so if the percentage is calculated and it is less than the minimum, the system will "round up" and apply the Minimum Late Fee Amount configured here.

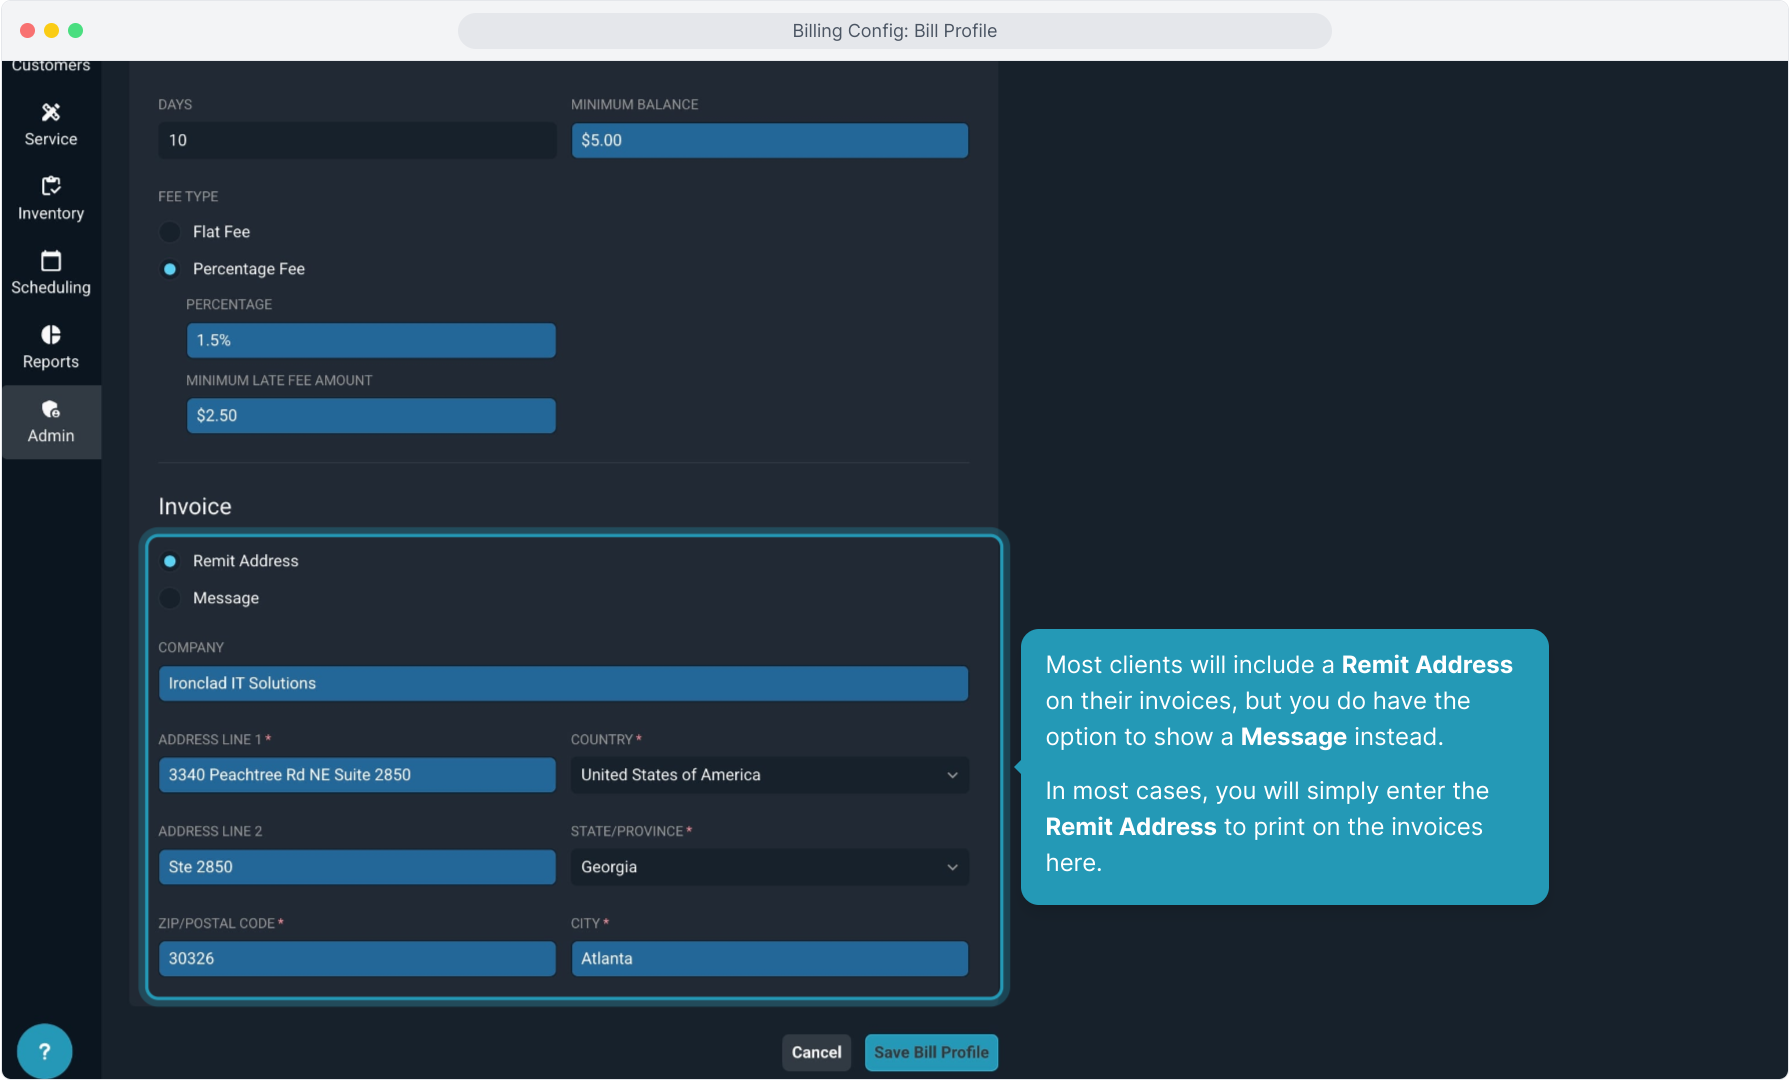
21. Most clients will include a Remit Address on their invoices, but you do have the option to show a Message instead.
In most cases, you will simply enter the Remit Address to print on the invoices here.
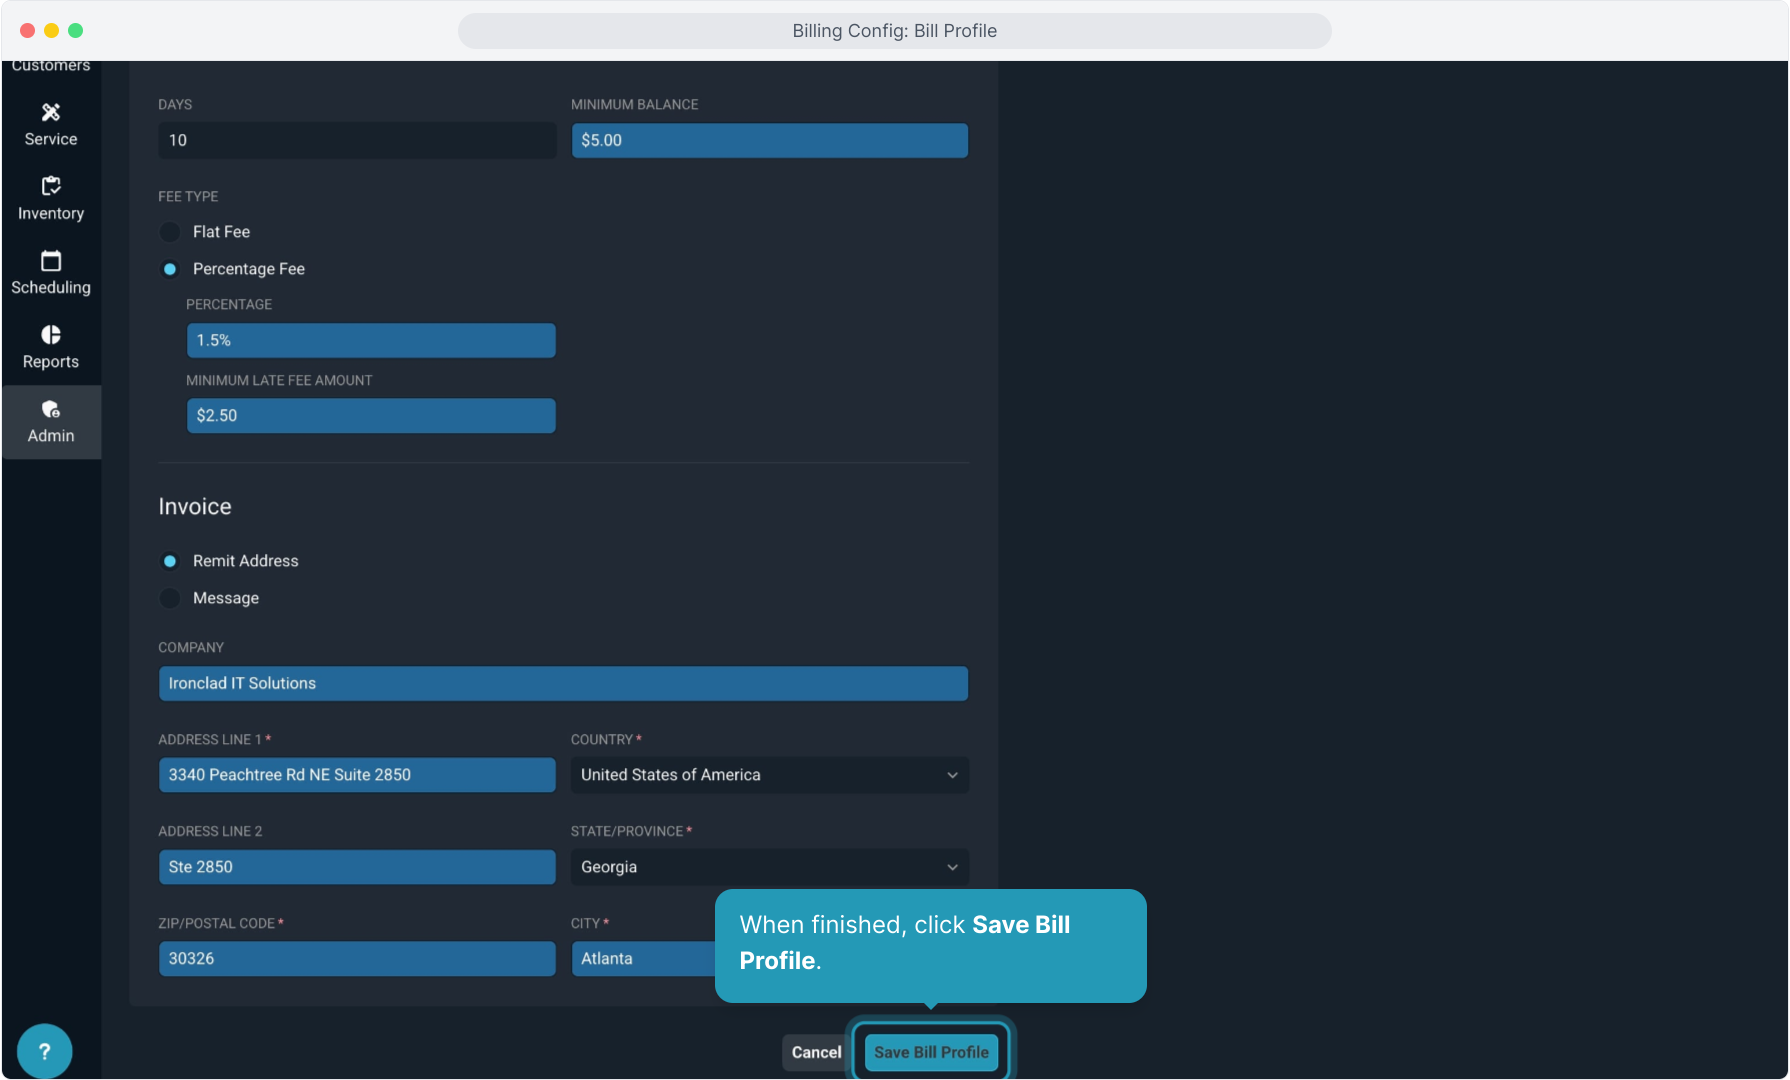
22. When finished, click Save Bill Profile.
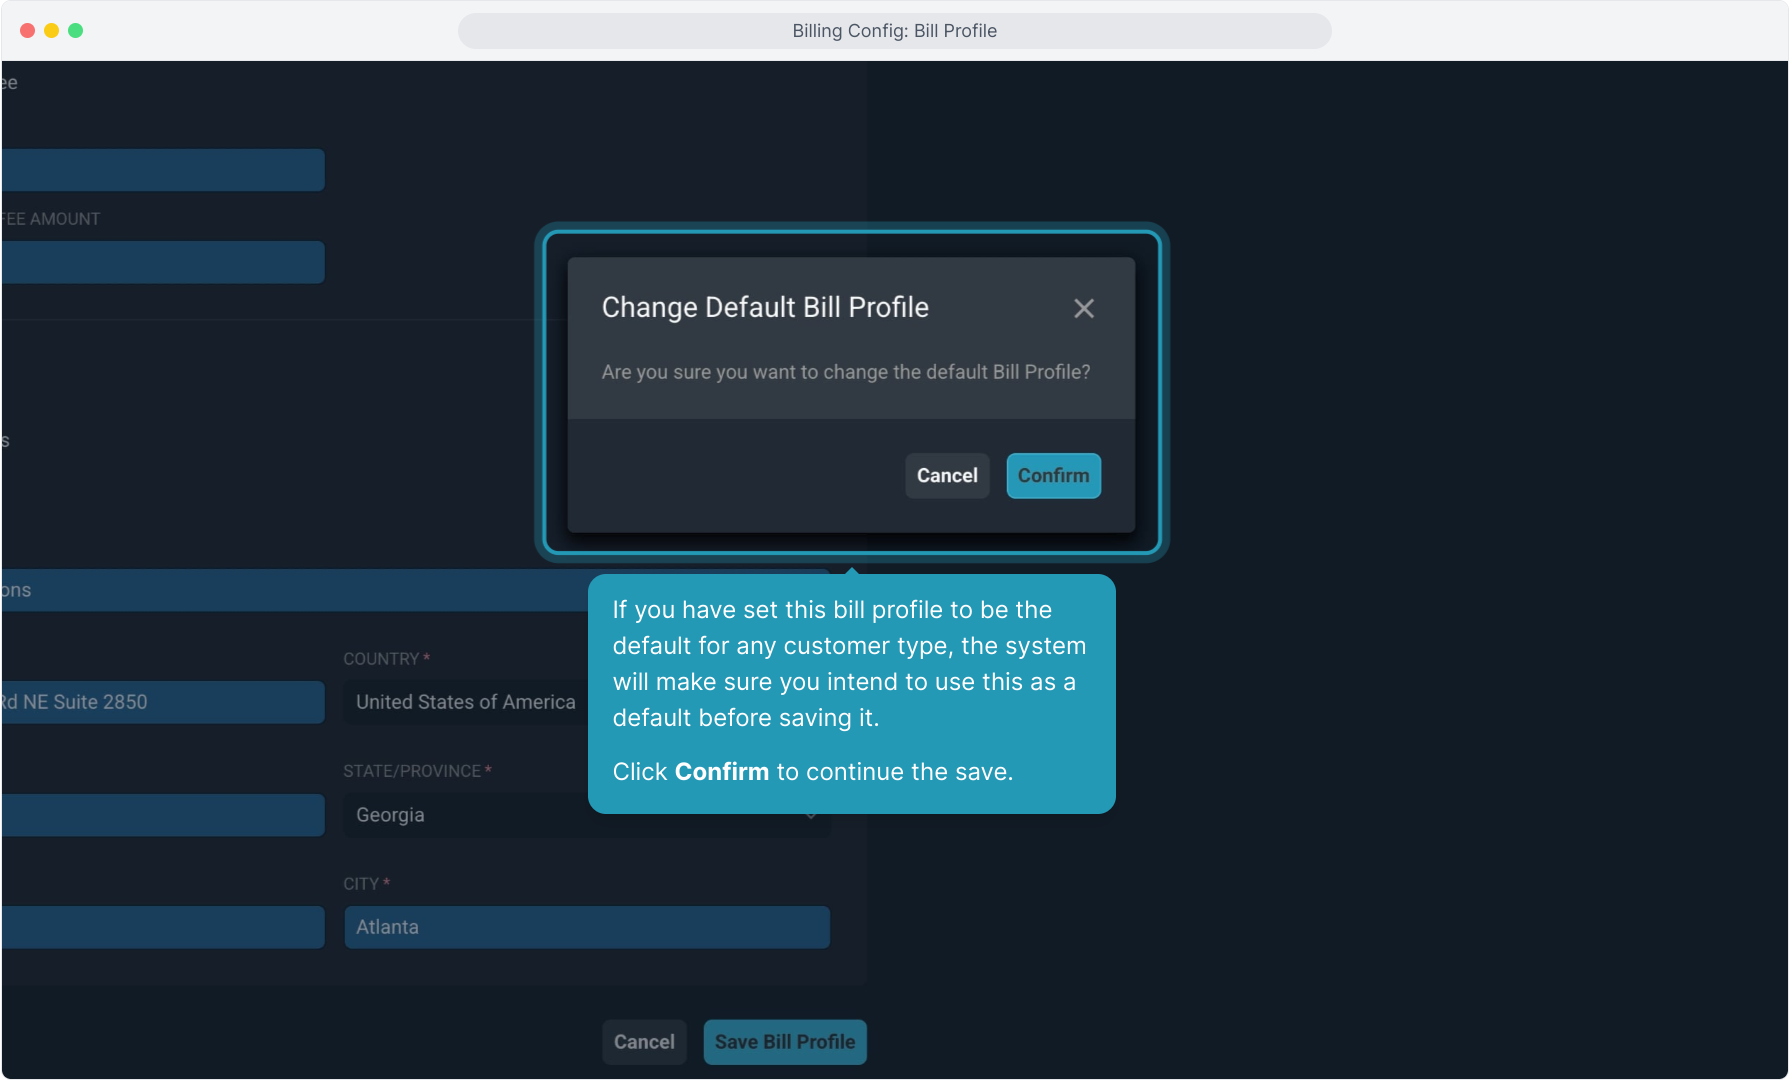
23. If you have set this bill profile to be the default for any customer type, the system will make sure you intend to use this as a default before saving it.
Click Confirm to continue the save.
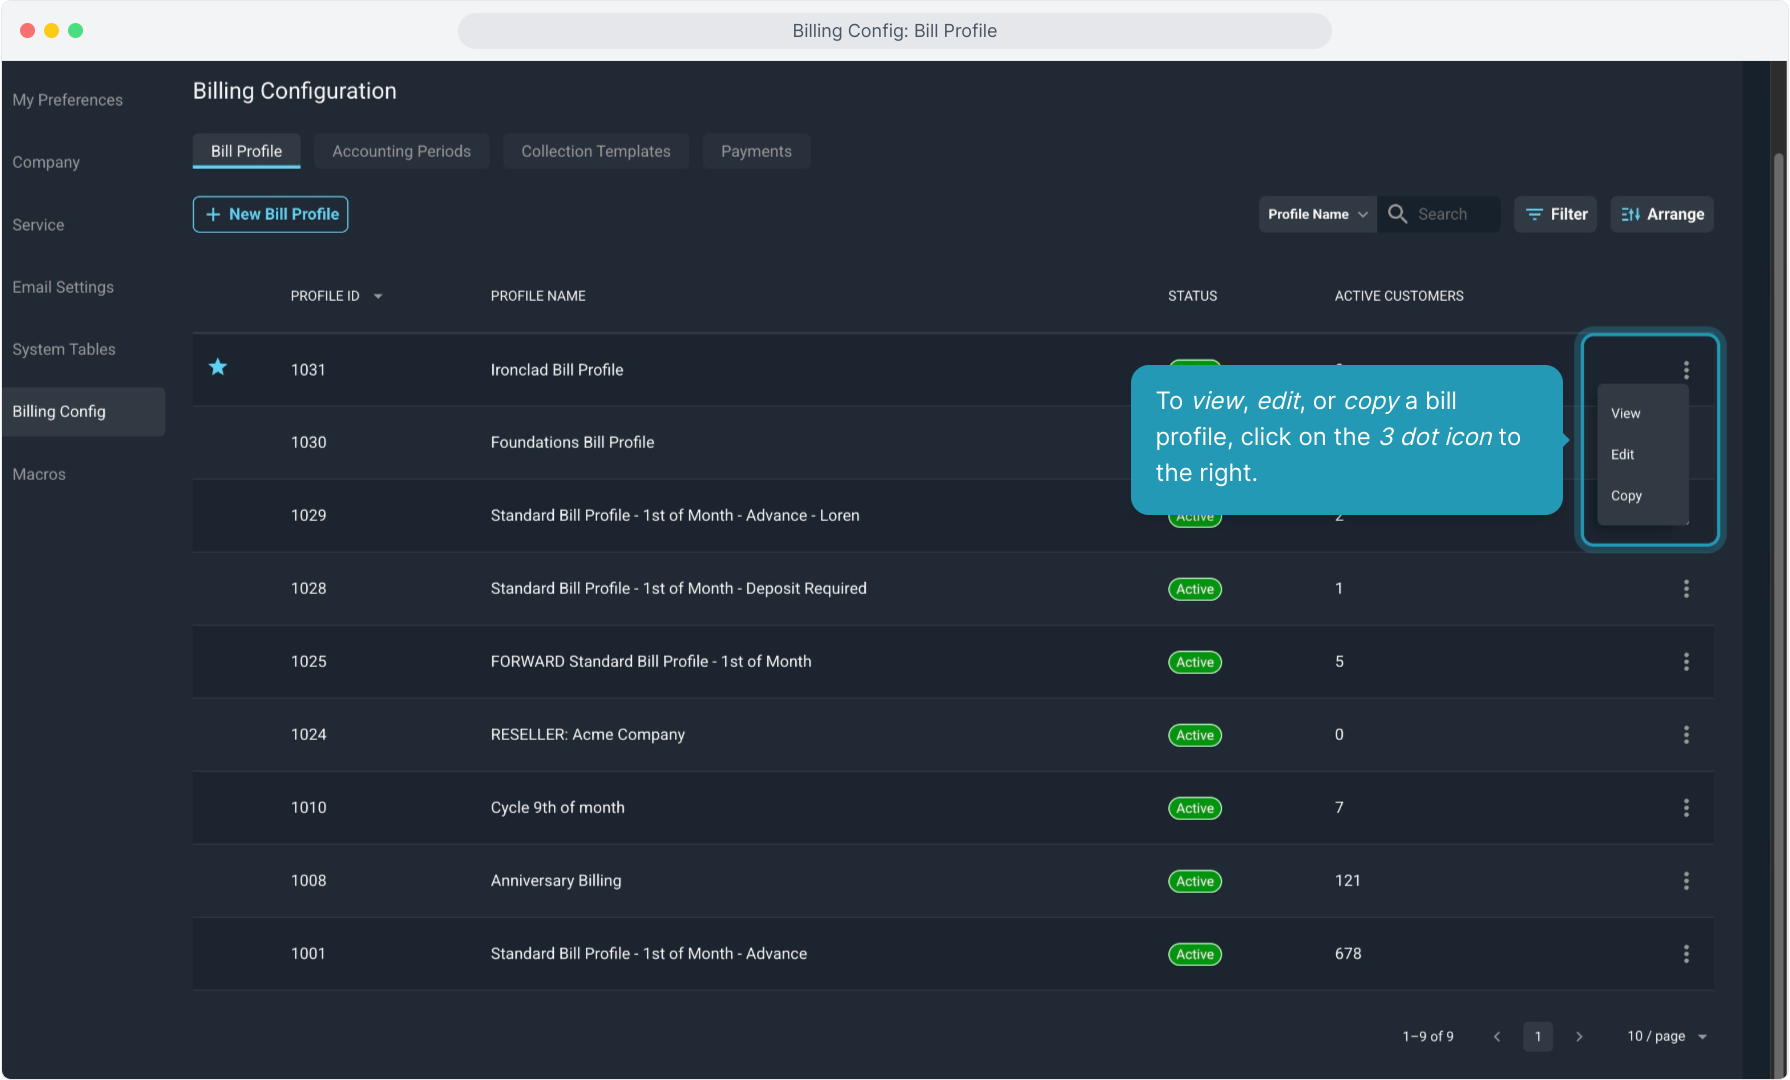
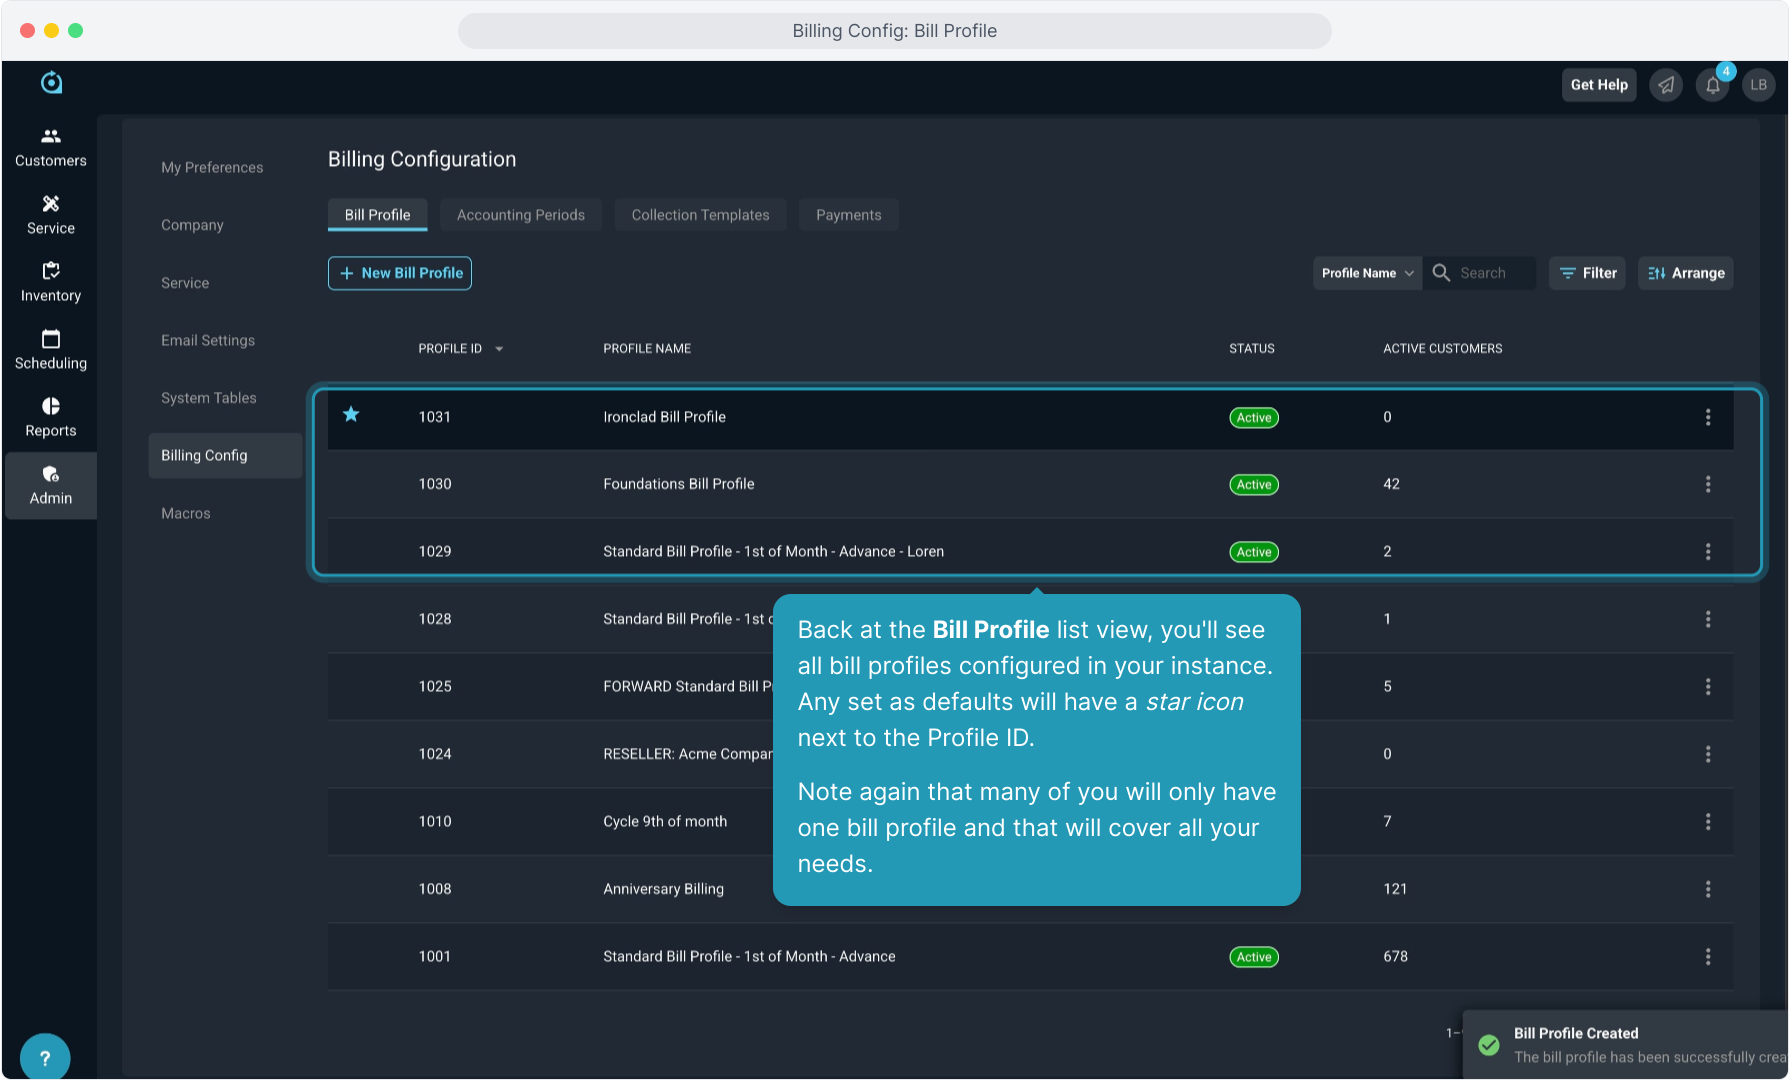
24. Back at the Bill Profile list view, you'll see all bill profiles configured in your instance. Any set as defaults will have a star icon next to the Profile ID.
Note again that many of you will only have one bill profile and that will cover all your needs.
25. To view, edit, or copy a bill profile, click on the 3 dot icon to the right.