
System Settings: Metered Usage
The Metered Usage category on the System Settings screen allows you to import rate decks from your providers and configure rate deck groups to ensure accurate customer billing. Rate decks define telecom pricing by listing rates for call destinations, prefixes, or usage types, including details such as cost per minute and billing increments. Rate deck groups organize multiple rate decks under a shared structure, making it easier to apply consistent billing rules, assign decks to customers or services, and manage rate updates across regions or carriers.
Rate Decks
Rate decks define the pricing structure for telecom services by listing specific rates associated with call destinations, prefixes, or usage types. Each rate deck determines how usage is billed, including cost per minute, rate effective dates, and applicable billing increments. Some clients prefer to have separate rate decks for different types of calls, such as local, domestic long distance, international, etc., or for inbound versus outbound calls. Rate decks can be structured and created in whatever format works best for your needs.
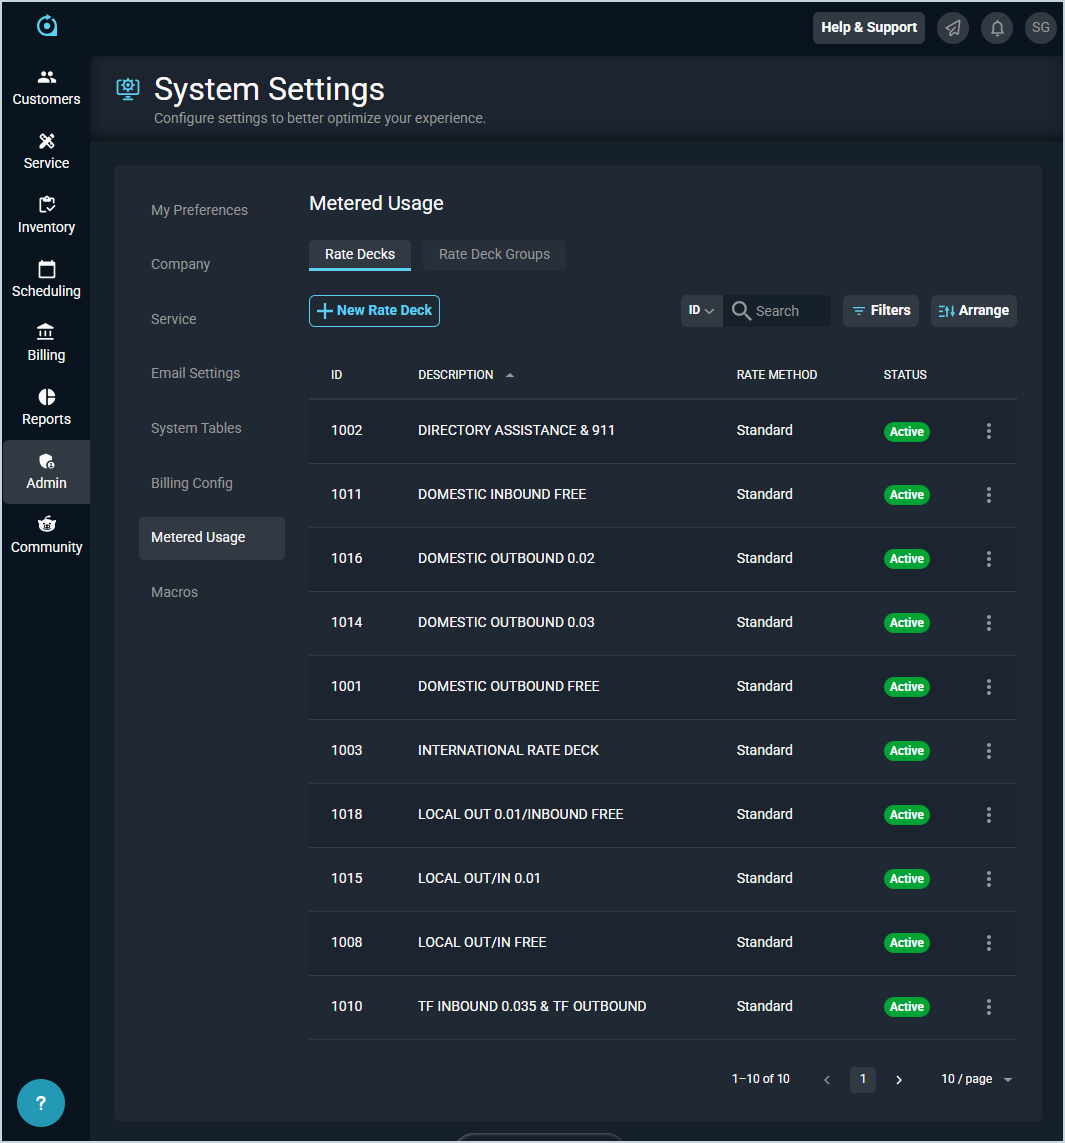
Each field in the Rate Decks section is defined below.
| No. | Label | Definition |
| 1 | ID | Numerical identifier for the rate deck. |
| 2 | Description | Description or name for the rate deck. |
| 3 | Rate Method | Method for the rate deck. Rate Method options include Standard, Markup, and Margin. |
| 4 | Status | Status of the rate deck. Status options include Active and Inactive. |
These actions are available in the Rate Decks section.
- Create a new rate deck by clicking the New Rate Deck button. See the Add/Edit Rate Decks article for more information.
- Search the rate decks displayed in this section by selecting a column from the dropdown above the grid and entering text in the Search field. The list view updates to display records matching your search in the column you selected.
- Filter the rate decks displayed on this view by clicking the Filter button above the grid. You can choose whether or not to show inactive rate decks and filter by a specific Rate Method.
- Customize which columns display in the list view and the order in which they display by clicking the Arrange button and making the desired changes. See the Arrange Columns article for more information.
- Edit the rate deck by clicking the ellipsis at the end of the row and selecting Edit from the menu options. See the Add/Edit Rate Decks article for more information.
- Copy the rate deck by clicking the ellipsis at the end of the row and selecting Copy from the menu options.
- Change the Status of a rate deck by clicking the ellipsis at the end of a row and selecting Set to Active or Set to Inactive from the menu options.
- Delete the rate deck by clicking the ellipsis at the end of the row and selecting Delete from the menu options.
Rate Deck Groups
Rate deck groups allow you to ensure you have rate decks for each type of usage that could occur by grouping individual rate decks into rate deck groups. These groups make it easy to manage usage rating by copying a rate deck group and switching out one rate deck for another in the new rate deck group if you need to rate usage differently for a specific usage type for different customers or services.

Each field in the Rate Deck Groups section is defined below.
| No. | Label | Definition |
| 1 | ID | Numerical identifier for the rate deck group. |
| 2 | Description | Description or name for the rate deck group. |
| 3 | Status | Status of the rate deck group. Status options include Active and Inactive. |
These actions are available in the Rate Deck Groups section.
- Create a new rate deck by clicking the New Rate Deck Group button. See the Add/Edit Rate Deck Groups article for more information.
- Search the rate deck groups displayed in this section by selecting a column from the dropdown above the grid and entering text in the Search field. The list view updates to display records matching your search in the column you selected.
- Filter the rate deck groups displayed on this view by clicking the Filter button above the grid.
- Customize which columns display in the list view and the order in which they display by clicking the Arrange button and making the desired changes. See the Arrange Columns article for more information.
- Edit the rate deck group by clicking the ellipsis at the end of the row and selecting Edit from the menu options. See the Add/Edit Rate Deck Groups article for more information.
- Copy the rate deck group by clicking the ellipsis at the end of the row and selecting Copy from the menu options.
- Change the Status of a rate deck group by clicking the ellipsis at the end of a row and selecting Set to Active or Set to Inactive from the menu options.