
System Settings: System Tables - Expenses
The Expenses tab in the System Tables category on the System Settings screen allows you to create expense codes. Expense codes are the categories your team chooses when adding an expense, such as Mileage or Parking. Each code controls whether the expense tracks mileage, whether it is billable to the customer, and how it is marked up. To open it, click Admin in the sidebar menu, select System Settings, click System Tables, and select the Expenses tab.
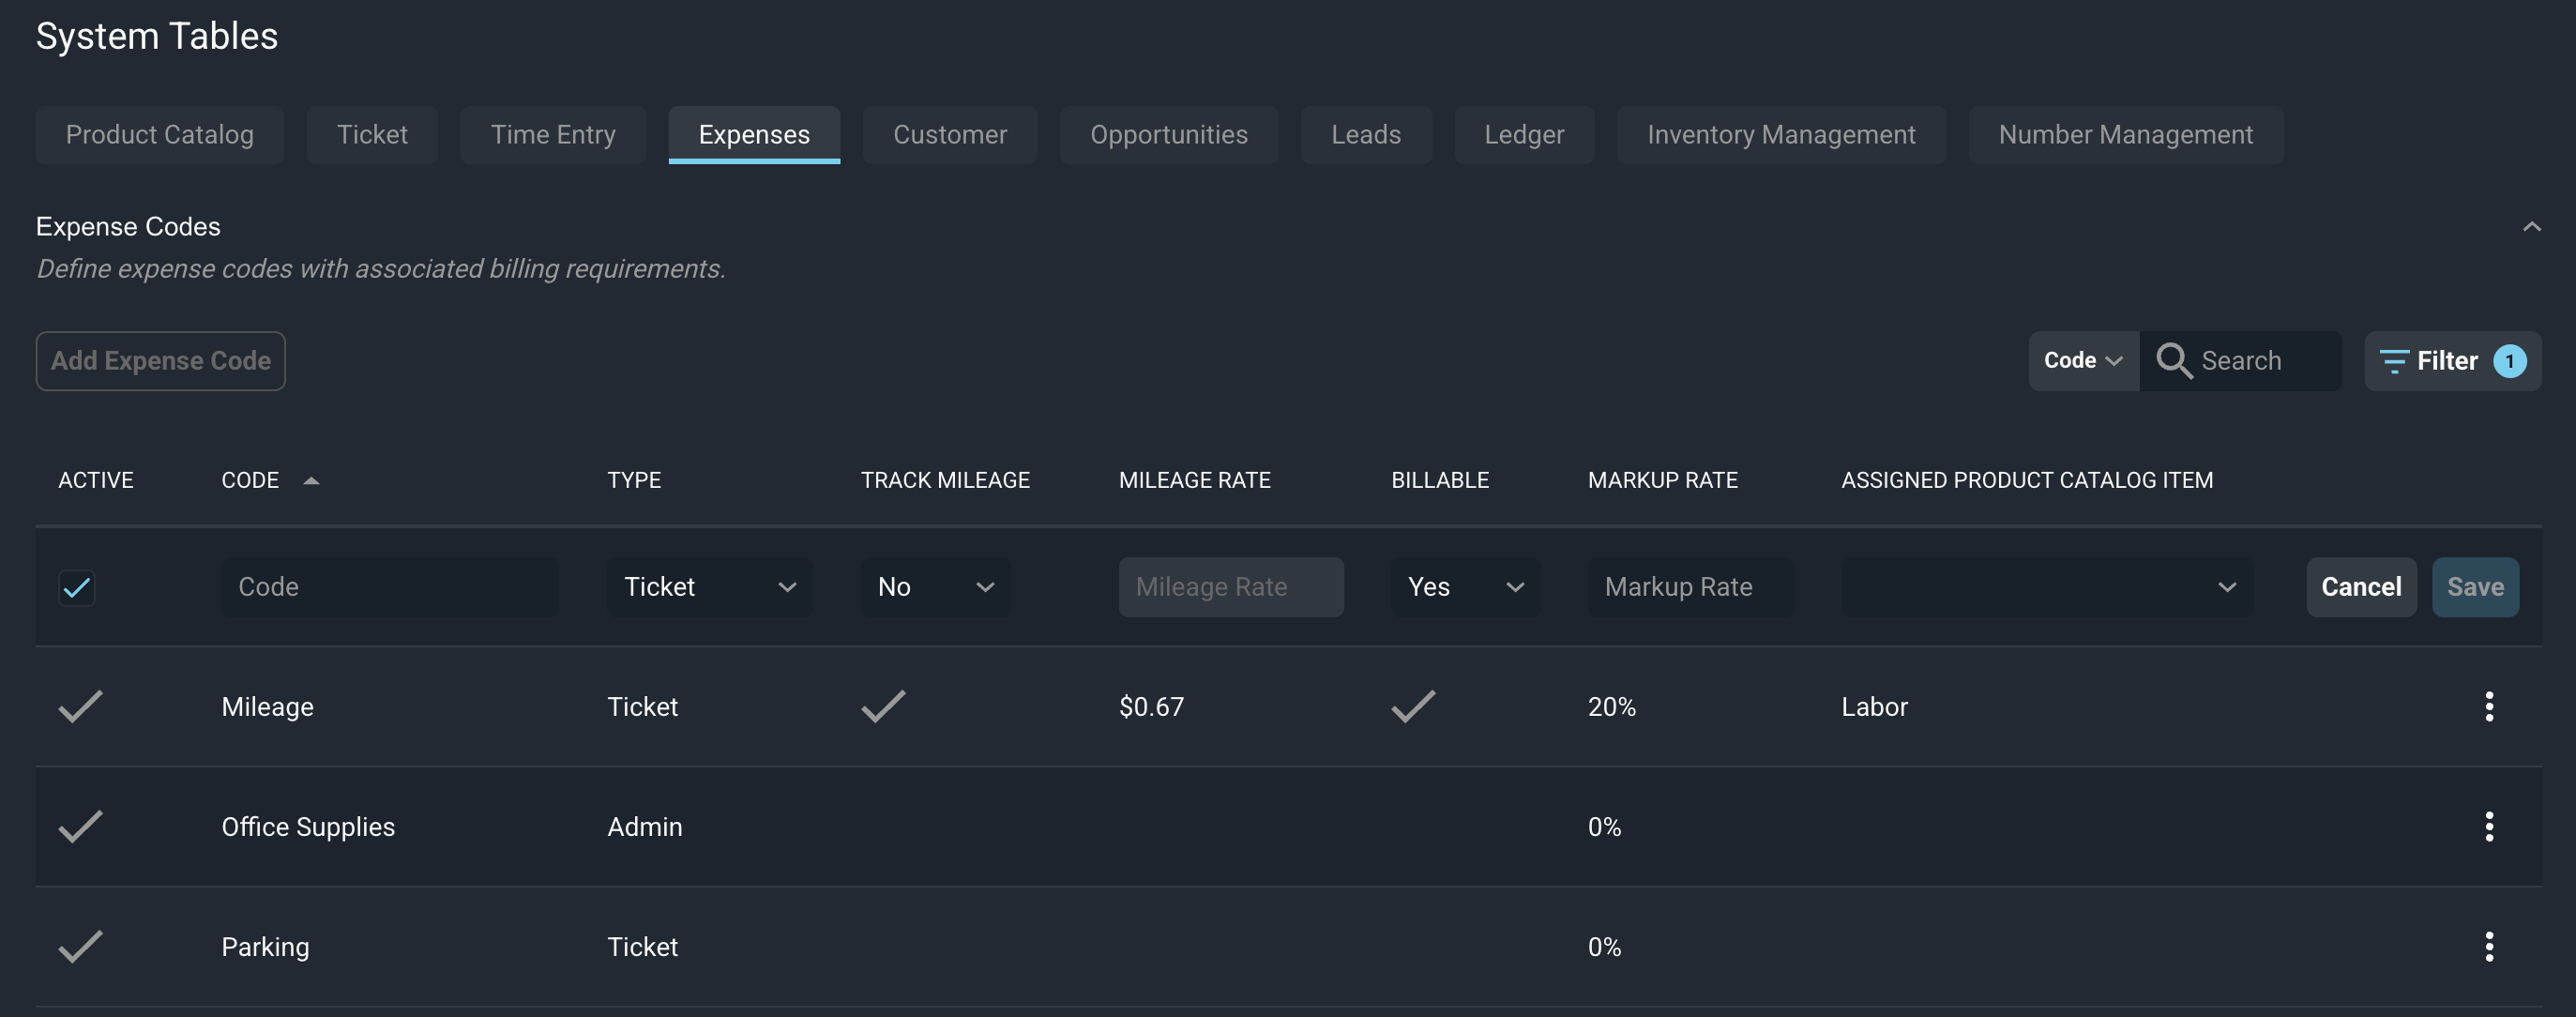
Each column in the Expense Codes section is defined below.
| Label | Definition |
| Active | Indicates whether the expense code is active and available when adding expenses. |
| Code | Name of the expense code, such as Mileage or Parking. |
| Type | Where the code can be used. Options include Ticket, Admin, and All. Ticket codes are available on expenses added to a ticket. Admin codes are available on expenses that are not tied to a ticket and simply added to a customer account. All makes the code available everywhere. |
| Track Mileage | When set to Yes, expenses with this code are entered as a starting and ending mileage, and the amount is calculated from the Mileage Rate. |
| Mileage Rate | Amount charged per mile. This field is available when Track Mileage is set to Yes. |
| Billable | When set to Yes, expenses with this code are billable to the customer by default. Admin codes cannot be billable. |
| Markup Rate | Percentage added to the expense amount to calculate the price charged to the customer. For example, a 20% markup on a $40.00 expense creates a price of $48.00. |
| Assigned Product Catalog Item | Product catalog item used for the charge that billable expenses add to the ticket. This field is not available for Admin codes. |
Follow these steps to add an expense code.
- Click the Add Expense Code button. A new row displays at the top of the list.
- Enter the Code and select the Type.
- Select whether to Track Mileage. If you select Yes, enter the Mileage Rate.
- Select whether the code is Billable and enter the Markup Rate.
- For billable codes, select the Assigned Product Catalog Item.
- Click Save to save the expense code, or click Cancel to discard it.
| NOTE: A Markup Rate is required to save an expense code. Enter 0 if you do not mark up the expense. |
These actions are available on the Expenses tab.
- Add a new expense code by clicking the Add Expense Code button.
- Search the expense codes by selecting a column from the dropdown and entering text in the Search field.
- Filter the expense codes by clicking the Filter button.
- Sort the results in the table by clicking the column label in the table header.
- Edit an expense code by clicking the ellipsis at the end of the row and selecting Edit.
- Deactivate an expense code by clicking the ellipsis at the end of the row and selecting Deactivate.
For more information about expenses, see the following articles.
Add/Edit Expenses
Expenses List View
Ticket Details: Expenses Tab
System Settings: System Tables - Overview