How To Guide: Managing Billing
1. Introduction
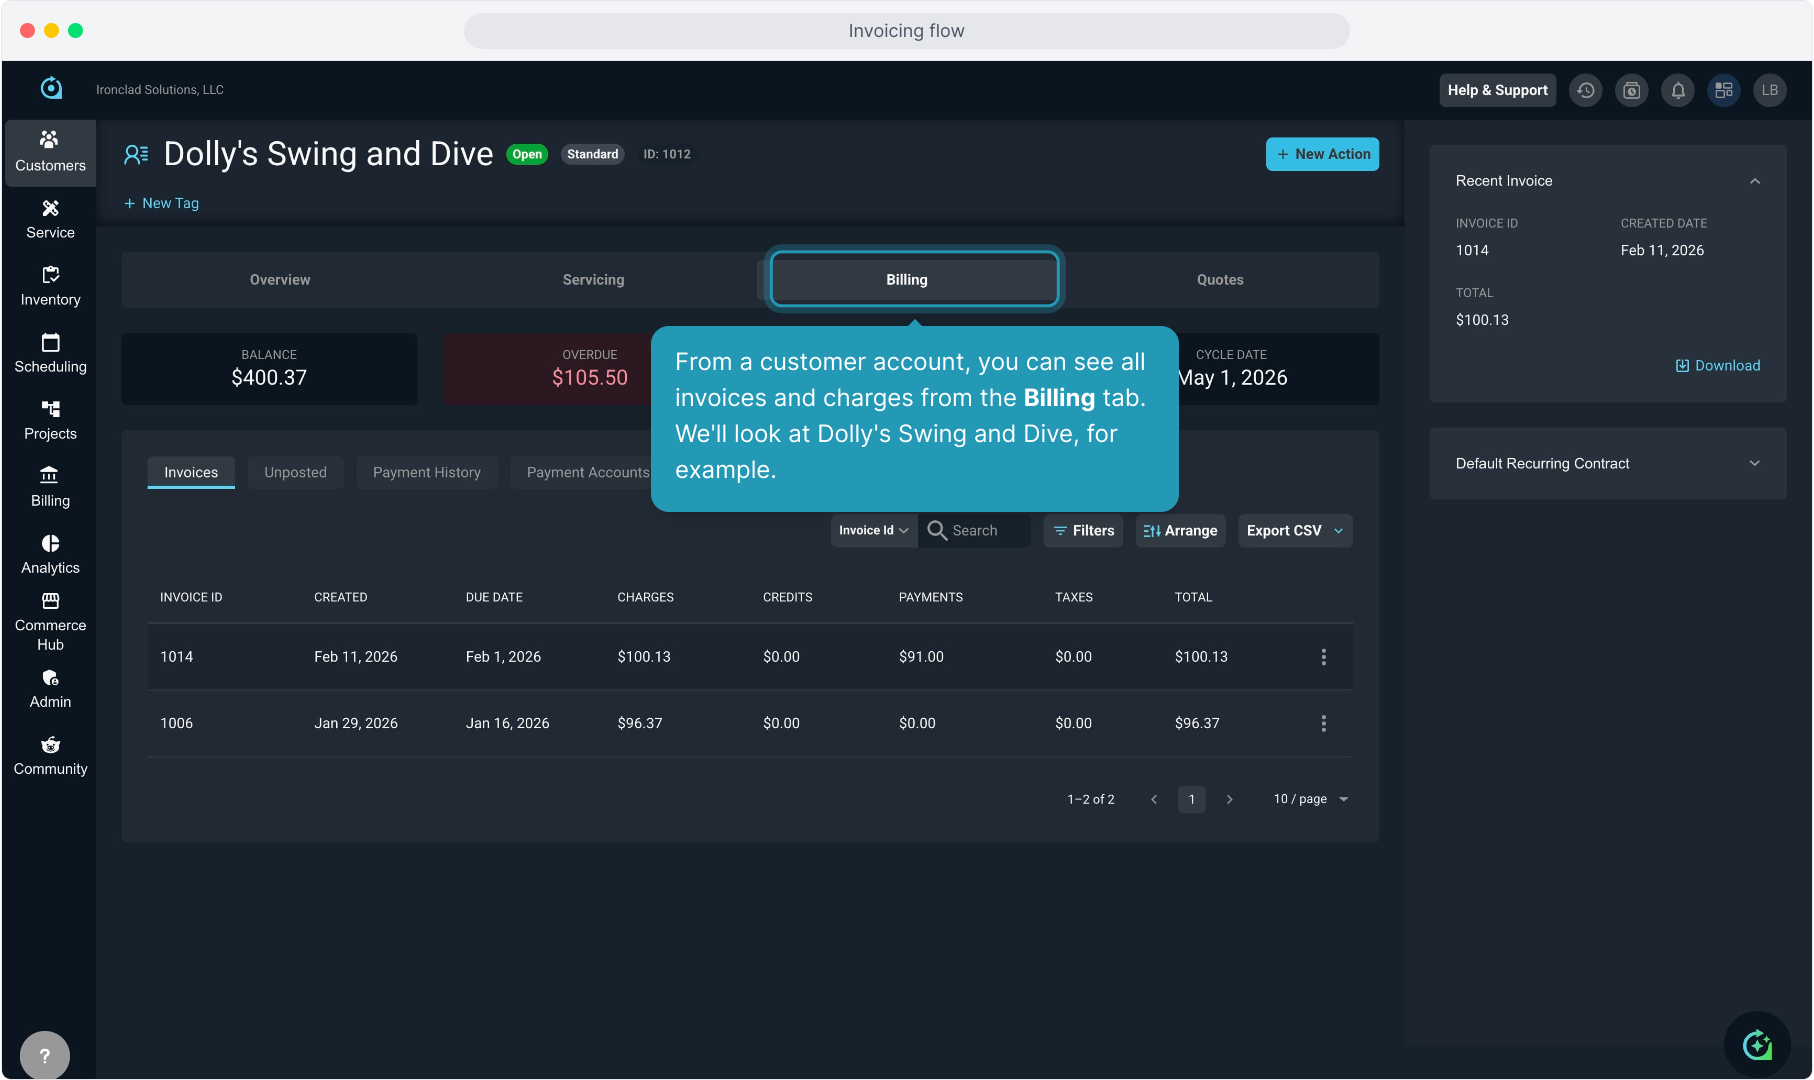
2. From a customer account, you can see all invoices and charges from the Billing tab. We'll look at Dolly's Swing and Dive, for example.
3. The Invoices tab will display all invoices that have been created on the account.
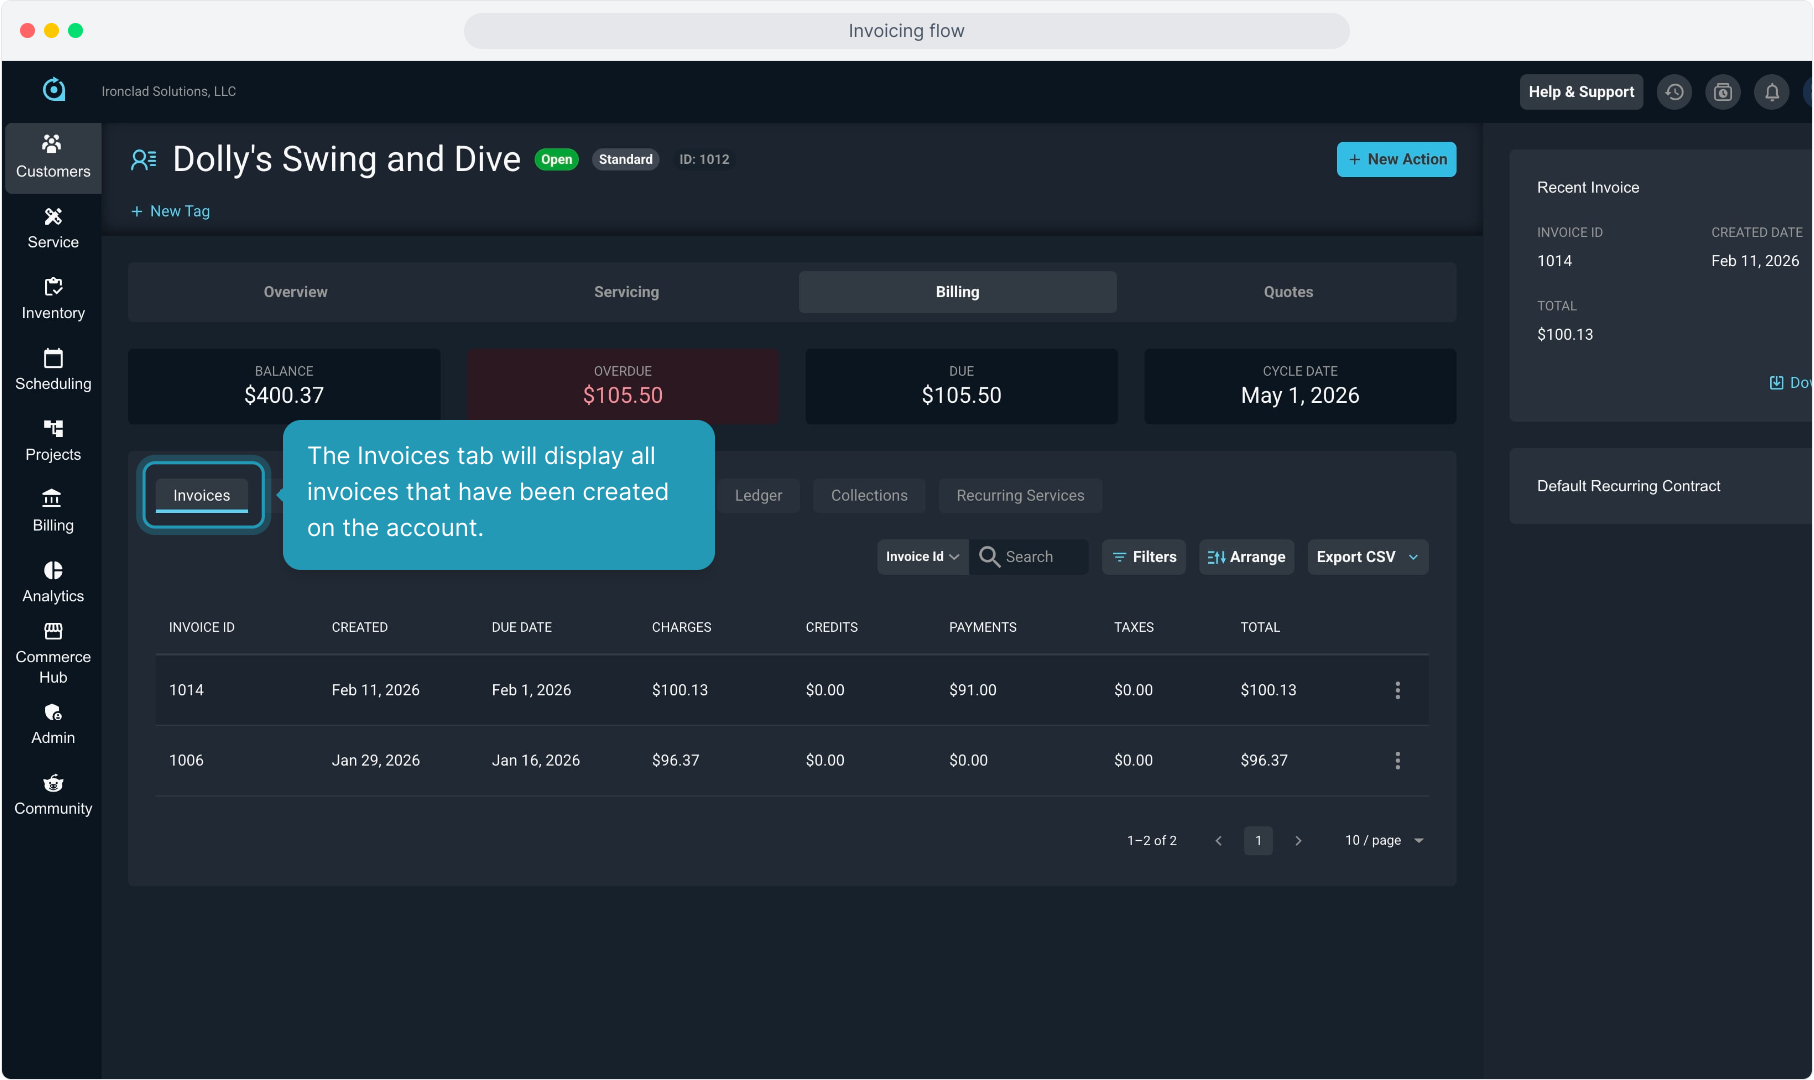
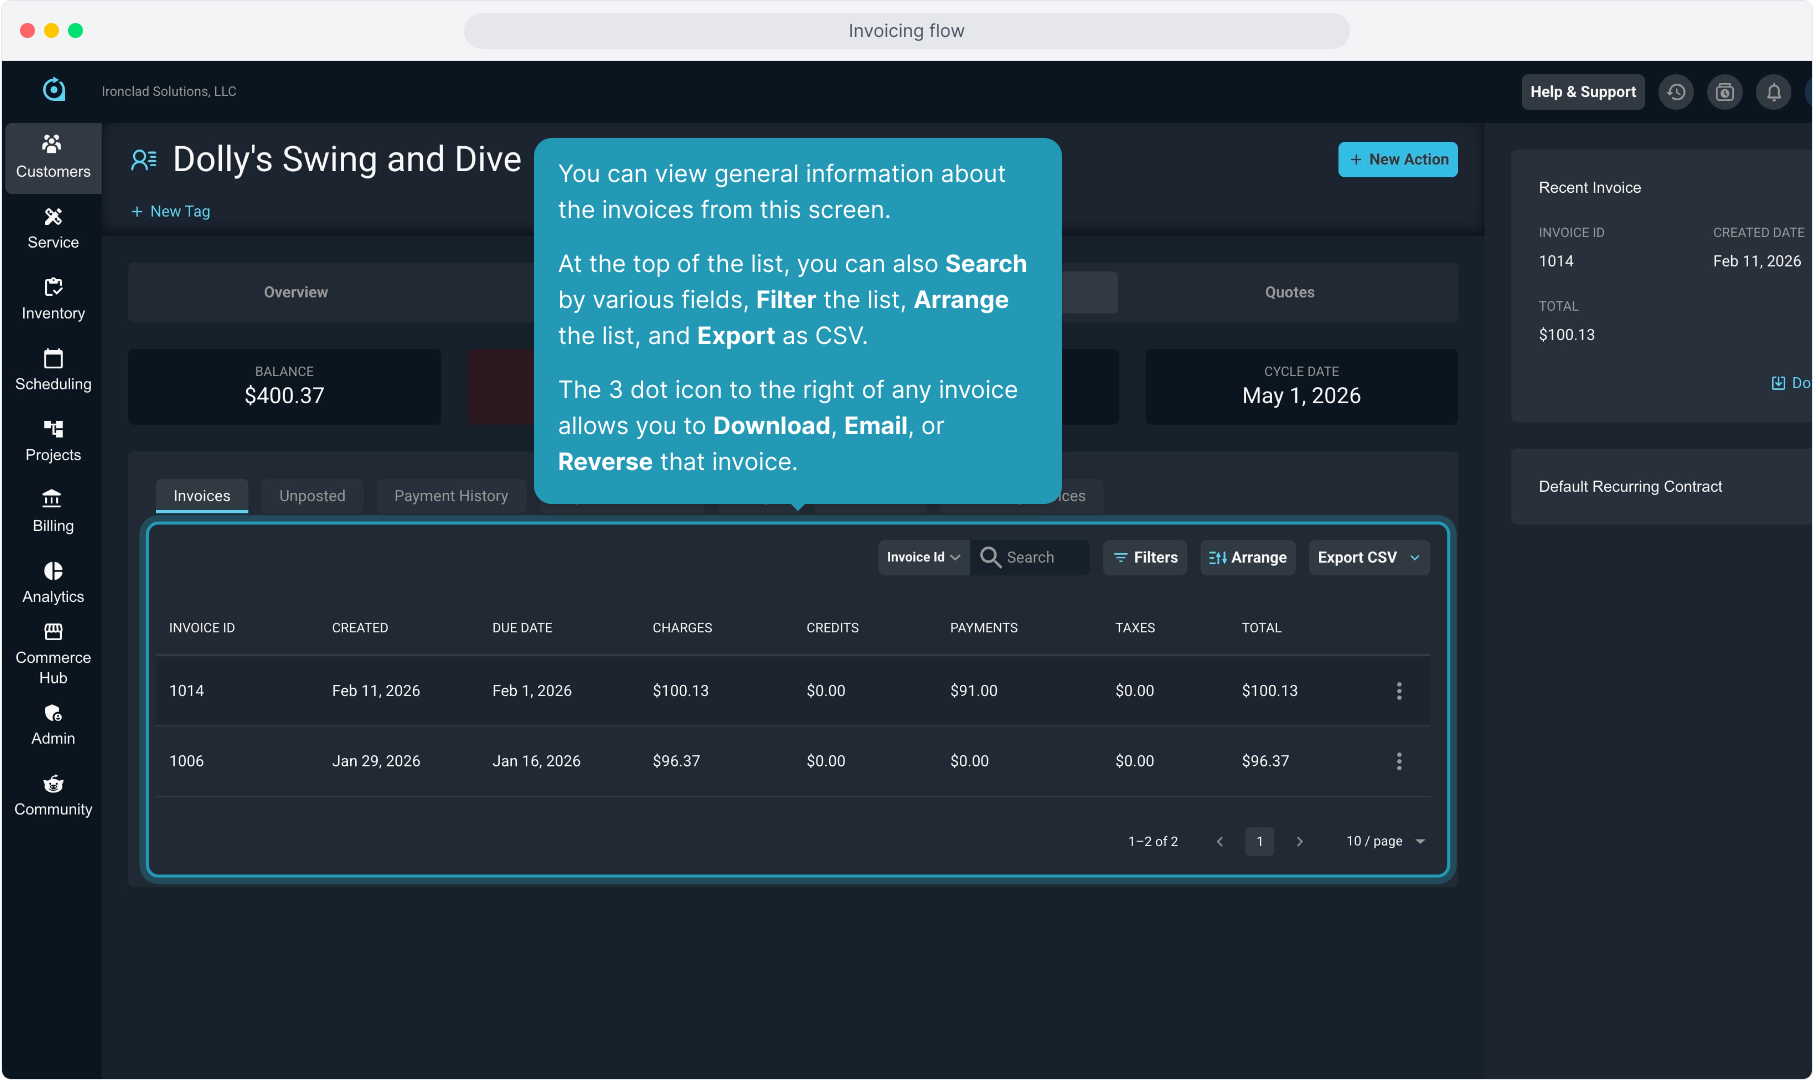
4. You can view general information about the invoices from this screen.
At the top of the list, you can also Search by various fields, Filter the list, Arrange the list, and Export as CSV.
The 3 dot icon to the right of any invoice allows you to Download, Email, or Reverse that invoice.
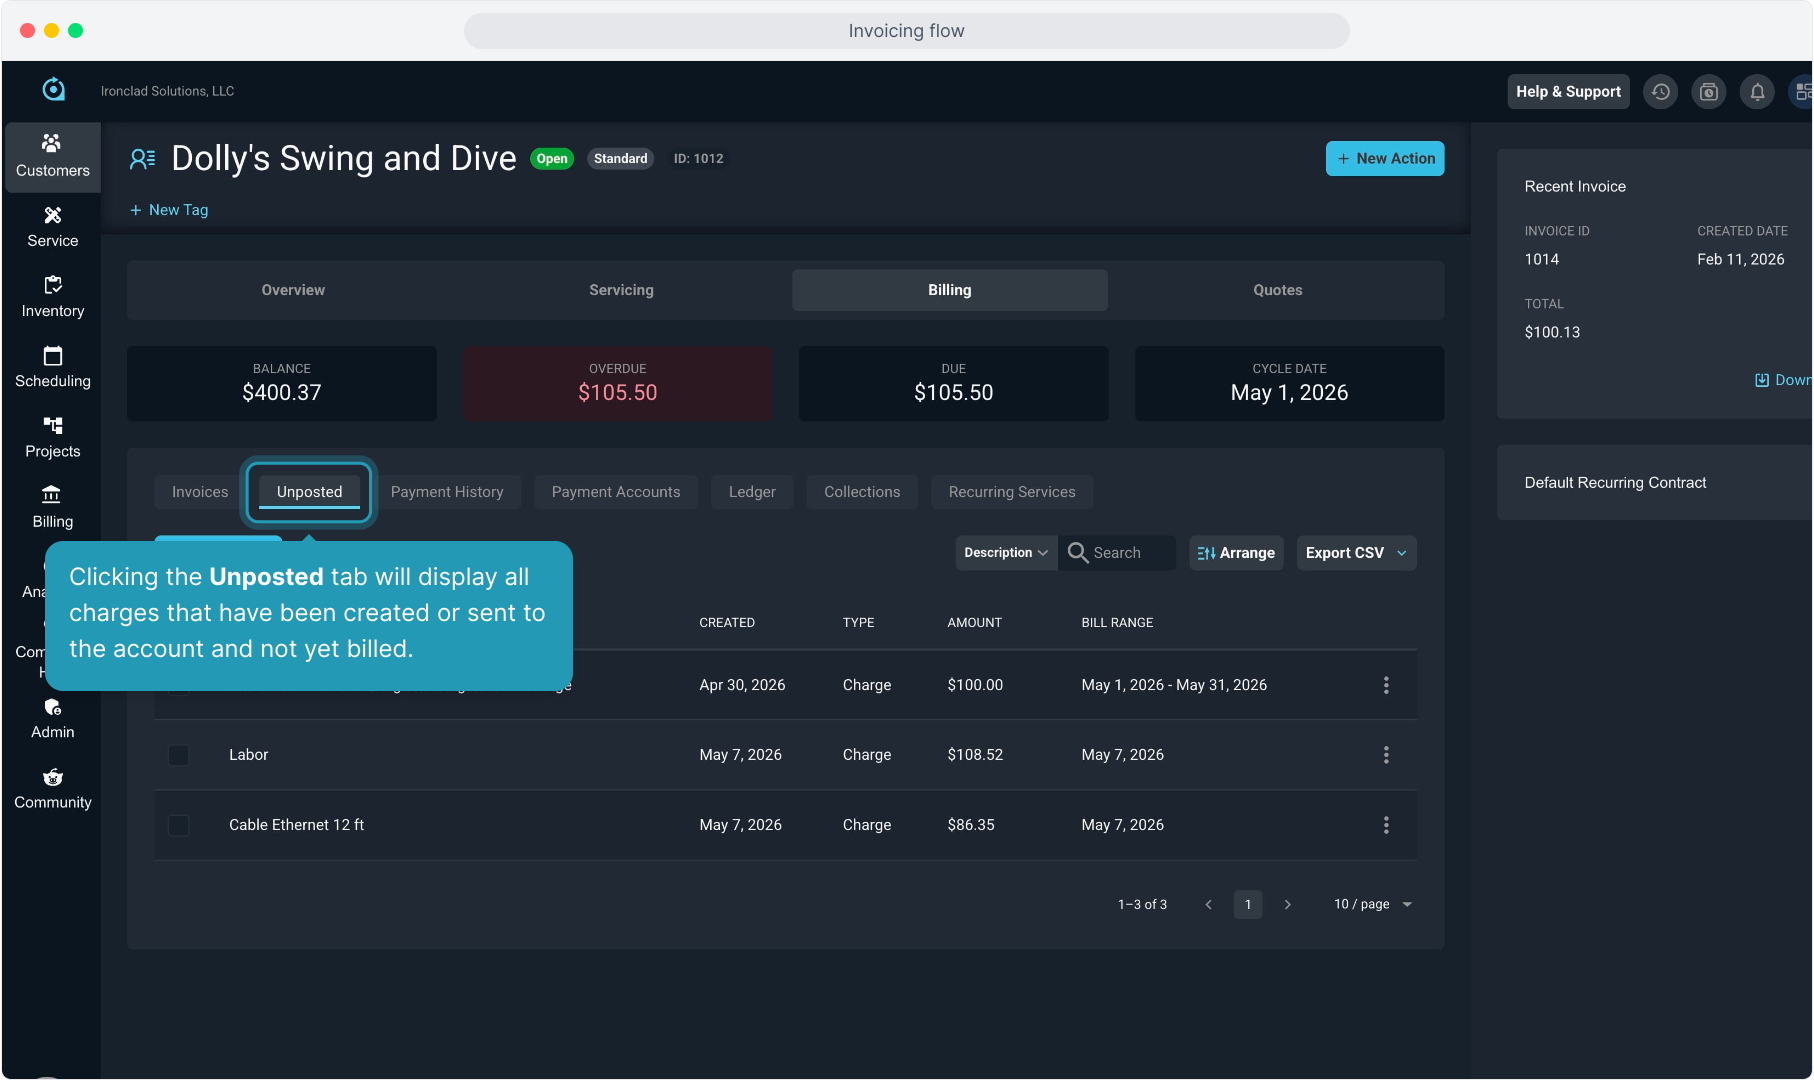
5. Clicking the Unposted tab will display all charges that have been created or sent to the account and not yet billed.
6. Any charges created by recurring billing services, ticket charges that have been Sent to Billing, and one-off onetime charges/credits added to the account will display here until they have been invoiced.
You can Search this list, Arrange the columns, or Export to CSV. Clicking the 3 dot icon does also allow you to Reverse the charge or credit.

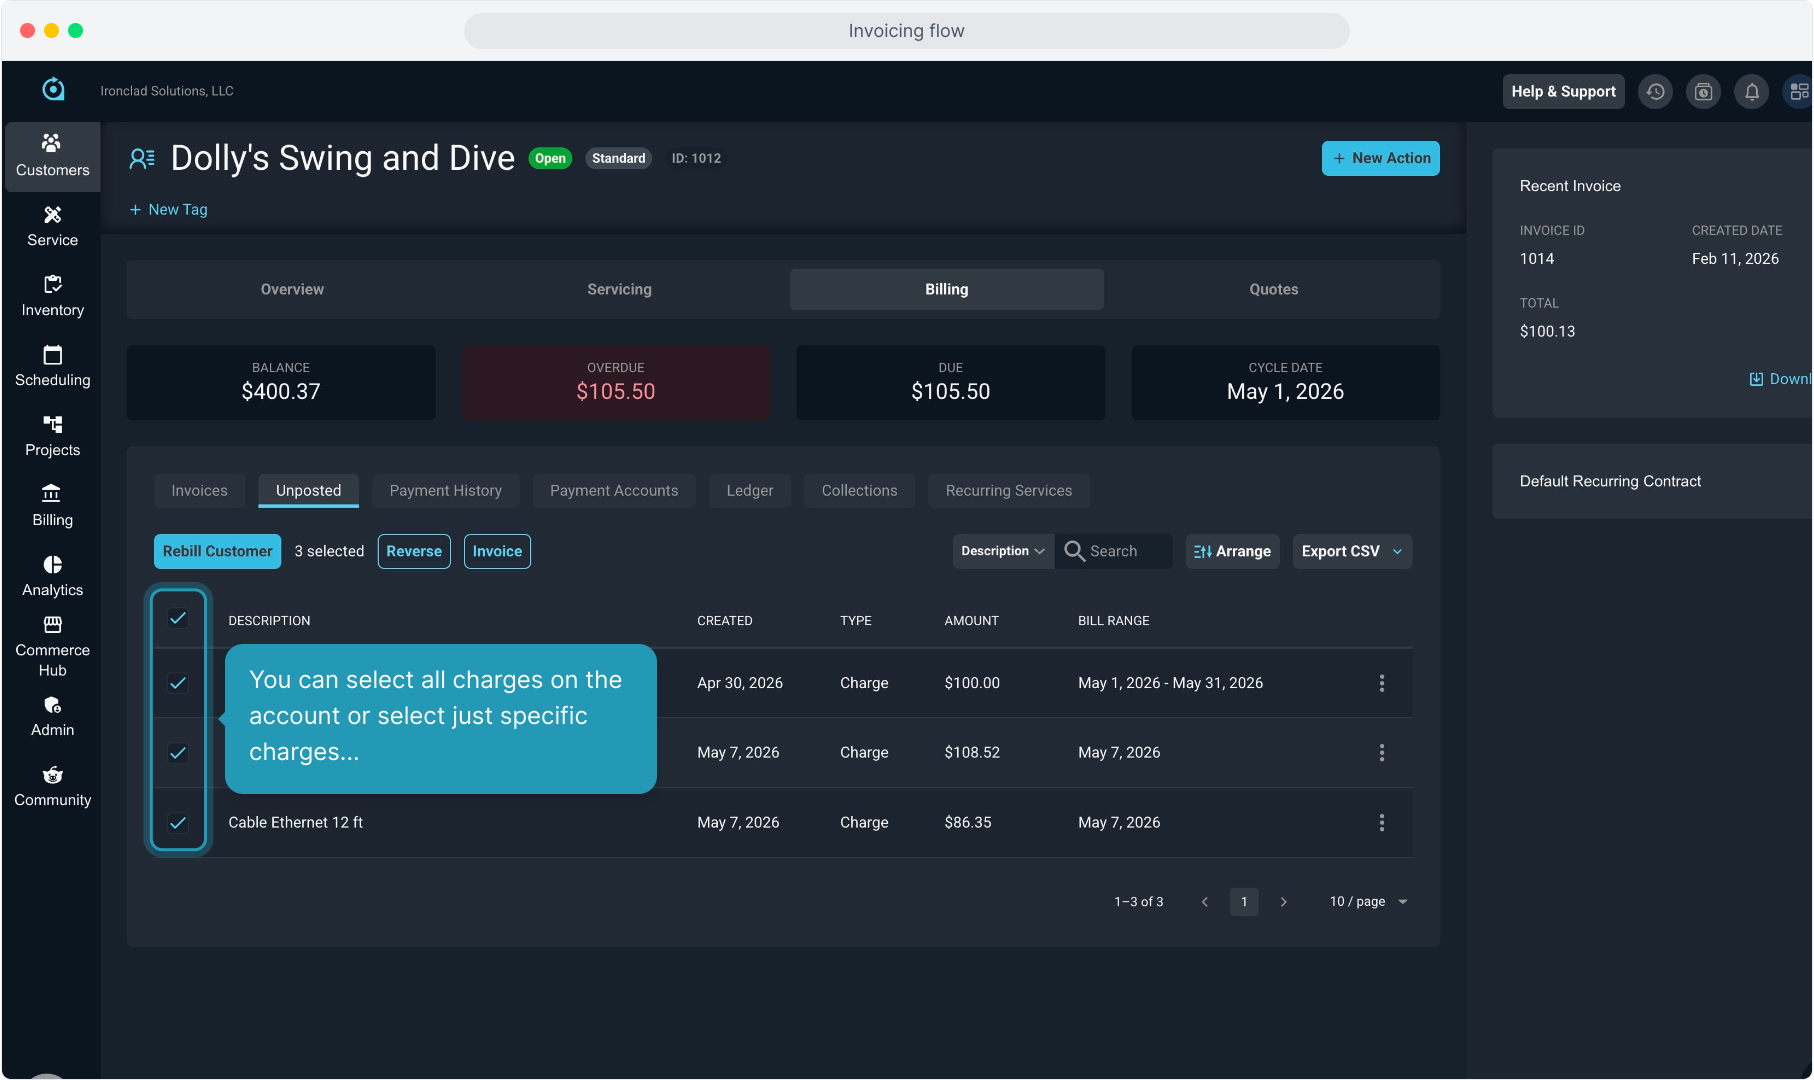
7. You can select all charges on the account or select just specific charges...
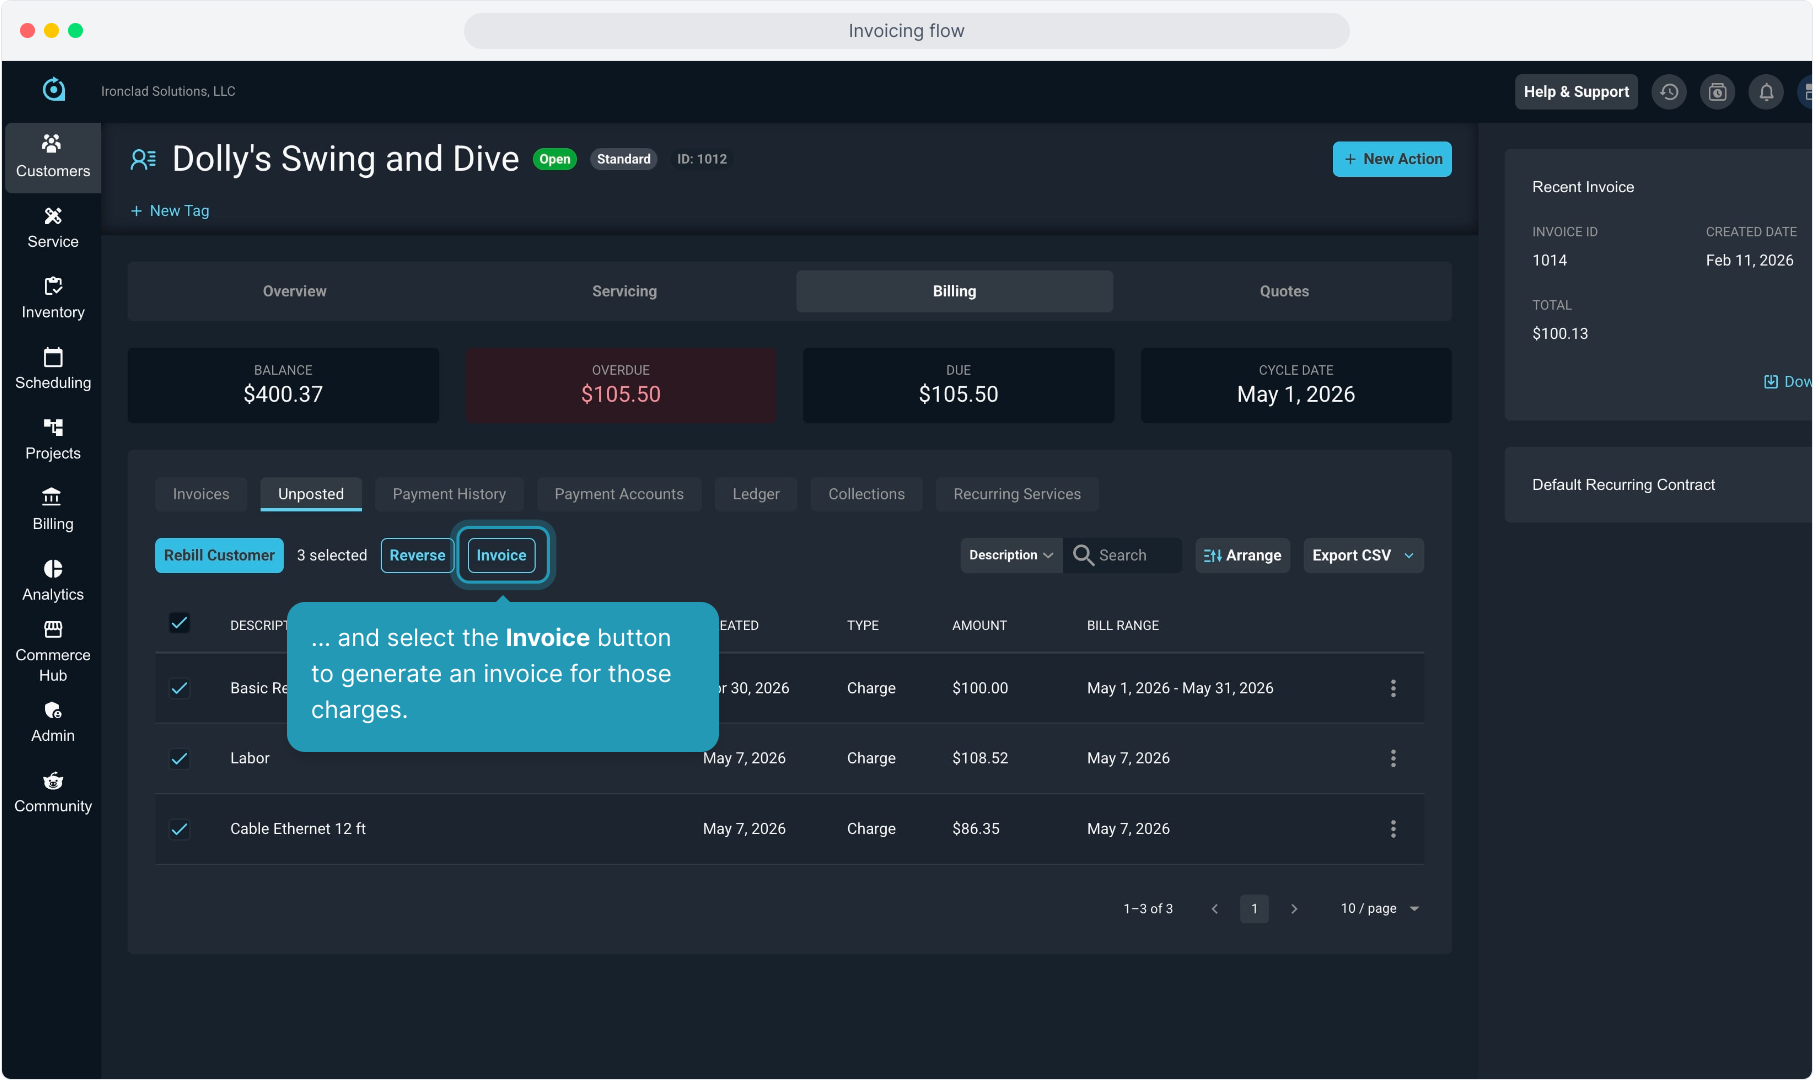
8. ... and select the Invoice button to generate an invoice for those charges.
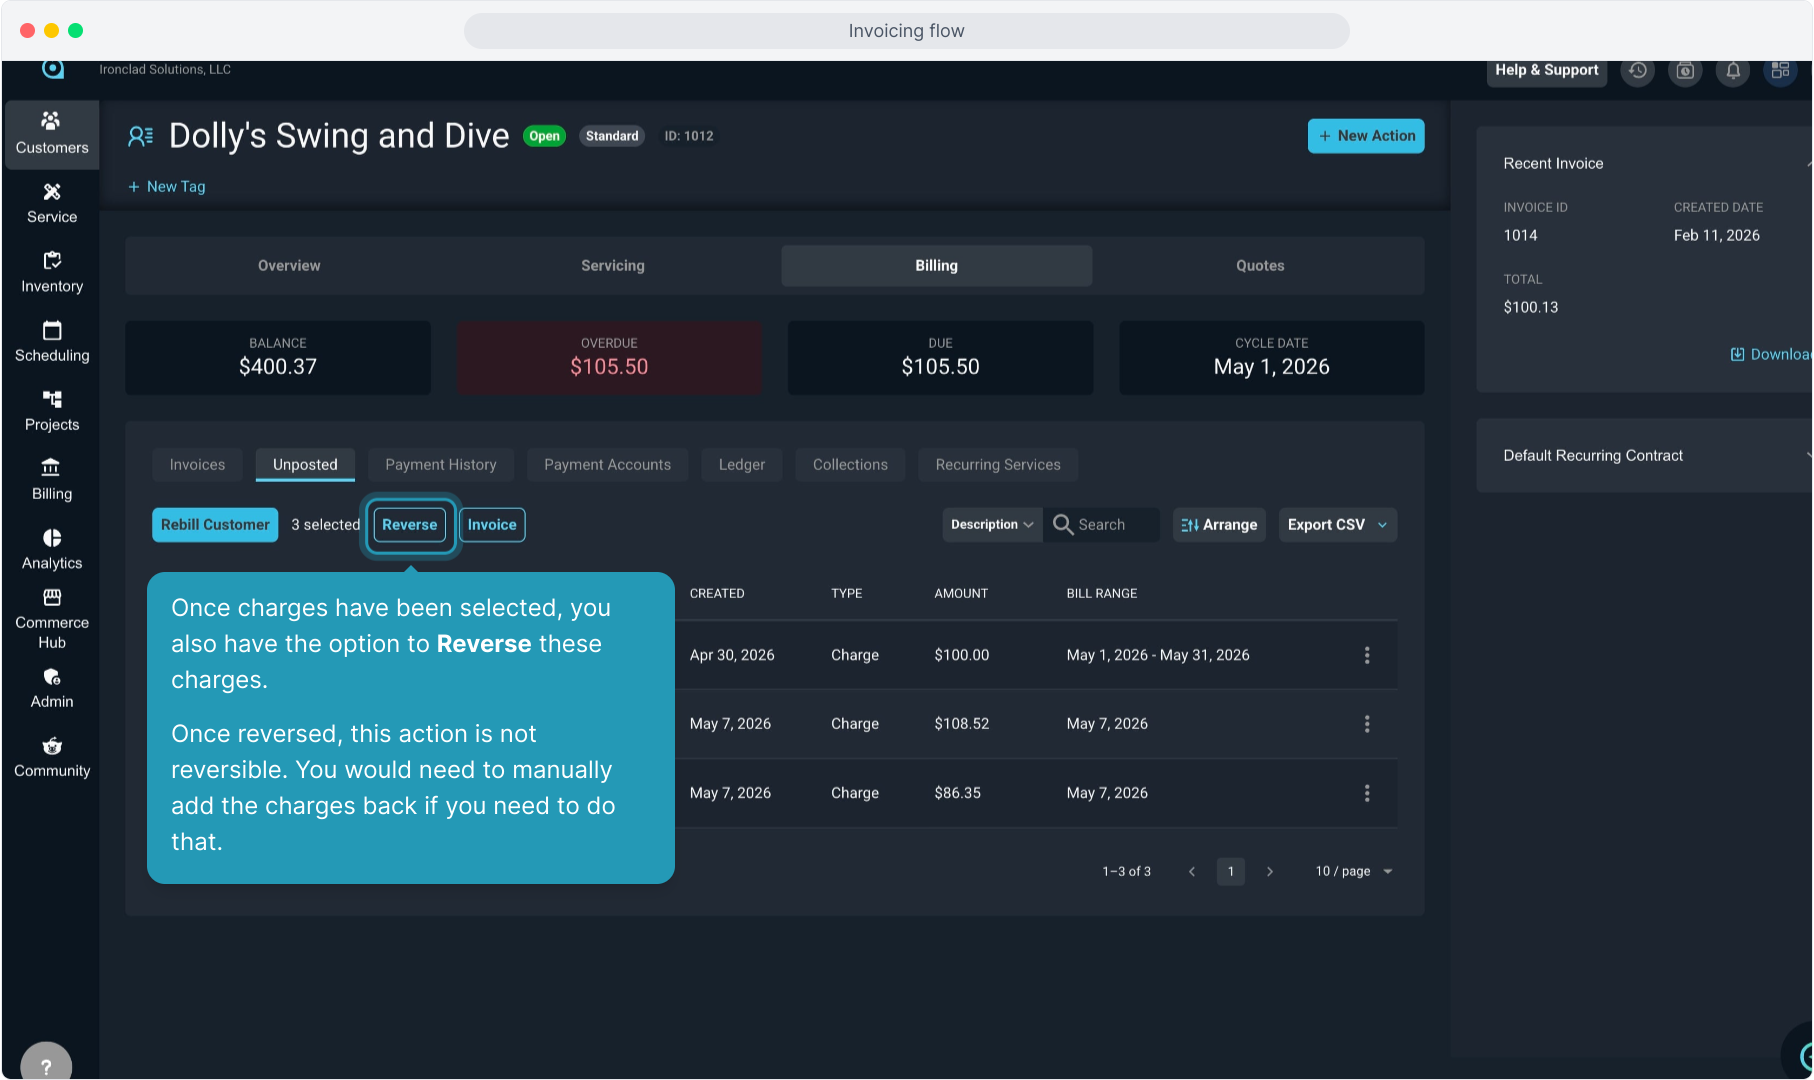
9. Once charges have been selected, you also have the option to Reverse these charges.
Once reversed, this action is not reversible. You would need to manually add the charges back if you need to do that.
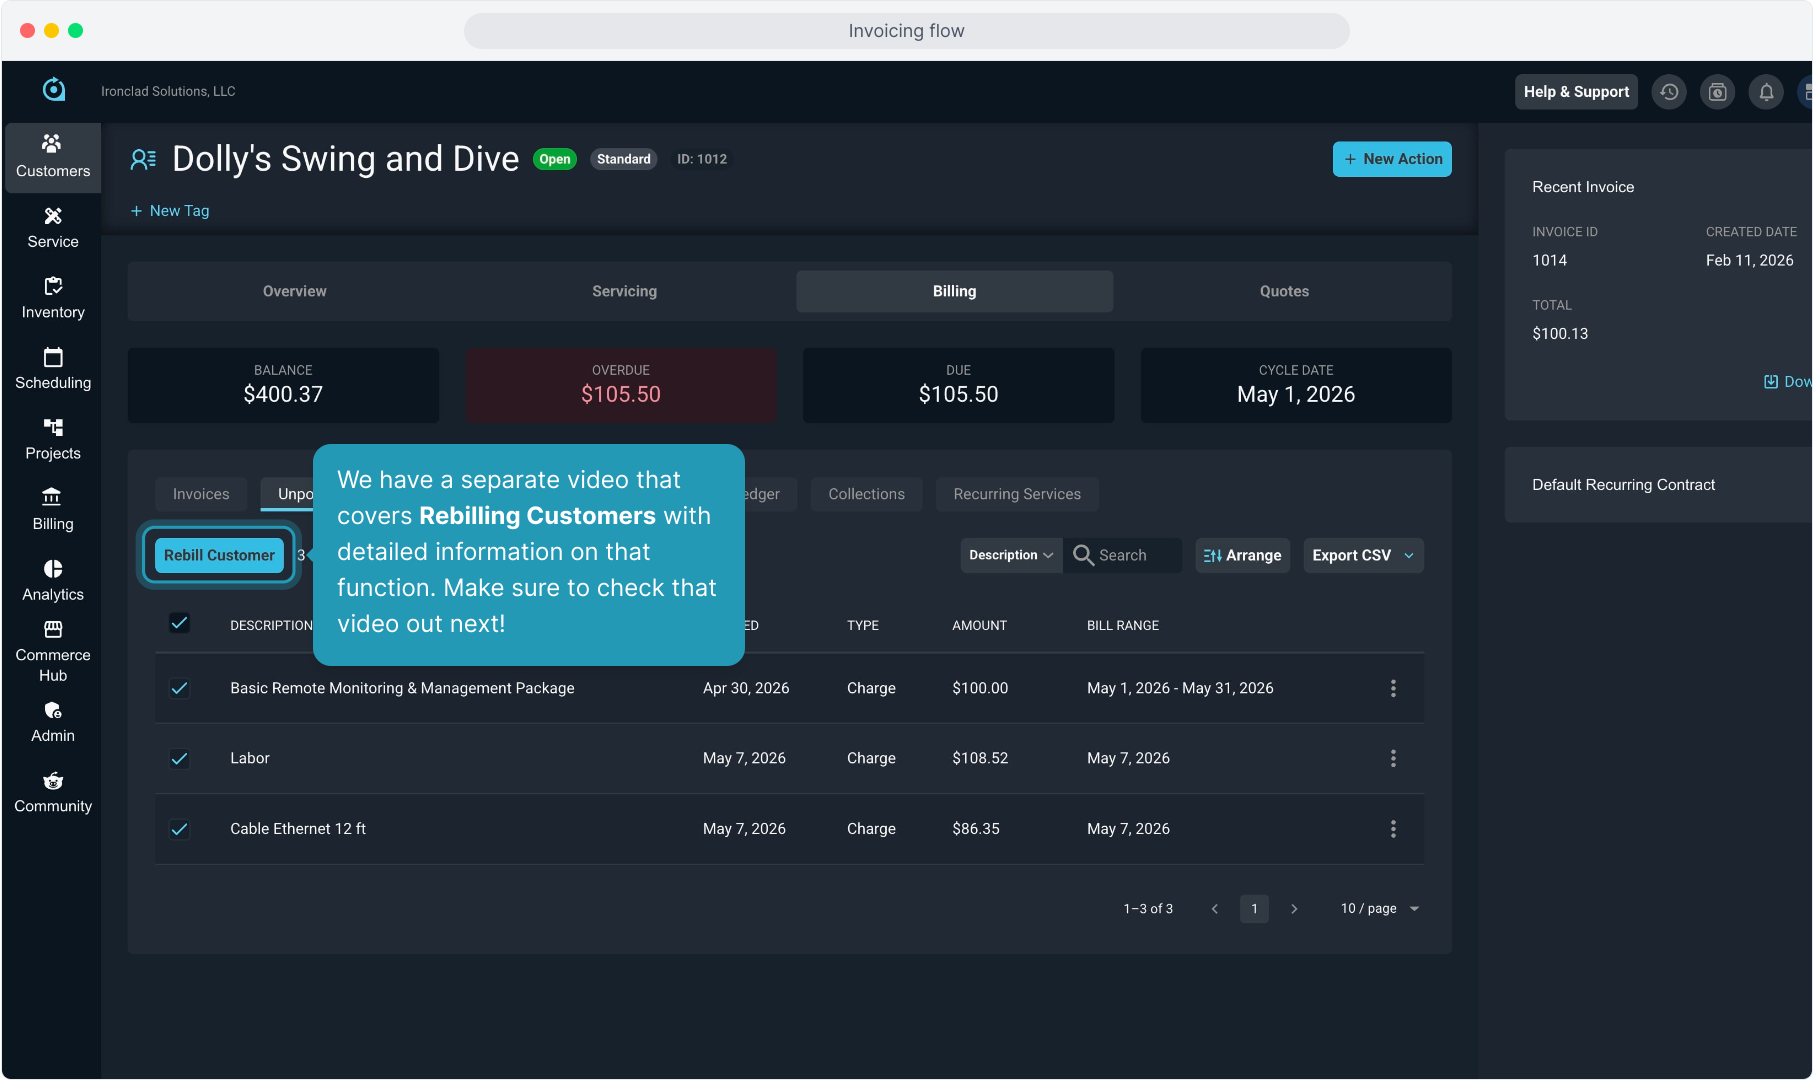
10. We have a separate video that covers Rebilling Customers with detailed information on that function. Make sure to check that video out next!
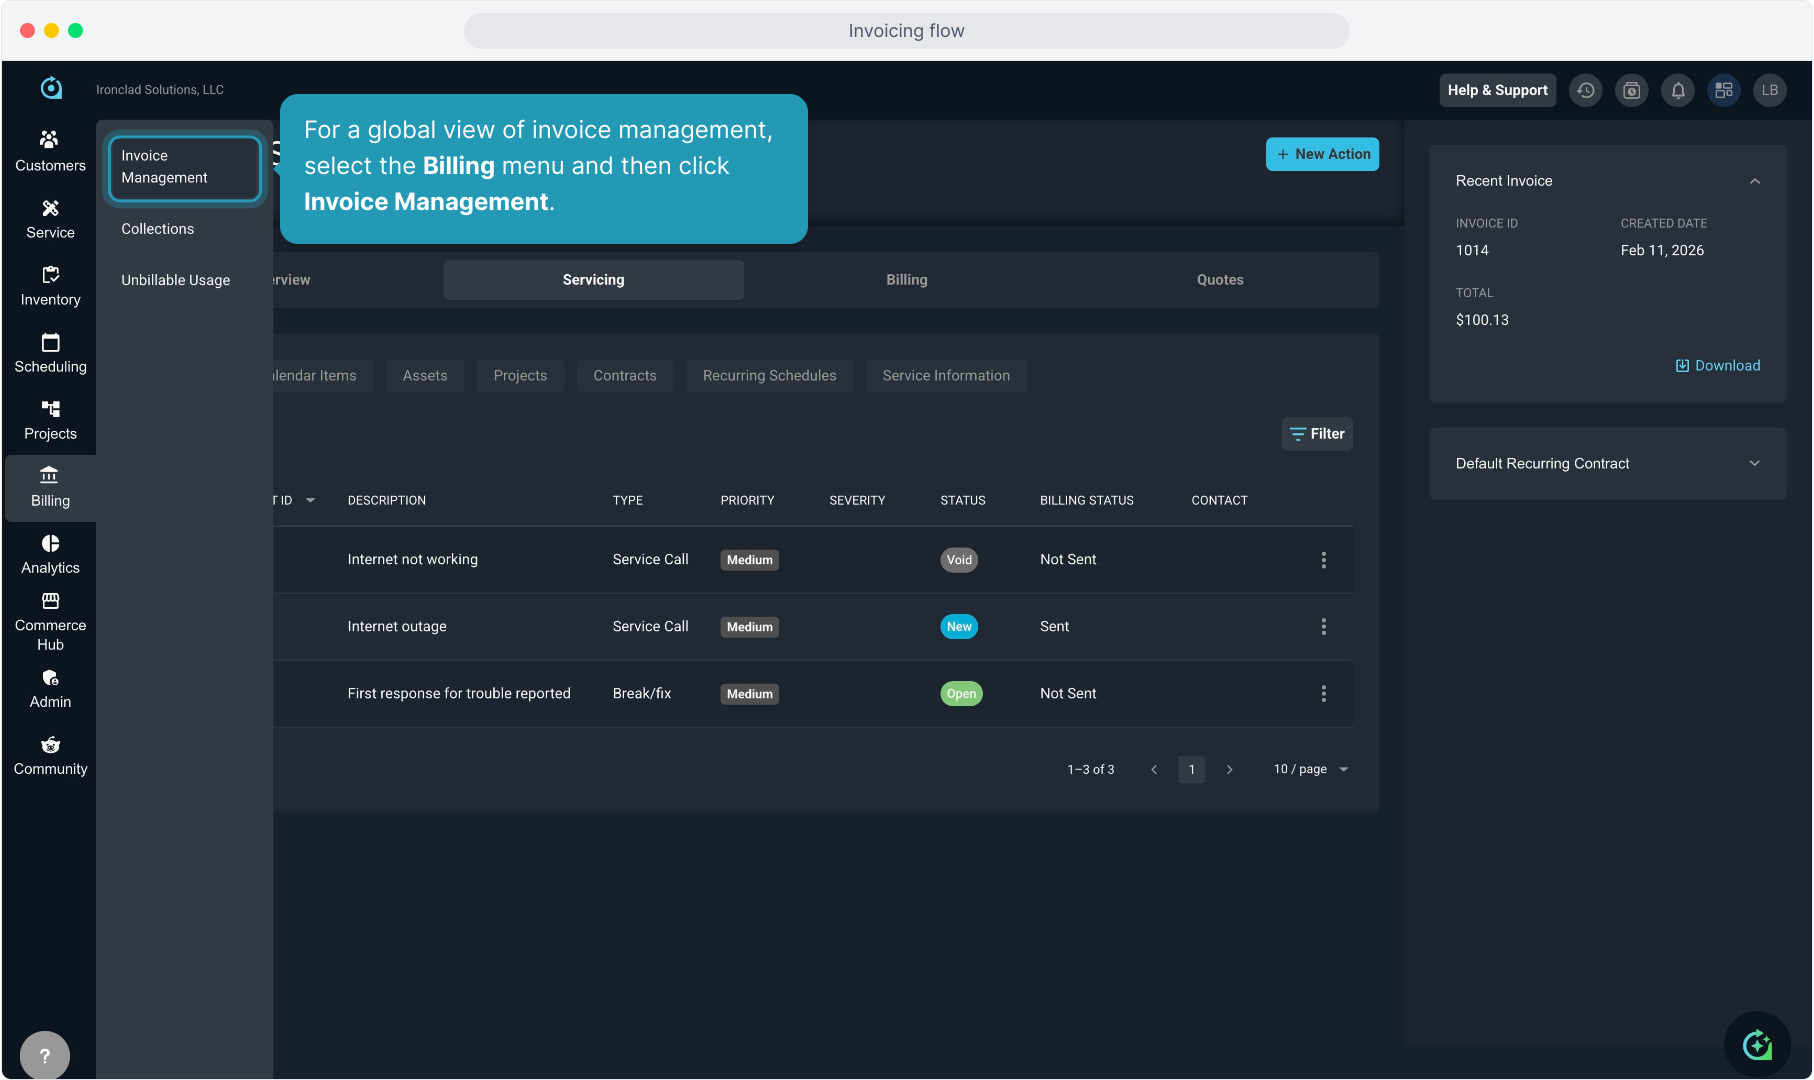
11. For a global view of invoice management, select the Billing menu and then click Invoice Management.
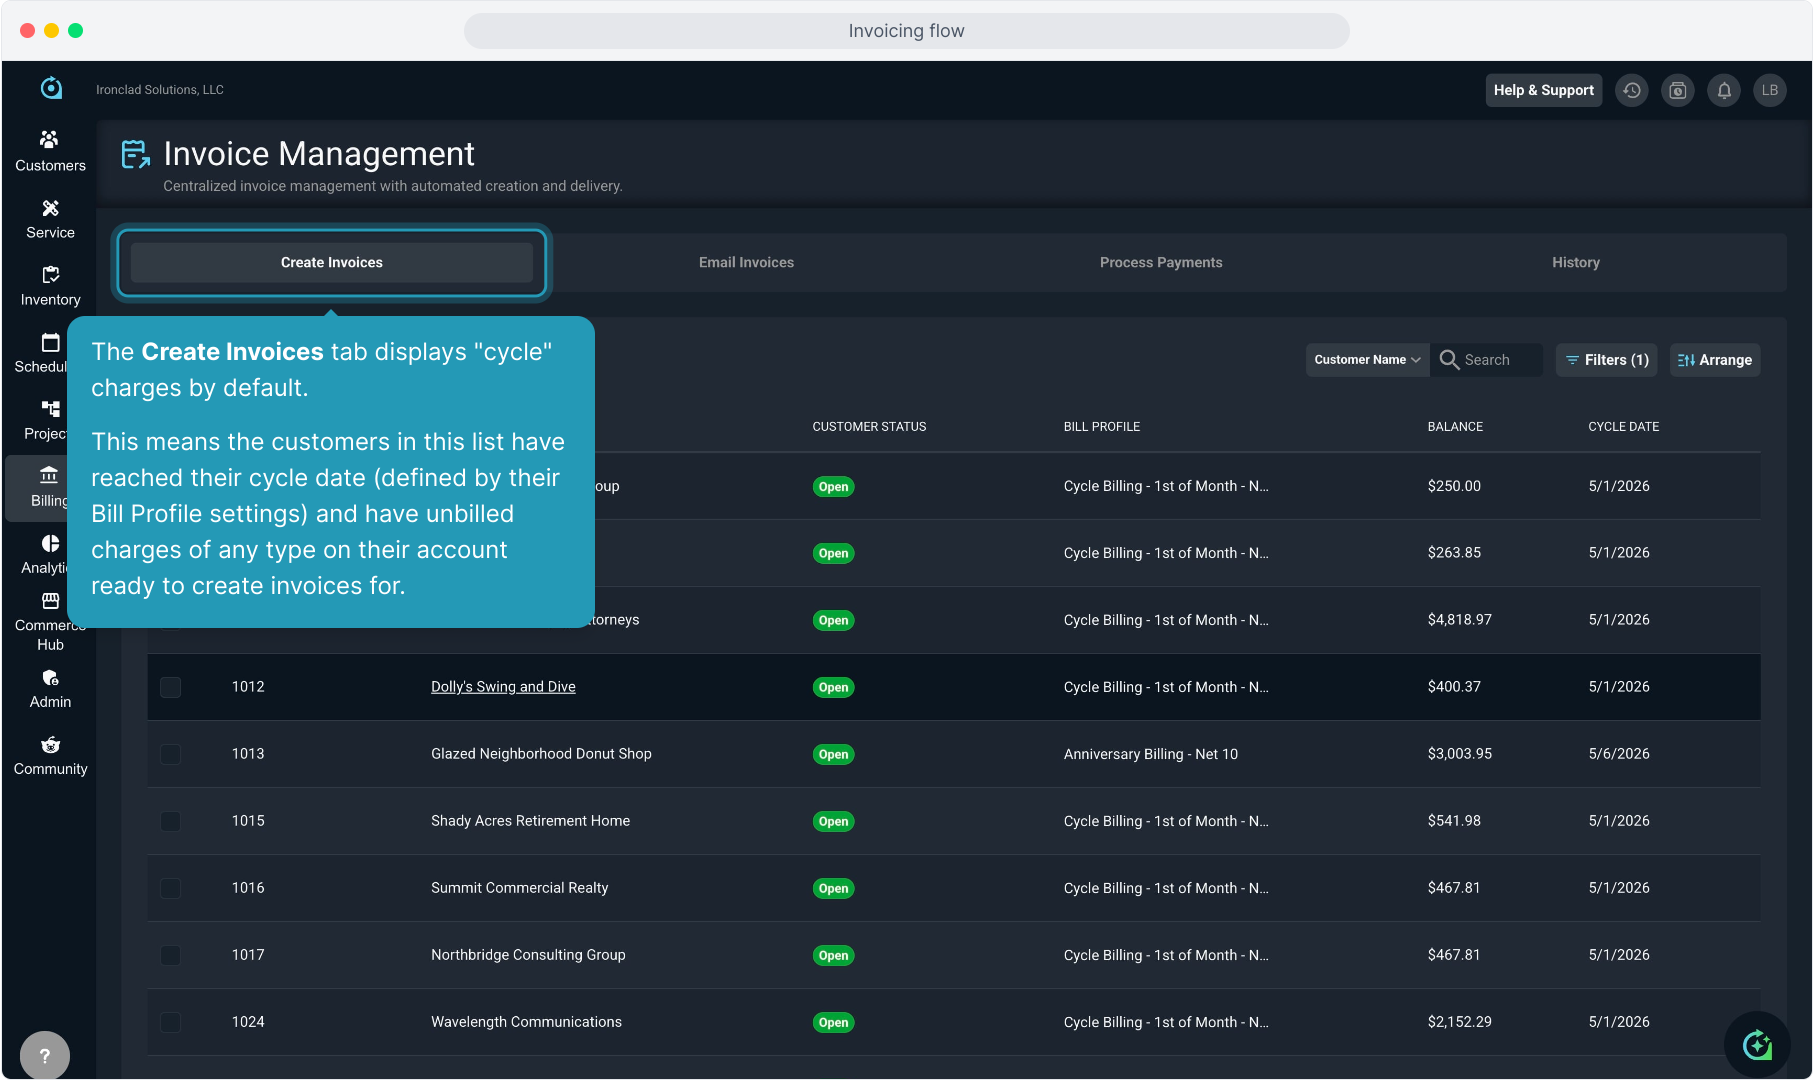
12. The Create Invoices tab displays "cycle" charges by default.
This means the customers in this list have reached their cycle date (defined by their Bill Profile settings) and have unbilled charges of any type on their account ready to create invoices for.
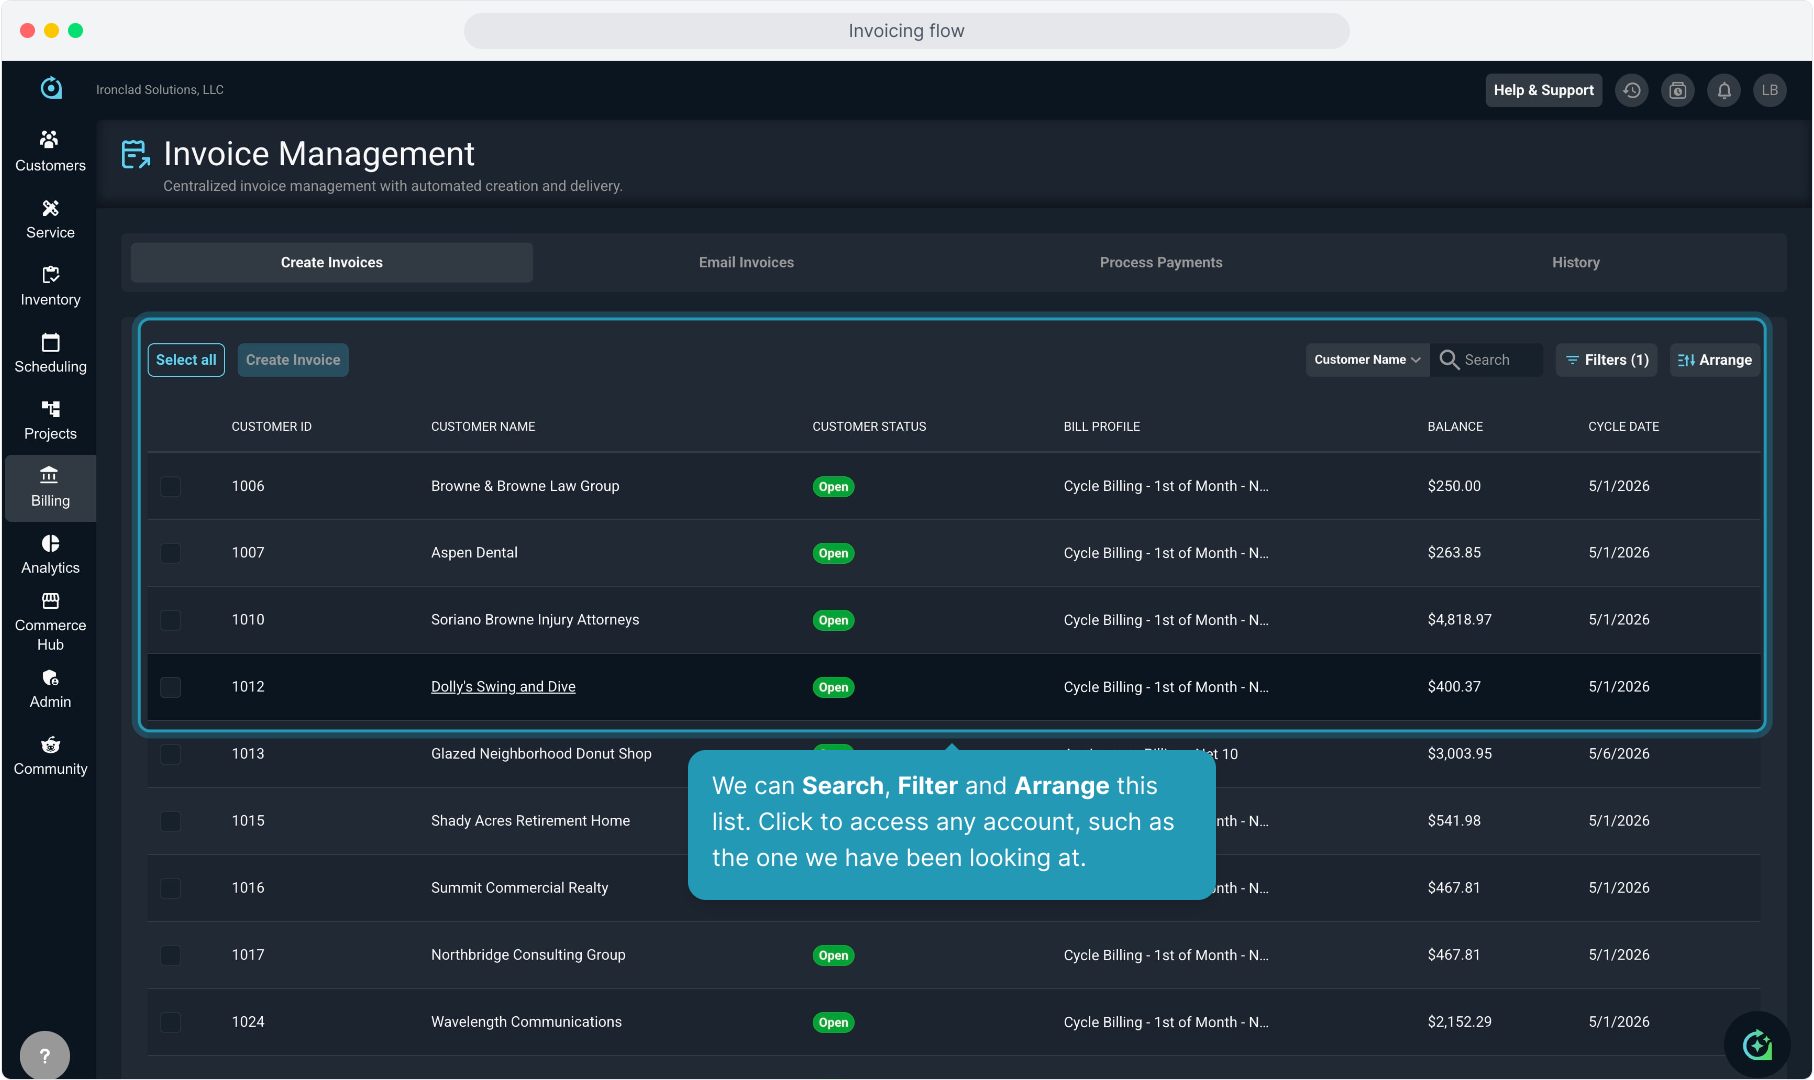
13. We can Search, Filter and Arrange this list. Click to access any account, such as the one we have been looking at.
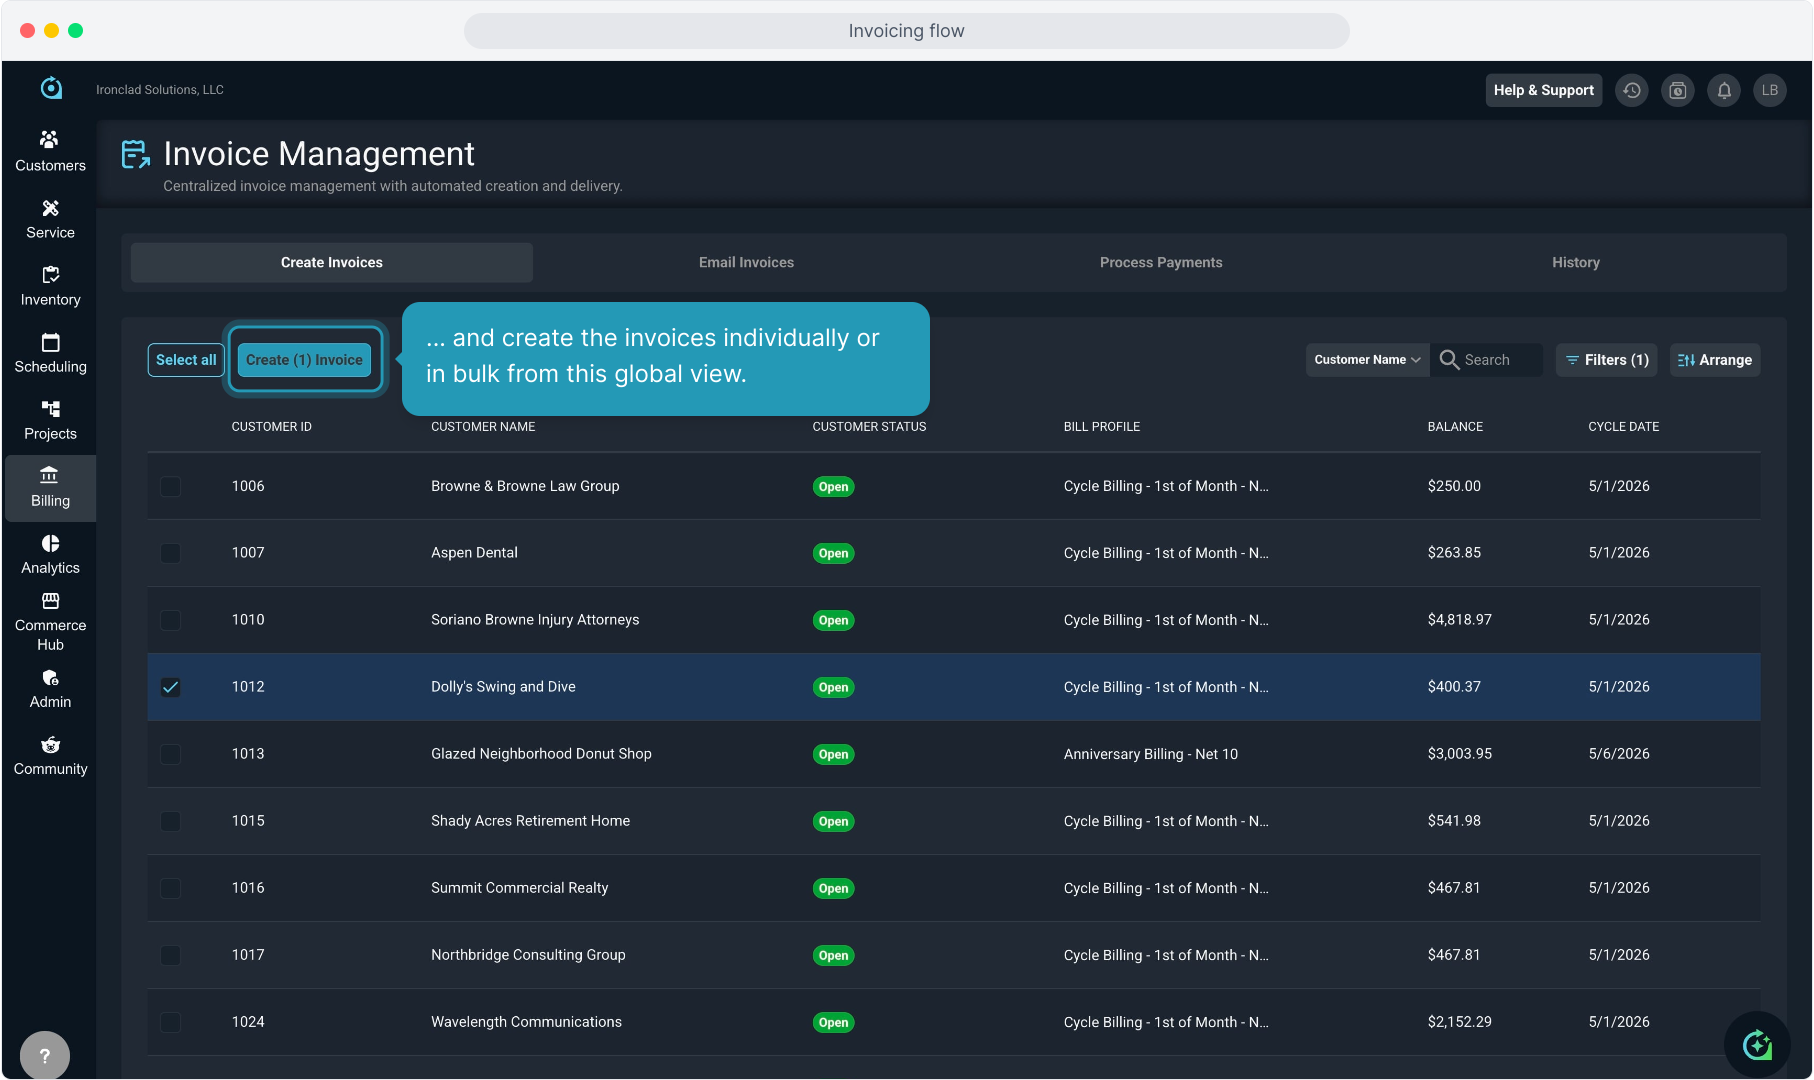
14. You can select any account or all accounts from here...

15. ... and create the invoices individually or in bulk from this global view.
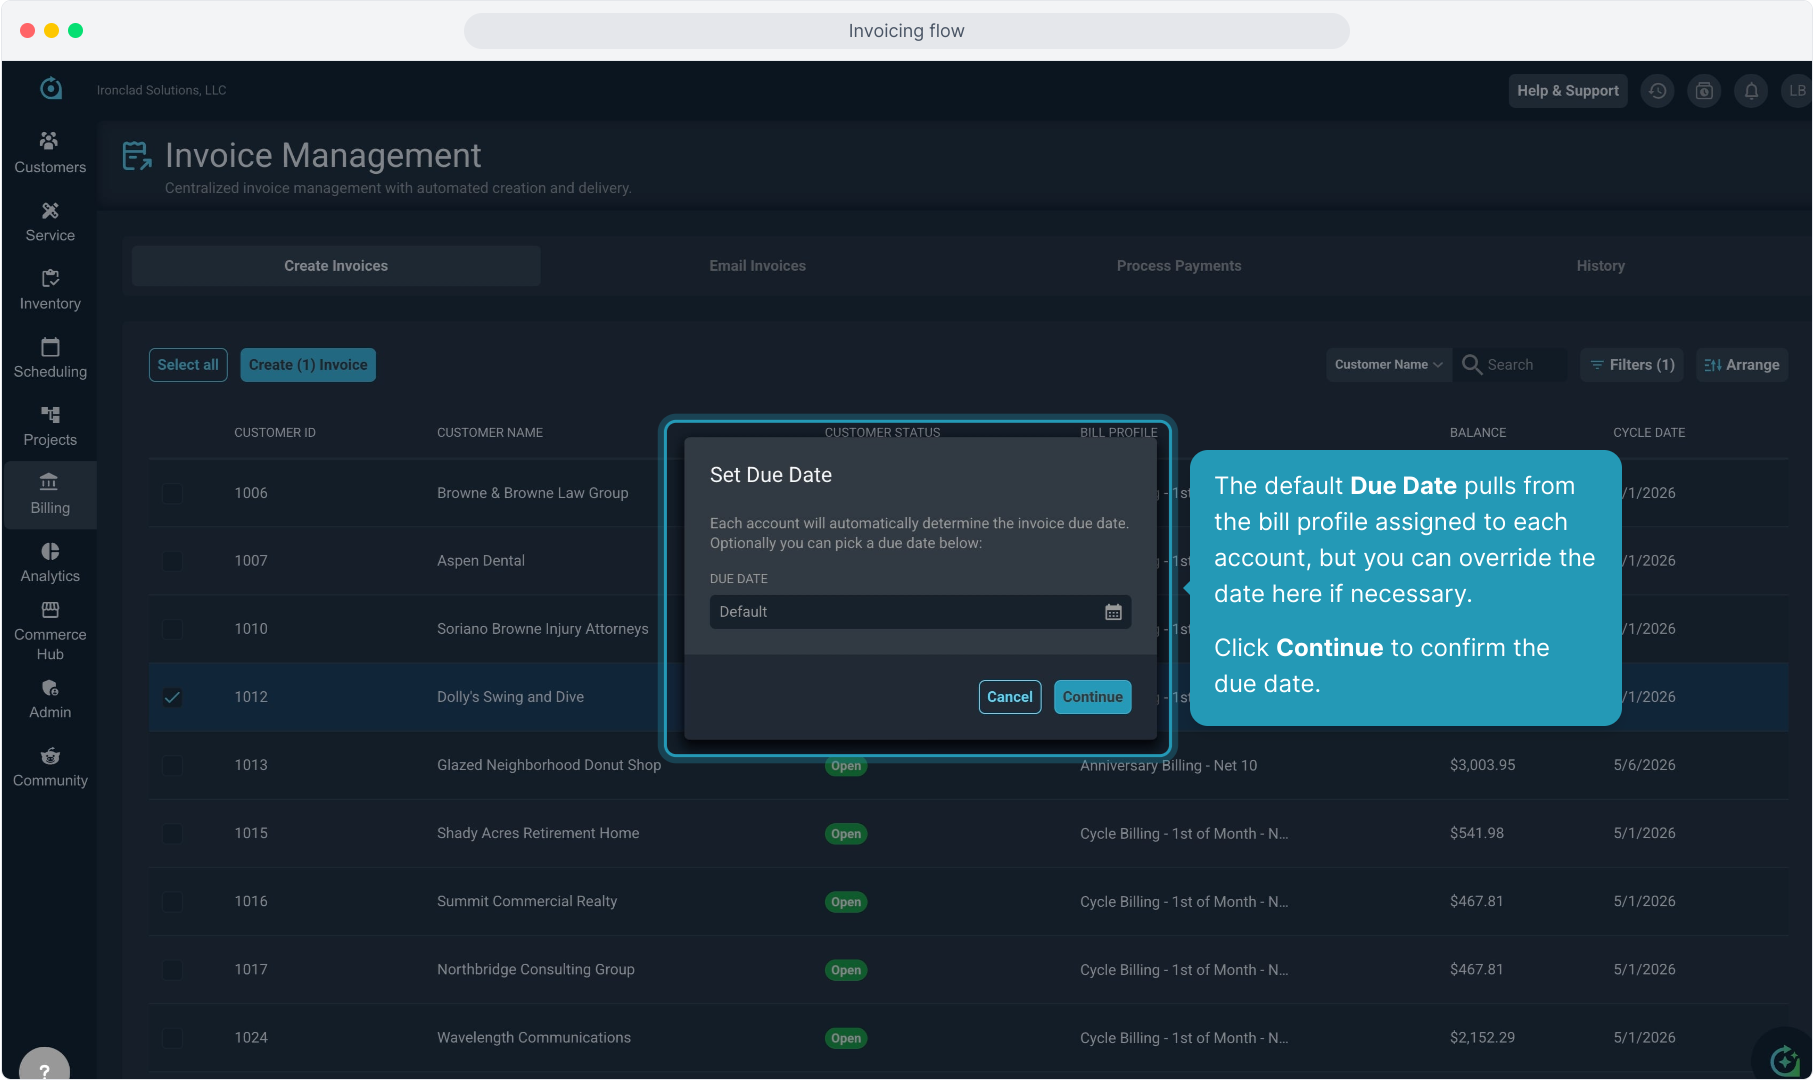
16. The default Due Date pulls from the bill profile assigned to each account, but you can override the date here if necessary.
Click Continue to confirm the due date.
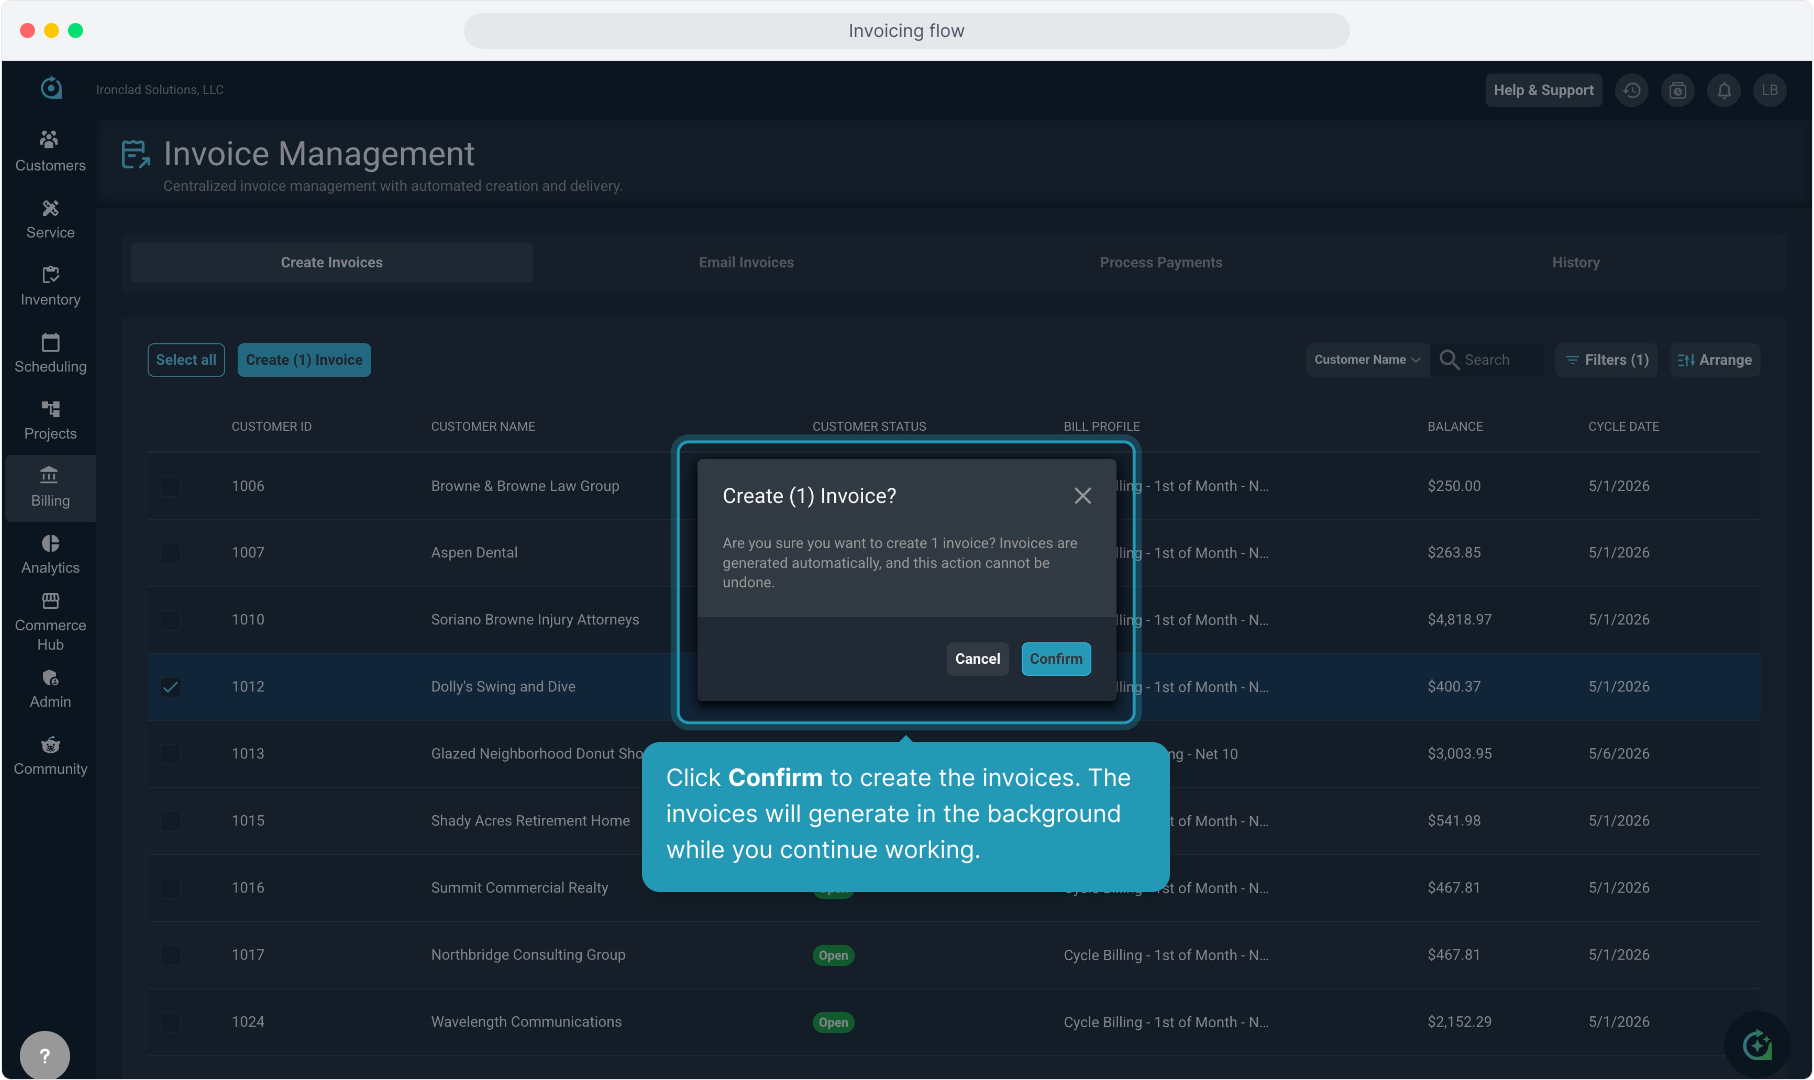
17. Click Confirm to create the invoices. The invoices will generate in the background while you continue working.
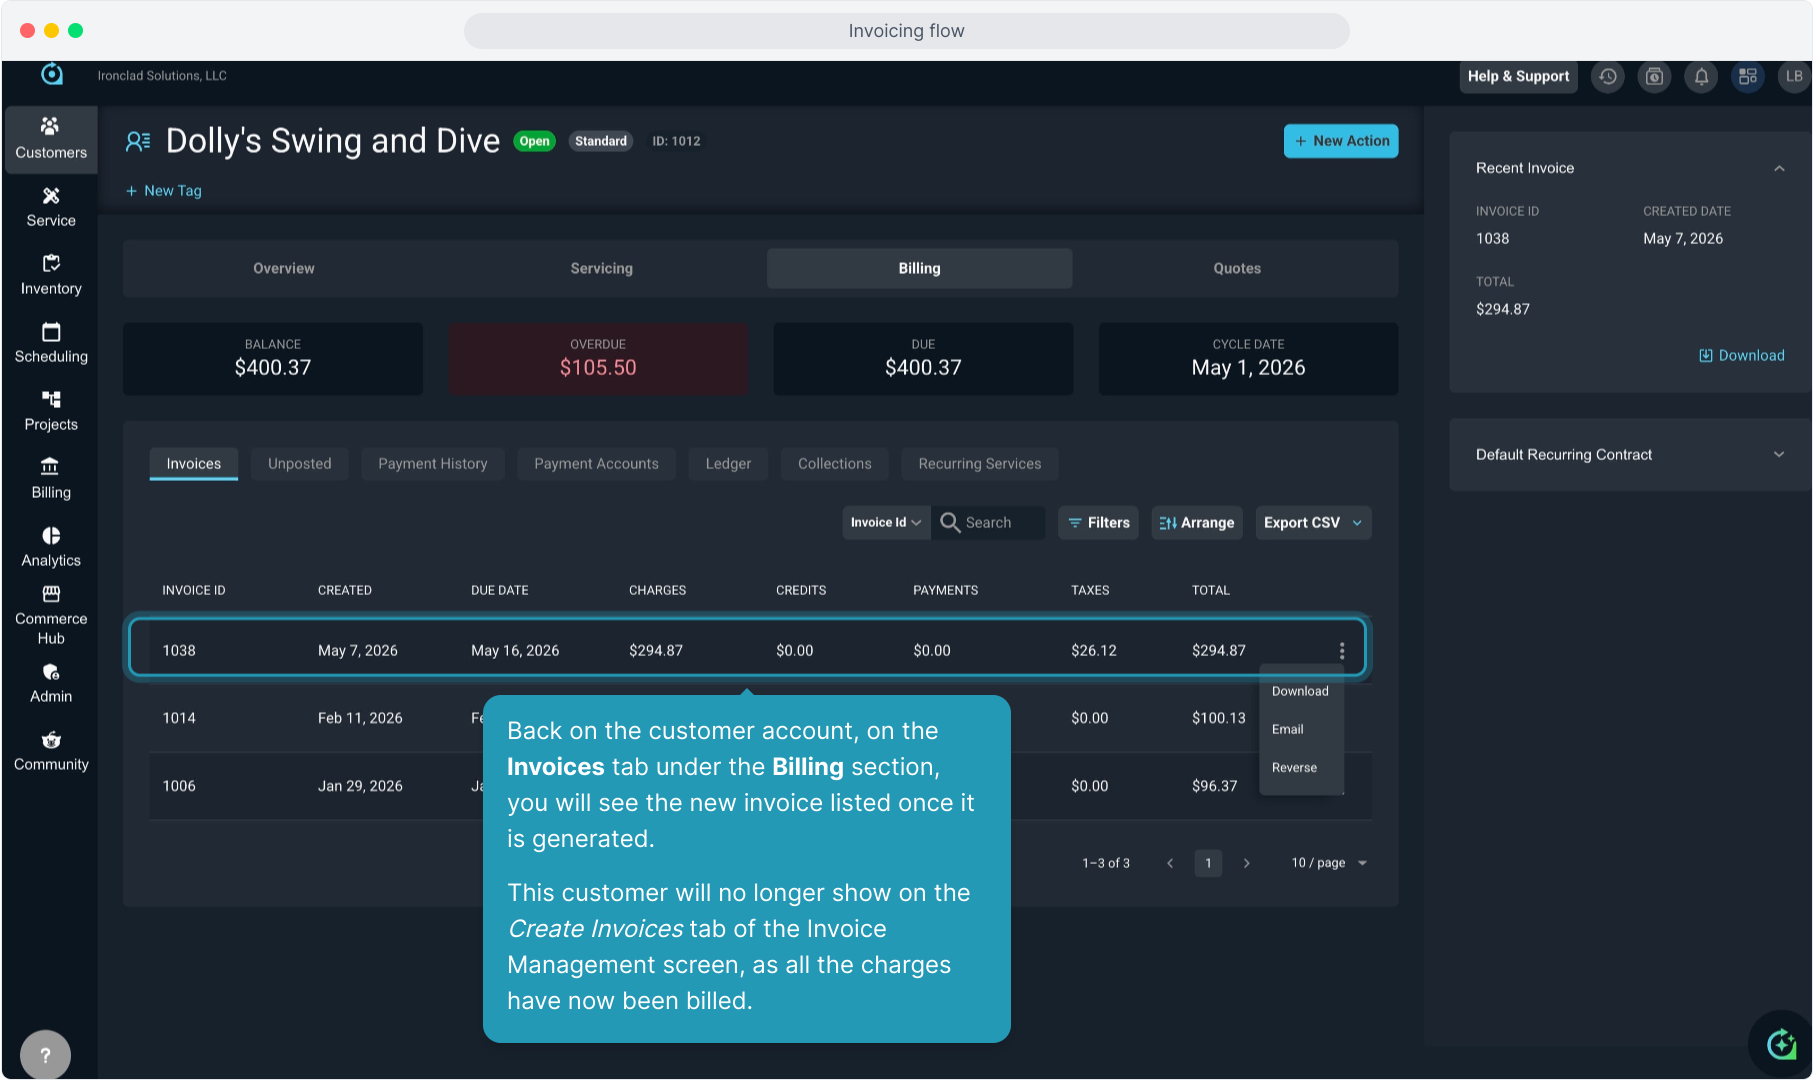
18. Back on the customer account, on the Invoices tab under the Billing section, you will see the new invoice listed once it is generated.
This customer will no longer show on the Create Invoices tab of the Invoice Management screen, as all the charges have now been billed.
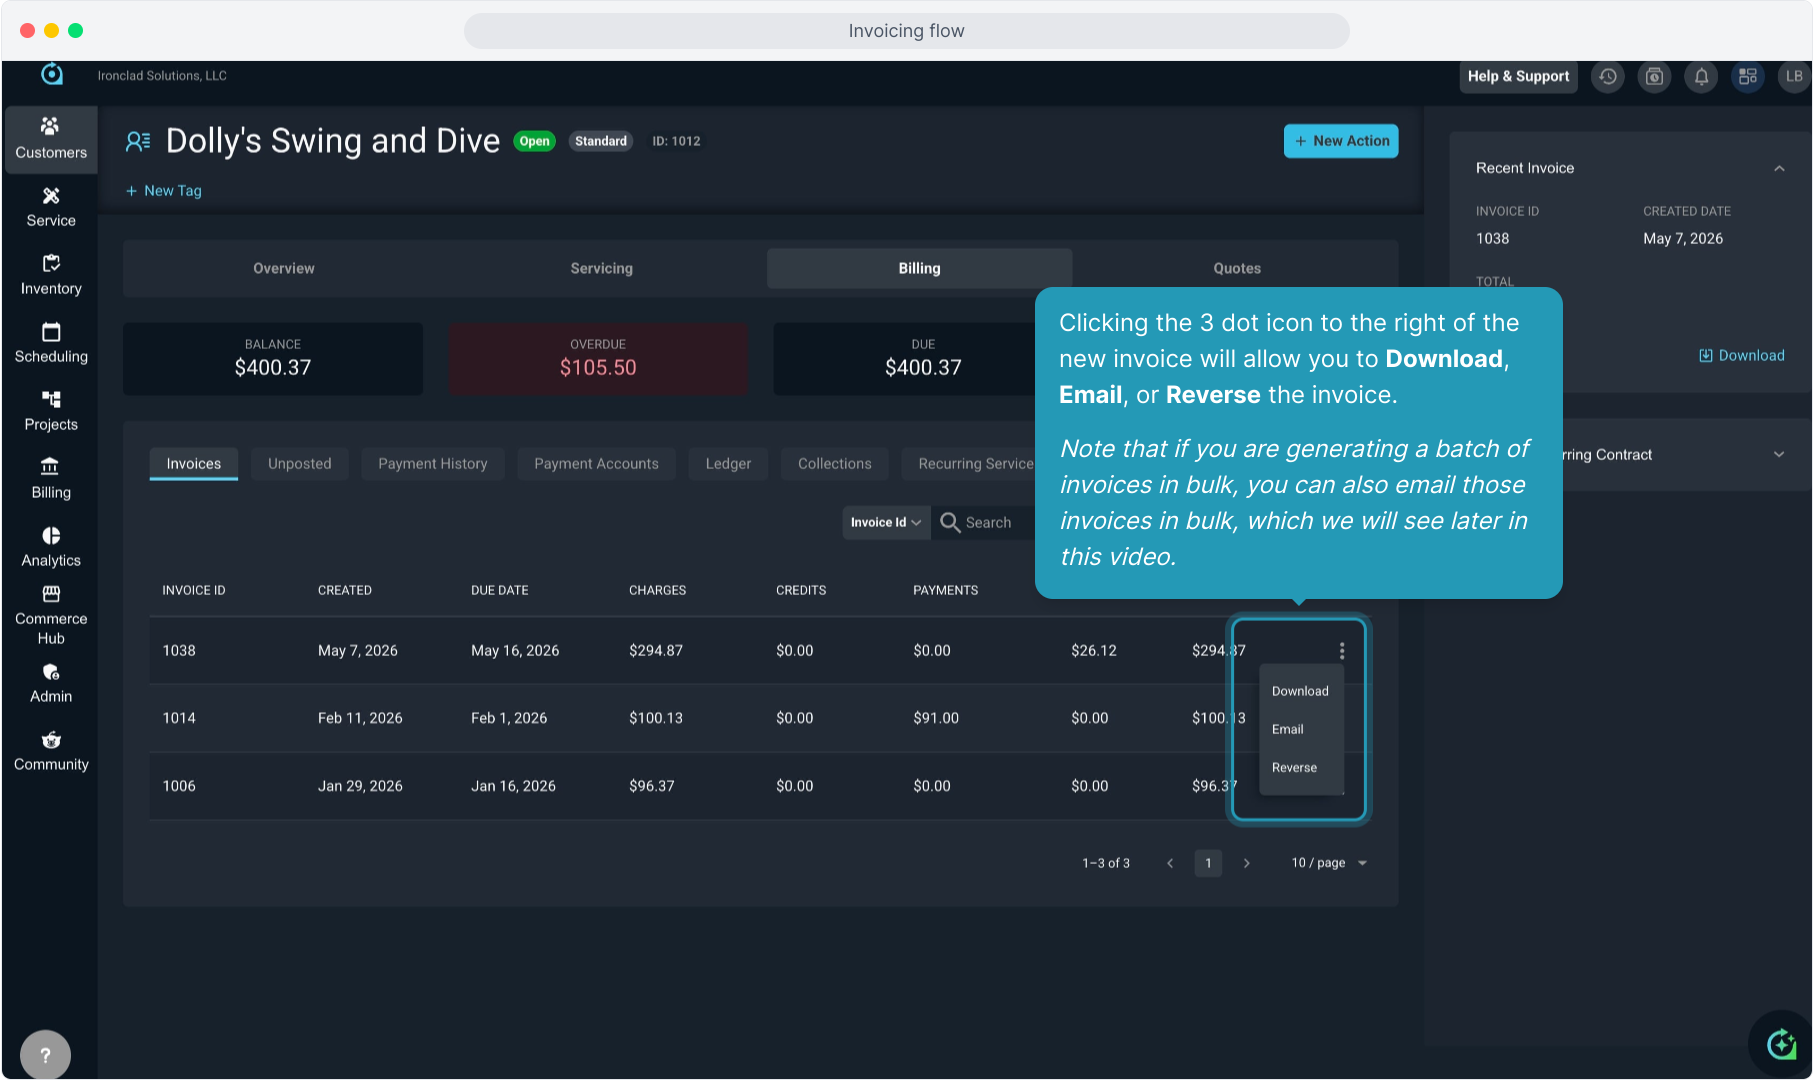
19. Clicking the 3 dot icon to the right of the new invoice will allow you to Download, Email, or Reverse the invoice.
Note that if you are generating a batch of invoices in bulk, you can also email those invoices in bulk, which we will see later in this video.
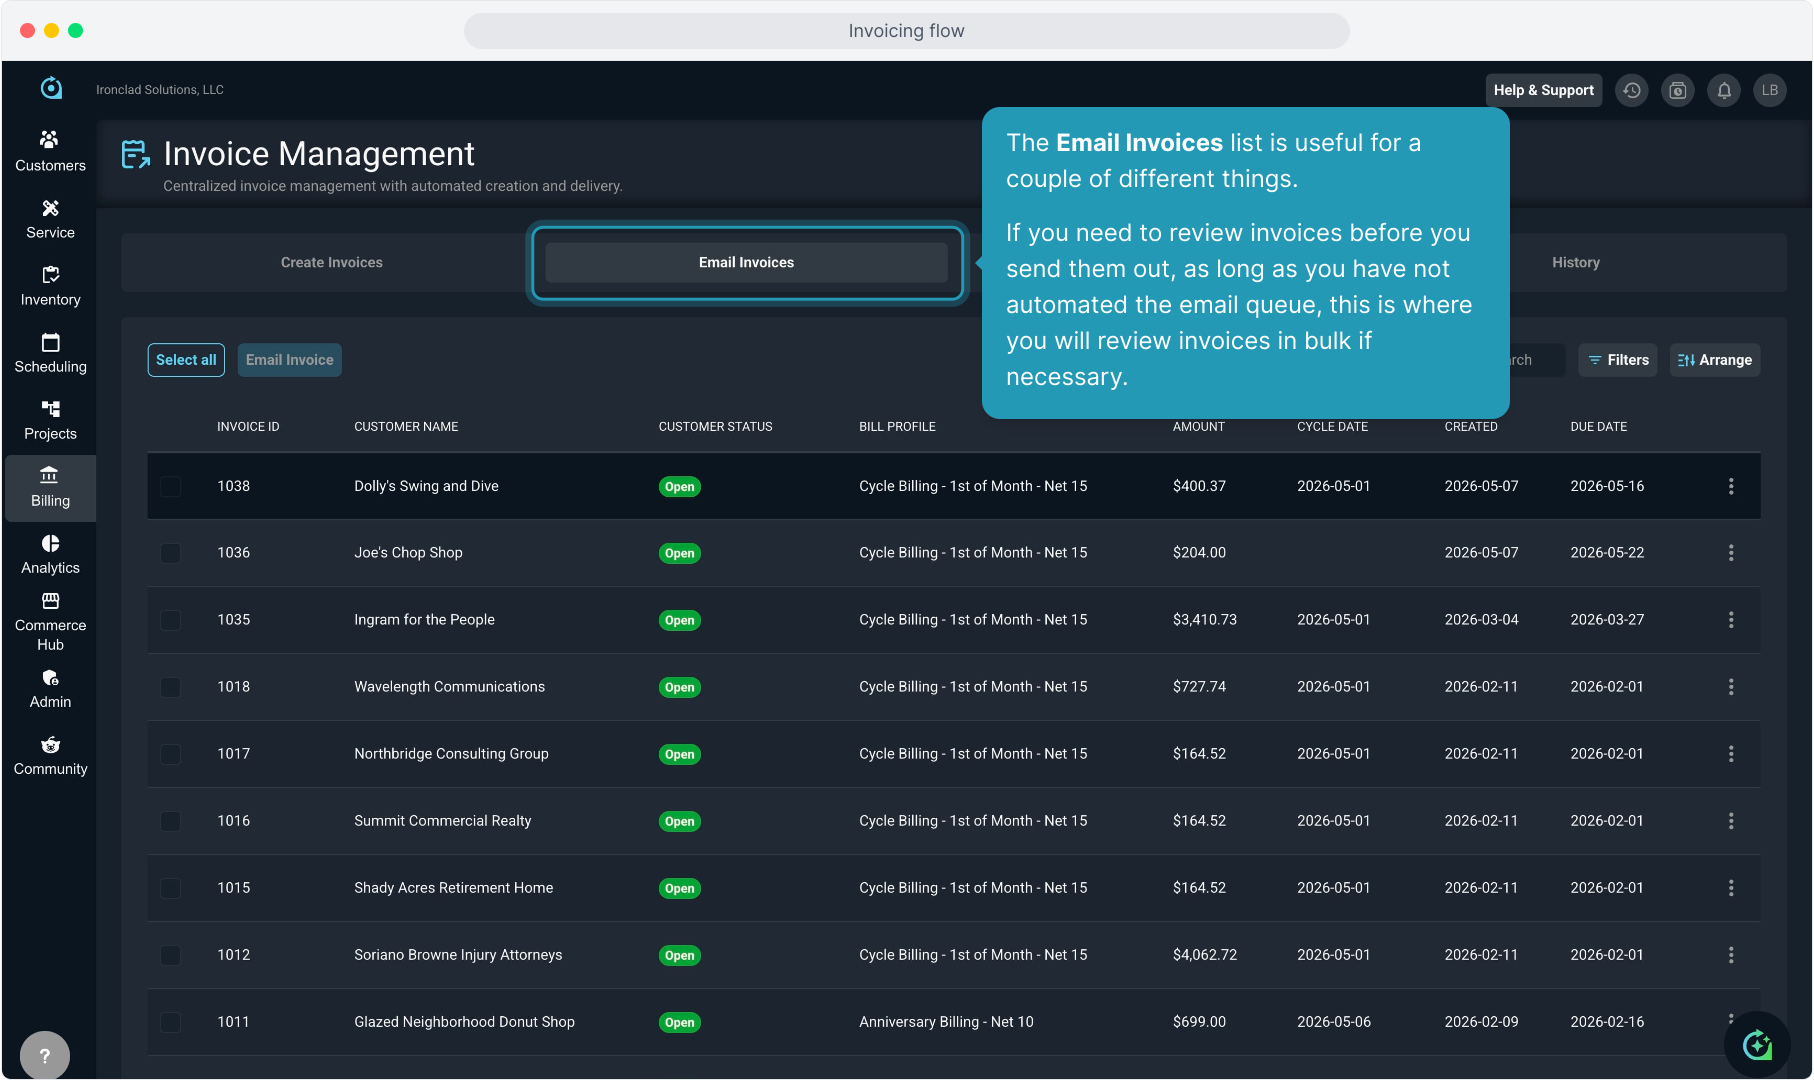
20. The Email Invoices list is useful for a couple of different things.
If you need to review invoices before you send them out, as long as you have not automated the email queue, this is where you will review invoices in bulk if necessary.
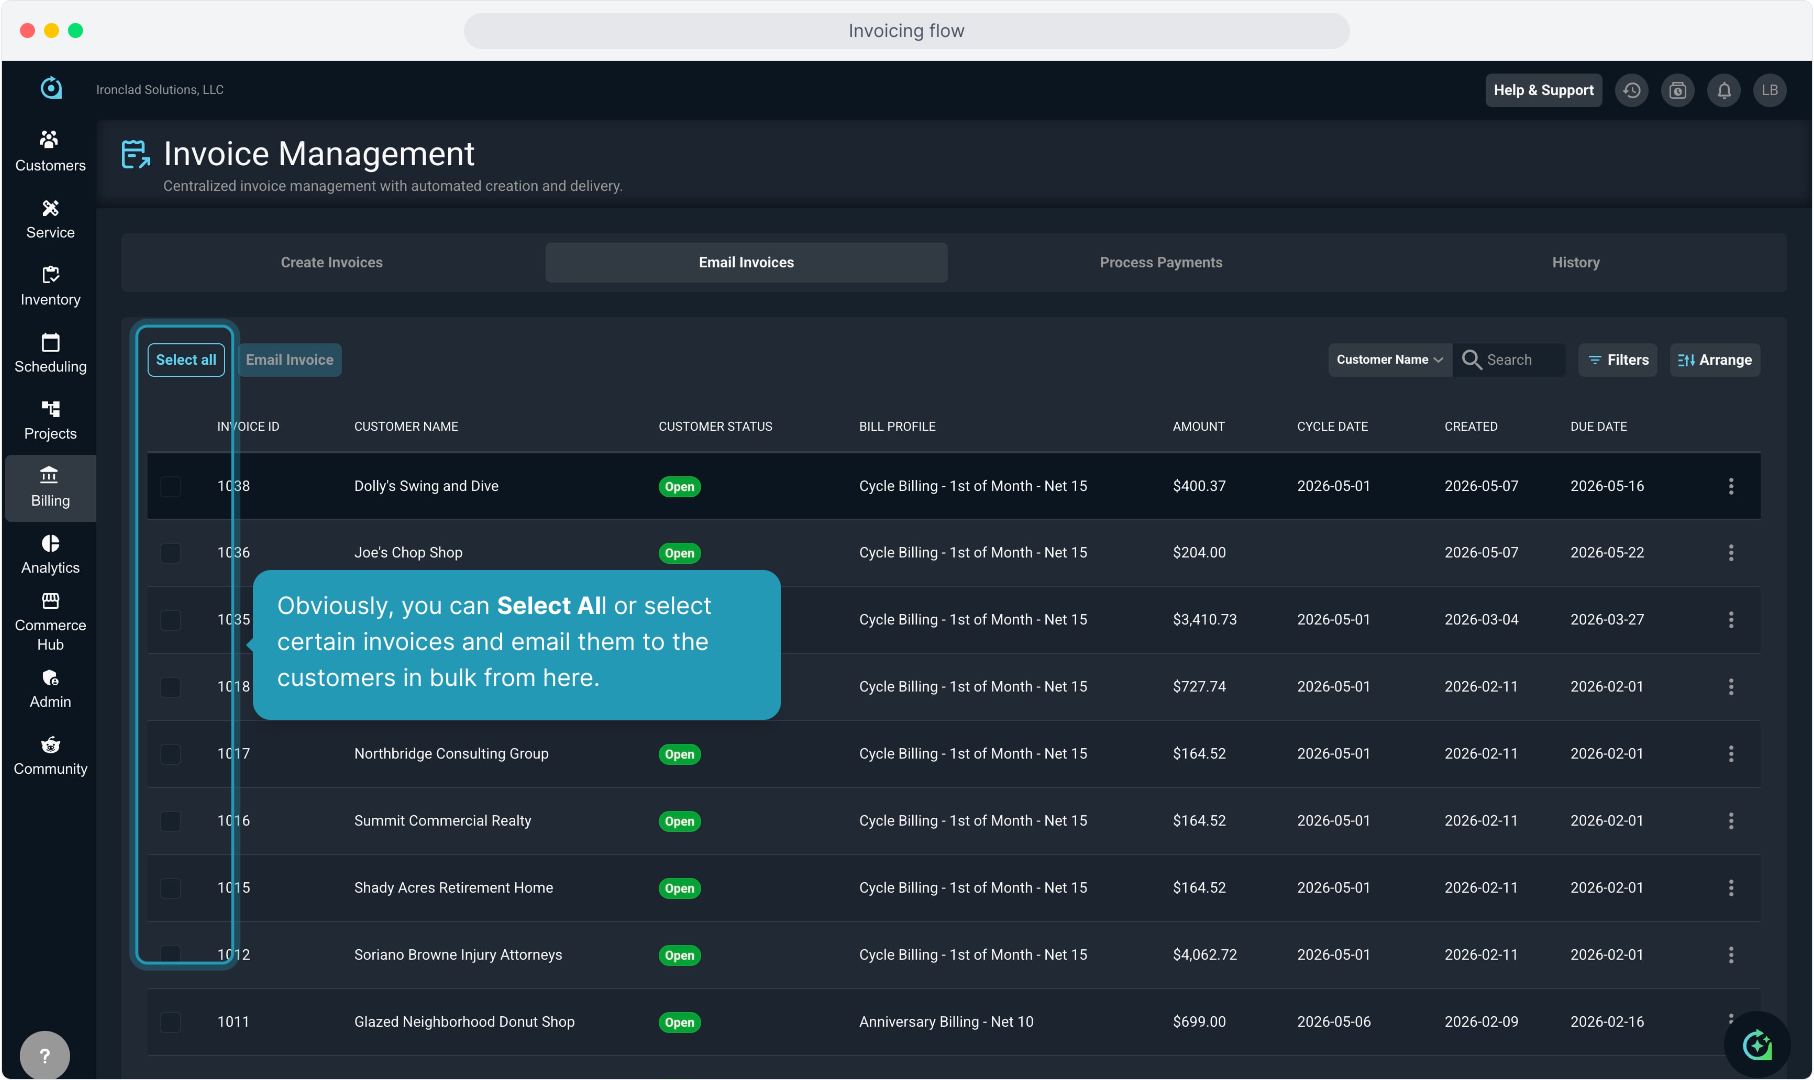
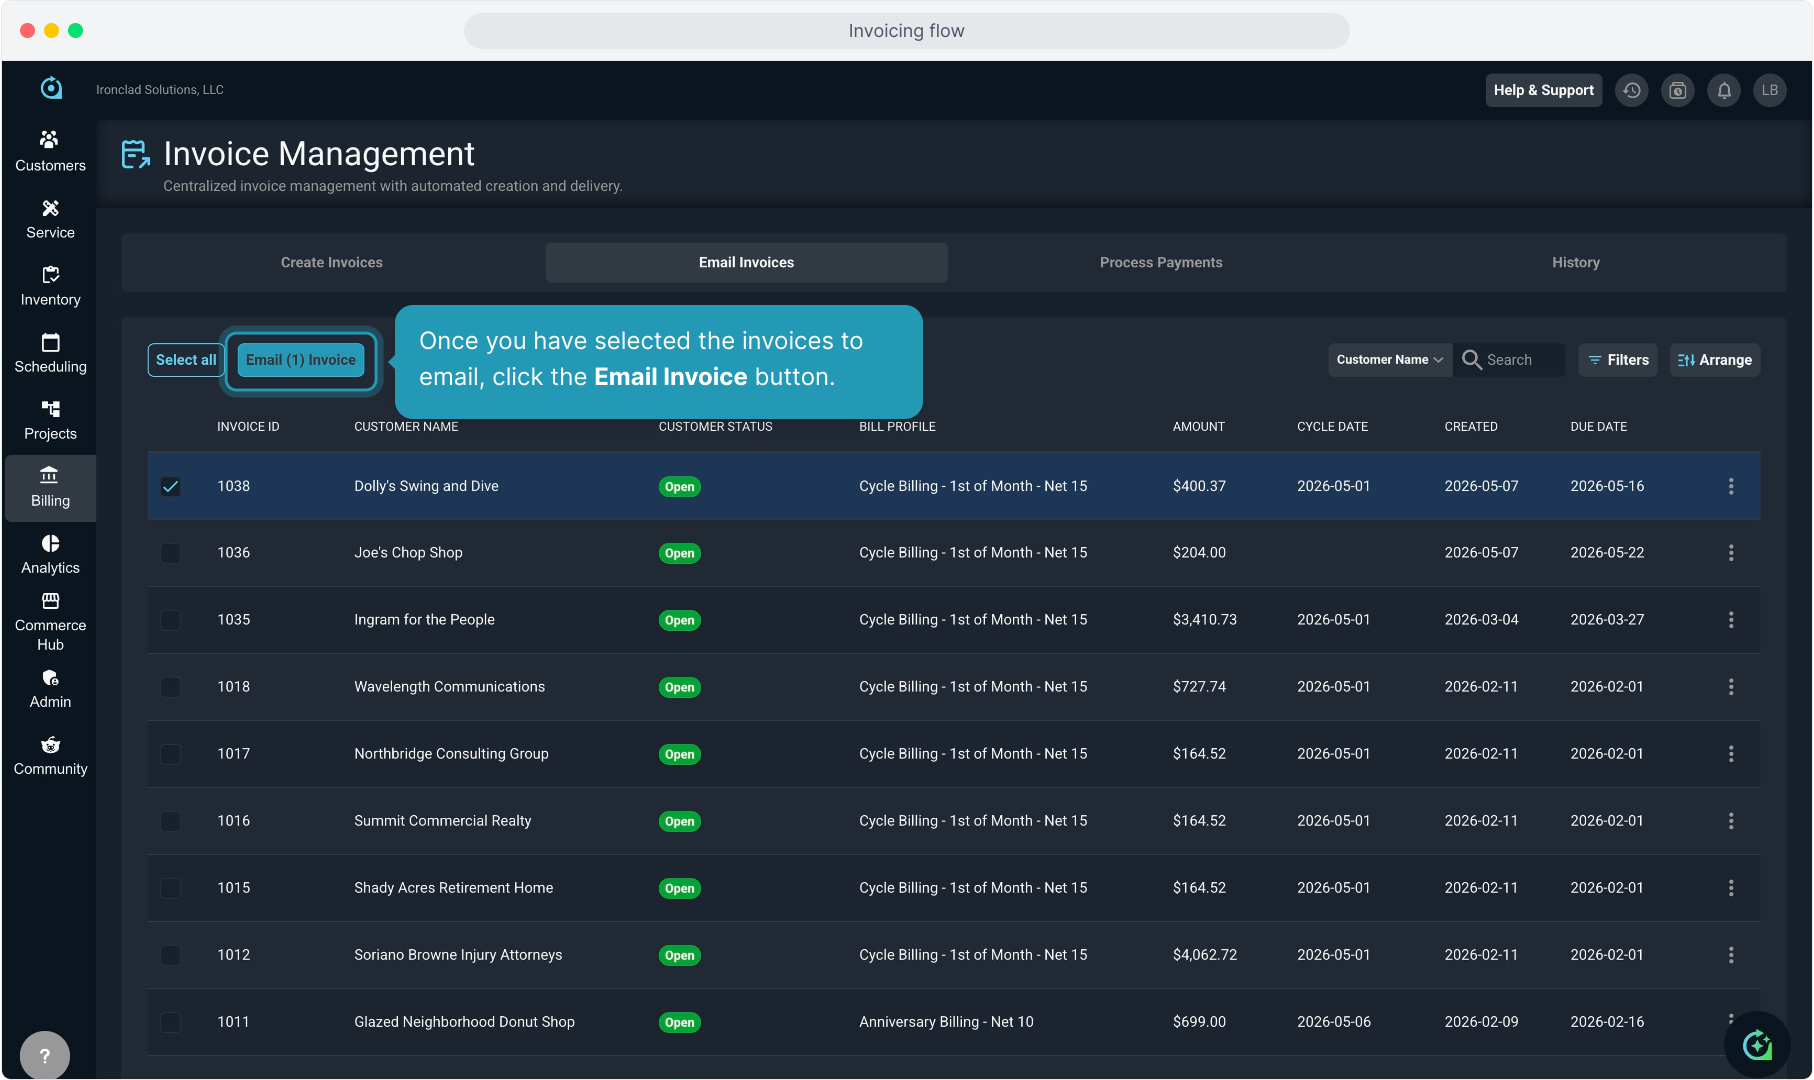
21. Obviously, you can Select All or select certain invoices and email them to the customers in bulk from here.
22. Once you have selected the invoices to email, click the Email Invoice button.
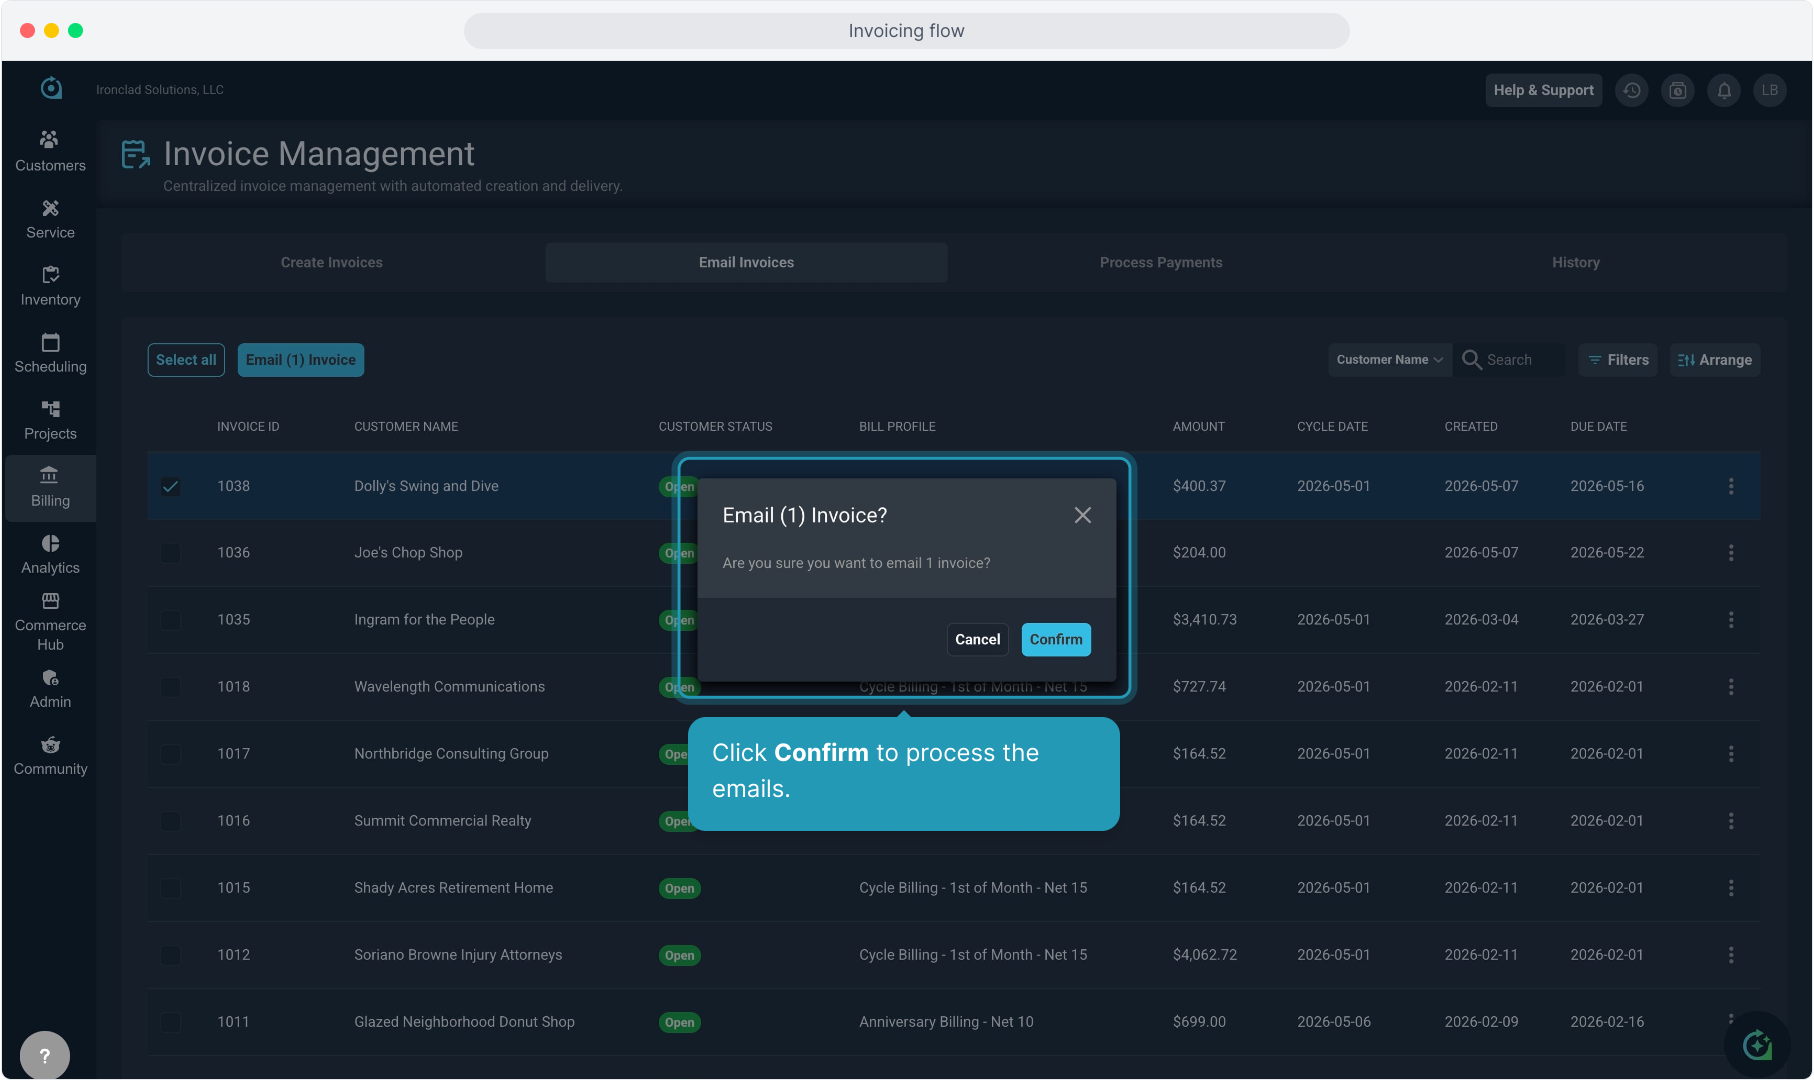
23. Click Confirm to process the emails.
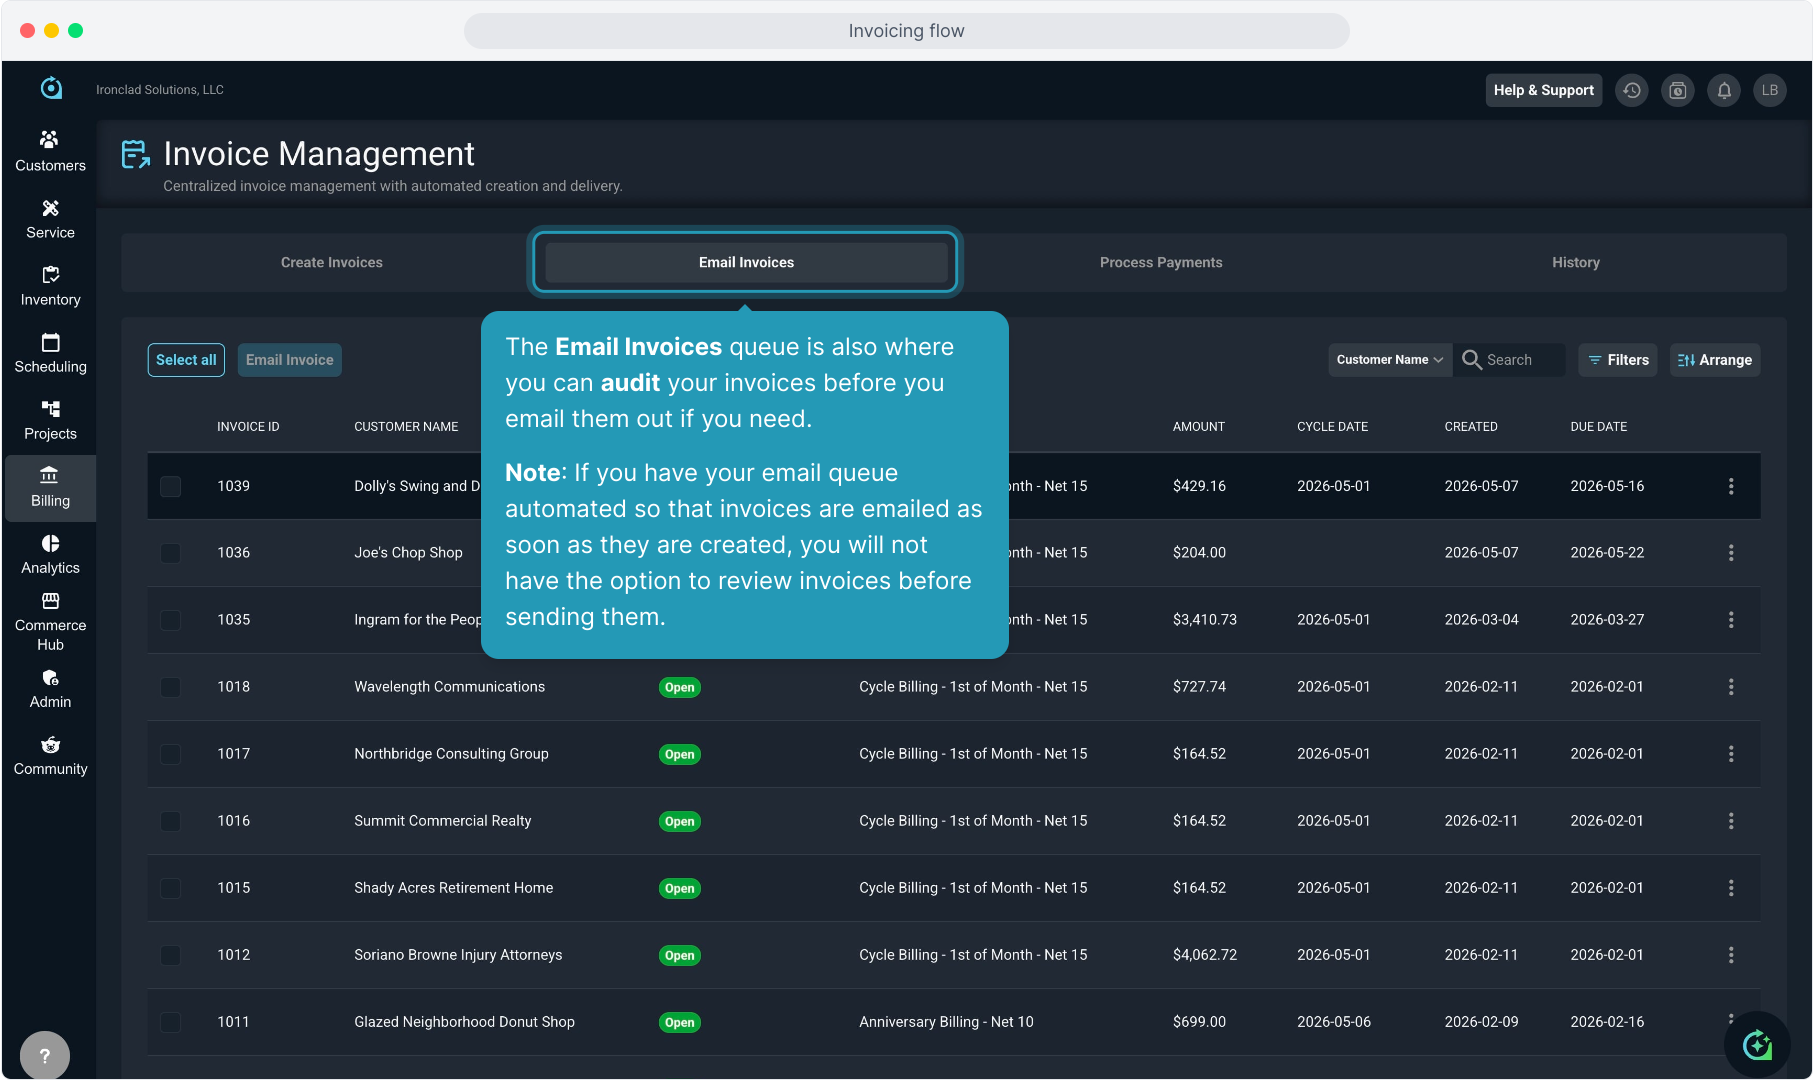
24. The Email Invoices queue is also where you can audit your invoices before you email them out if you need.
Note: If you have your email queue automated so that invoices are emailed as soon as they are created, you will not have the option to review invoices before sending them.
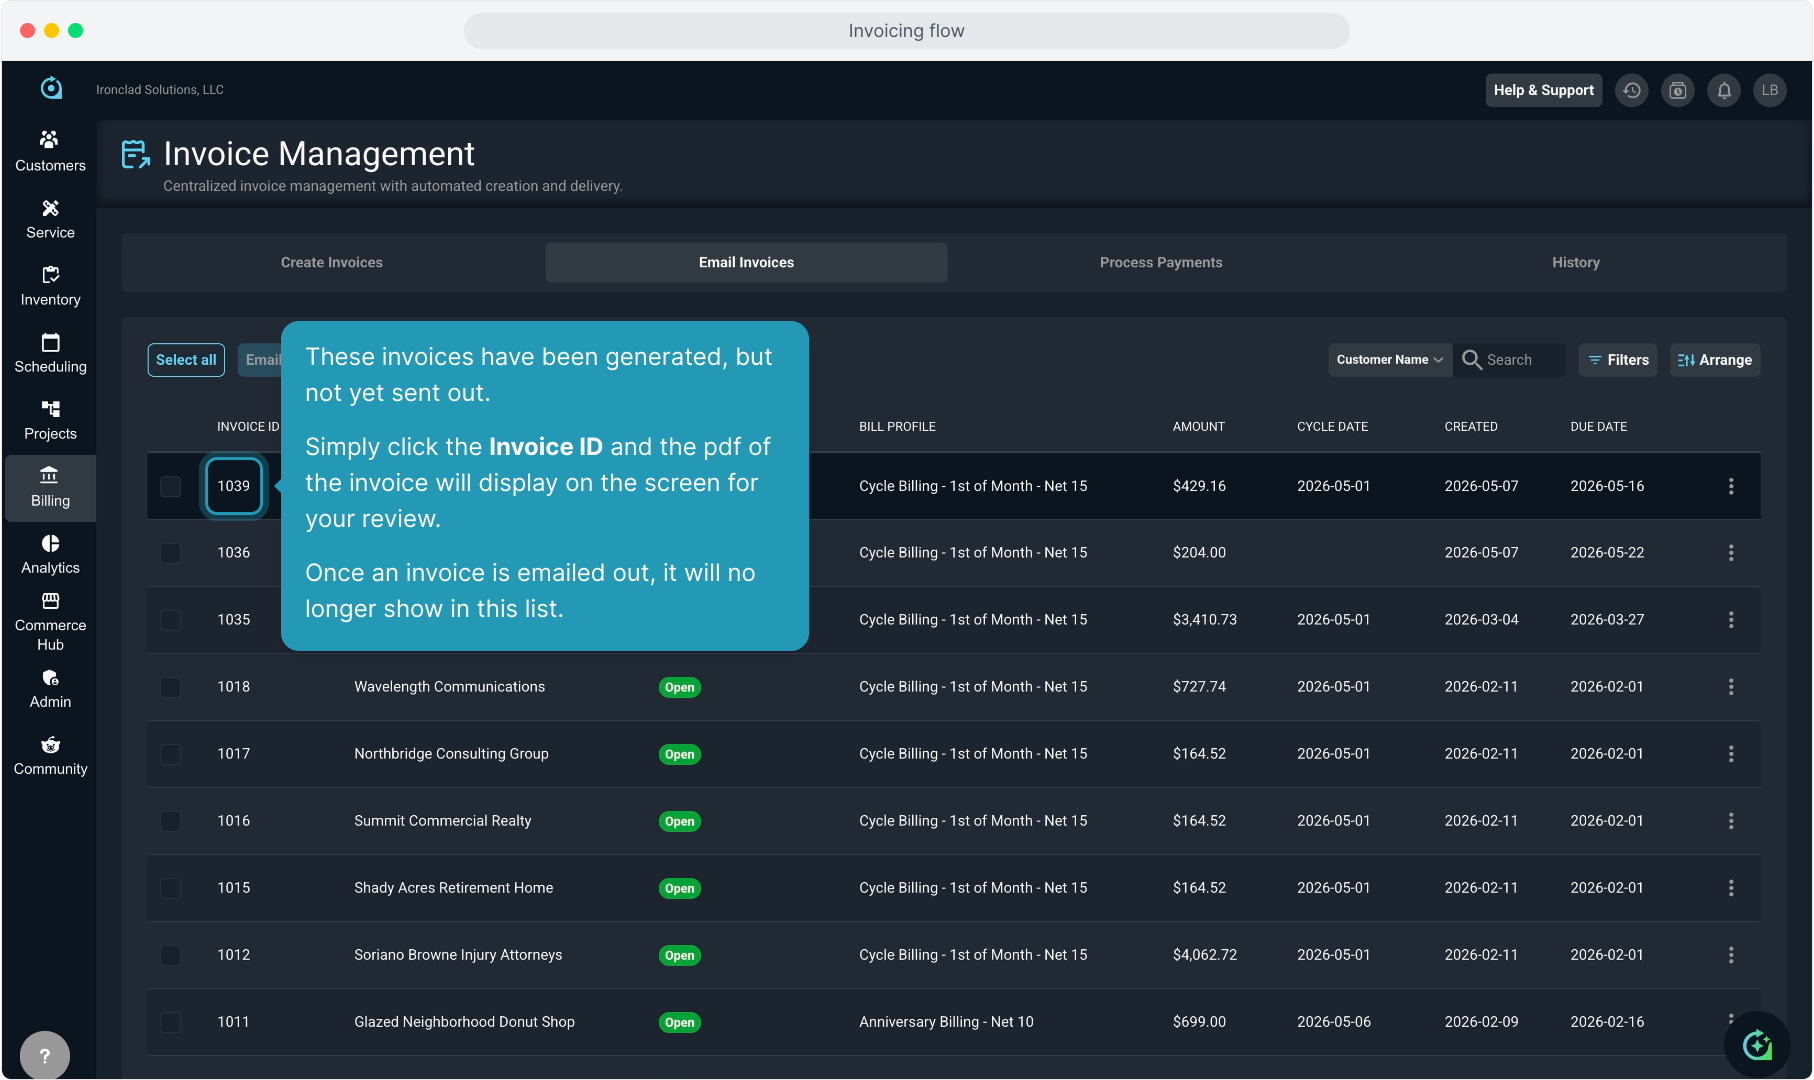
25. These invoices have been generated, but not yet sent out.
Simply click the Invoice ID and the pdf of the invoice will display on the screen for your review.
Once an invoice is emailed out, it will no longer show in this list.
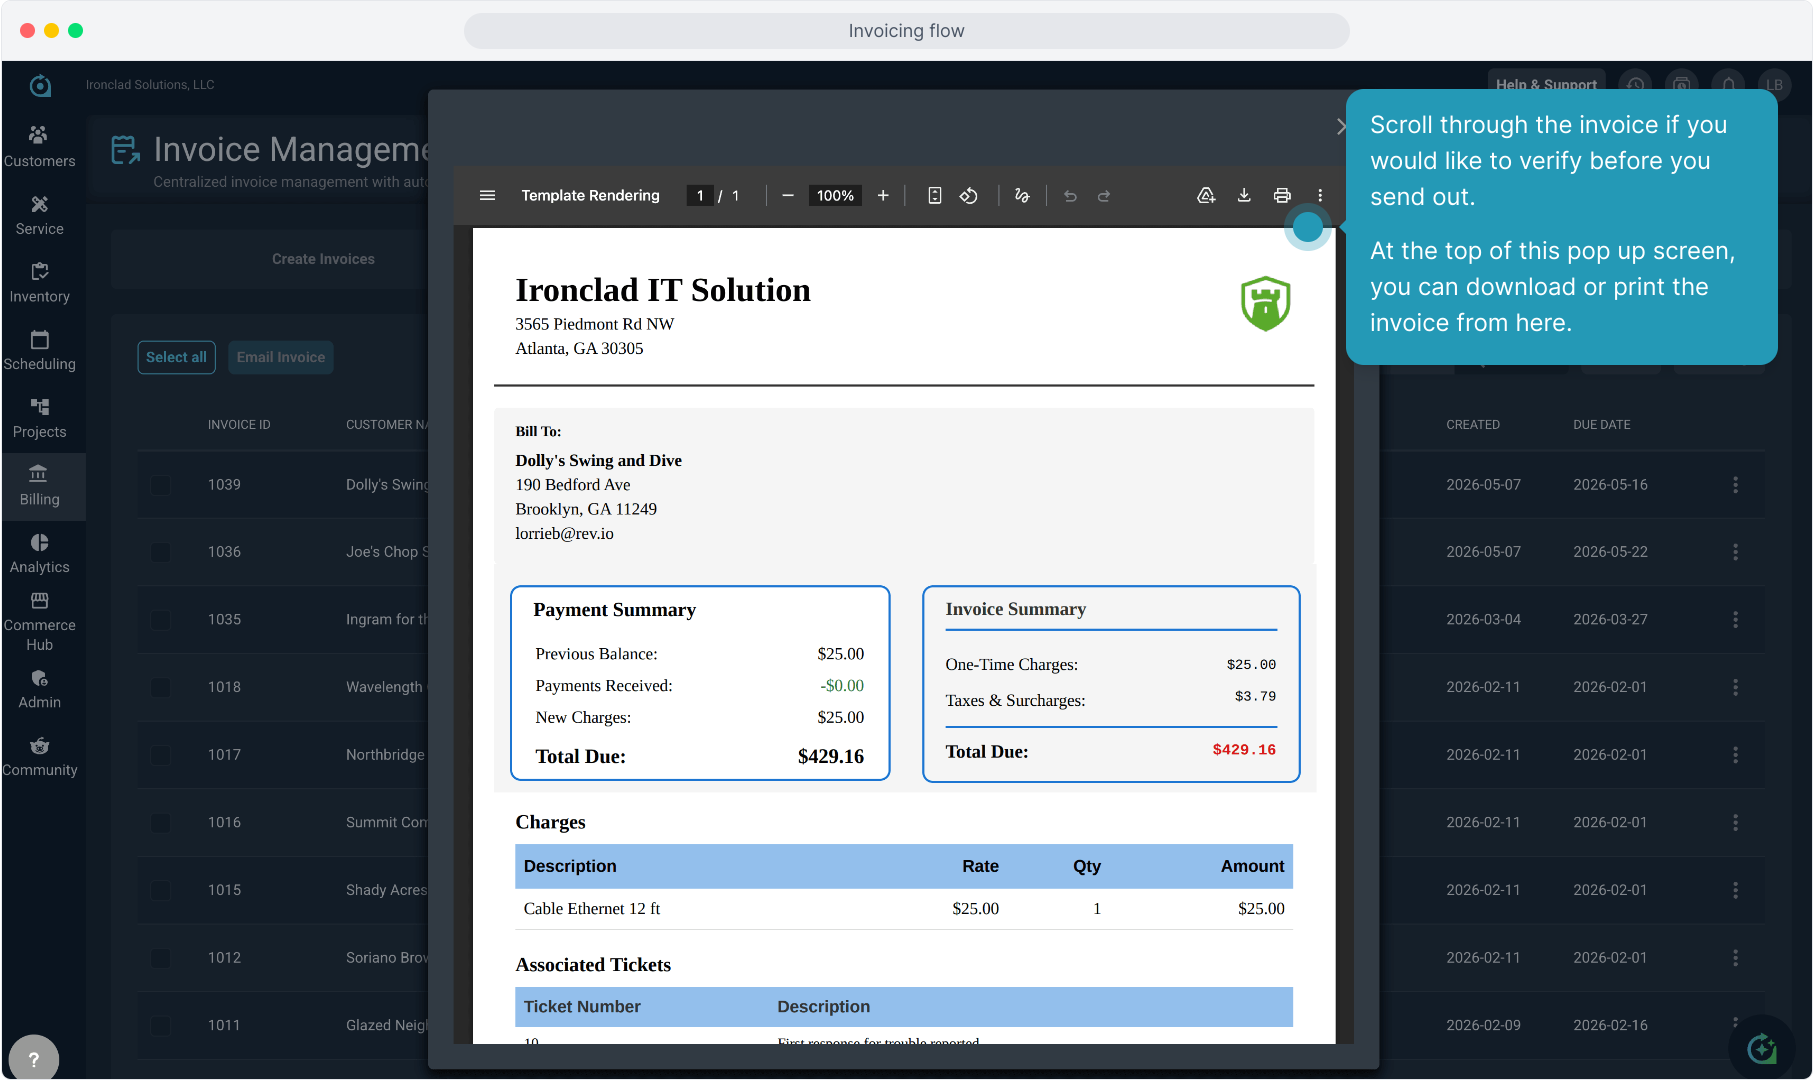
26. Scroll through the invoice if you would like to verify before you send out.
At the top of this pop up screen, you can download or print the invoice from here.
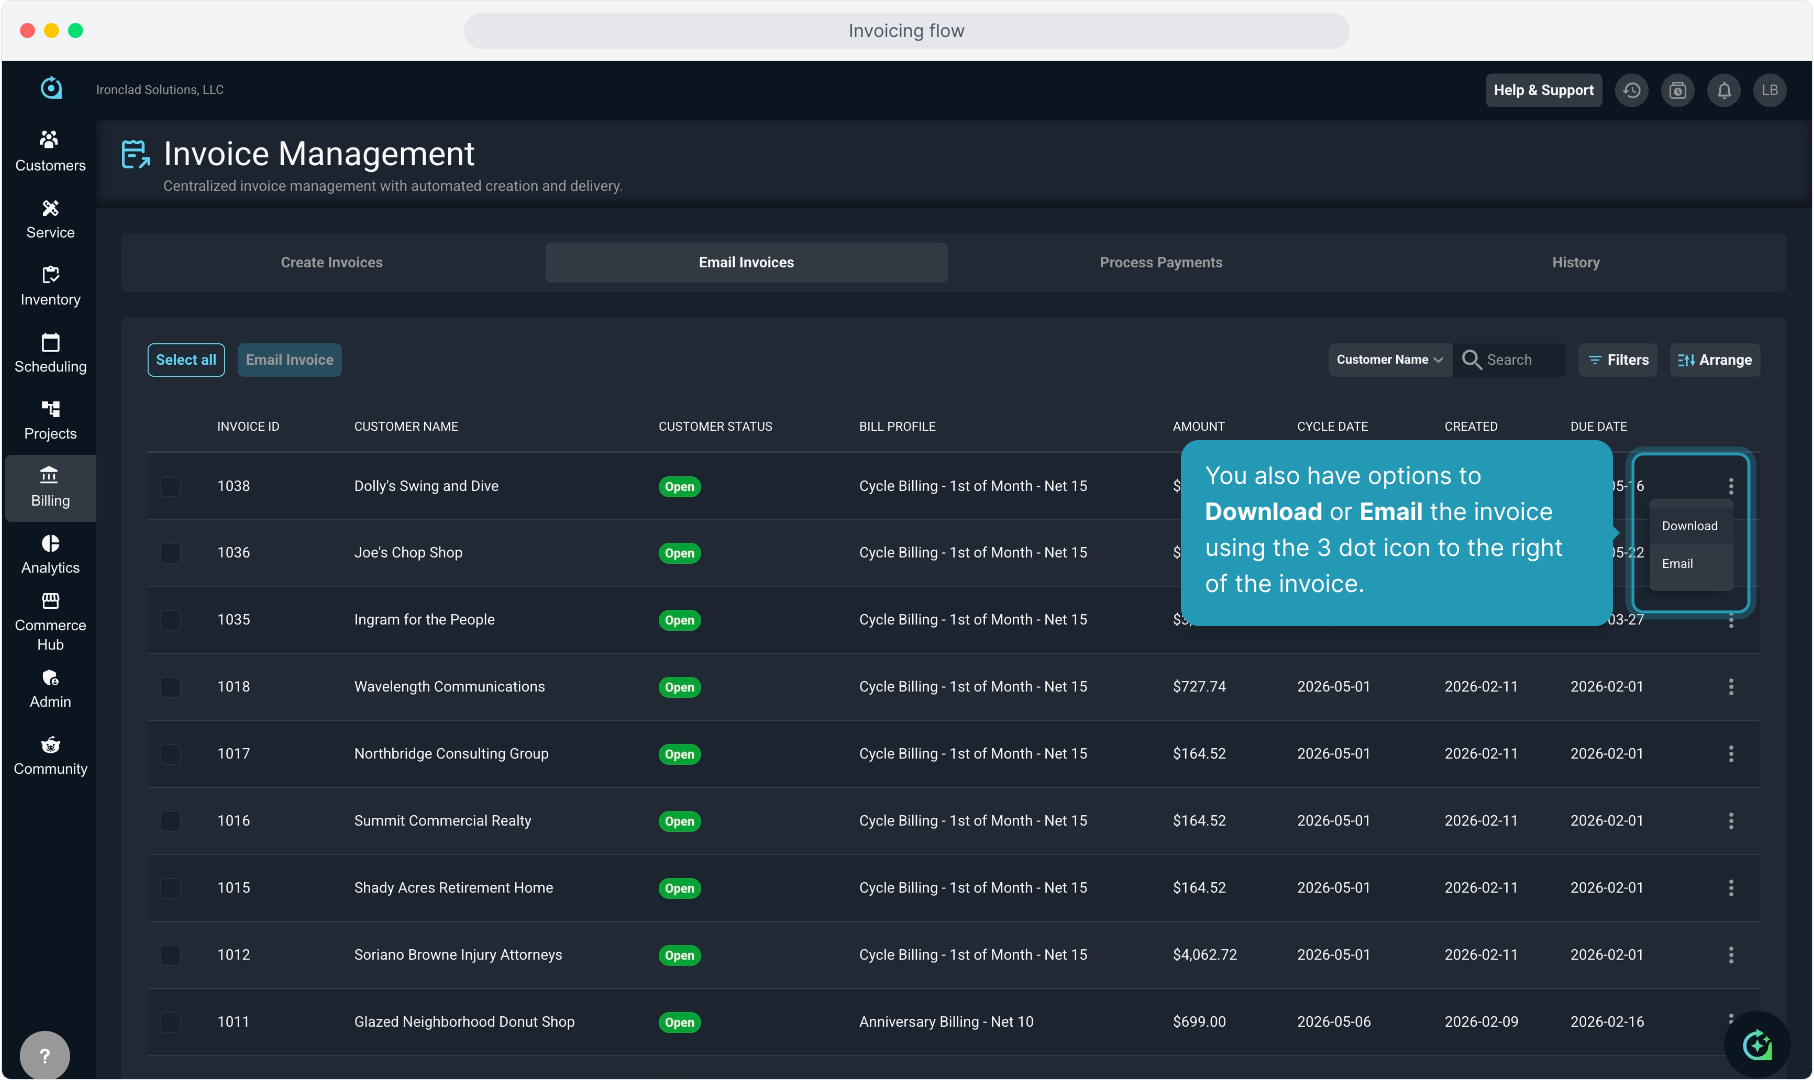
27. You also have options to Download or Email the invoice using the 3 dot icon to the right of the invoice.
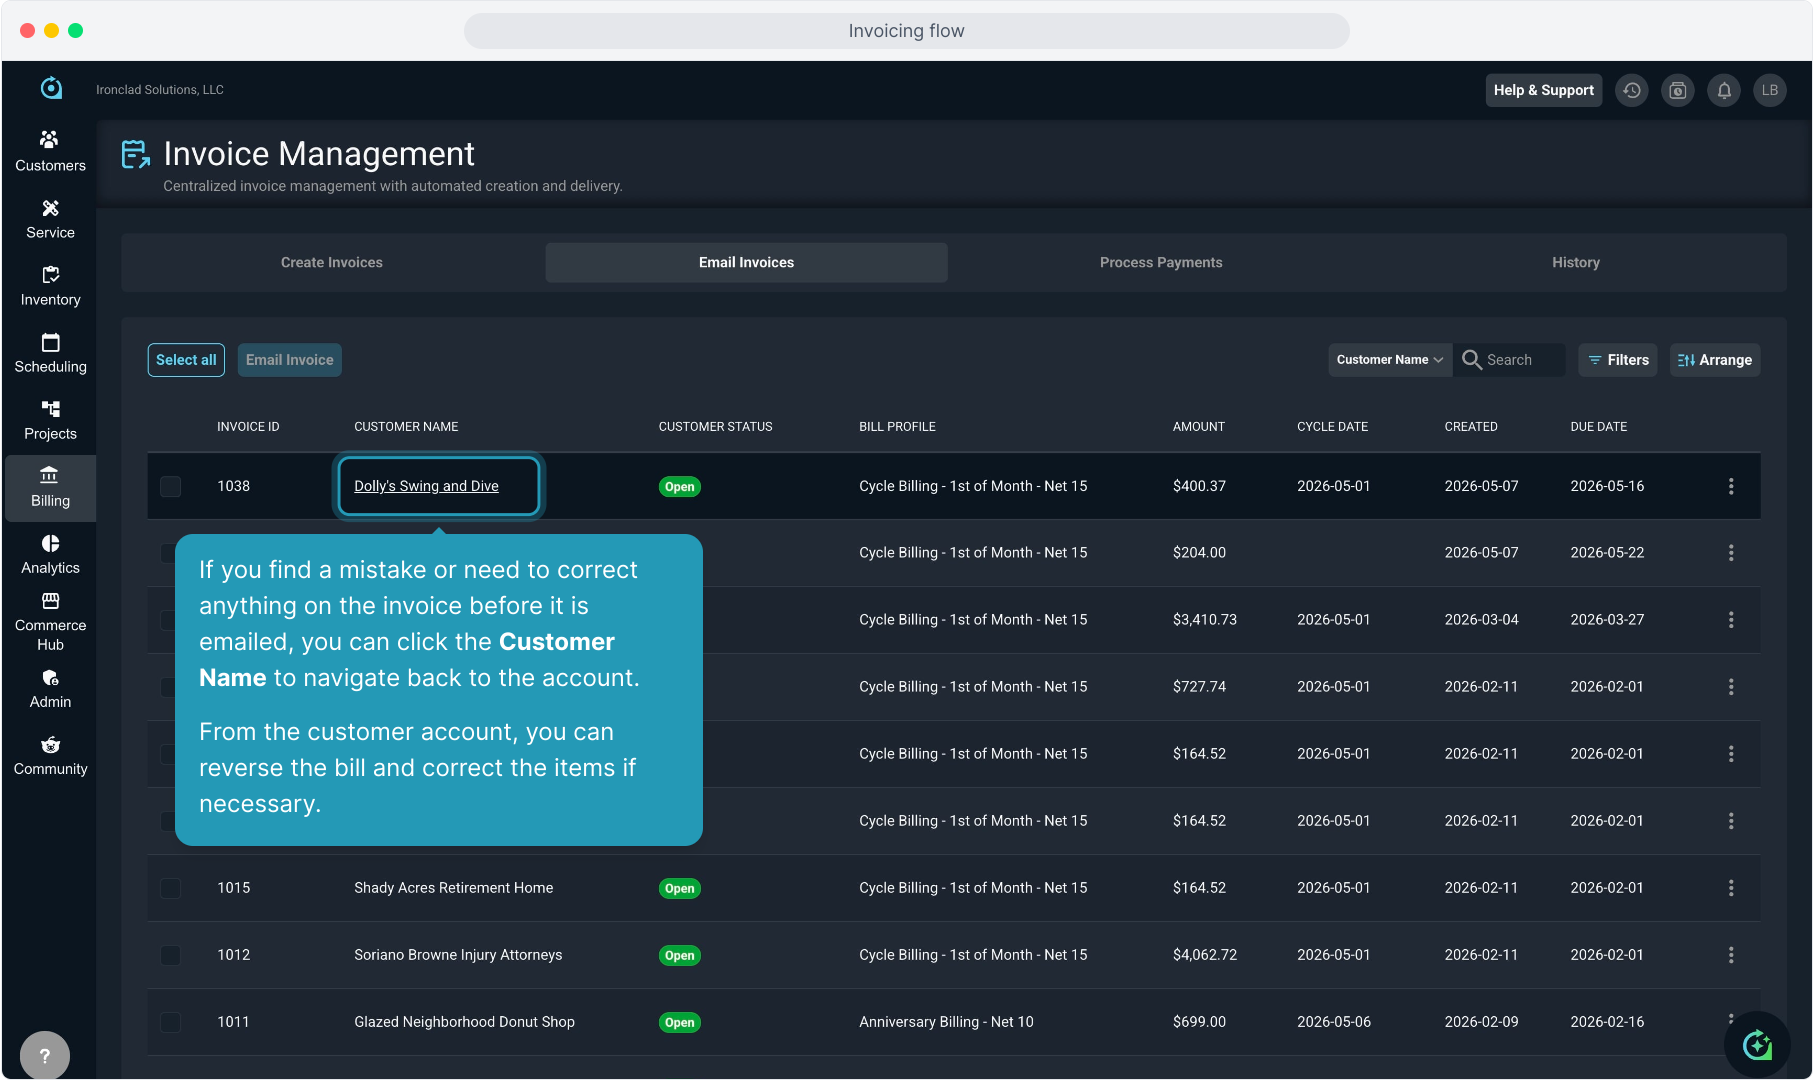
28. If you find a mistake or need to correct anything on the invoice before it is emailed, you can click the Customer Name to navigate back to the account.
From the customer account, you can reverse the bill and correct the items if necessary.
29. From the History tab on the Invoice Management screen, you can view all the activity relating to invoices.
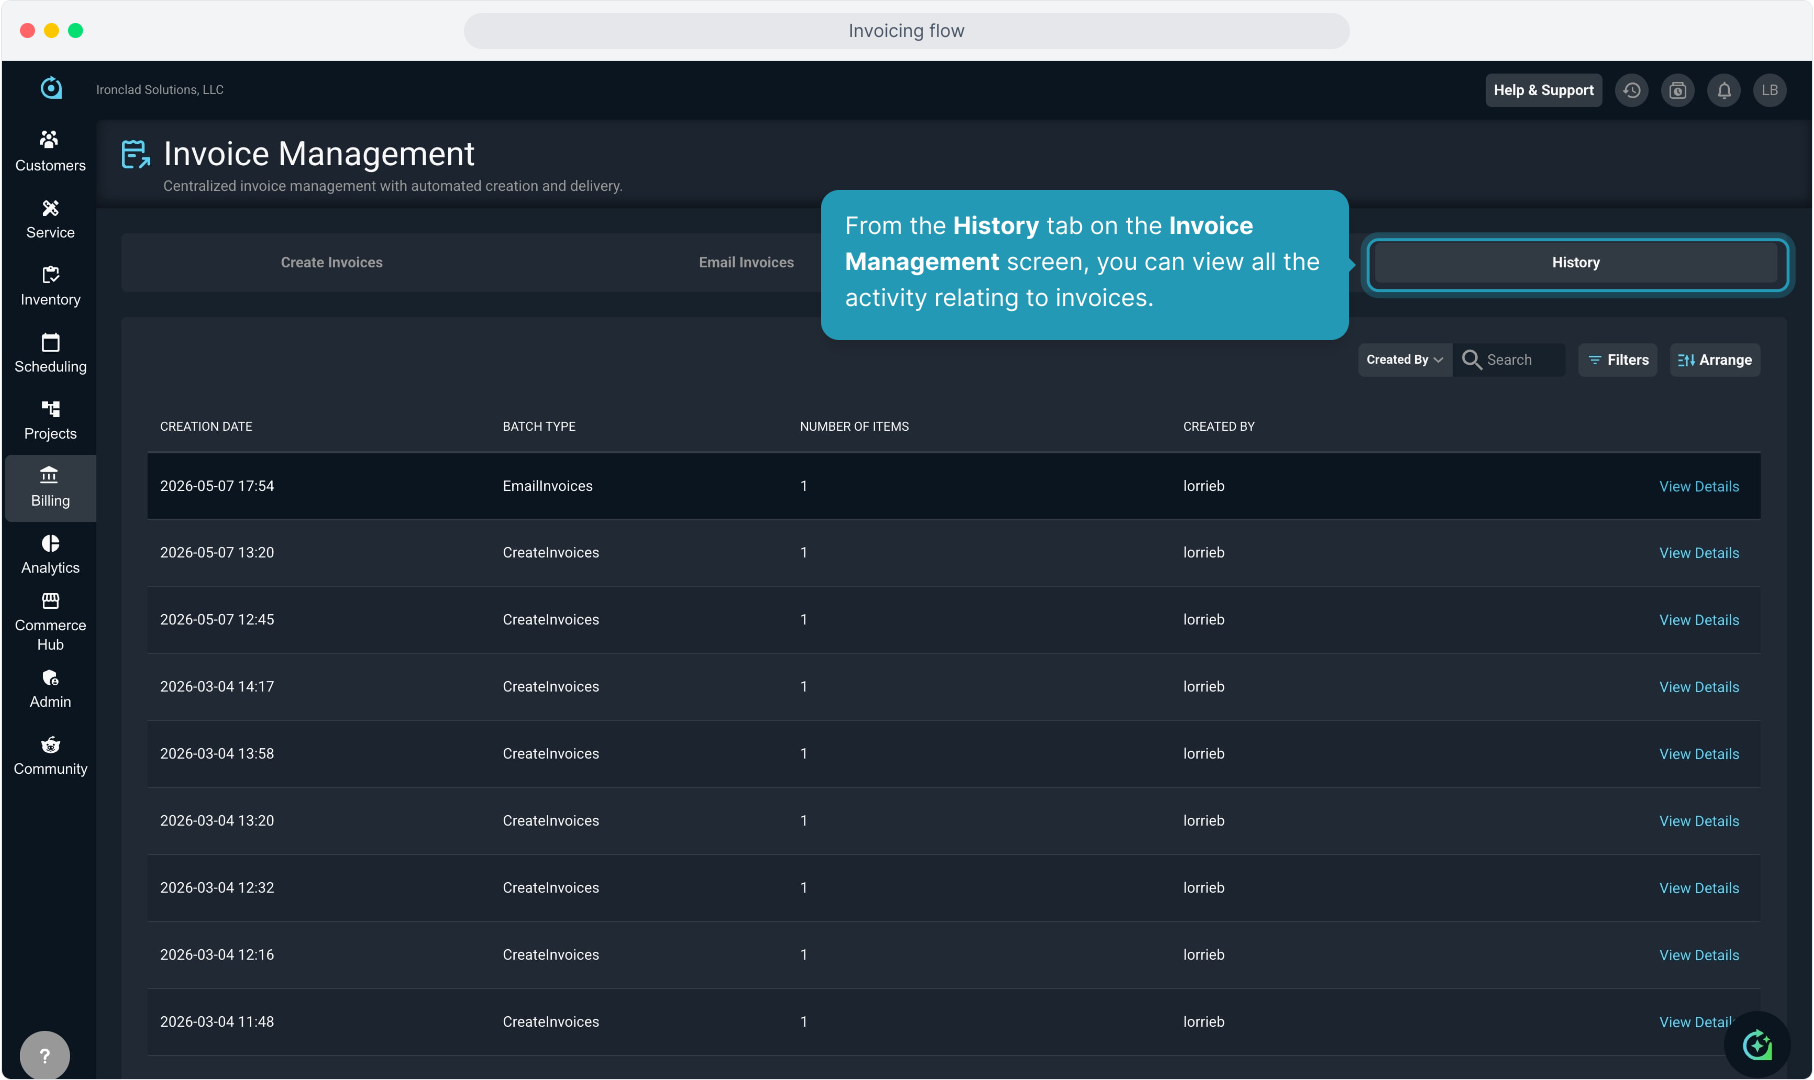
30. The Batch Type field shows you what type of batch has been created.
You'll see batches for creating invoices, emailing invoices, and processing payments.
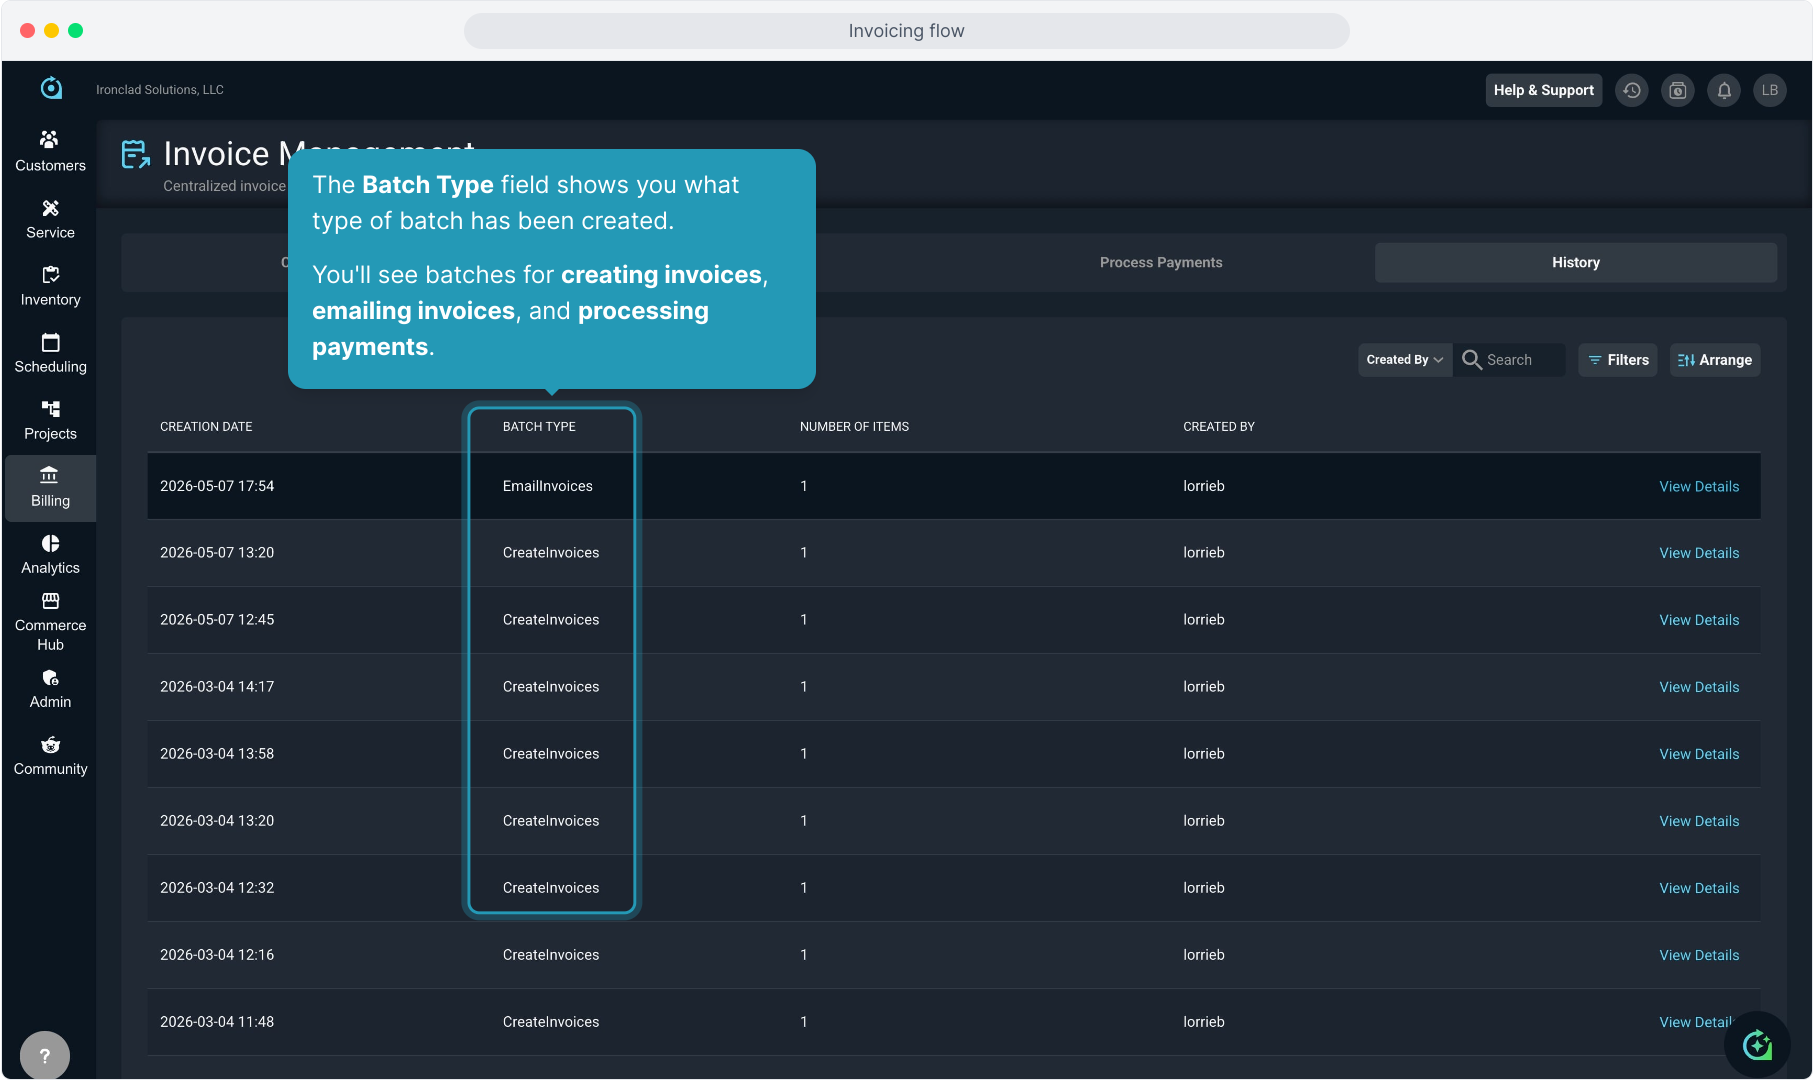
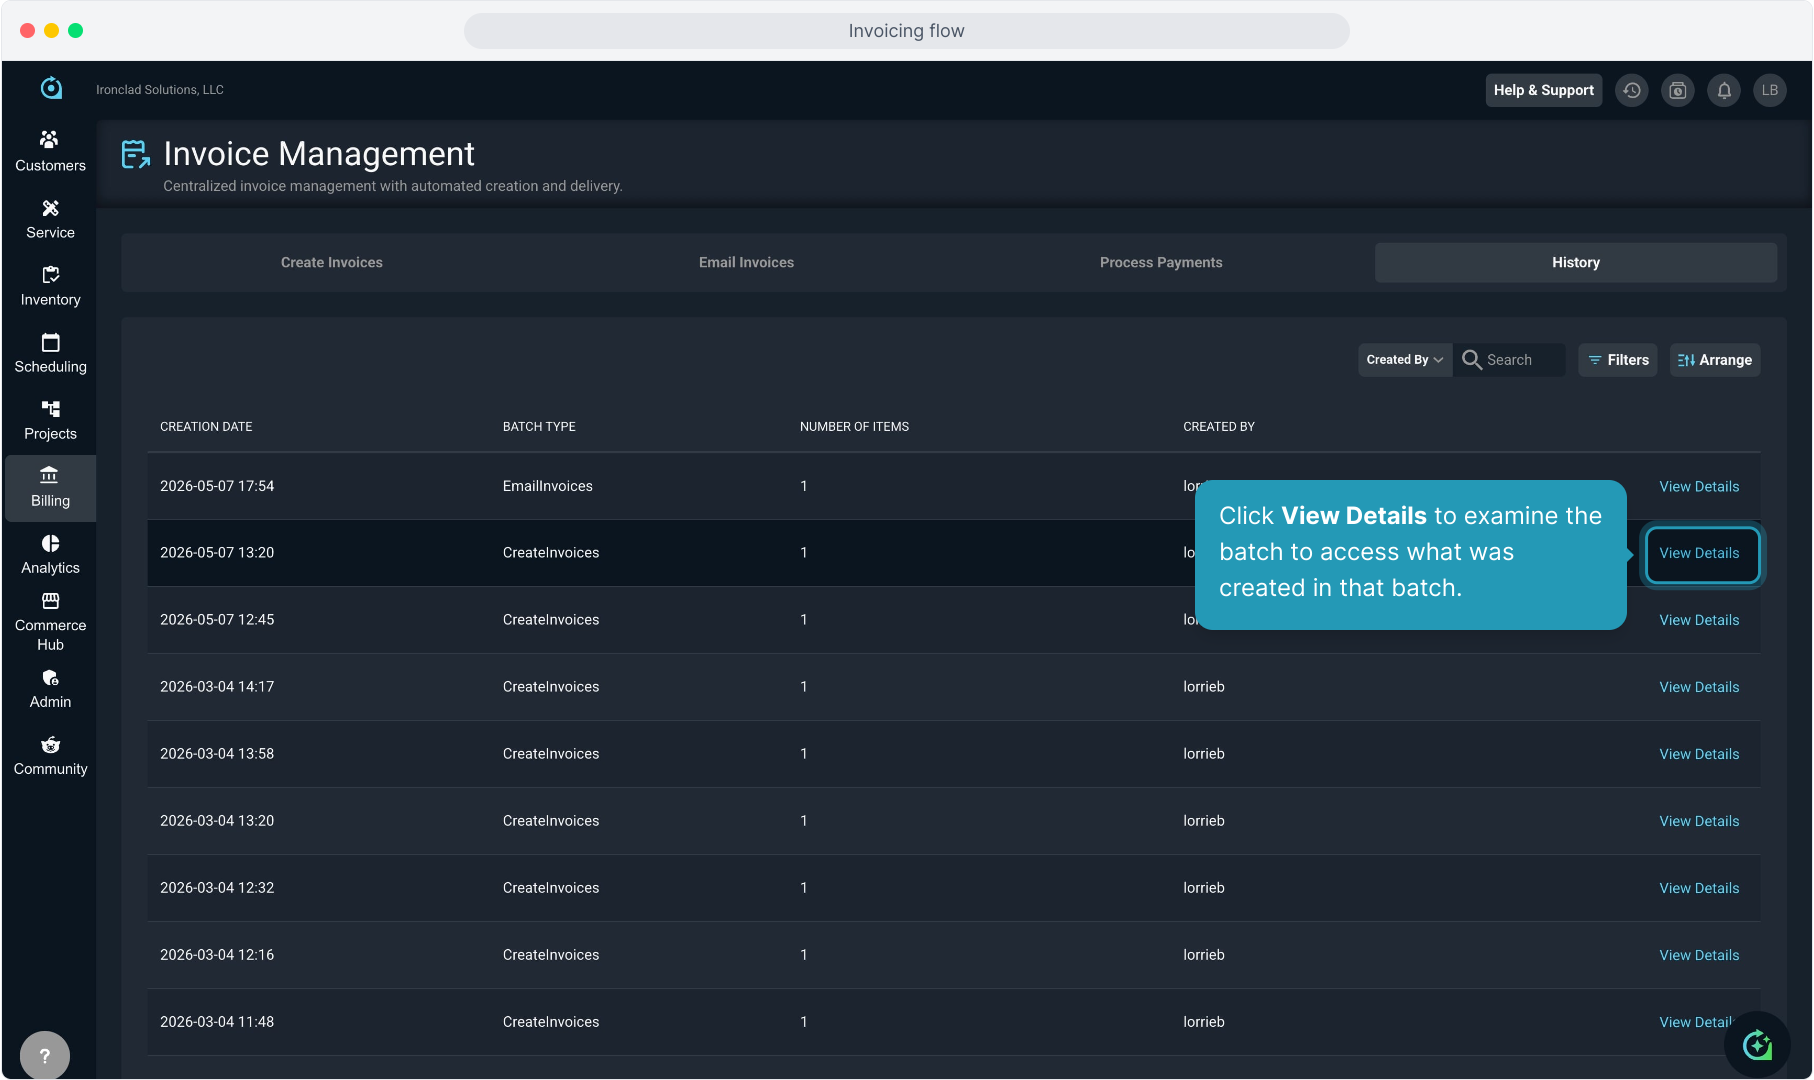
31. Click View Details to examine the batch to access what was created in that batch.
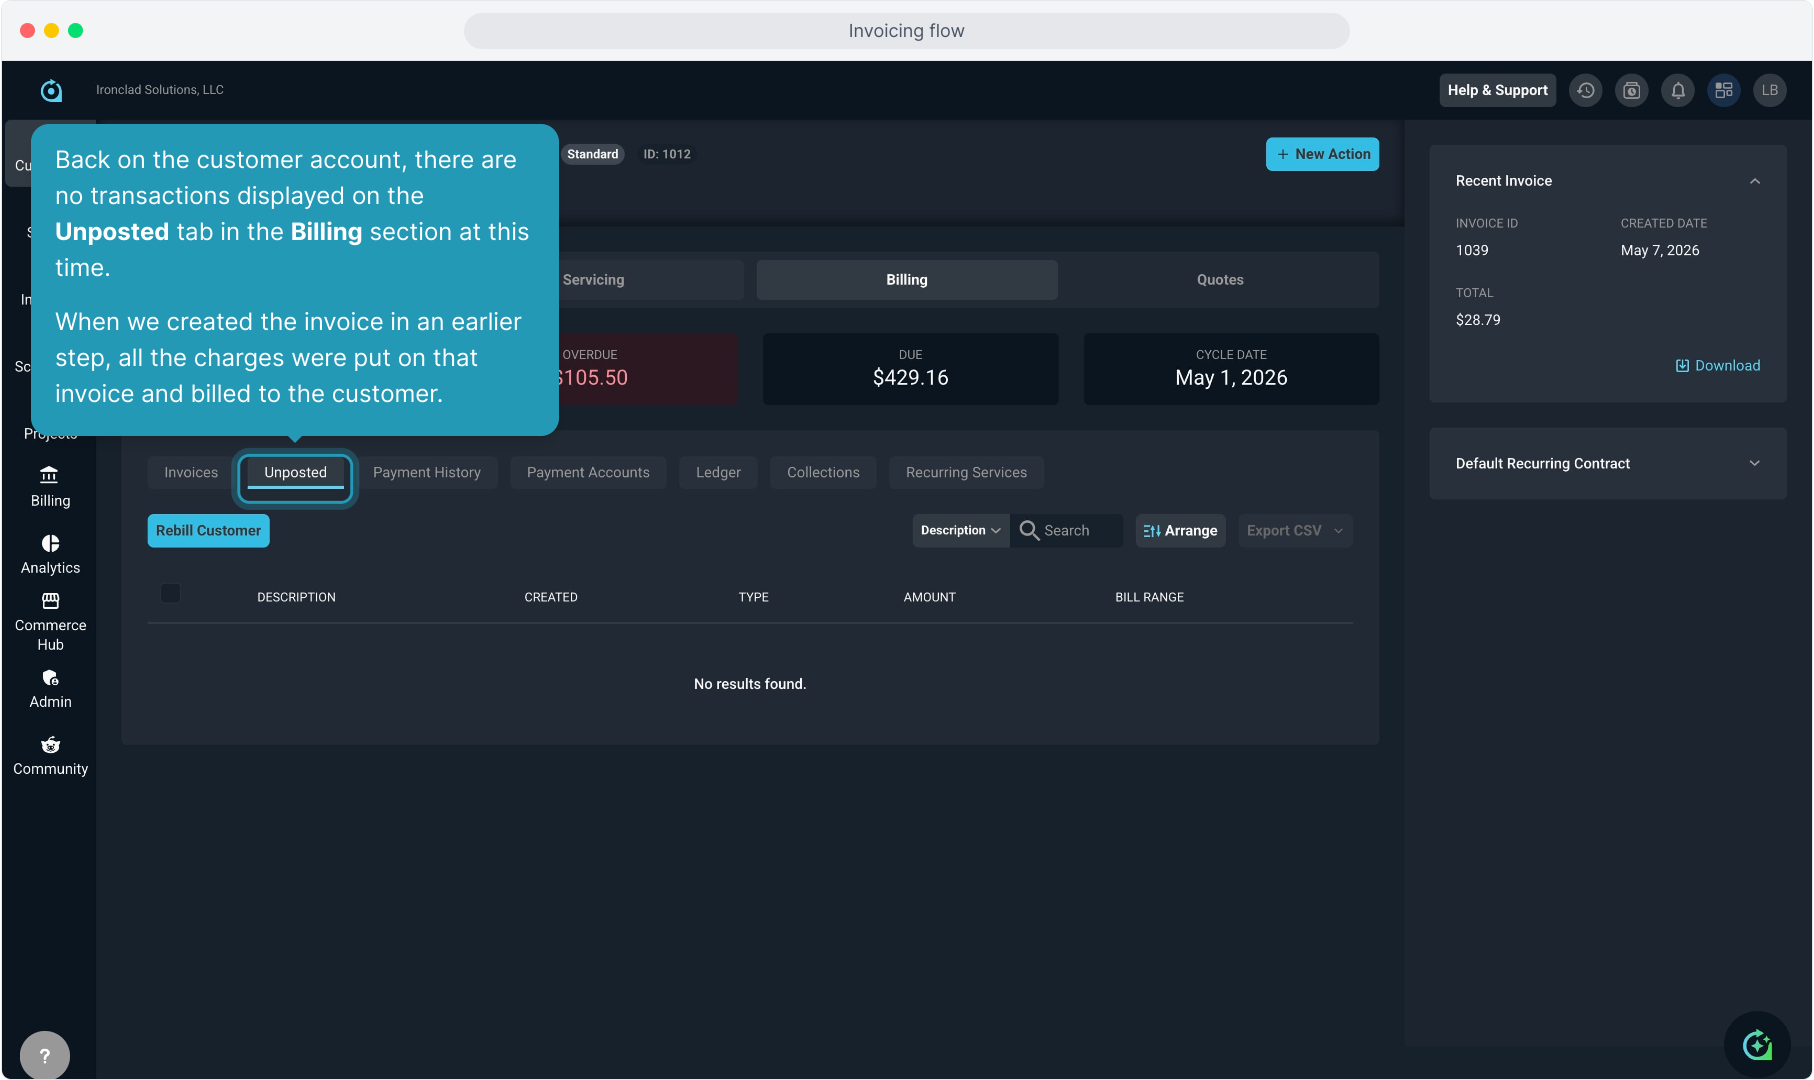
32. Back on the customer account, there are no transactions displayed on the Unposted tab in the Billing section at this time.
When we created the invoice in an earlier step, all the charges were put on that invoice and billed to the customer.
33. Now we will talk about what happens with charges produced via tickets specifically.
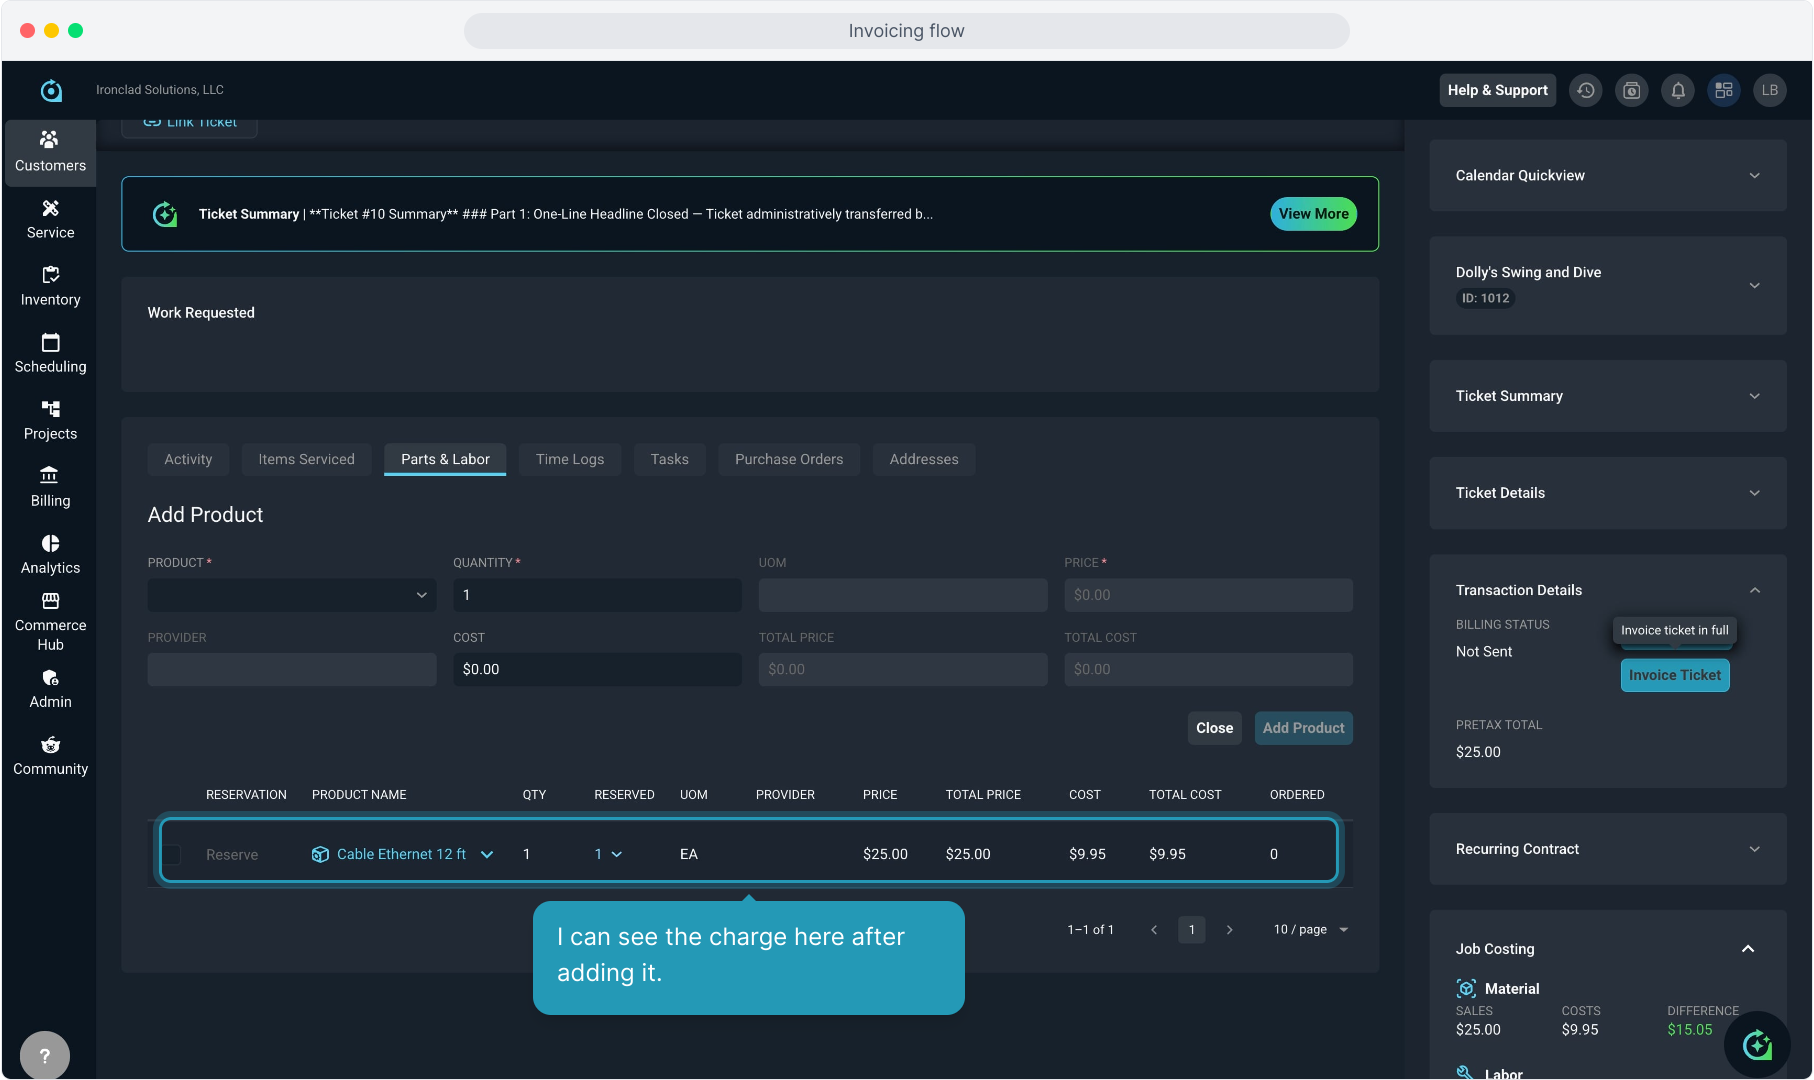
I've navigated to an open ticket on this account and added a product with a charge to the Parts & Labor tab on the ticket.
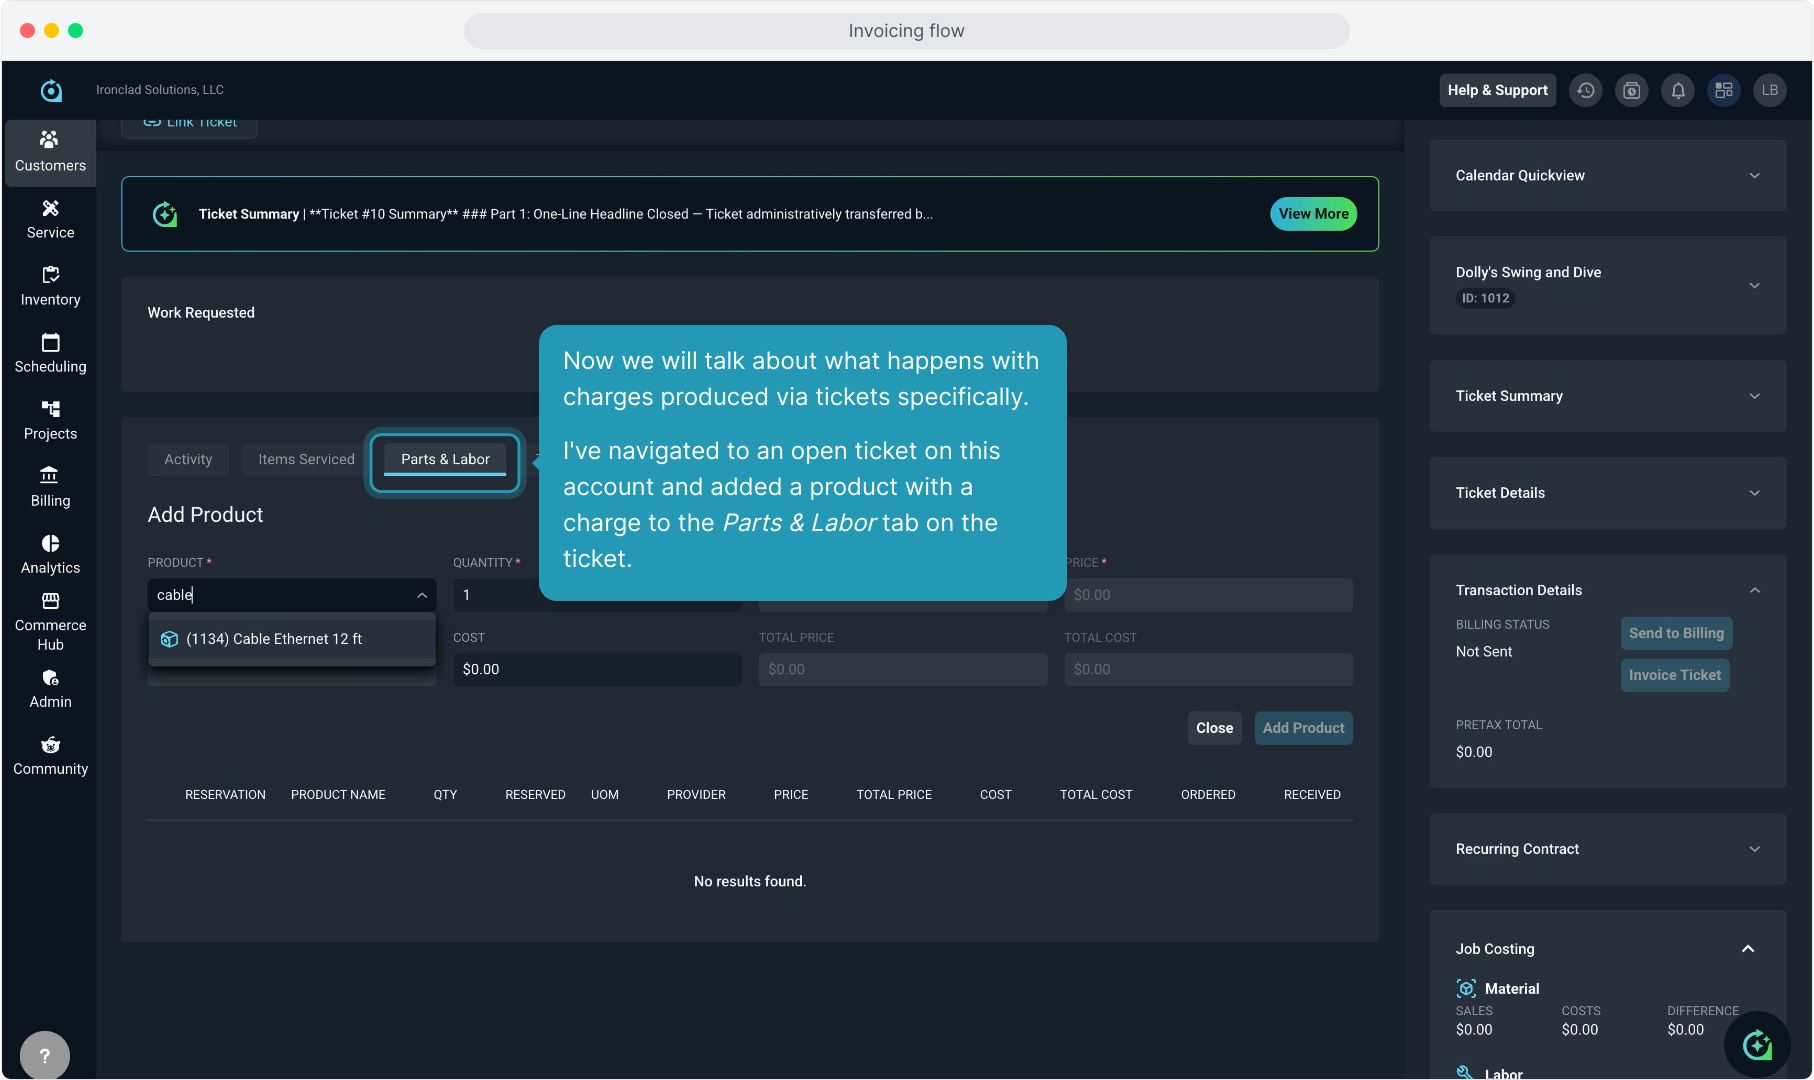
34. I can see the charge here after adding it.
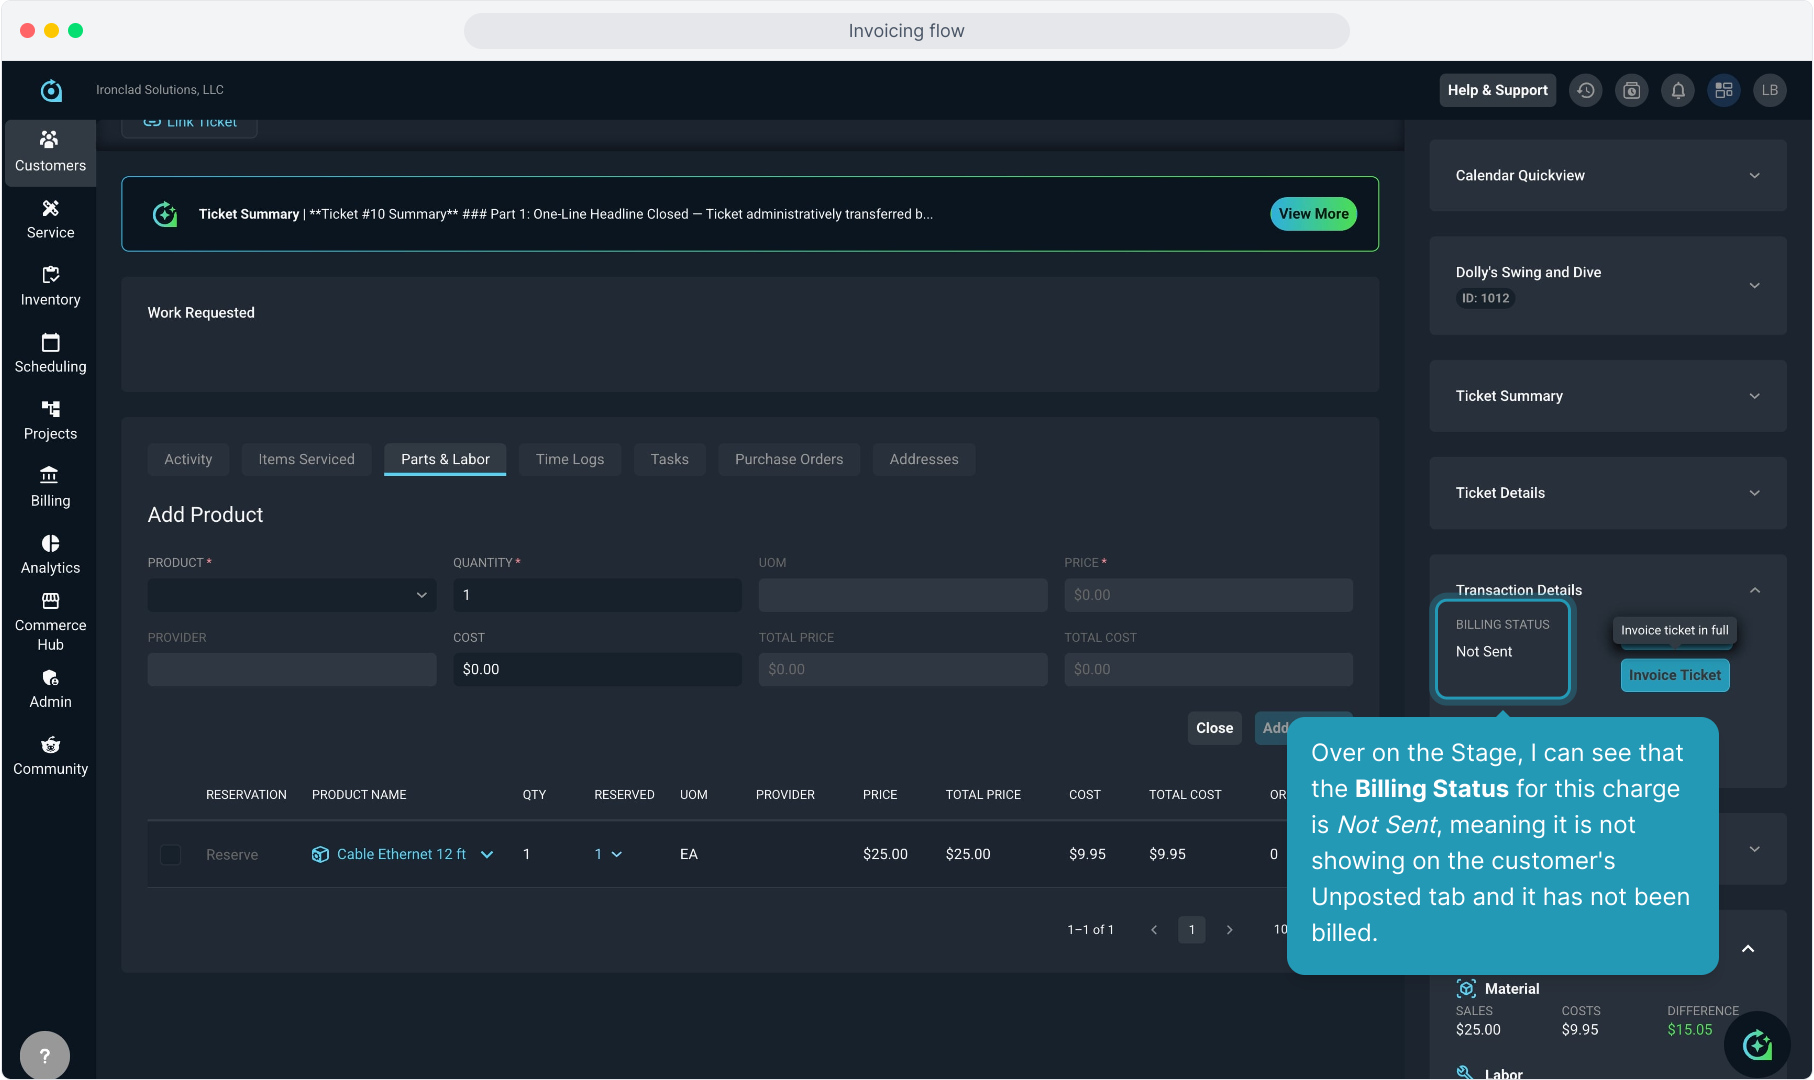
35. Over on the Stage, I can see that the Billing Status for this charge is Not Sent, meaning it is not showing on the customer's Unposted tab and it has not been billed.
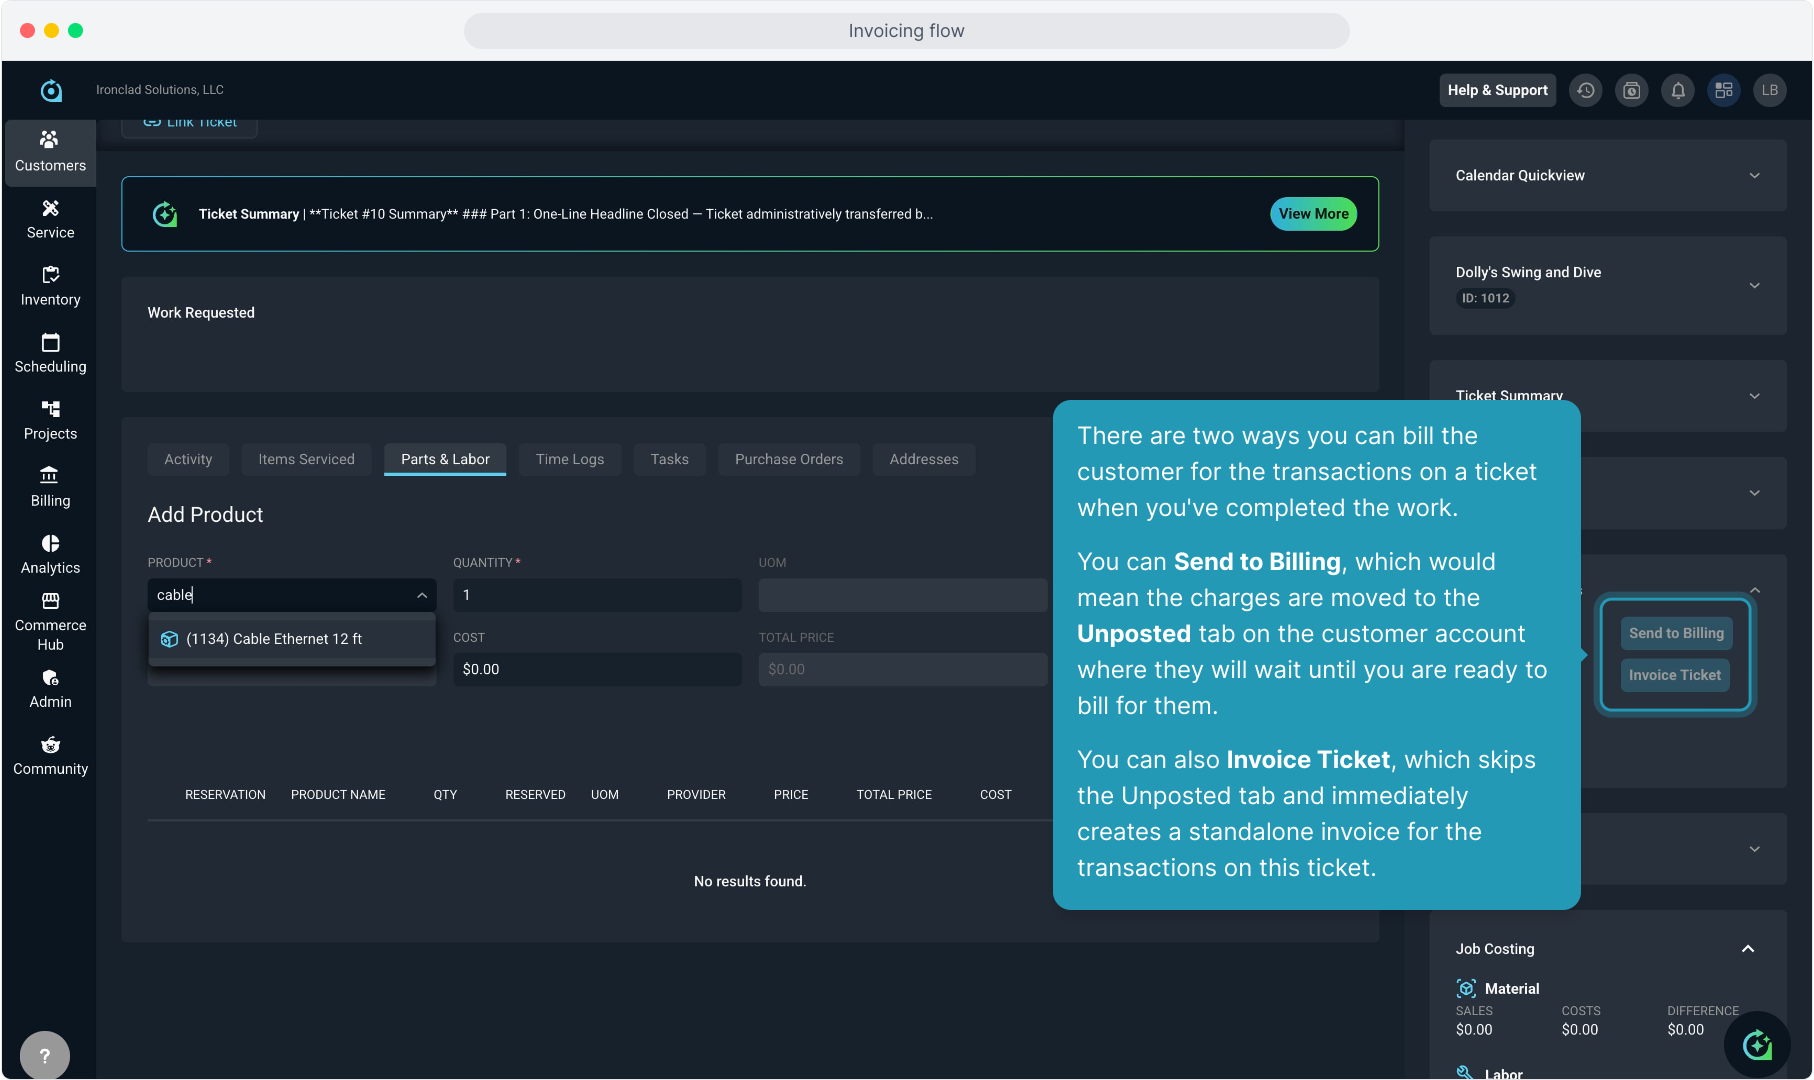
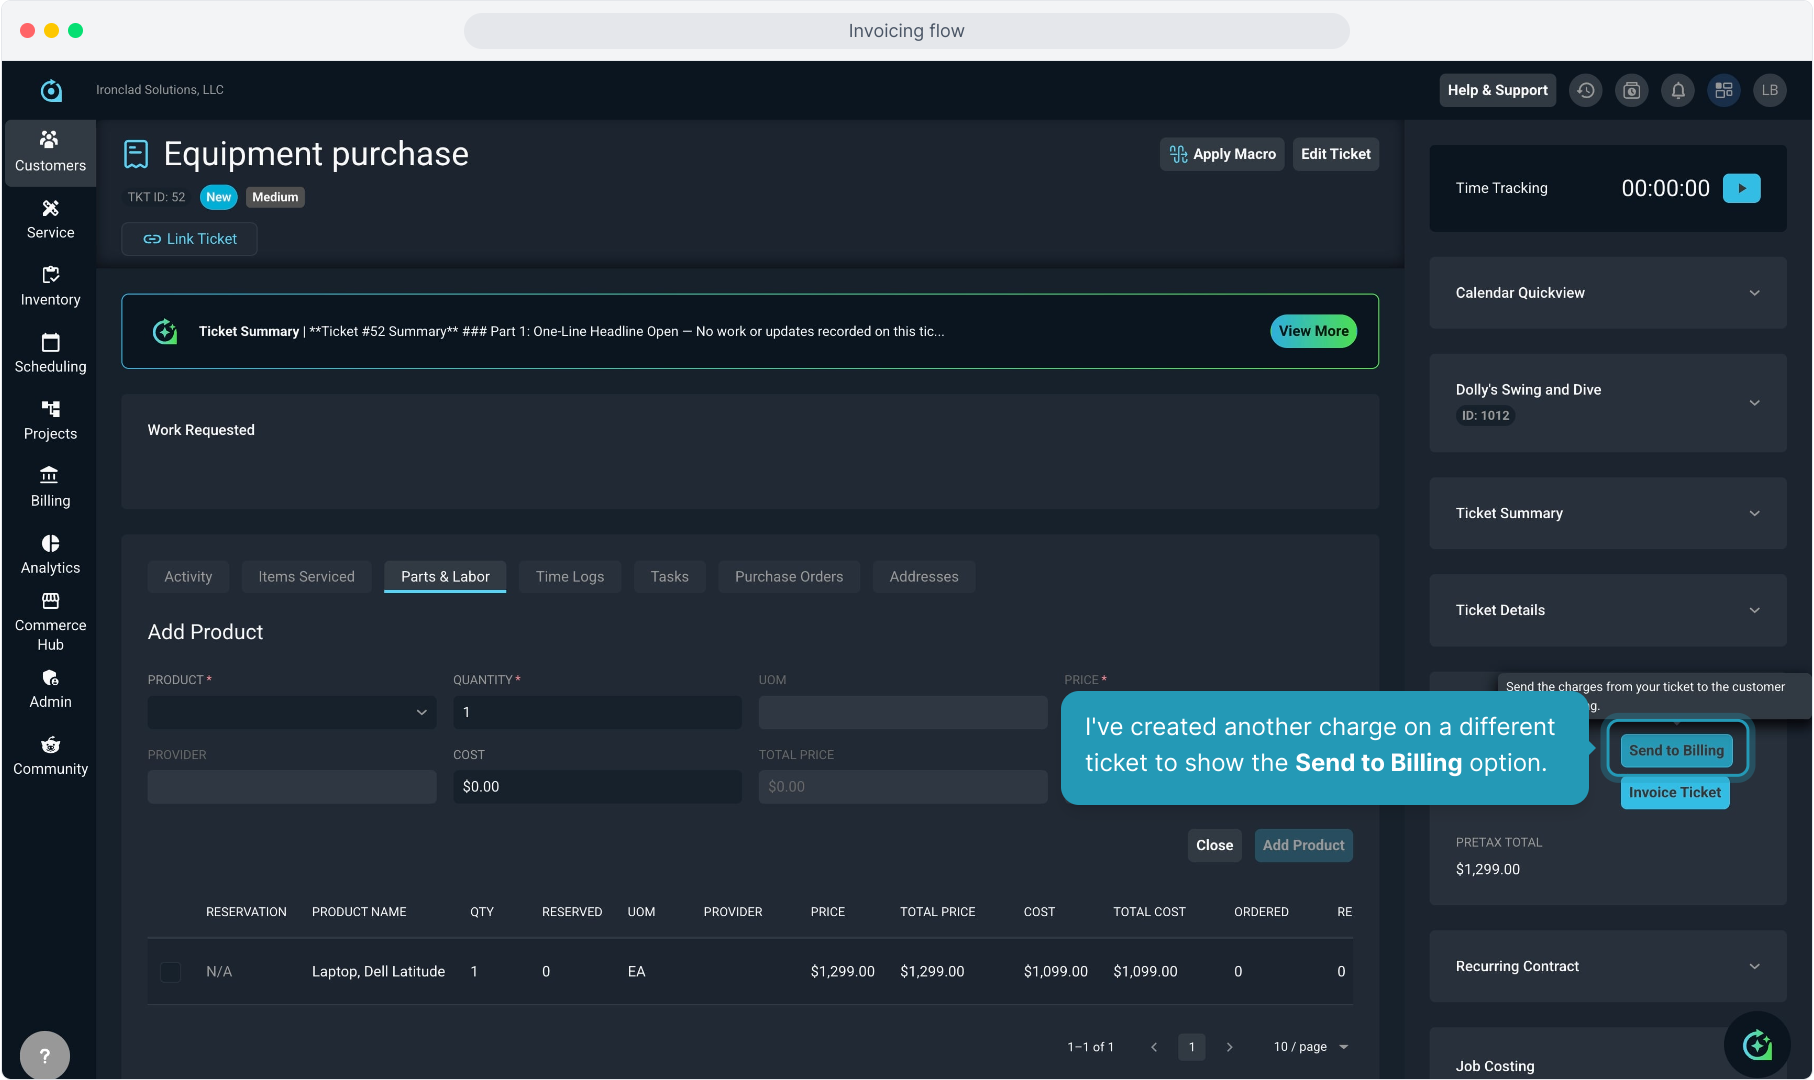
36. There are two ways you can bill the customer for the transactions on a ticket when you've completed the work.
You can Send to Billing, which would mean the charges are moved to the Unposted tab on the customer account where they will wait until you are ready to bill for them.
You can also Invoice Ticket, which skips the Unposted tab and immediately creates a standalone invoice for the transactions on this ticket.
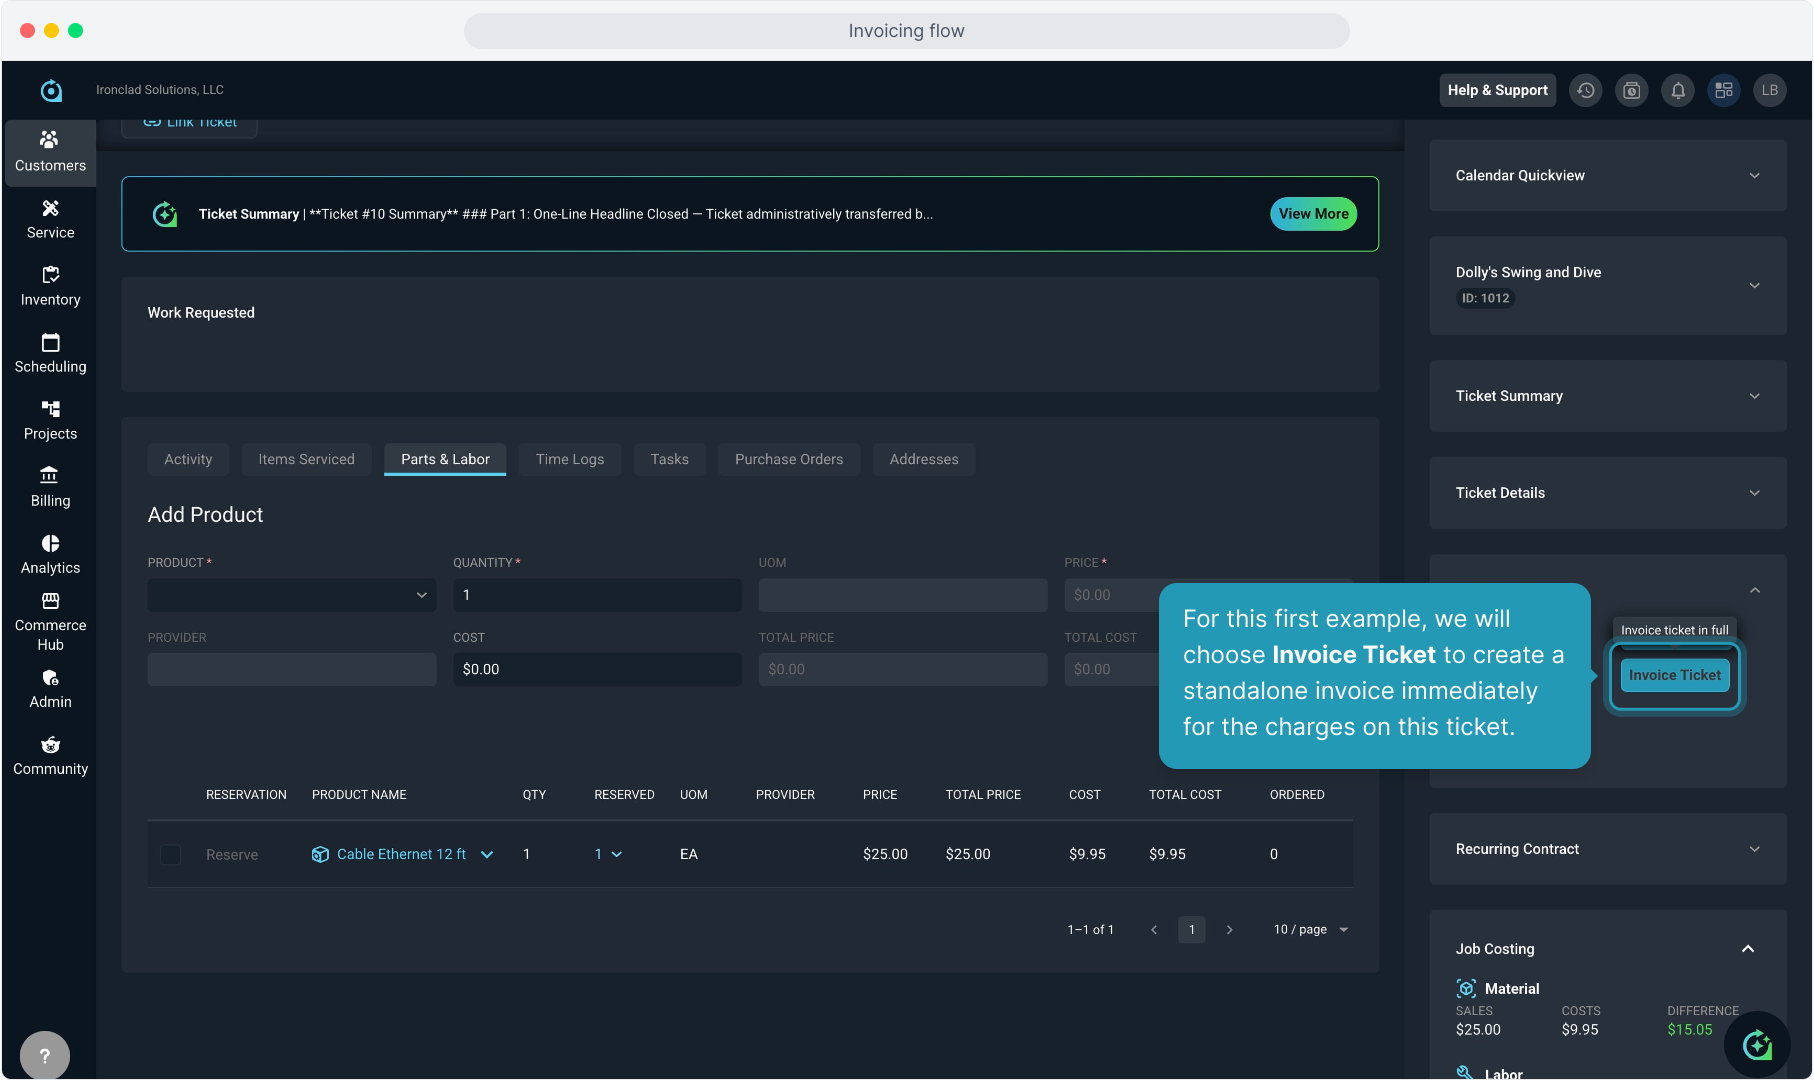
37. For this first example, we will choose Invoice Ticket to create a standalone invoice immediately for the charges on this ticket.
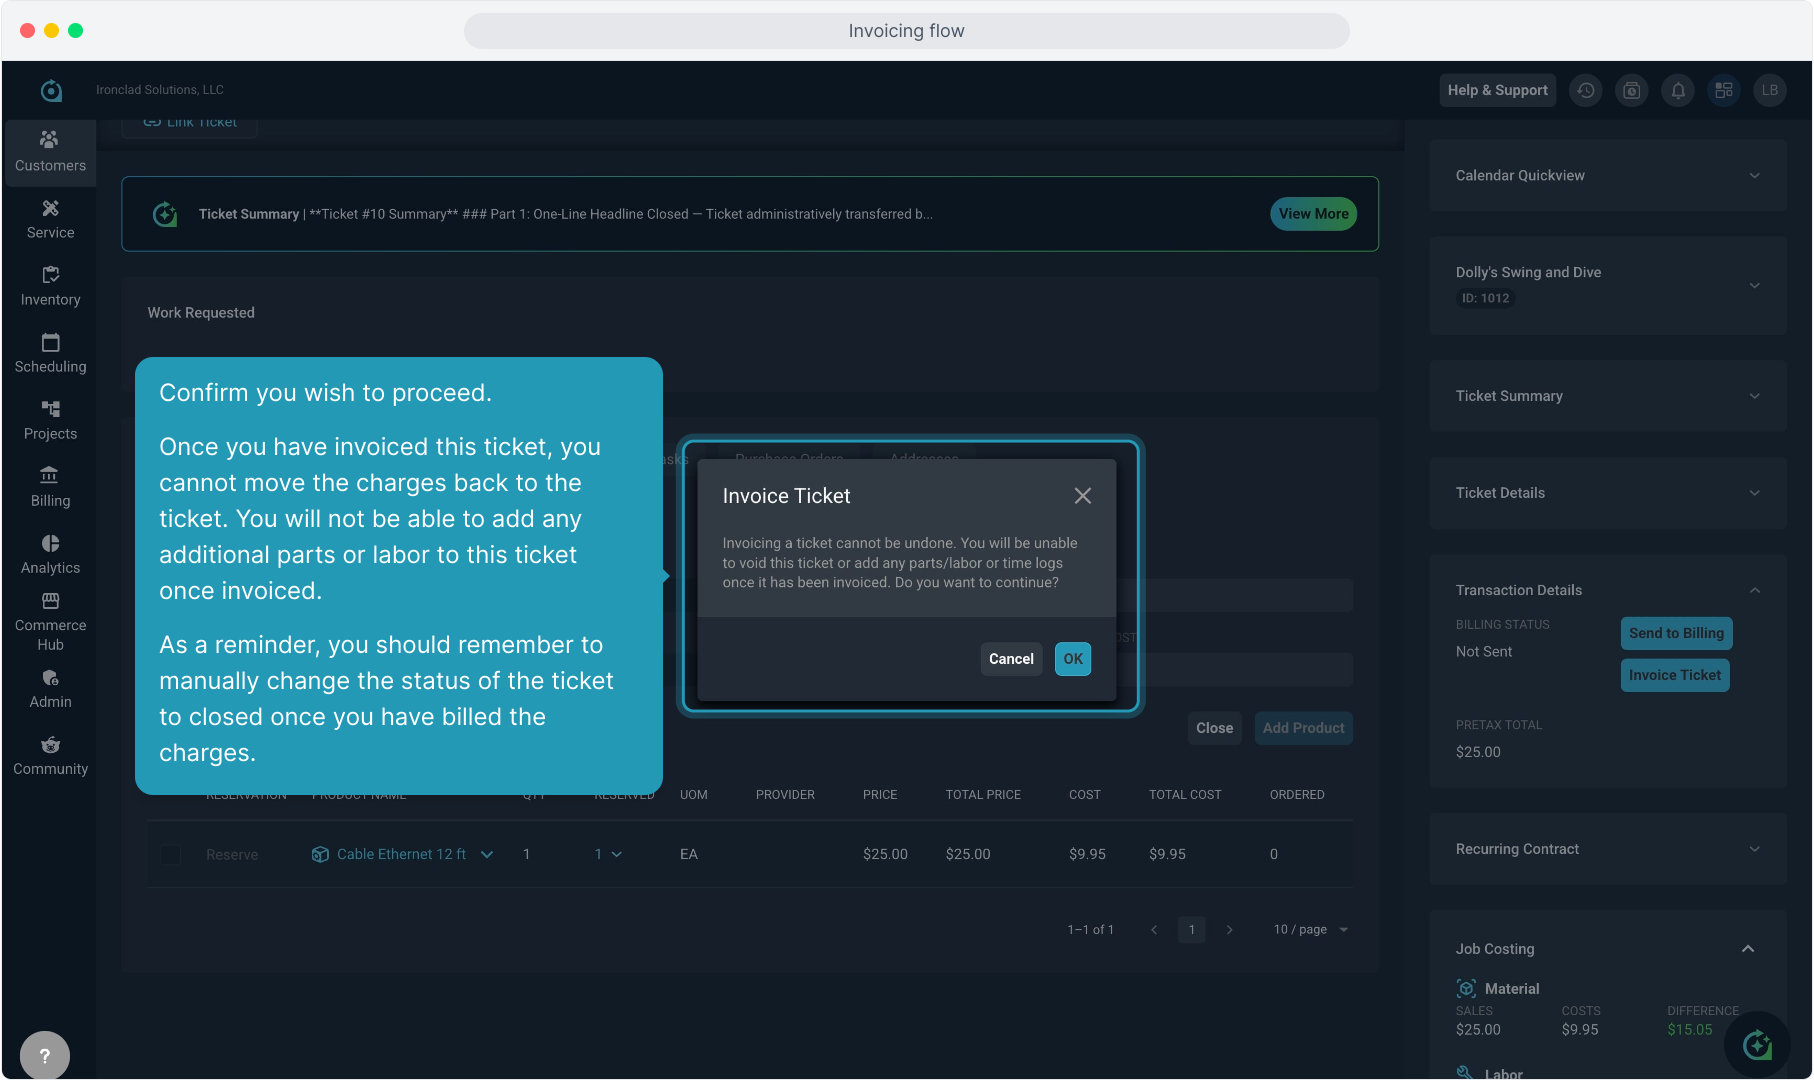
38. Confirm you wish to proceed.
Once you have invoiced this ticket, you cannot move the charges back to the ticket. You will not be able to add any additional parts or labor to this ticket once invoiced.
As a reminder, you should remember to manually change the status of the ticket to closed once you have billed the charges.
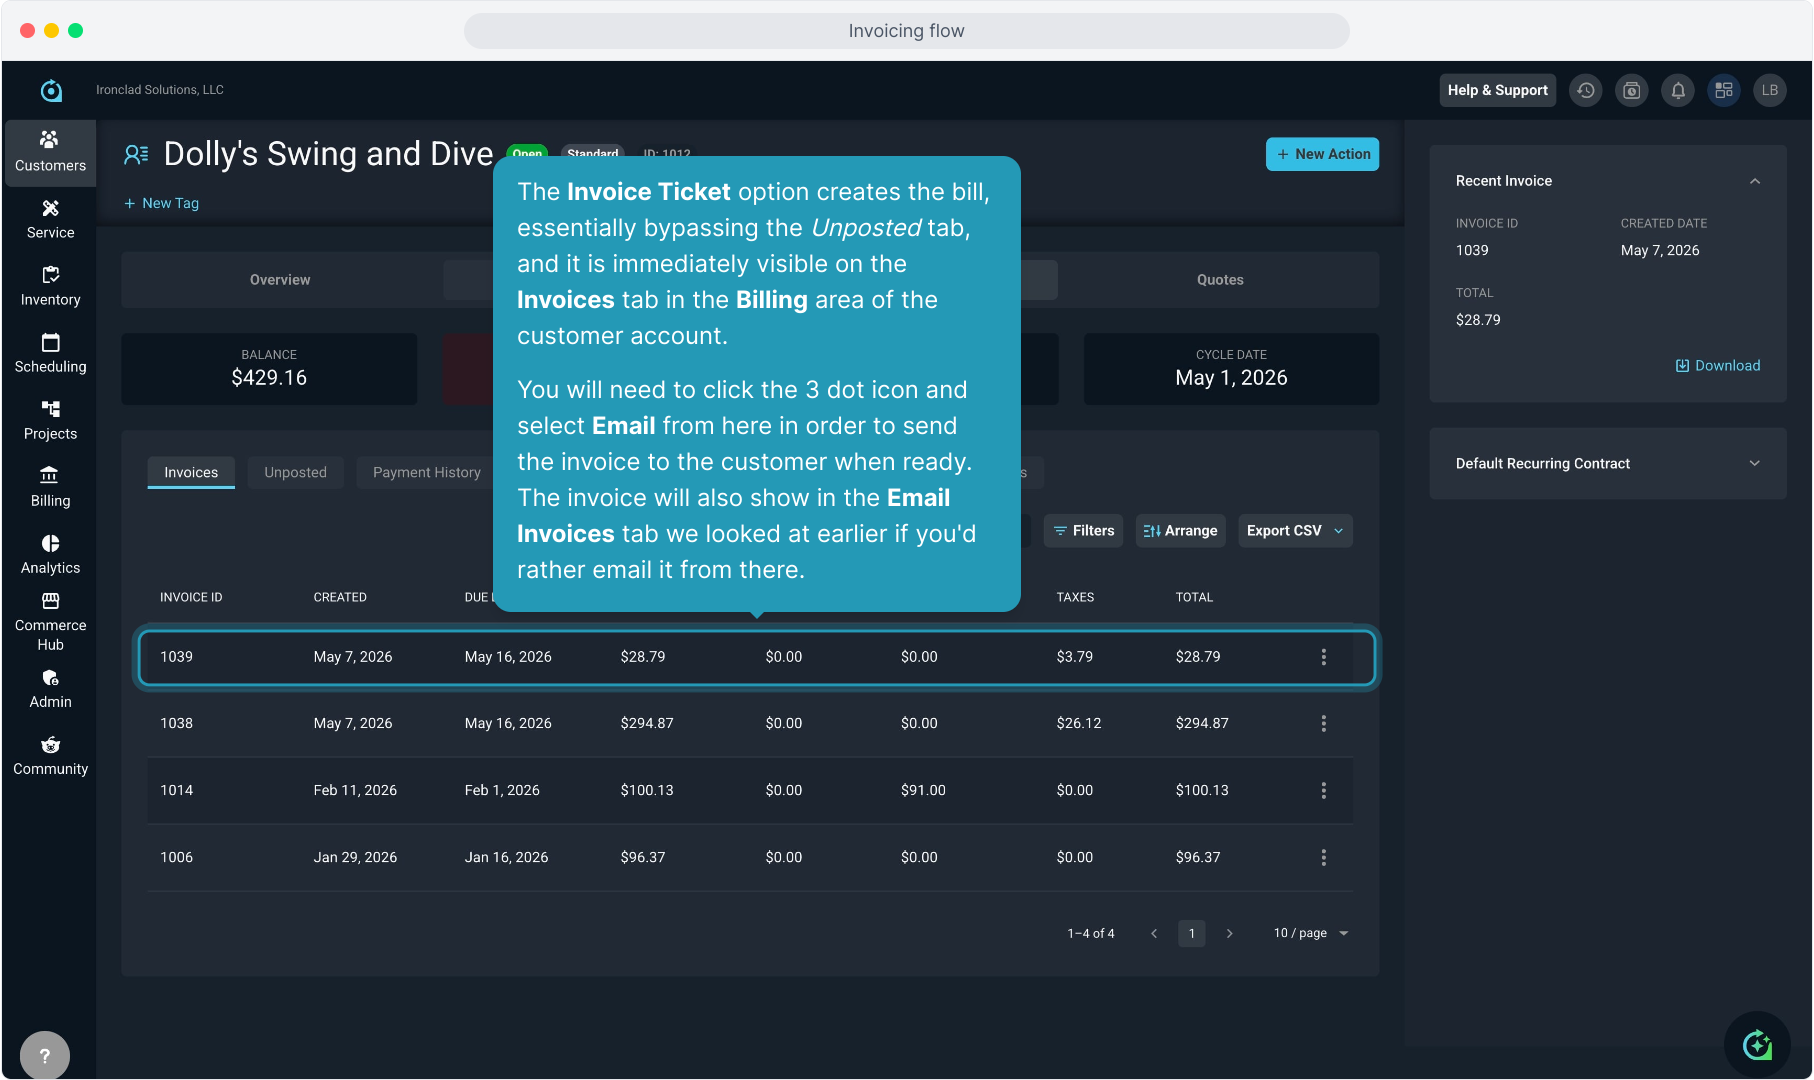
39. The Invoice Ticket option creates the bill, essentially bypassing the Unposted tab, and it is immediately visible on the Invoices tab in the Billing area of the customer account.
You will need to click the 3 dot icon and select Email from here in order to send the invoice to the customer when ready. The invoice will also show in the Email Invoices tab we looked at earlier if you'd rather email it from there.
40. I've created another charge on a different ticket to show the Send to Billing option.
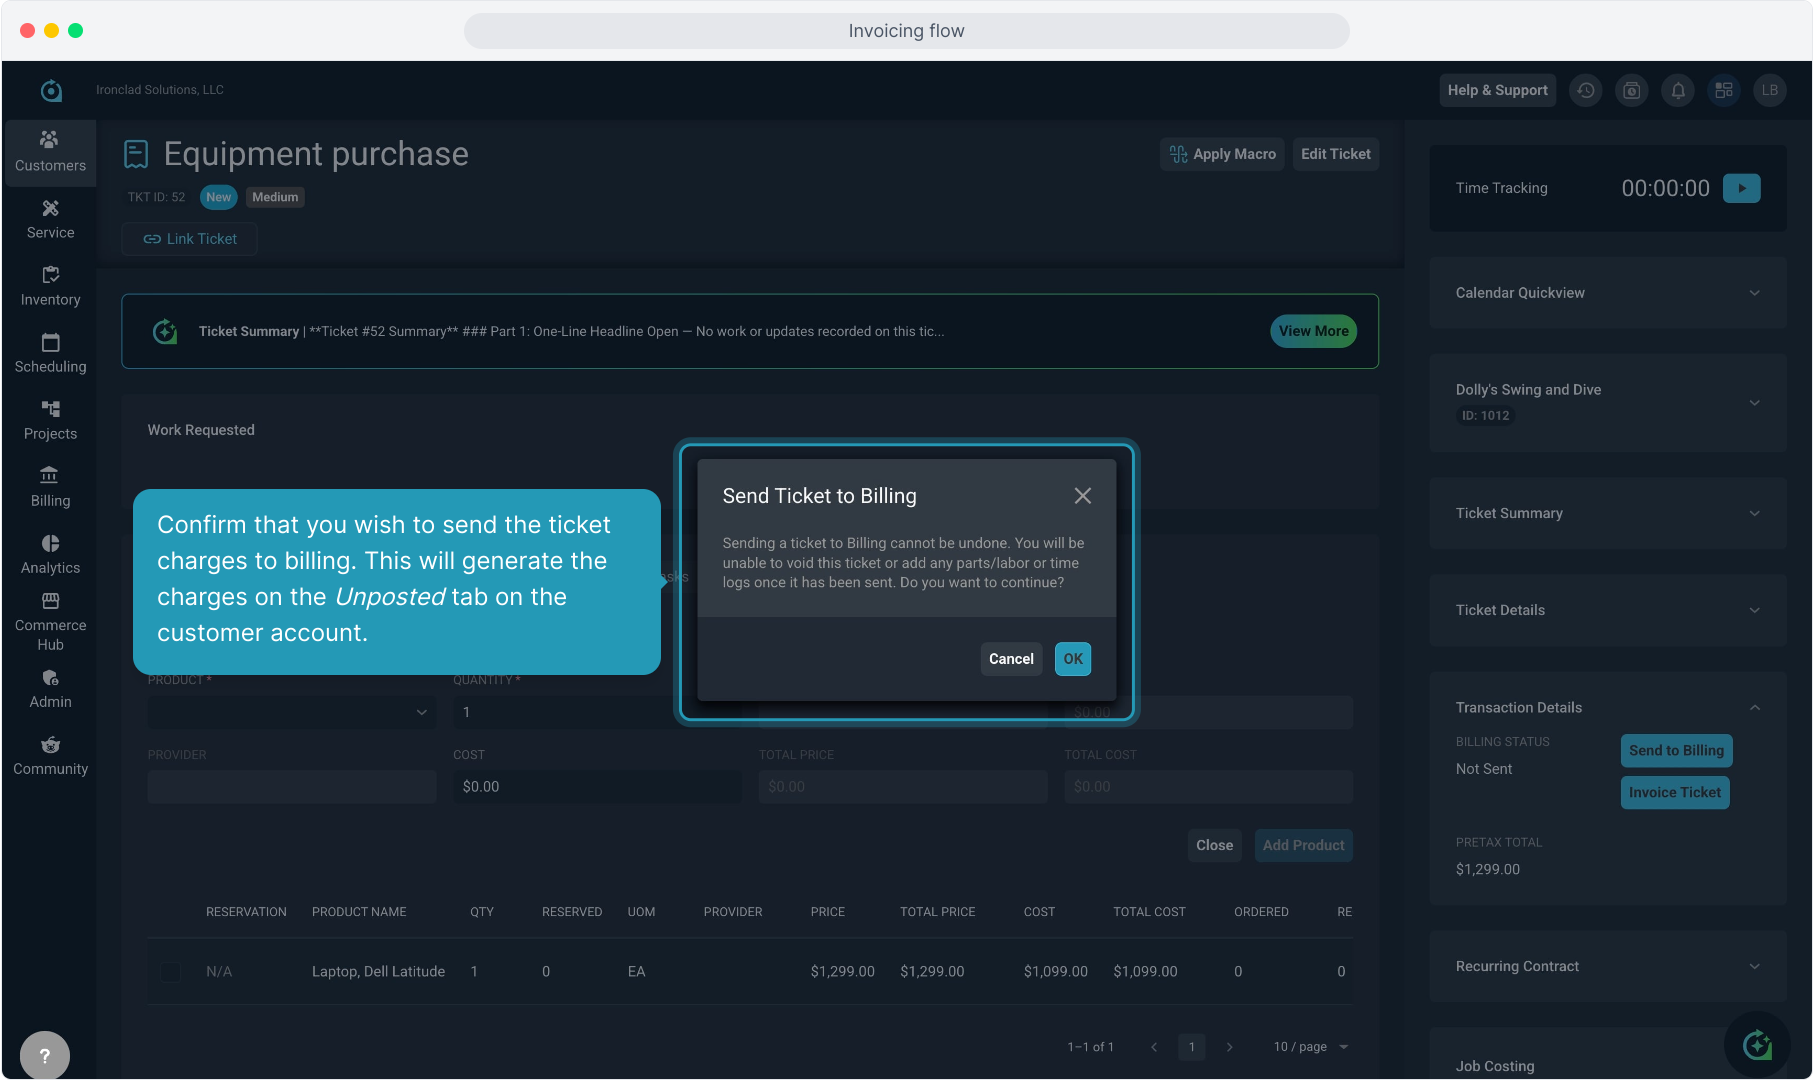
41. Confirm that you wish to send the ticket charges to billing. This will generate the charges on the Unposted tab on the customer account.
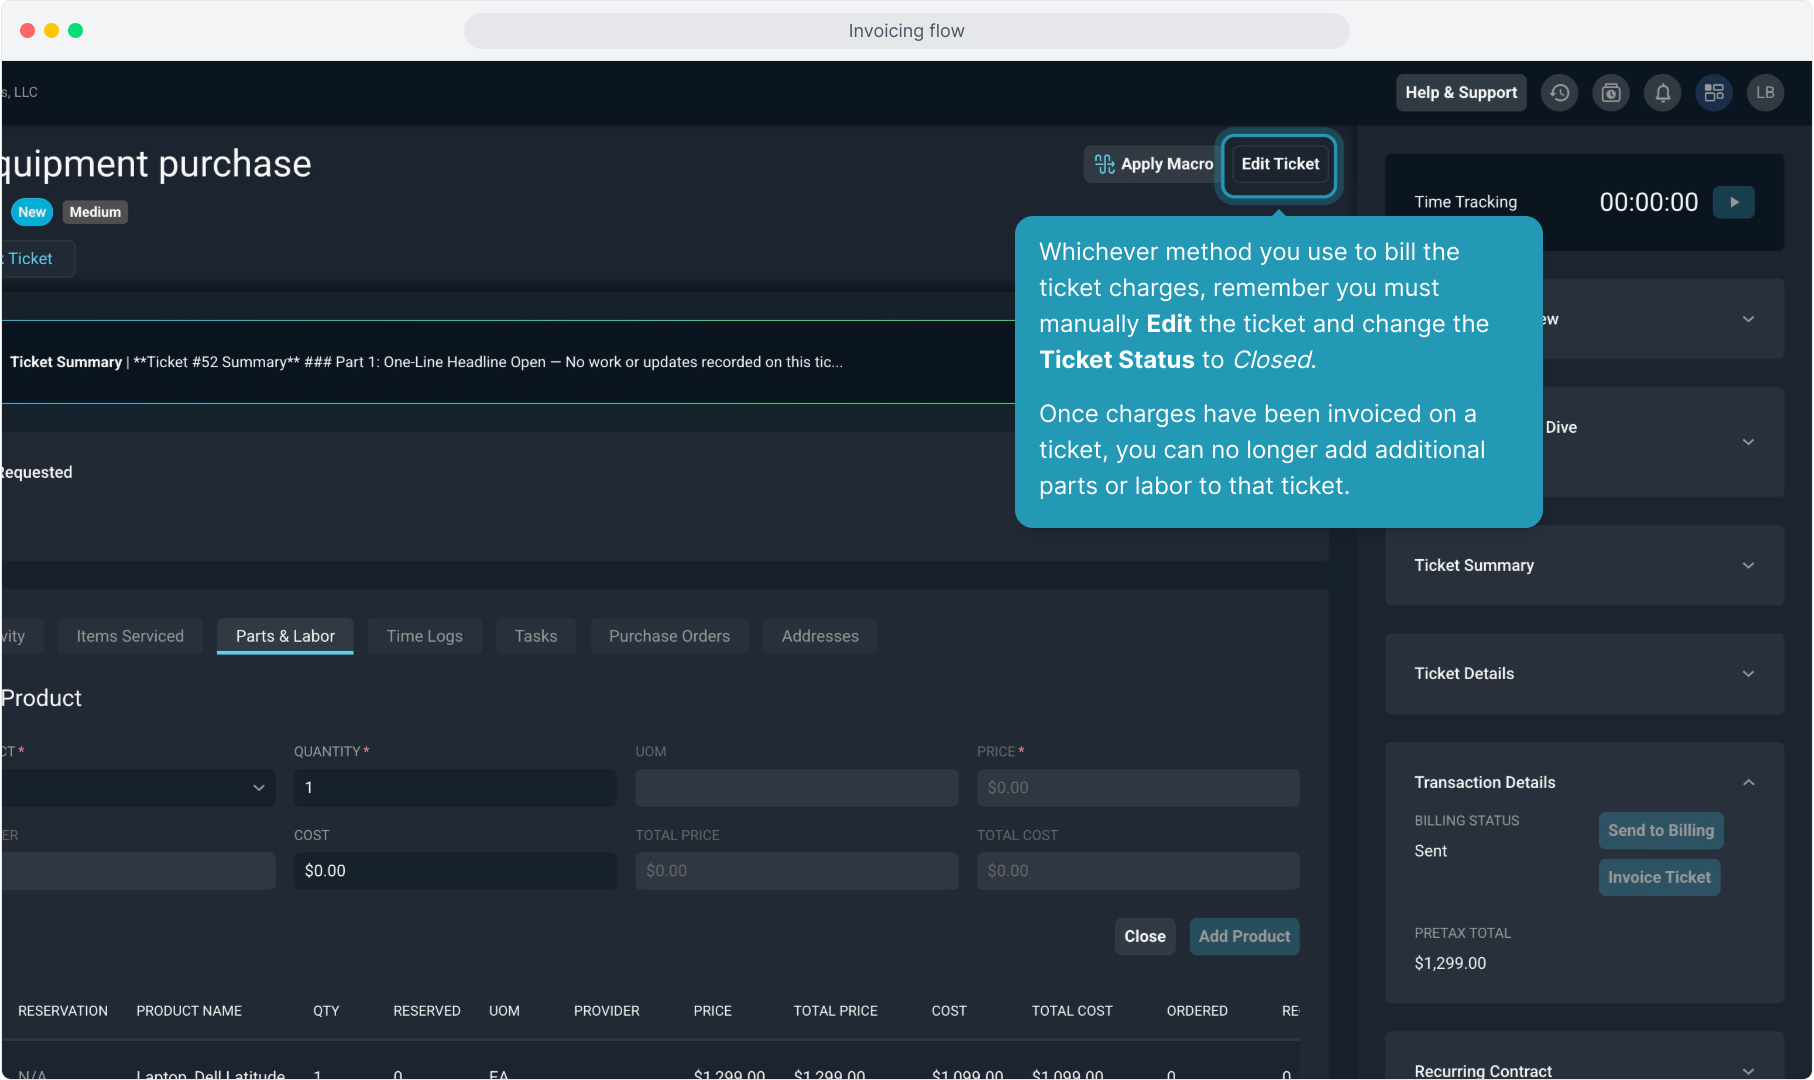
42. Whichever method you use to bill the ticket charges, remember you must manually Edit the ticket and change the Ticket Status to Closed.
Once charges have been invoiced on a ticket, you can no longer add additional parts or labor to that ticket.
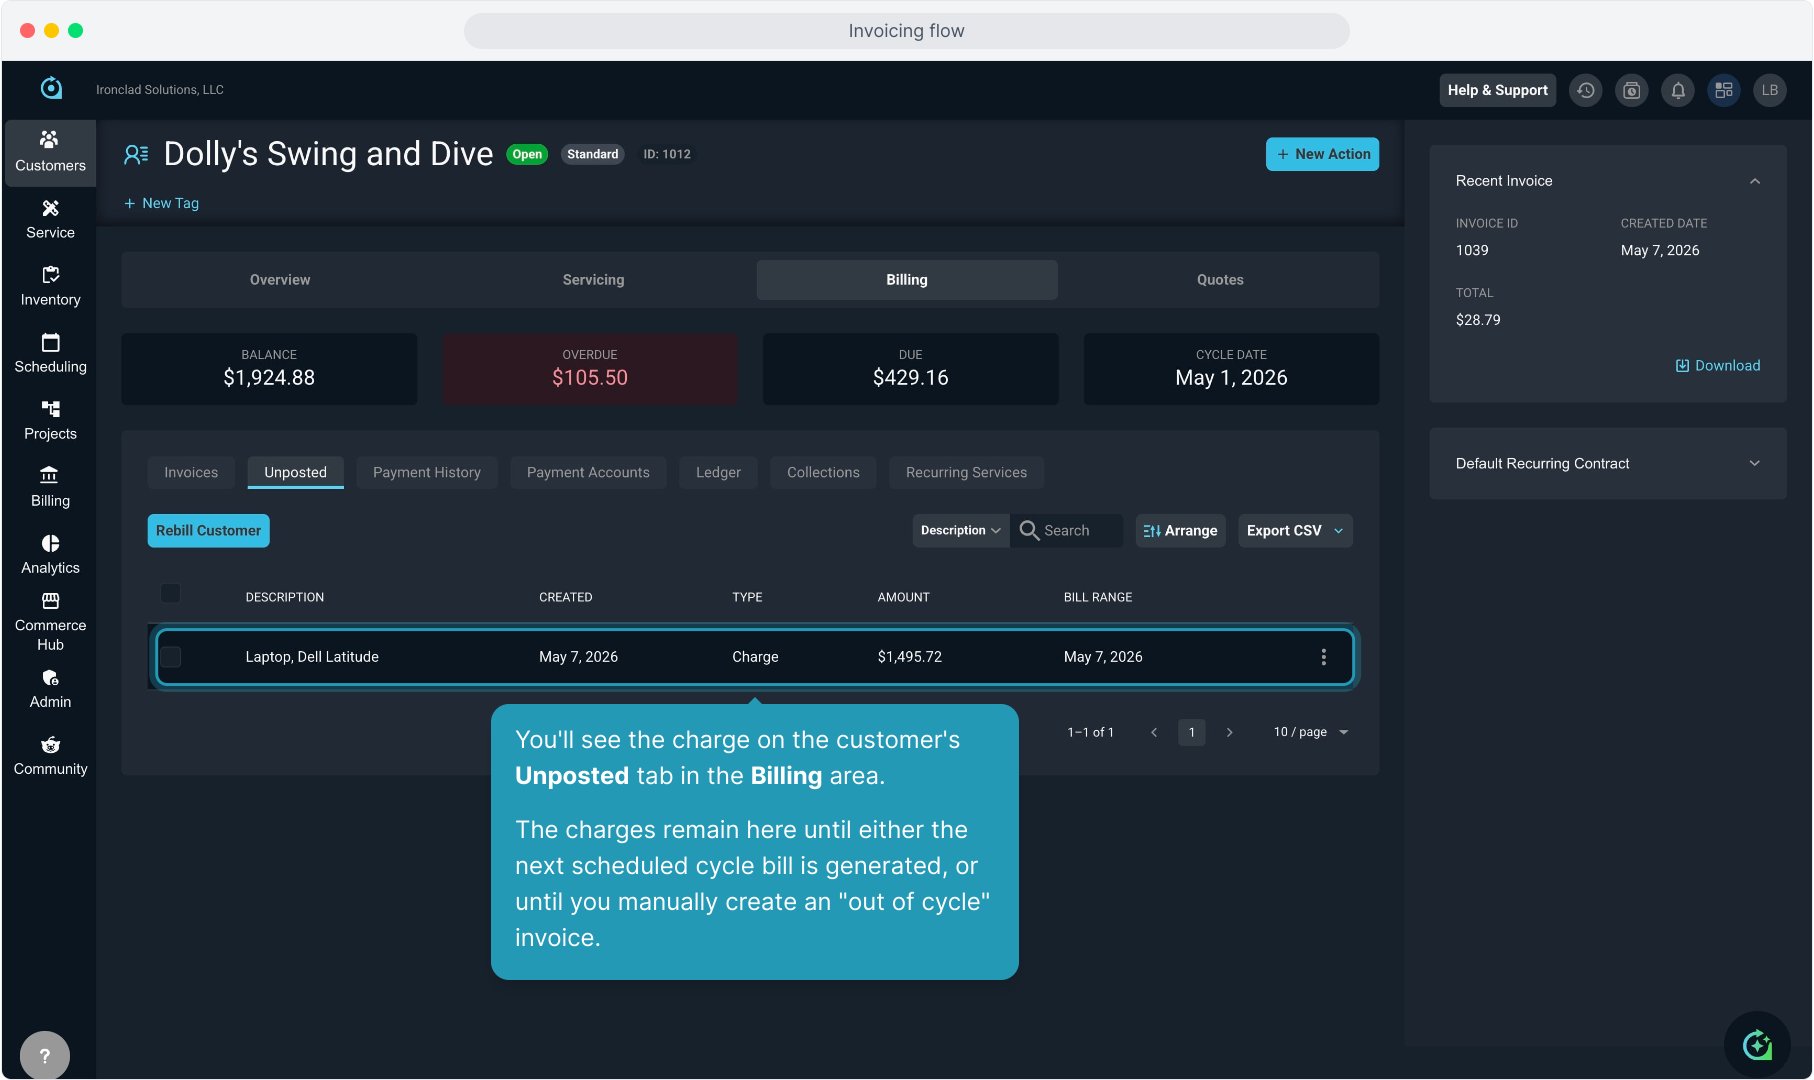
43. You'll see the charge on the customer's Unposted tab in the Billing area.
The charges remain here until either the next scheduled cycle bill is generated, or until you manually create an "out of cycle" invoice.
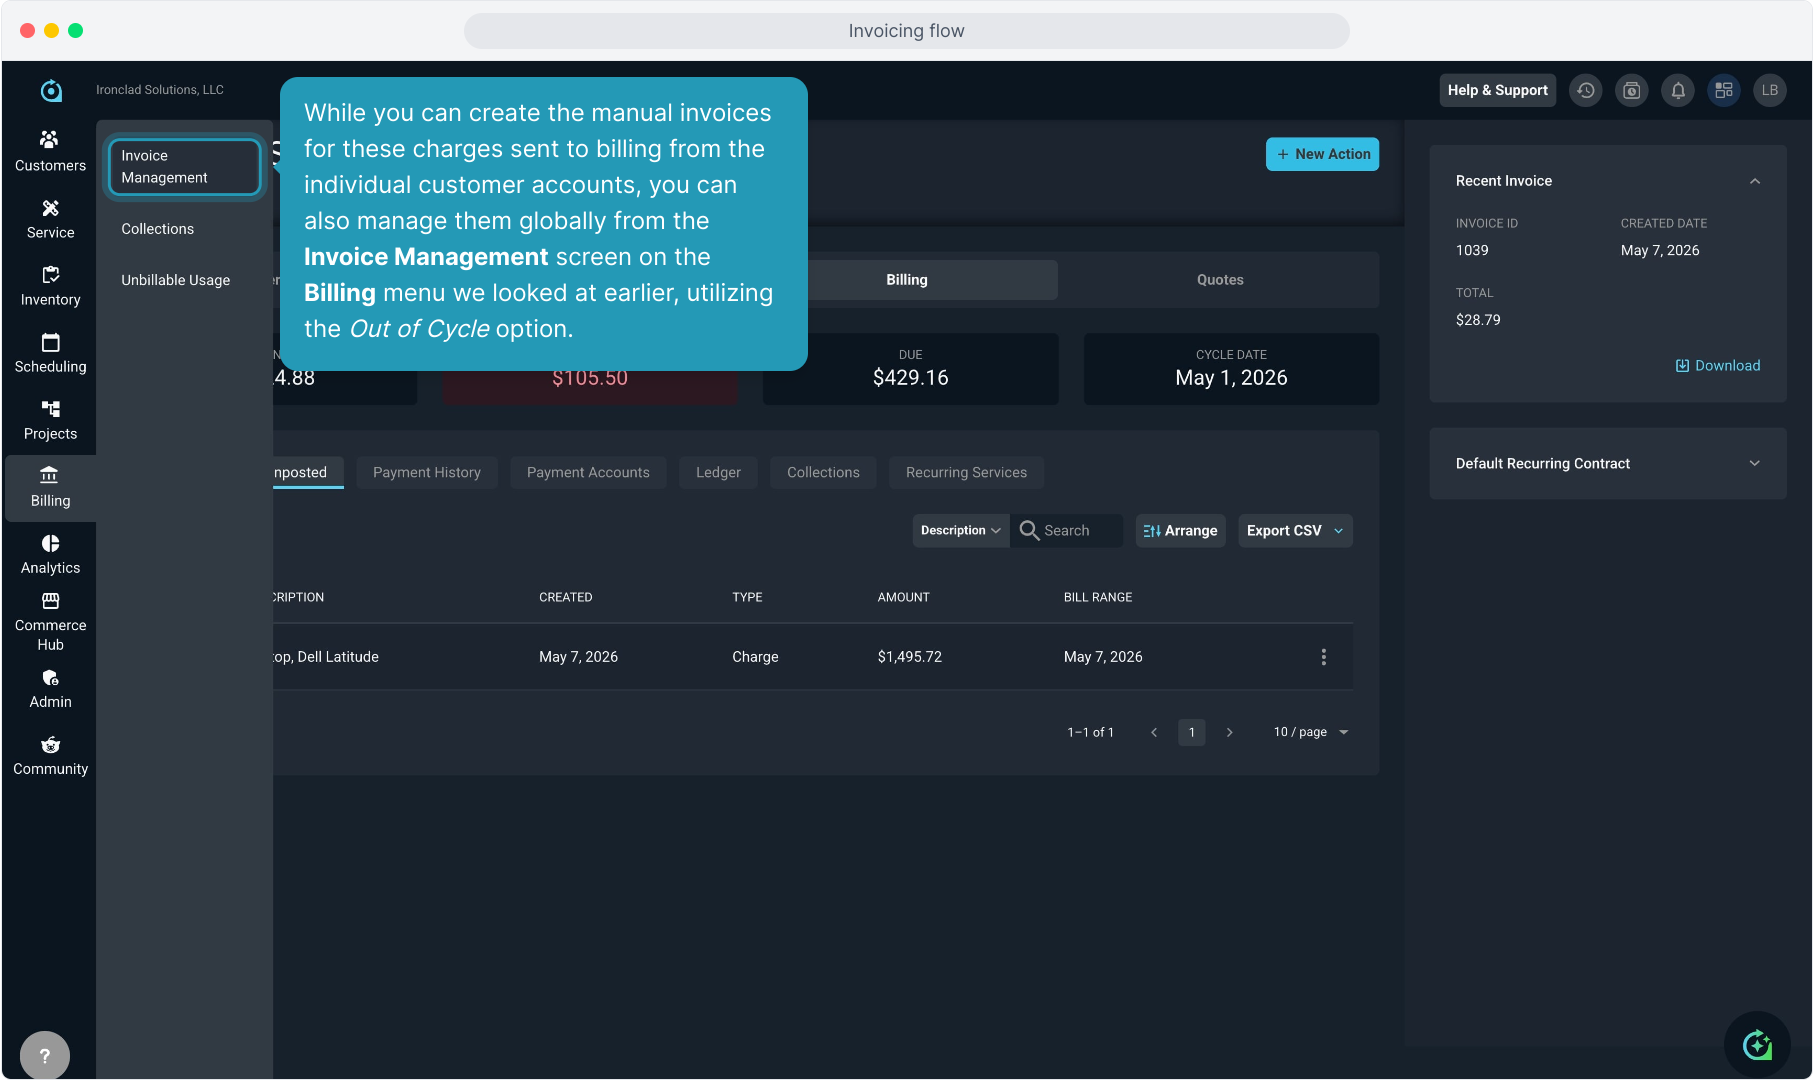
44. While you can create the manual invoices for these charges sent to billing from the individual customer accounts, you can also manage them globally from the Invoice Management screen on the Billing menu we looked at earlier, utilizing the Out of Cycle option.
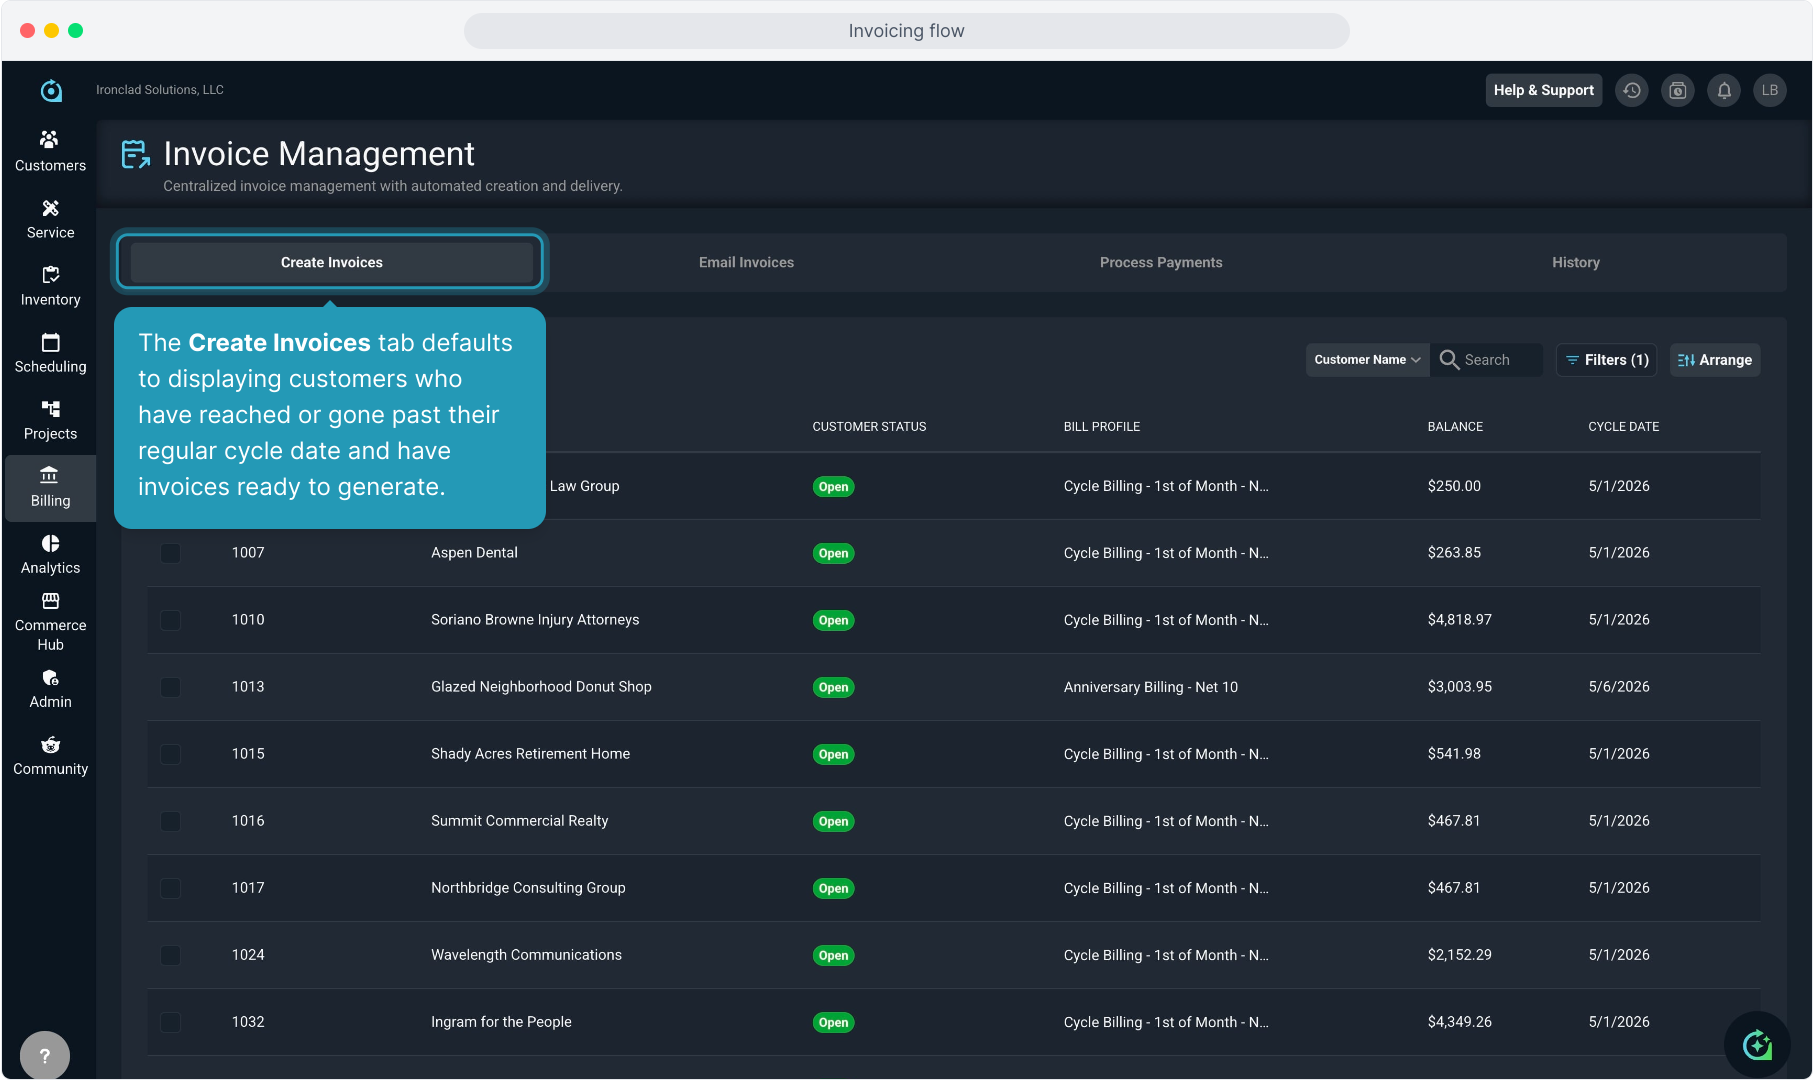
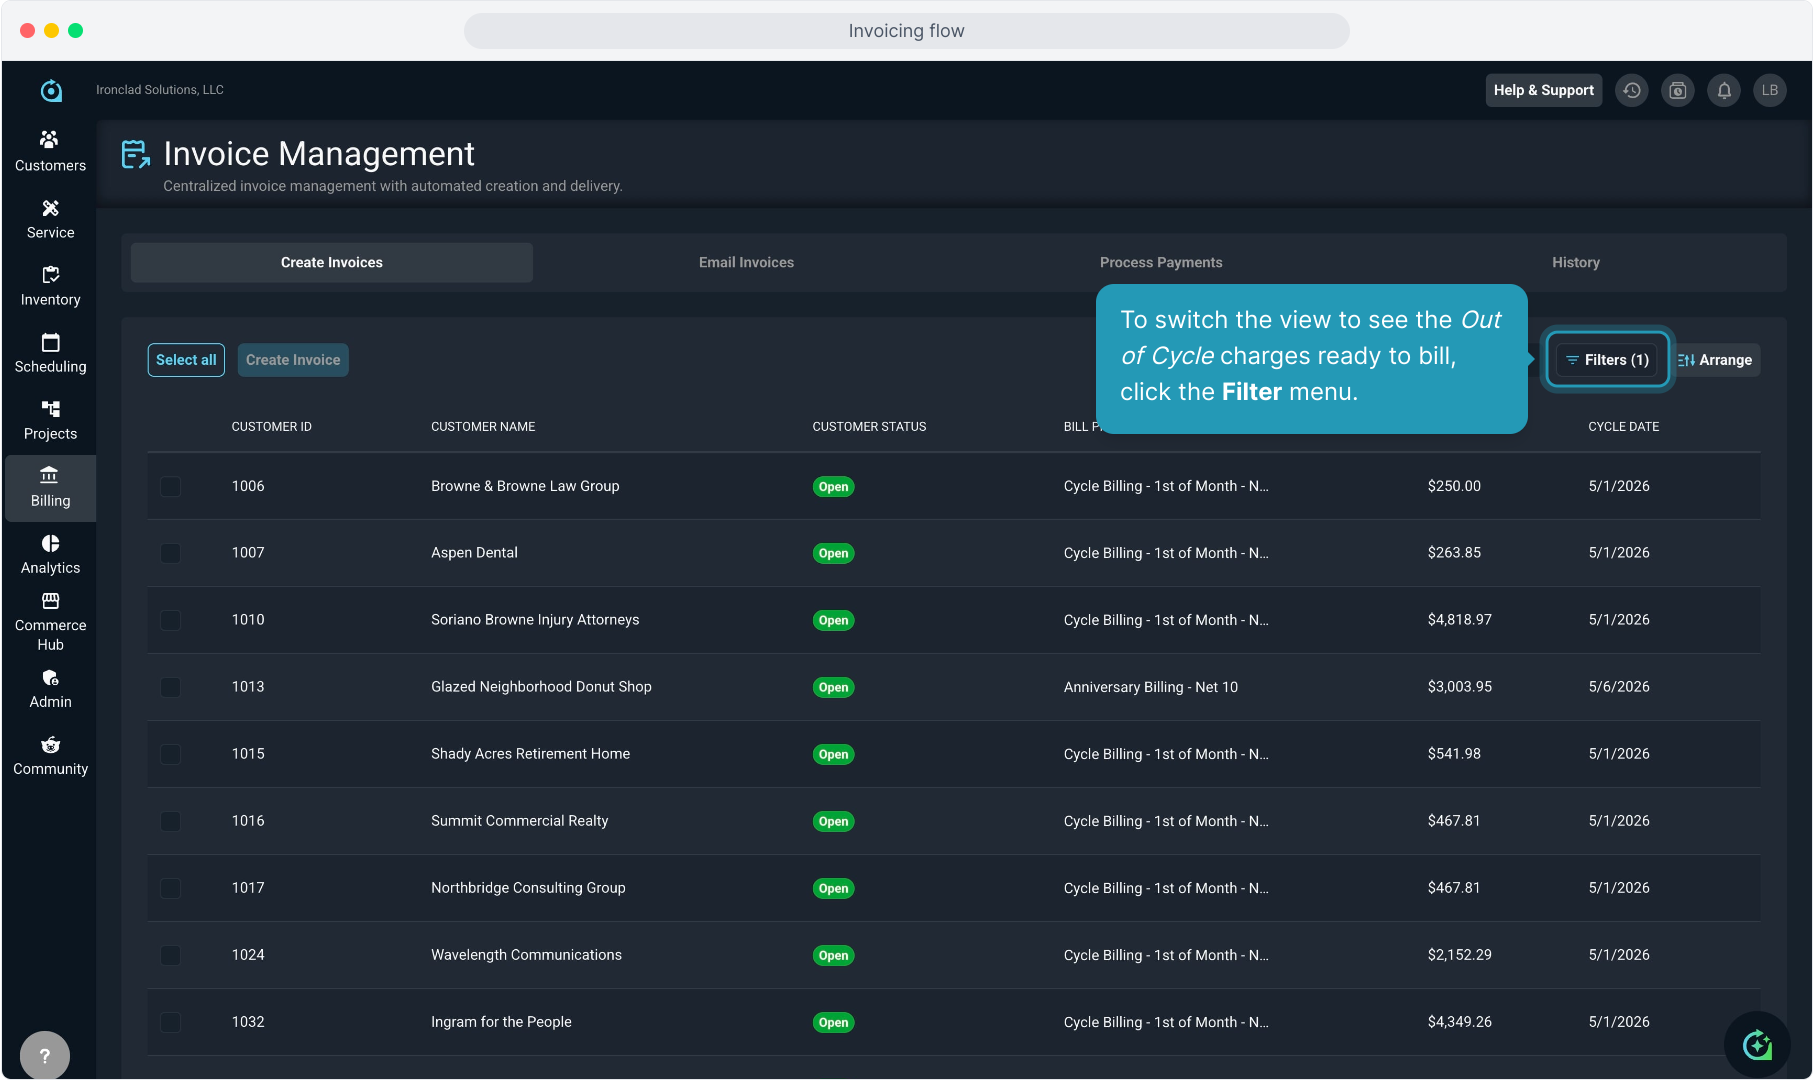
45. The Create Invoices tab defaults to displaying customers who have reached or gone past their regular cycle date and have invoices ready to generate.
46. To switch the view to see the Out of Cycle charges ready to bill, click the Filter menu.
47. Select Out of Cycle.
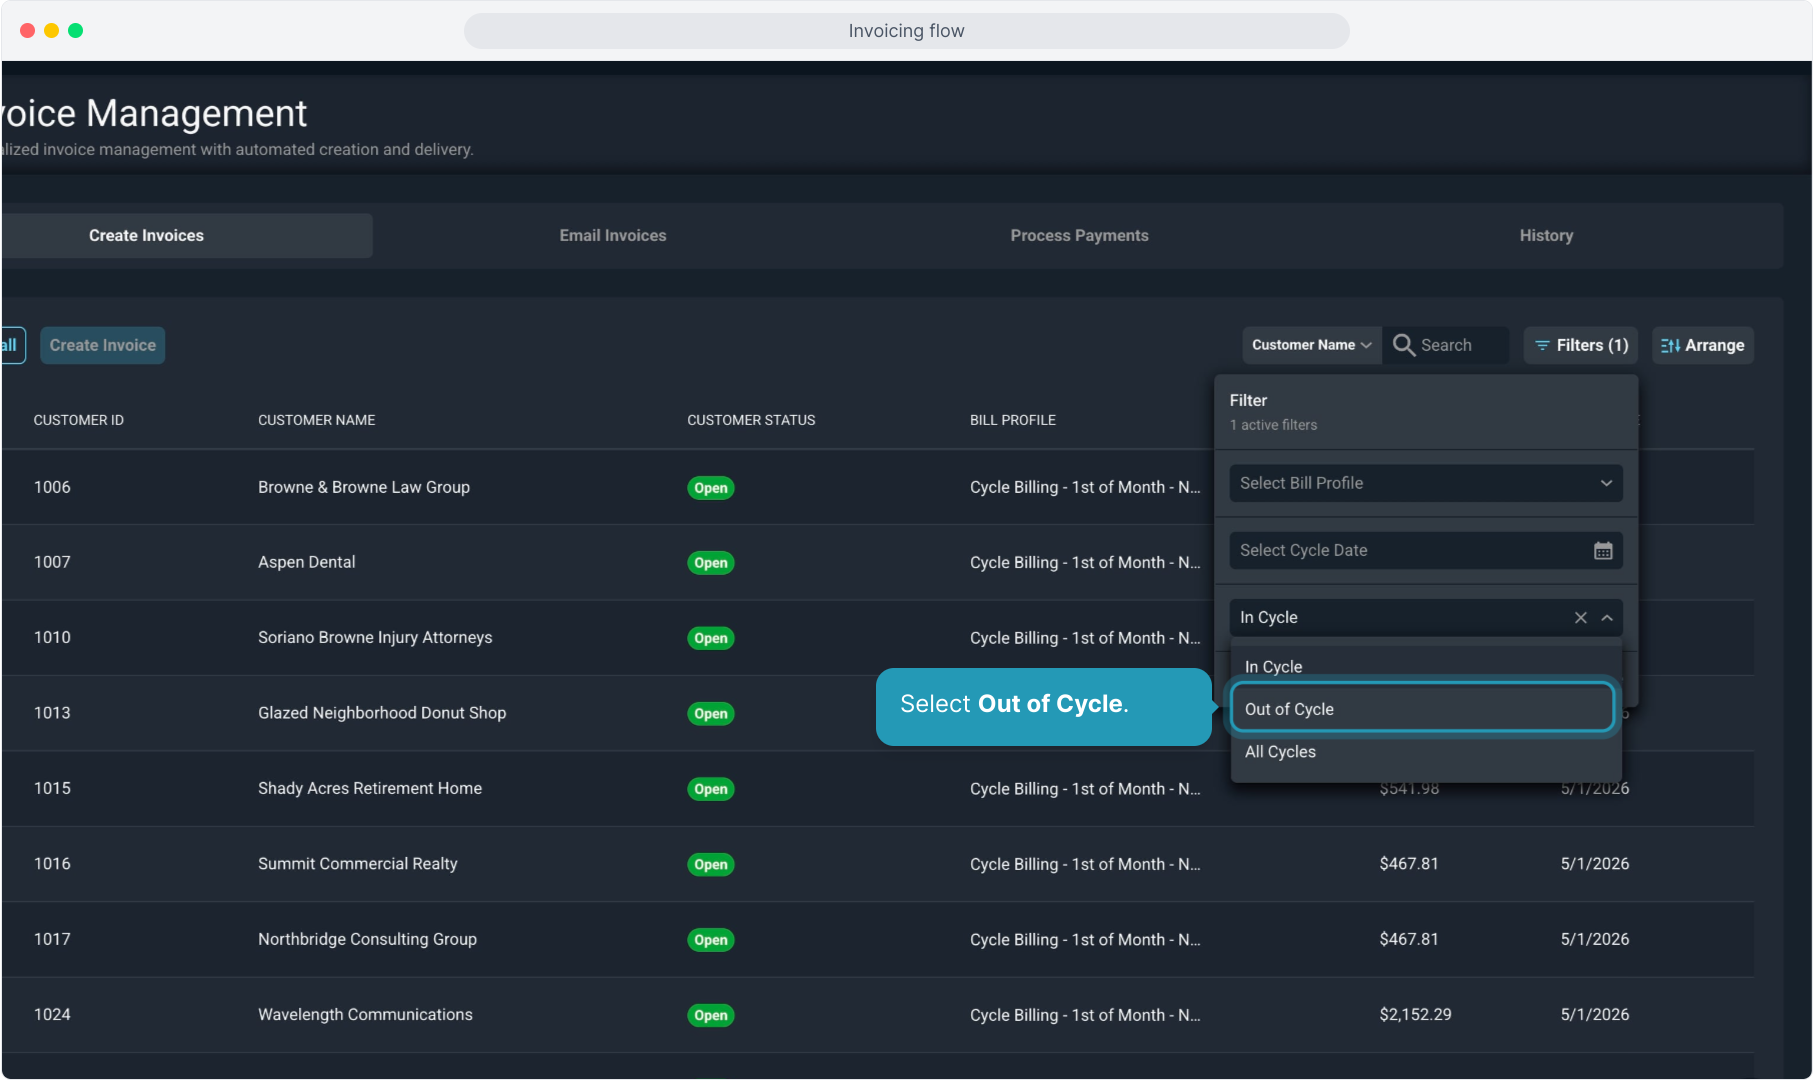
48. Then click the Save button.

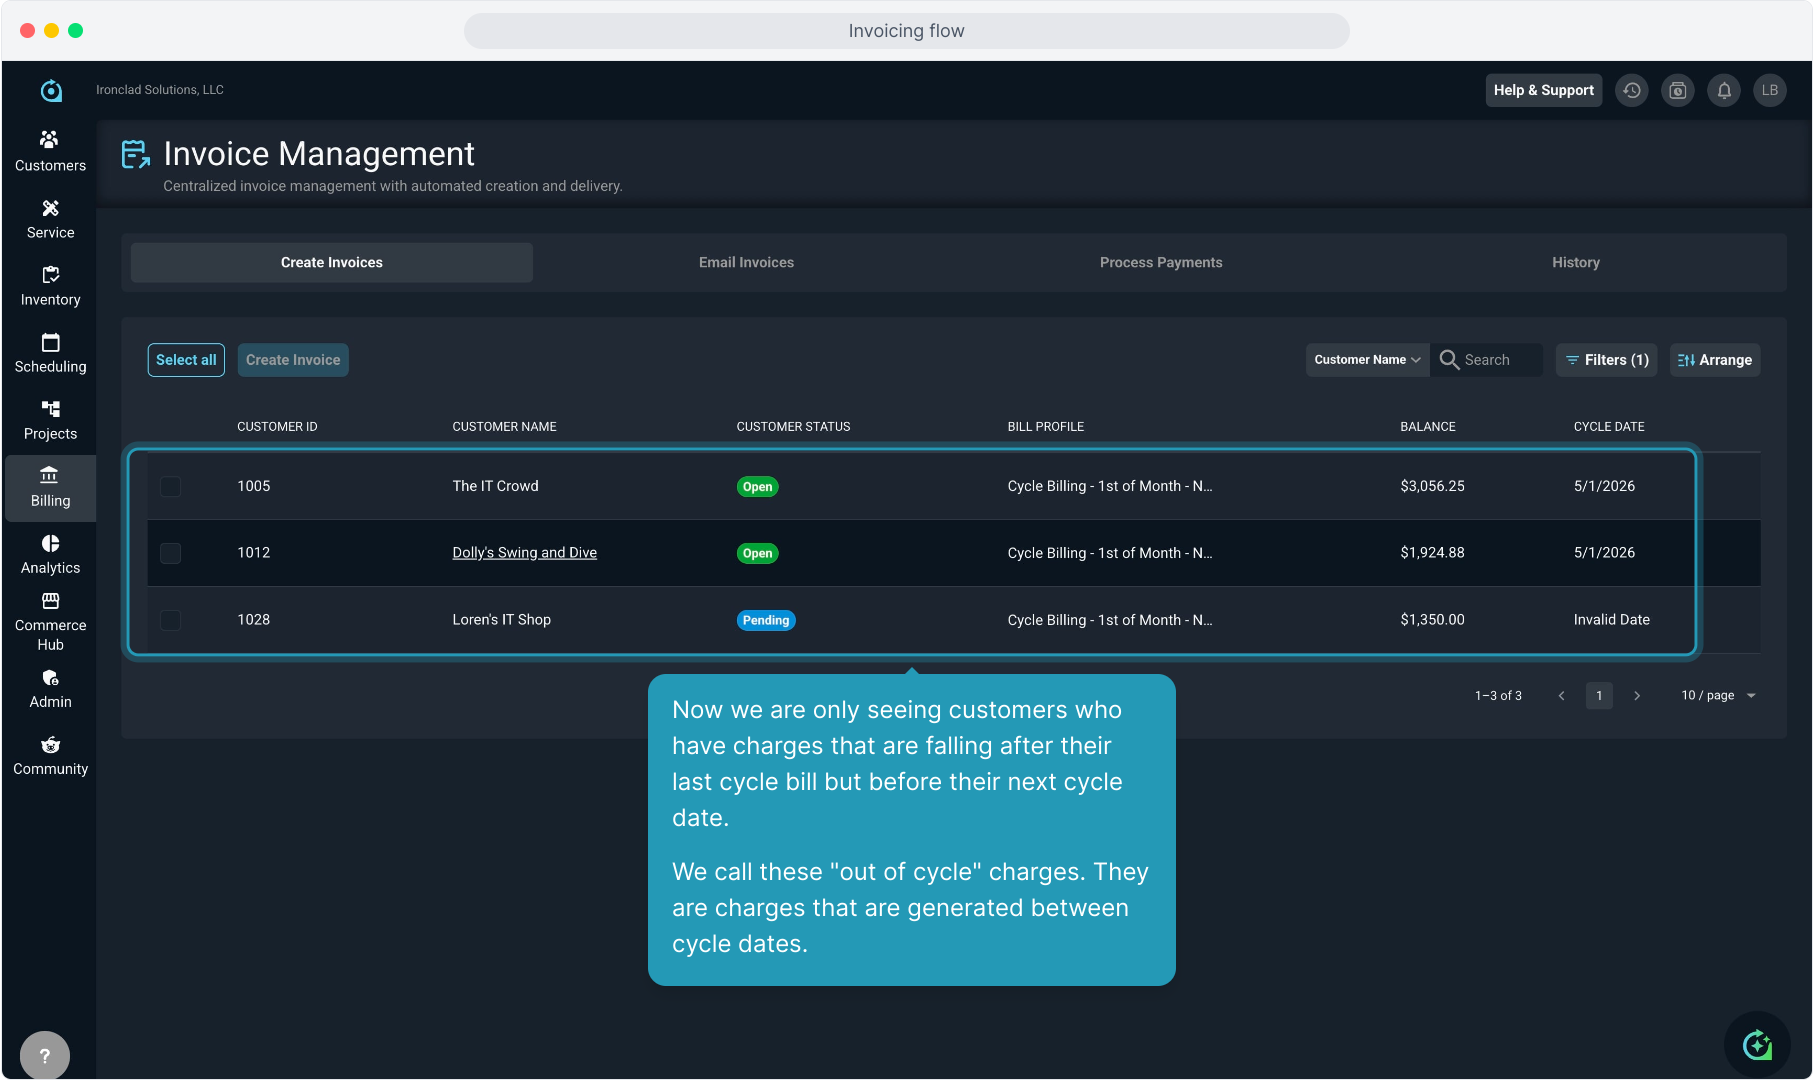
49. Now we are only seeing customers who have charges that are falling after their last cycle bill but before their next cycle date.
We call these "out of cycle" charges. They are charges that are generated between cycle dates.
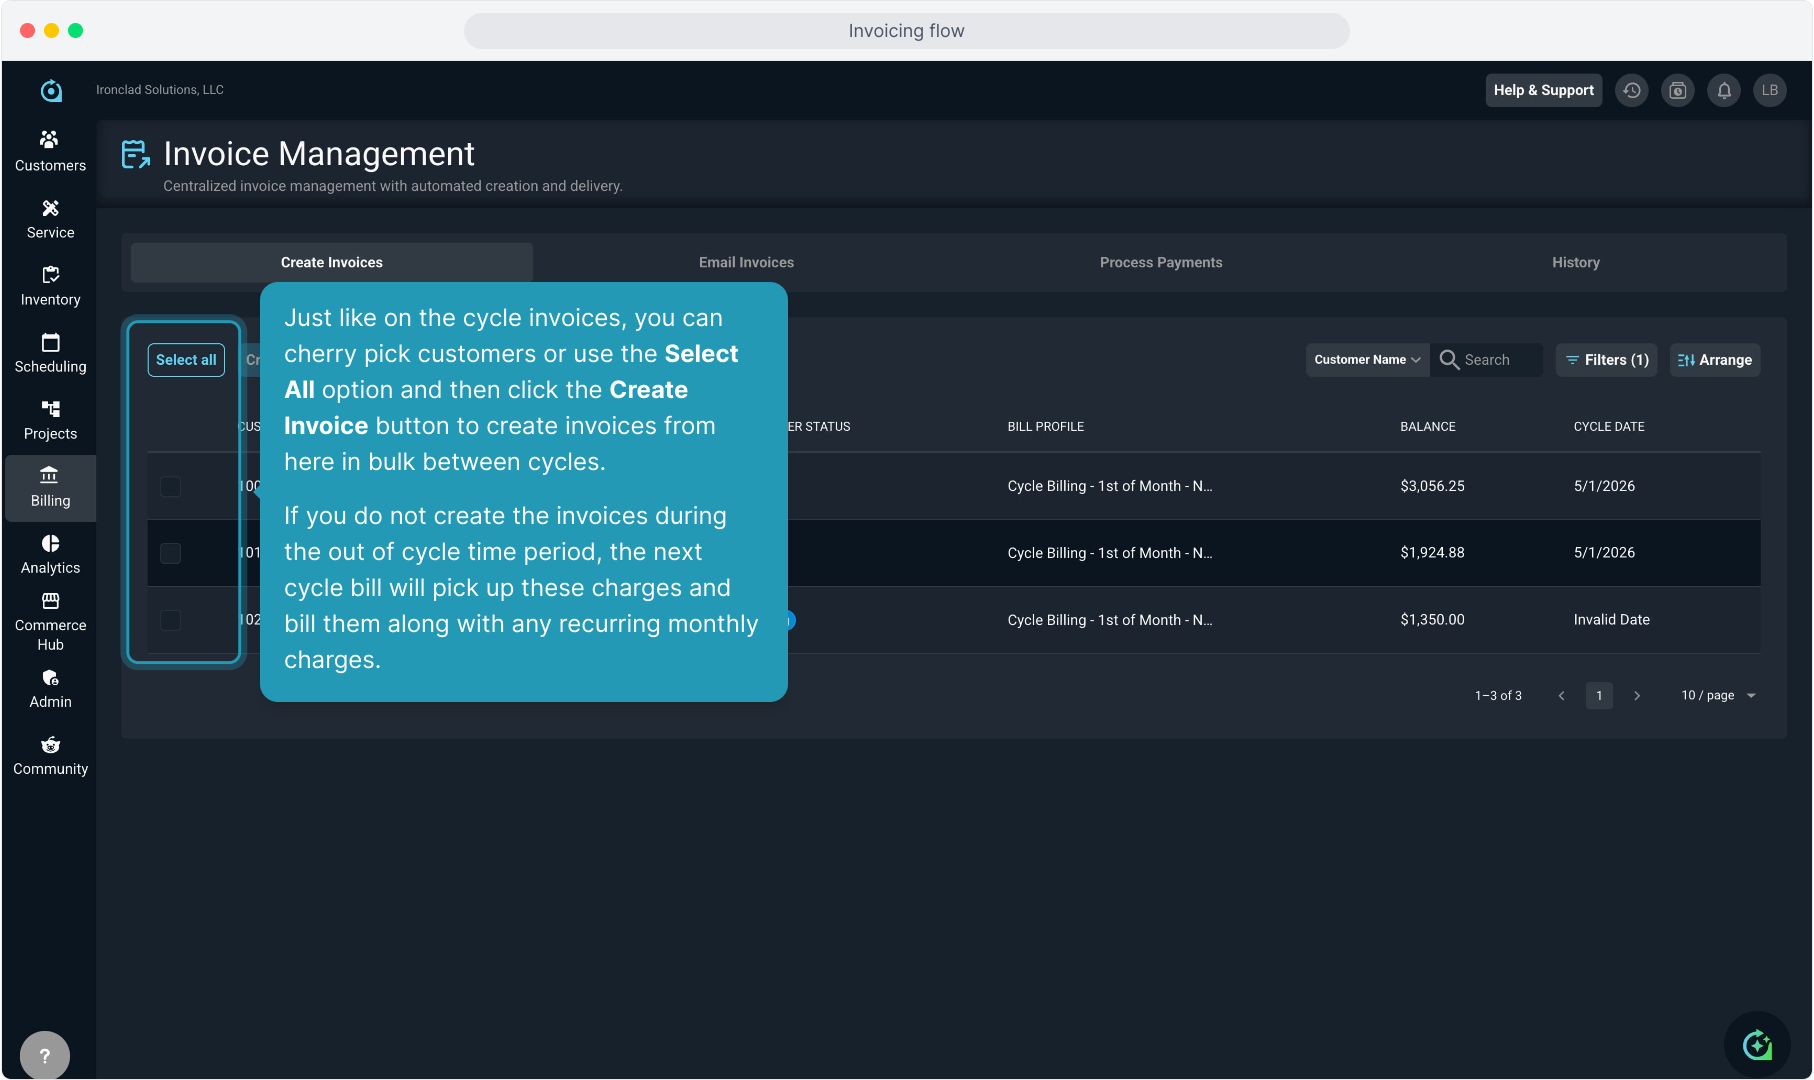
50. Just like on the cycle invoices, you can cherry pick customers or use the Select All option and then click the Create Invoice button to create invoices from here in bulk between cycles.
If you do not create the invoices during the out of cycle time period, the next cycle bill will pick up these charges and bill them along with any recurring monthly charges.
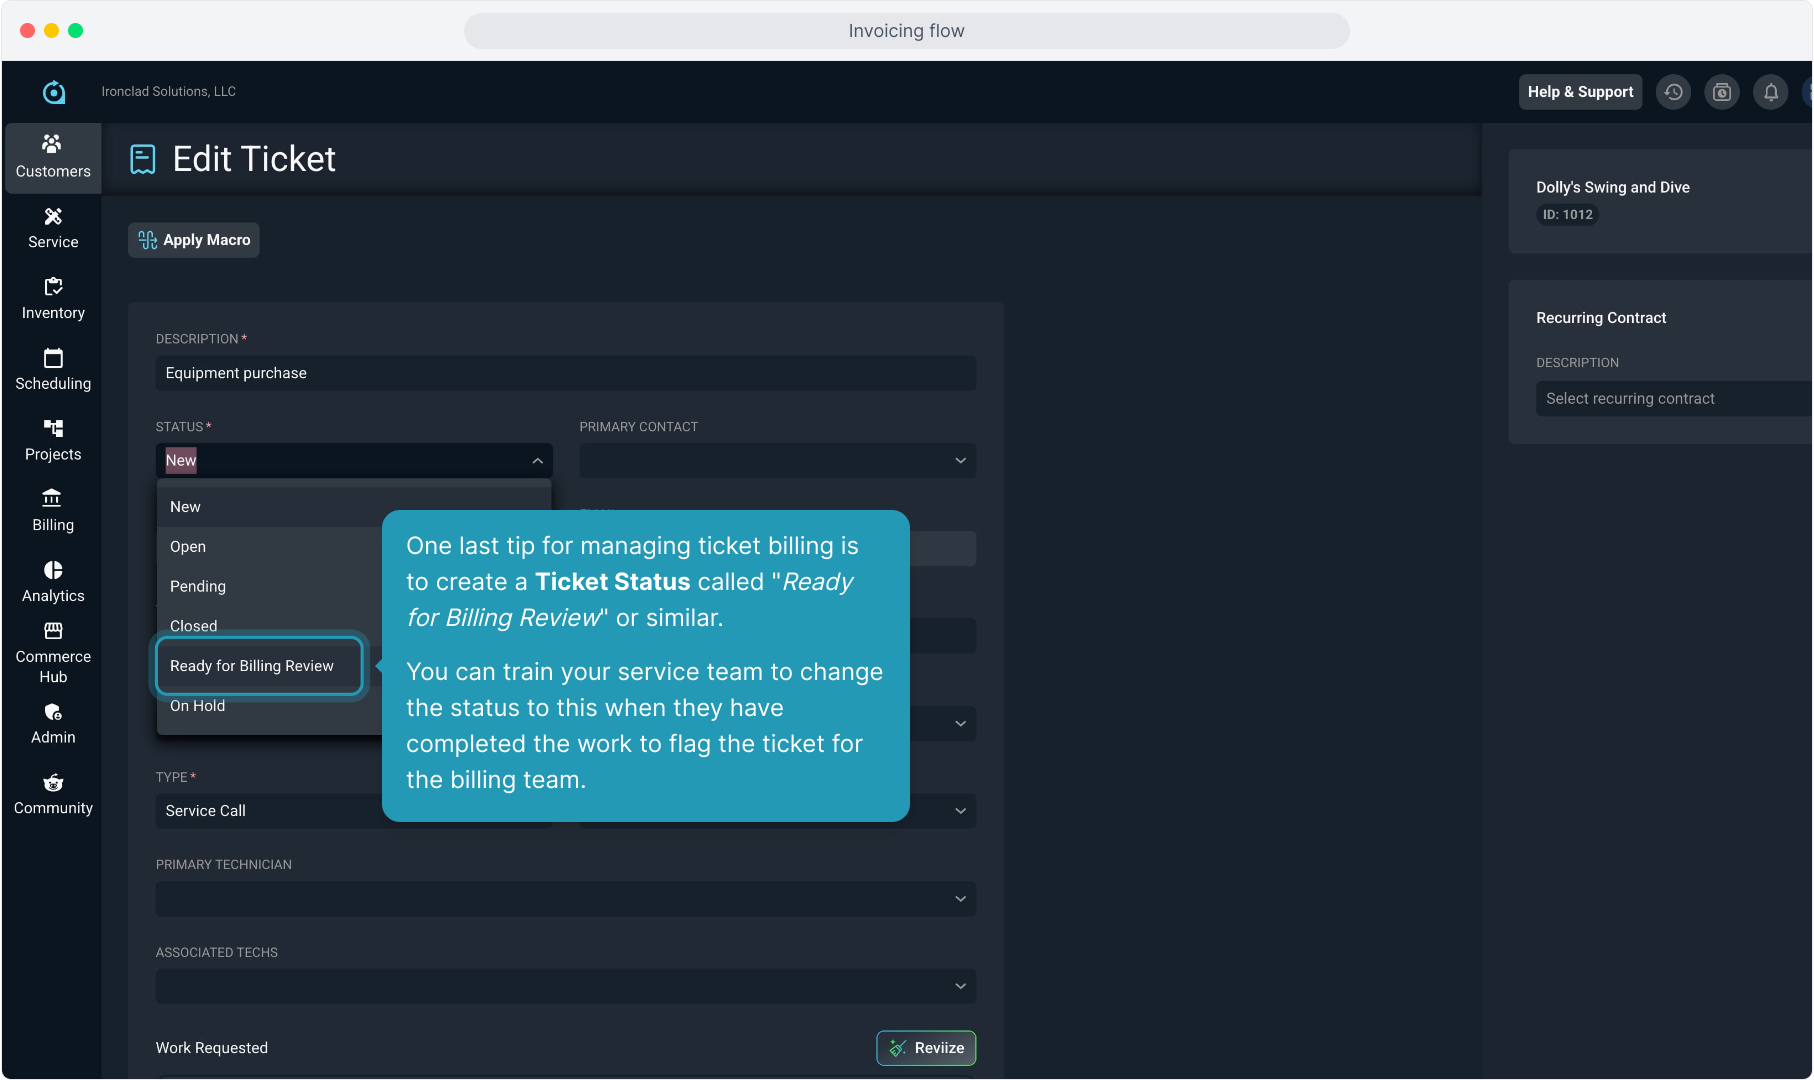
51. One last tip for managing ticket billing is to create a Ticket Status called "Ready for Billing Review" or similar.
You can train your service team to change the status to this when they have completed the work to flag the ticket for the billing team.
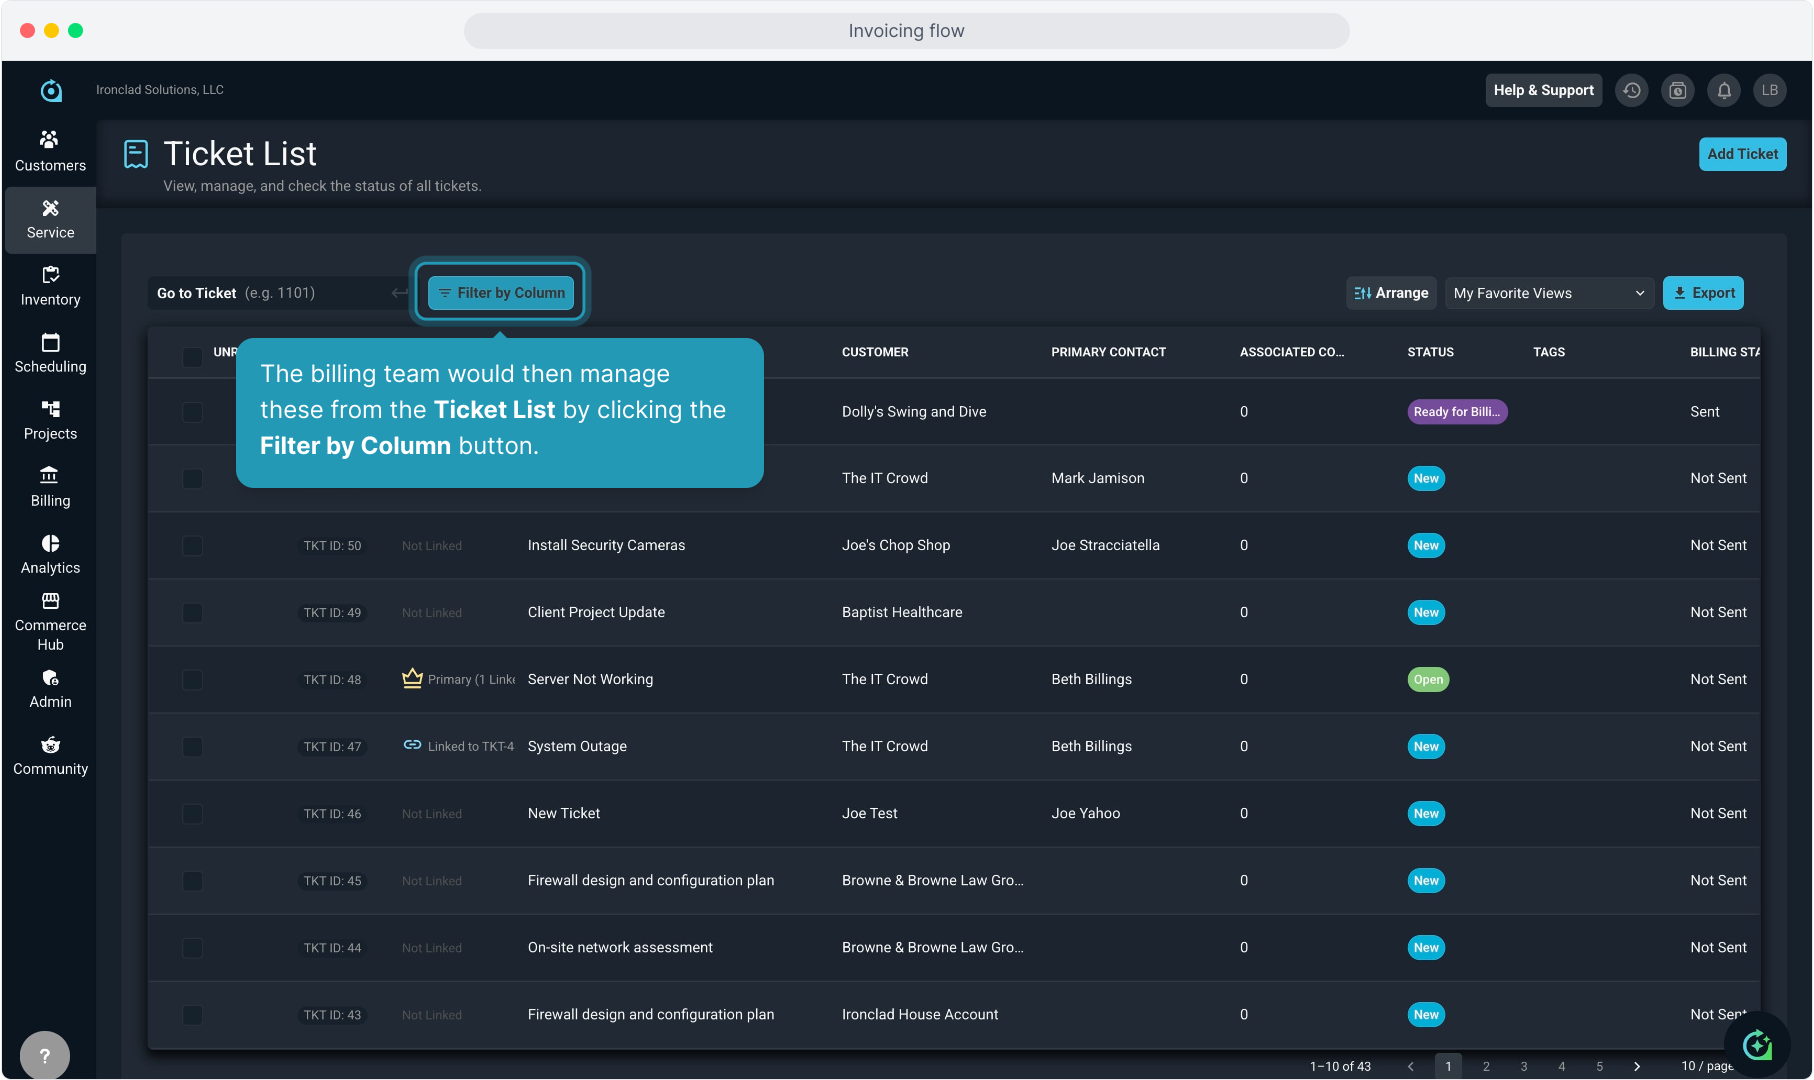
52. The billing team would then manage these from the Ticket List by clicking the Filter by Column button.
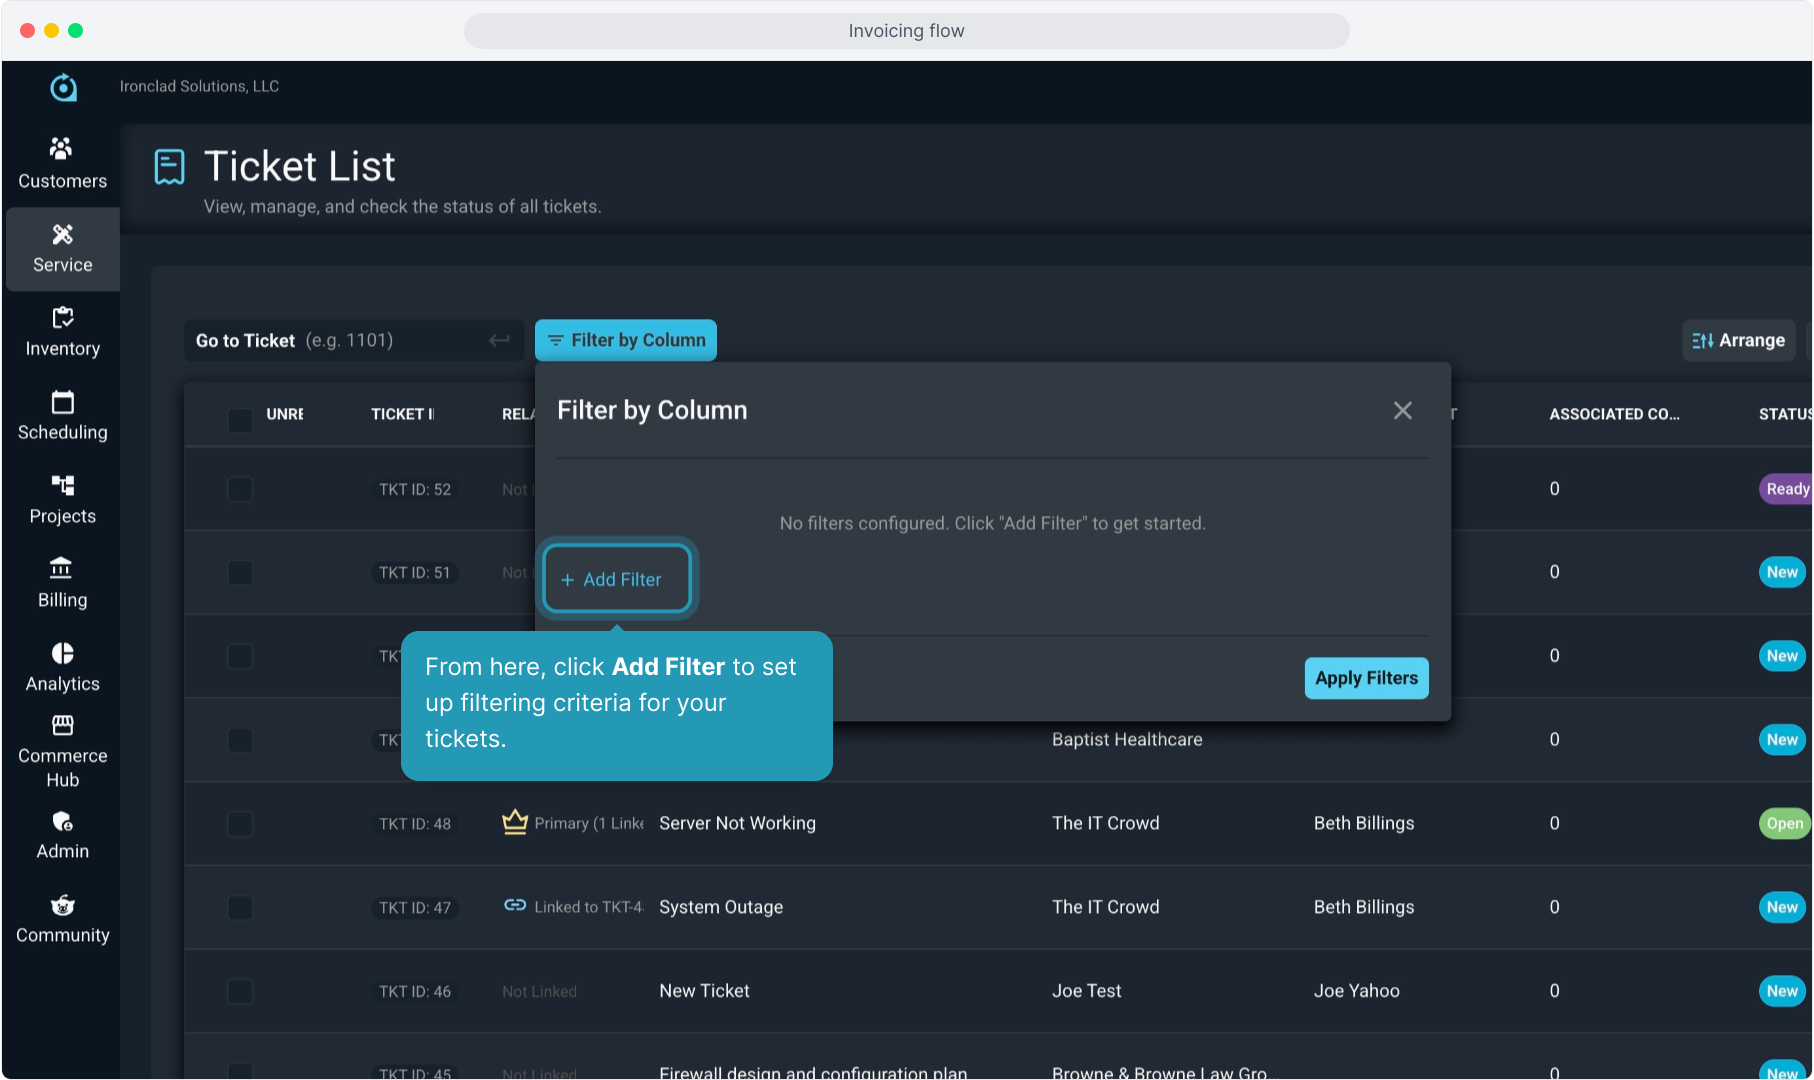
53. From here, click Add Filter to set up filtering criteria for your tickets.
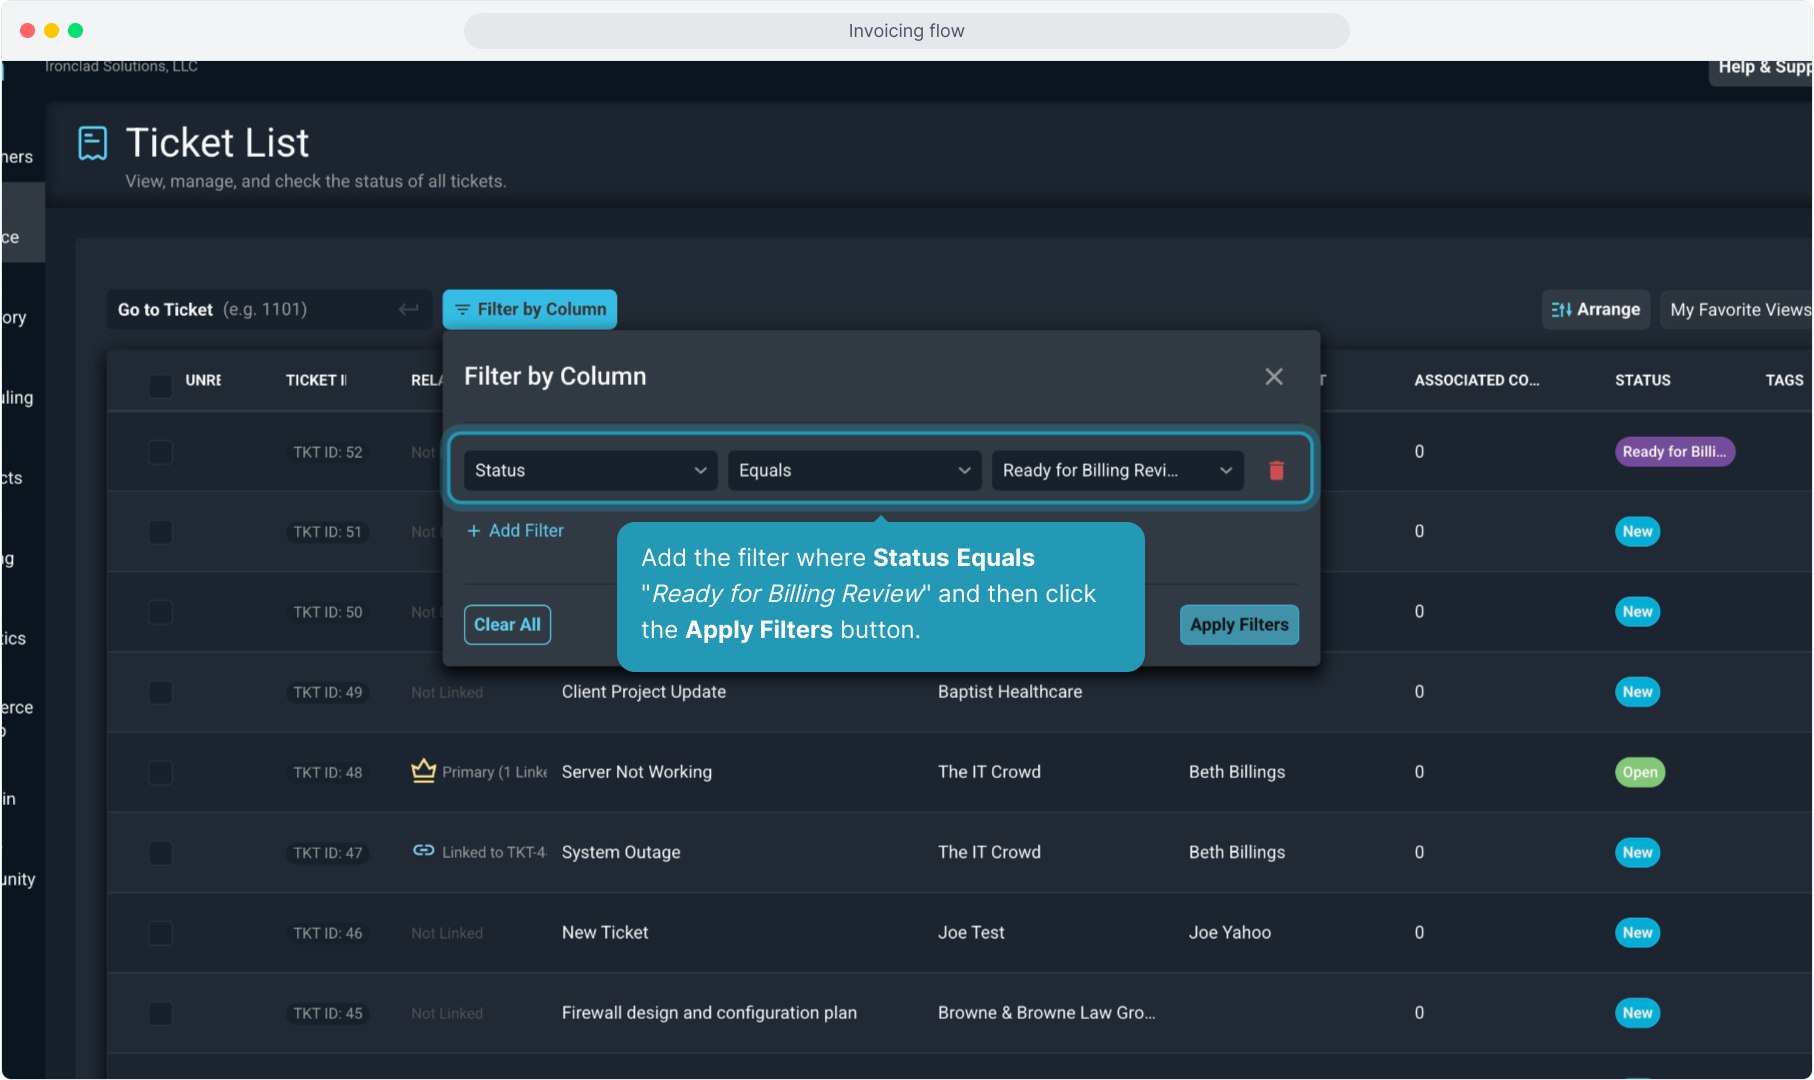
54. Add the filter where Status Equals "Ready for Billing Review" and then click the Apply Filters button.
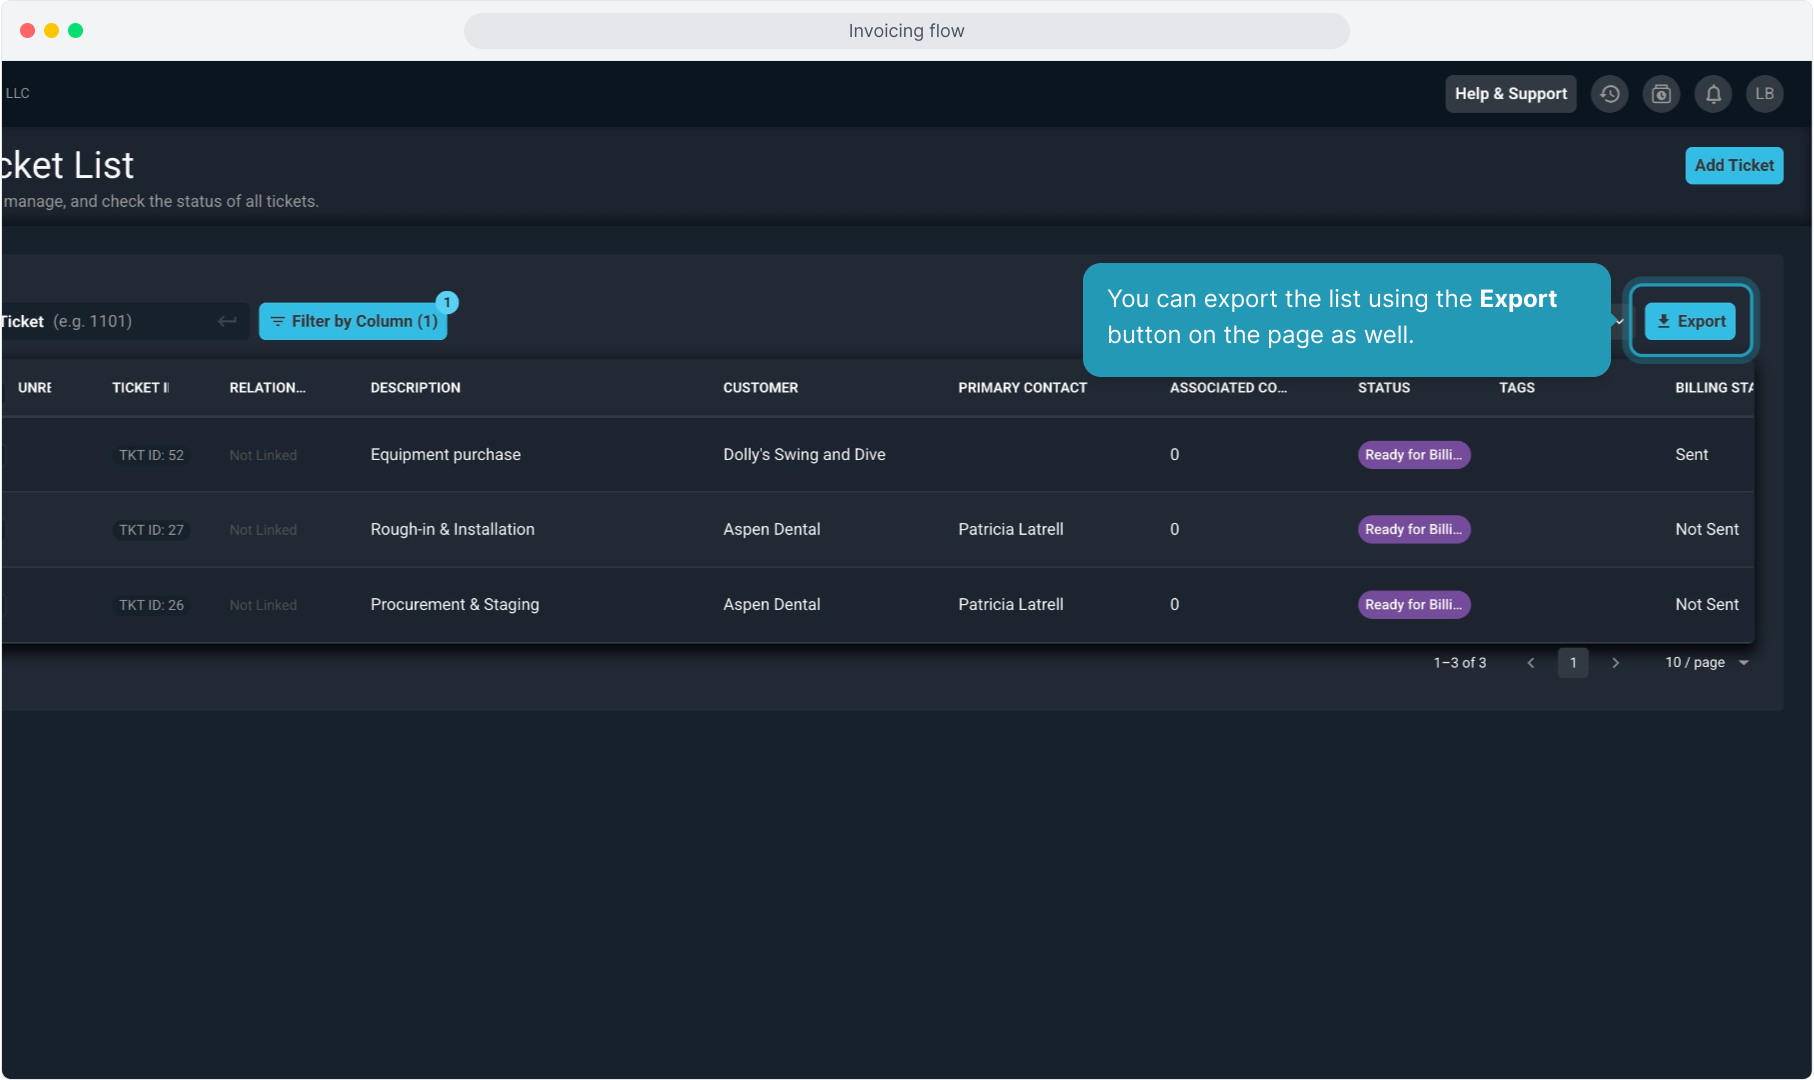
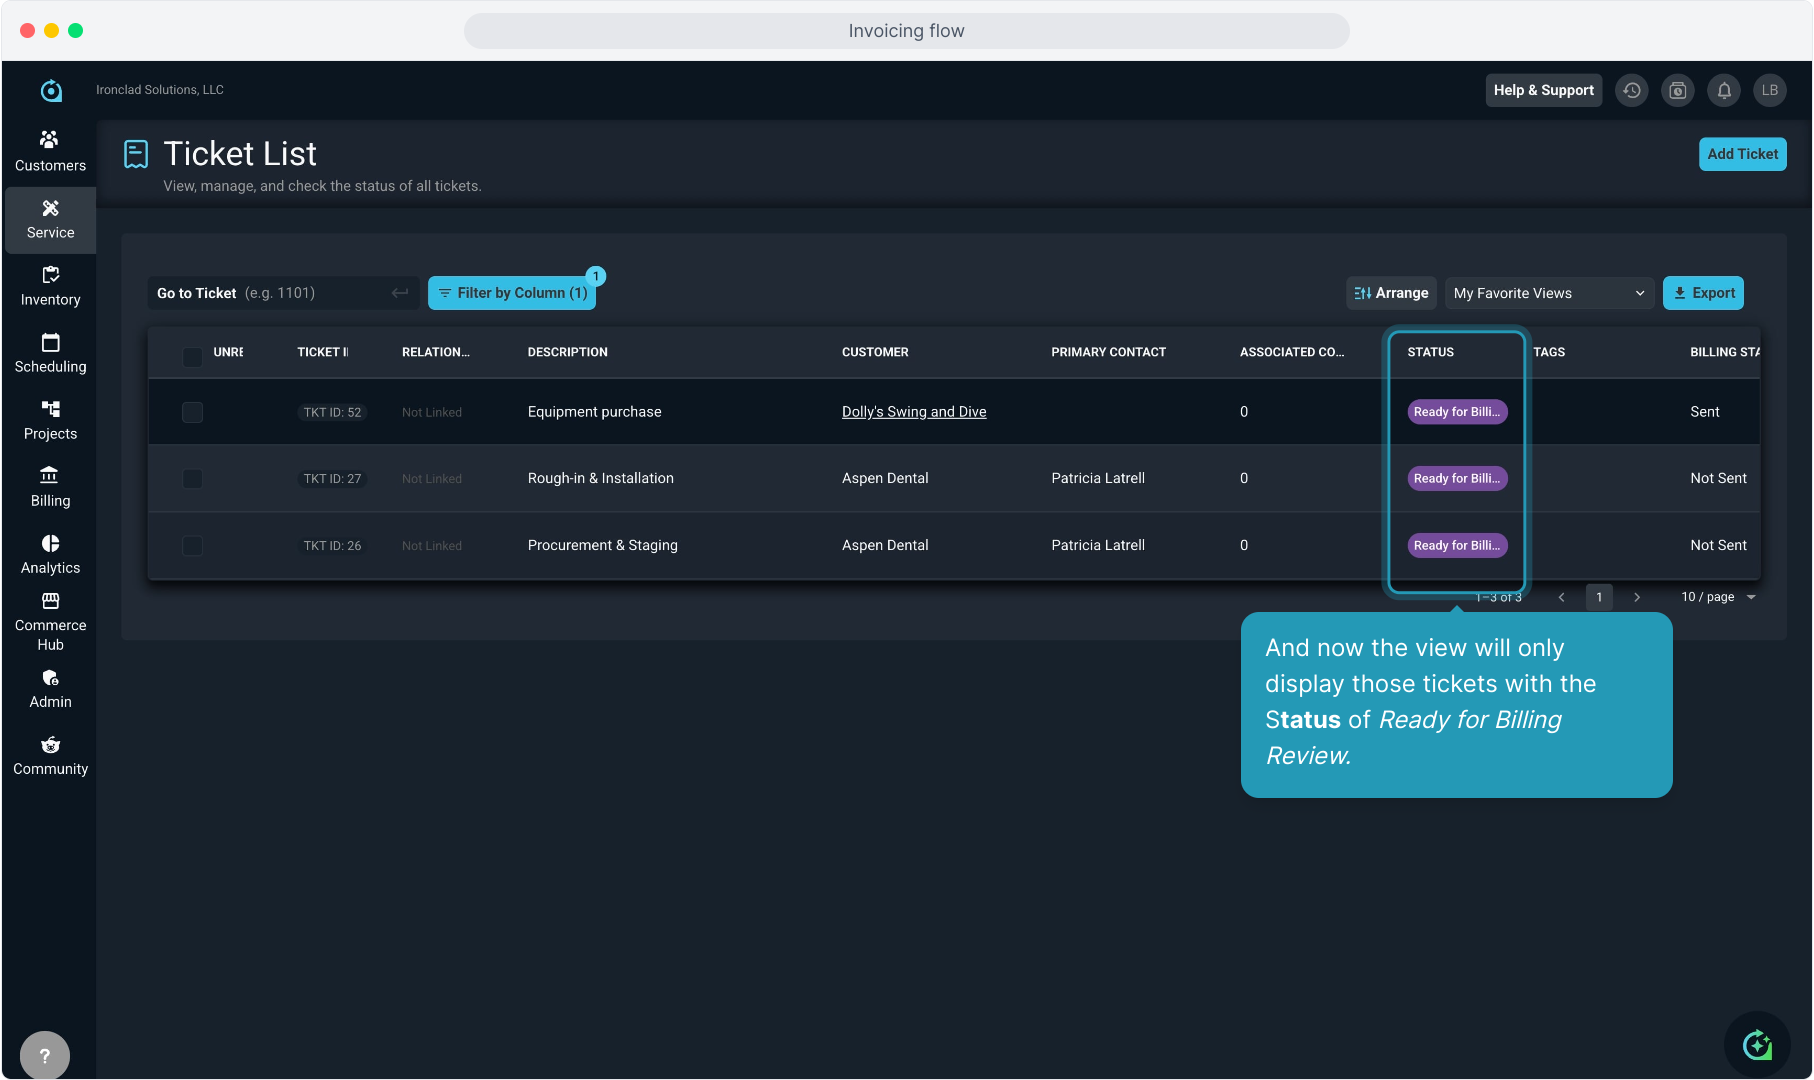
55. And now the view will only display those tickets with the Status of Ready for Billing Review.
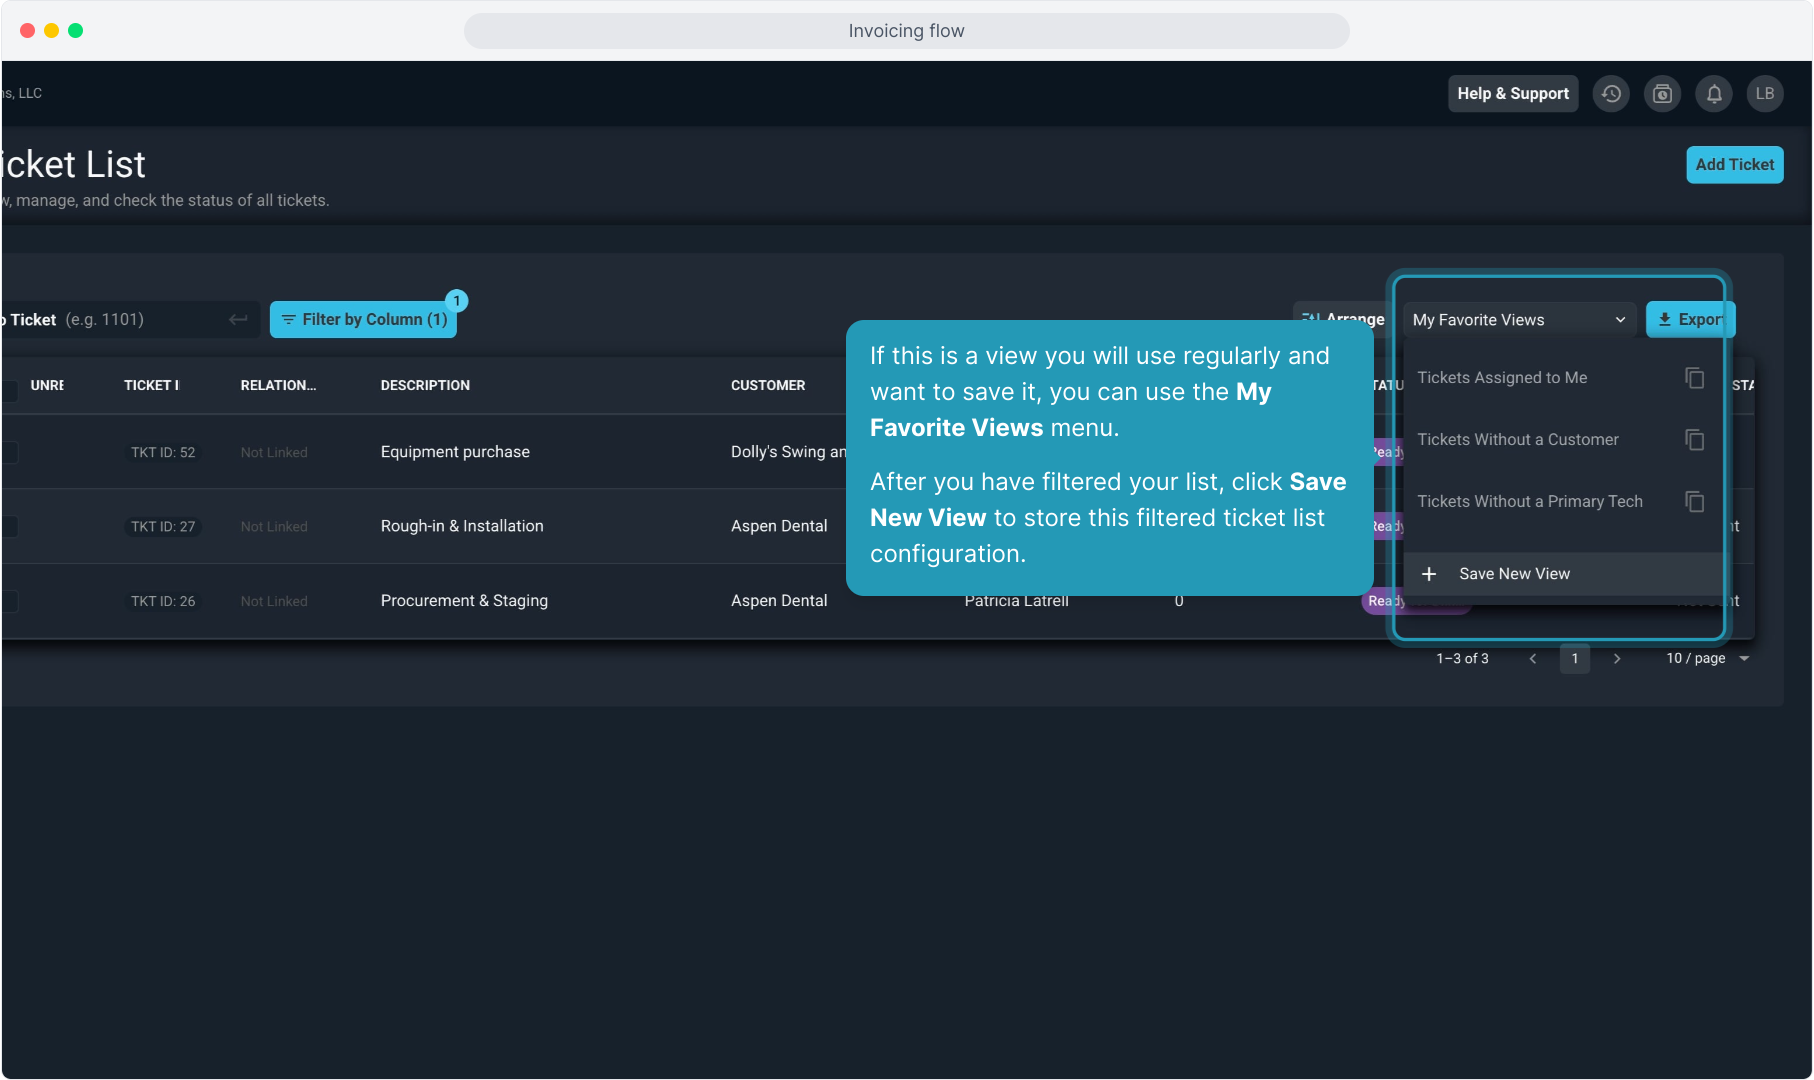
56. If this is a view you will use regularly and want to save it, you can use the My Favorite Views menu.
After you have filtered your list, click Save New View to store this filtered ticket list configuration.
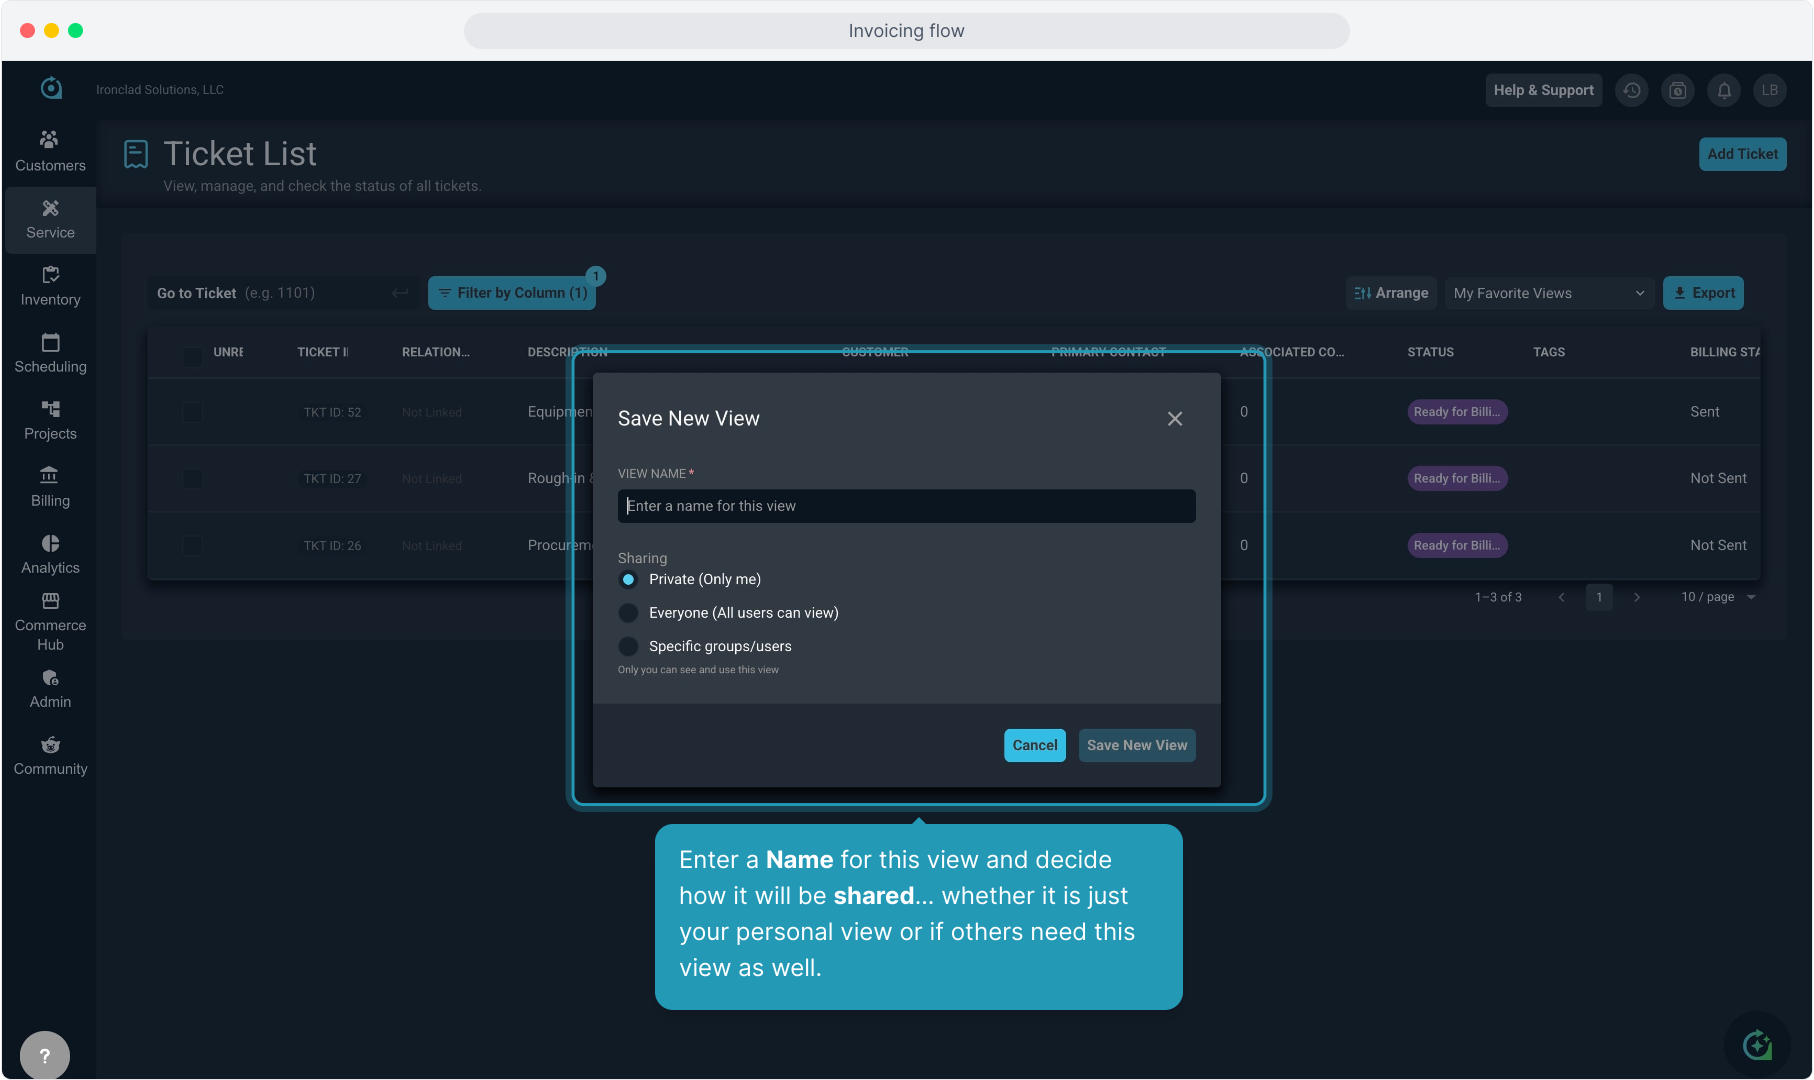
57. Enter a Name for this view and decide how it will be shared... whether it is just your personal view or if others need this view as well.
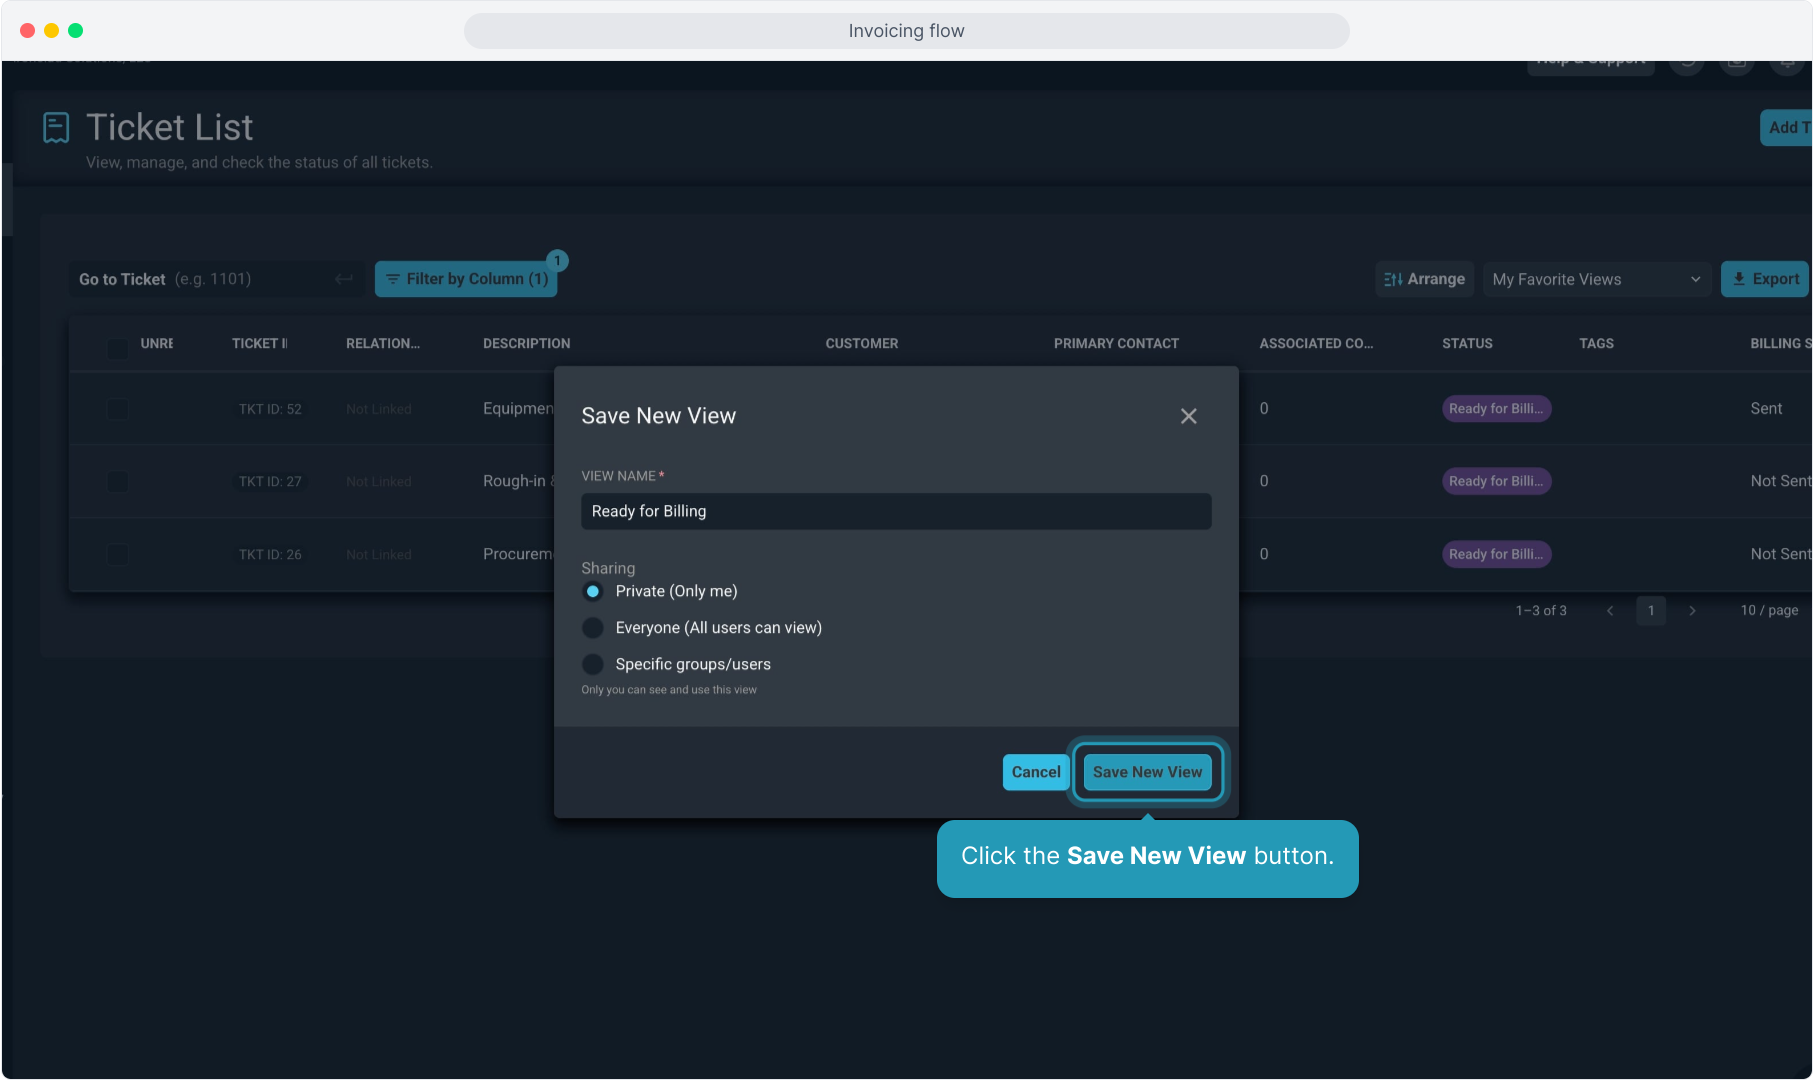
58. Click the Save New View button.
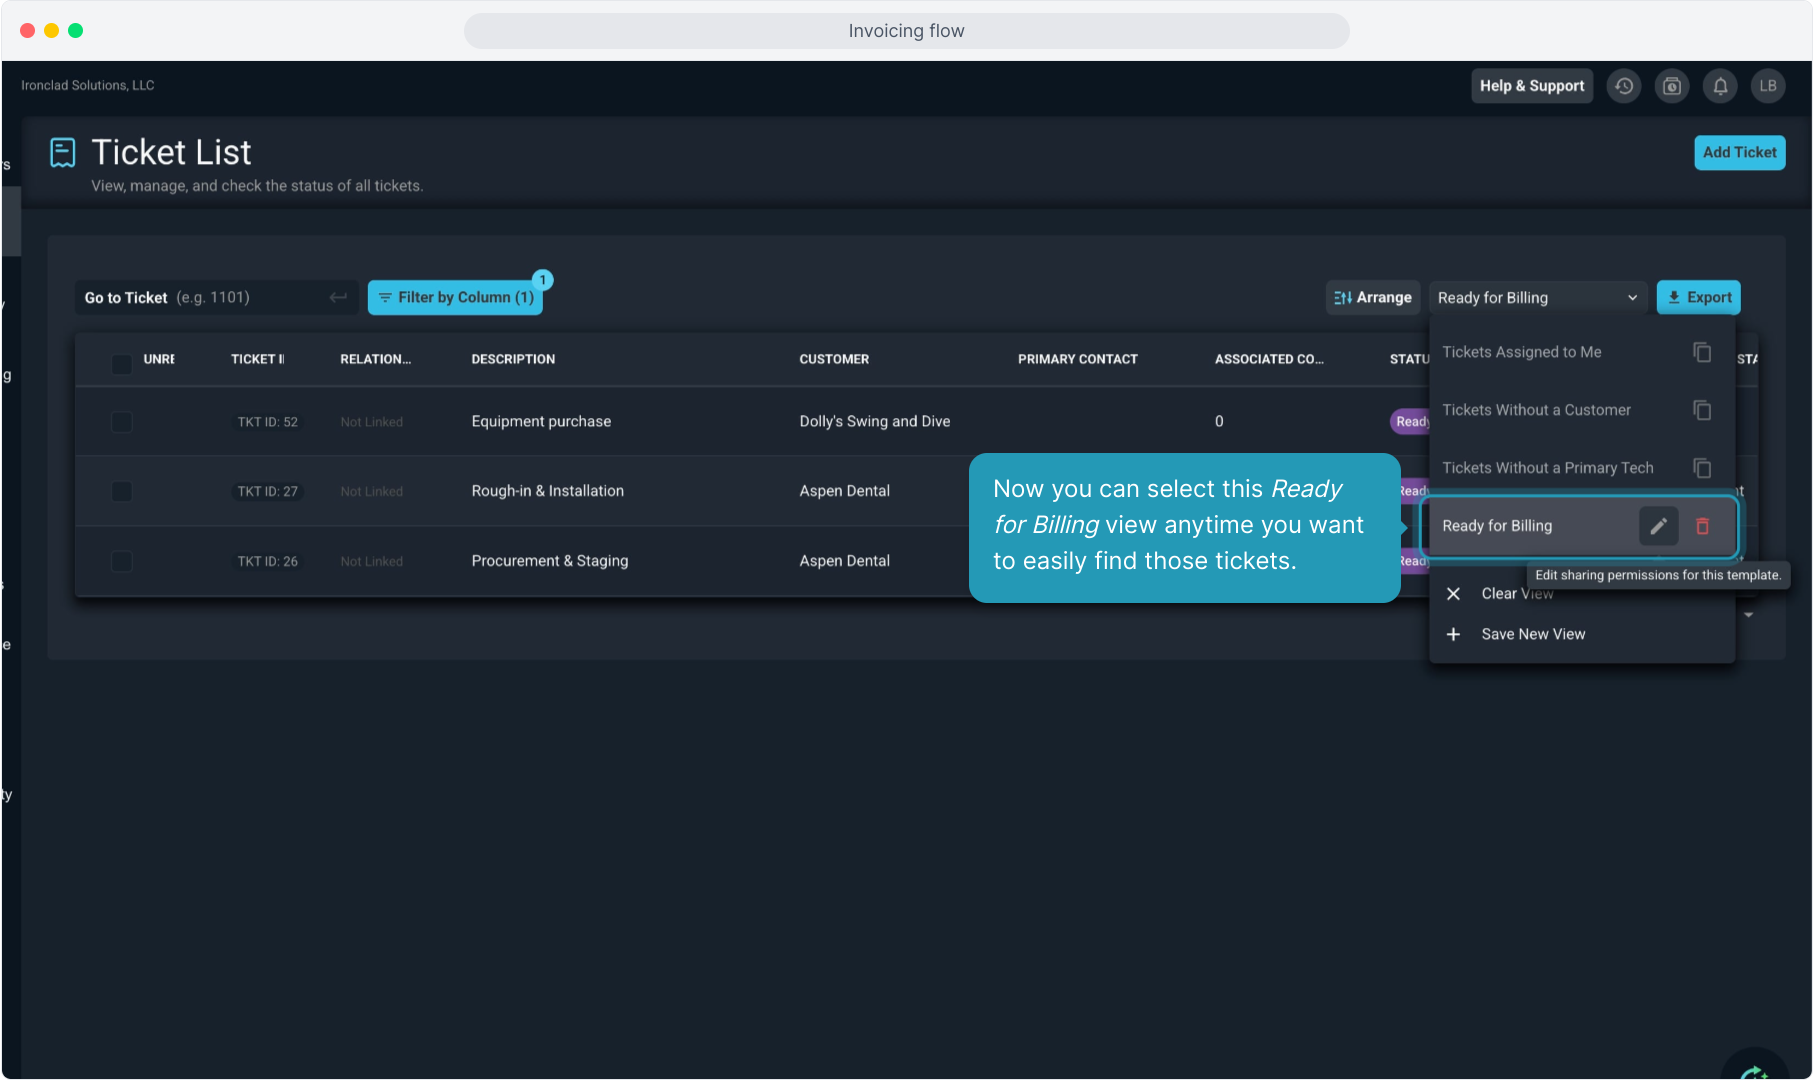
59. Now you can select this Ready for Billing view anytime you want to easily find those tickets.
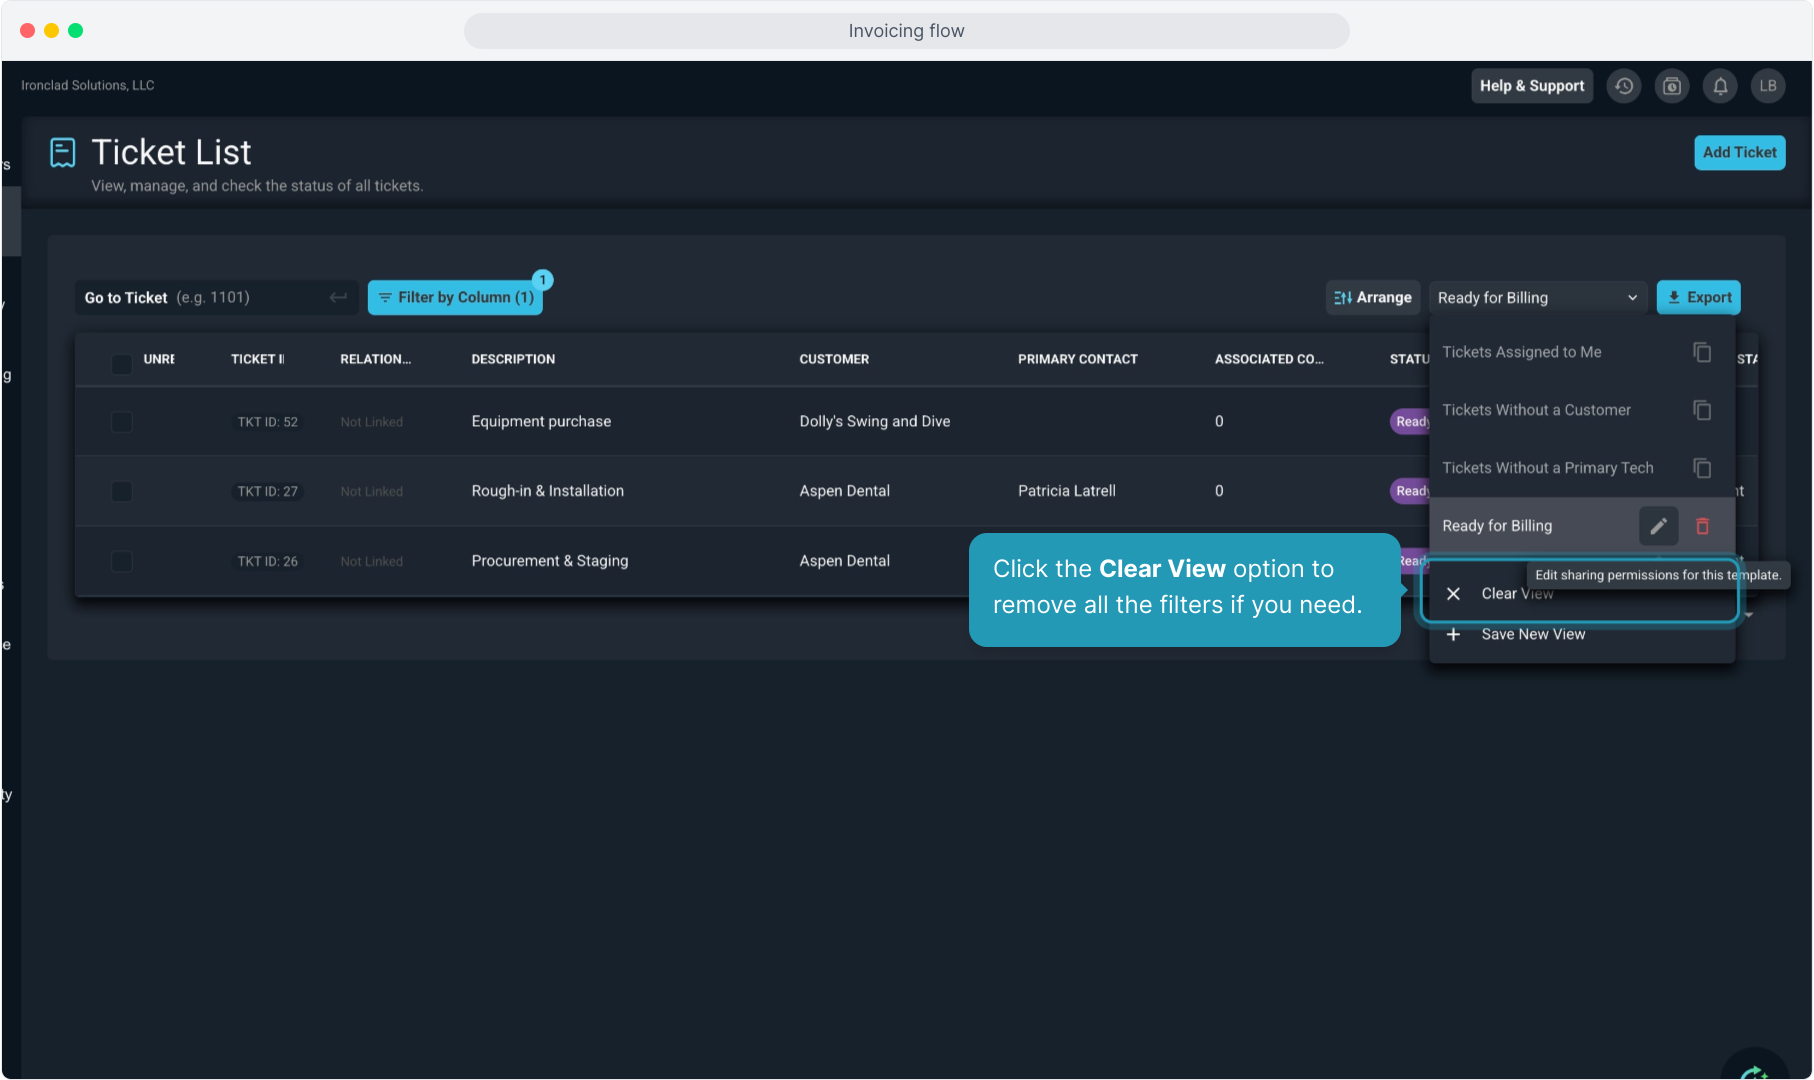
60. Click the Clear View option to remove all the filters if you need.
61. And remember you can always see if a saved view is applied here.
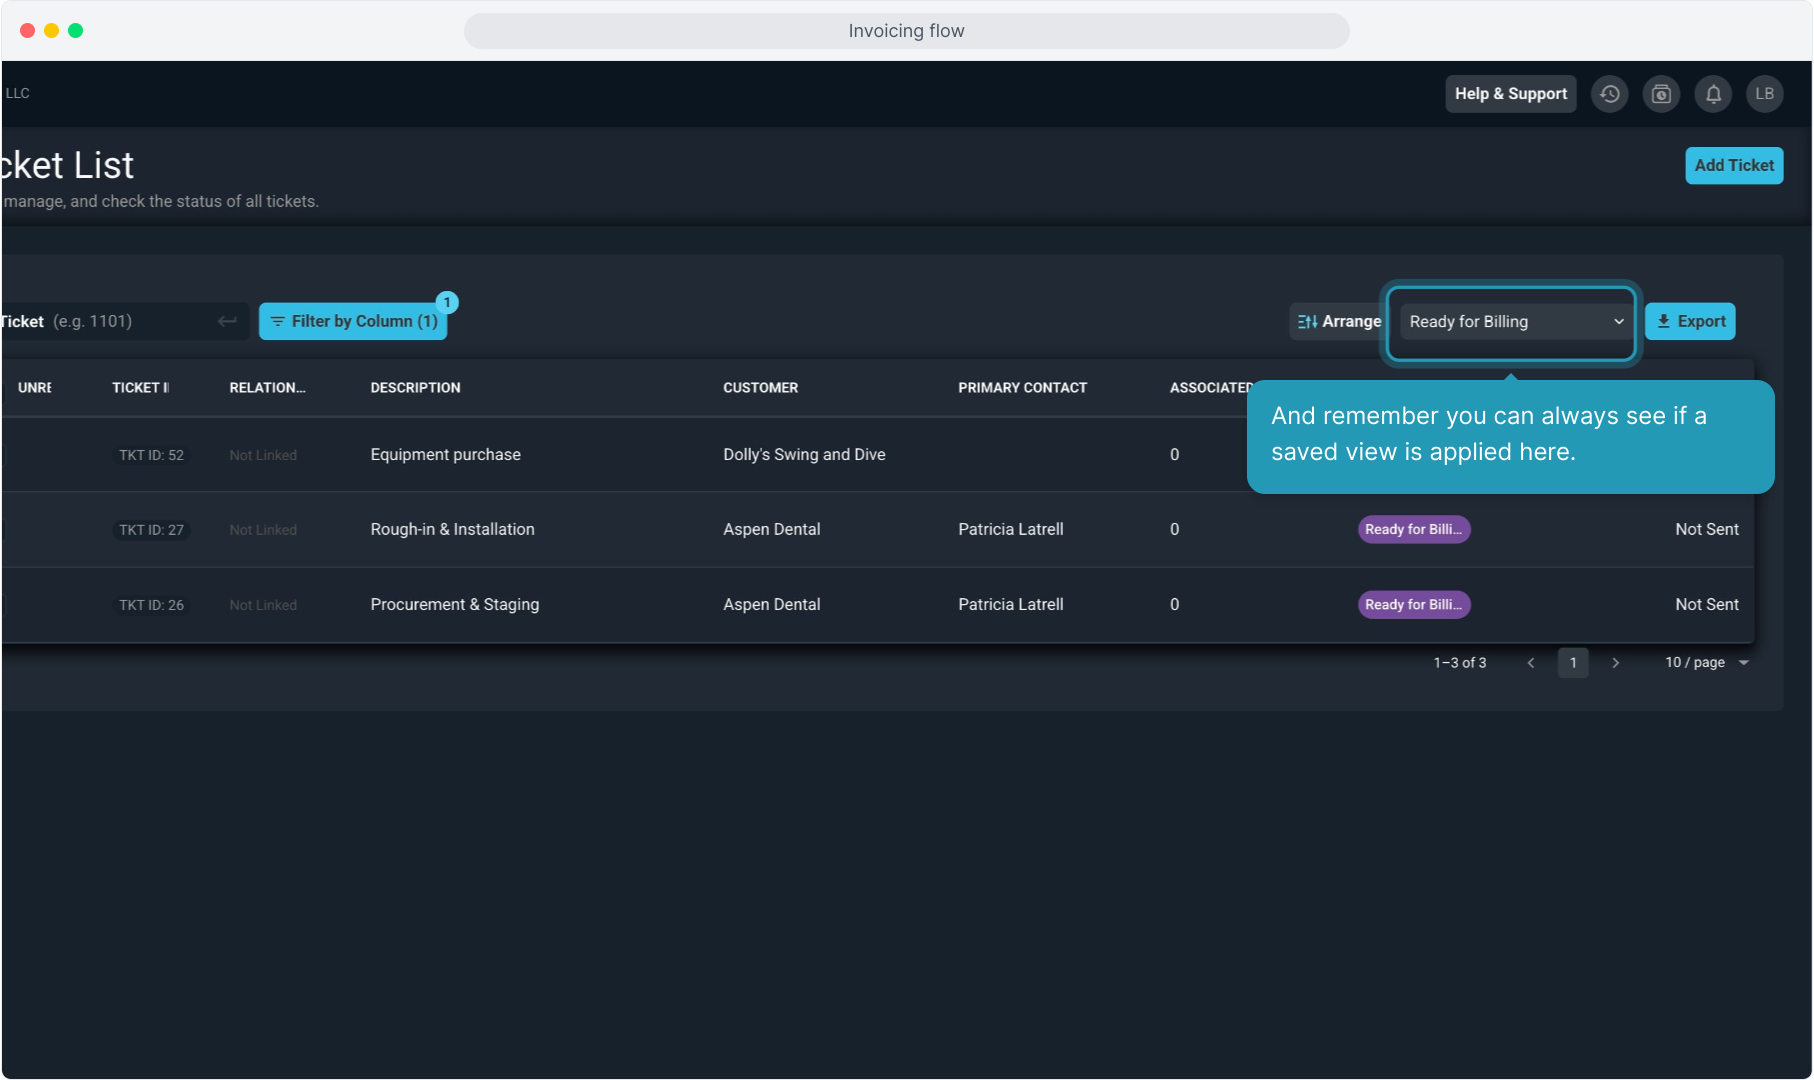
62. You can export the list using the Export button on the page as well.