How To Guide: Inventory Management - Configuration
1. Introduction
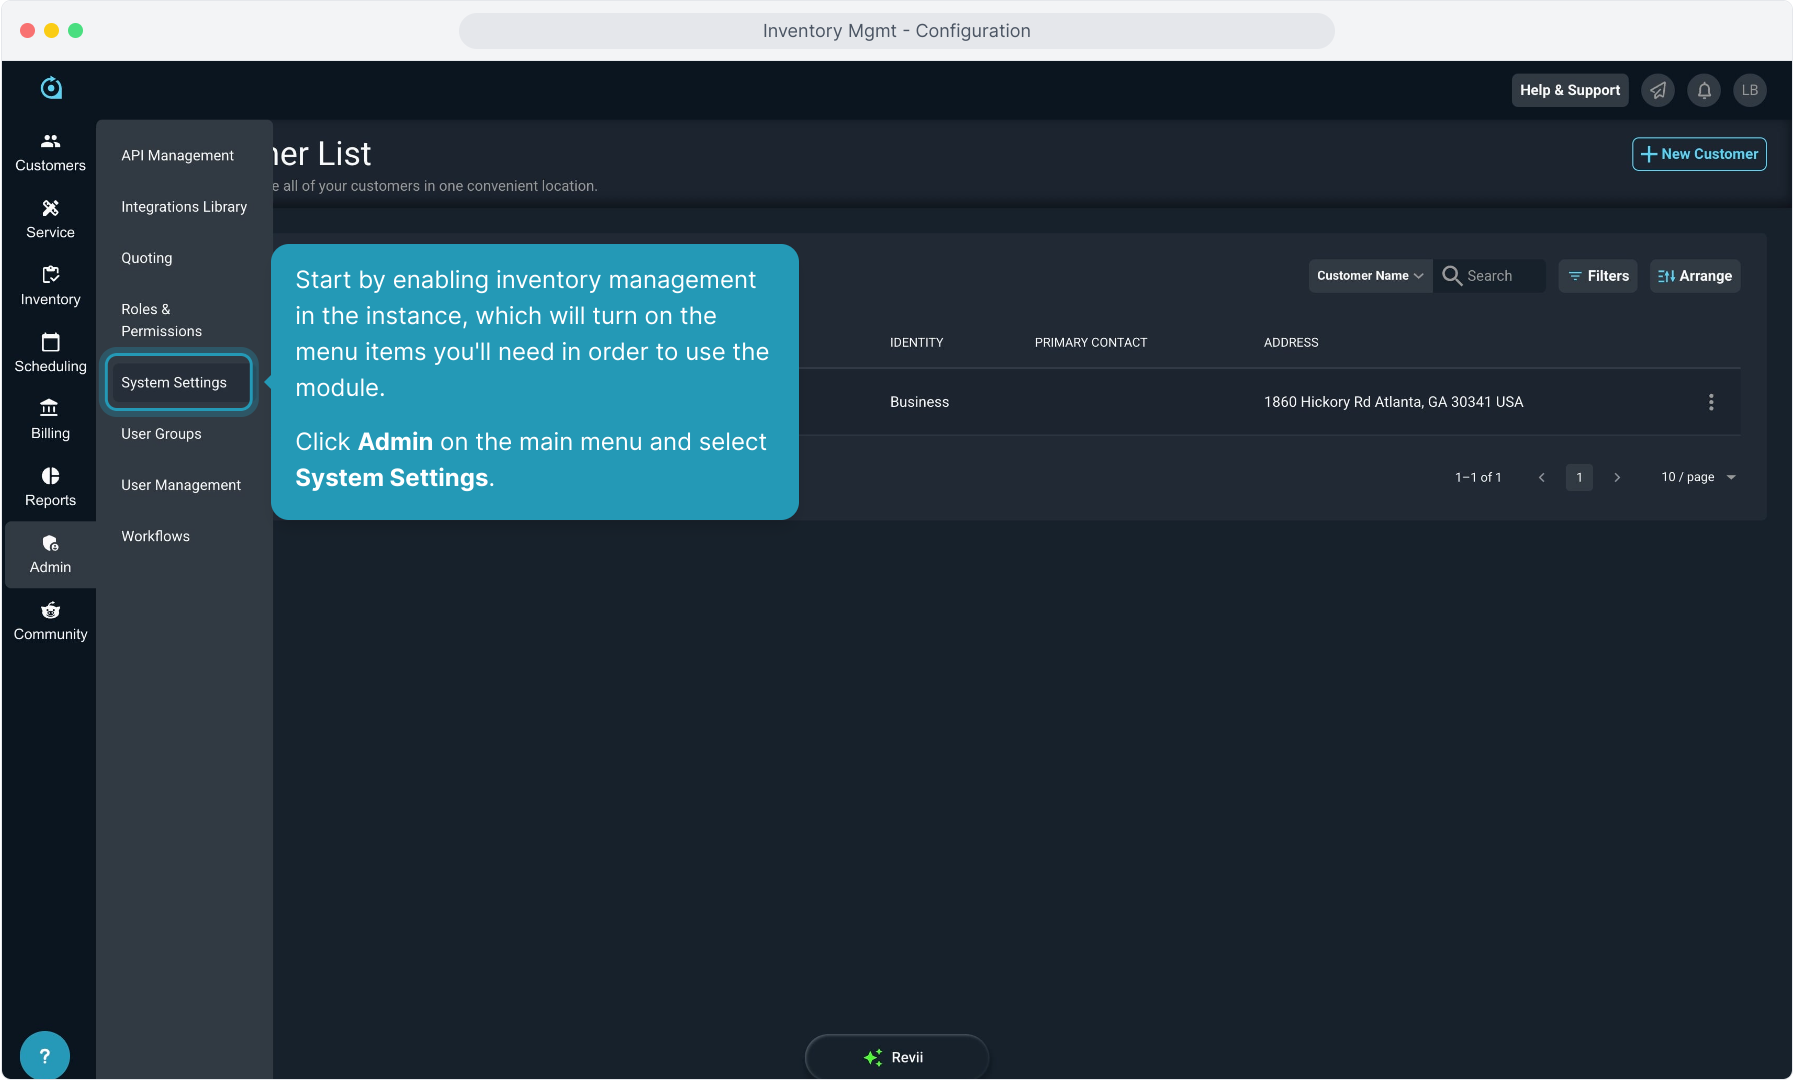
2. Start by enabling inventory management in the instance, which will turn on the menu items you'll need in order to use the module. This will require Admin level permission.
Click Admin on the main menu and select System Settings.
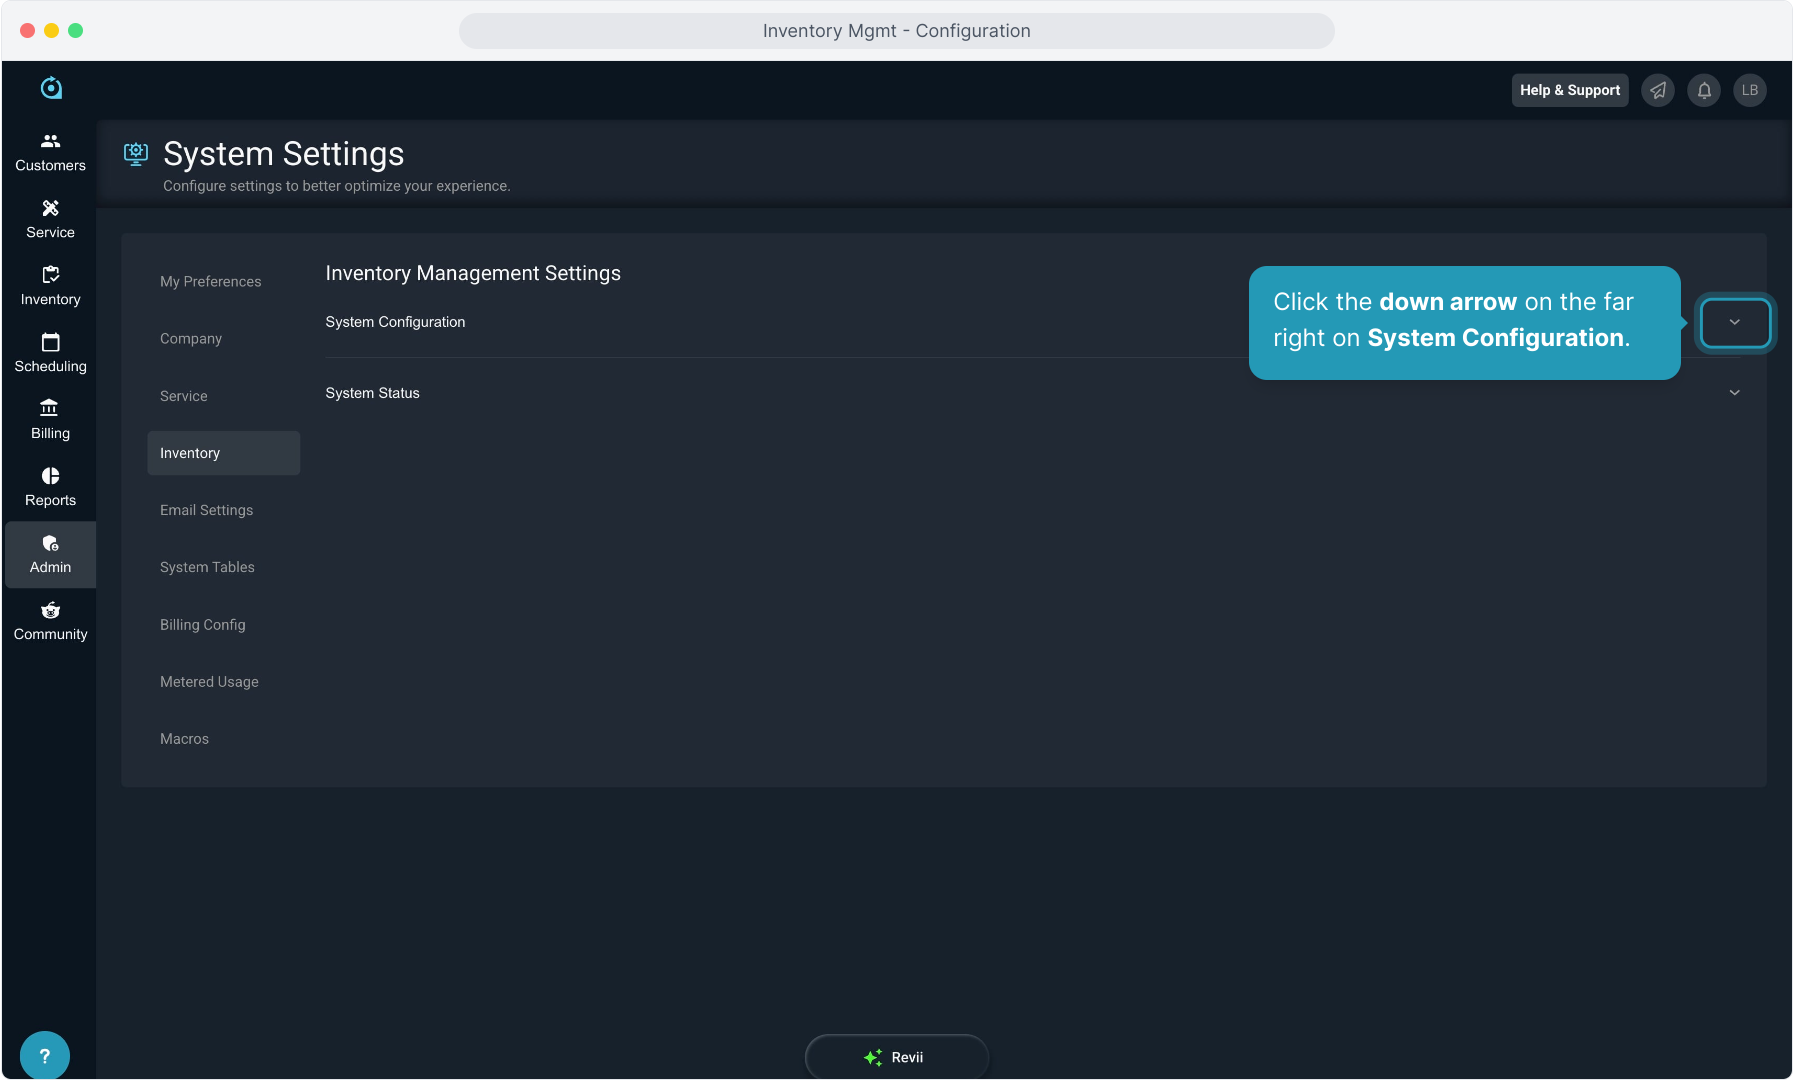
3. Select Inventory.
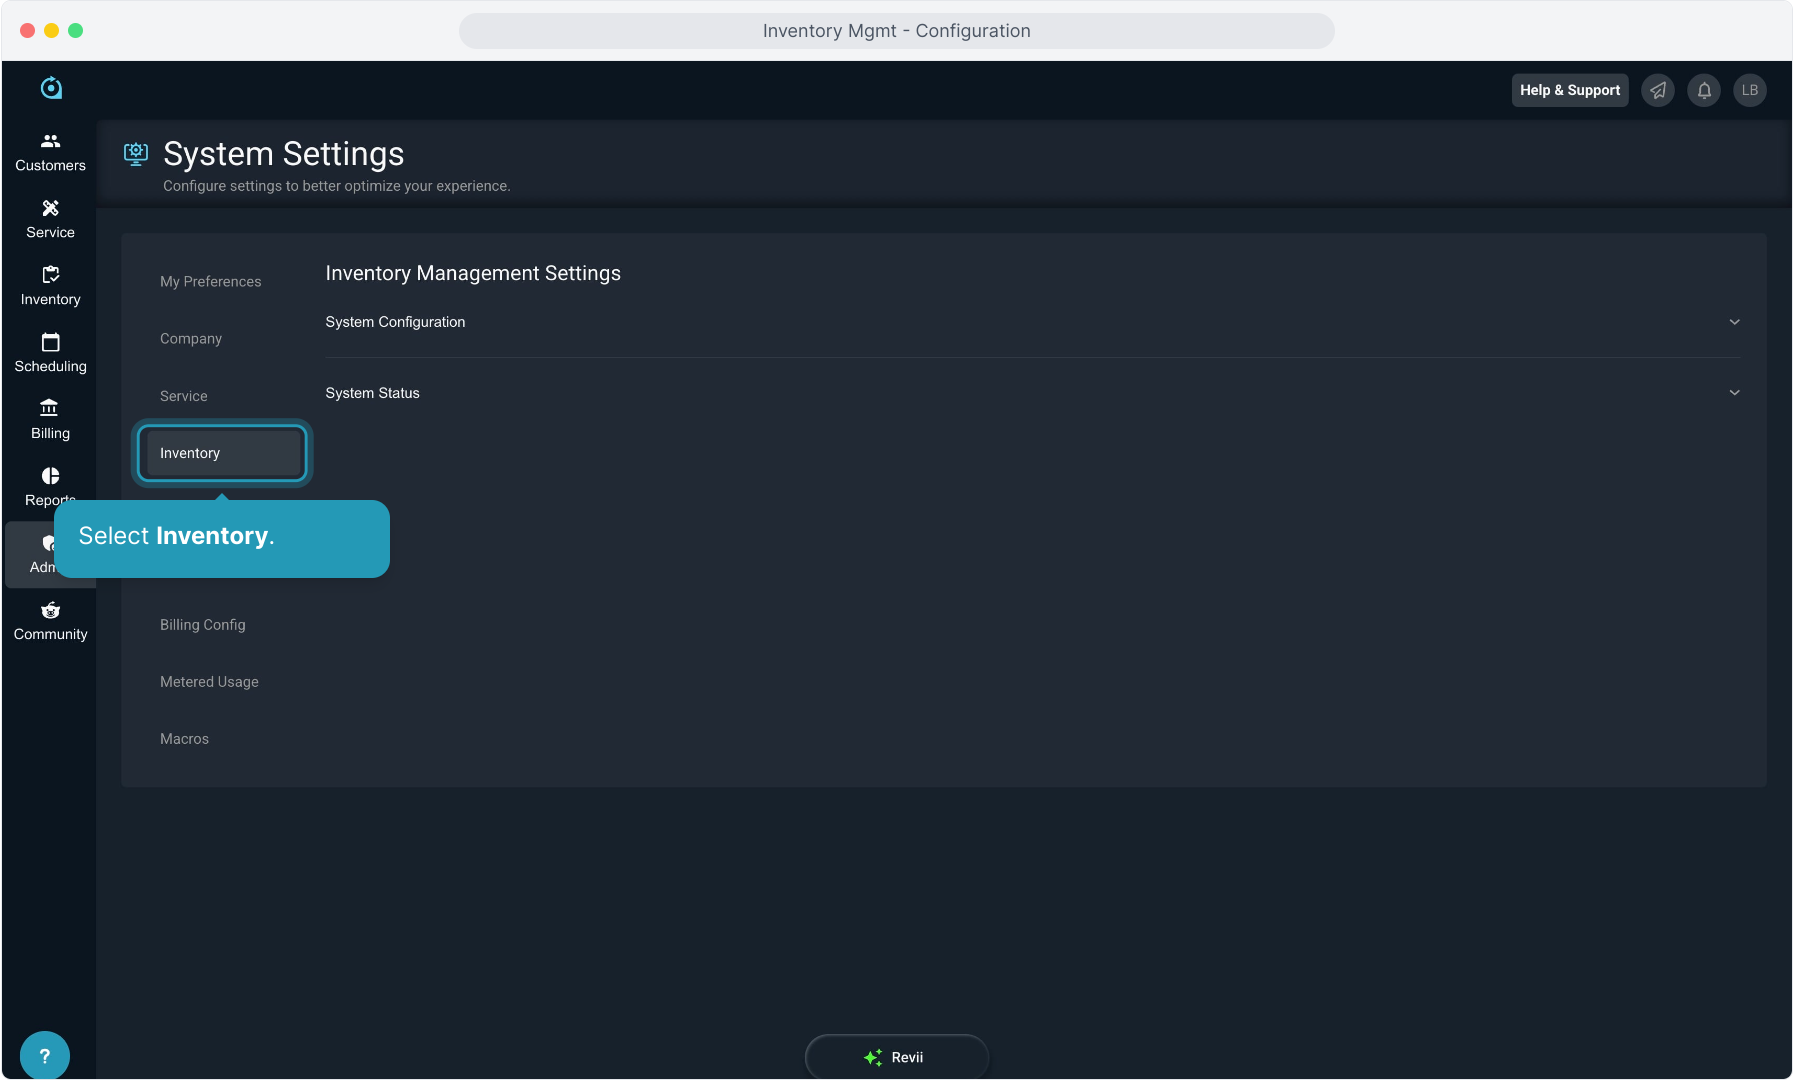
4. Click the down arrow on the far right on System Configuration.
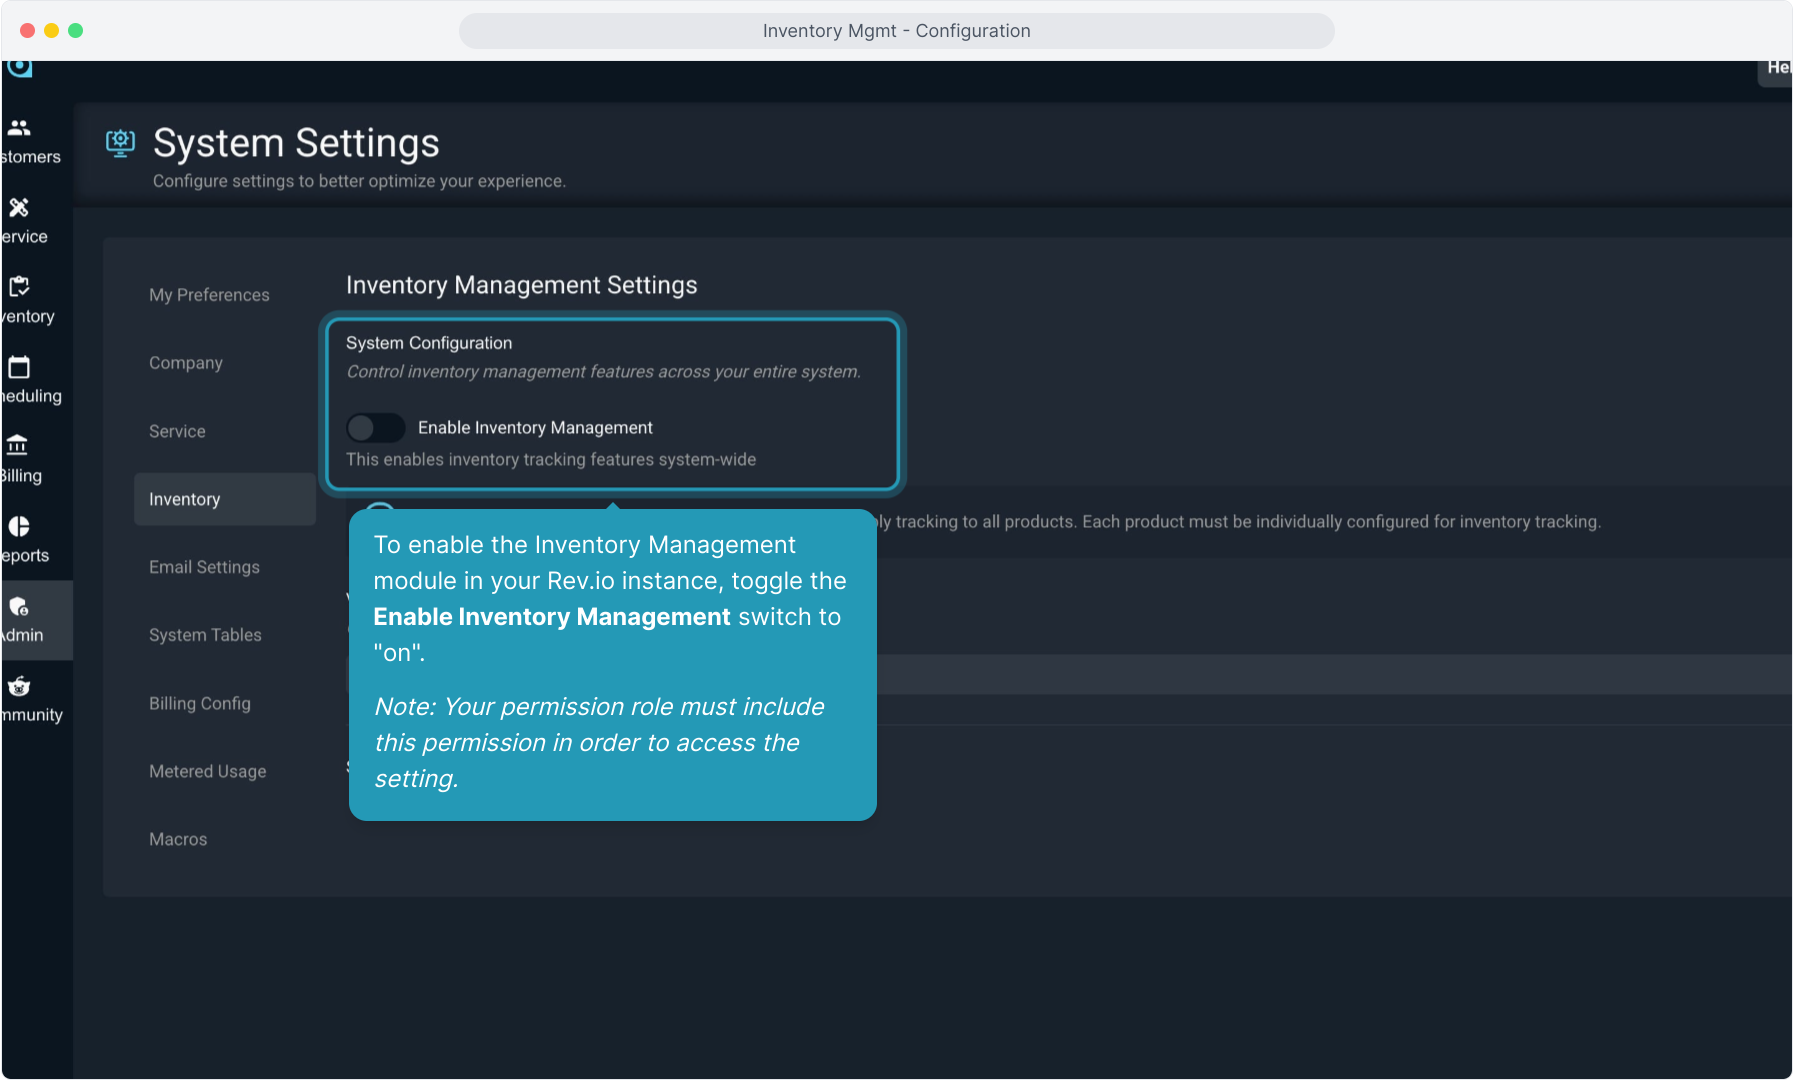
5. To enable the Inventory Management module in your Rev.io instance, toggle the Enable Inventory Management switch to "on".
Note: Your permission role must include this permission in order to access the setting.
6. Enabling inventory management does not automatically track all products. Later in this video we will show you how to enable tracking on your products.
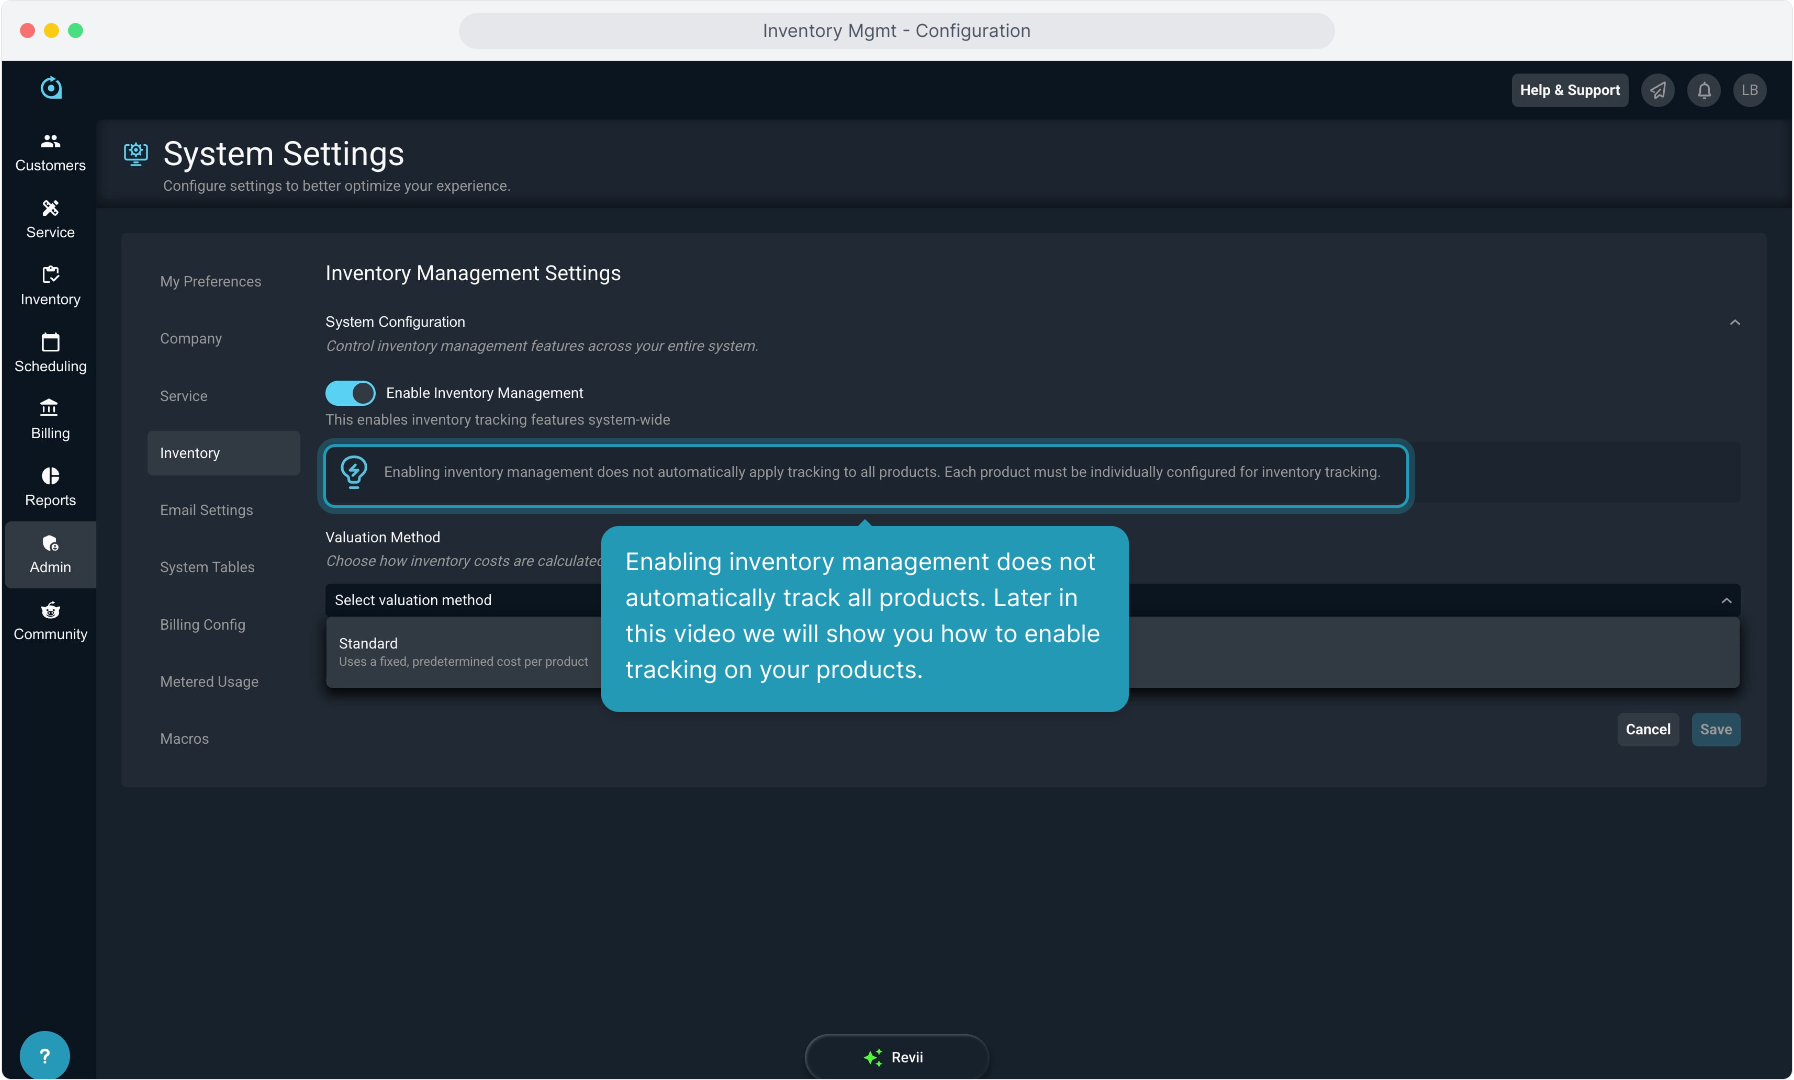
7. You must select the Valuation Method next. Currently, we support Standard as the only option, but more options will be released shortly.

8. Once you have enabled and set the valuation method, click the Save button.

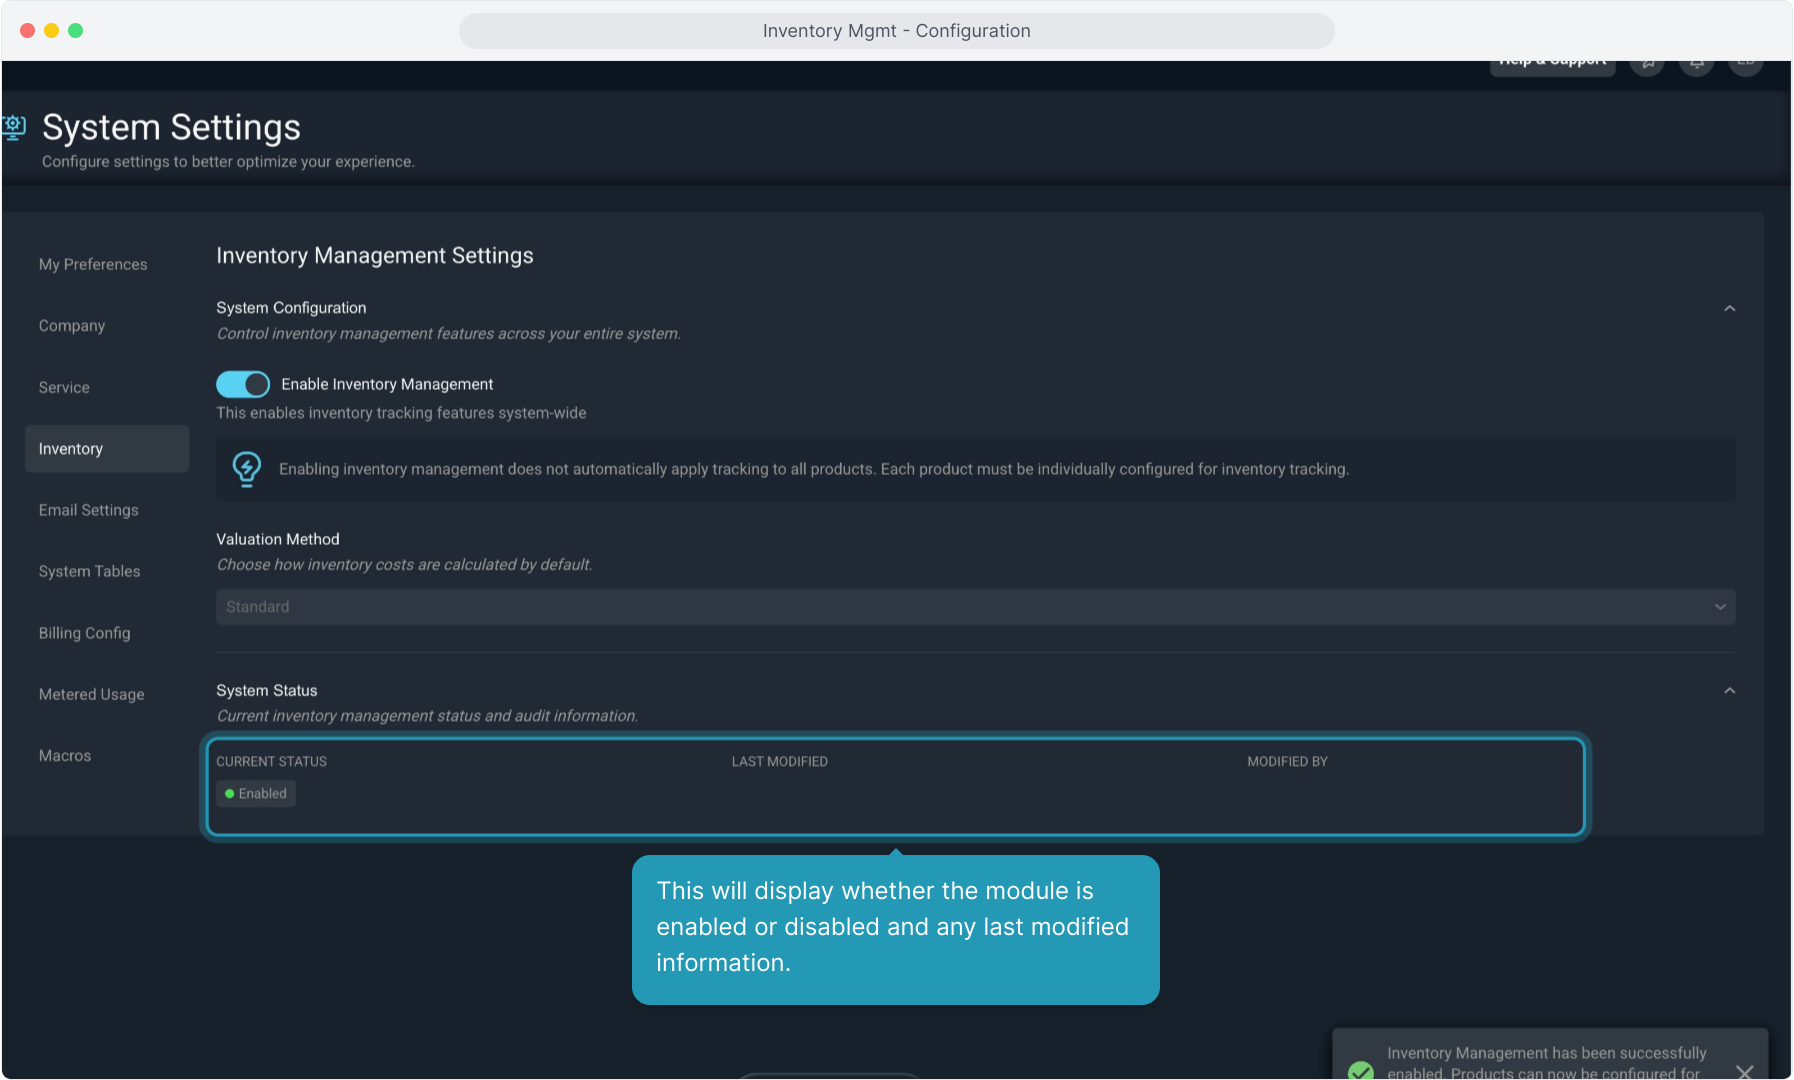
9. You can view the System Status of your inventory management module by clicking the down arrow on the right.
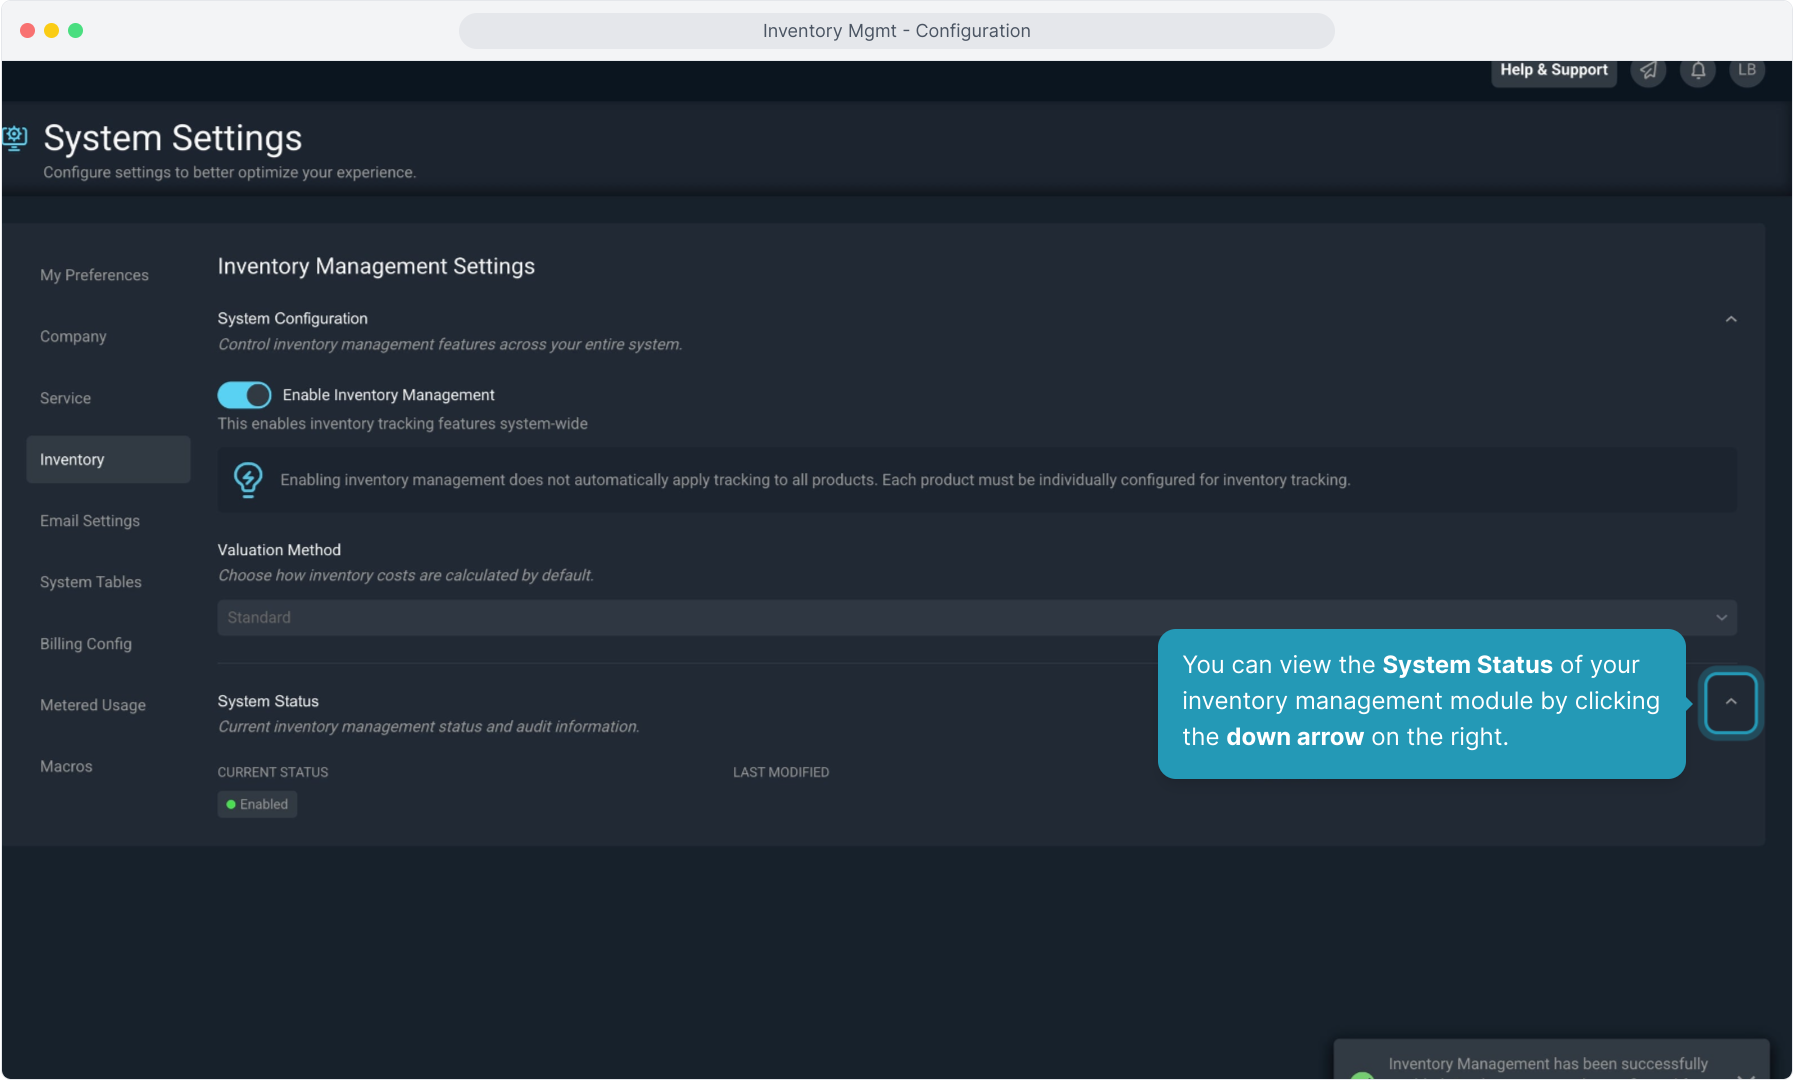
10. This will display whether the module is enabled or disabled and any last modified information.
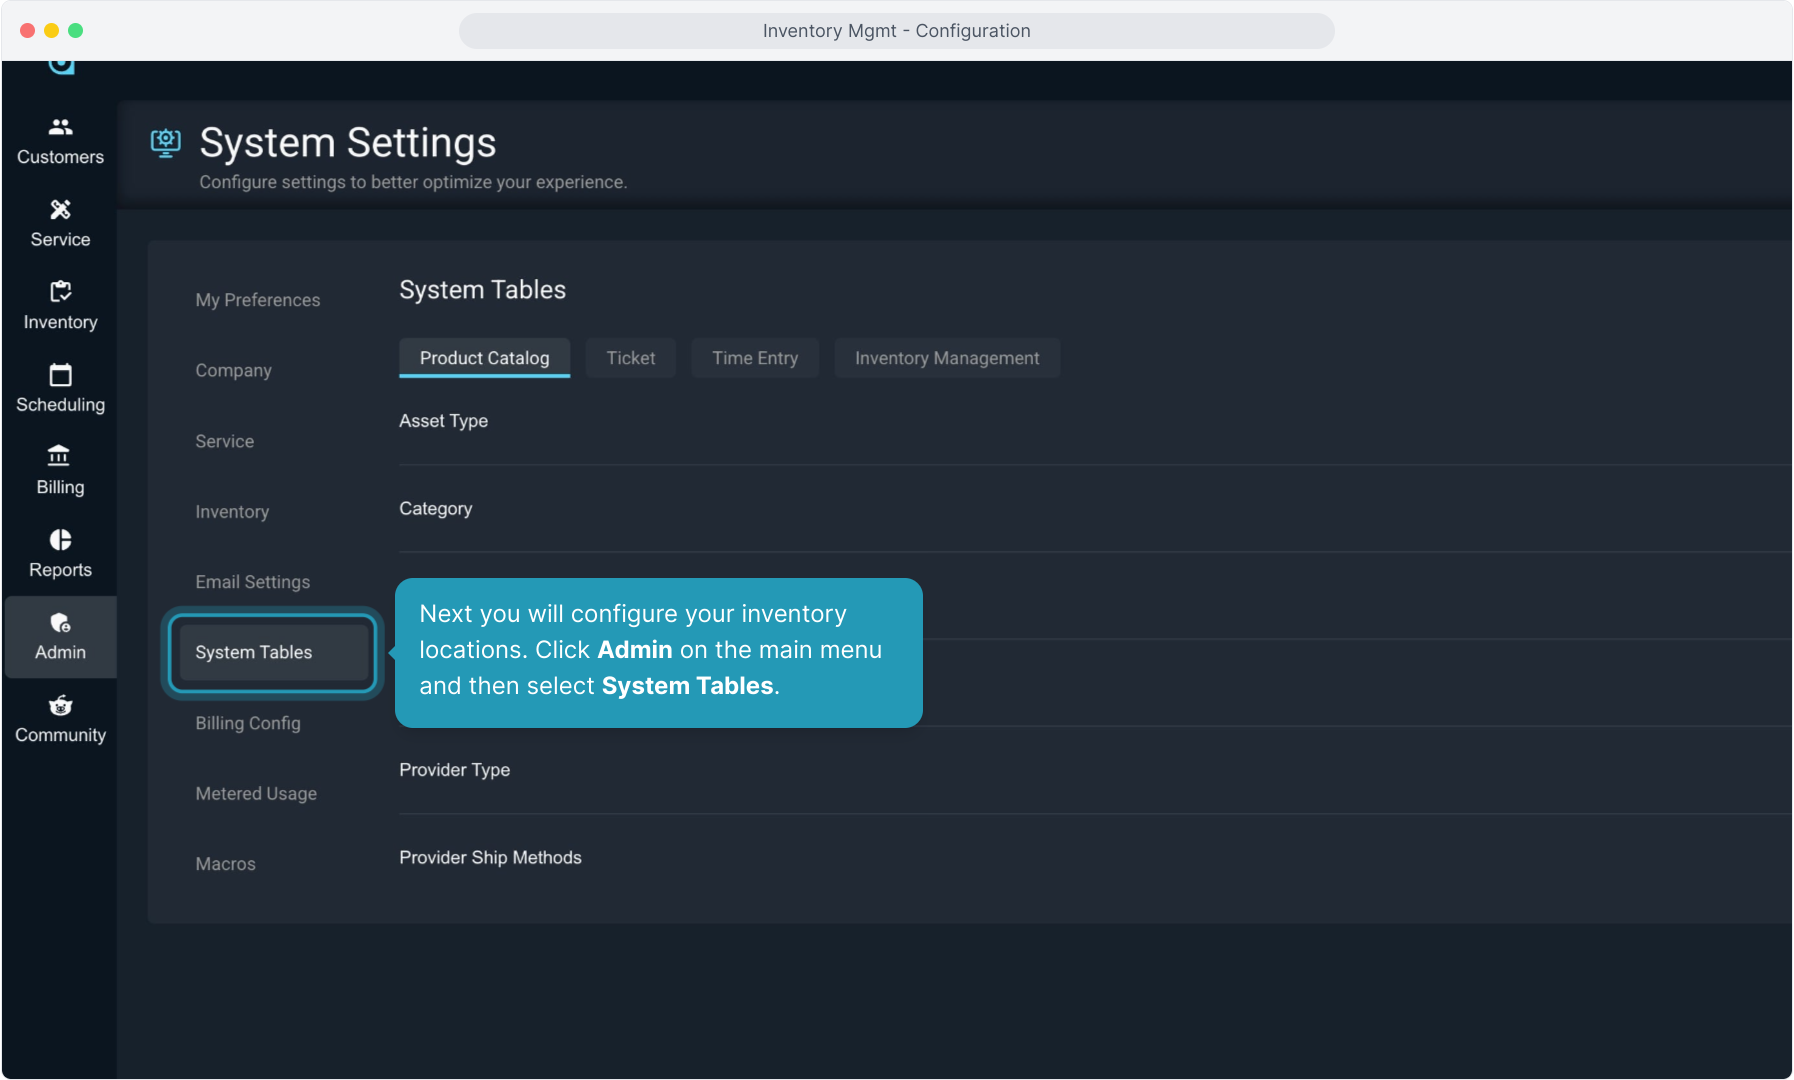
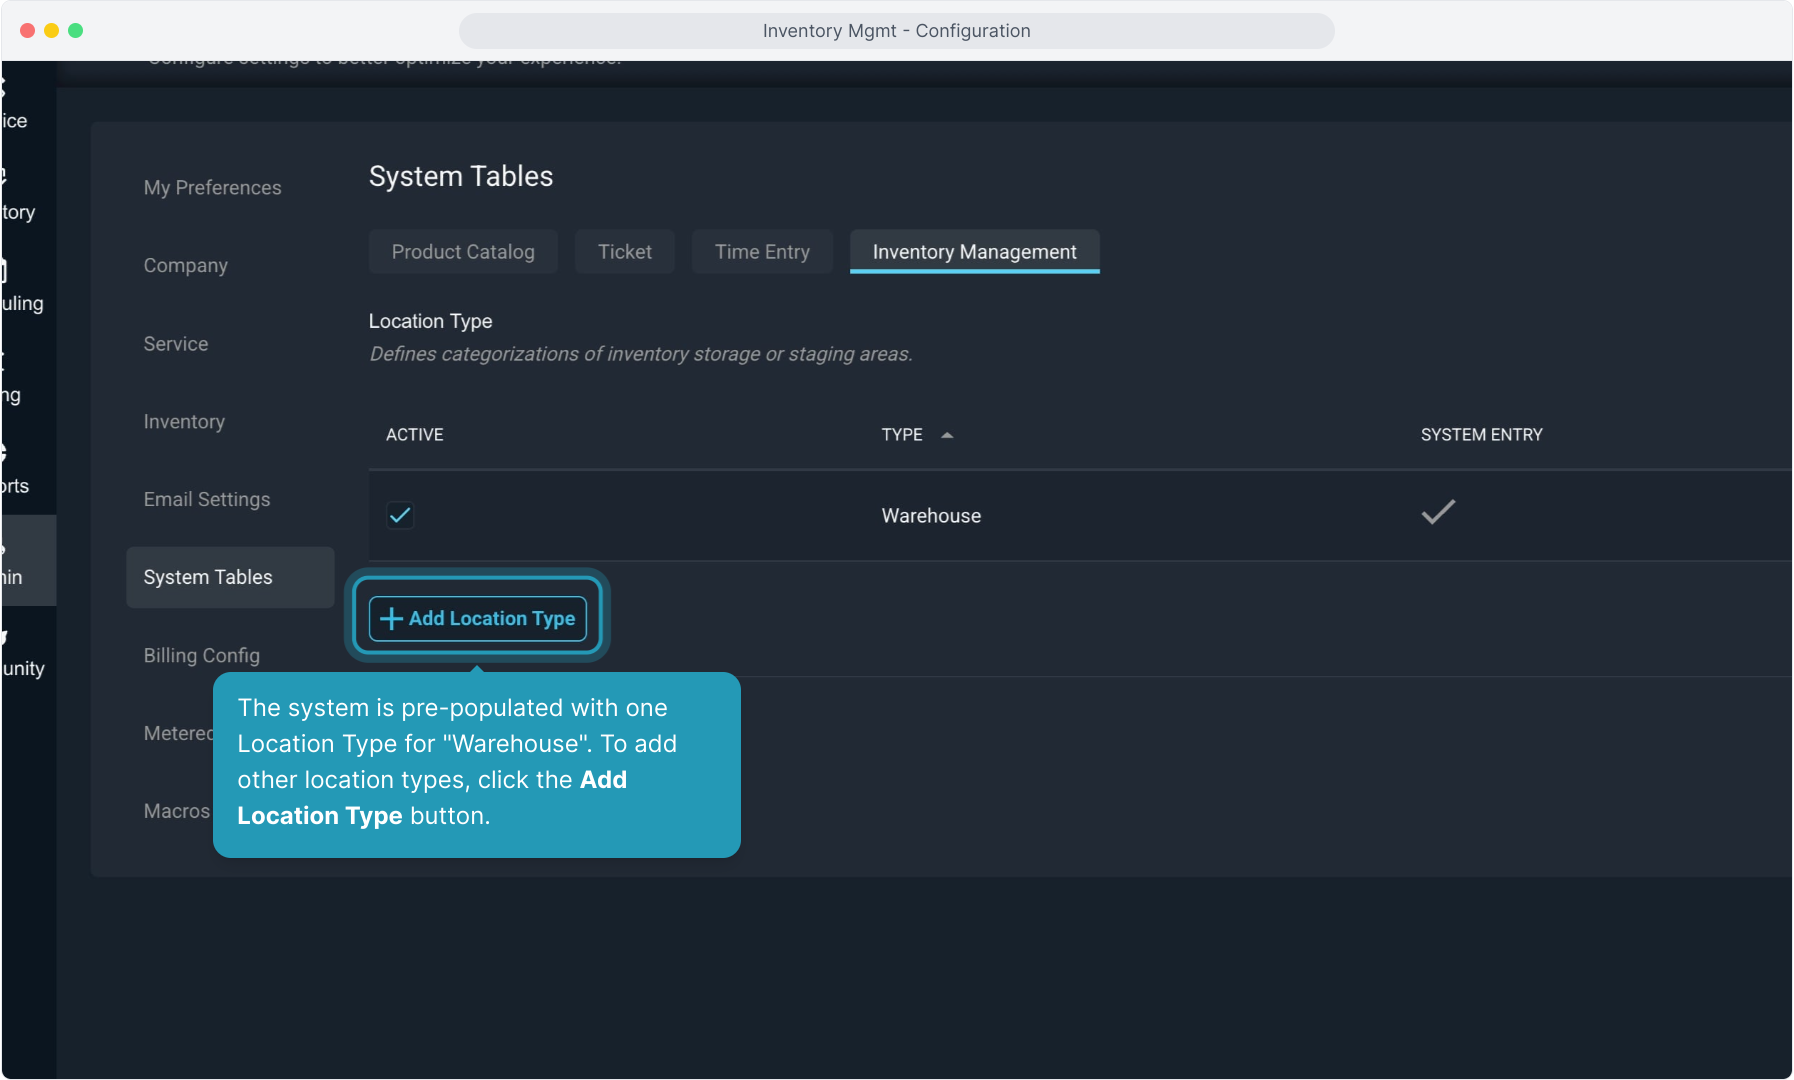
11. Next you will configure your inventory locations. Click Admin on the main menu and then select System Tables.
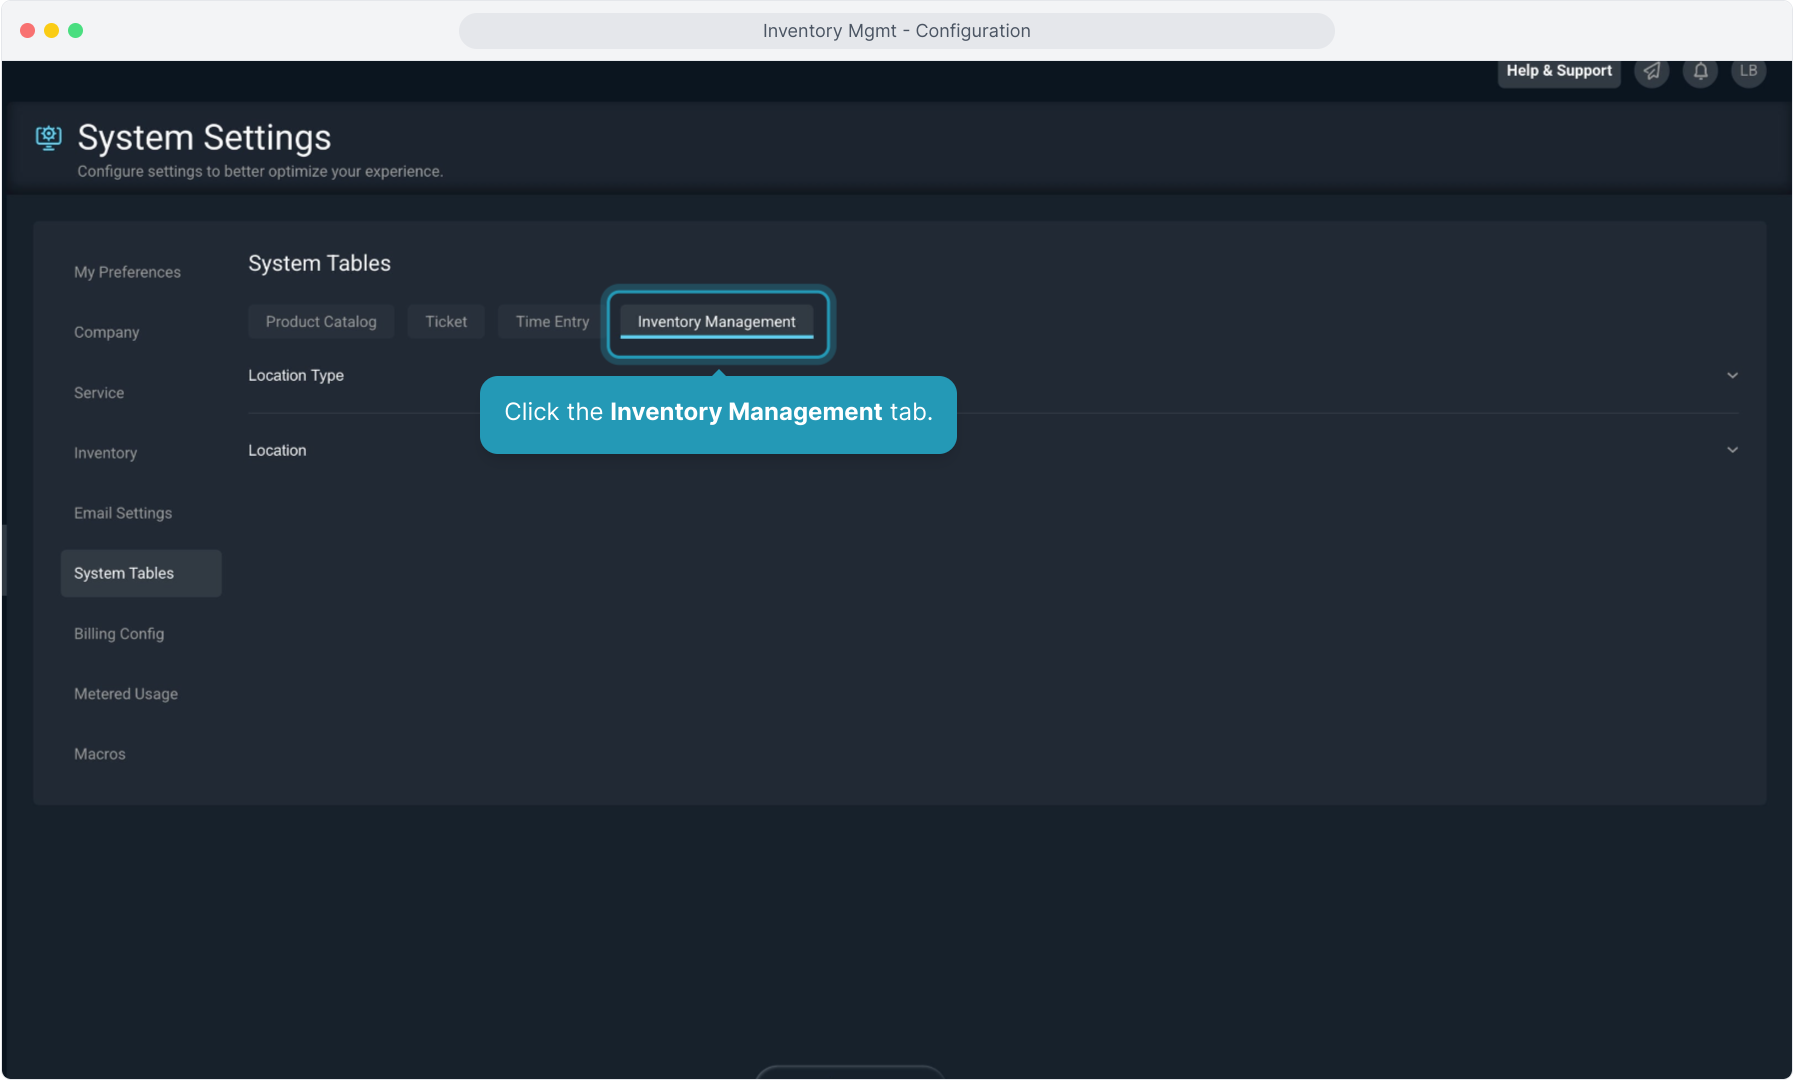
12. Click the Inventory Management tab.
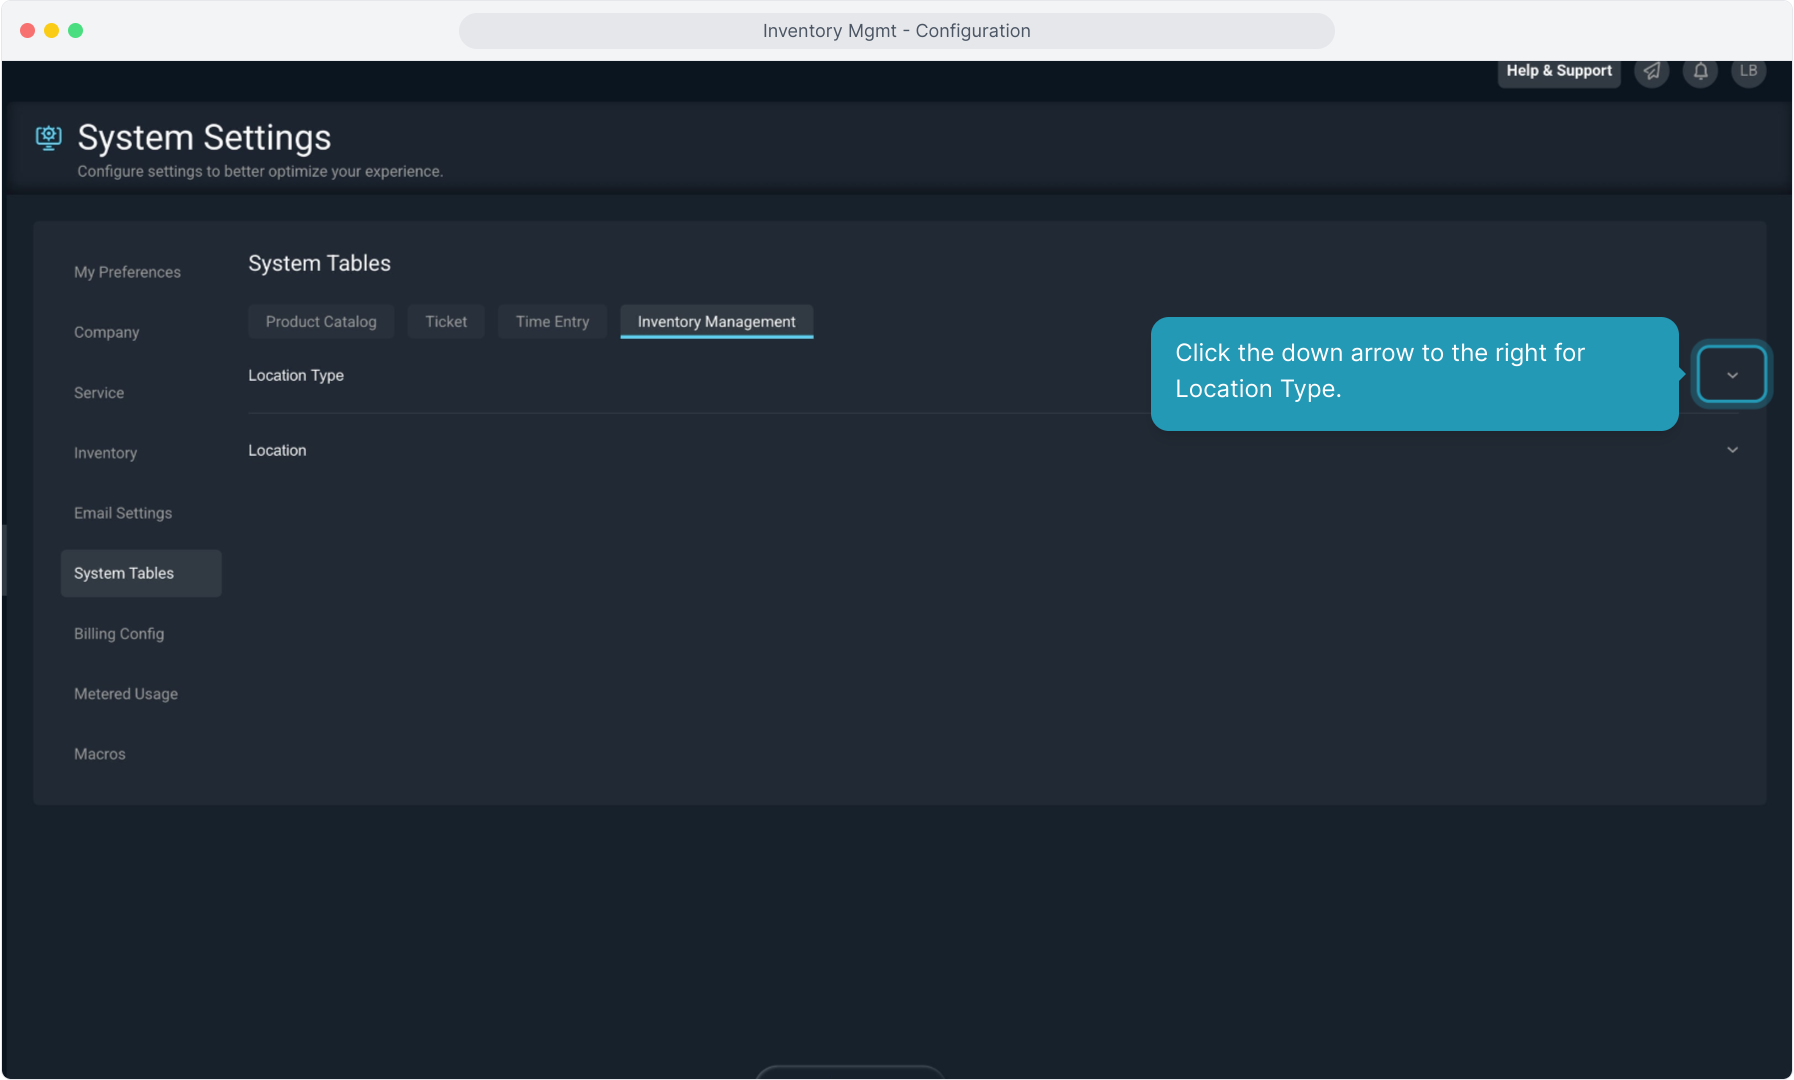
13. Click the down arrow to the right for Location Type.
14. The system is pre-populated with one Location Type for "Warehouse". To add other location types, click the Add Location Type button.
15. After you add any location types, you can add the Locations if you wish. Click the down arrow on the right
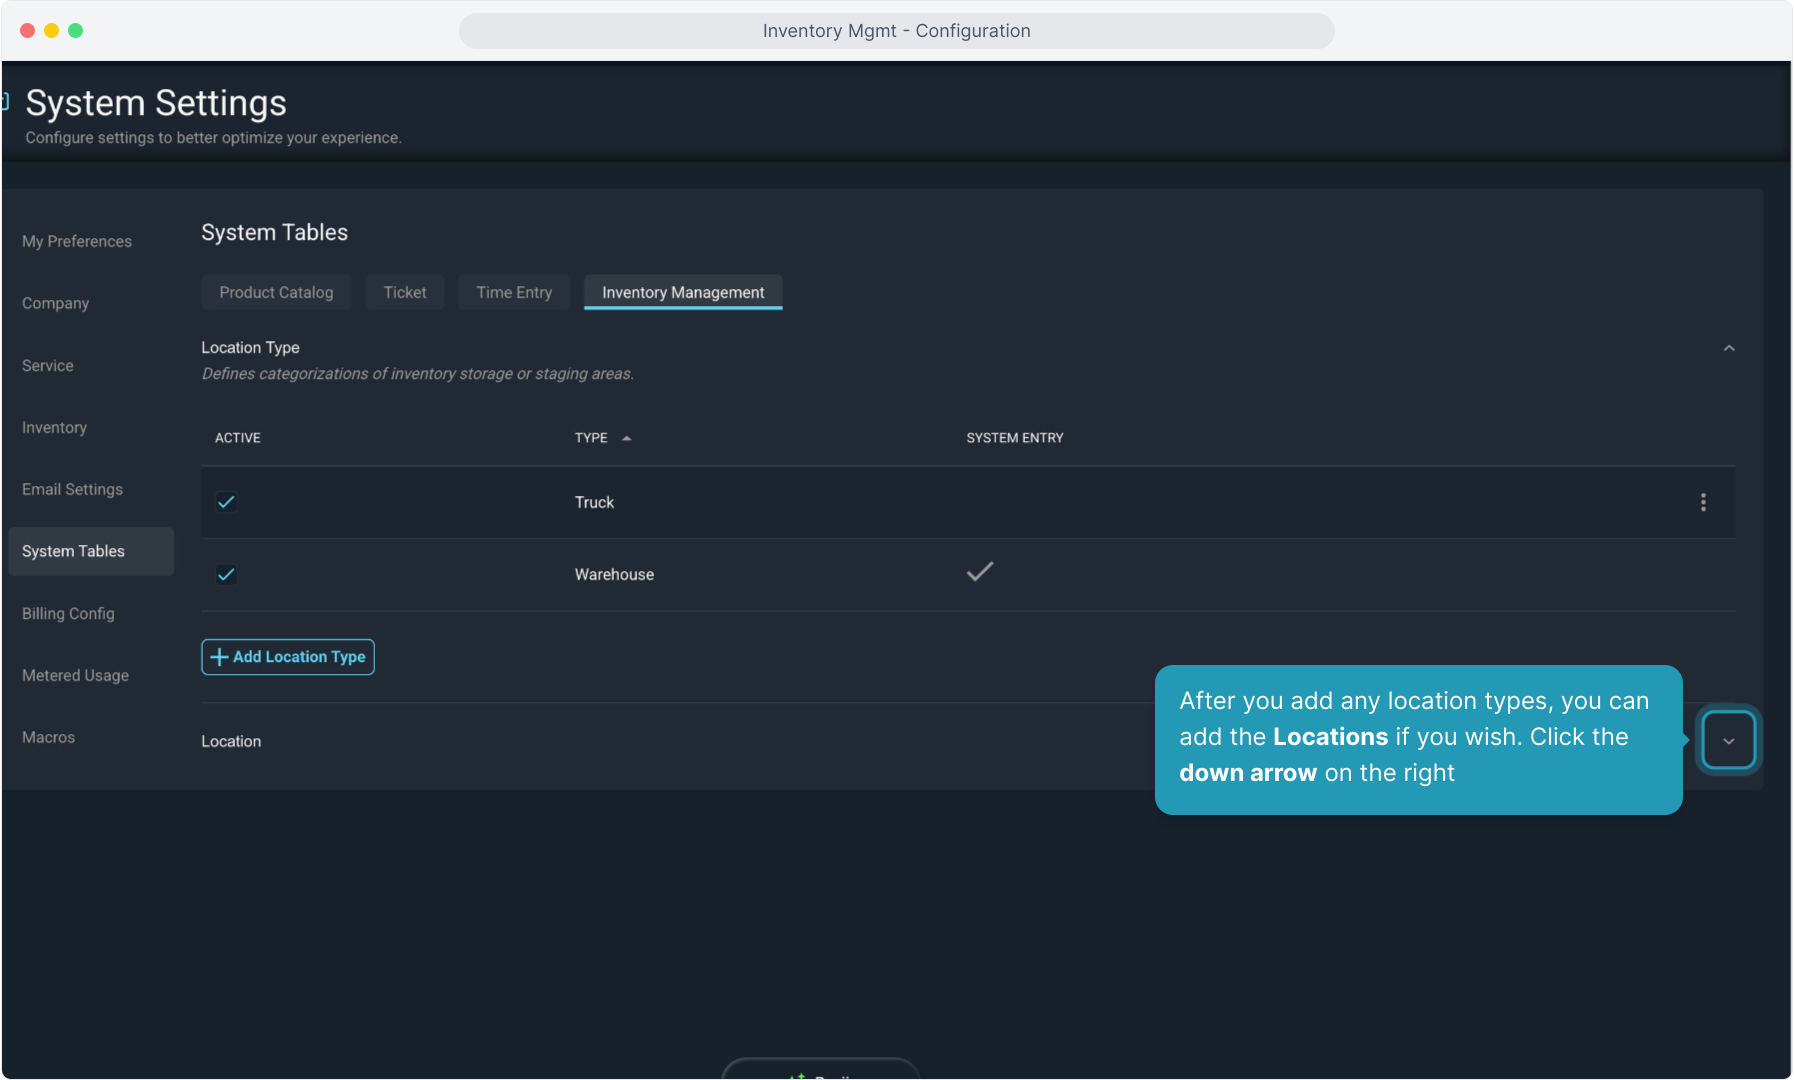
16. There are no system entries for location. Click the Add Location button to begin adding locations.

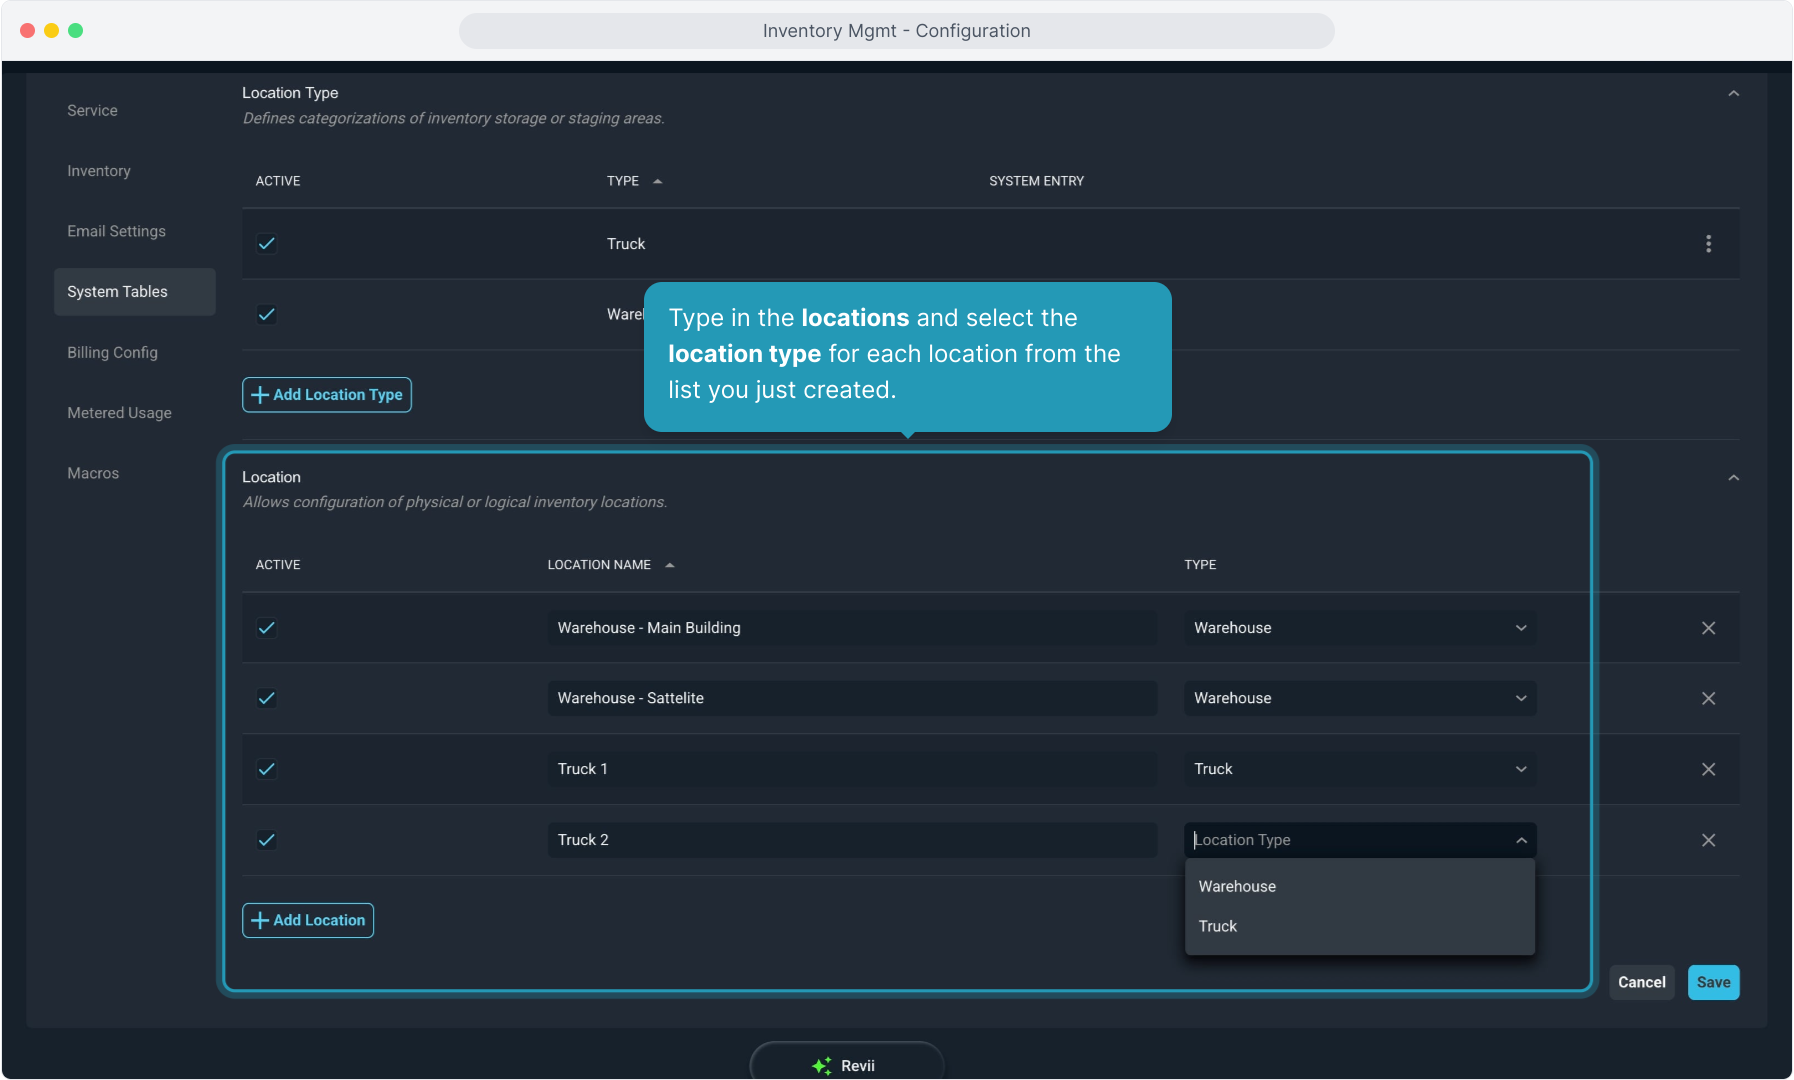
17. Type in the locations and select the location type for each location from the list you just created.
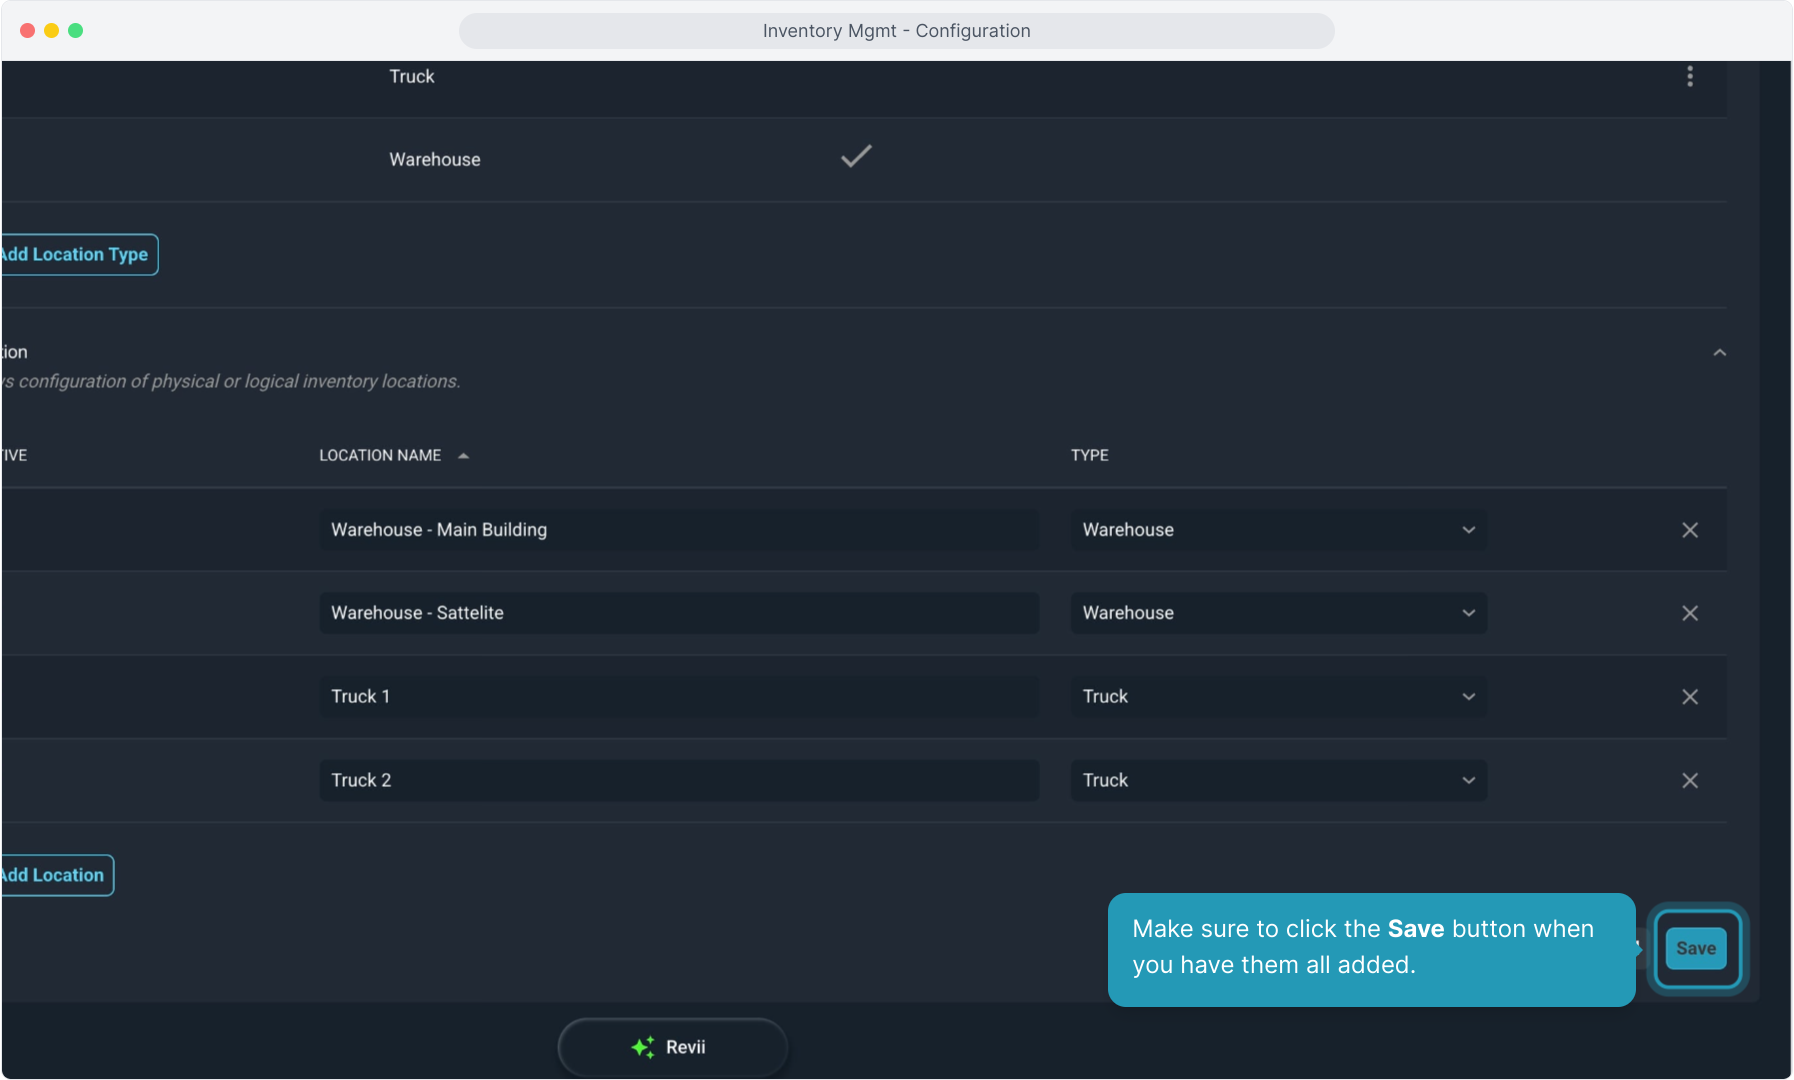
18. Make sure to click the Save button when you have them all added.
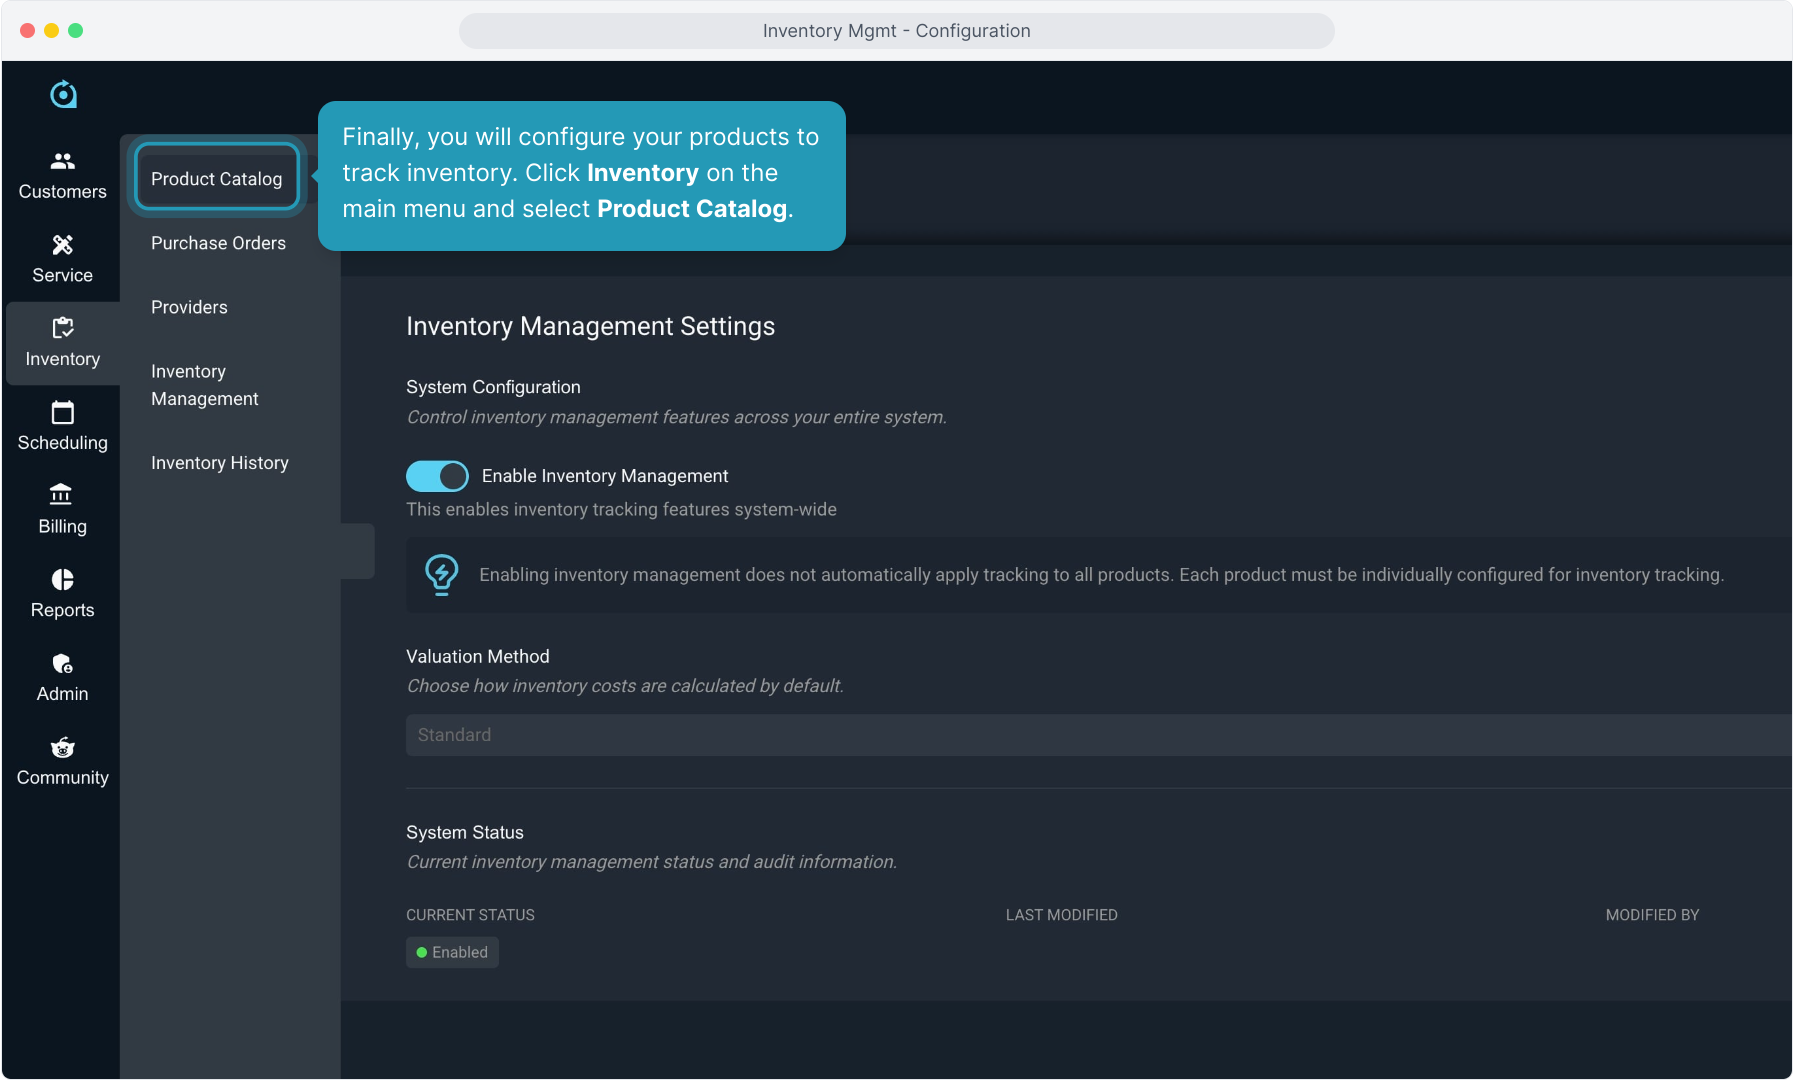
19. Finally, you will configure your products to track inventory. Click Inventory on the main menu and select Product Catalog.
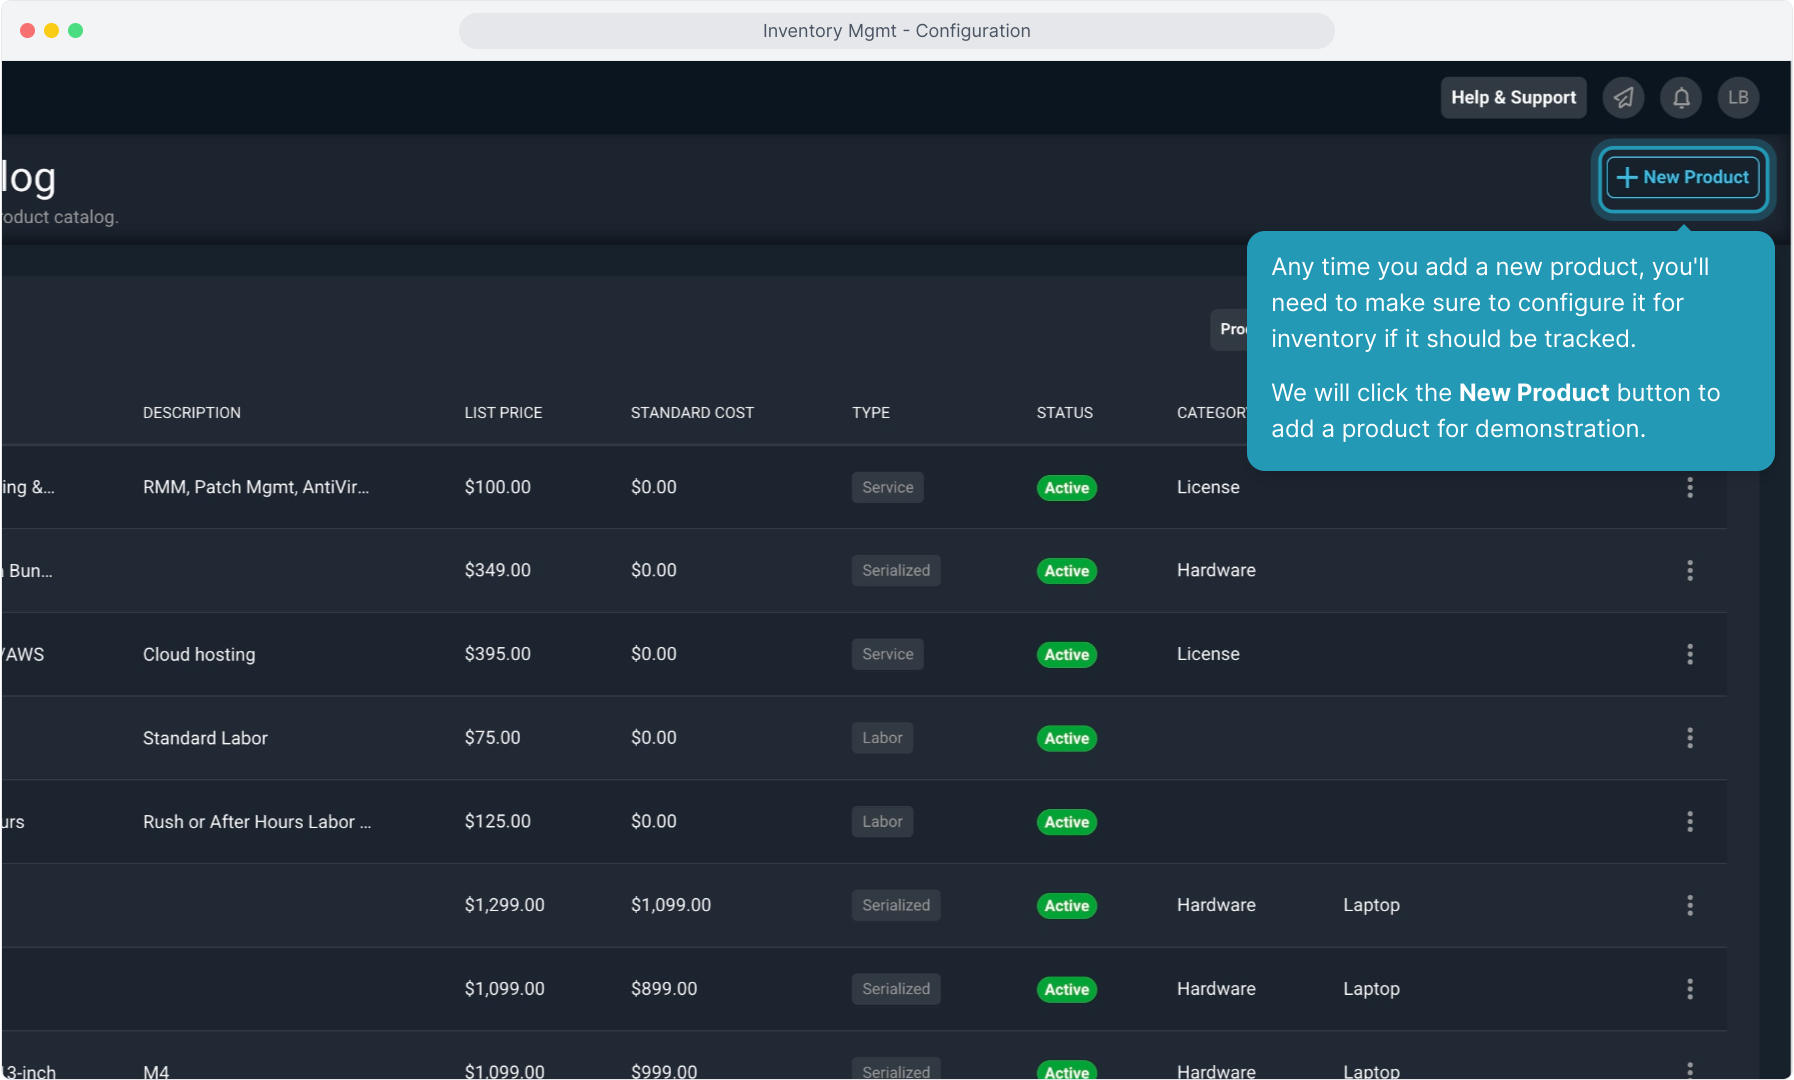
20. Any time you add a new product, you'll need to make sure to configure it for inventory if it should be tracked.
We will click the New Product button to add a product for demonstration.
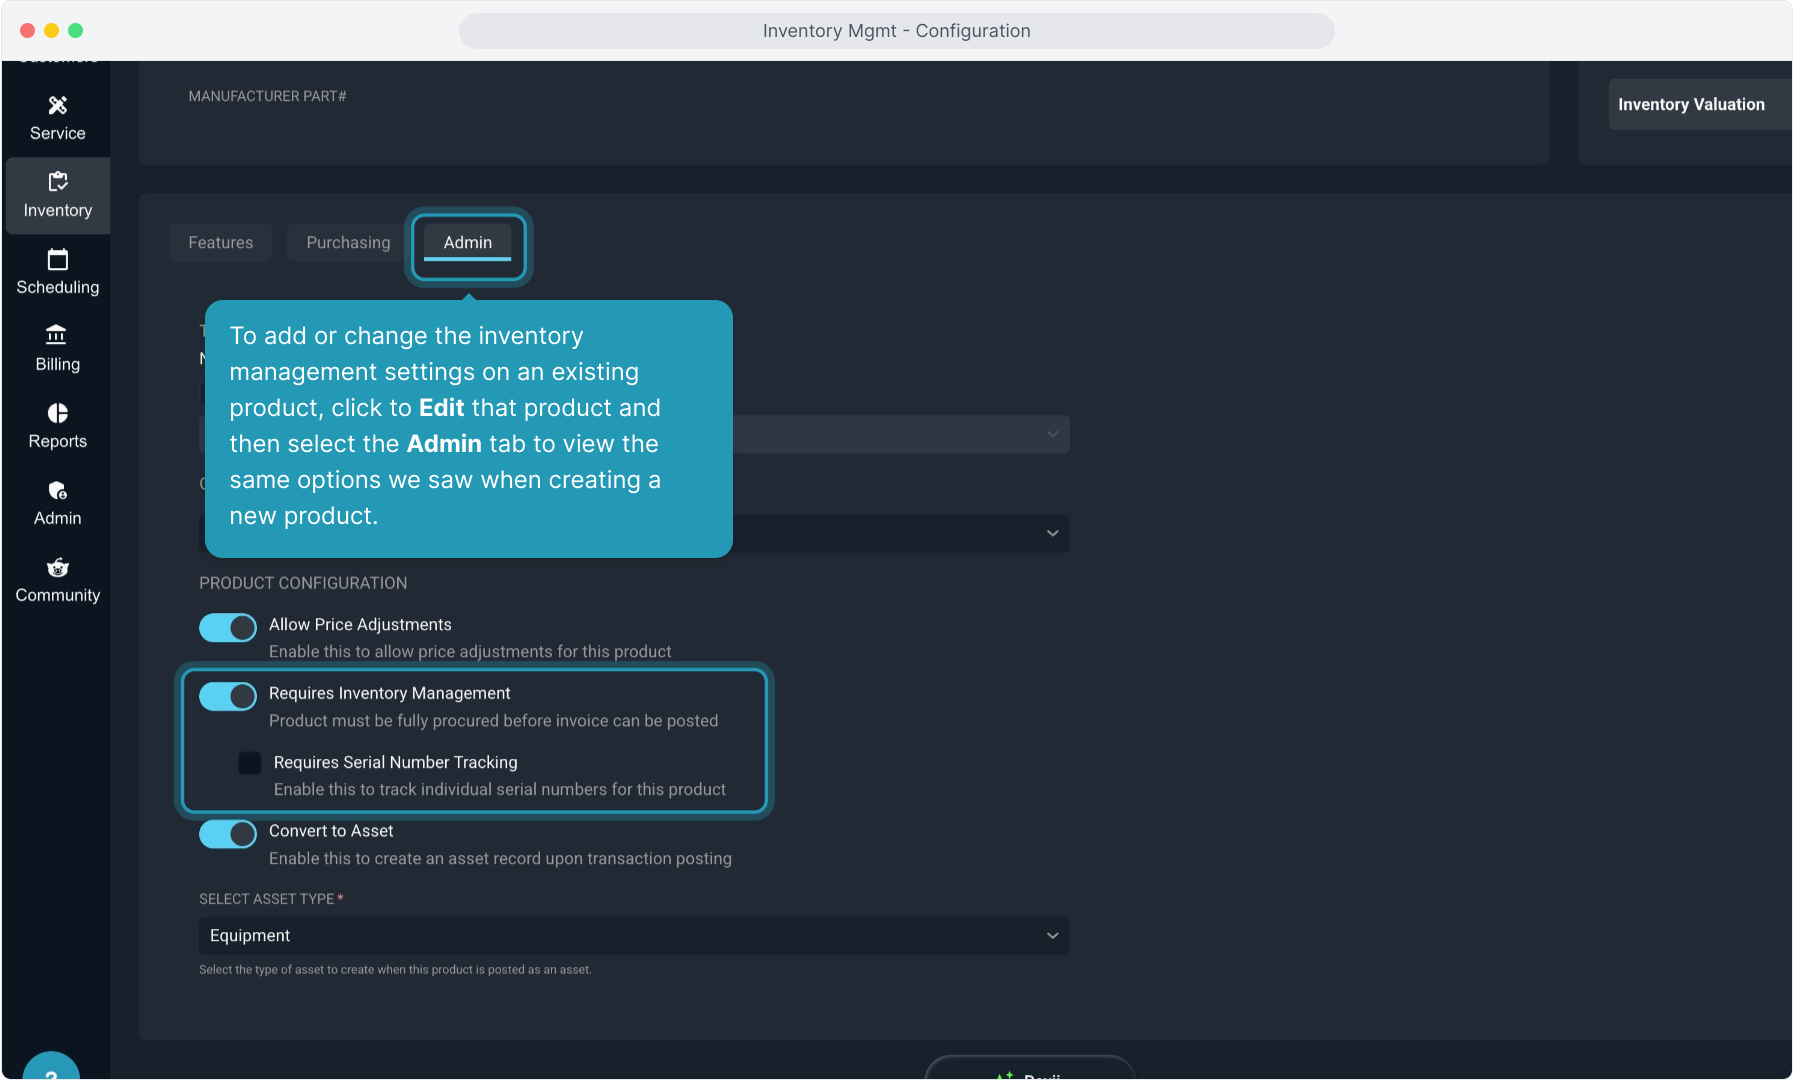
21. If you want to track this product in inventory, toggle the Requires Inventory Management option to "on".
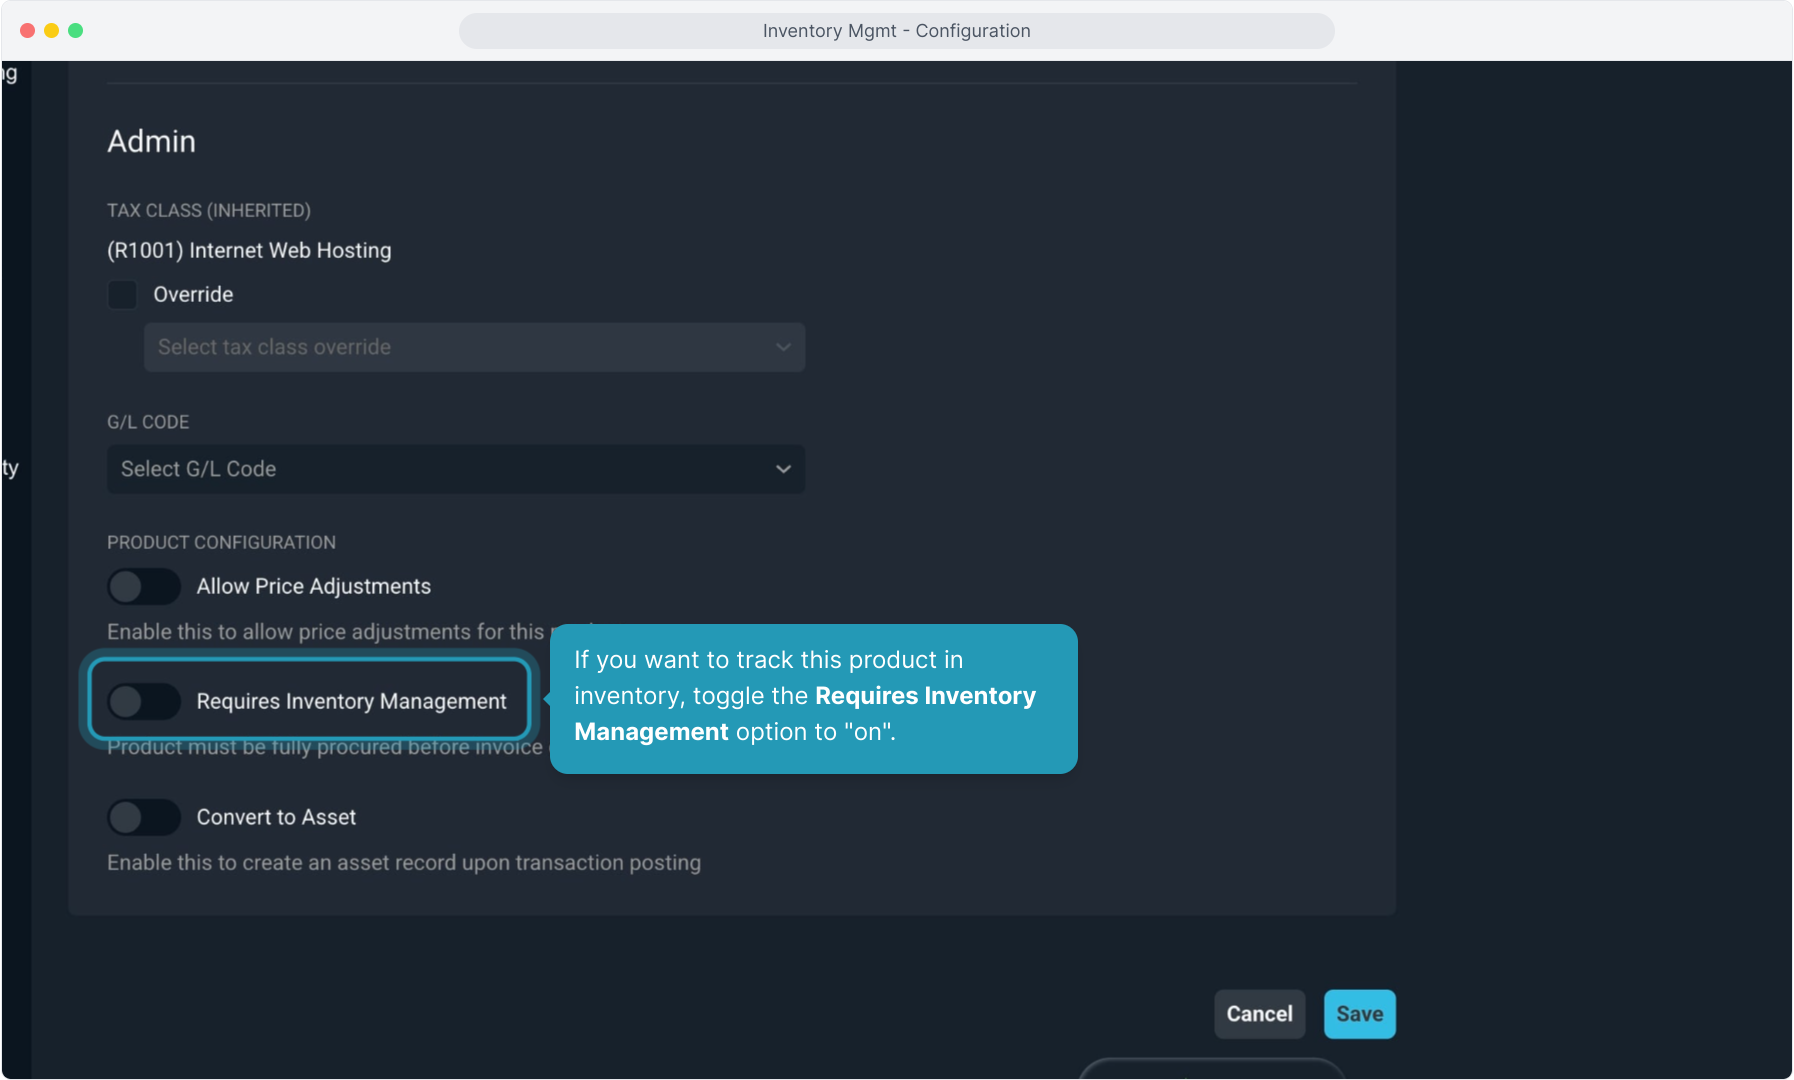
22. If you turn on the Requires Inventory Management option, a second option will appear.
If this is a serialized product, you can choose to Require Serial Number Tracking if you wish.
Note: If you do not enable this feature, inventory will be tracked but will not require serial numbers to be input.

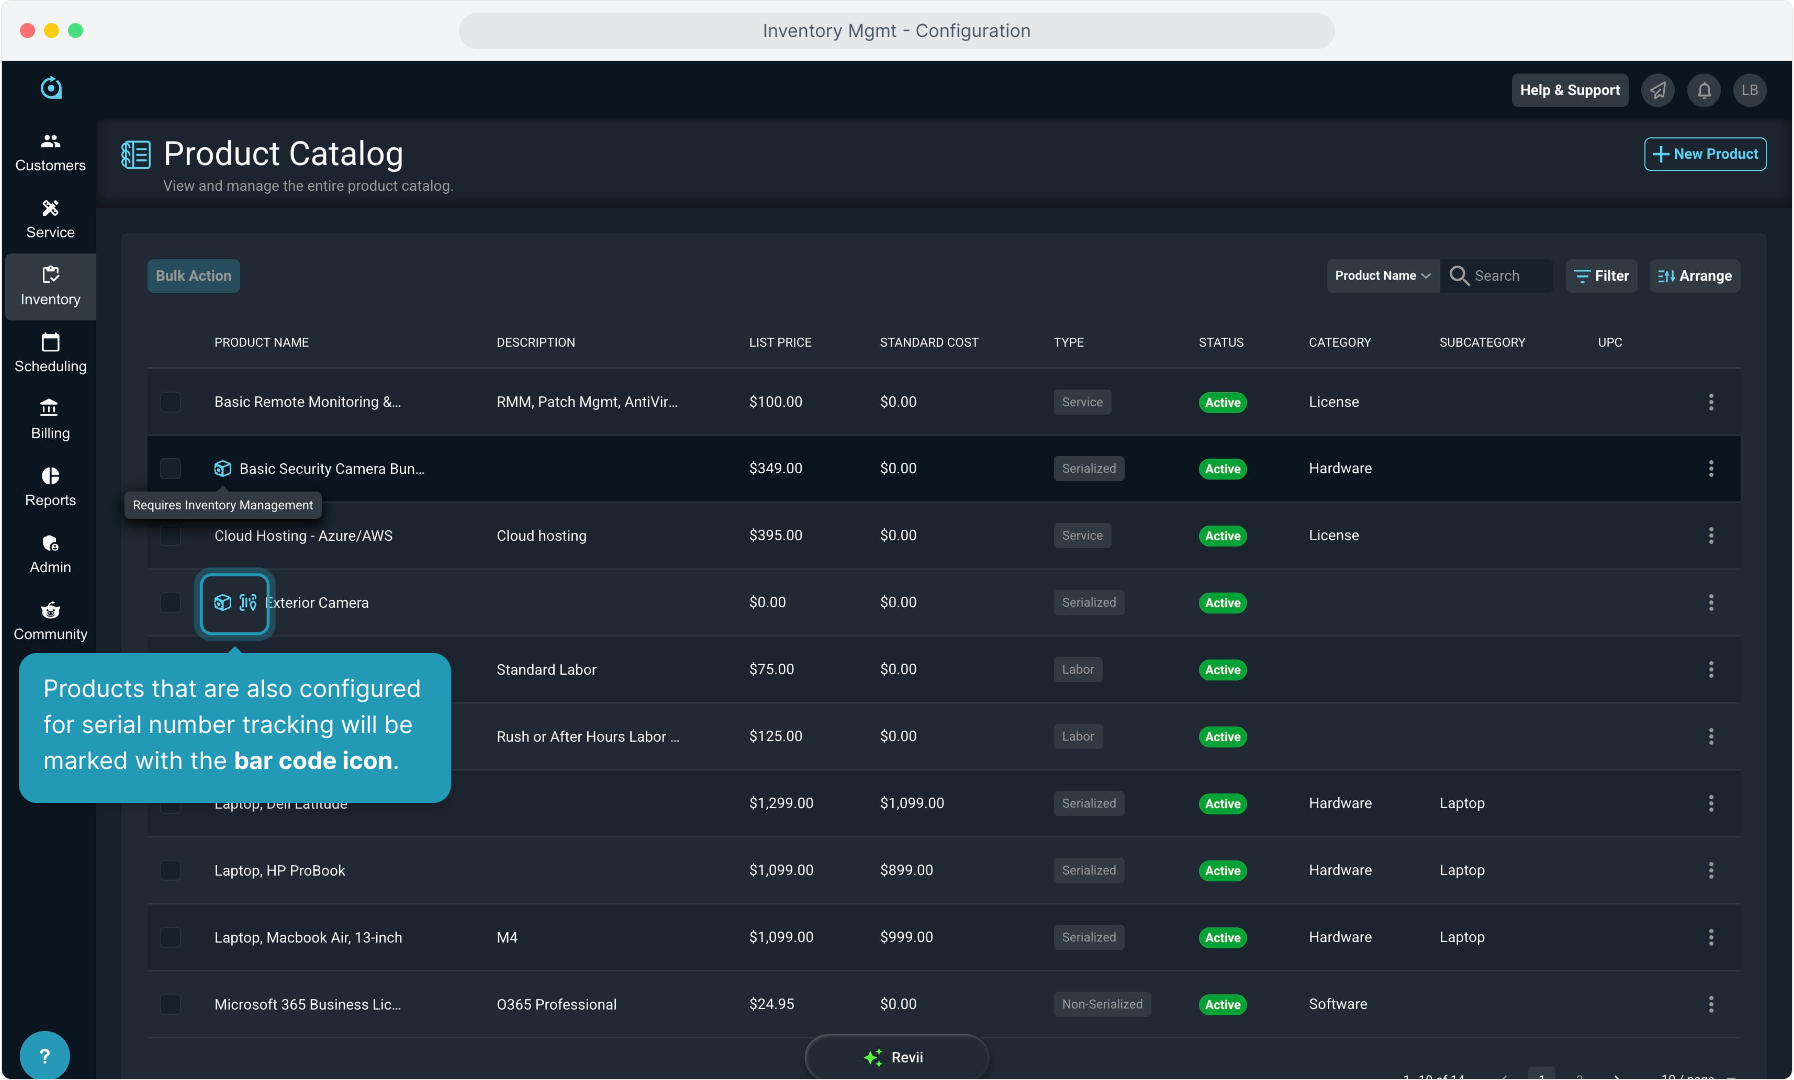
23. Products that are configured for inventory management will be marked with the box icon.
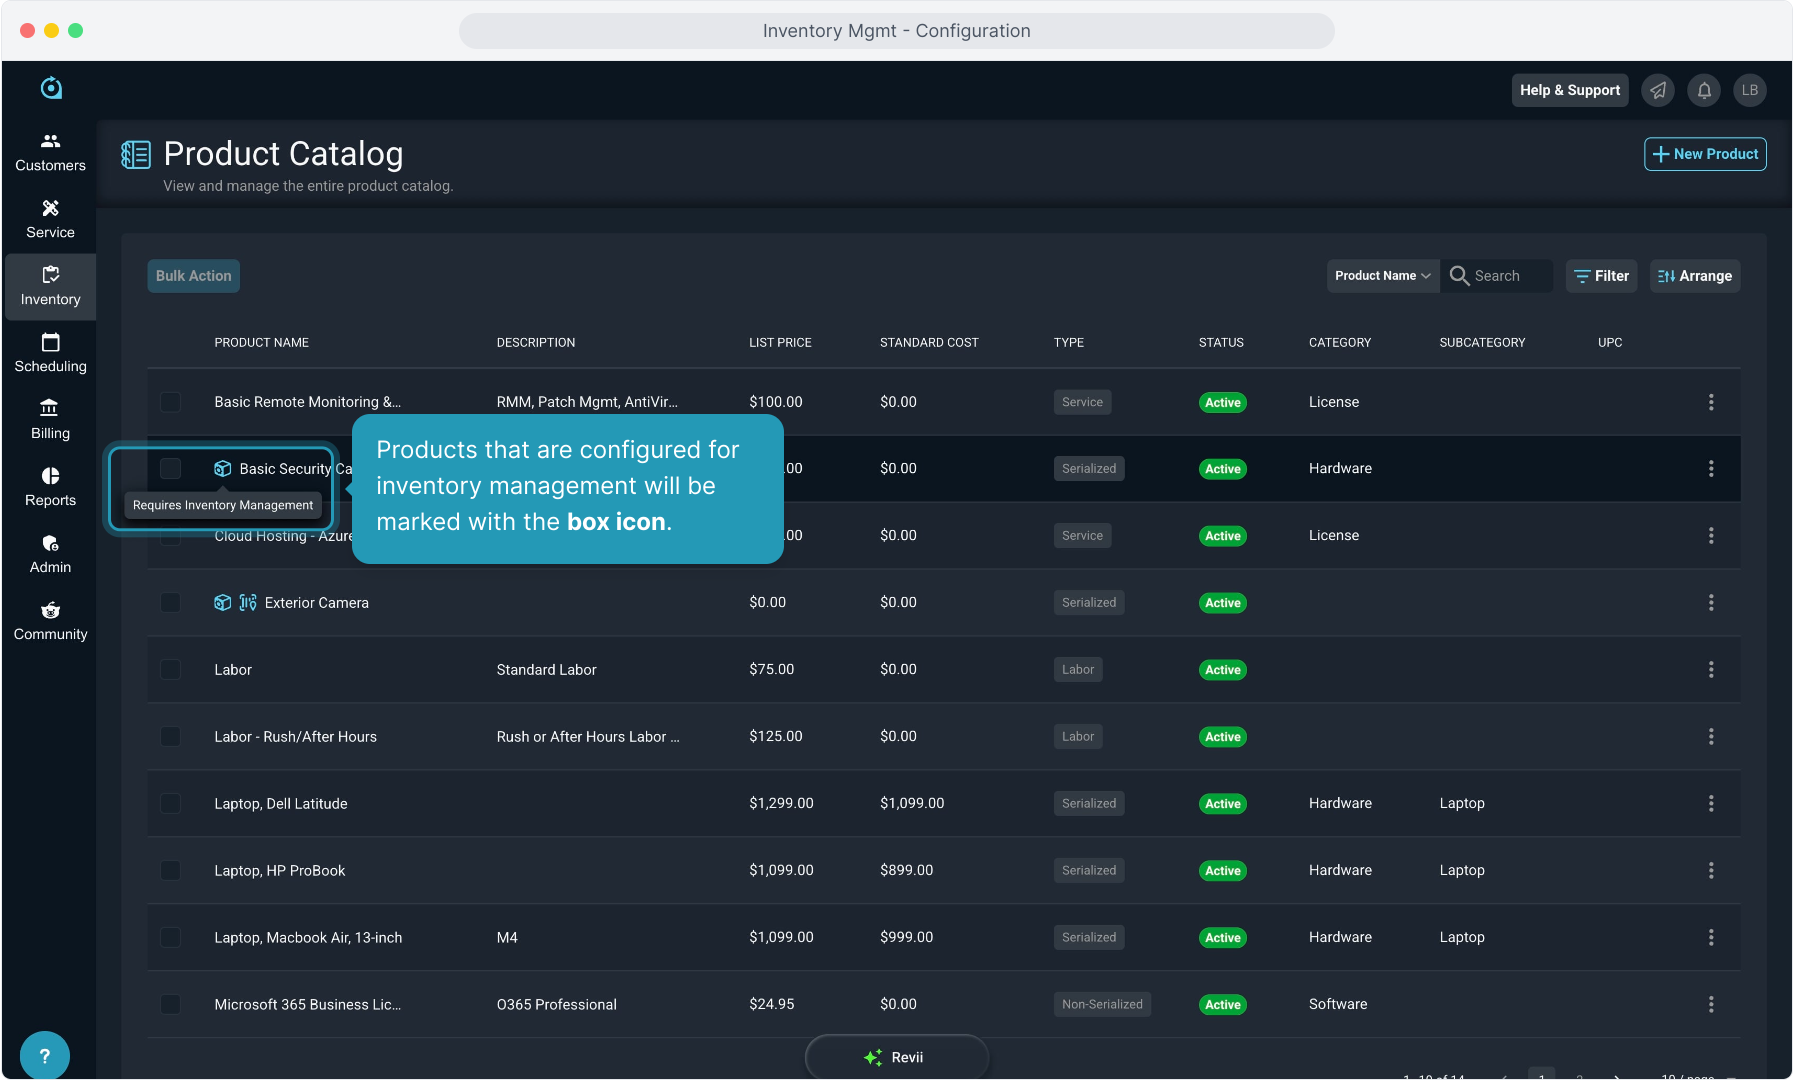
24. Products that are also configured for serial number tracking will be marked with the bar code icon.
25. To add or change the inventory management settings on an existing product, click to Edit that product and then select the Admin tab to view the same options we saw when creating a new product.
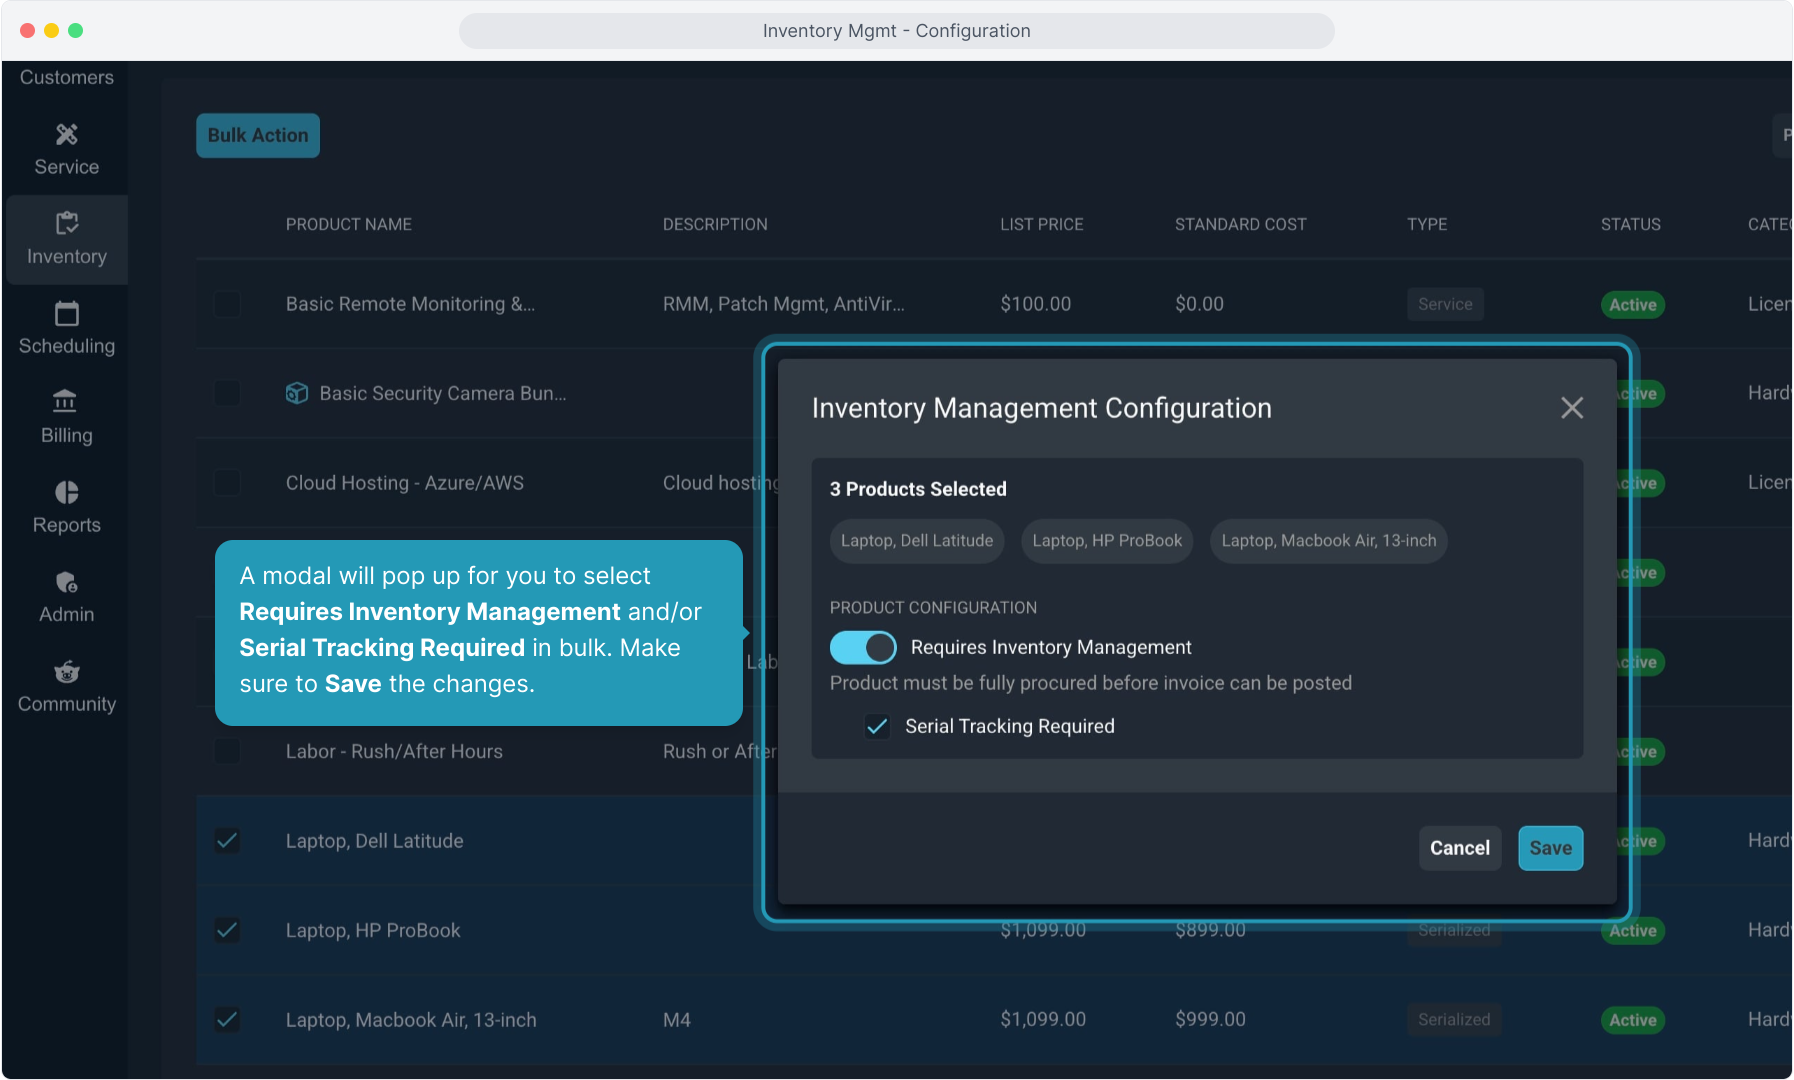
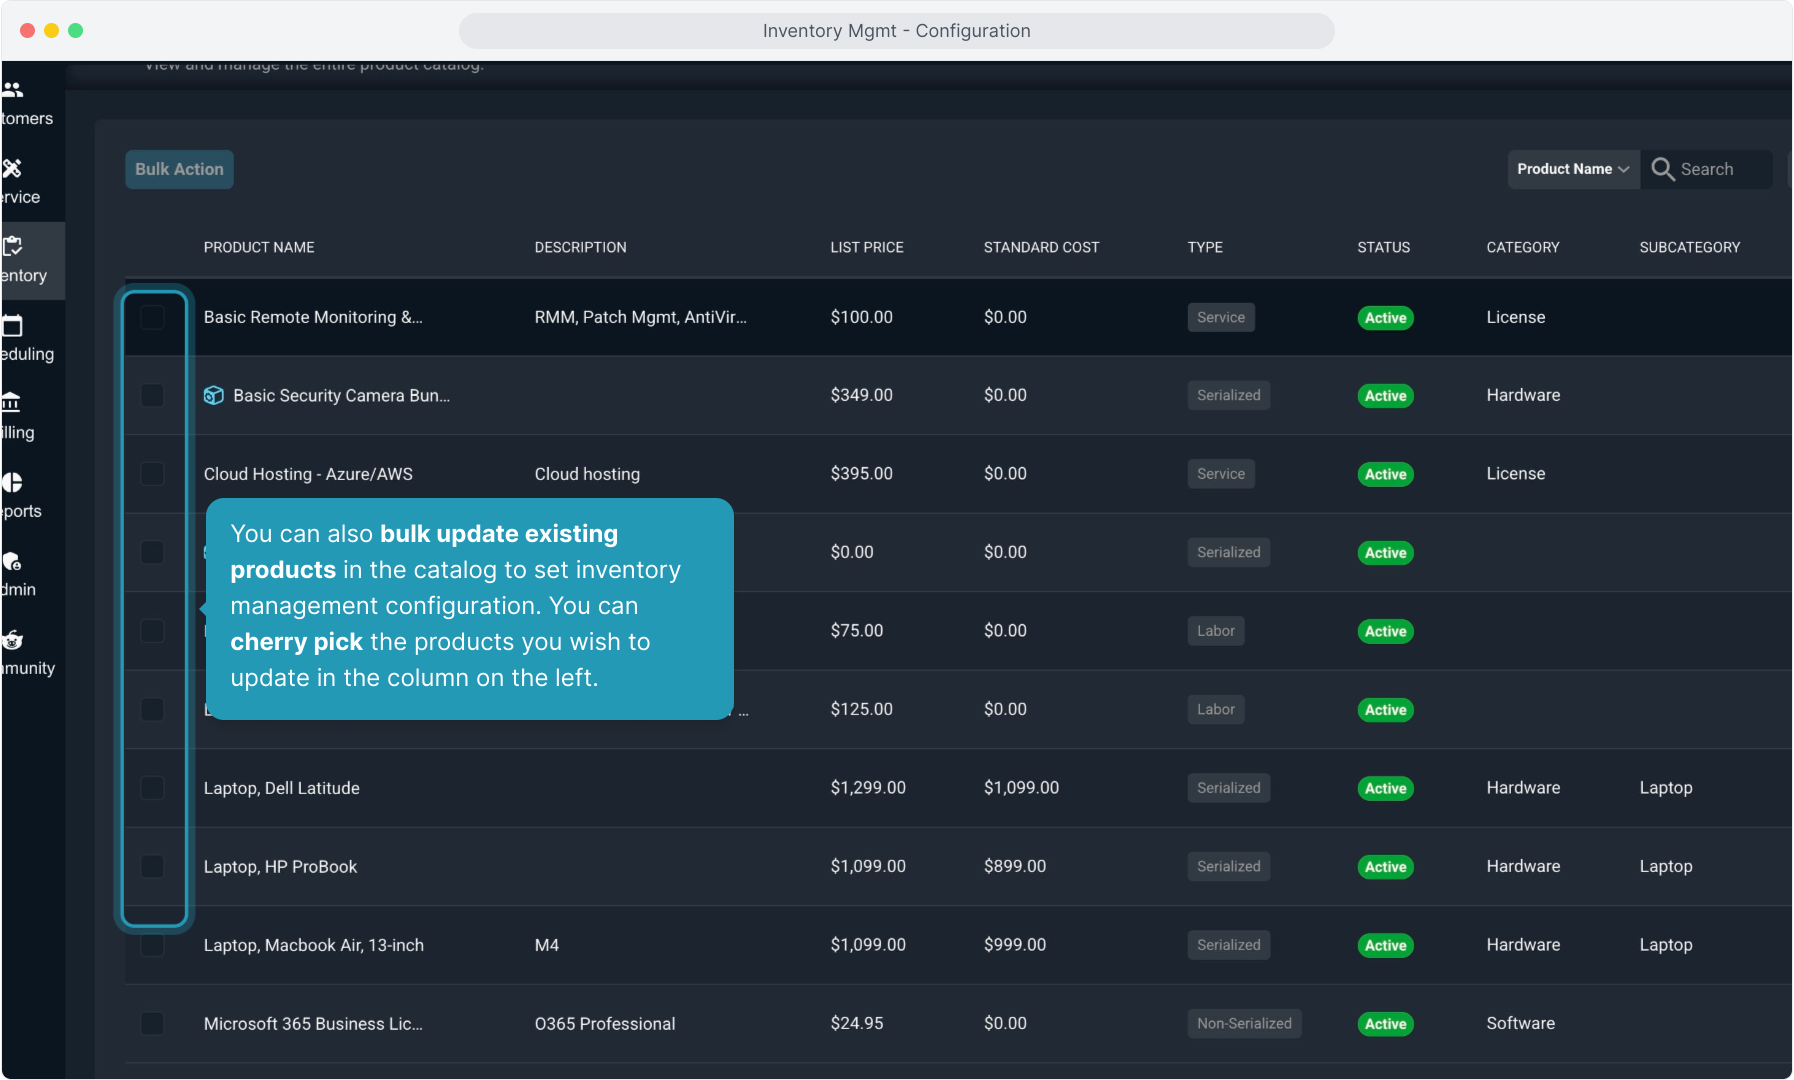
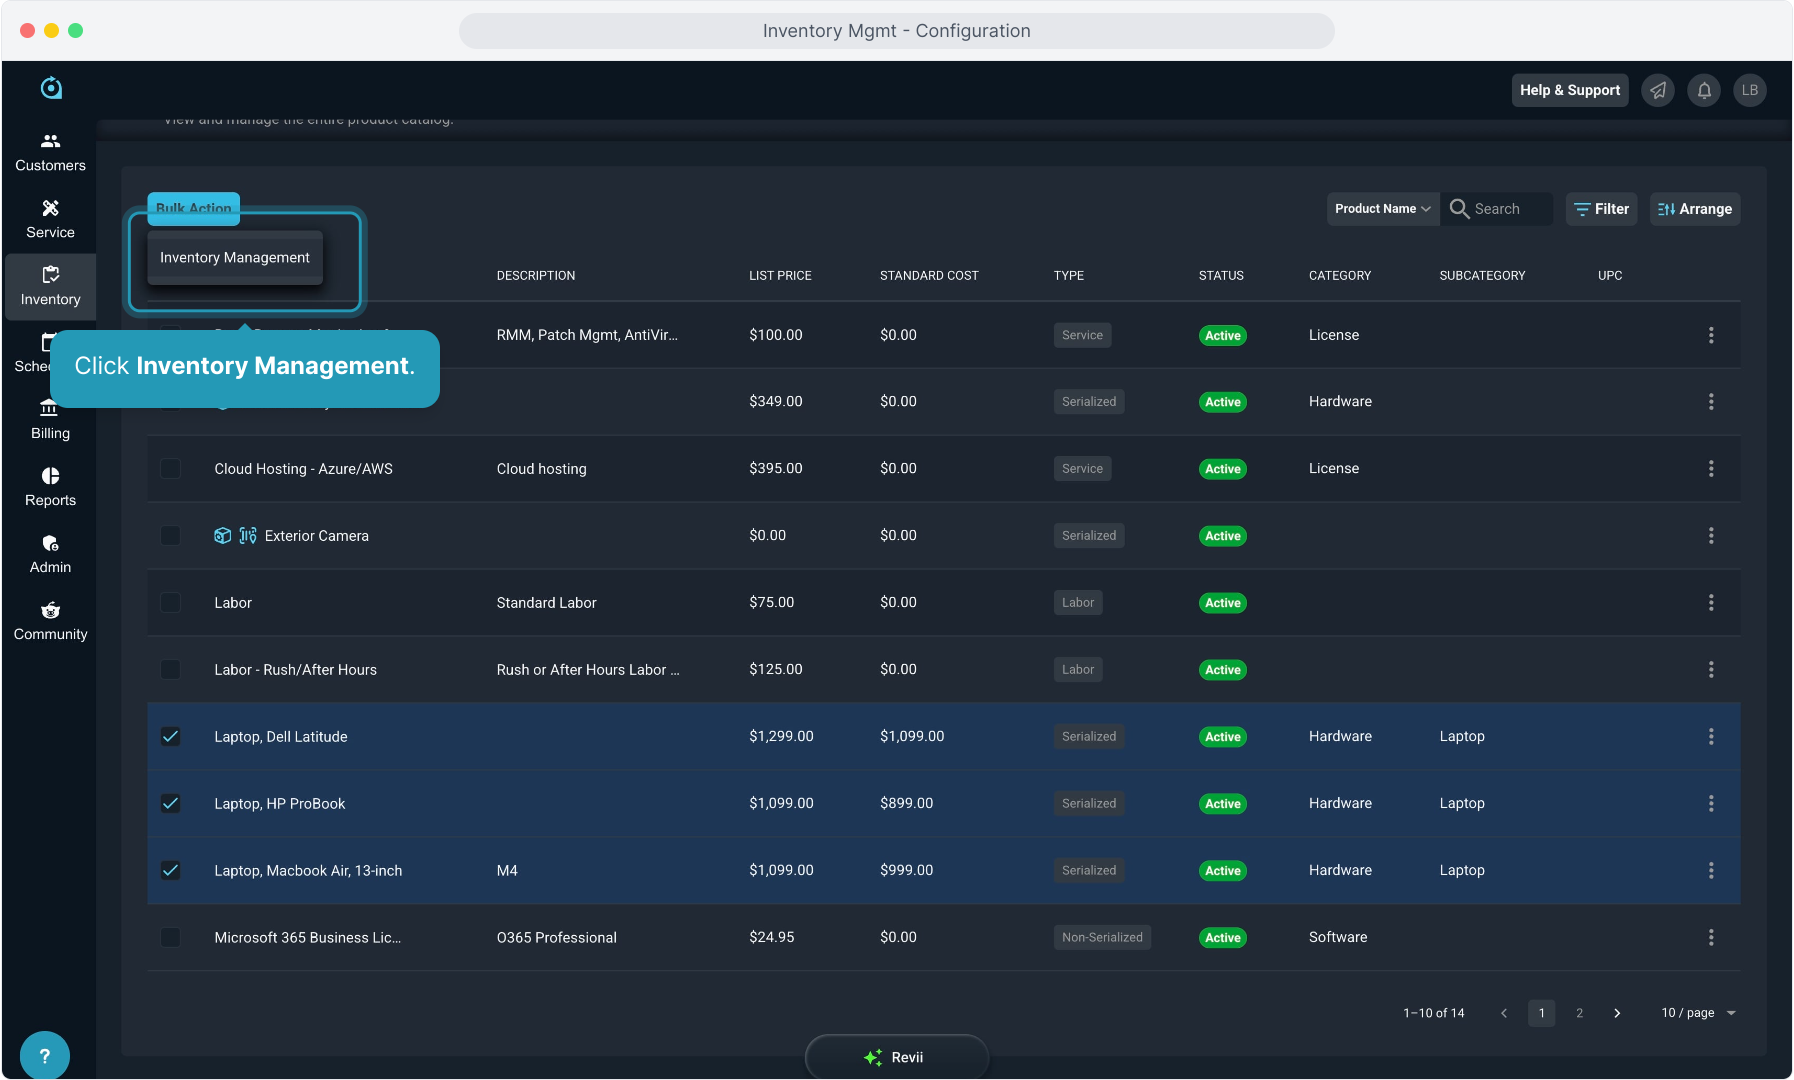
26. You can also bulk update existing products in the catalog to set inventory management configuration. You can cherry pick the products you wish to update in the column on the left.
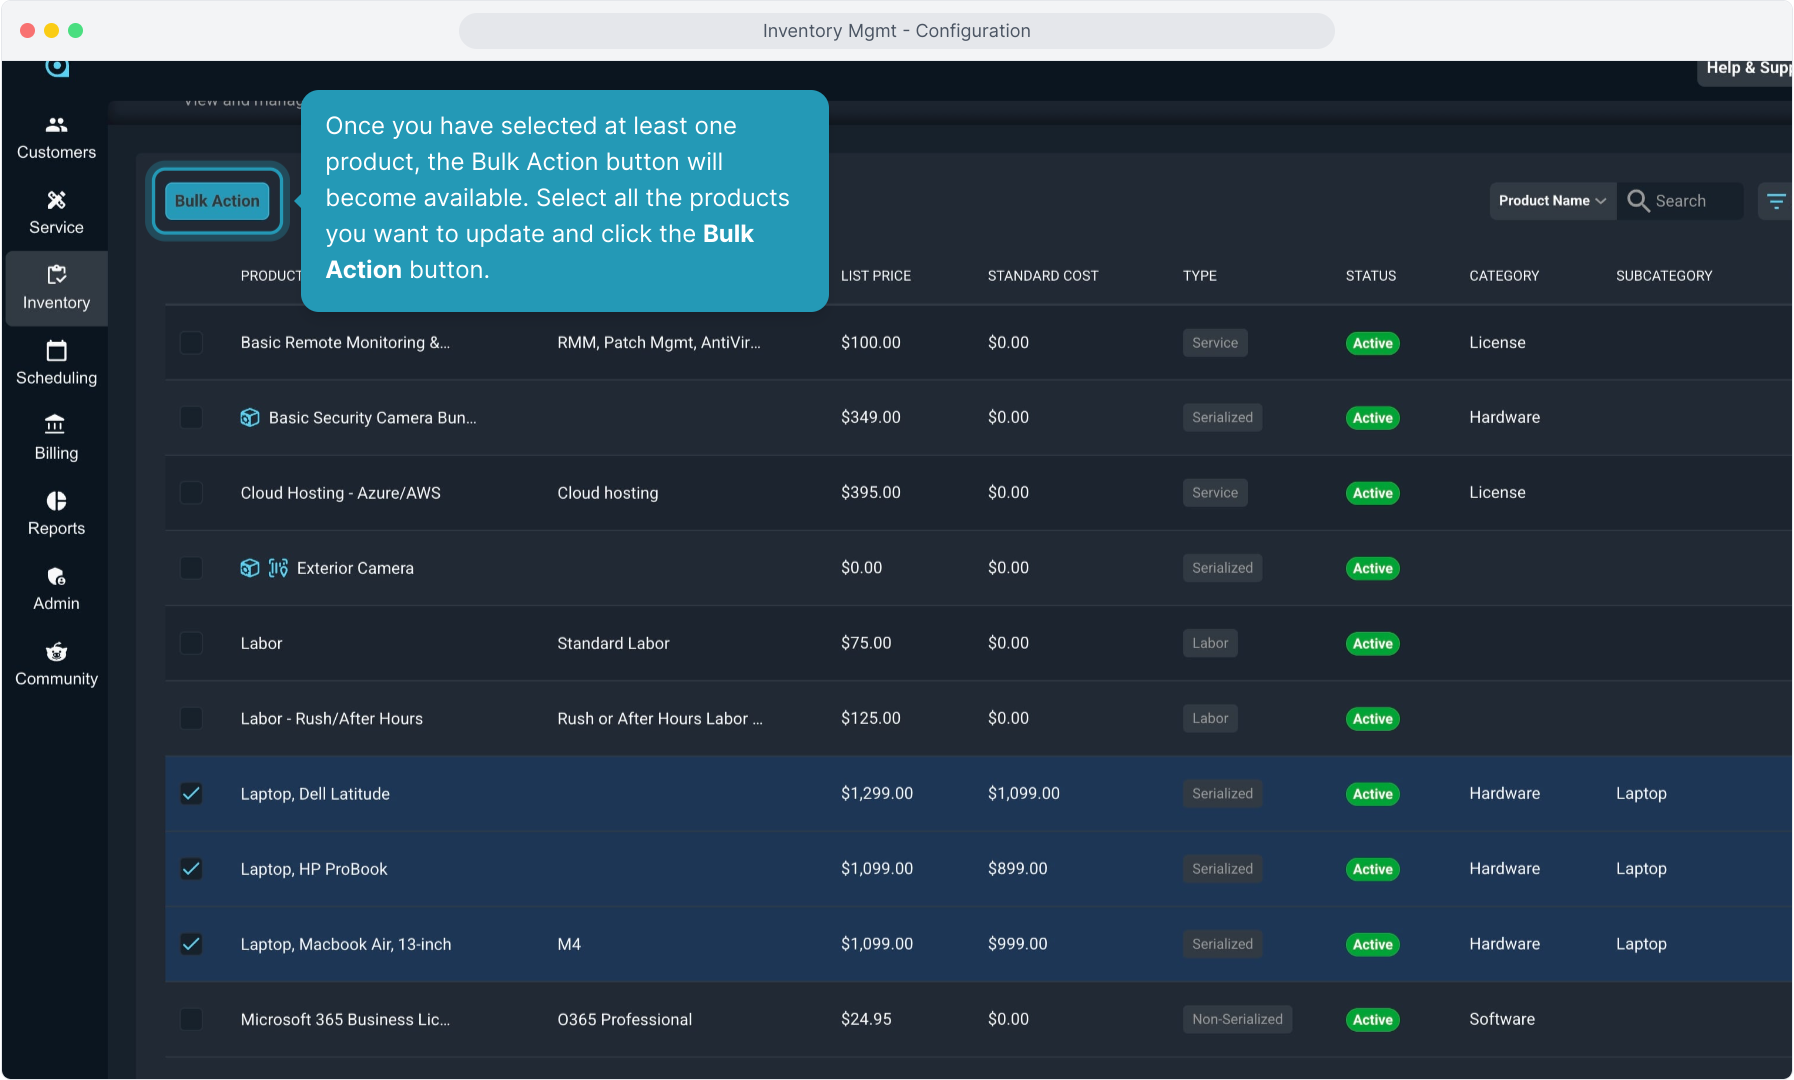
27. Once you have selected at least one product, the Bulk Action button will become available. Select all the products you want to update and click the Bulk Action button.
28. Click Inventory Management.
29. A modal will pop up for you to select Requires Inventory Management and/or Serial Tracking Required in bulk. Make sure to Save the changes.