How To Guide: System Settings - System Tables
1. Introduction
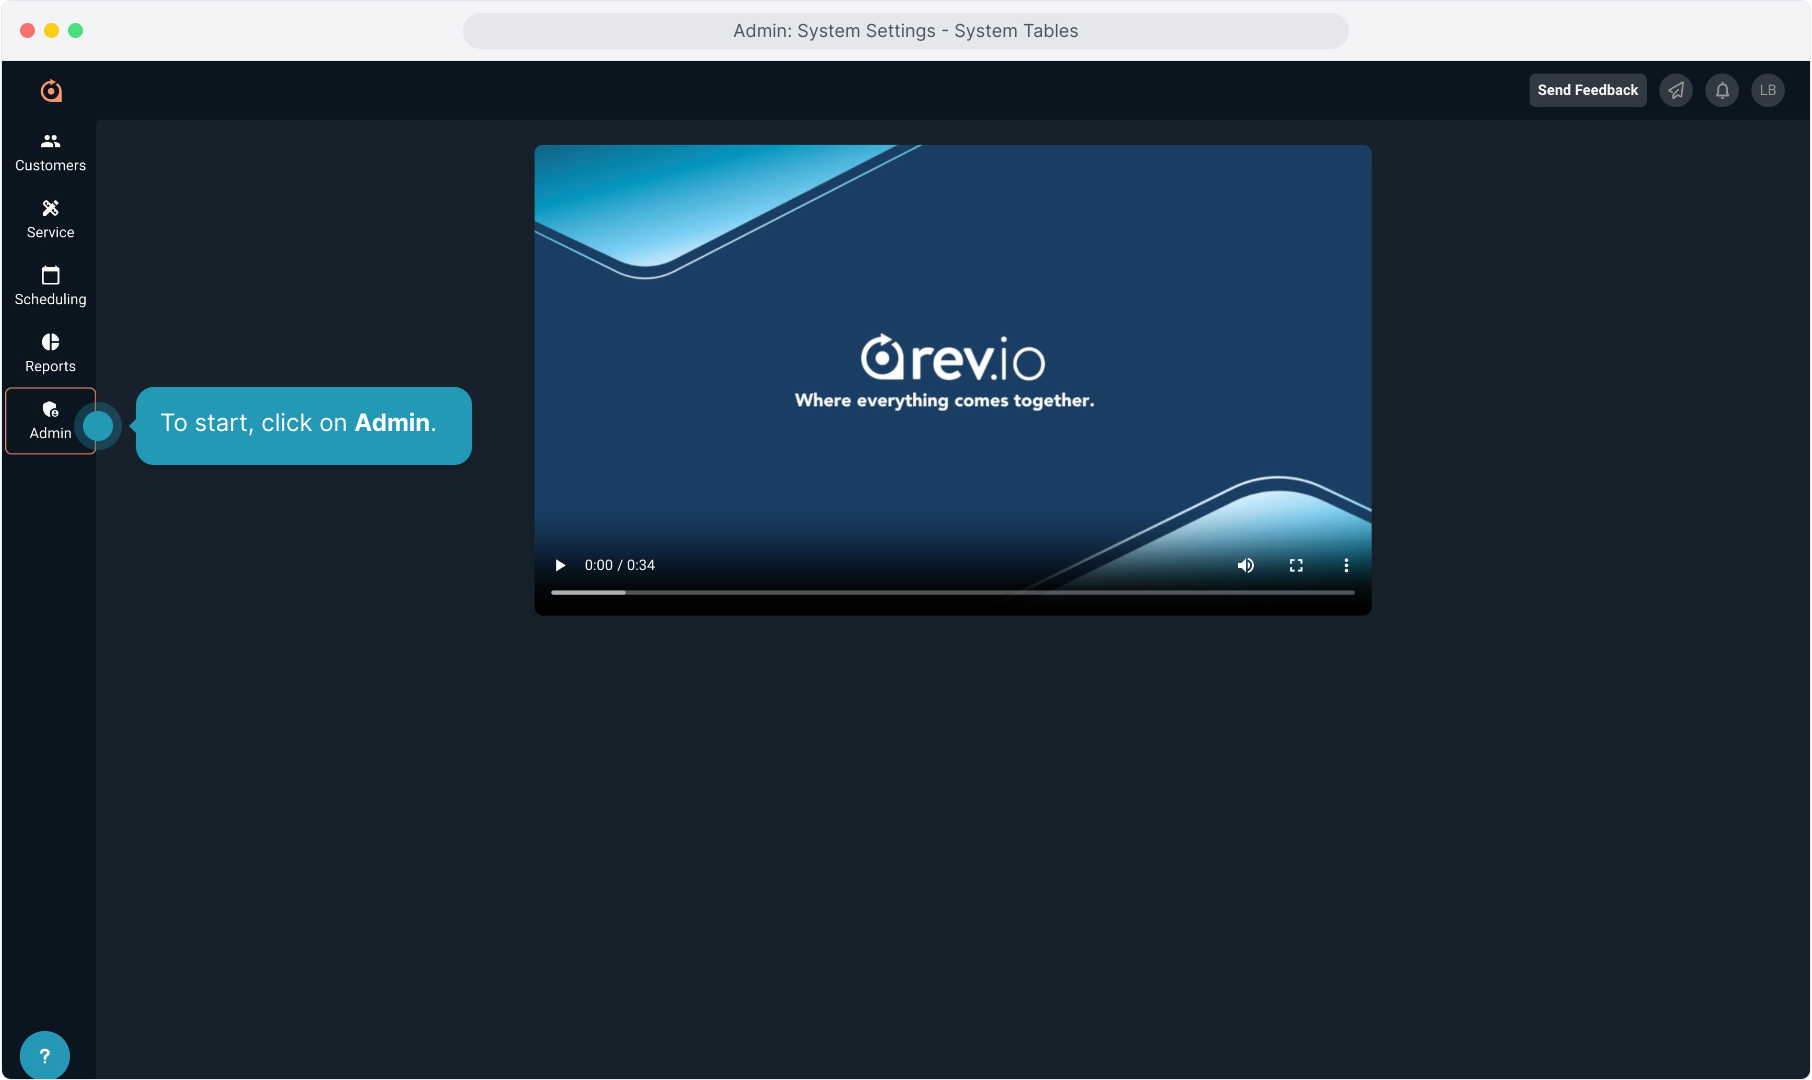
2. To start, click on Admin.
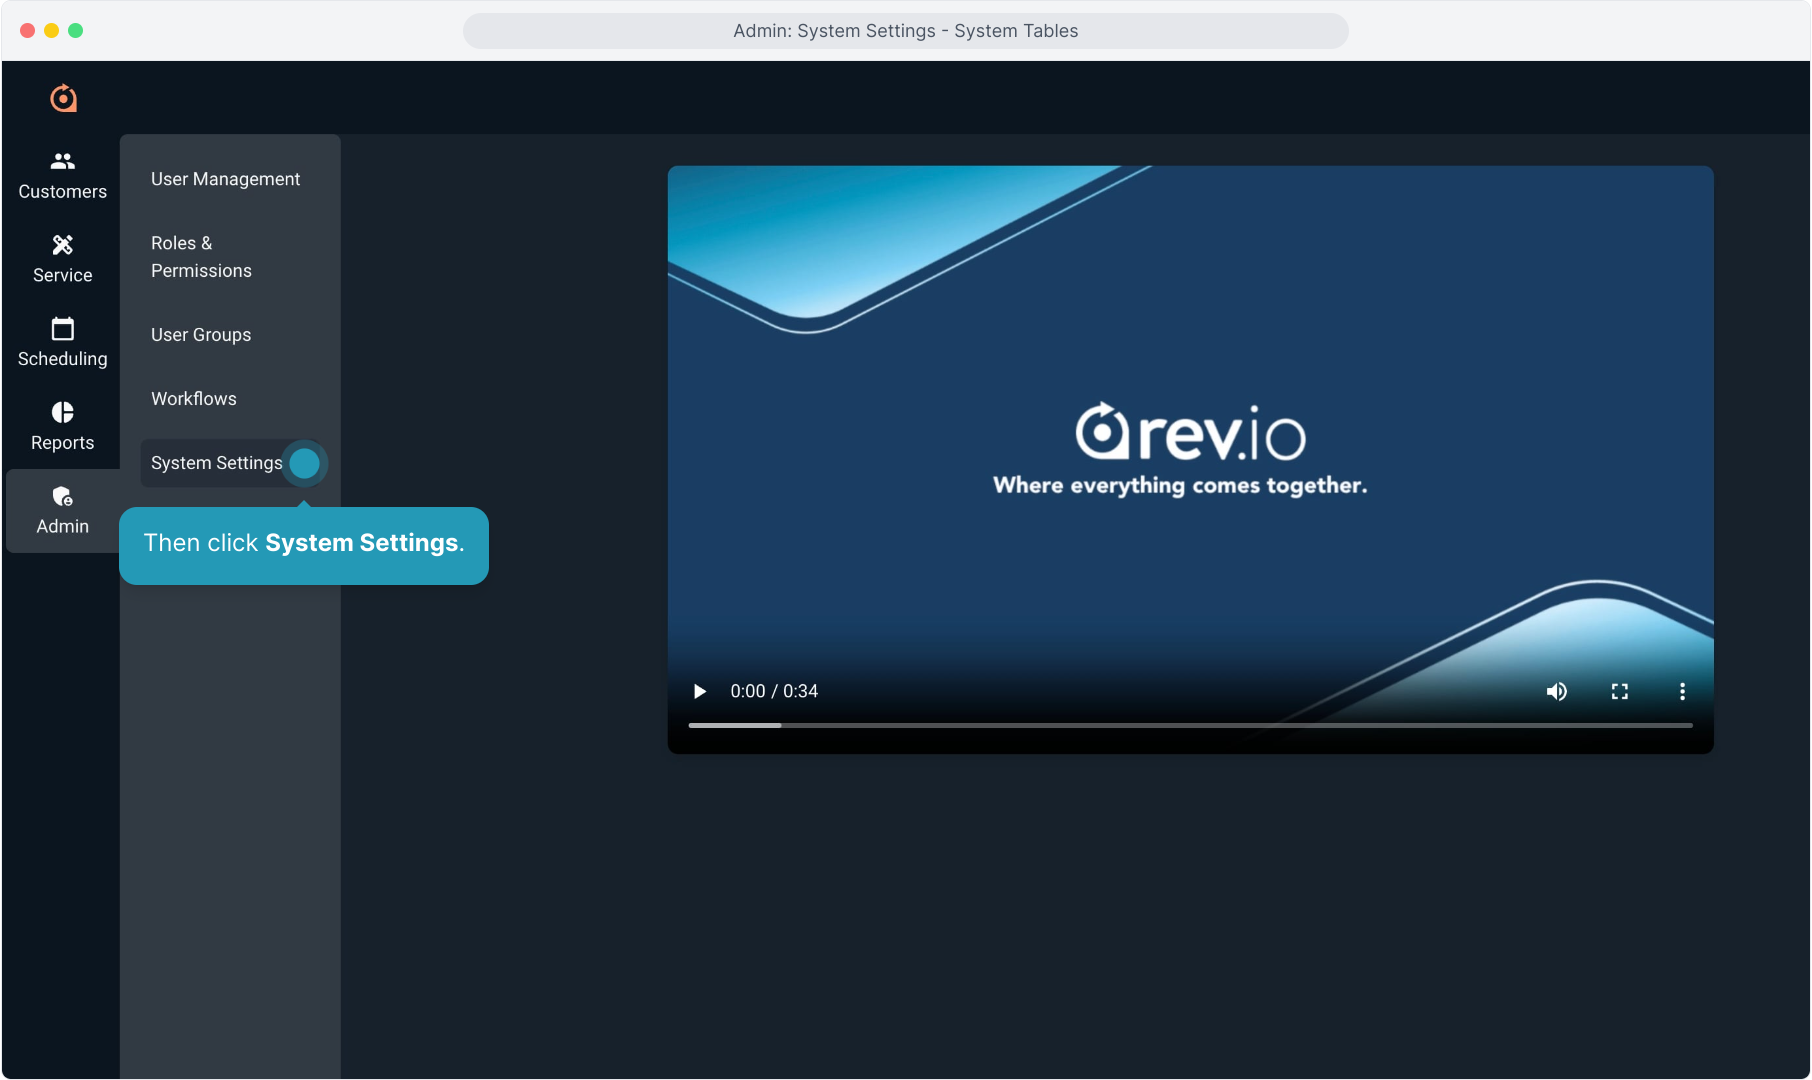
3. Then click System Settings.
4. Next, select System Tables.
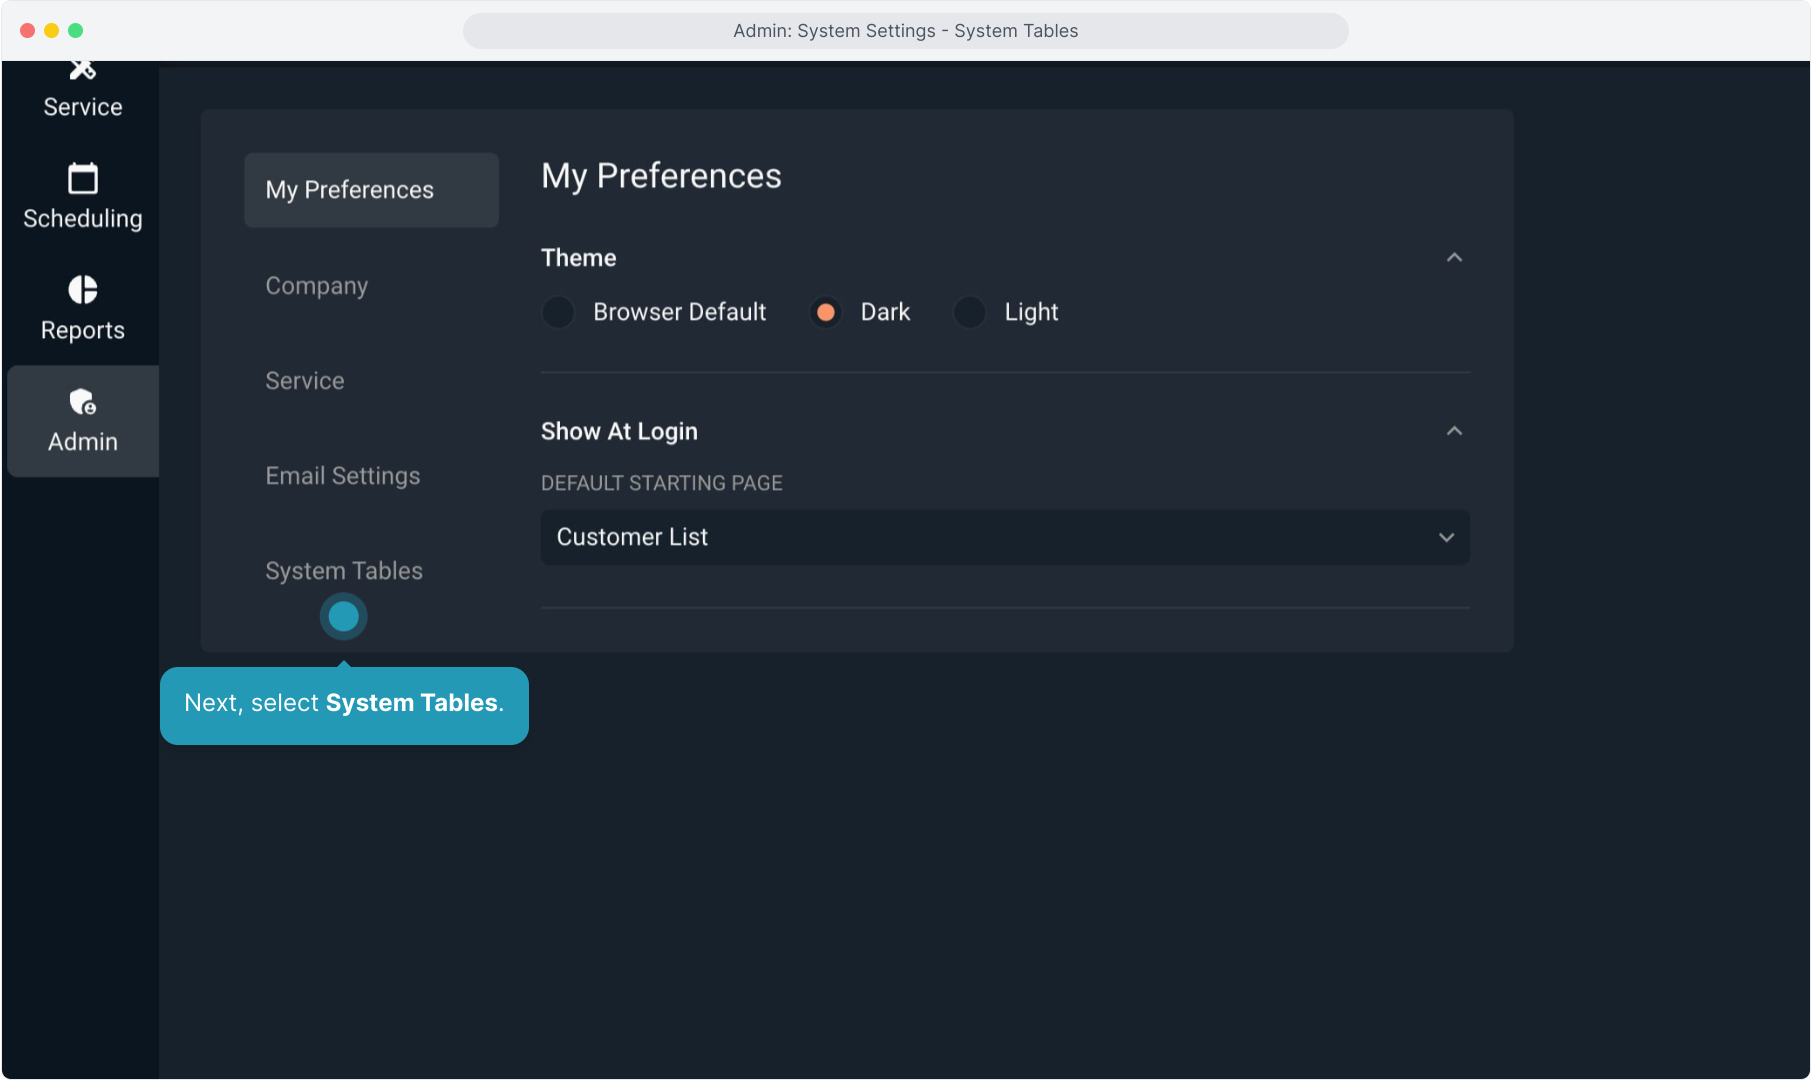
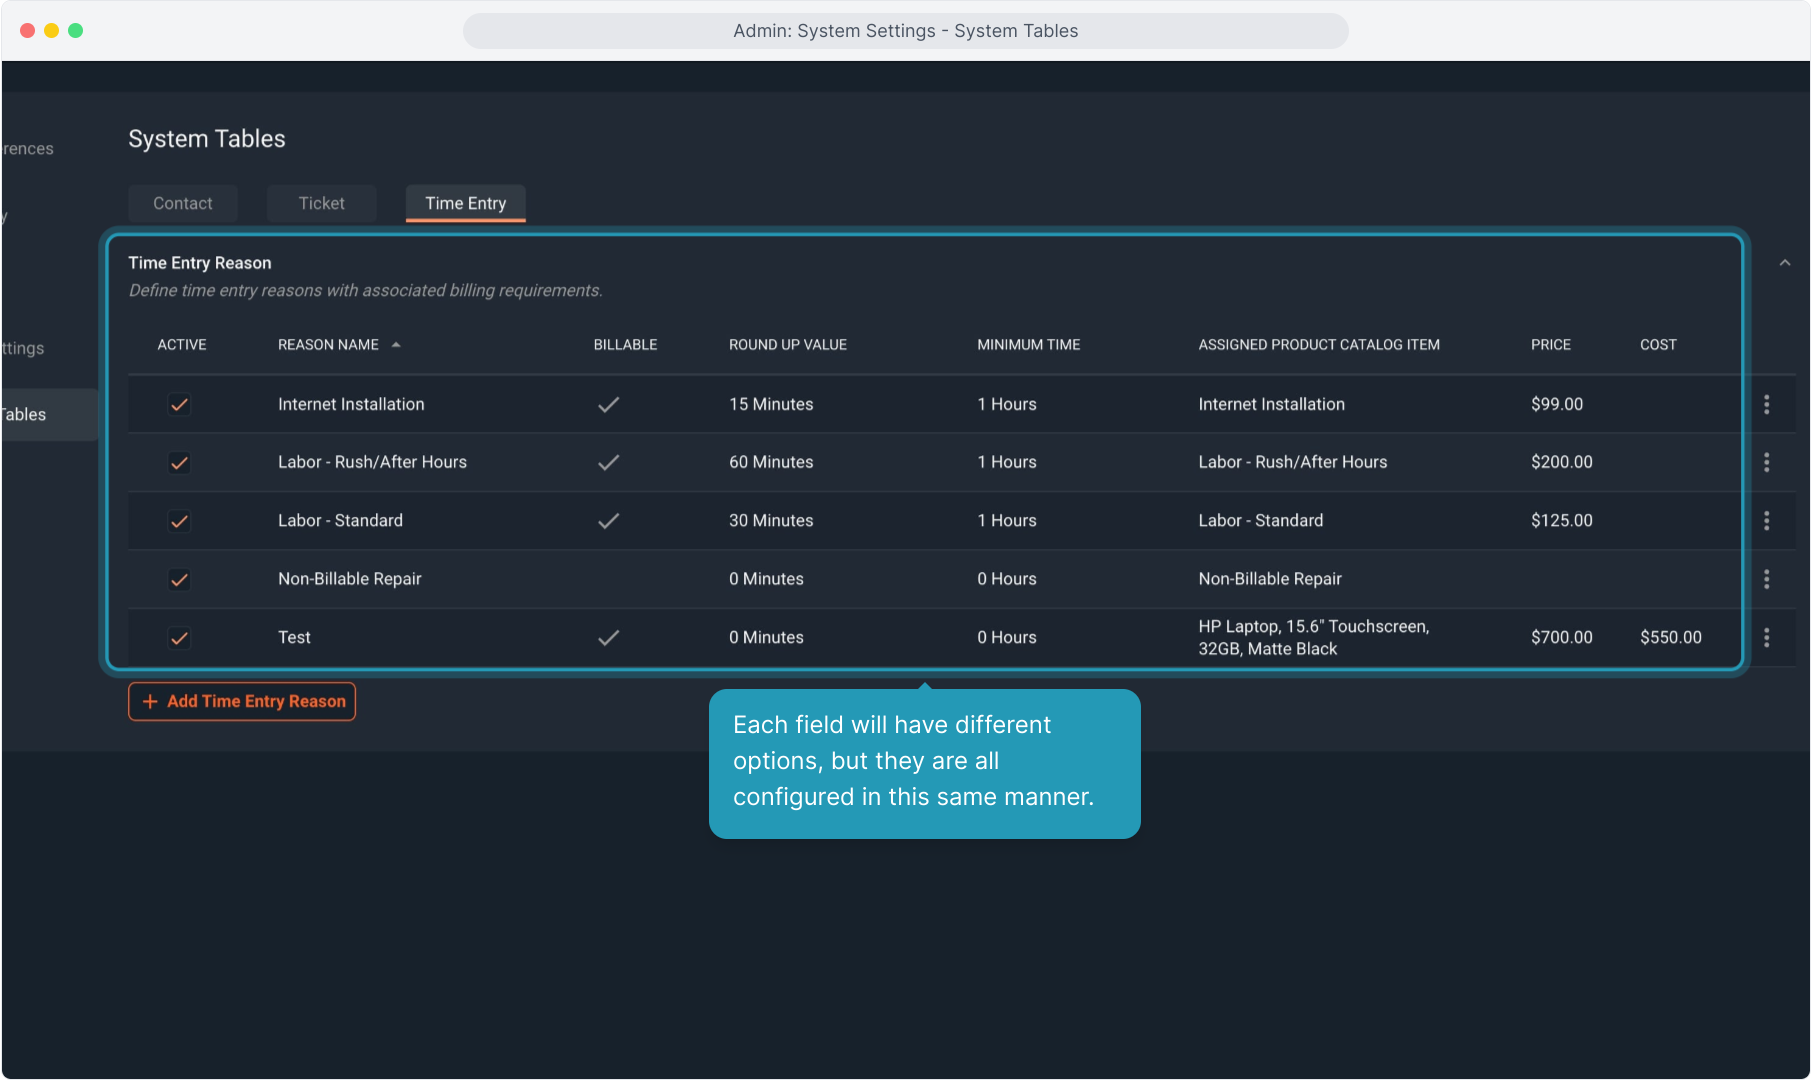
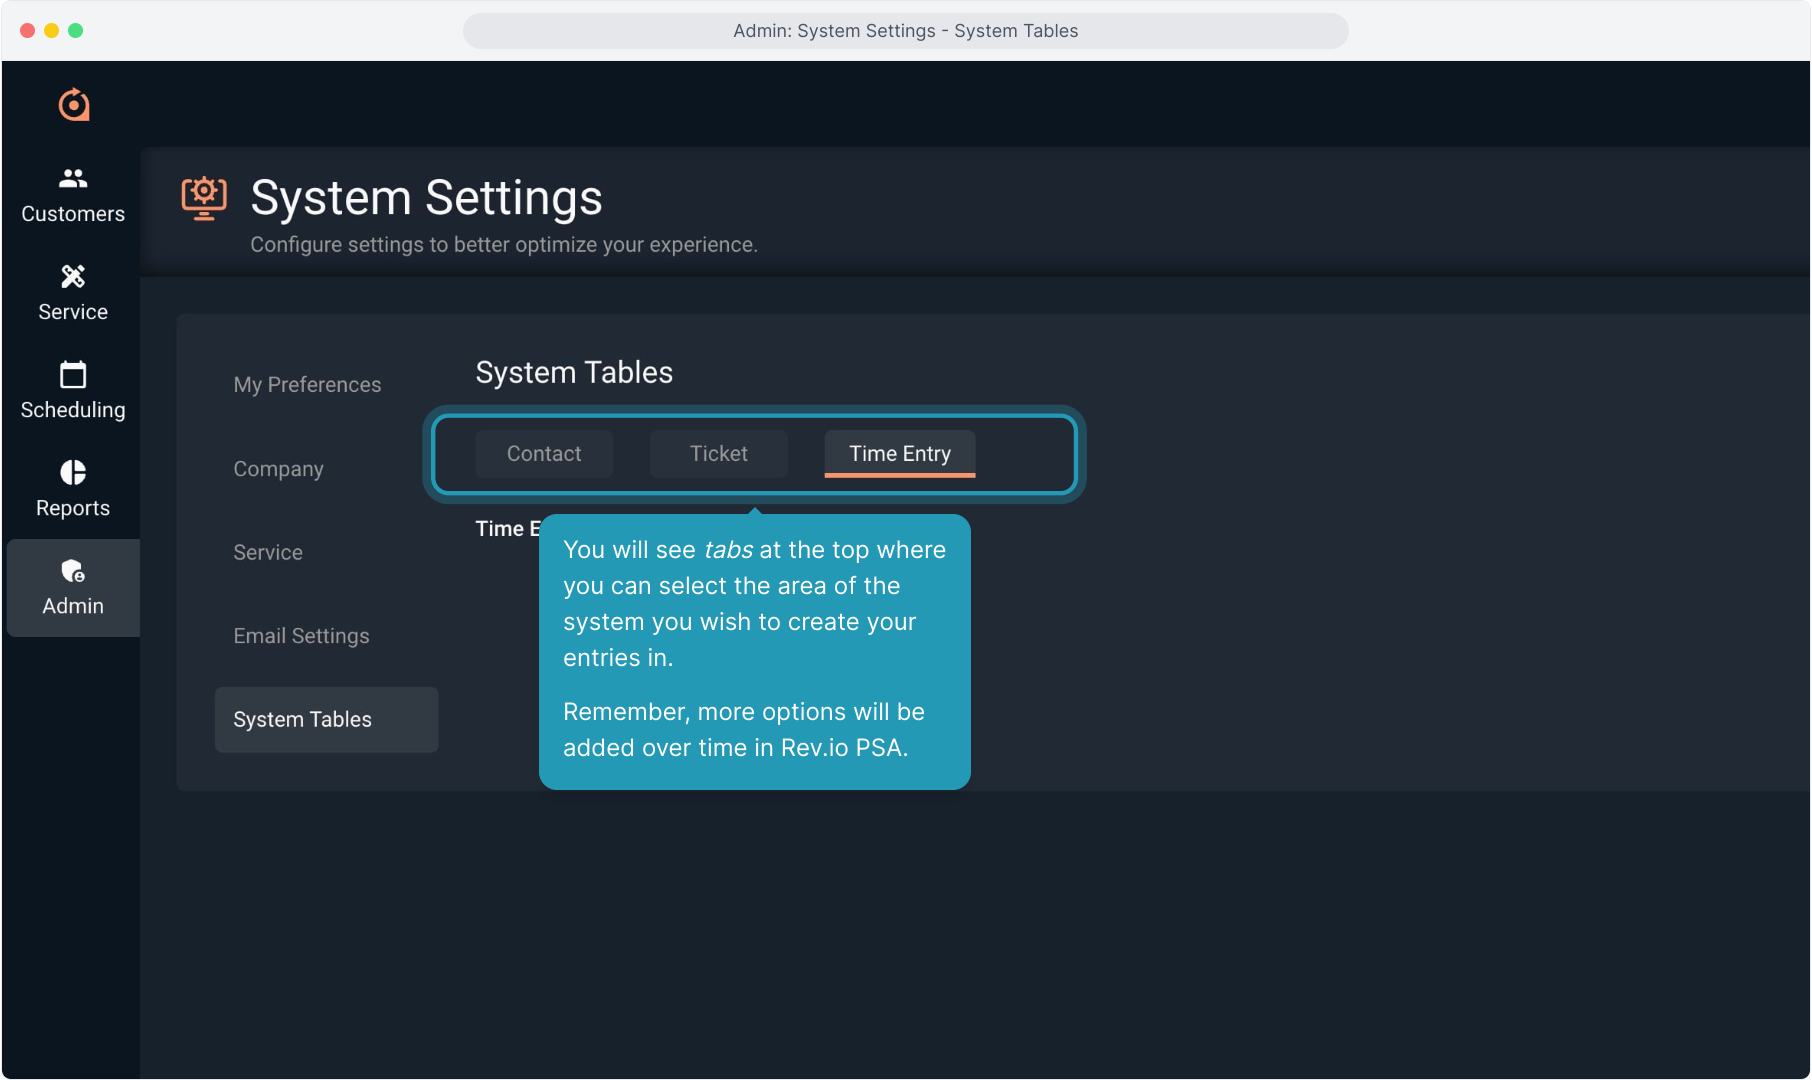
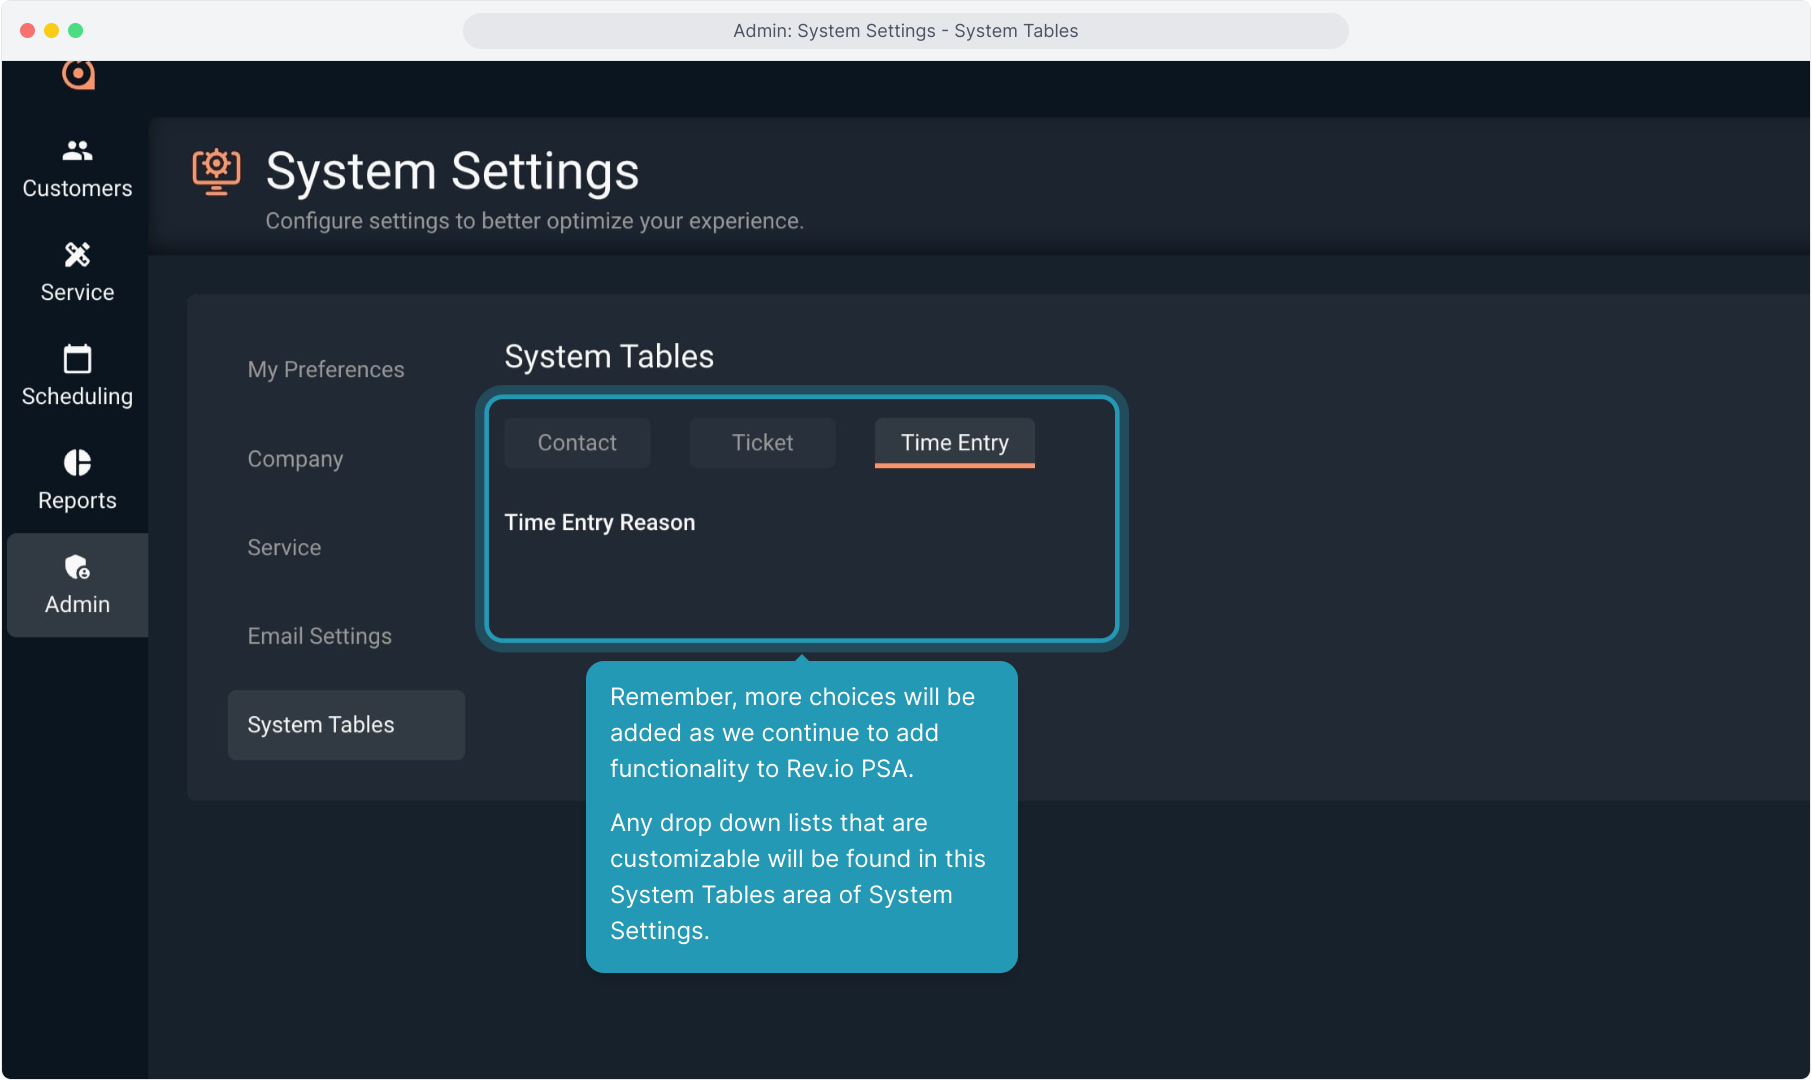
5. You will see tabs at the top where you can select the area of the system you wish to create your entries in. Remember, more options will be added over time in Rev.io PSA.
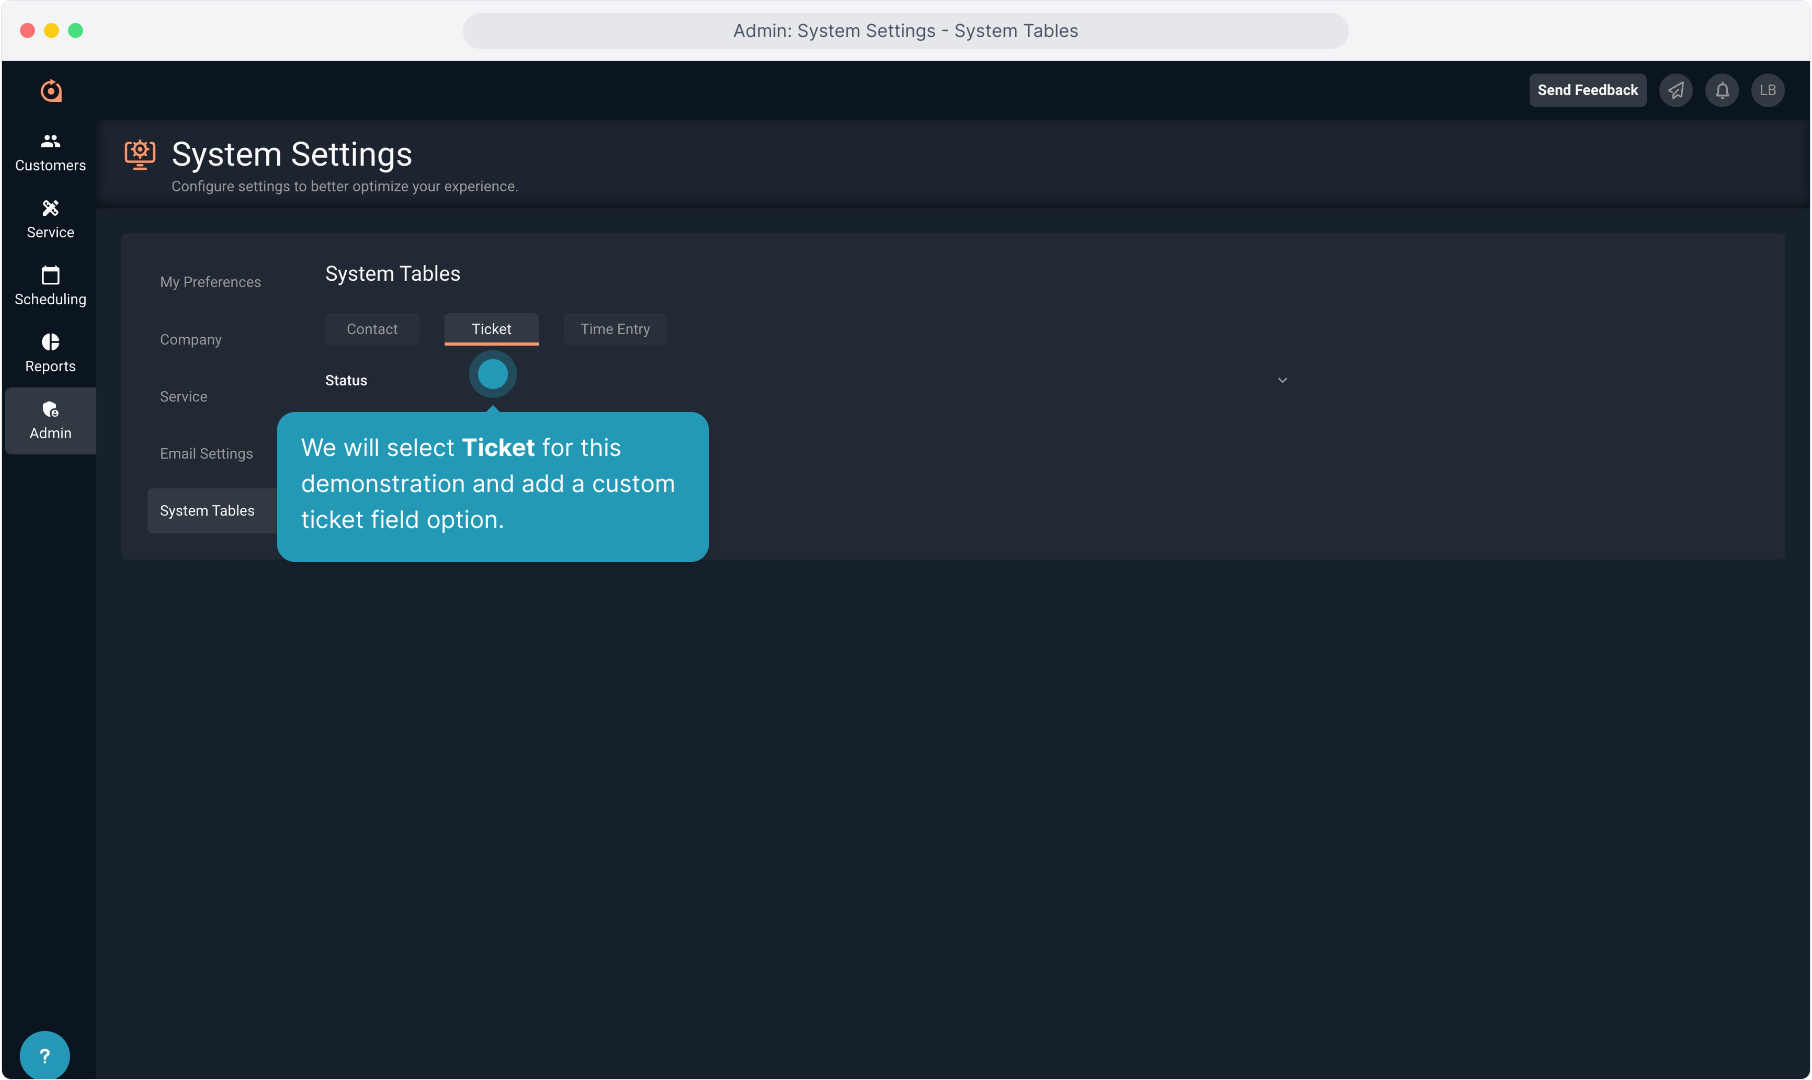
6. We will select Ticket for this demonstration and add a custom ticket field option.
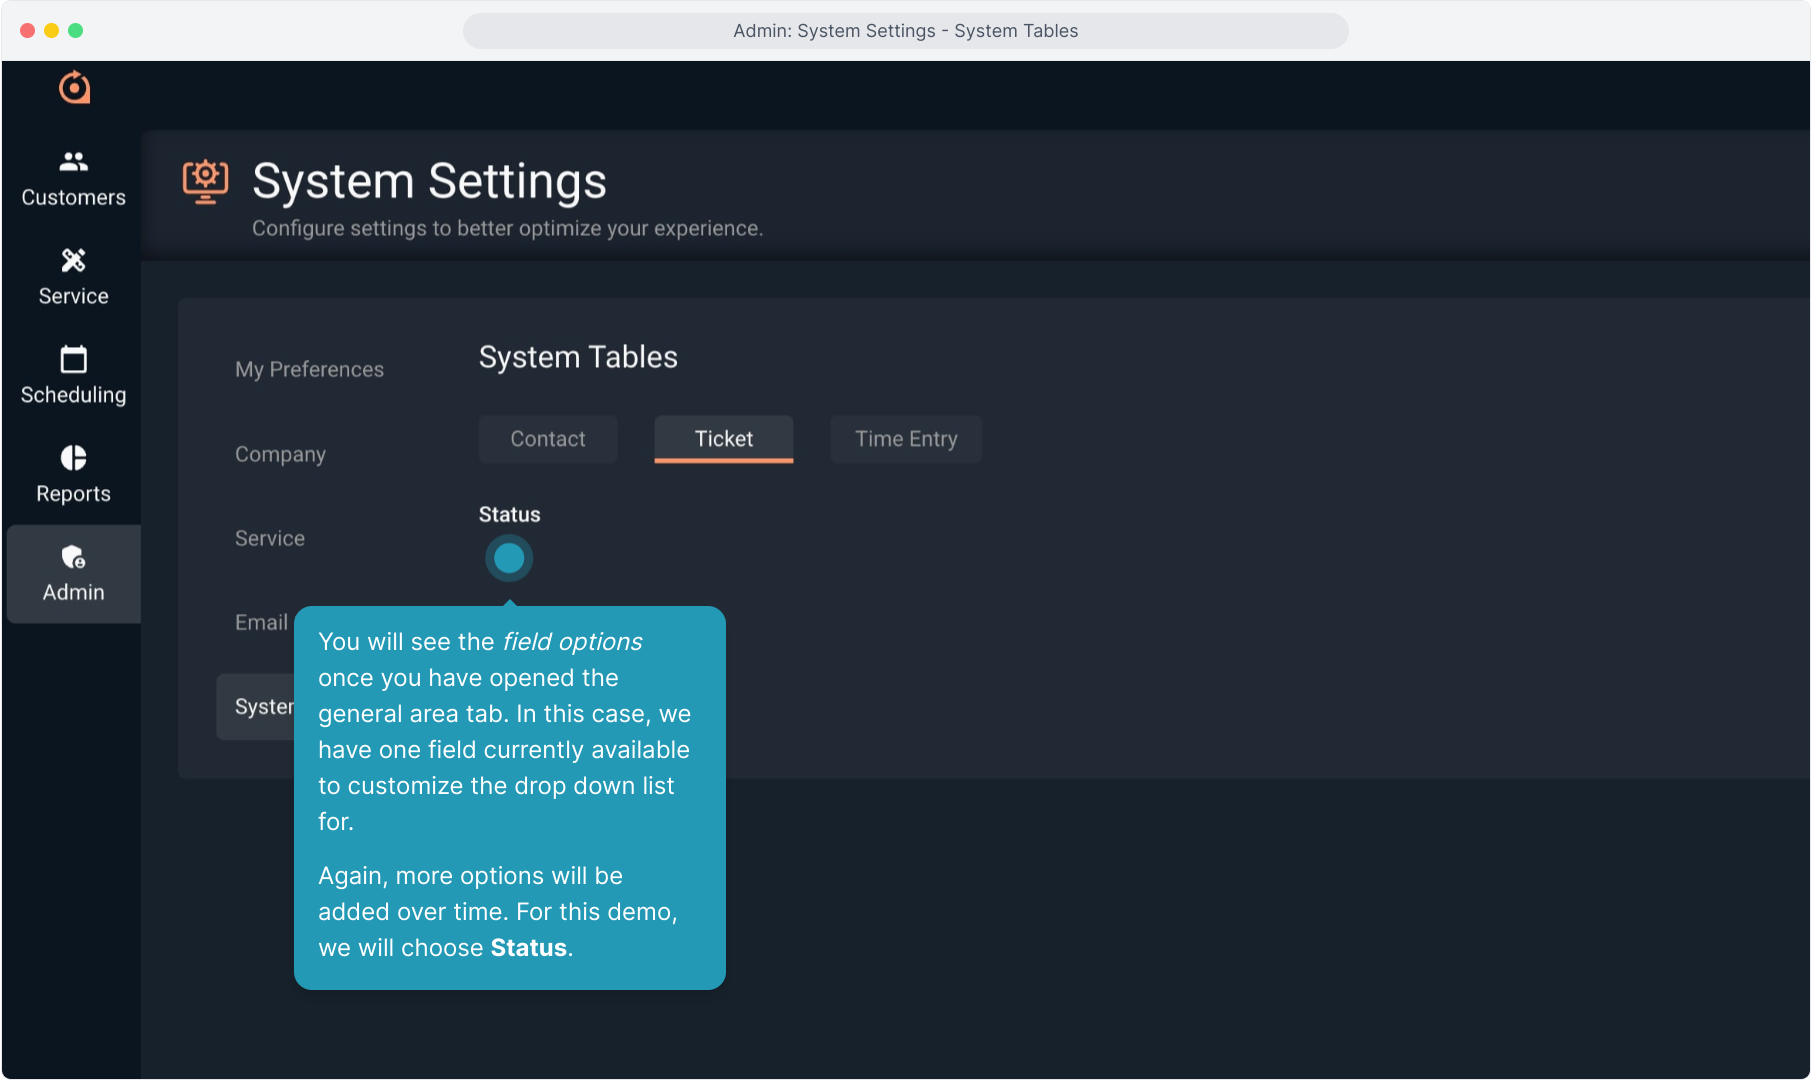
7. You will see the field options once you have opened the general area tab. In this case, we have one field currently available to customize the drop down list for.
Again, more options will be added over time. For this demo, we will choose Status.
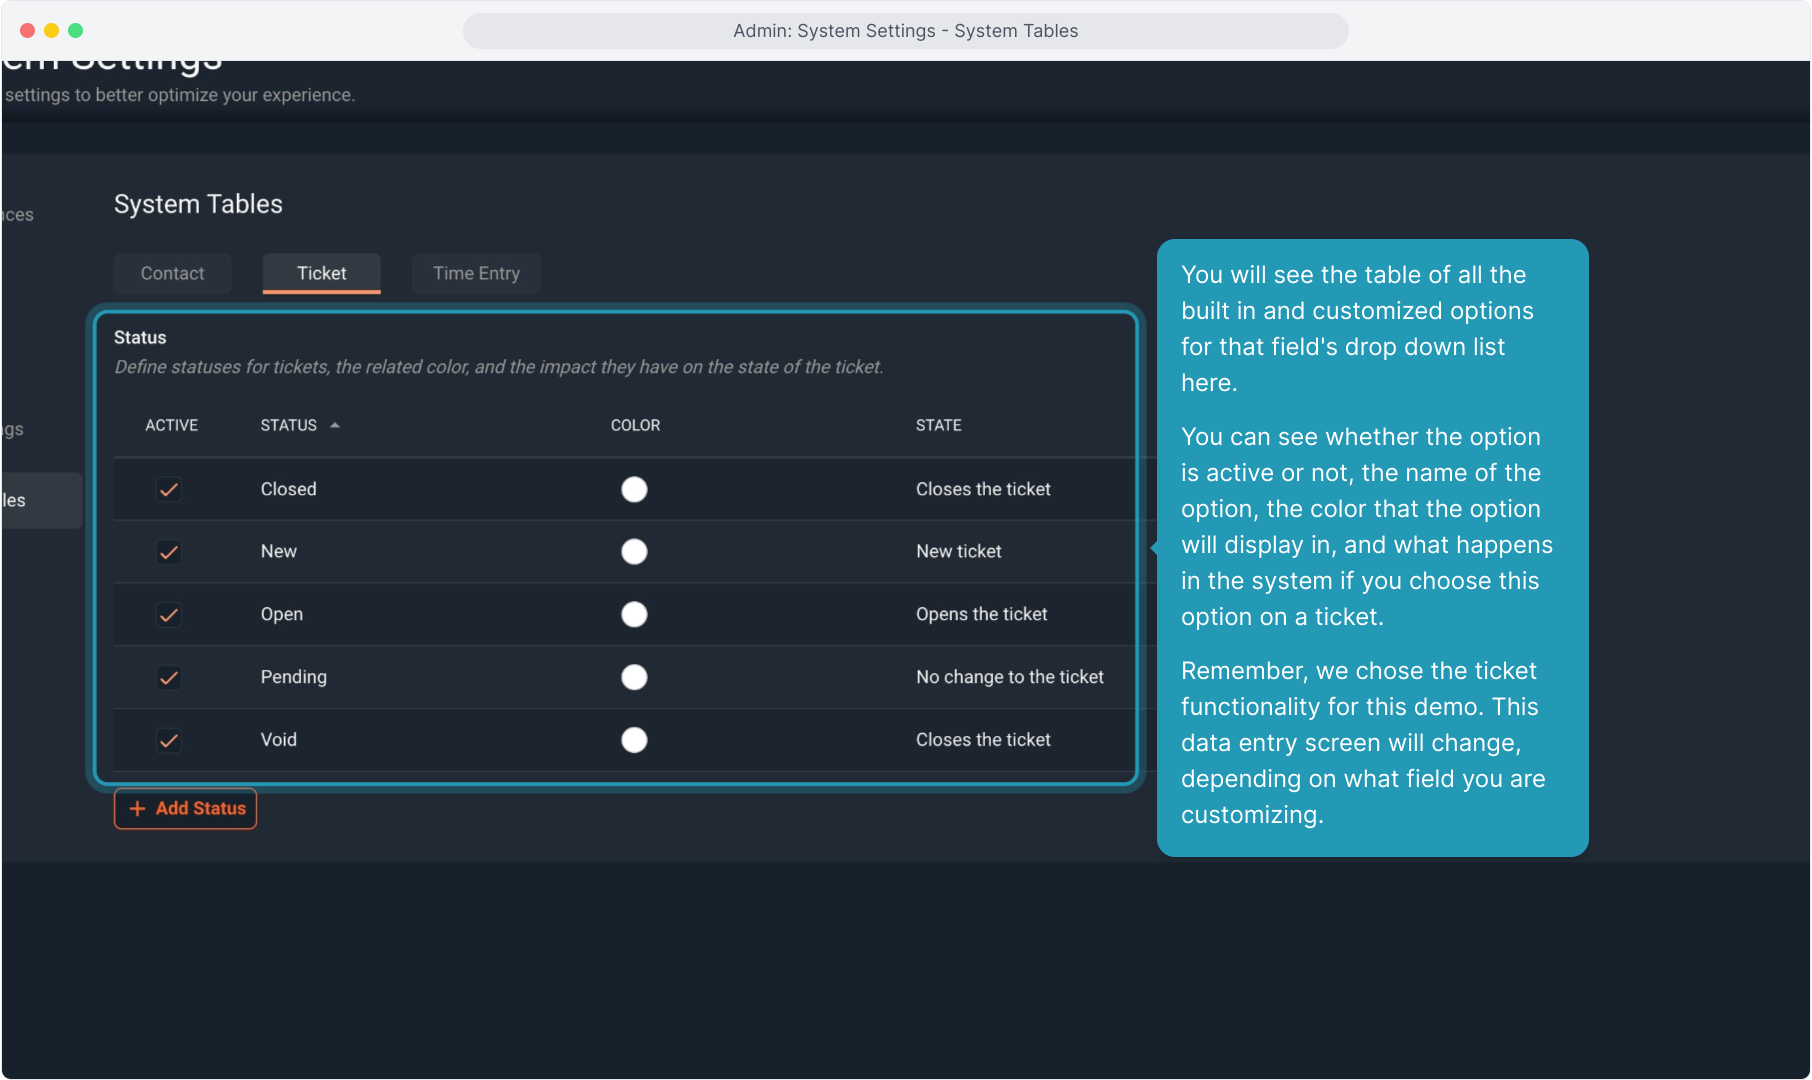
8. You will see the table of all the built in and customized options for that field's drop down list here.
You can see whether the option is active or not, the name of the option, the color that the option will display in, and what happens in the system if you choose this option on a ticket.
Remember, we chose the ticket functionality for this demo. This data entry screen will change, depending on what field you are customizing.
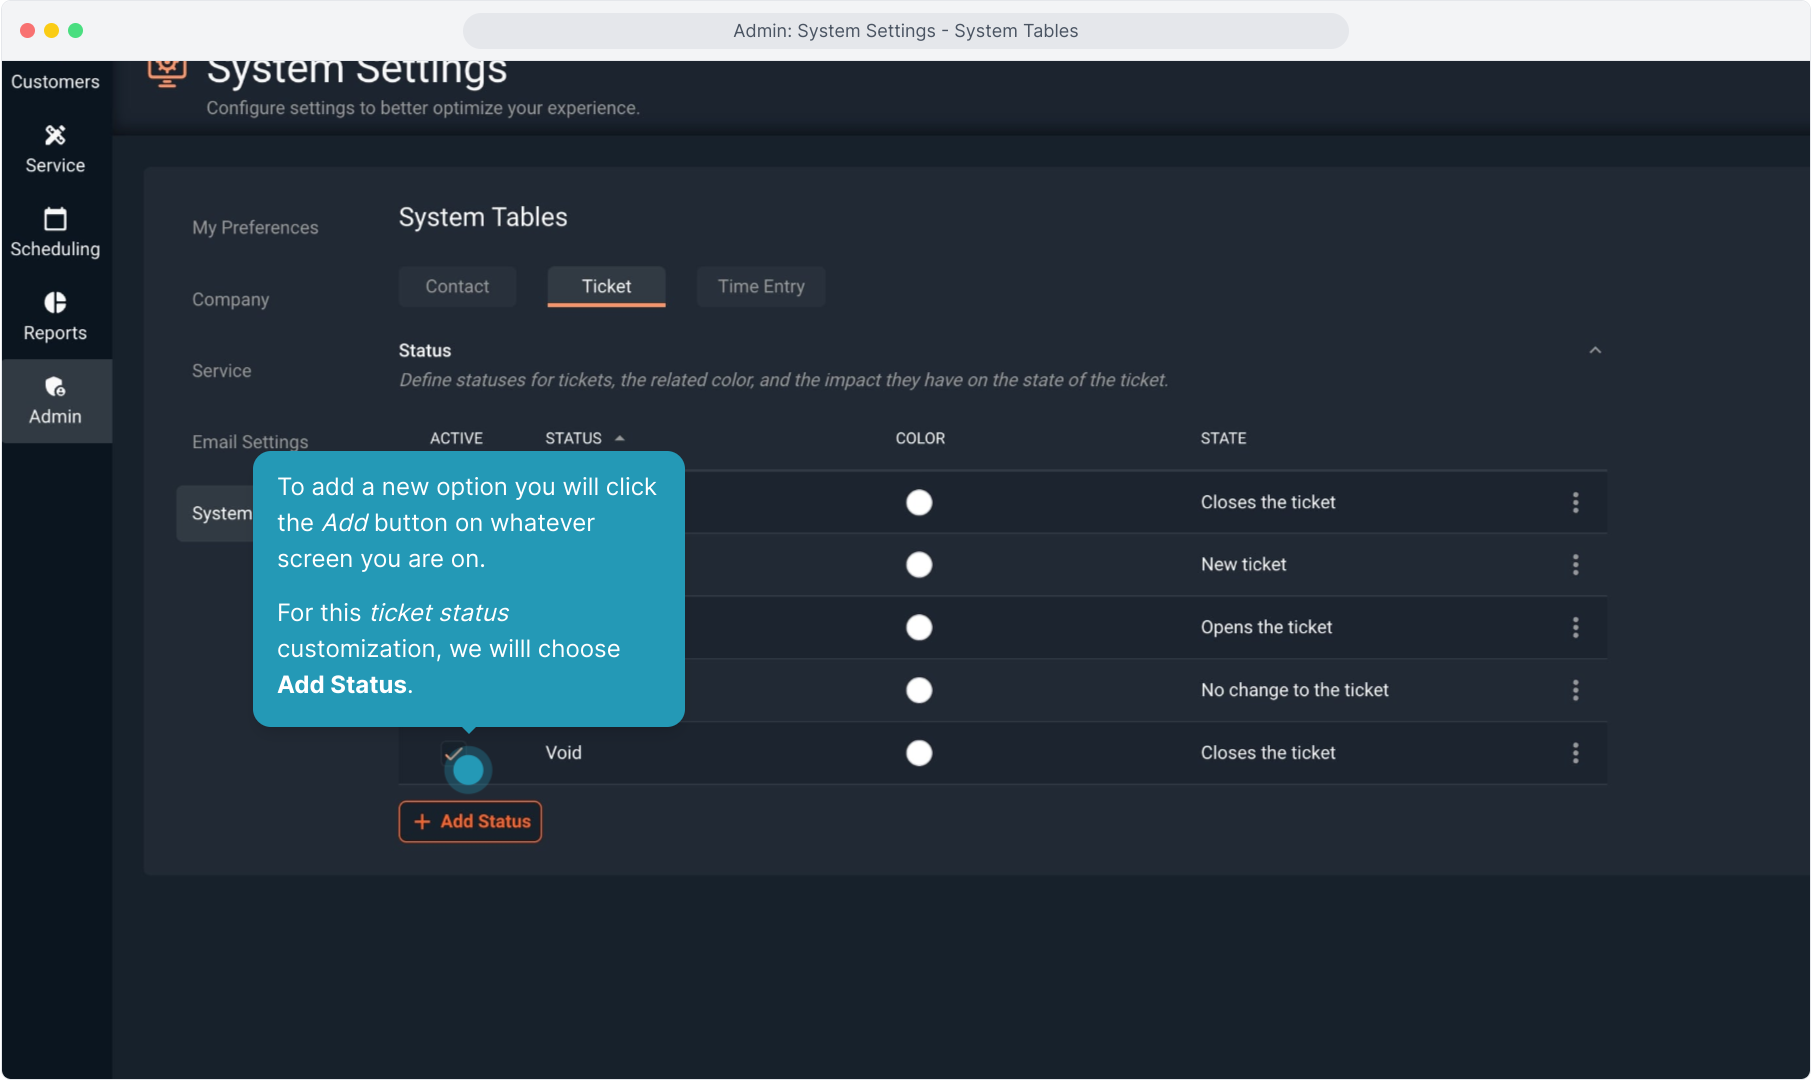
9. To add a new option you will click the Add button on whatever screen you are on. For this ticket status customization, we will choose Add Status.
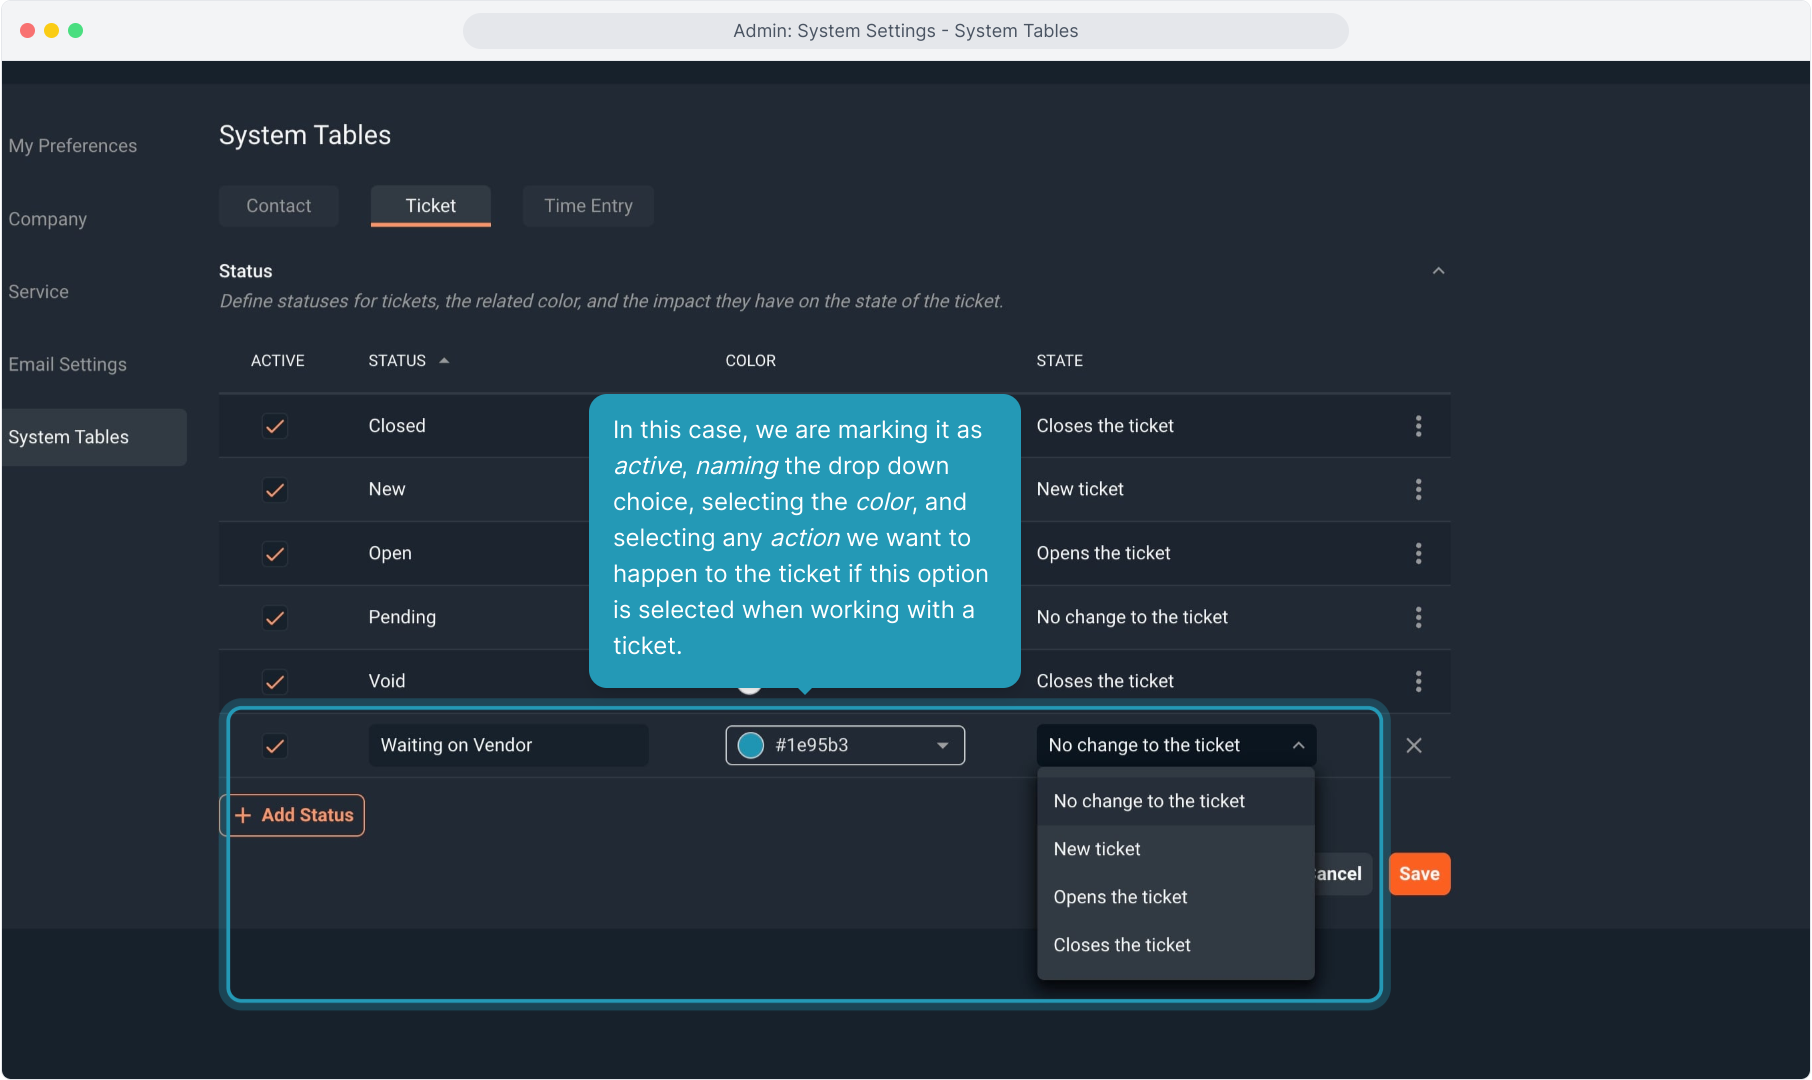
10. In this case, we are marking it as active, naming the drop down choice, selecting the color, and selecting any action we want to happen to the ticket if this option is selected when working with a ticket.
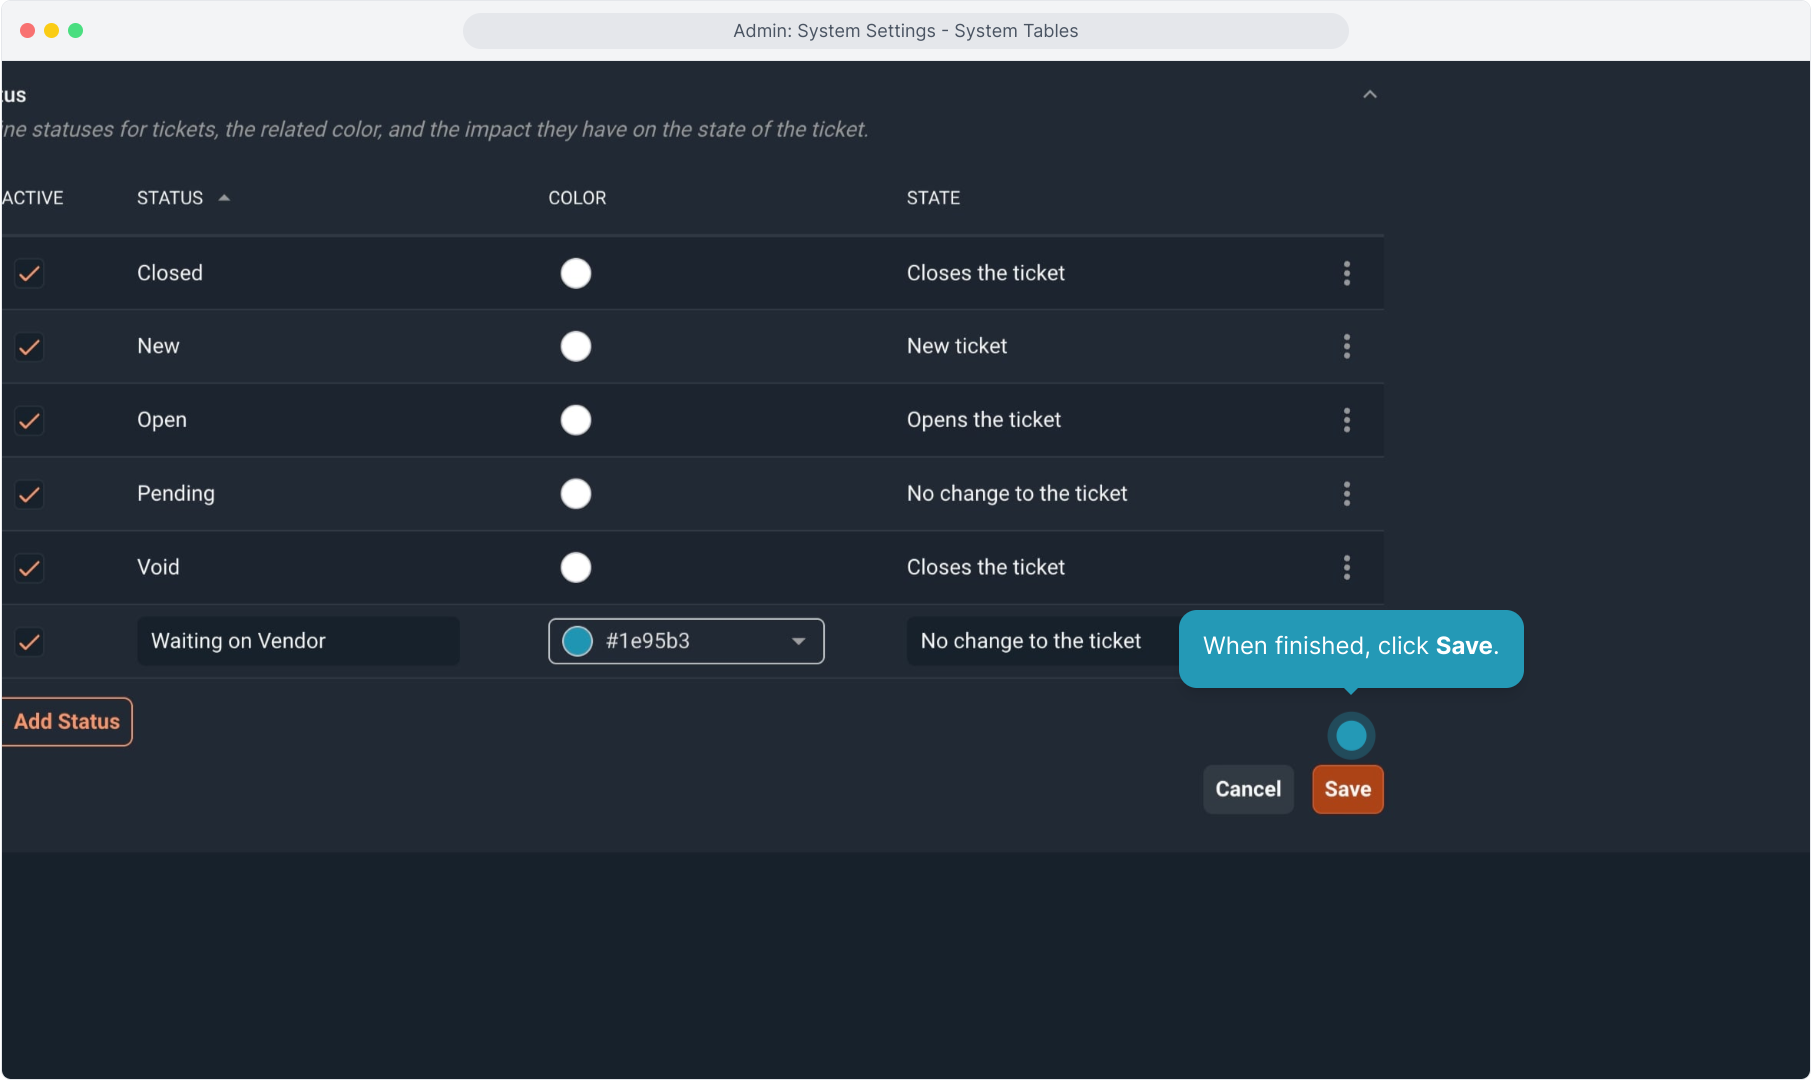
11. When finished, click Save.
12. To edit or delete an option, click the three dot icon and make a selection. Note you will not be able to delete or alter any system options that are built into Rev.io PSA.

13. Remember, more choices will be added as we continue to add functionality to Rev.io PSA. Any drop down lists that are customizable will be found in this System Tables area of System Settings.
14. Each field will have different options, but they are all configured in this same manner.