
How To Guide: Inventory Management - Adding/Removing Stock Manually from Product Catalog
1. Introduction
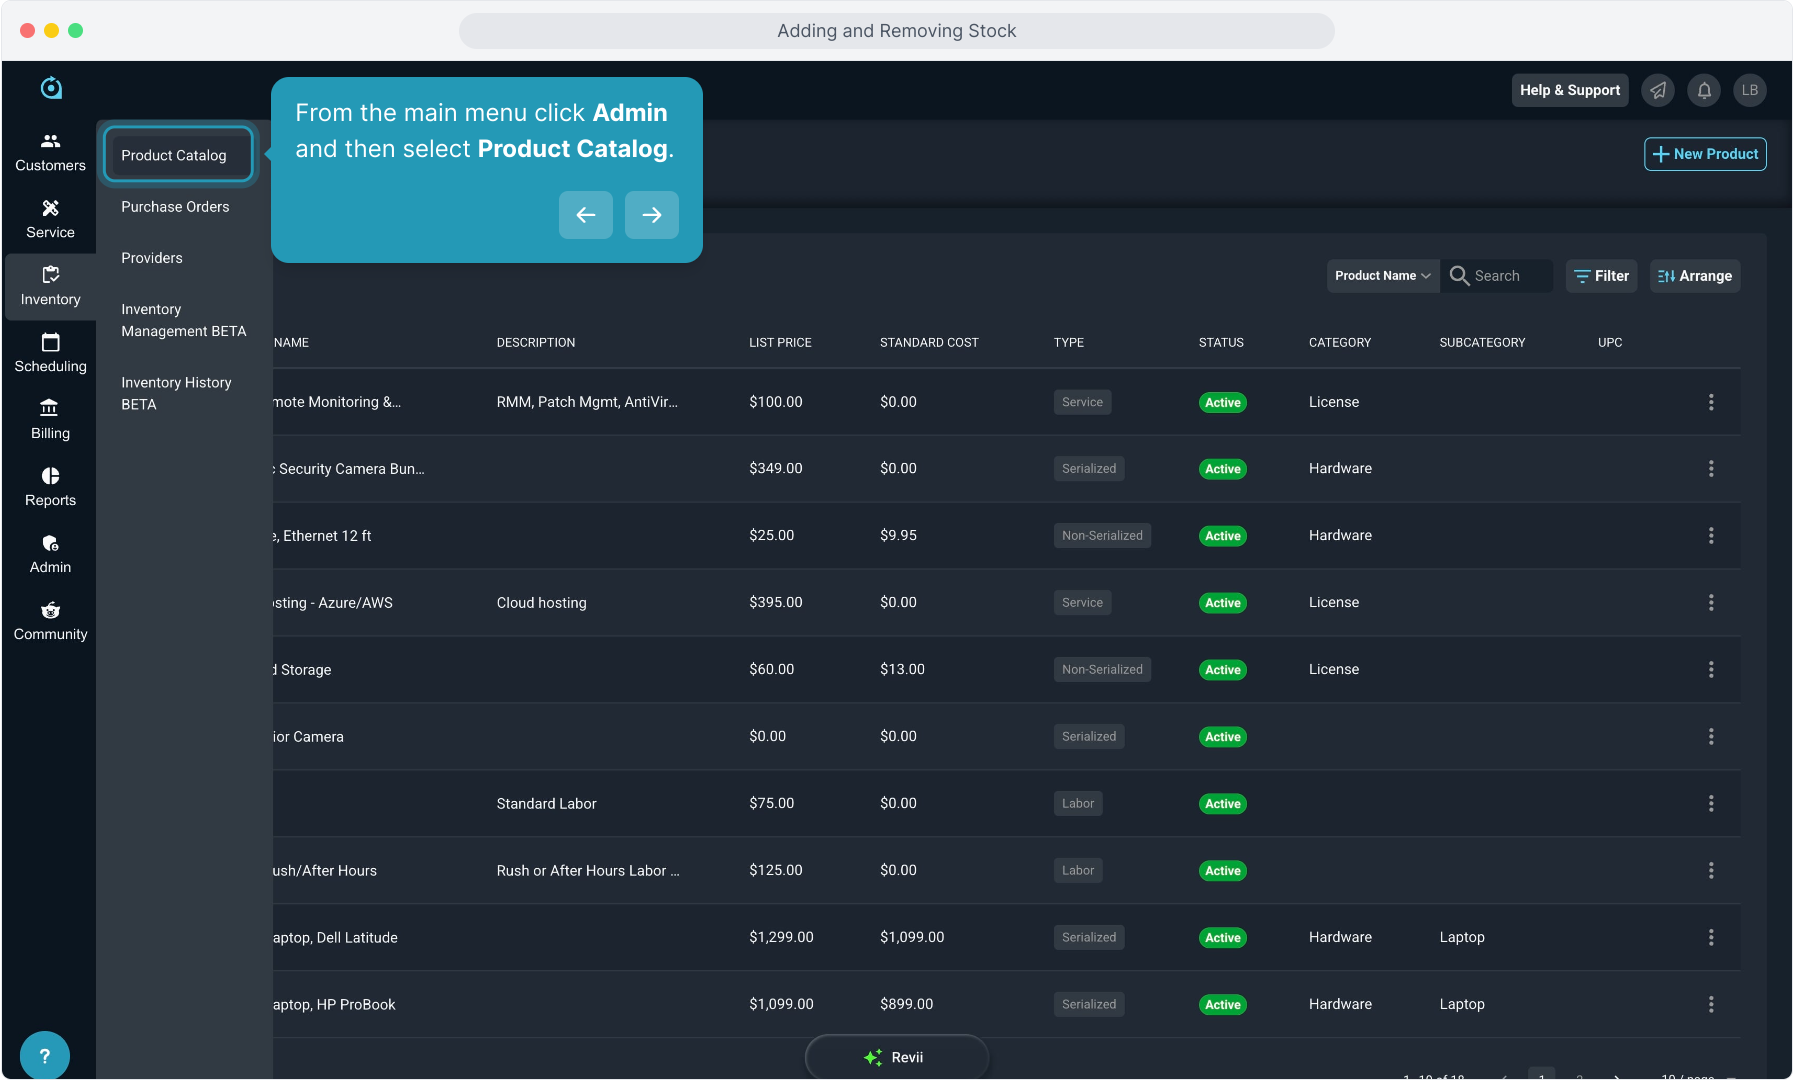
2. From the main menu click Admin and then select Product Catalog.
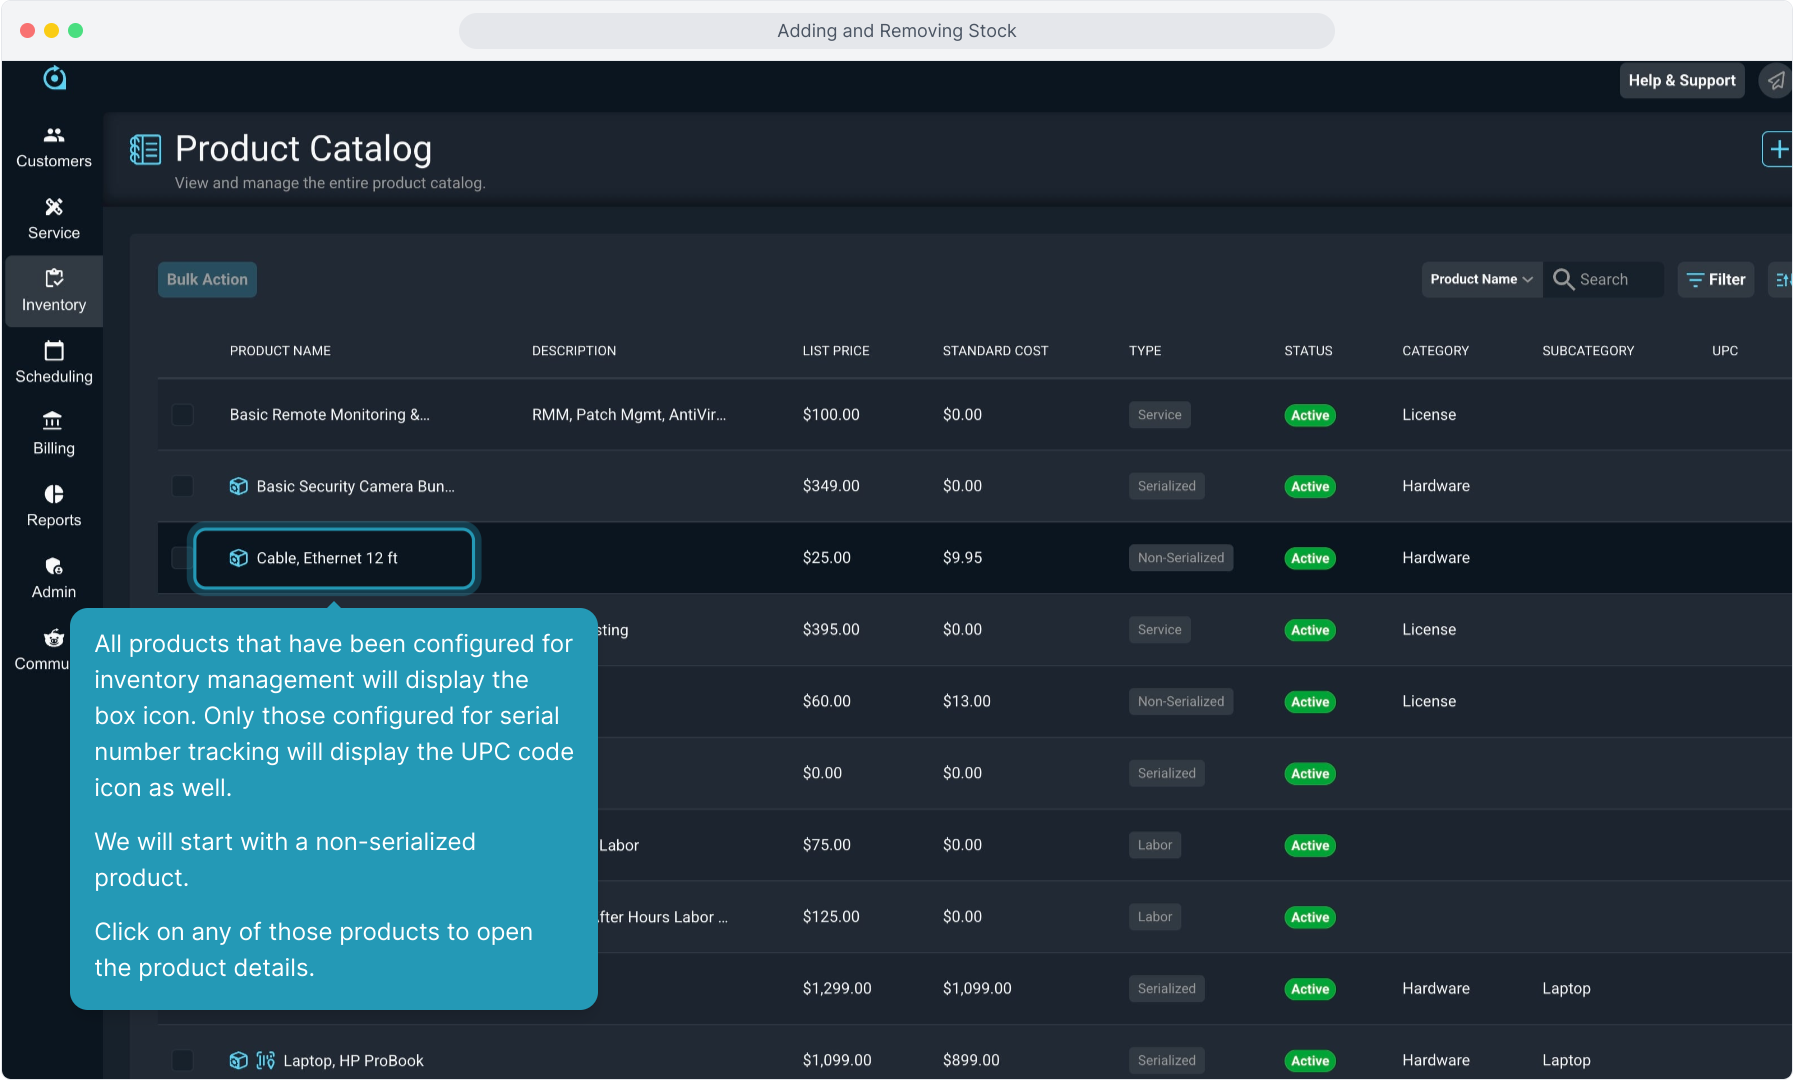
3. All products that have been configured for inventory management will display the box icon. Only those configured for serial number tracking will display the UPC code icon as well. We will start with a non-serialized product.
Click on any of those products to open the product details.
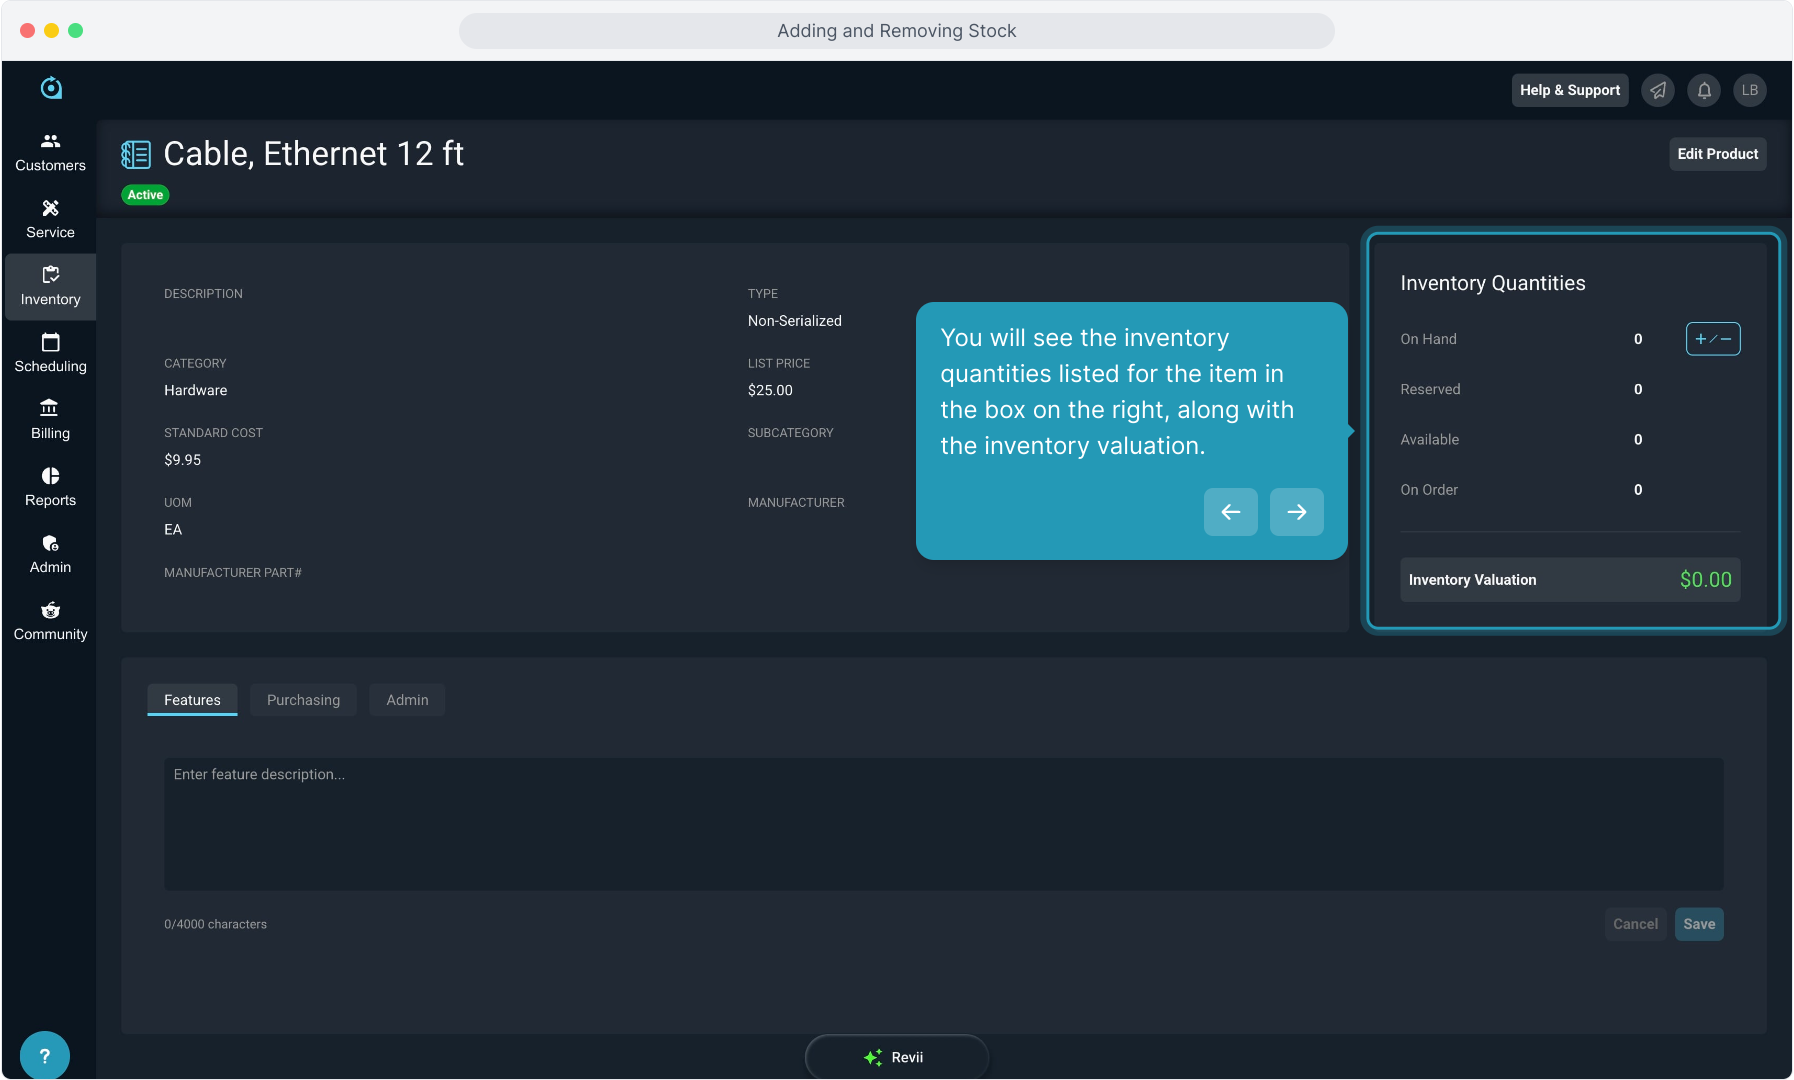
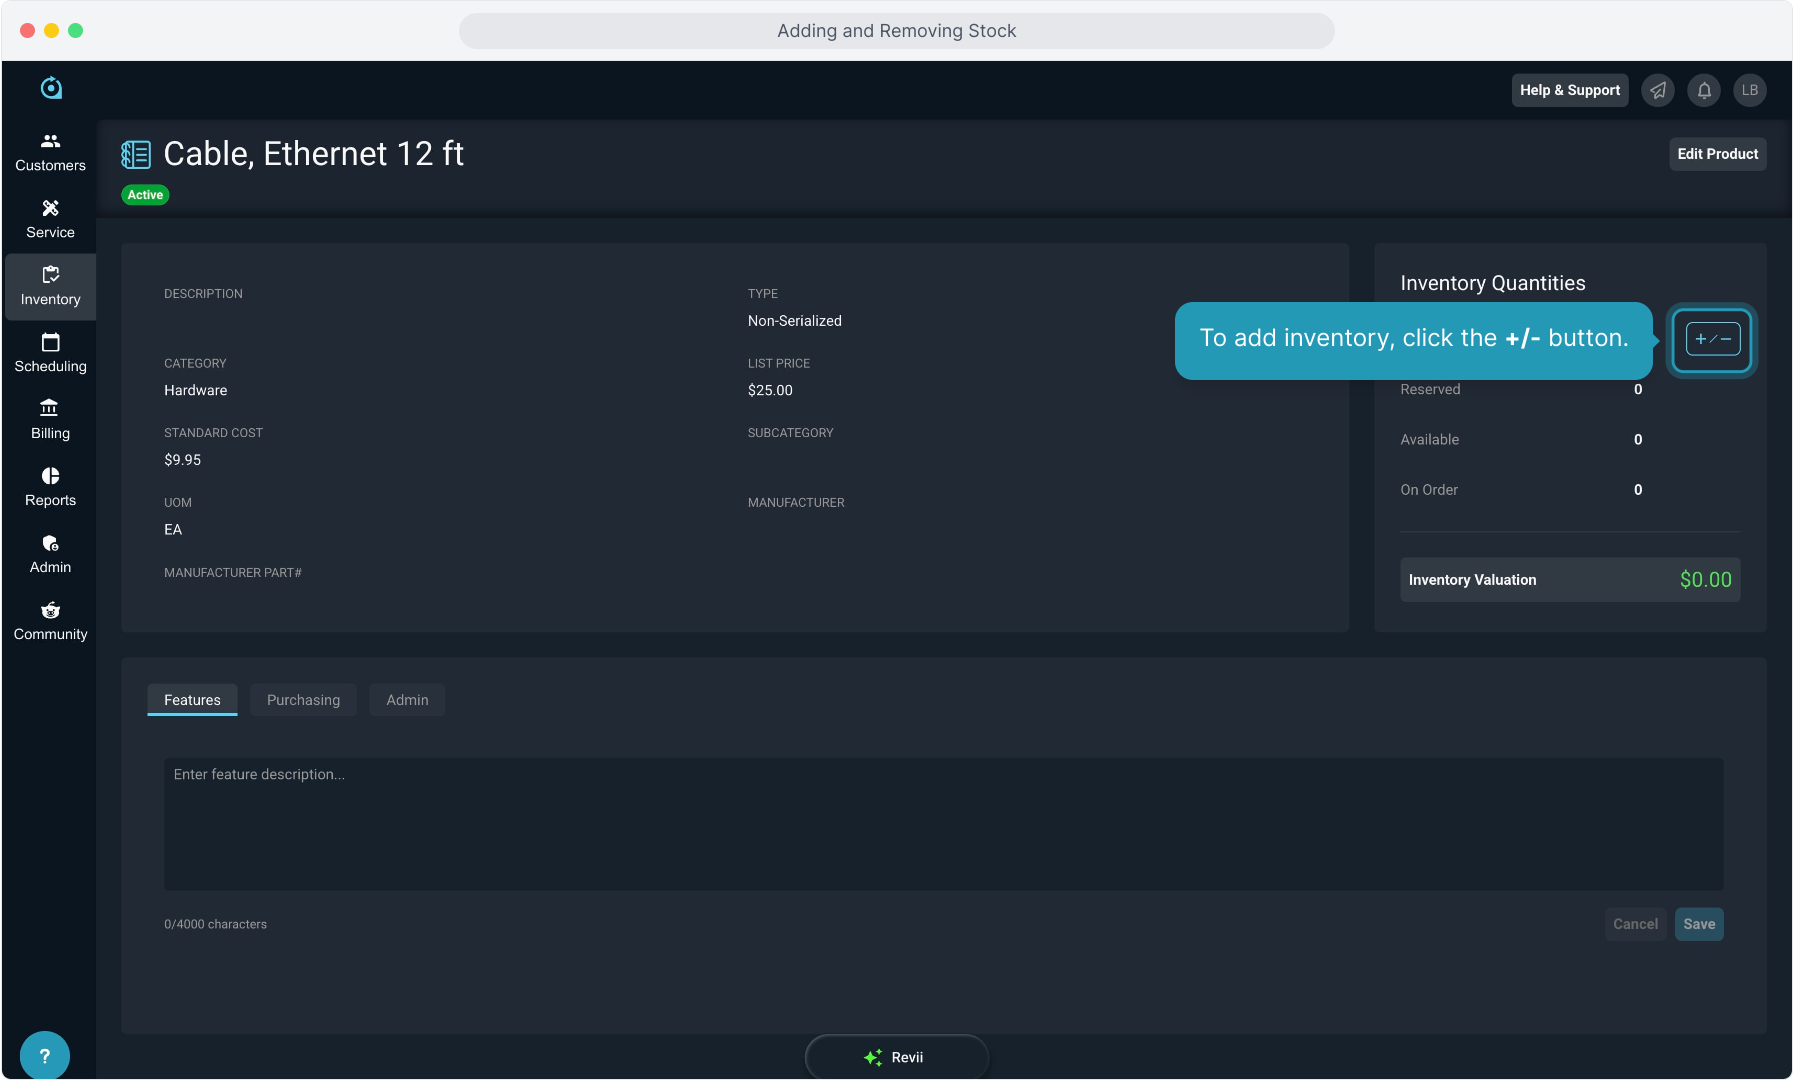
4. You will see the inventory quantities listed for the item in the box on the right, along with the inventory valuation.
5. To add inventory, click the +/- button.
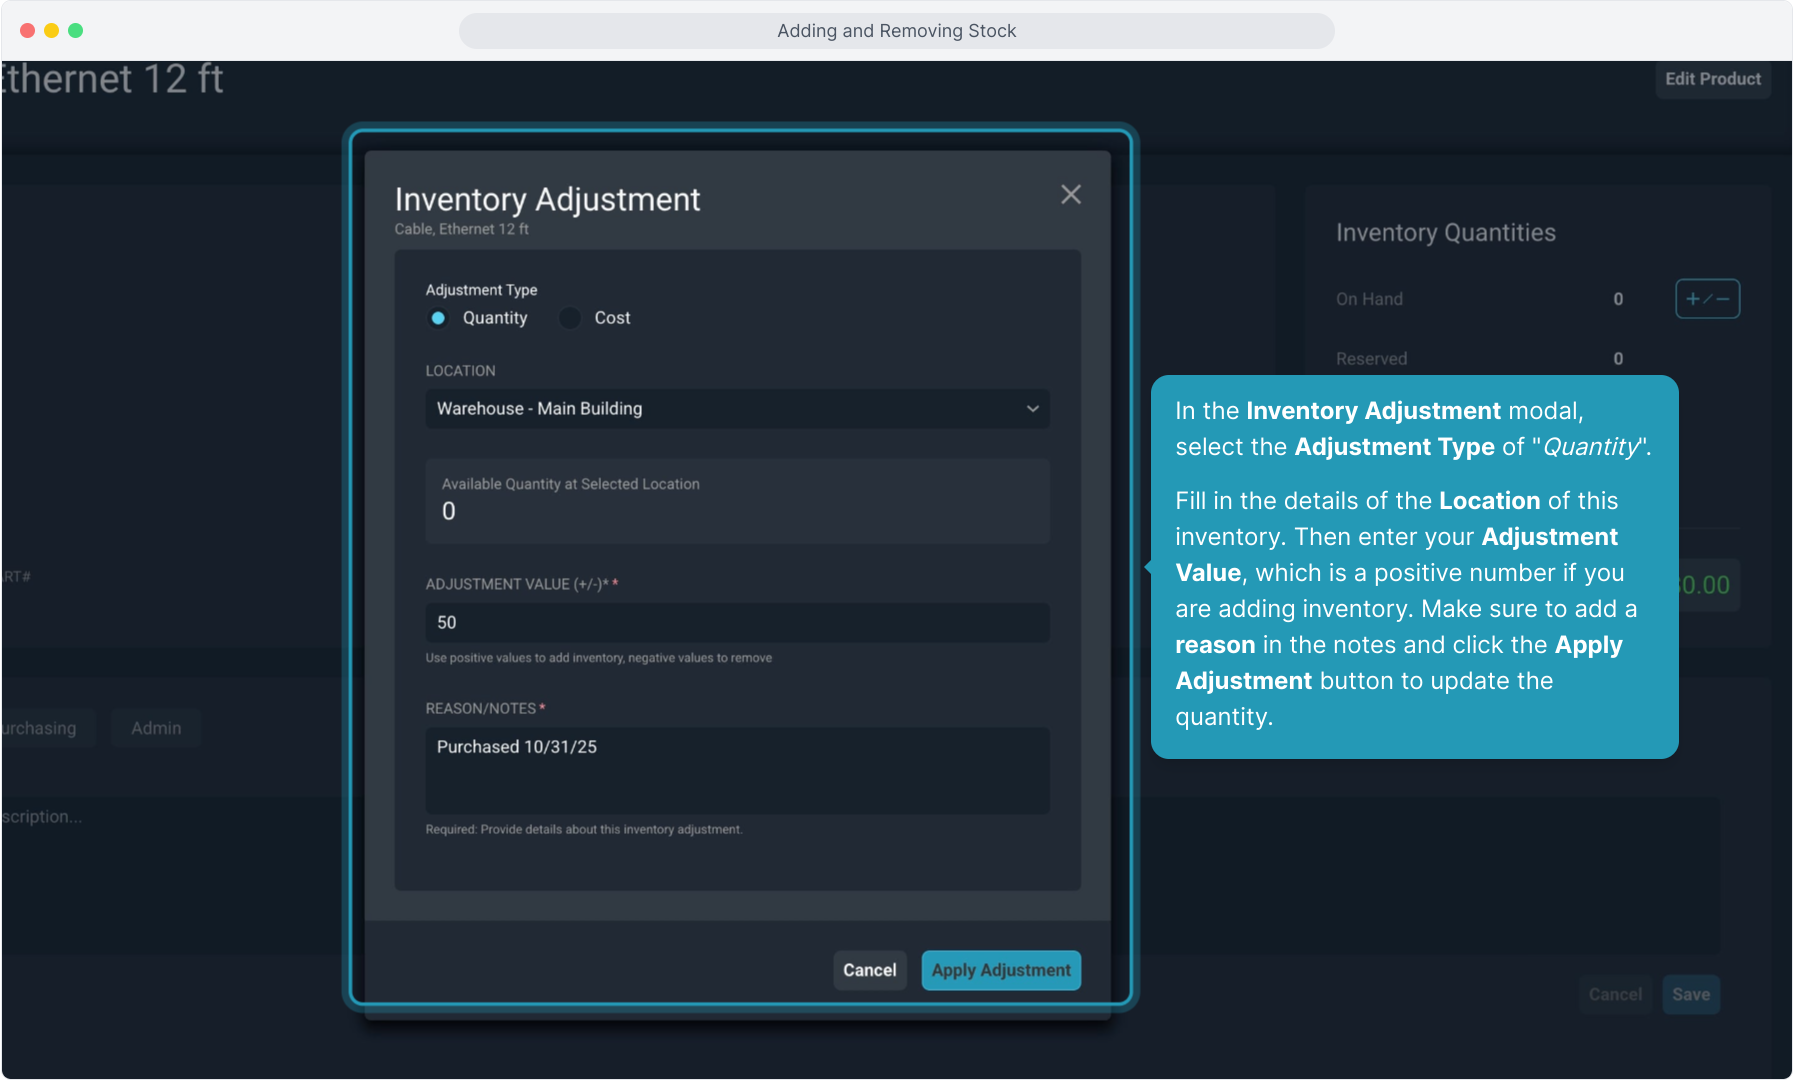
6. In the Inventory Adjustment modal, select the Adjustment Type of "Quantity".
Fill in the details of the Location of this inventory. Then enter your Adjustment Value, which is a positive number if you are adding inventory. Make sure to add a reason in the notes and click the Apply Adjustment button to update the quantity.
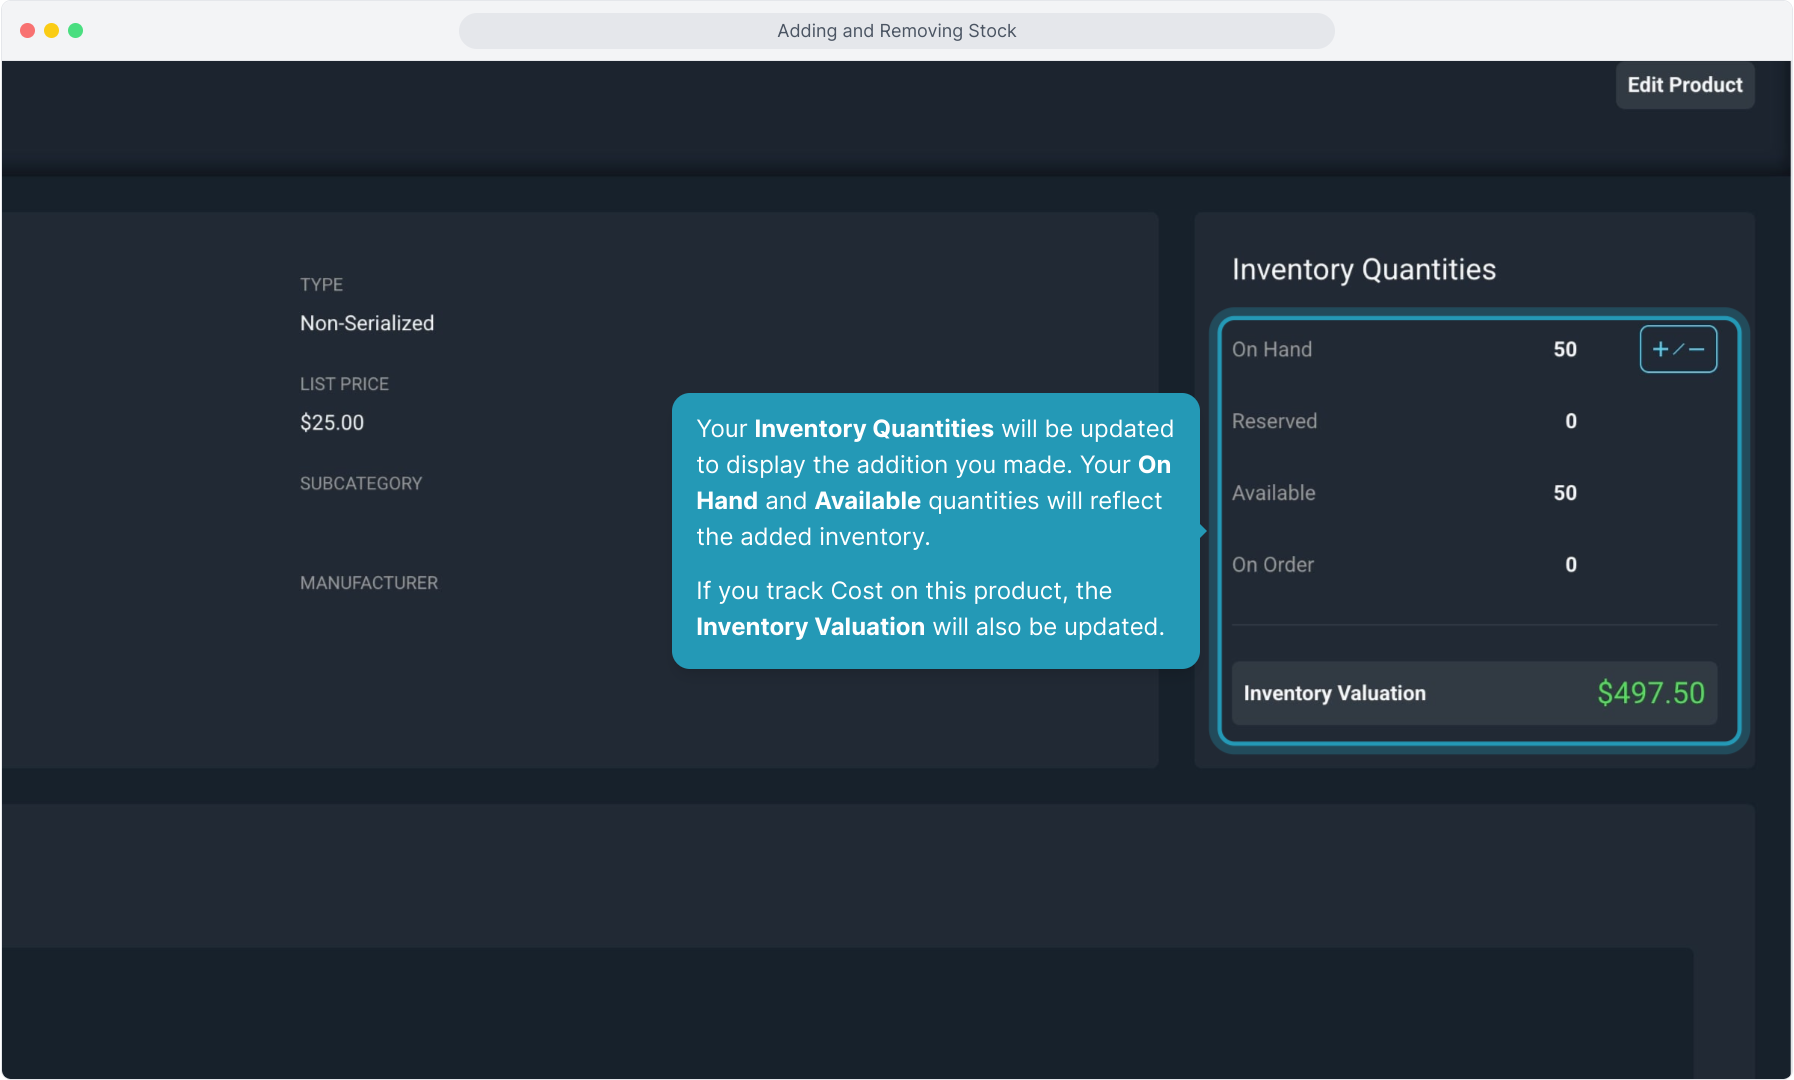
7. Your Inventory Quantities will be updated to display the addition you made. Your On Hand and Available quantities will reflect the added inventory.
If you track cost on this product, the Inventory Valuation will also be updated.
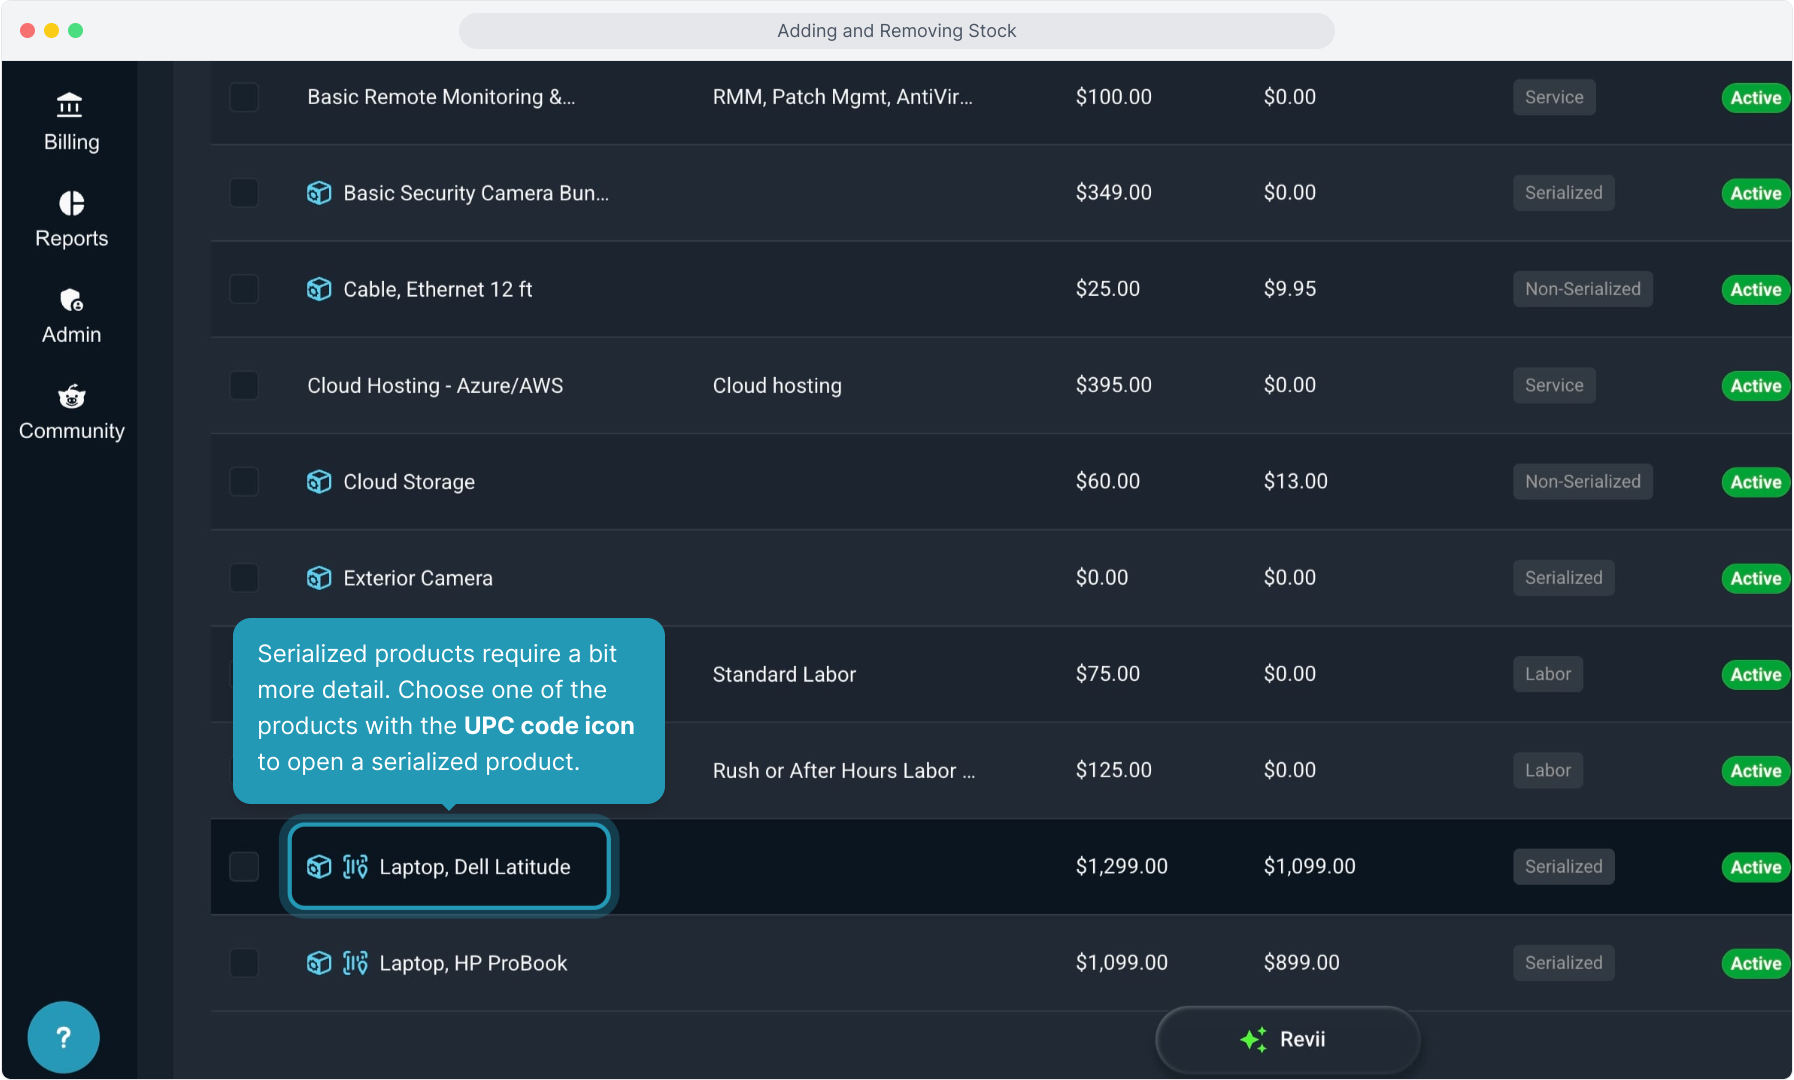
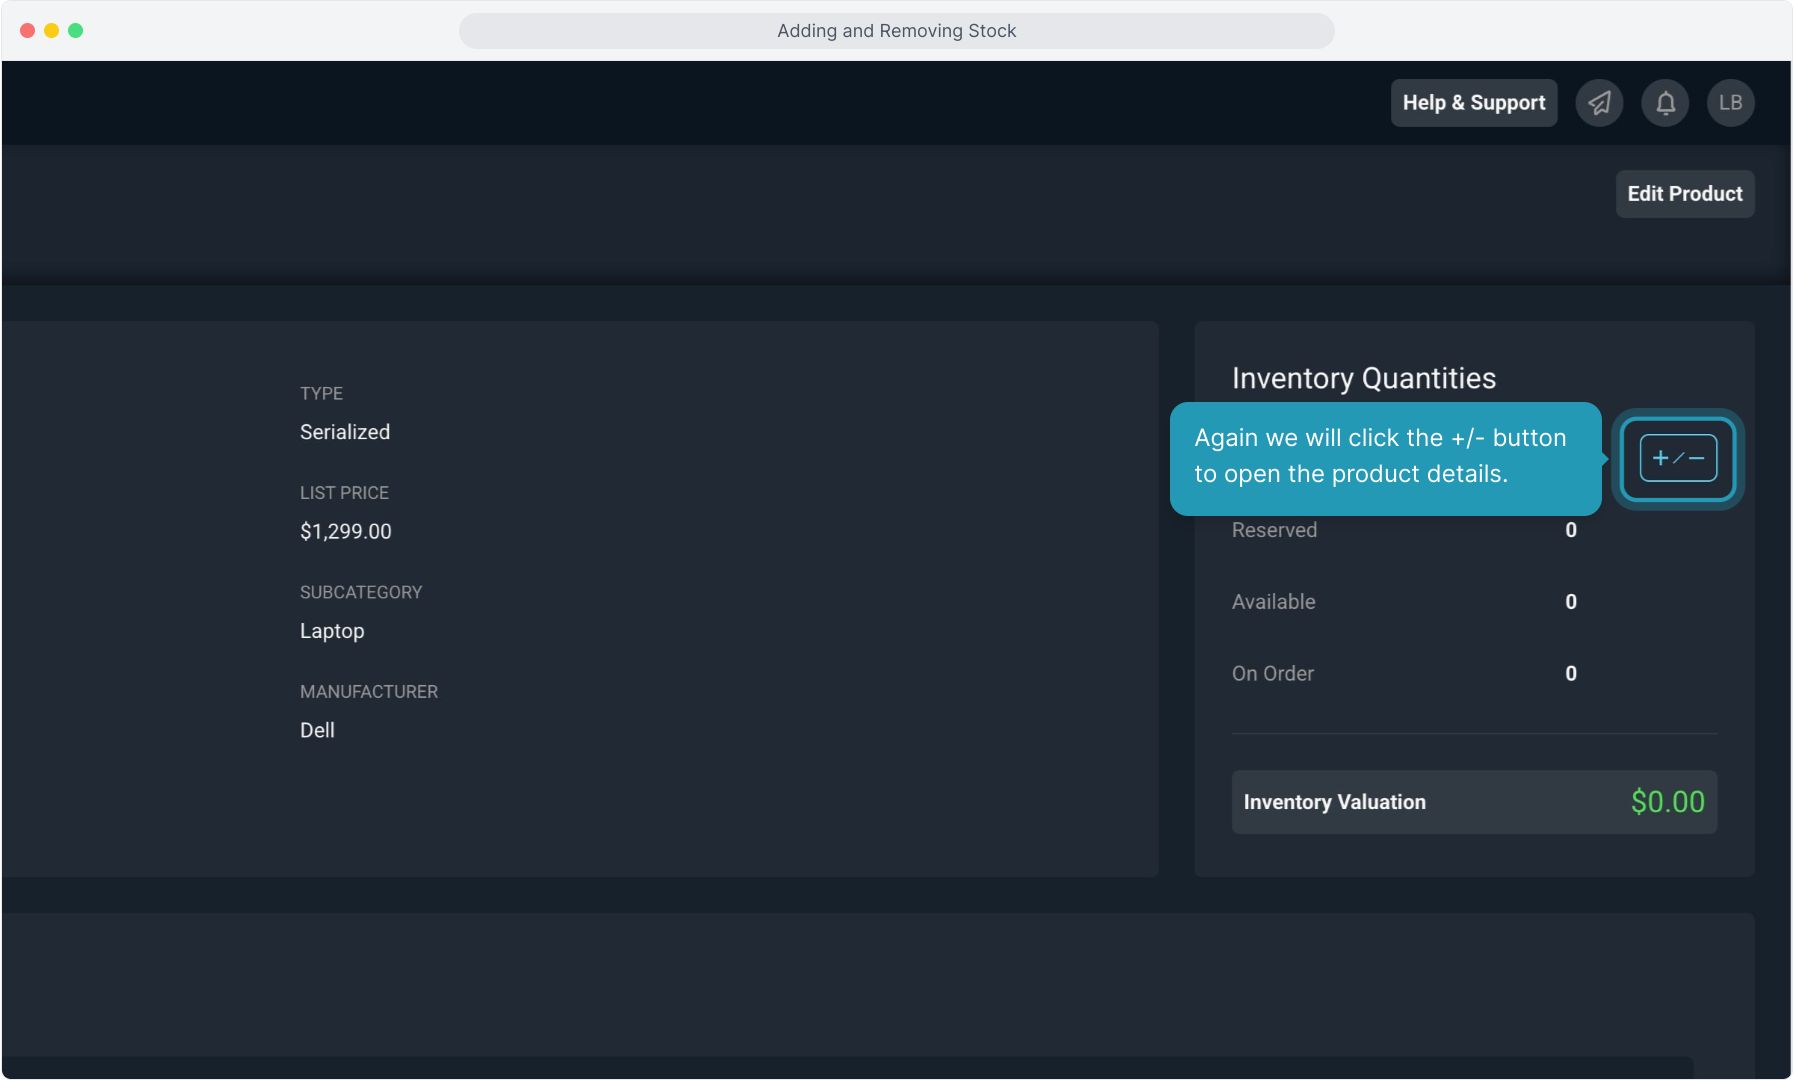
8. Serialized products require a bit more detail. Choose one of the products with the UPC code icon to open a serialized product.
9. Again we will click the +/- button to open the product details.
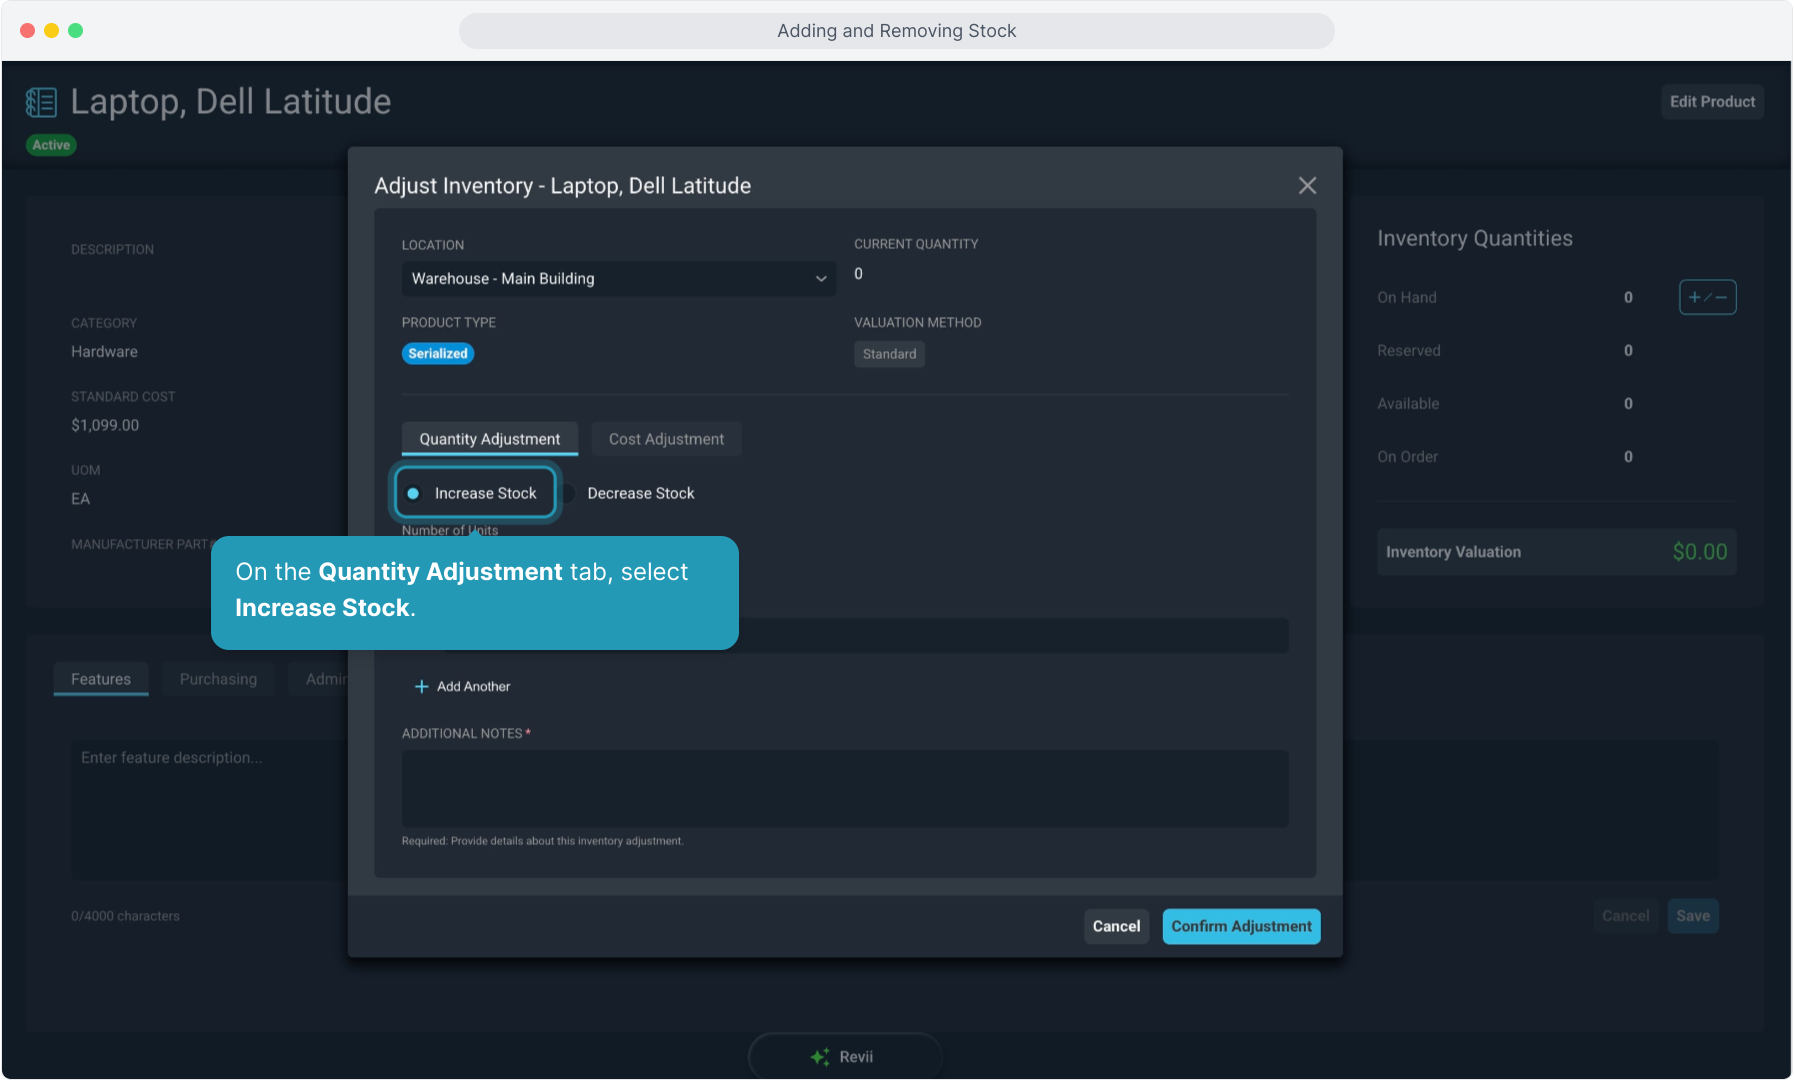
10. On the Quantity Adjustment tab, select Increase Stock.
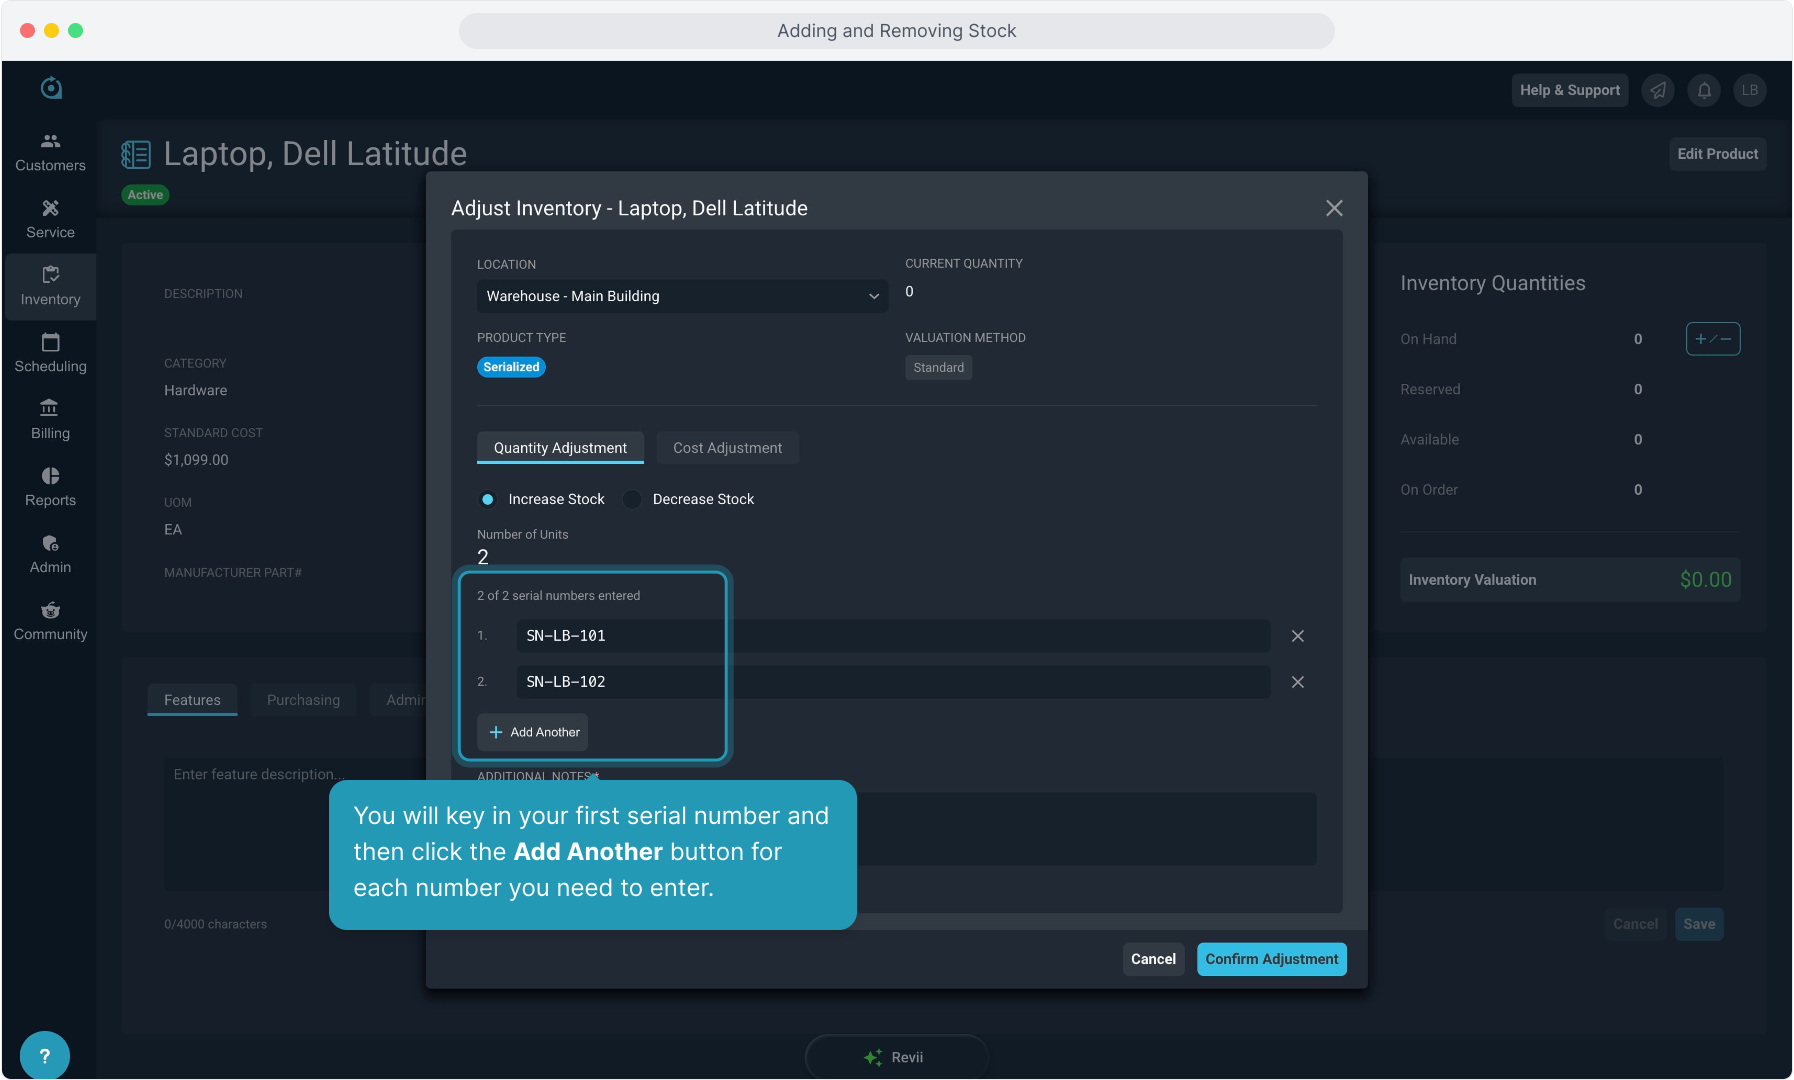
11. You will key in your first serial number and then click the Add Another button for each number you need to enter.
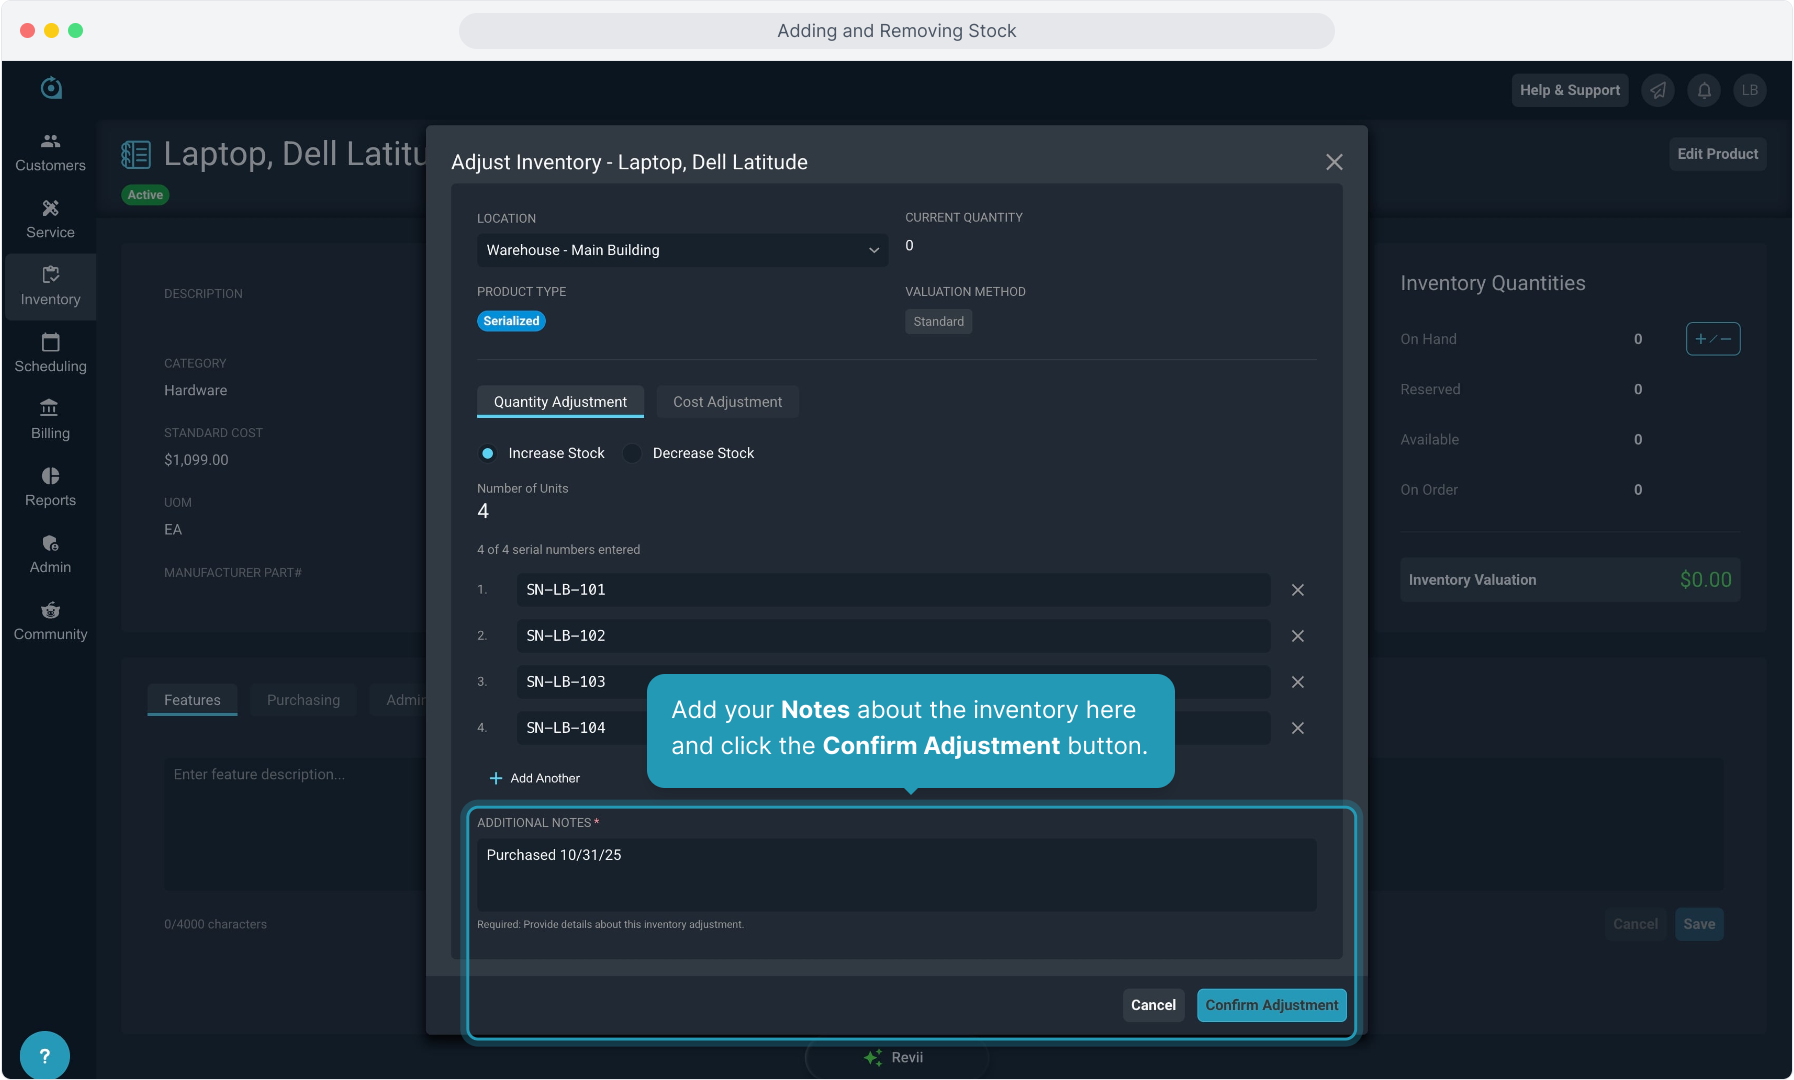
12. Add your Notes about the inventory here and click the Confirm Adjustment button.
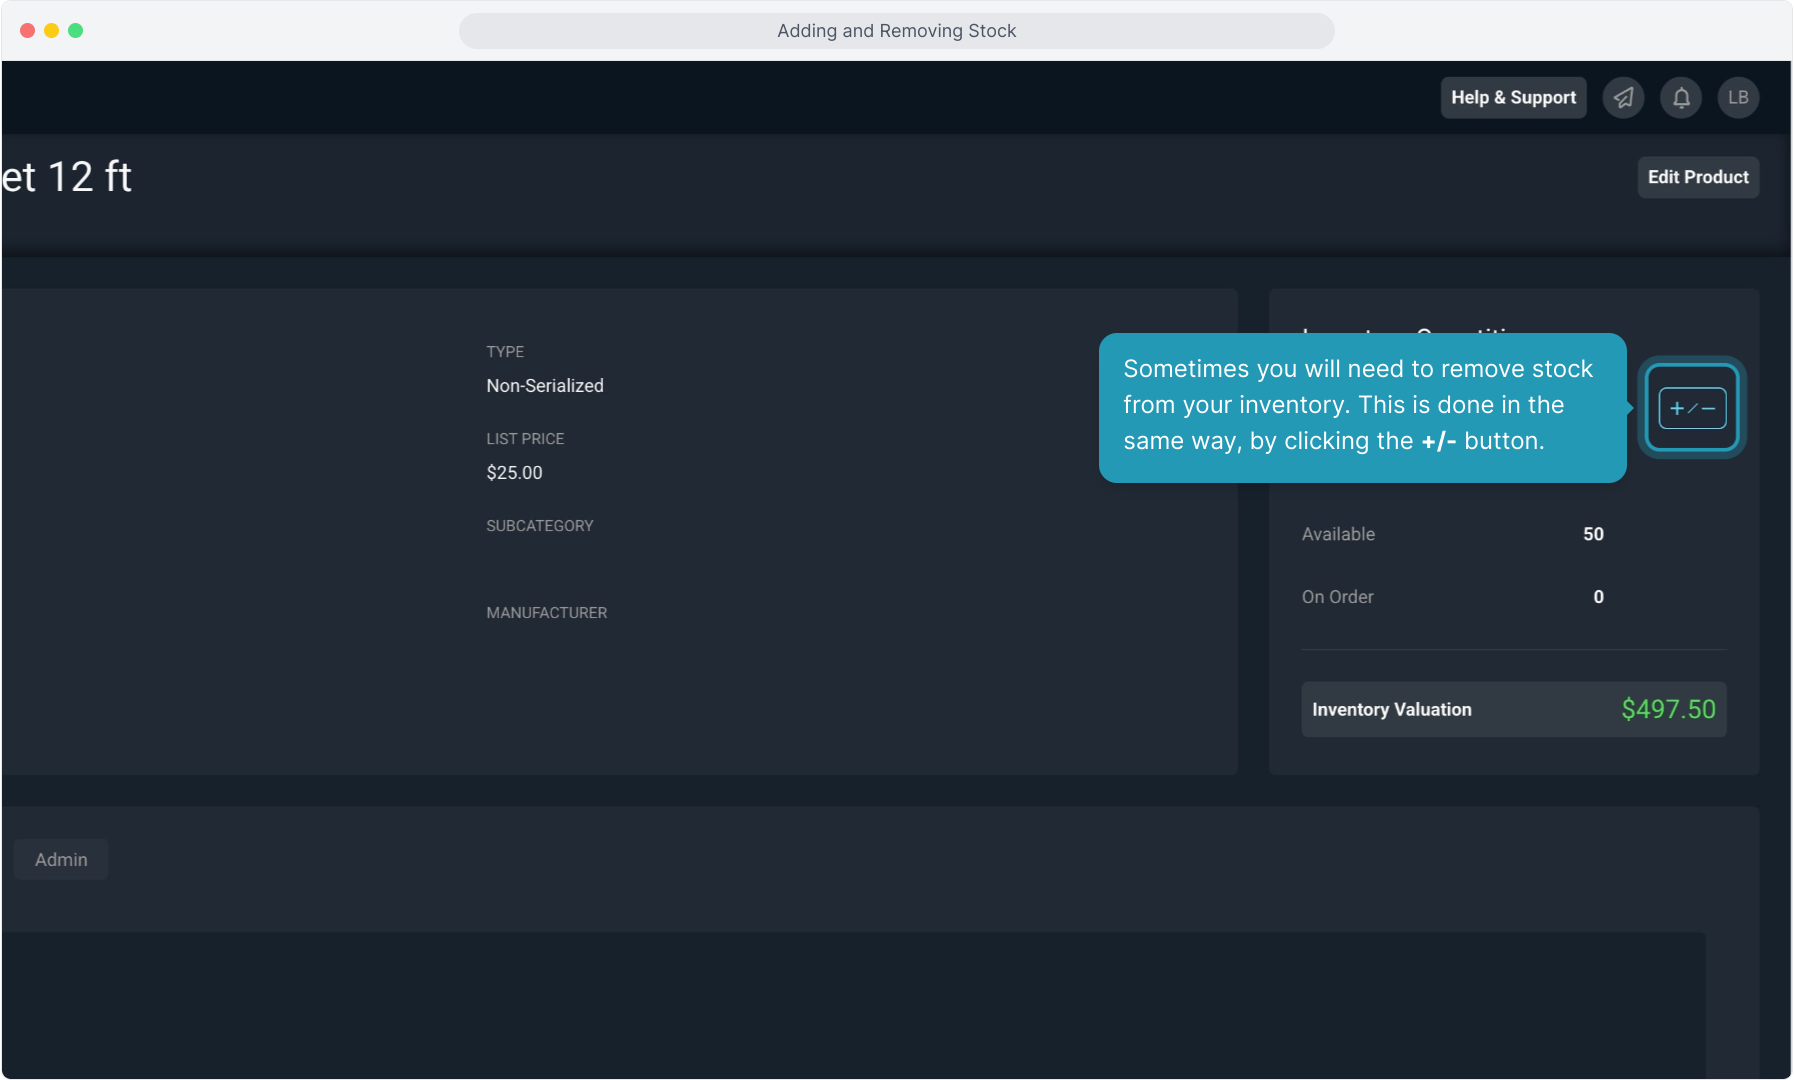
13. Sometimes you will need to remove stock from your inventory. This is done in the same way, by clicking the +/- button.
14. Instead of adding a positive number, to remove inventory just populate the value with a negative number to decrease the quantity. Make sure to select the location you wish to remove the stock from and then click the Apply Adjustment button when finished.

15. Back on the Inventory Quantities box on the product, the On Hand and Available quantities will be adjusted to reflect the removal, as will the Inventory Valuation if you are tracking cost on the product.

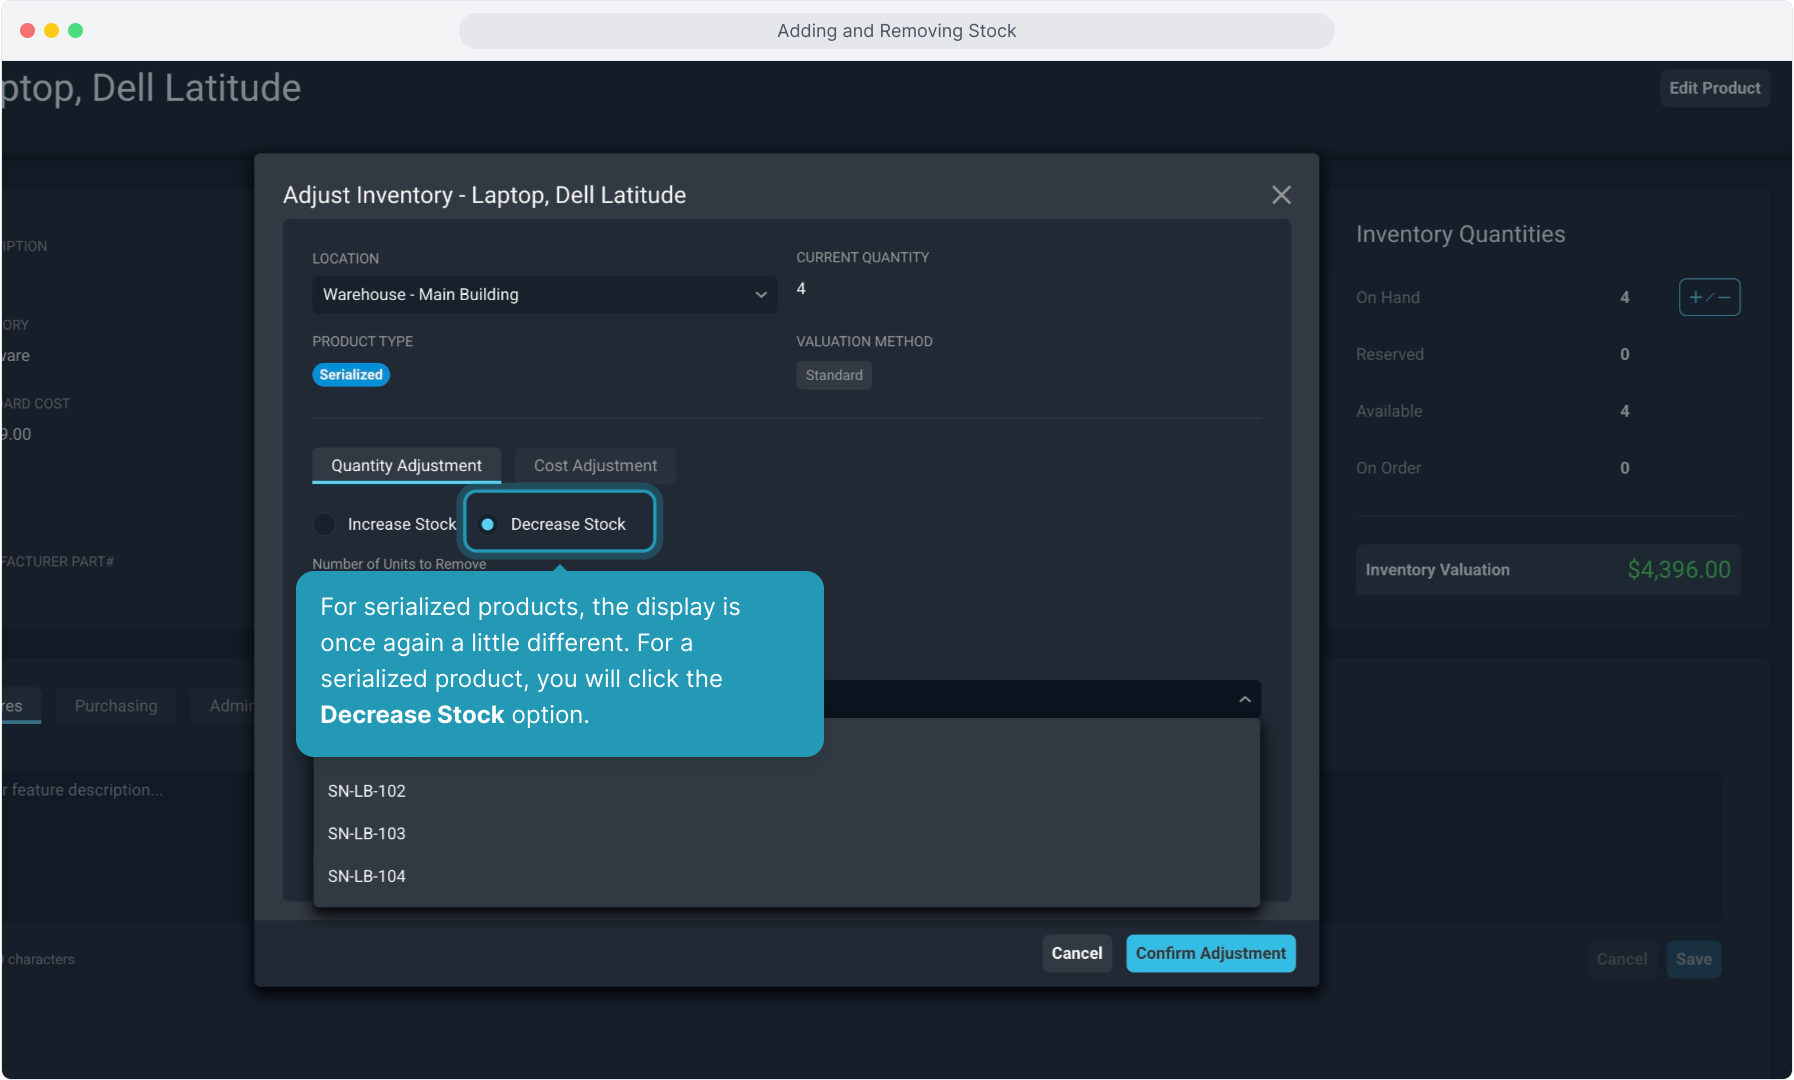
16. For serialized products, the display is once again a little different. For a serialized product, you will click the Decrease Stock option.
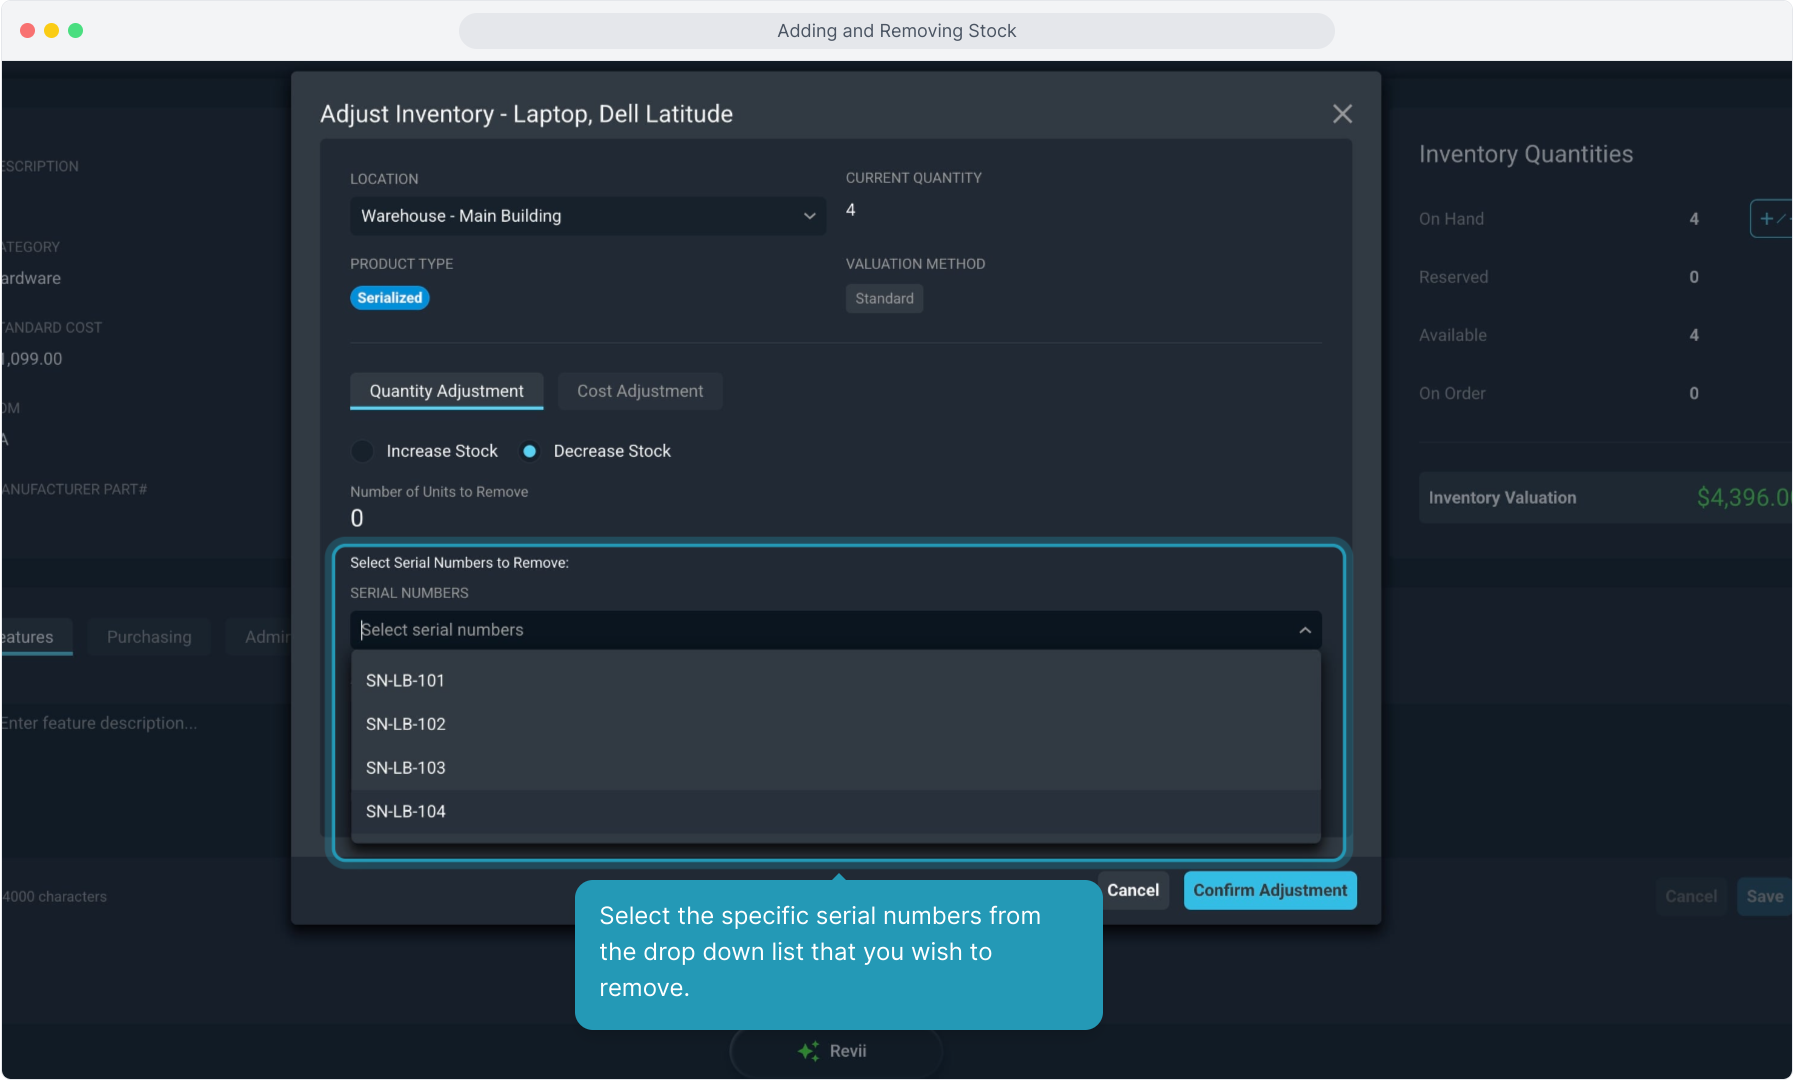
17. Select the specific serial numbers from the drop down list that you wish to remove.
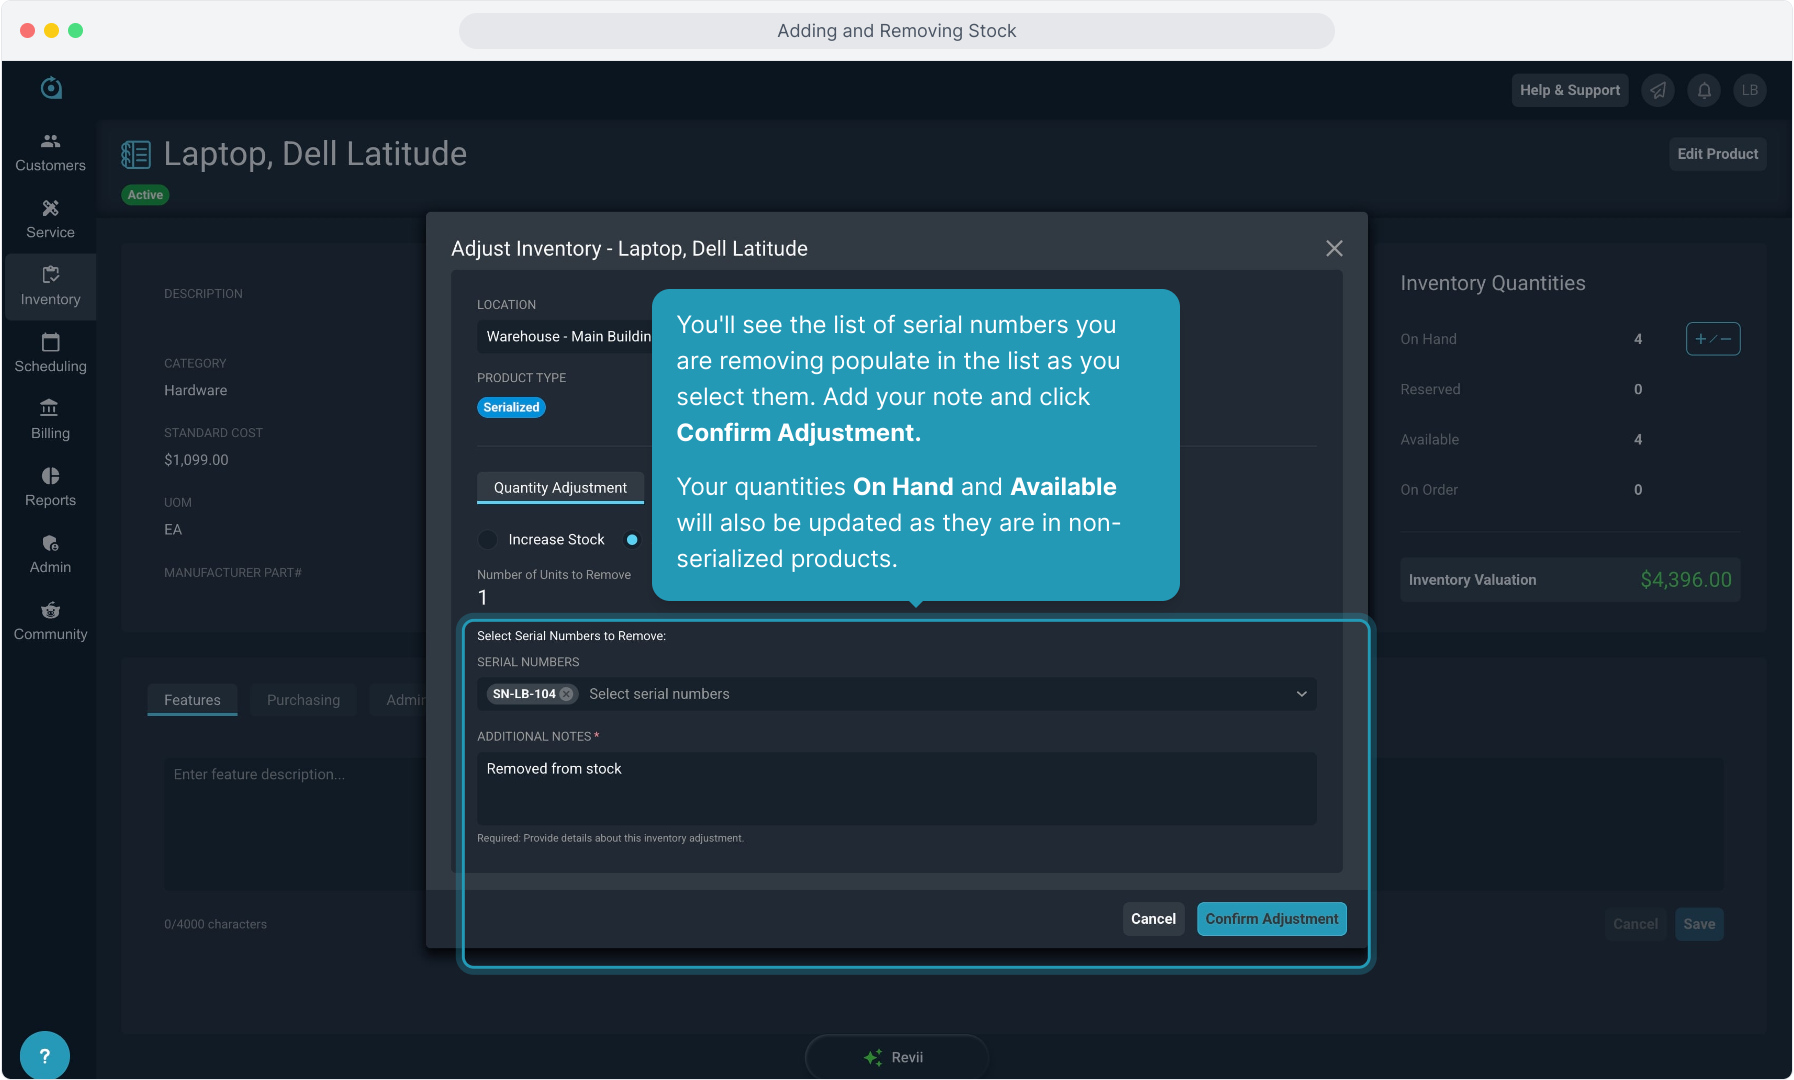
18. You'll see the list of serial numbers you are removing populate in the list as you select them. Add your note and click Confirm Adjustment.
Your quantities On Hand and Available will also be updated as they are in non-serialized products.
19. All of these inventory changes are tracked in the Inventory History screen from the Inventory main menu.
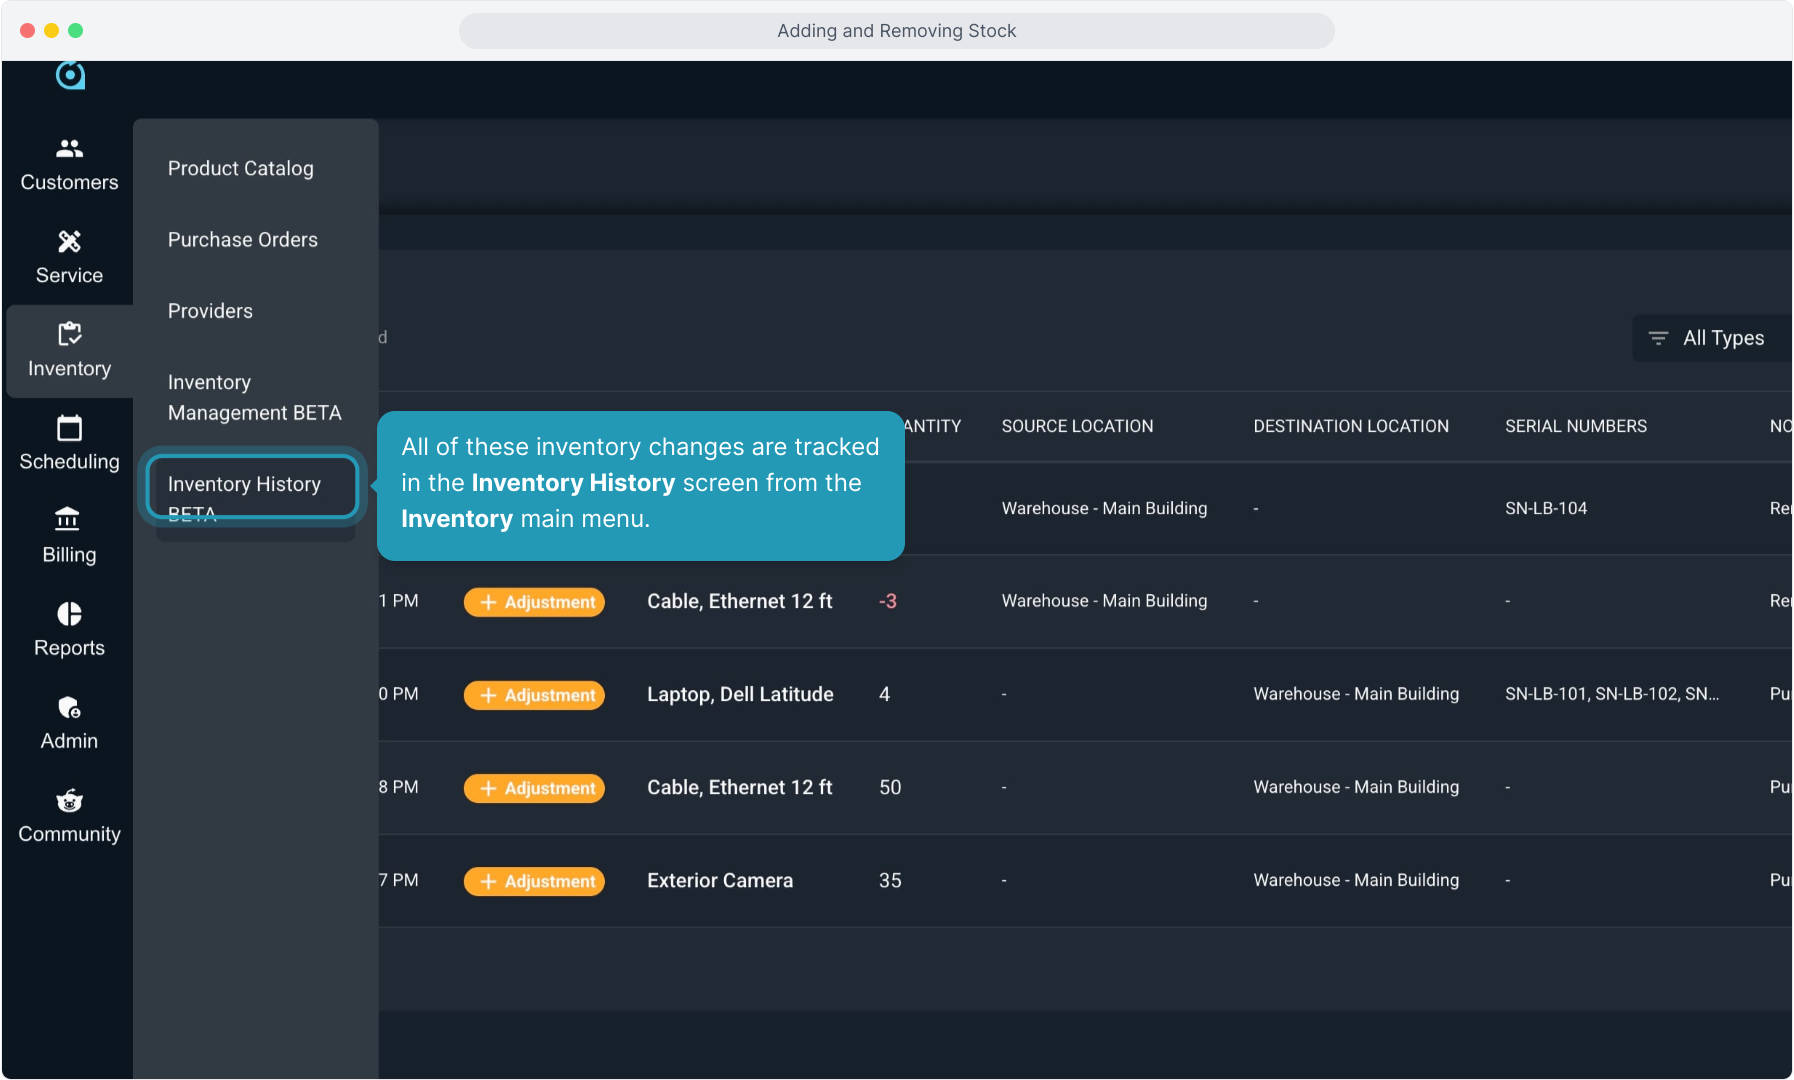
20. All changes to inventory will display here.
You can also filter on Type and Time Ranges, and you can Search for specific items.
