How To Guide: Managing Tickets - Time Logs and Time Tracking
1. Introduction
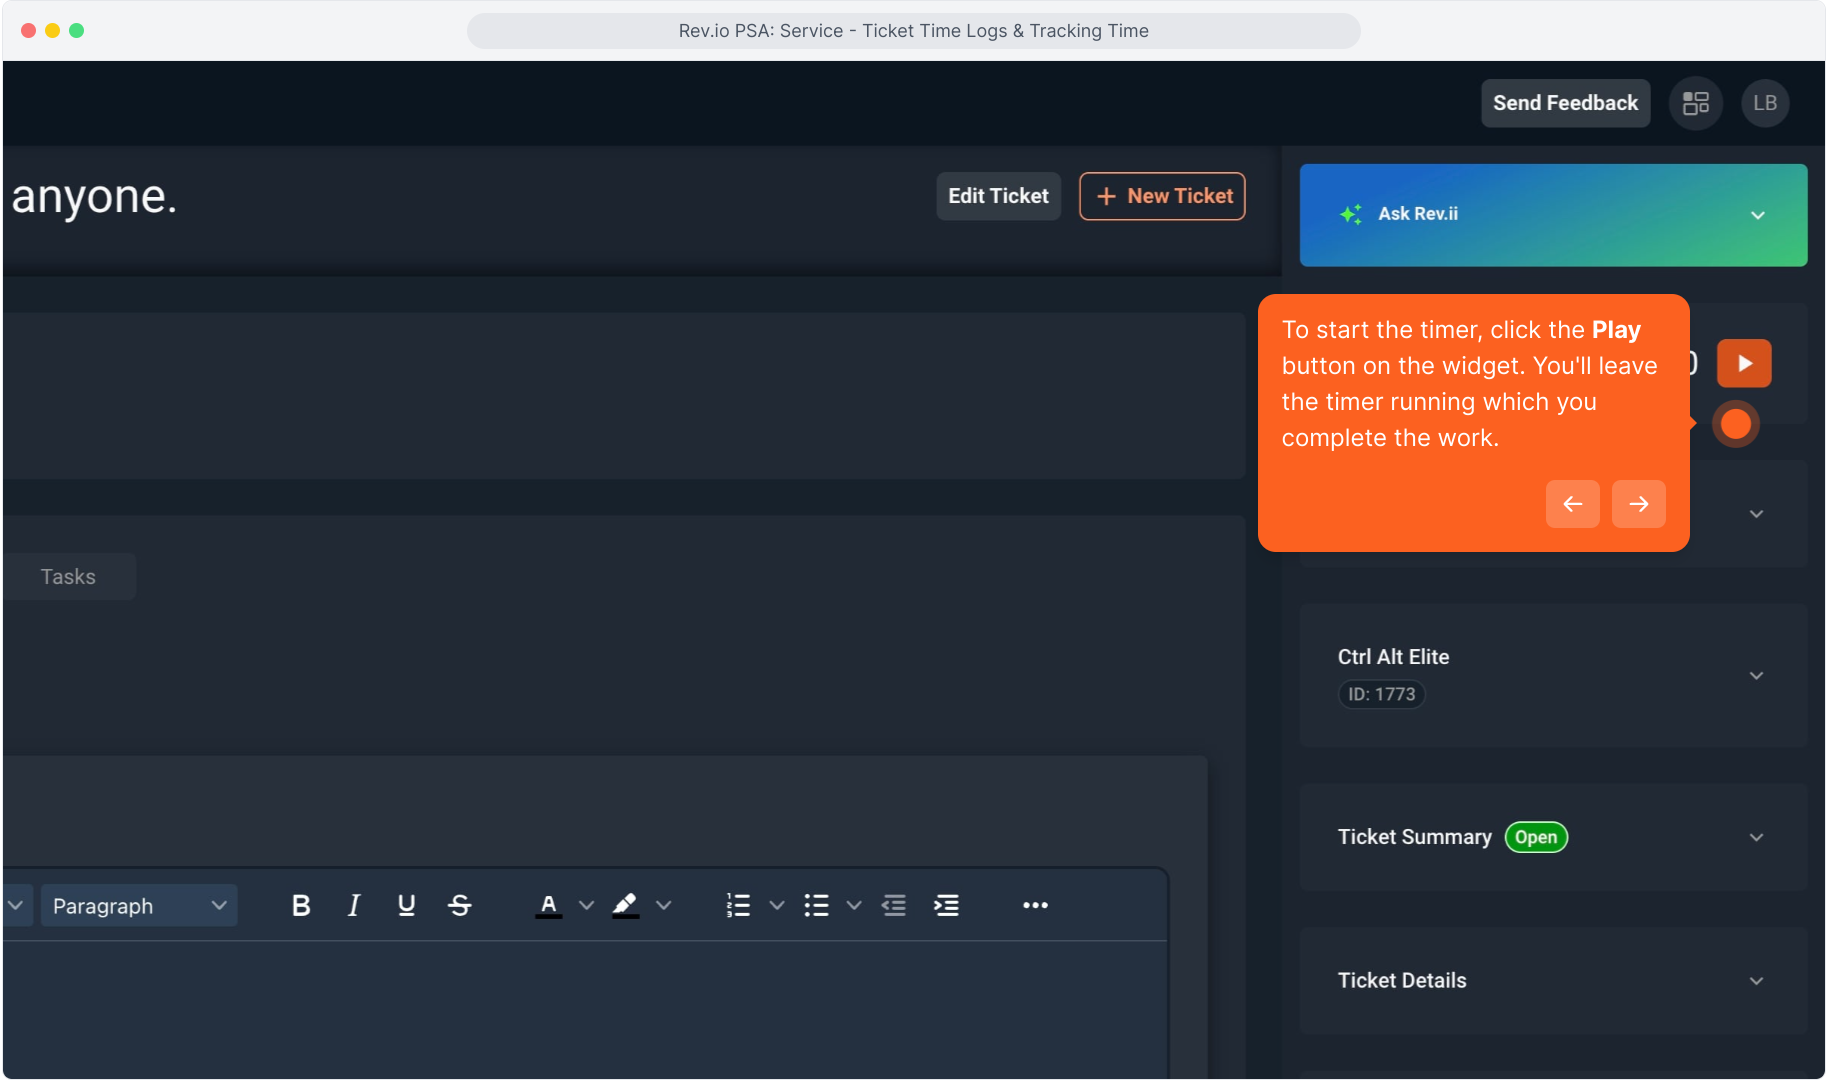
2. One way to track time on a ticket is real-time, using the Time Tracking widget available on the ticket.

3. To start the timer, click the Play button on the widget. You'll leave the timer running which you complete the work.
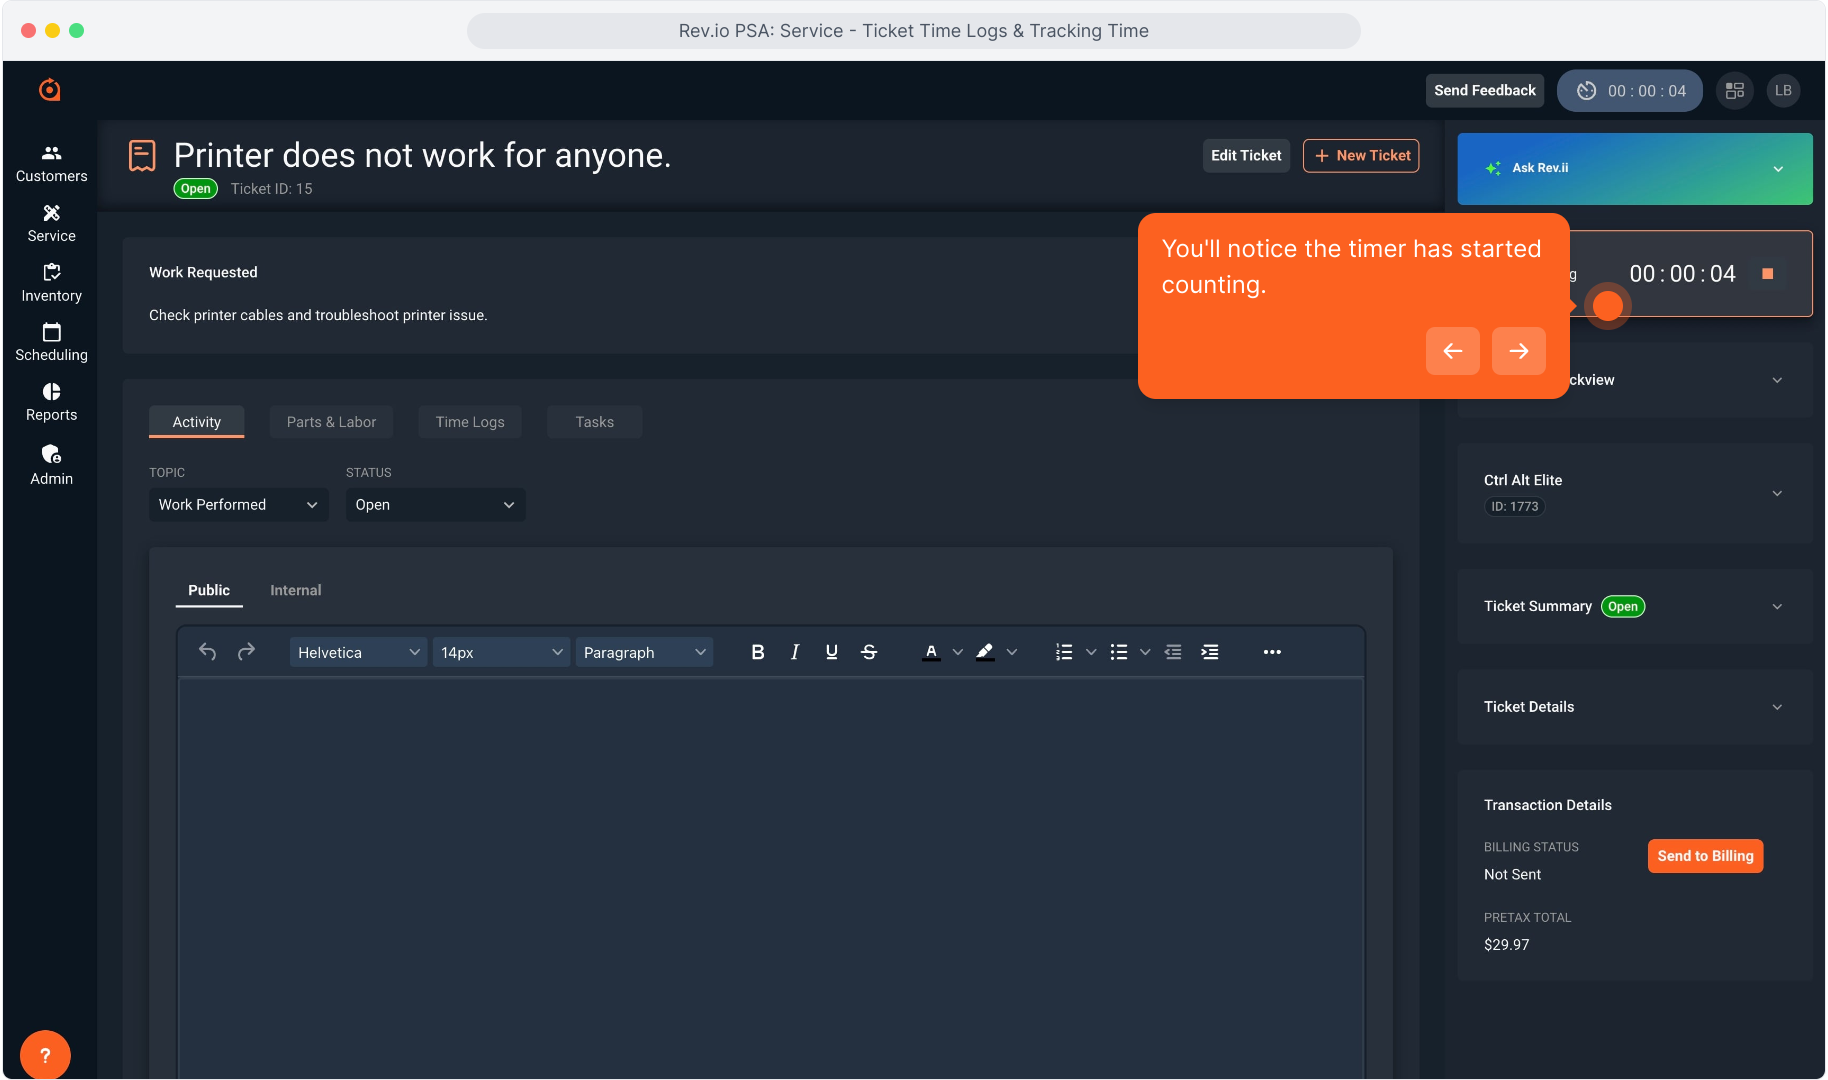
4. You'll notice the timer has started counting.
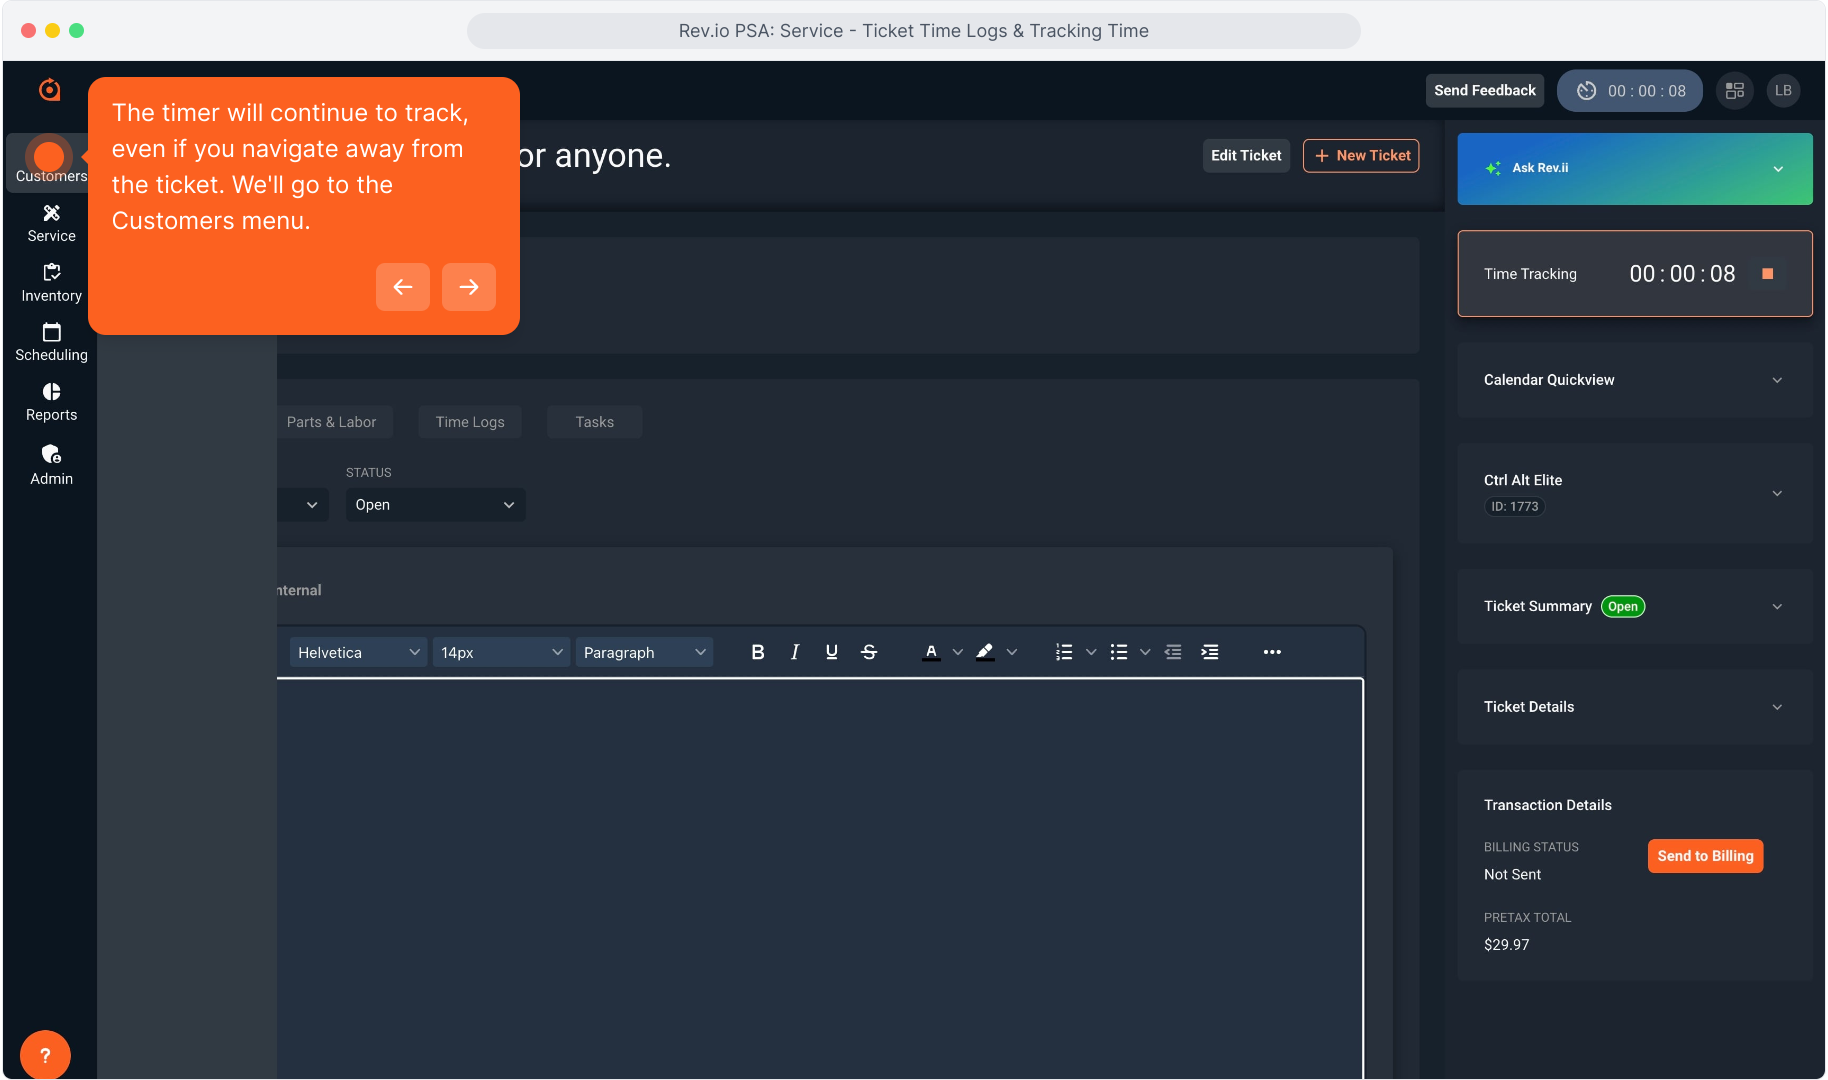
5. The timer will continue to track, even if you navigate away from the ticket. We'll go to the Customers menu.
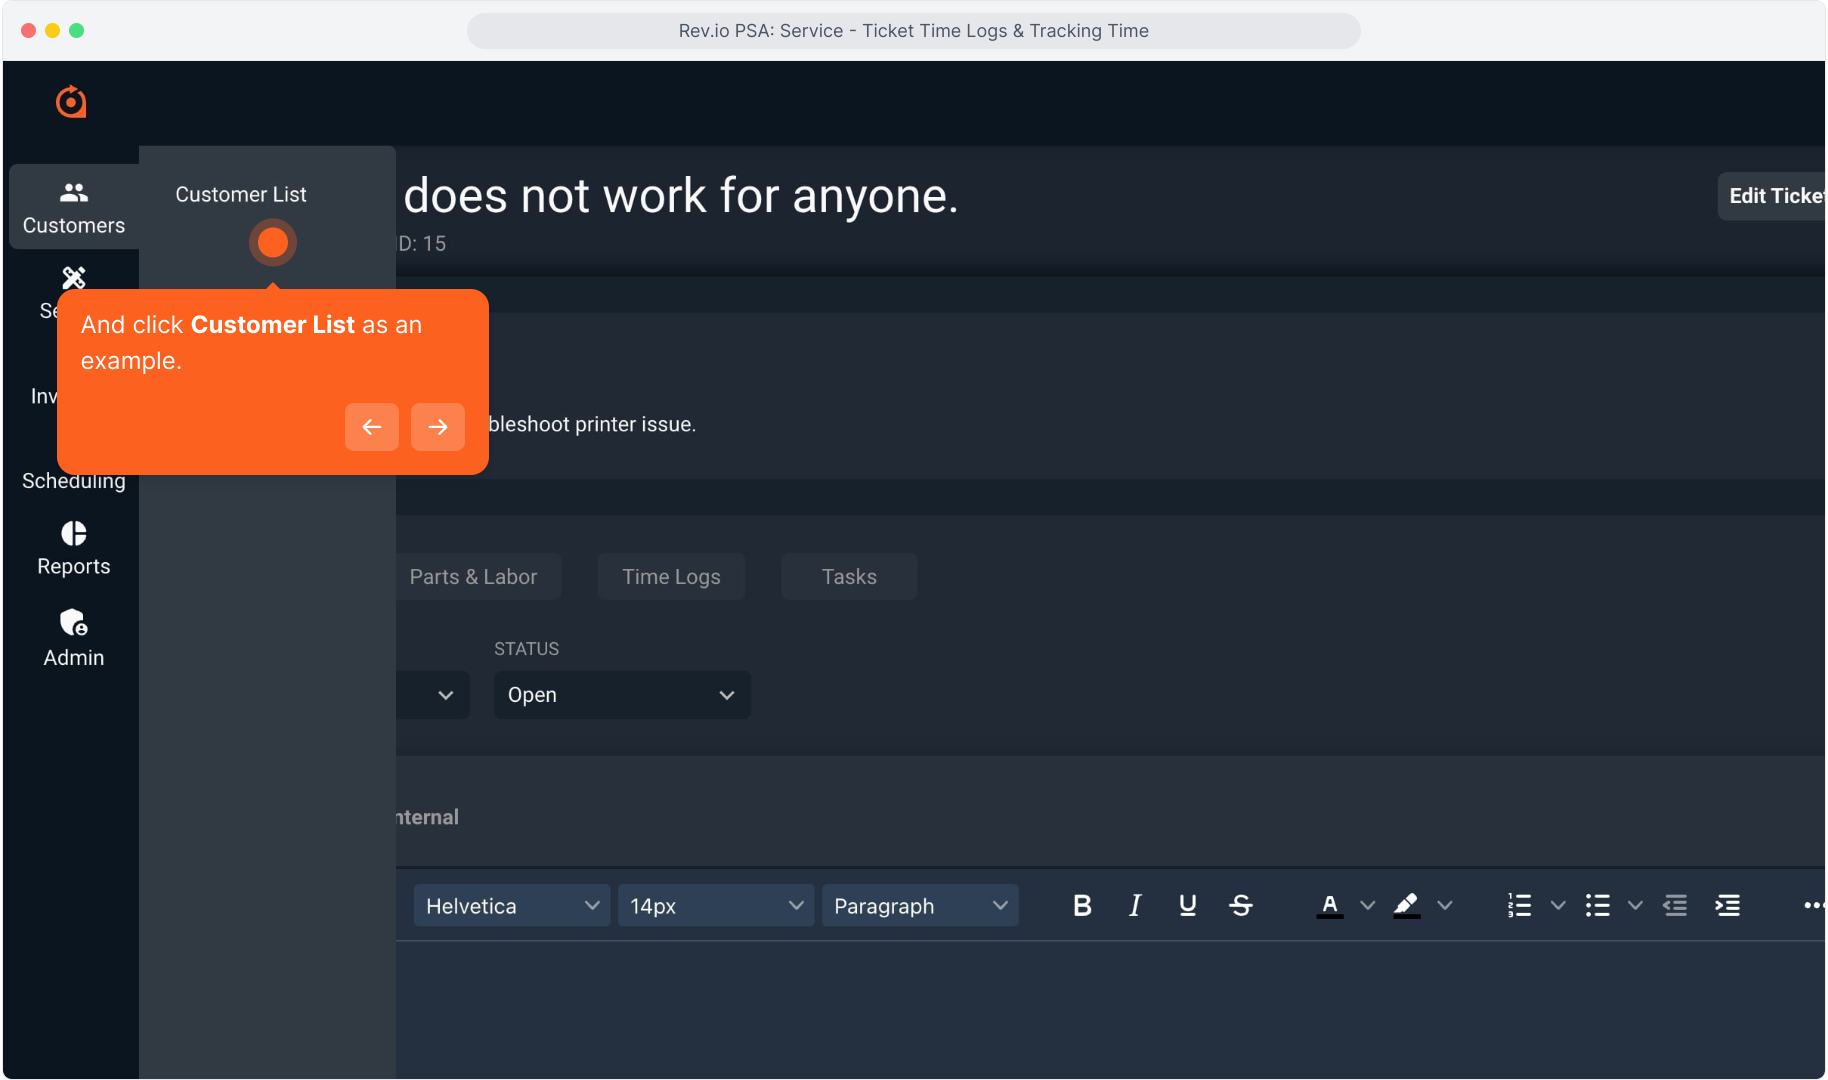
6. And click Customer List as an example.
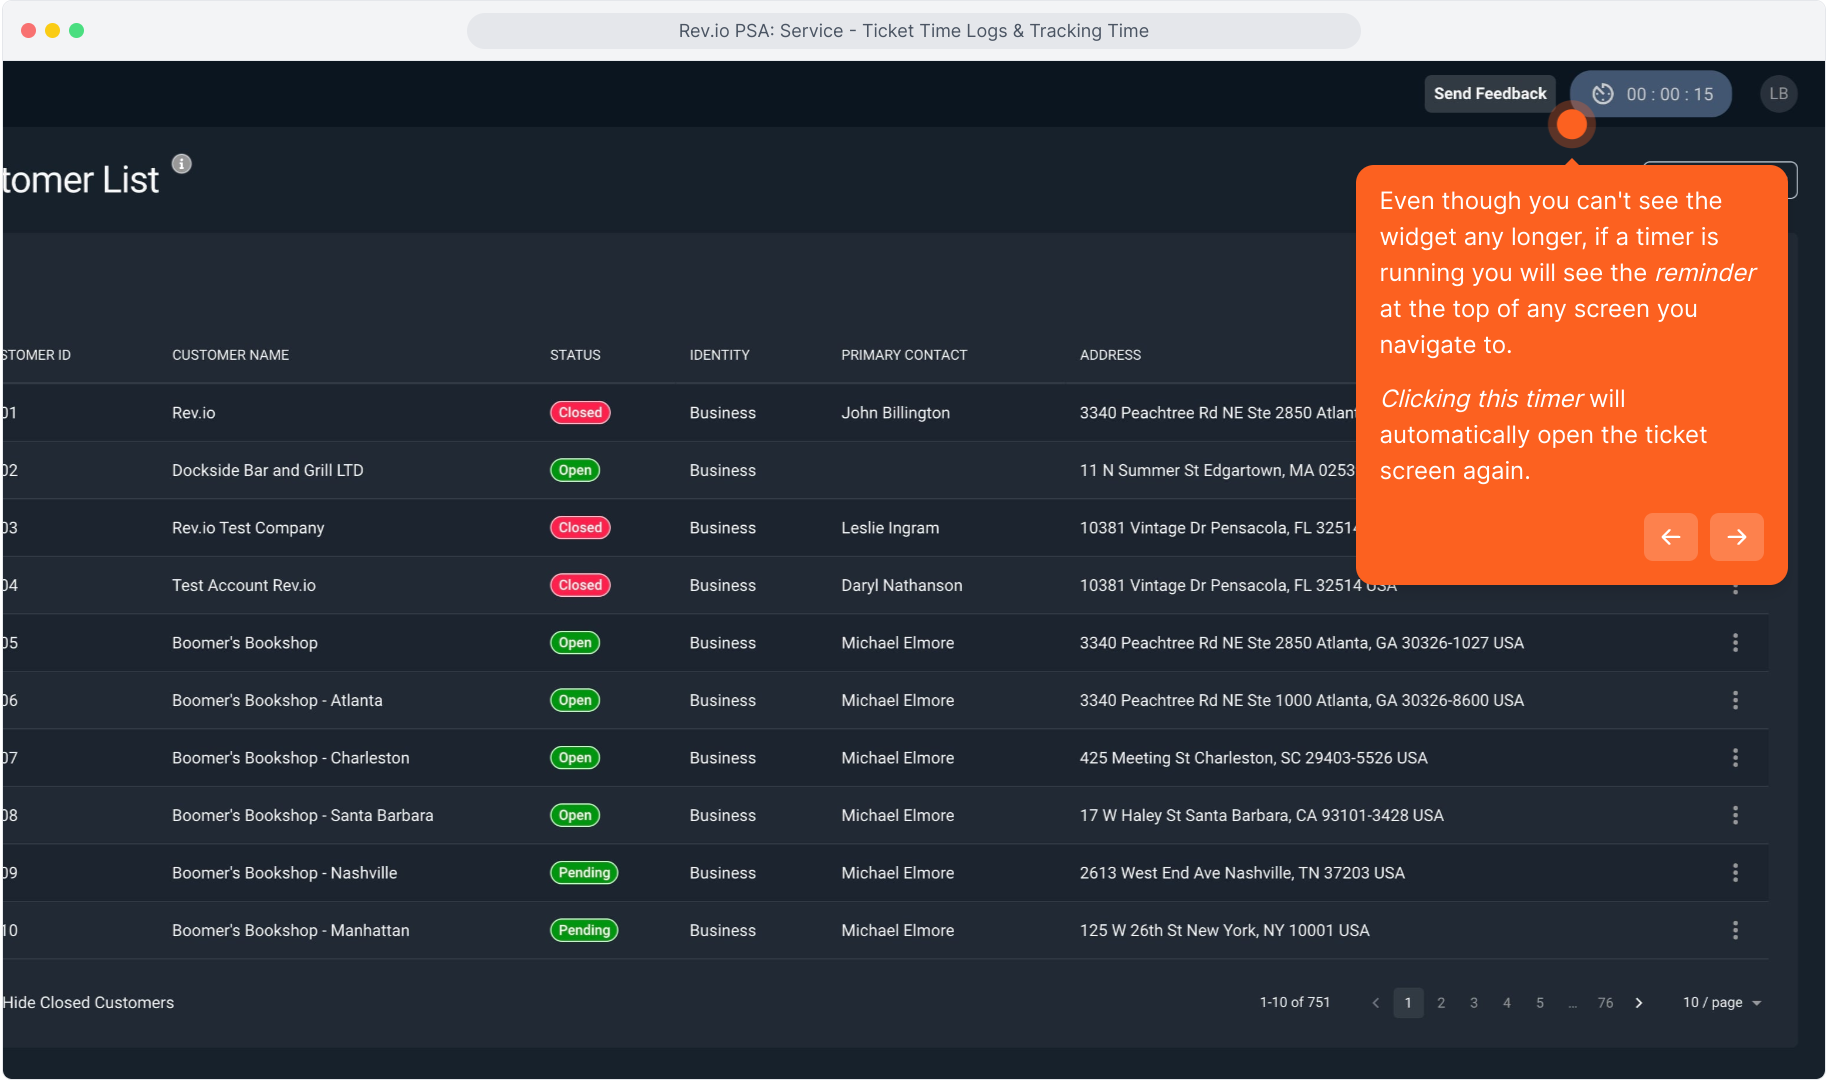
7. Even though you can't see the widget any longer, if a timer is running you will see the reminder at the top of any screen you navigate to.
Clicking this timer will automatically open the ticket screen again.
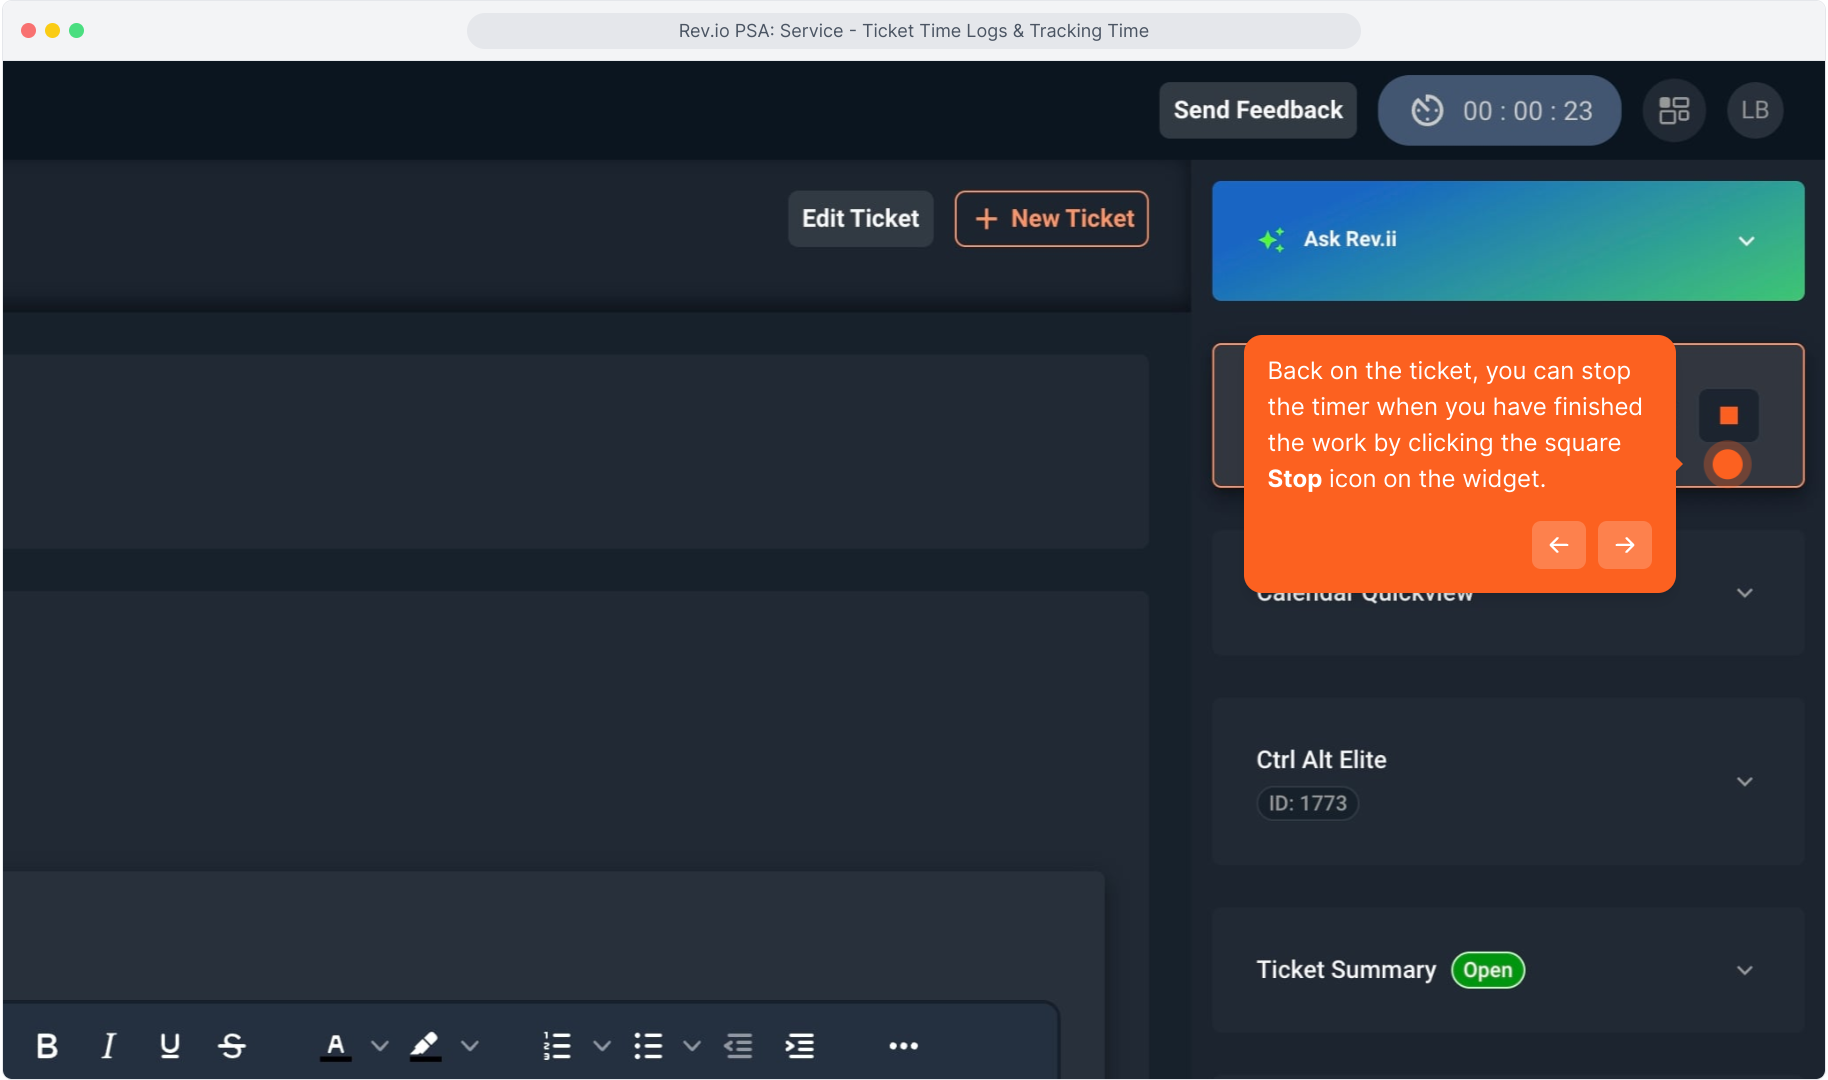
8. Back on the ticket, you can stop the timer when you have finished the work by clicking the square Stop icon on the widget.
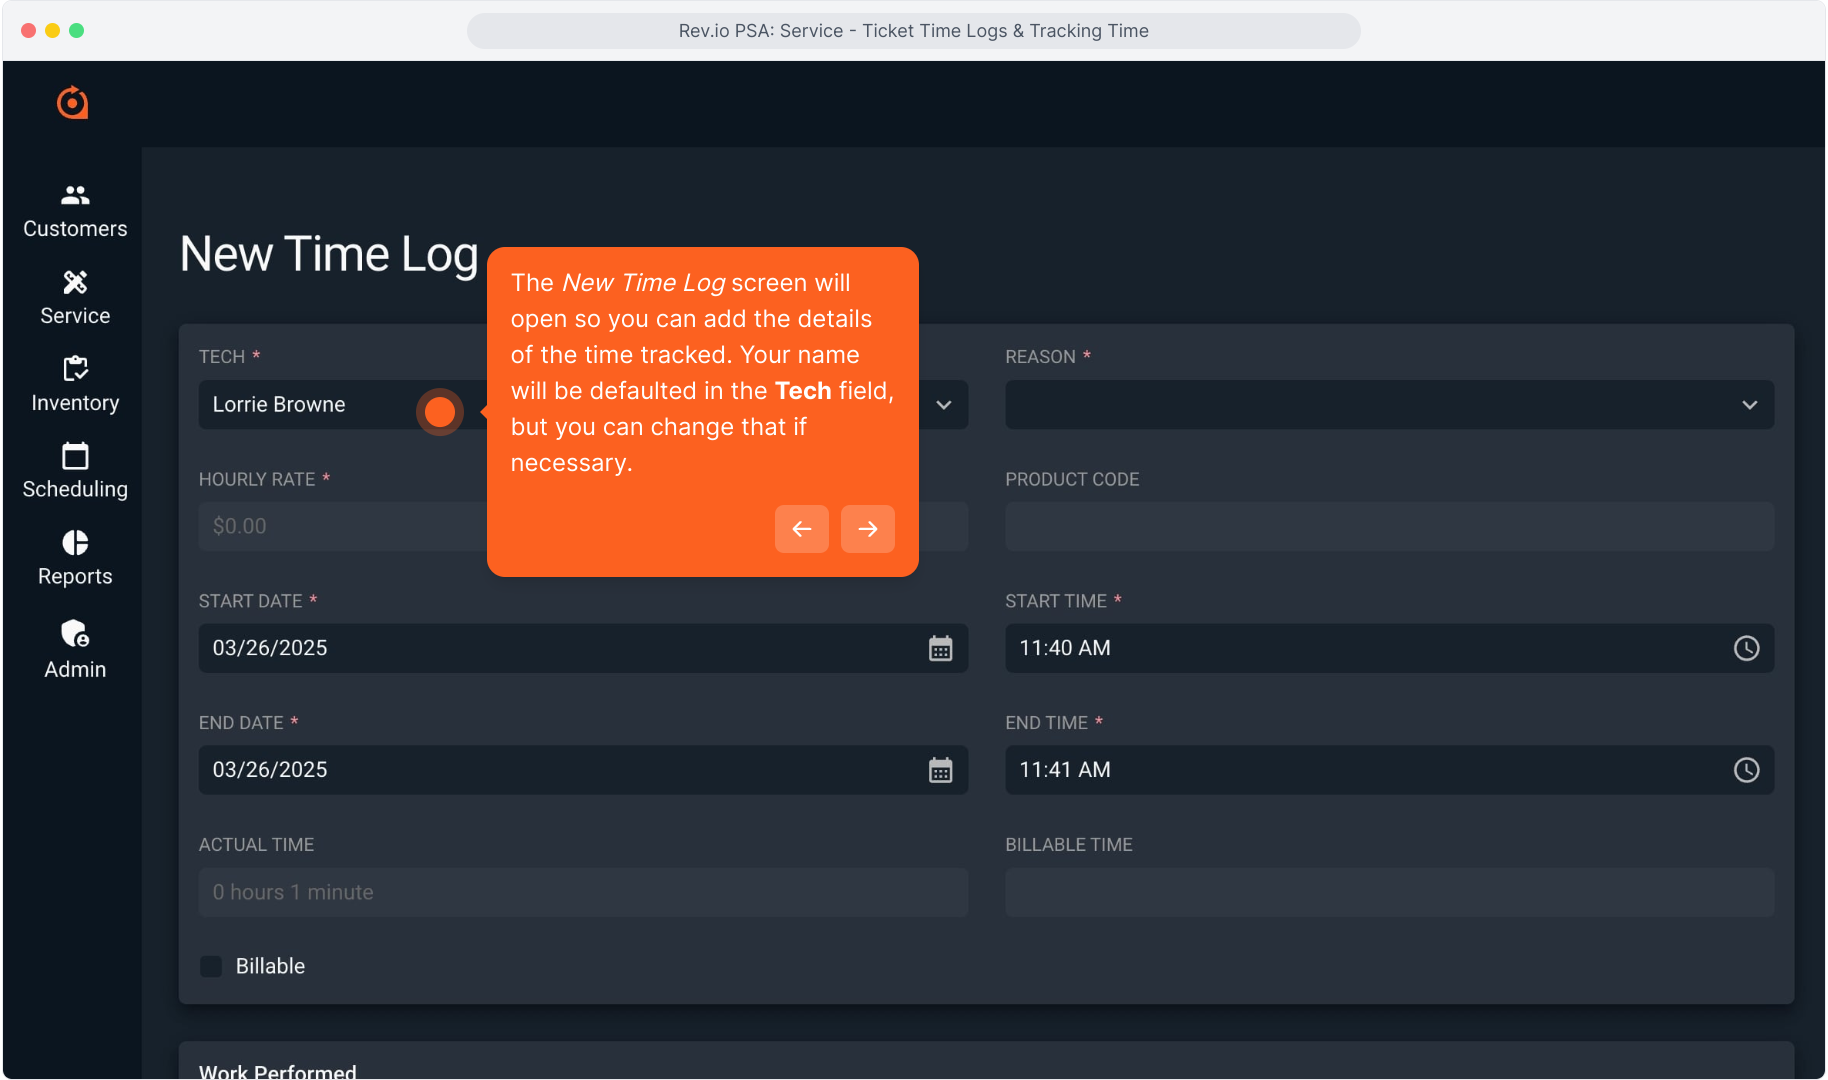
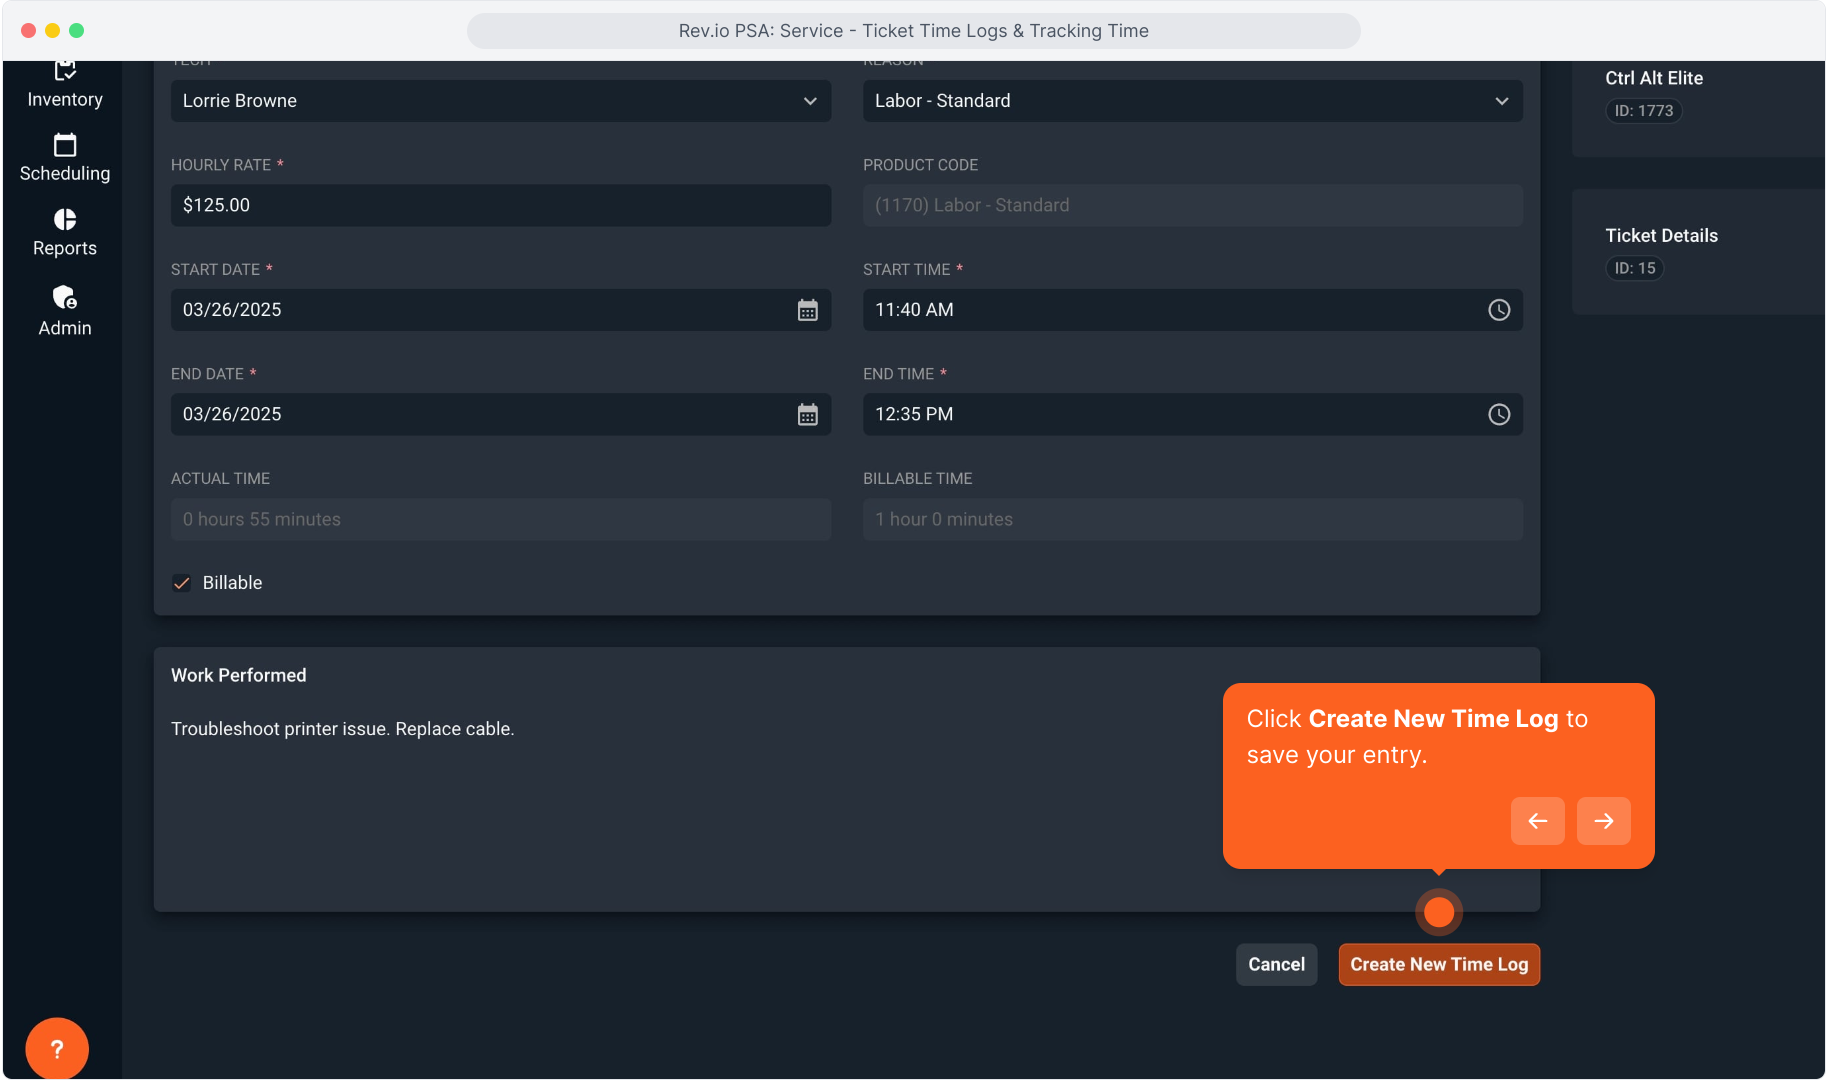
9. The New Time Log screen will open so you can add the details of the time tracked. Your name will be defaulted in the Tech field, but you can change that if necessary.
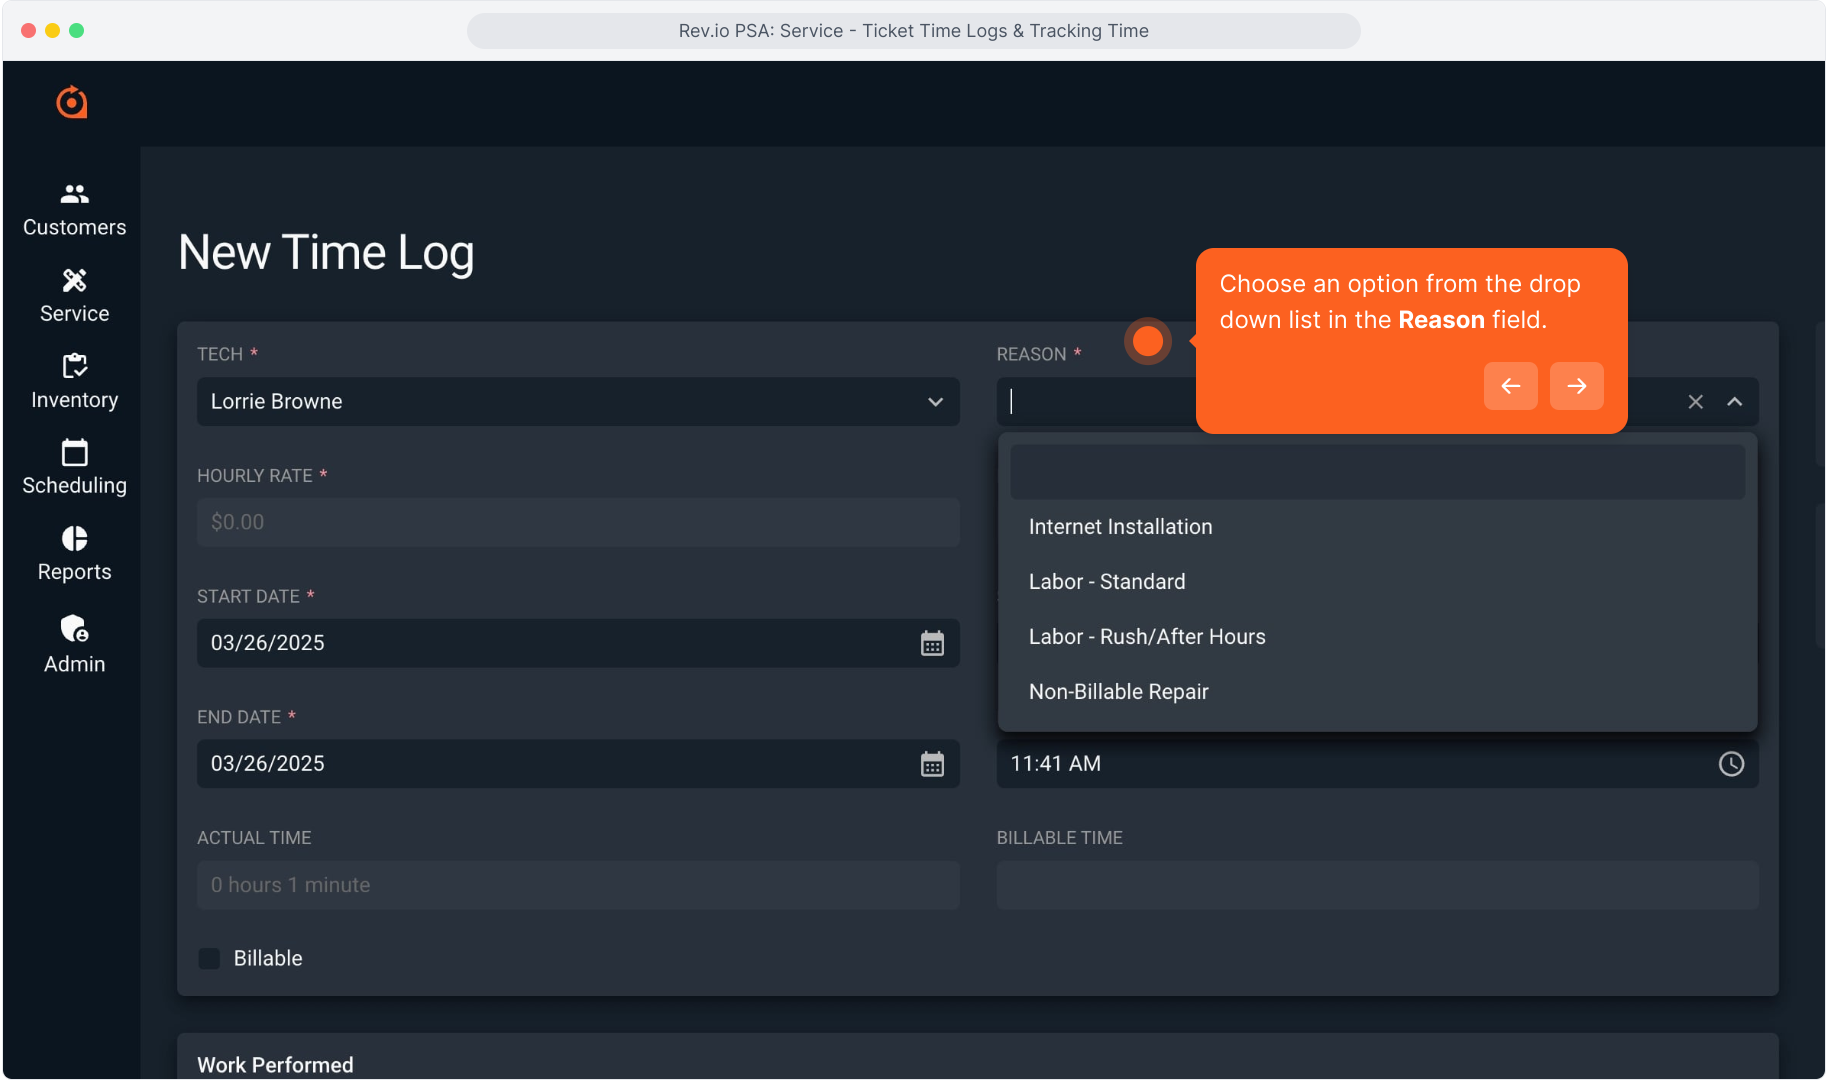
10. Choose an option from the drop down list in the Reason field.
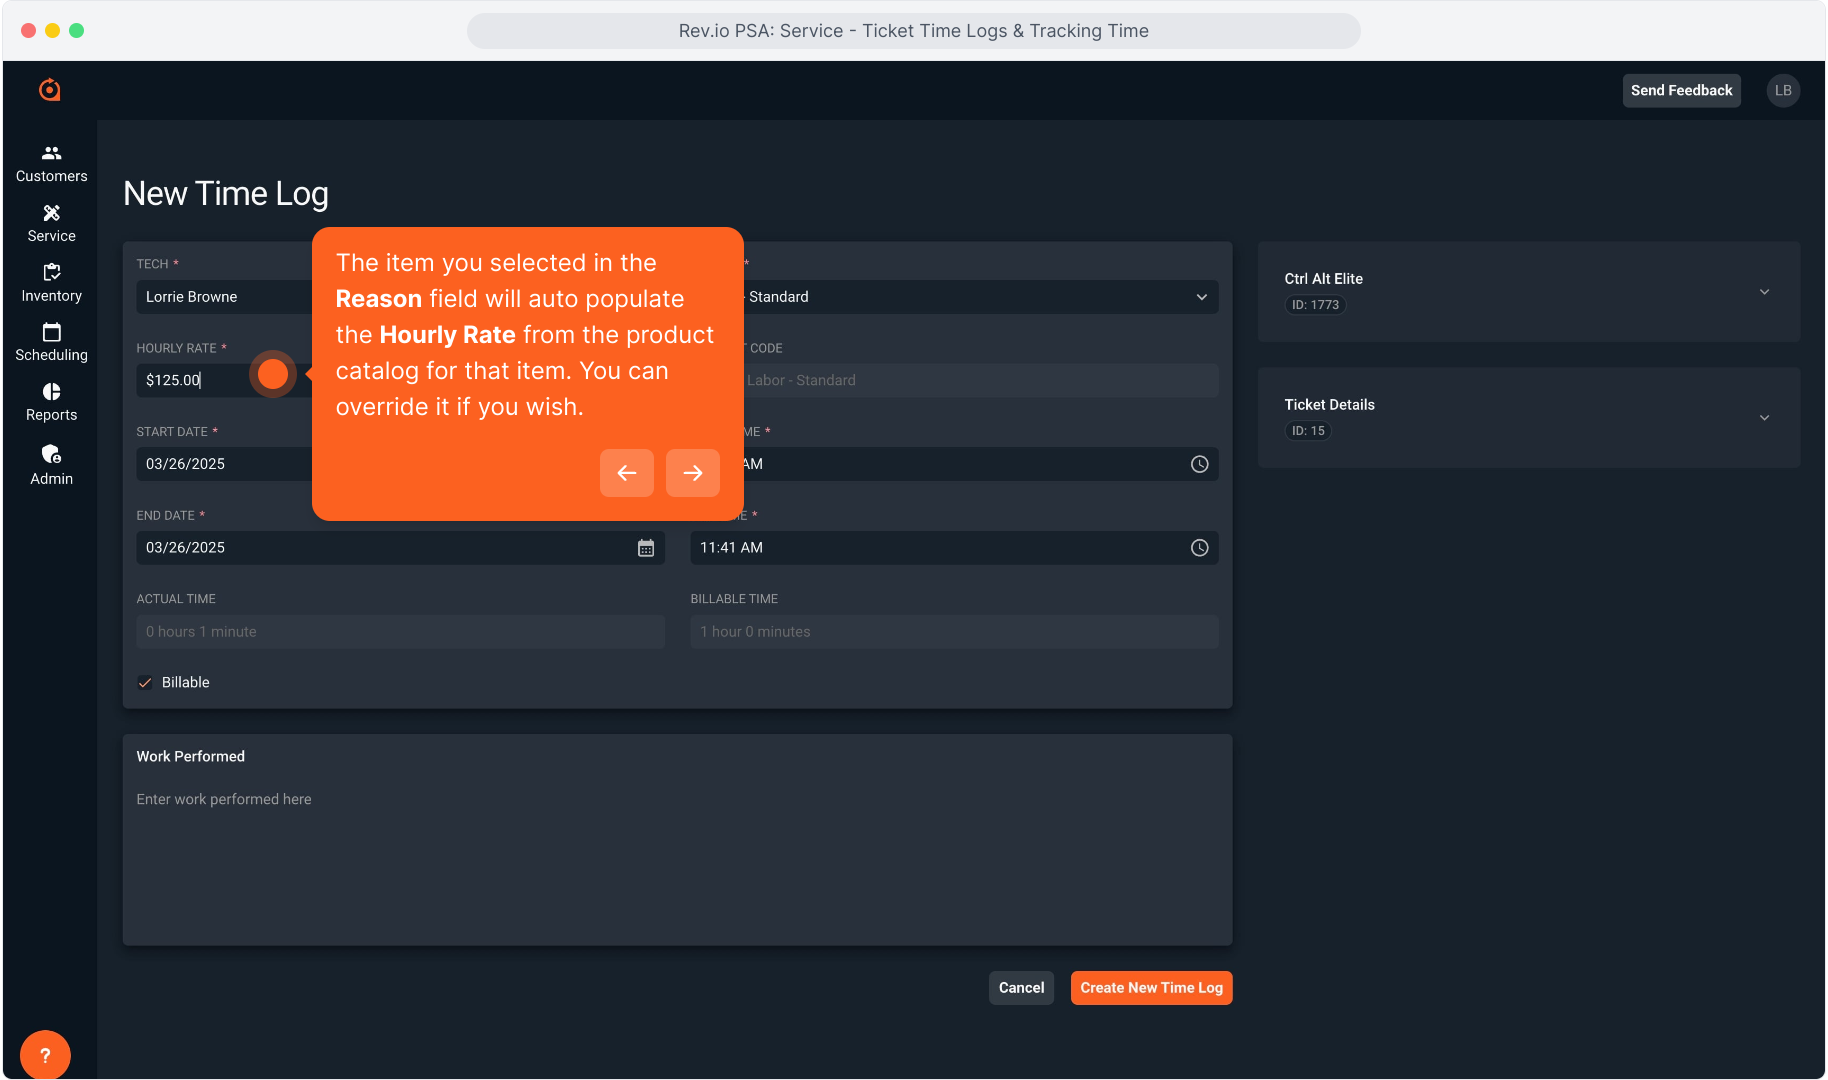
11. The item you selected in the Reason field will auto populate the Hourly Rate from the product catalog for that item. You can override it if you wish.
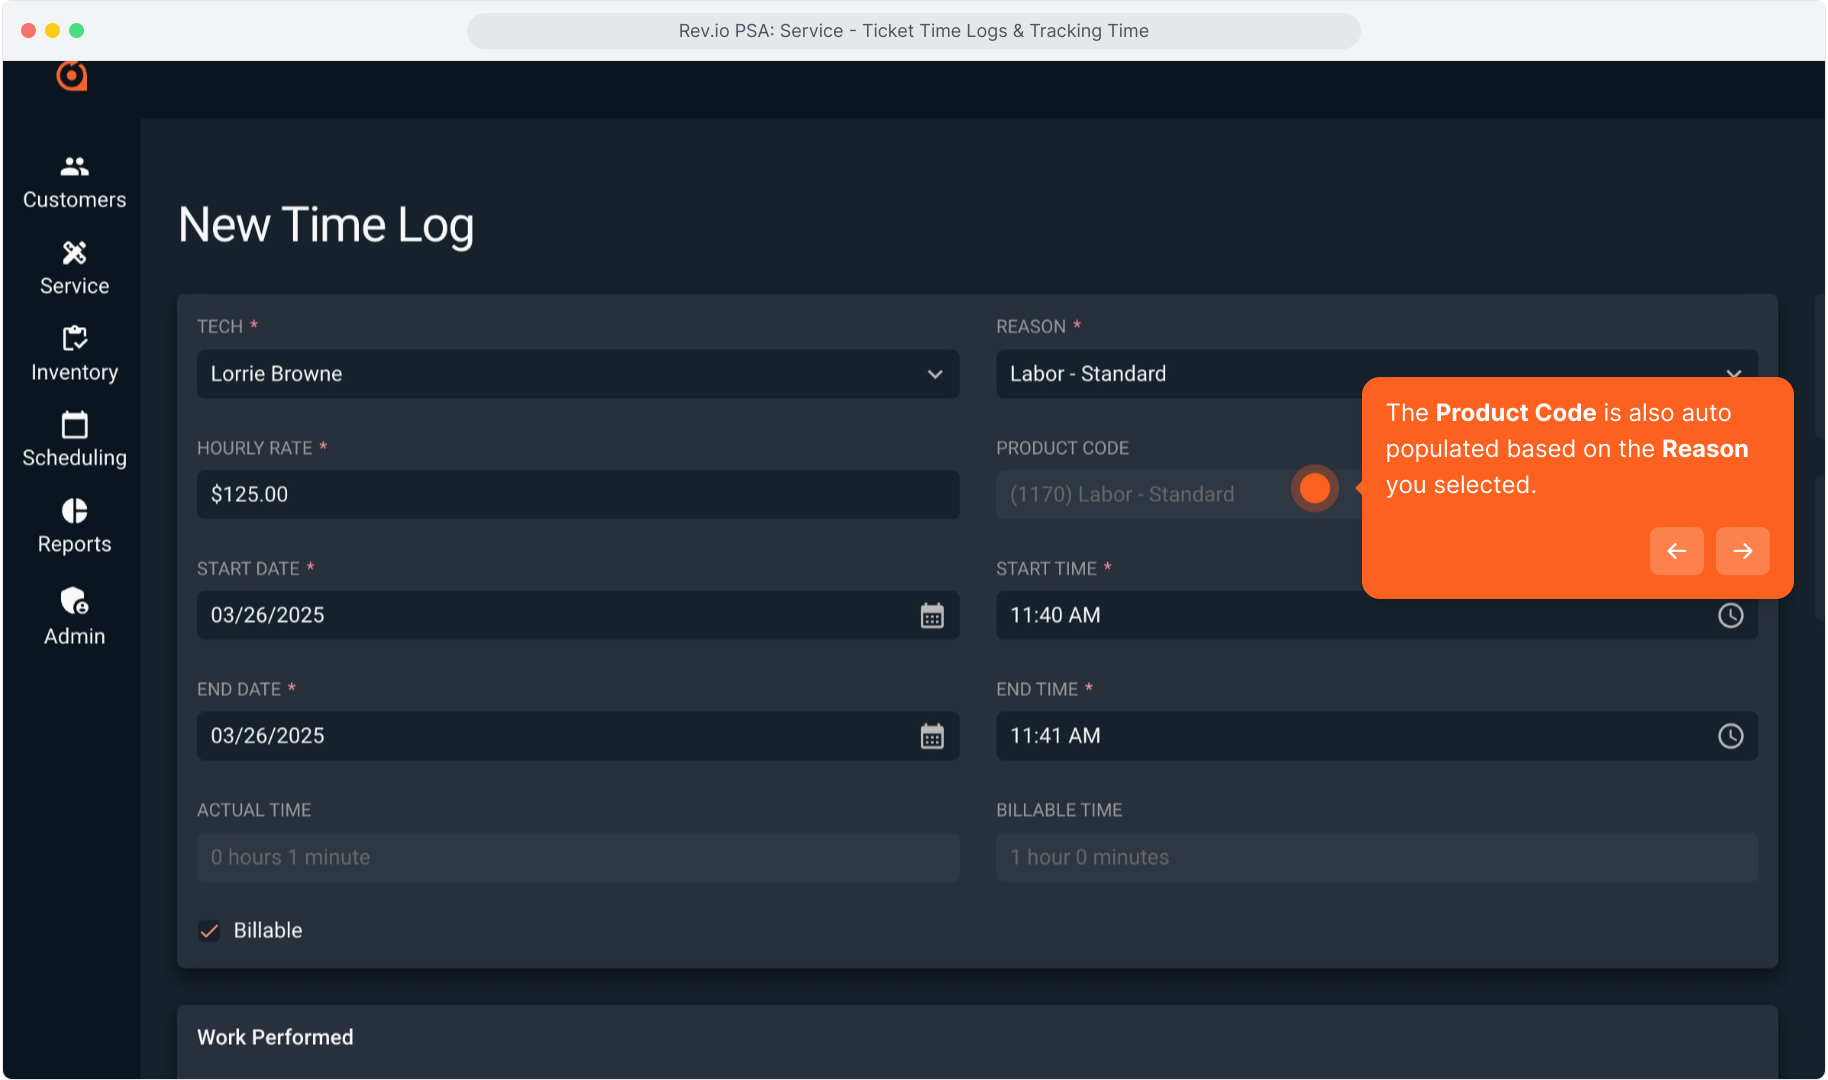
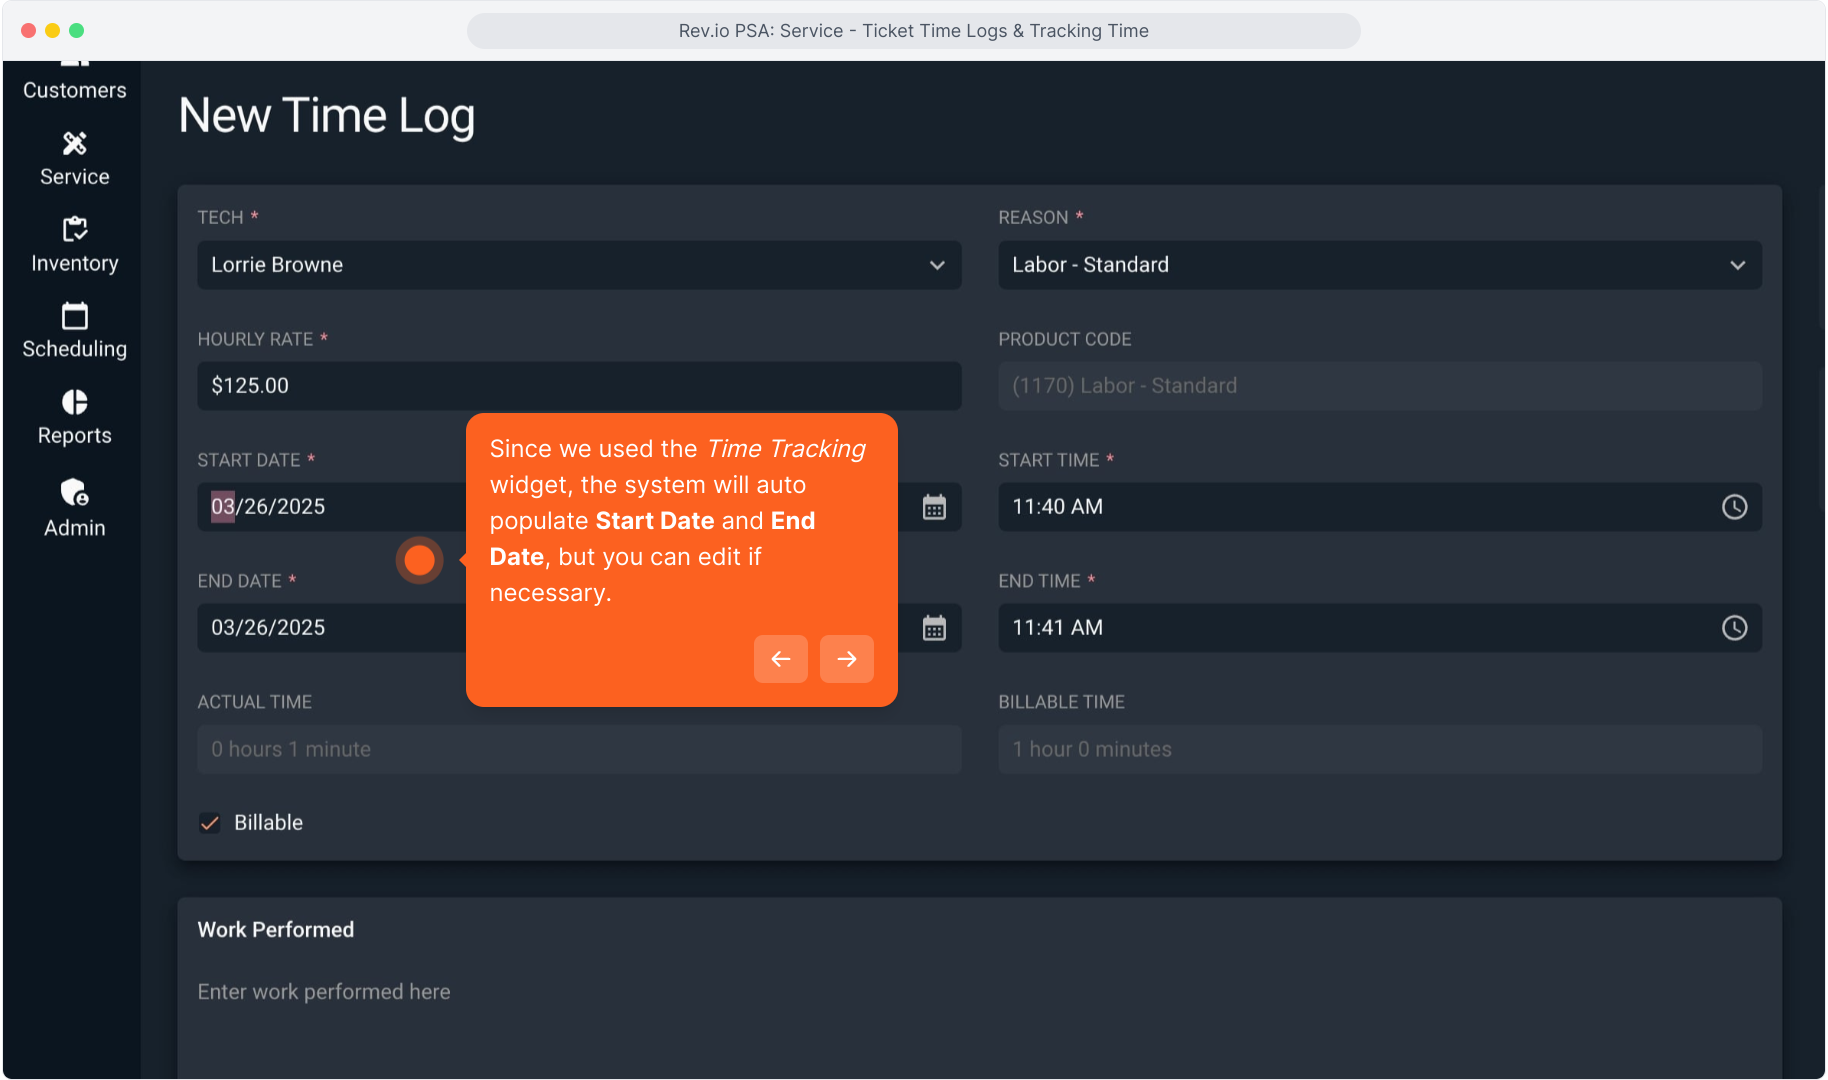
12. The Product Code is also auto populated based on the Reason you selected.
13. Since we used the Time Tracking widget, the system will auto populate Start Date and End Date, but you can edit if necessary.
14. Similarly, the widget will auto populate Start Time and End Time. These can be edited if necessary.

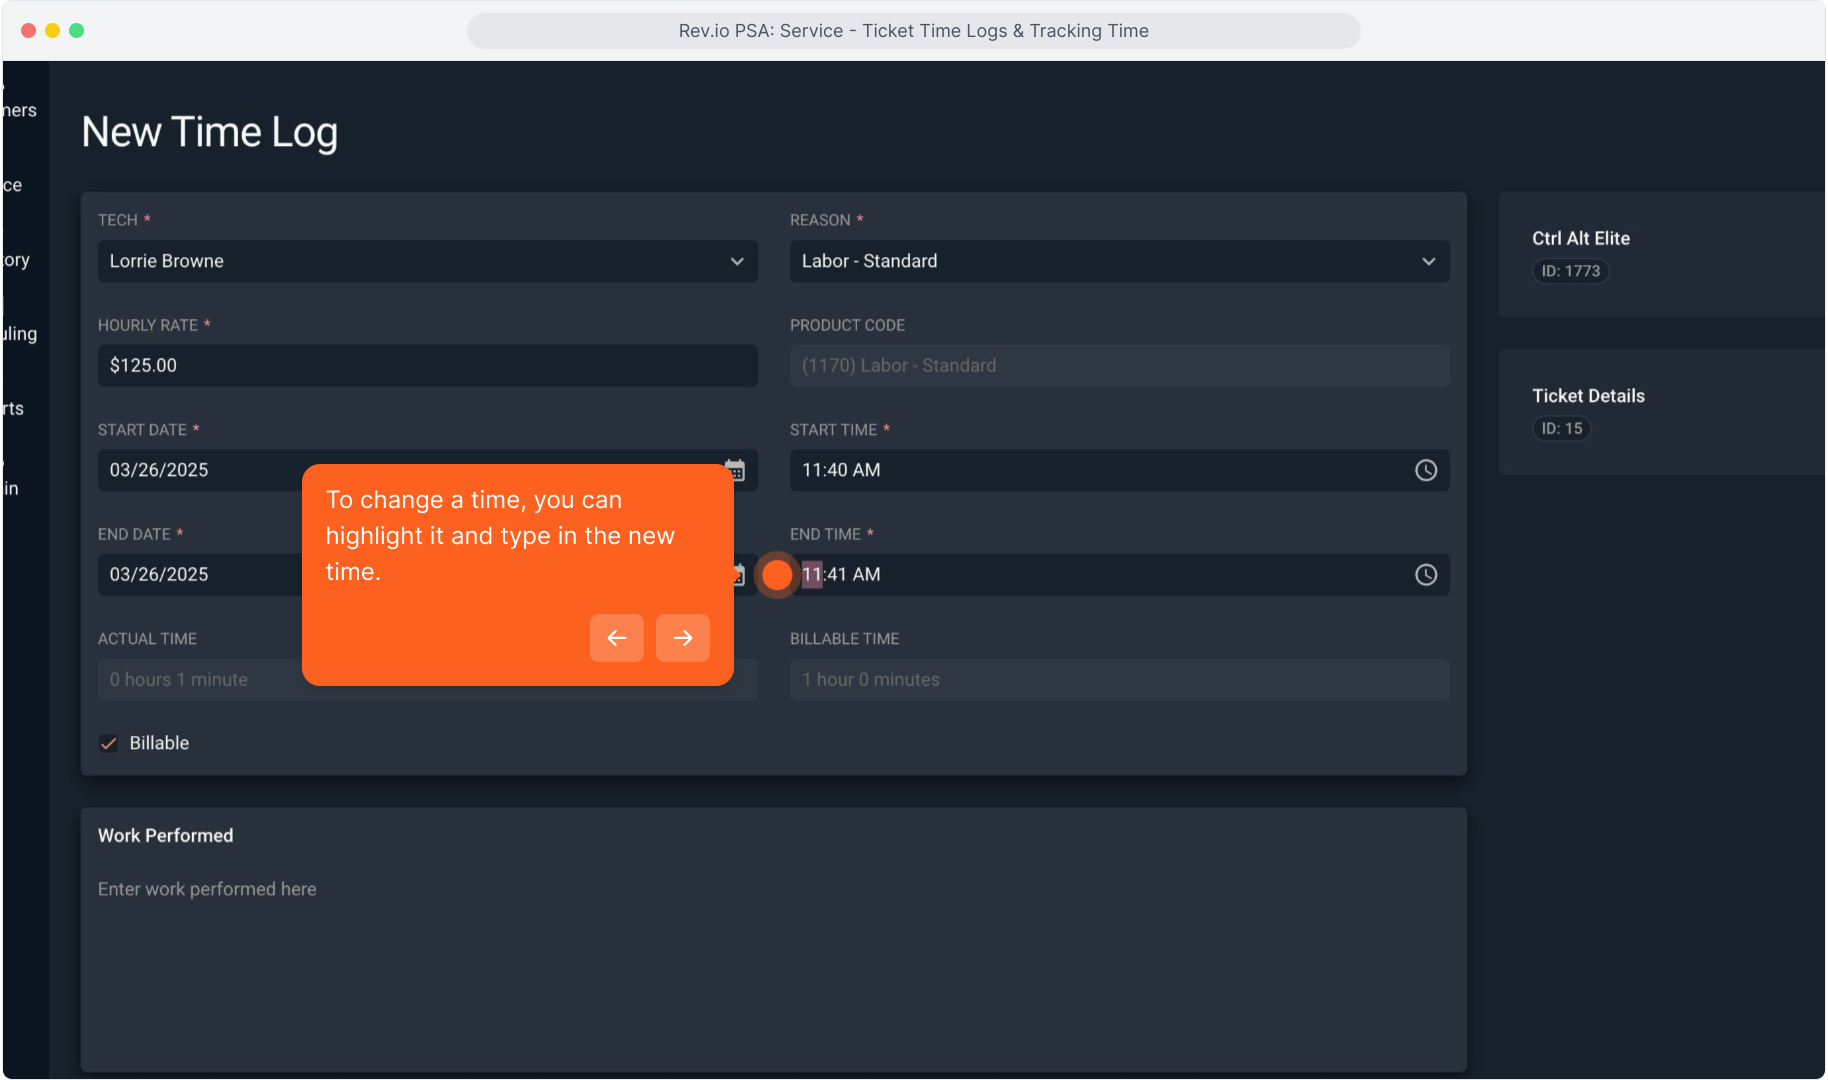
15. To change a time, you can highlight it and type in the new time.
16. Intentionally blank.
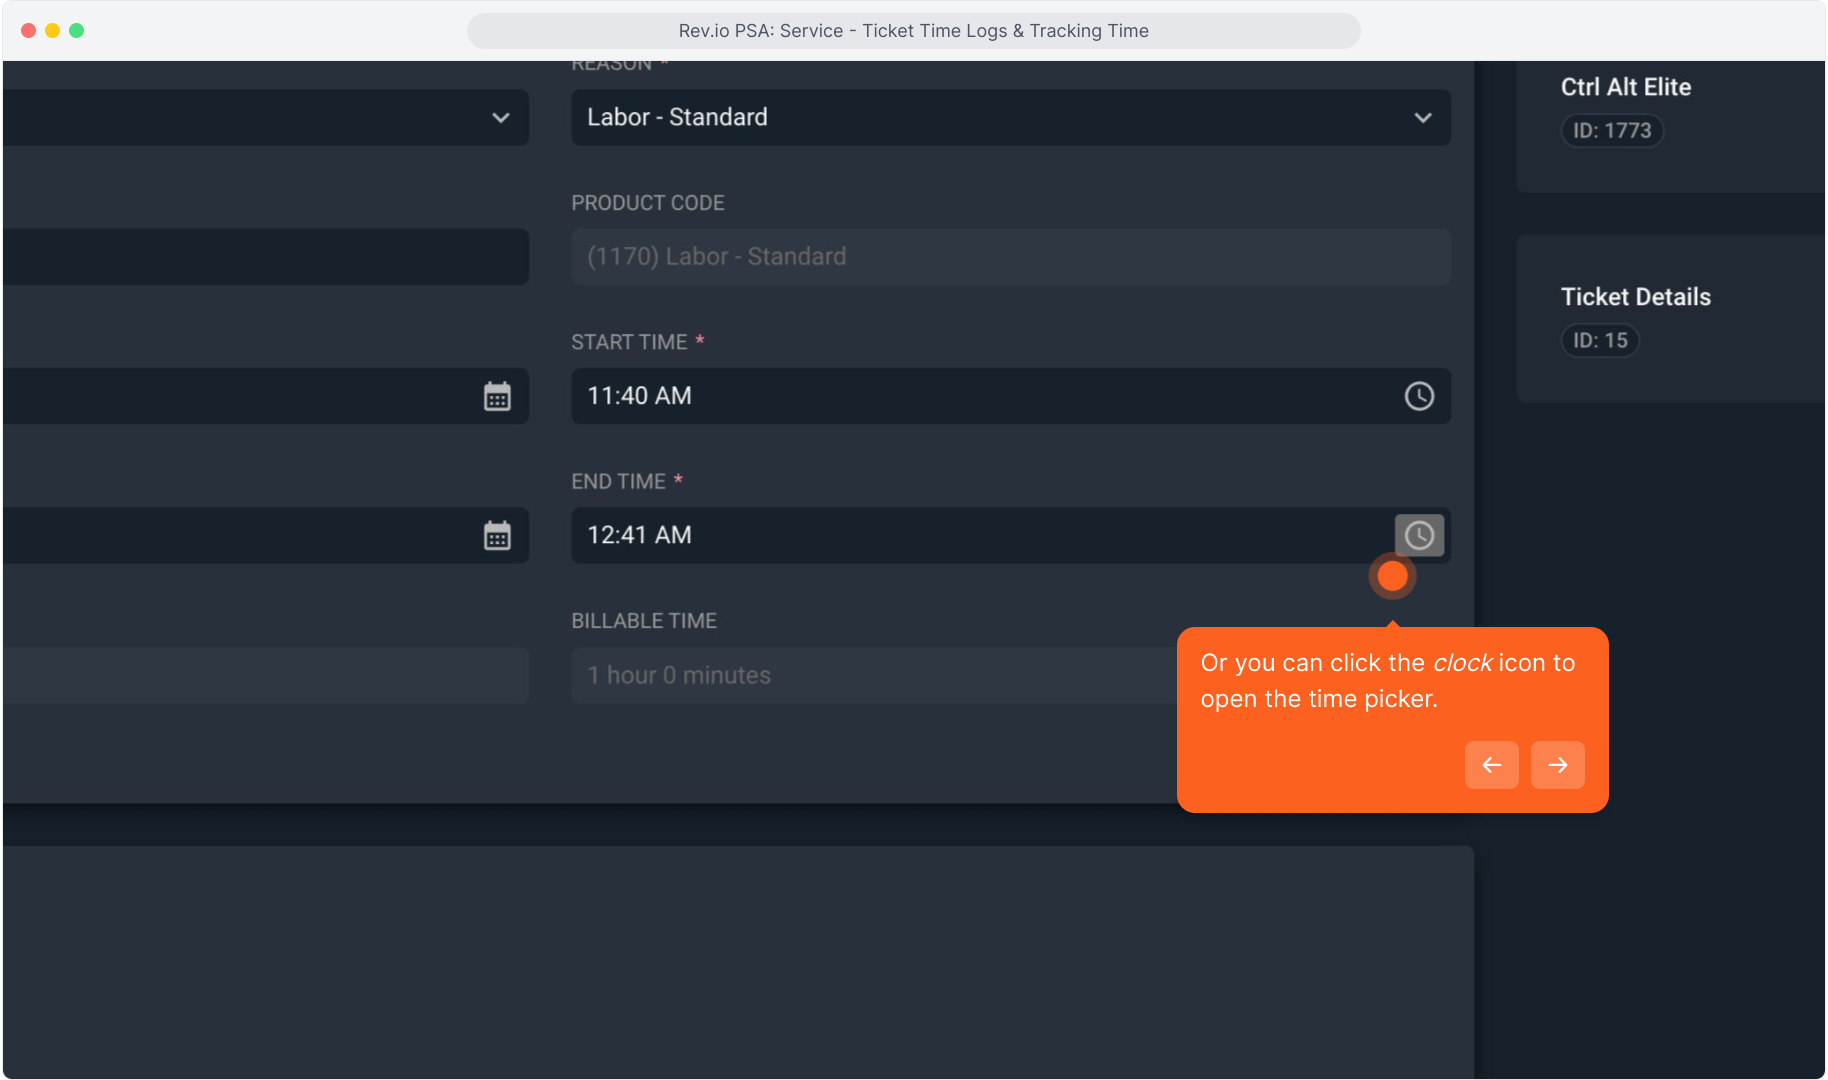
17. Or you can click the clock icon to open the time picker.
18. Intentionally blank.
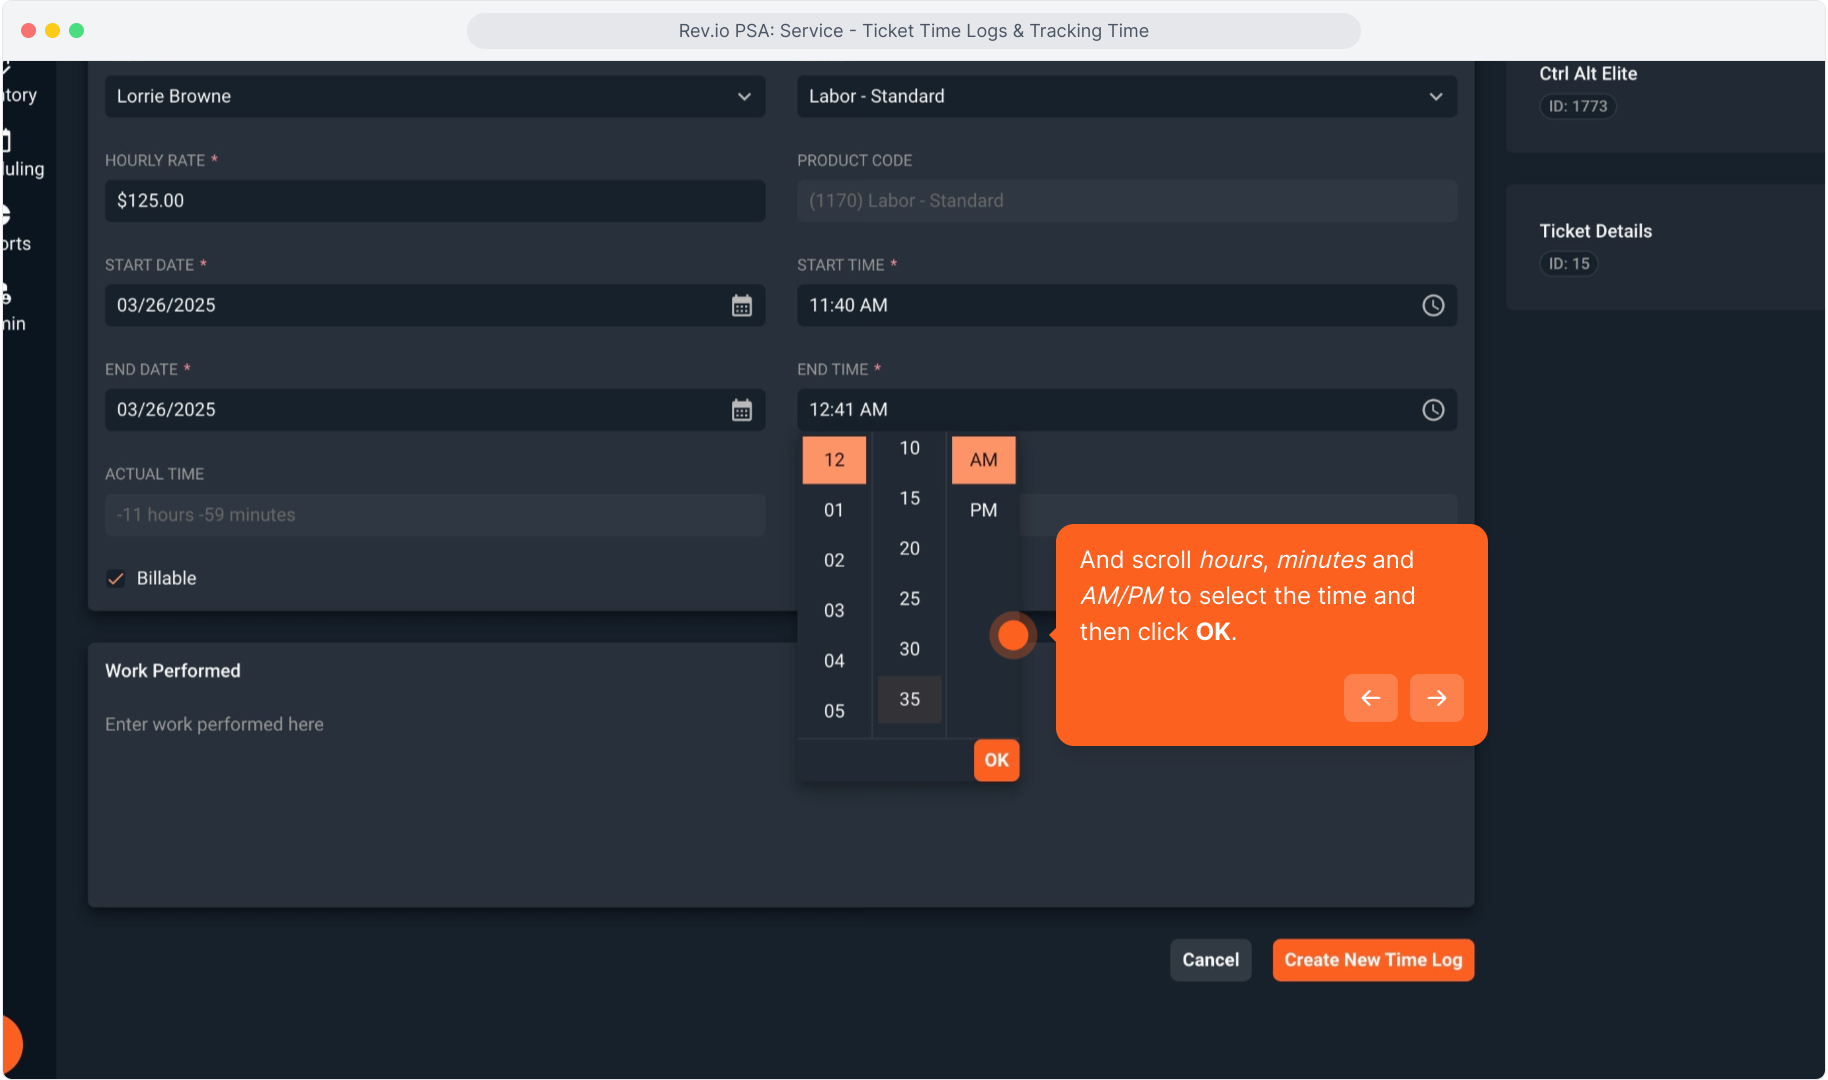
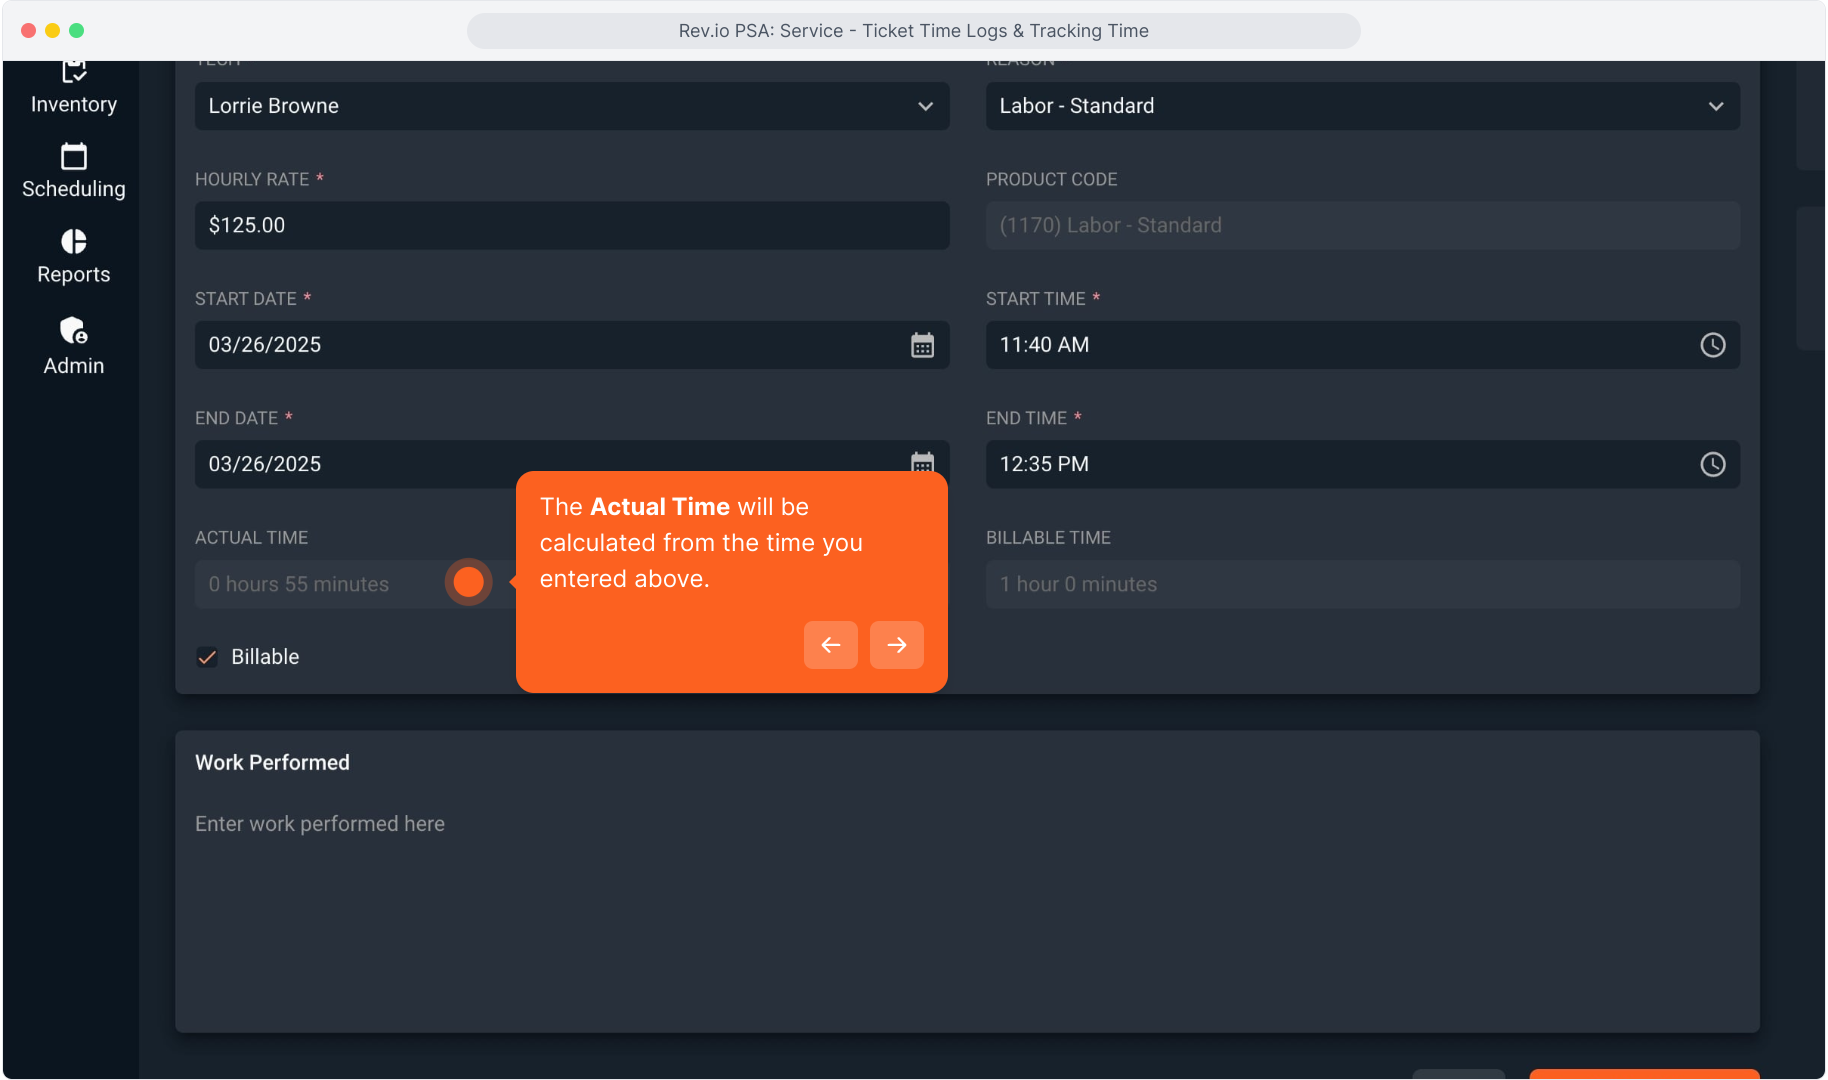
19. And scroll hours, minutes and AM/PM to select the time and then click OK.
20. The Actual Time will be calculated from the time you entered above.
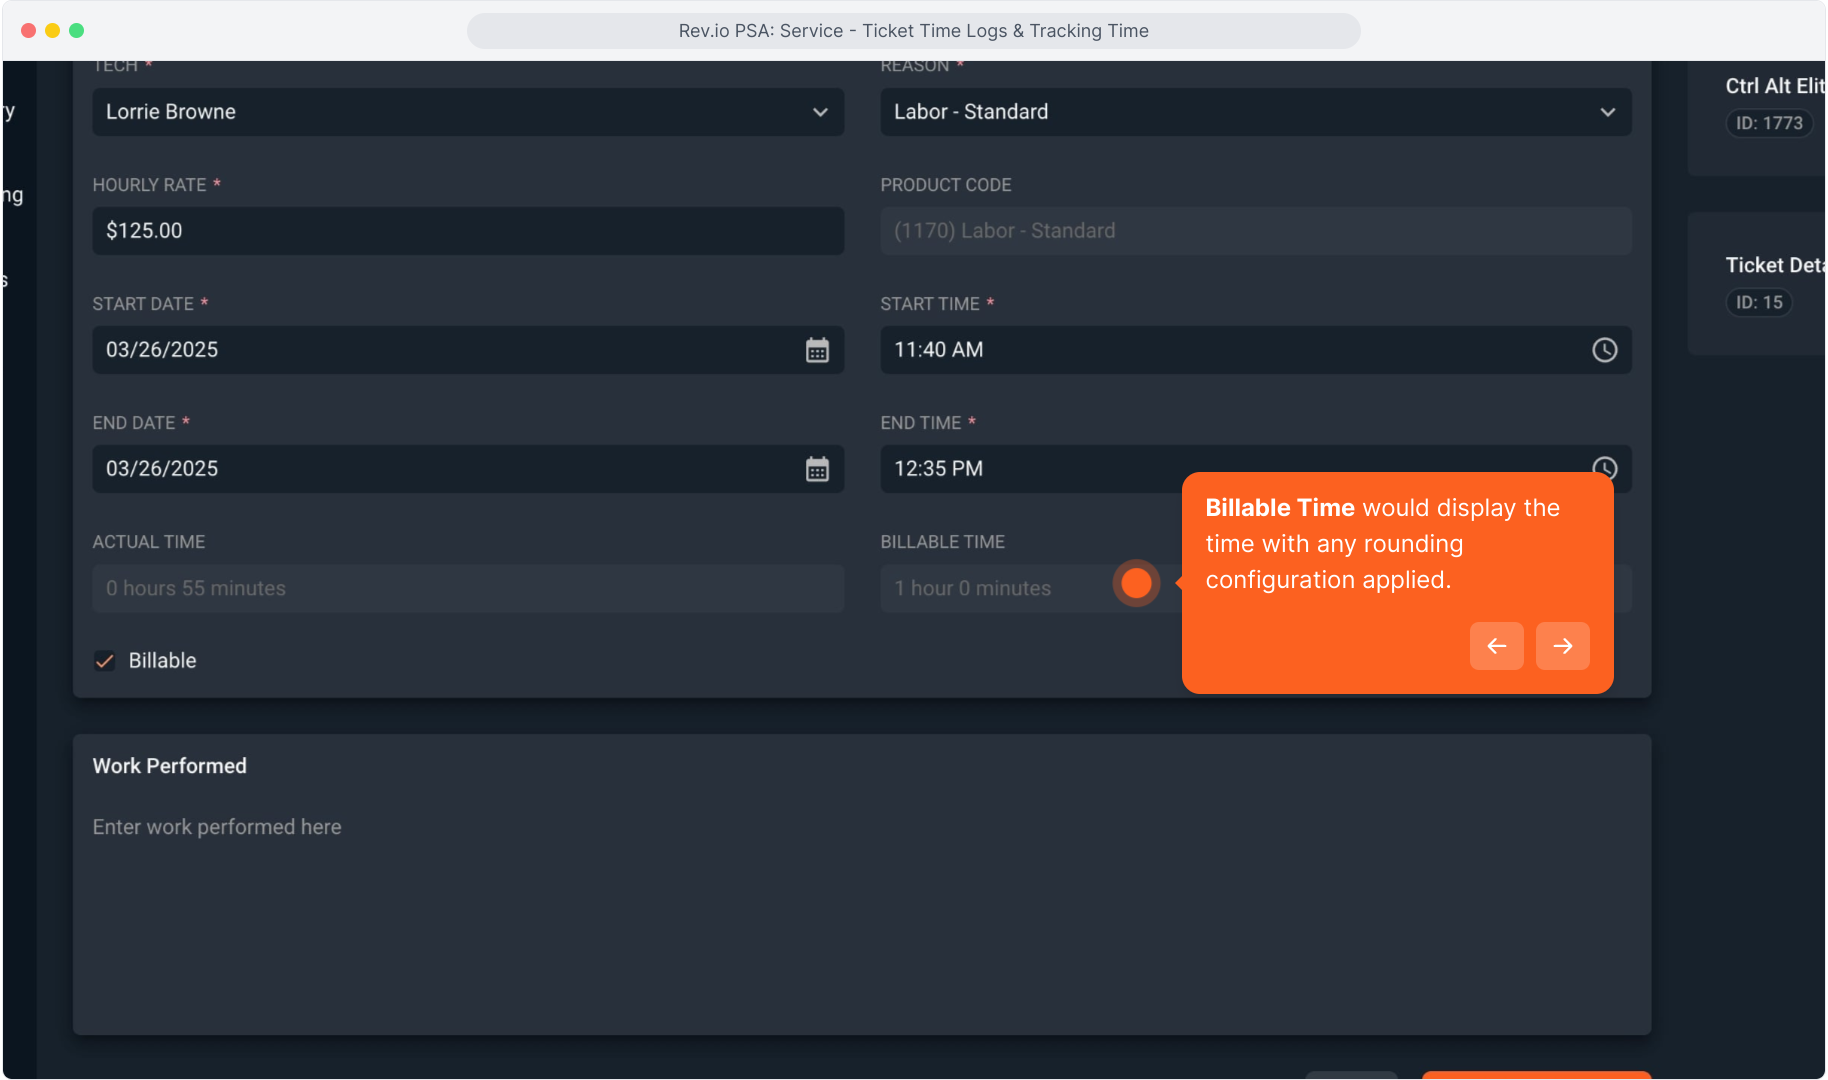
21. Billable Time would display the time with any rounding configuration applied.
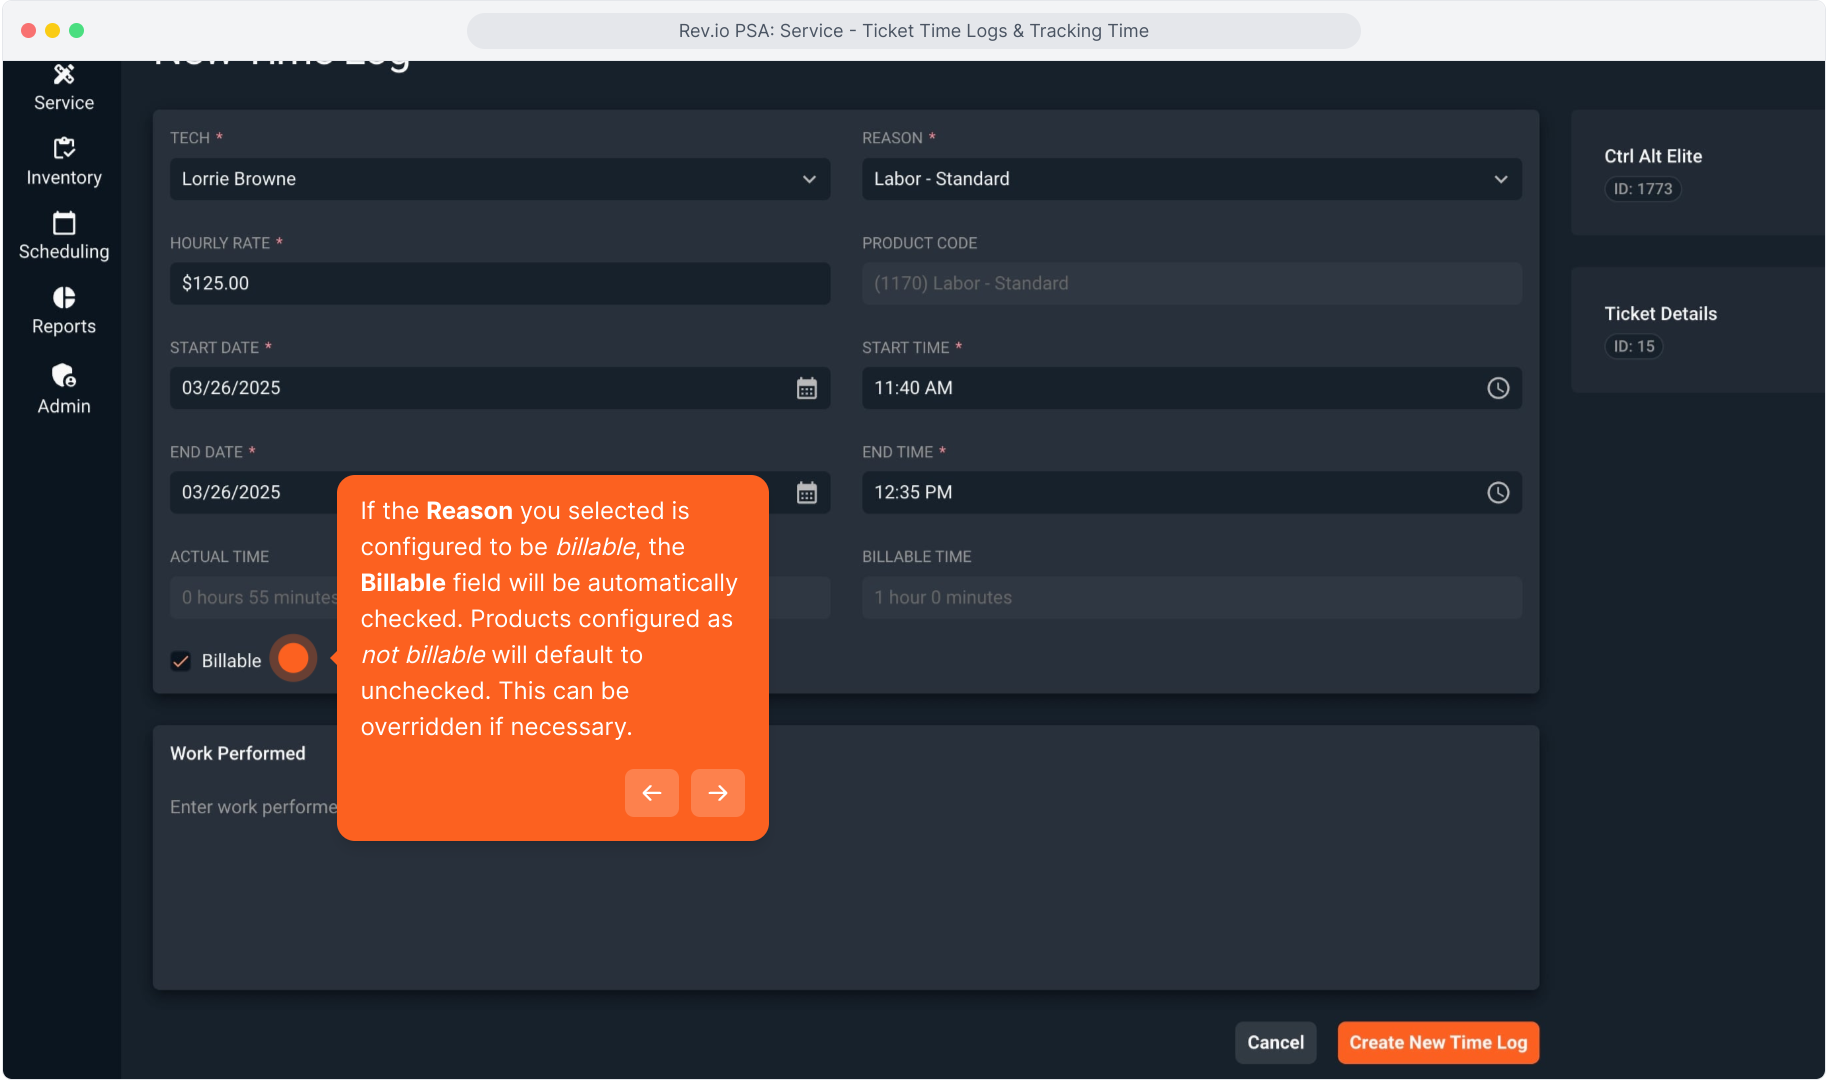
22. If the Reason you selected is configured to be billable, the Billable field will be automatically checked. Products configured as not billable will default to unchecked. This can be overridden if necessary.
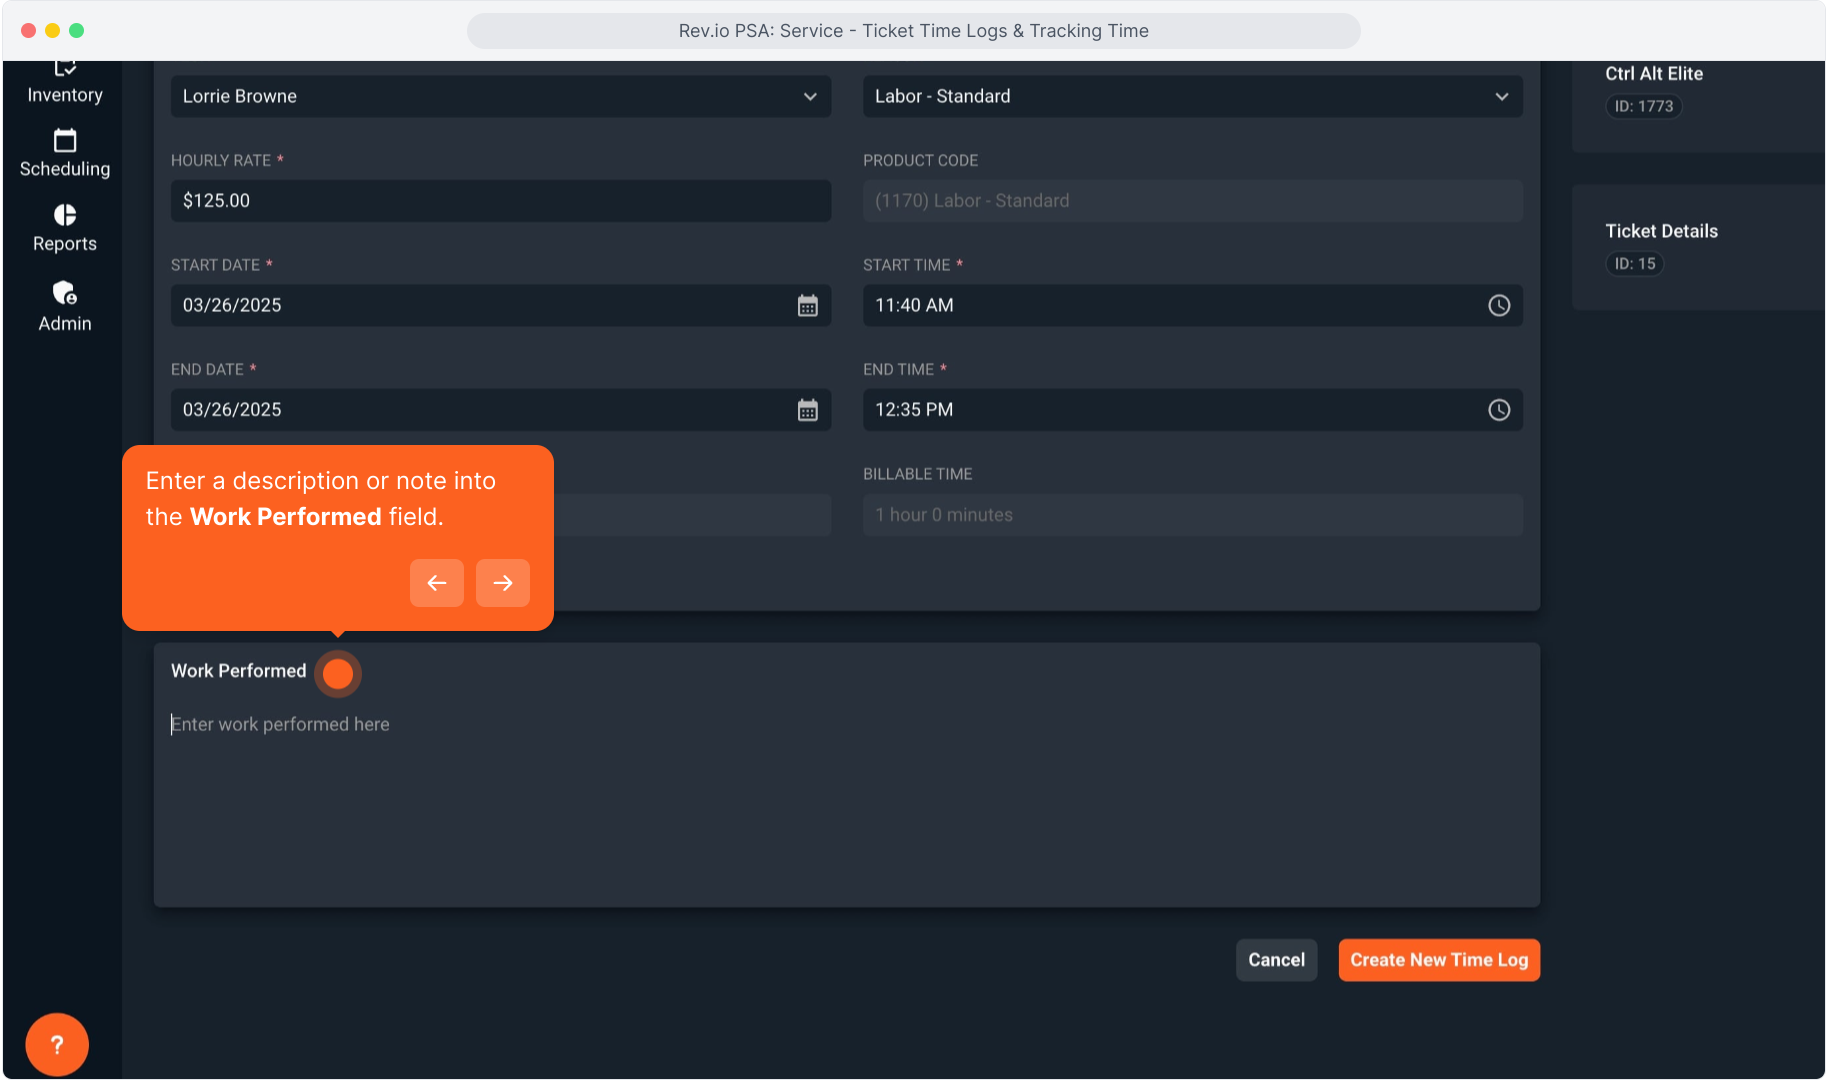
23. Enter a description or note into the Work Performed field.
24. Intentionally blank.
25. Click Create New Time Log to save your entry.
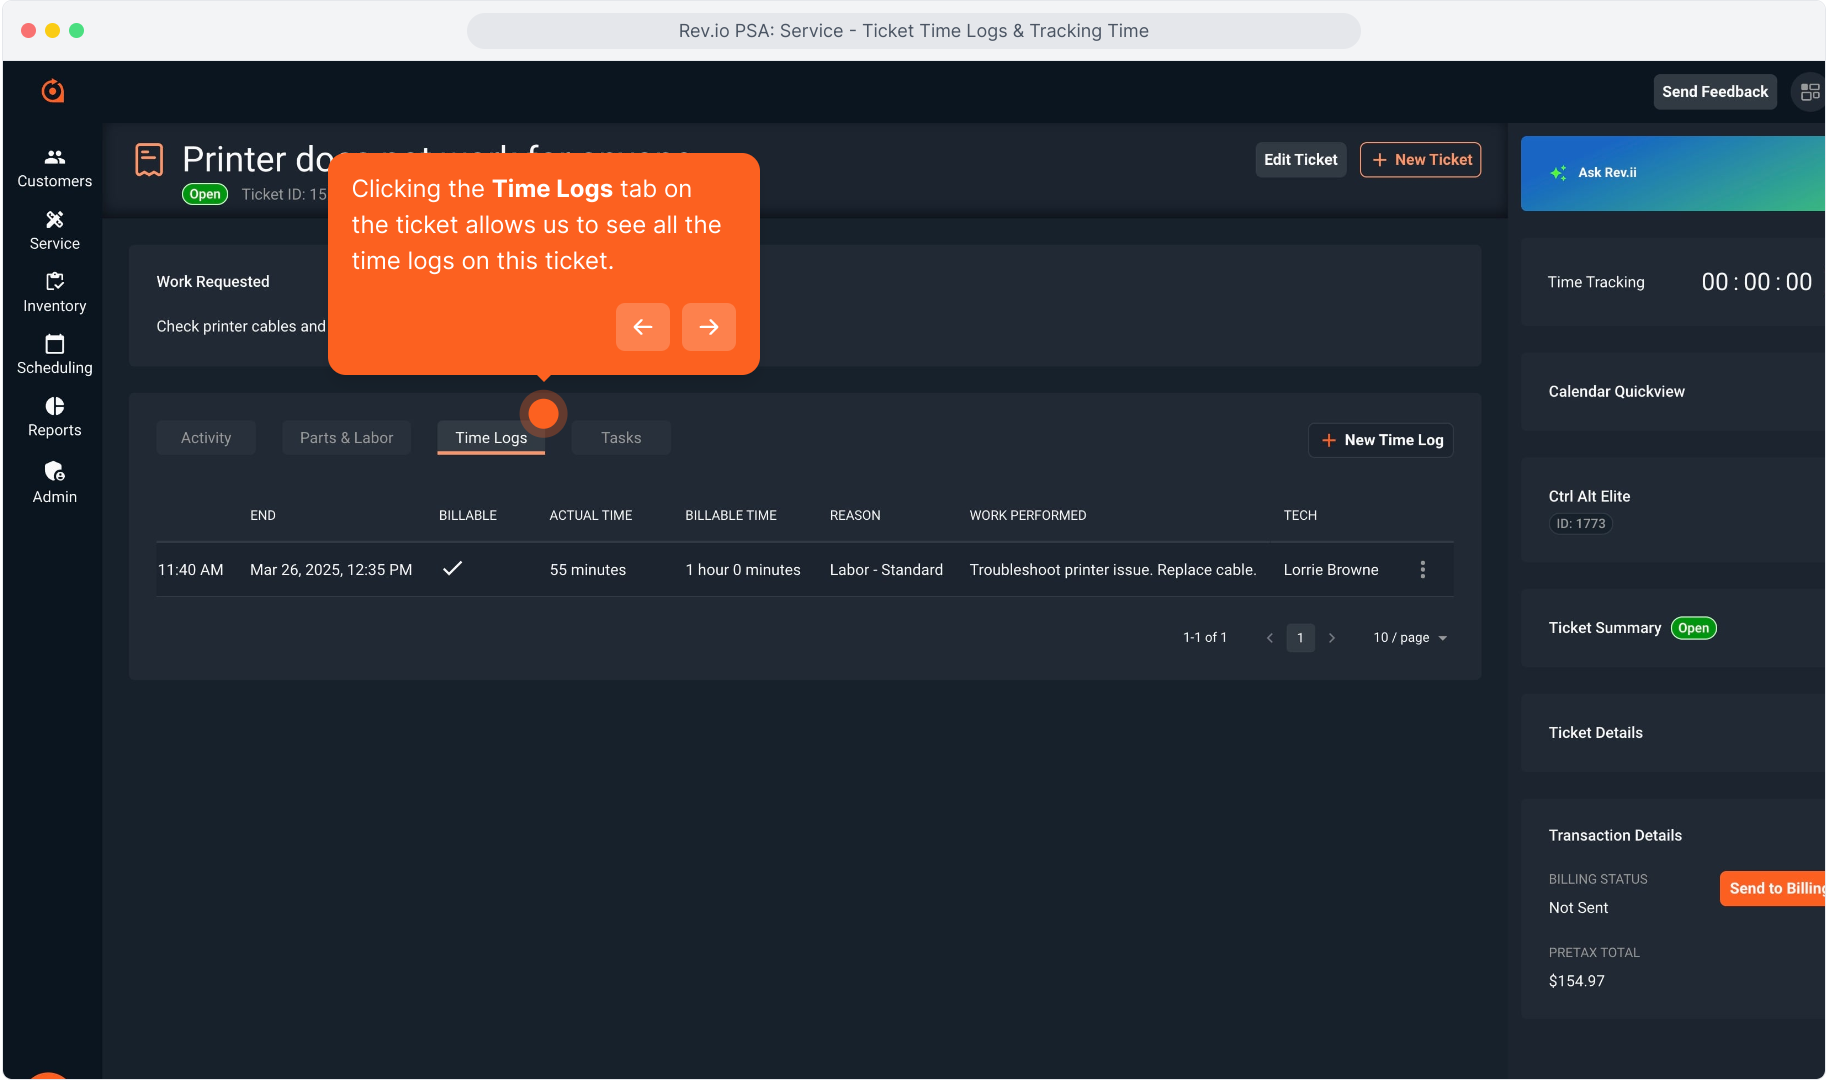
26. Clicking the Time Logs tab on the ticket allows us to see all the time logs on this ticket.
27. Clicking the three dot icon on any time log entry will allow you to view, edit or delete the time log.

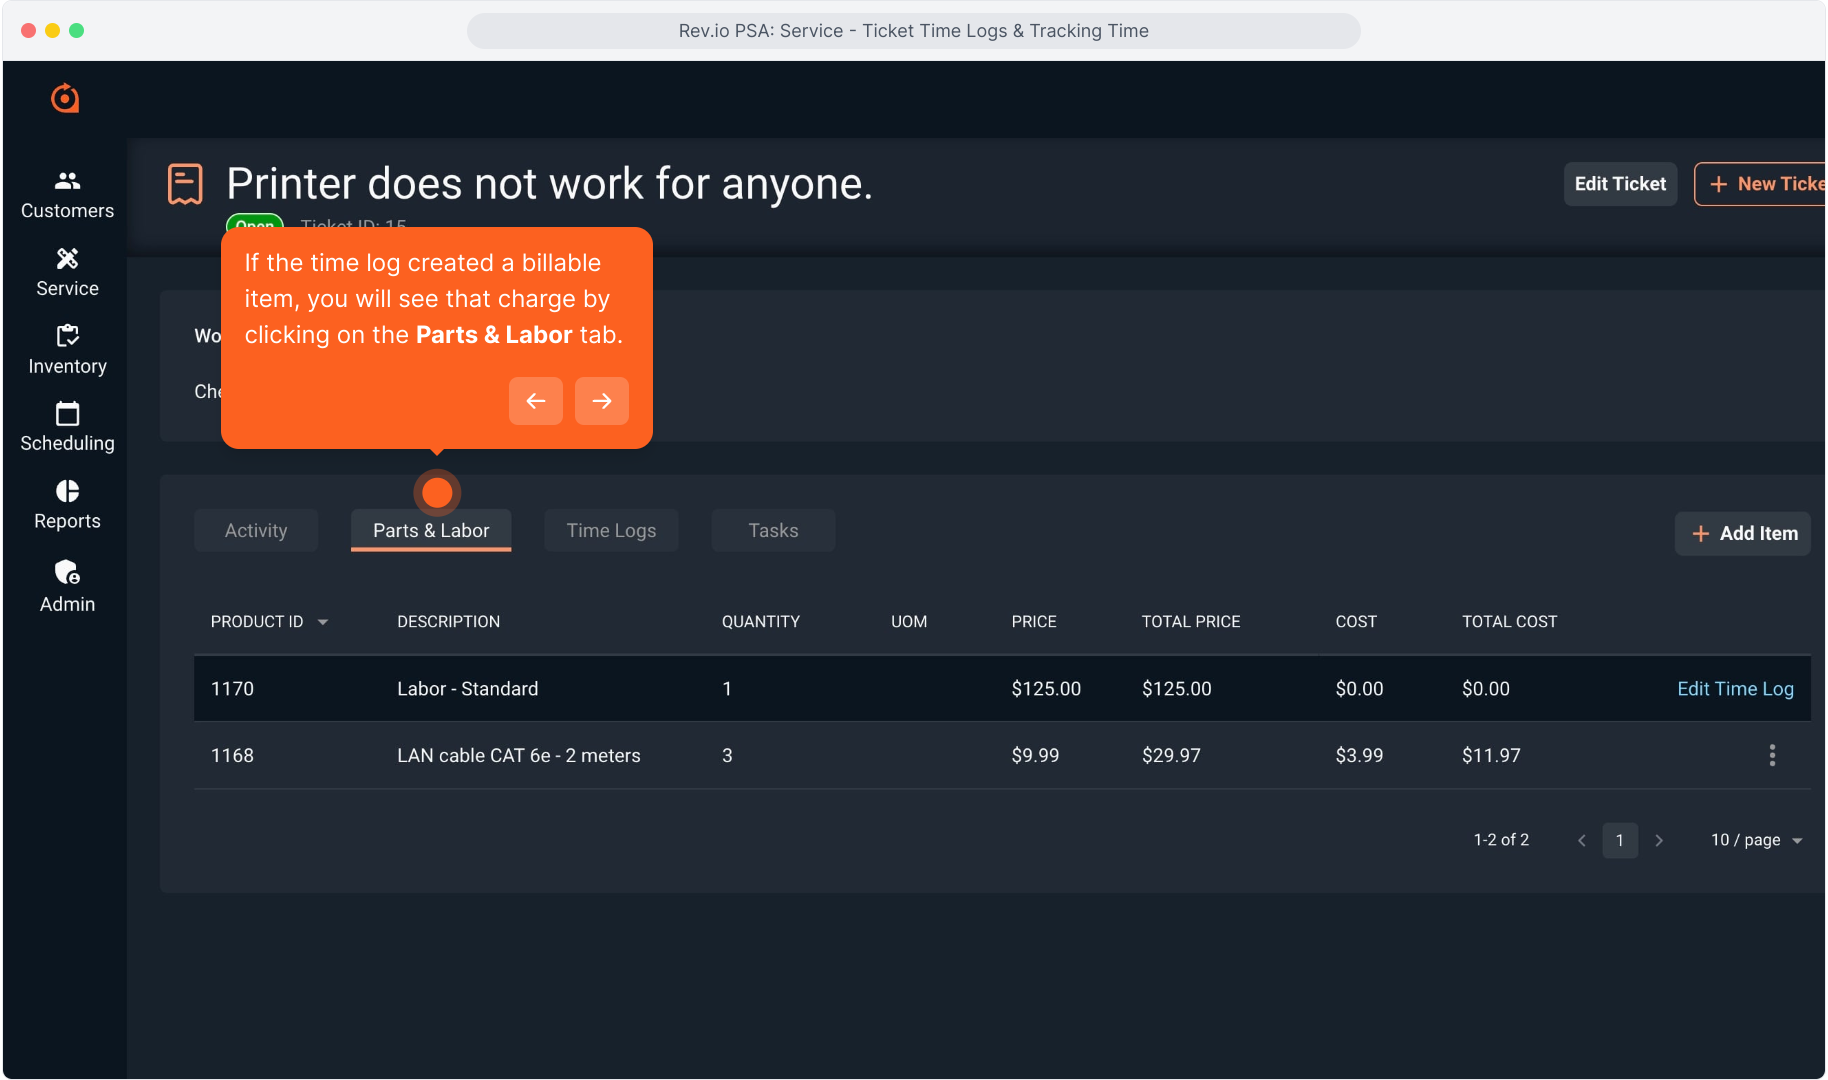
28. If the time log created a billable item, you will see that charge by clicking on the Parts & Labor tab.
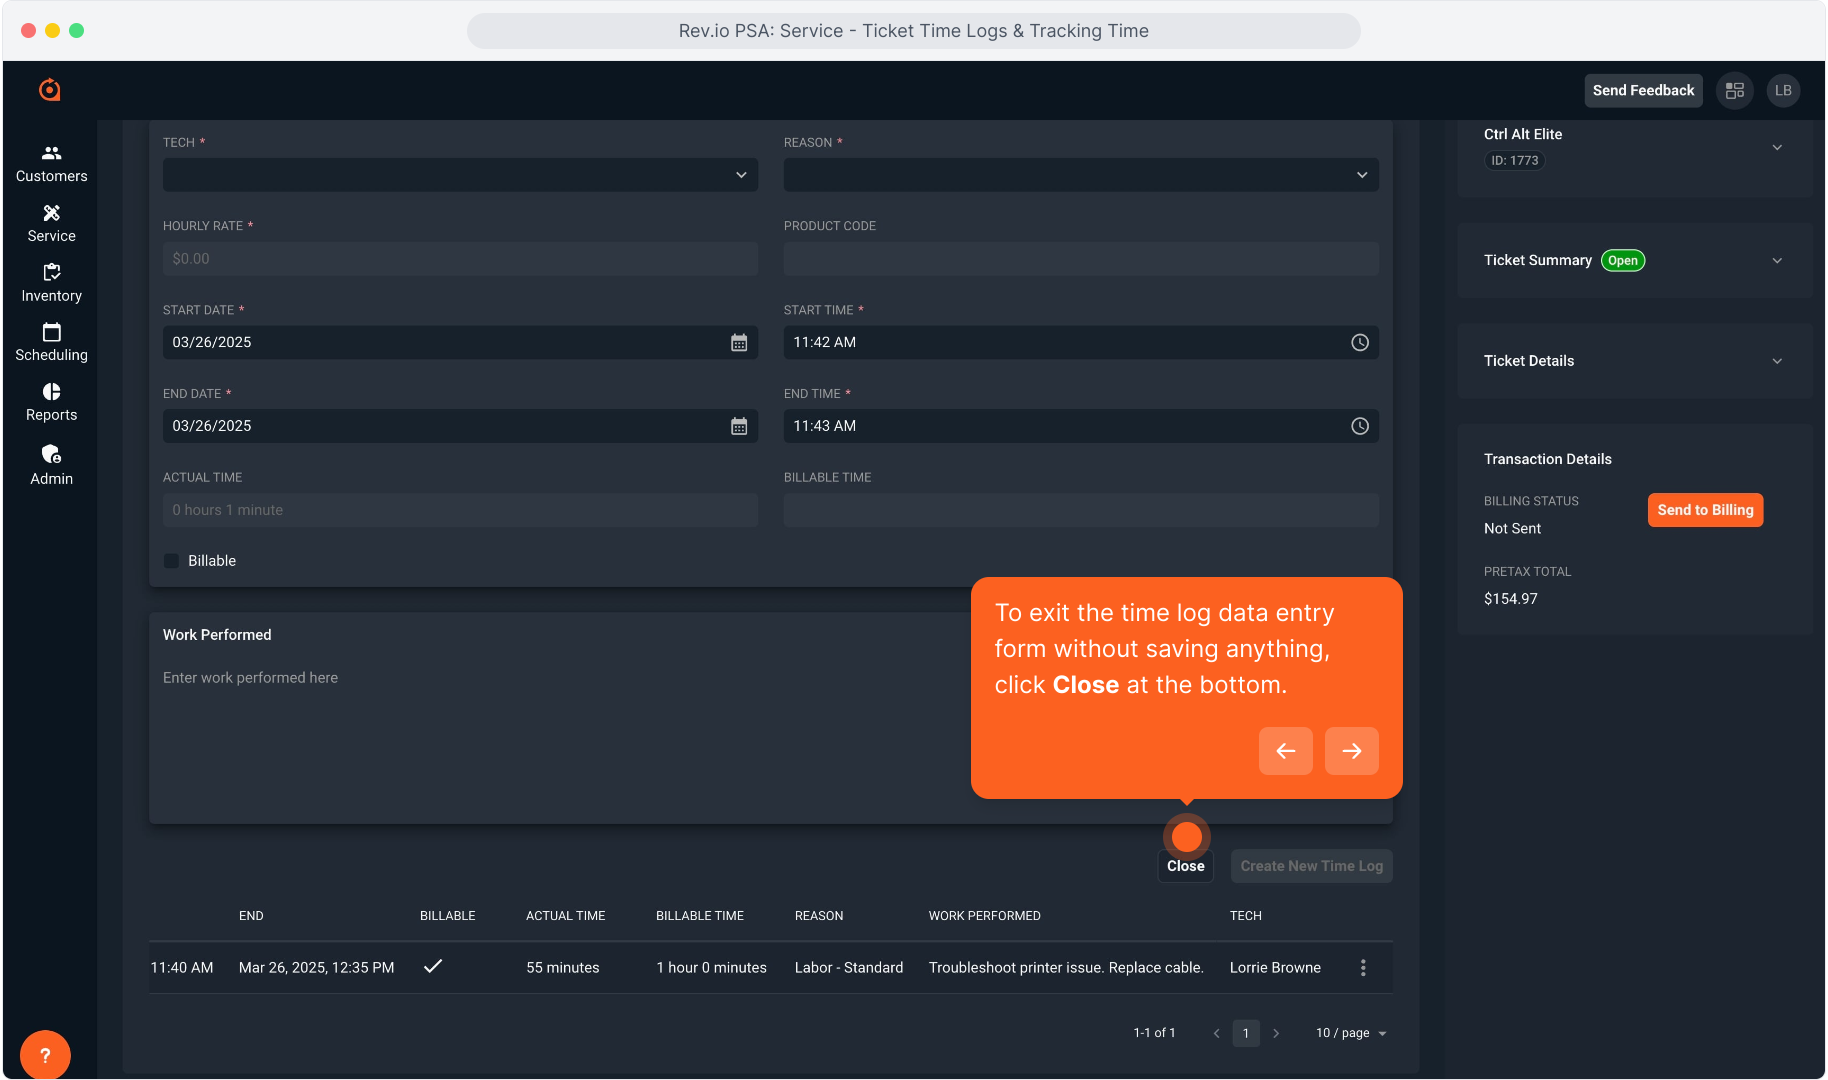
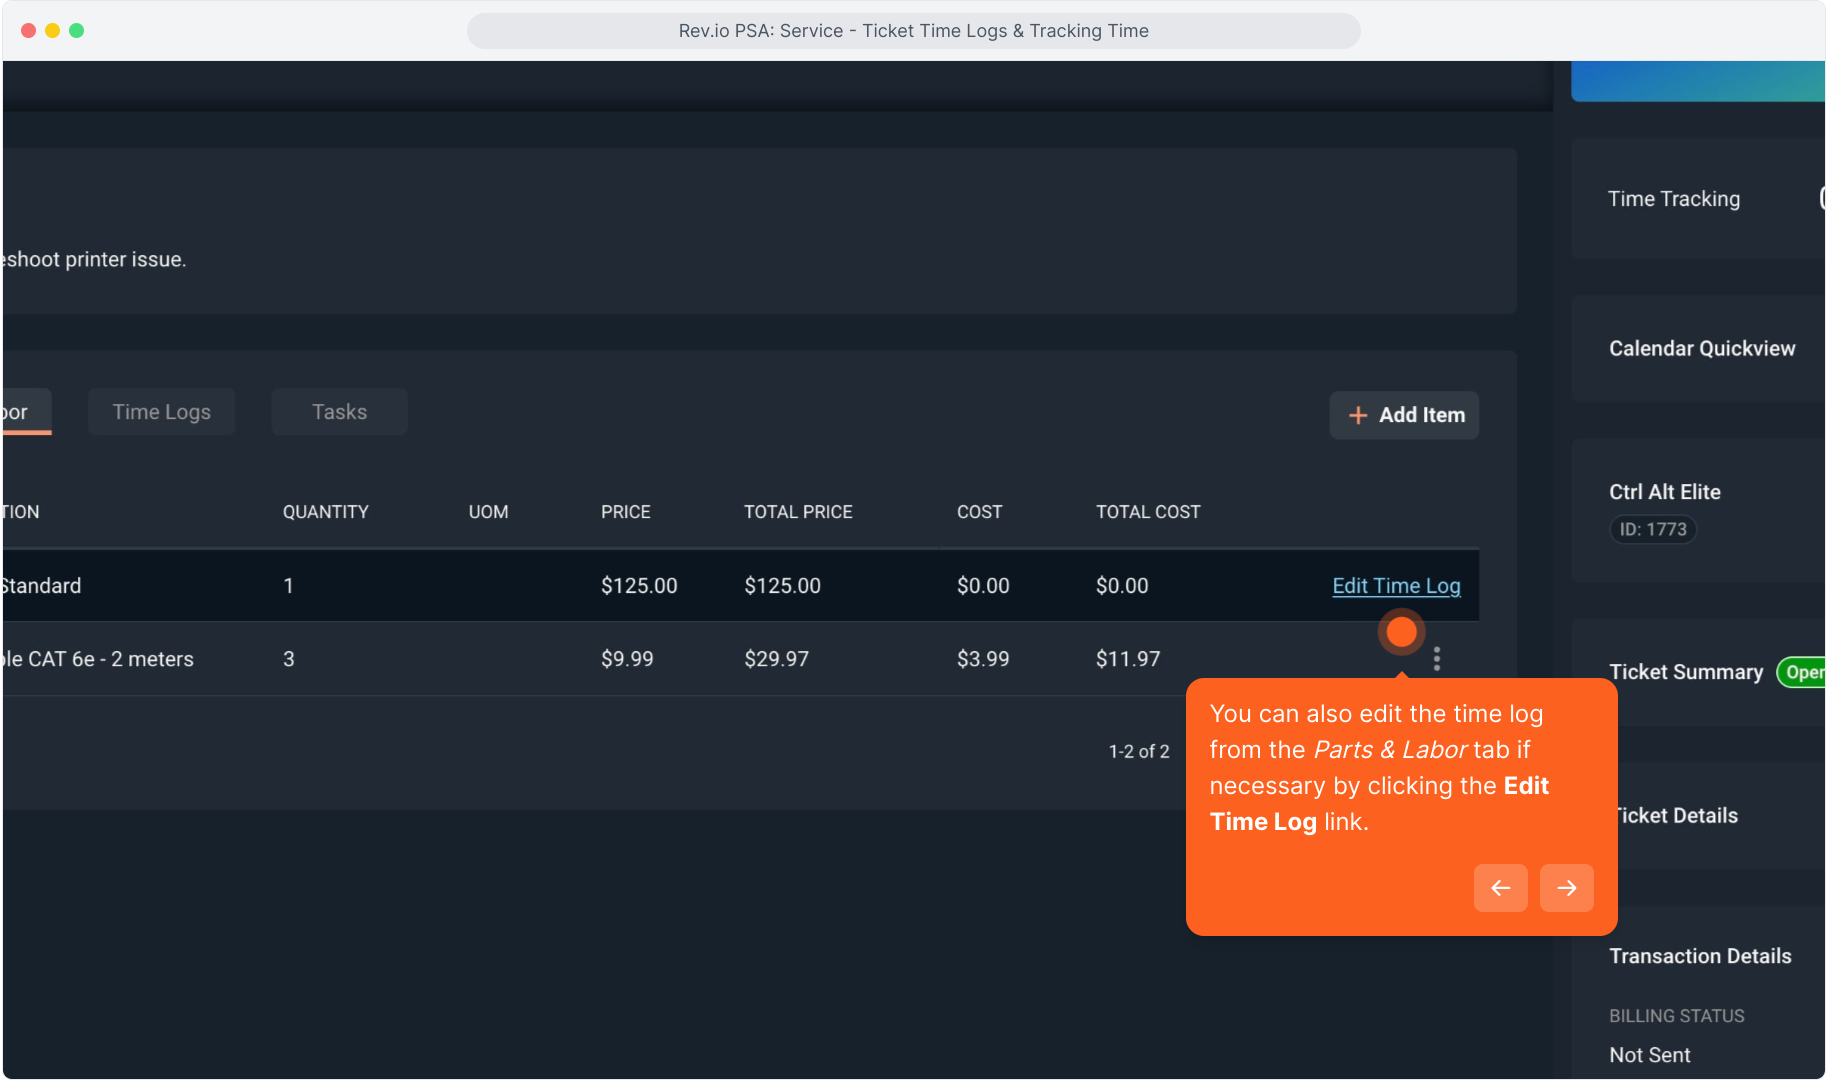
29. You can also edit the time log from the Parts & Labor tab if necessary by clicking the Edit Time Log link.
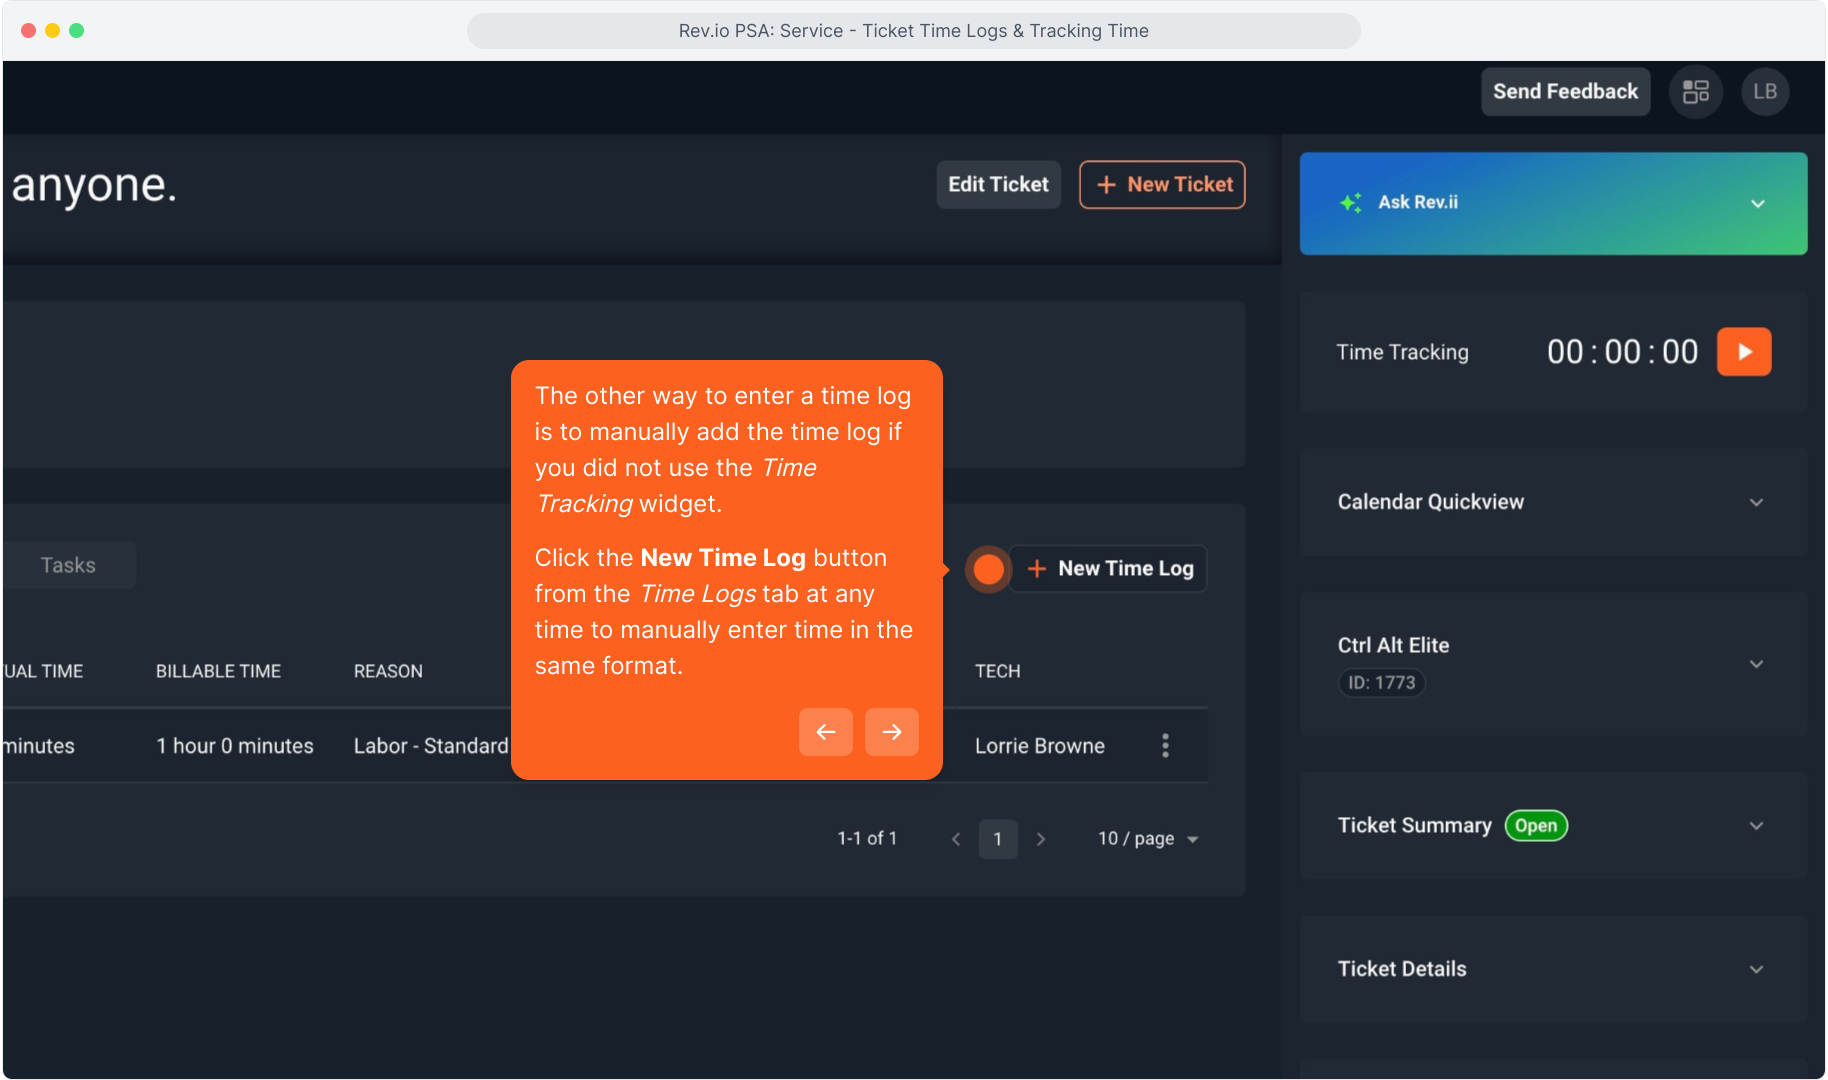
30. The other way to enter a time log is to manually add the time log if you did not use the Time Tracking widget.
Click the New Time Log button from the Time Logs tab at any time to manually enter time in the same format.
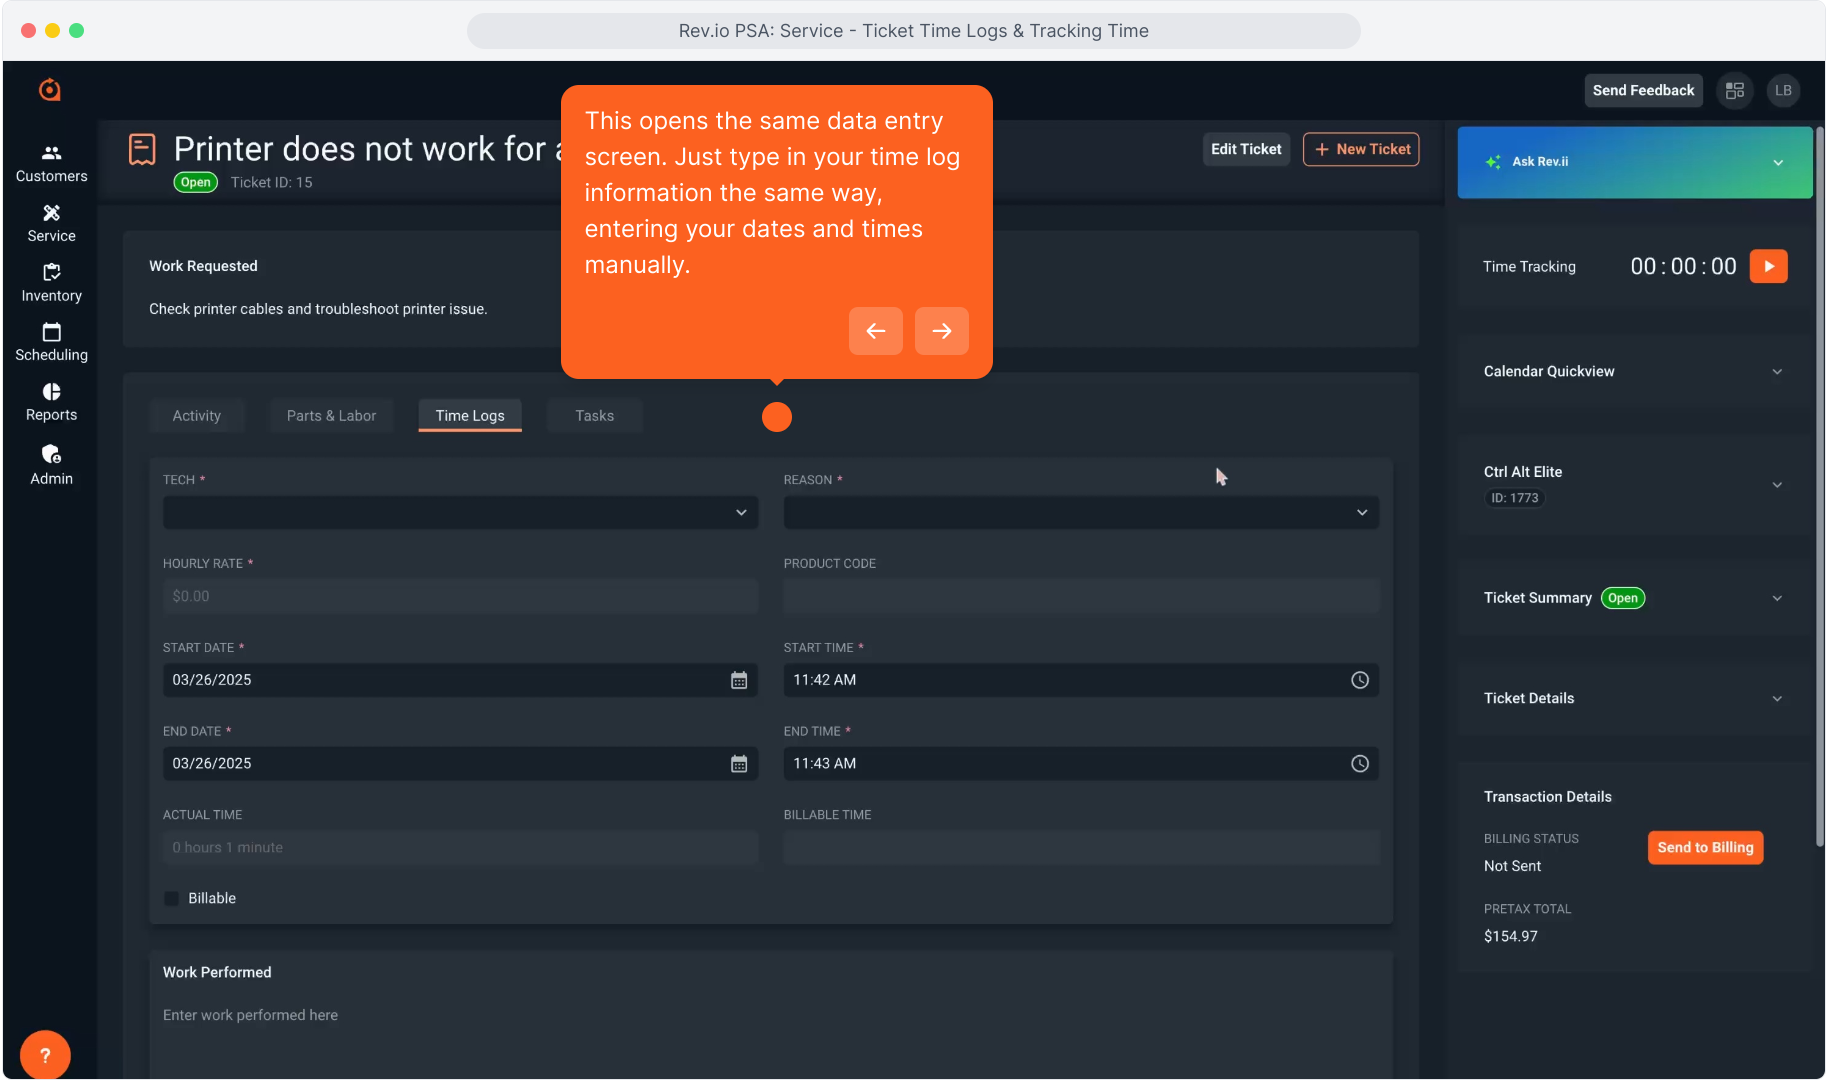
31. This opens the same data entry screen. Just type in your time log information the same way, entering your dates and times manually.
32. To exit the time log data entry form without saving anything, click Close at the bottom.