How To Guide: Configuring Collection Templates
1. Introduction
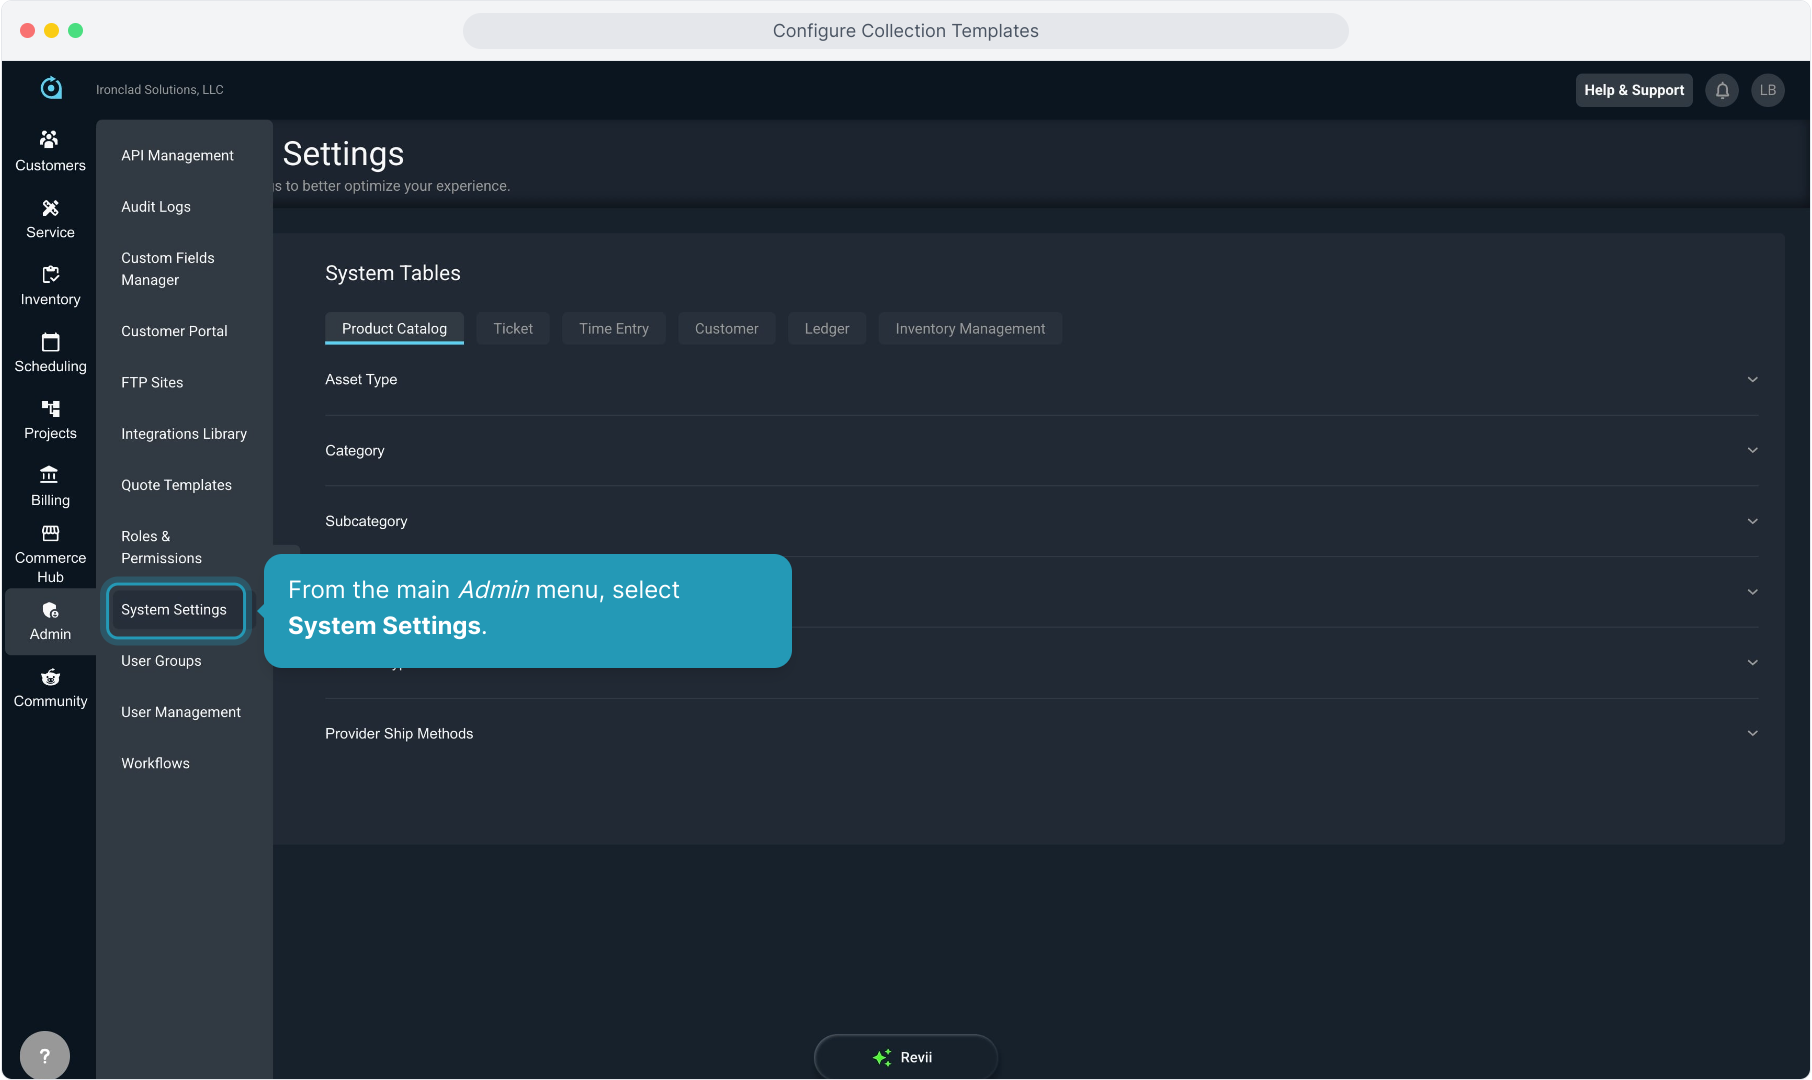
2. From the main Admin menu, select System Settings.
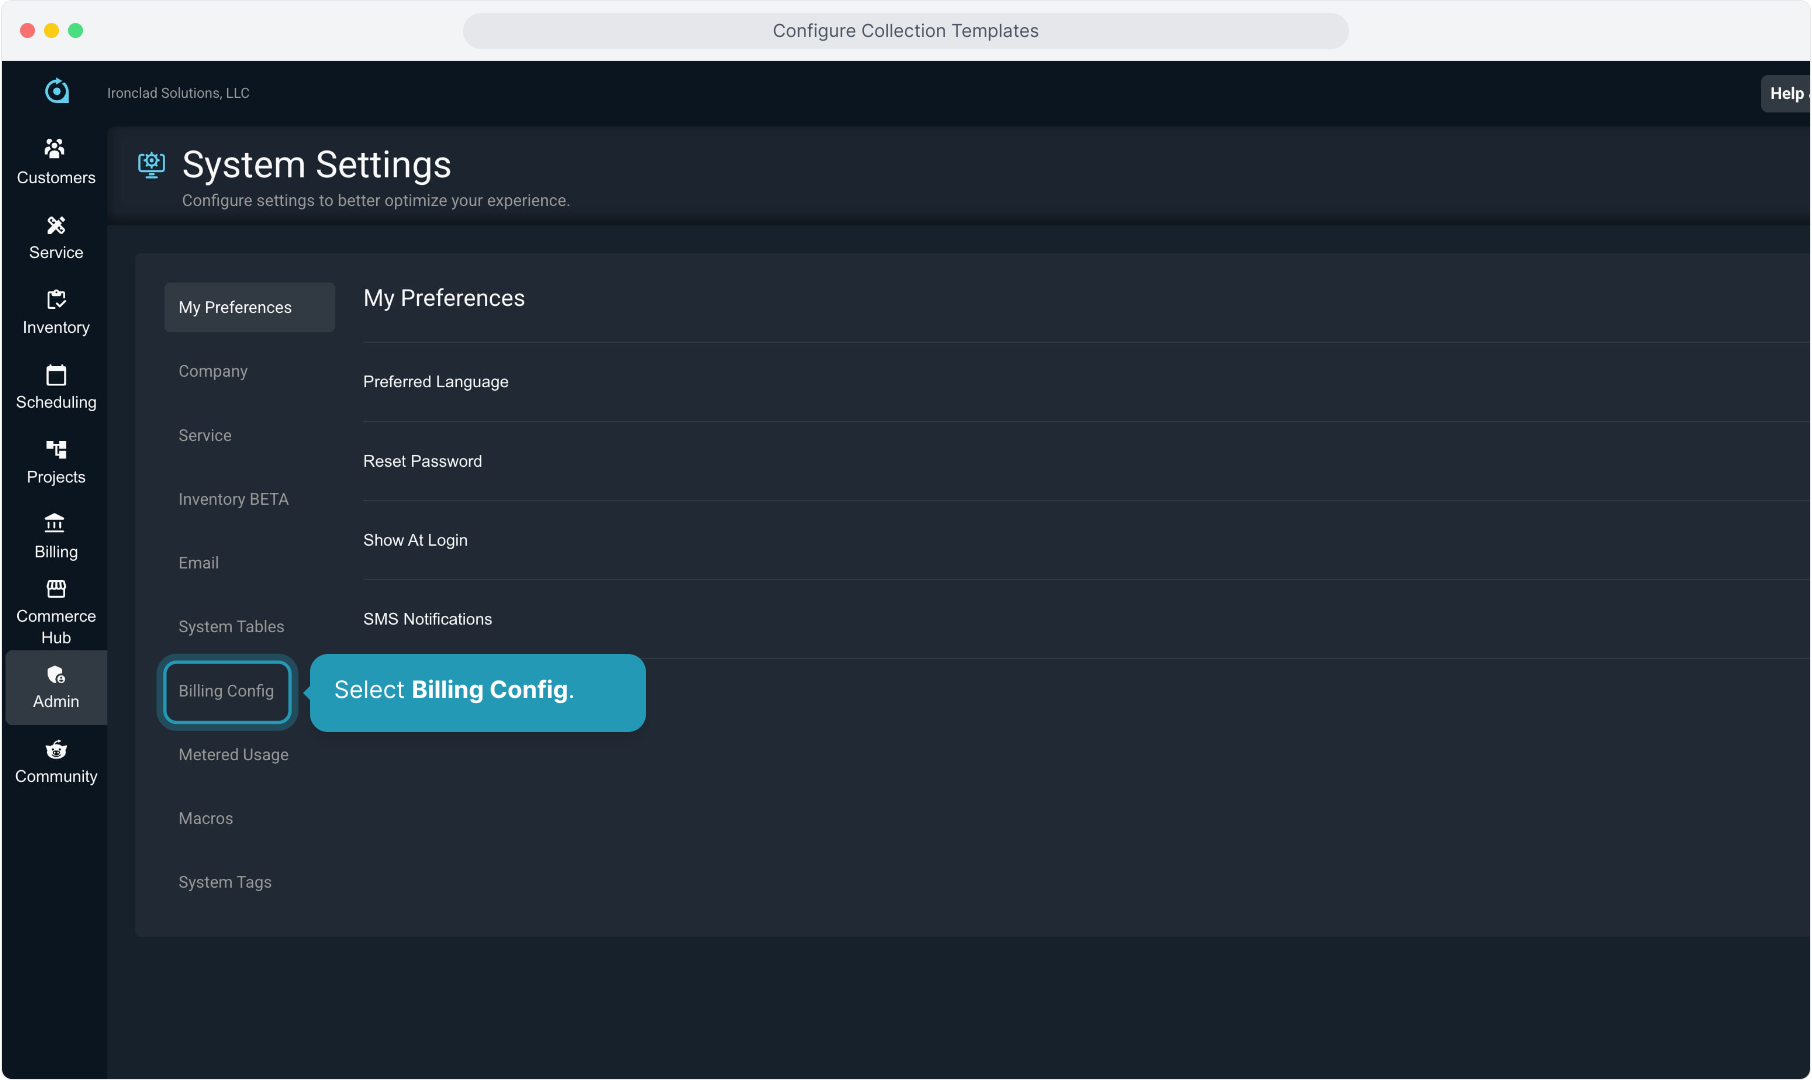
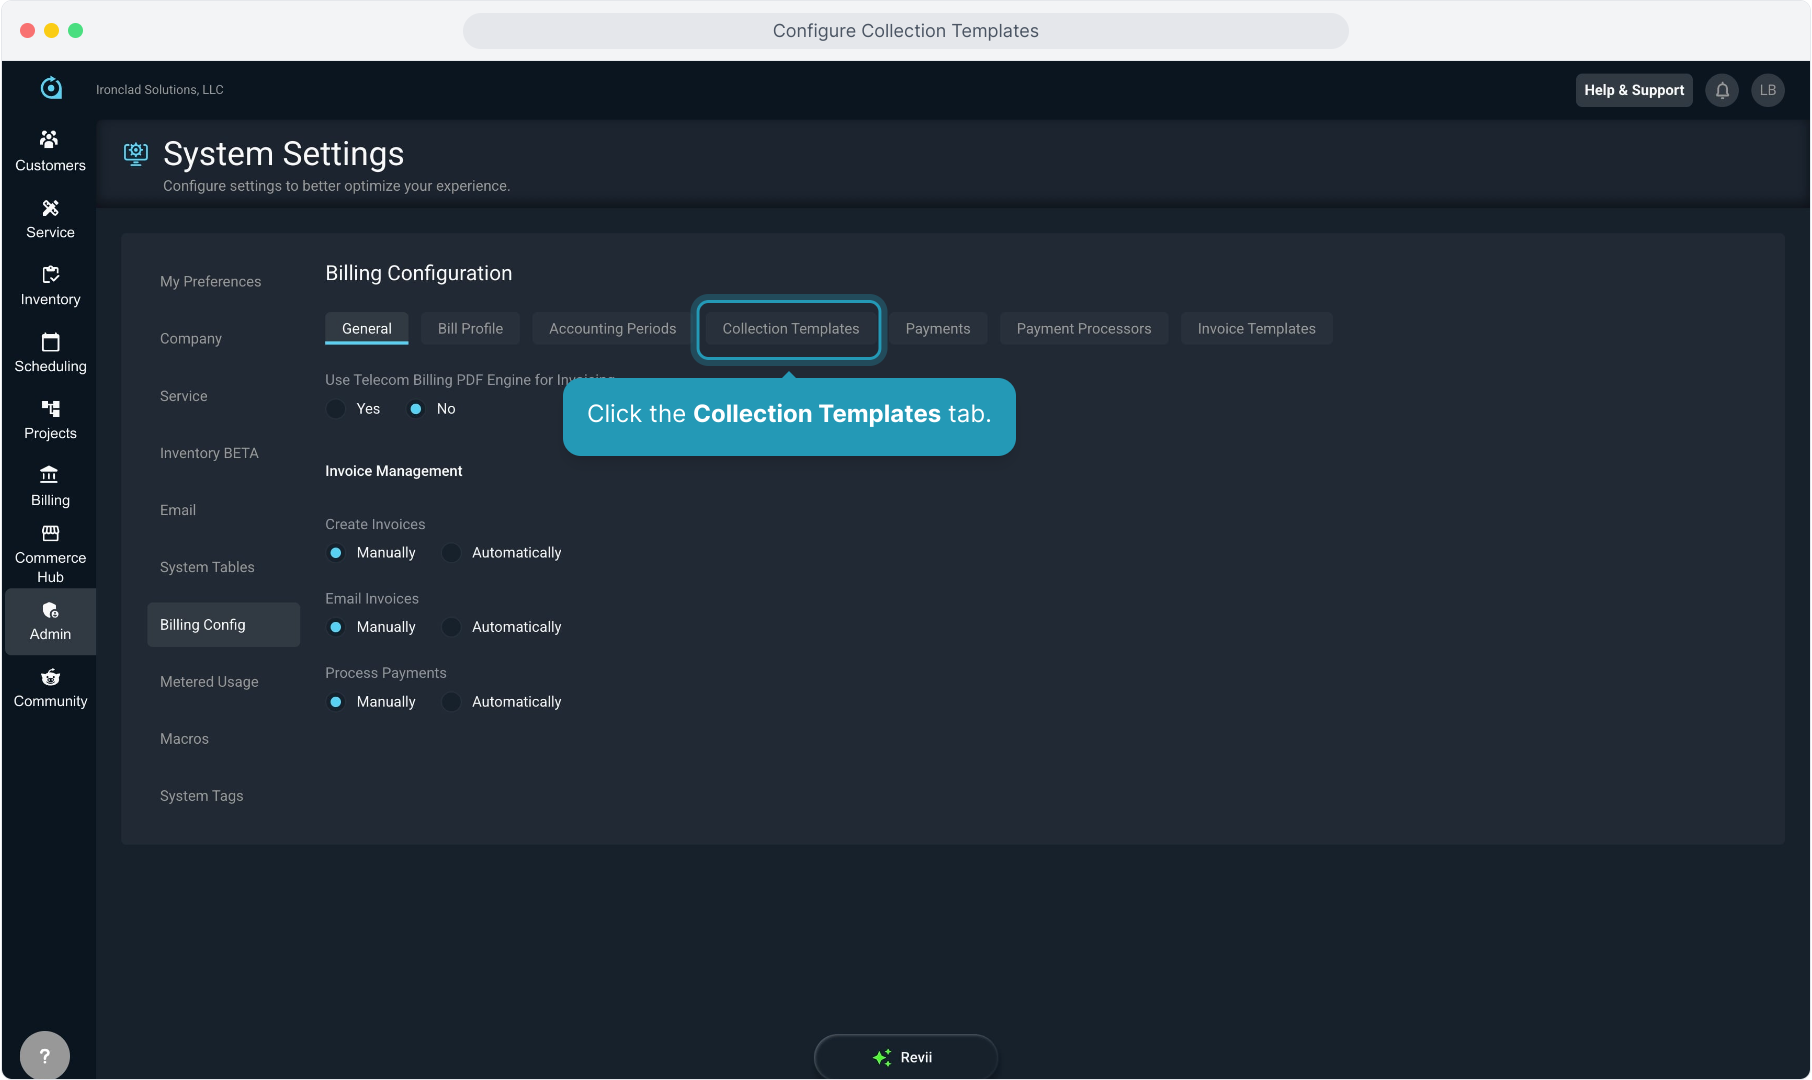
3. Select Billing Config.
4. Click the Collection Templates tab.
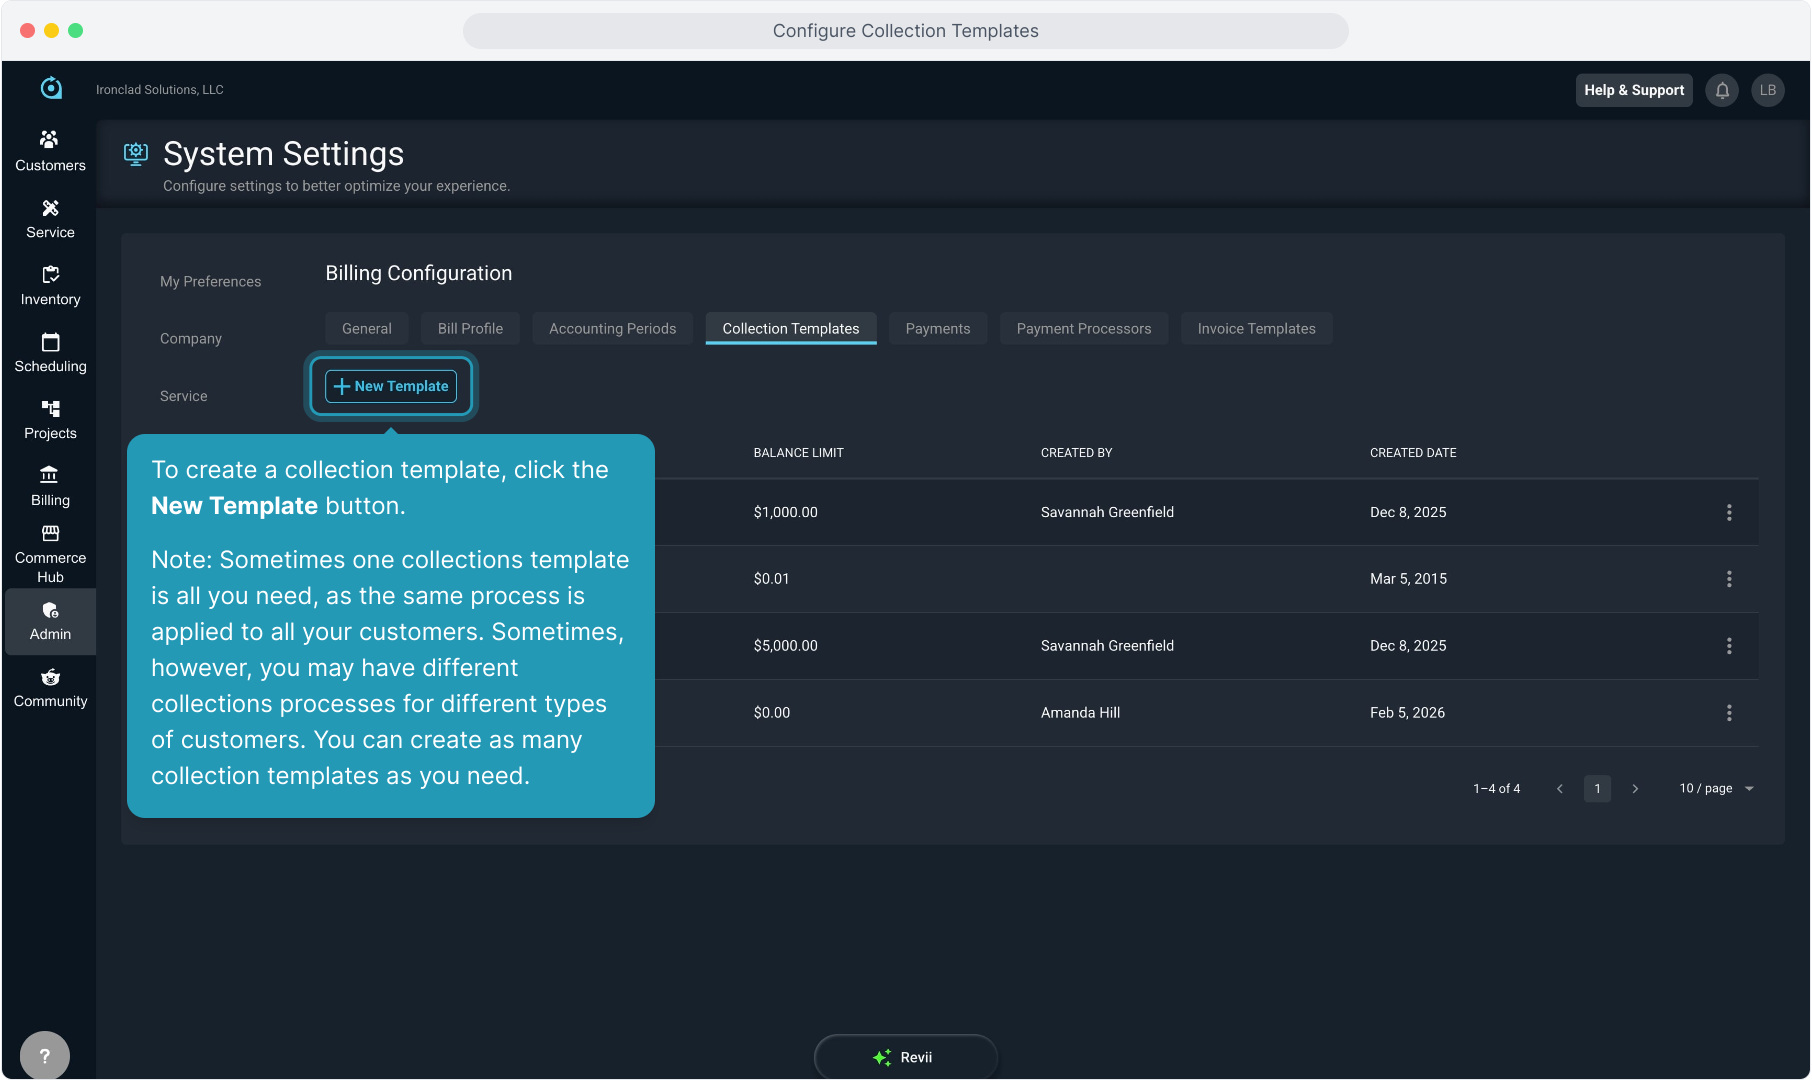
5. To create a collection template, click the New Template button.
Note: Sometimes one collections template is all you need, as the same process is applied to all your customers. Sometimes, however, you may have different collections processes for different types of customers. You can create as many collection templates as you need.
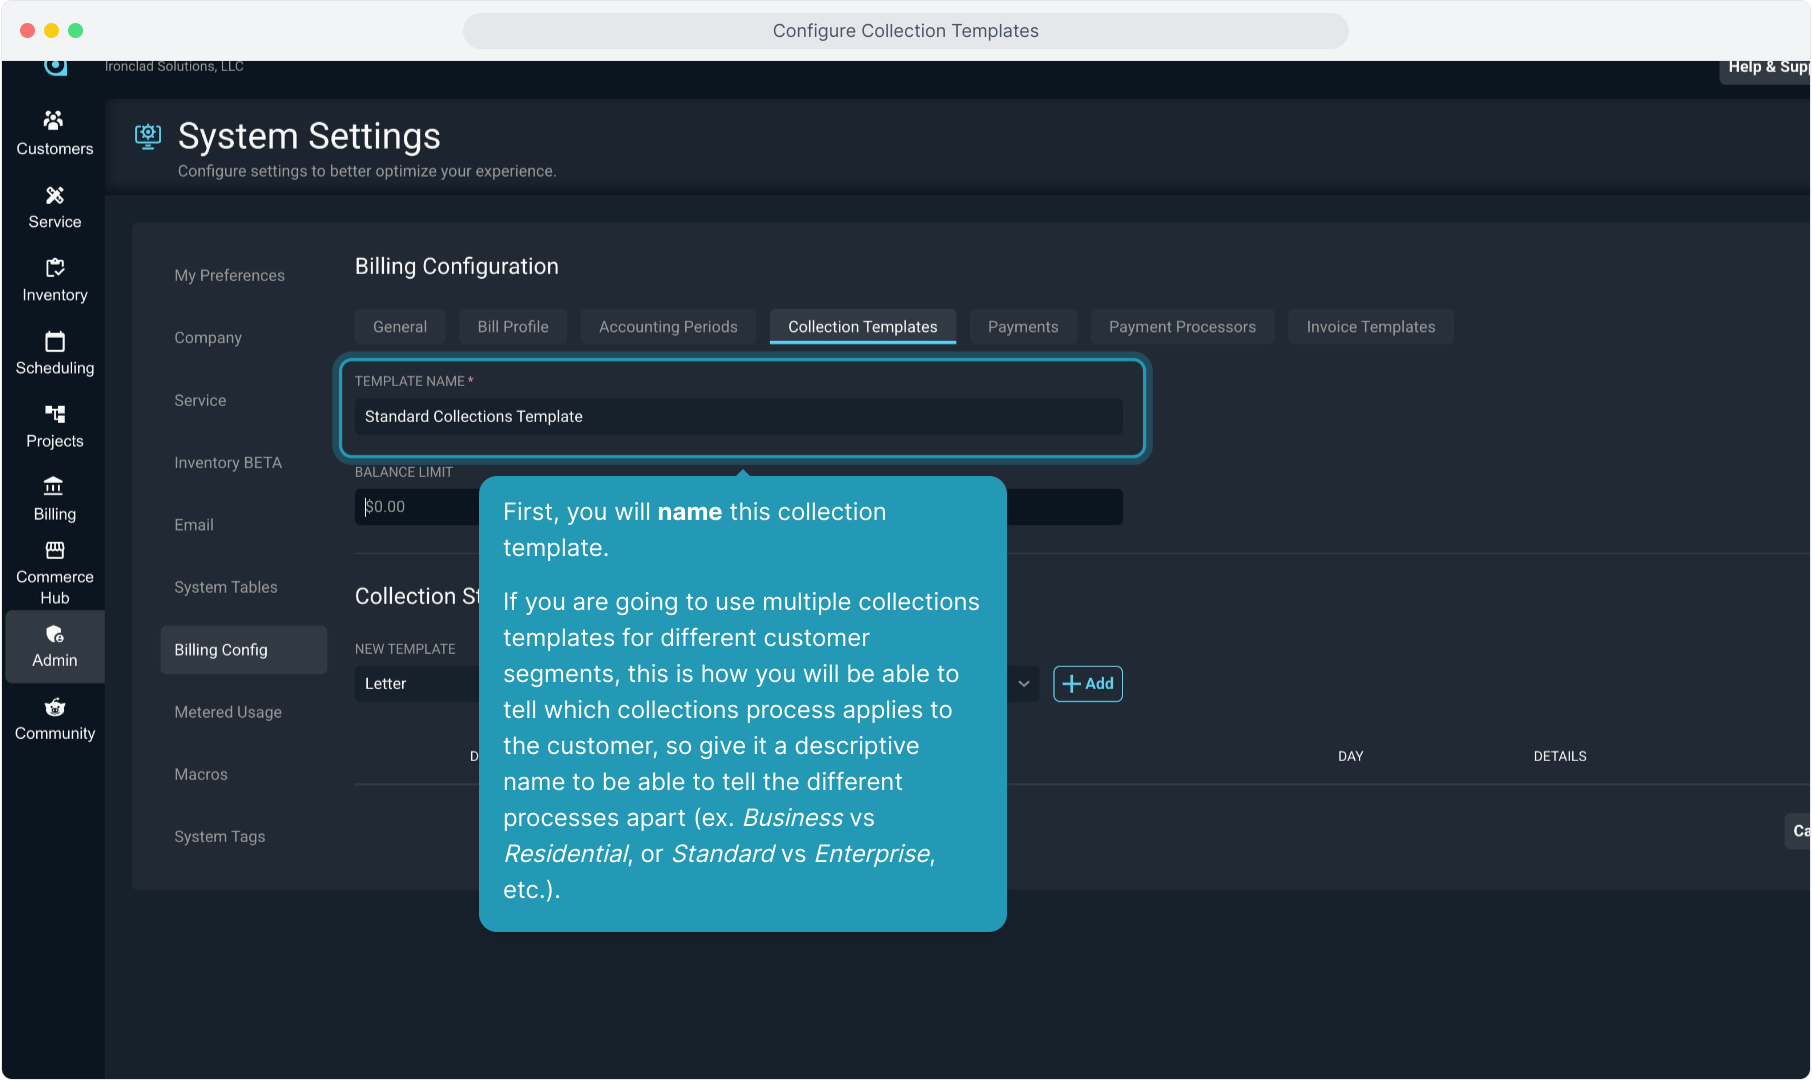
6. First, you will name this collection template.
If you are going to use multiple collections templates for different customer segments, this is how you will be able to tell which collections process applies to the customer, so give it a descriptive name to be able to tell the different processes apart (ex. Business vs Residential, or Standard vs Enterprise, etc.).
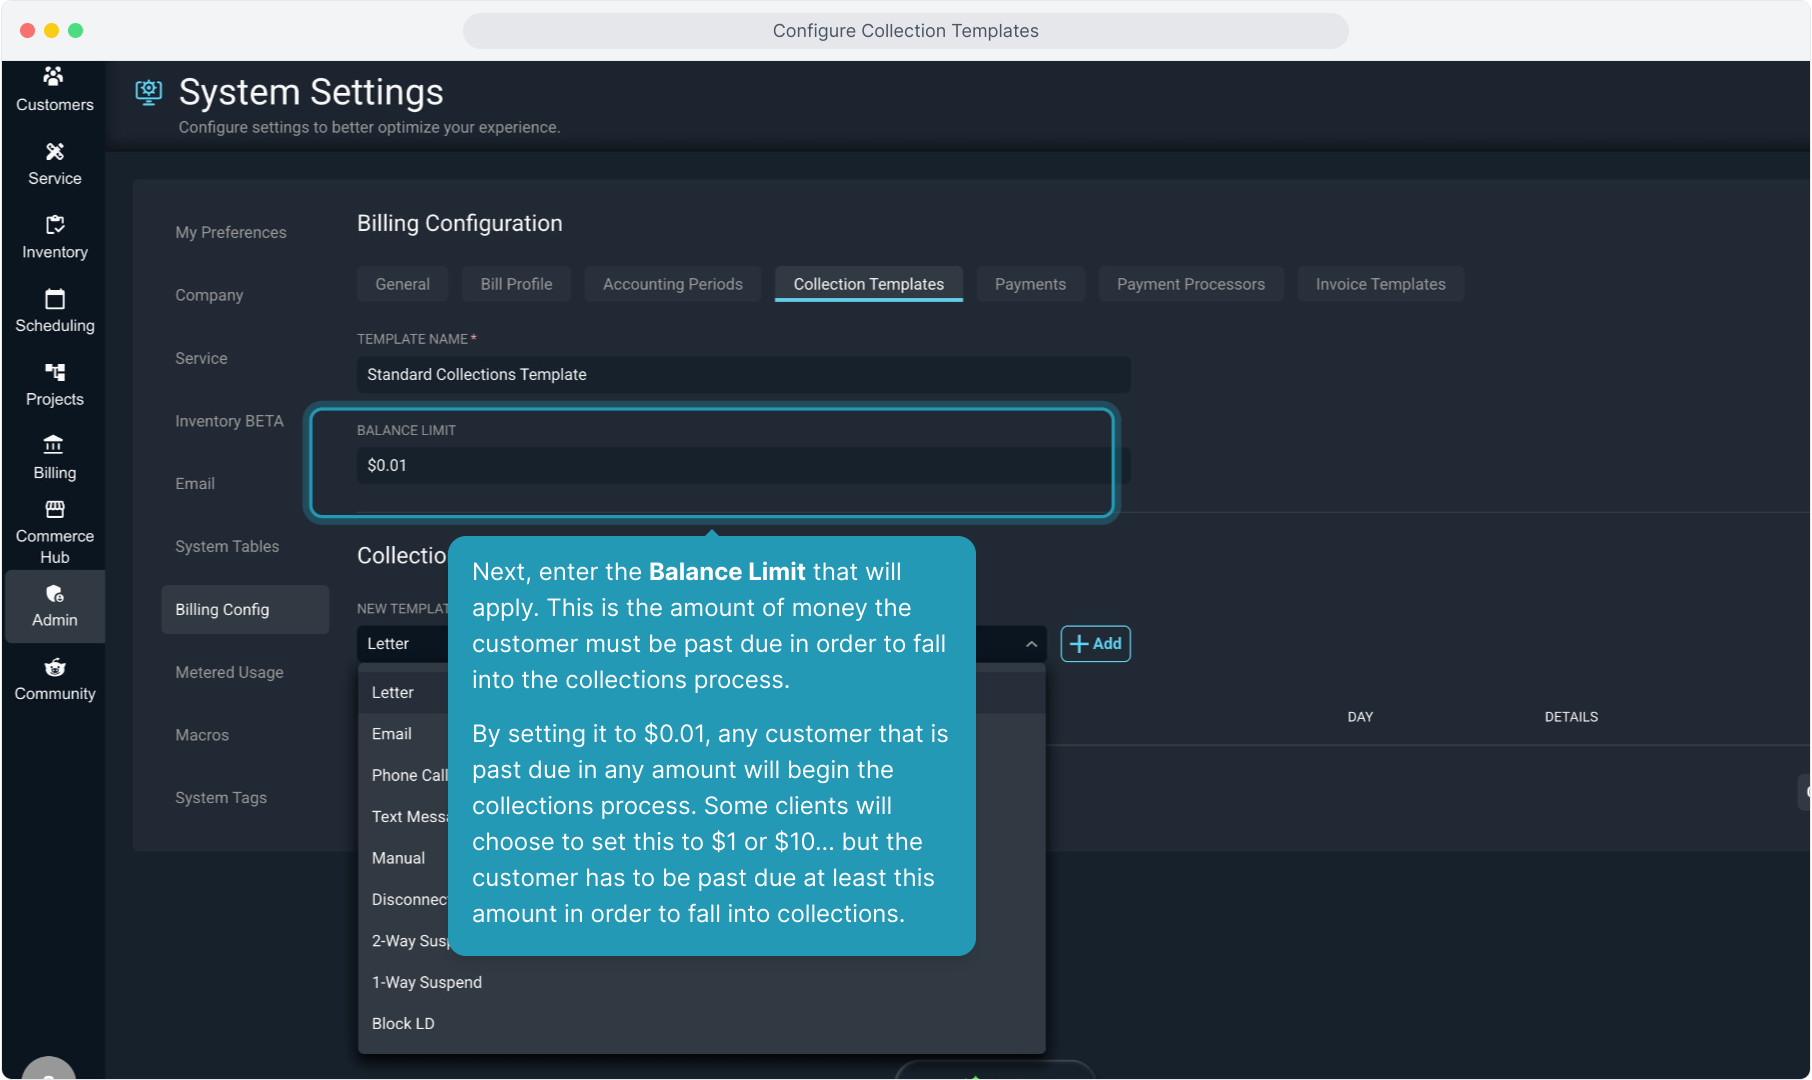
7. Next, enter the Balance Limit that will apply. This is the amount of money the customer must be past due in order to fall into the collections process.
By setting it to $0.01, any customer that is past due in any amount will begin the collections process. Some clients will choose to set this to $1 or $10... but the customer has to be past due at least this amount in order to fall into collections.
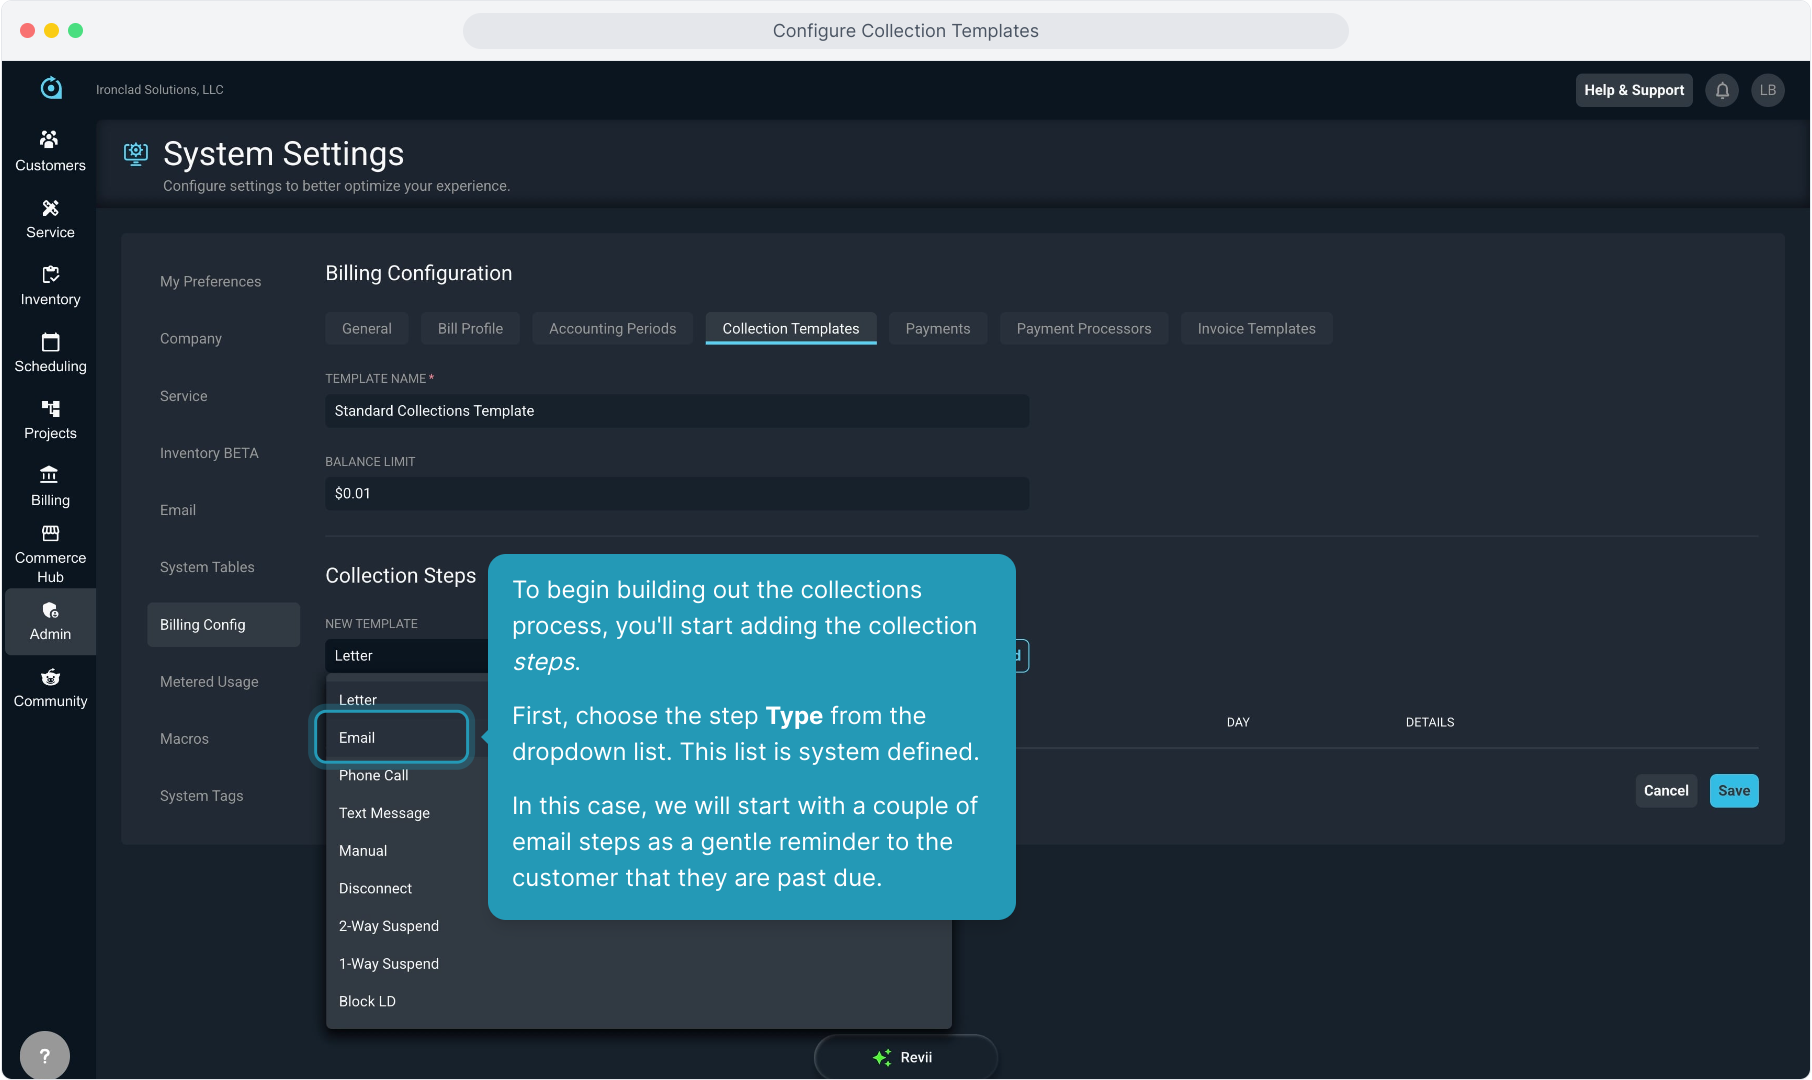
8. To begin building out the collections process, you'll start adding the collection steps. First, choose the step Type from the dropdown list. This list is system defined.
In this case, we will start with a couple of email steps as a gentle reminder to the customer that they are past due.
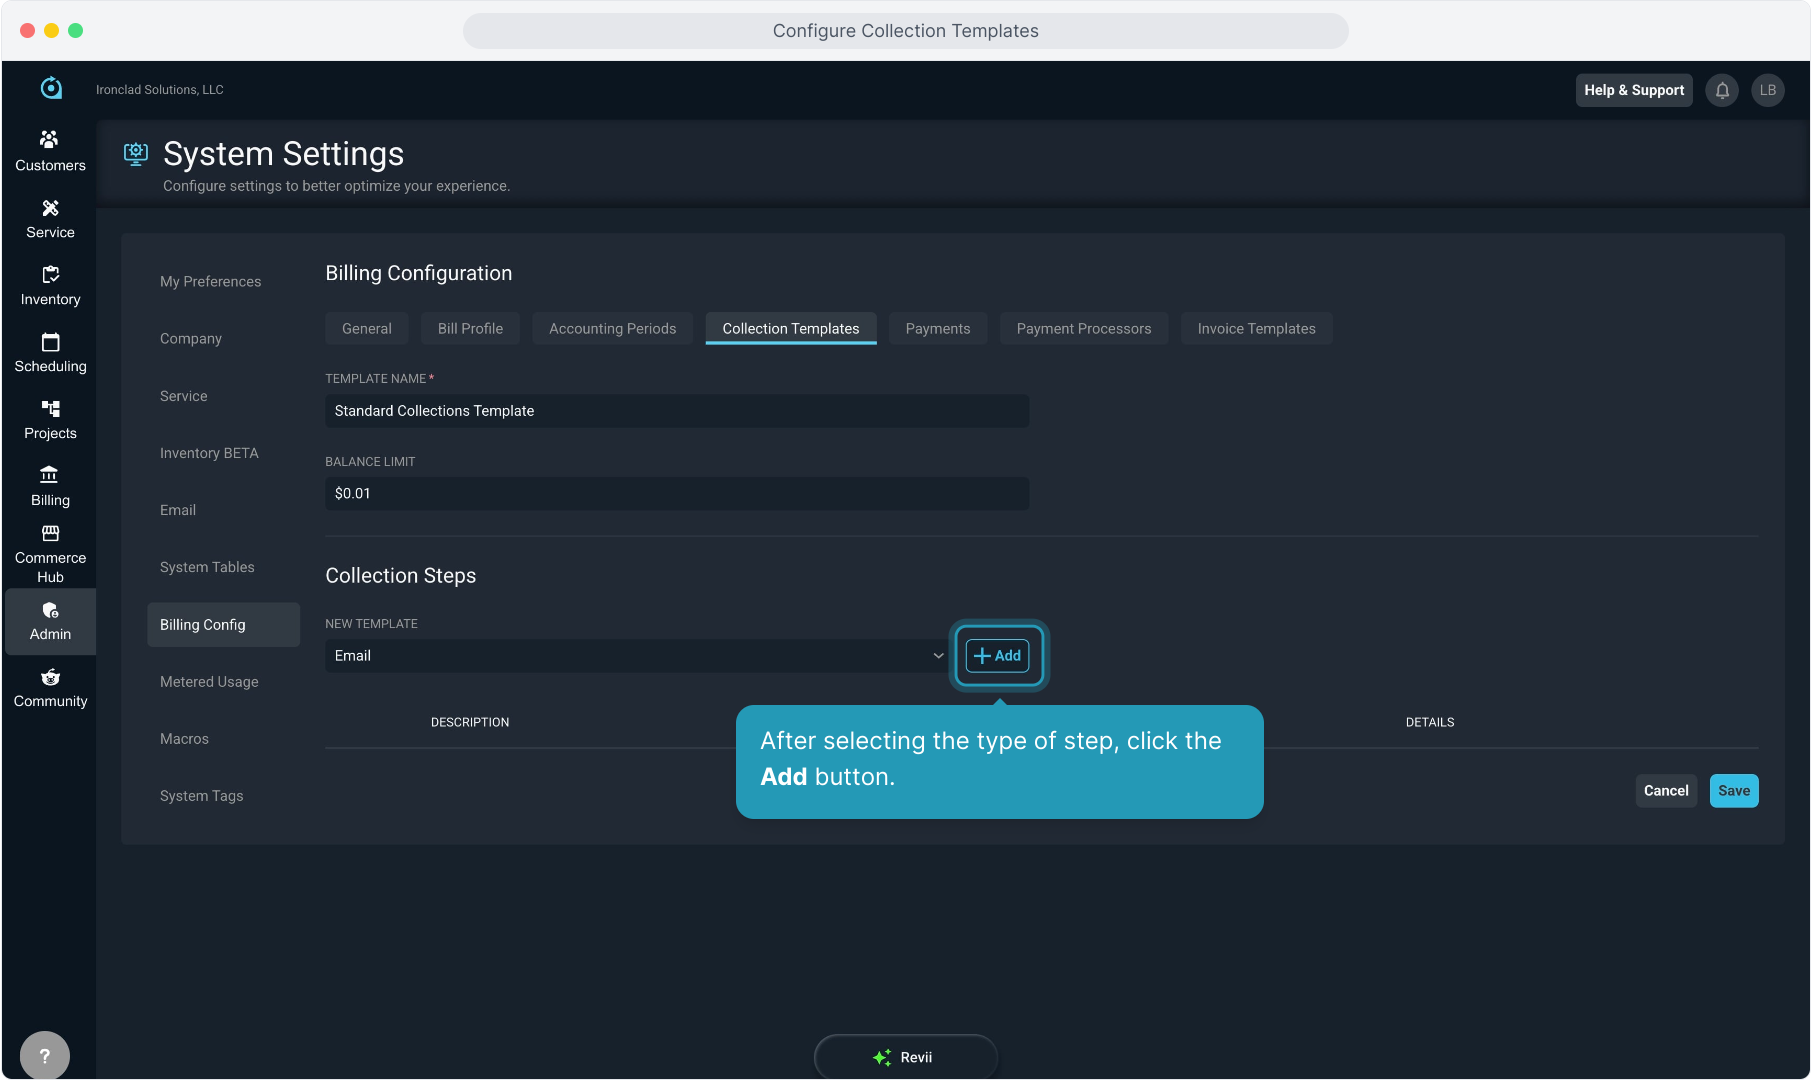
9. After selecting the type of step, click the Add button.
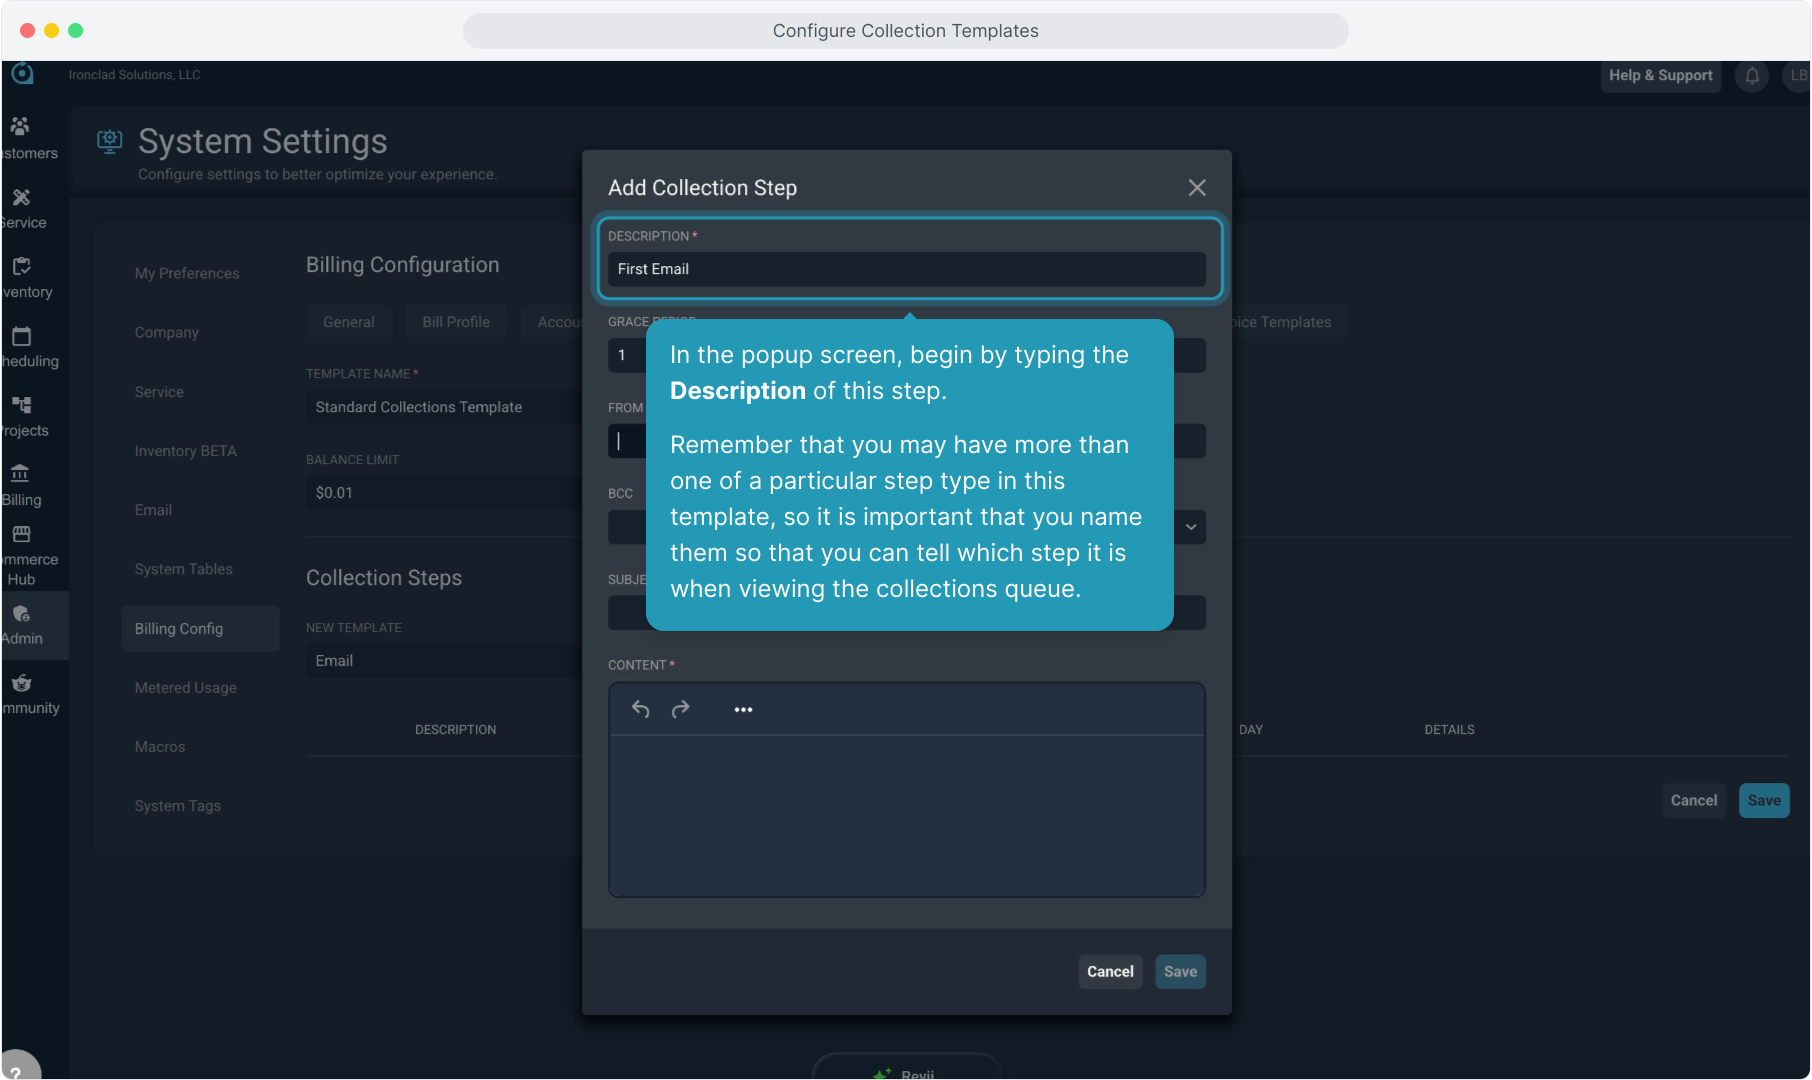
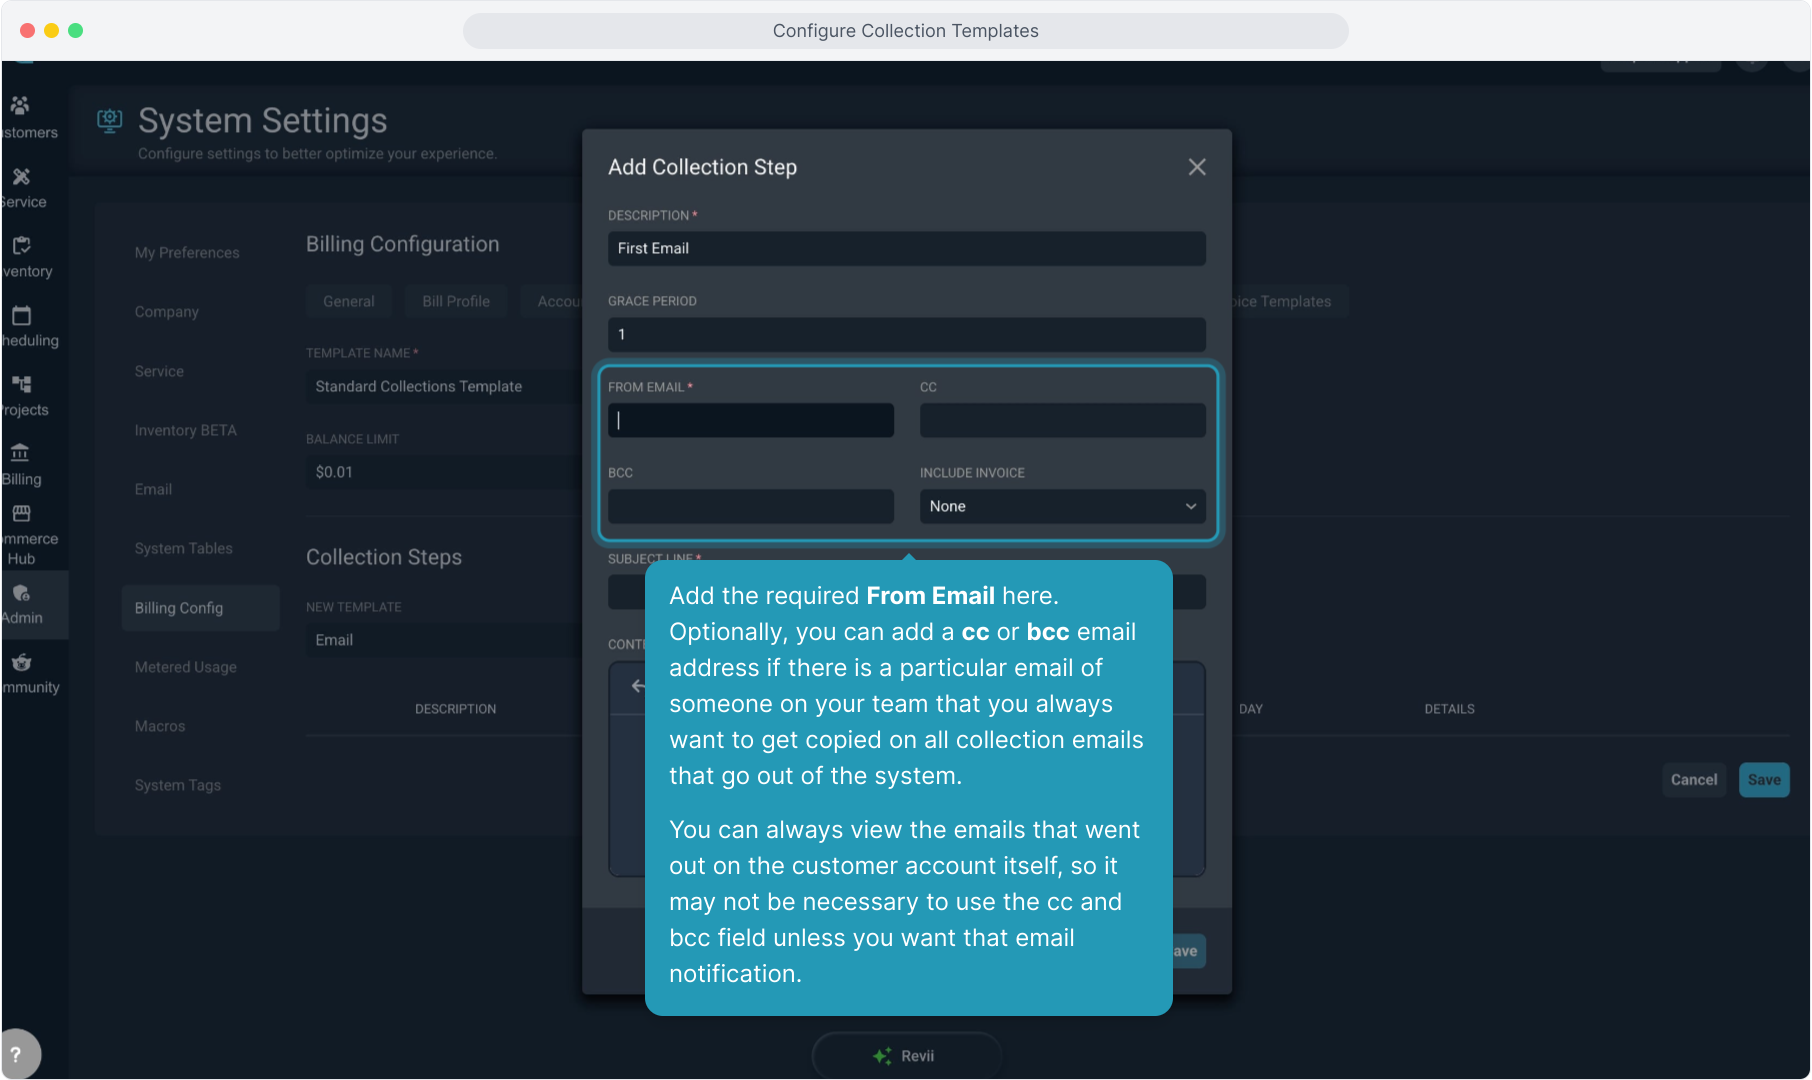
10. In the popup screen, begin by typing the Description of this step.
Remember that you may have more than one of a particular step type in this template, so it is important that you name them so that you can tell which step it is when viewing the collections queue.
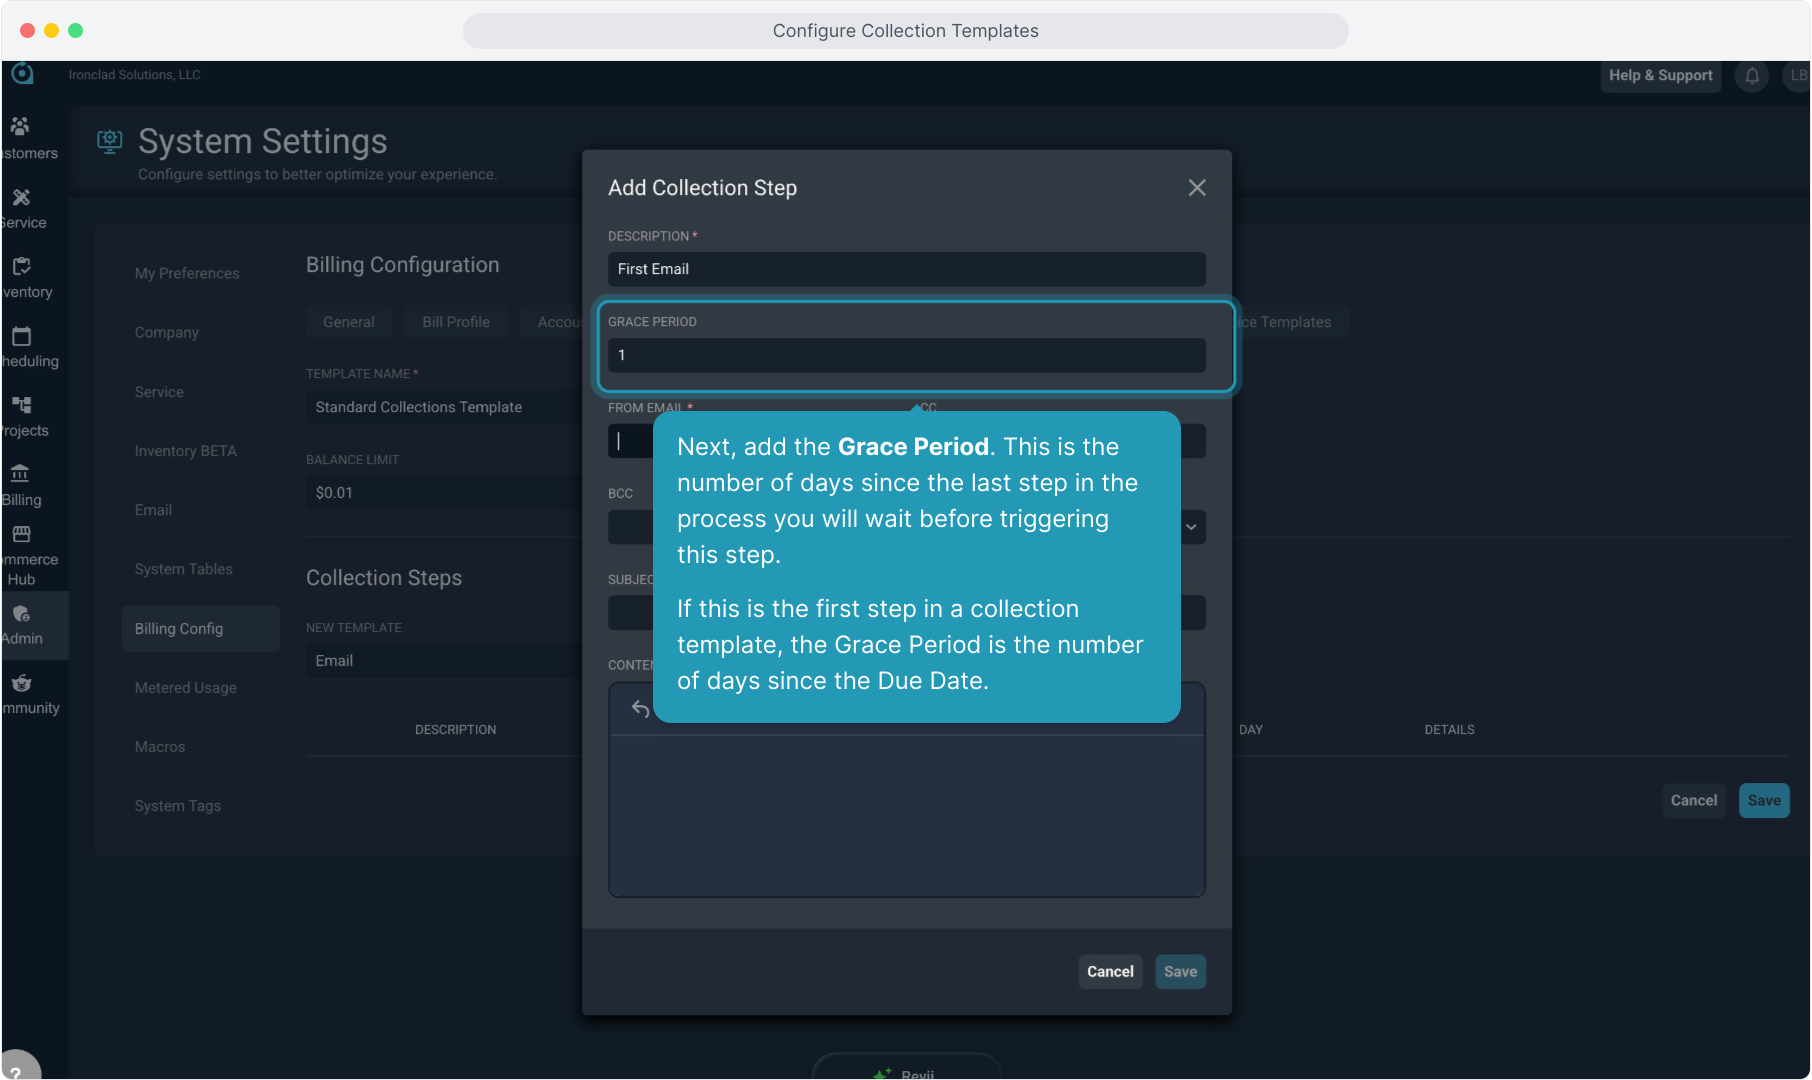
11. Next, add the Grace Period. This is the number of days since the last step in the process you will wait before triggering this step.
If this is the first step in a collection template, the Grace Period is the number of days since the Due Date.
12. Add the required From Email here. Optionally, you can add a cc or bcc email address if there is a particular email of someone on your team that you always want to get copied on all collection emails that go out of the system.
You can always view the emails that went out on the customer account itself, so it may not be necessary to use the cc and bcc field unless you want that email notification.
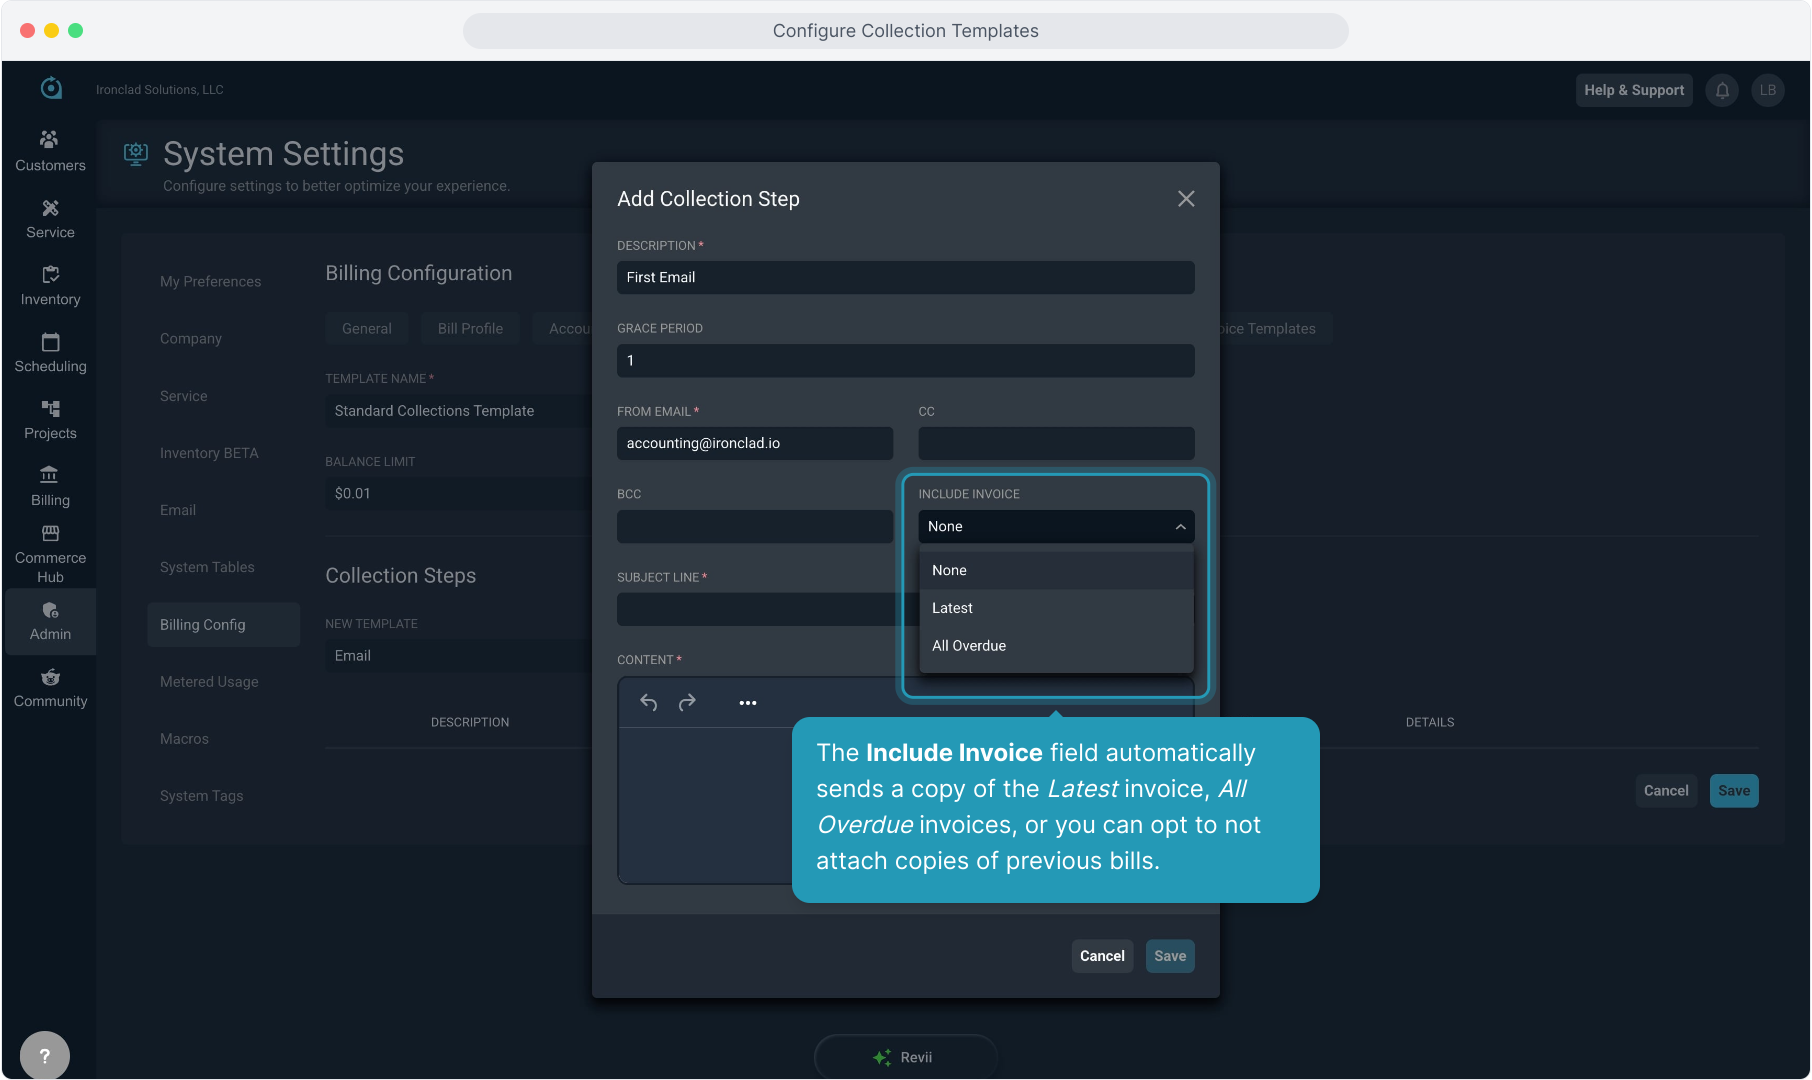
13. The Include Invoice field automatically sends a copy of the Latest invoice, All Overdue invoices, or you can opt to not attach copies of previous bills.
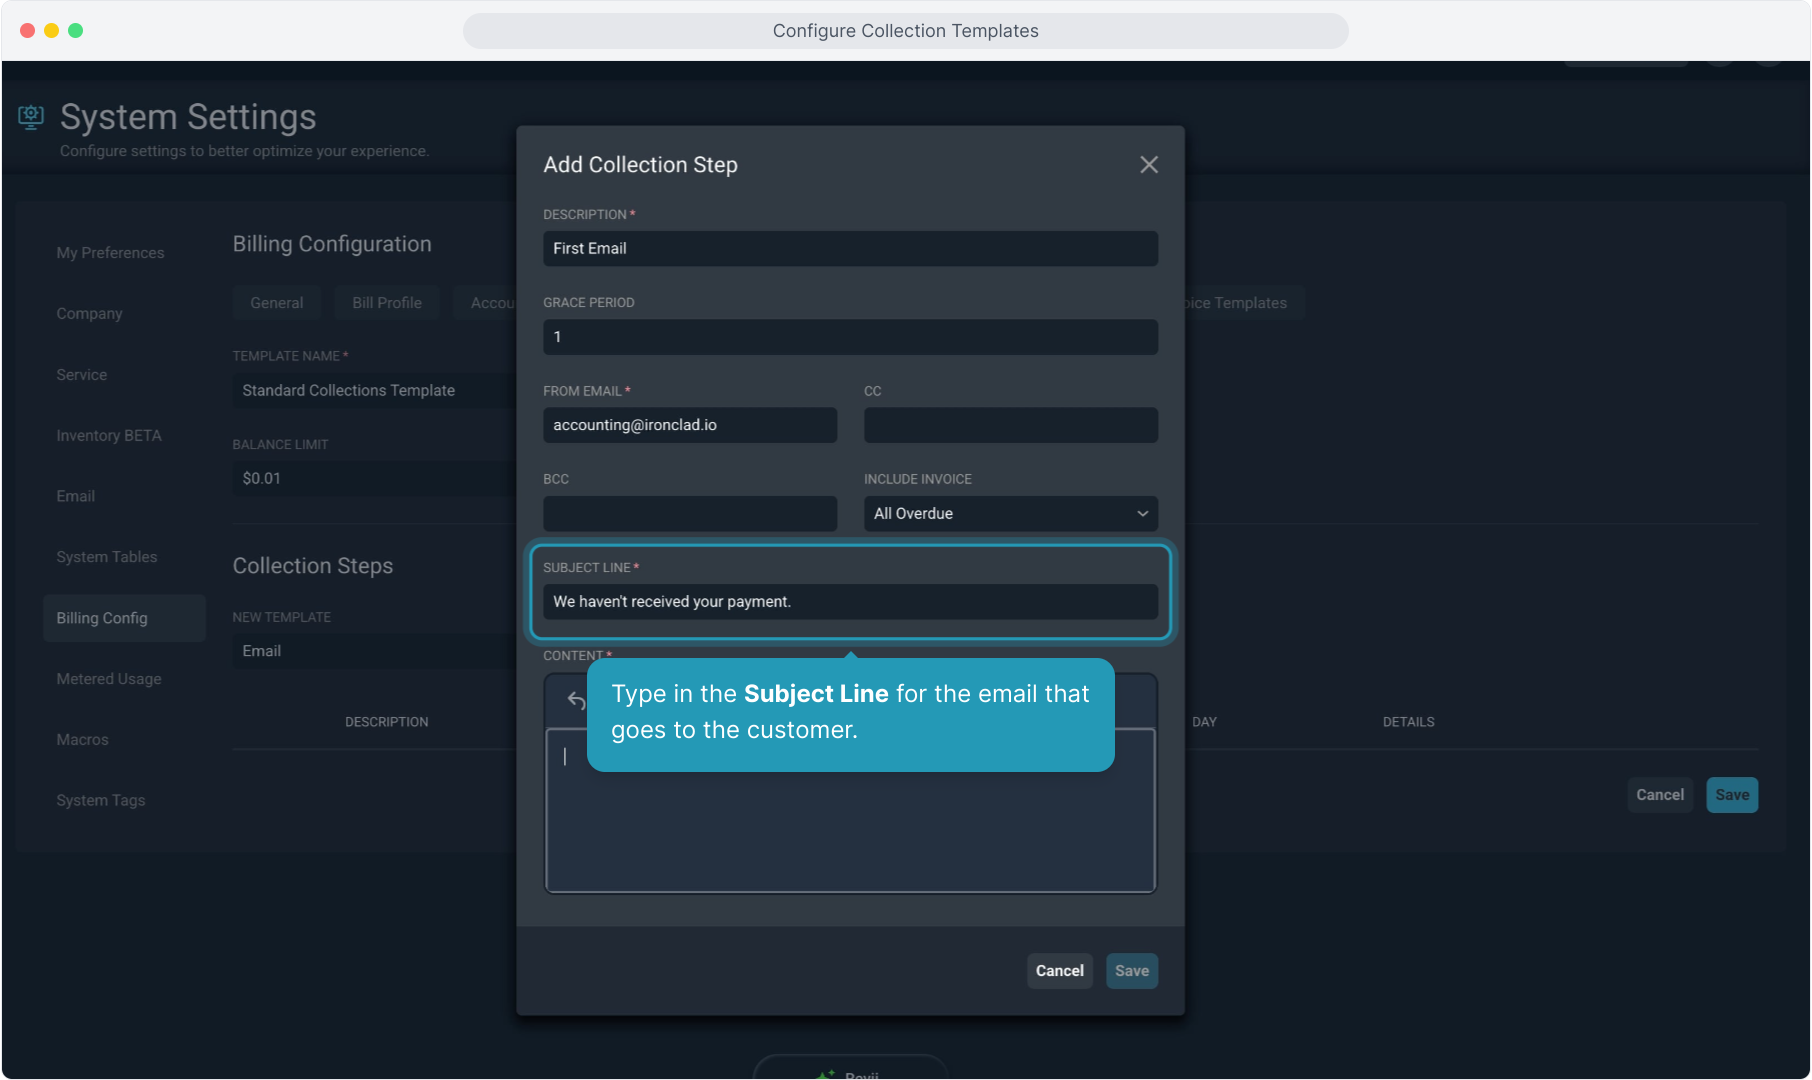
14. Type in the Subject Line for the email that goes to the customer.
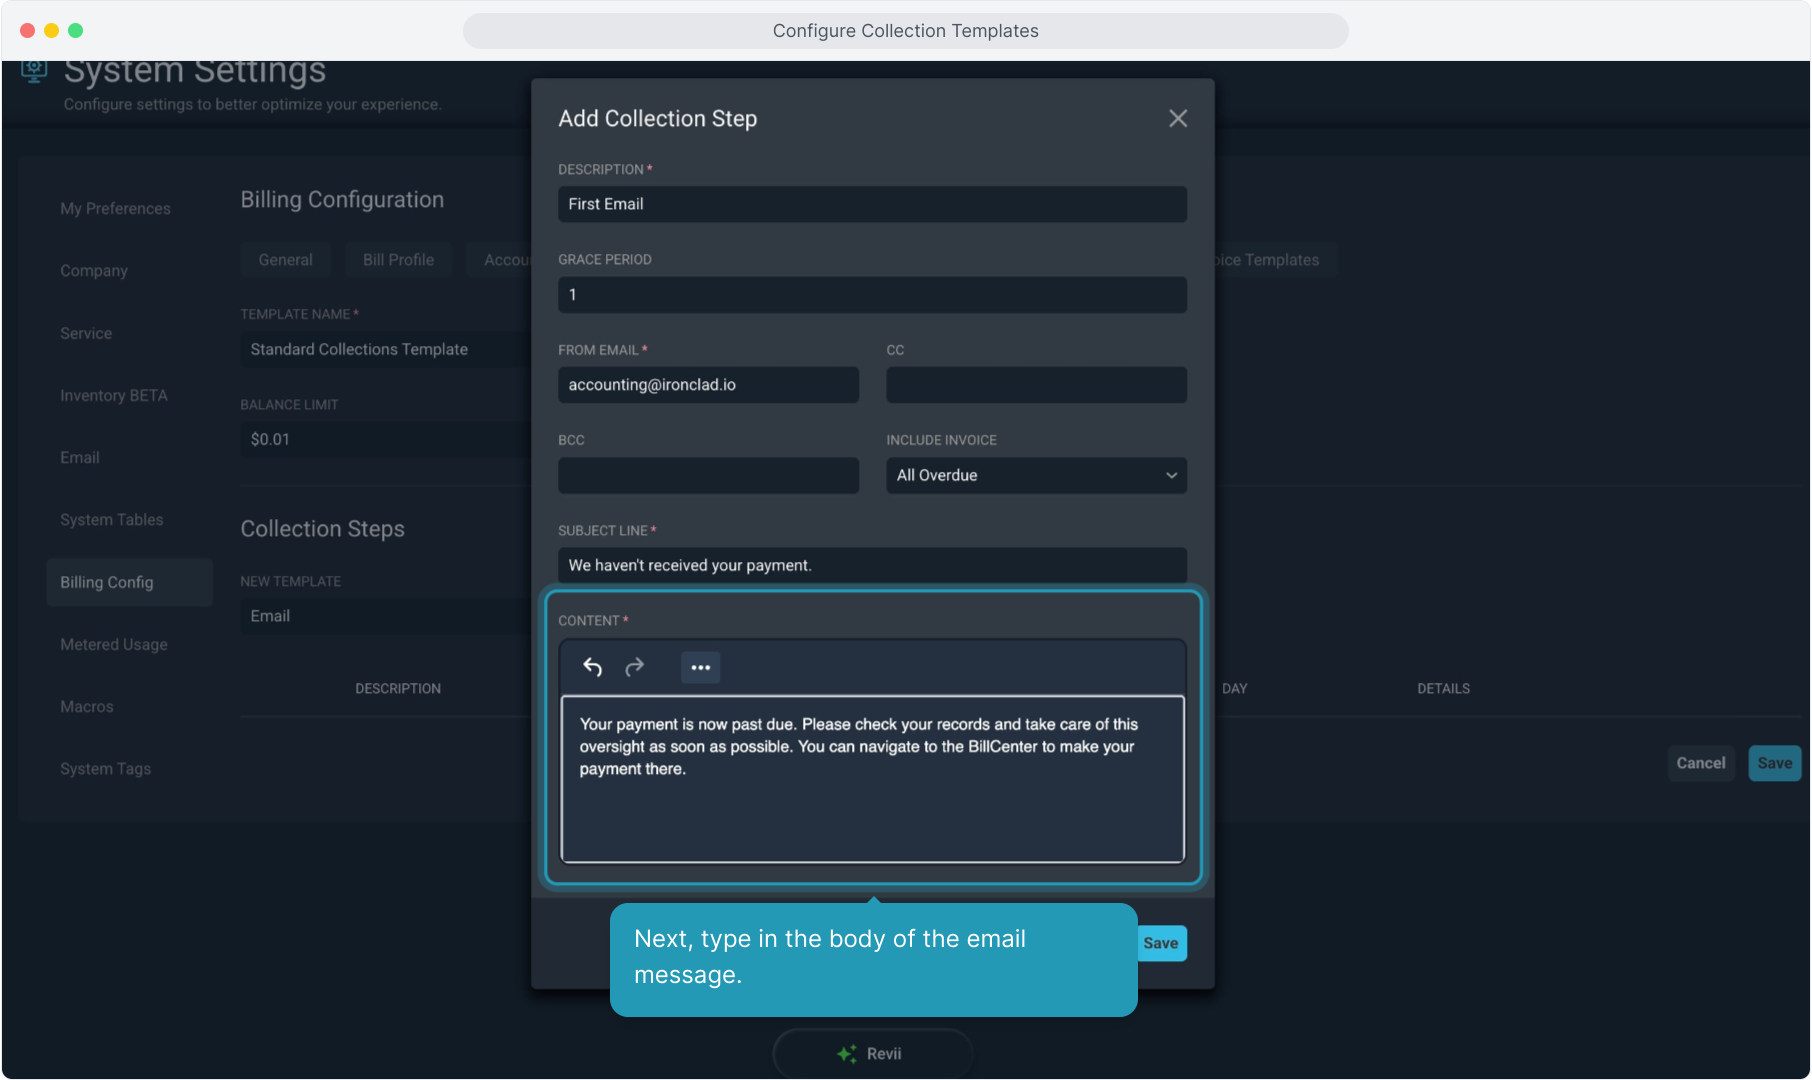
15. Next, type in the body of the email message.
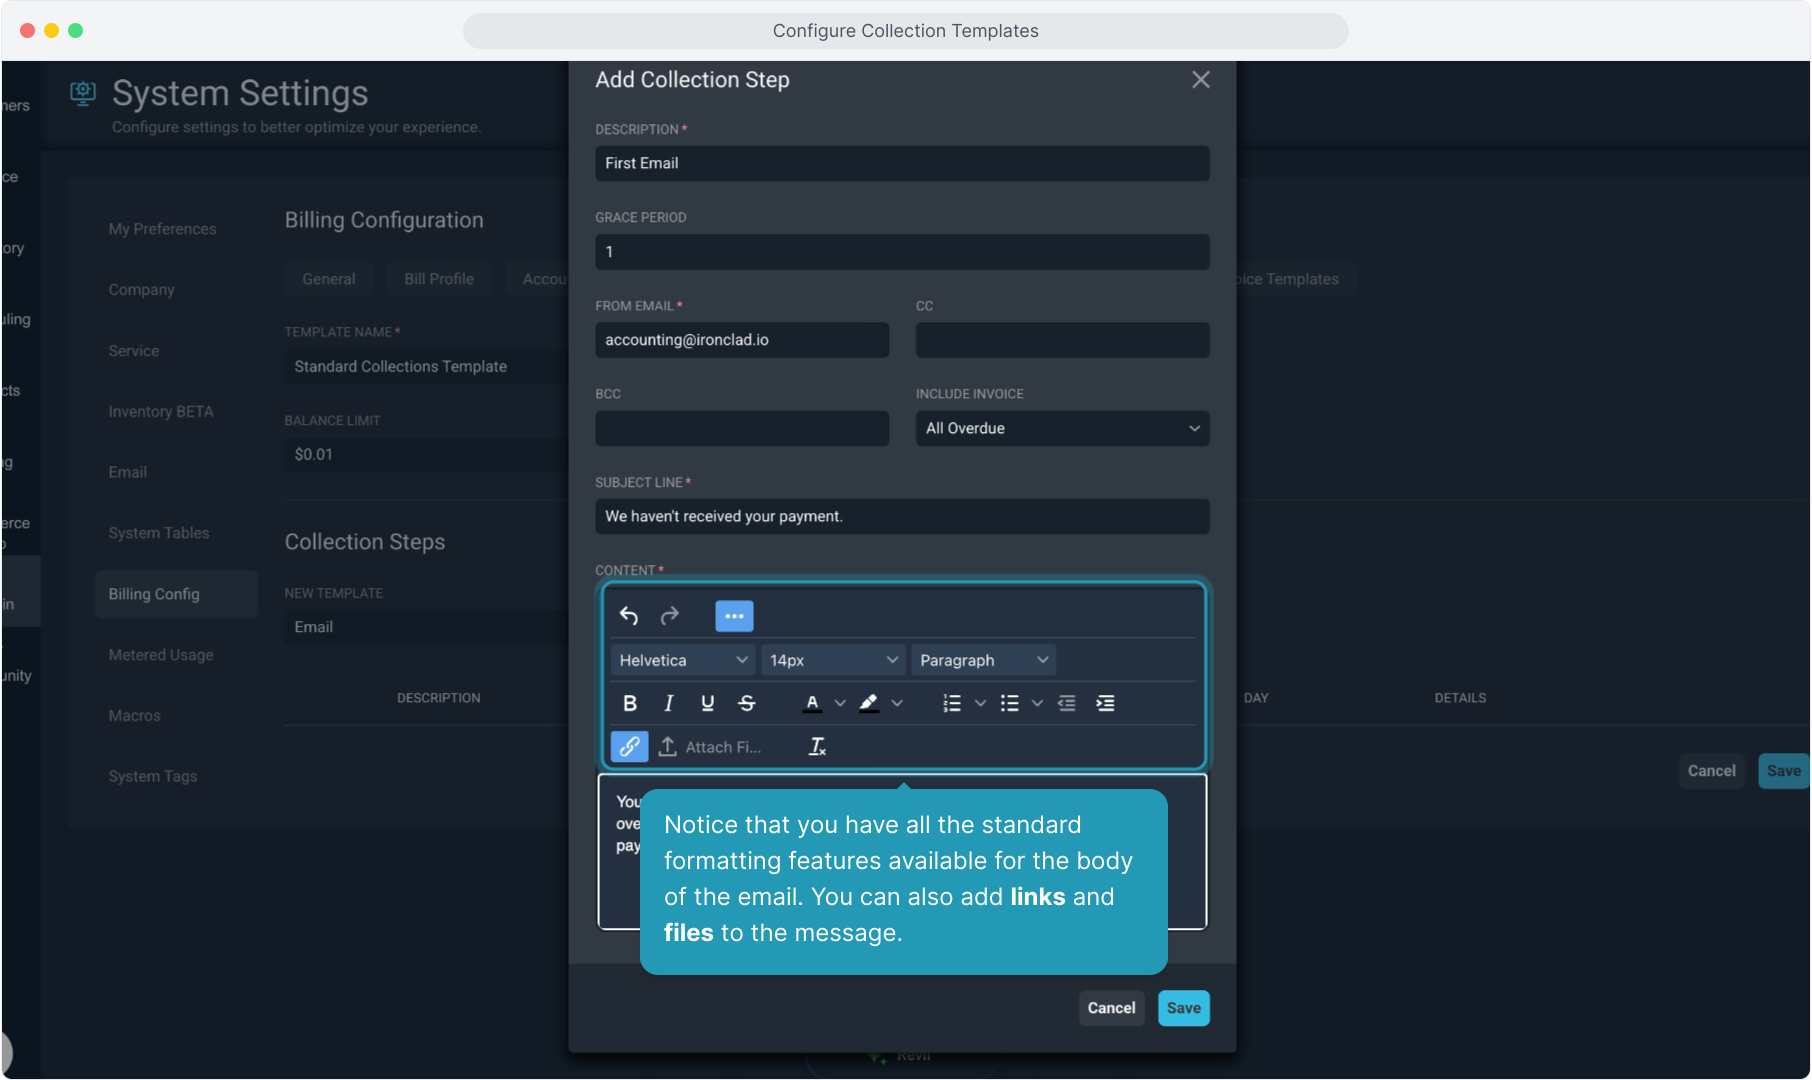
16. Click the 3 dot icon to access formatting options for the content.
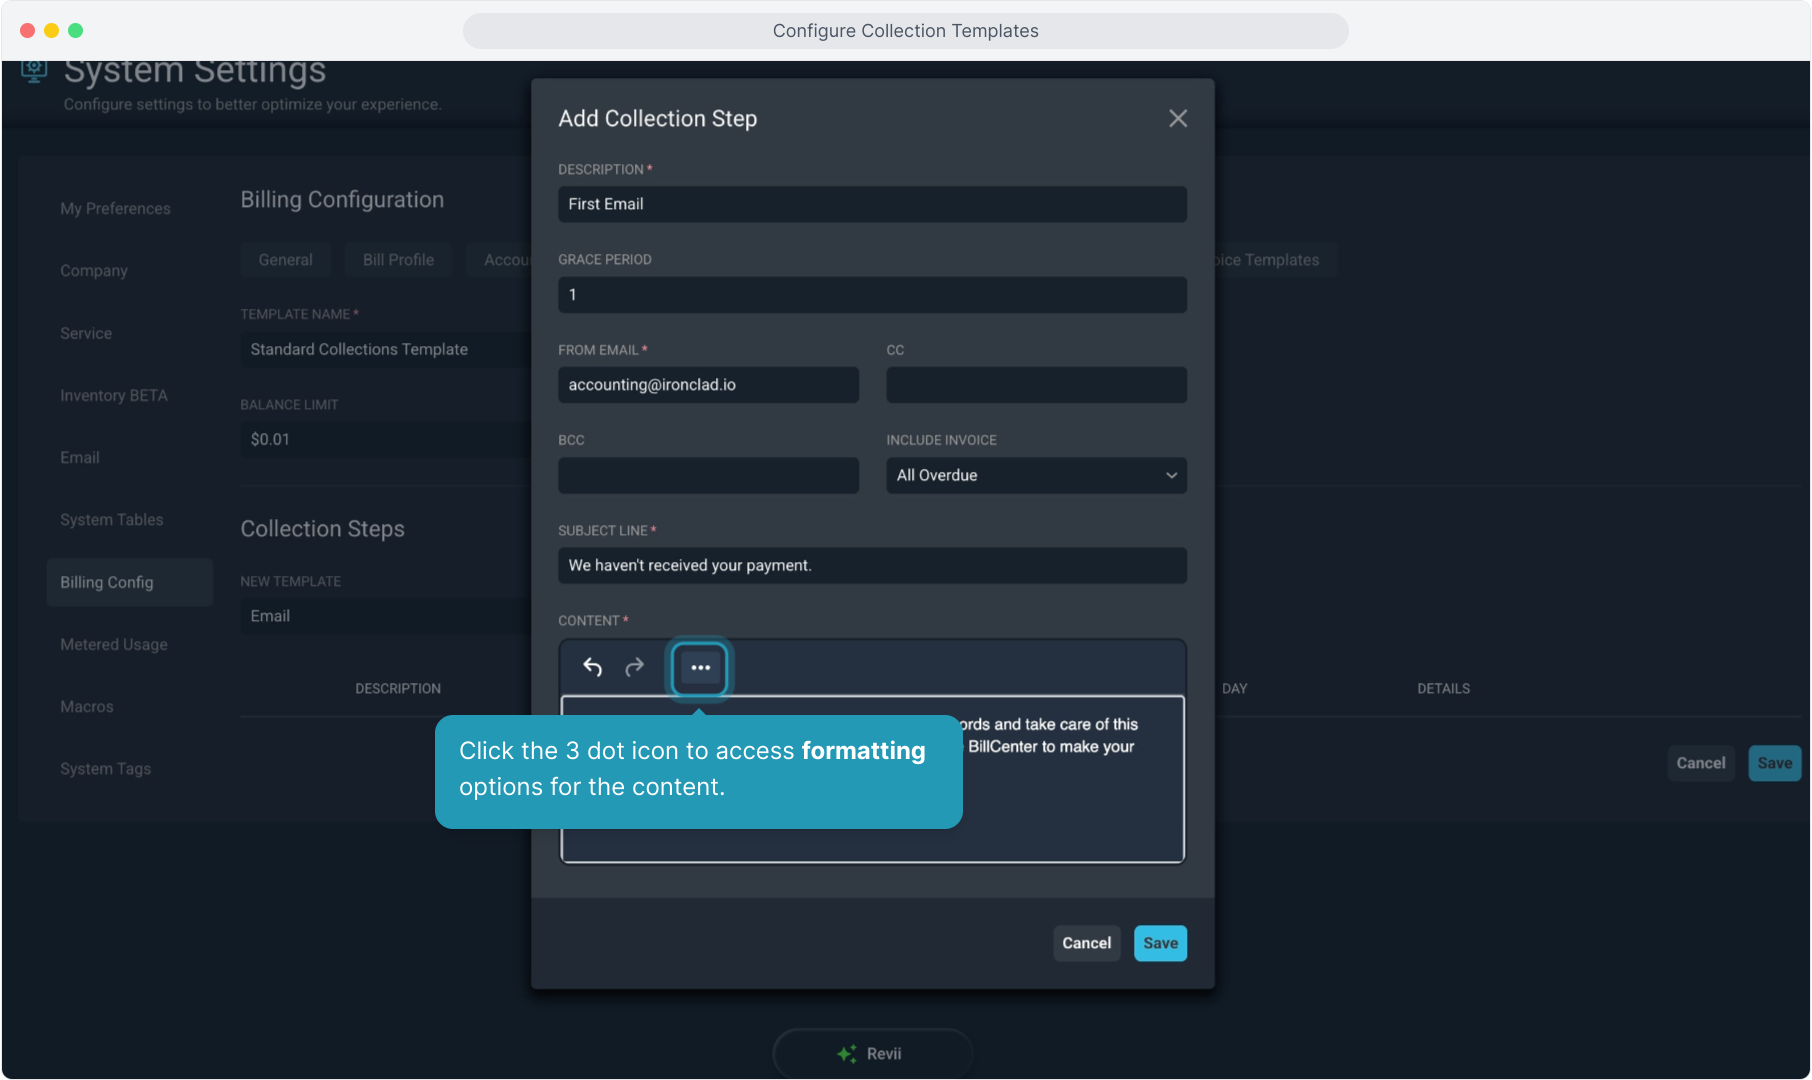
17. Notice that you have all the standard formatting features available for the body of the email. You can also add links and files to the message.
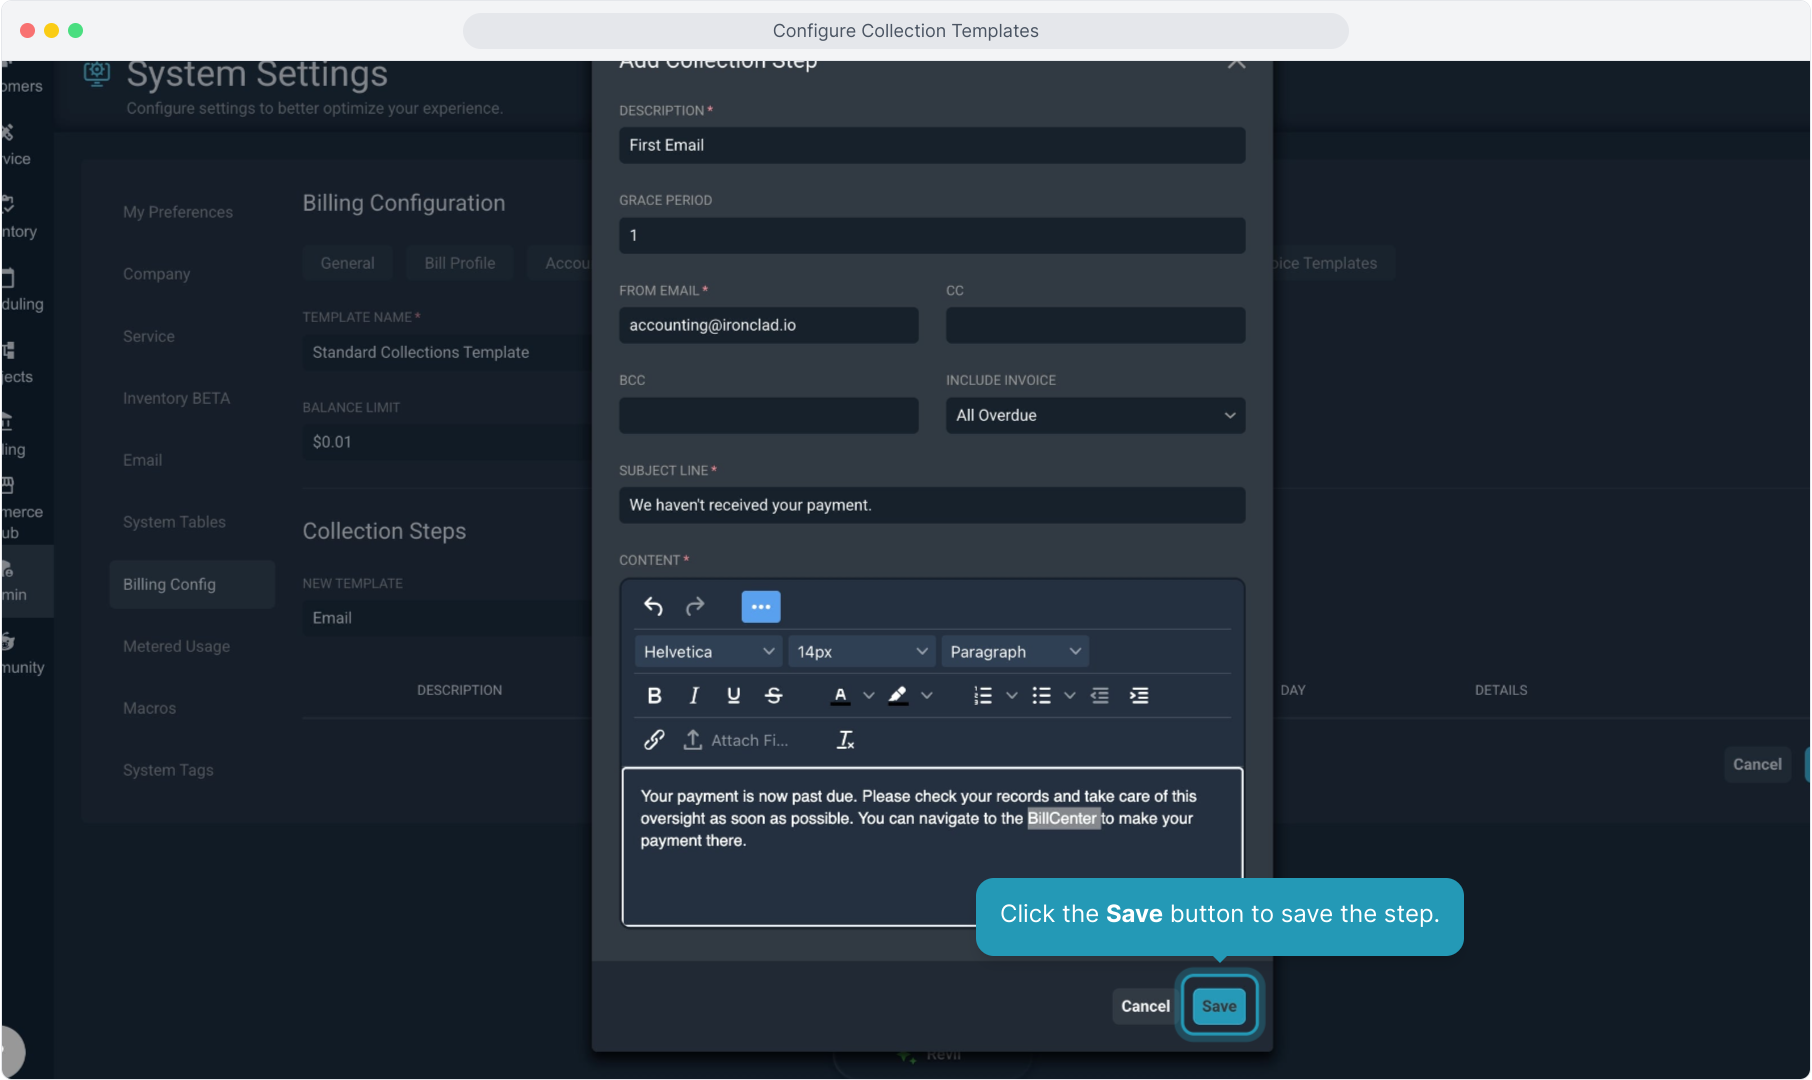
18. Click the Save button to save the step.
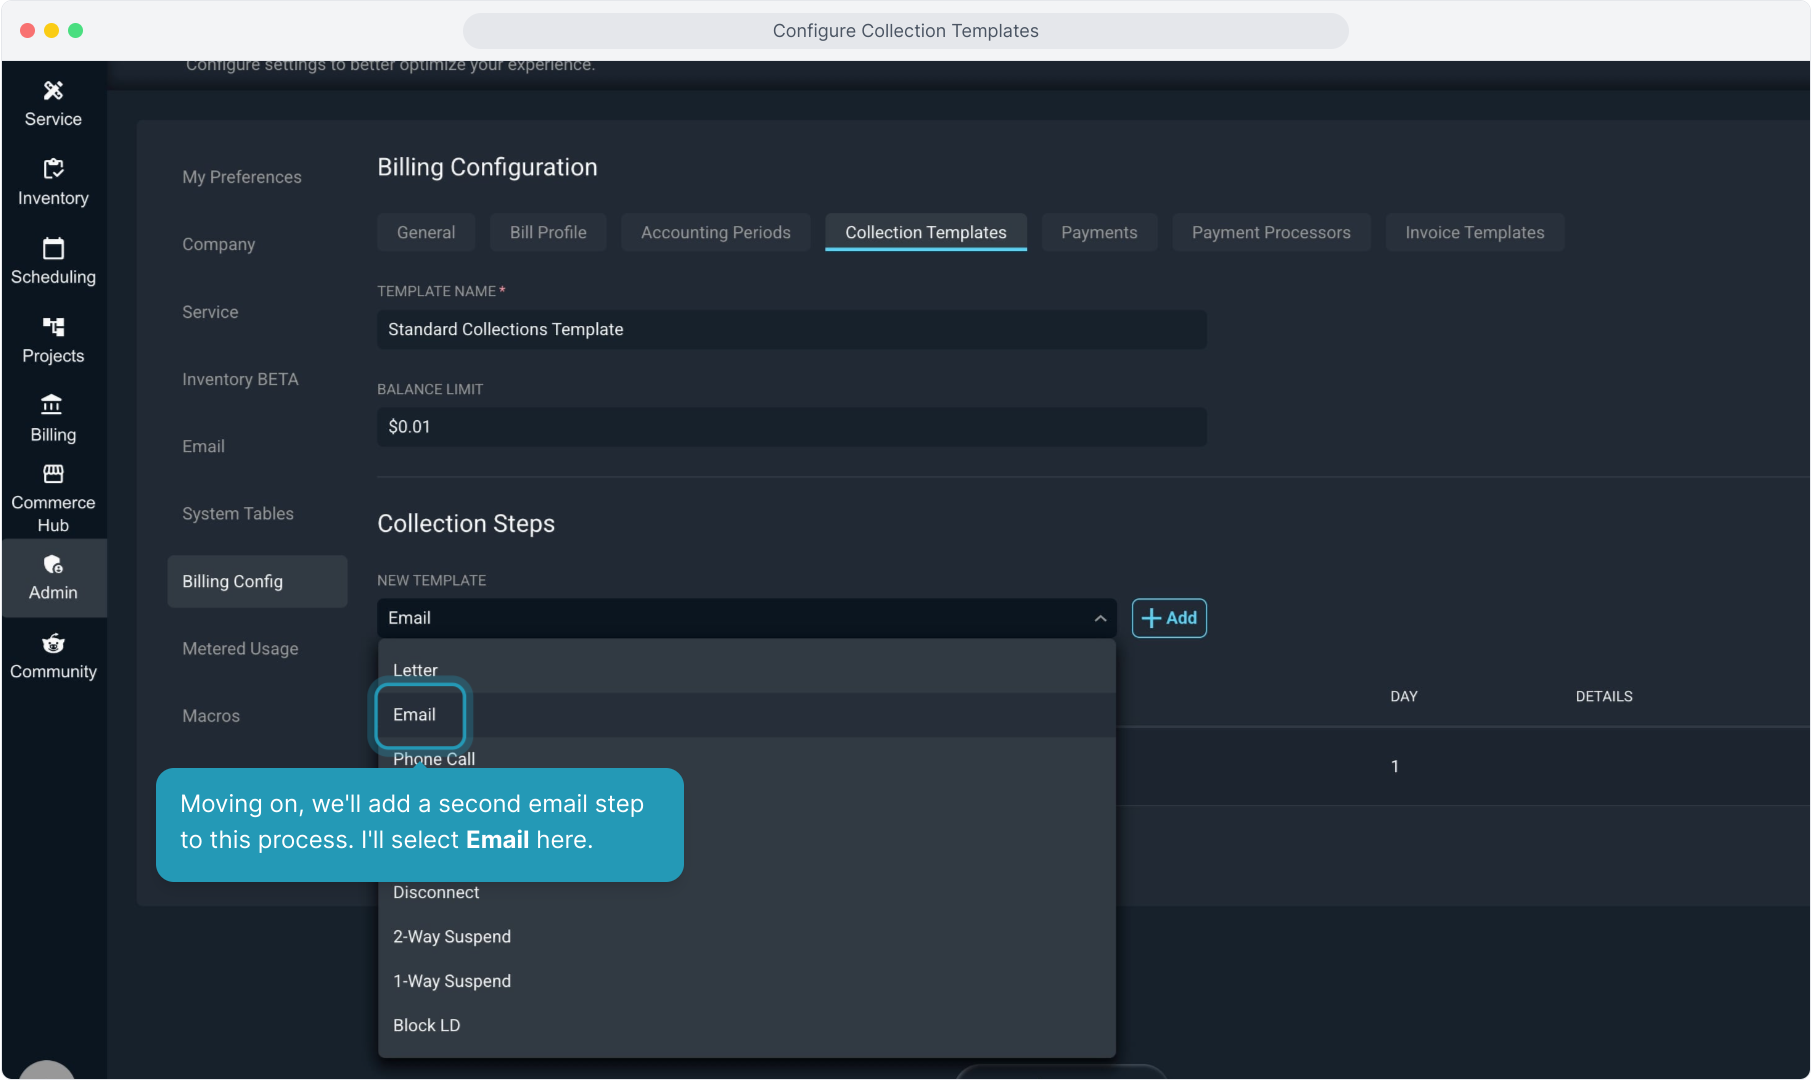
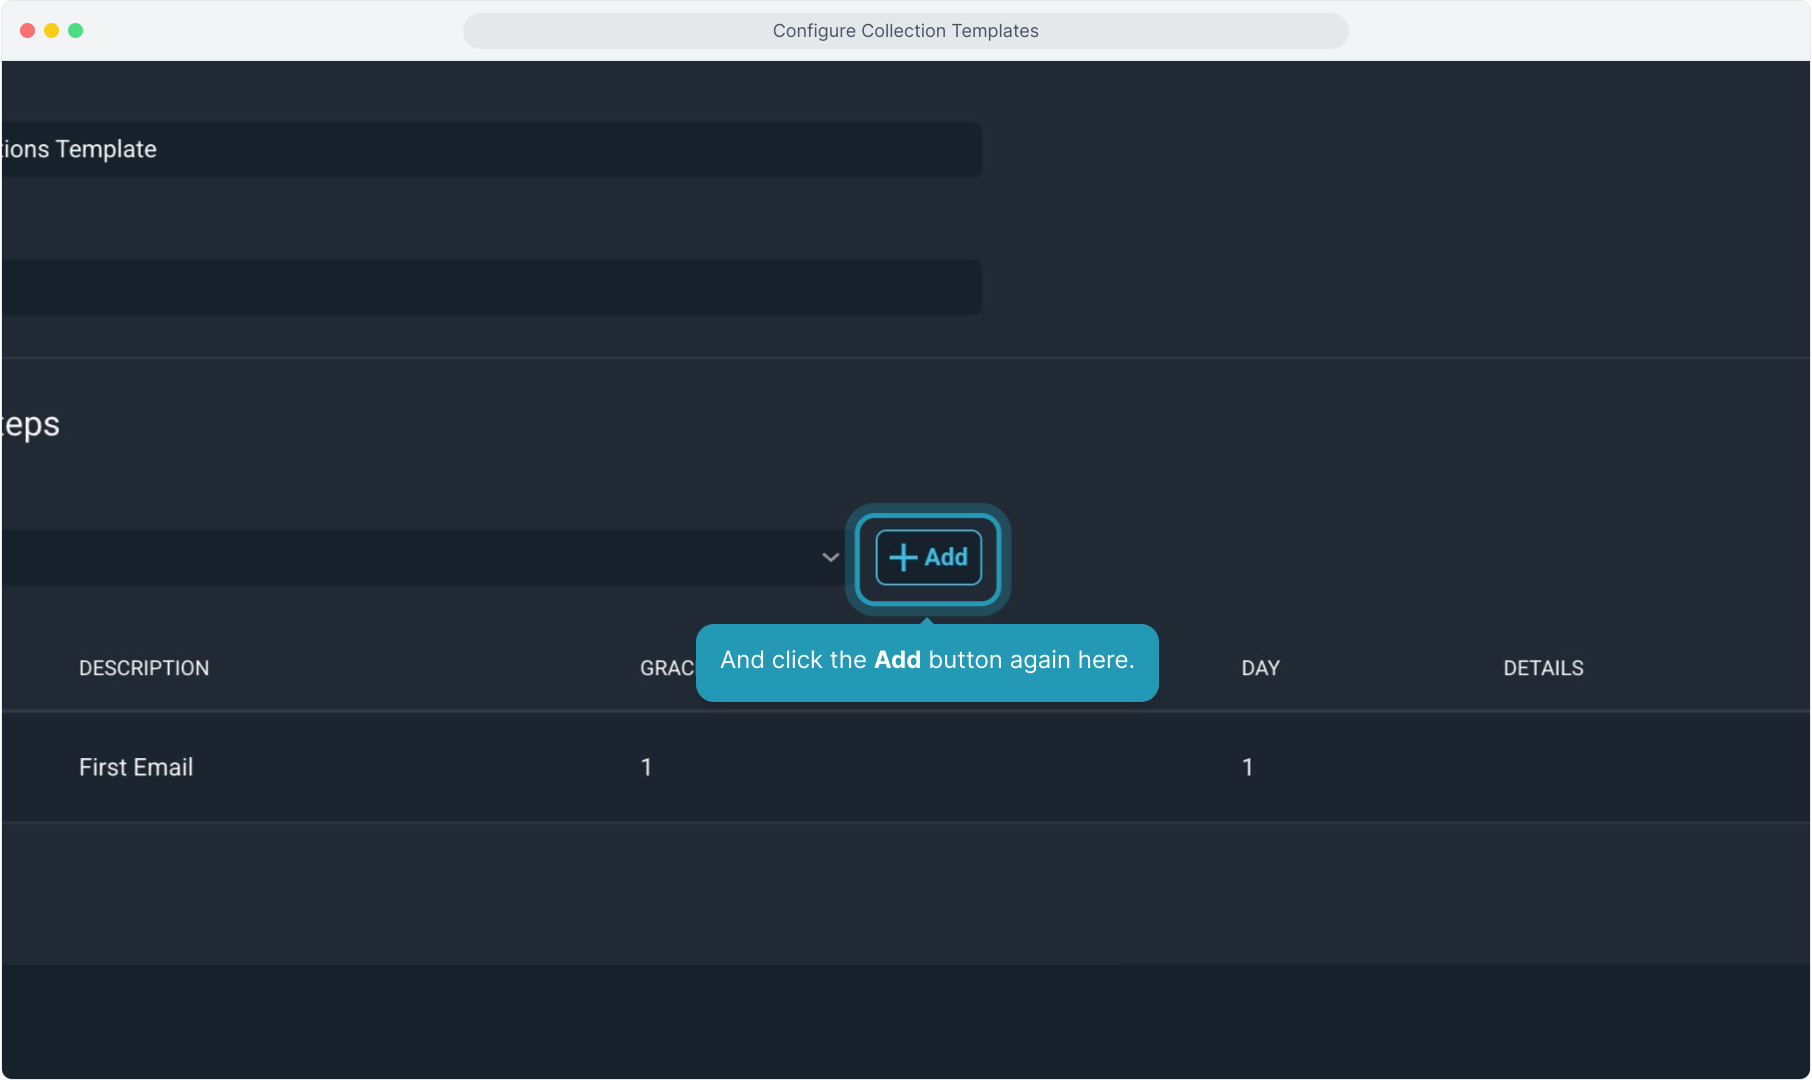
19. Moving on, we'll add a second email step to this process. I'll select Email here.
20. And click the Add button again here.
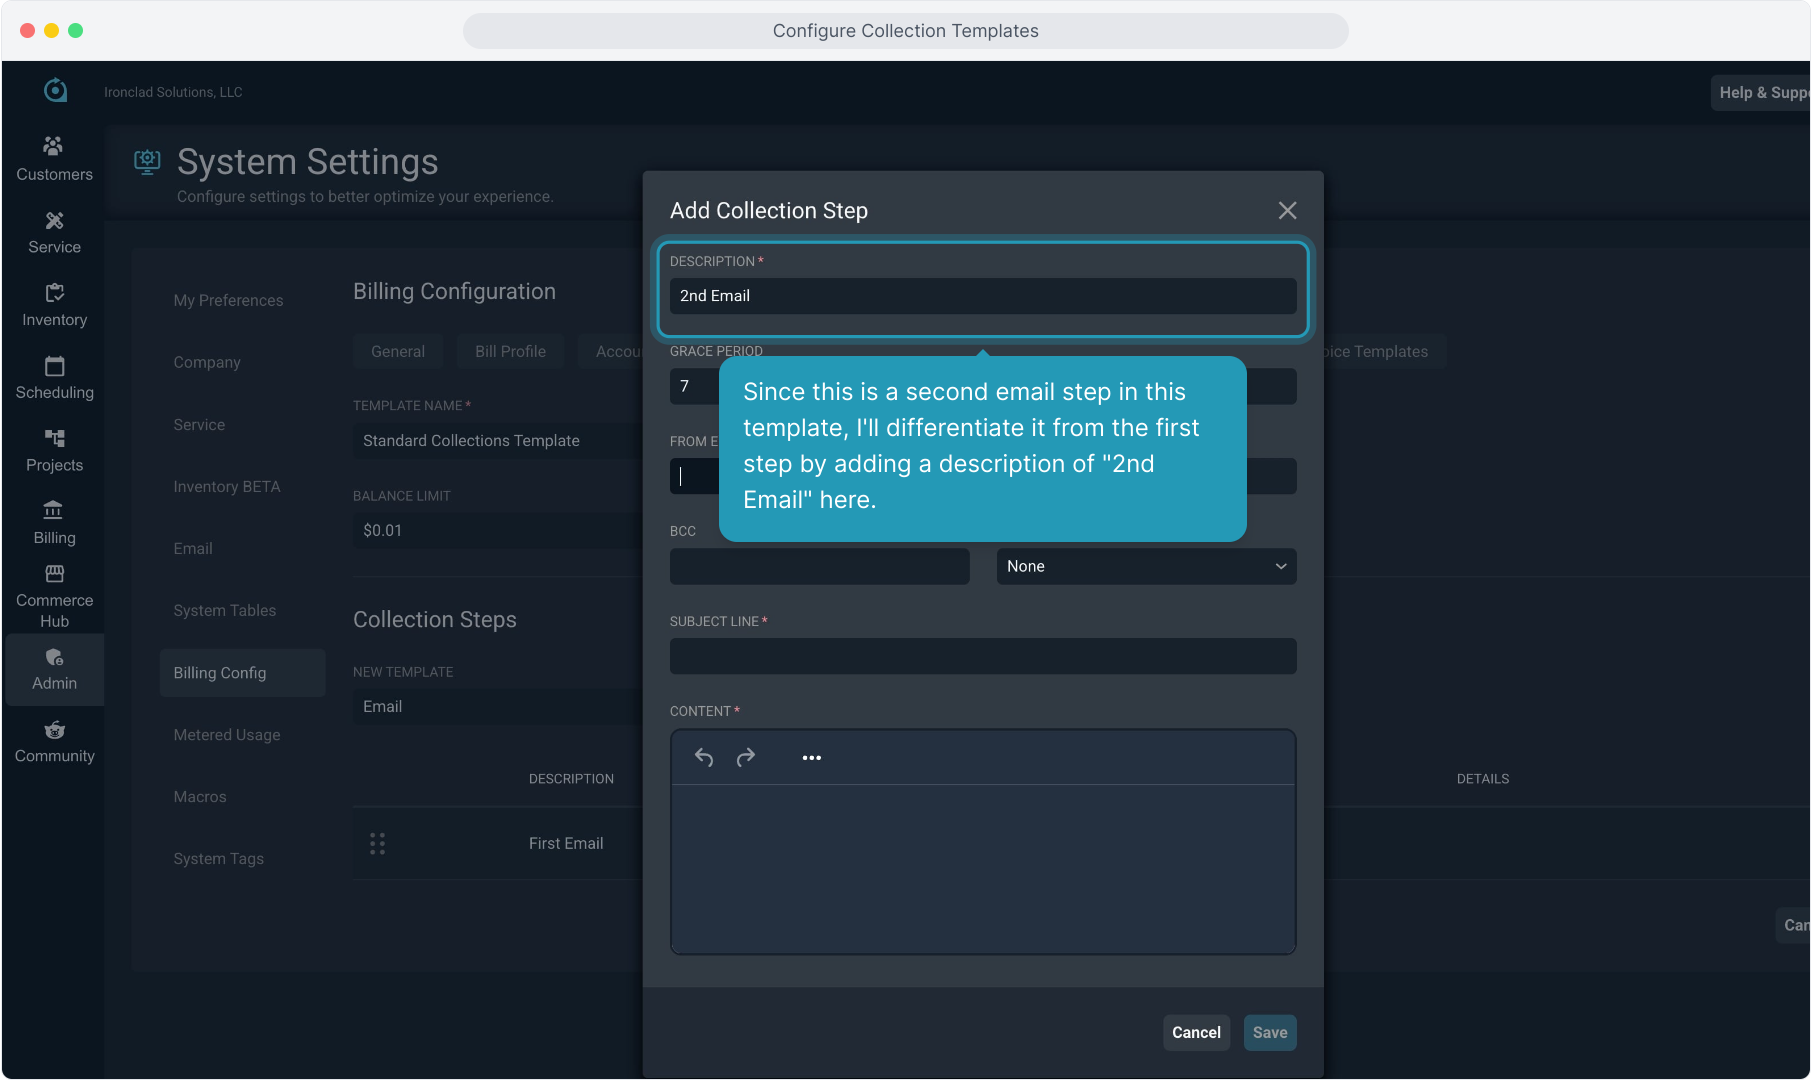
21. Since this is a second email step in this template, I'll differentiate it from the first step by adding a description of "2nd Email" here.
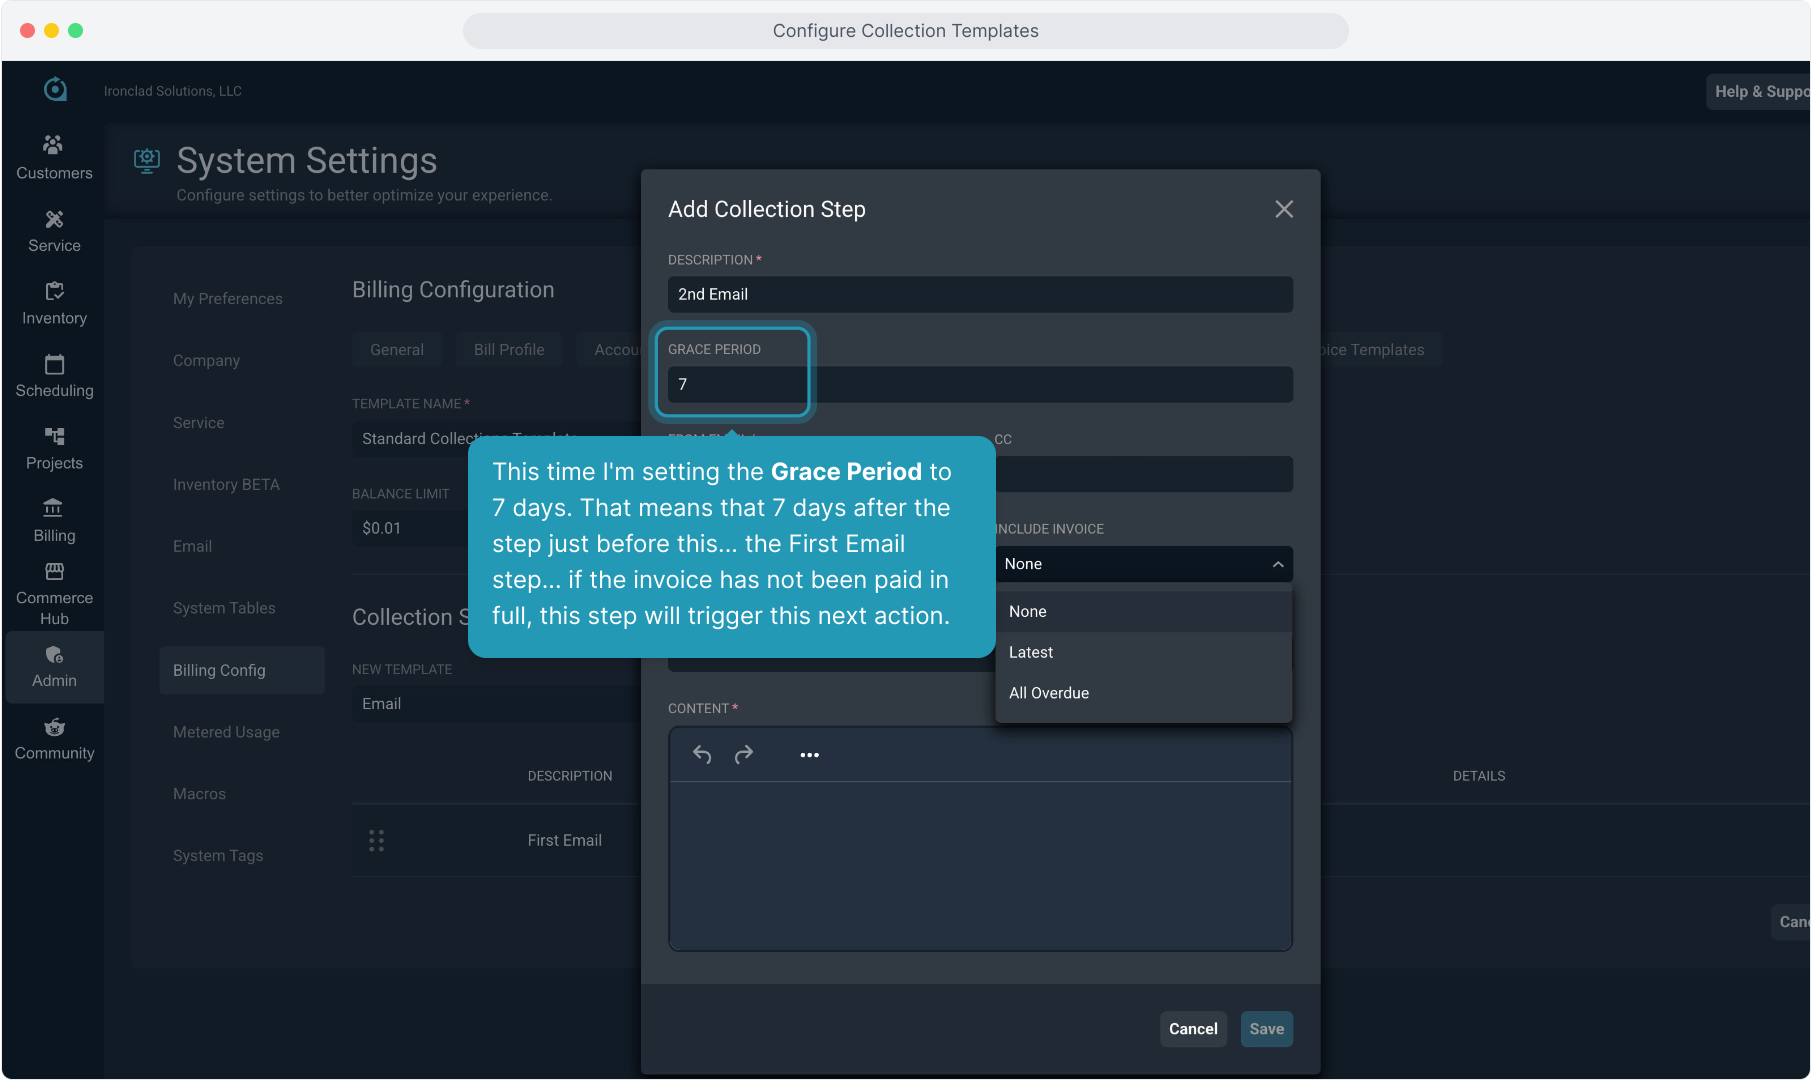
22. This time I'm setting the Grace Period to 7 days. That means that 7 days after the step just before this... the First Email step... if the invoice has not been paid in full, this step will trigger this next action.
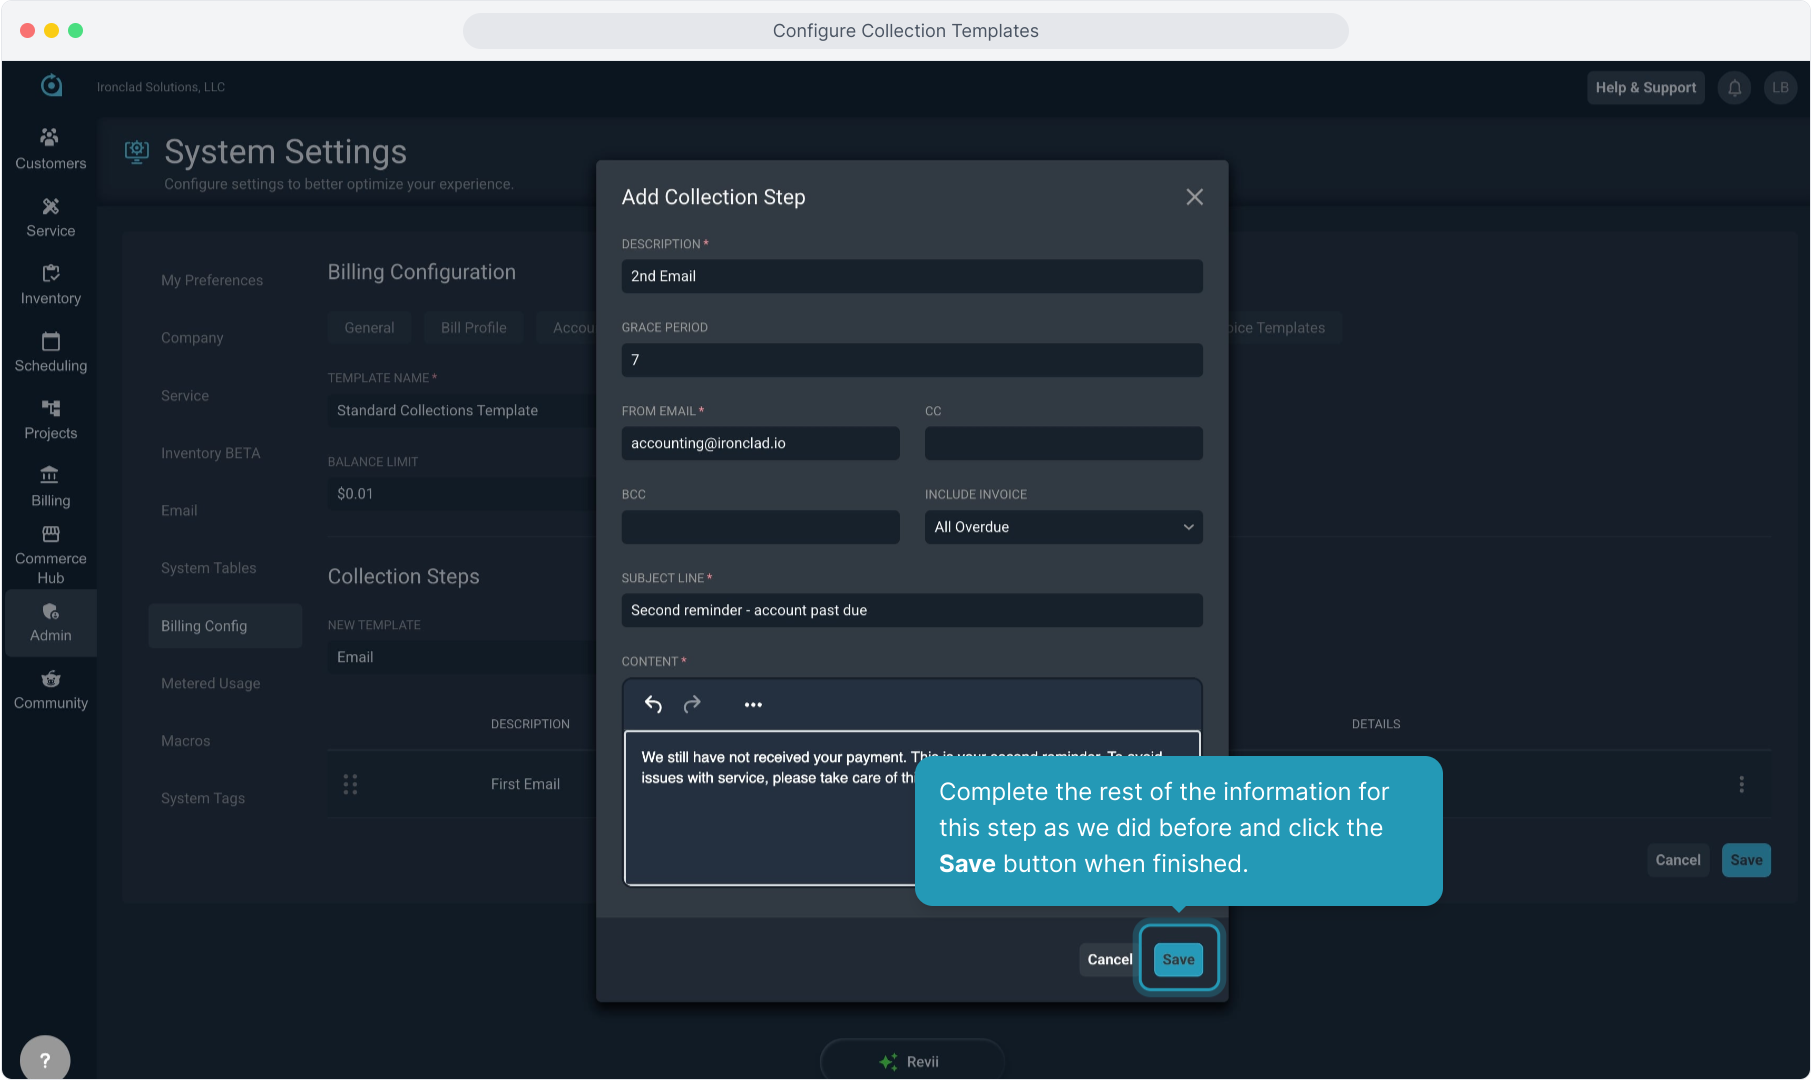
23. Complete the rest of the information for this step as we did before and click the Save button when finished.
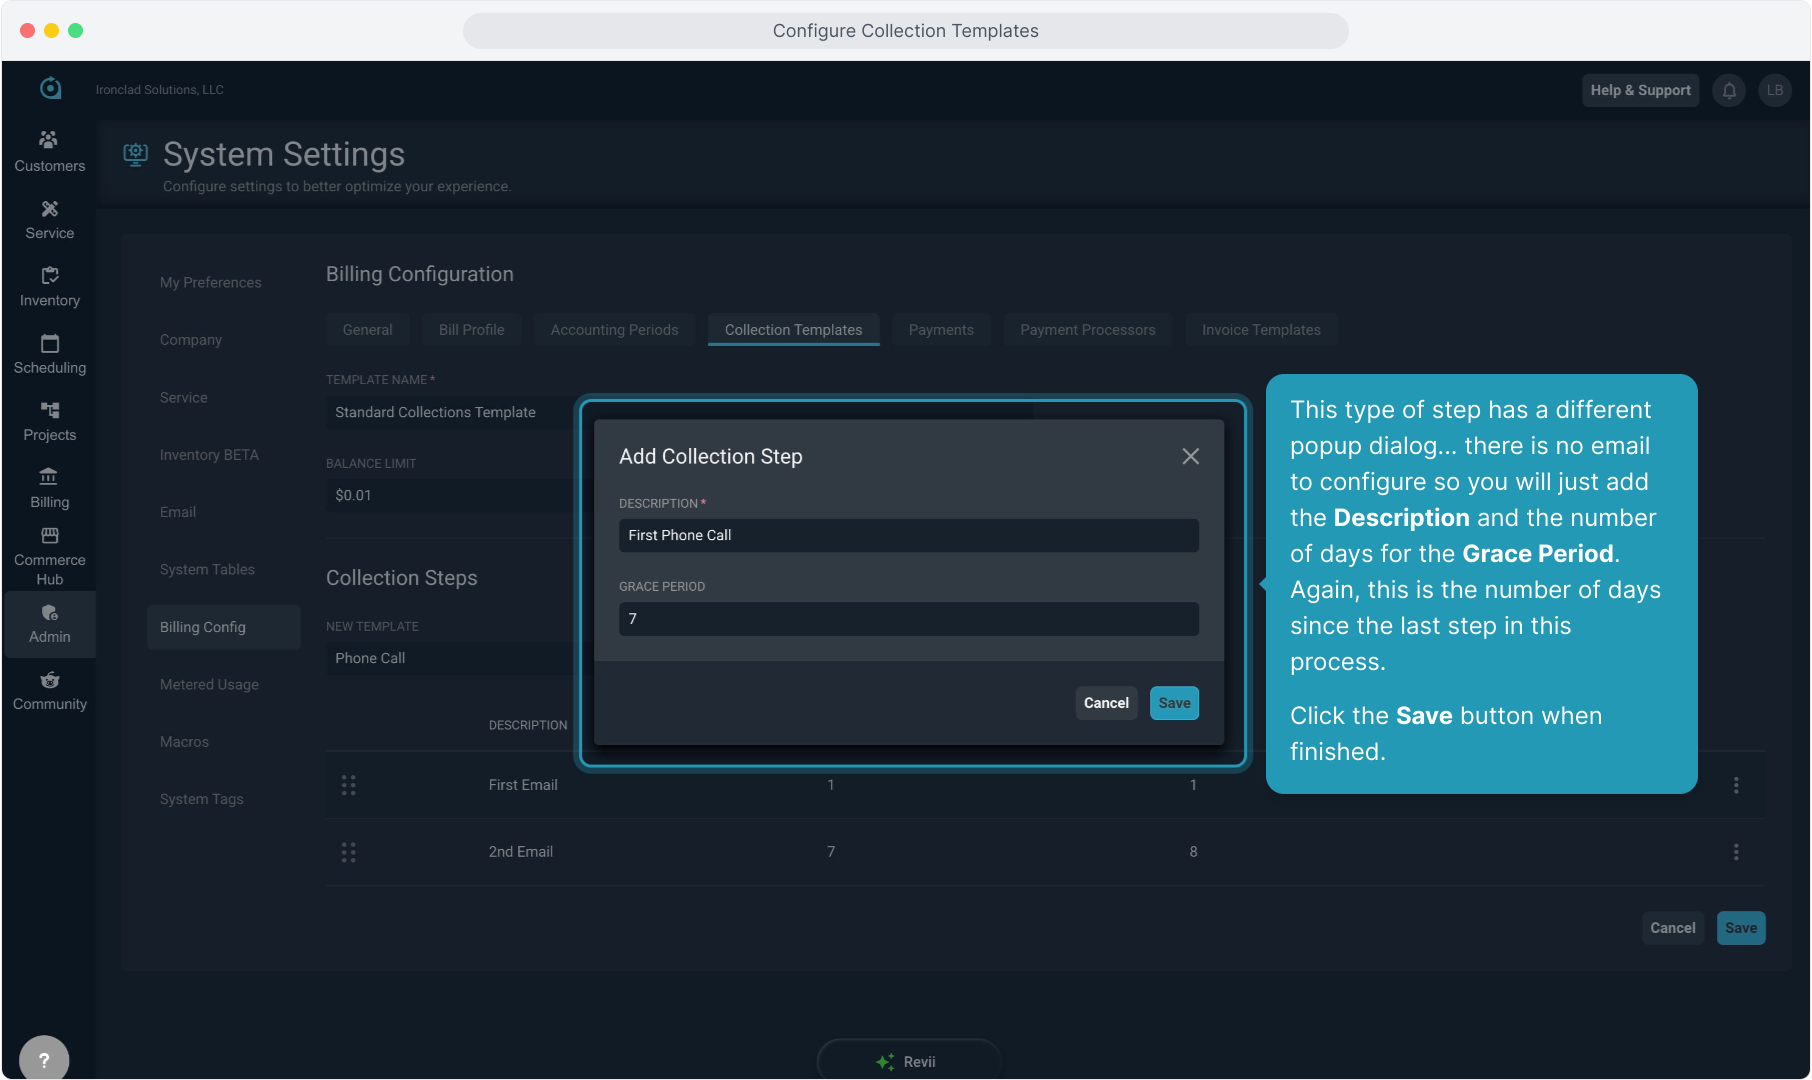
24. We'll make the third step in this process a manual phone call. We selected Phone Call from the dropdown and we'll click the Add button.
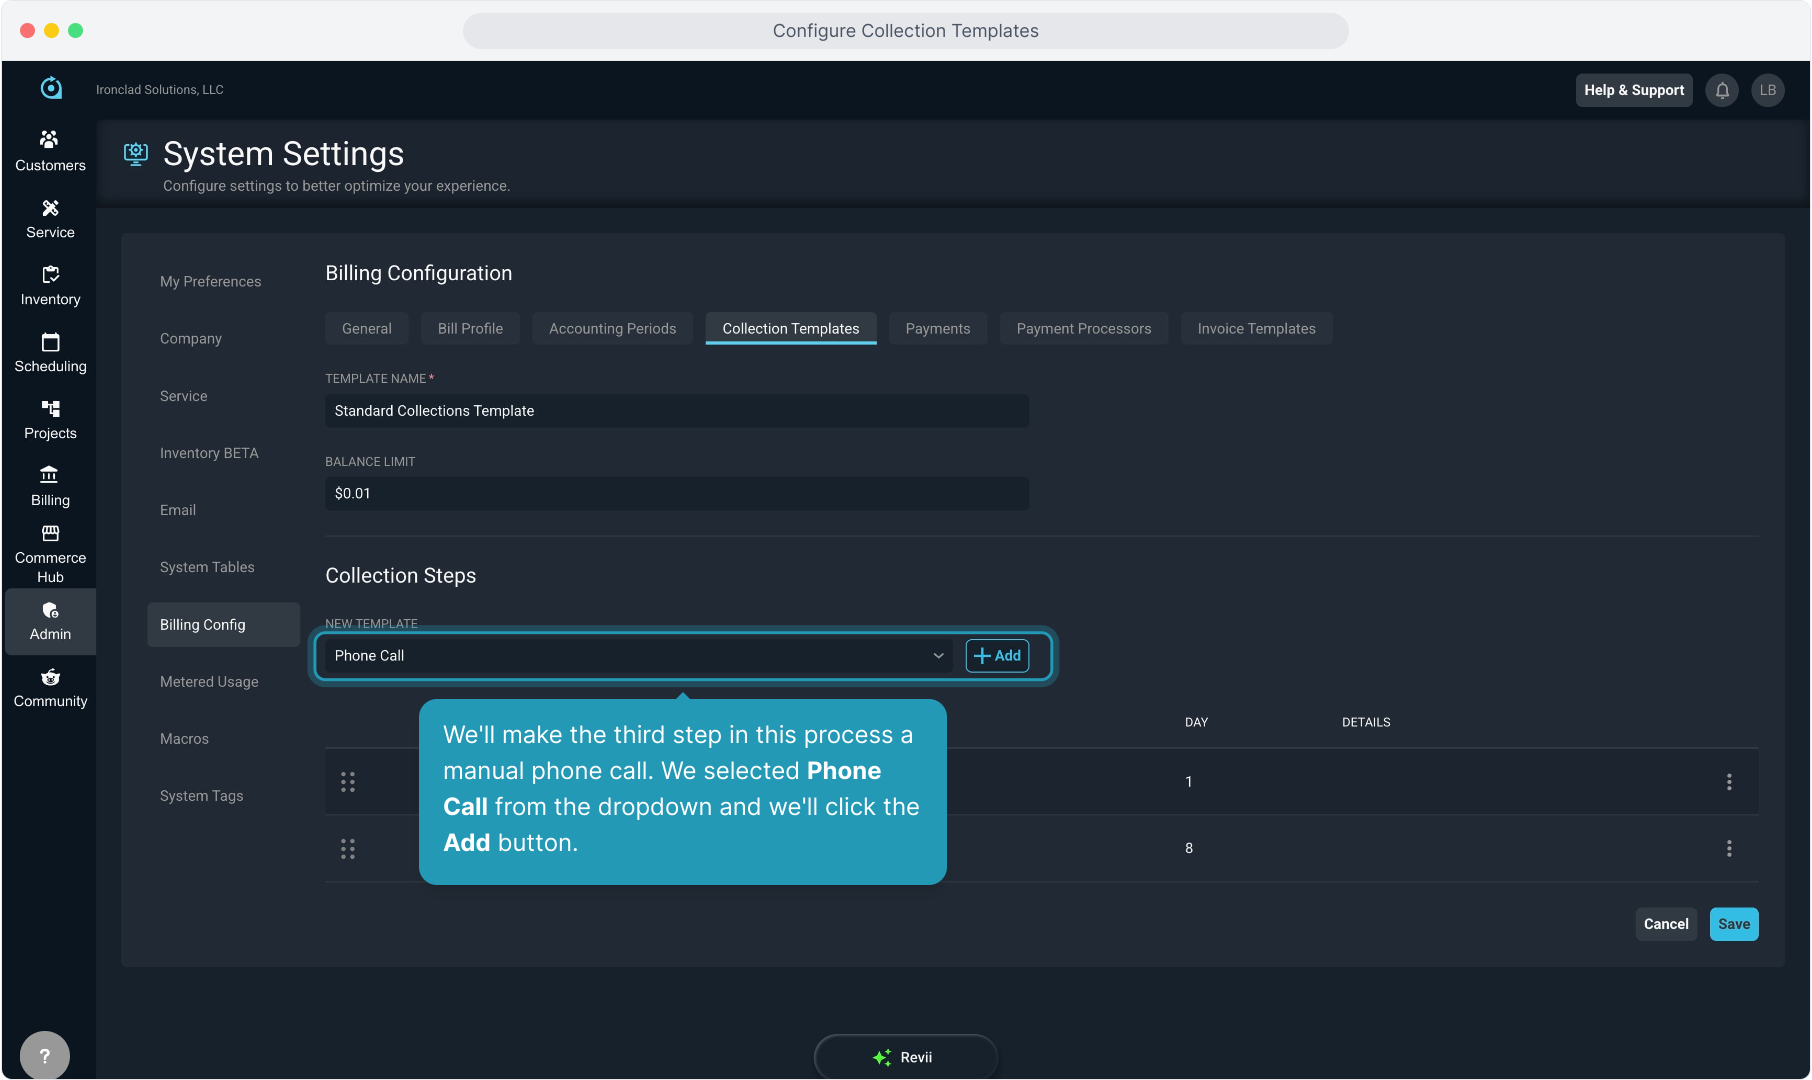
25. This type of step has a different popup dialog... there is no email to configure so you will just add the Description and the number of days for the Grace Period. Again, this is the number of days since the last step in this process.
Click the Save button when finished.
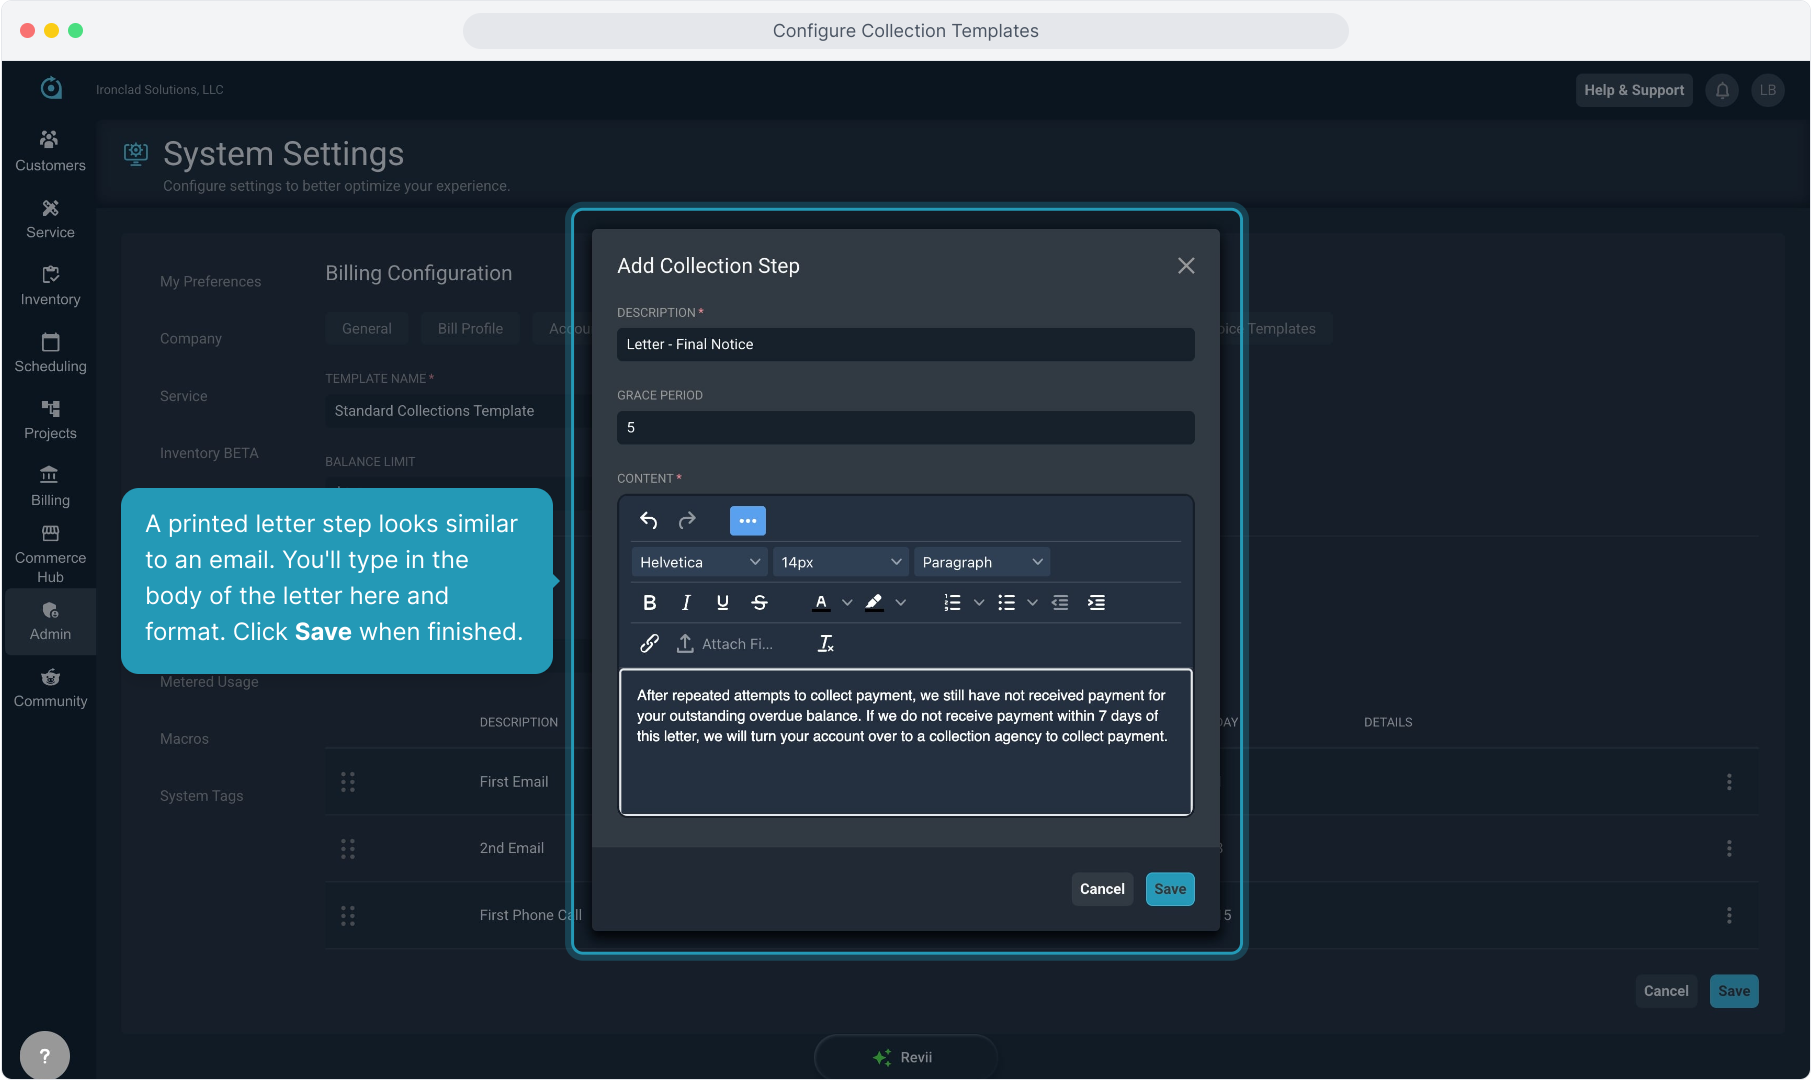
26. Continue adding steps as you need. We'll add a Letter step for a printed correspondence.

27. A printed letter step looks similar to an email. You'll type in the body of the letter here and format. Click Save when finished.
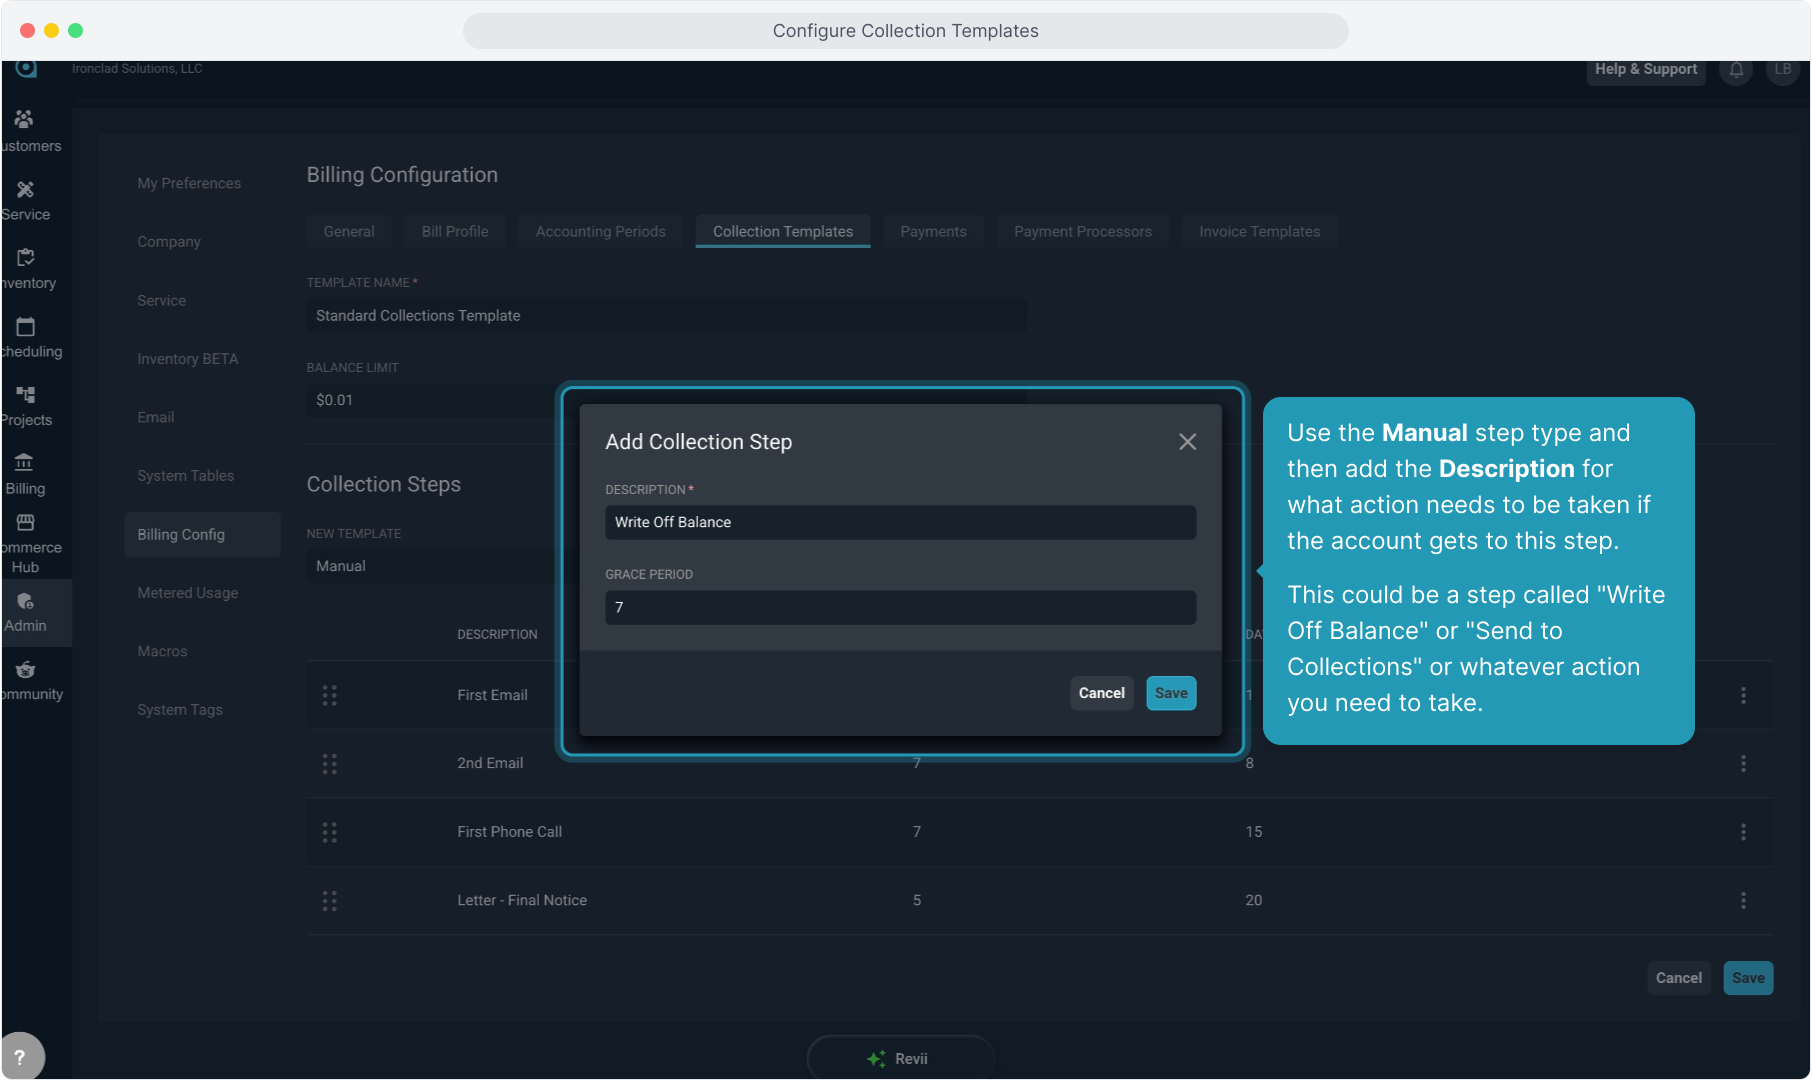
28. Any collection actions you need to take that are not in the standard list can be created for your process by using the Manual option.
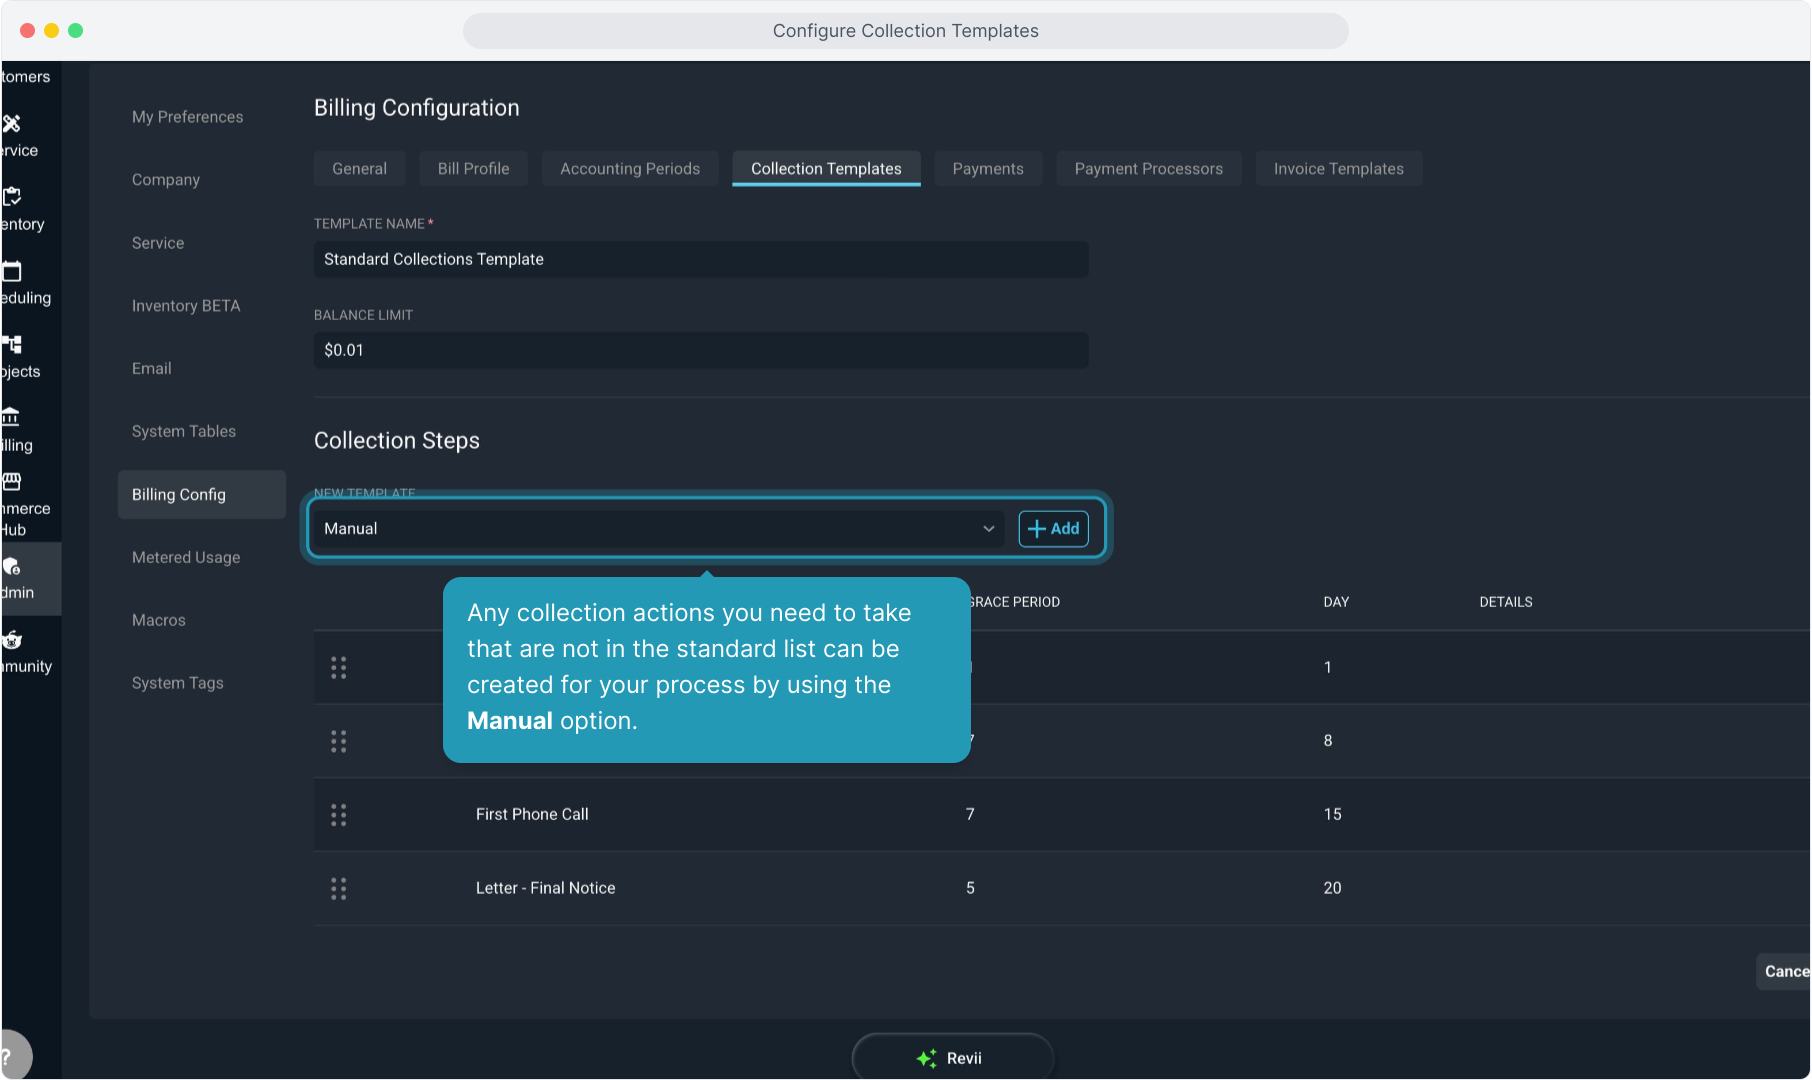
29. Use the Manual step type and then add the Description for what action needs to be taken if the account gets to this step.
This could be a step called "Write Off Balance" or "Send to Collections" or whatever action you need to take.
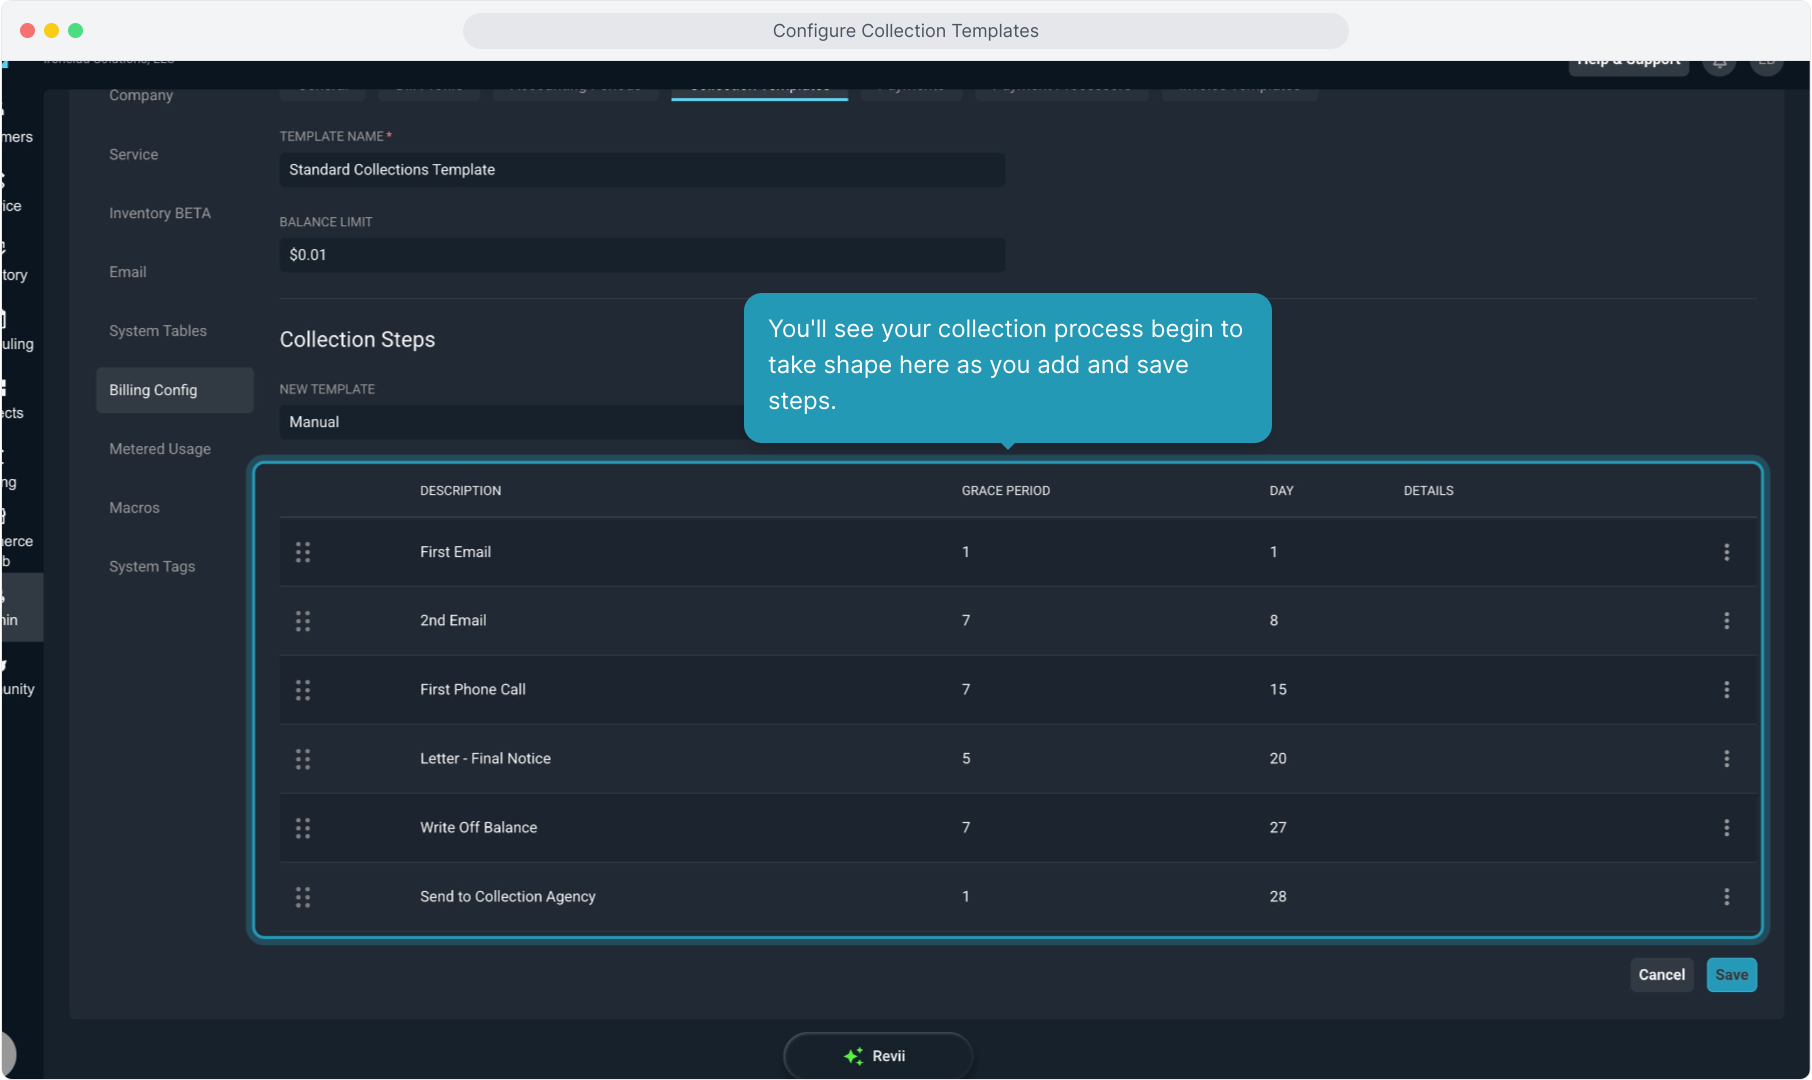
30. You'll see your collection process begin to take shape here as you add and save steps.
31. The Grace Period column here shows you the number of days since the previous step that the next step will trigger.
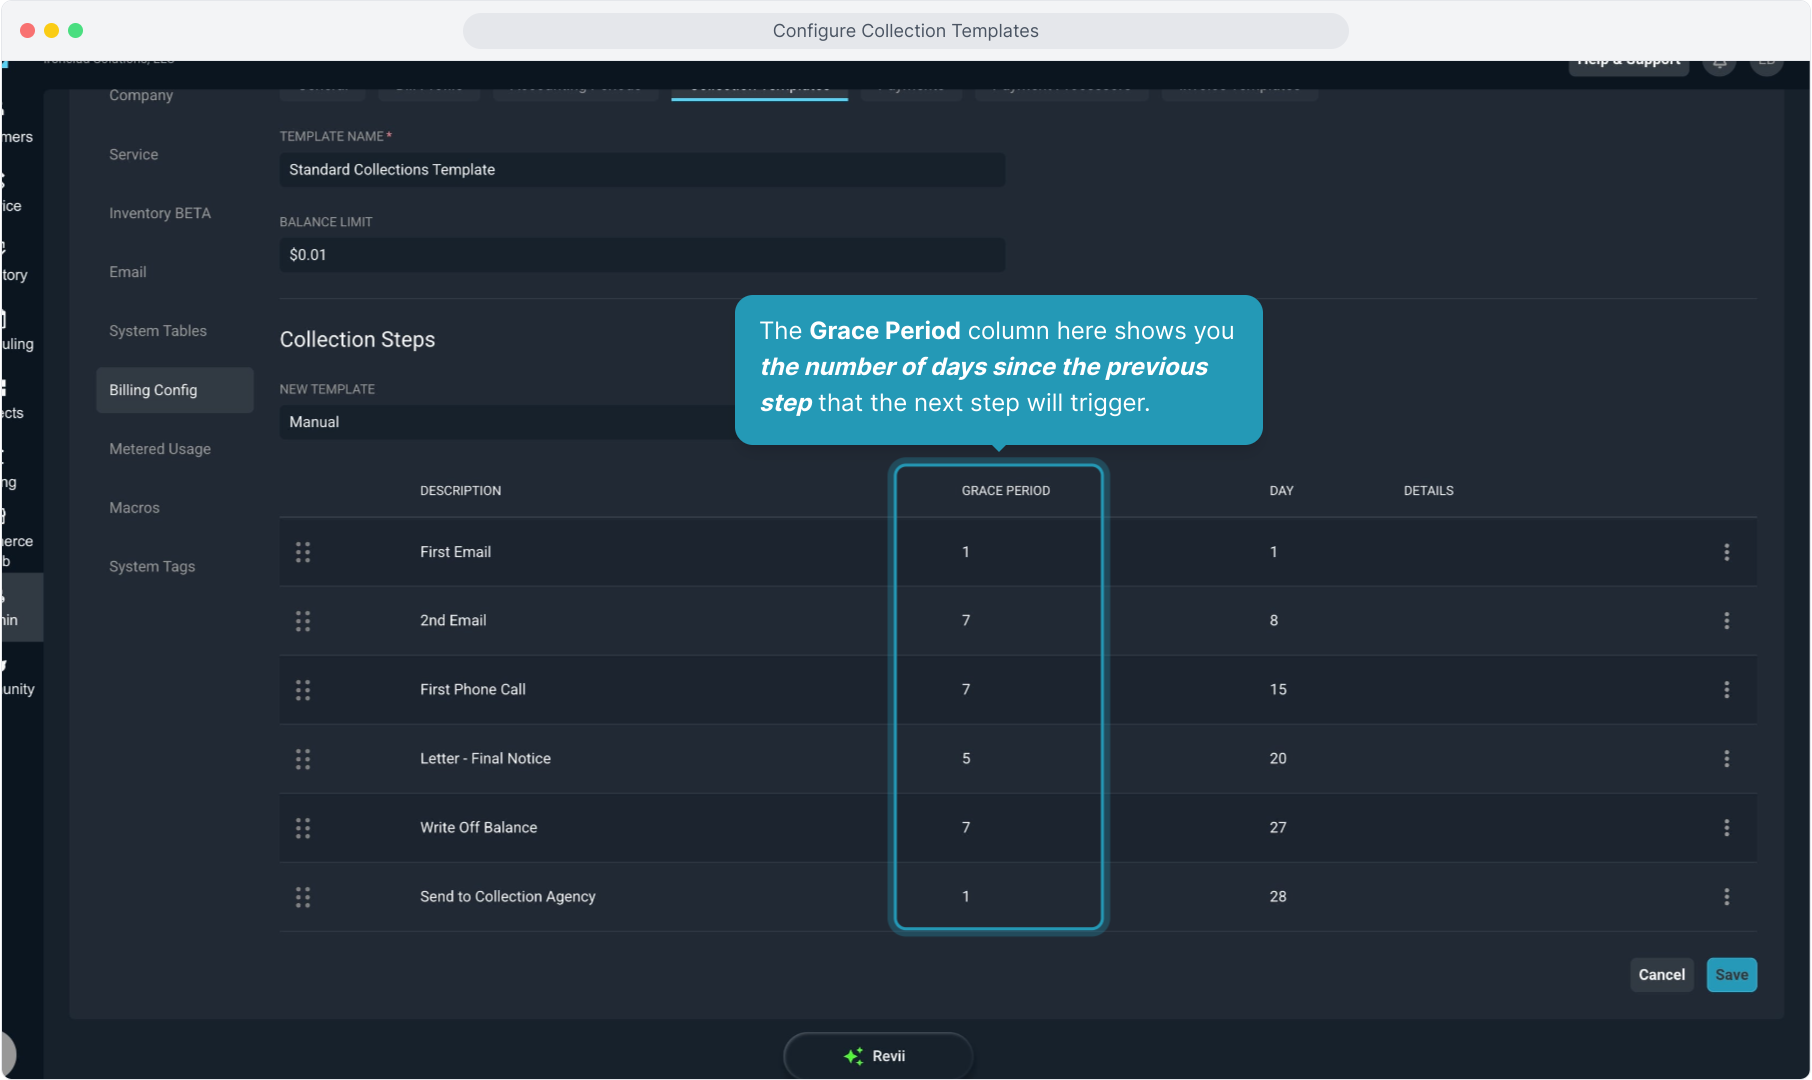
32. The Day column shows you the number of days since the Due Date so that you can see how far past due the account really is at each step.

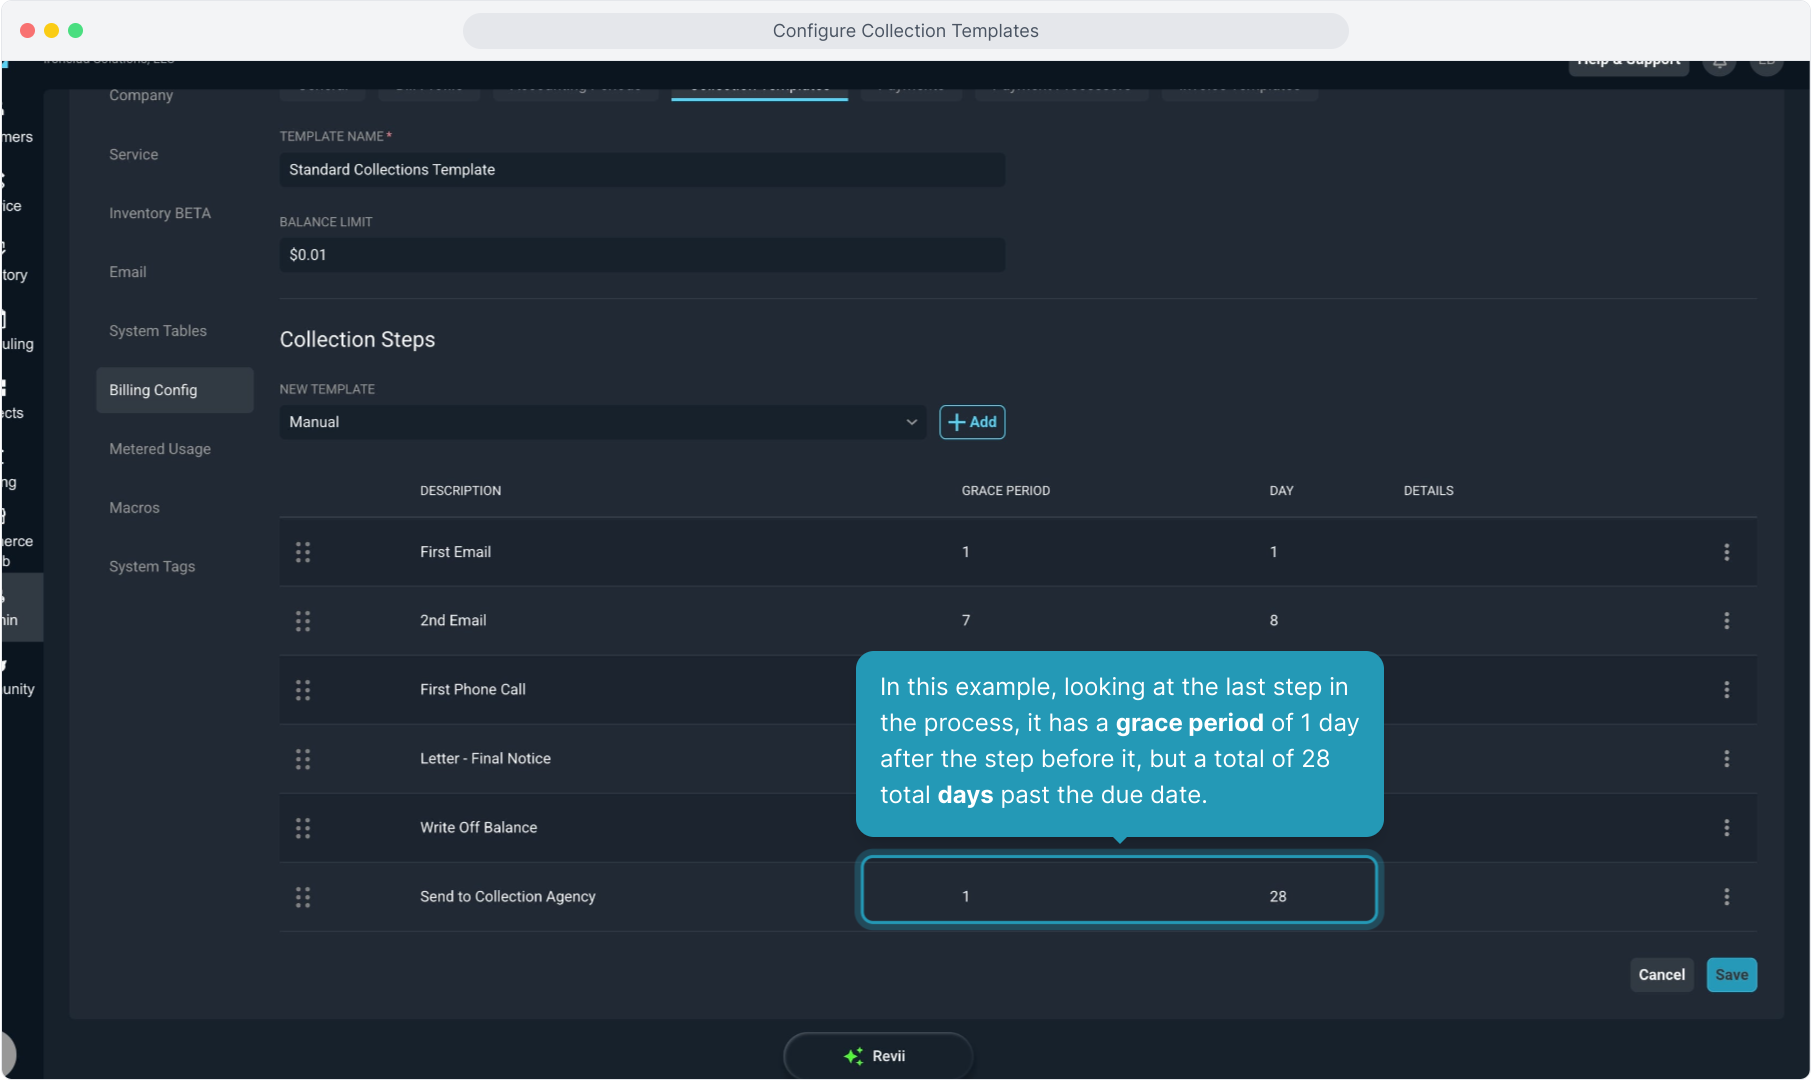
33. In this example, looking at the last step in the process, it has a grace period of 1 day after the step before it, but a total of 28 total days past the due date.
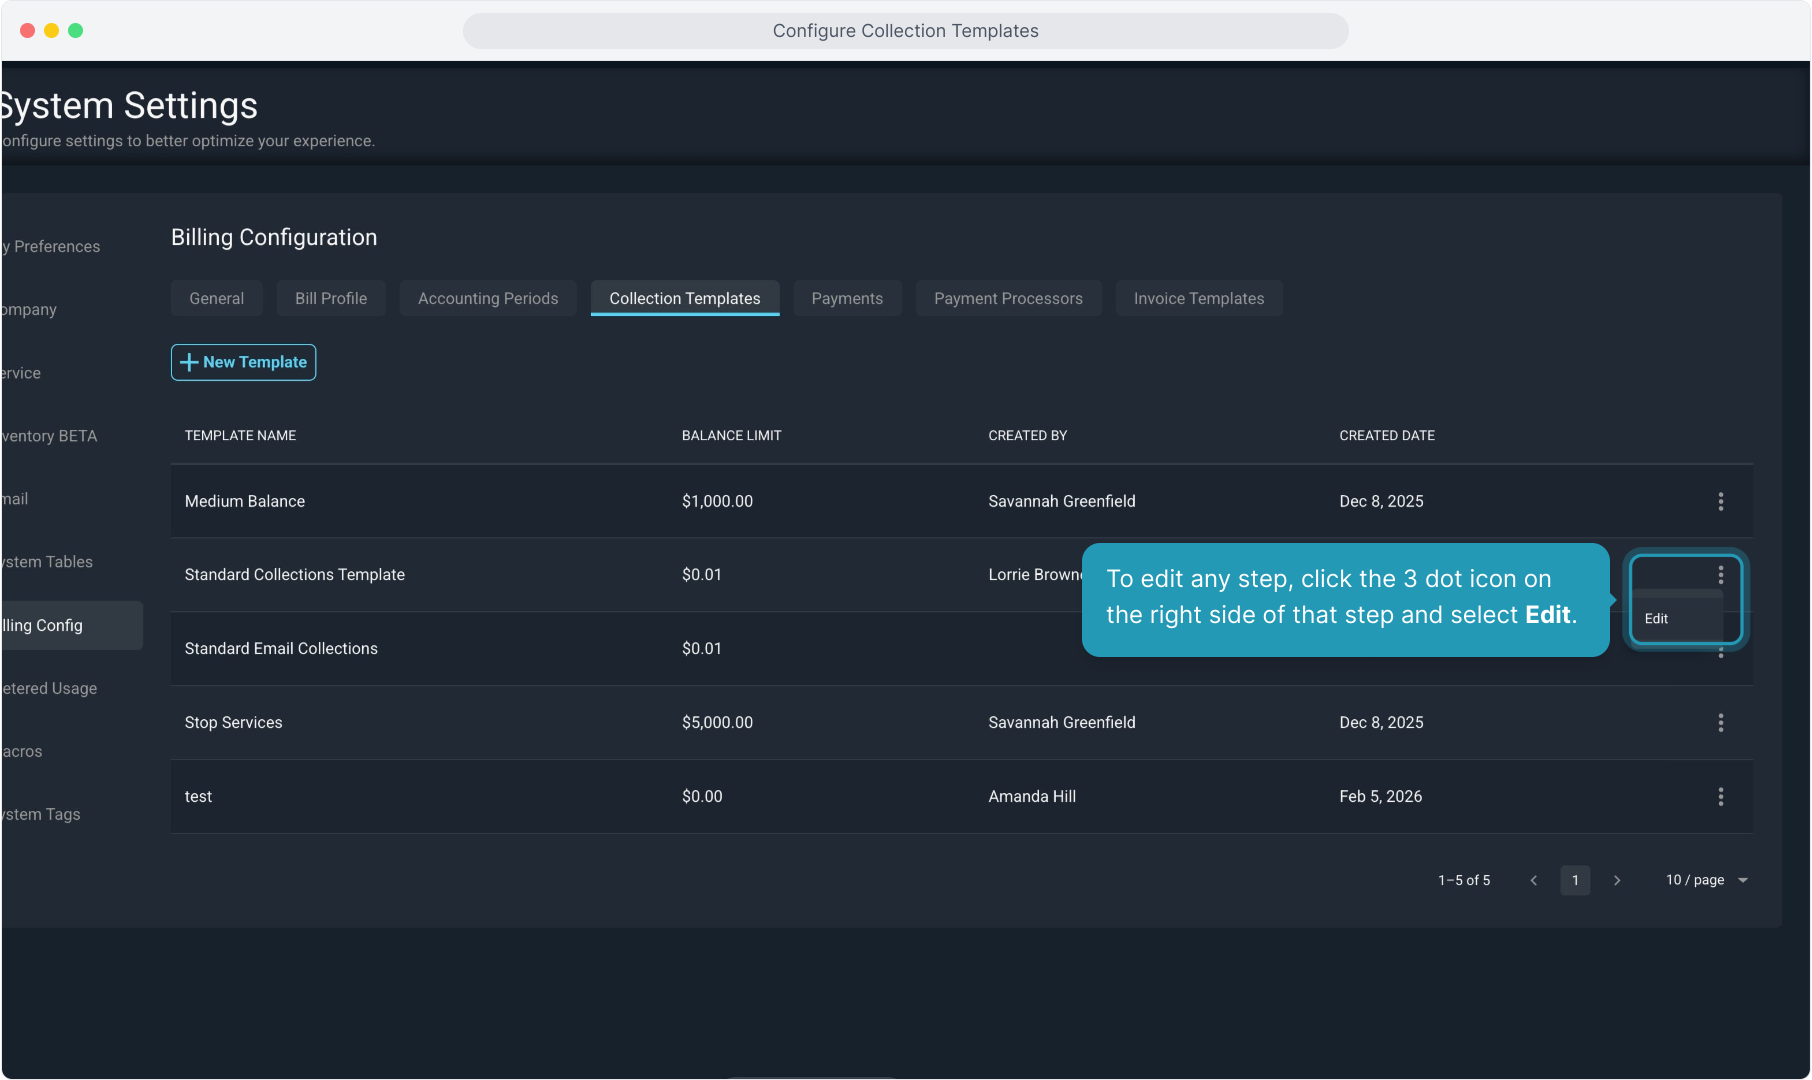
34. To edit any step, click the 3 dot icon on the right side of that step and select Edit.
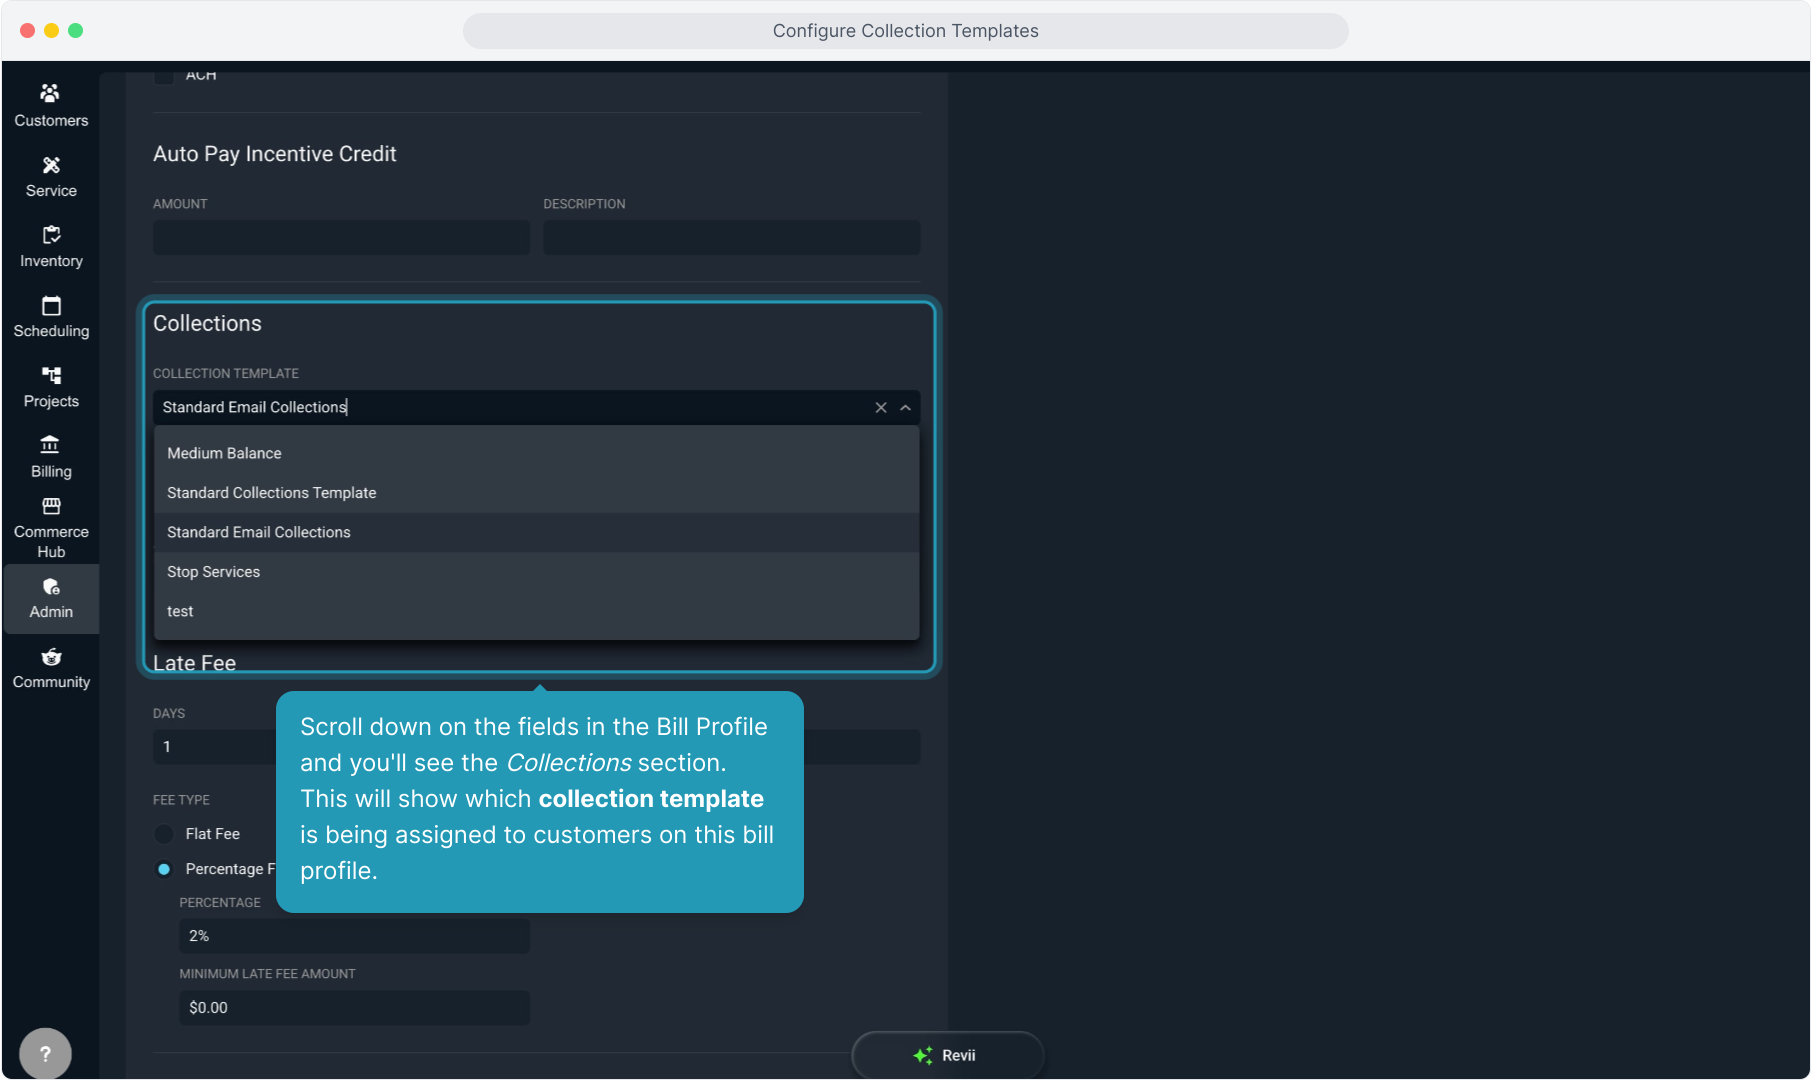
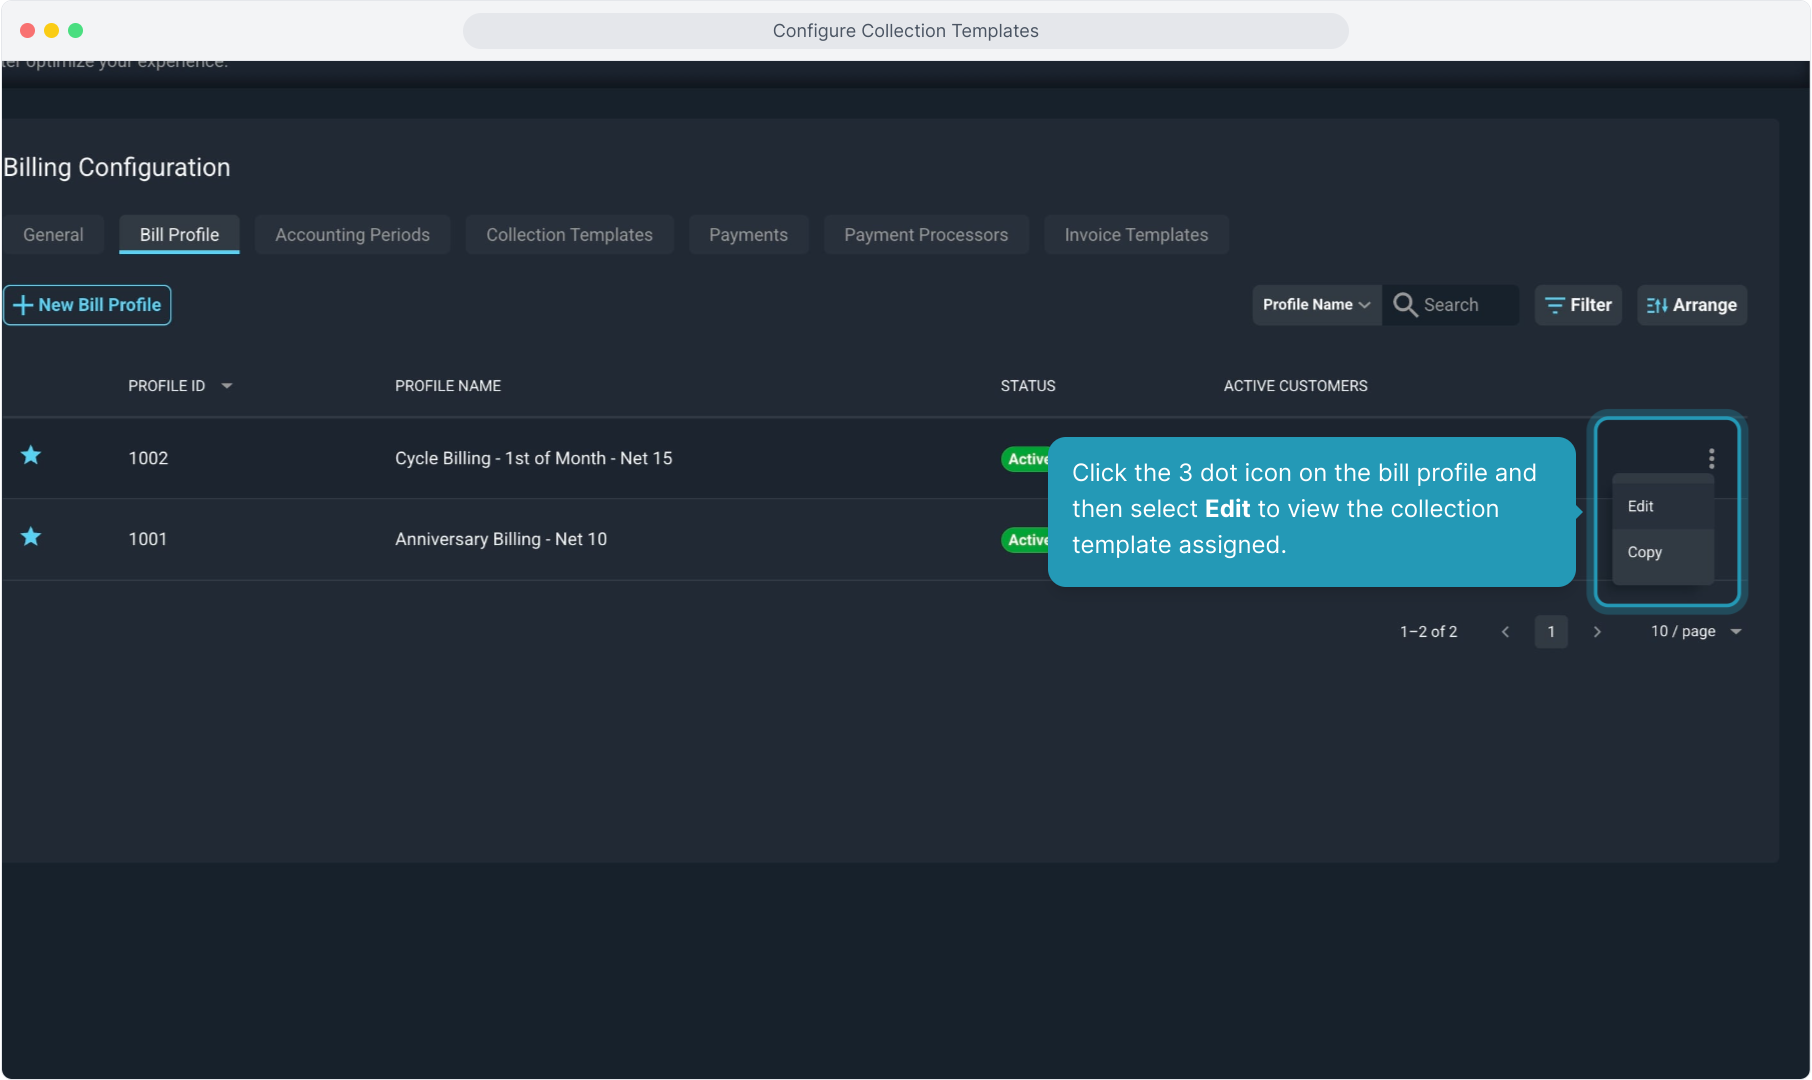
35. As a reminder, collection templates are applied to customer accounts via the Bill Profile assigned to that customer.
To view the collection template associated, from the main Admin menu, select System Settings and then Billing Config. Click the Bill Profile tab.

36. Click the 3 dot icon on the bill profile and then select Edit to view the collection template assigned.
37. Scroll down on the fields in the Bill Profile and you'll see the Collections section. This will show which collection template is being assigned to customers on this bill profile.