How To Guide: Receiving Inventory on Purchase Orders
1. Introduction
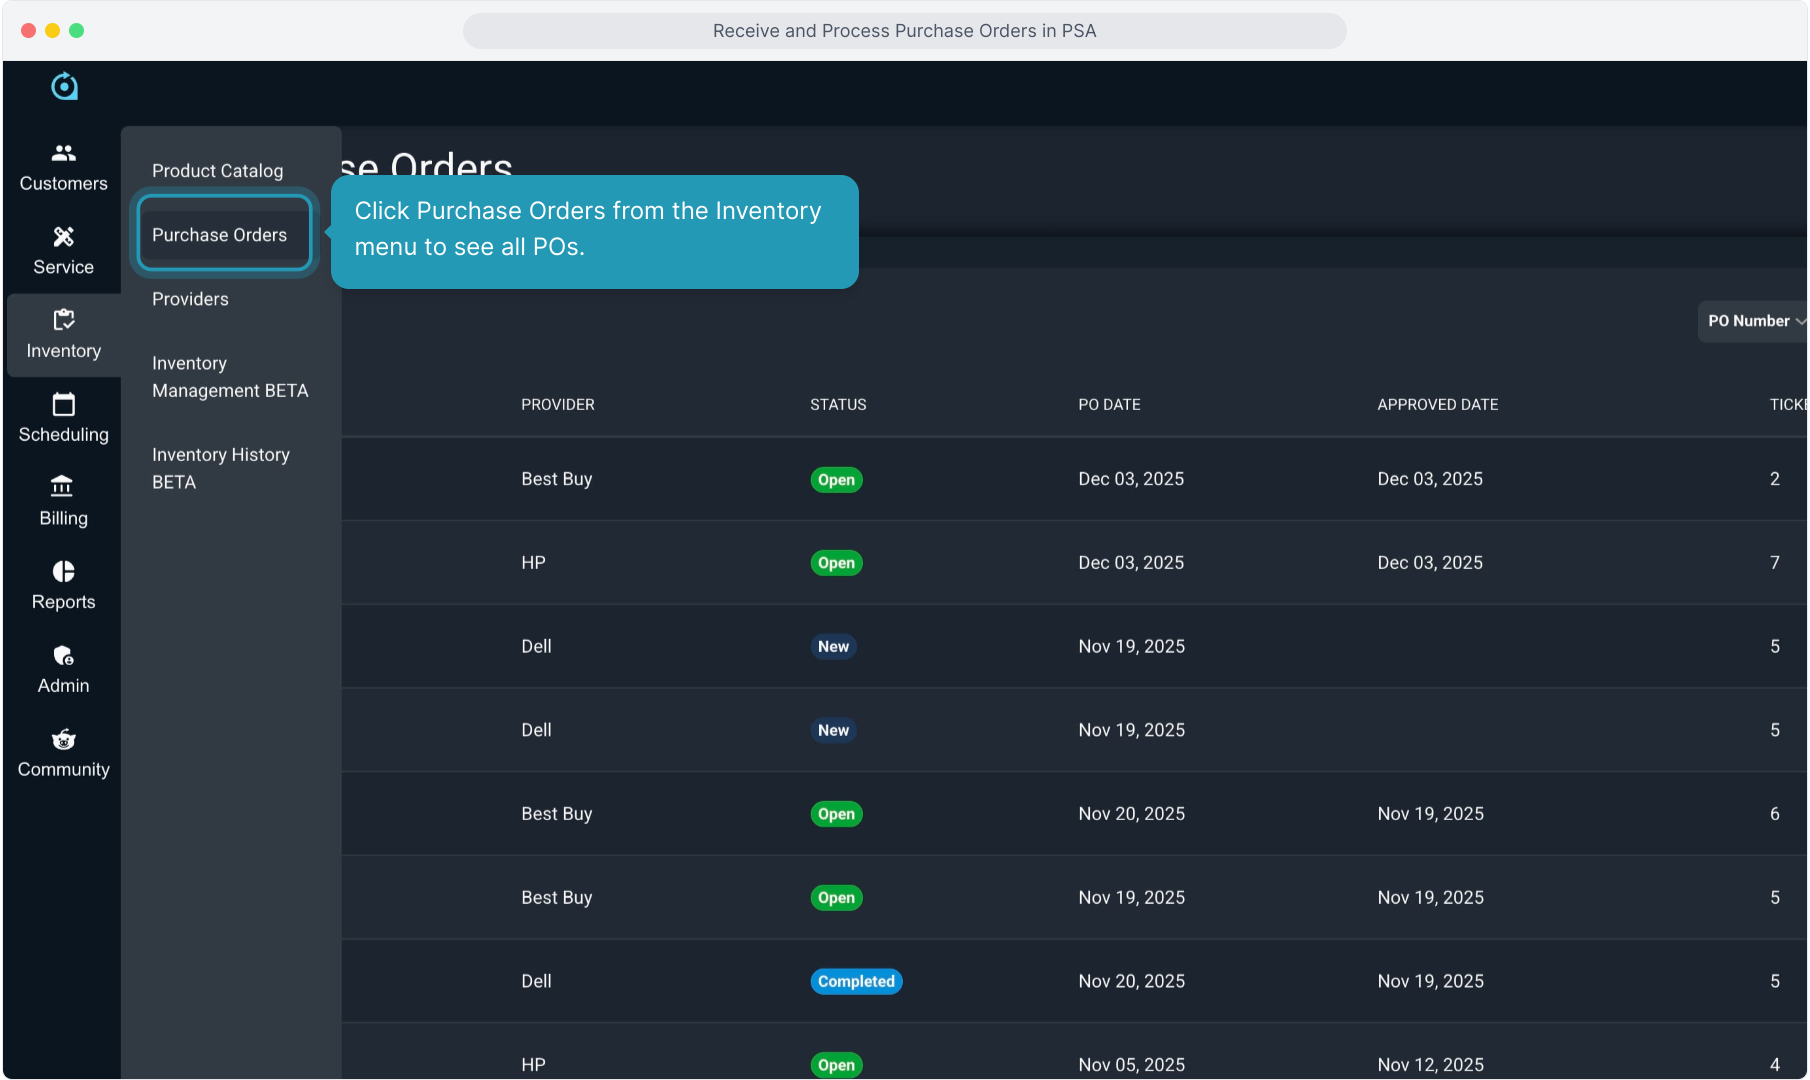
2. Click Purchase Orders from the Inventory menu to see all POs.
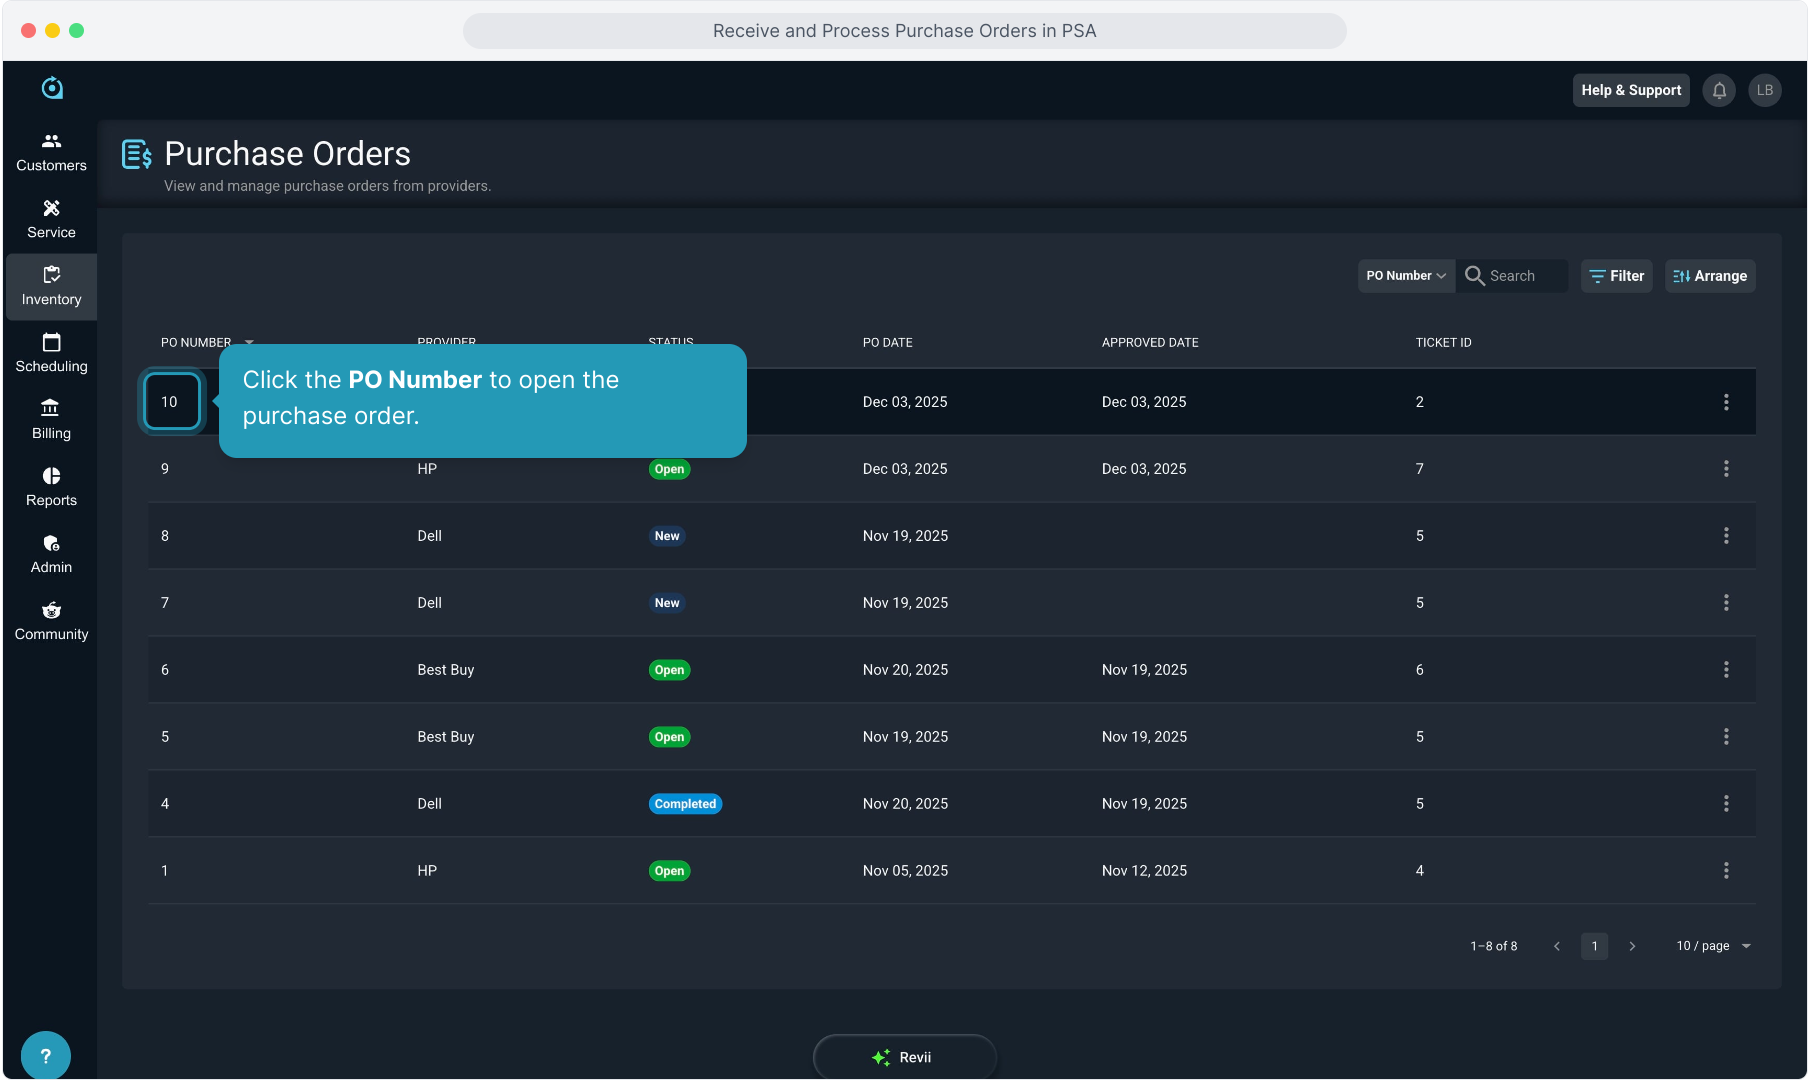
3. Click the PO Number to open the purchase order.
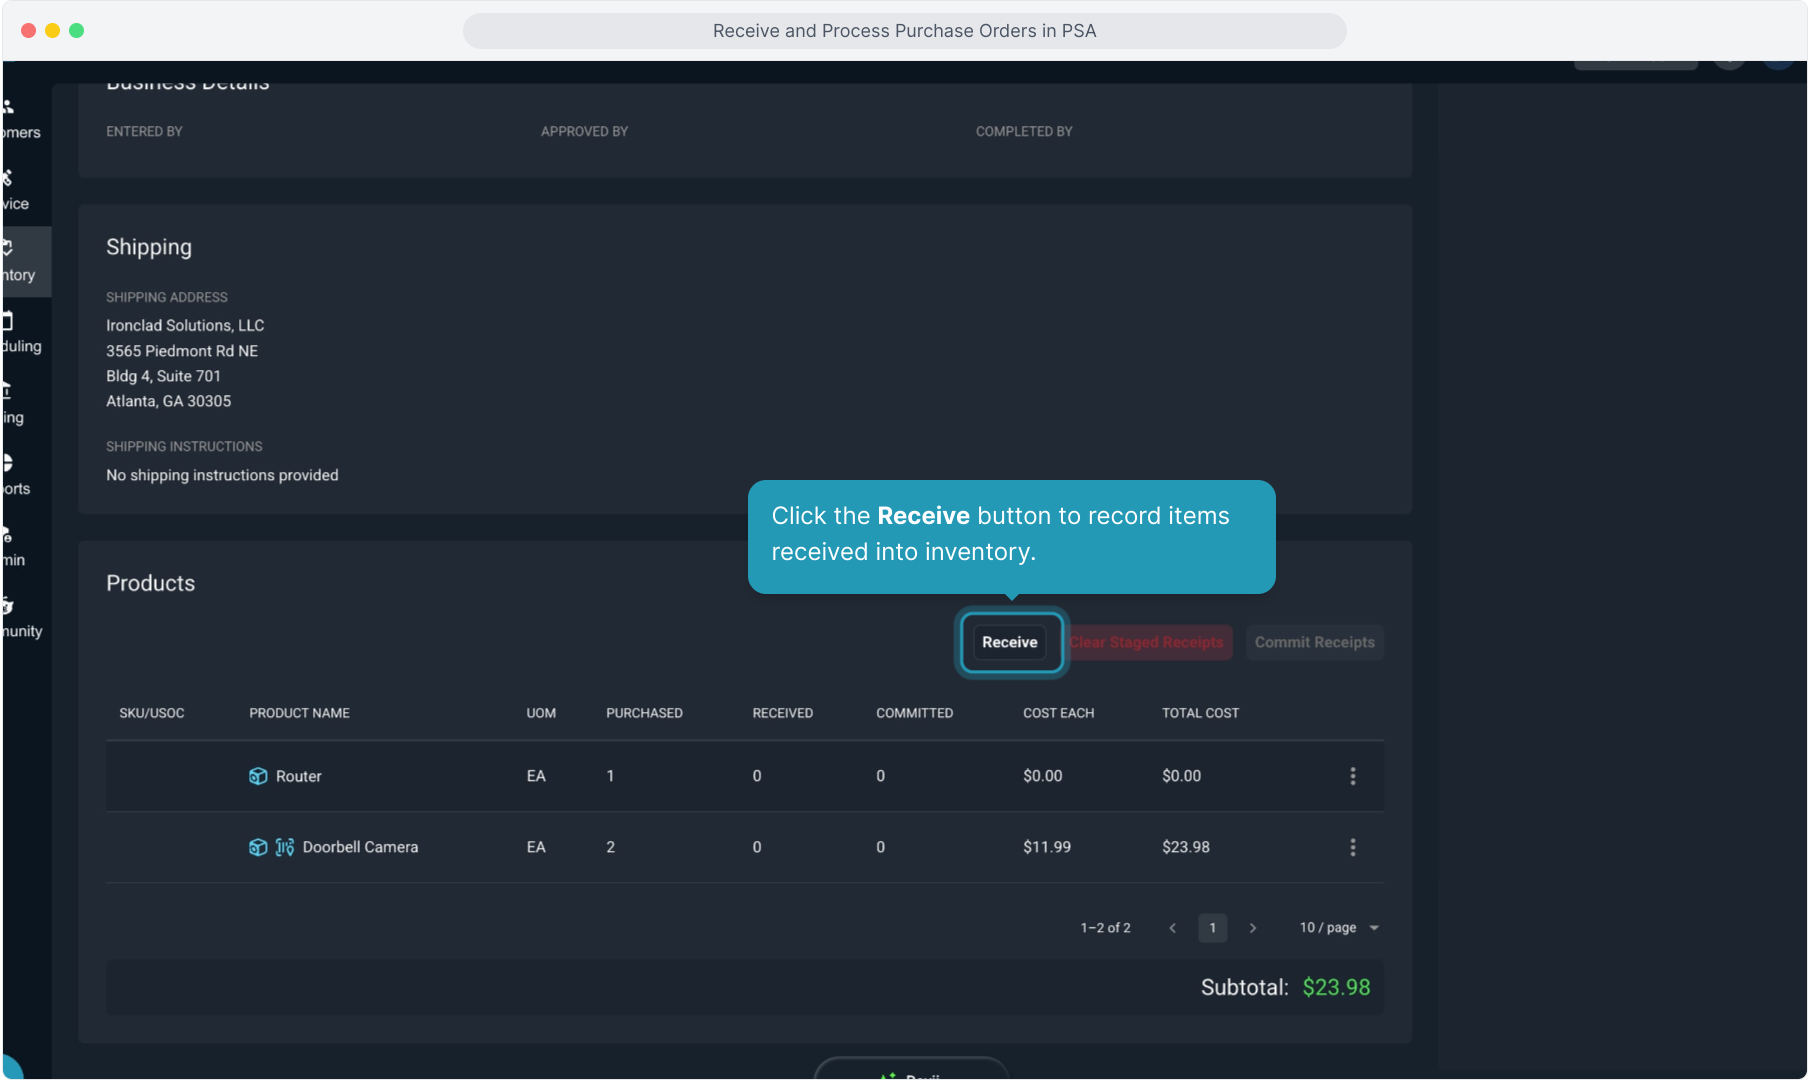
4. Click the Receive button to record items received into inventory.
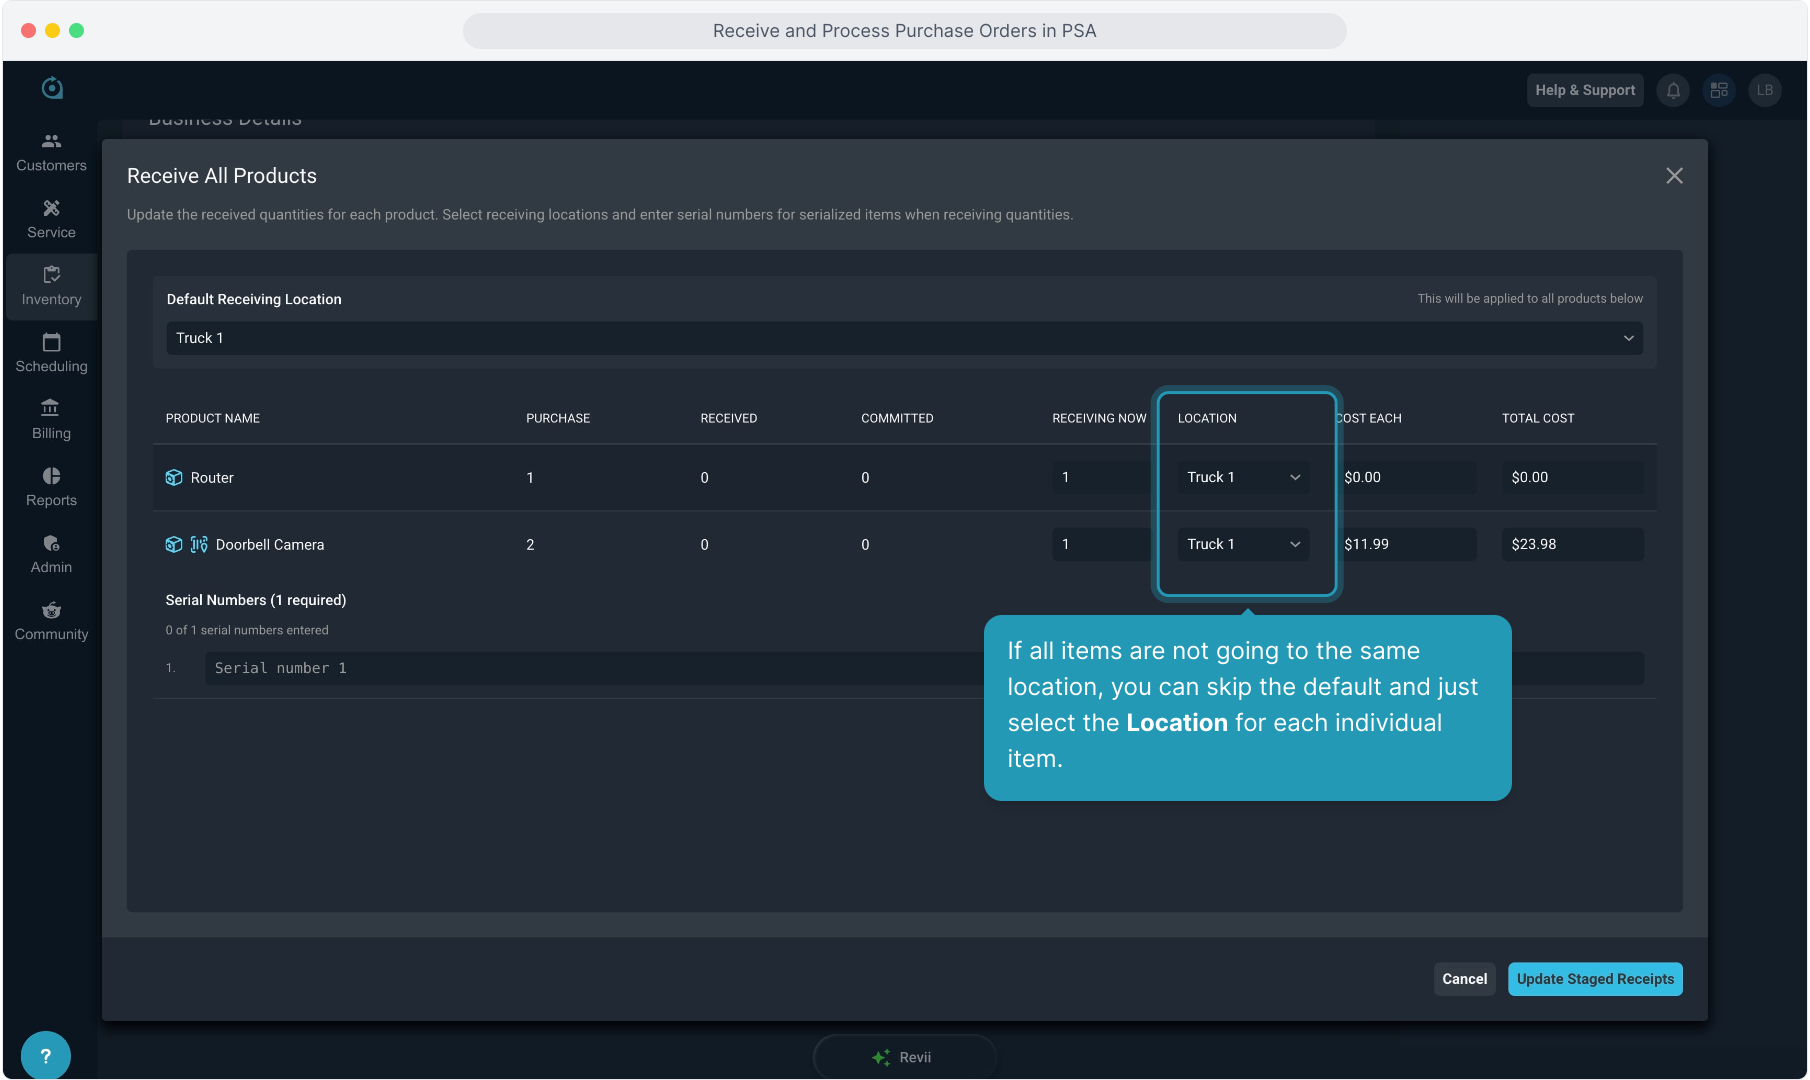
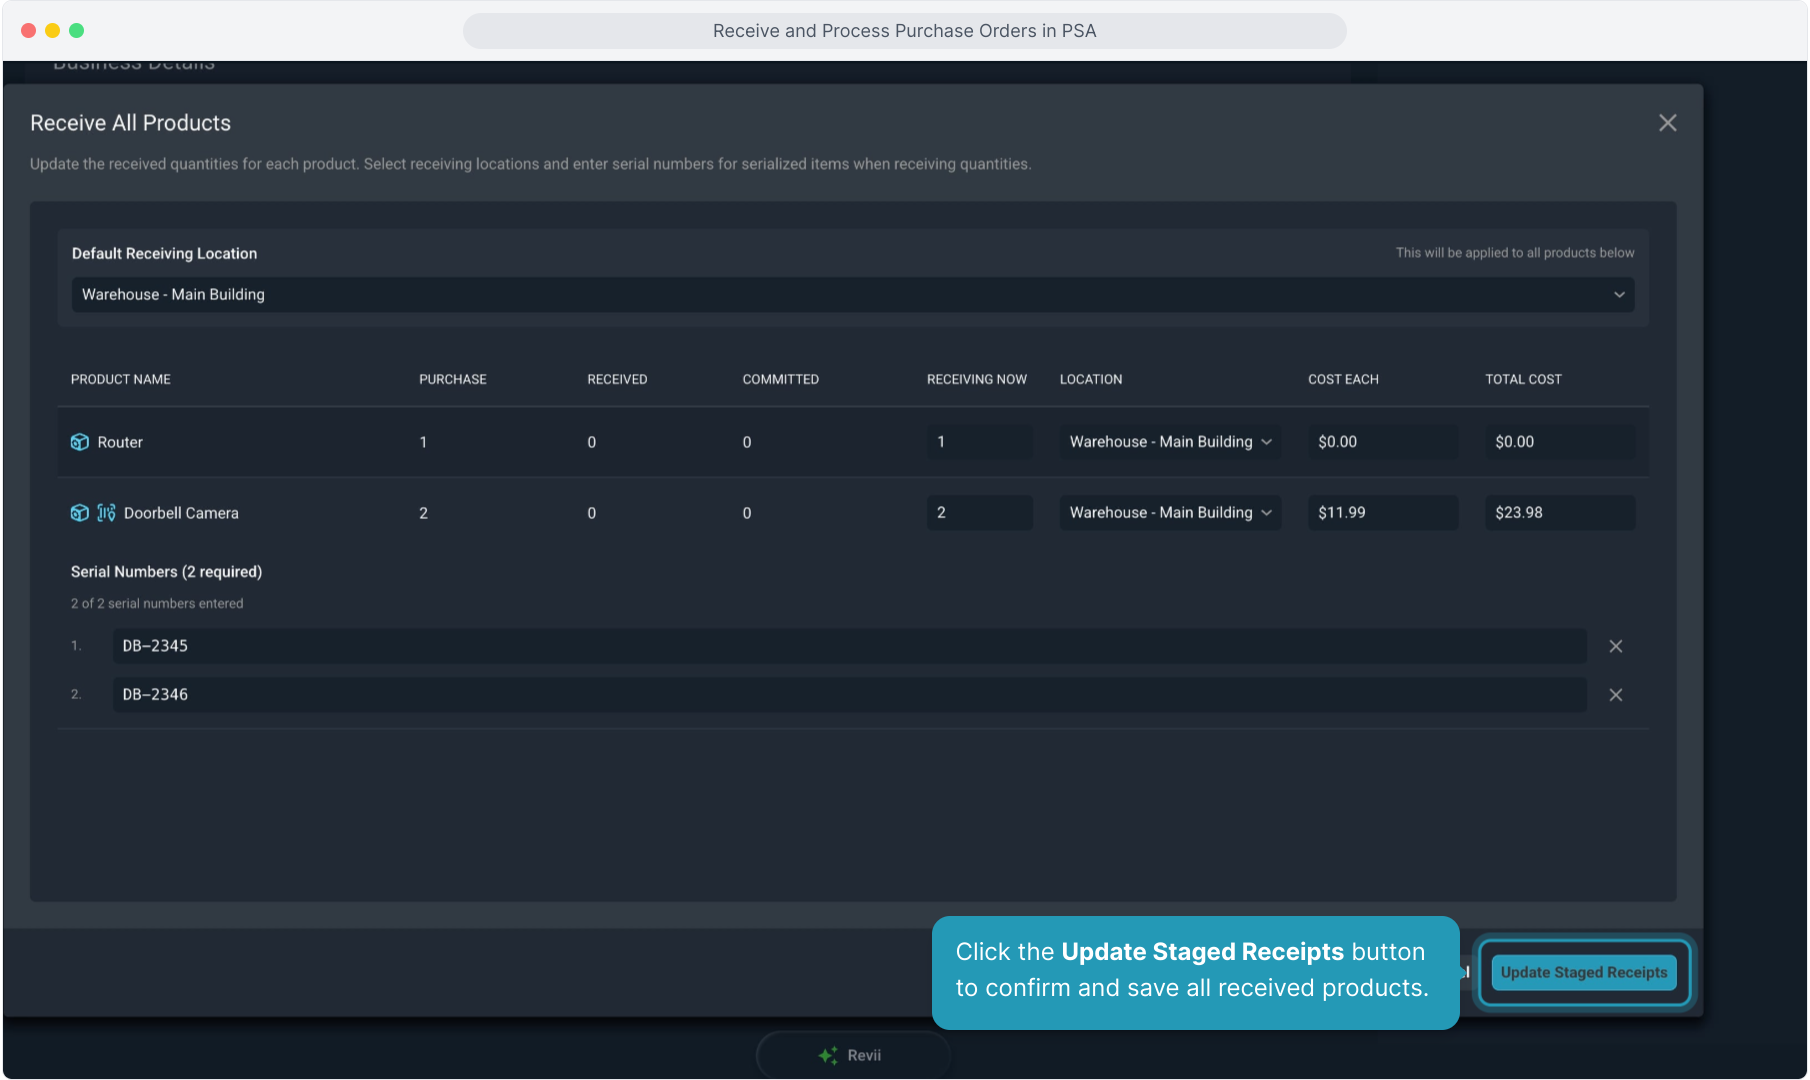
5. If all items will be received into the same inventory location, you can use the Default Receiving Location option at the top so you don't have to select the location on each individual item.

6. If all items are not going to the same location, you can skip the default and just select the Location for each individual item.
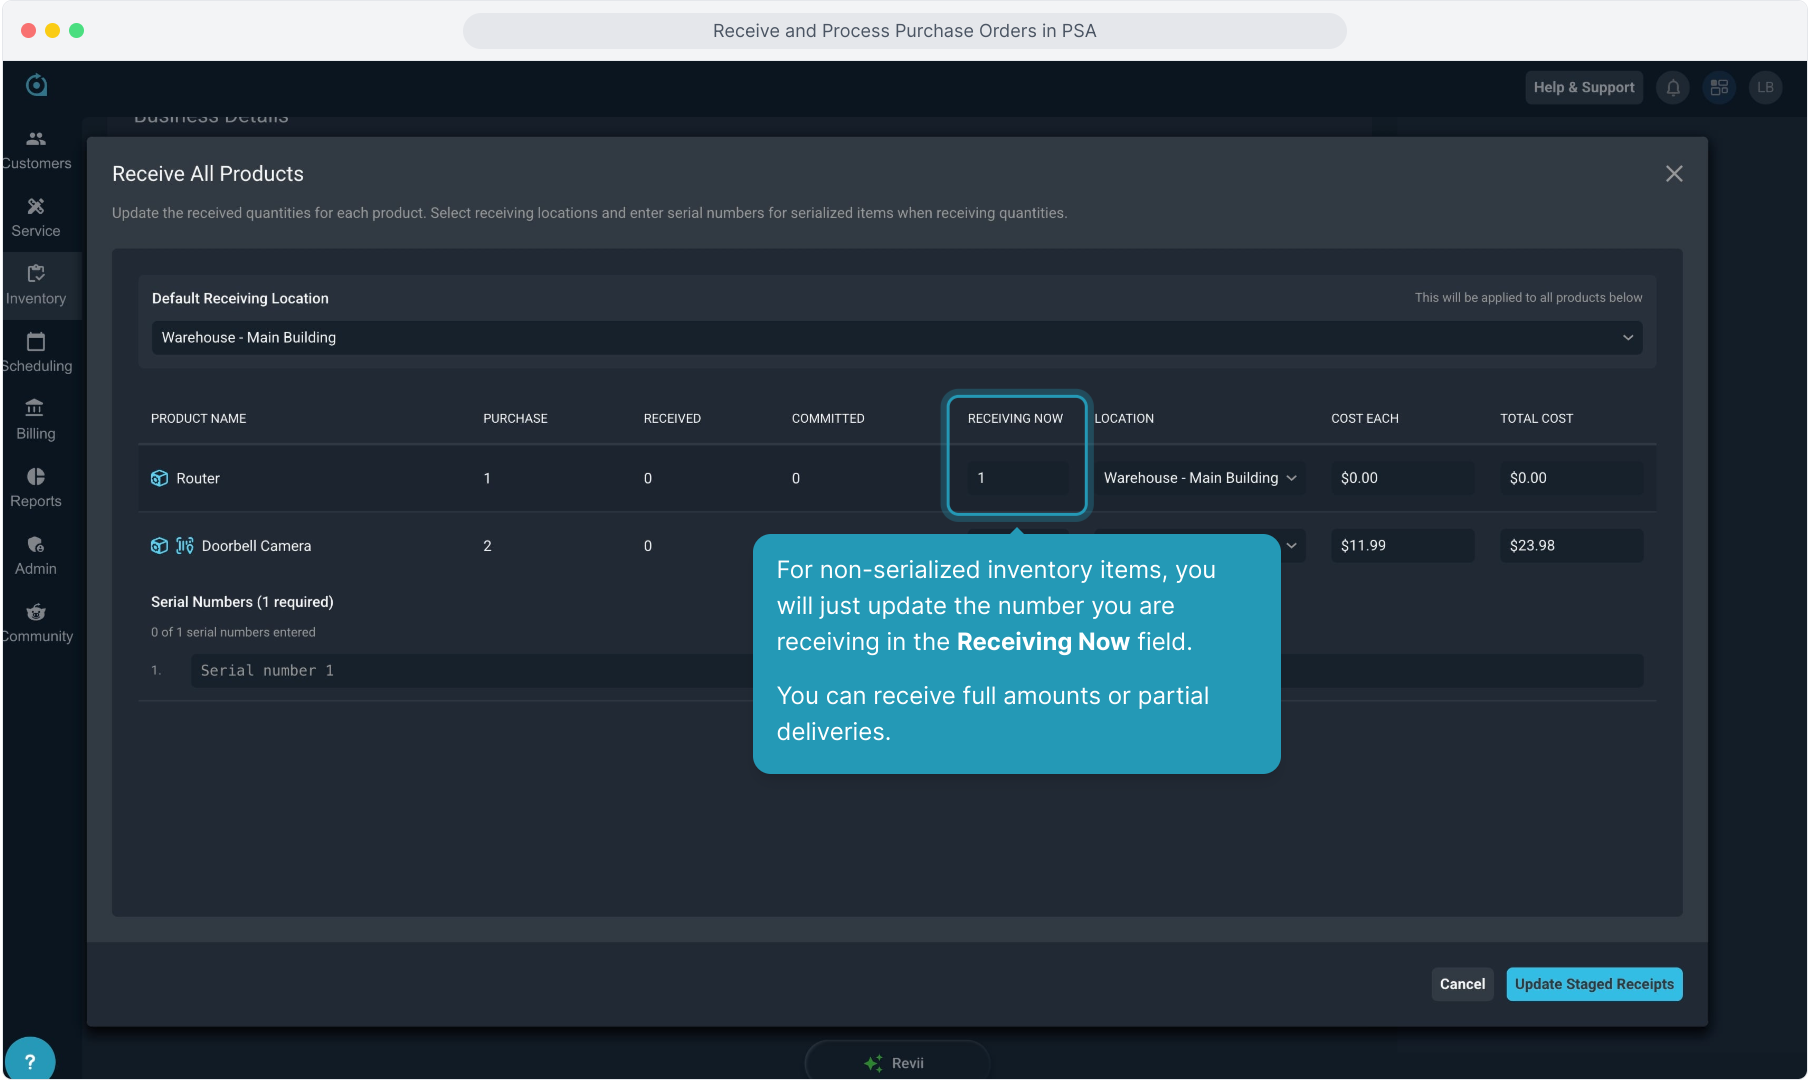
7. For non-serialized inventory items, you will just update the number you are receiving in the Receiving Now field.
You can receive full amounts or partial deliveries.
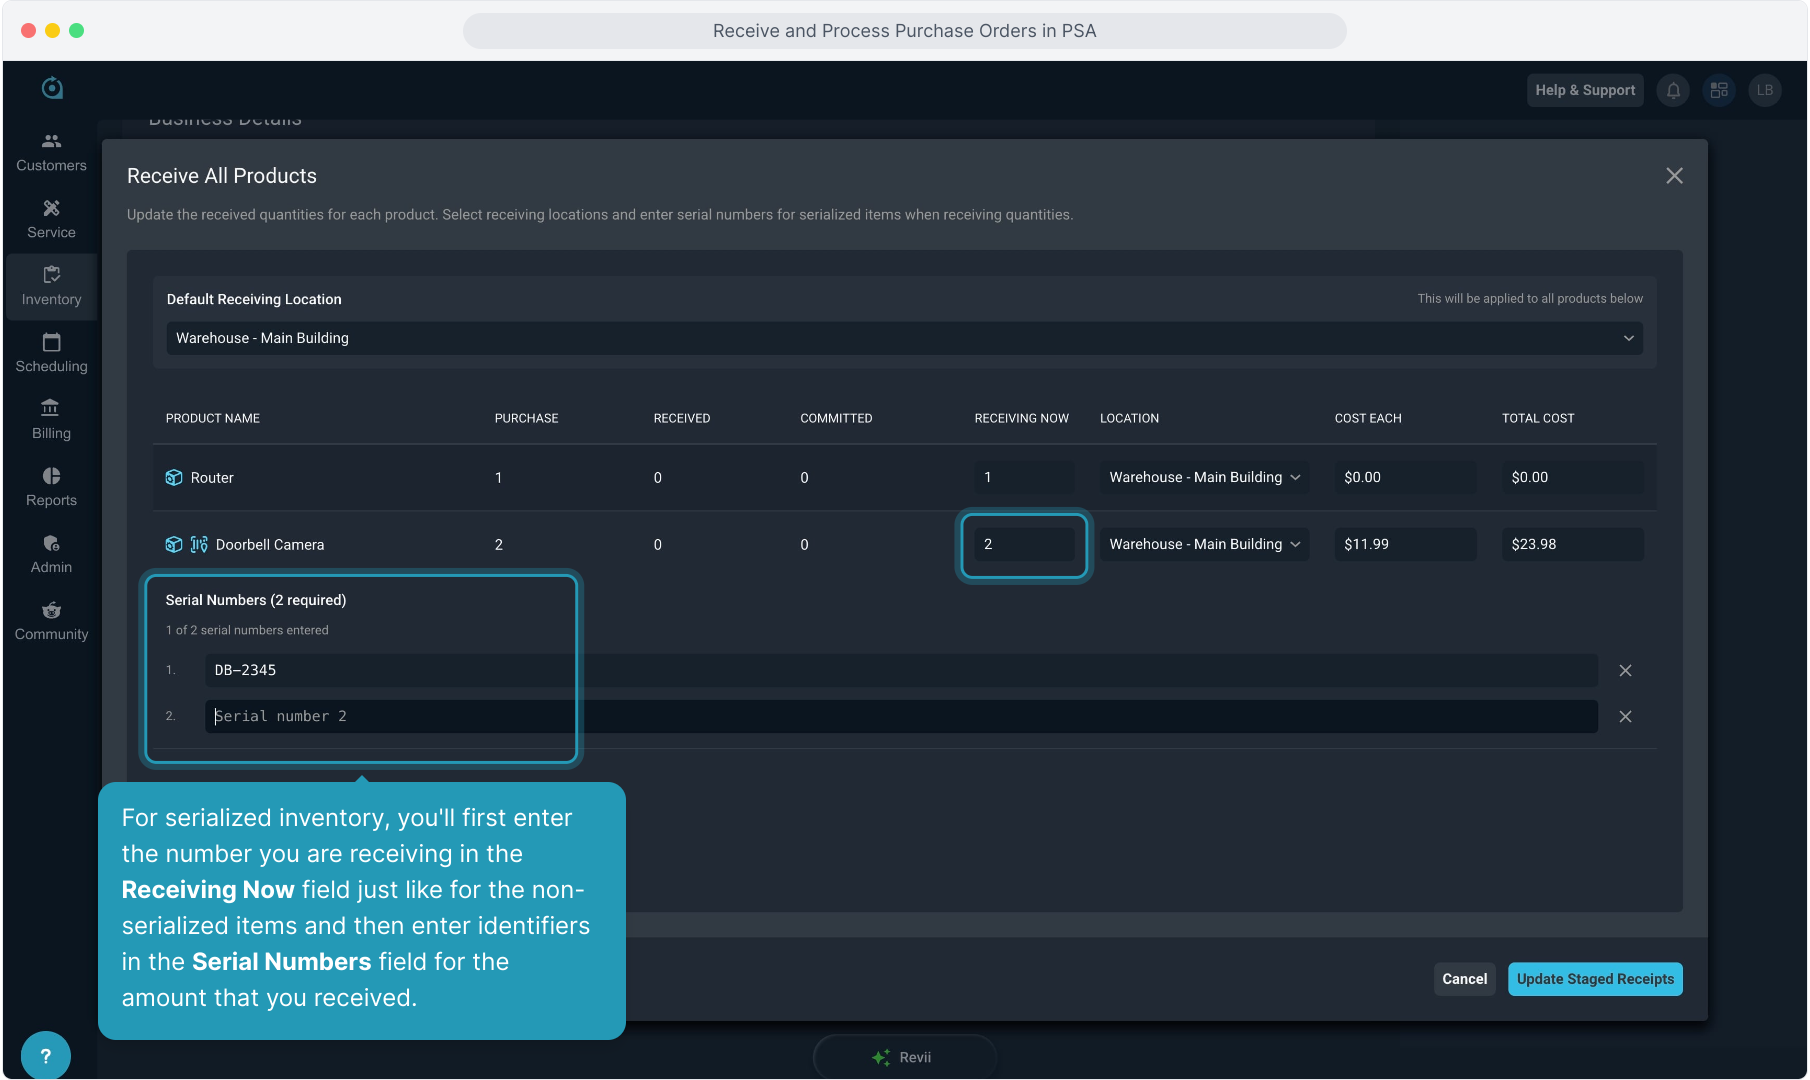
8. For serialized inventory, you'll first enter the number you are receiving in the Receiving Now field just like for the non-serialized items and then enter identifiers in the Serial Numbers field for the amount that you received.
9. Click the Update Staged Receipts button to confirm and save all received products.
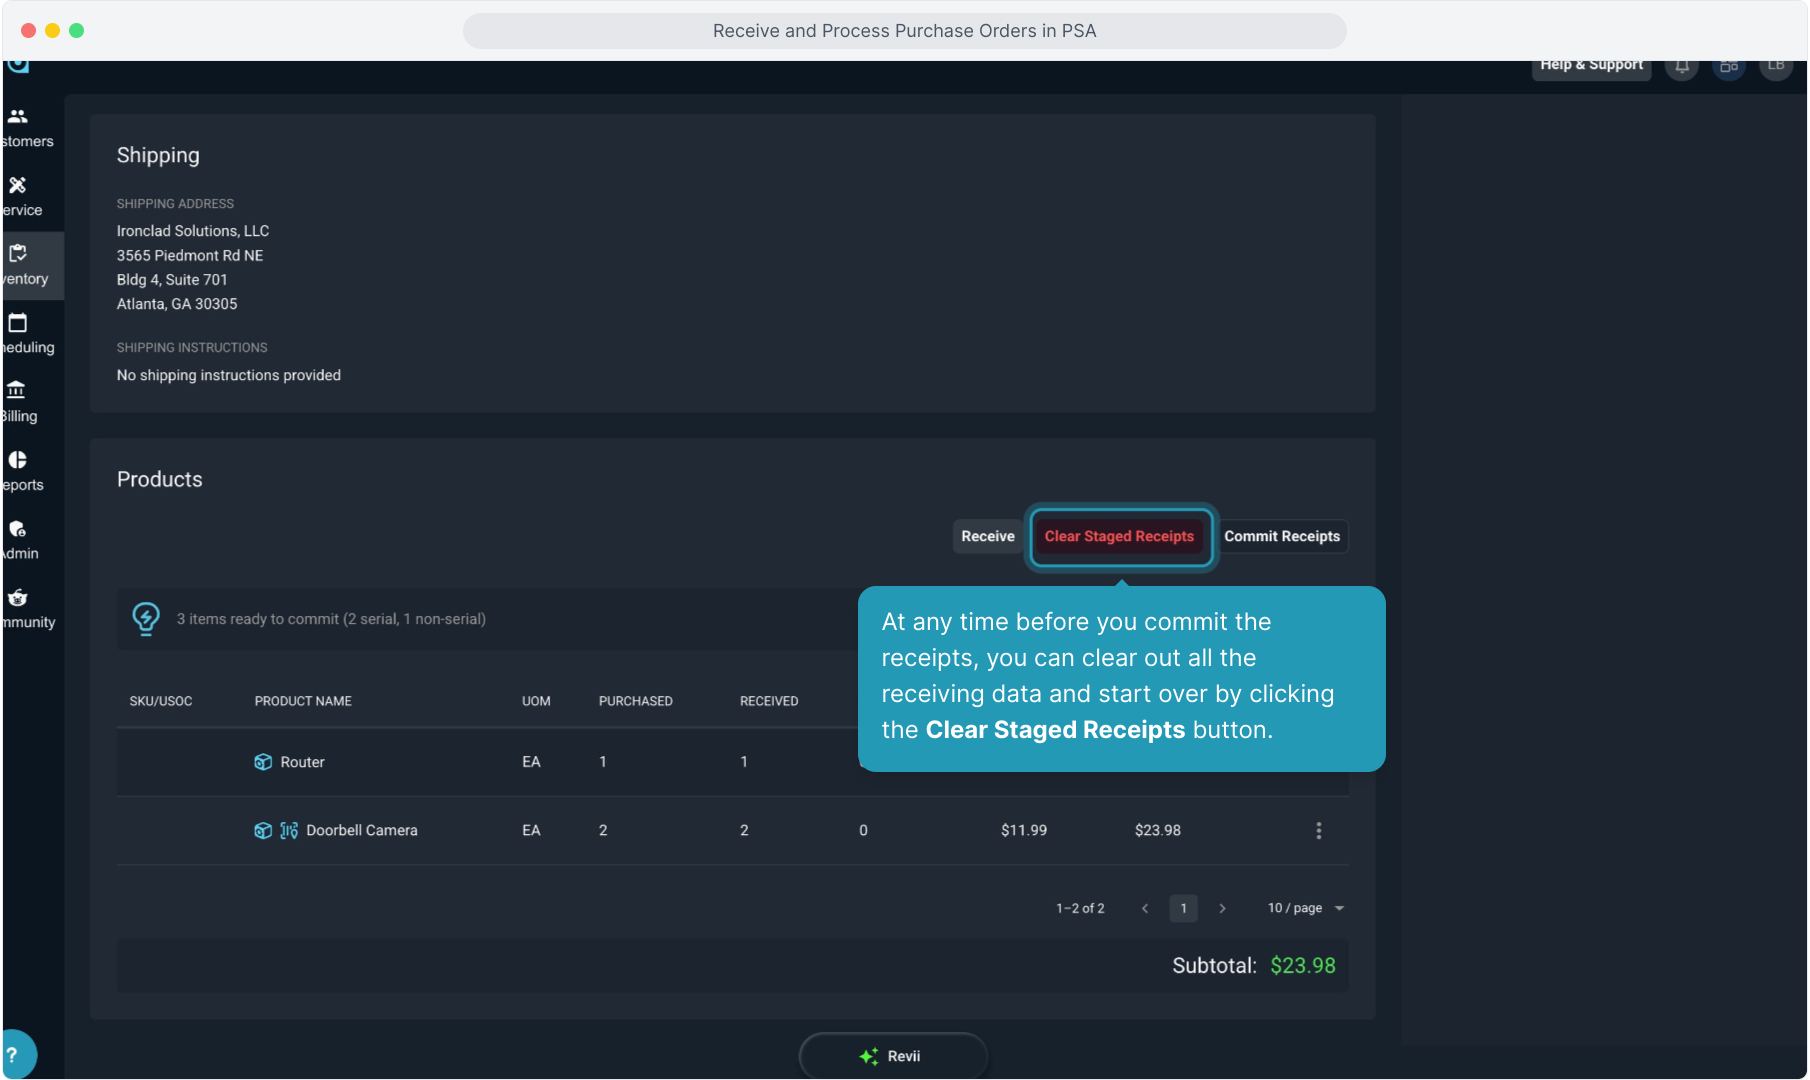
10. At any time before you commit the receipts, you can clear out all the receiving data and start over by clicking the Clear Staged Receipts button.
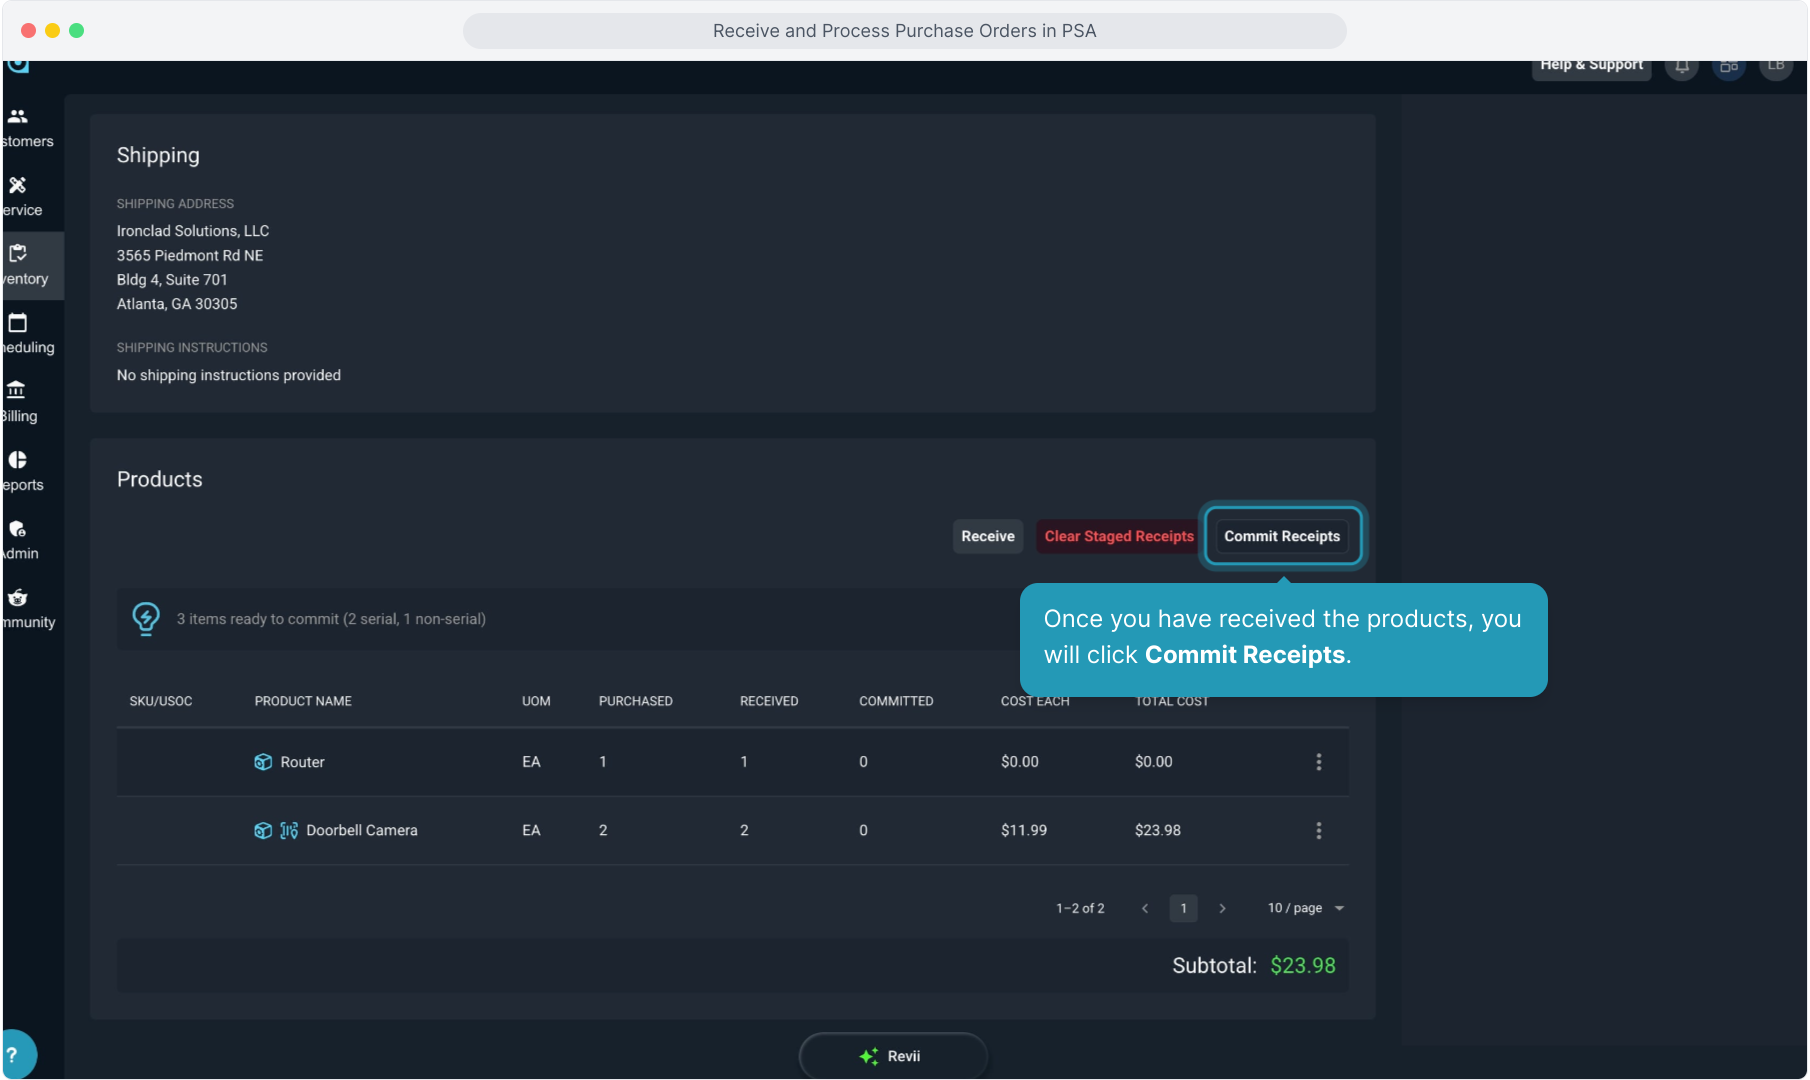
11. Once you have received the products, you will click Commit Receipts.
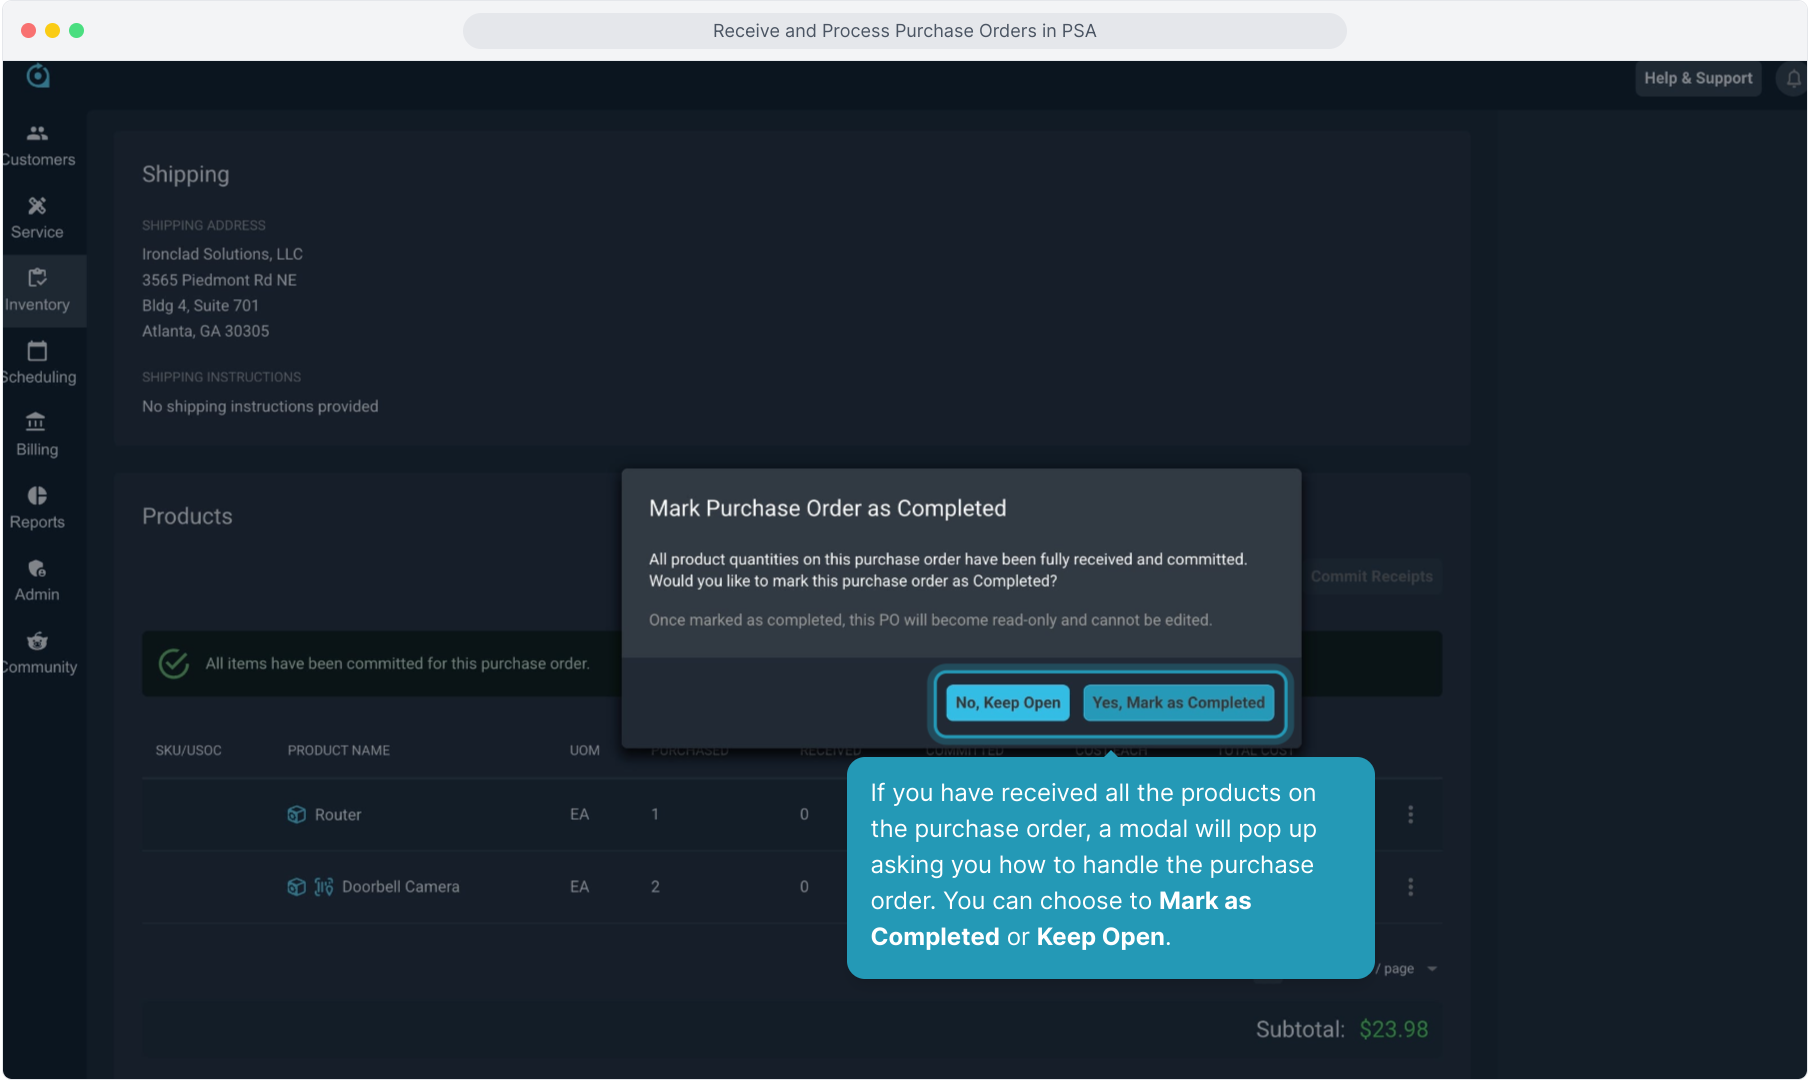
12. If you have received all the products on the purchase order, a modal will pop up asking you how to handle the purchase order. You can choose to Mark as Completed or Keep Open.
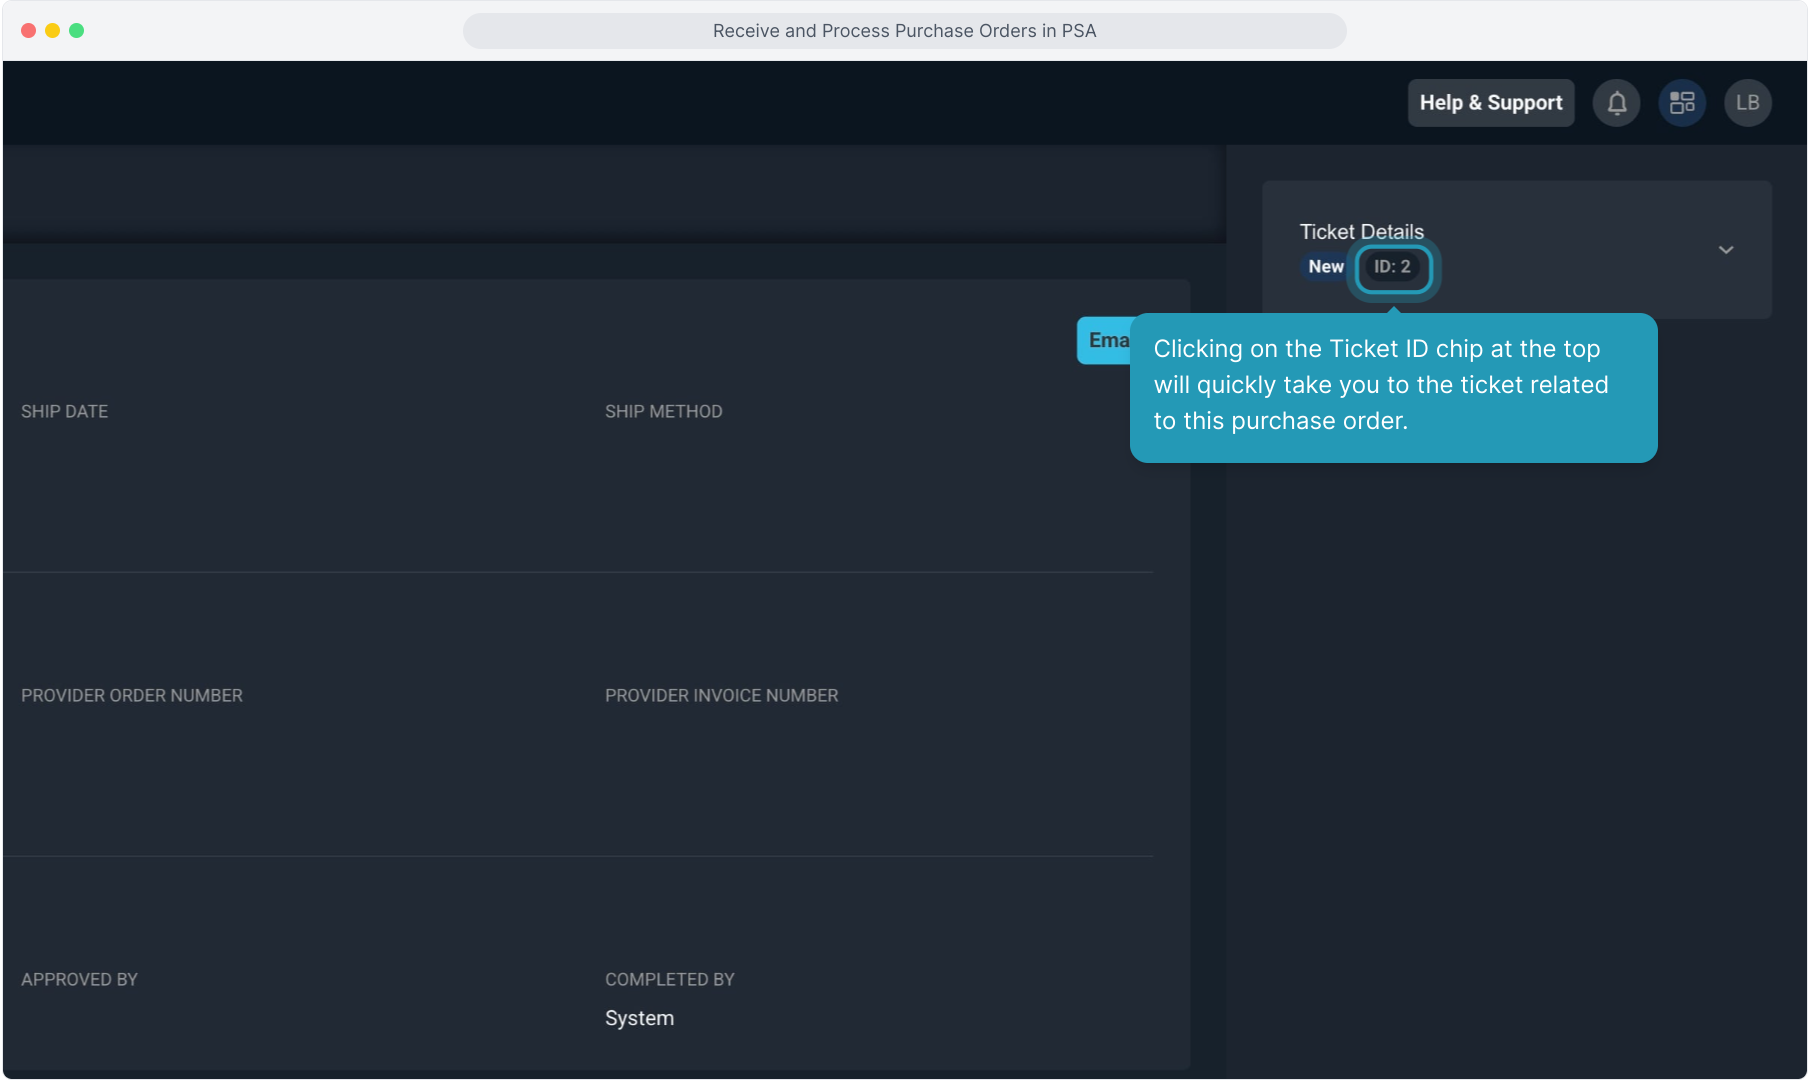
13. Clicking on the Ticket ID chip at the top will quickly take you to the ticket related to this purchase order.
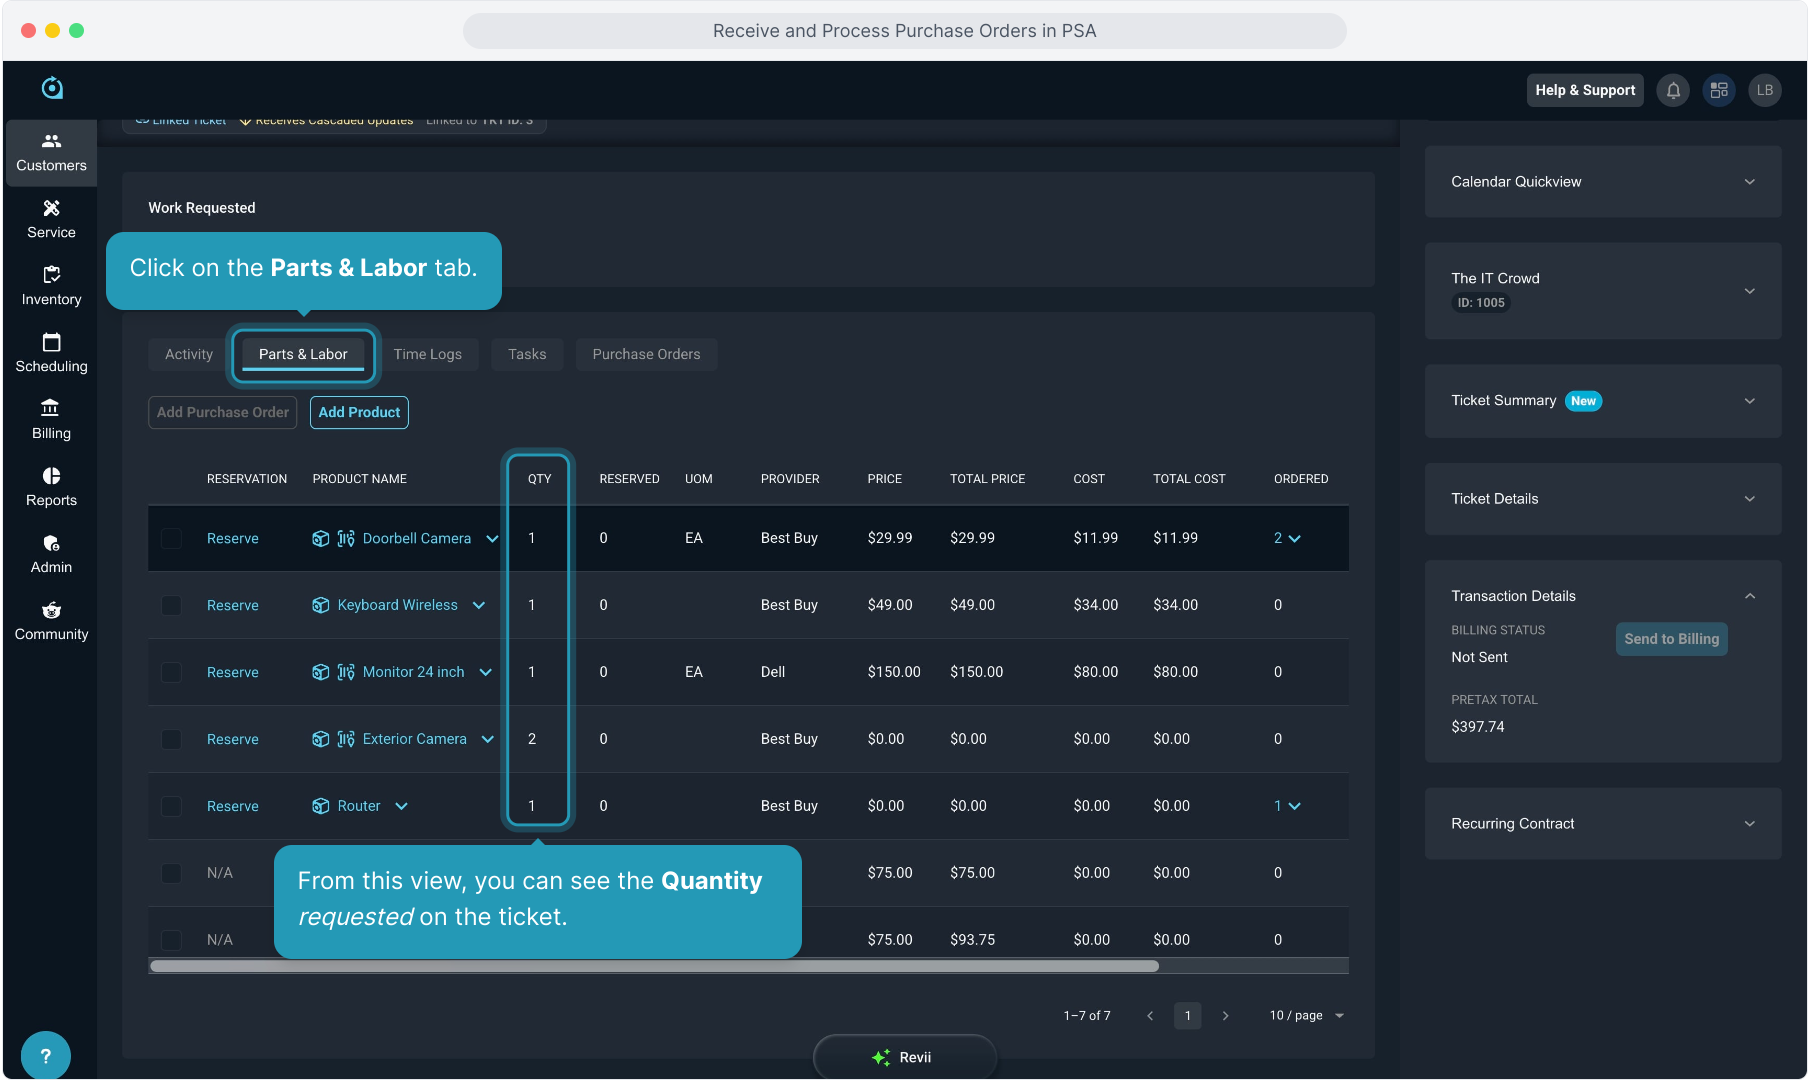
14. From this view, you can see the Quantity requested on the ticket.
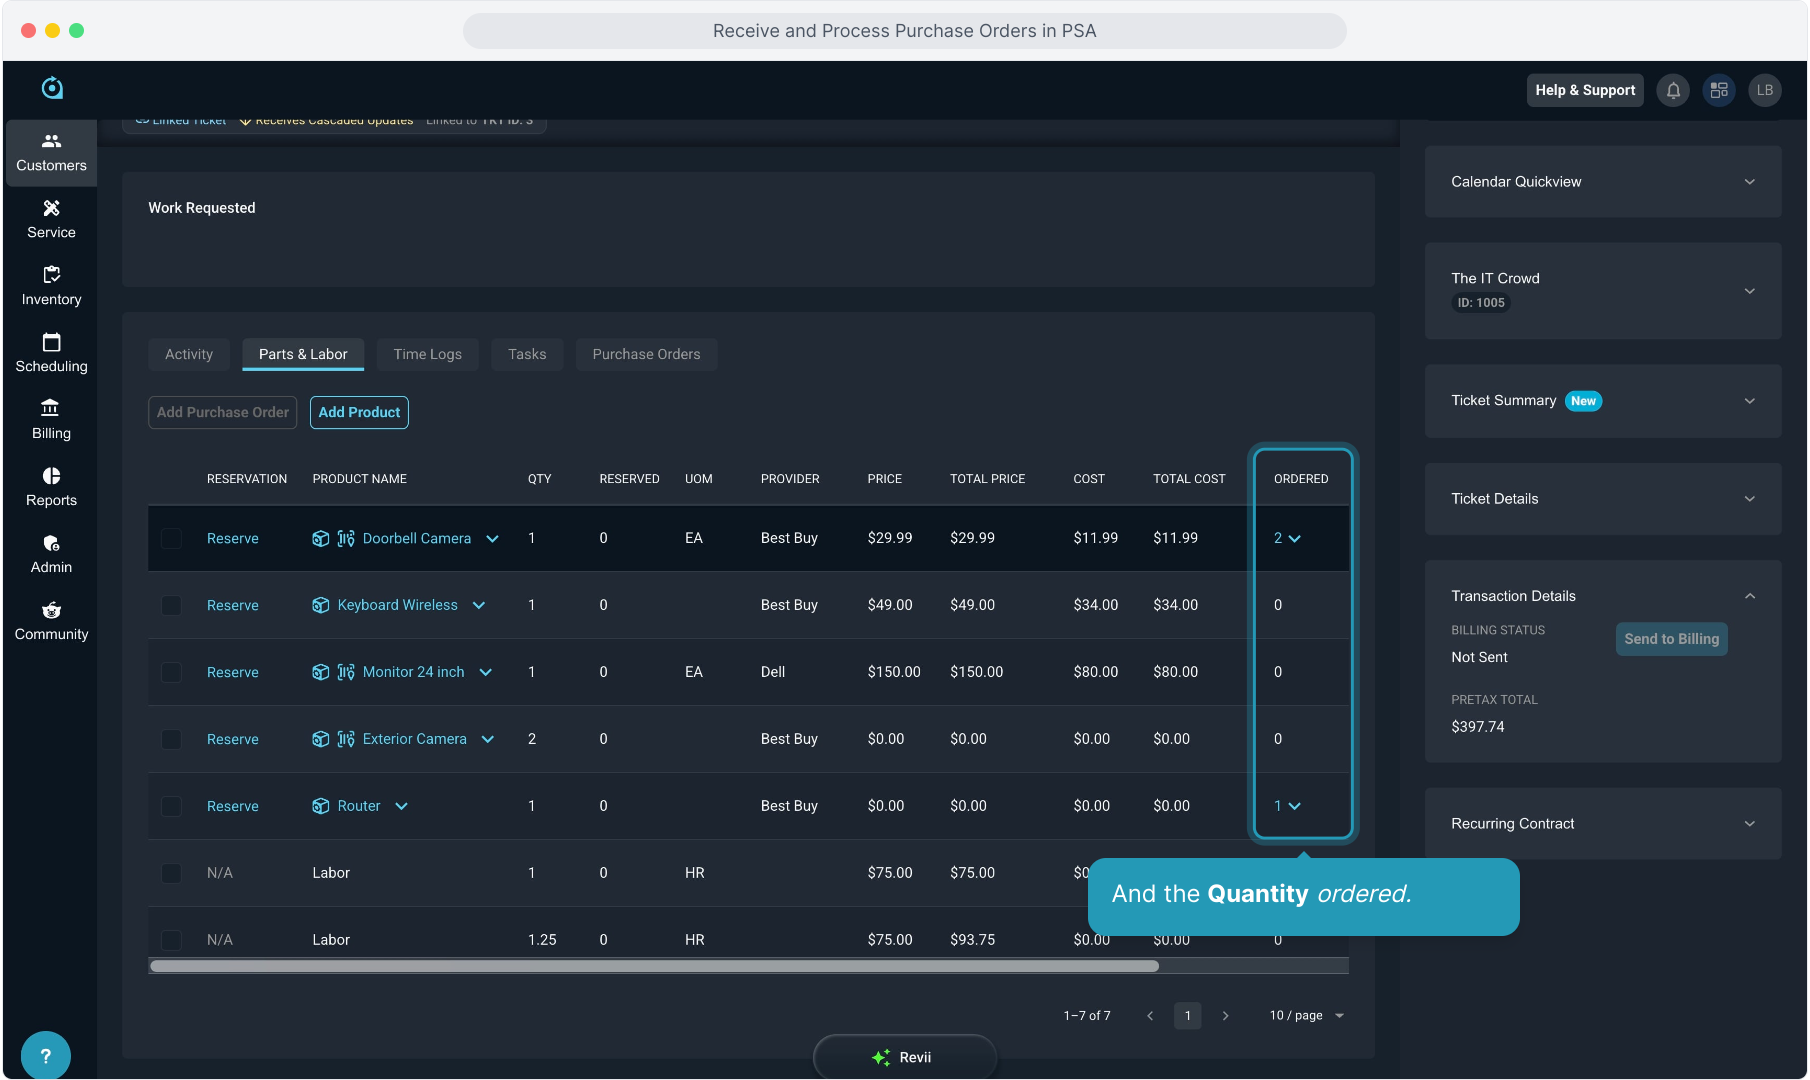
15. And the Quantity ordered.
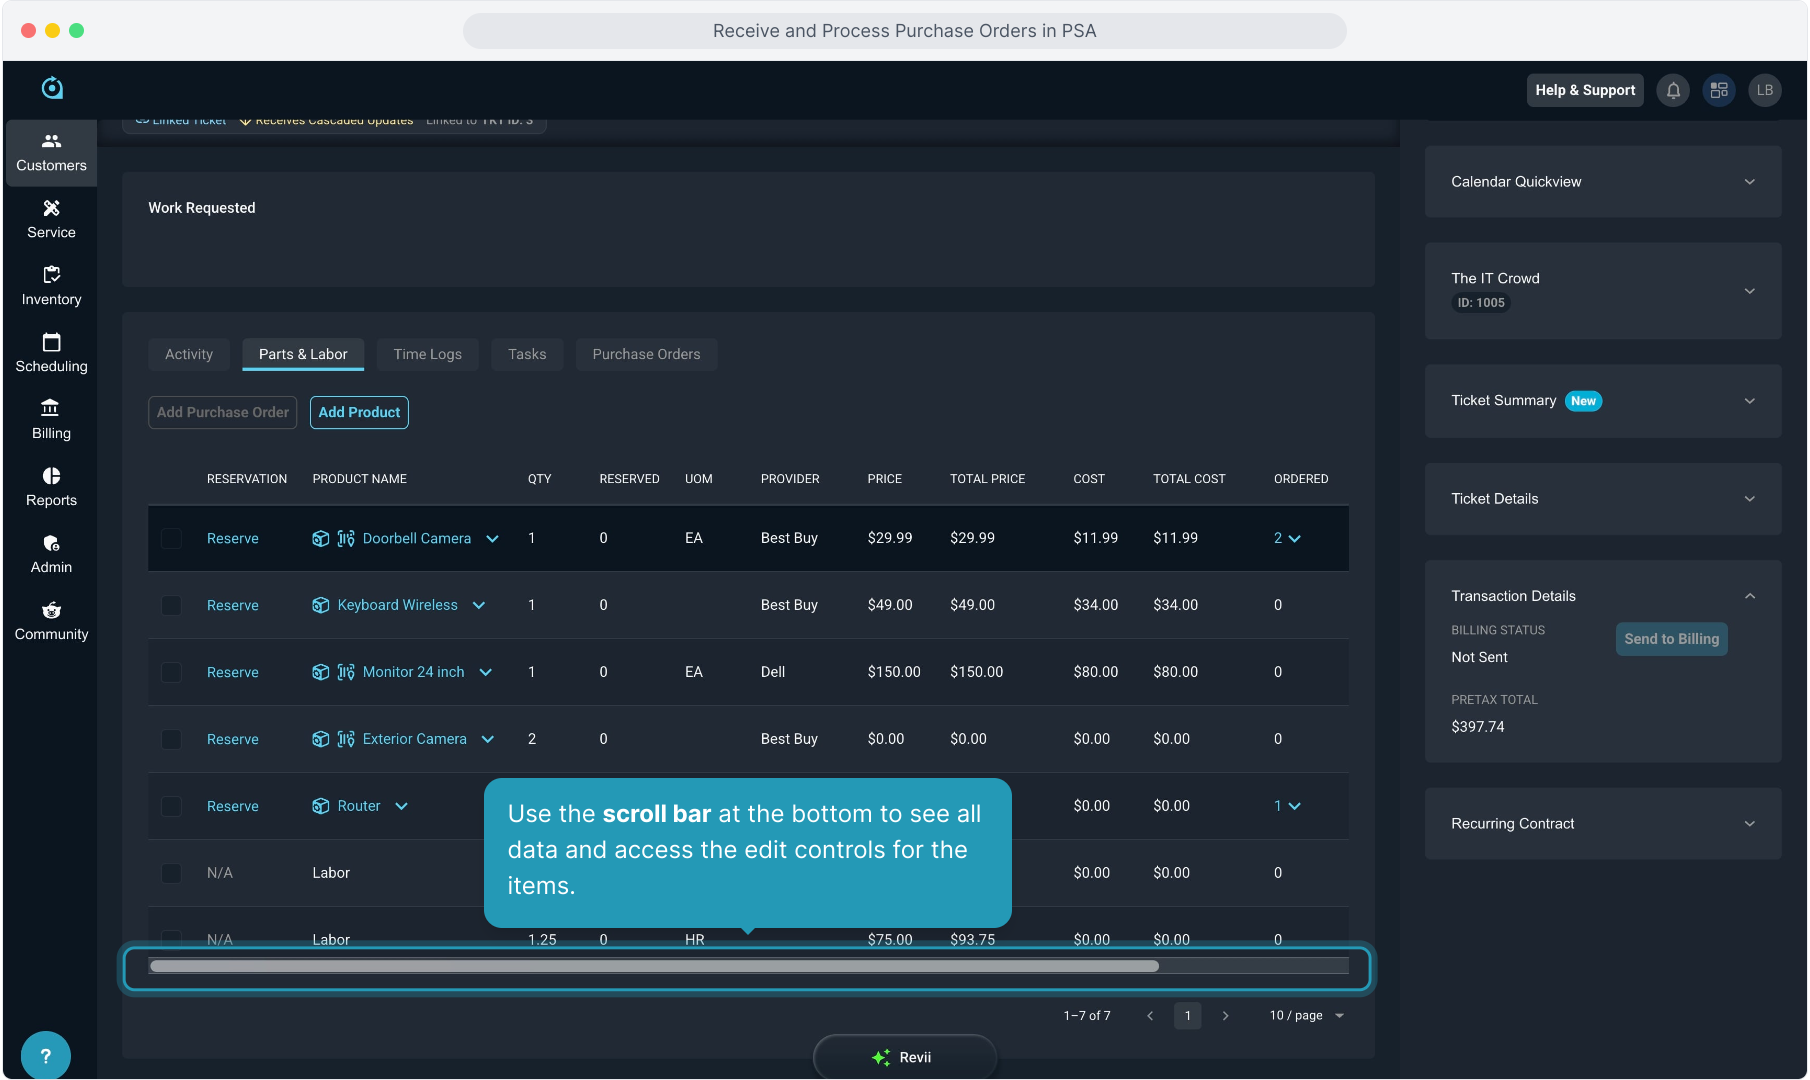
16. Use the scroll bar at the bottom to see all data and access the edit controls for the items.
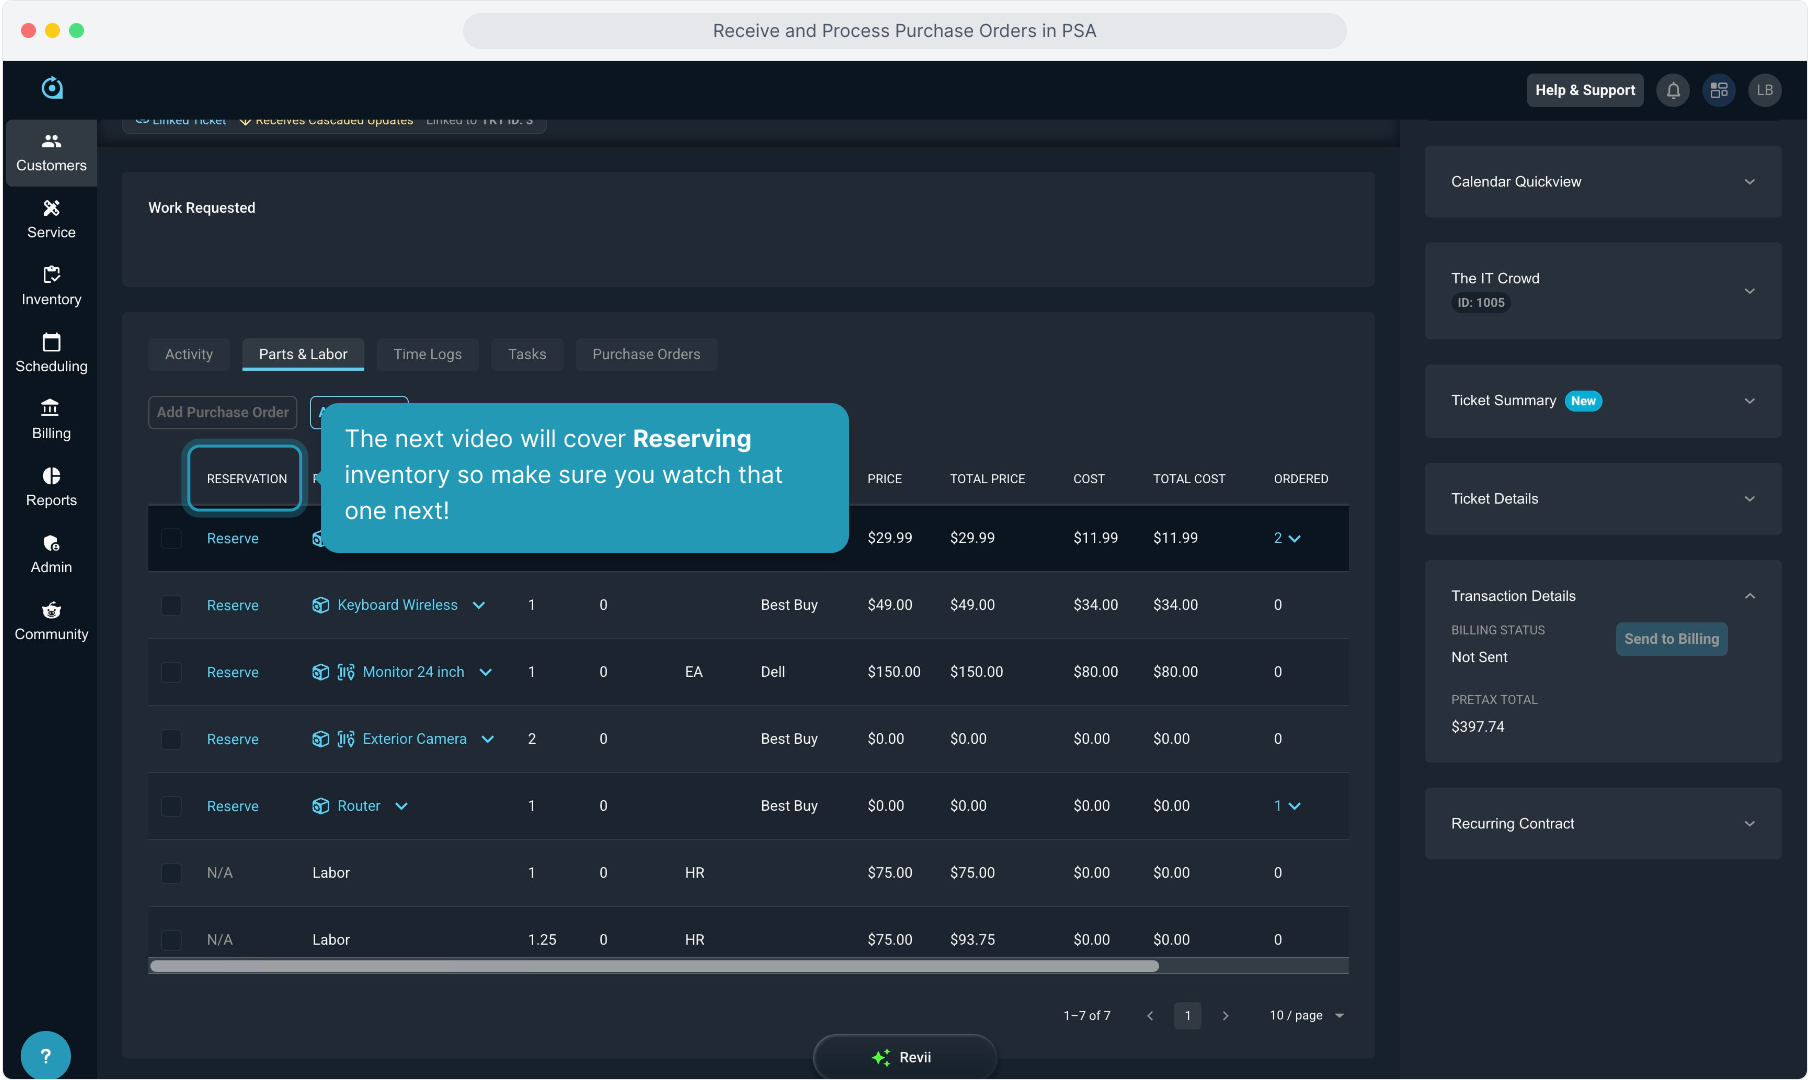
17. The next video will cover Reserving inventory so make sure you watch that one next!