
Project Management List View
The Project Management list view displays all projects in your system, regardless of Customer or Status. A 'project' in Rev.io represents a collection of related work, such as tasks, tickets, and phases, managed together to achieve a defined outcome. The Project Management list view allows you to create, view, and manage projects in one place, making it easy to track progress, coordinate work, and maintain visibility across active and completed initiatives.
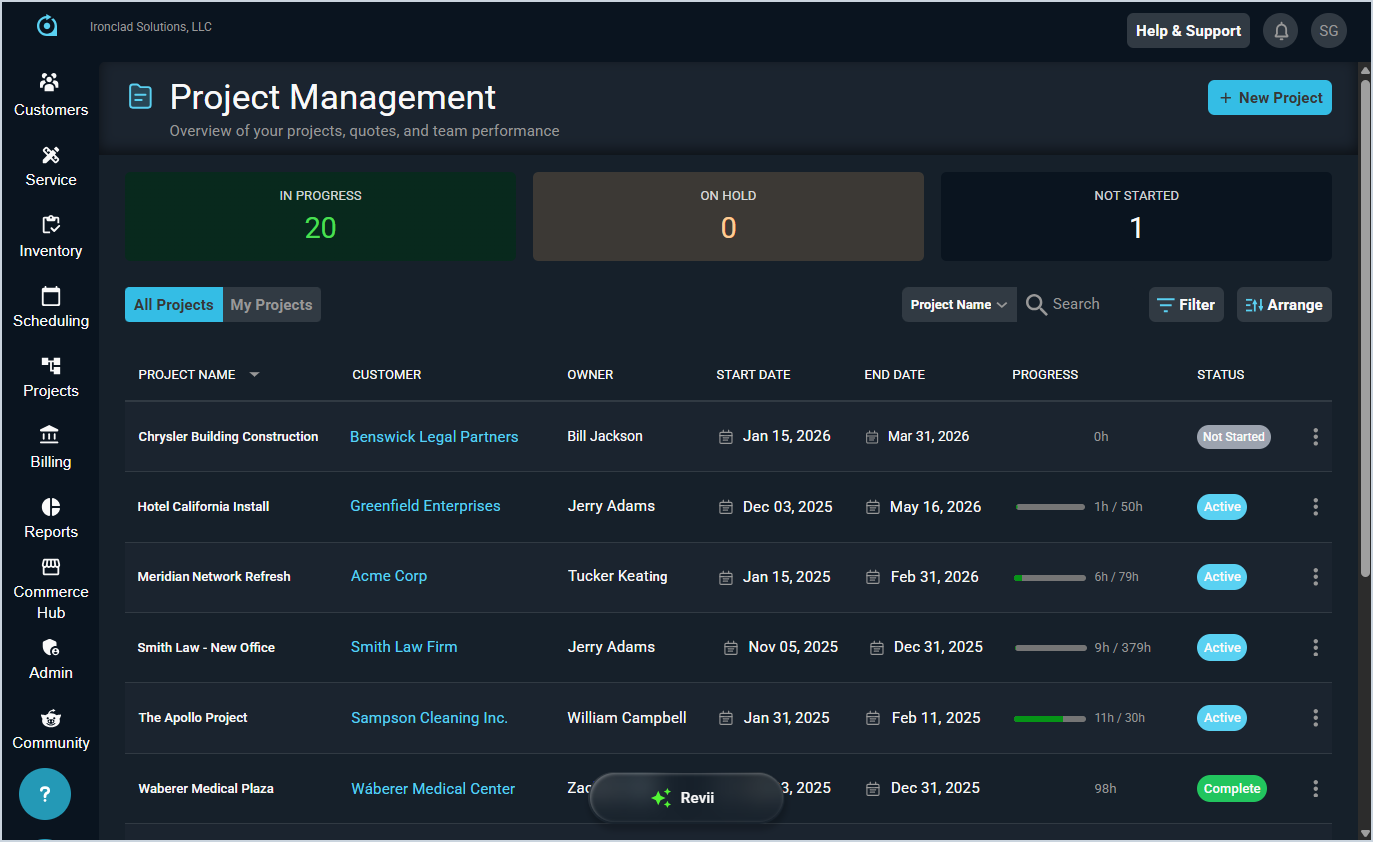
Each field on the Project Management screen is defined below.
| No. | Label | Definition |
| 1 | Project Name | Name of the project. |
| 2 | Customer | Customer account for which the project was created. |
| 3 | Owner | Name of the user who owns the project in your Rev.io instance. |
| 4 | Start Date | Start date for the project. |
| 5 | End Date | End date for the project. |
| 6 | Progress | Number of hours completed for the project compared to the number of Budget Hours entered for the project. |
| 7 | Status | Status of the project. Status options include Active, Complete, Not Started, In Progress, At Risk, On Hold, and Cancelled. |
These actions are available on the Project Management list view.
- View the number of projects In Progress, On Hold, or Not Started using the tiles at the top of the screen.
- Change the list view to display only projects where you're the Owner by clicking the My Projects tab above the grid.
- Add a new project by clicking the New Project button at the top of the screen. See the Add/Edit Projects article for more information.
- Search the projects displayed on this view by selecting a column from the dropdown above the grid and entering text in the Search field. The list view updates to display records matching your search in the column you selected.
- Filter the projects displayed on this view by clicking the Filter button above the grid and checking the Include Archived option. The list view hides projects that have been archived by default so you can focus on products currently in use. Checking the Include Archived option shows all projects in the list view, regardless of their archival status.
- Customize which columns display in the list view and the order in which they display by clicking the Arrange button and making the desired changes. See the Arrange Columns article for more information.
- Sort the results in the table by clicking the column label in the table header.
- View more details for the project by clicking the row or by clicking the ellipsis at the end of the row and selecting View Details from the menu. See the View Project: Details article for more information.
- Edit the project by clicking the ellipsis at the end of the row and selecting Edit Project from the menu. See the Add/Edit Projects article for more information.
- Duplicate a project by clicking the ellipsis at the end of the row and selecting Duplicate Project from the menu options.