
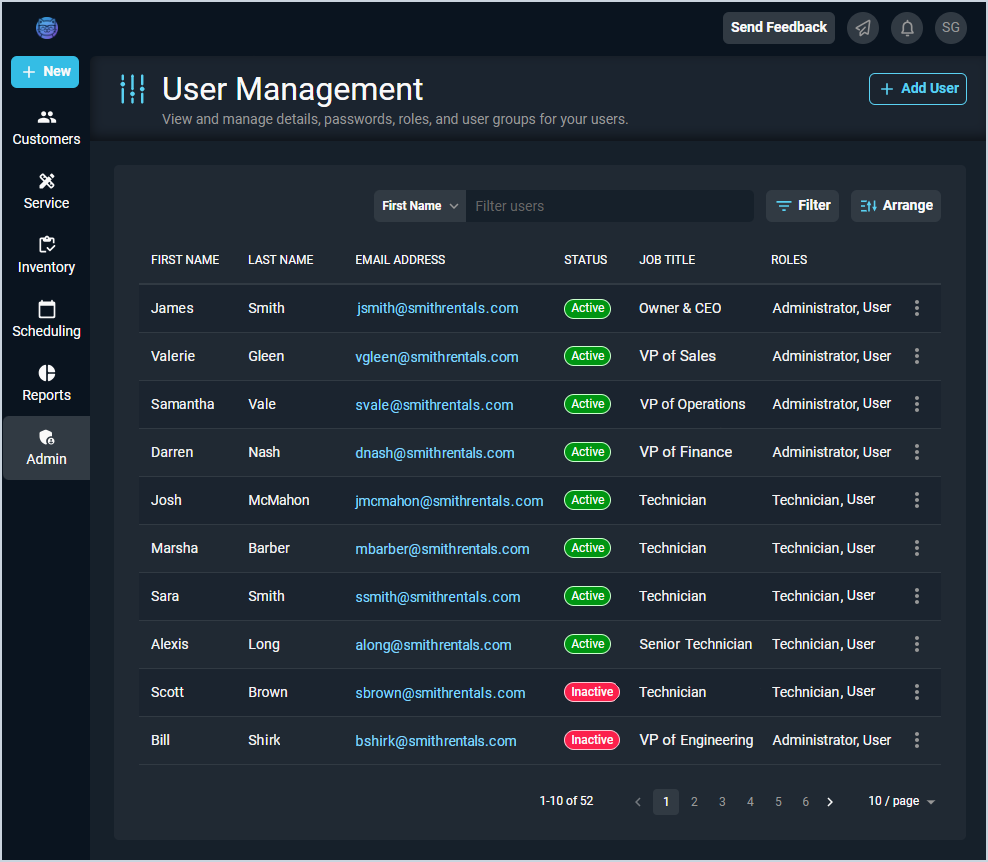
User Management List View
The User Management screen displays a list of users in your database and allows you to filter for a specific user. From this list view, you can manage details for the users displayed. A 'user' in Rev.io is anyone who accesses the Rev.io web environment, including reps and techs.
| Users can be created in either the legacy Billing application or in Rev.io and will sync across both systems. However, users from legacy Billing will not display in the User Management list view until they log into Rev.io for the first time. |
Each field on the User Management screen is defined below.
| Fields shown in the list view can vary based on the data entered on record creation. If a field is left blank or a column is hidden using the Arrange columns option, it will not appear in the list view. |
| No. | Label | Definition |
| 1 | First Name | First name of the user. |
| 2 | Last Name | Last name of the user. |
| 3 | Email Address | Email address for the user. |
| 4 | Status | Status of the user. Status options include Active and Inactive. |
| 5 | Job Title | Job title for the user. |
| 6 | Roles | Roles assigned to the user. |
| 7 | Hide Inactive Users | Click to hide users with an Inactive Status. |
These actions are available on the User Management screen.
- Add a new user by clicking the Add User button at the top of the screen. See the Add/Edit Users article for more information.
- Search the users displayed on this view by selecting a column from the dropdown above the grid and entering text in the search field. The list view updates to display records matching your search in the column you selected.
- Filter the users displayed on this view by clicking the Filter button above the grid and selecting the Hide Inactive Users option. This option hides users with an Inactive Status so that the list is easier to manage.
- Customize which columns display in the list view and the order in which they display by clicking the Arrange button and making the desired changes. See the Arrange Columns article for more information.
- Sort the results in the table by clicking the column label in the table header.
- View more details for the user by clicking the row or the ellipsis at the end of the row and selecting Info from the menu. See the View User Details article for more information.
- Edit the user by clicking the ellipsis at the end of the row and selecting Edit from the menu. See the Add/Edit Users article for more information.
- Change the status of the user by clicking the ellipsis at the end of the row and selecting Set to Inactive or Set to Active from the menu. See the Making Users Active/Inactive article for more information.