NOTE: An authorized user account is required to run this integration. To support better security and audit visibility, we recommend creating a dedicated "service account" user. When configuring this integration, sign in using the service account rather than your personal user account to ensure that audit logs reflect the service account running the integration instead of the user who originally installed it.
Complete the steps below to configure the Acronis integration.
NOTE: The Acronis integration is a billed service. Rev.io charges based on the customers, workloads, and offering items you provision in Acronis through this integration. You must work with the Rev.io sales team to establish your commercial agreement before configuring the integration.
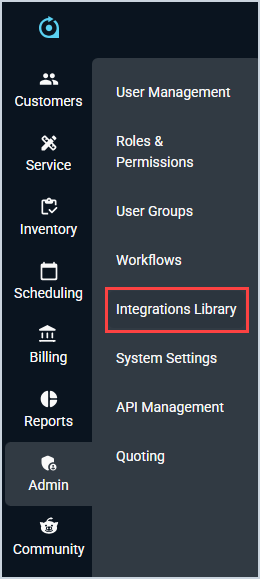
Click Admin on the sidebar menu and select Integrations Library.
Click the Marketplace tab.
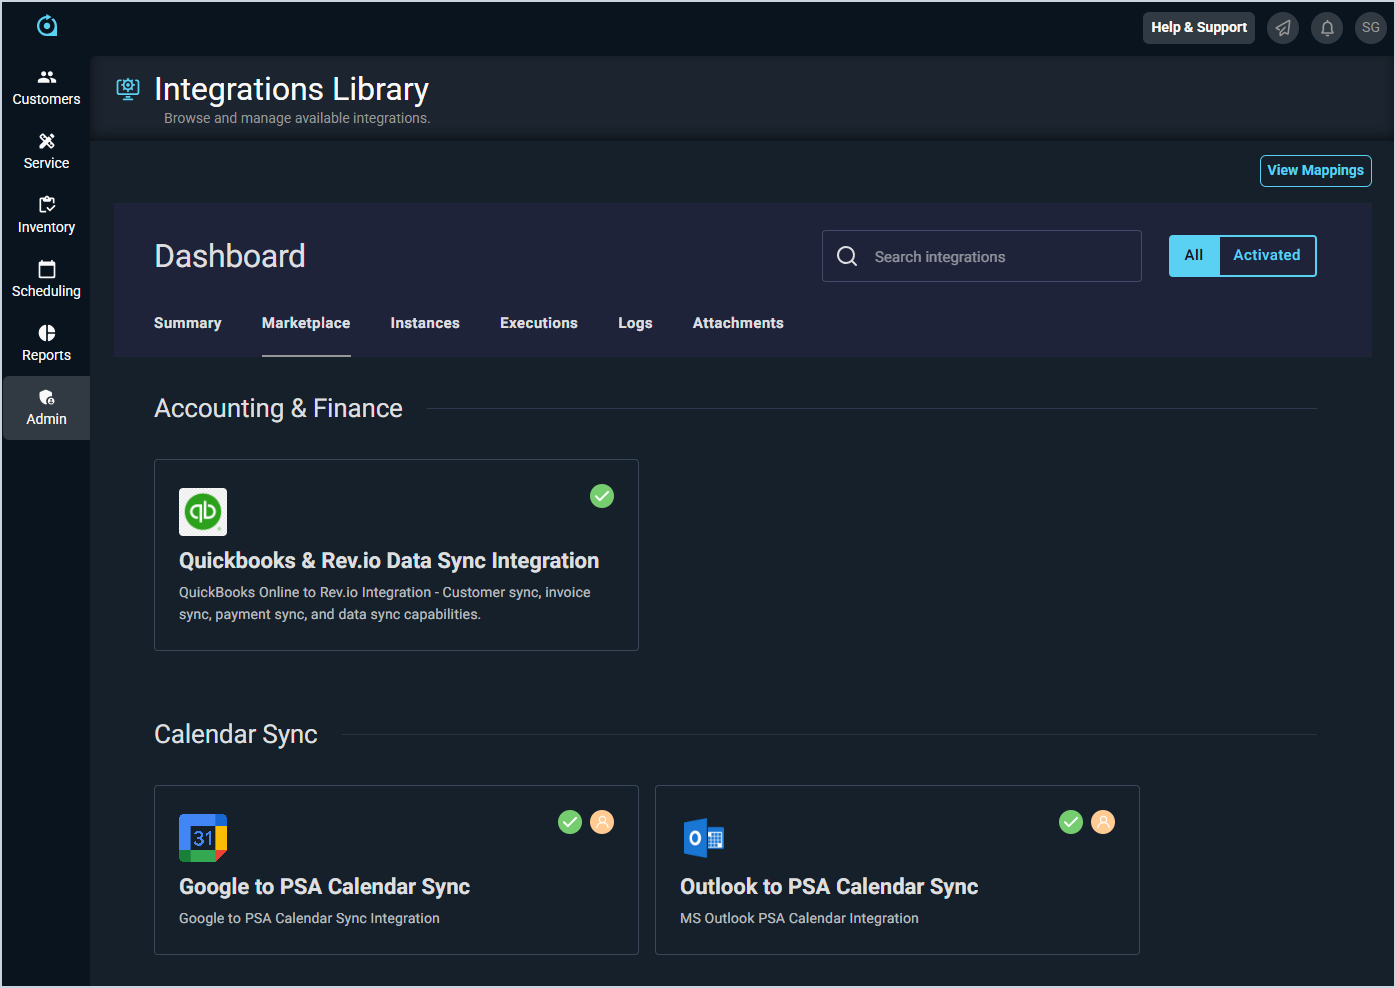
Locate and select the Acronis Integration in the RMM section.
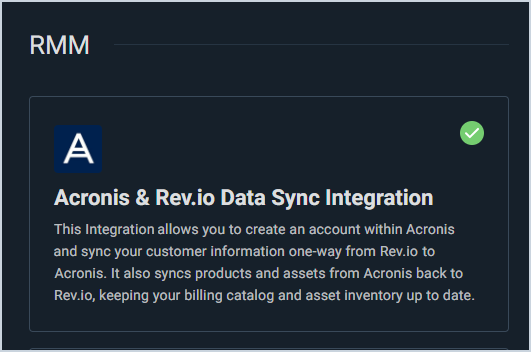
Click the Configure button.
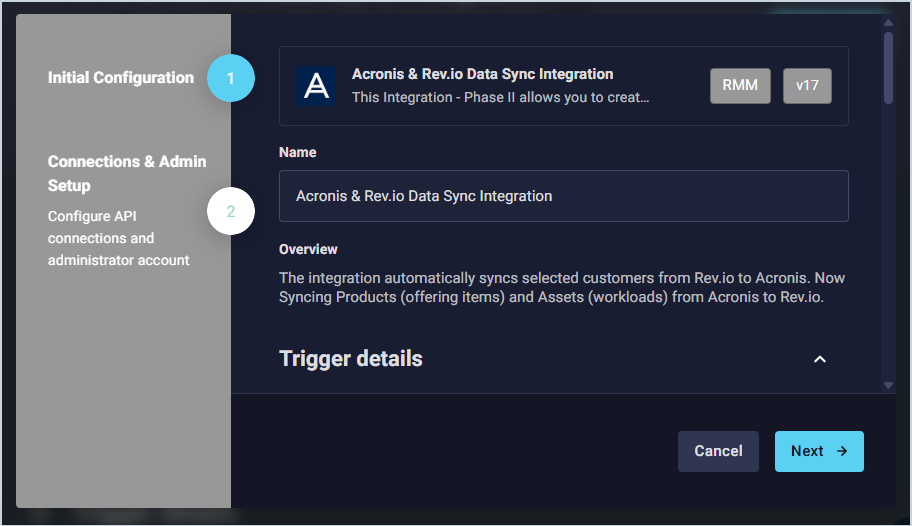
The Initial Configuration section is automatically populated. You can review URLs and add API Keys in the Trigger Details section if needed. When finished, click the Next button.
The Acronis integration is a billed service. Rev.io charges based on the customers, workloads, and offering items you provision in Acronis through this integration. You must work with the Rev.io sales team to establish your commercial agreement before configuring the integration.
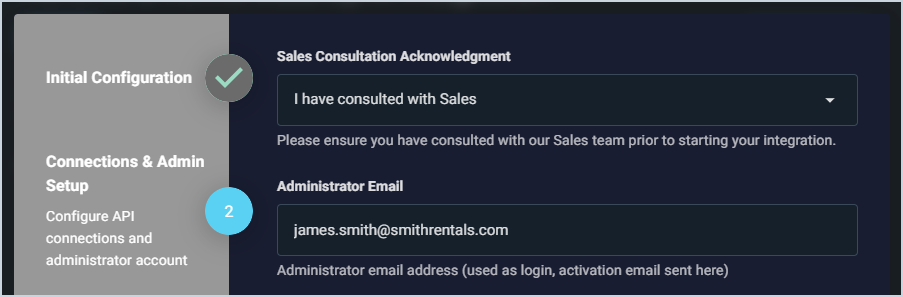
Select I have consulted with Sales from the dropdown to confirm that you've completed this required step. Then, enter the email address where your Acronis activation email was sent in the Administrator Email field.
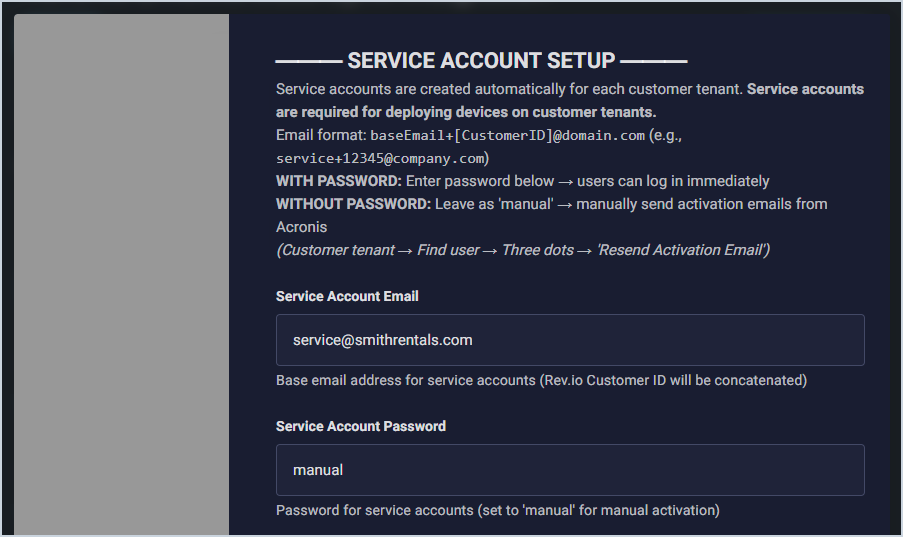
Enter the email address you want to use for service accounts in the Service Account Email field. Service accounts are dedicated user accounts in Acronis that allow you to configure devices for your customers and are required to deploy devices properly. The system automatically creates a service account for every customer in Acronis using the base email plus their Rev.io Customer ID. For example, service@rev.io becomes service+12345@rev.io. Configure the service account password using one of the following options:
Set a default password: Enter a password in the Service Account Password field. To configure devices for a customer, log in to Acronis using the base email plus their Rev.io Customer ID and the default password.
Use a unique password per account: Leave manual in the Service Account Password field. To log in and configure devices for a customer, send the activation link manually using an admin account by accessing the customer in Acronis, clicking My Company, locating the service account user, clicking the 3-dot icon, and clicking Resend Activation Email. You can also set a default password in the Service Account Password field and change it later using the same process.
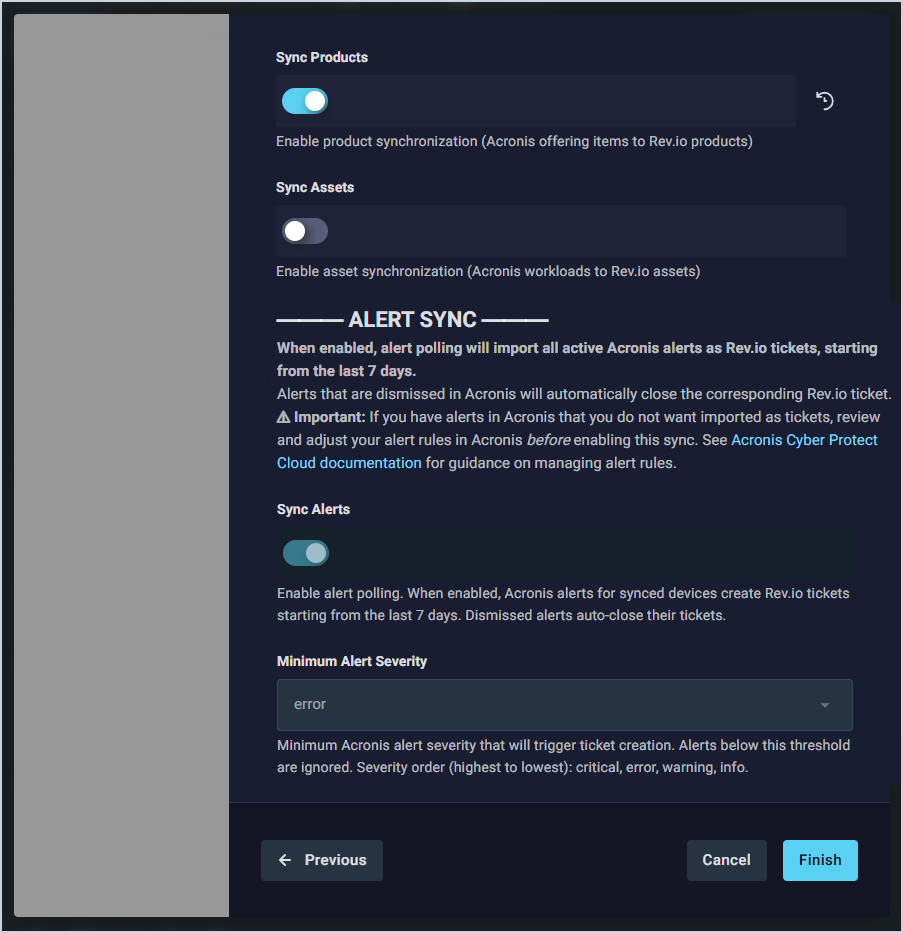
Configure which data you want to sync between Acronis and Rev.io. Then, click the Finish button.
Sync Products: Enable to sync Acronis offering items into the Rev.io product catalog.
Sync Assets: Enable to sync Acronis workloads (devices being protected) into Rev.io as assets associated with the corresponding customer.
Sync Alerts: Enable to poll Acronis alerts and automatically create Rev.io tickets for each active alert. Dismissing an alert in Acronis will automatically close its corresponding Rev.io ticket. IMPORTANT: When you enable Sync Alerts, the integration will import all active Acronis alerts from the last 7 days as Rev.io tickets. If you have alerts in Acronis that you do not want imported as tickets, review and adjust your alert rules in Acronis before enabling this sync. See the Acronis Cyber Protect Cloud documentation for guidance on managing alert rules. When Sync Alerts is enabled, a new RMM Alert ticket type will be automatically created in your Rev.io environment on the first sync if it does not already exist.
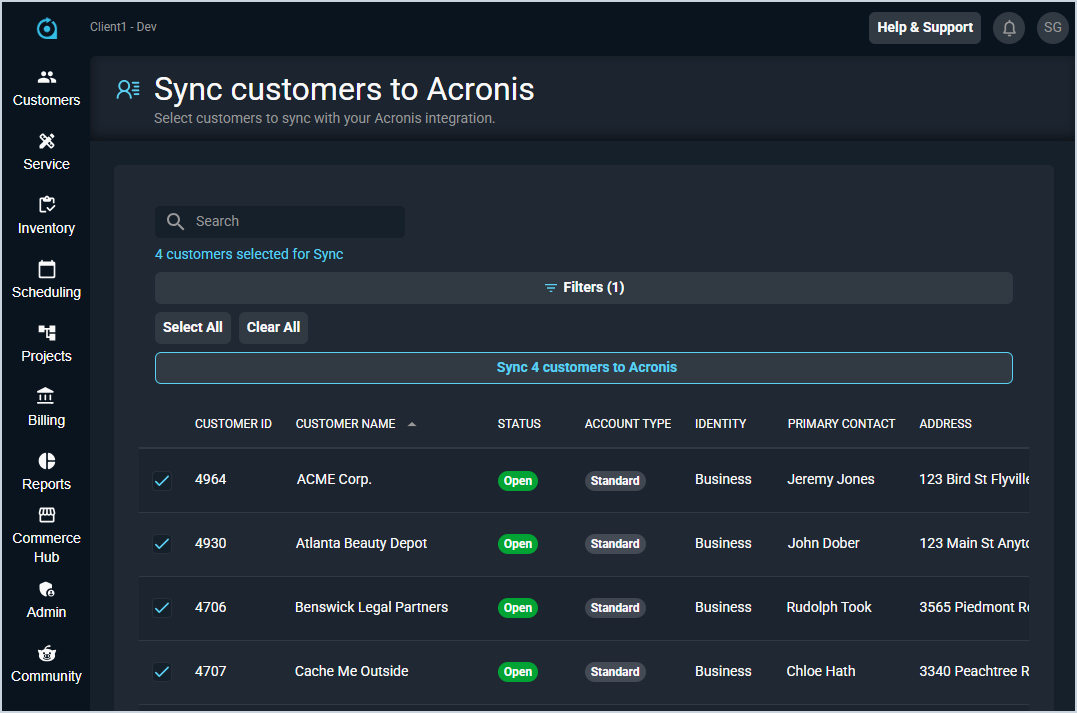
Select the customers you want to sync with Acronis and click the Sync customers to Acronis button. You'll receive an in-app notification when the sync is complete.
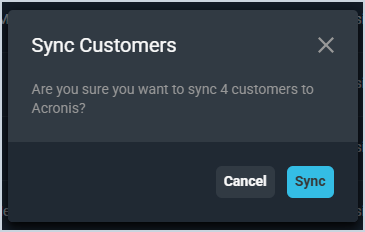
Click the Sync button to confirm. You will receive a pop-up notification in the lower right corner when the sync is complete.
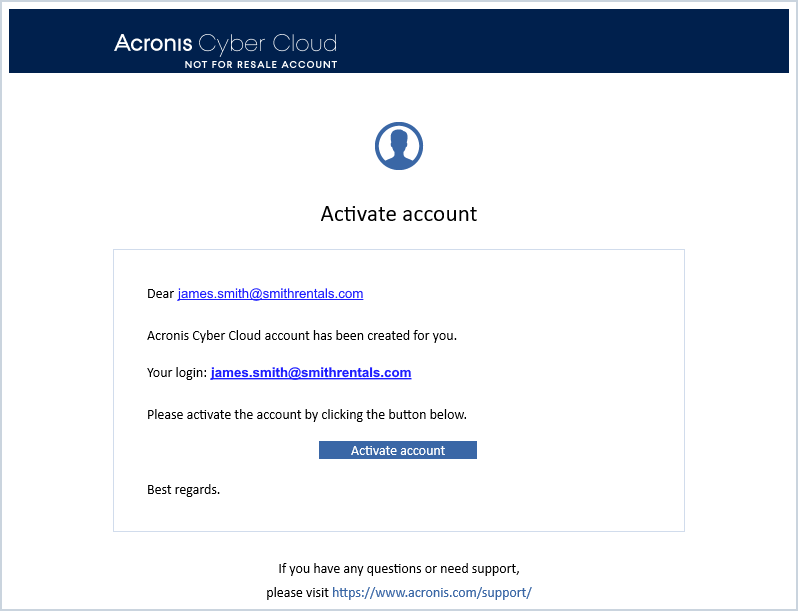
Open your Acronis activation email. Click the Activate Account button.
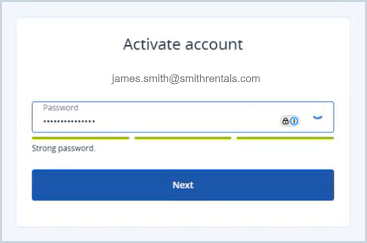
Enter the password for your Acronis account and click the Next button.
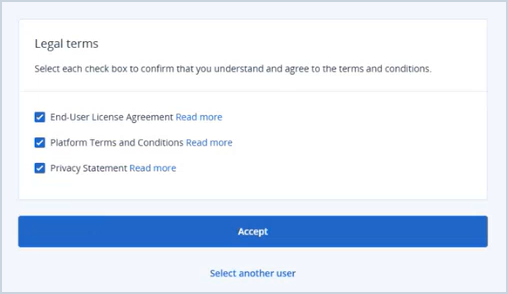
Select the checkboxes to agree to the legal terms and click the Accept button.
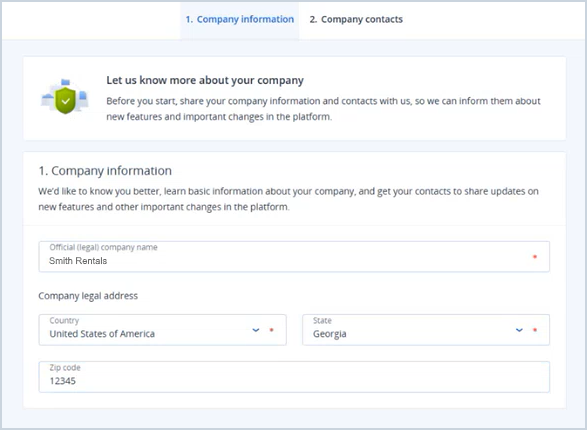
Enter your company name, country, state, and ZIP code to complete the Company Information tab. Then, click the Next button.
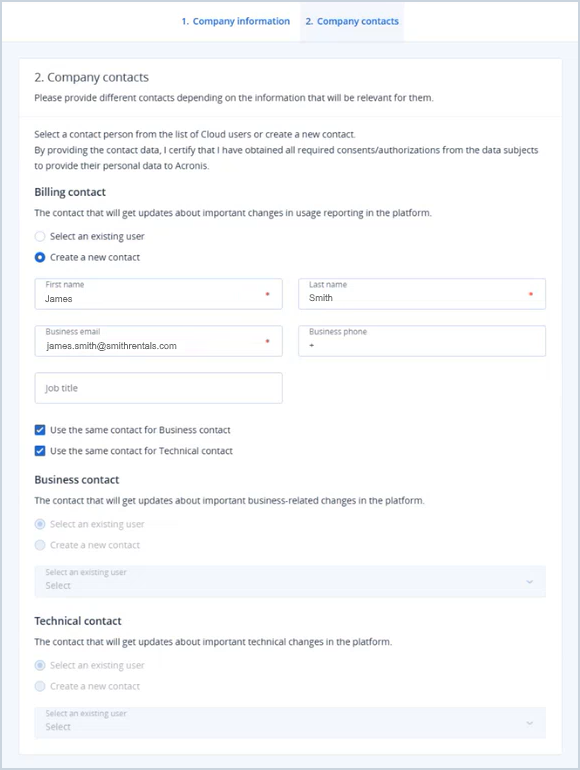
Enter the required information for a billing contact, business contact, and technical contact to complete the Company Contacts tab. Then, click the Done button.
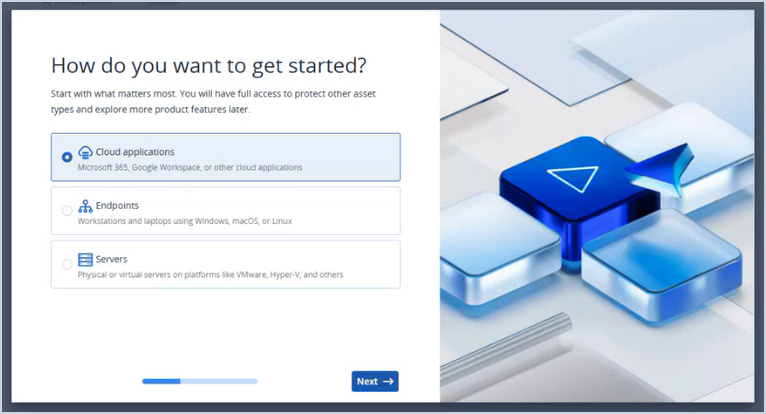
Complete the Acronis activation survey by making your selections in the pop-up and clicking the Next button.
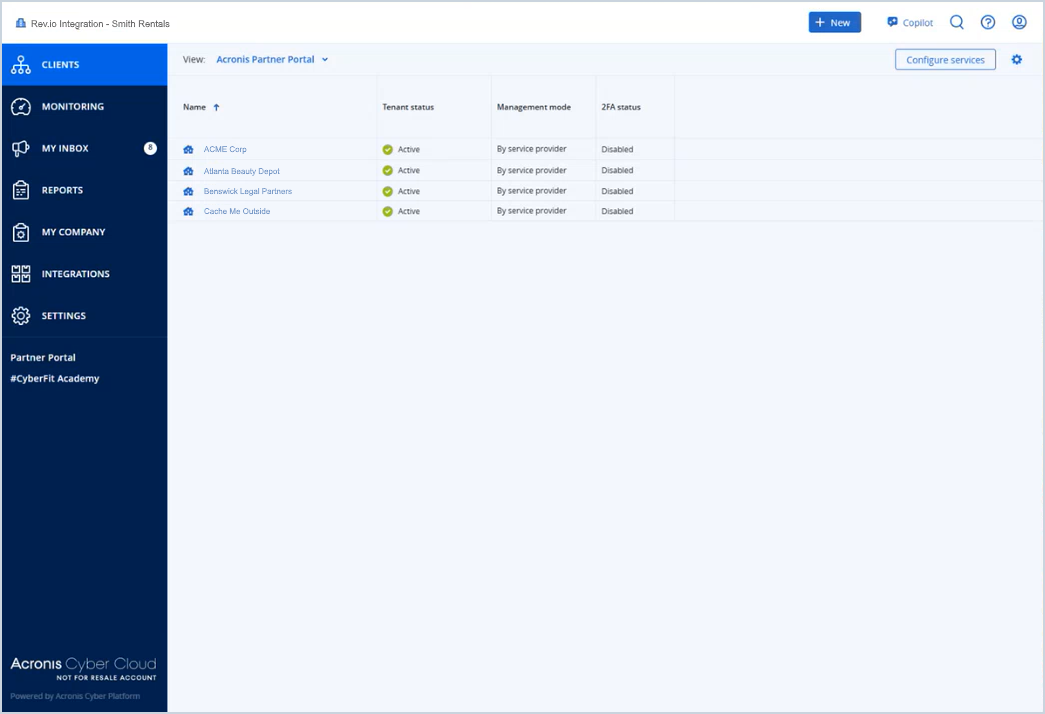
The list of customers you selected to sync displays in the Acronis portal. Clicking on any name in the list shows you the information synced from Rev.io for the customer, including company name, website, address, and email address.
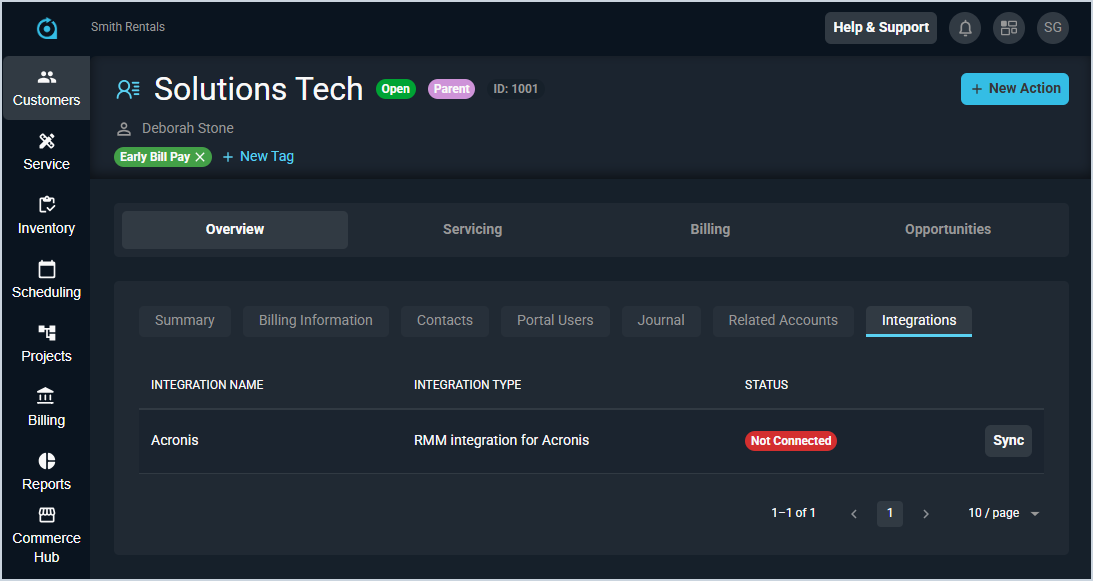
To sync new customers with Acronis, open the Integrations tab on the customer profile screen and click the Sync button for the Acronis integration. To deactivate a customer's Acronis sync, you'll need to remove the sync manually from both Rev.io and Acronis.