How To Guide: Managing Tickets - Activity Tab
1. Introduction
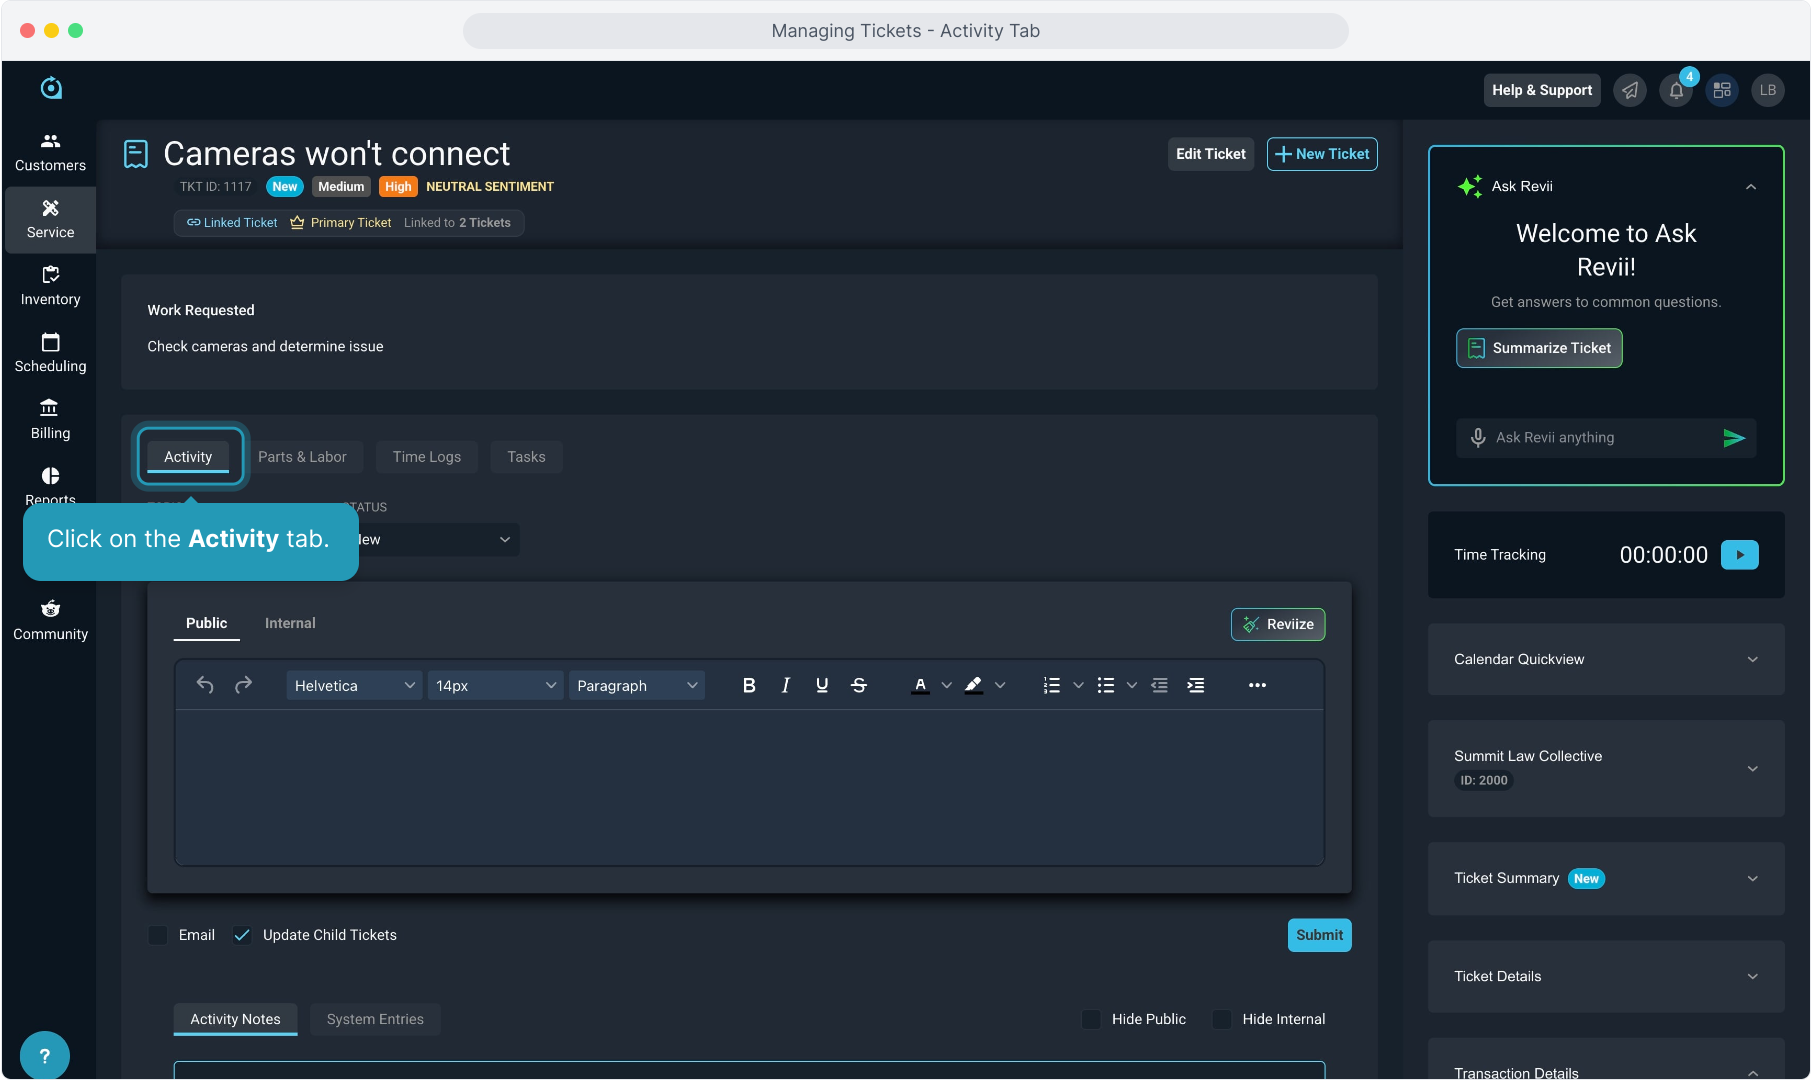
2. Click on the Activity tab.
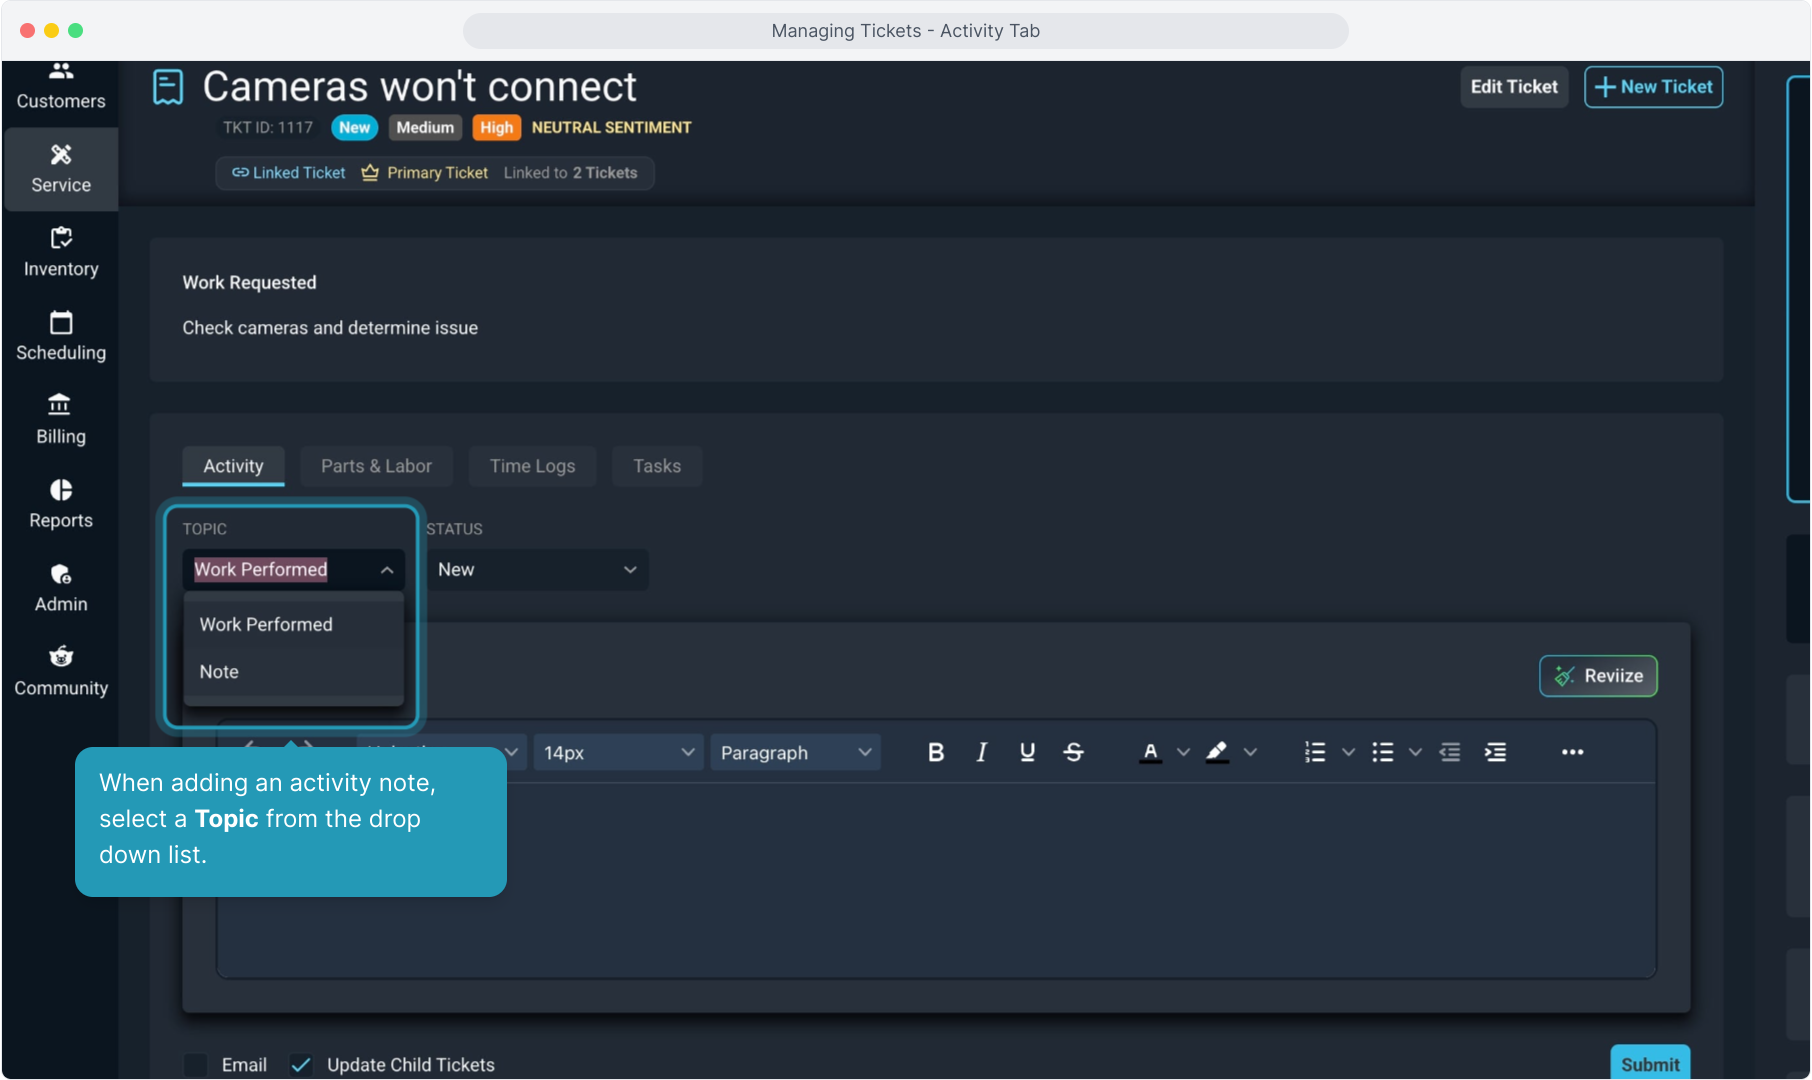
3. When adding an activity note, select a Topic from the drop down list.
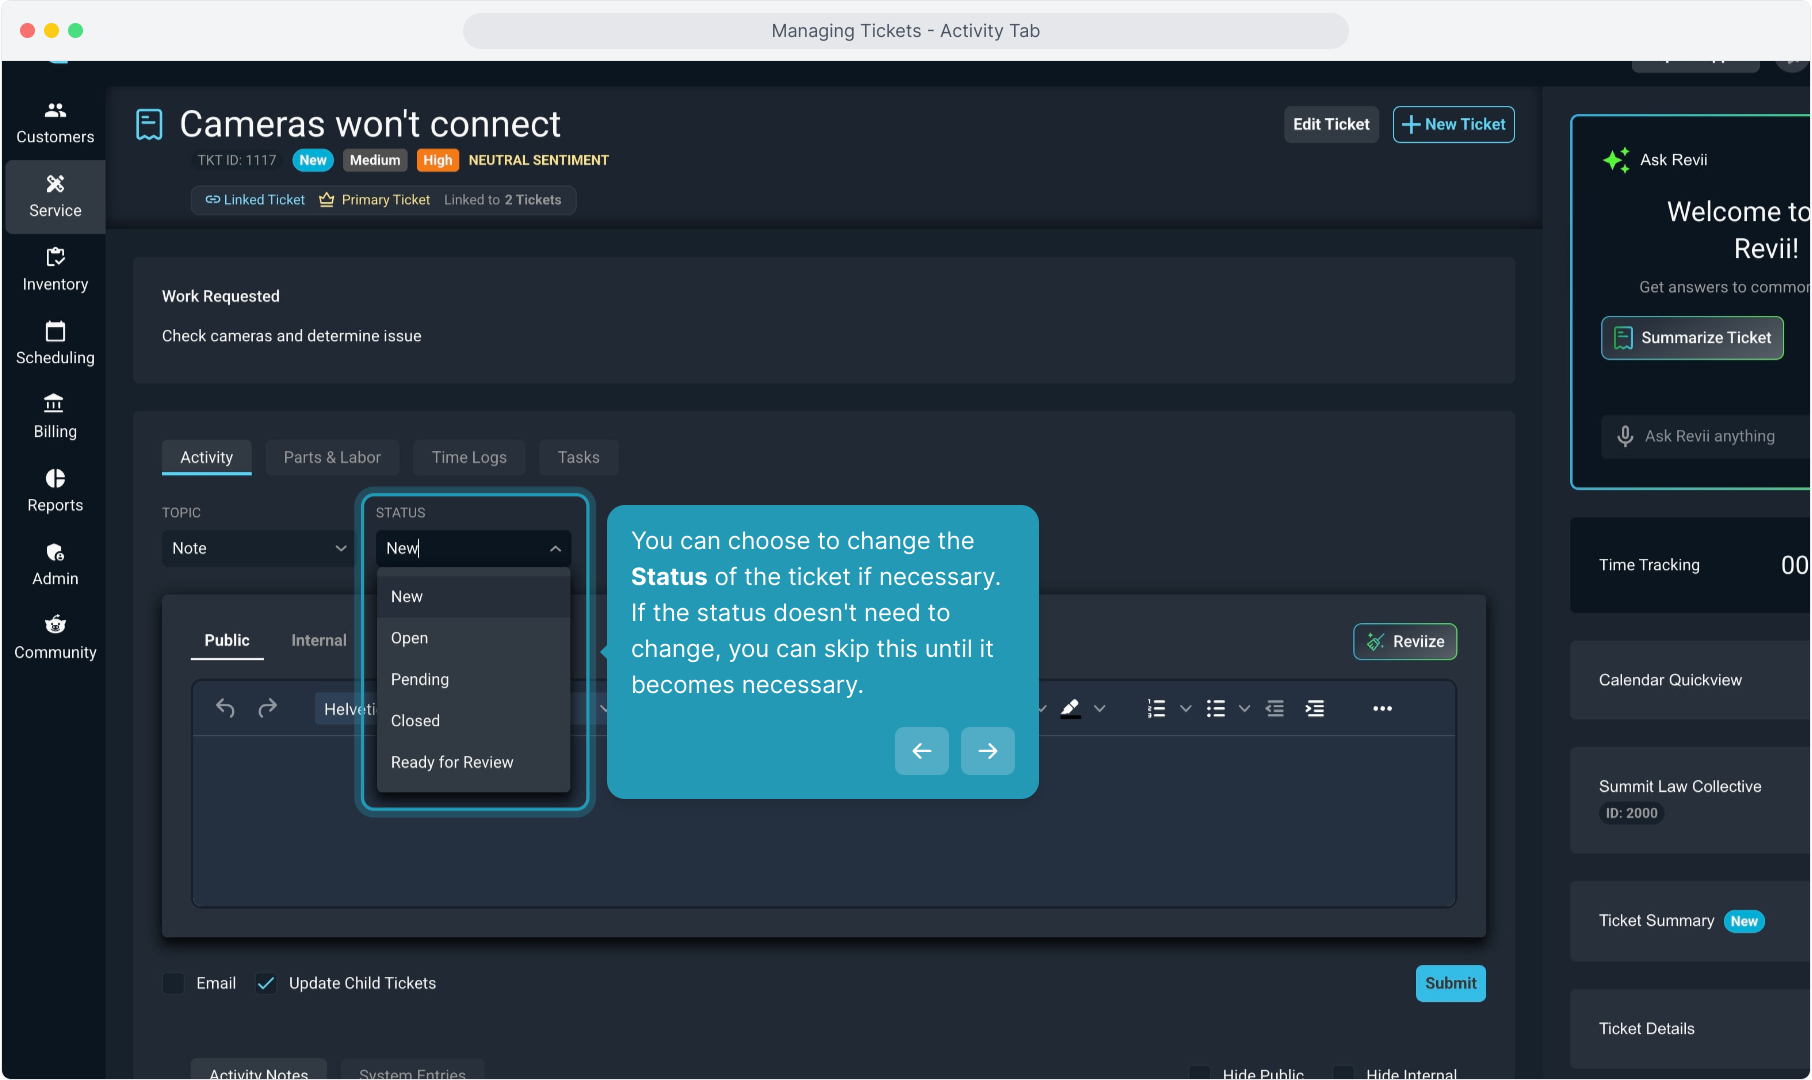
4. You can choose to change the Status of the ticket if necessary. If the status doesn't need to change, you can skip this until it becomes necessary.
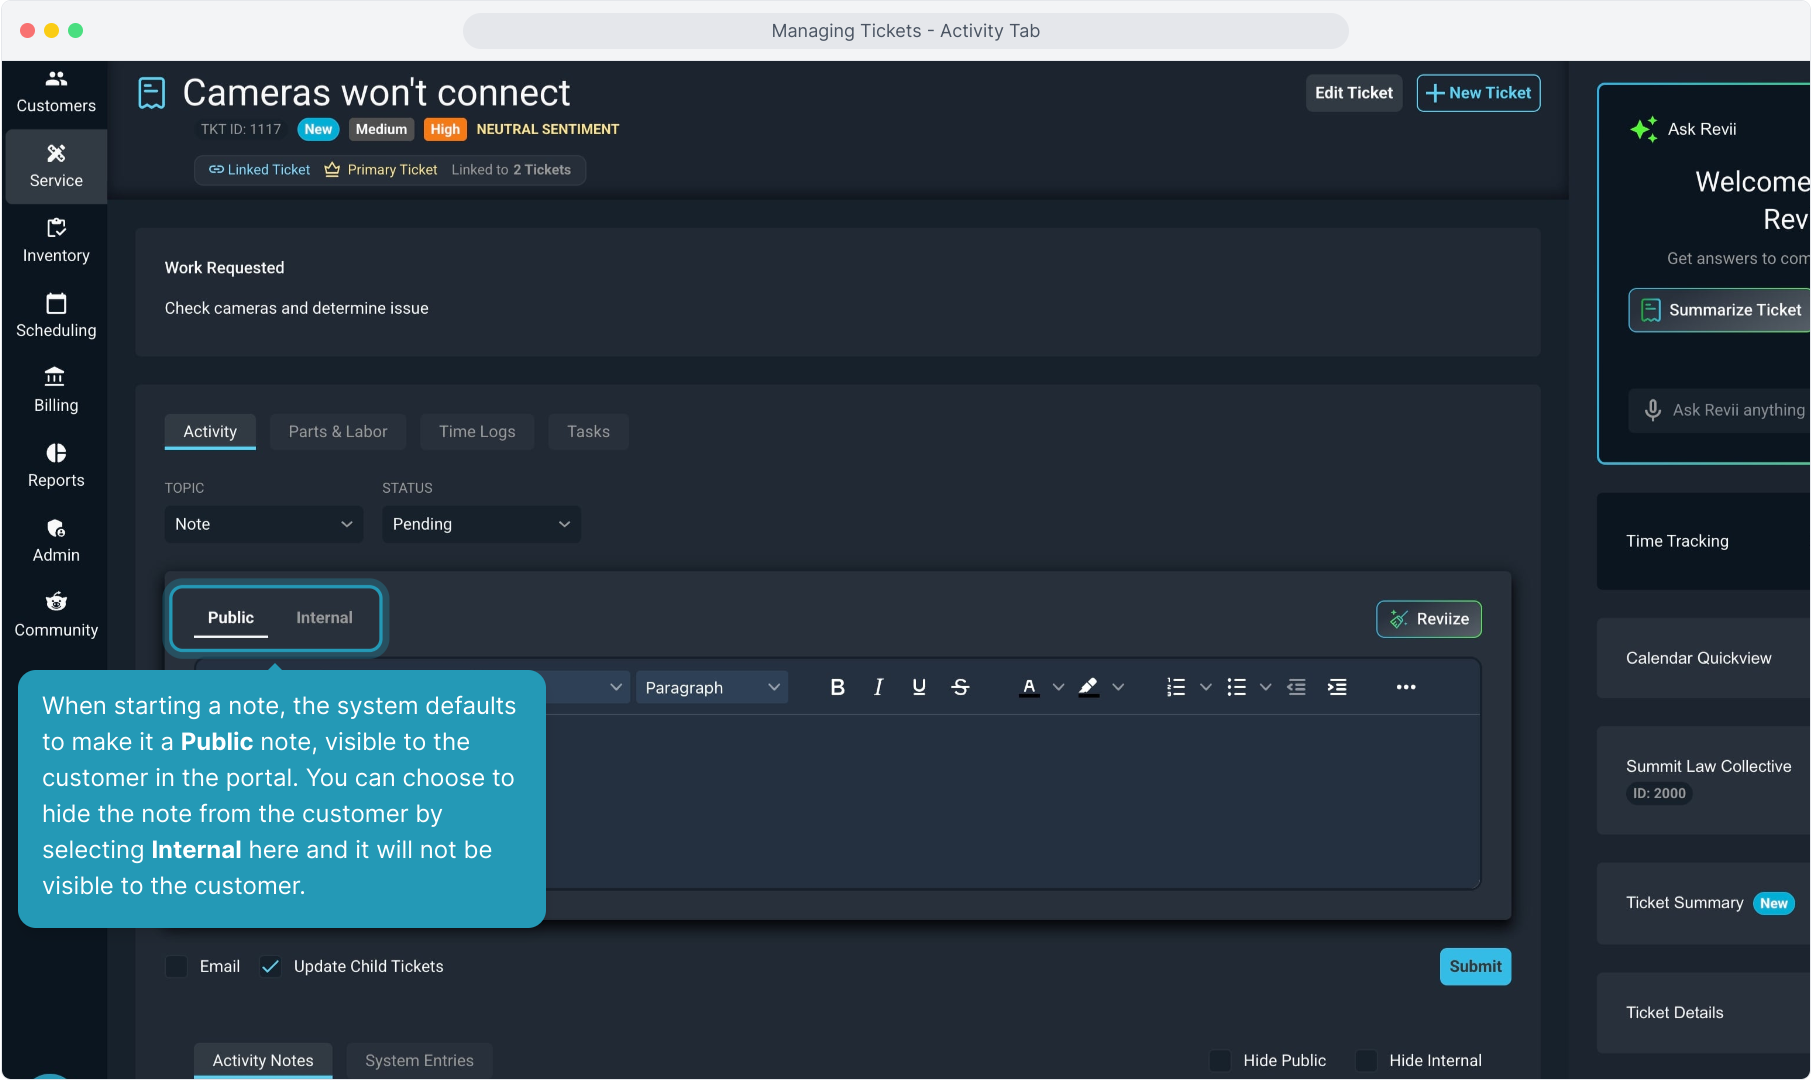
5. When starting a note, the system defaults to make it a Public note, visible to the customer in the portal. You can choose to hide the note from the customer by selecting Internal here and it will not be visible to the customer.
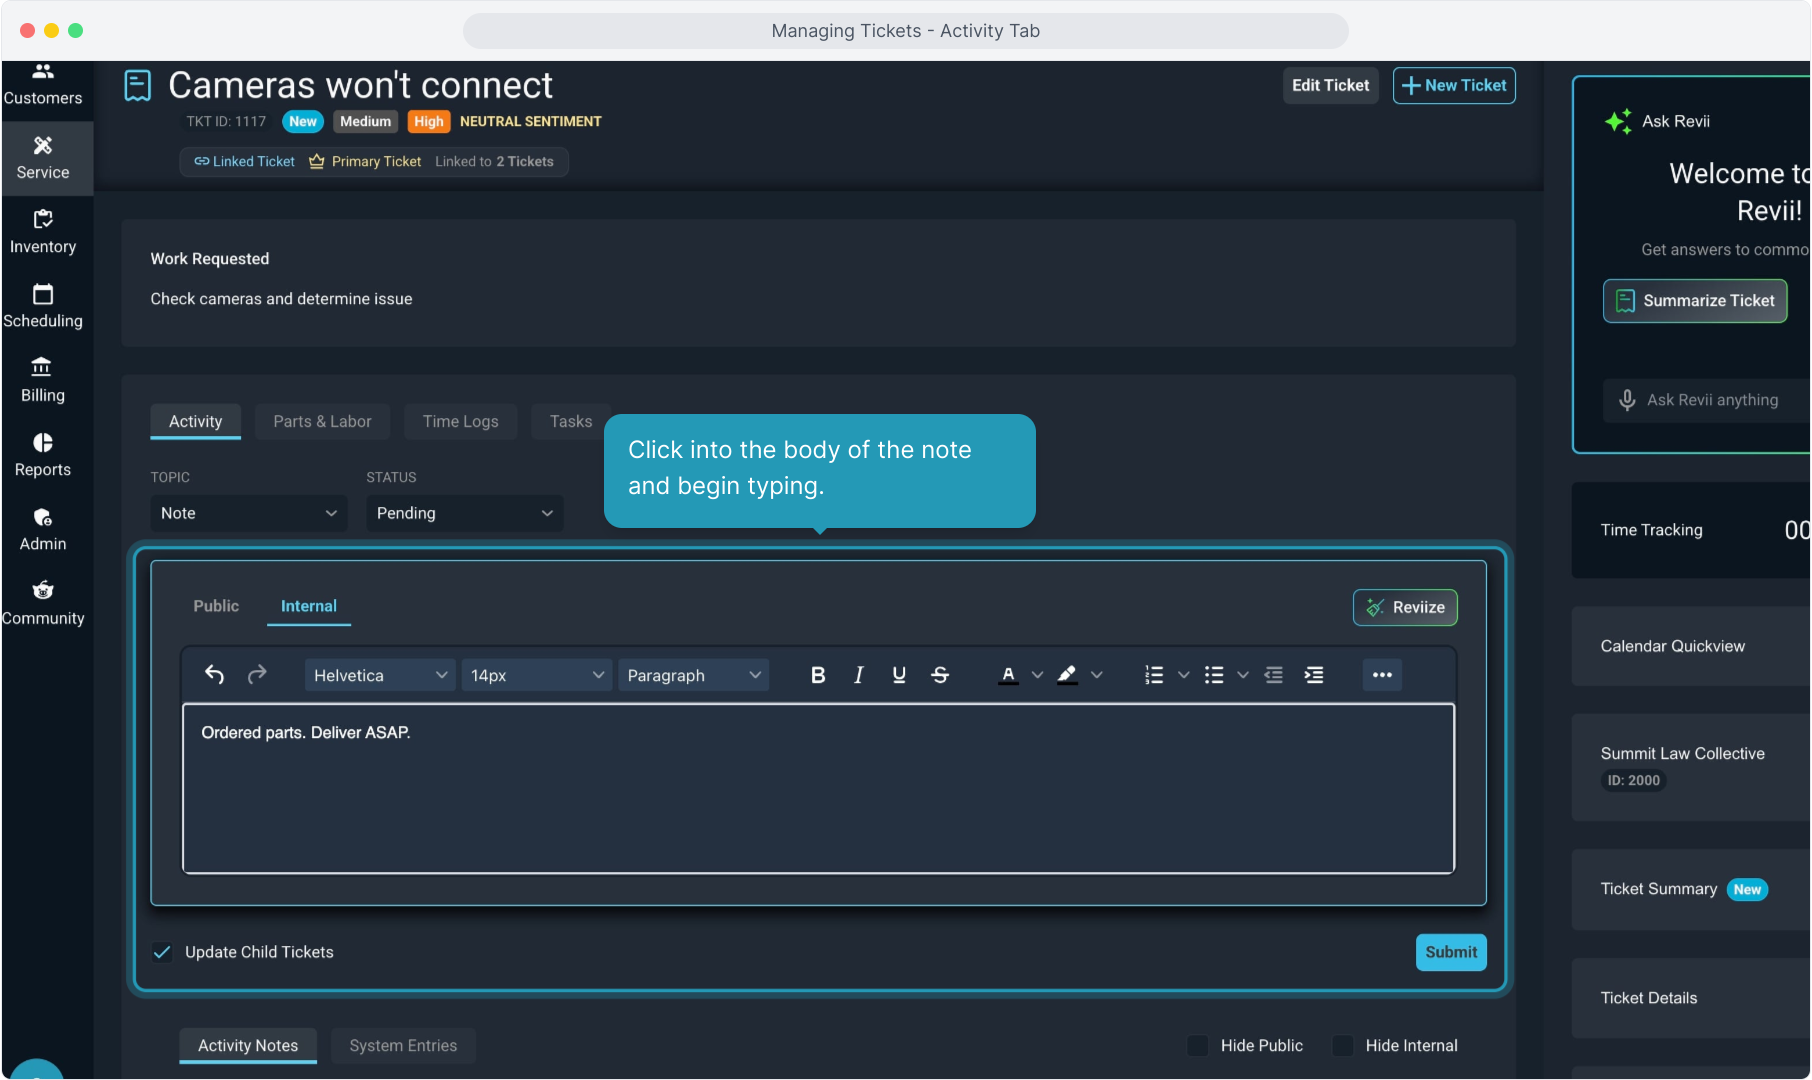
6. Click into the body of the note and begin typing.
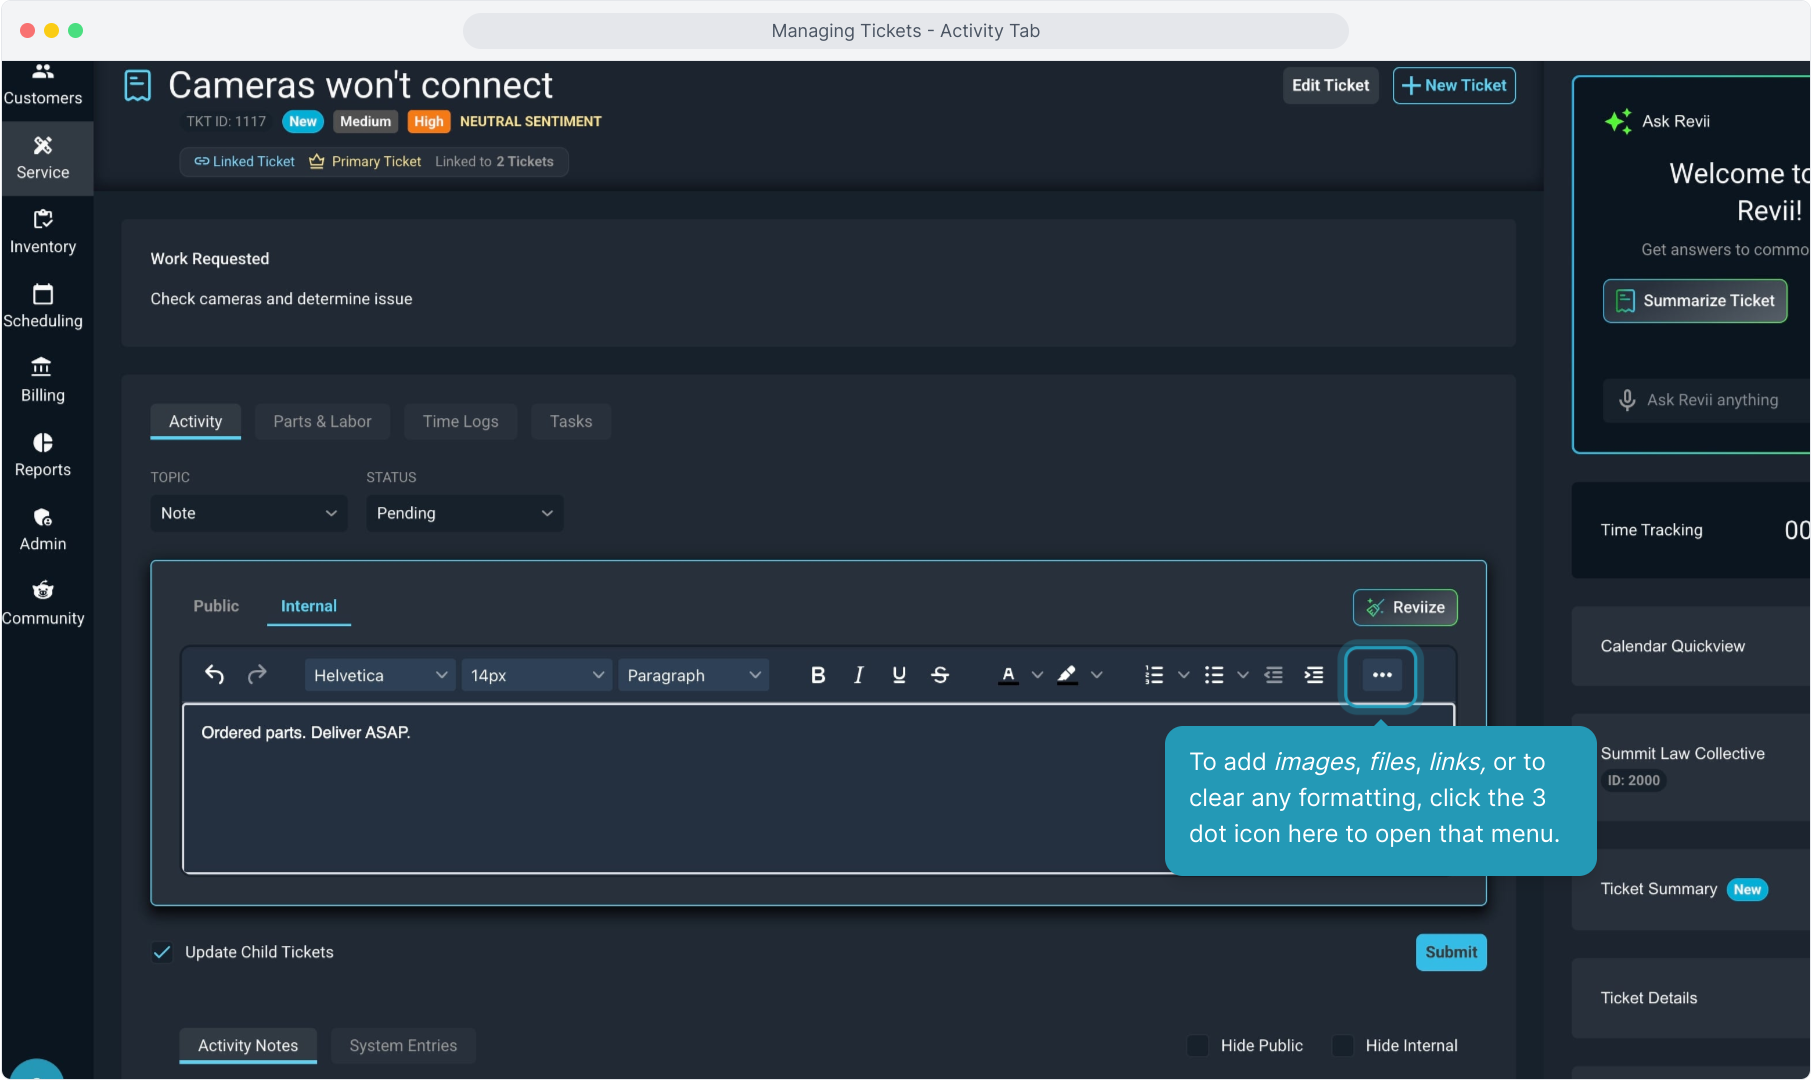
7. To add images, files, links, or to clear any formatting, click the 3 dot icon here to open that menu.
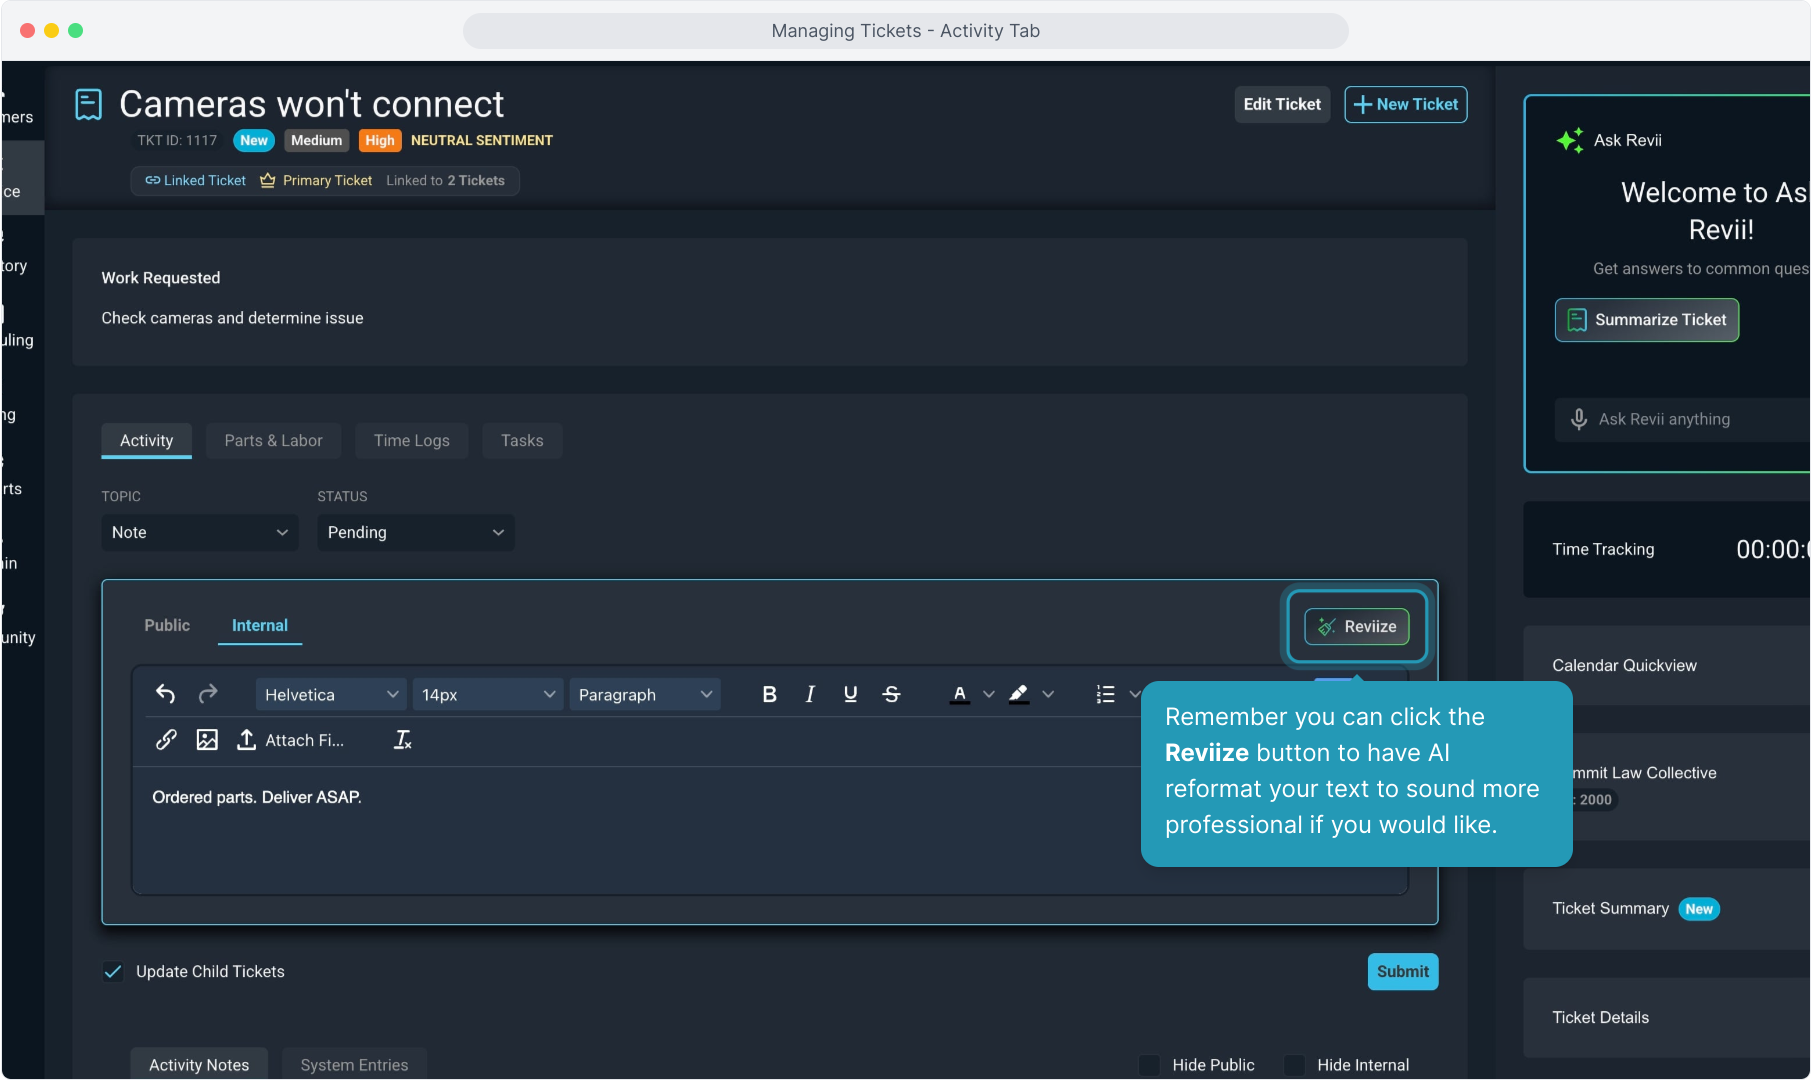
8. Remember you can click the Reviize button to have AI reformat your text to sound more professional if you would like.
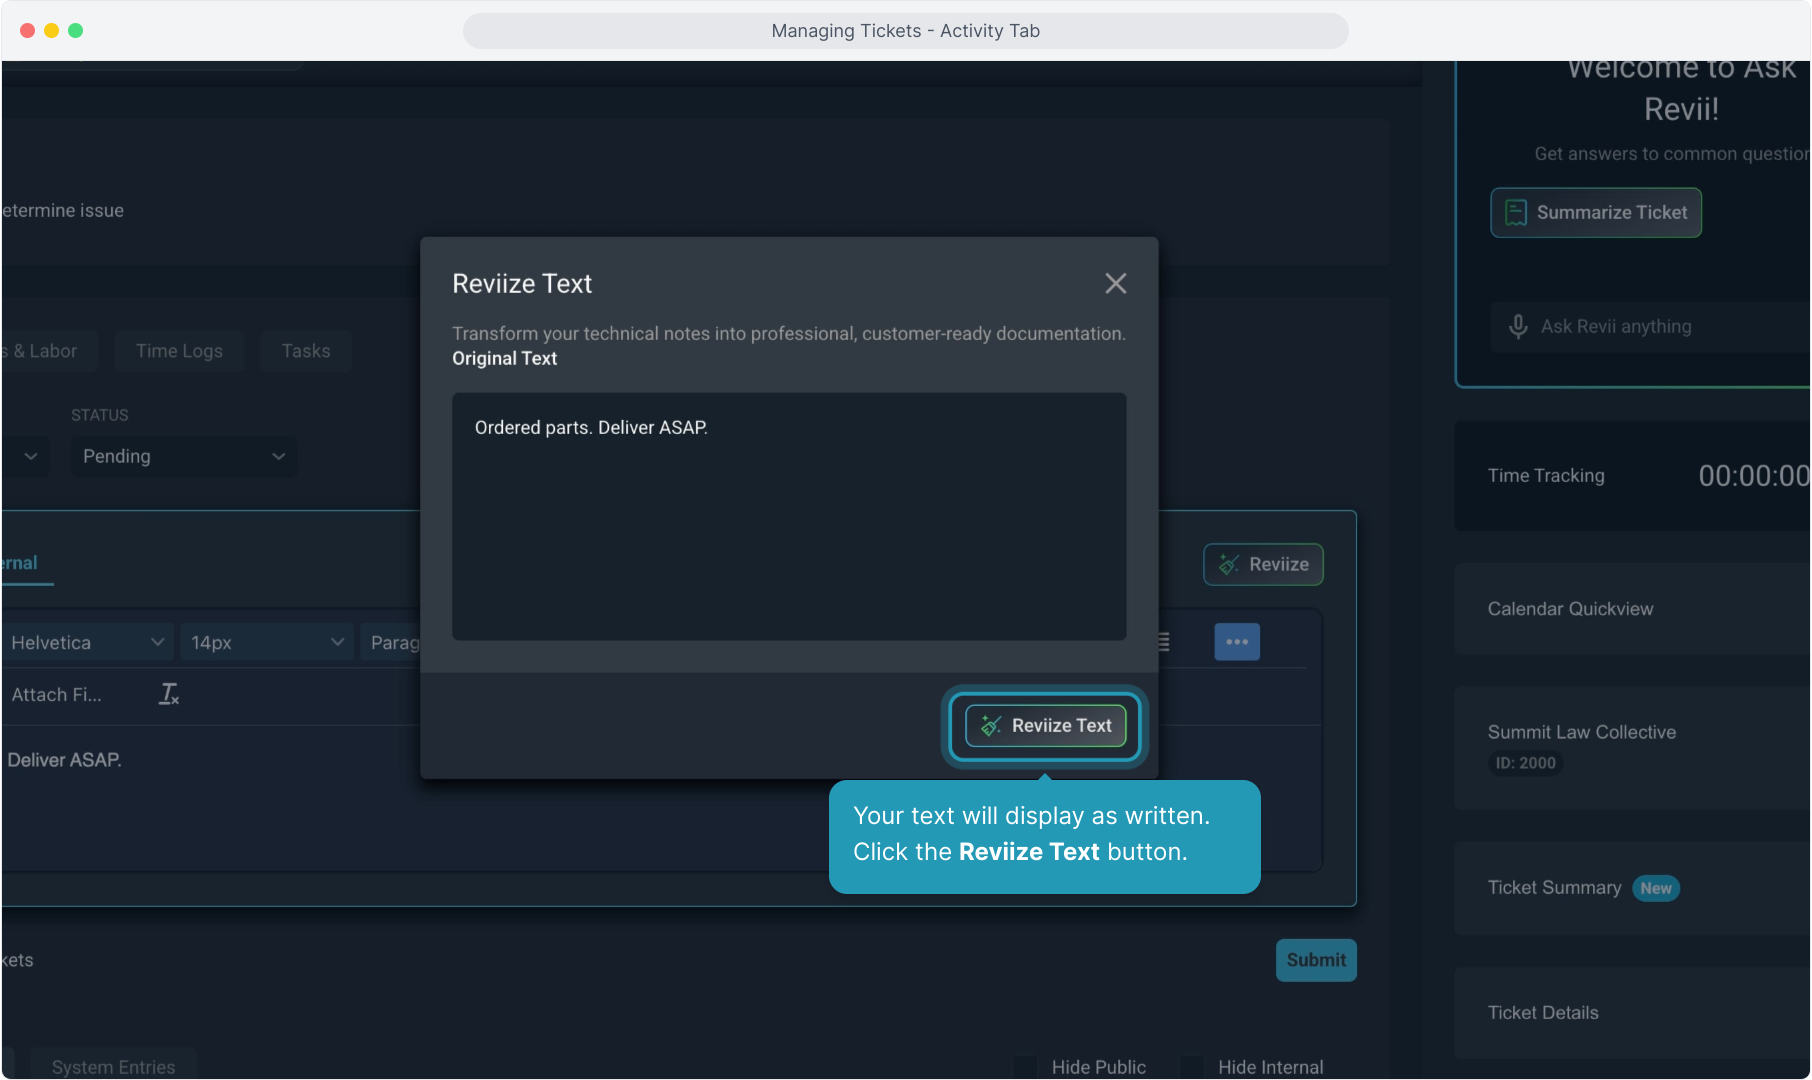
9. Your text will display as written. Click the Reviize Text button.
10. The system will show you the reformatted text. You can choose to Accept Changes or you can Regenerate to try again.
If you wish to use your original text, simply click the X to close the Reviize window.

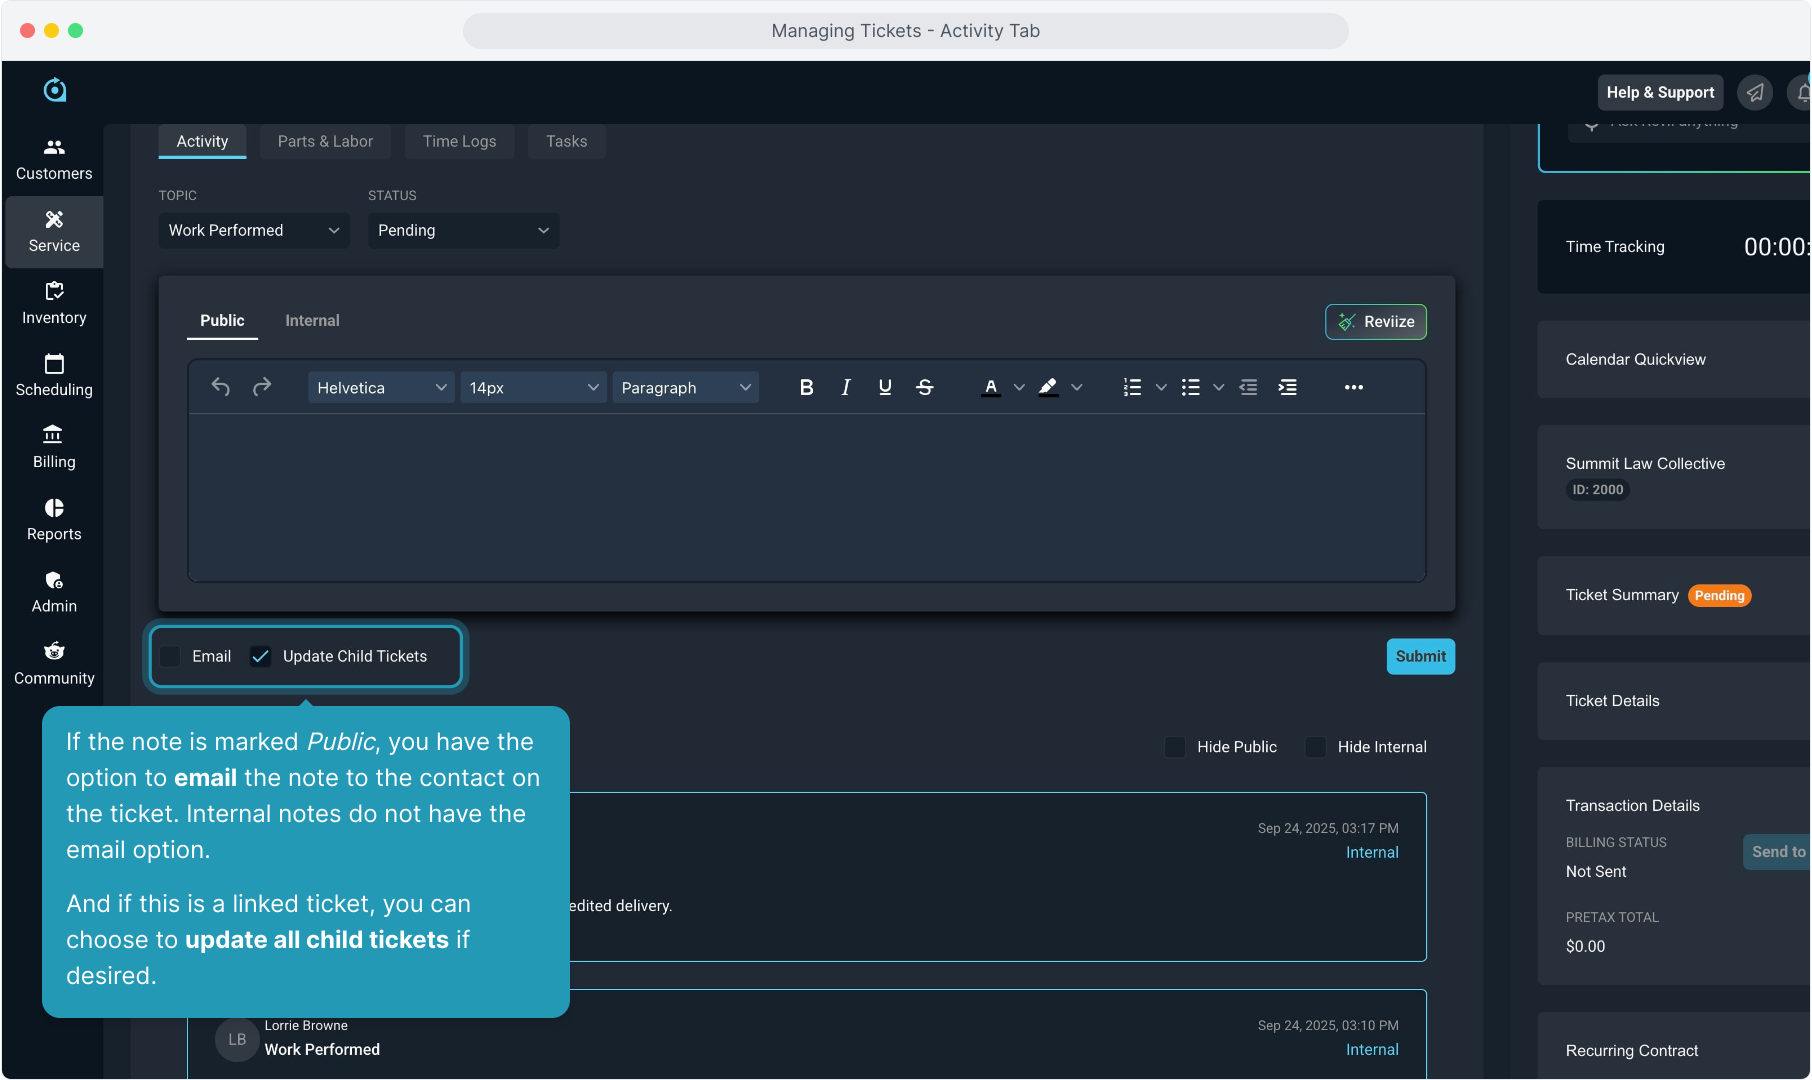
11. If the note is marked Public, you have the option to email the note to the contact on the ticket. Internal notes do not have the email option.
And if this is a linked ticket, you can choose to update all child tickets if desired.
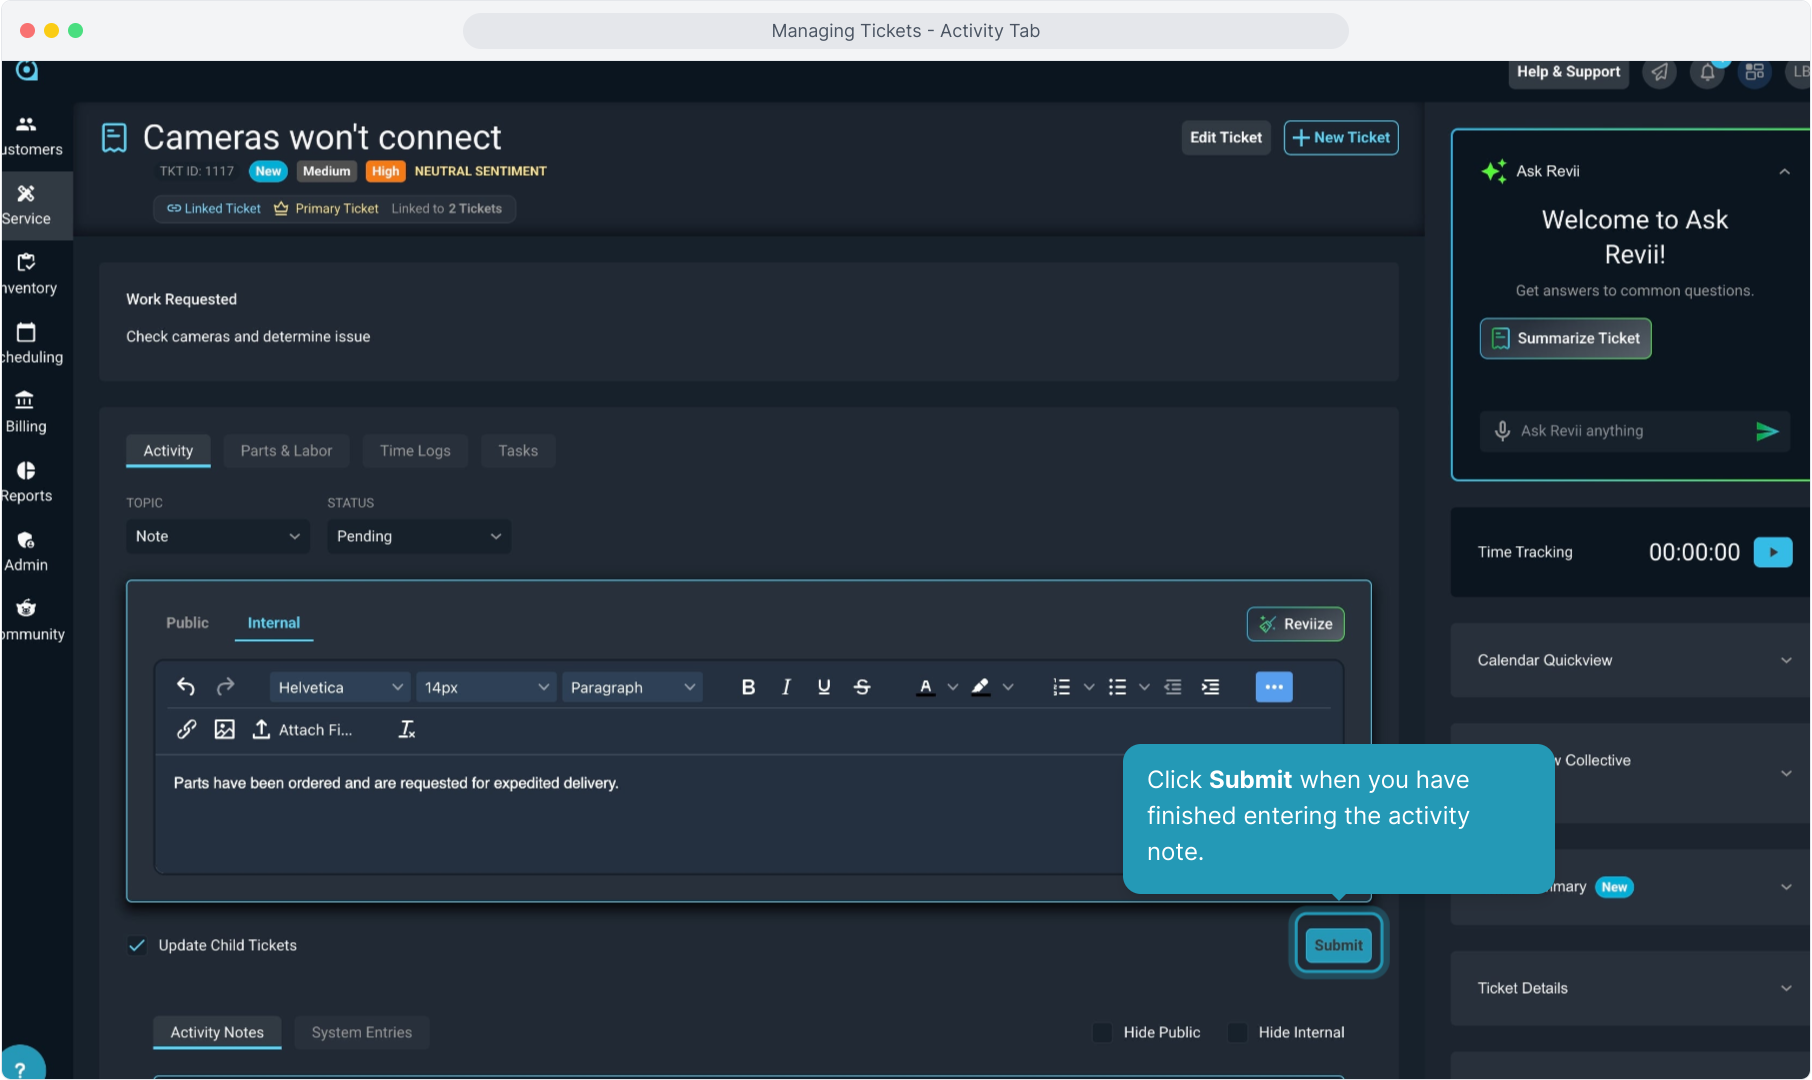
12. Click Submit when you have finished entering the activity note.
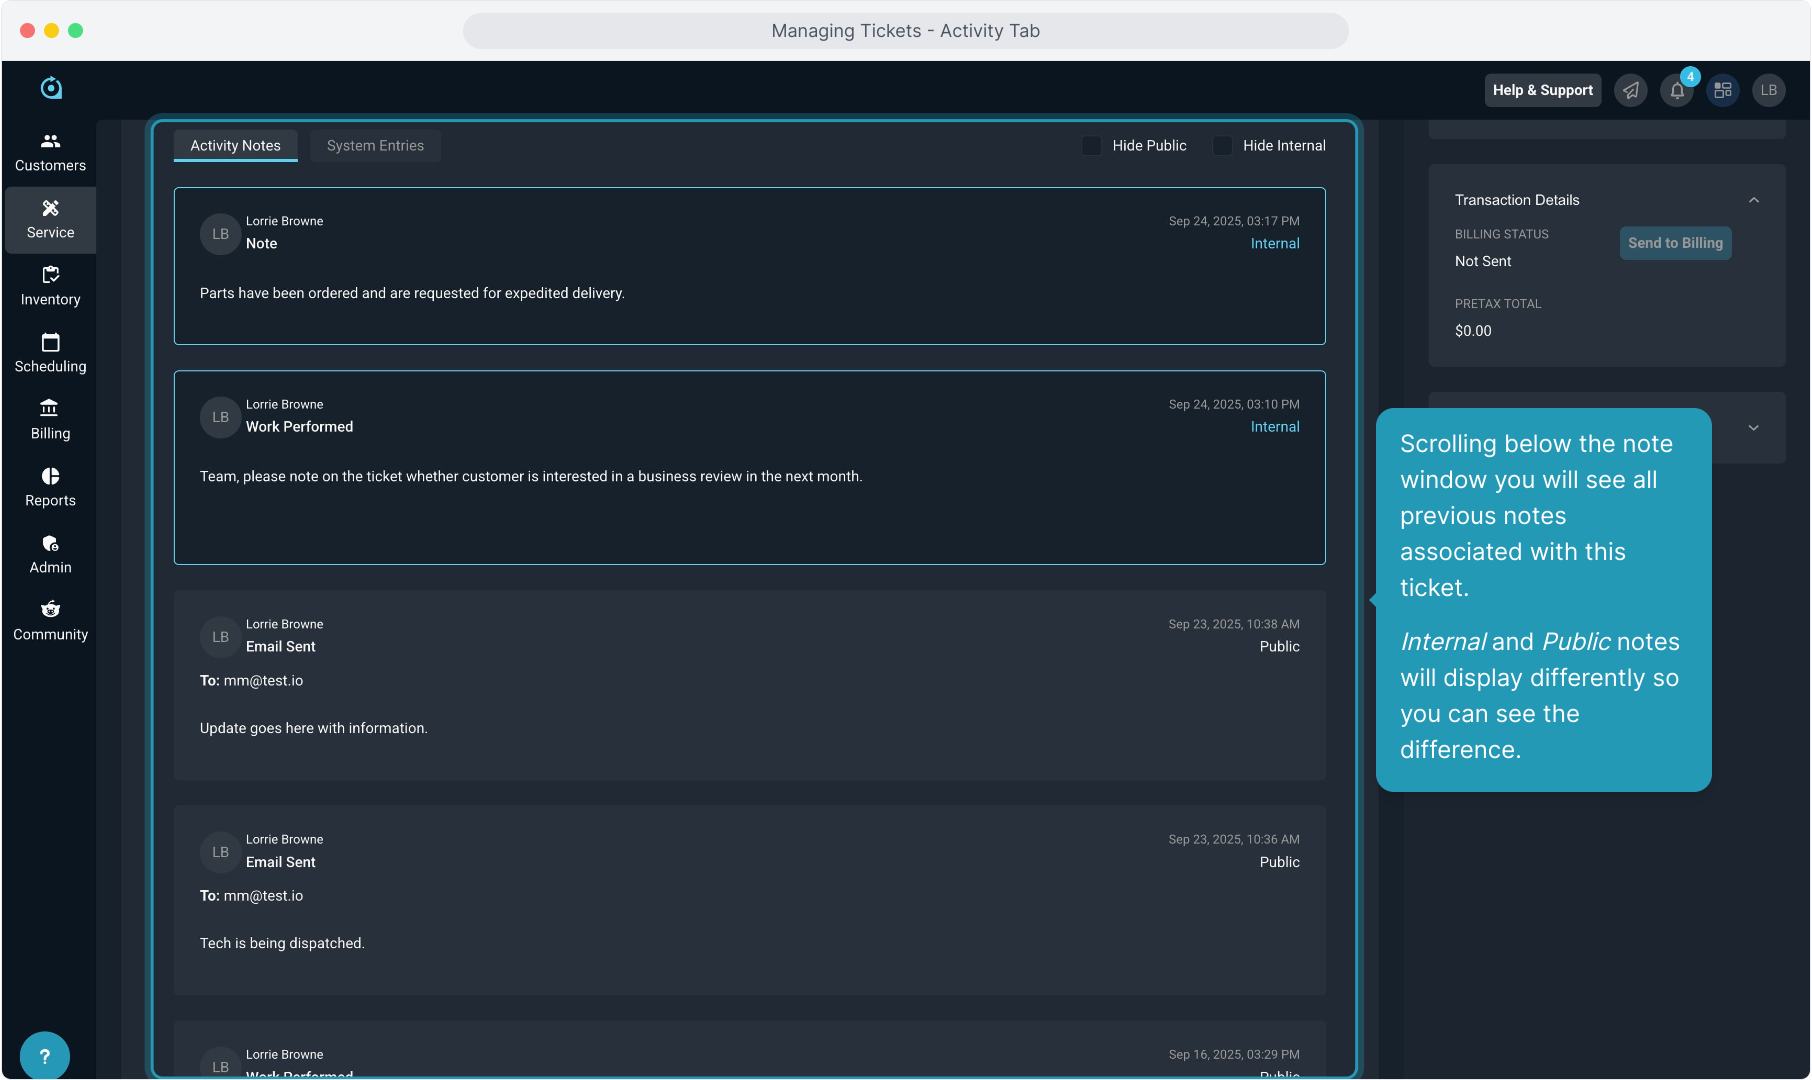
13. Scrolling below the note window you will see all previous notes associated with this ticket.
Internal and Public notes will display differently so you can see the difference.
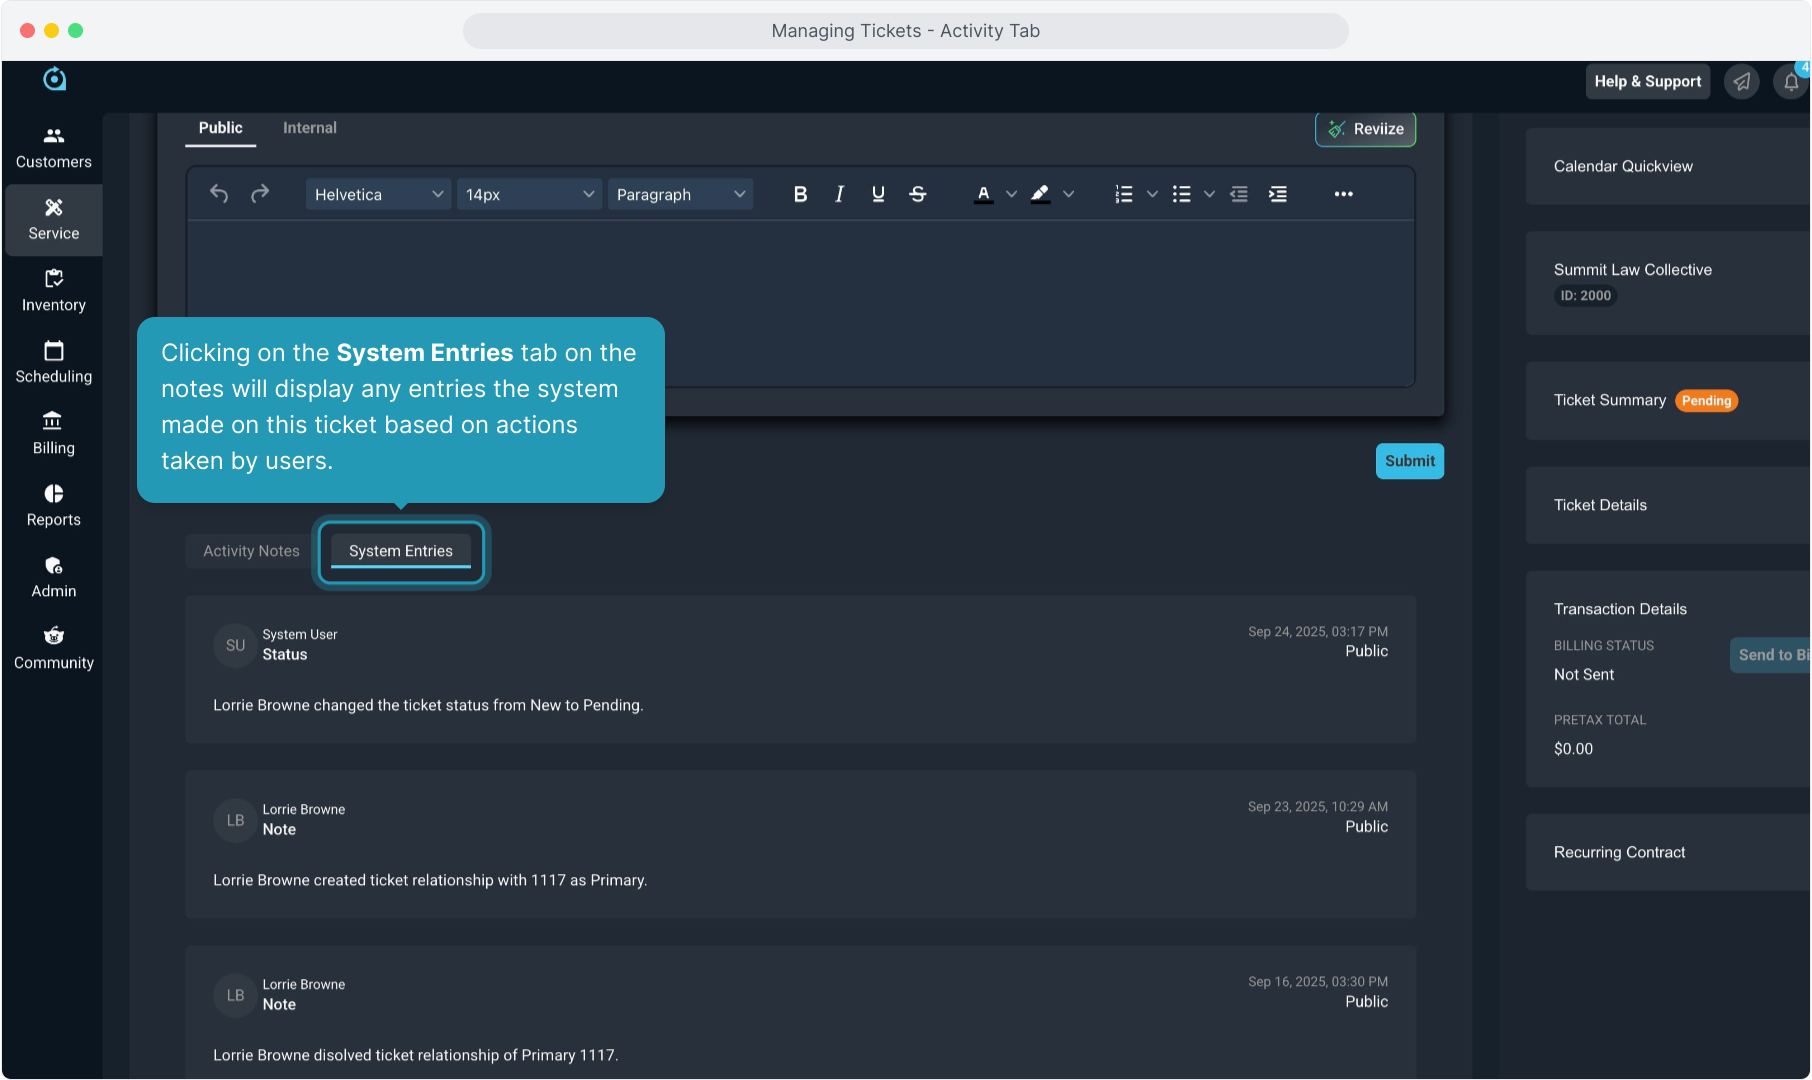
14. Clicking on the System Entries tab on the notes will display any entries the system made on this ticket based on actions taken by users.