How To Guide: Managing Roles & Permissions
1. Introduction
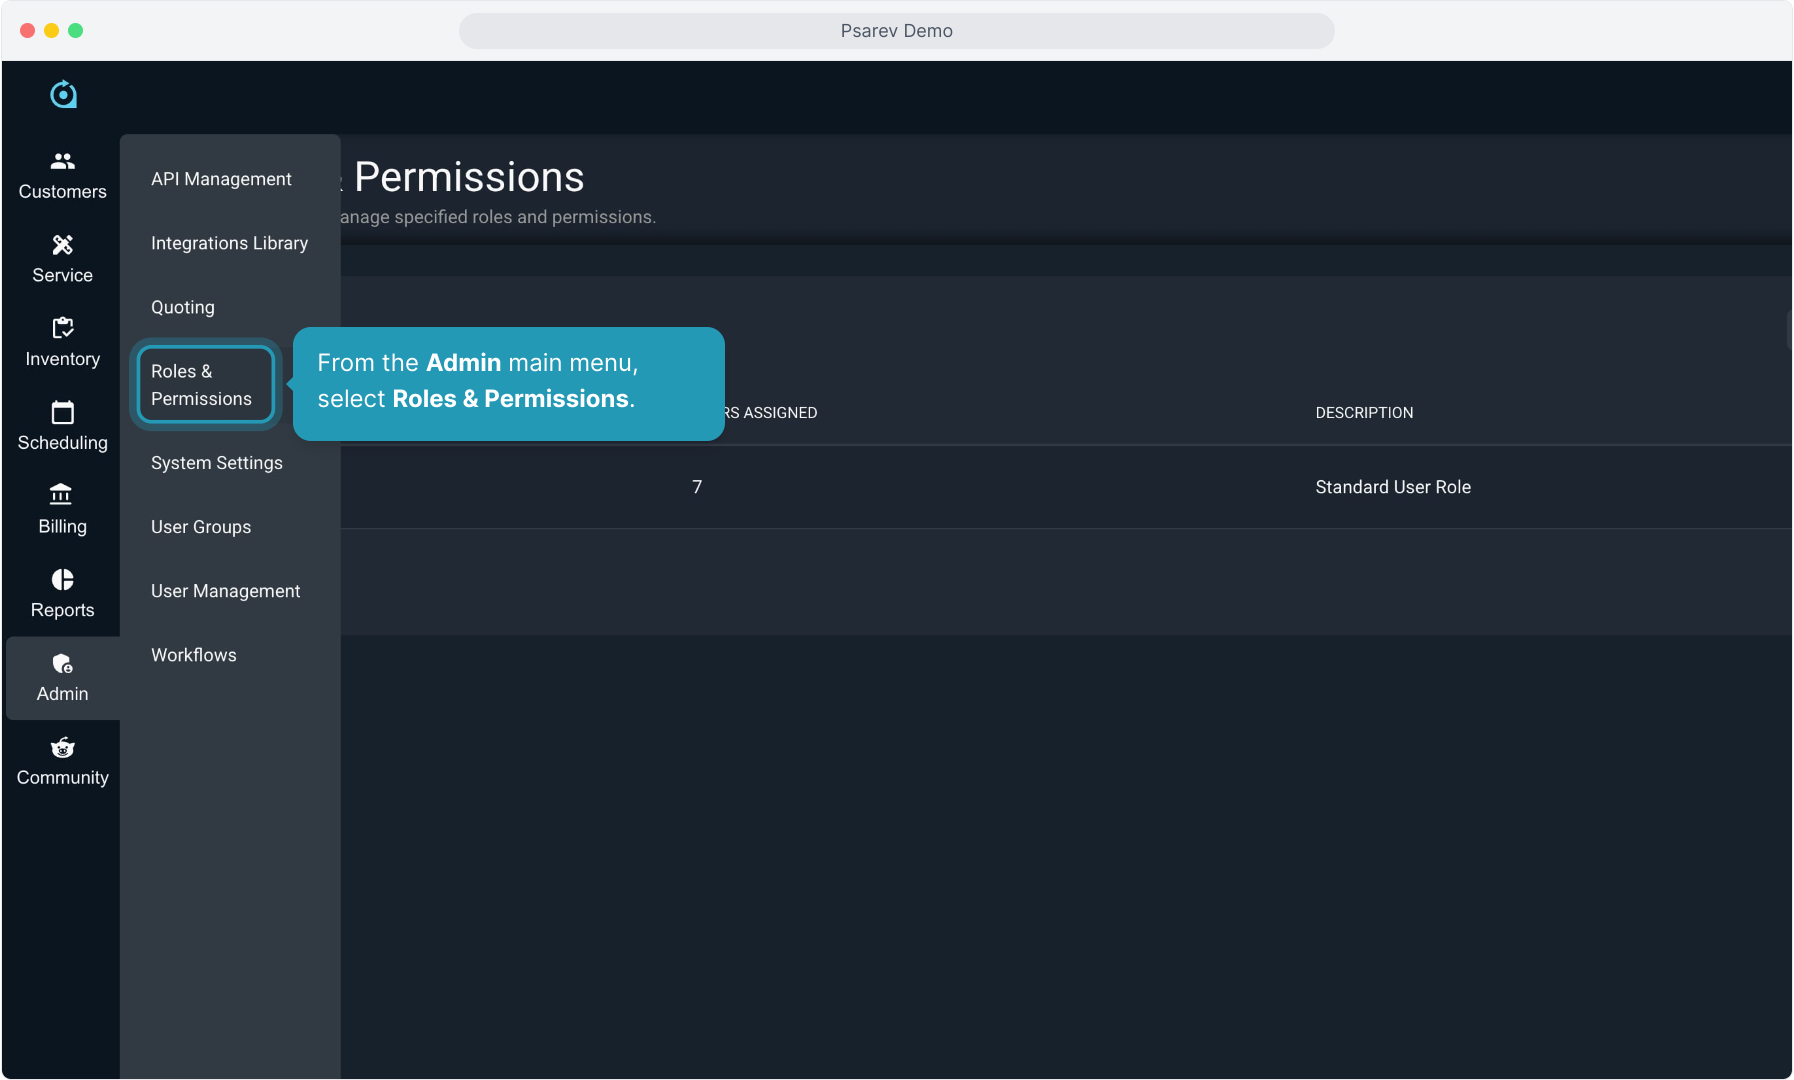
2. From the Admin main menu, select Roles & Permissions.
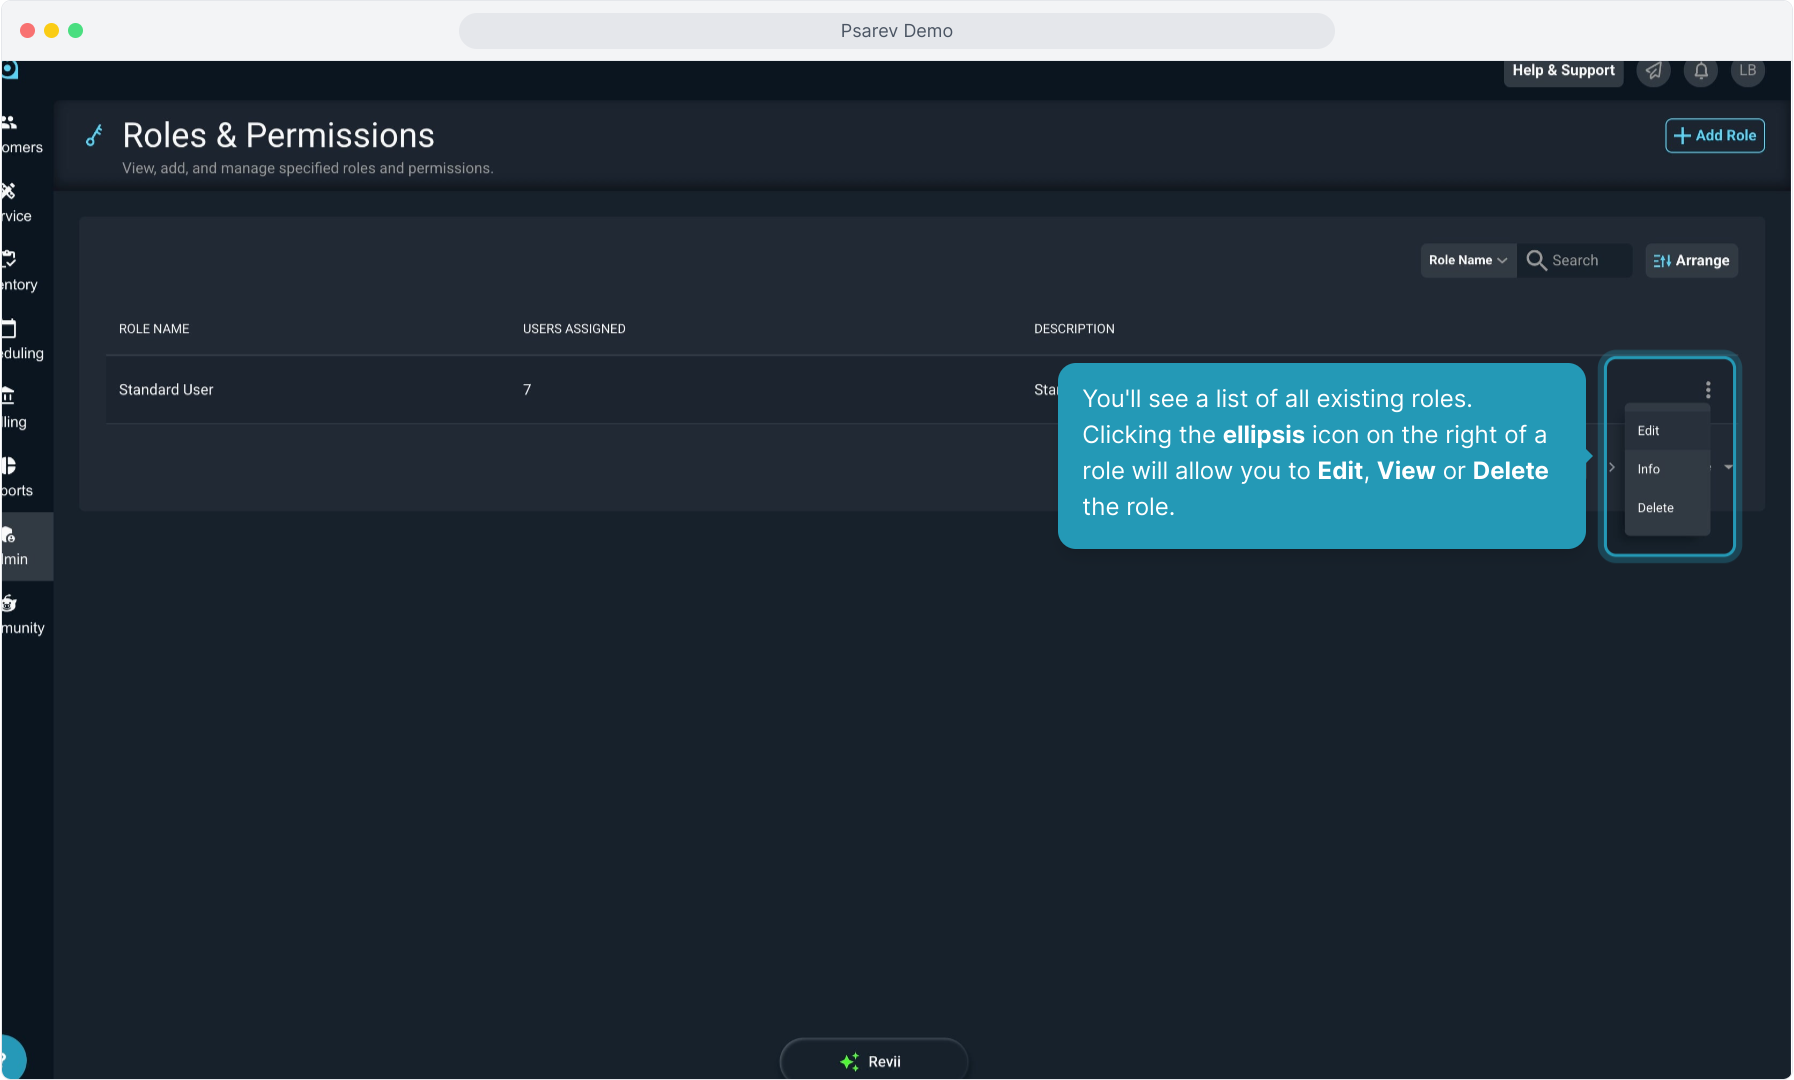
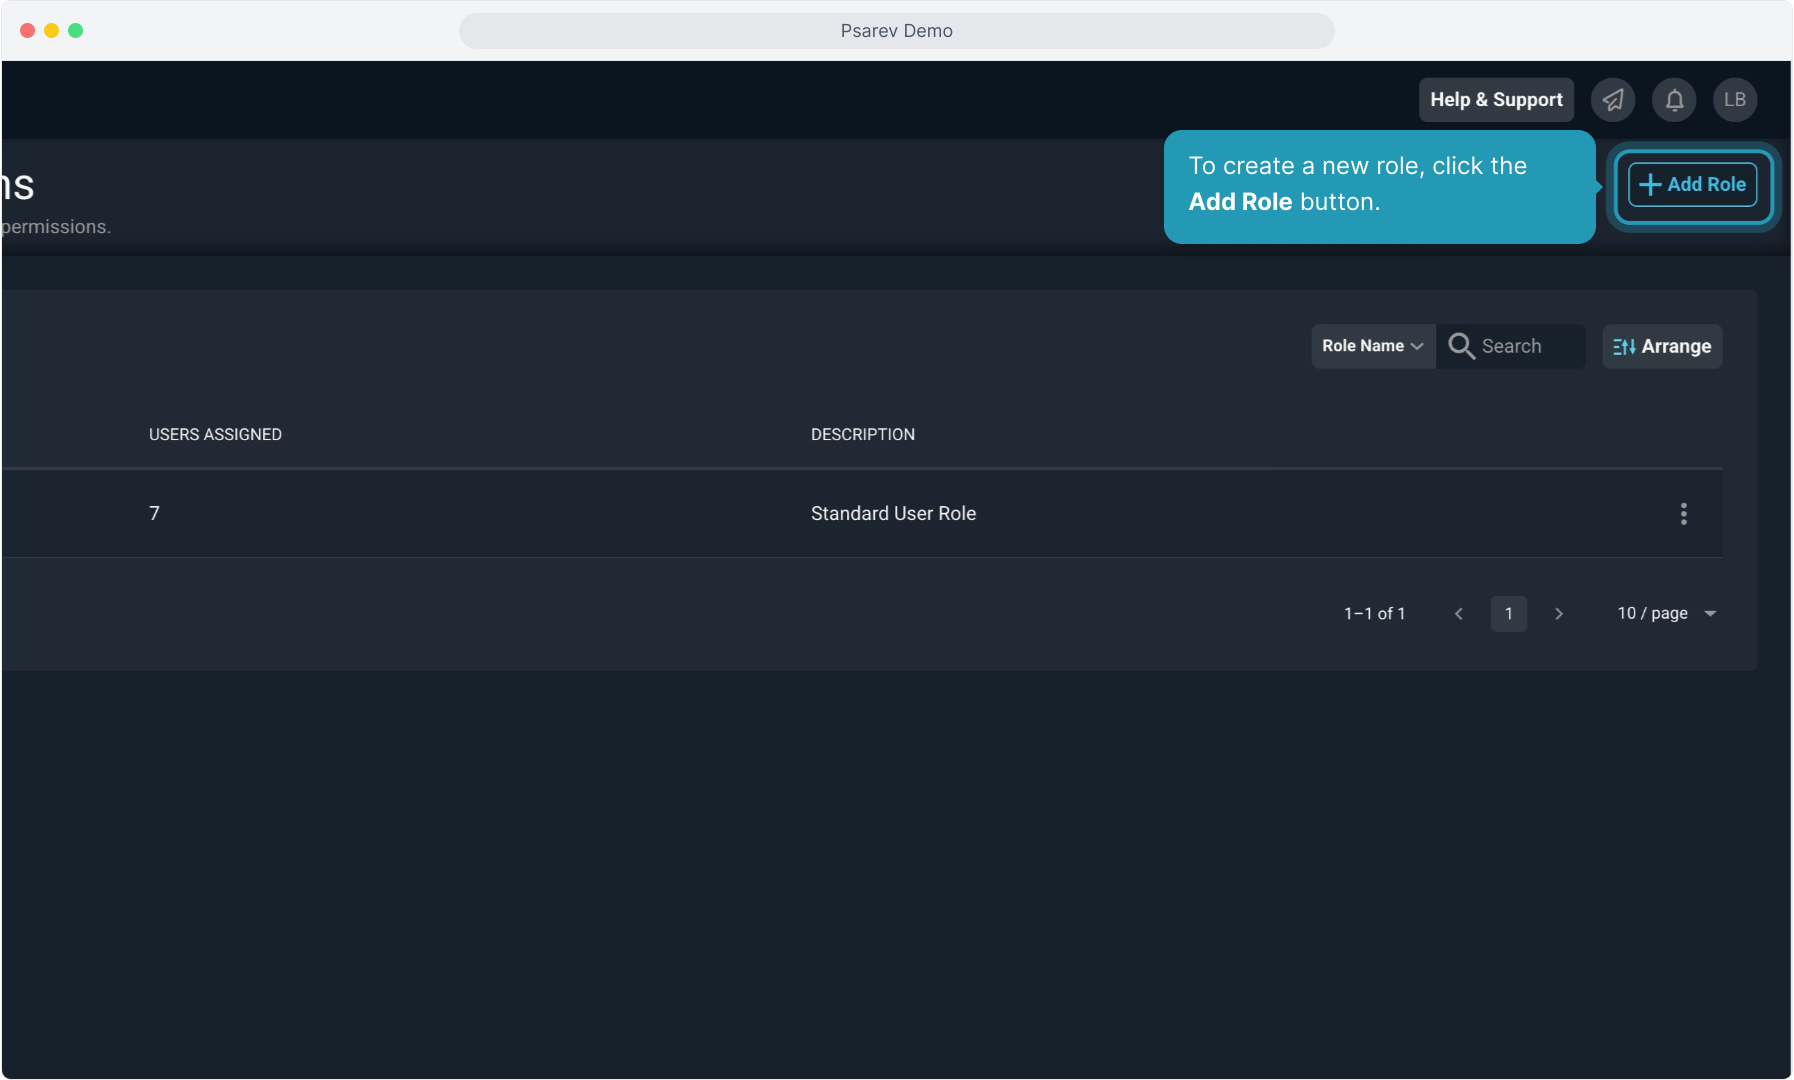
3. You'll see a list of all existing roles. Clicking the ellipsis icon on the right of a role will allow you to Edit, View or Delete the role.
4. Clicking Edit on the role will allow you to change any permission settings you need.
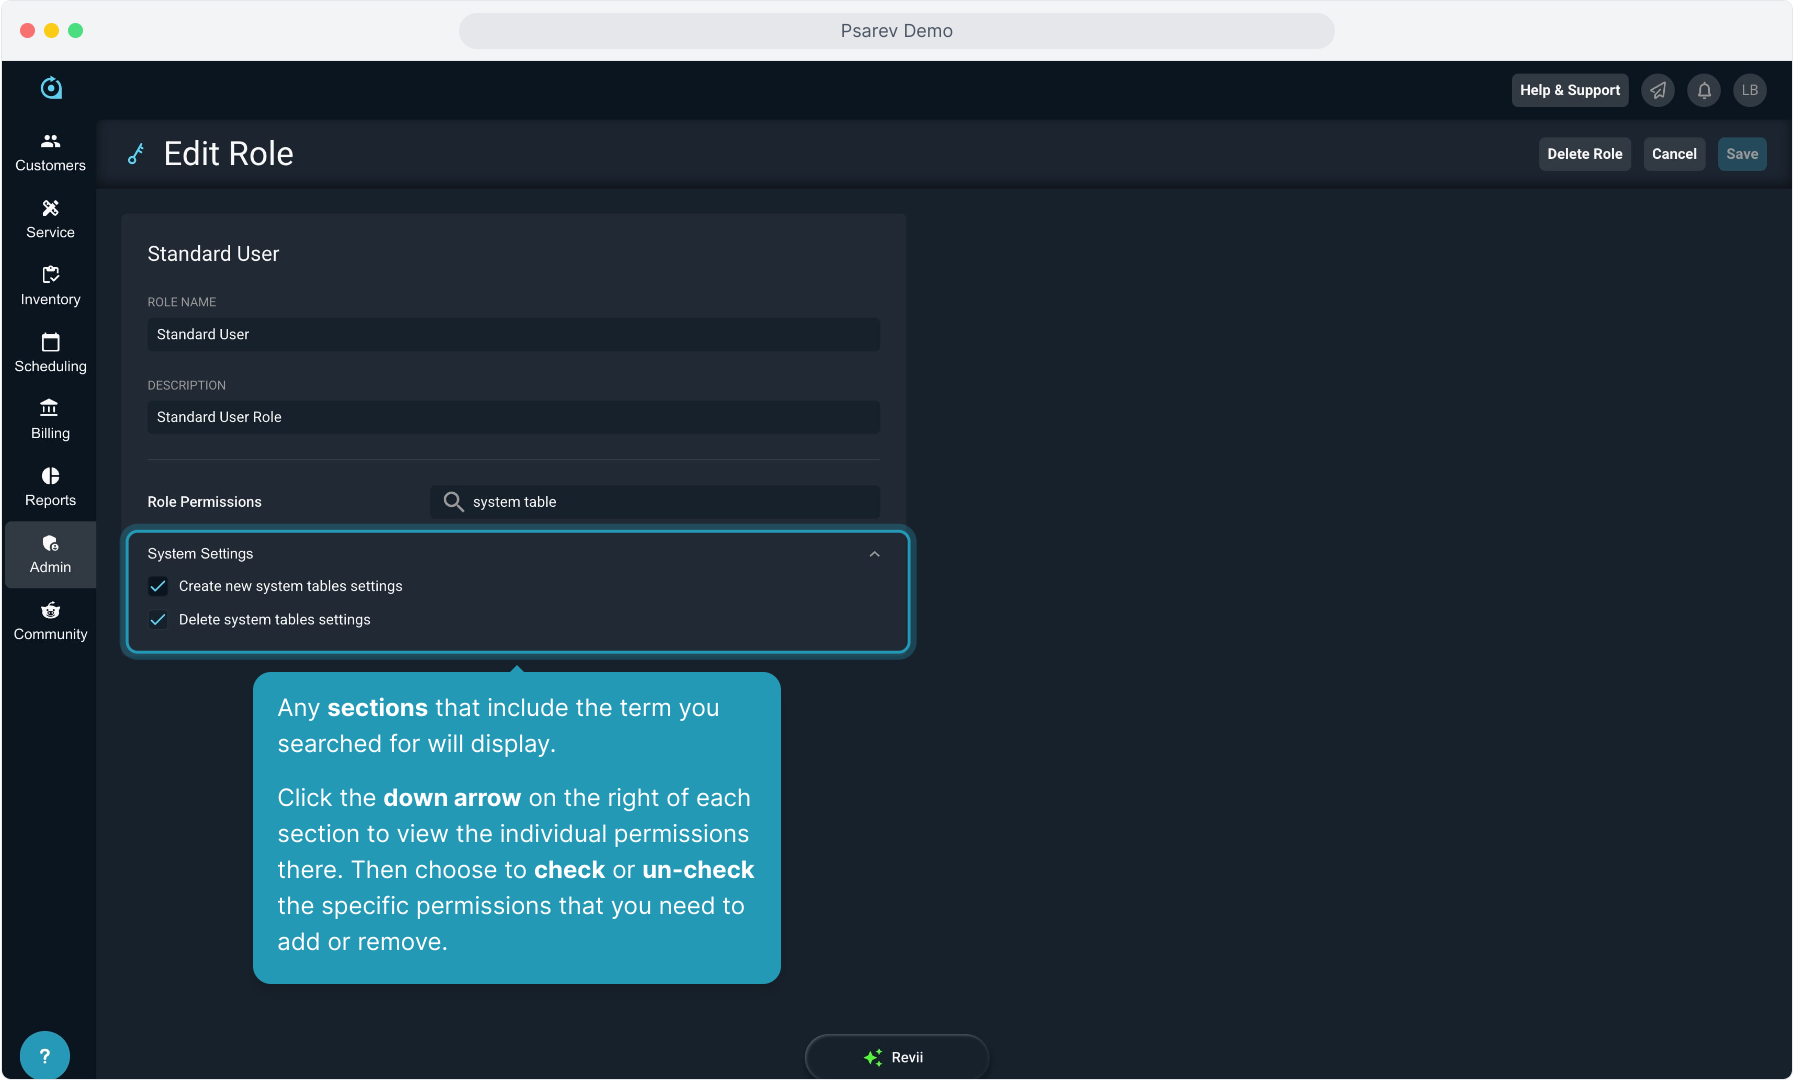
You can type in the Search field to find the permission you need.

5. Any sections that include the term you searched for will display.
Click the down arrow on the right of each section to view the individual permissions there. Then choose to check or un-check the specific permissions that you need to add or remove.
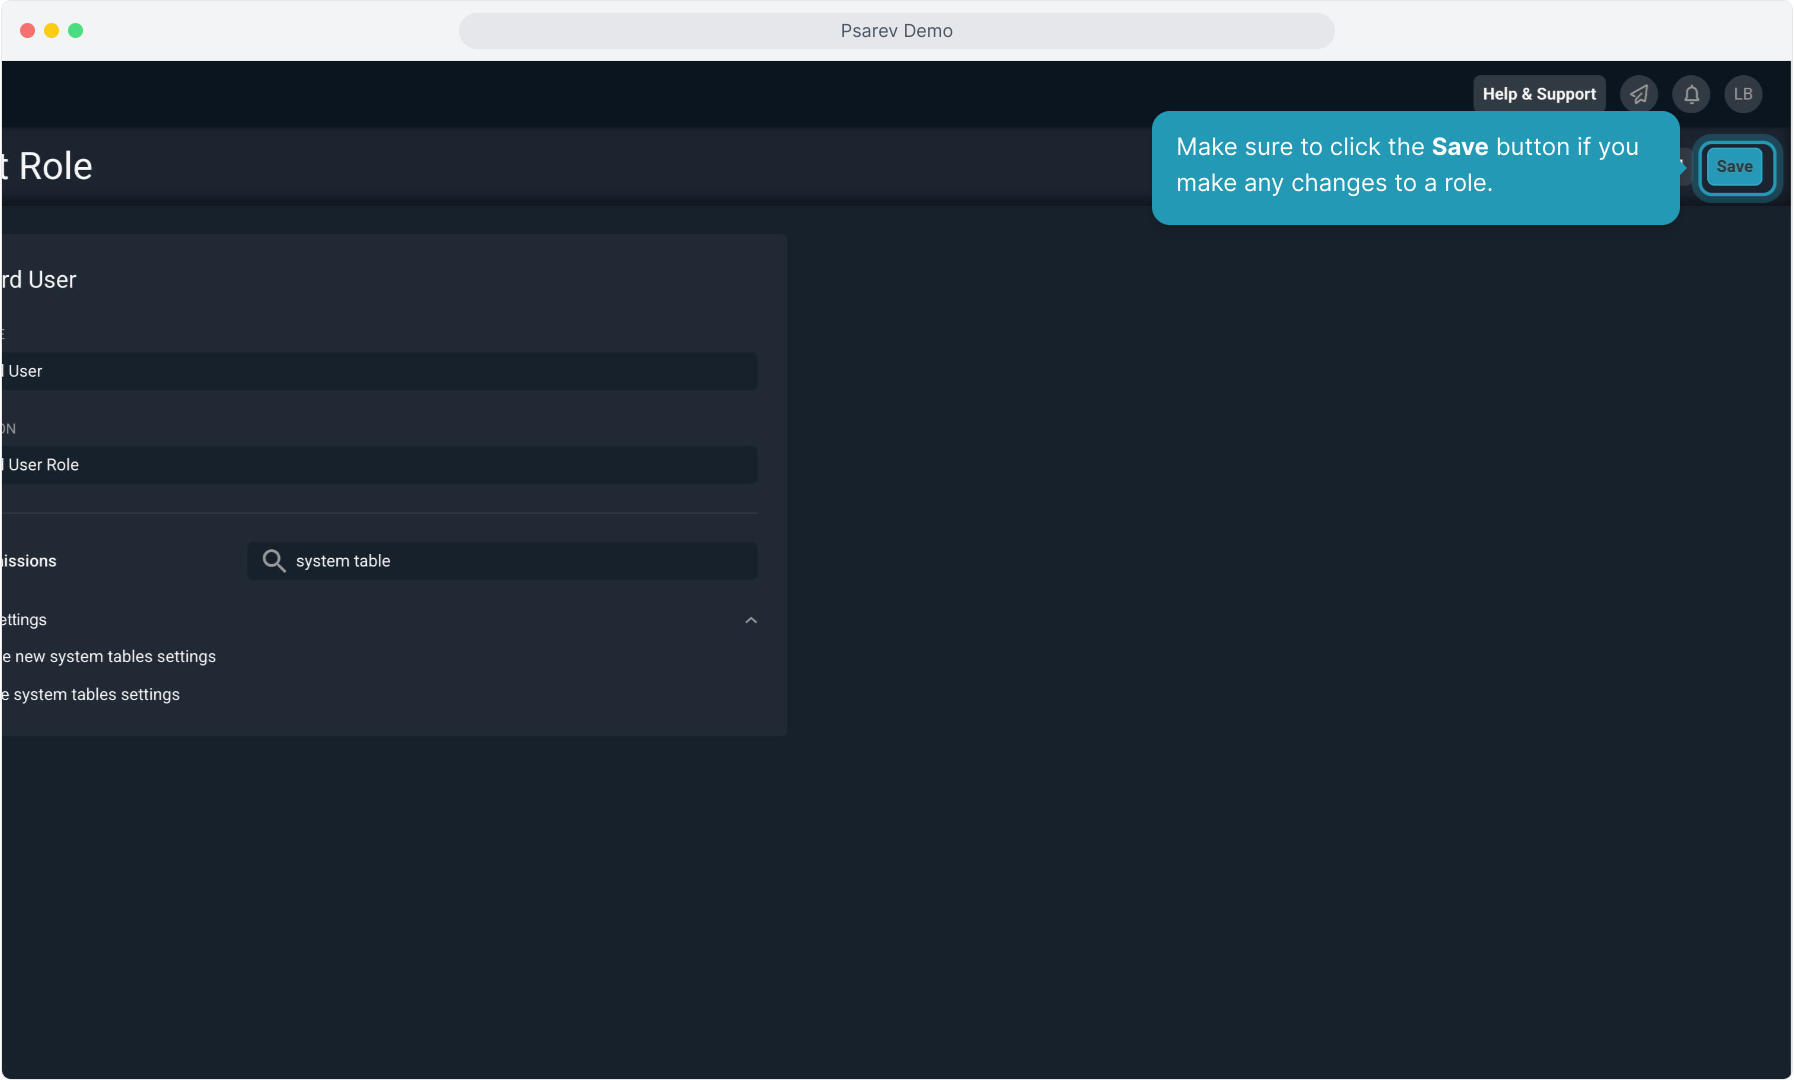
6. Make sure to click the Save button if you make any changes to a role.
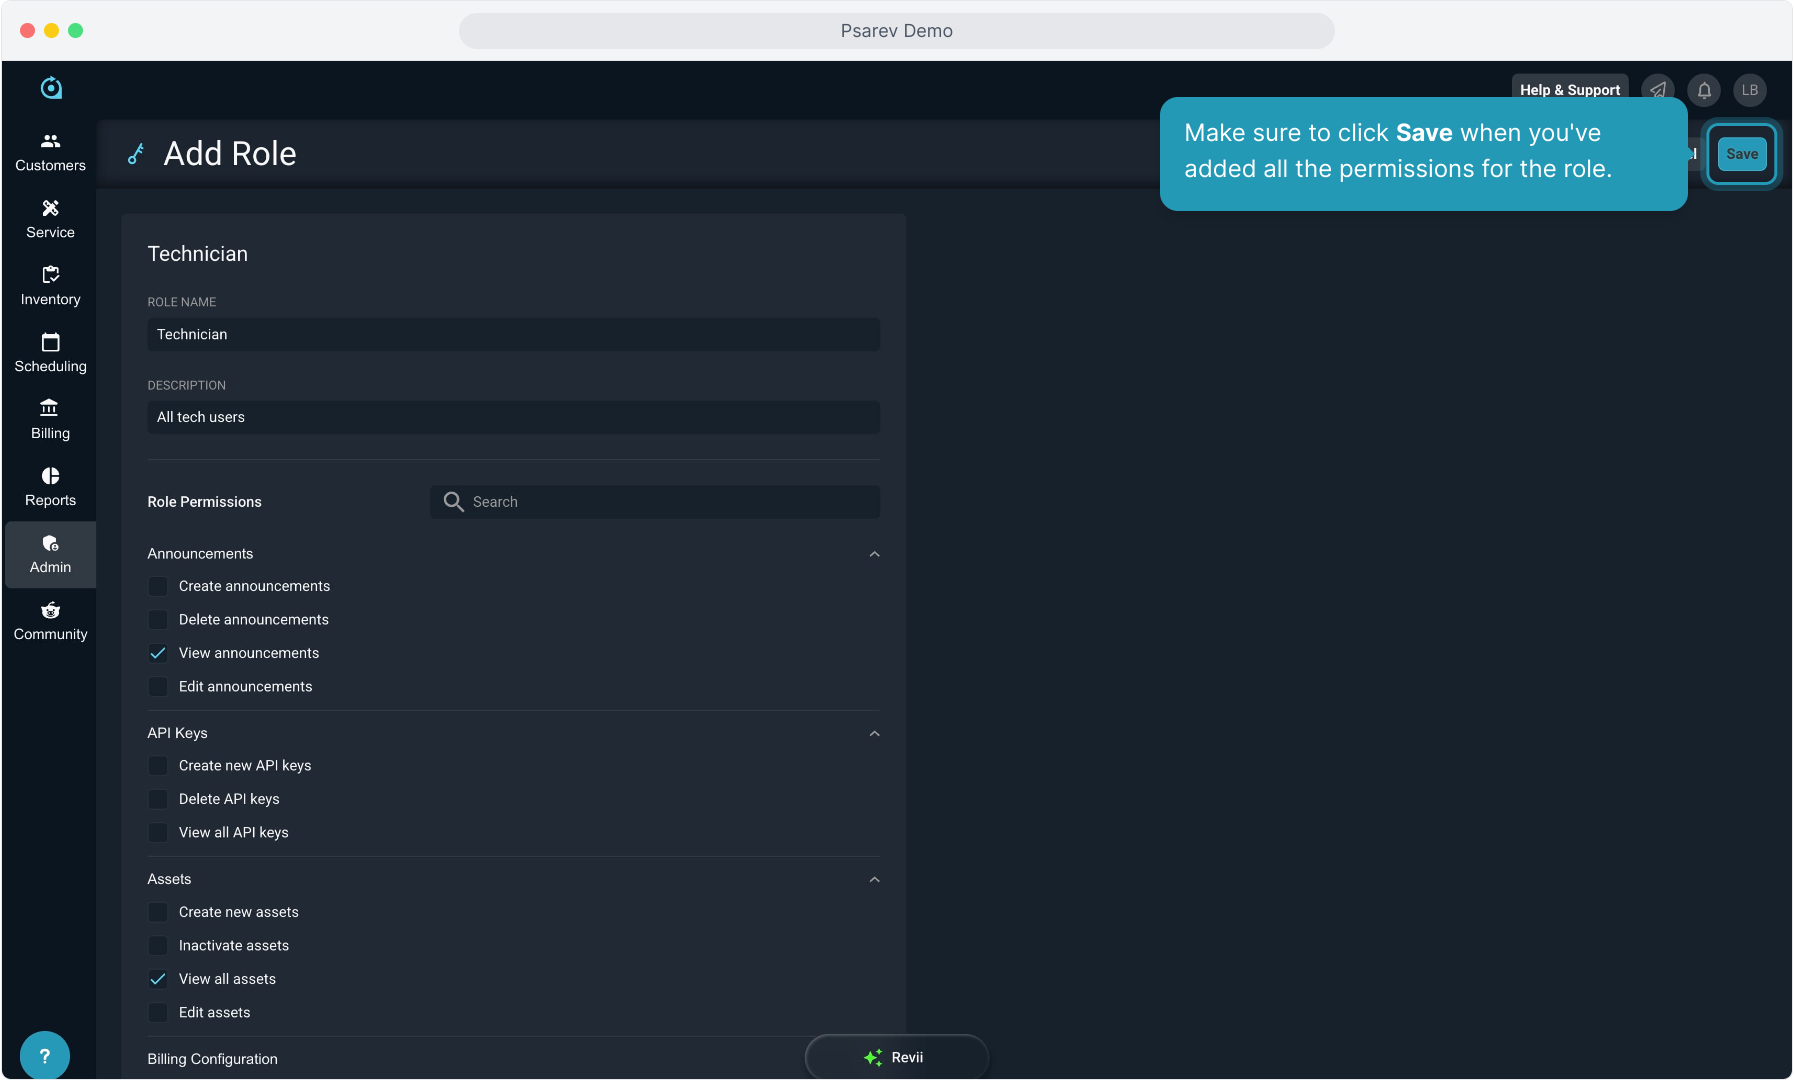
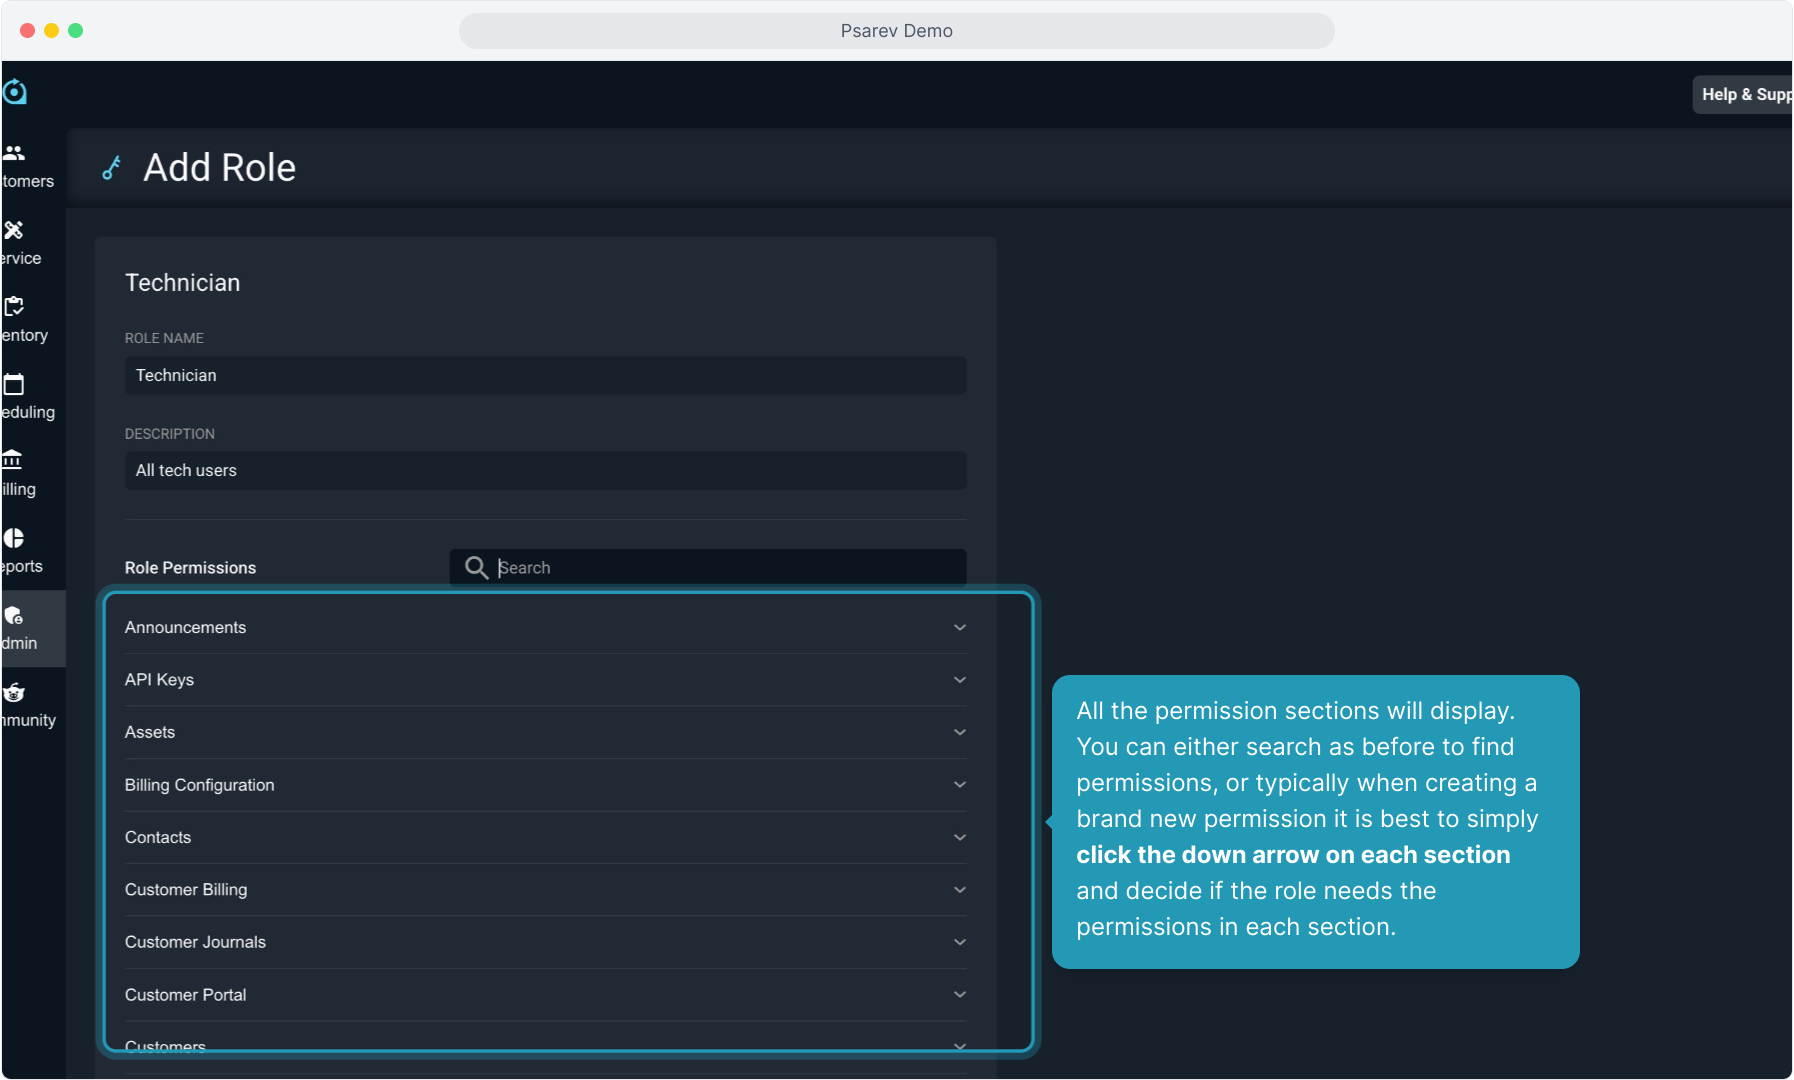
7. To create a new role, click the Add Role button.
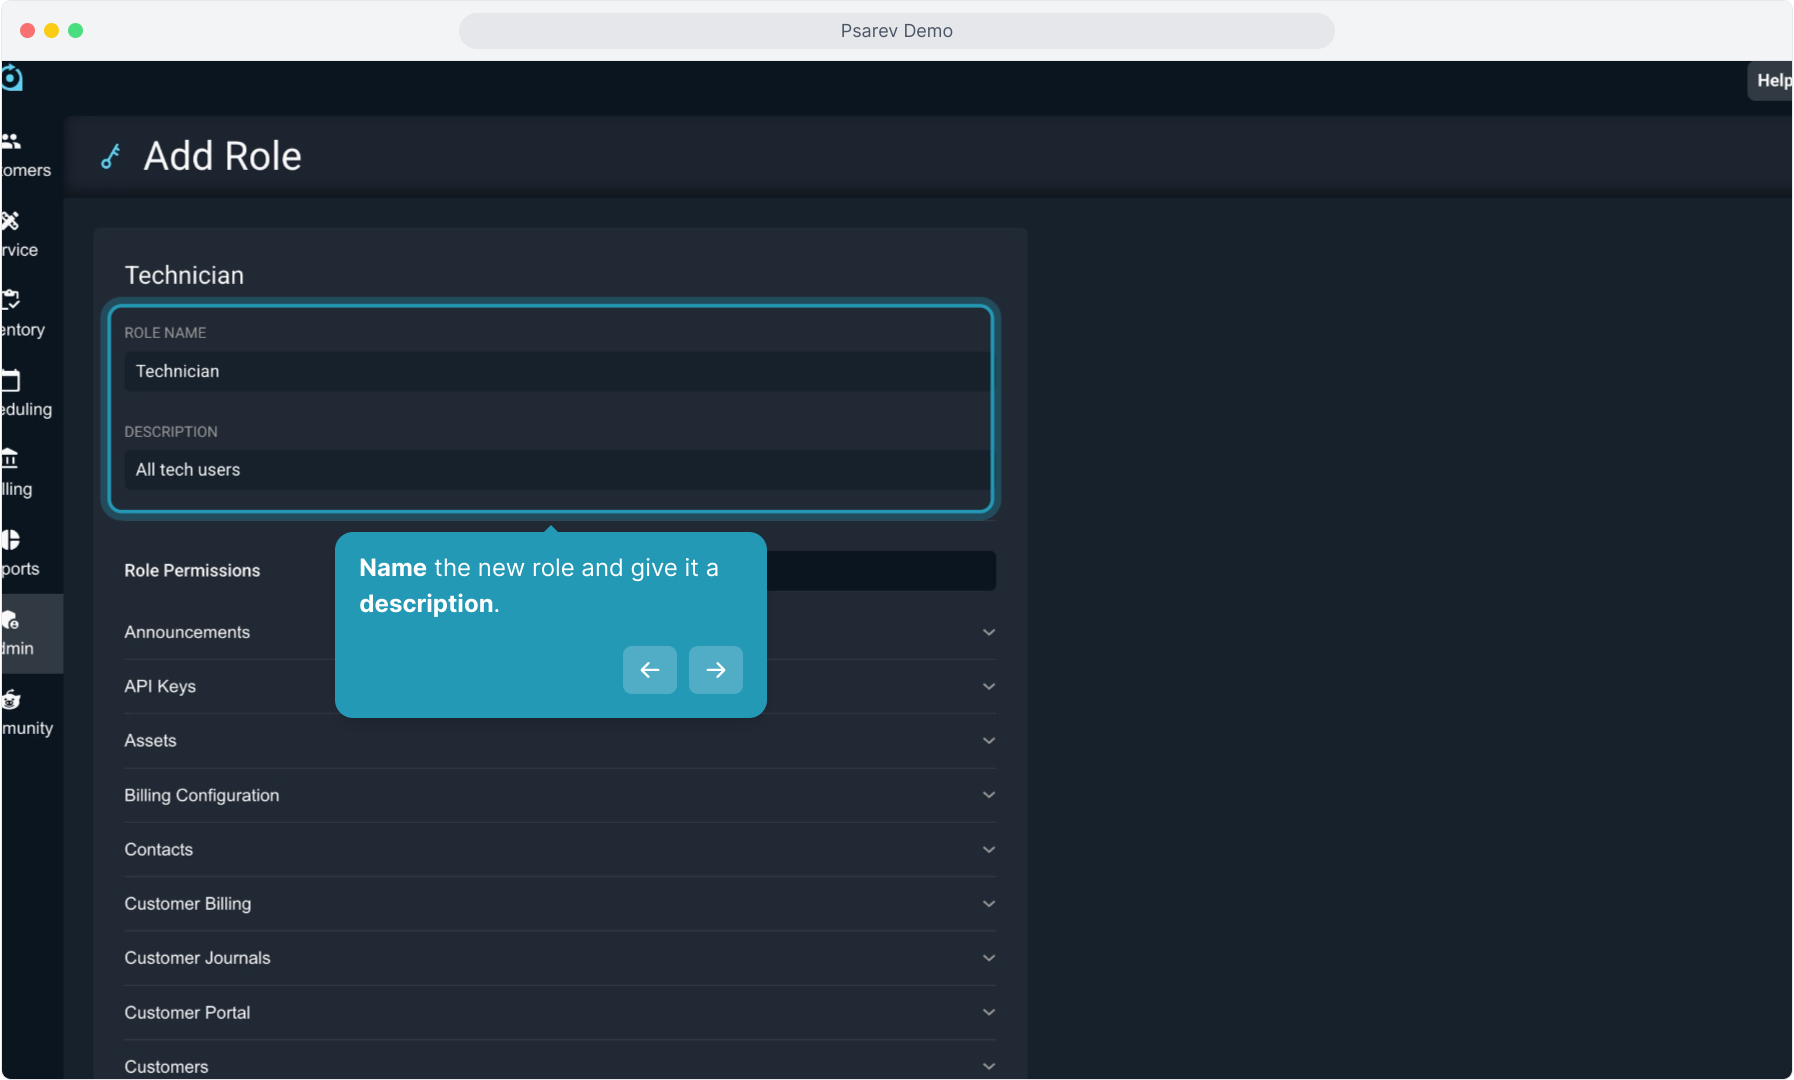
8. Name the new role and give it a description.
9. All the permission sections will display. You can either search as before to find permissions, or typically when creating a brand new permission it is best to simply click the down arrow on each section and decide if the role needs the permissions in each section.
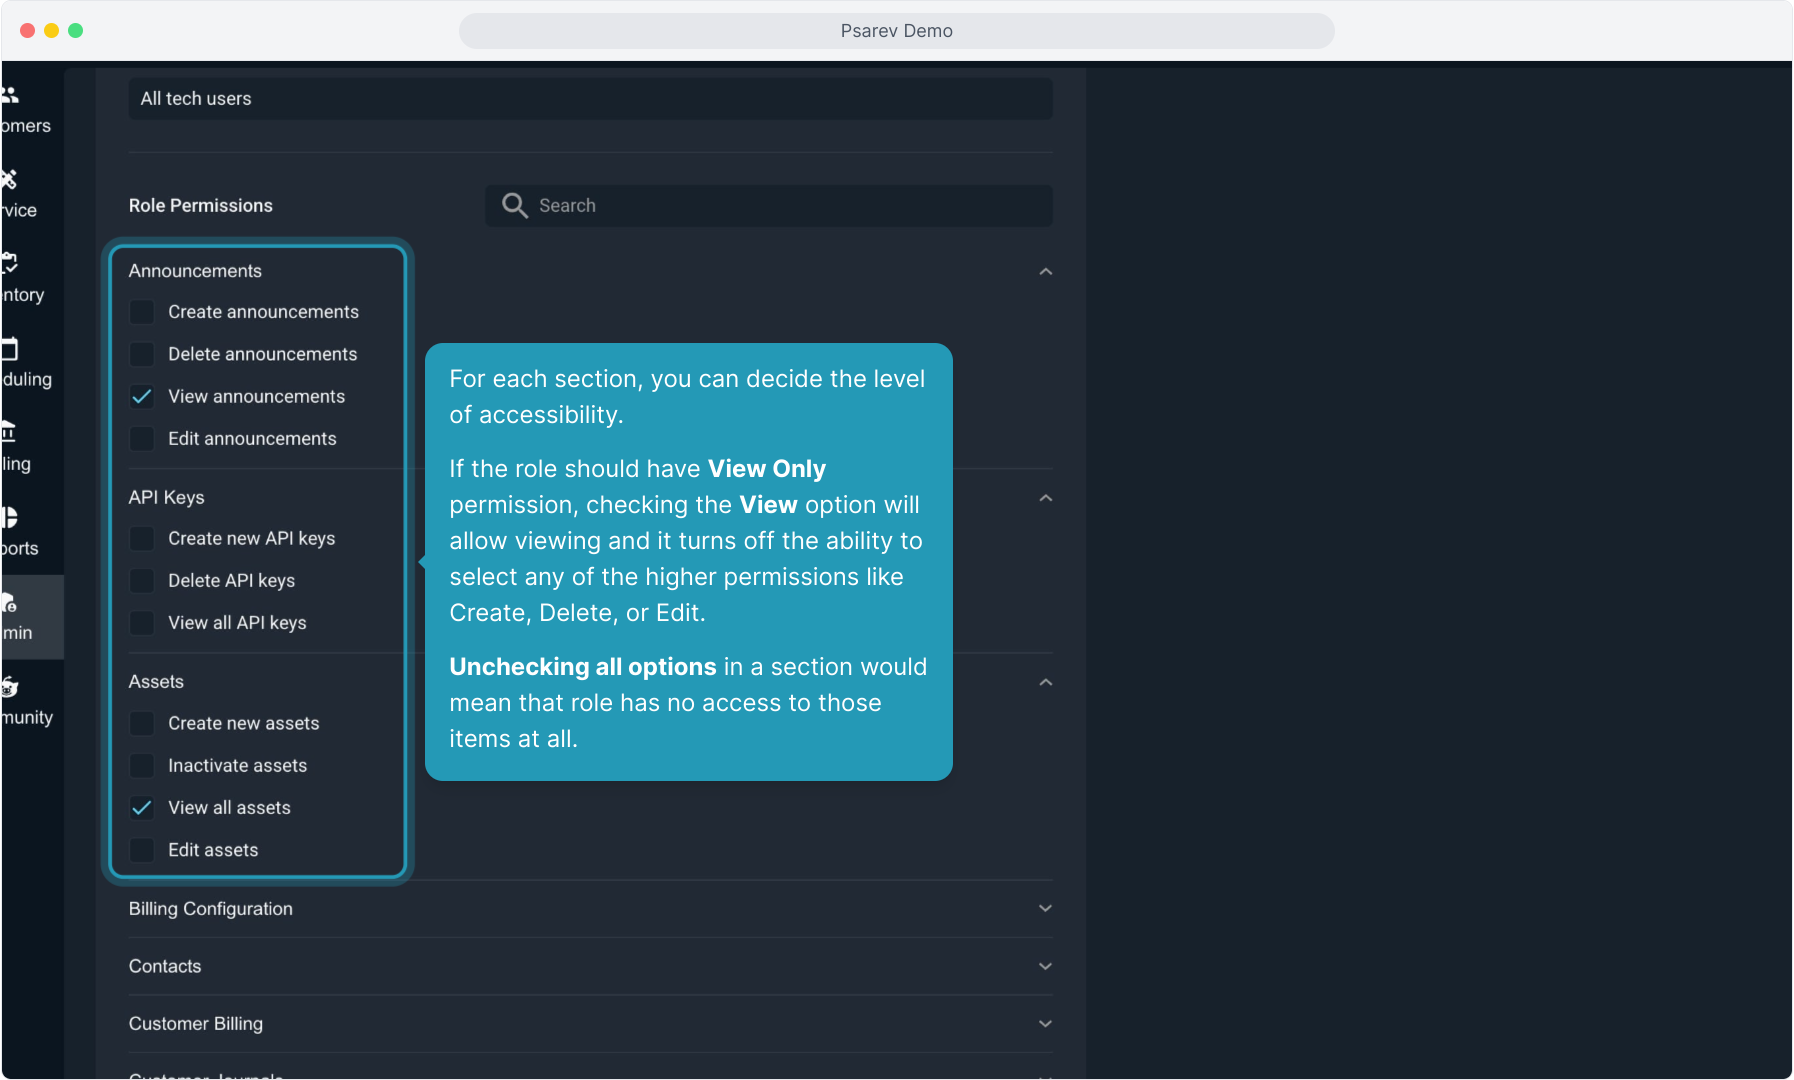
10. For each section, you can decide the level of accessibility.
If the role should have View Only permission, checking the View option will allow viewing and it turns off the ability to select any of the higher permissions like Create, Delete, or Edit.
Unchecking all options in a section would mean that role has no access to those items at all.
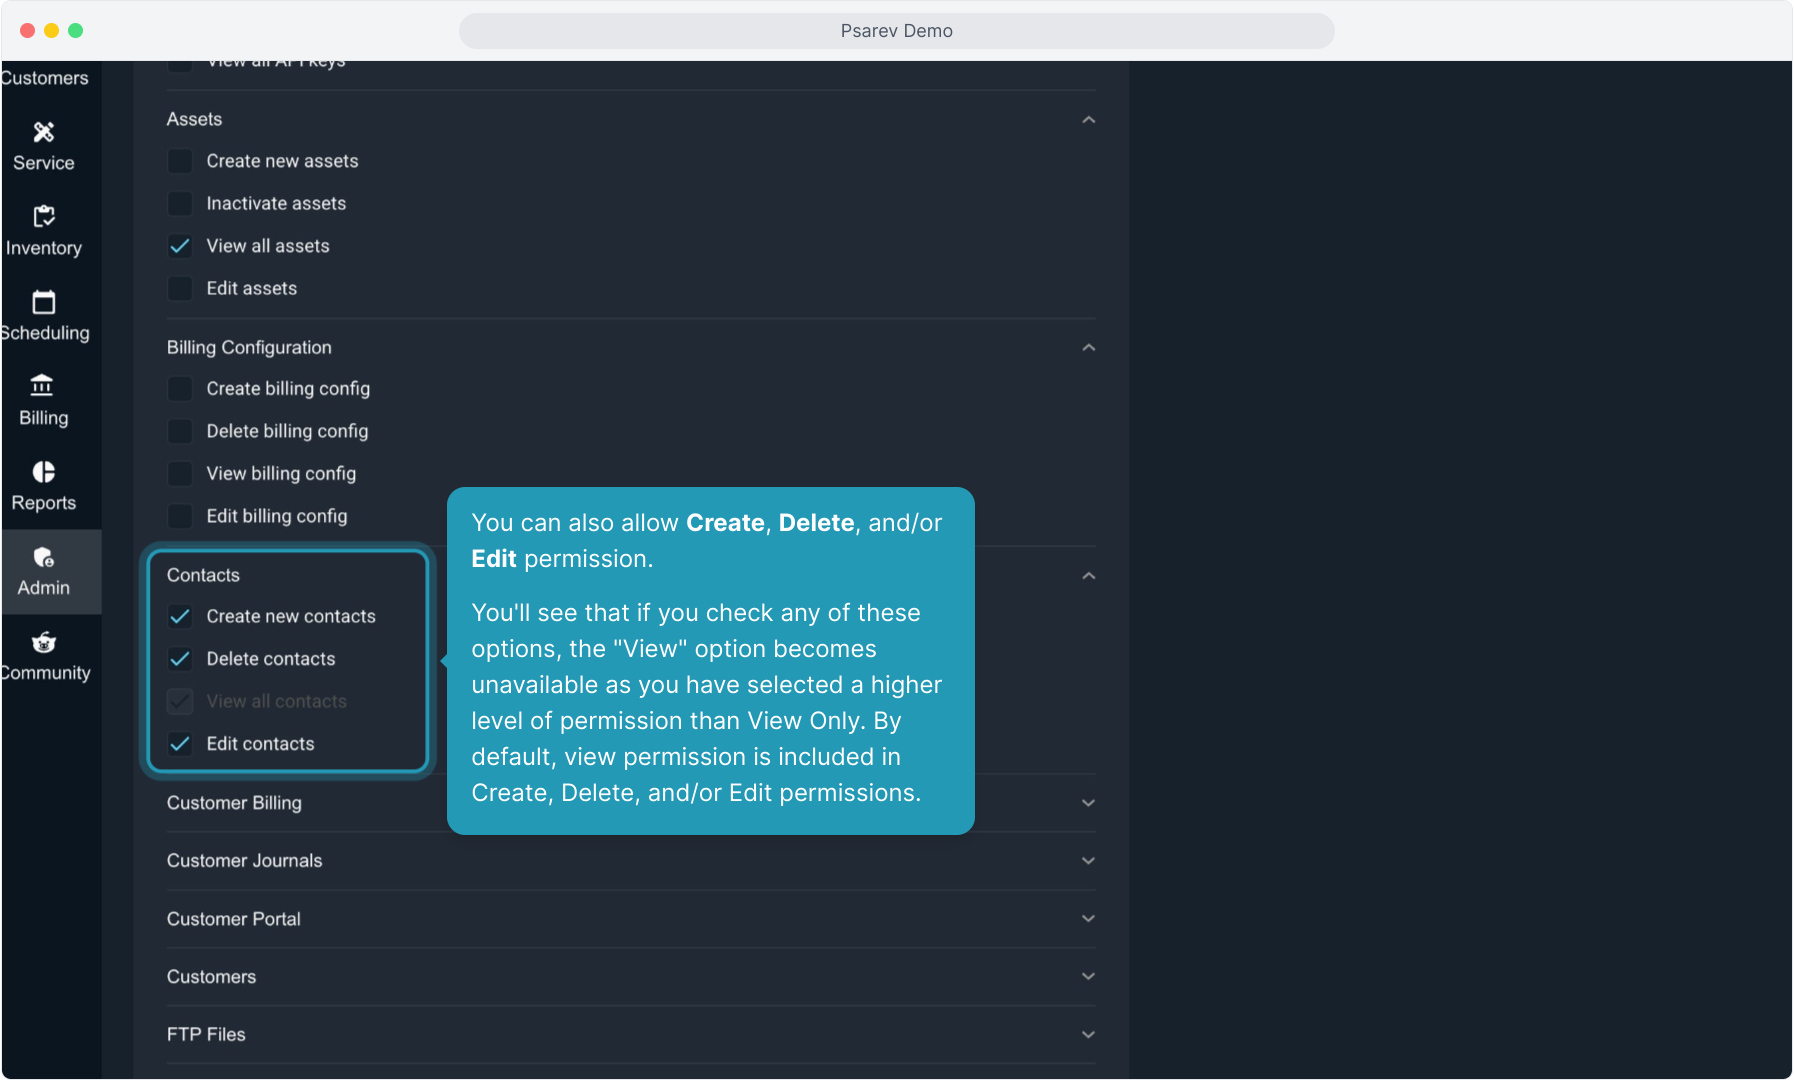
11. You can also allow Create, Delete, and/or Edit permission.
You'll see that if you check any of these options, the "View" option becomes unavailable as you have selected a higher level of permission than View Only. By default, view permission is included in Create, Delete, and/or Edit permissions.
12. Make sure to click Save when you've added all the permissions for the role.