
System Settings: System Tables - Ticket
The System Tables category on the System Settings screen allows you to configure various data points that can be selected using dropdown menus throughout your database. The Ticket tab specifically controls the values available in various dropdowns related to tickets throughout the system.
Status
The Status section allows you to define the ticket statuses available in your instance, including their display color and the state change that occurs when each status is applied to a ticket.
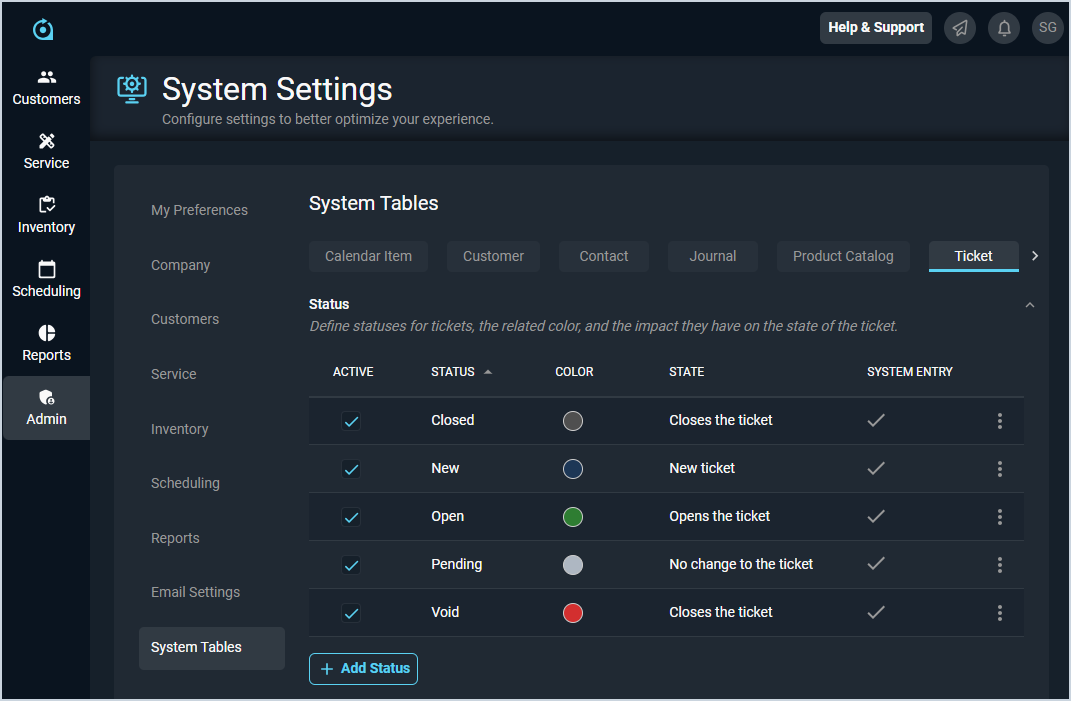
Each field in the Status section is defined below.
| No. | Label | Definition |
| 1 | Active | A checkmark indicates that the status is active in your instance. |
| 2 | Status | Name of the status. |
| 3 | Color | Custom color selected for the status. |
| 4 | State | Changes made to the ticket when the status is selected. |
| 5 | System Entry | A checkmark indicates that the status is a system entry and cannot be modified. |
Priority
The Priority section allows you to define the priority levels available on tickets, including their display color and the order in which they appear in the priority dropdown.
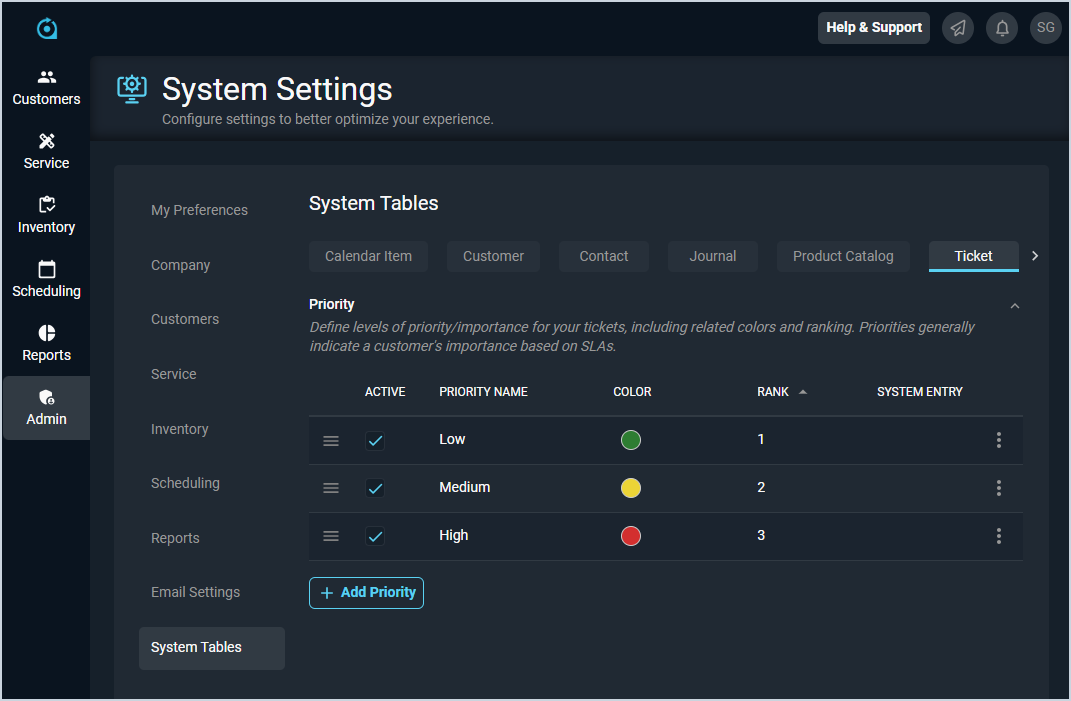
Each field in the Priority section is defined below.
| No. | Label | Definition |
| 1 | Active | A checkmark indicates that the priority is active in your instance. |
| 2 | Priority Name | Name of the priority. |
| 3 | Color | Custom color selected for the priority. |
| 4 | Rank | Order the priority option displays in when using the Priority dropdown on tickets. NOTE: To reorder the line items, simply click and drag the items into the desired order using the drag icon at the start of the row. |
| 5 | System Entry | A checkmark indicates that the priority is a system entry and cannot be modified. |
Ticket Type
The Ticket Type section allows you to define the ticket types available in your instance and assign a default priority to each type.

Each field in the Ticket Type section is defined below.
| No. | Label | Definition |
| 1 | Active | A checkmark indicates that the type is active in your instance. |
| 2 | Type Name | Name of the ticket type. |
| 3 | Assigned Priority | Priority assigned to the ticket when the type is selected. |
| 4 | System Entry | A checkmark indicates that the type is a system entry and cannot be modified. |
Severity
The Severity section allows you to define the severity levels available on tickets, including their display color and the order in which they appear in the severity dropdown.
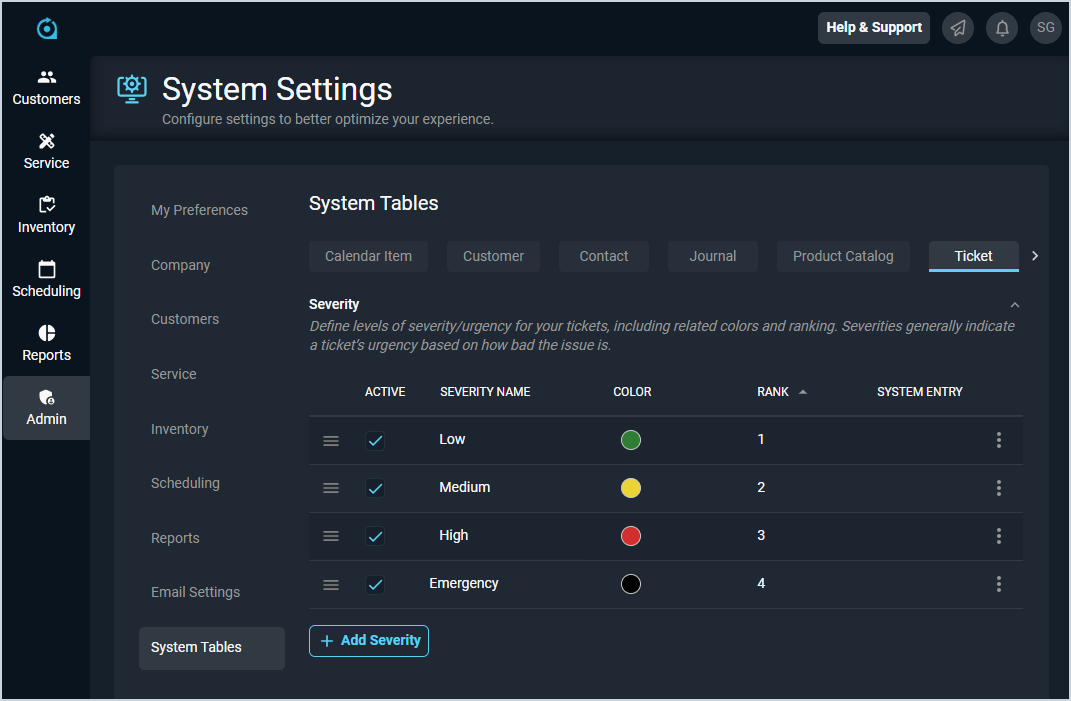
Each field in the Severity section is defined below.
| No. | Label | Definition |
| 1 | Active | A checkmark indicates that the severity is active in your instance. |
| 2 | Severity Name | Name of the severity. |
| 3 | Color | Custom color selected for the severity. |
| 4 | Rank | Order the severity option displays in when using the Severity dropdown on tickets. NOTE: To reorder the line items, simply click and drag the items into the desired order using the drag icon at the start of the row. |
| 5 | System Entry | A checkmark indicates that the severity is a system entry and cannot be modified. |
Ticket Tags
The Tags section allows you to define custom tags for tickets, including their display labels, colors, and usage settings. Tags can be applied to tickets to help categorize and identify them at a glance.
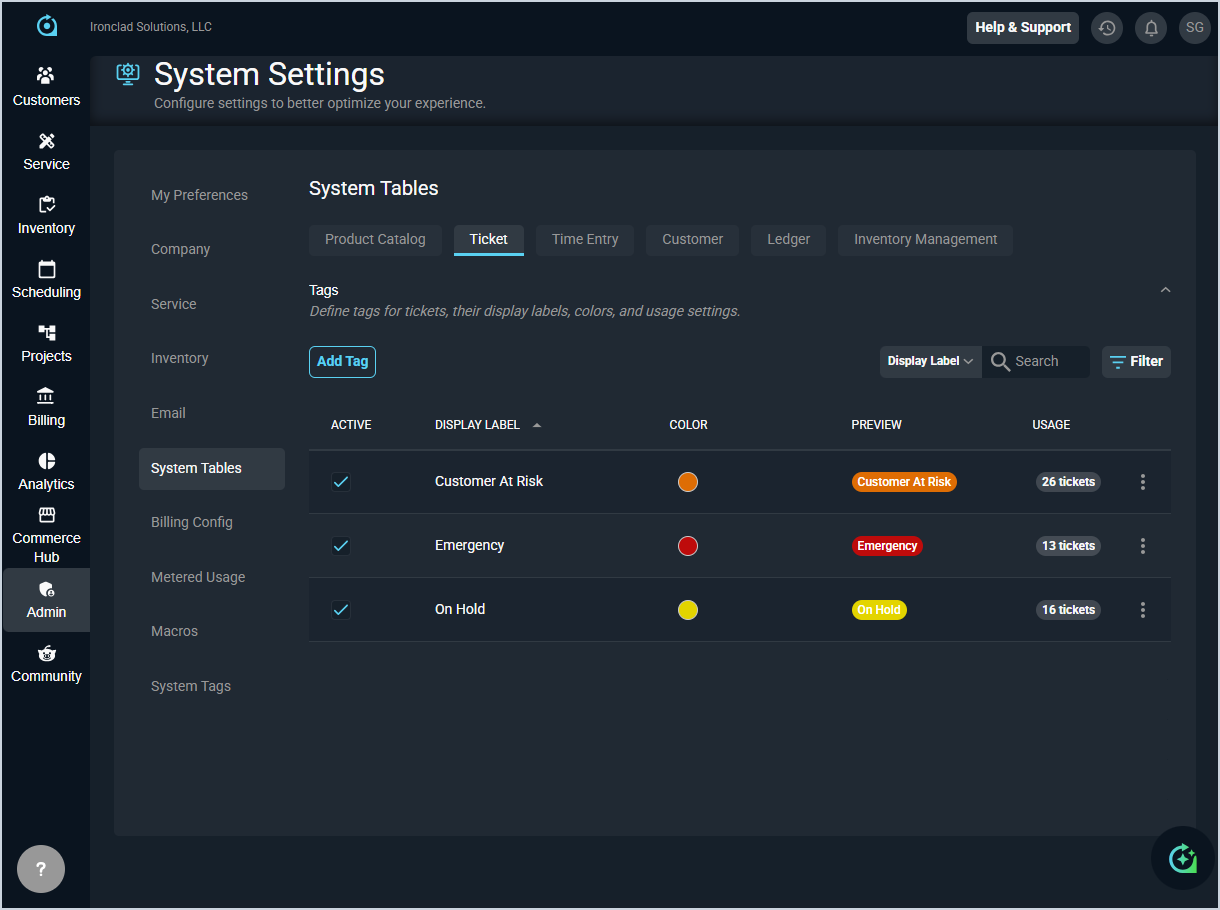
Each field in the Tags section is defined below.
| No. | Label | Definition |
| 1 | Active | A checkmark indicates that the tag is active in your instance. |
| 2 | Display Label | Name of the tag as it will appear on tickets. |
| 3 | Color | Custom color selected for the tag. |
| 4 | Preview | A visual preview of how the tag will appear when applied to a ticket. |
| 5 | Usage | The number of tickets the tag is currently applied to. |
Available Actions
These actions are available on the Ticket tab.
- Enter new items by clicking the Add button in each section, completing the desired fields, and clicking the Save button.
- For sections with the drag icons at the start of each row, reorder the line items by simply clicking and dragging the items into the desired order using the drag icons.
- Edit line items by clicking the ellipsis at the end of the row and selecting Edit from the menu options. Click the Save button at the bottom of the screen once you've finished making changes.
- Delete line items by clicking the ellipsis at the end of the row and selecting Delete from the menu options. NOTE: You cannot delete items if they have been used in your instance. For example, once a ticket is set to a certain ticket type, that Ticket Type can no longer be deleted.
- See the System Settings Overview article for more information about the other categories on the System Settings screen.