
Number Management: List View
The Number Management list view shows all of your number groups and how many numbers in each group are available, unavailable, and assigned. To open it, click Inventory in the sidebar menu and select Number Management.
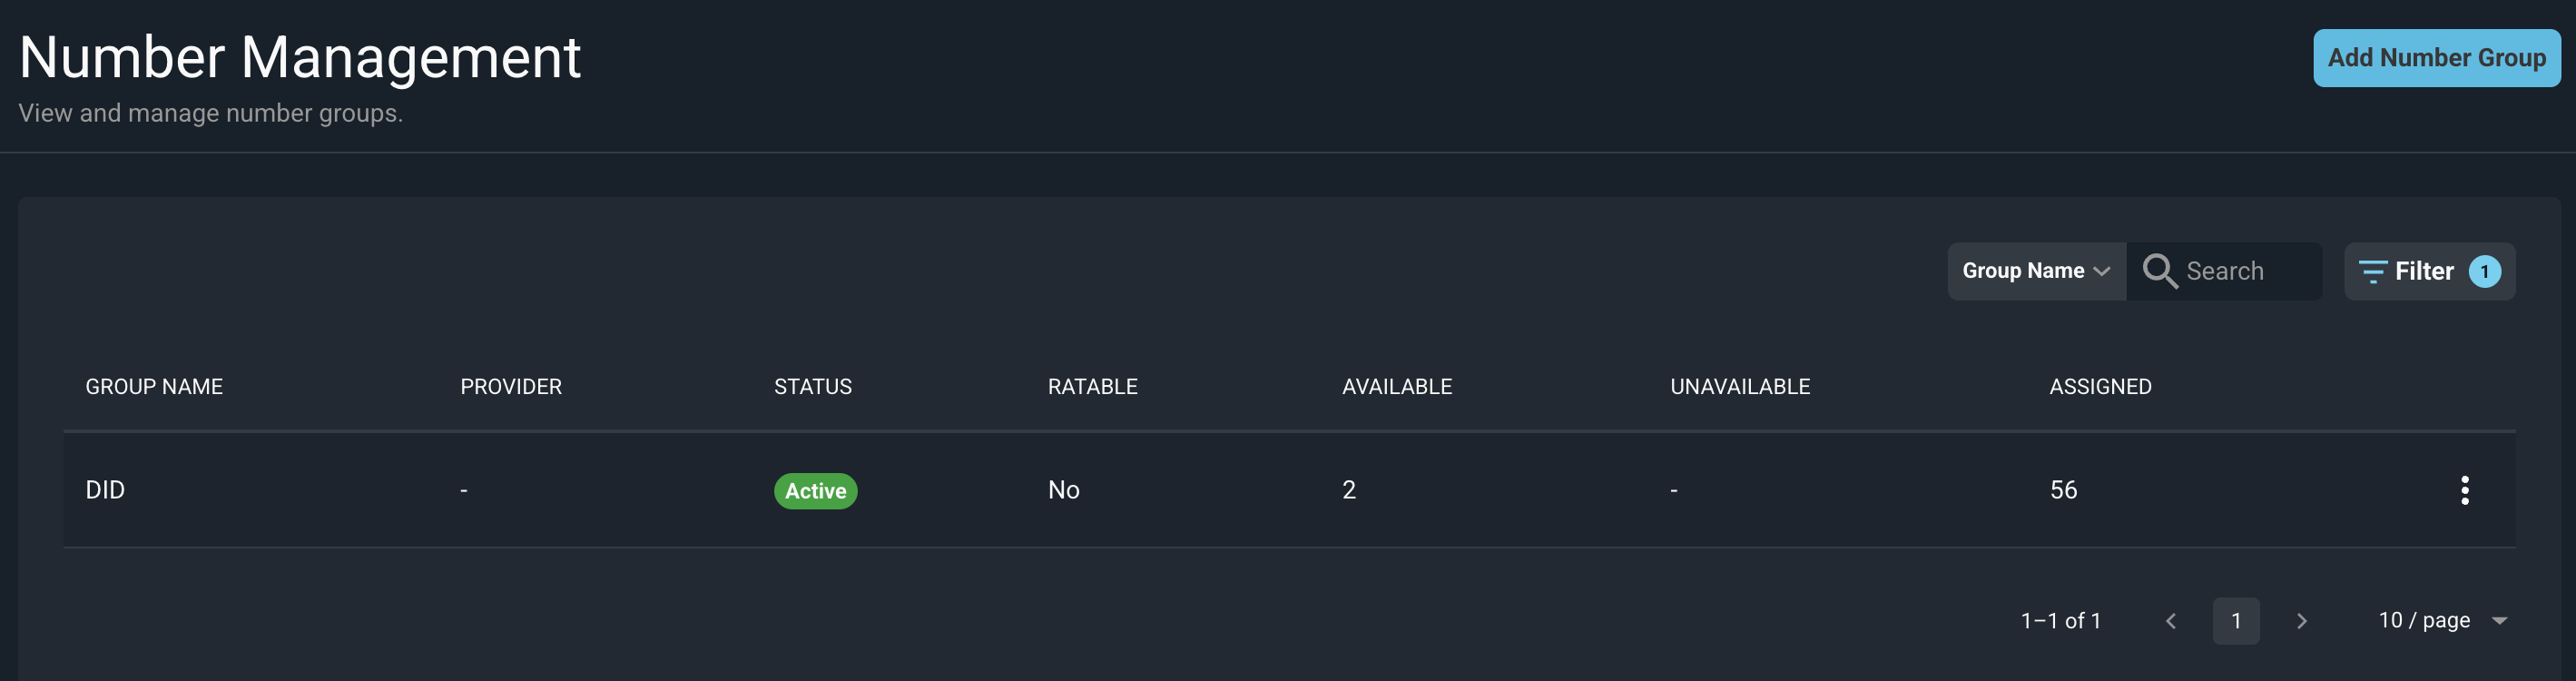
Each column on the Number Management screen is defined below.
No. | Label | Definition |
|---|---|---|
1 | Group Name | The name of the number group. Most clients will simply need a "DID" number group. Some clients will want to categorize DID or Tollfree numbers into different groups, for instance |
2 | Provider | The provider associated with the number group. A dash appears if no provider has been set. |
3 | Status | Whether the number group is active. |
4 | Ratable | Indicates whether the numbers in the group are ratable. [CONFIRM: definition of Ratable] |
5 | Available | The number of telephone numbers in the group that are available to assign to a customer. |
6 | Unavailable | The number of telephone numbers in the group that are currently unavailable. A dash appears if there are none. |
7 | Assigned | The number of telephone numbers in the group that are assigned to a customer's service. |
These actions are available on the Number Management screen.
- Add a new group by clicking the Add Number Group button. See the Add/Edit Number Groups article for more information.
- Search for a group by selecting a field from the dropdown next to the Search box (set to Group Name by default) and entering text.
- Filter the groups displayed by clicking the Filter button. The number on the button shows how many filters are currently applied.
- View a group by clicking the three-dot menu at the end of its row and selecting View. See the Number Management: Group Details article for more information.
- Edit a group by clicking the three-dot menu at the end of its row and selecting Edit.
- Deactivate a group by clicking the three-dot menu at the end of its row and selecting Deactivate. To view deactivated number groups, change the filter to allow them as they are suppressed by default.
- Move between pages using the page controls at the bottom of the list, and change how many groups appear on each page using the per page dropdown.
Related Articles
- Number Management: Overview
- Add/Edit Number Groups
- Number Management: Group Details
- System Settings: System Tables - Number Management