How To Guide: Merging and Linking Tickets
1. Introduction
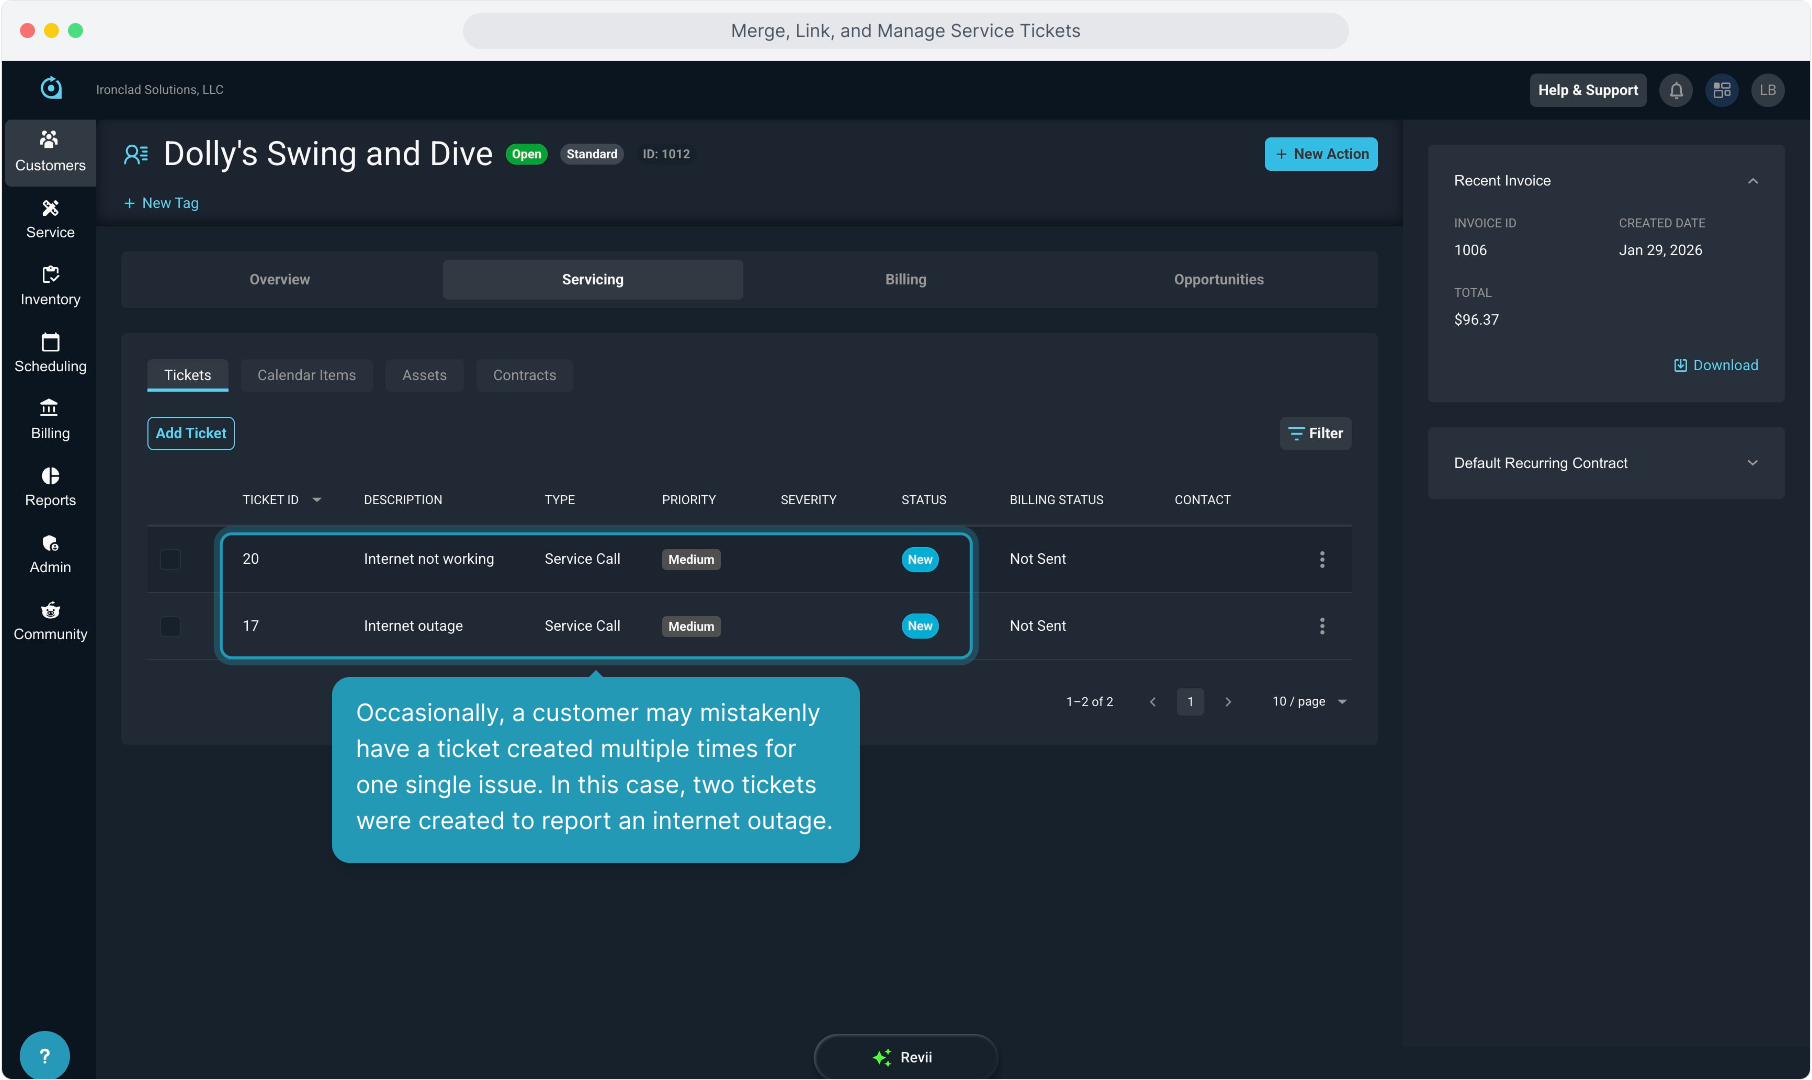
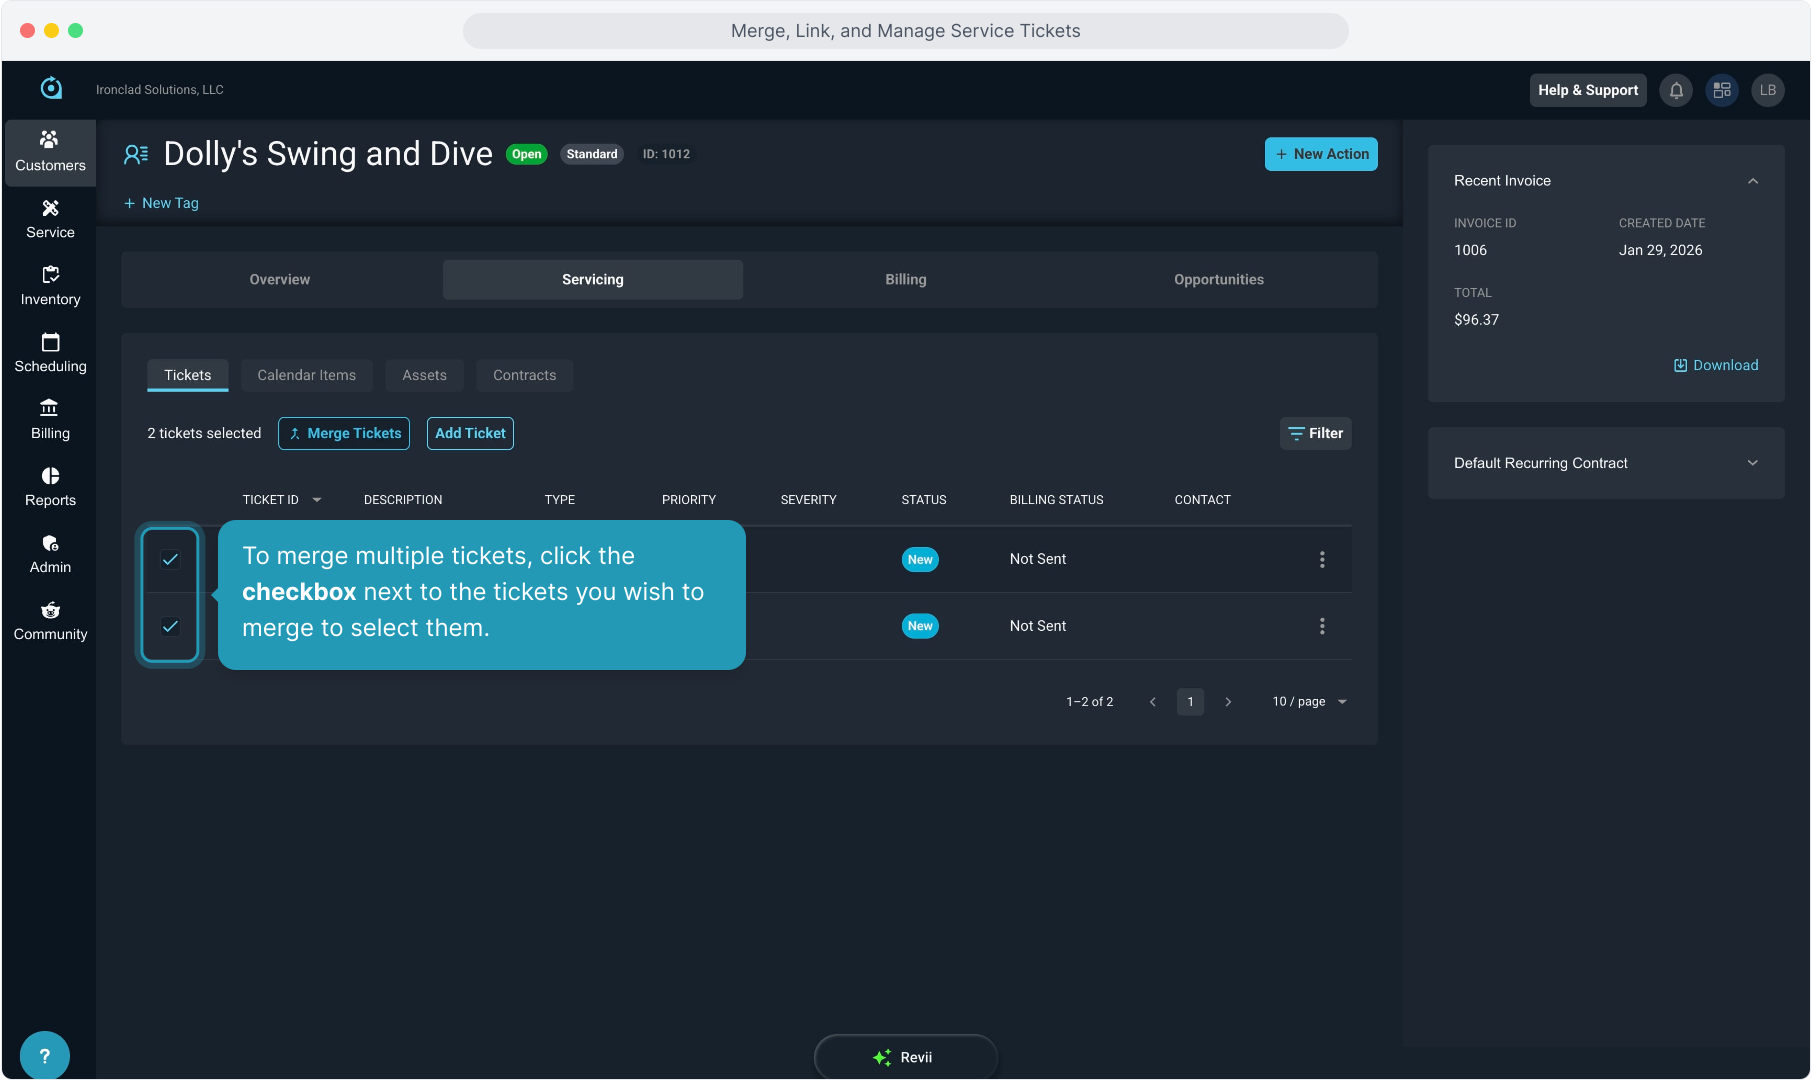
2. Occasionally, a customer may mistakenly have a ticket created multiple times for one single issue. In this case, two tickets were created to report an internet outage.
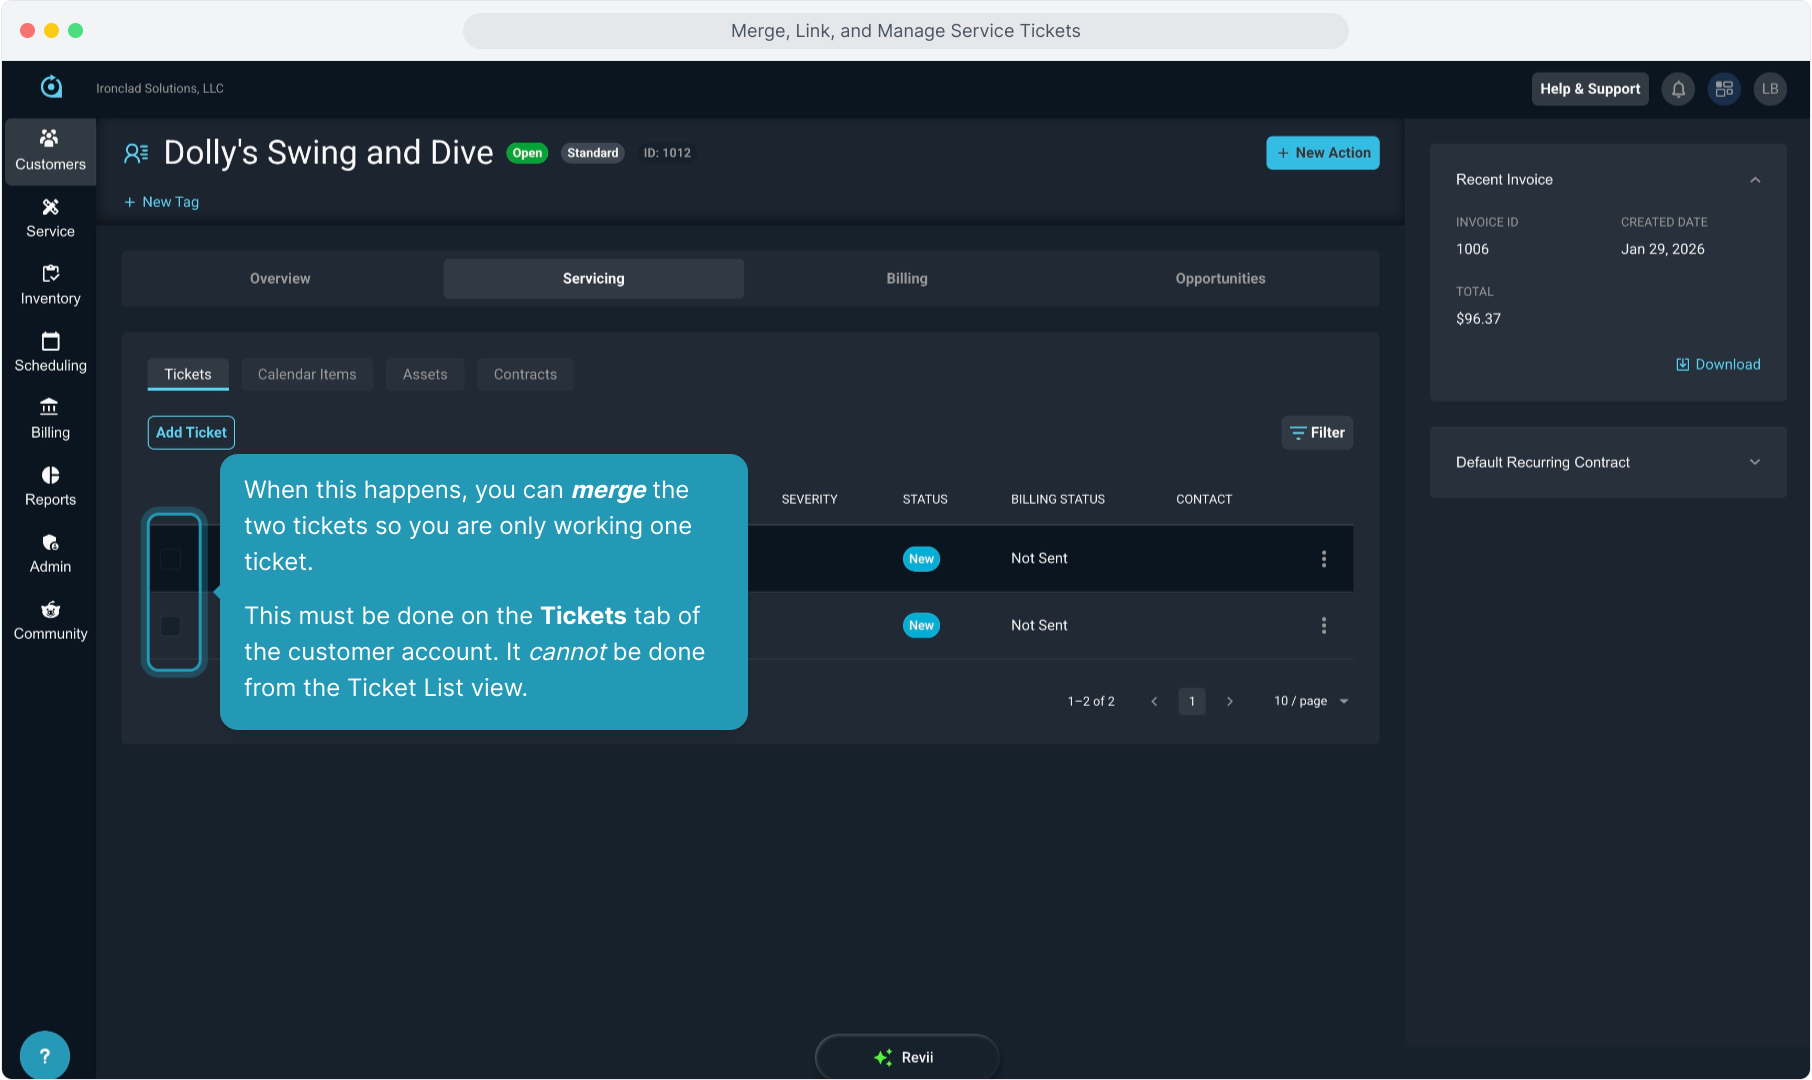
3. When this happens, you can merge the two tickets so you are only working one ticket.
This must be done on the Tickets tab of the customer account. It cannot be done from the Ticket List view.
4. To merge multiple tickets, click the checkbox next to the tickets you wish to merge to select them.
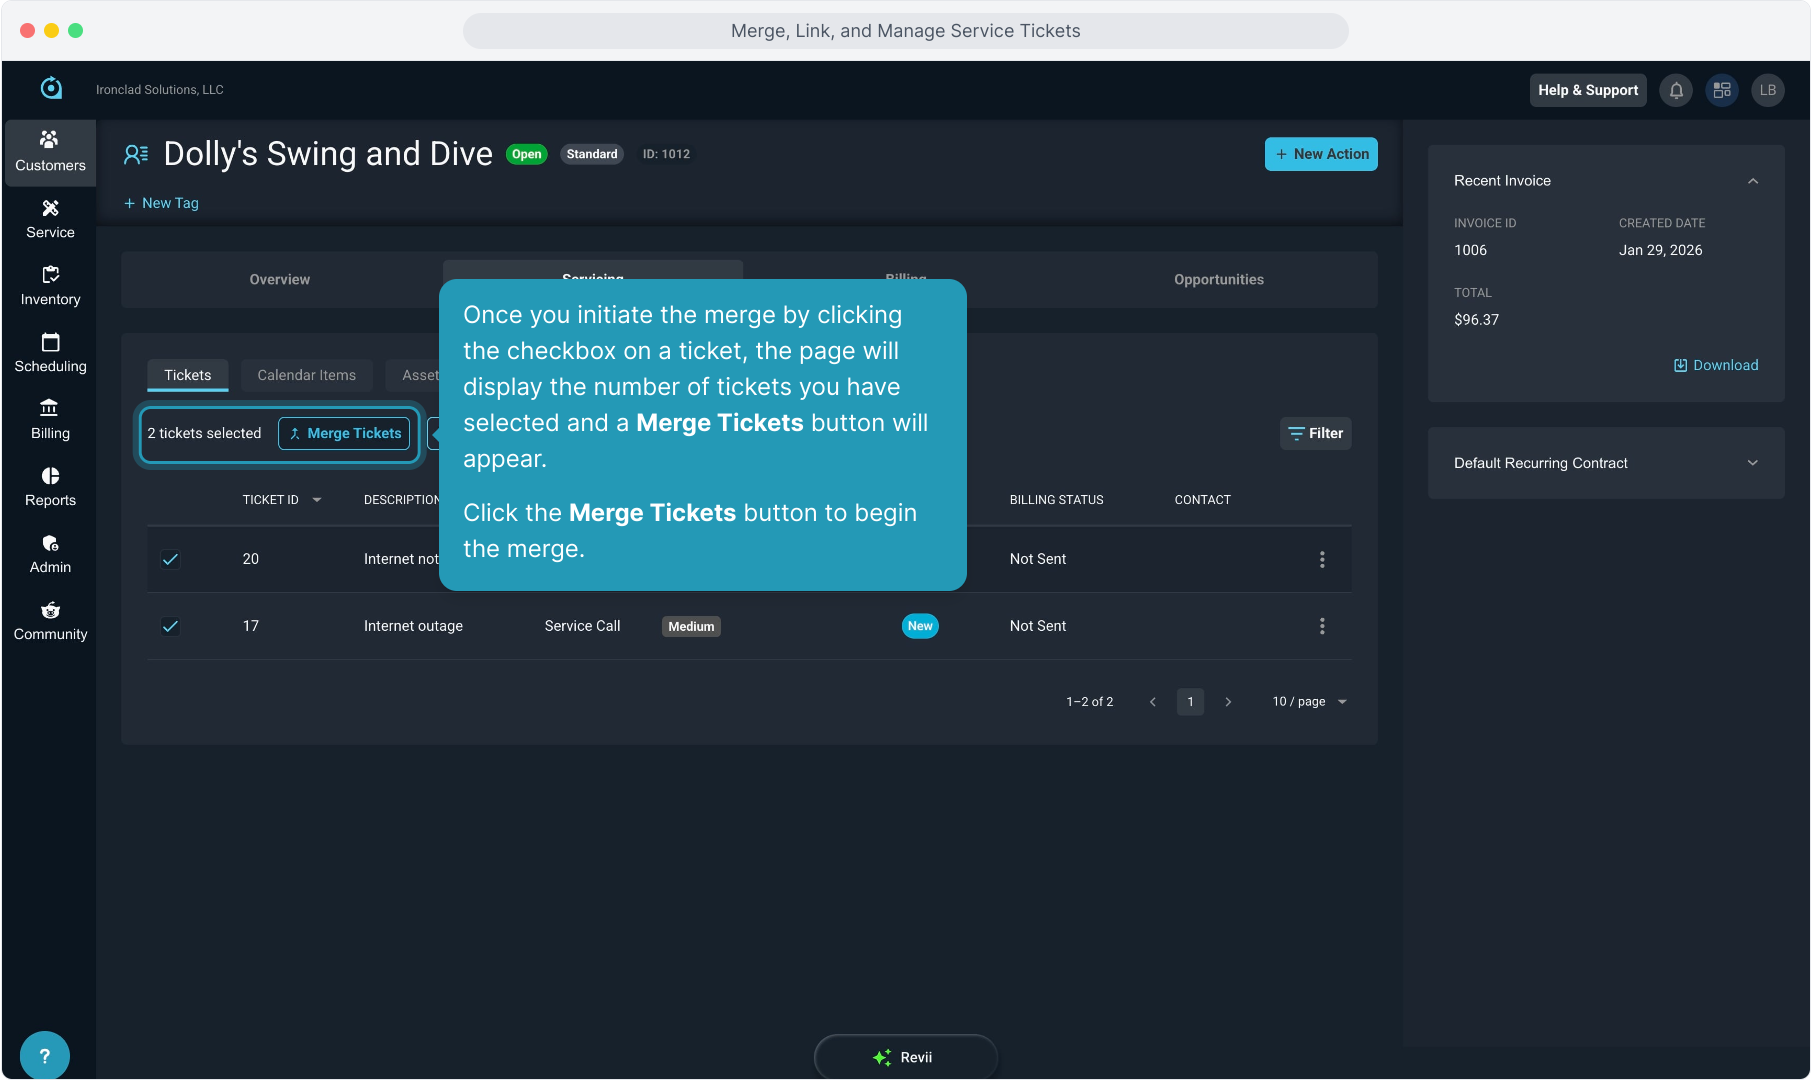
5. Once you initiate the merge by clicking the checkbox on a ticket, the page will display the number of tickets you have selected and a Merge Tickets button will appear.
Click the Merge Tickets button to begin the merge.
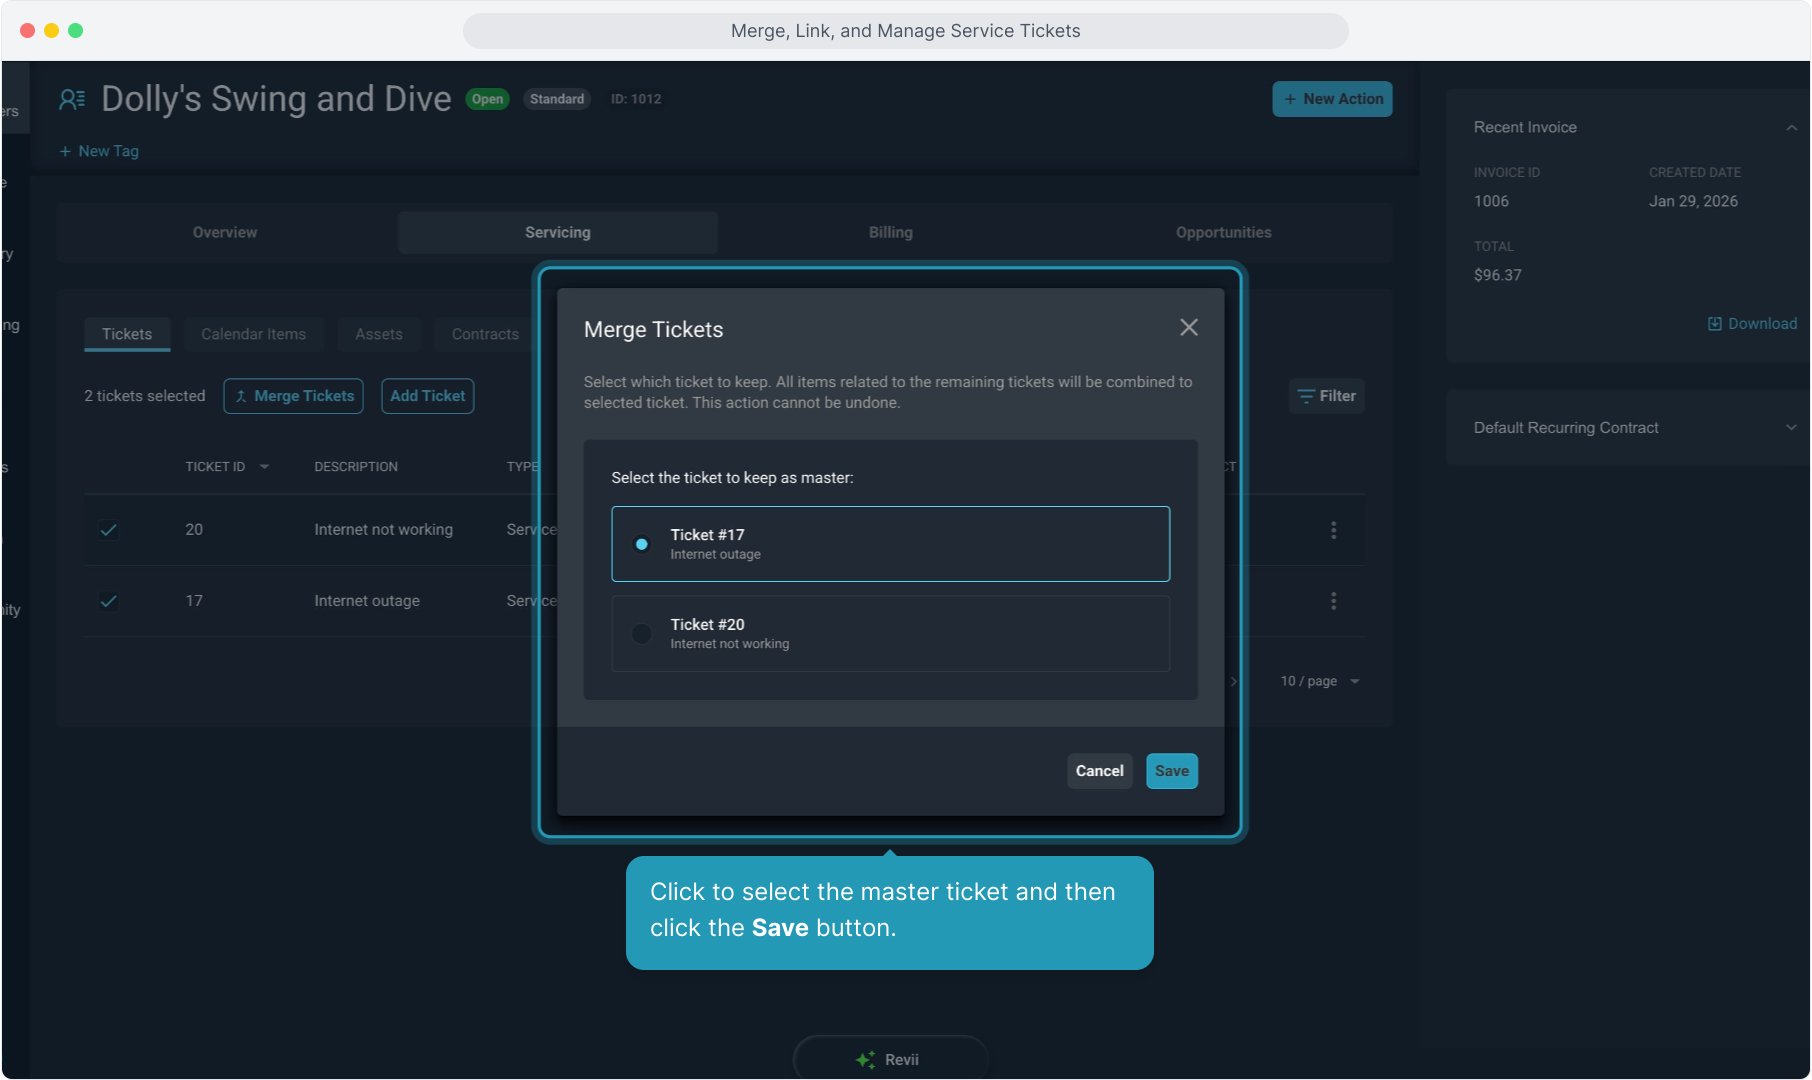
6. A pop up box will appear and from here you can select the ticket to keep as the master ticket.
The other selected tickets will be voided and this action cannot be undone.

7. Click to select the master ticket and then click the Save button.
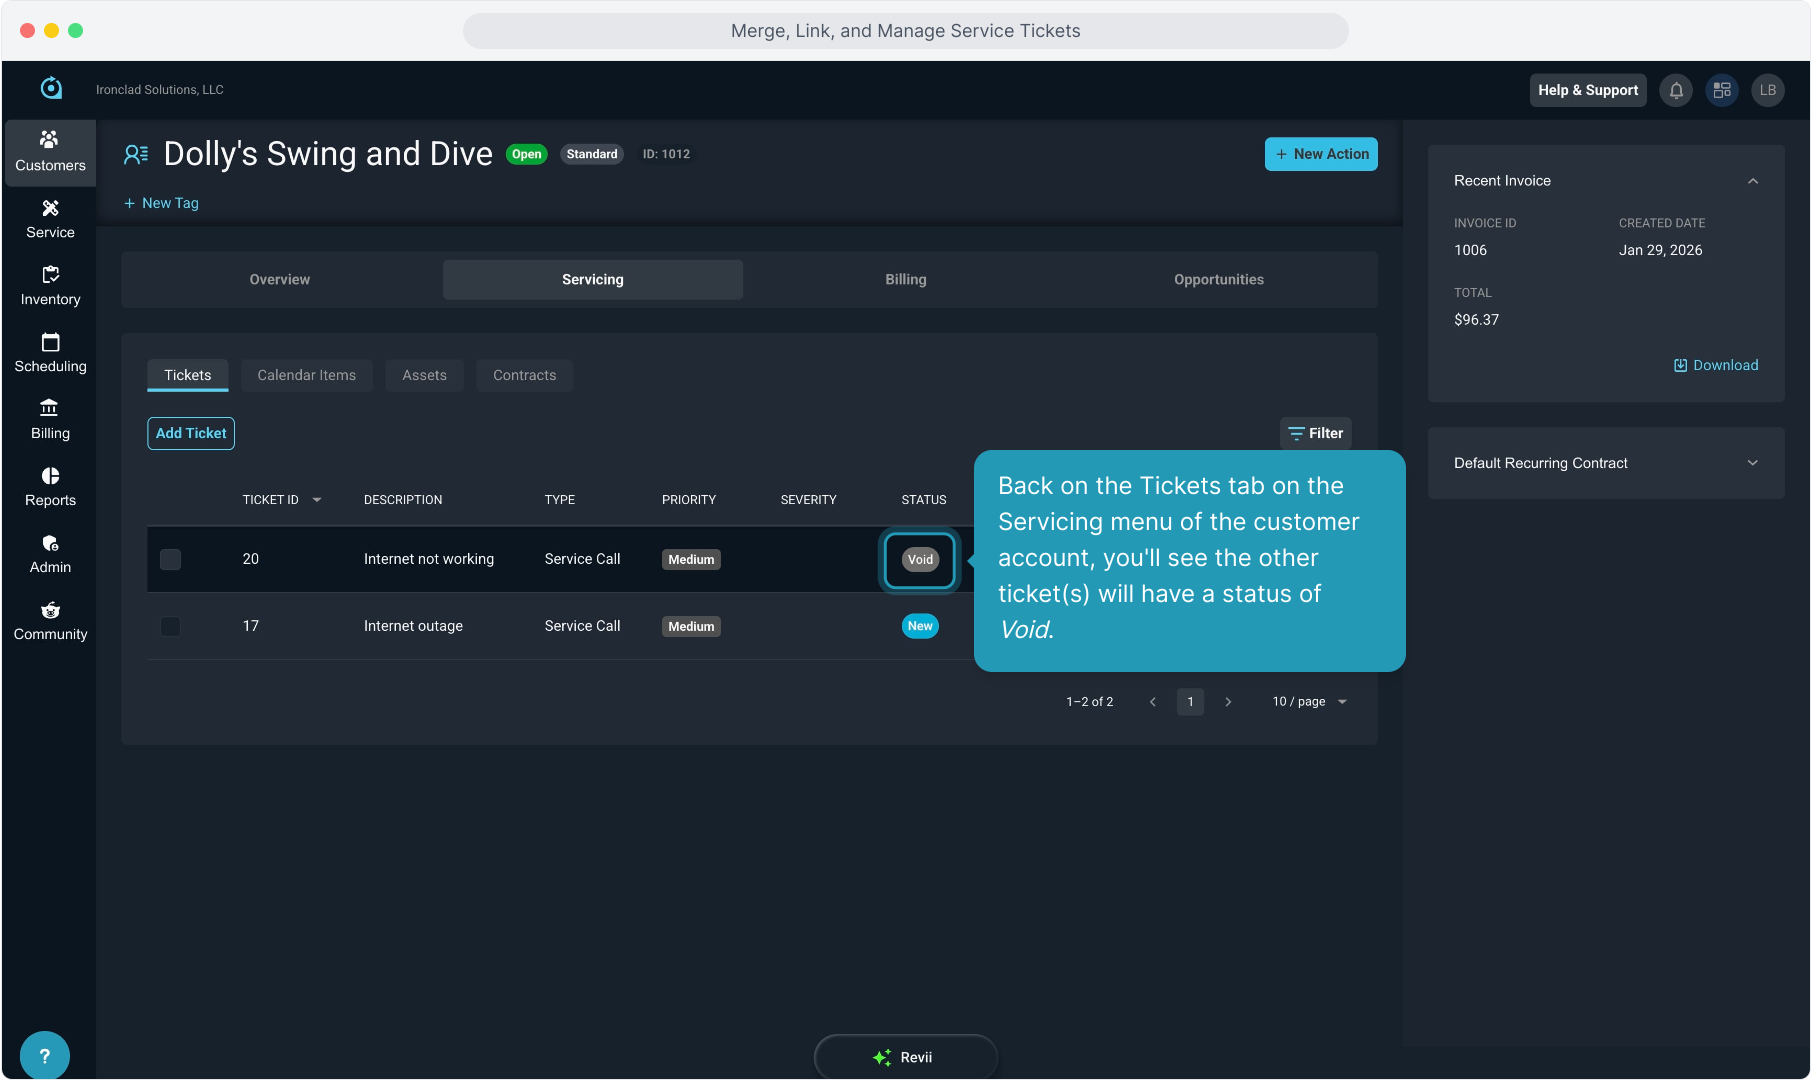
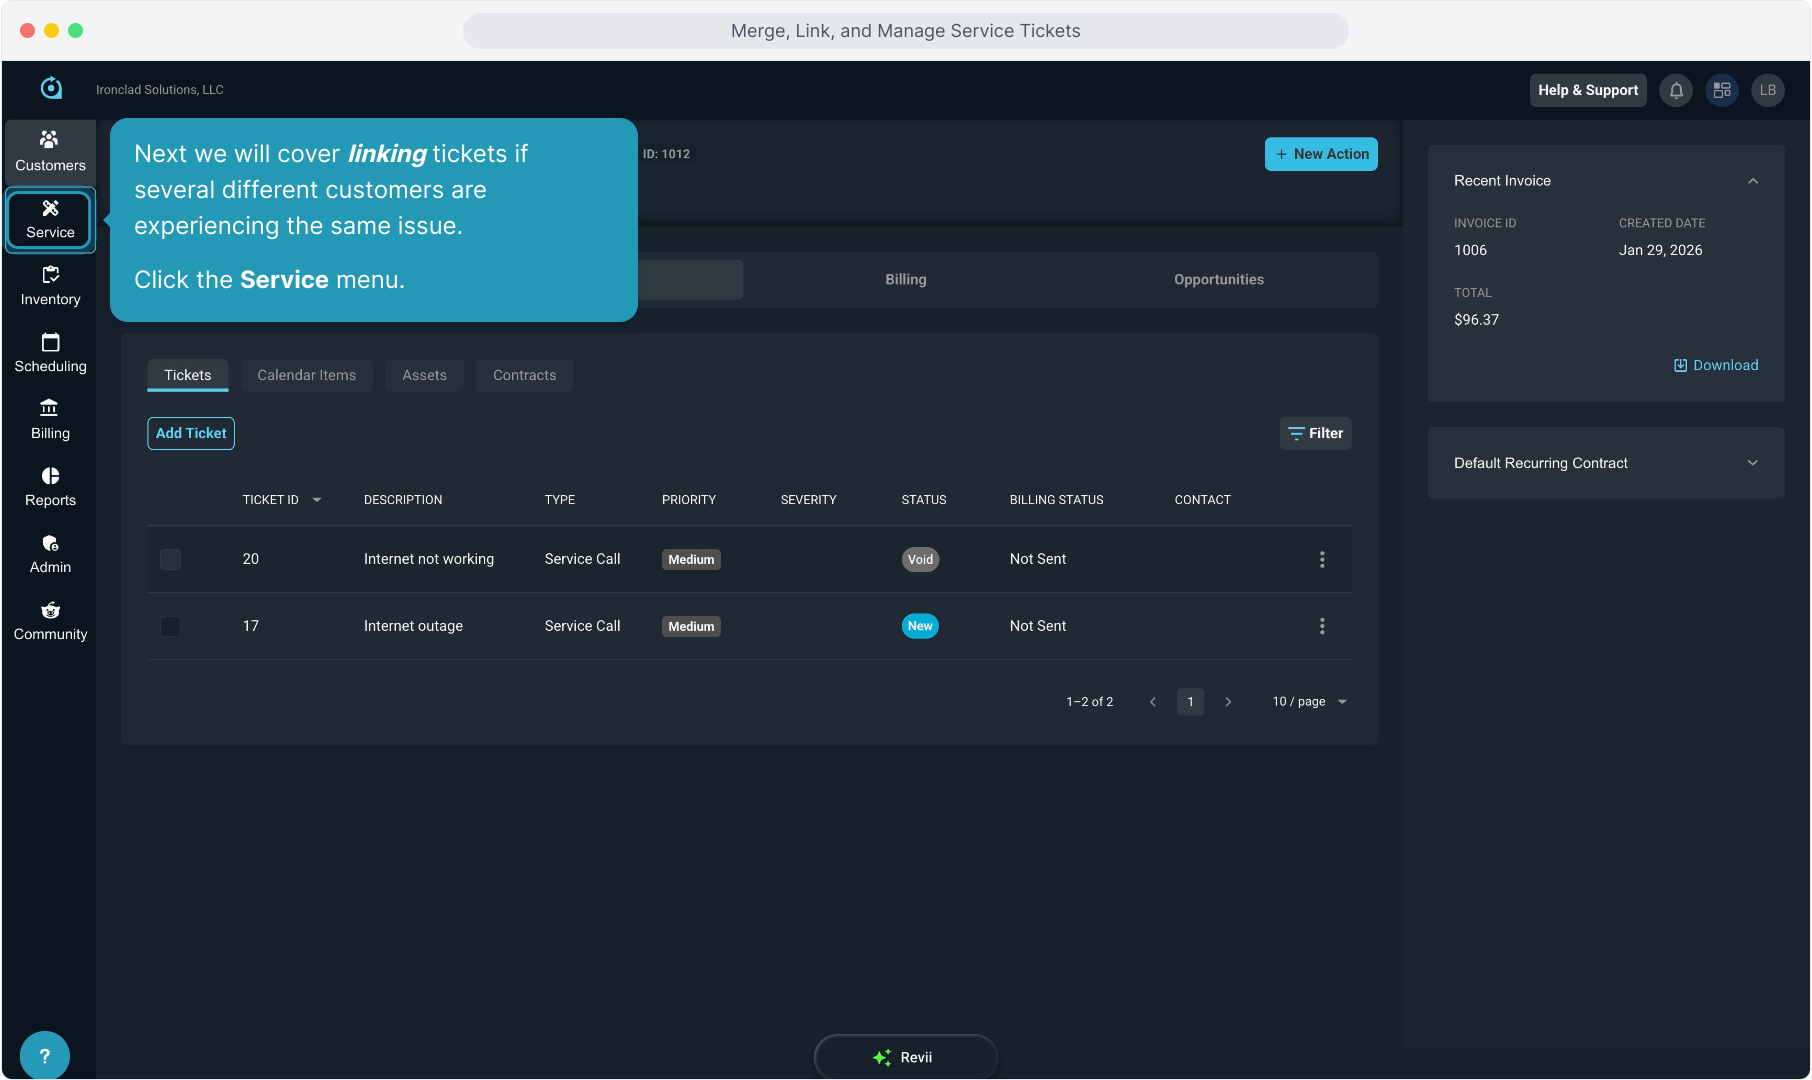
8. Back on the Tickets tab on the Servicing menu of the customer account, you'll see the other ticket(s) will have a status of Void.
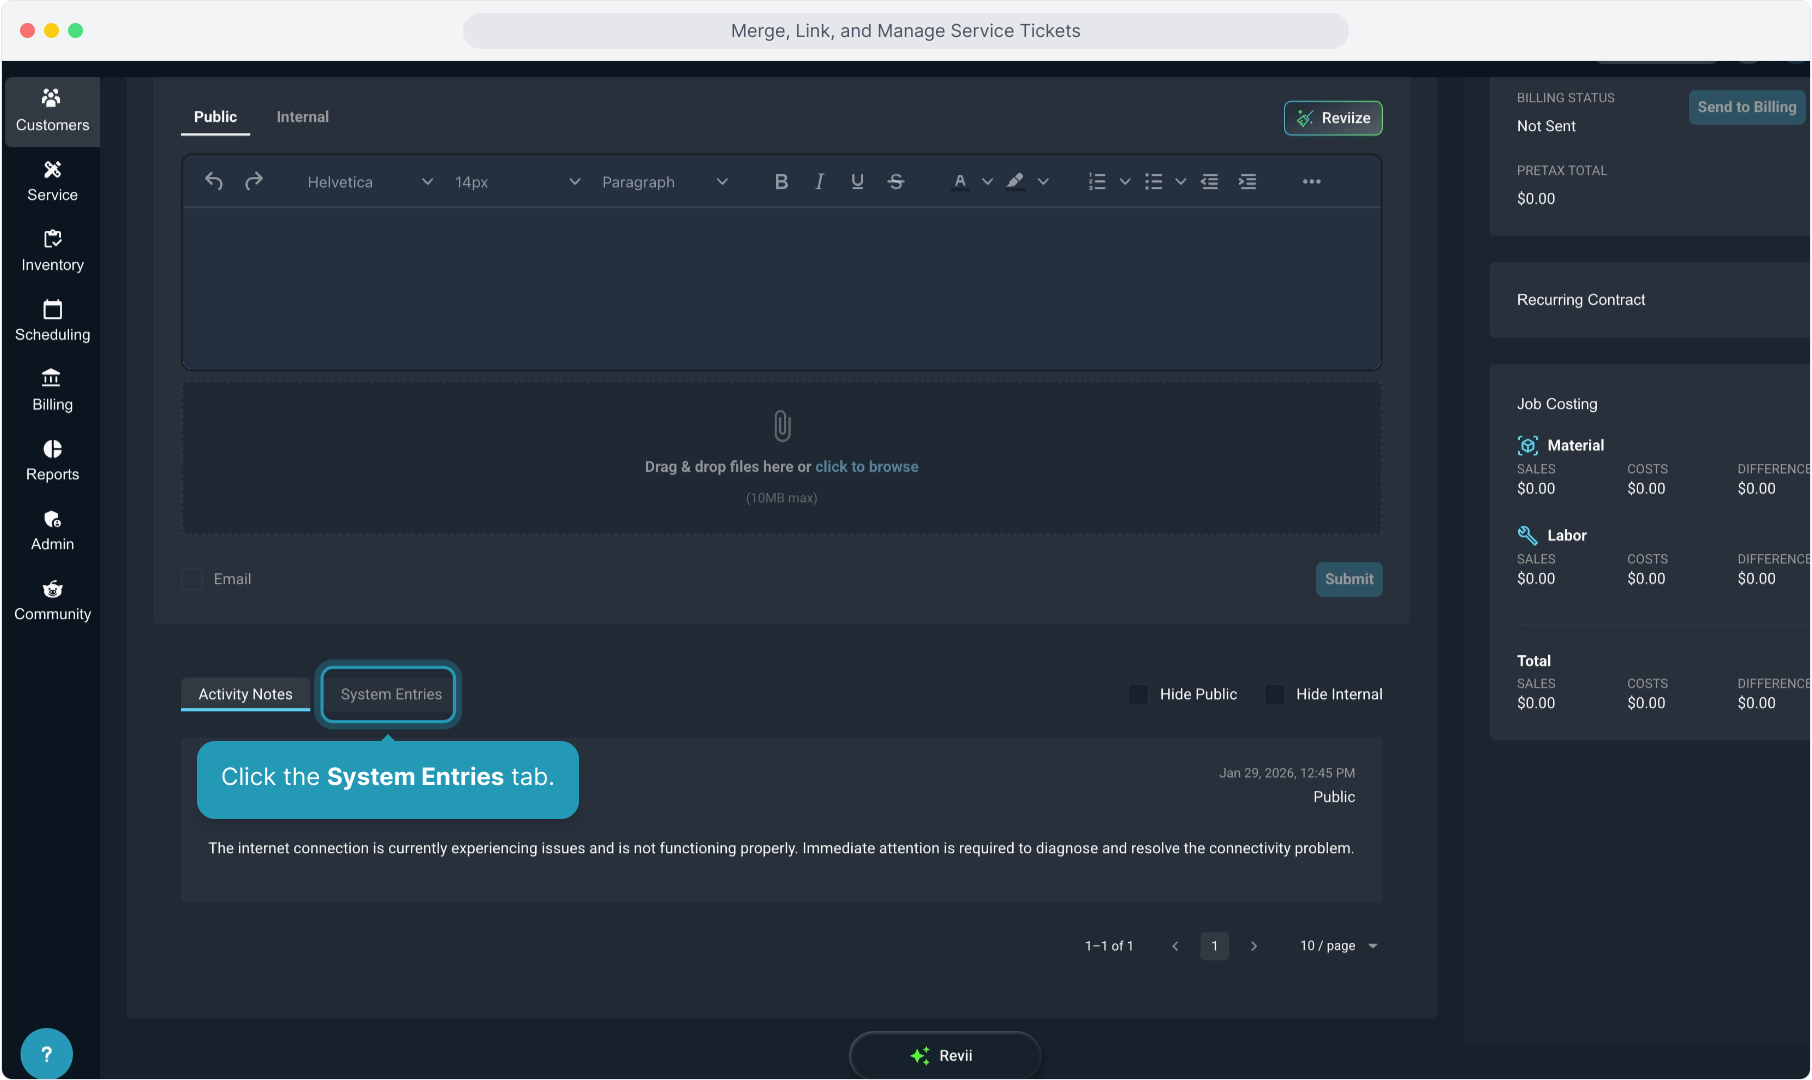
9. To view the notes the system creates on the voided ticket, click the ticket ID to open that ticket.

10. Click the System Entries tab.
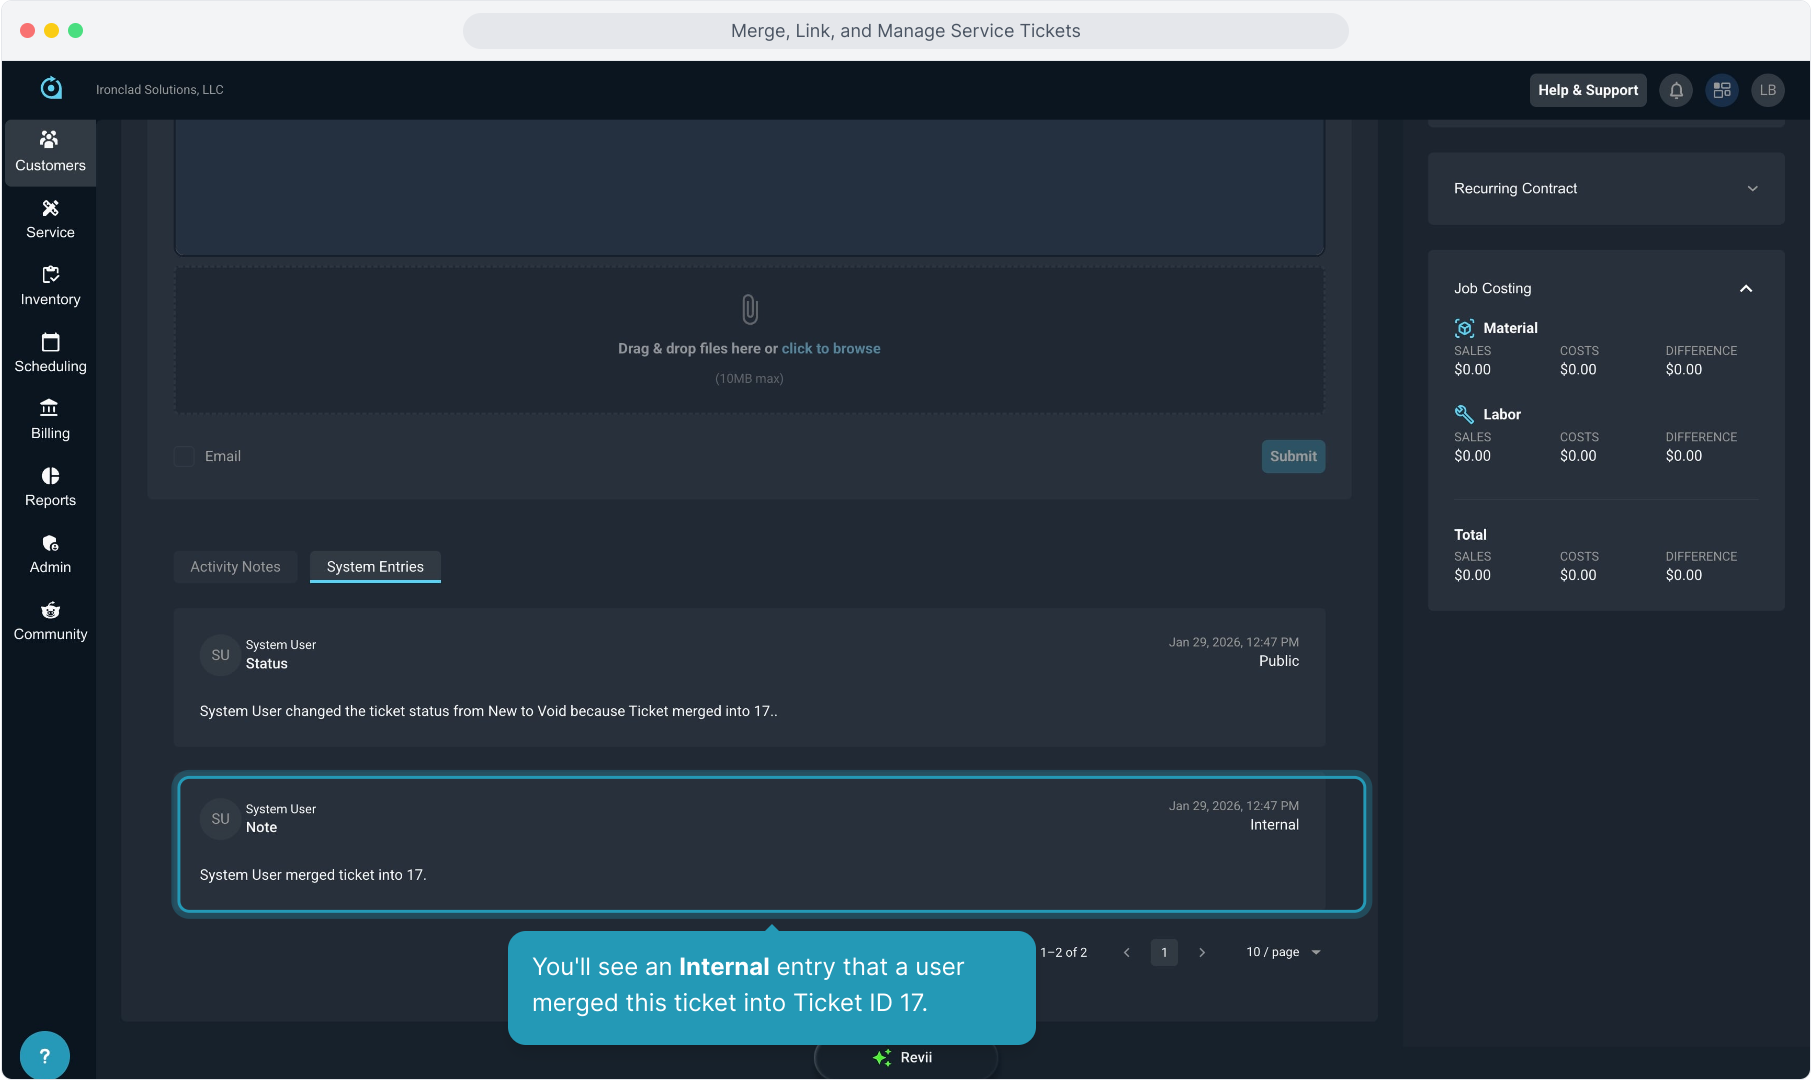
11. You'll see an Internal entry that a user merged this ticket into Ticket ID 17.
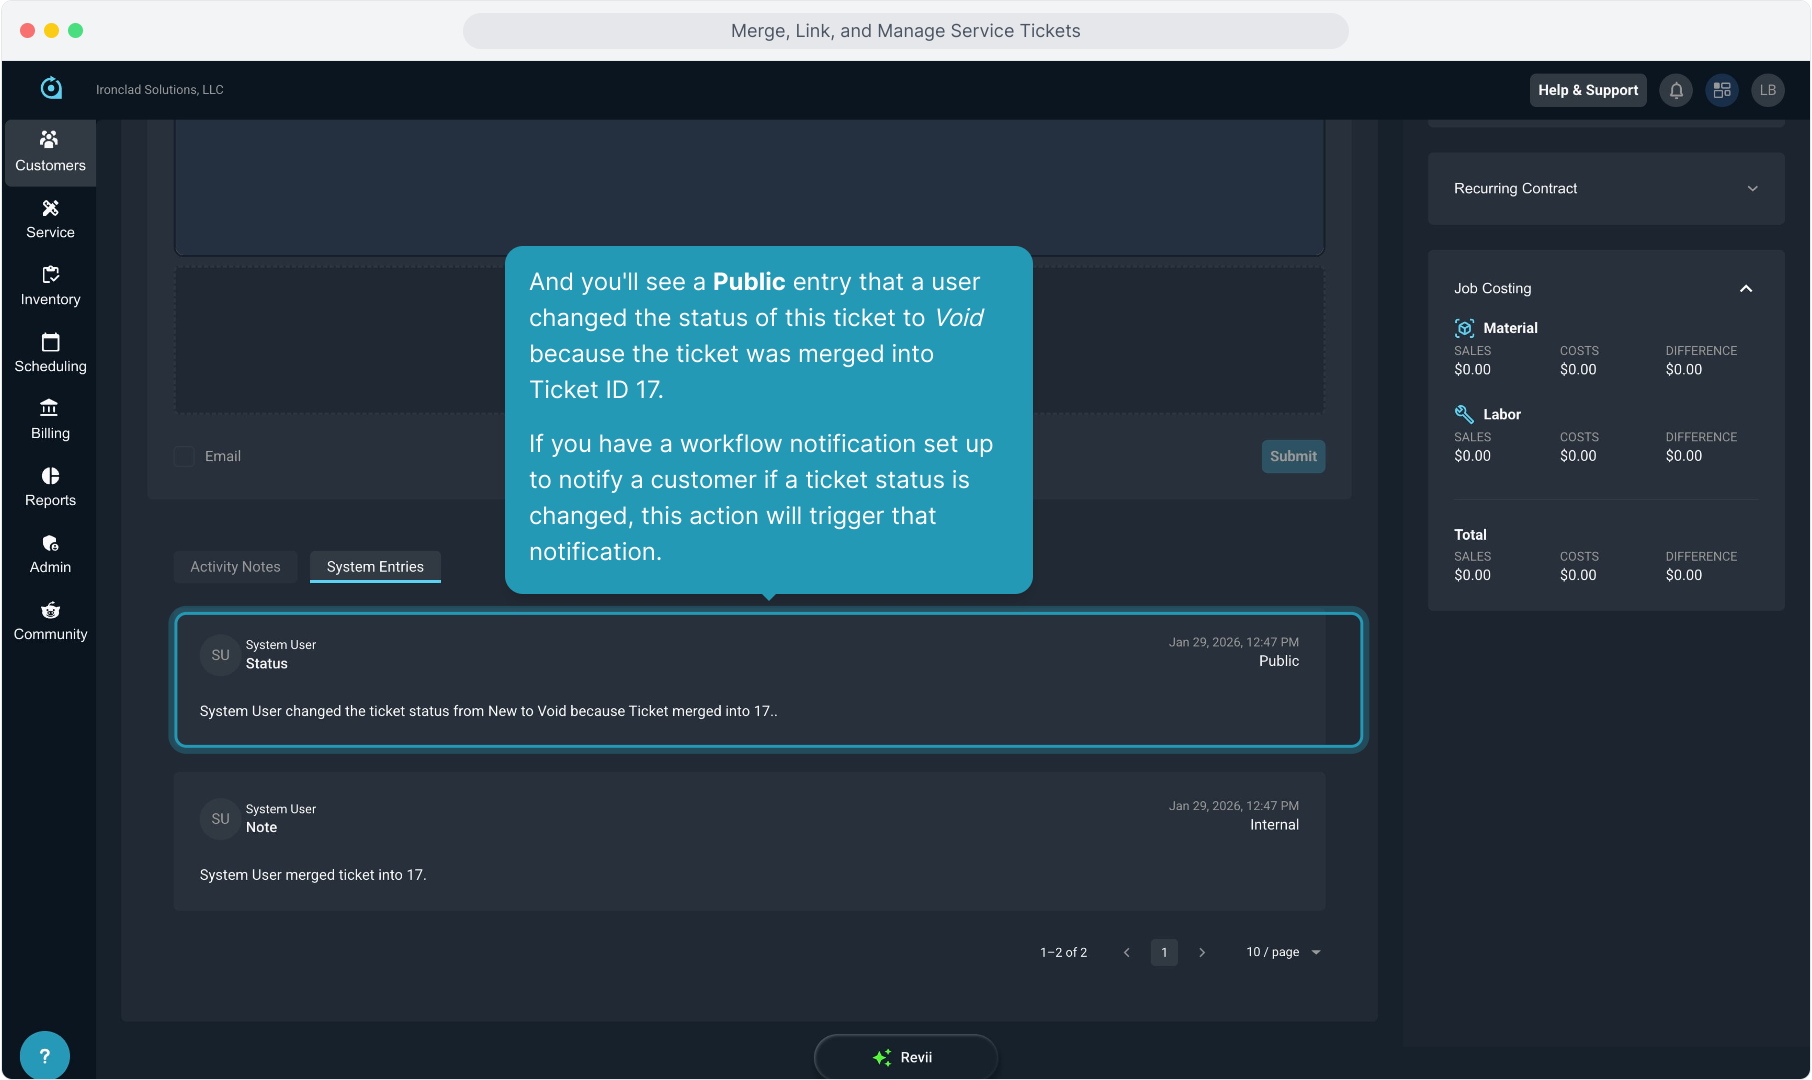
12. And you'll see a Public entry that a user changed the status of this ticket to Void because the ticket was merged into Ticket ID 17.
If you have a workflow notification set up to notify a customer if a ticket status is changed, this action will trigger that notification.
13. Next we will cover linking tickets if several different customers are experiencing the same issue.
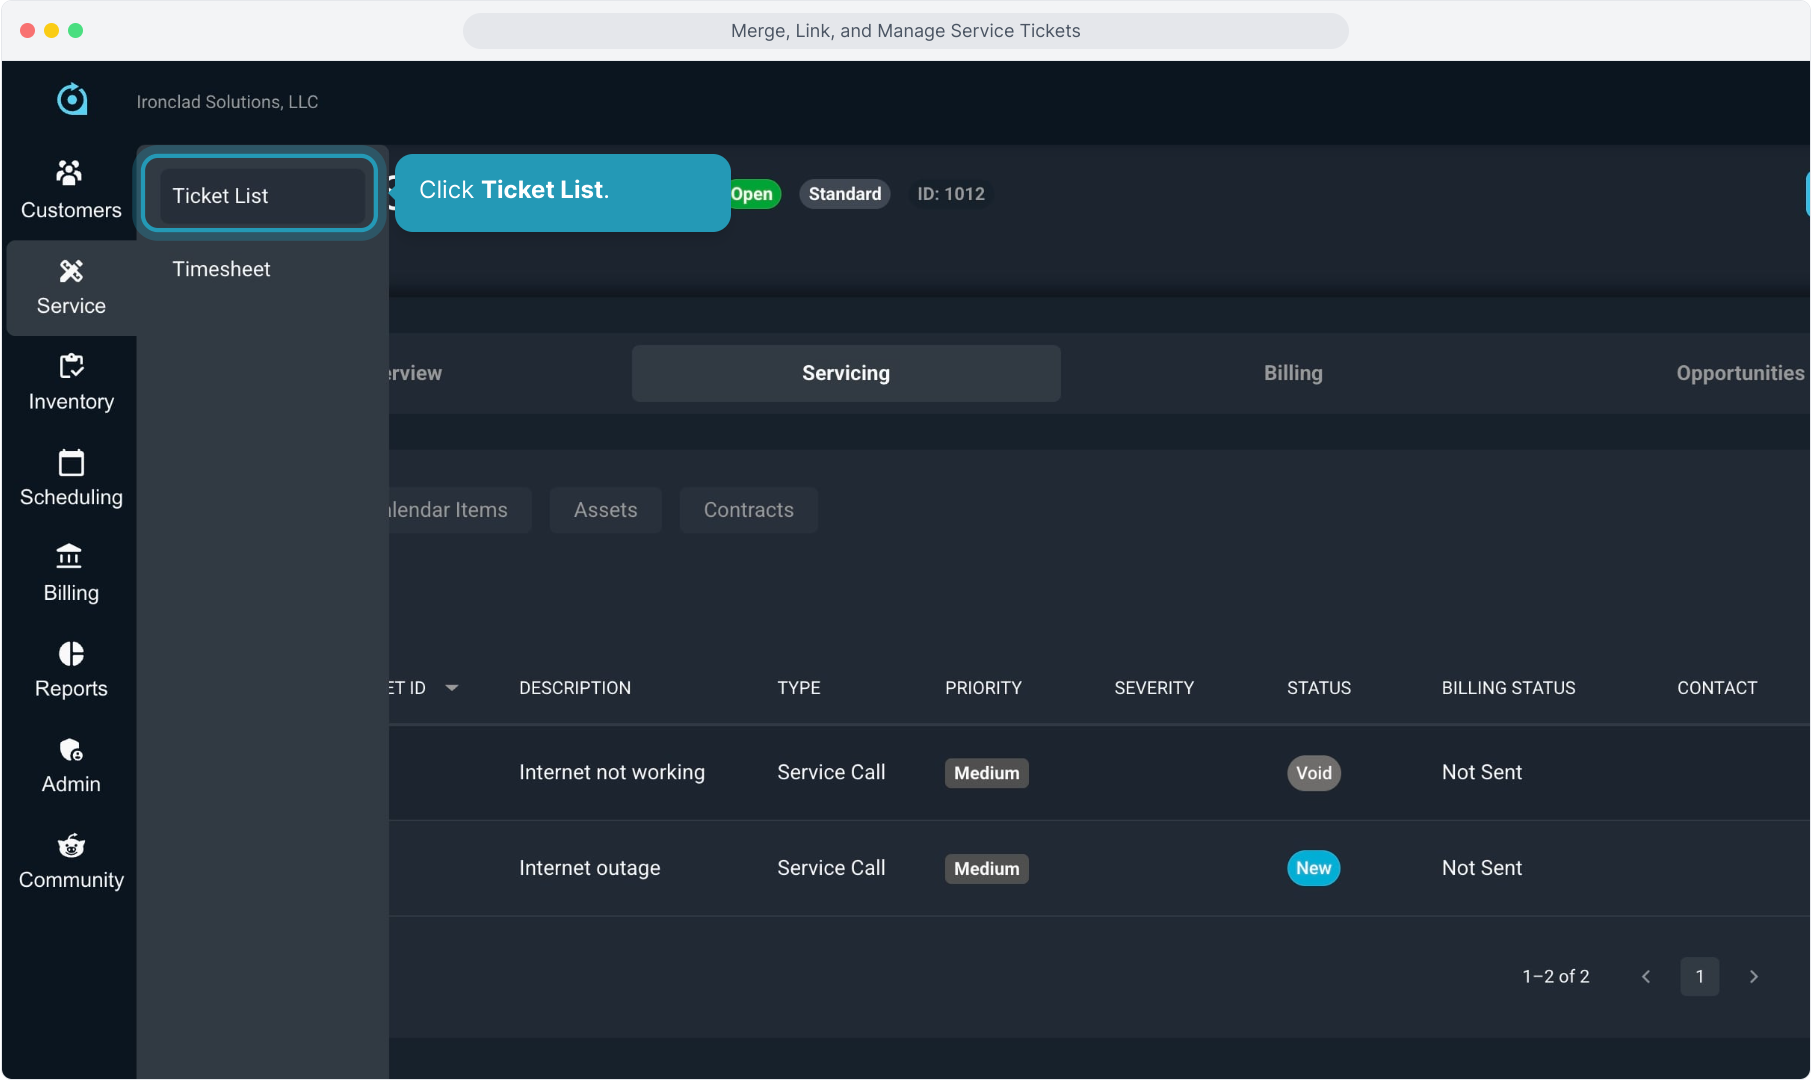
Click the Service menu.
14. Click Ticket List.
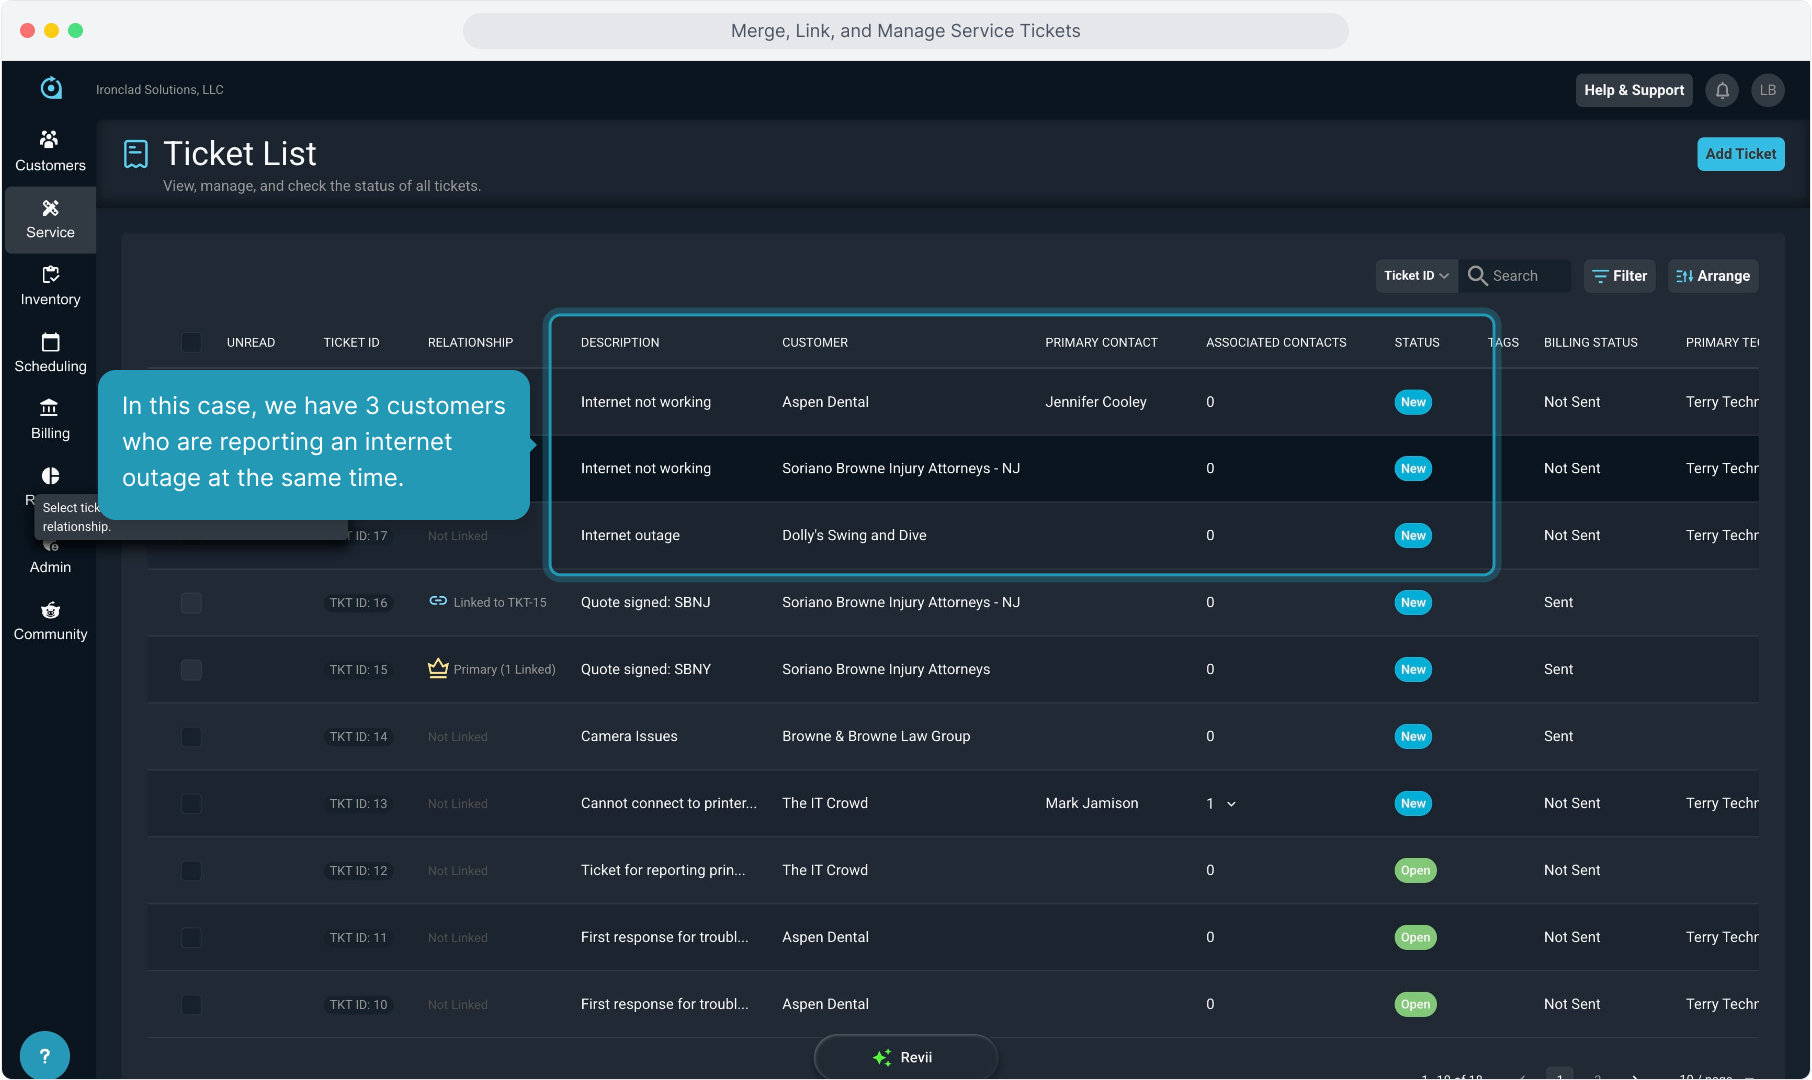
15. In this case, we have 3 customers who are reporting an internet outage at the same time.
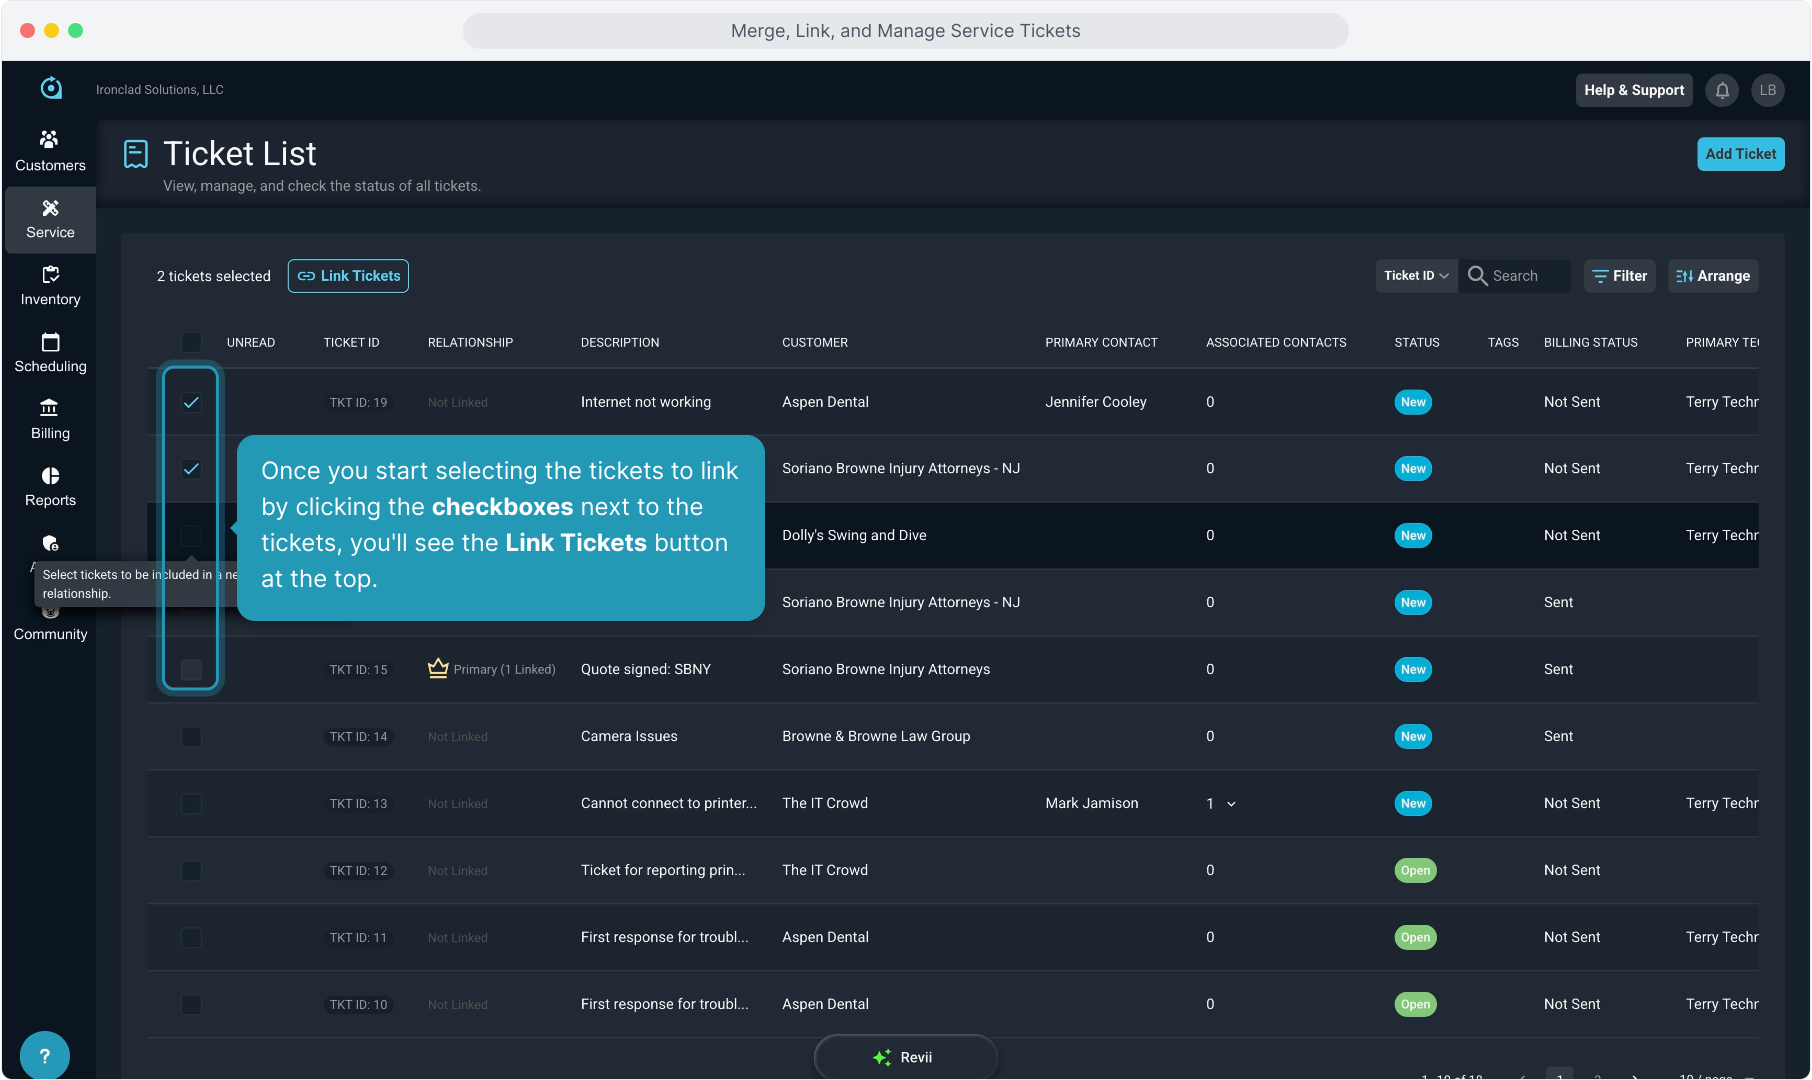
16. Once you start selecting the tickets to link by clicking the checkboxes next to the tickets, you'll see the Link Tickets button at the top.
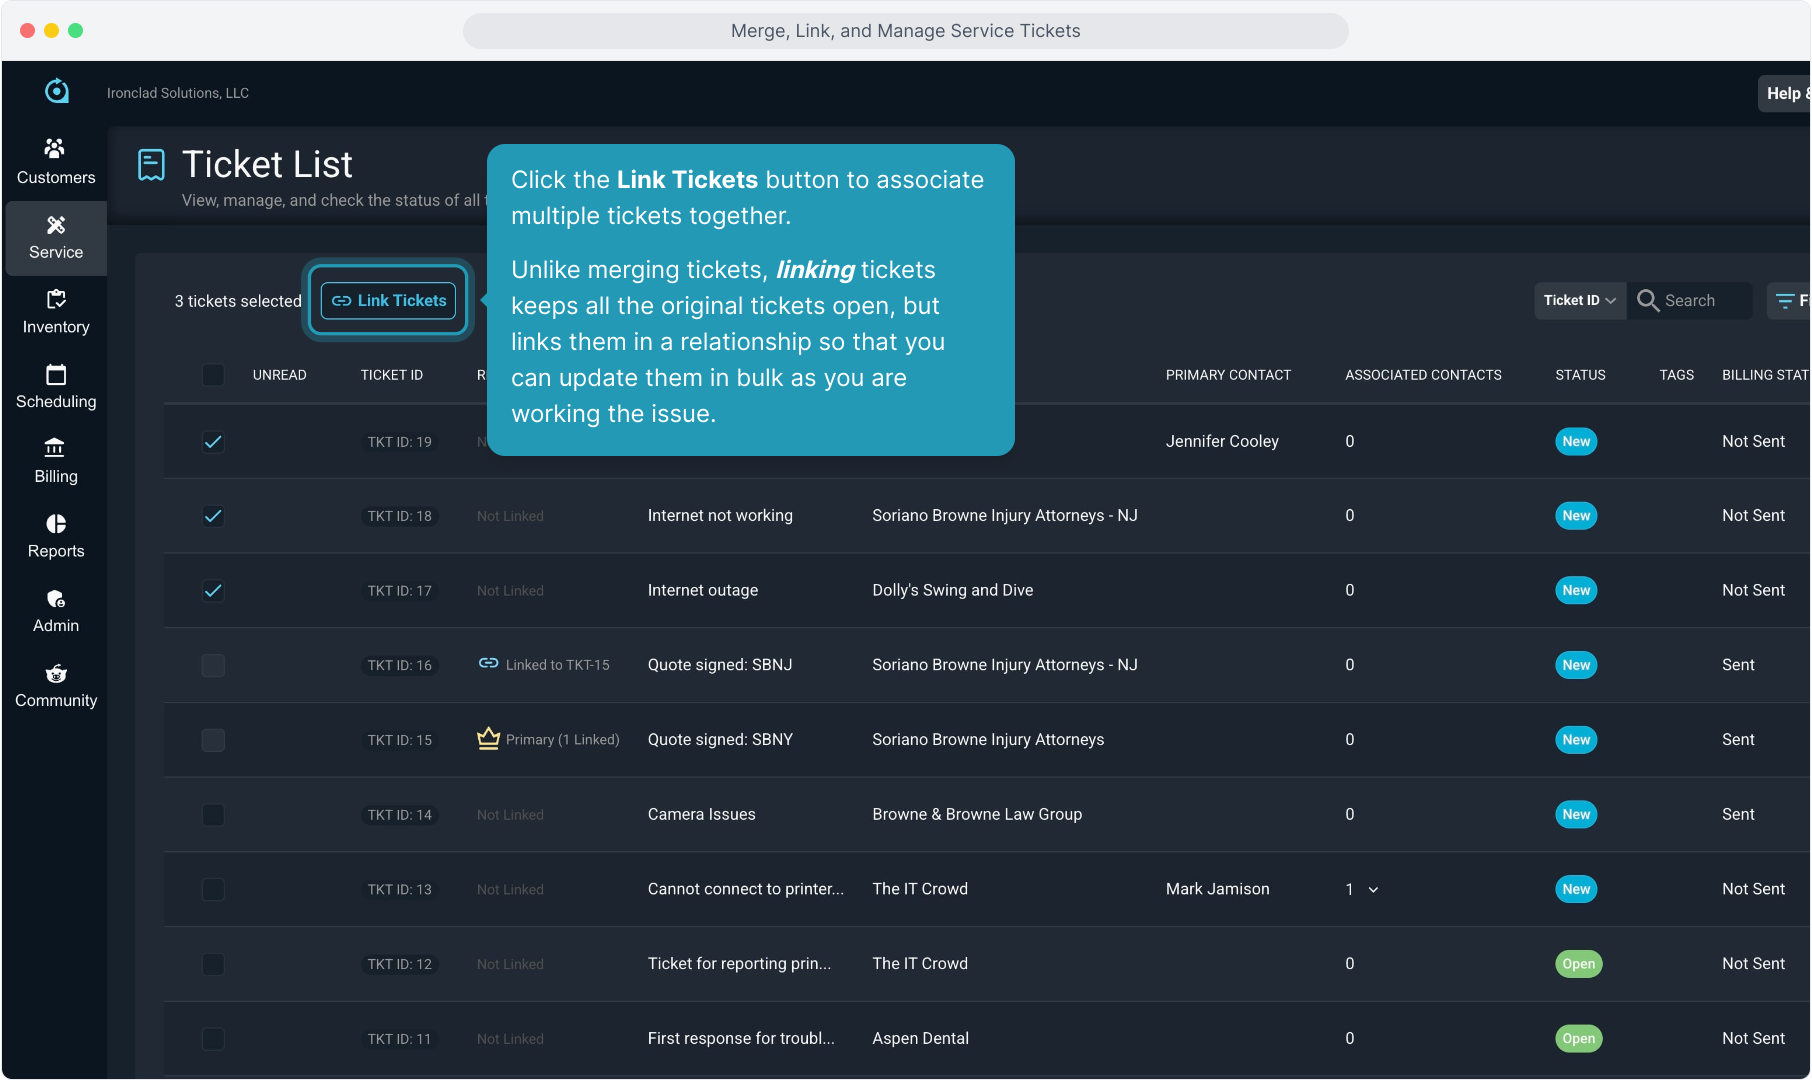
17. Click the Link Tickets button to associate multiple tickets together.
Unlike merging tickets, linking tickets keeps all the original tickets open, but links them in a relationship so that you can update them in bulk as you are working the issue.
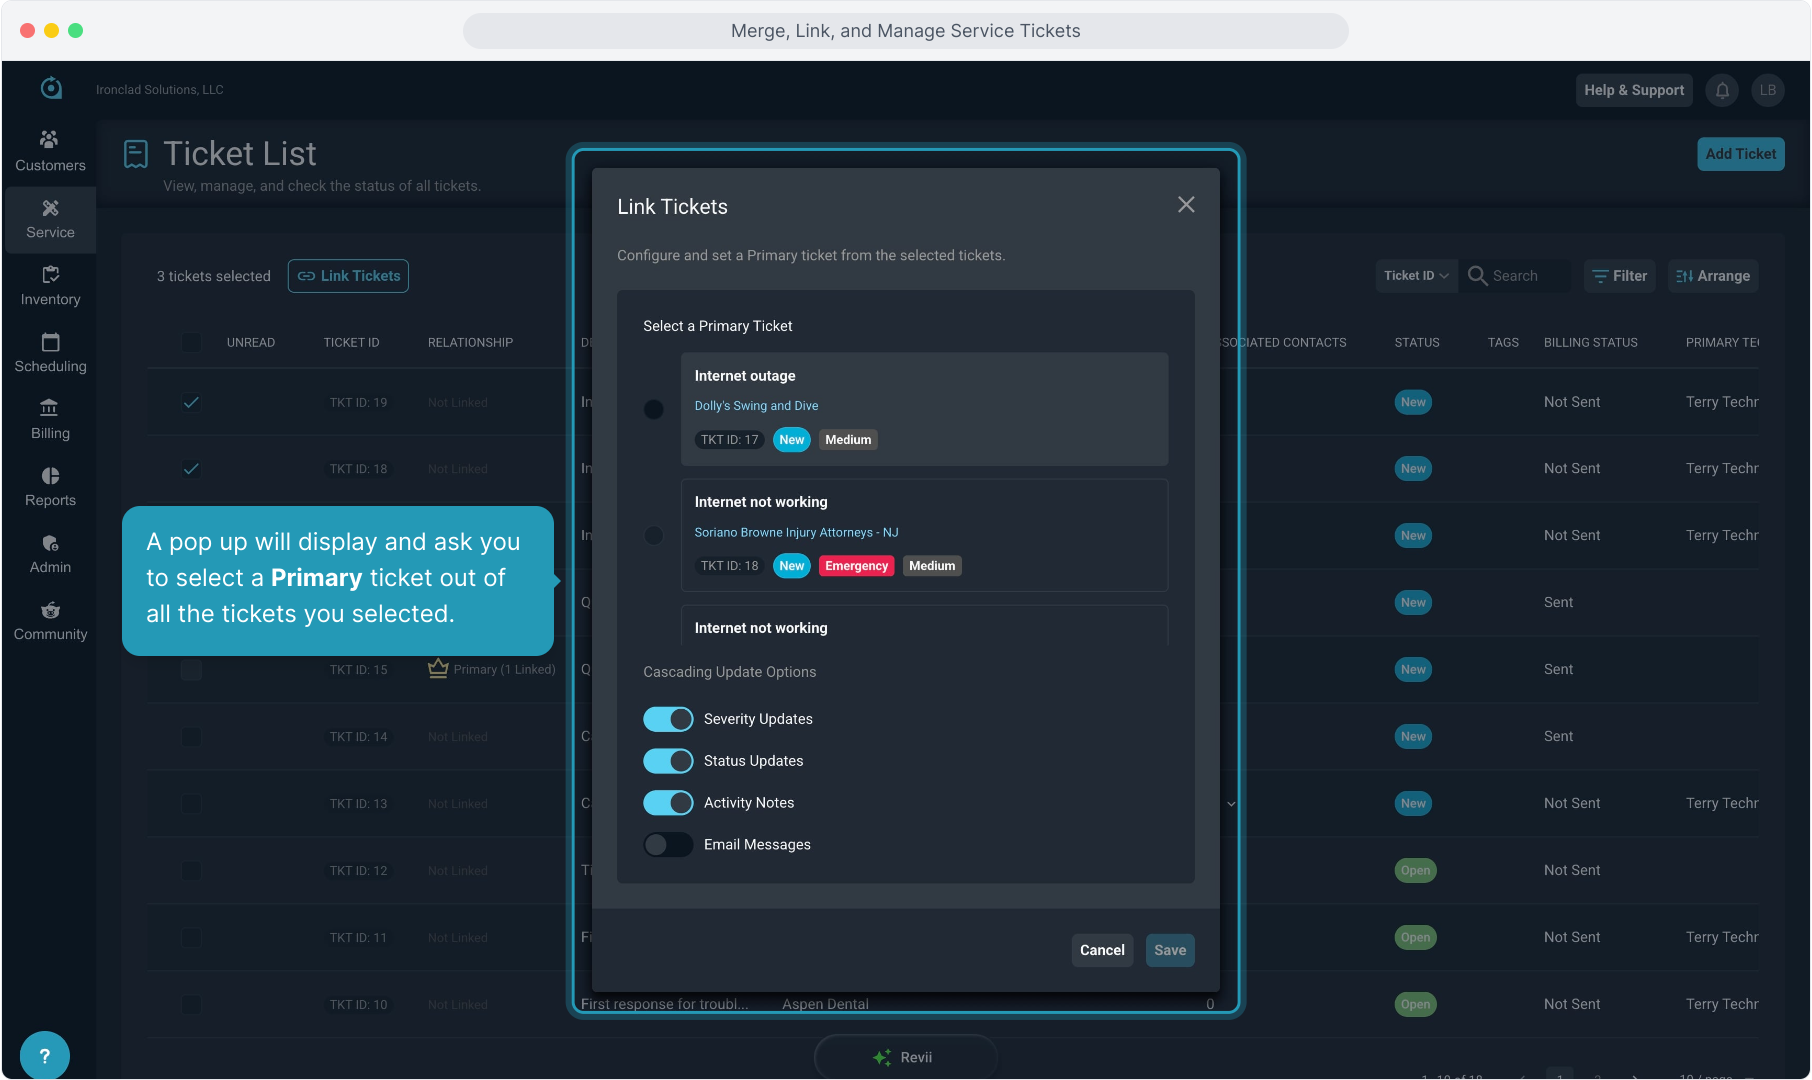
18. A pop up will display and ask you to select a Primary ticket out of all the tickets you selected.
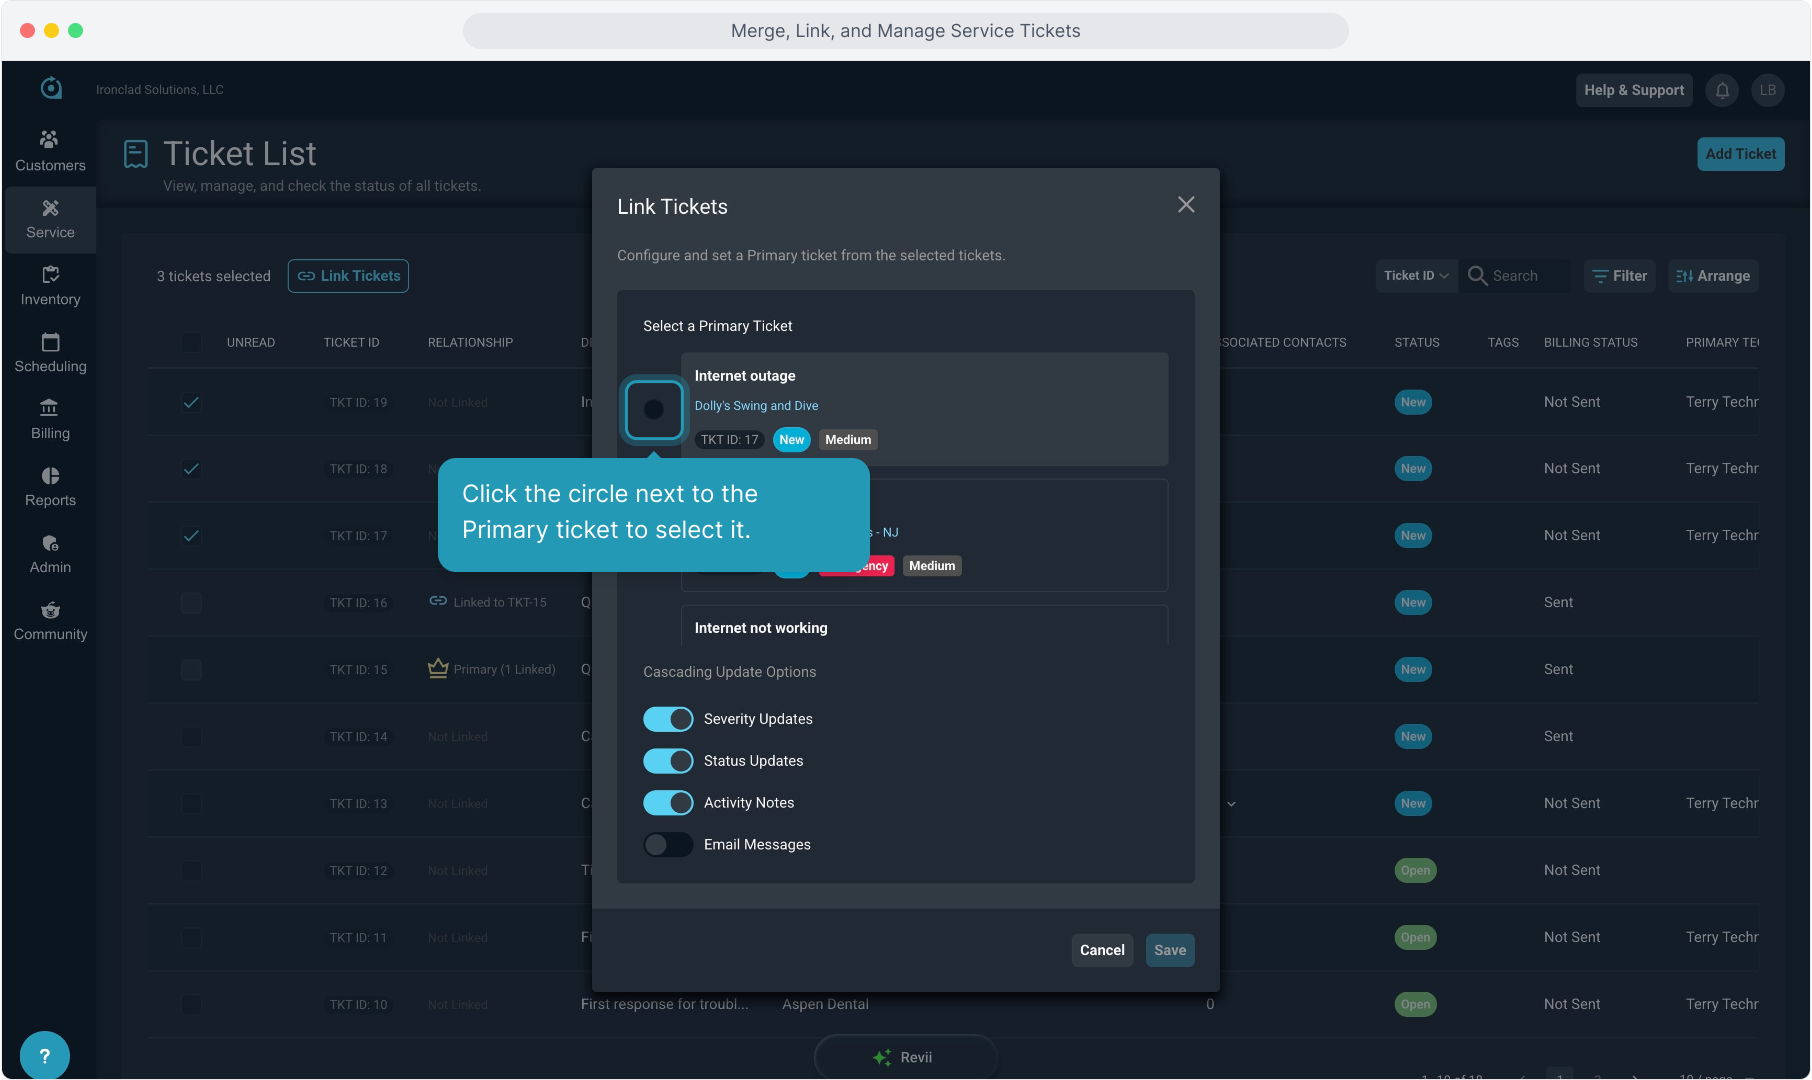
19. Click the circle next to the Primary ticket to select it.
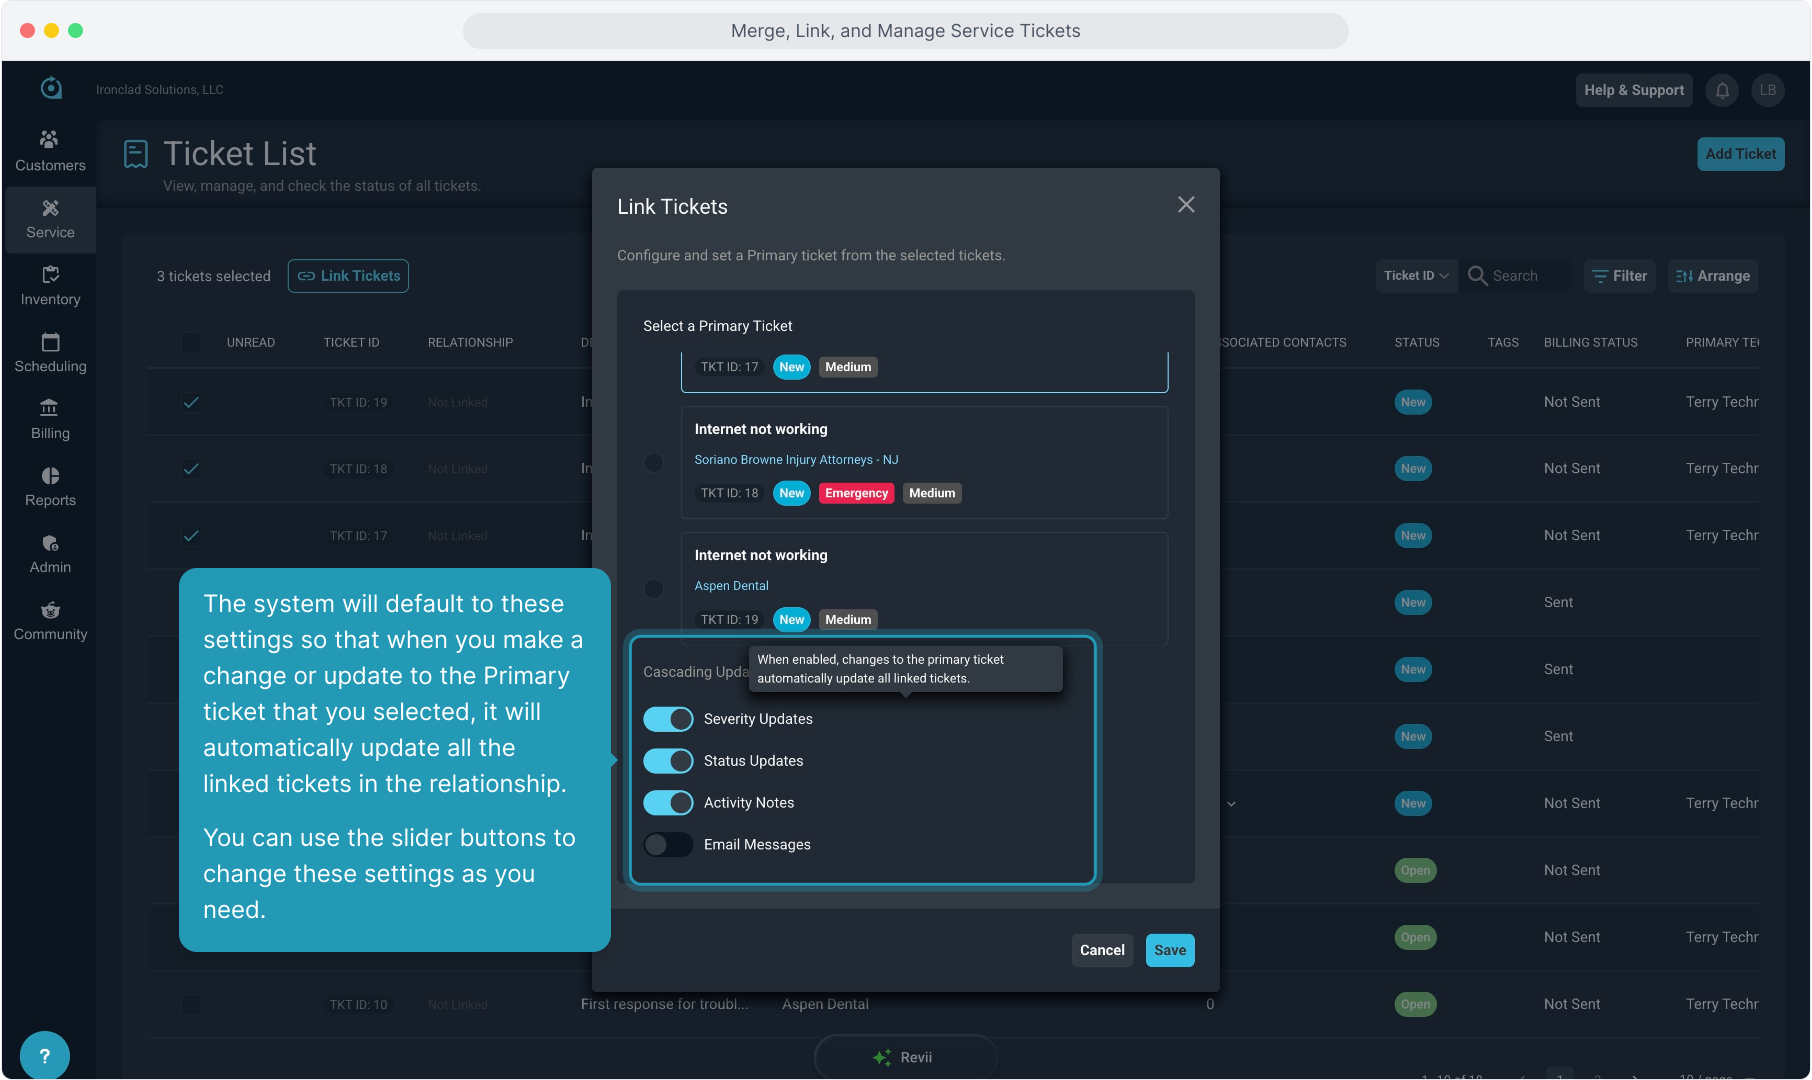
20. The system will default to these settings so that when you make a change or update to the Primary ticket that you selected, it will automatically update all the linked tickets in the relationship.
You can use the slider buttons to change these settings as you need.
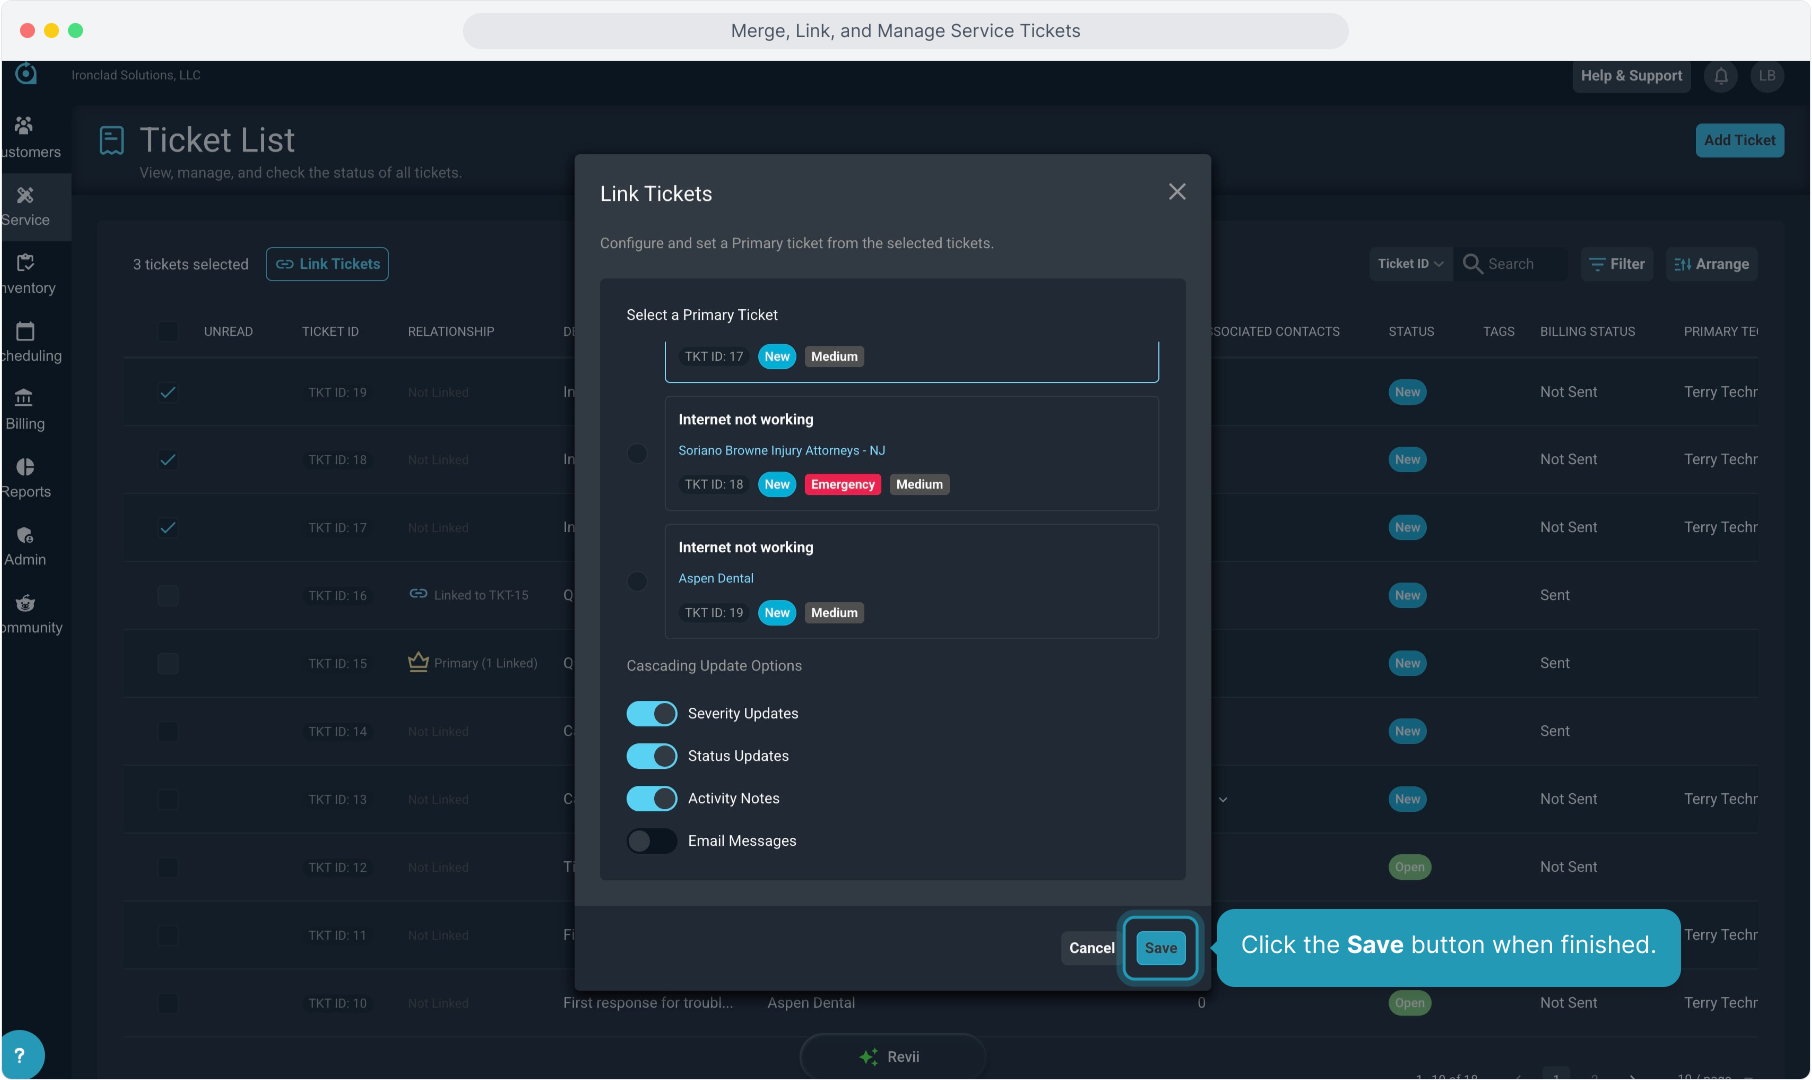
21. Click the Save button when finished.
22. Back on the Ticket List screen, you will now see visual indicators that these tickets are in a linked relationship.
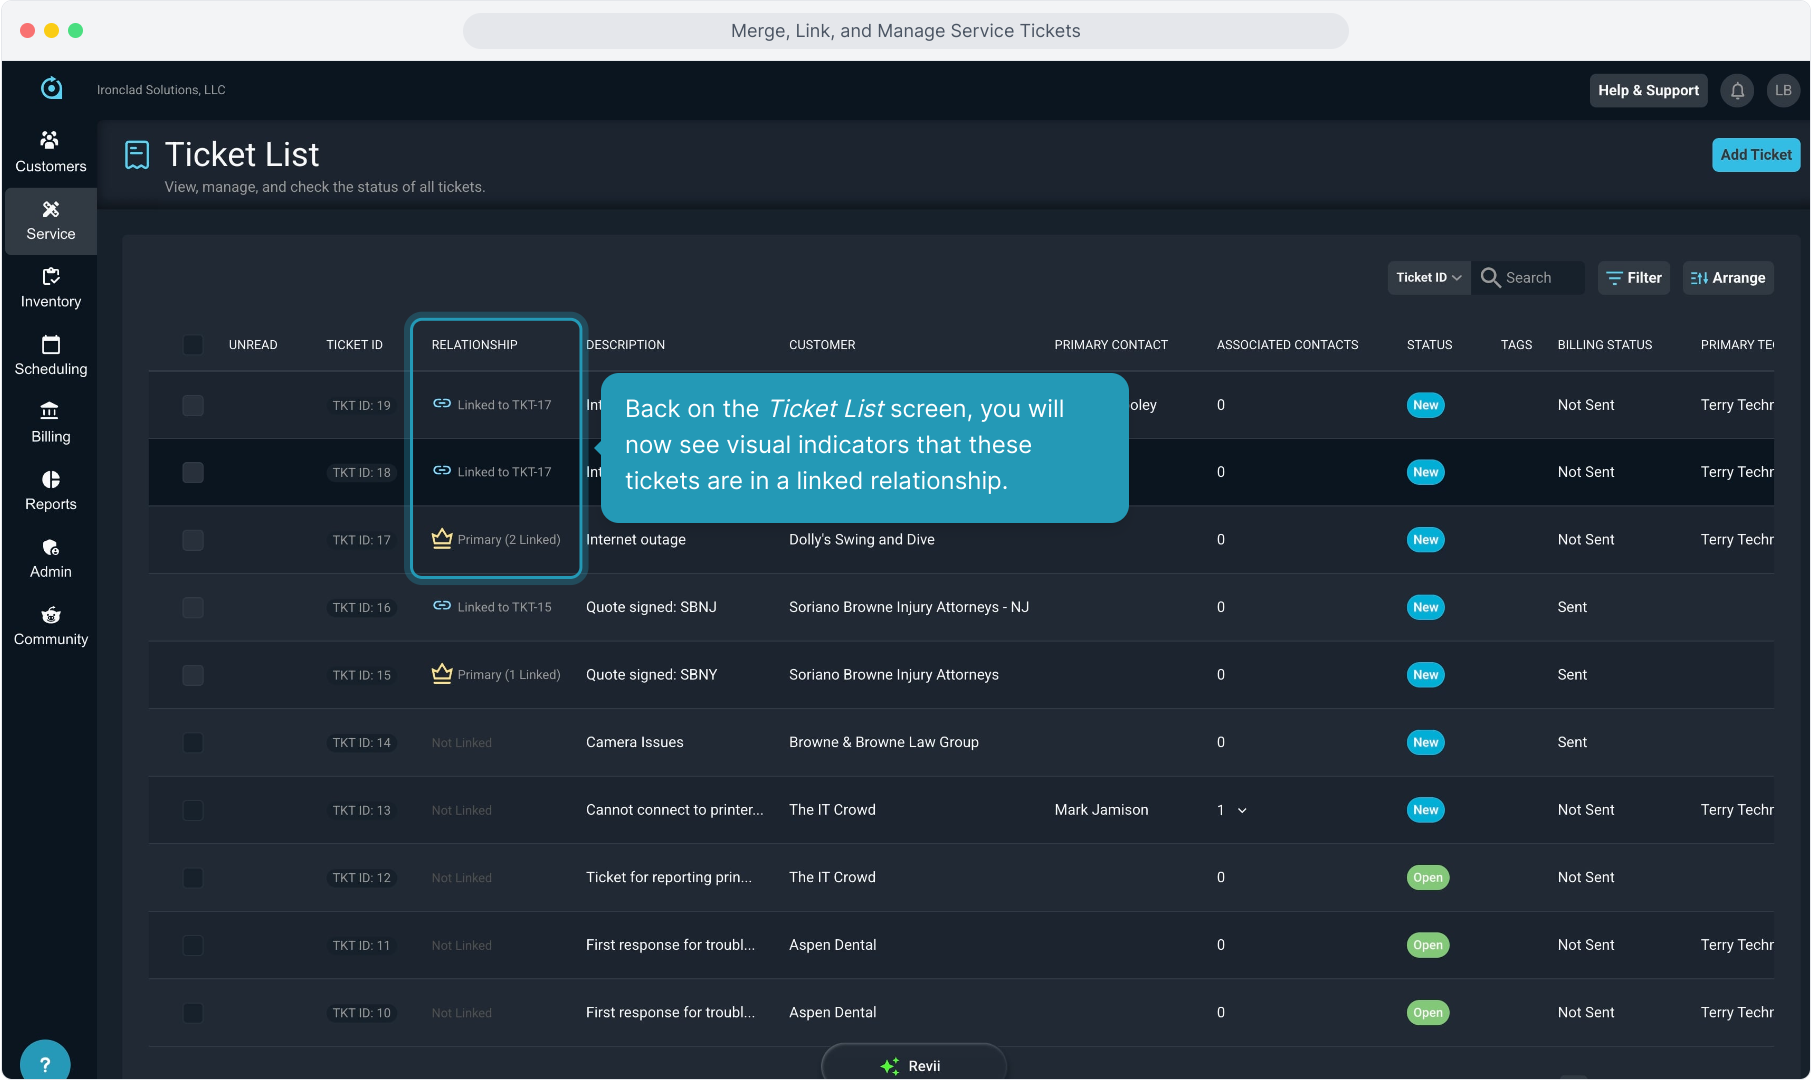
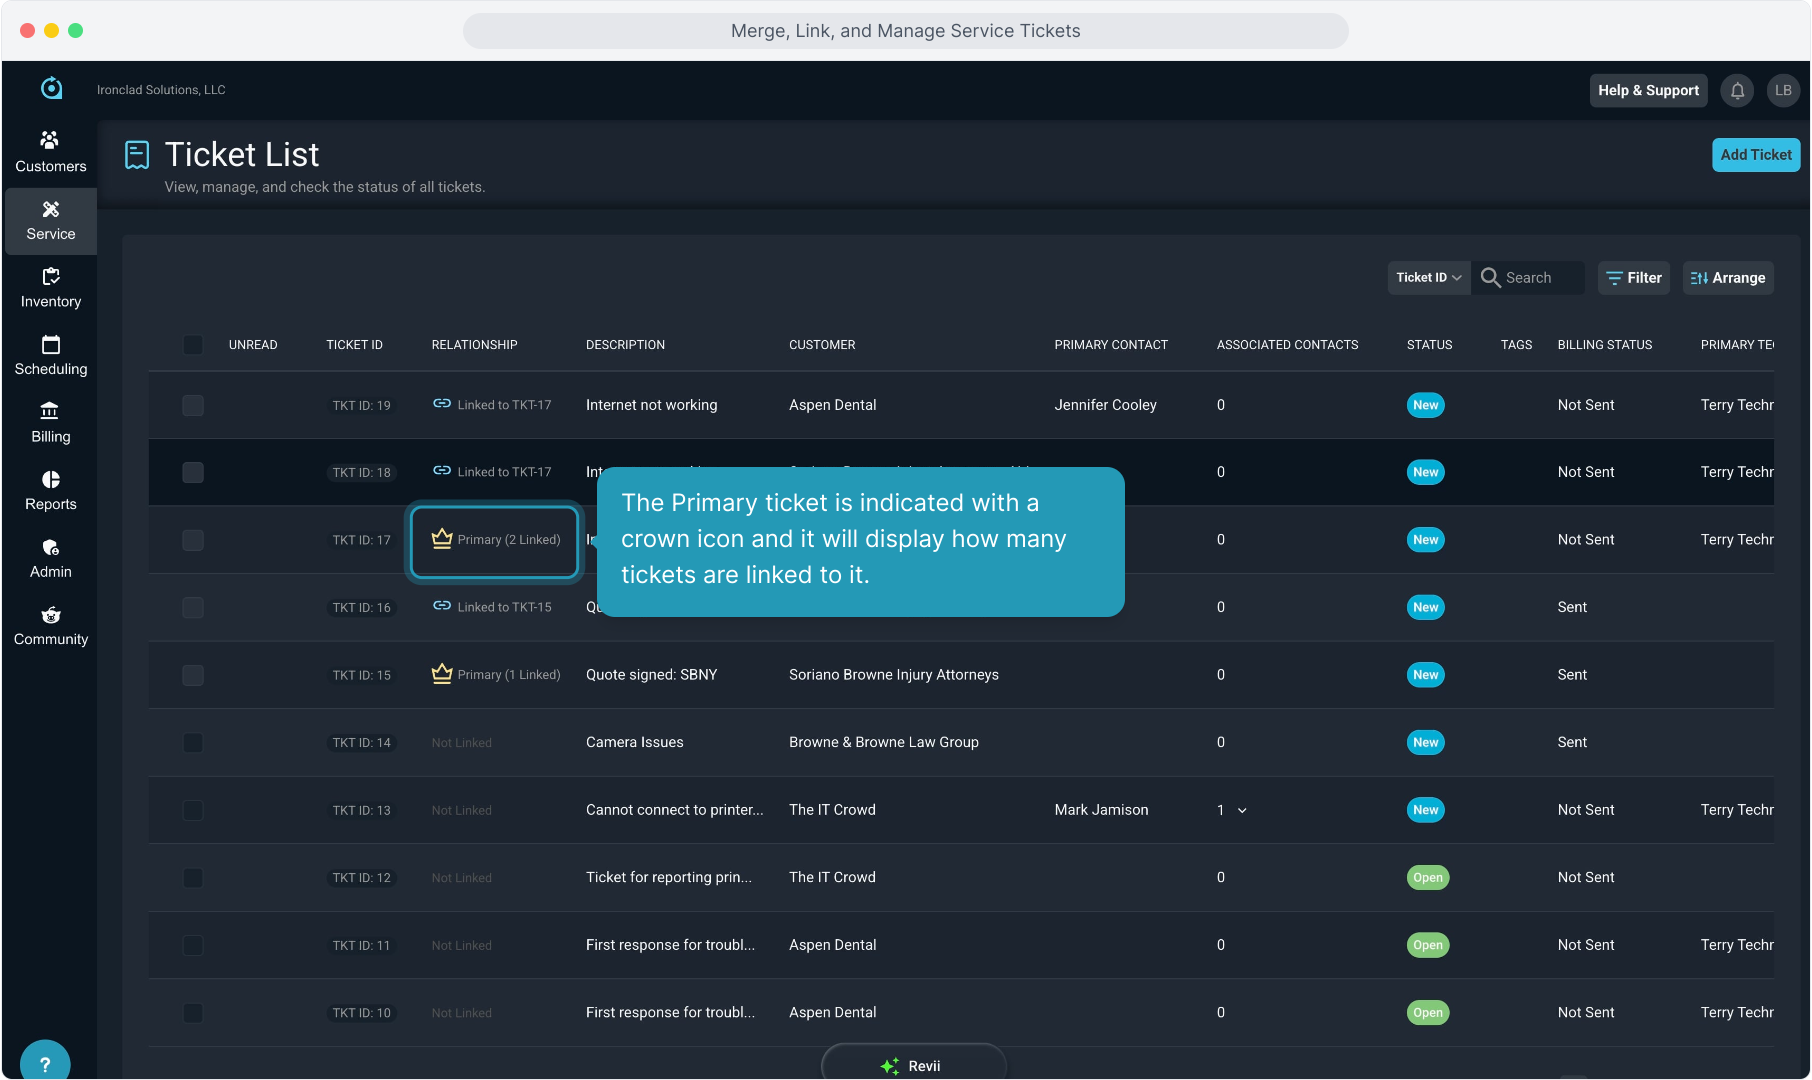
23. The Primary ticket is indicated with a crown icon and it will display how many tickets are linked to it.
24. The other linked ticket(s) will be identified with a link icon and the Primary ticket ID will be visible.

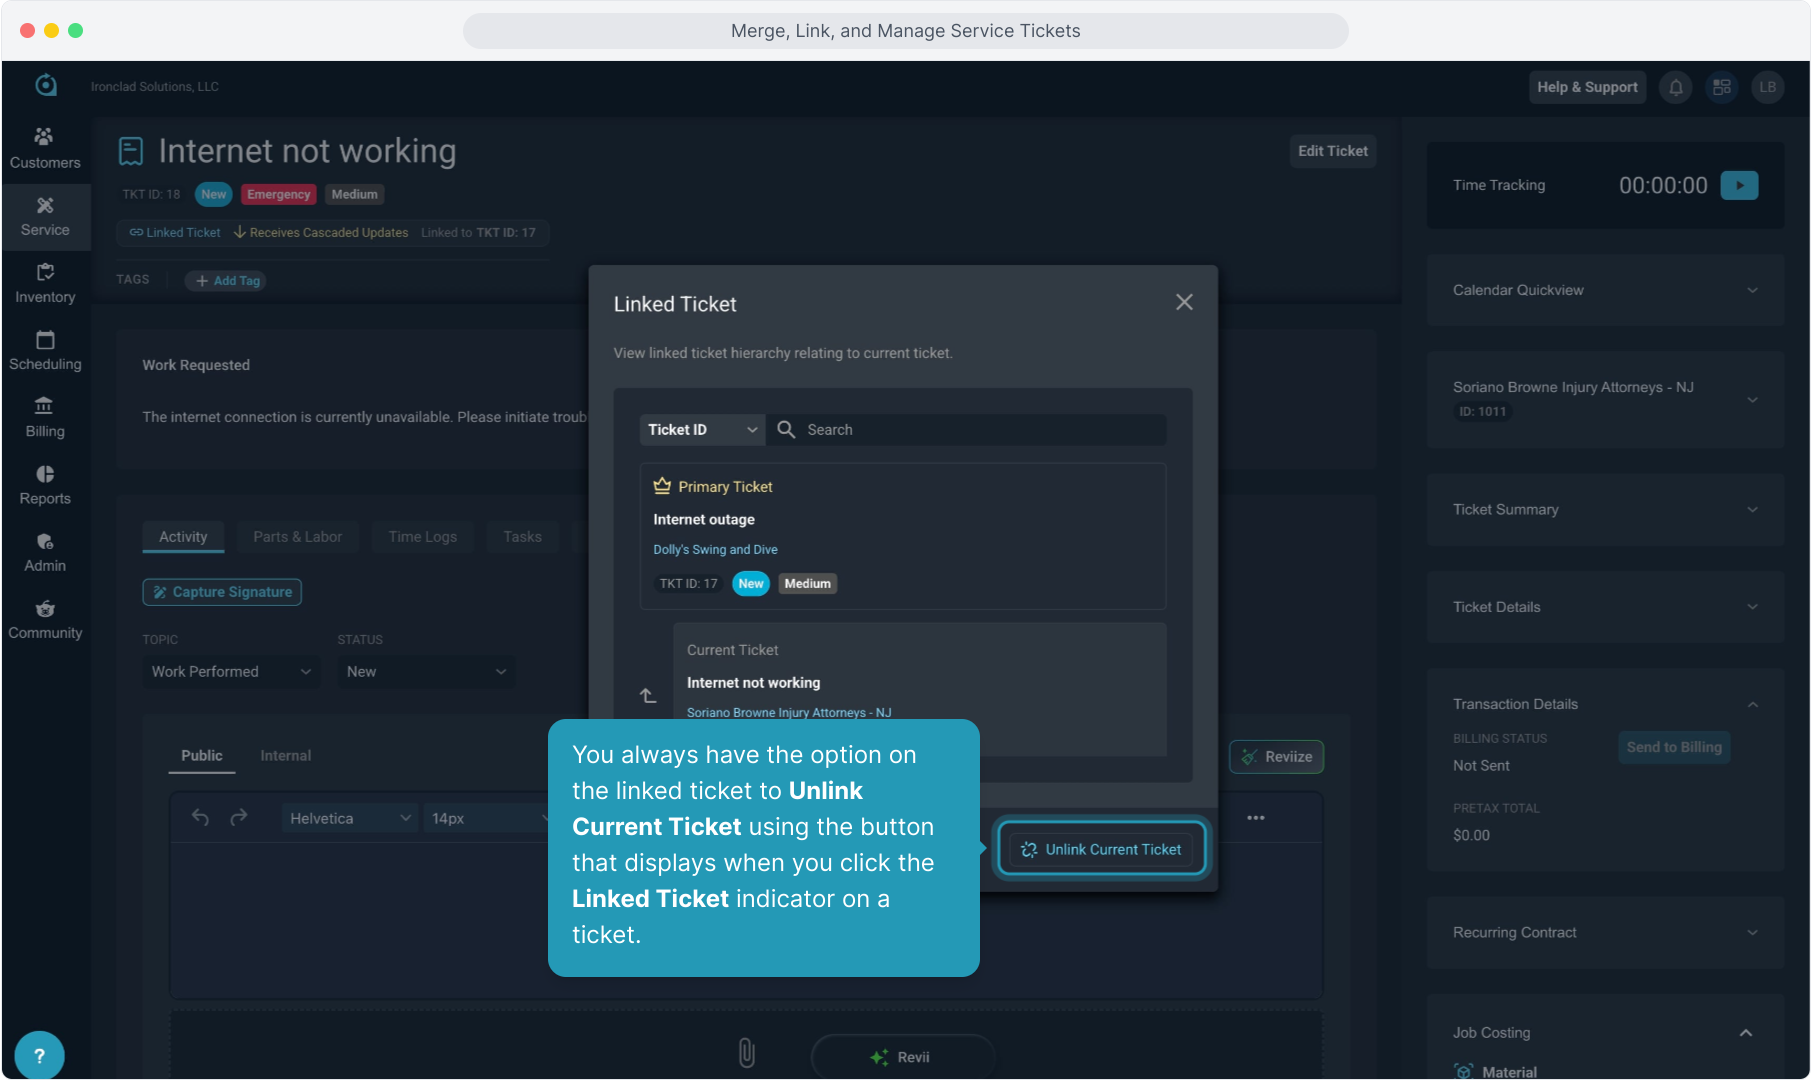
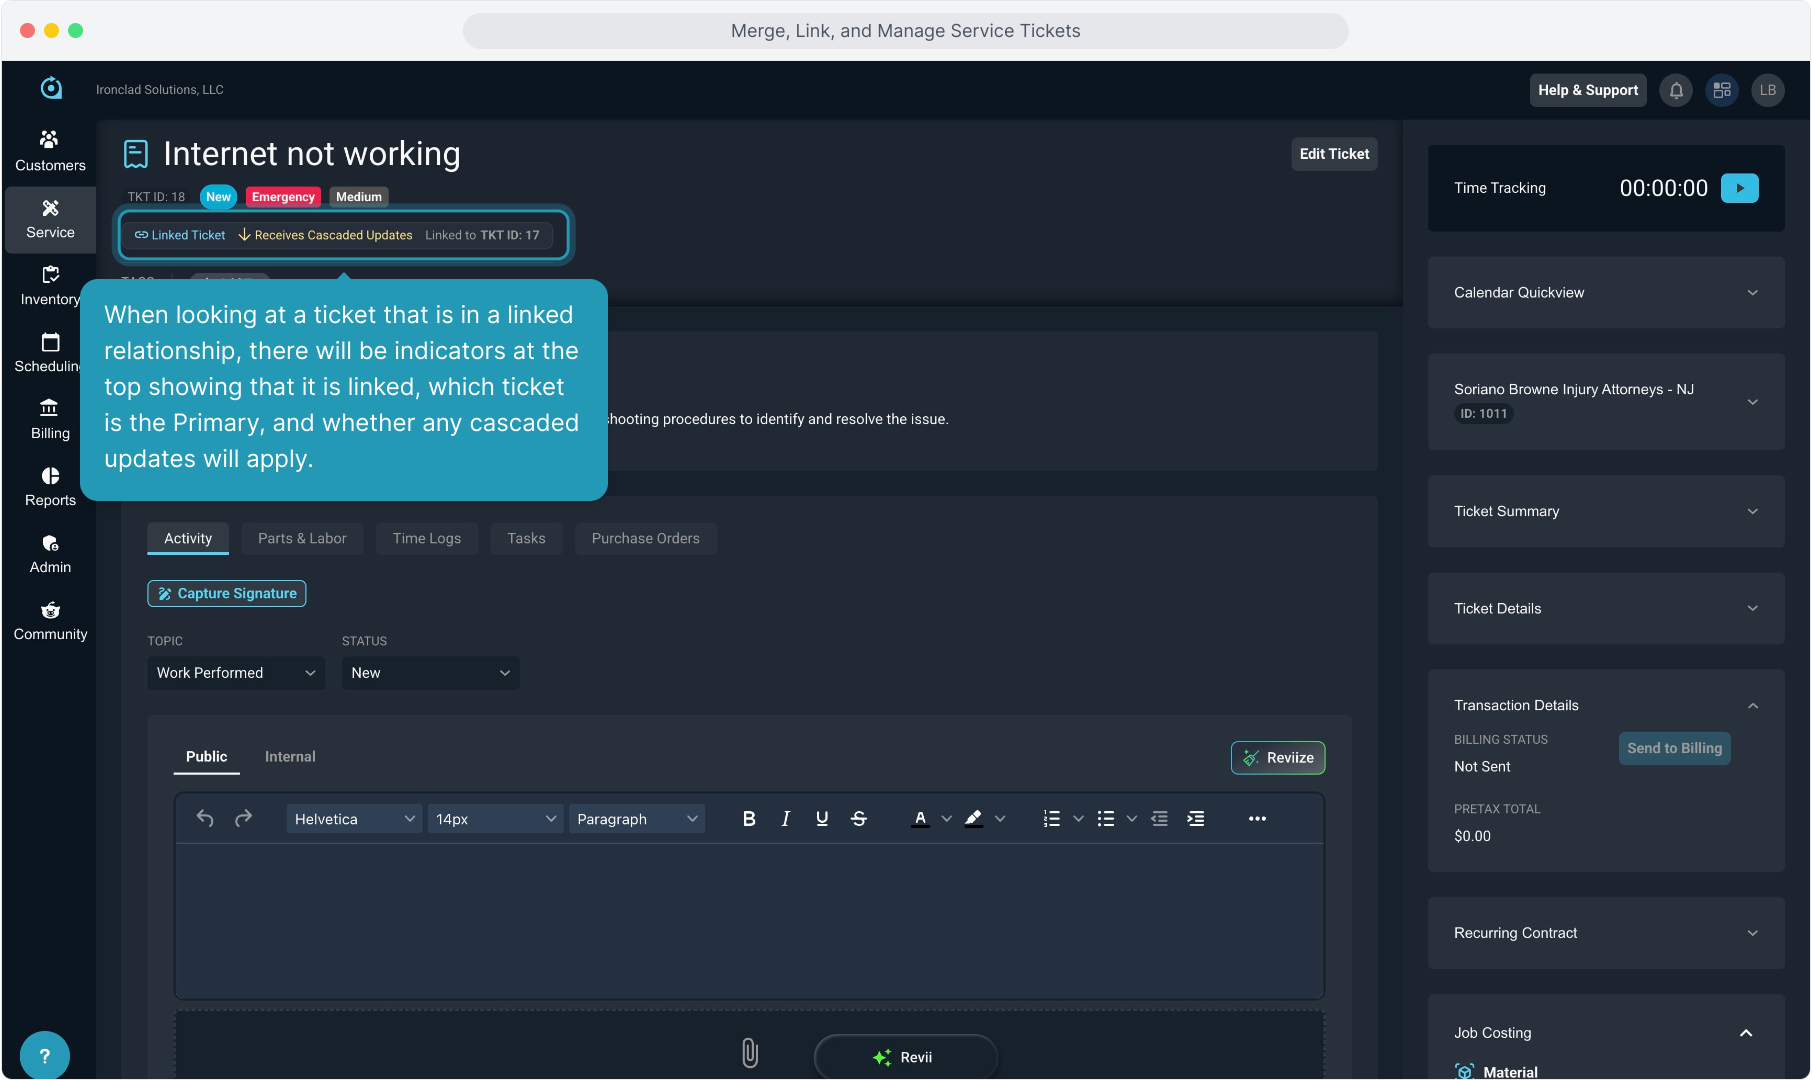
25. When looking at a ticket that is in a linked relationship, there will be indicators at the top showing that it is linked, which ticket is the Primary, and whether any cascaded updates will apply.
26. You always have the option on the linked ticket to Unlink Current Ticket using the button that displays when you click the Linked Ticket indicator on a ticket.