How To Guide: Managing Inventory
1. Introduction
2. To view global inventory, from the Inventory menu item, select Inventory Management.

3. The screen will default to the Inventory Matrix view.
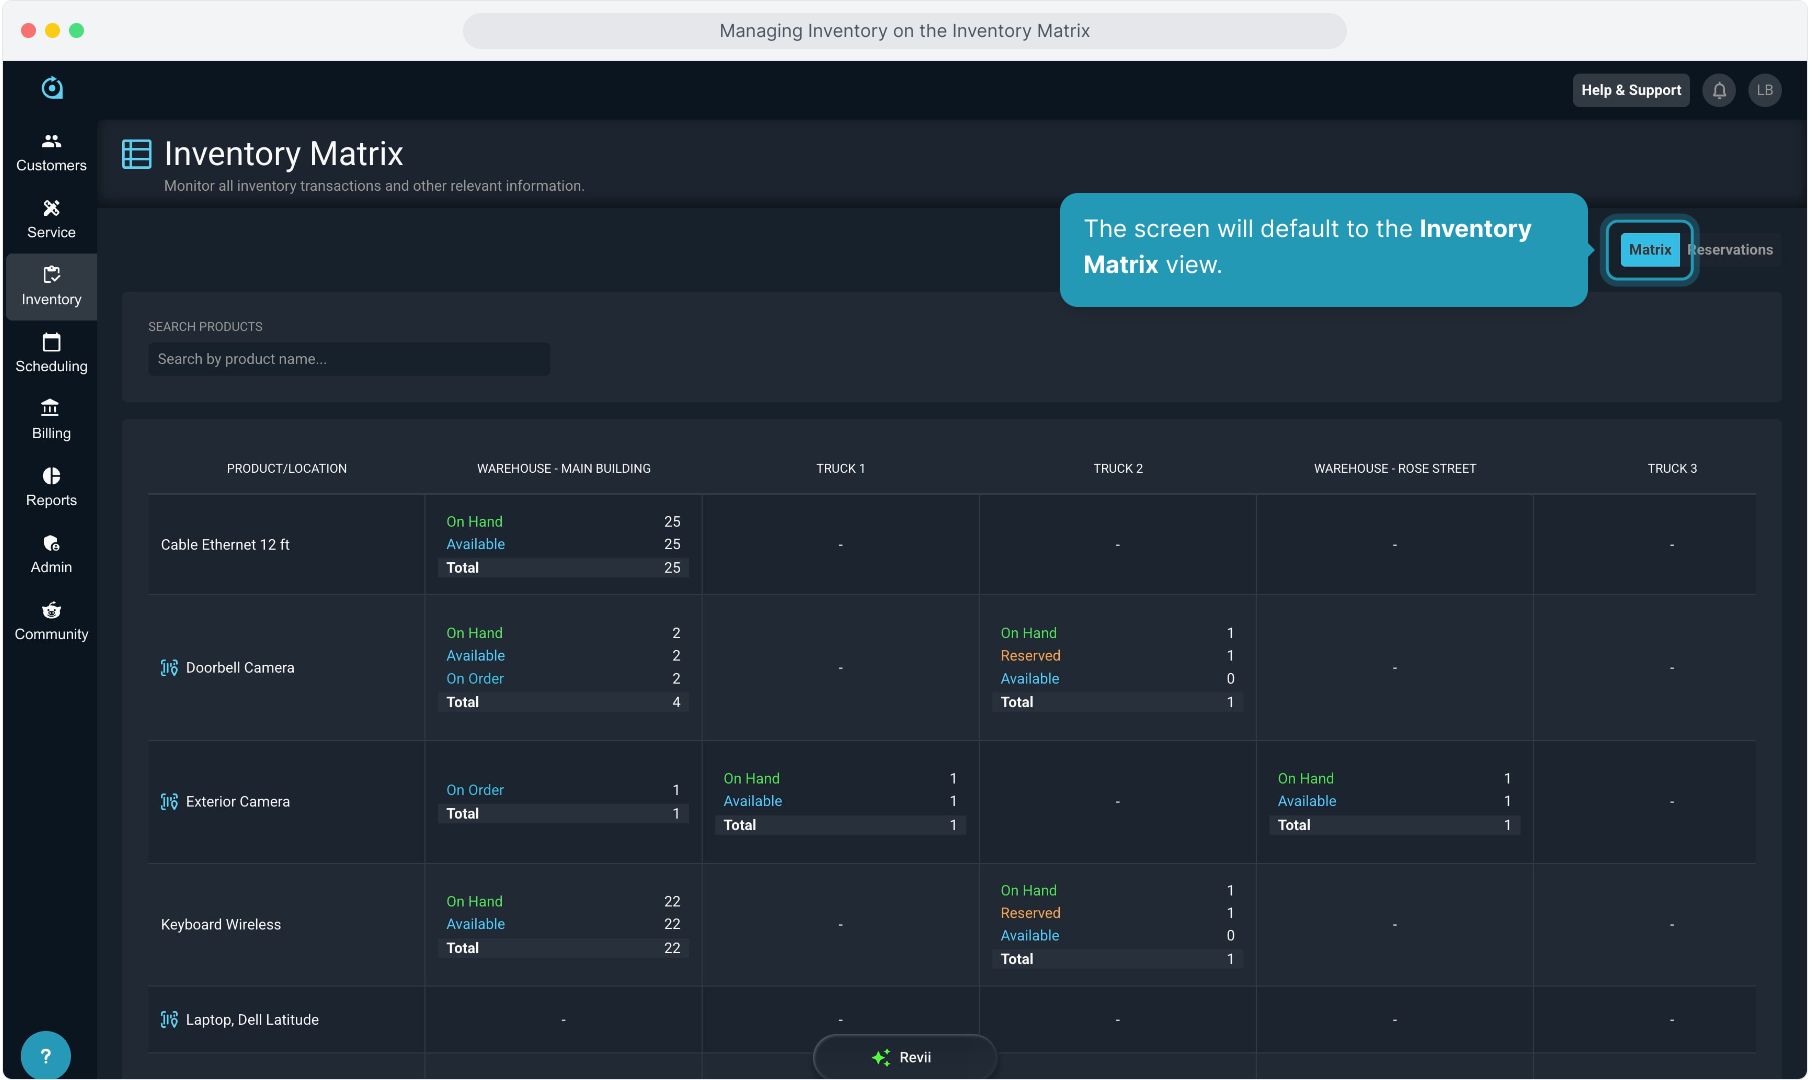
4. This view shows all products and all locations, with quantities for each.

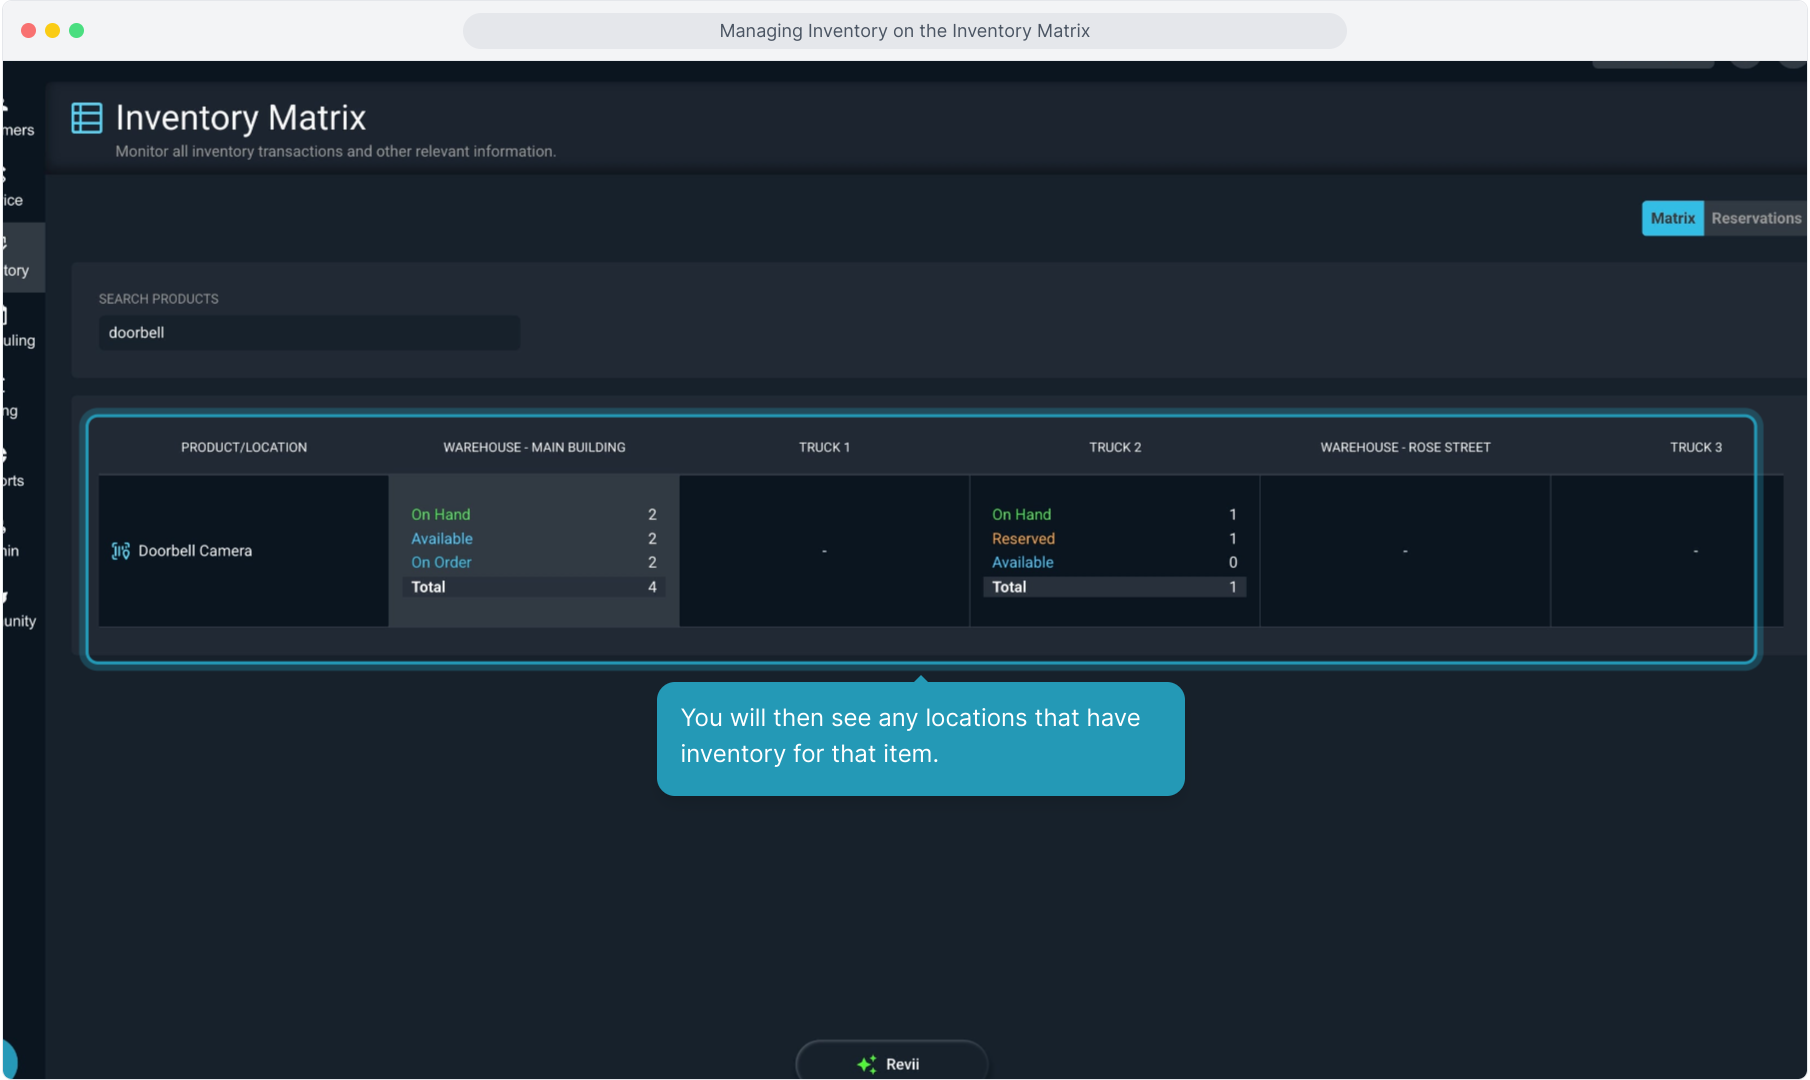
5. You can Search Products for specific items.
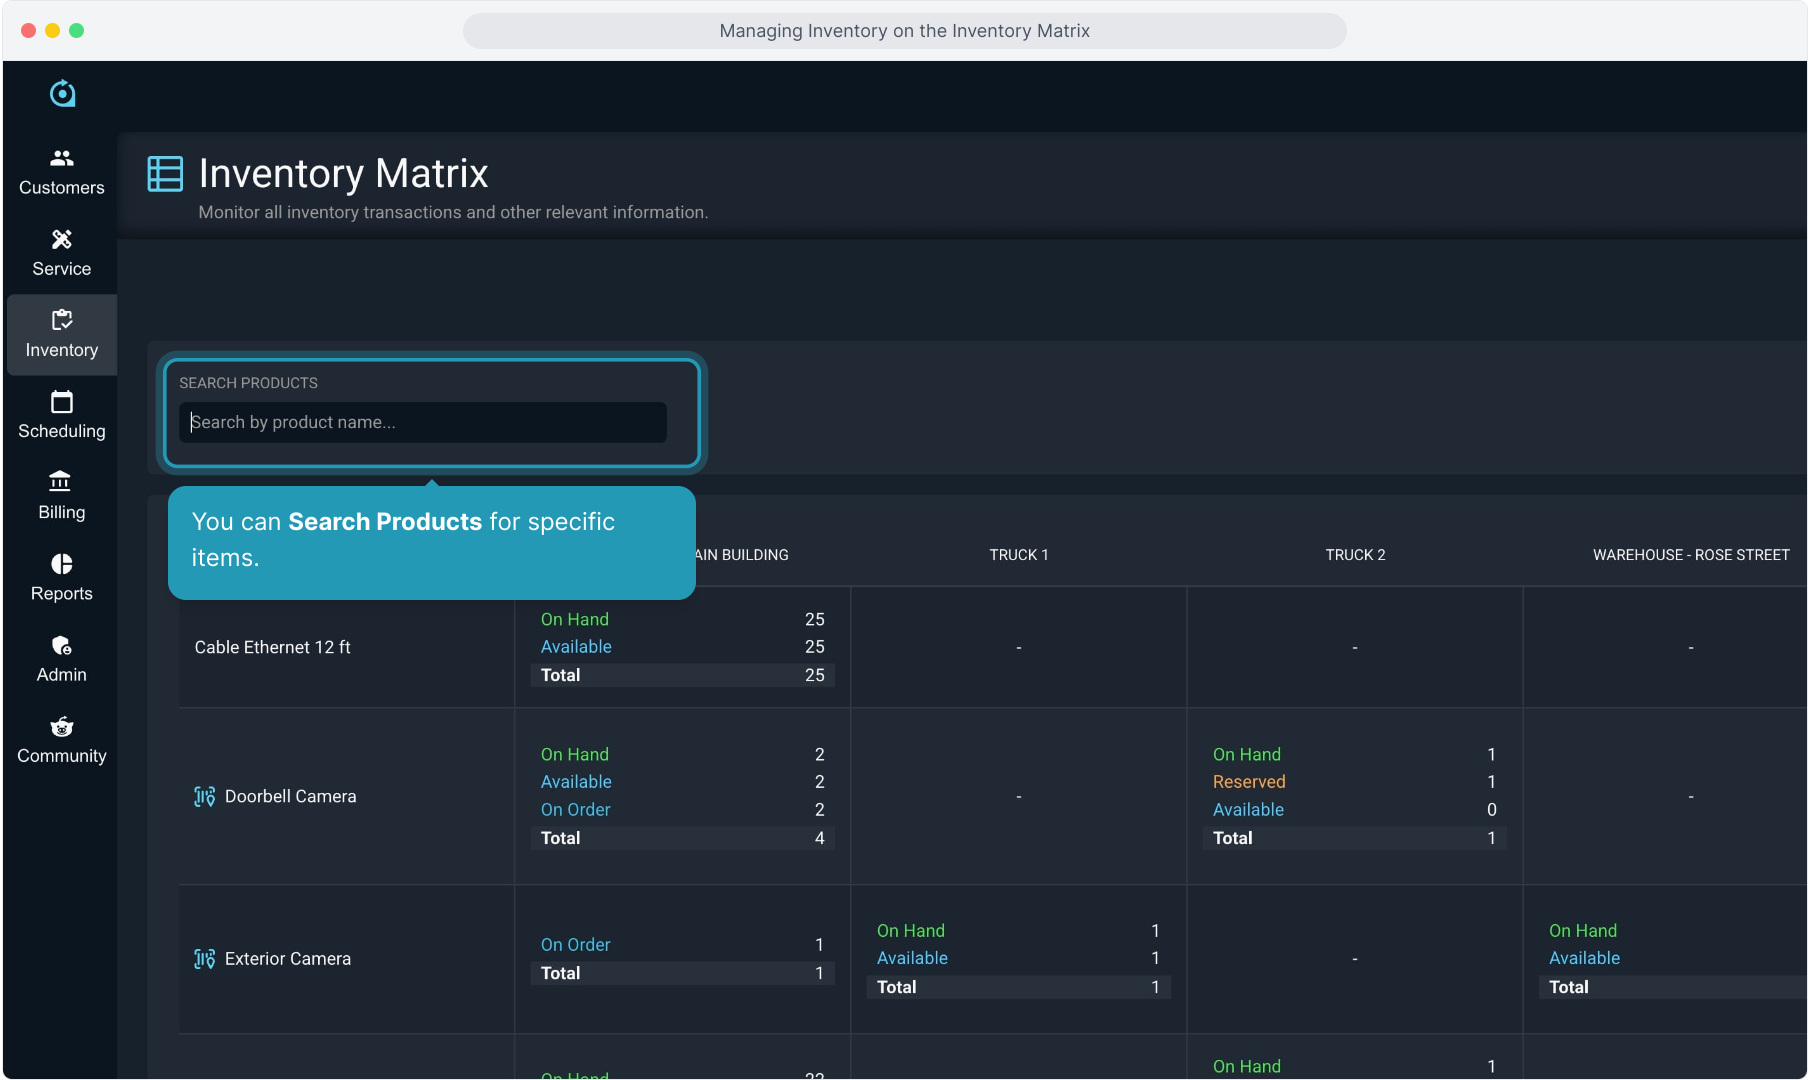
6. You will then see any locations that have inventory for that item.
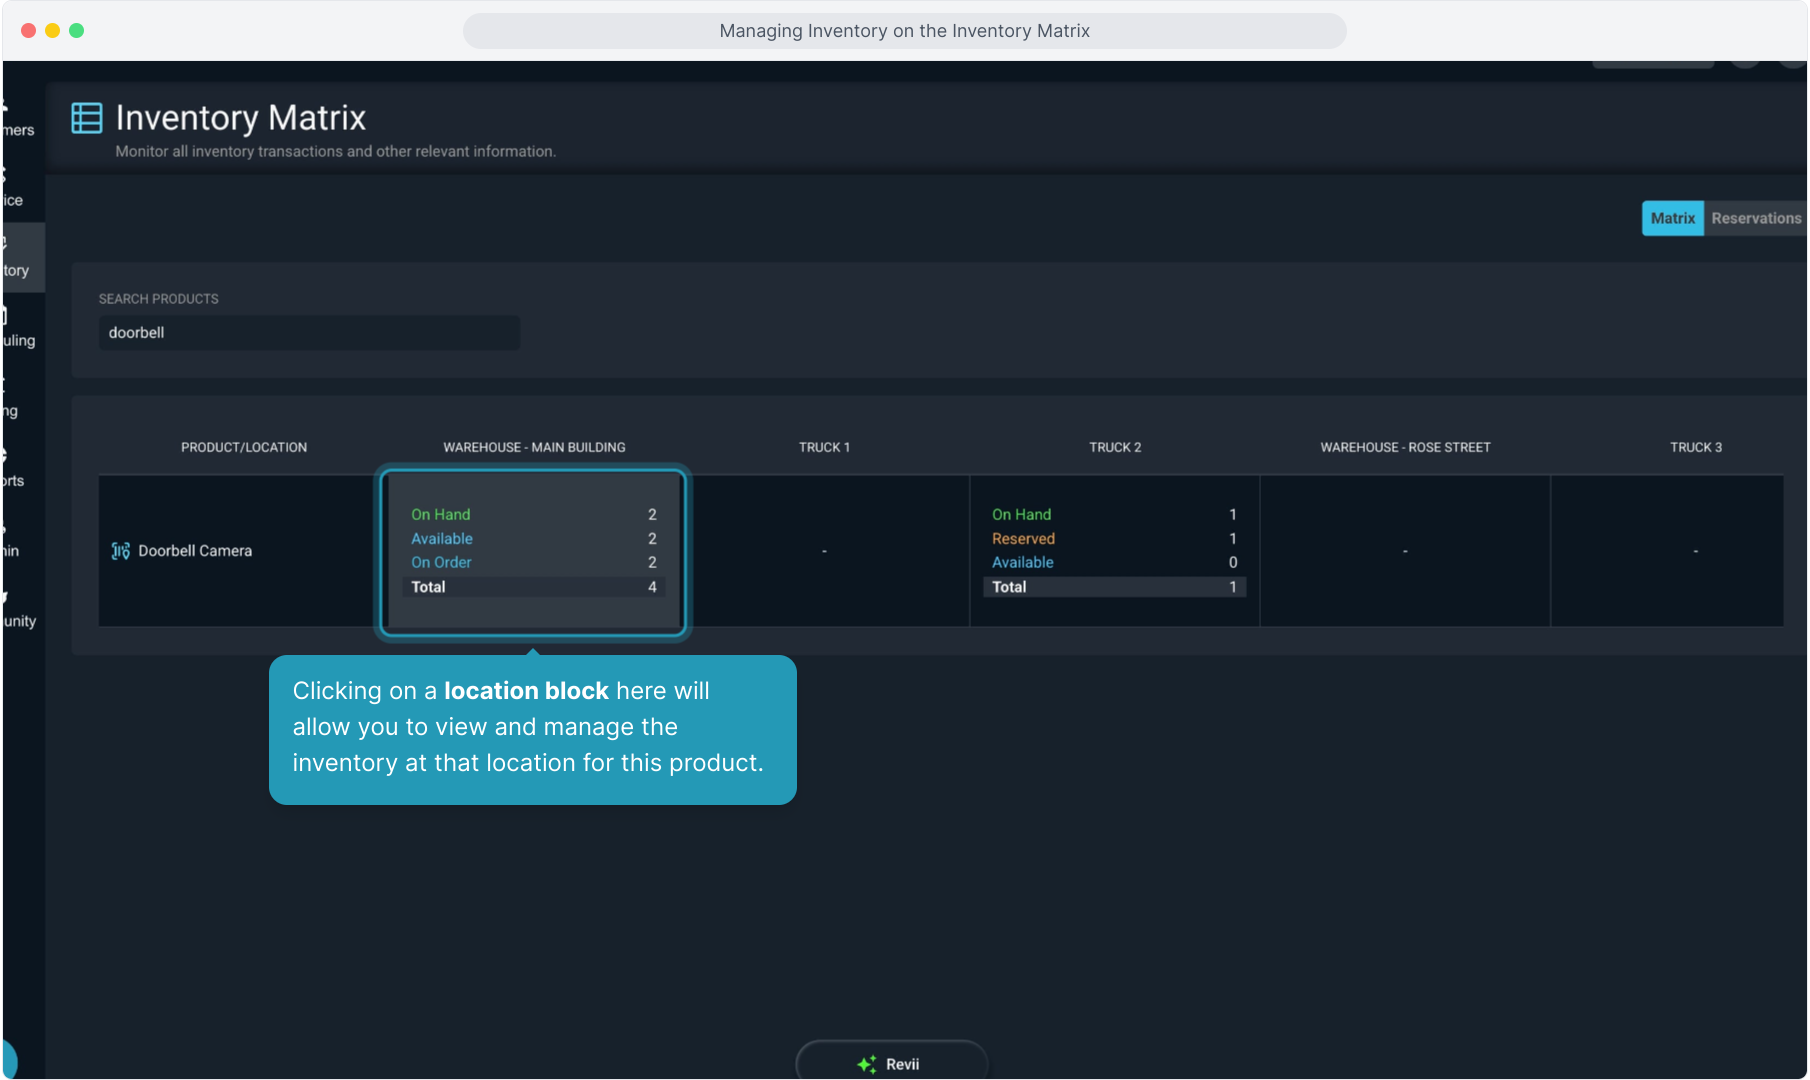
7. Clicking on a location block here will allow you to view and manage the inventory at that location for this product.
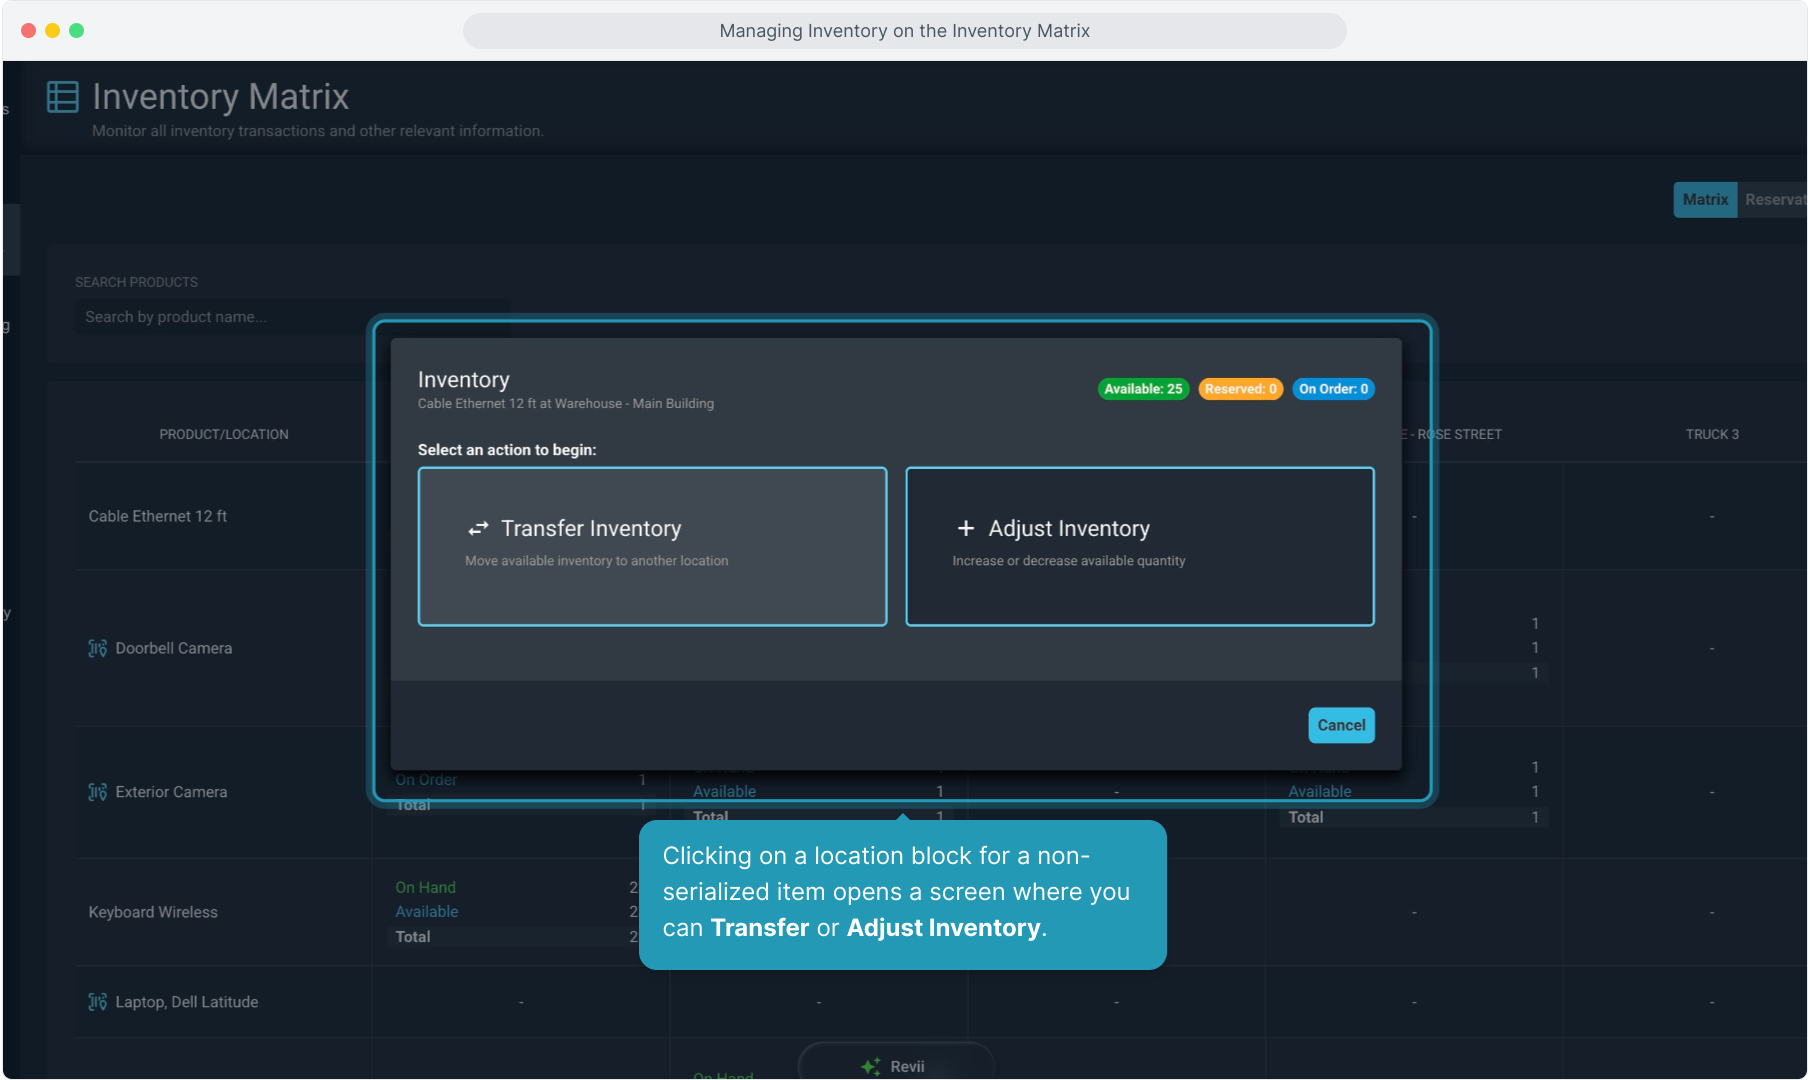
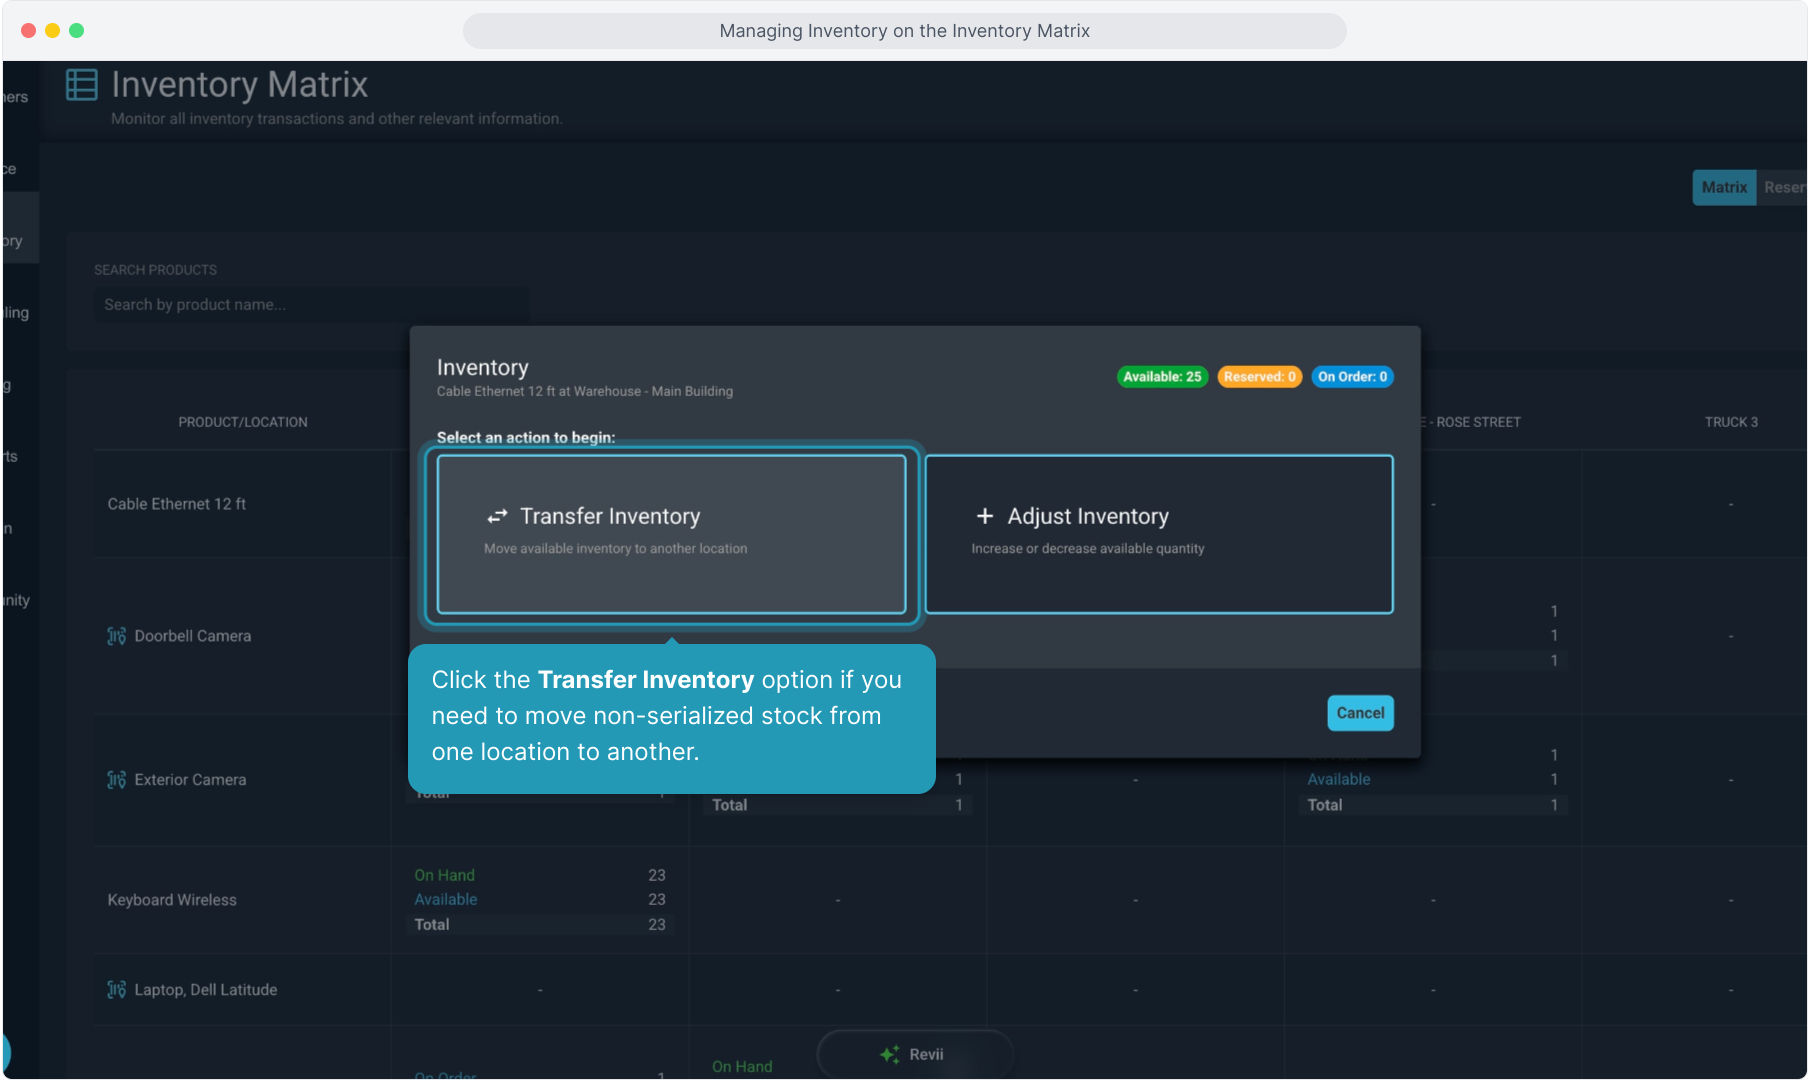
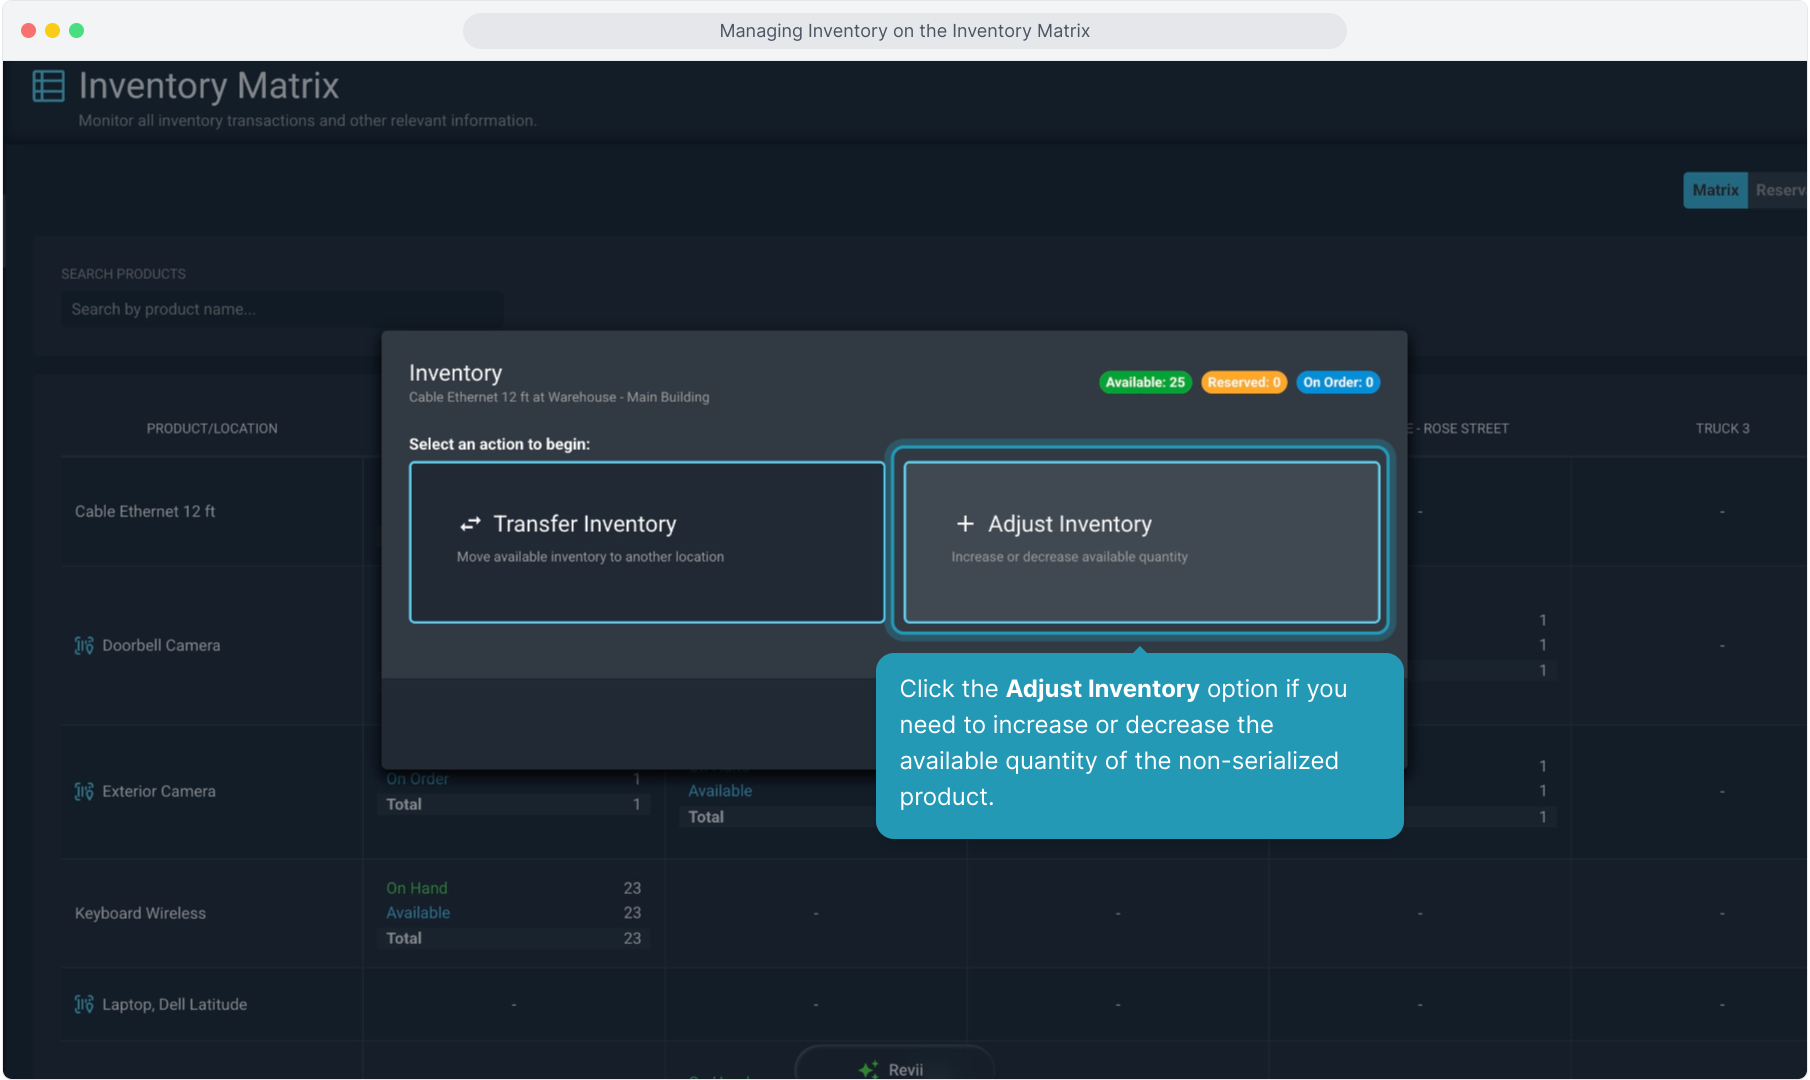
8. Clicking on a location block for a non-serialized item opens a screen where you can Transfer or Adjust Inventory.
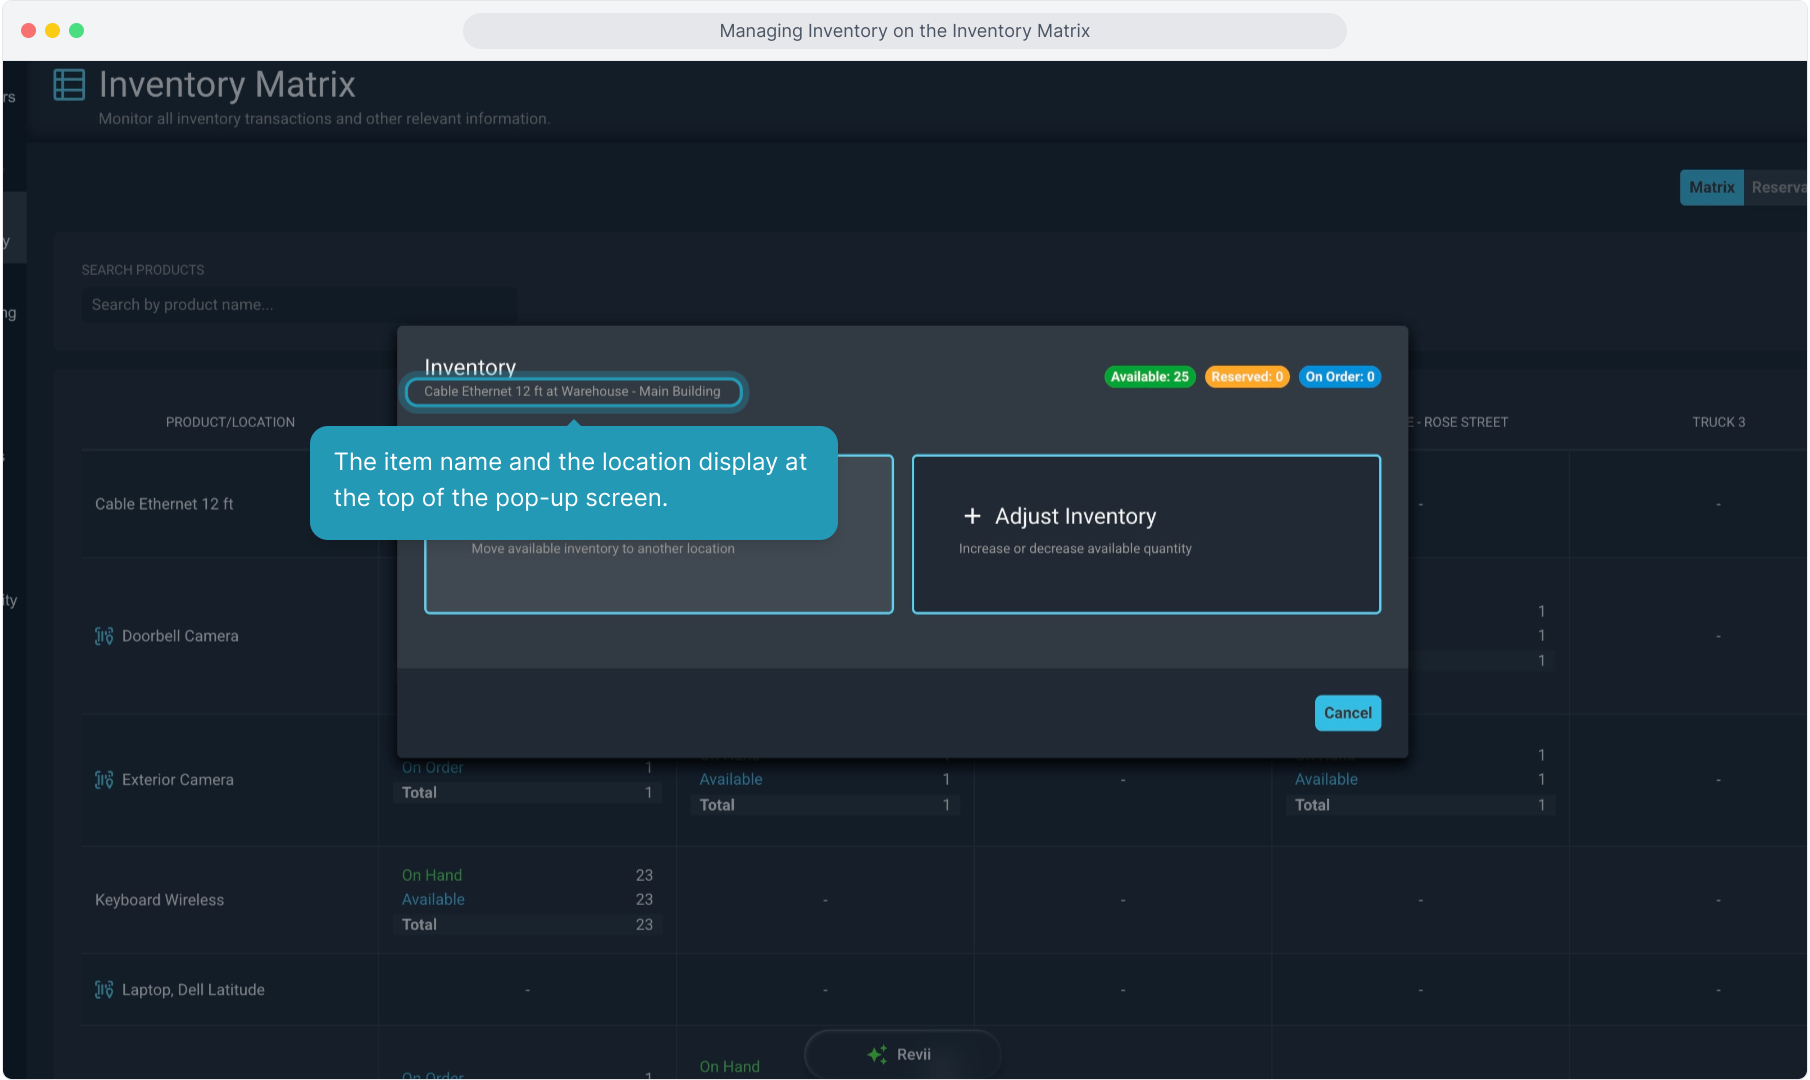
9. The item name and the location display at the top of the pop-up screen.
10. Click the Transfer Inventory option if you need to move non-serialized stock from one location to another.
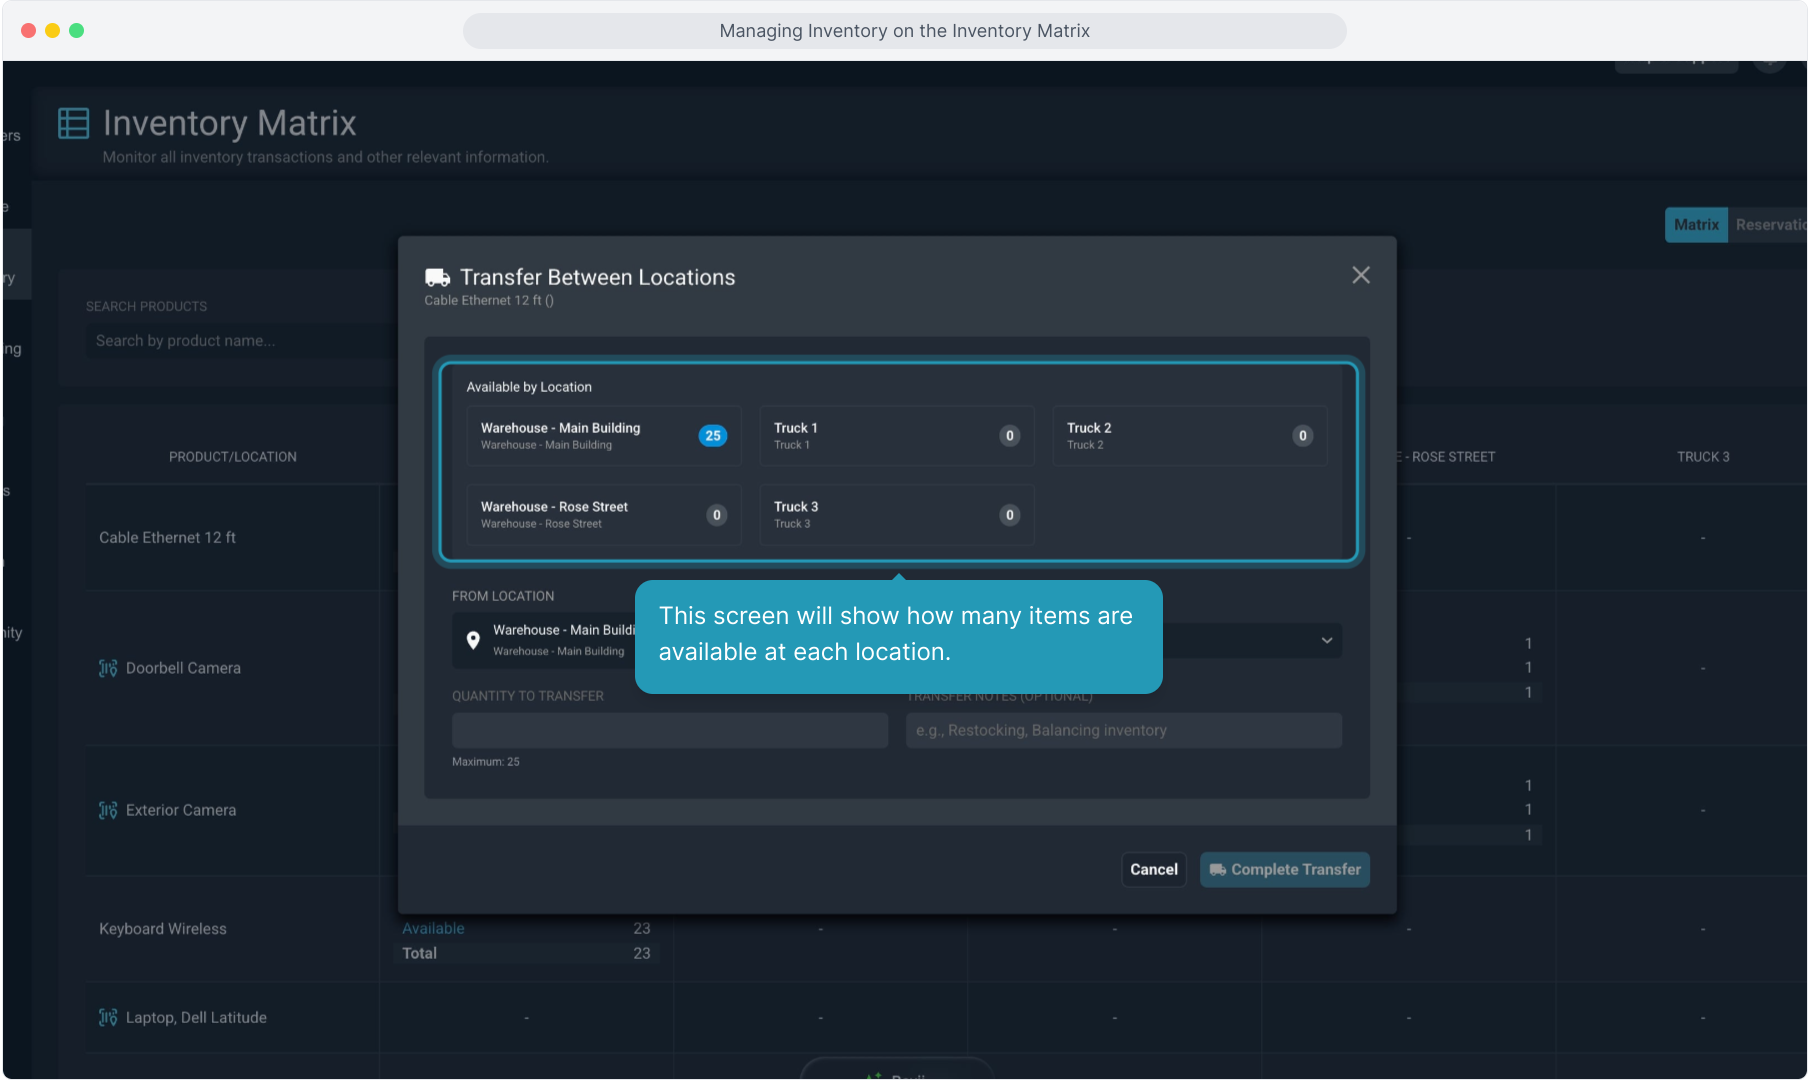
11. This screen will show how many items are available at each location.
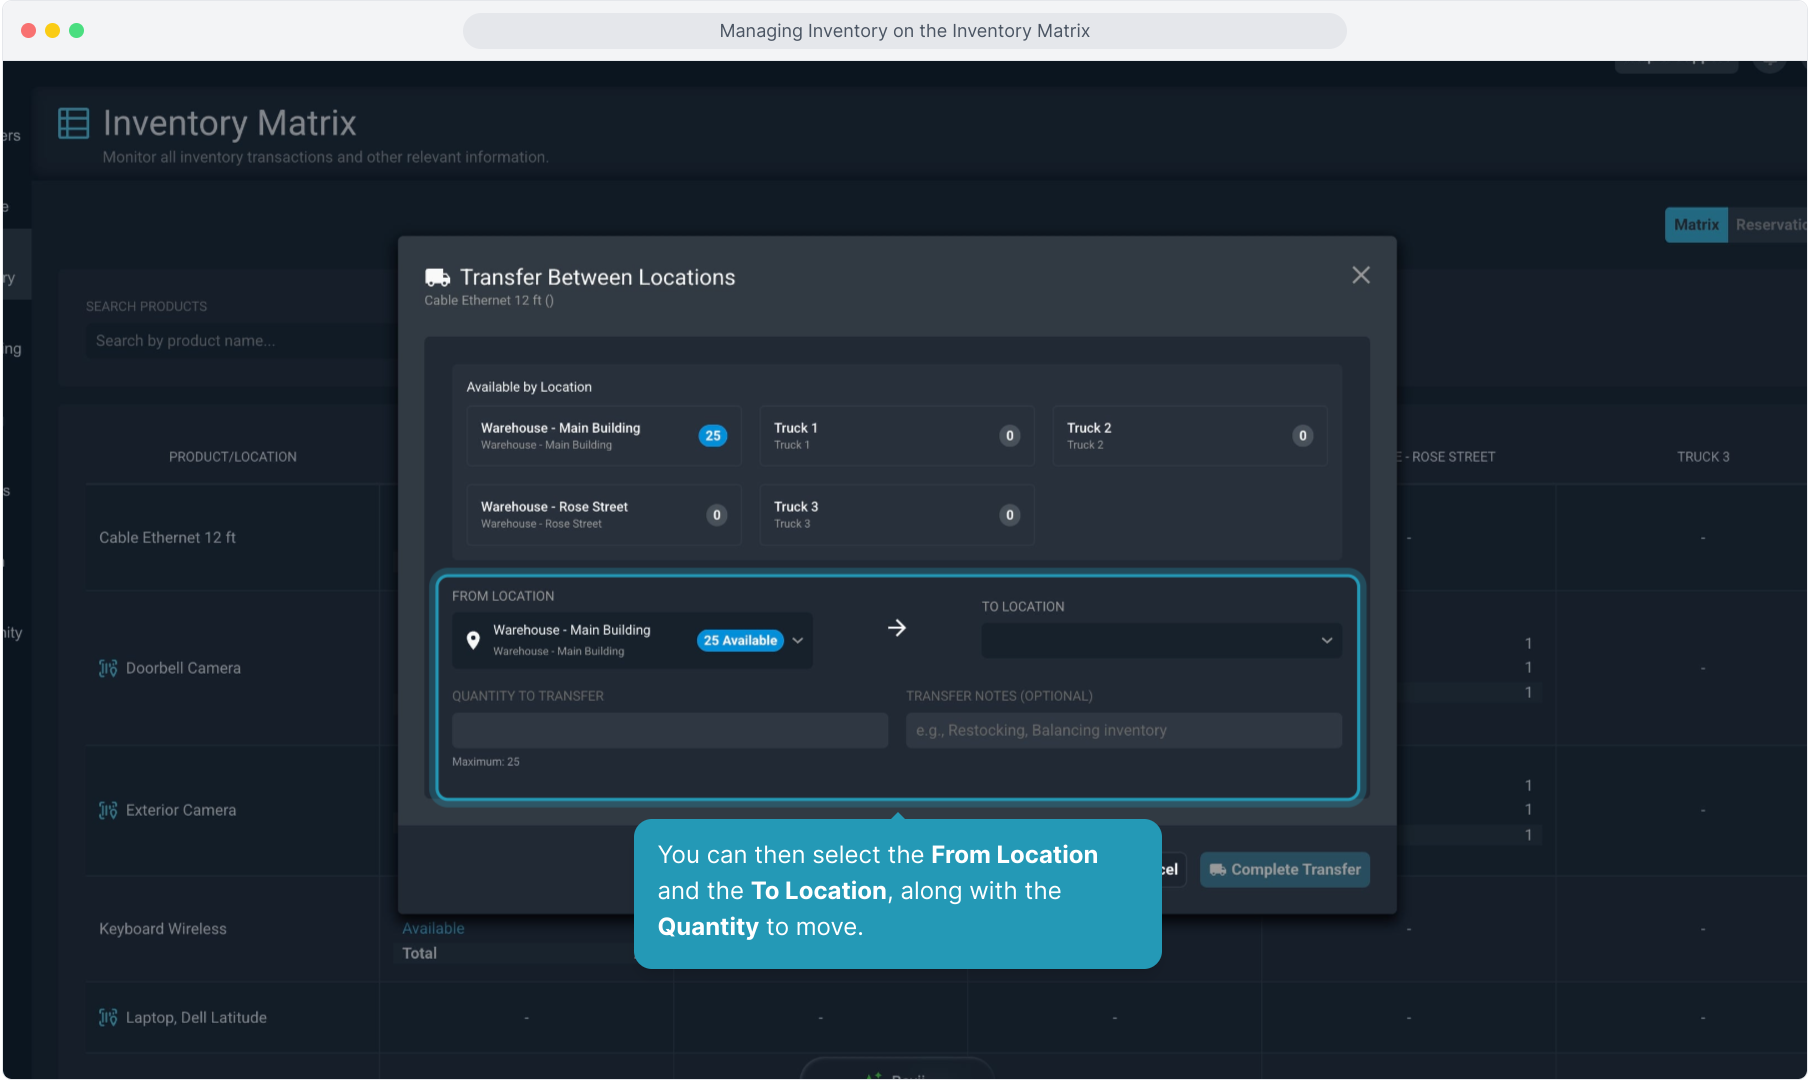
12. You can then select the From Location and the To Location, along with the Quantity to move.
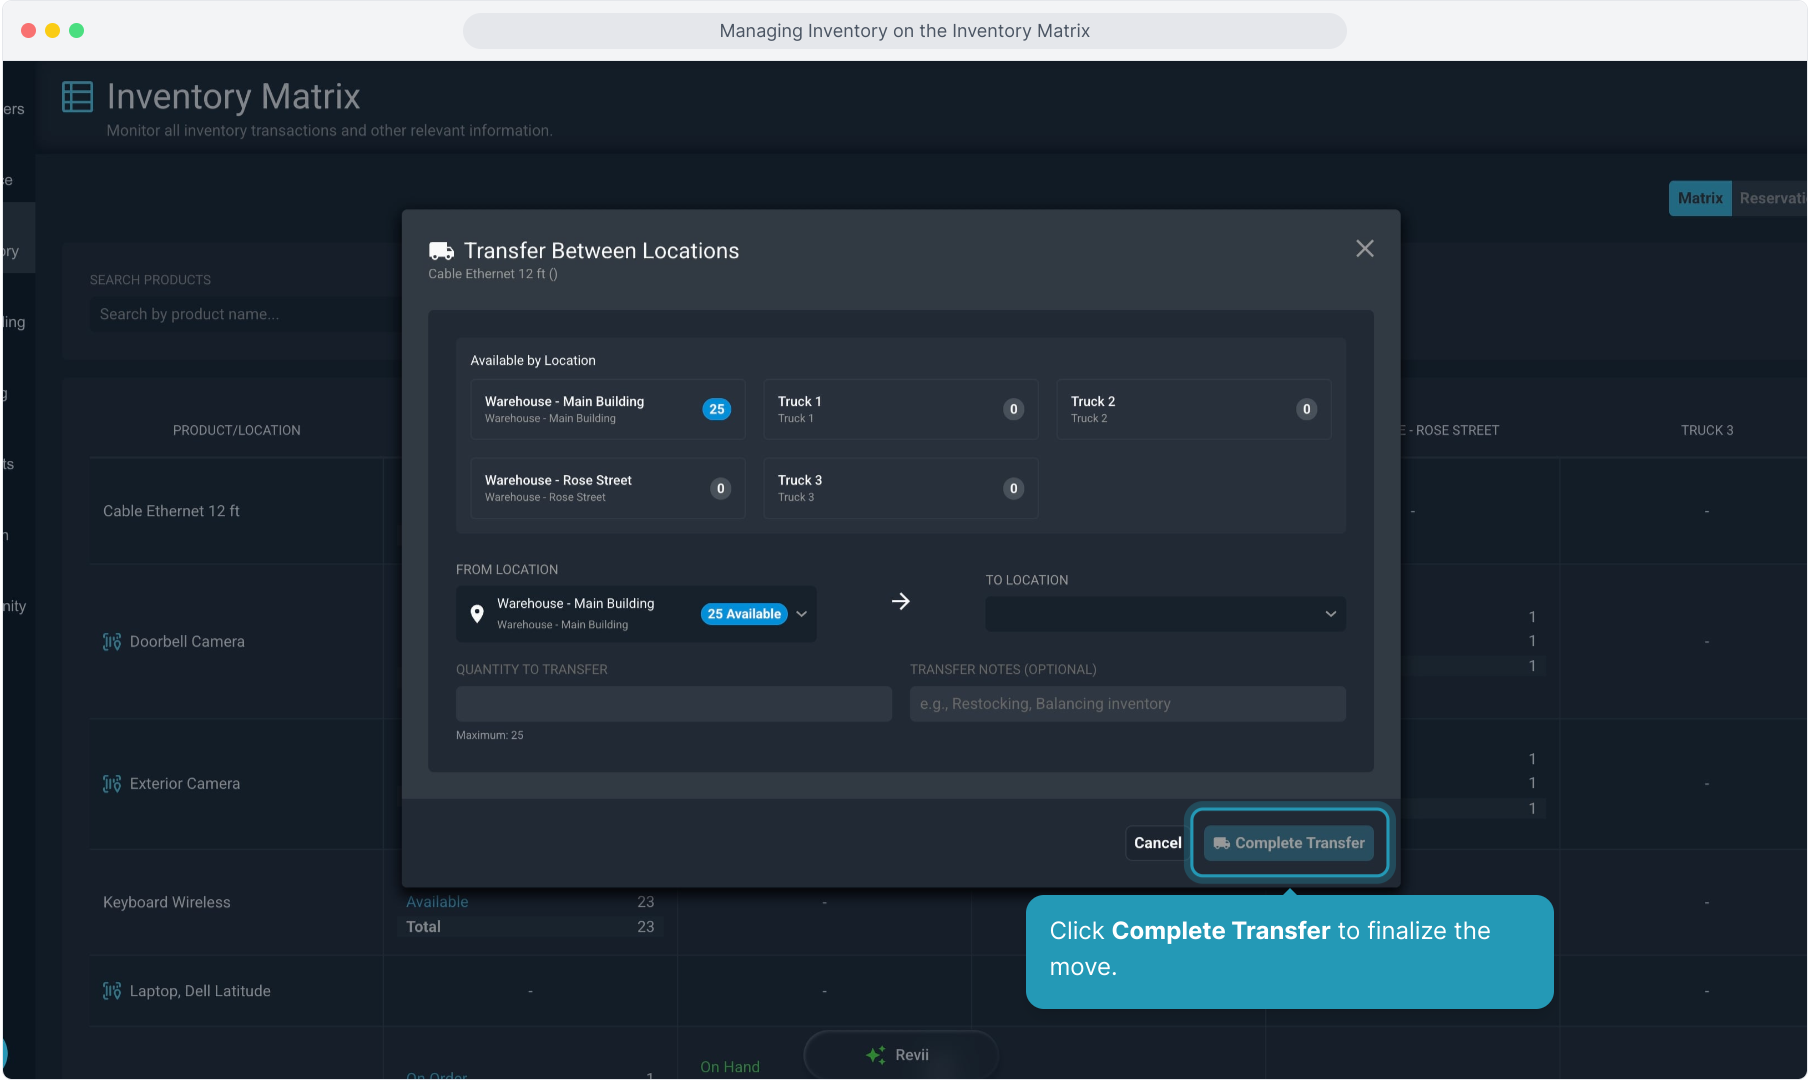
13. Click Complete Transfer to finalize the move.
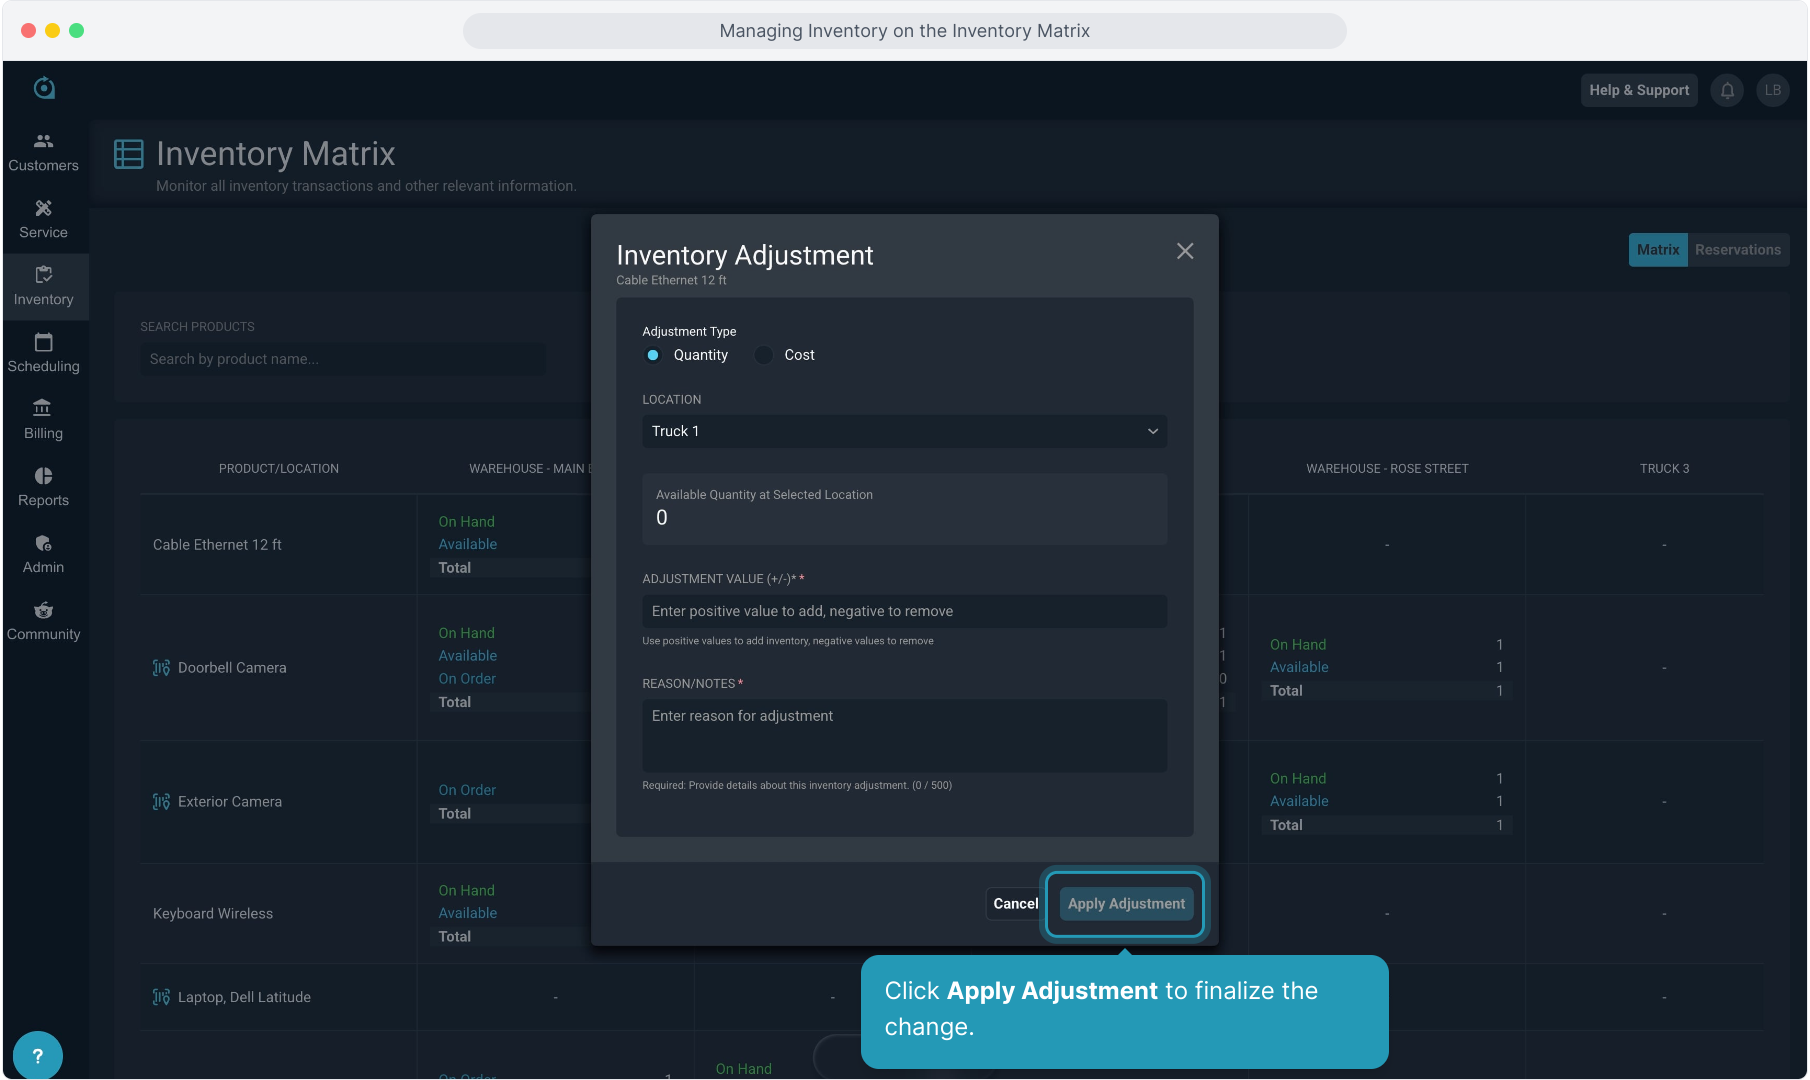
14. Click the Adjust Inventory option if you need to increase or decrease the available quantity of the non-serialized product.
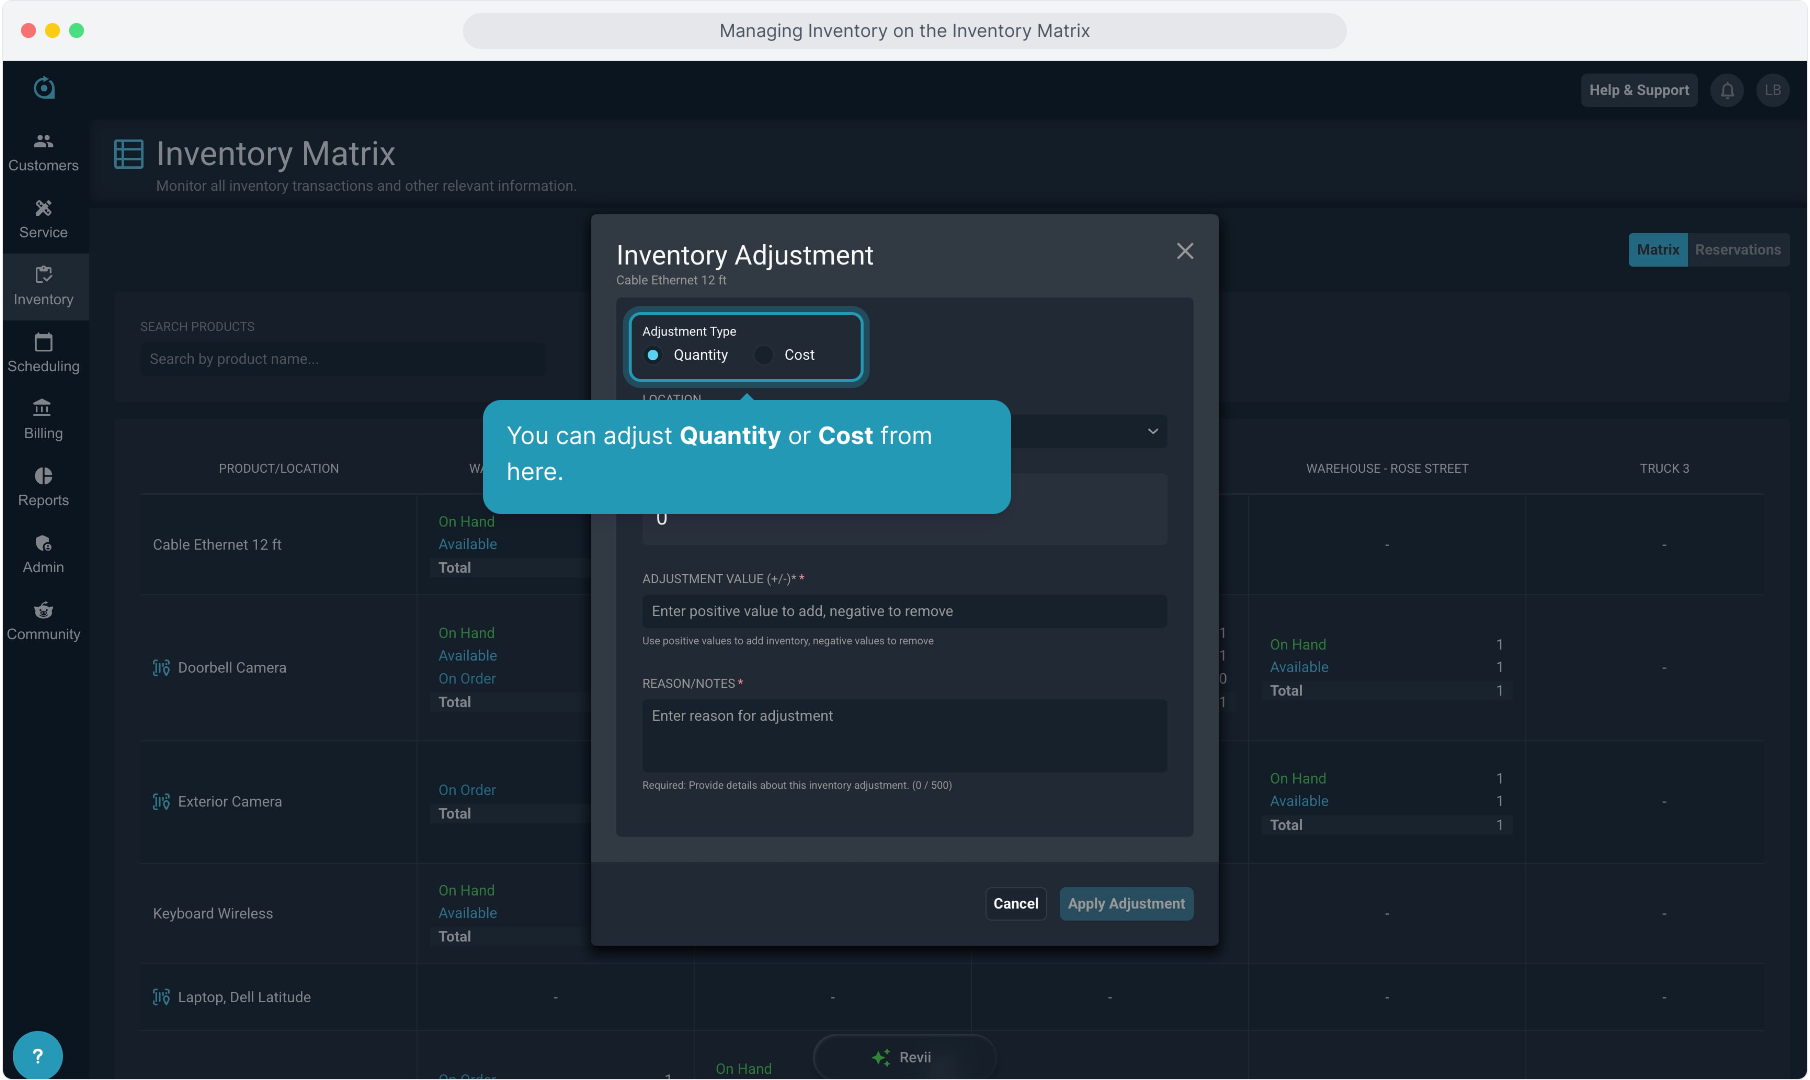
15. You can adjust Quantity or Cost from here.
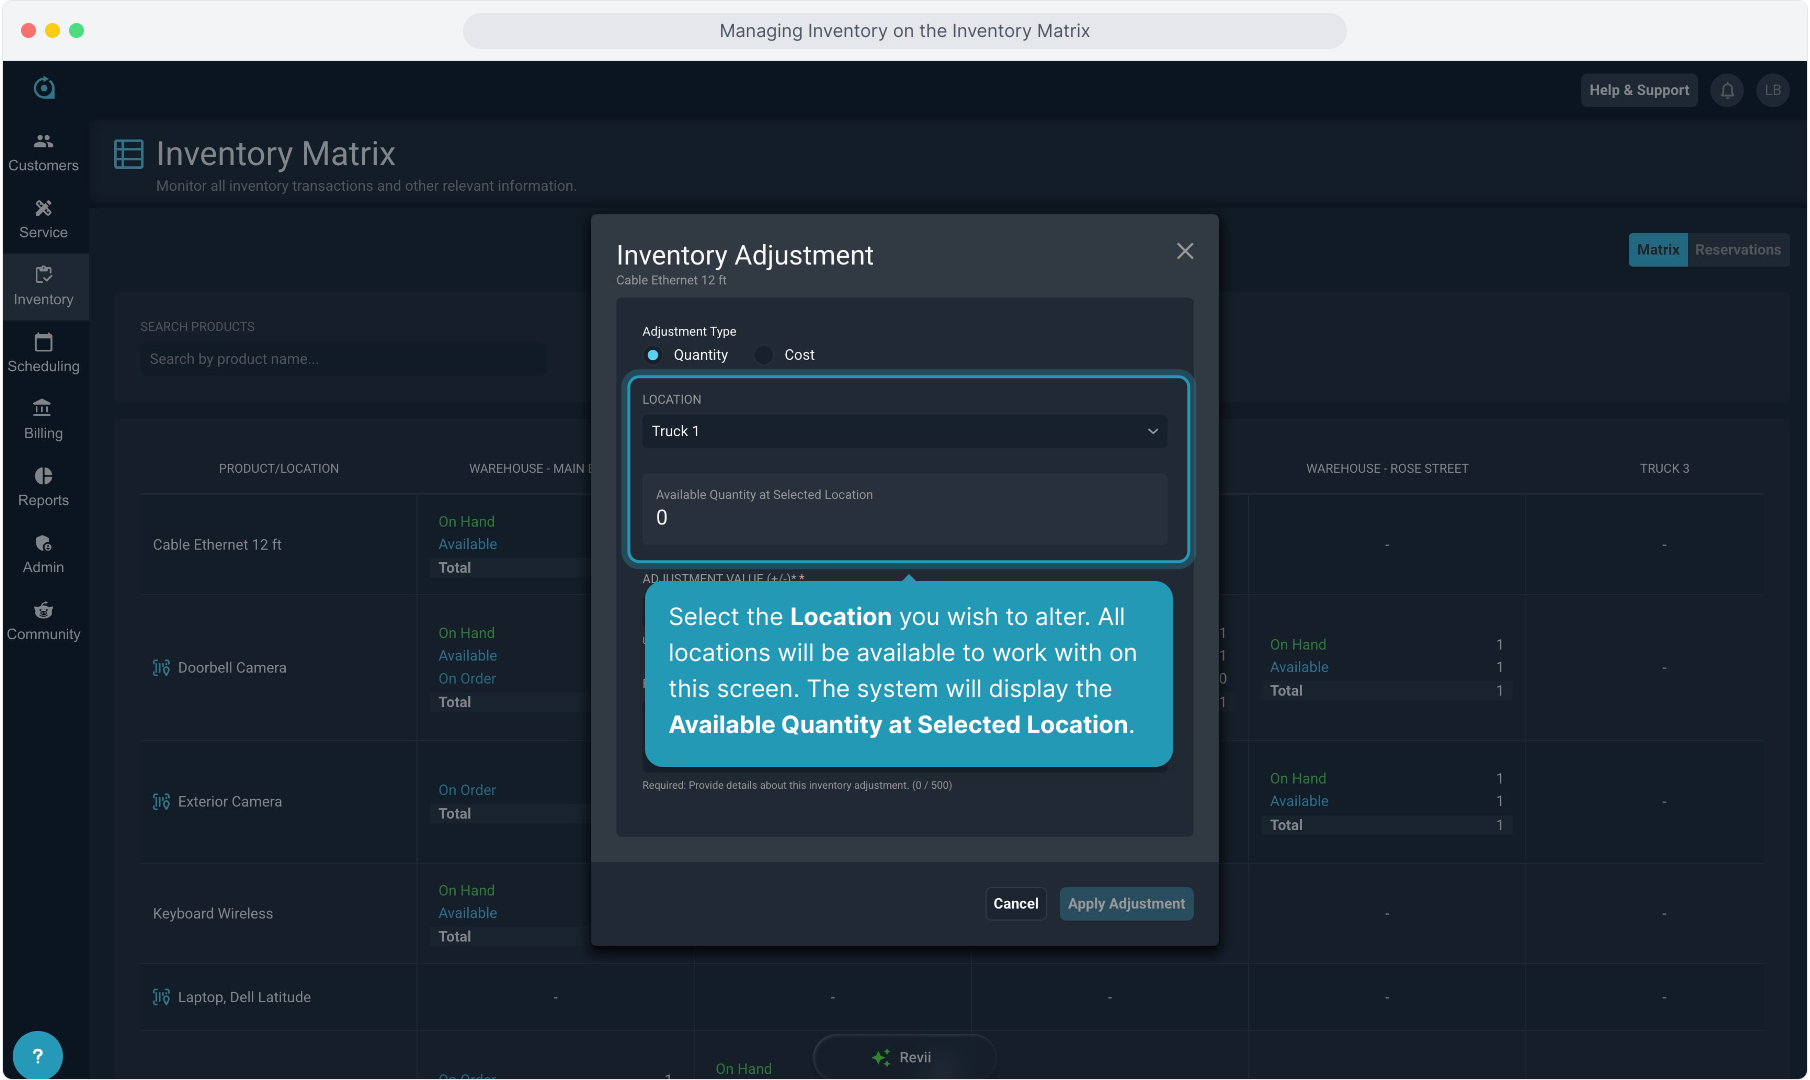
16. Select the Location you wish to alter. All locations will be available to work with on this screen. The system will display the Available Quantity at Selected Location.
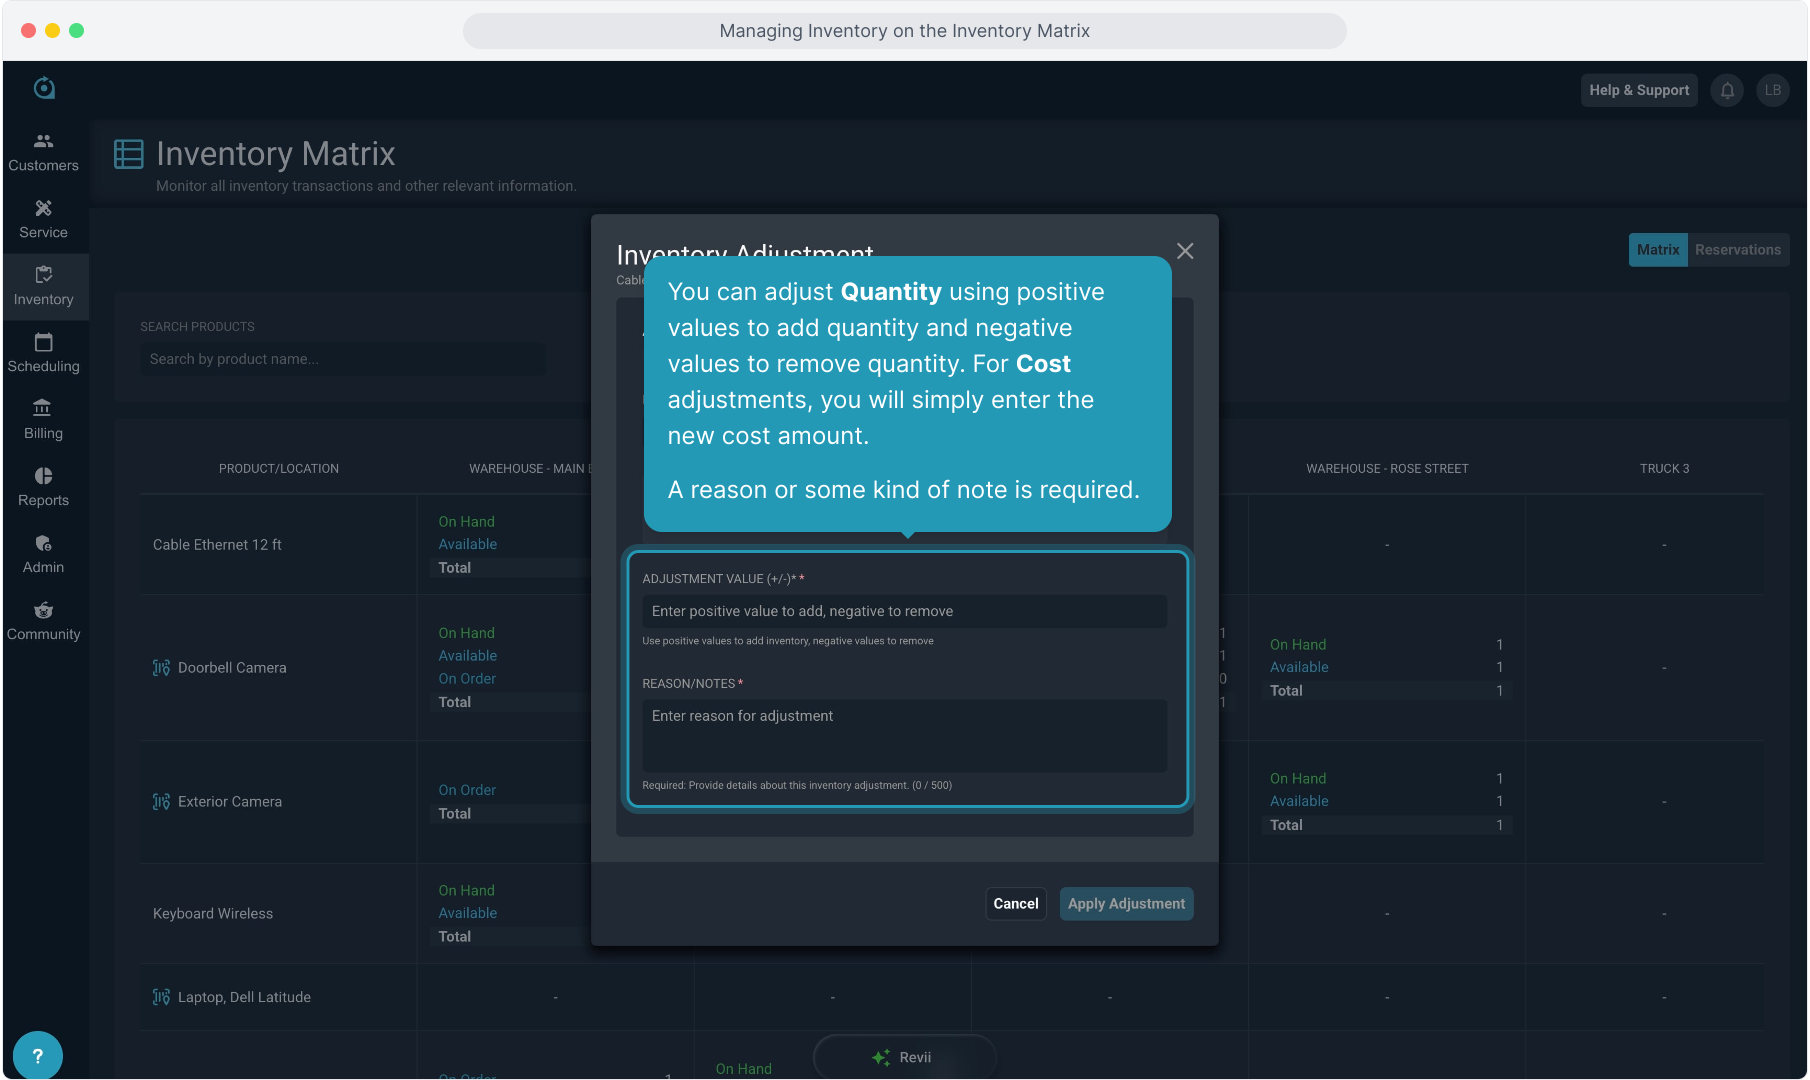
17. You can adjust Quantity using positive values to add quantity and negative values to remove quantity. For Cost adjustments, you will simply enter the new cost amount.
A reason or some kind of note is required.
18. Click Apply Adjustment to finalize the change.
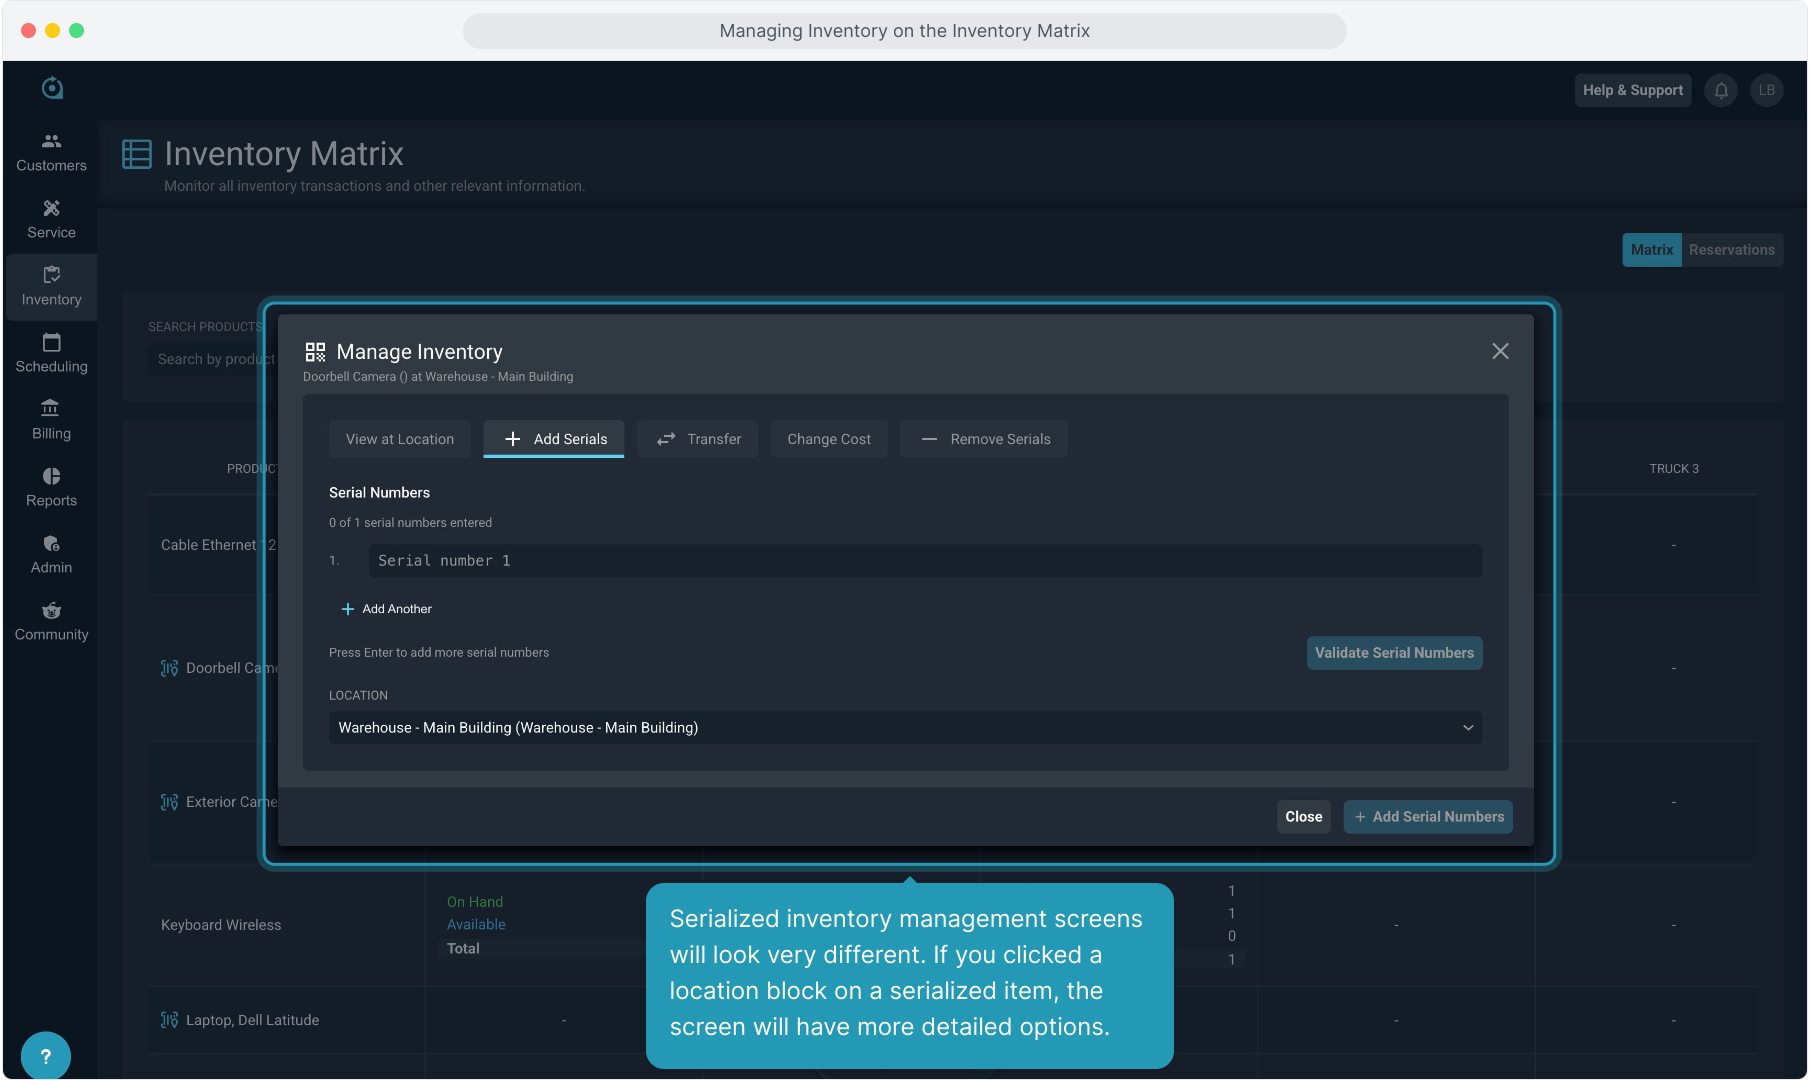
19. Serialized inventory management screens will look very different. If you clicked a location block on a serialized item, the screen will have more detailed options.
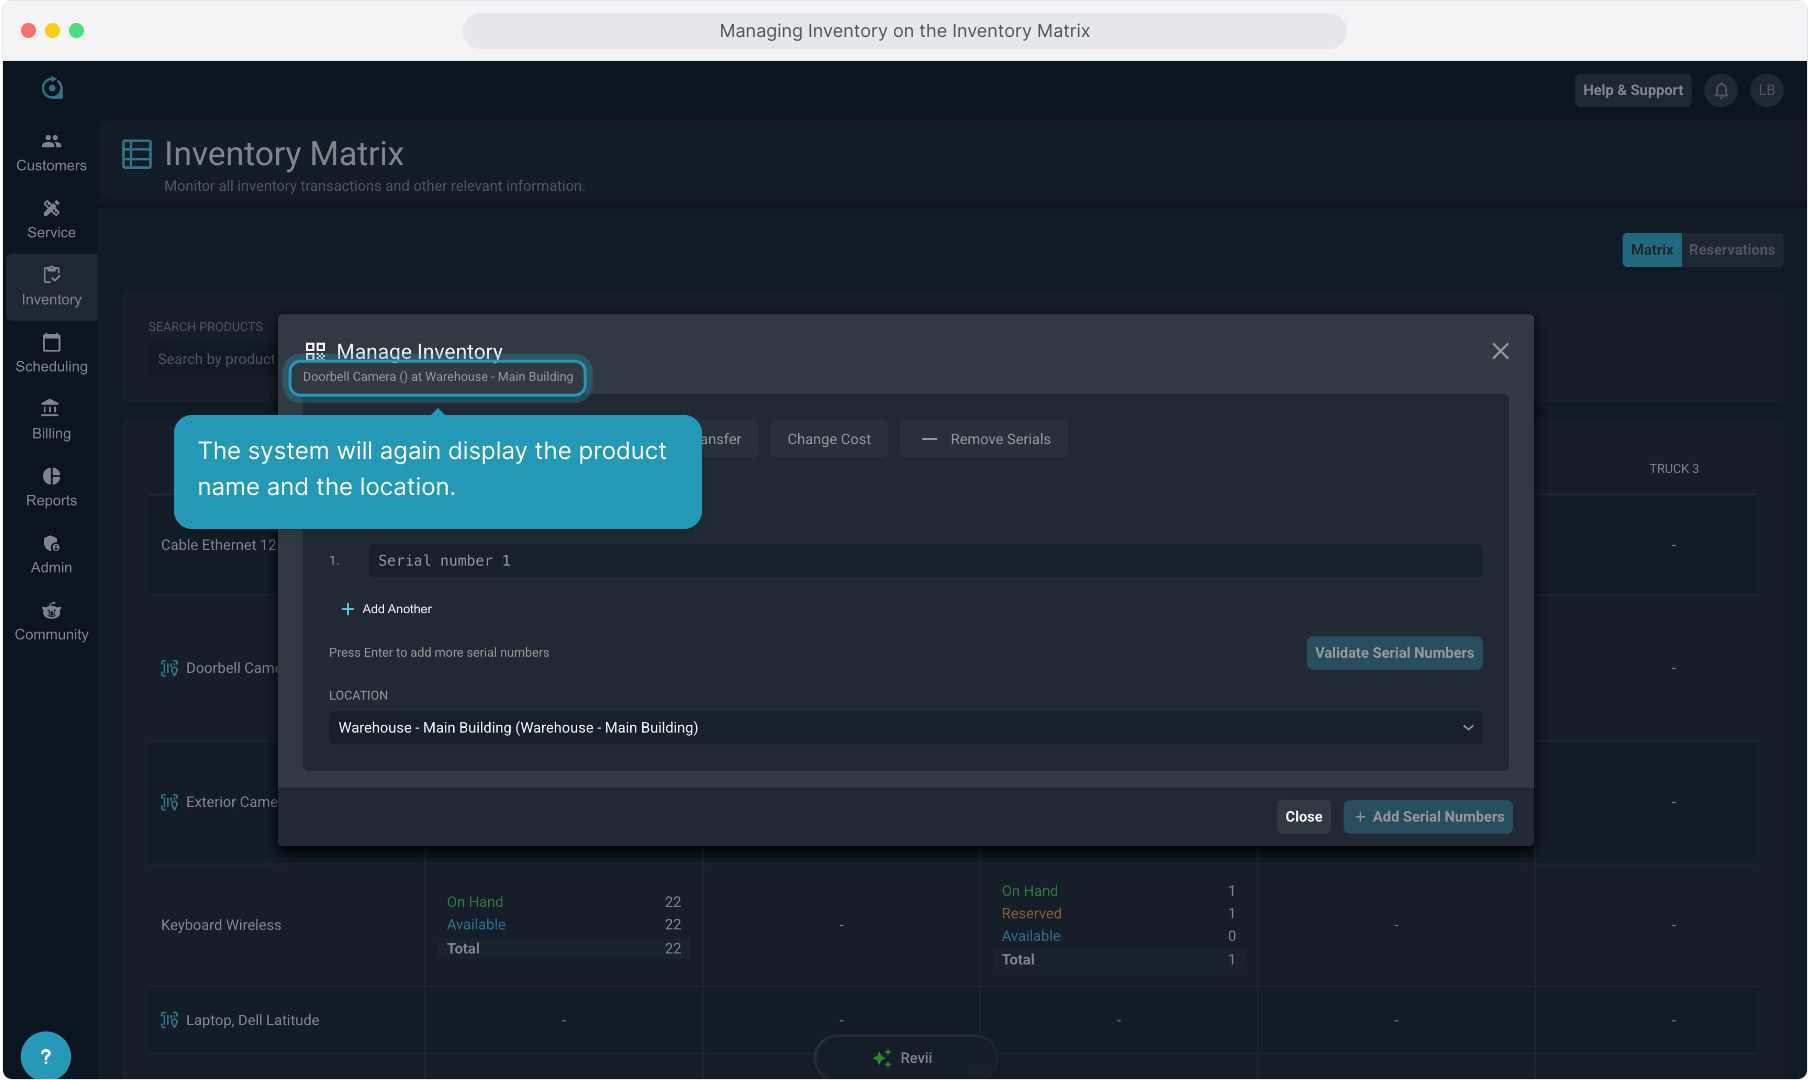
20. The system will again display the product name and the location.
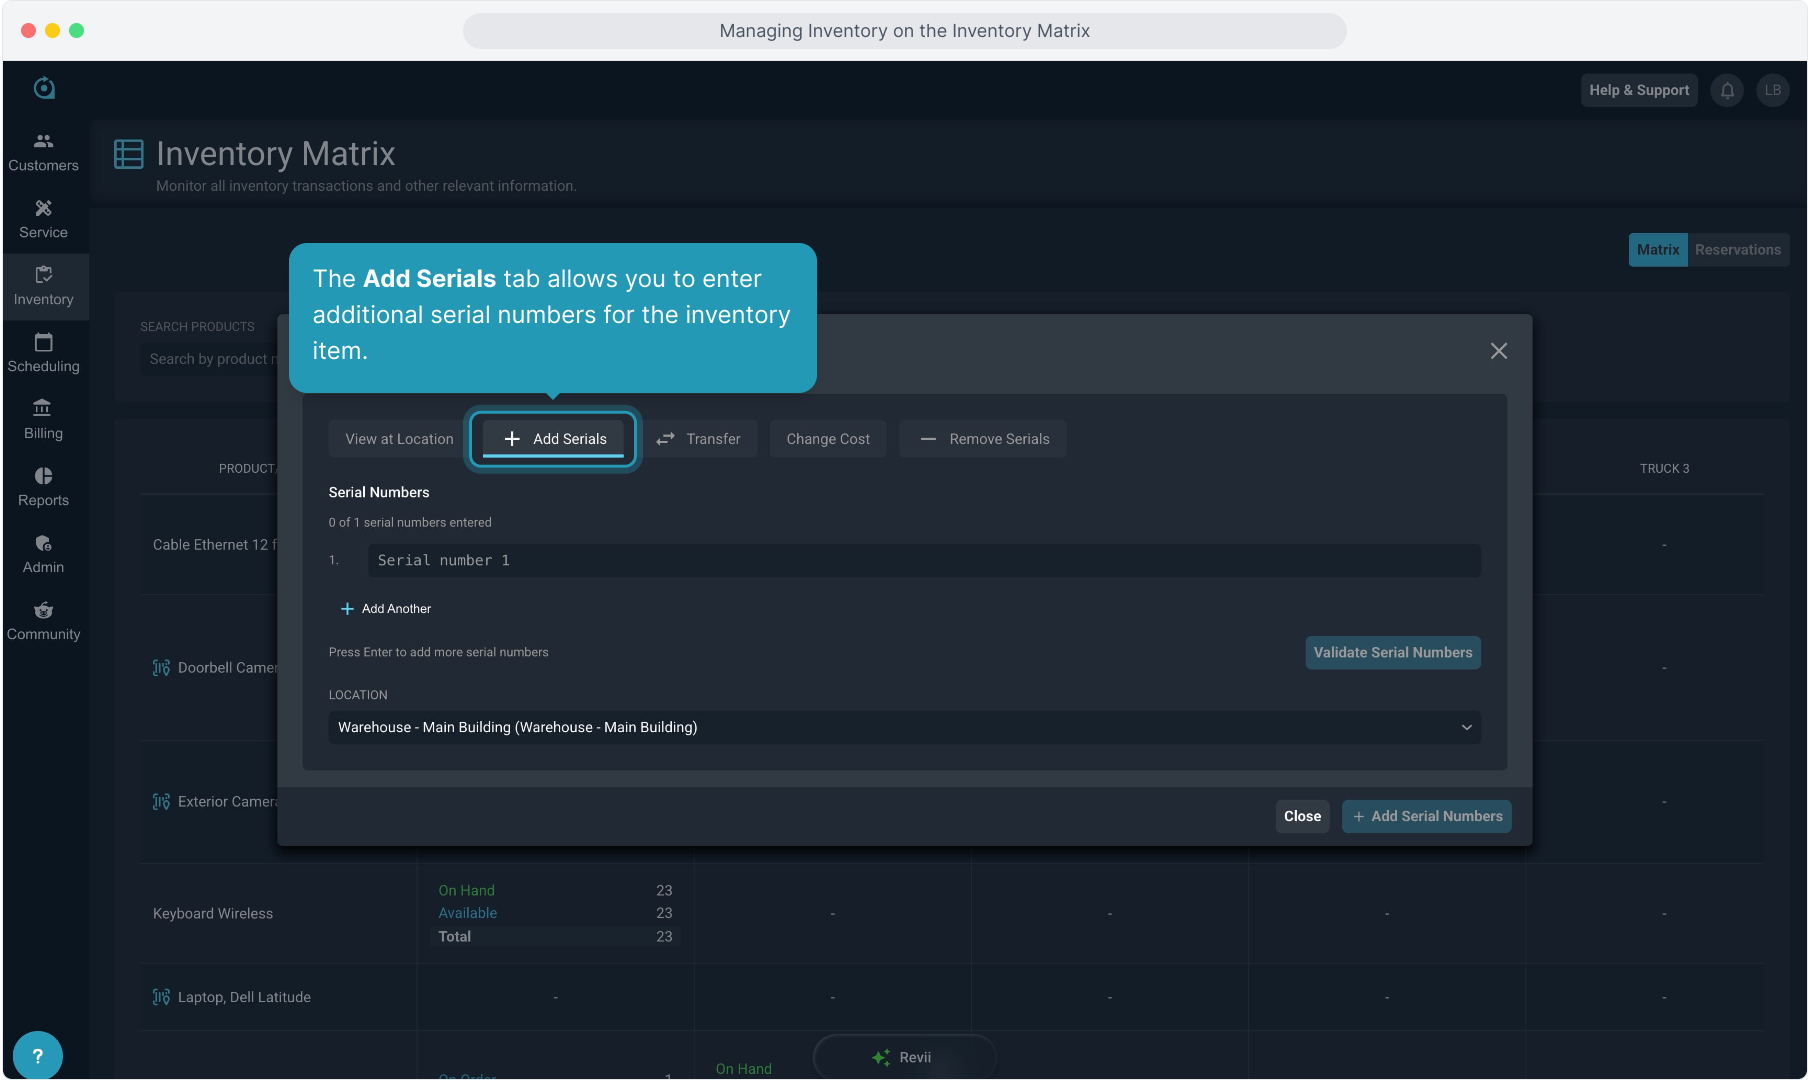
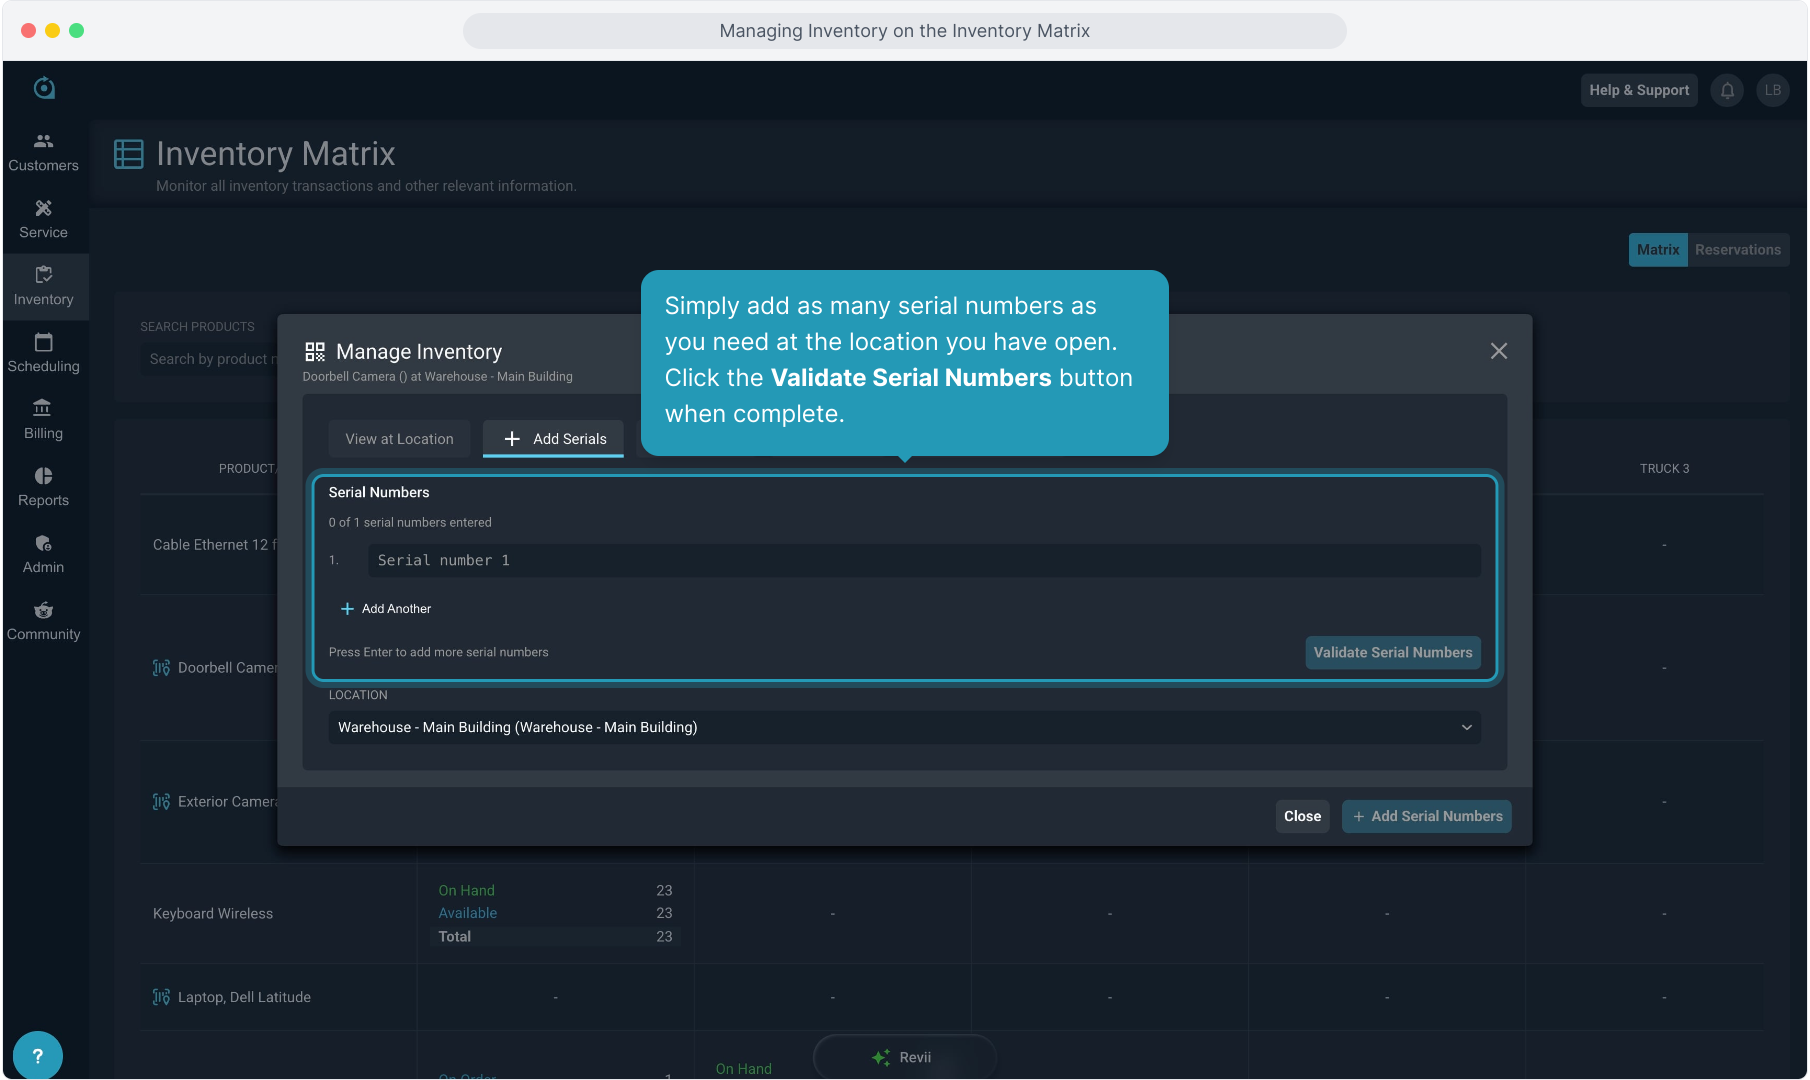
21. The View at Location tab will display the detail of all the items at the selected location, including the serial numbers and status.

22. The Add Serials tab allows you to enter additional serial numbers for the inventory item.
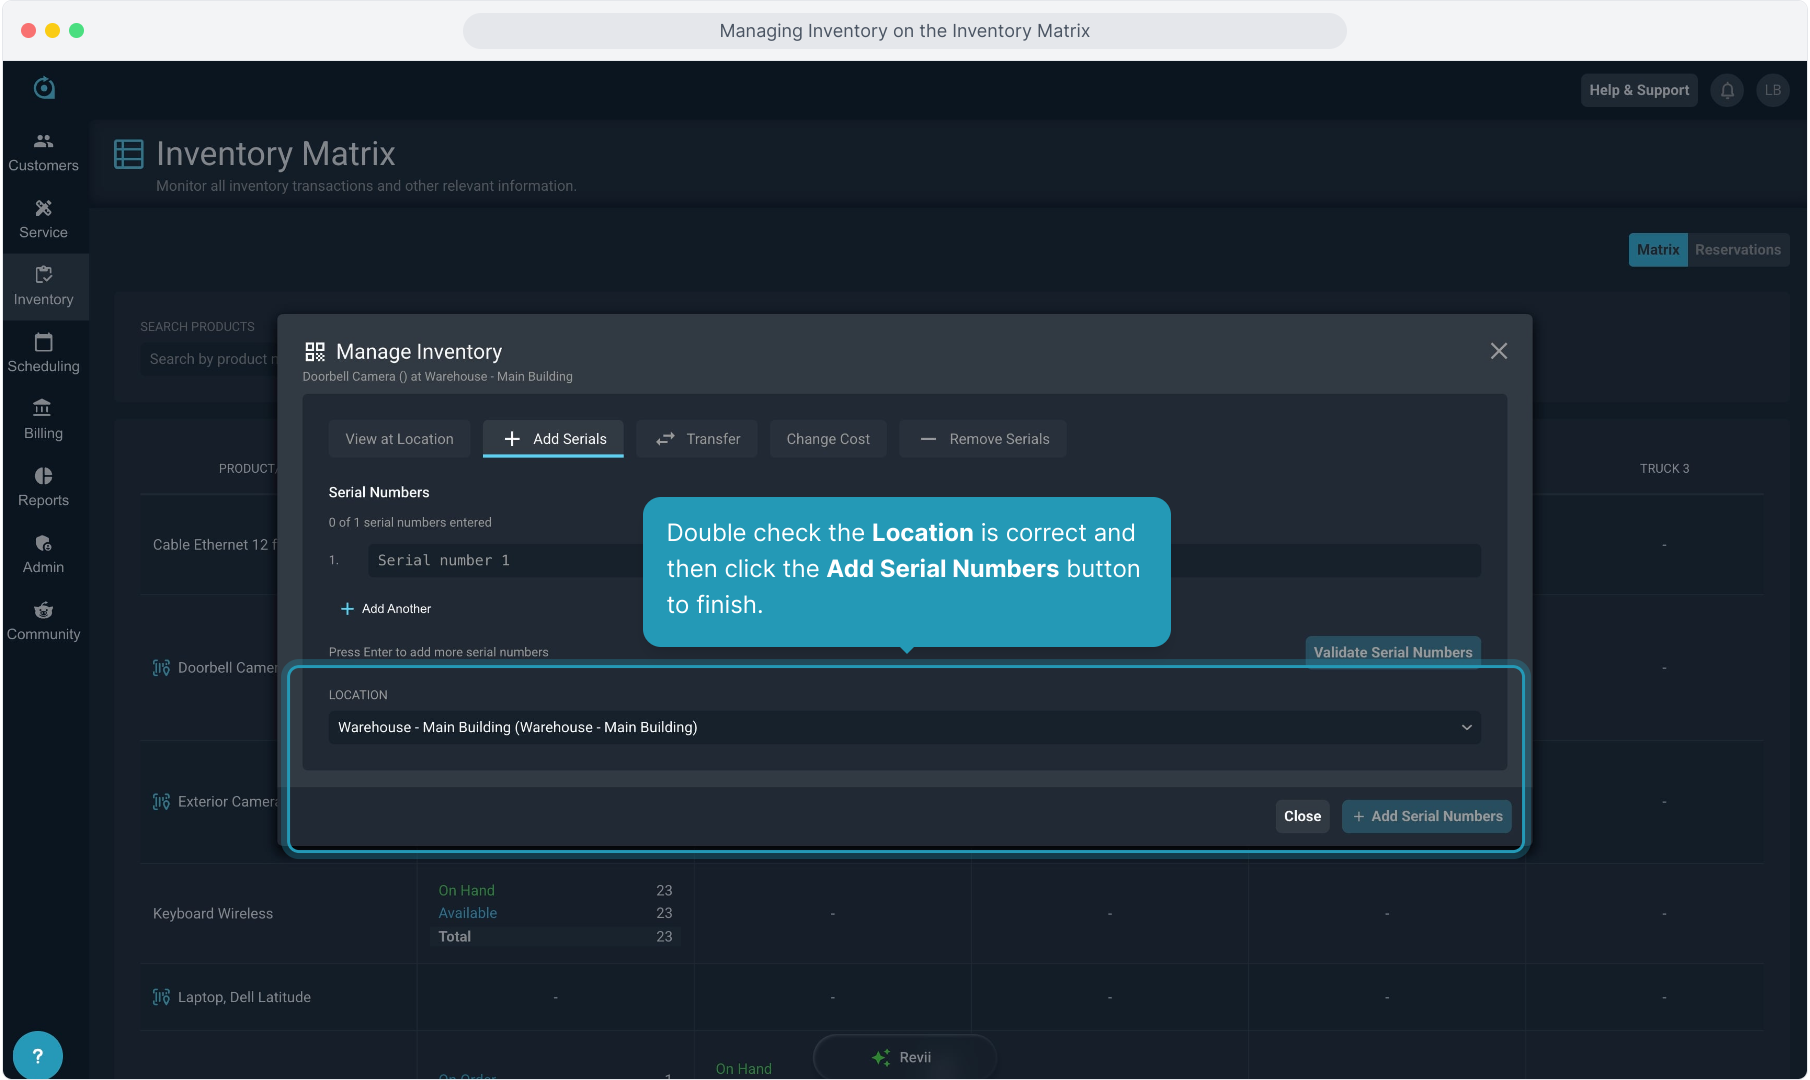
23. Simply add as many serial numbers as you need at the location you have open. Click the Validate Serial Numbers button when complete.
24. Double check the Location is correct and then click the Add Serial Numbers button to finish.
25. The Transfer tab allows you to move serialized items between locations.
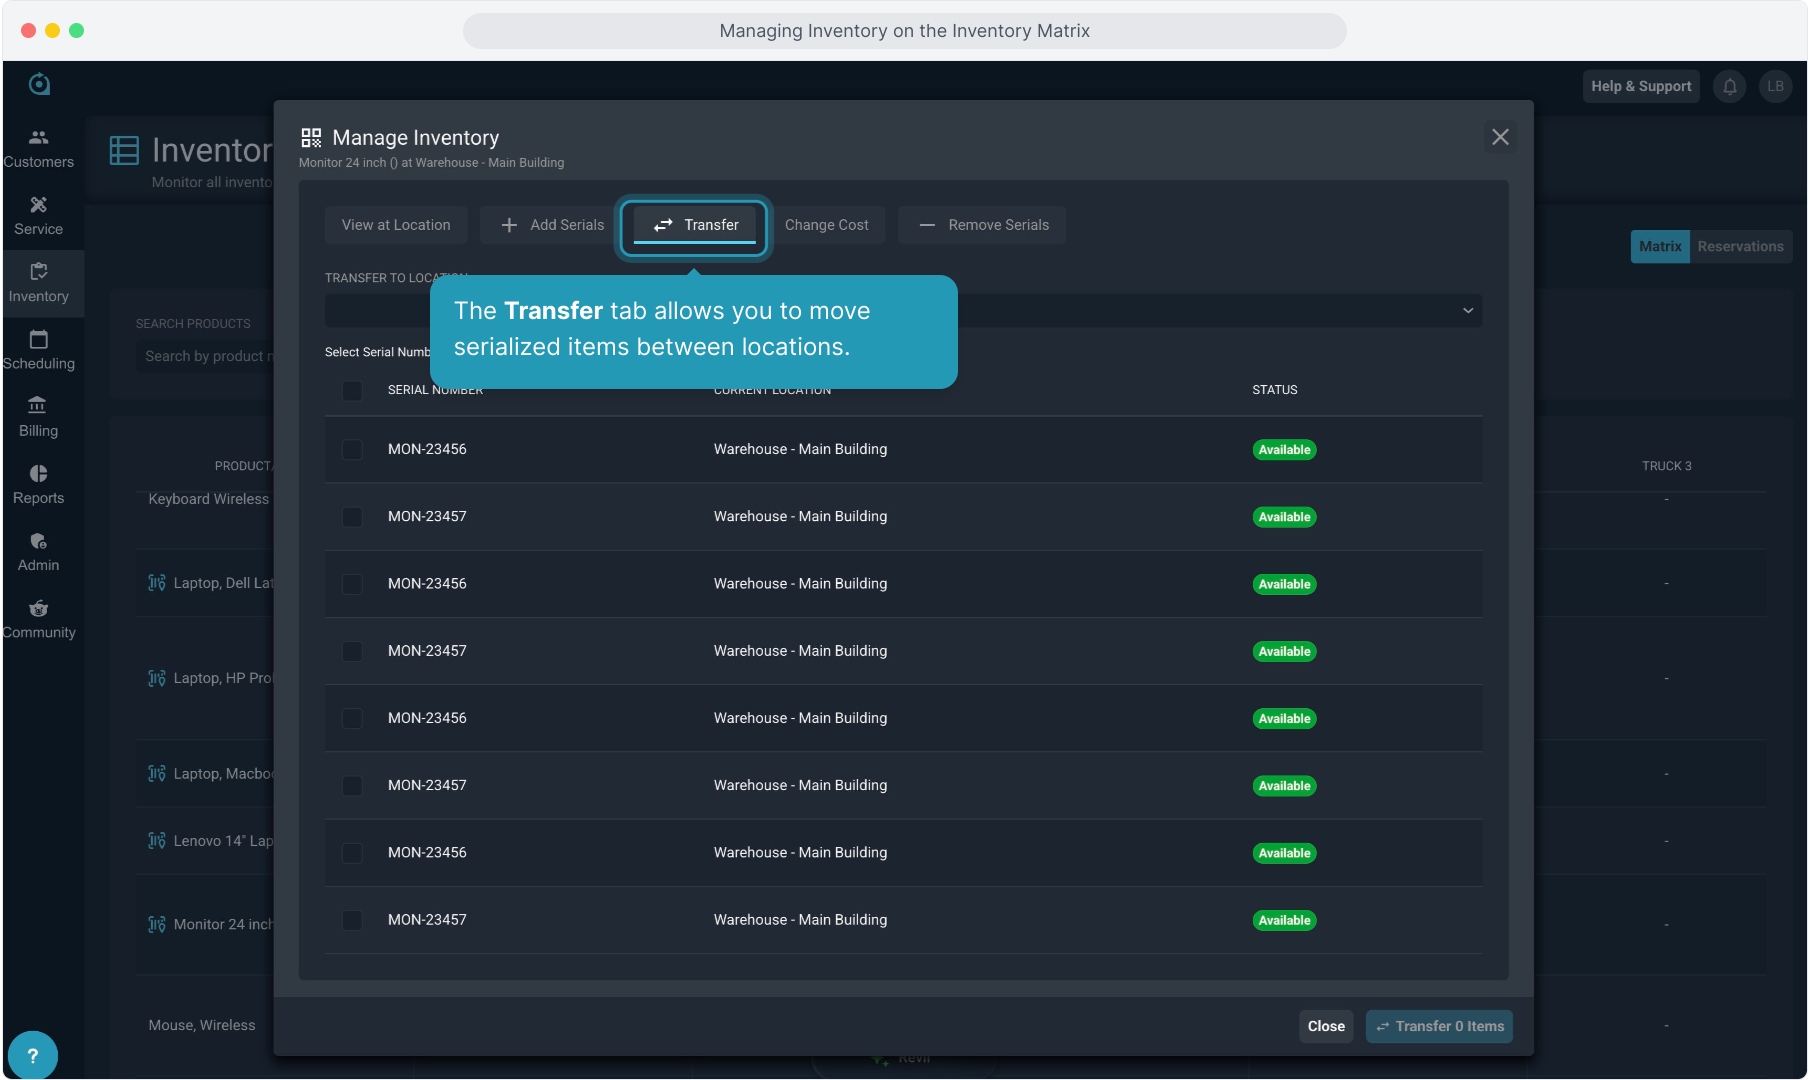
26. Select the Transfer To Location from the drop down list.
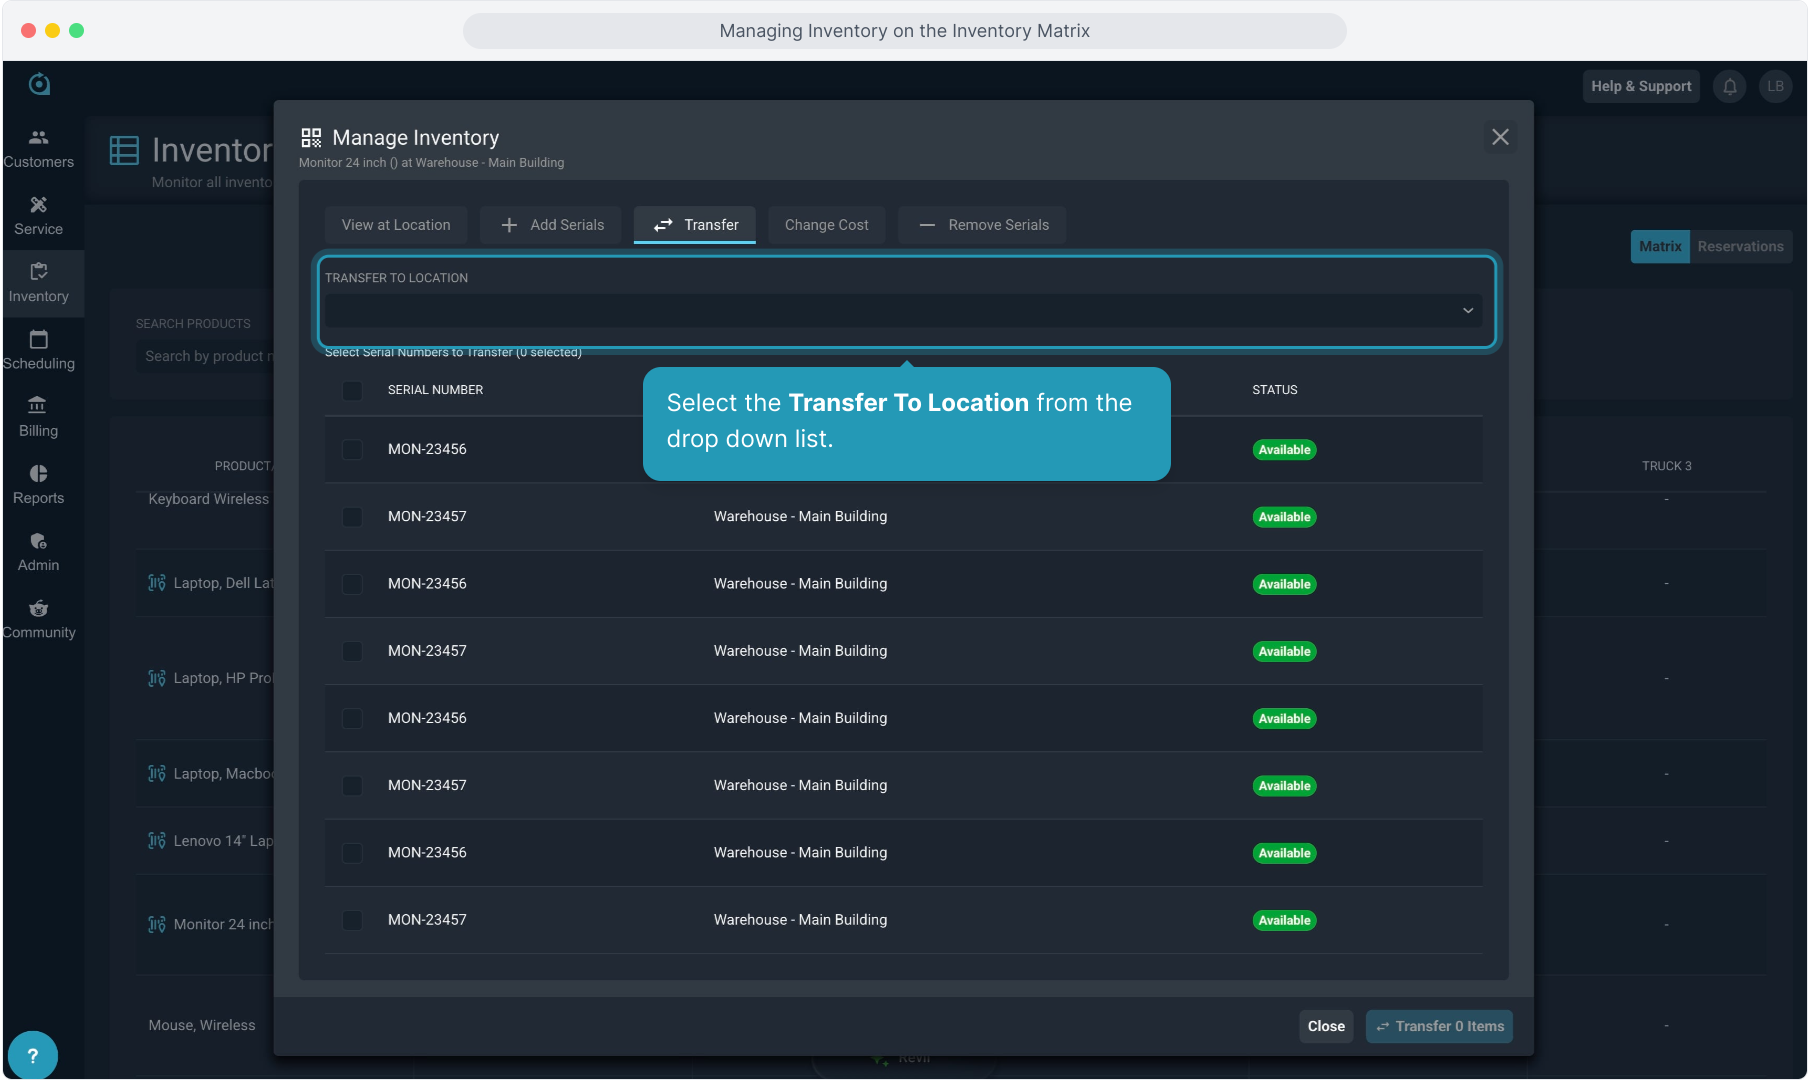
27. Select the checkboxes on the serial numbers of the items you wish to transfer.
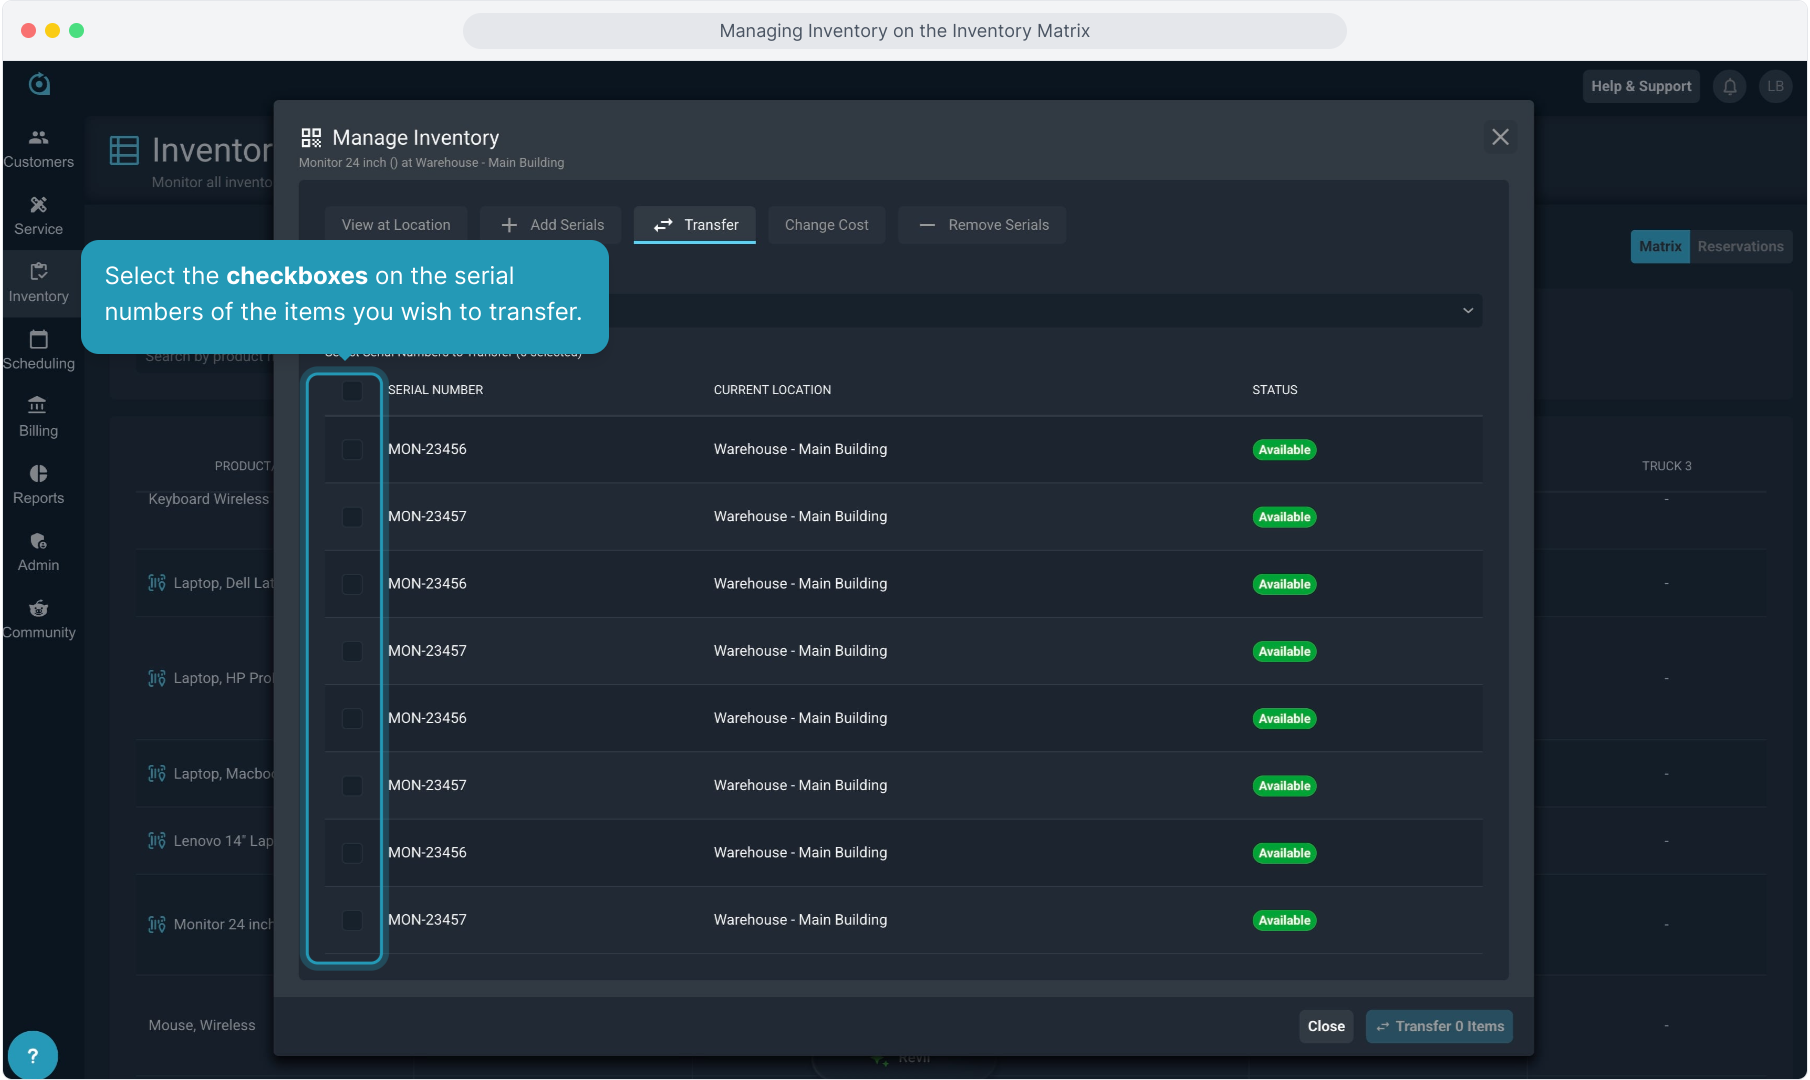
28. Click the Transfer Items button to finish.

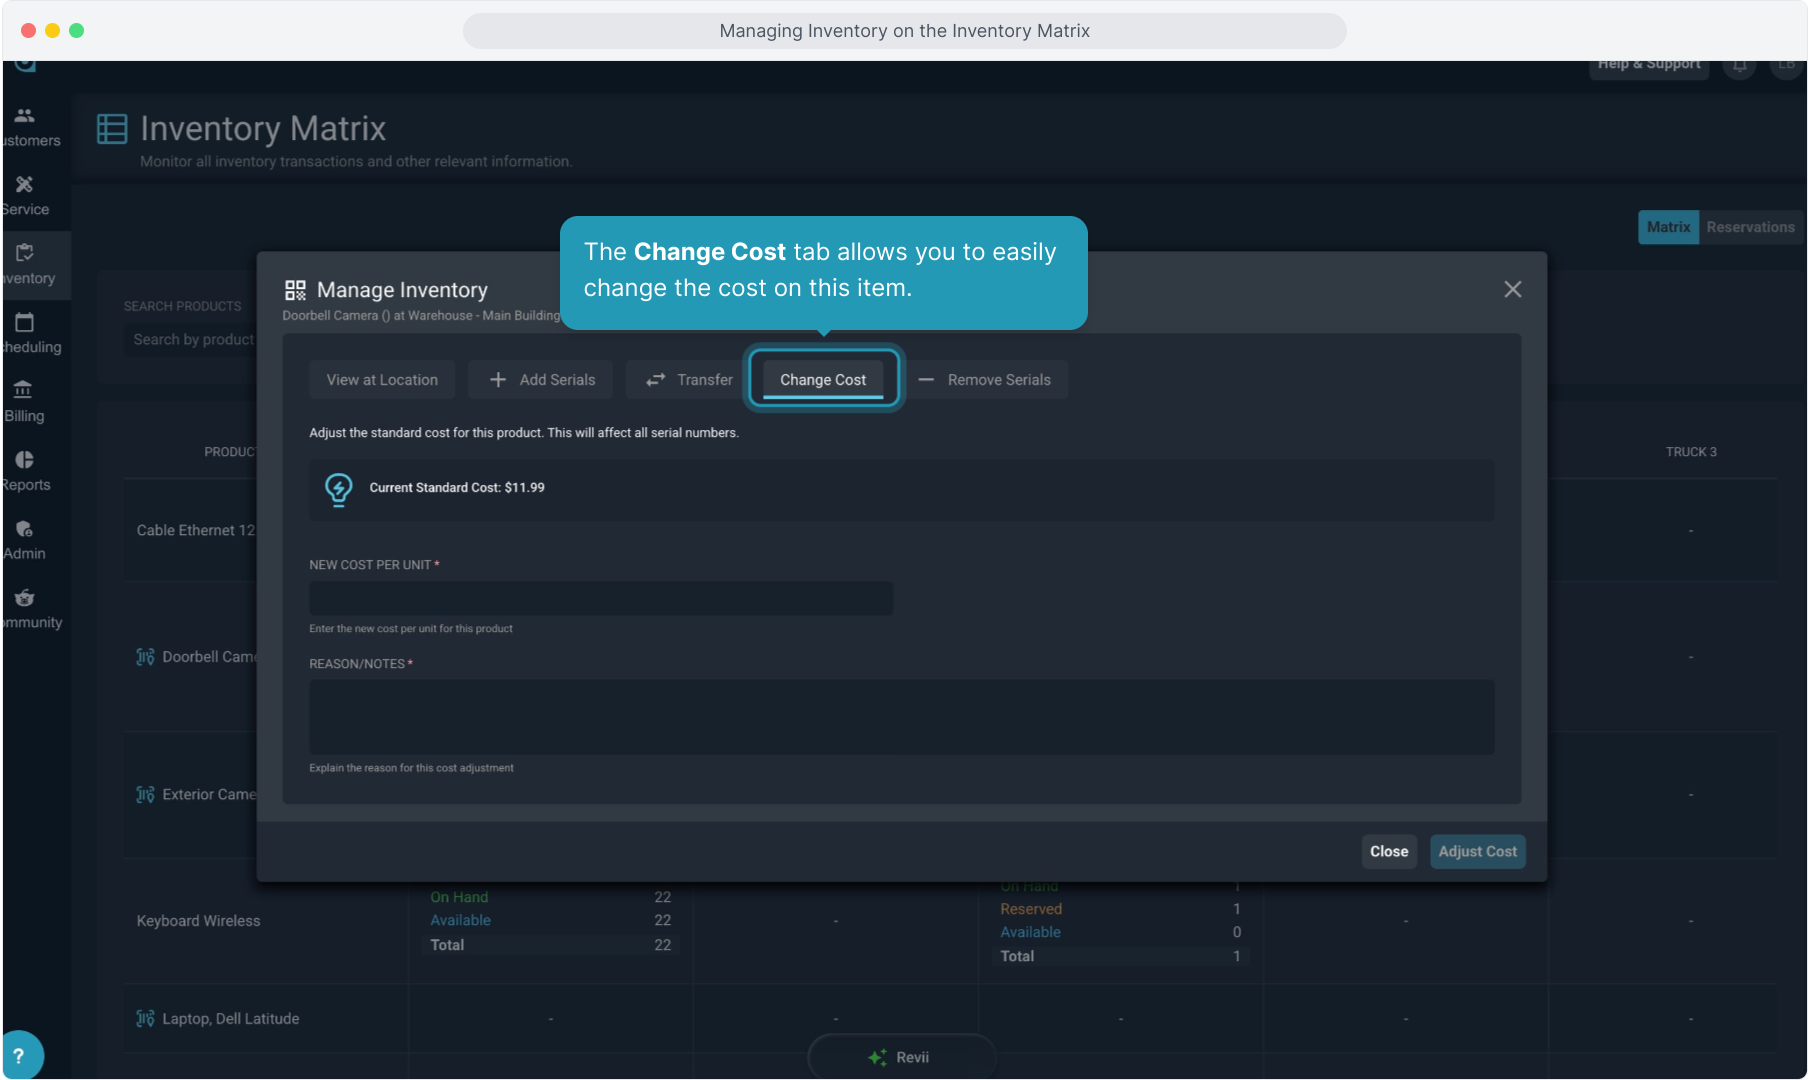
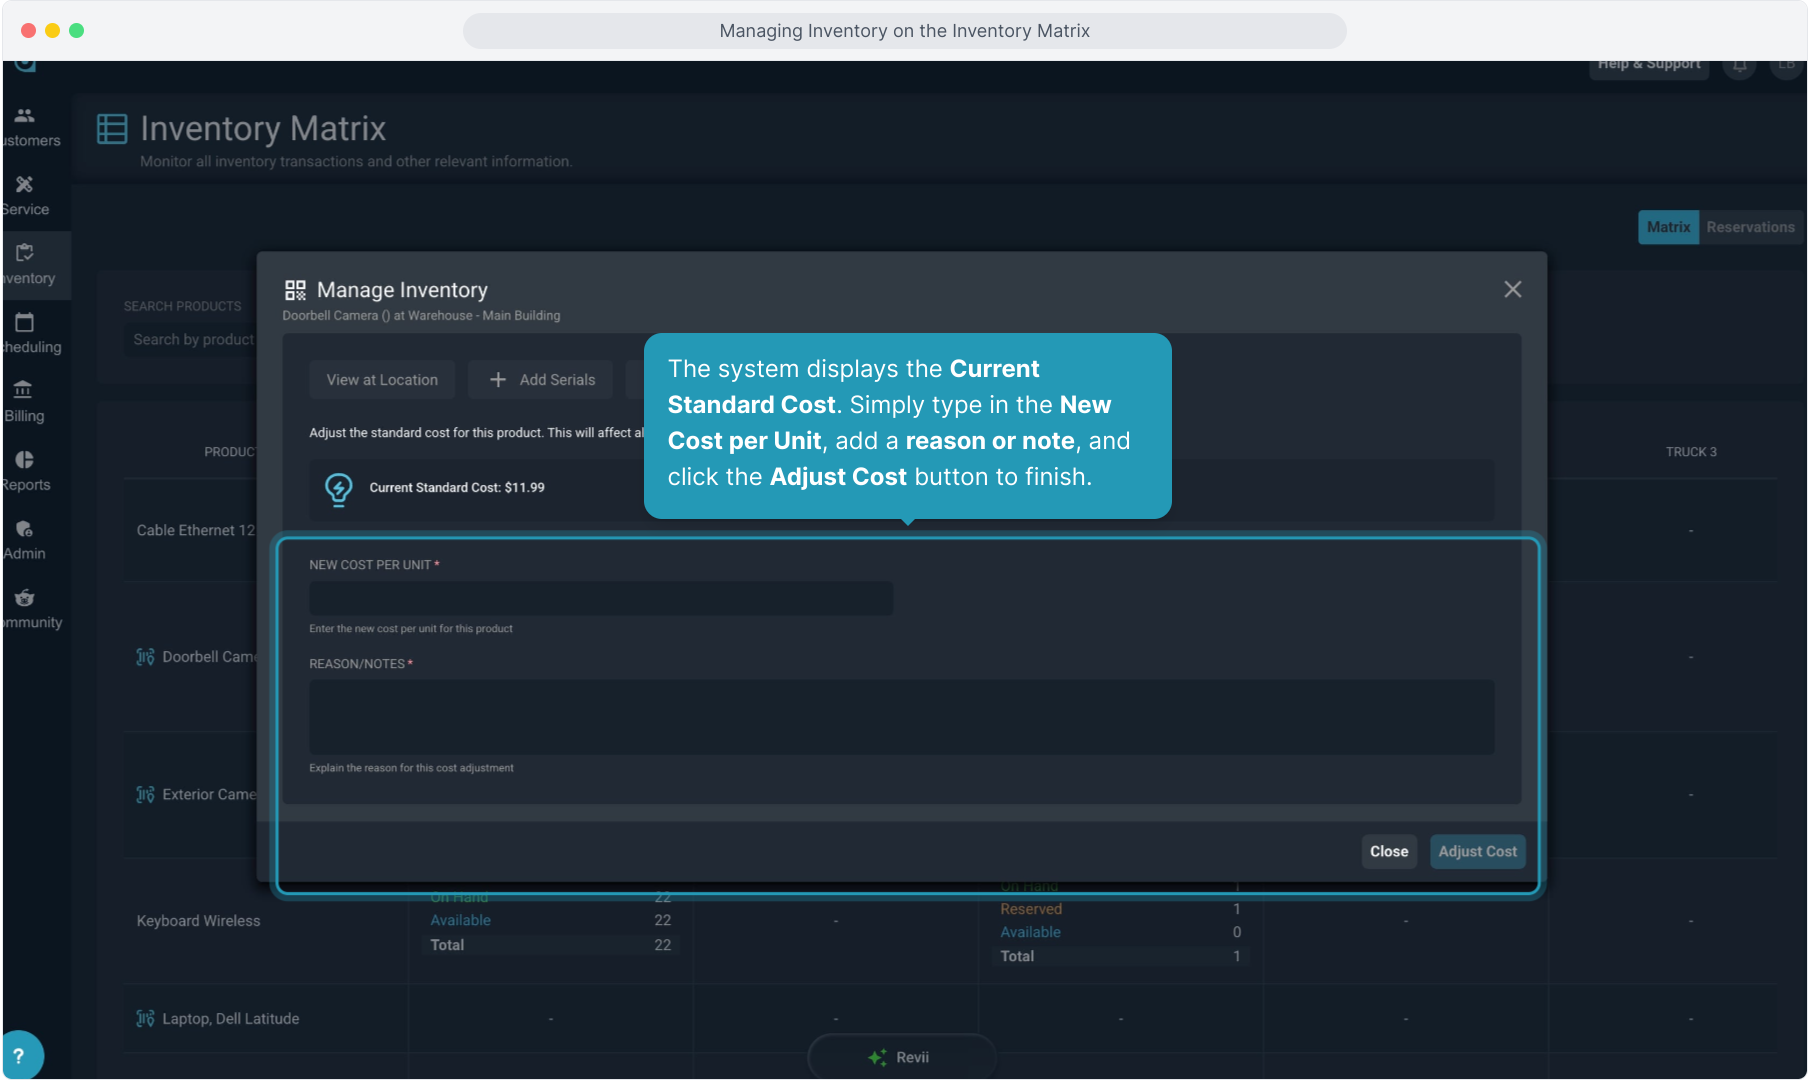
29. The Change Cost tab allows you to easily change the cost on this item.
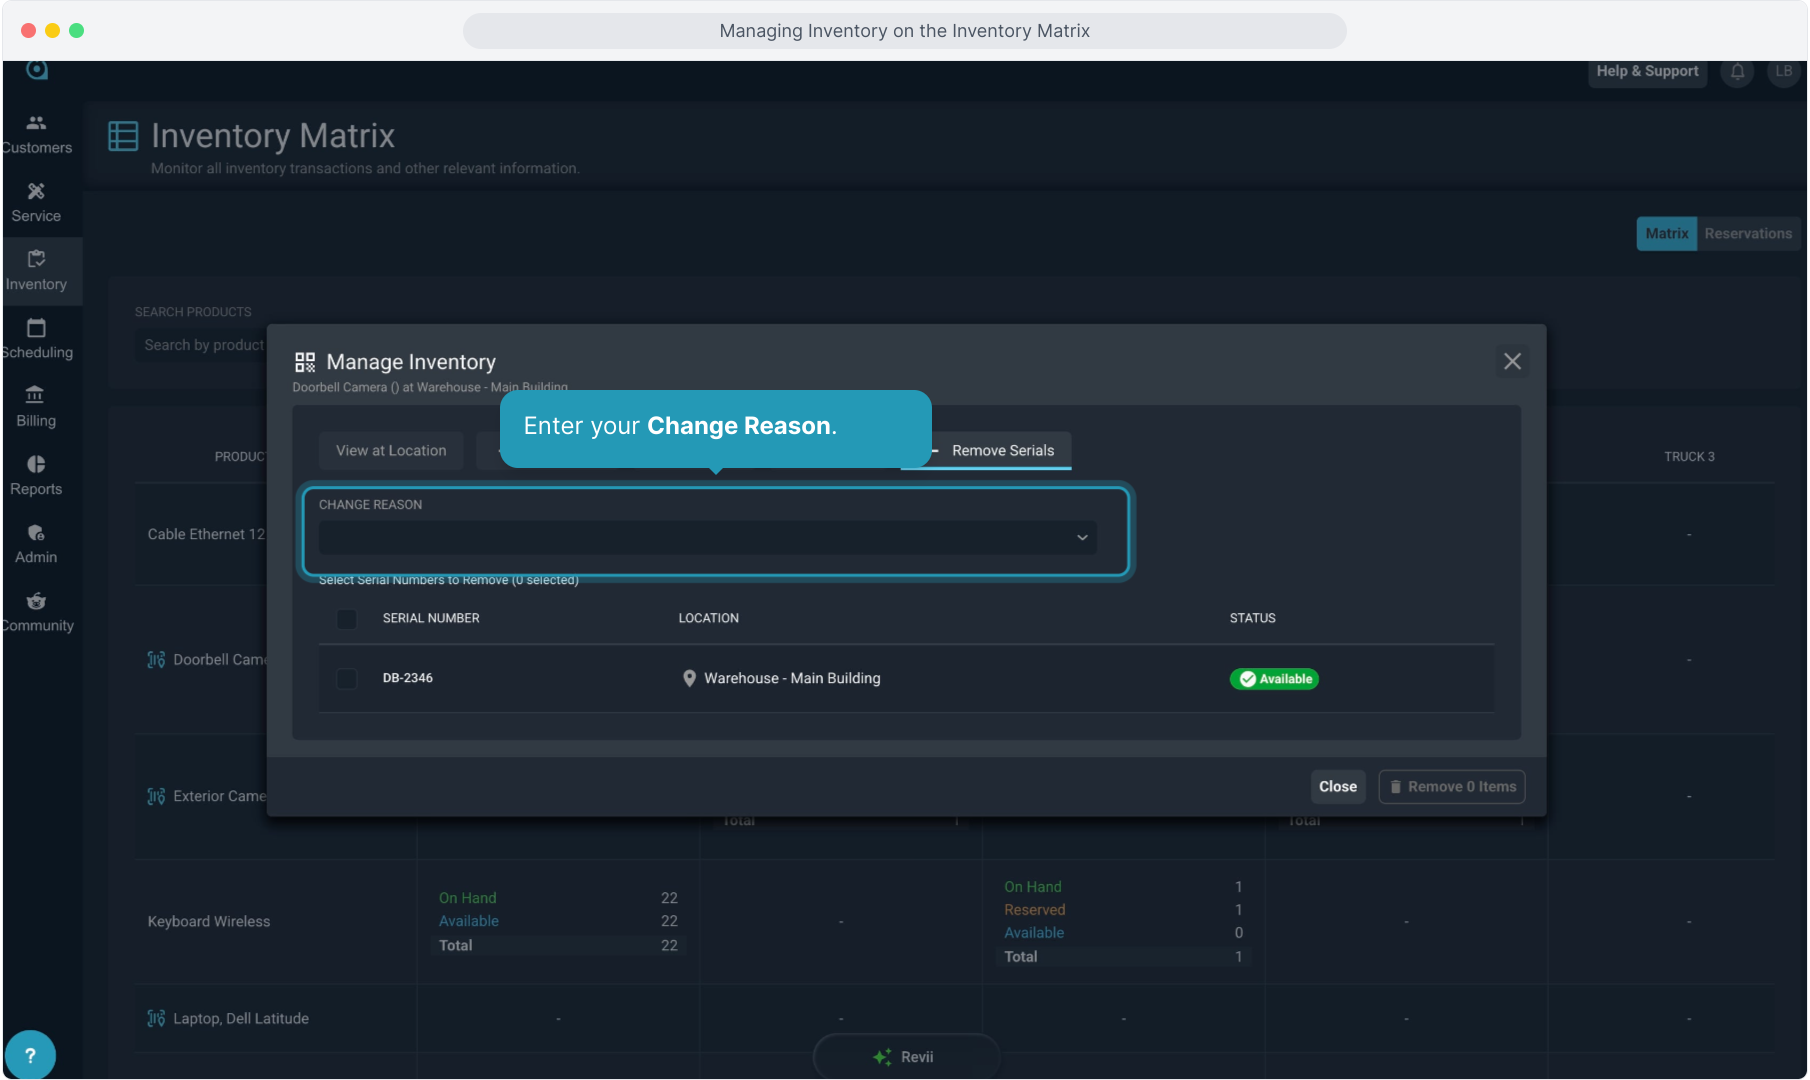
30. The system displays the Current Standard Cost. Simply type in the New Cost per Unit, add a reason or note, and click the Adjust Cost button to finish.
31. Click the Remove Serials tab if you need to remove any serialized items.
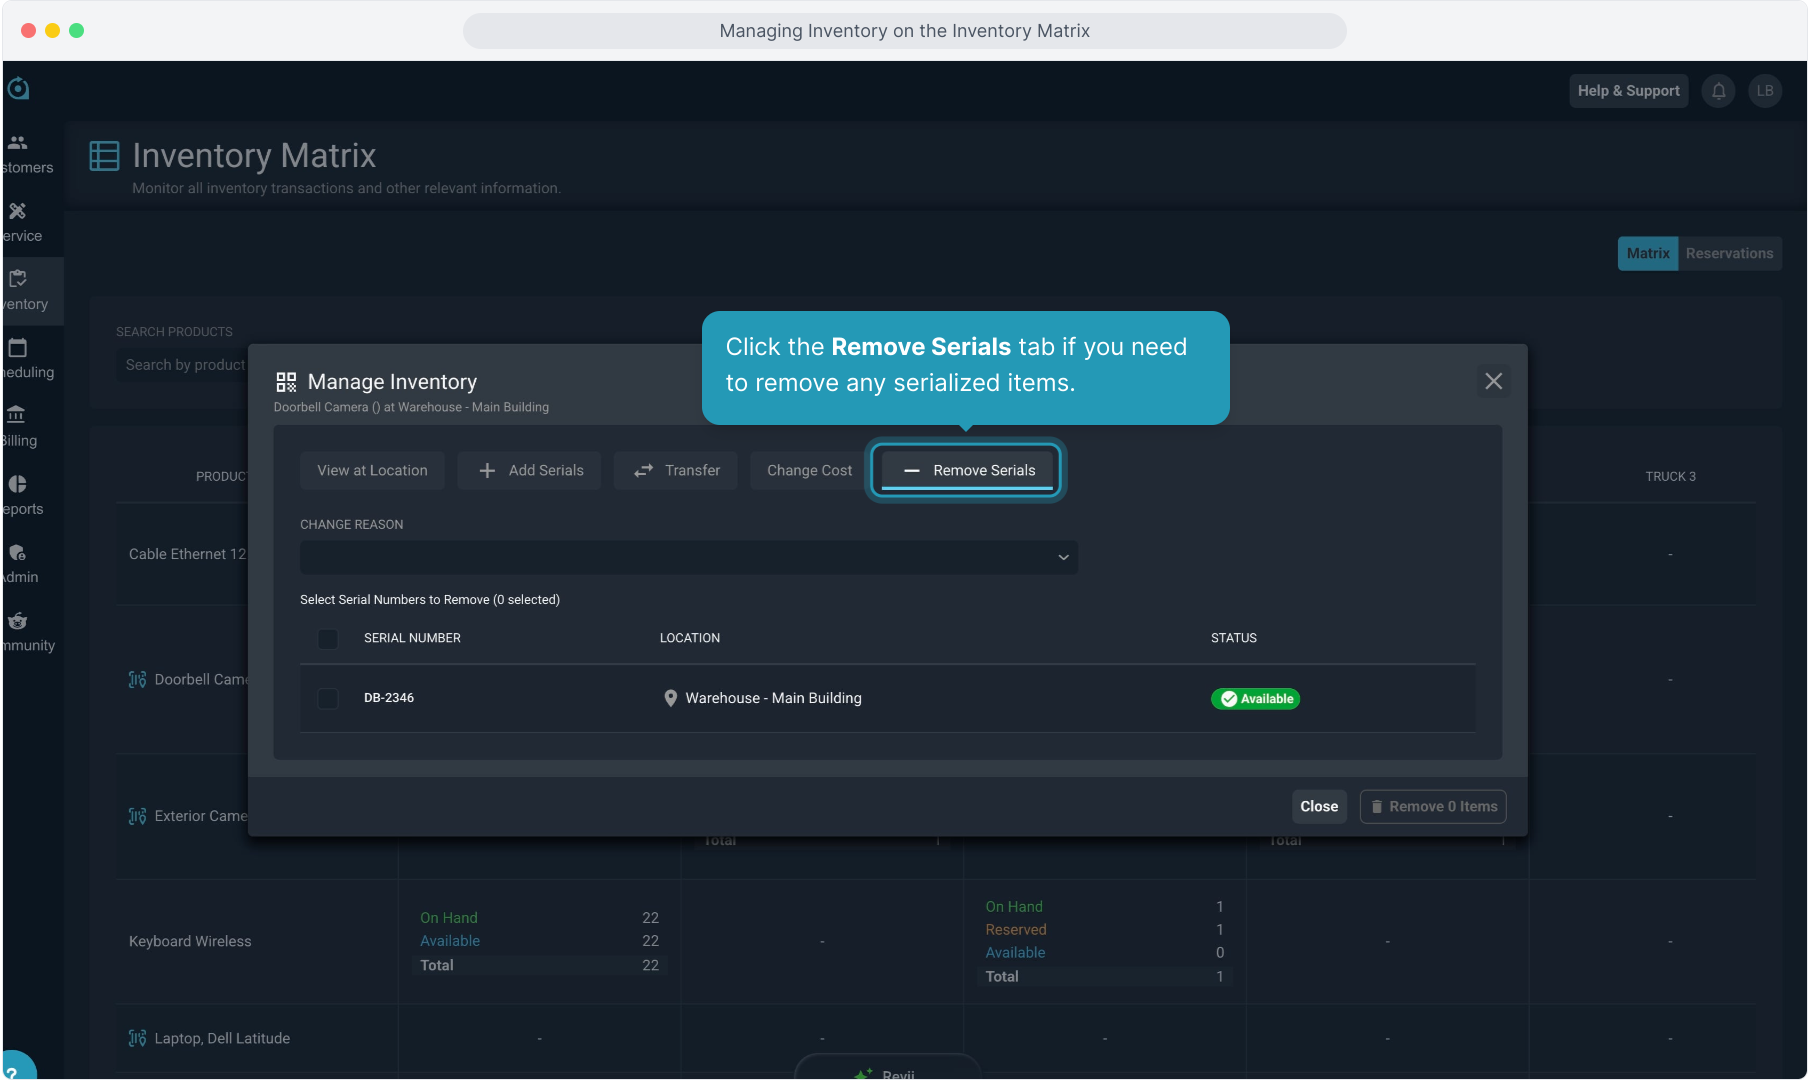
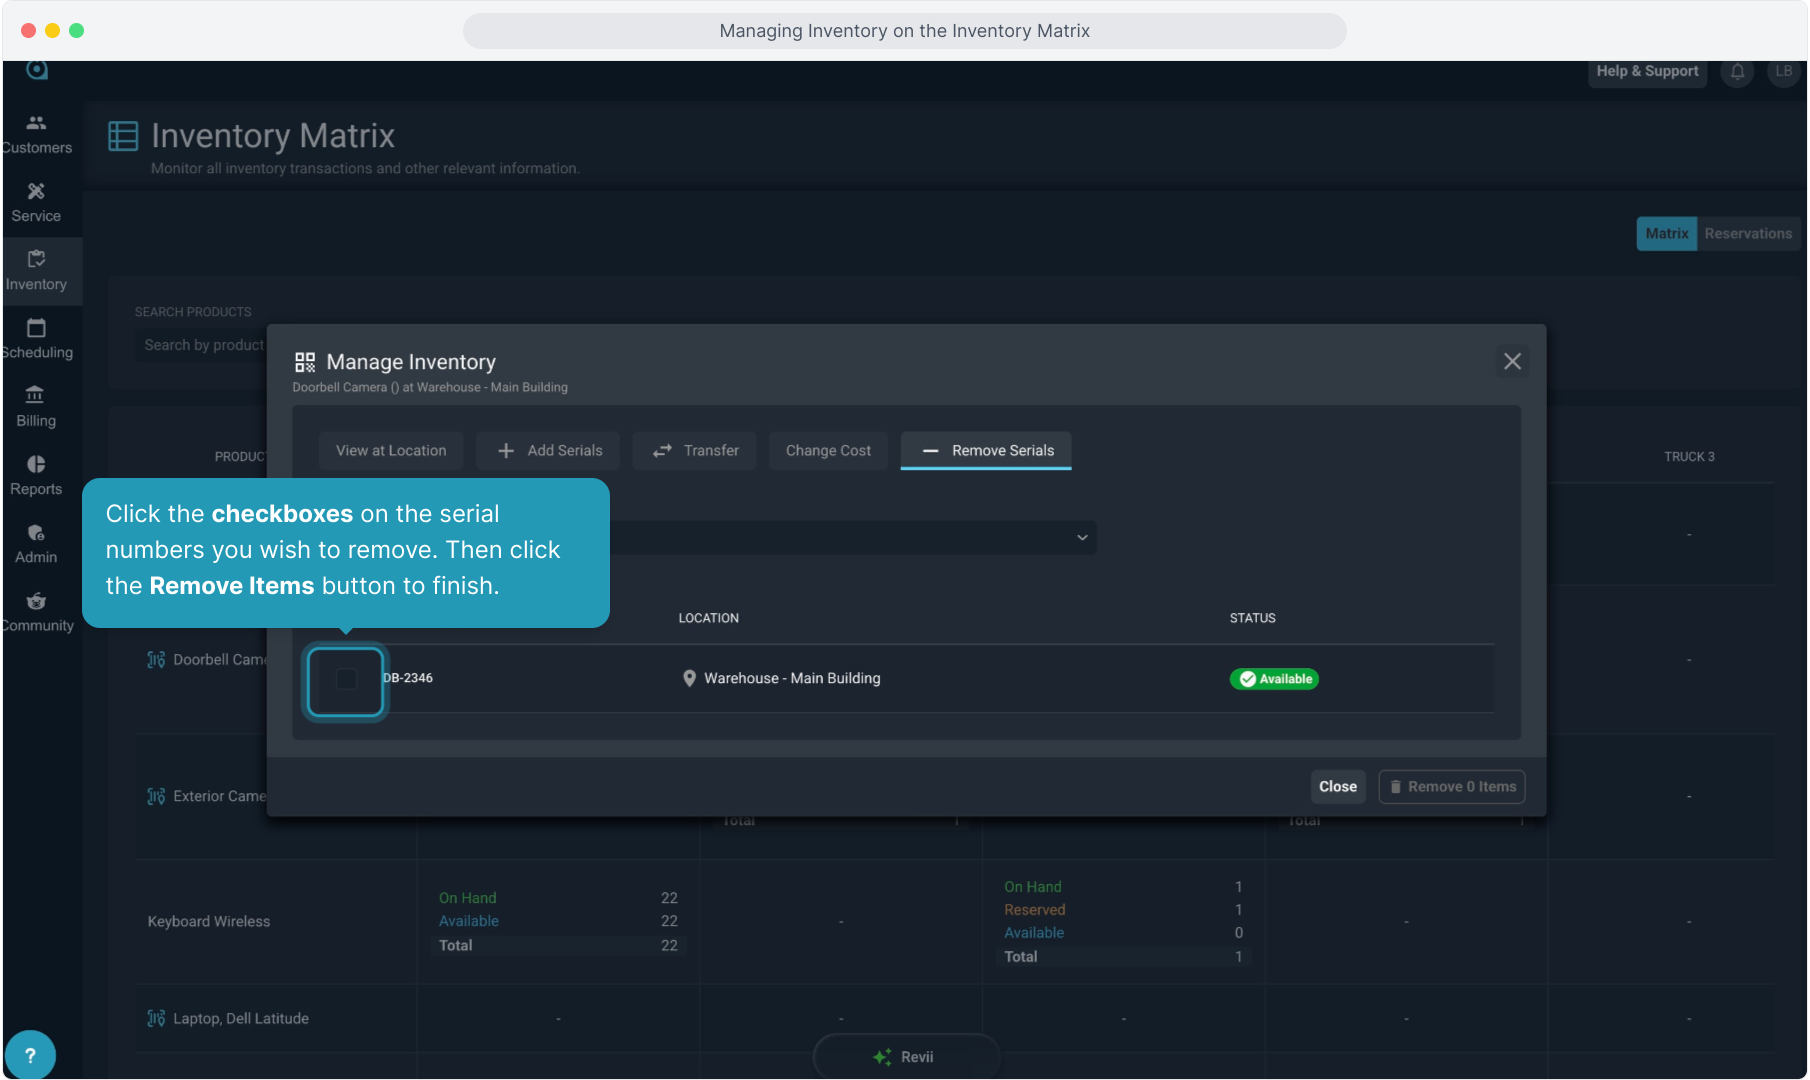
32. Enter your Change Reason.
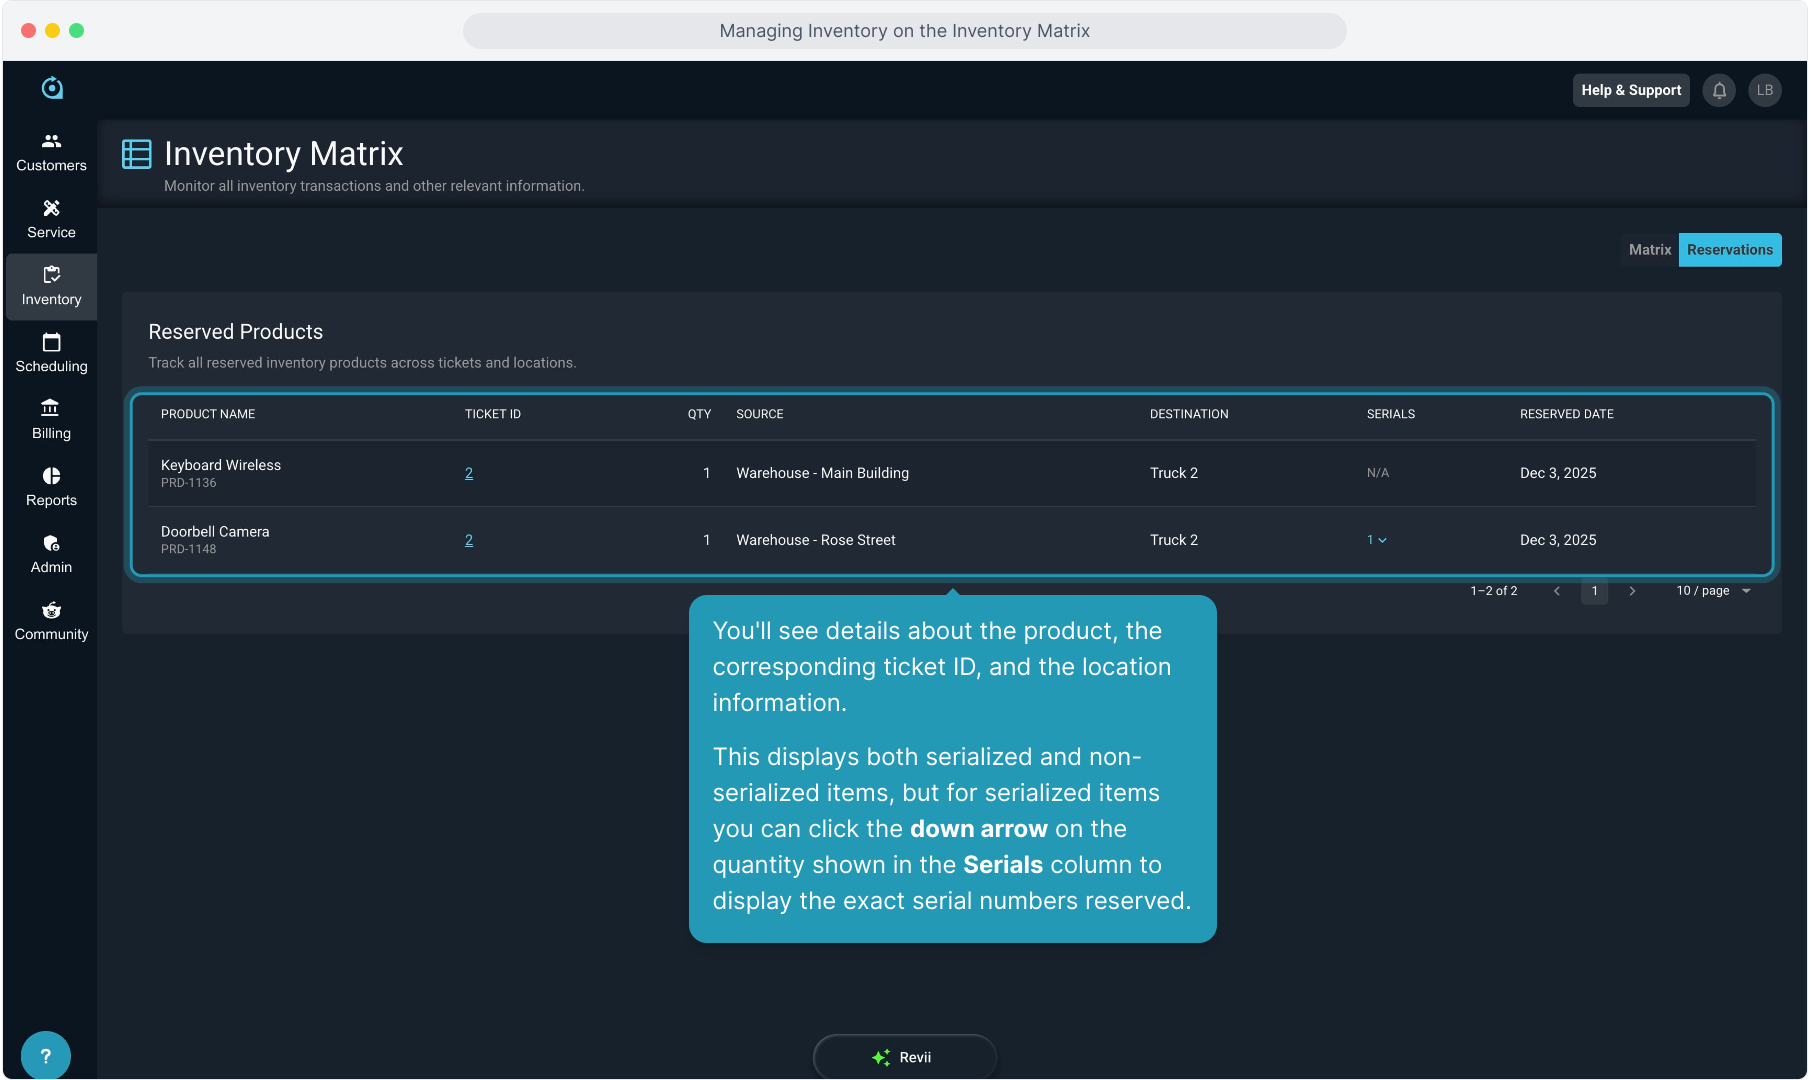
33. Click the checkboxes on the serial numbers you wish to remove. Then click the Remove Items button to finish.
34. There is also a Reservations view on the Inventory Matrix screen. Click this to see any inventory that has been reserved.
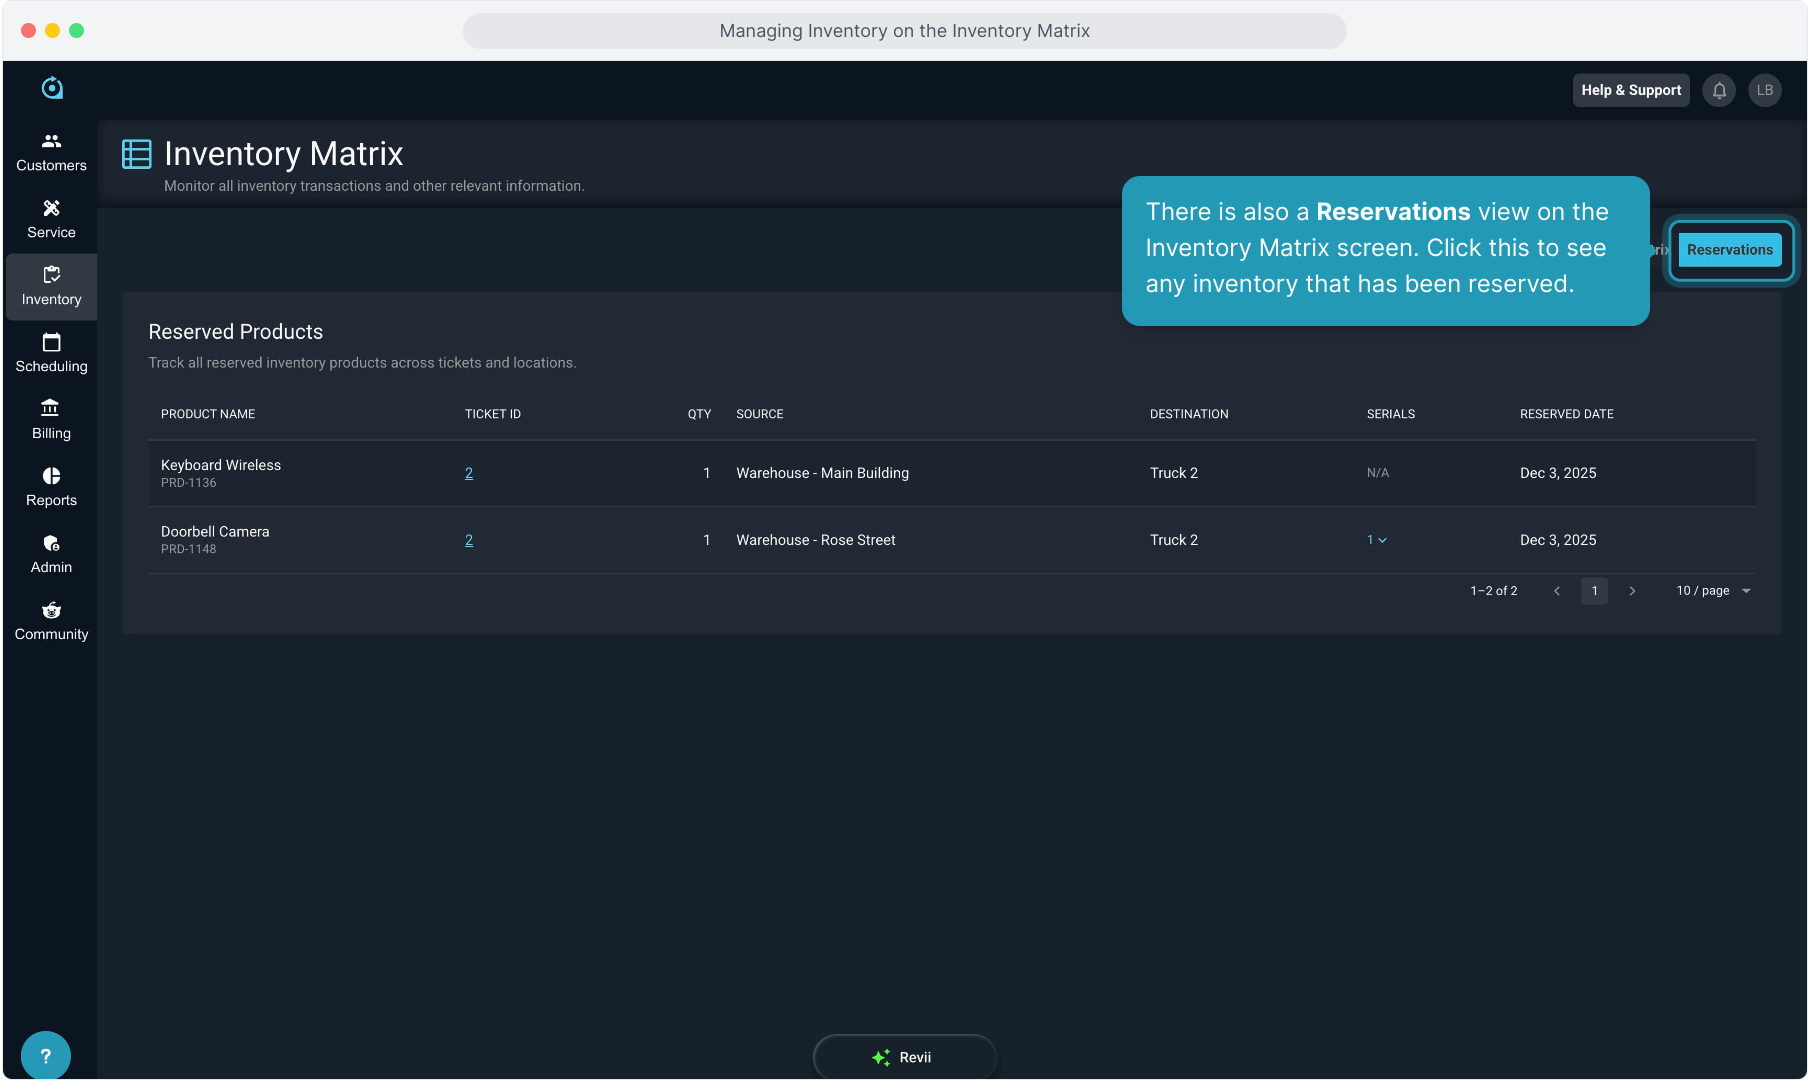
35. You'll see details about the product, the corresponding ticket ID, and the location information.
This displays both serialized and non-serialized items, but for serialized items you can click the down arrow on the quantity shown in the Serials column to display the exact serial numbers reserved.